amateur
-
Posts
3,535 -
Joined
-
Last visited
Content Type
Profiles
Forums
Gallery
Events
Everything posted by amateur
-
I don't know how it was/is done in eastern parts of europe, but here it is not both buffers convex on one side, and both concave on the other side: it is a left/right business: the left one (when standing in front of the wagon) being the mushroom-one, the right one flat. So, there never is any problem when turning around, or sorting. Good to hear your loco finally made it to australia ! Jan
-
I can't think anything else than Jud having removed his post.... (btw: also hitting the like-button results in a notification that someone reacted to a post) Jan
- 378 replies
-
- 1
-

-
- java
- pacific crossroads
- (and 2 more)
-
Look at the Dutch Sterns: they all have some kind of curved bar on top, with two small lions resting on top of it, and some kind of curtains around the central piece (some cow in your case). Jan
-
I was surprised buy the fact that you have the styrene visible from the side. It does not quite match the quality of the hull and your fantastic paintwork. What will your final display look like? Jan
- 2,699 replies
-
- 3
-
-
- heller
- soleil royal
- (and 9 more)
-
Hi Ken, thanks for the extensive answer and the pics. I checked: the pics in the naval archive are all taken in Europe, shortly before the war. So that matches your suspicion that the shields were put on very shortly before the action in the Java sea. btw: the same applies to the colourscheme of both ships. Virtually all pics show them basic grey, just as build. Almost no camouflage pics of these ships. Jan
- 378 replies
-
- 3
-
-
- java
- pacific crossroads
- (and 2 more)
-
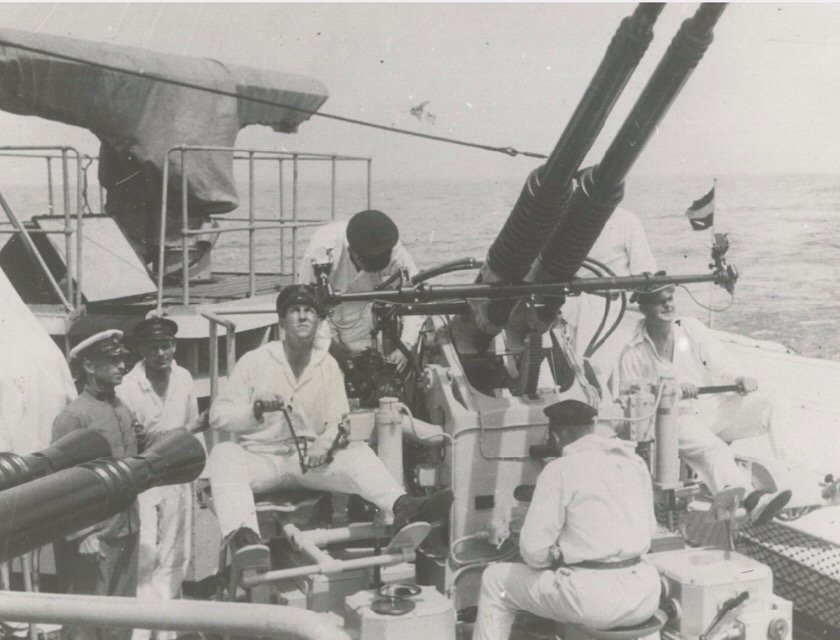
Just a question: the bofors on The Ruyter had no shields.... why did they fit they on Java, but not on the (newer) guns of De Ruyter...? (And: the pics I can find show all WwII dutch bofors without shields. Or are we talking different shields?.) Pic from tha navy-archive (nimh) of one of the Java-bofors Jan
- 378 replies
-
- 5
-
-
- java
- pacific crossroads
- (and 2 more)
-
Yep, there is: the so-called standing rigging (the non-moving parts like stays and shrouds) used to be more heavily tarred, so are darker than the running rigging (anything that is used to handle sails and spars), which was not so heavily tarred, to keep the lines plyable. Jan
-
No, thereisnopreview, but onthe other hand: what you see inthe 'edit' -area is what readsrs get to see when posted. Jan
- 378 replies
-
- 5
-
-
- java
- pacific crossroads
- (and 2 more)
-
Perhaps the instructionmanual has an informative instruction ? Otherwise: you are old and wise enough to build your own hexagonal light-thingy. btw the pics of the original all show a sixsides glass-house on top of your building. You'll have to rebuild Jan
-
Just thinking without checking: evergreen sells styrene tubes in various sizes. is it possible to open such a tube, slide it over the propellershaft and glue it to both motor and prop-shaft, thus replacing the rubber one? Evergreen can be painted, so it would attract less attention..? but perhaps thosetubes are way oversized? Jan
-
It is the same: my link brings you at @dafi's site Jan
-
http://www.dafinismus.de/plates_en.html#anker7
-
Today I started the rings on the lids. Fiddly stuff (too fiddly for my fingers and my tools: carpet monster took abot half of them ) and fitted on my test-port lid. Outer diameter of the ring ist about 2 mm. Actually, these are adapted 3mm rings that I found a long time ago on a webshop long gone. Jan
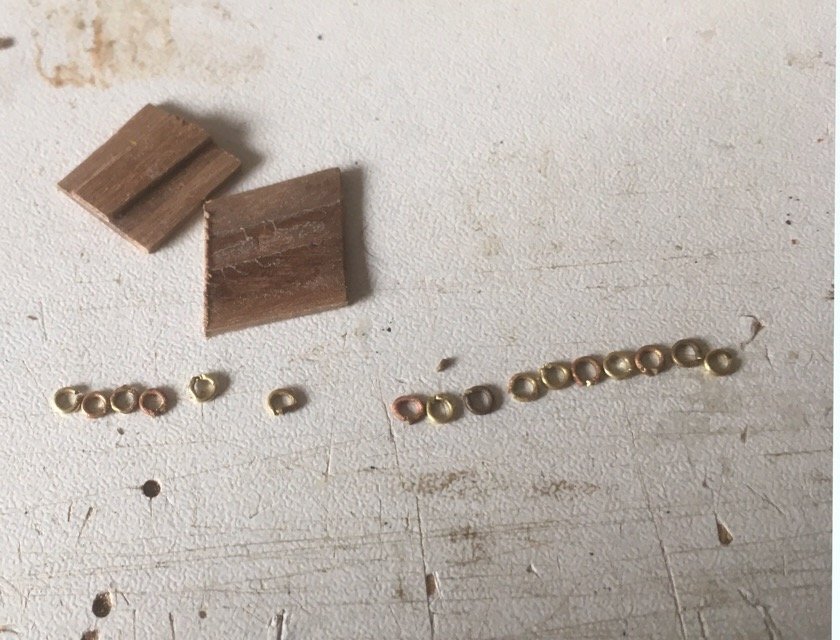
- 139 replies
-
- 4
-
-
- corel
- prins willem
- (and 1 more)
-
Which, as expected, looks far better than the paper parts Jan
-
yes, you forgot something: XI: a nice gift-paper to wrap it all up (ad VII: certainly no stay-sails, and no preventer stays. Don't forget the shrouds and the all-important ratlines) Jan
-
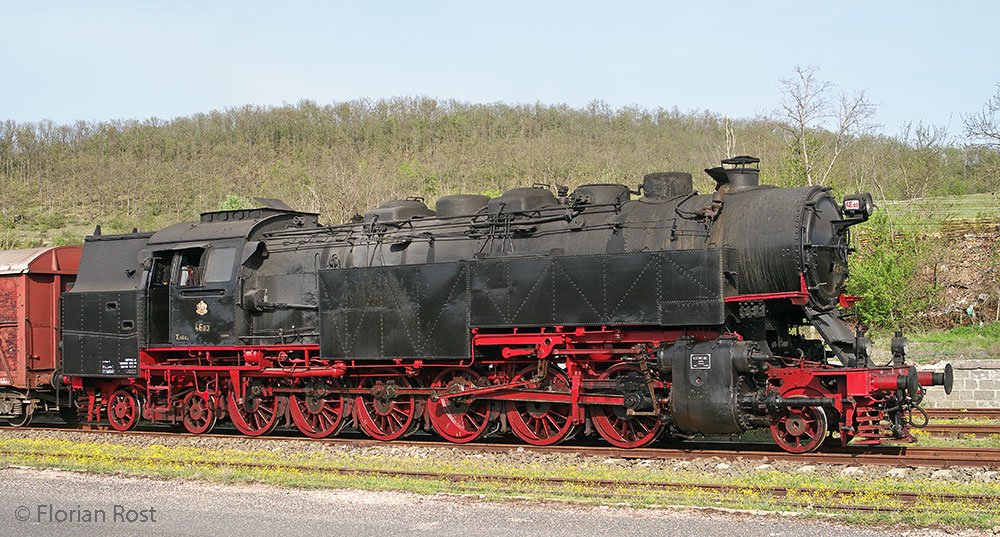
When you receive the kit, can you give us some of the history? Fentens advertises it as a Polish machine, named Bulgar, sometimes it is referred to as a German machine, but the pics in the internet suggest that it is a Bulgarian one (build in Poland, nicknamed 'Mother Bear') (registration number 46.03) (btw nice pattern for the rivetting :)) Jan
-
Hi Piet, I considered that, but there is nithong behind the ports, apart from that ugly U-shaped piece of black painted wood, and in some cases: just plywood of the bulkheads. Nothing of interest, so not drawing attention to it by showing an open port. Jan
-
Rivets, yeah, should have known... jan
-
Just coincidence and lazyness. the local shop sells 400grams card (way to thick), 150 grams with a very visible structure in it, and 120 grams in packages of 250 sheets (way to much) So I took a sheet of white, cut two strips, ran a black marker along it. Took me less time than going to big city nearby Jan
- 139 replies
-
- 4
-
-
- corel
- prins willem
- (and 1 more)
-
Did you order the laserset that goes with the loco? Saves you time, as it incluses the spoked wheel and the frames (as far as I understood in a card-forum). It is a serious locomotive: you'll need some shelve-space when finished Jan
-
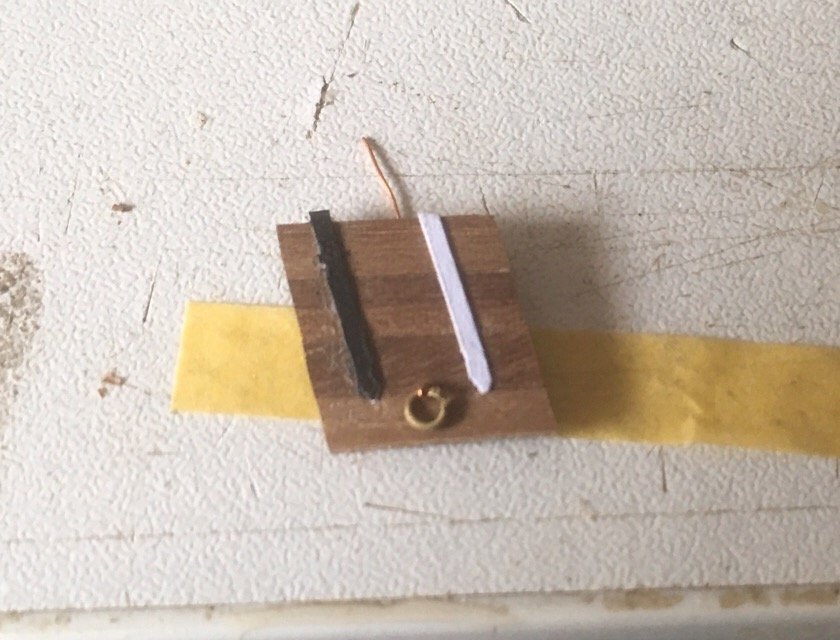
Today I finished the hinges for the starboard-side. Still a long way to go Jan

- 139 replies
-
- 5
-
-
- corel
- prins willem
- (and 1 more)
-
I guess there where wire-diagonals with the original, but yes, these frames did not give any protection to the pilots at all. Jan
-
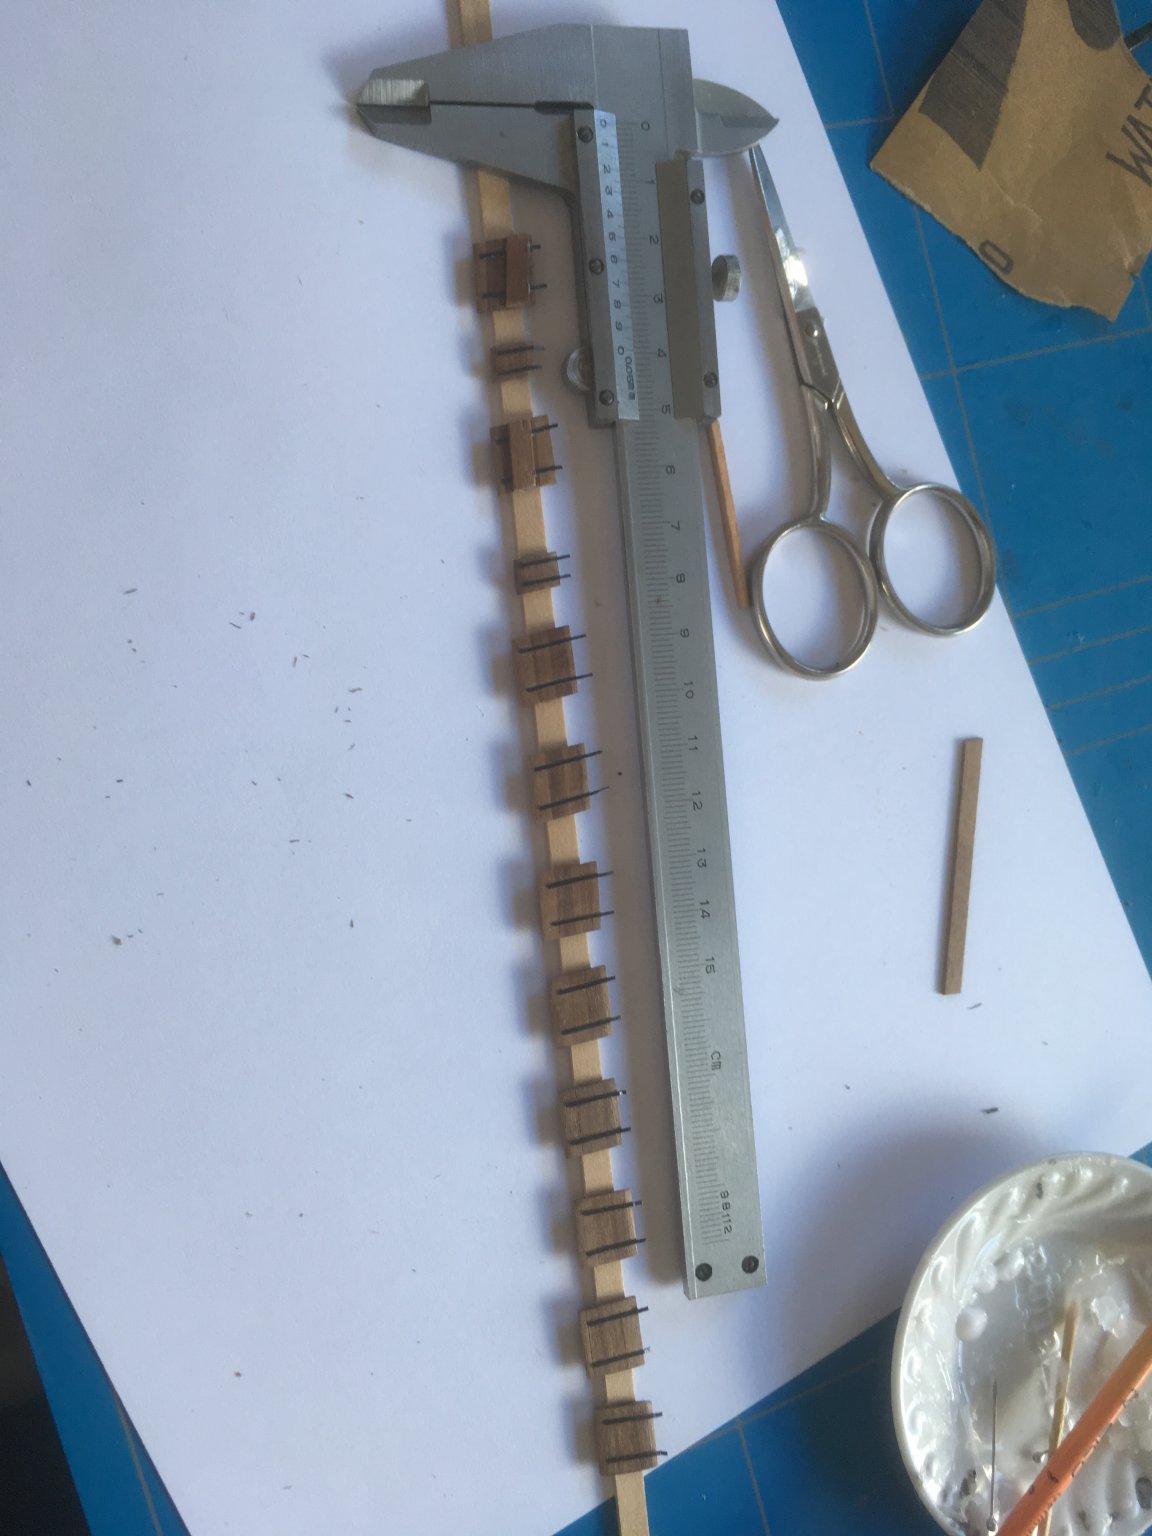
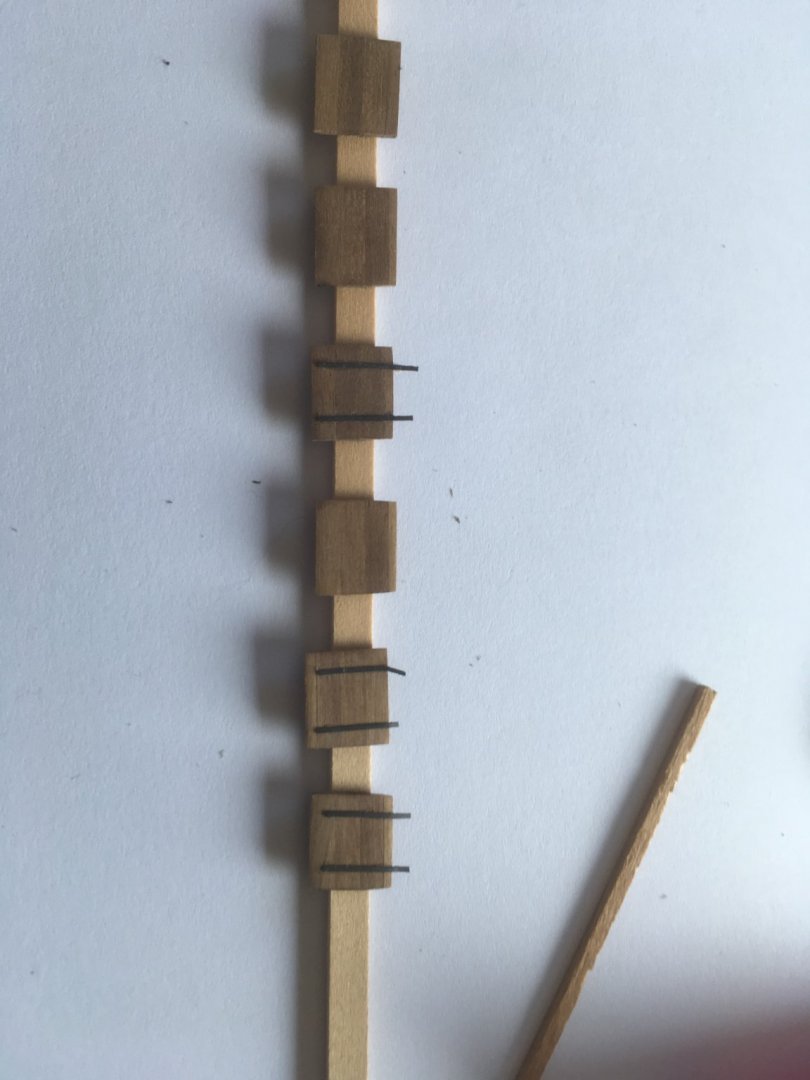
I have been struggling with blackened paper all morning. came up with this so far.... six lousy strips. Perhaps my tolerances should be slightly higher, to get some speed Jan
- 139 replies
-
- 6
-
-
- corel
- prins willem
- (and 1 more)