kurtvd19
-
Posts
3,049 -
Joined
-
Last visited
Content Type
Profiles
Forums
Gallery
Events
Everything posted by kurtvd19
-
 Pat: Wood glue will not work for attaching metal to wood. Either use C/A or epoxy. Kurt
- 449 replies
-
- 3
-

-
- sultana
- model shipways
- (and 2 more)
-
I didn't give him a lot the first time. Will make sure he's got enough this time. I only had a small container at the time and his ride was waiting. Kurt
- 228 replies
-
- 3
-
-
- gunboat
- model shipways
- (and 1 more)
-
Elijah: I can give you some more stain at the next meeting or if you can stop by. Kurt
- 228 replies
-
- 4
-
-
- gunboat
- model shipways
- (and 1 more)
-
Deno: Had a childhood friend named Dennis - called him Deno. Go to the main page here at MSW and click on the KIT BUILDS. In the upper right of the page is the word search with a magnifying glass symbol to it's right. Type in the Enterprise 1799 there and click onthe magnifying glass image. There will be various Enterprise build logs there to scroll through. Kurt
-
Welcome Deno. It would be great to know your real name - you can add it in your profile. Go to the Kit Builds section and do a search for "Enterprise 1799" and you will see several build logs by members who have built this same kit. Look at their builds and start one of your own and show your progress or ask for guidance if you have difficulty. Kurt
-
Gluing Planks When Wet
kurtvd19 replied to mikiek's topic in Building, Framing, Planking and plating a ships hull and deck
The drying can be sped up with a hair dryer and I have done this many times w/o noticing any shrinkage. You have to be careful to not heat the wood excessively - that's why I use a hair dryer instead of a heat gun (have both - hair dryer's heat is adequate). As to shrinkage - I don't soak planks any longer than a minute and most times I allow them to dry clamped in place w/o any heat and have not experienced any shrinkage. If the plank doesn't get soaked enough to expand any appreciable amount and the plank is dried w/o heat the wood structure returns to normal equilibrium and the same size you started from. Allowing the plank to air dry assures that it returns to normal equilibrium with the shop's atmosphere thus no shrinkage. I would not glue planks when wet as any shrinkage as they dry has to set up stress on the frames/bulkheads - is that adequate to break the glue joint? Maybe. What's the rush? Kurt -
Gluing Planks When Wet
kurtvd19 replied to mikiek's topic in Building, Framing, Planking and plating a ships hull and deck
There is no need for nails or other means of securing the planks if the wet plank is clamped in place as close as possible to the final curvature and allowed to dry. When dry any area of the plank needing an additional bend can be wet again locally and re-clamped in place to accommodate the additional curve. When dry if there are any slight gaps they can be closed with slight pressure when glue is applied and the plank clamped into the final position. Very little pressure is required as clamping is only needed for the glue to set. The gaps can be closed with slight edge pressure. One question that was asked was about clamping issues affecting the wood. Soft woods like basswood can be compressed by clamps - spread the force out with a wood block between the clamp and the wood. If a dent is made in the wood by a clamp it's able to be eliminated many times by wetting the wood at the dent and applying some heat to the area. As the heat can also loosen and reactivte the glue be sure to lightly clamp the plank on adjacent frames/bulkheads until the glue resets. Kurt -
As long as you apply the heat gently and don't overheat the wood to the point where the lignin boils, everything should cool off OK and the strength will not be affected. As others have cautioned - Be Careful. These things can start fires - I saw many fires started using these things for removing paint by pros and homeowners before I retired from the FD. Kurt
-
As long as you make sure there isn't a burr on the cut end it should work perfectly. I had the opposite problem with another brand of micro chuck - the shaft was too short to go into my dental drill hand piece so I ah do de-solder the one that came in the chuck and replace it with one a bit longer - no problem as it is a std size. Kurt
-
Welcome to Flagship Models as a new Sponsor. Check out their new Civil War figures in 1/192 scale - other scales soon). They have been introducing new Civil War Ironclad models in a steady stream - great detail. Kurt
-
Air Brush Paints
kurtvd19 replied to Worldway's topic in Painting, finishing and weathering products and techniques
I don't brush paint except on very rare occasions and didn't try them with a brush, but I would not personally use them with a brush due to the rather coarse pigment that in my opinion would produce a rather coarse and heavy coat of paint. Thinning doesn't affect the pigment size of the paint so the coverage would look coarse (in my opinion). I did dab some onto some scrap wood in the shop and decided they were not worth spending time on. The old Floquil (solvent based) and the current Badger Modelflex Acrylic paints have a pigment that is very finely ground to about 1 micron. Other hobby paints are probably close but I have personal knowledge of the Floquil and Badger paints. Typical house paint has a pigment size of 17-19 microns - they all advertise "covers in one coat!". I find the MS paint unacceptable but that doesn't mean that other won't say they are the best thing since sliced bread. Kurt -
Air Brush Paints
kurtvd19 replied to Worldway's topic in Painting, finishing and weathering products and techniques
Derek: Stick with the airbrush paints. Hobby paints have a much finer pigment size than other paints. They are designed to not hide detail under a thick coat of heavy (large pigment) paint. The larger/coarser pigment paints hide detail. I do not recommend the MS paints - the pigment size is not comparable at all to an airbrushing paint. I had some donated to our club and I could not in good conscious pass it on to anybody who was contemplating airbrushing - it looked to me to be the same consistency as house paint. On the off chance that the stuff I examined was atypical when some time later a couple of jars were offered at another club's meeting I took a jar to check it out and my opinion did not change. I have over a dozen air brushes with small to large needles/tips and I wouldn't even try to use any of this stuff through any of my brushes. In fairness to Model Expo this is the only Model Shipway's labeled product I don't fully recommend. Do a search here on airbrushing - there are some very detailed posts by experienced users on using the right paints. Kurt -
Welcome to MSW Steve. Gerald Wingrove, a true master in metal is building a metal hull and I am sure his build will be of interest to you. His work is exceptional and highly detailed. A bit different than I think you are considering, but your time will not be wasted in checking his work out. Again, welcome to MSW. Kurt
-
Welcome a new Sponsor to MSW - Chesapeake Light Craft. Their new model kits follow the same procedures used to build their full scale kit boats. Kurt
- 1 reply
-
- 5
-
-
Thinning water based paint
kurtvd19 replied to grsjax's topic in Painting, finishing and weathering products and techniques
Ron is right about alcohol. One issue with Acrylics is drying too fast - alcohol only intensifies the effect. Badger recommends using only distilled water for thinning their Acrylic paints which I use exclusively. I have never had to thin the Badger paints unless I left a jar open as they are of the proper consistency for airbrushing as supplied. Kurt -
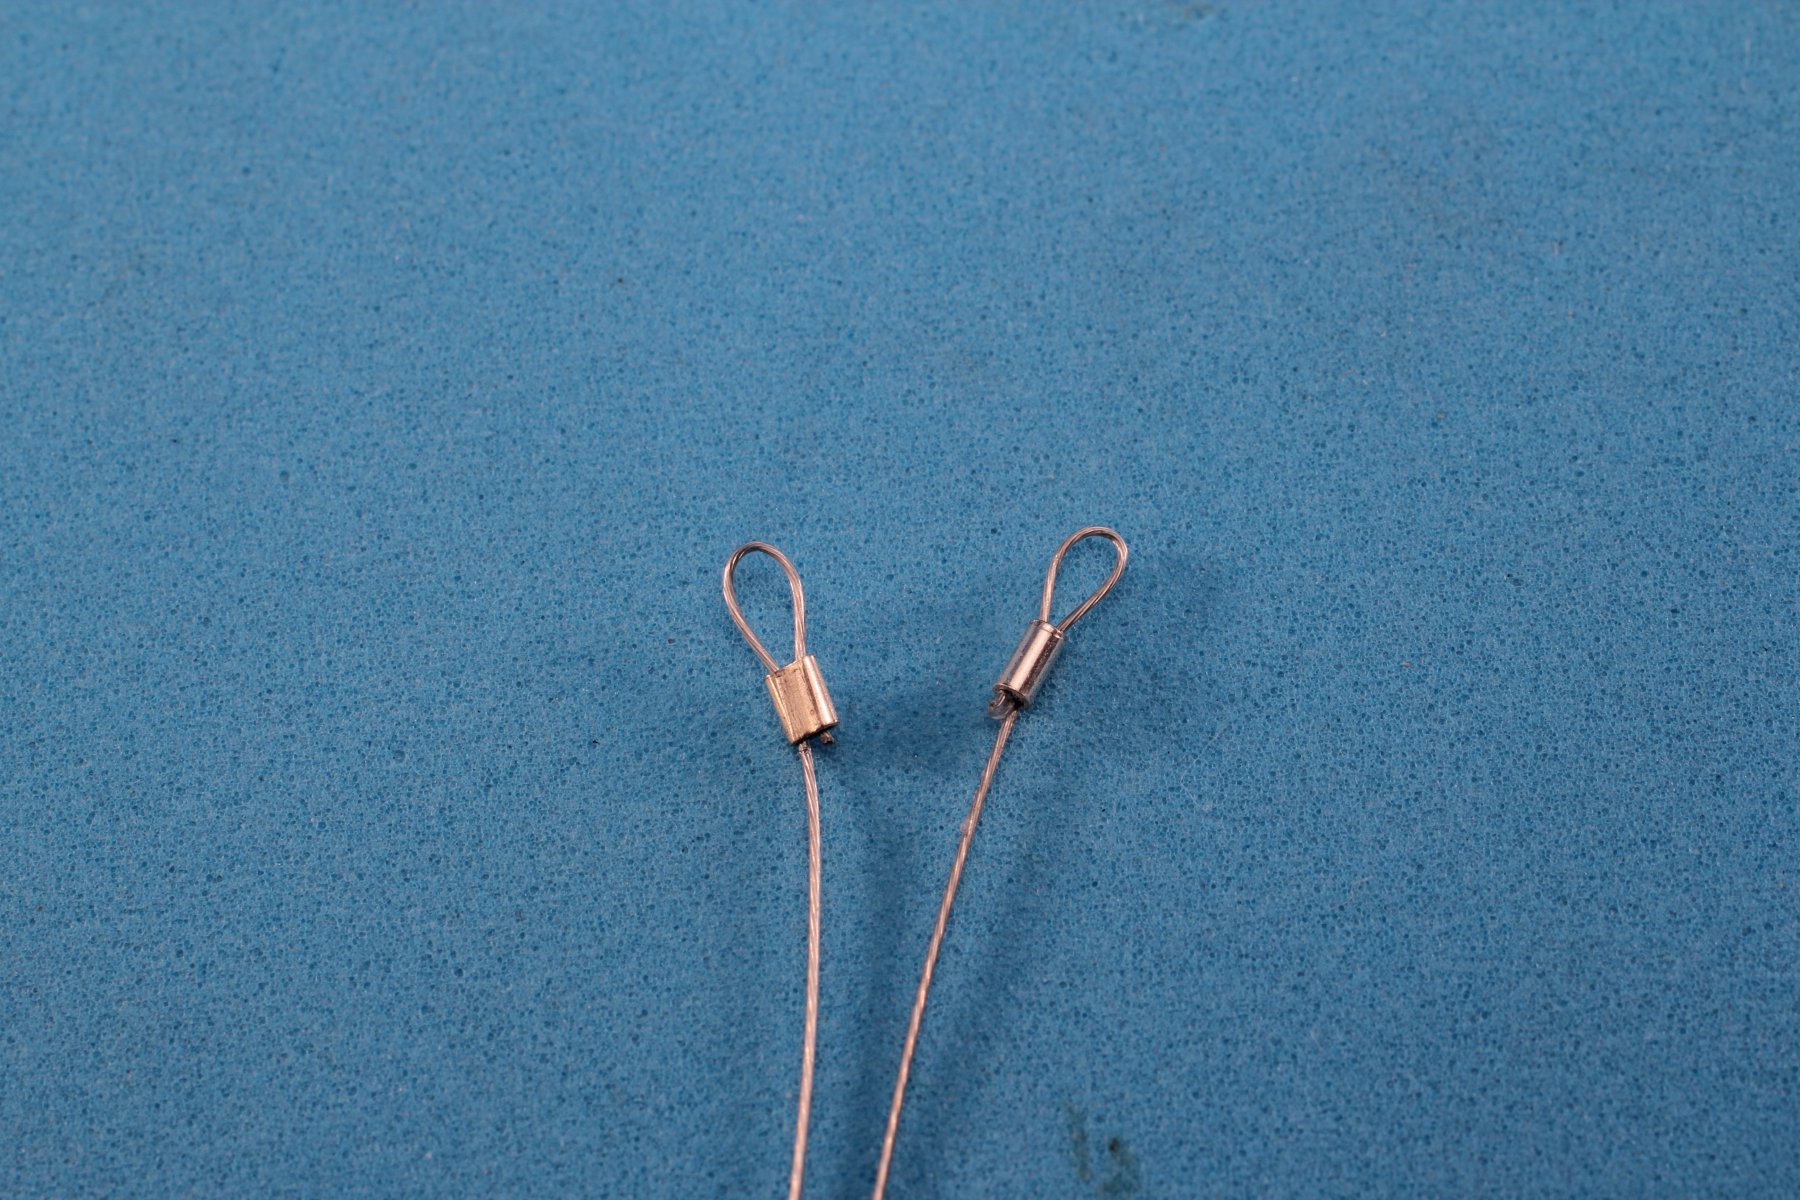
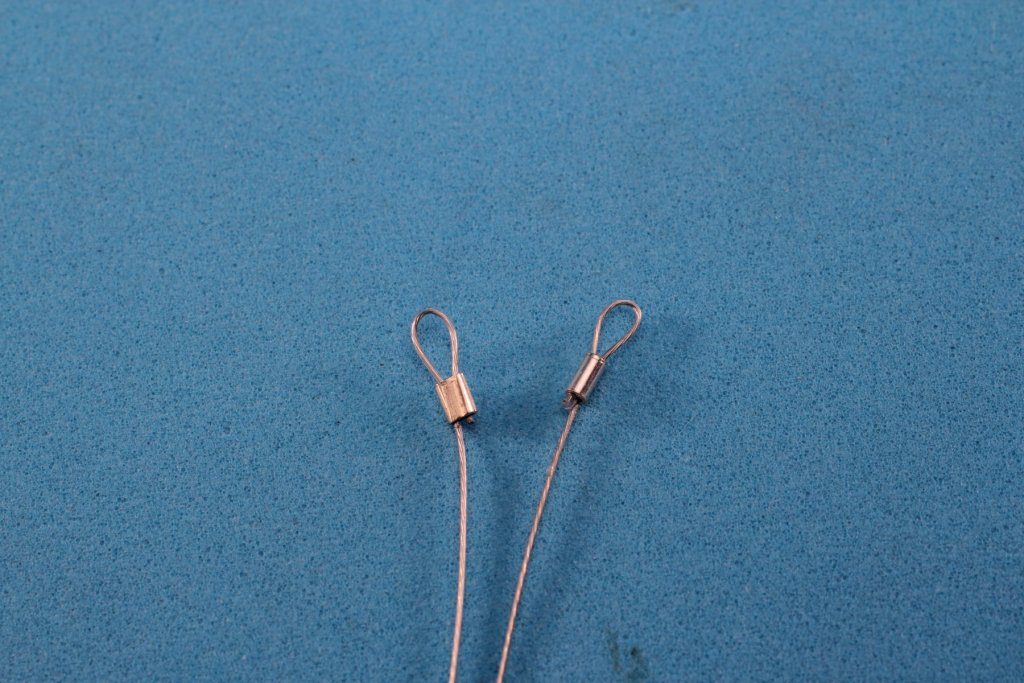
Mark: The photo shows on the right a 0.045" dia. crimp on 1 x 7 SS wire 0.012" dia. For 1/12 this would be a smaller line, but it's next to impossible to see that it is a crimp and for larger sizes be sure to use the special crimp pliers and you can get the crimp to be smooth except for the seam where the crimp is touching itself and it then appears as a line that is very hard to see any curvature of the piece. The bit to the left was an illustration to show what not to do. Kurt
-
Is Warner Woods West still in business ??
kurtvd19 replied to Teakfreak's topic in Masting, rigging and sails
Yes, Lloyd retired and dropped his ad in the NRG's Journal last year (Lloyd was a long time NRG Director). Kurt -
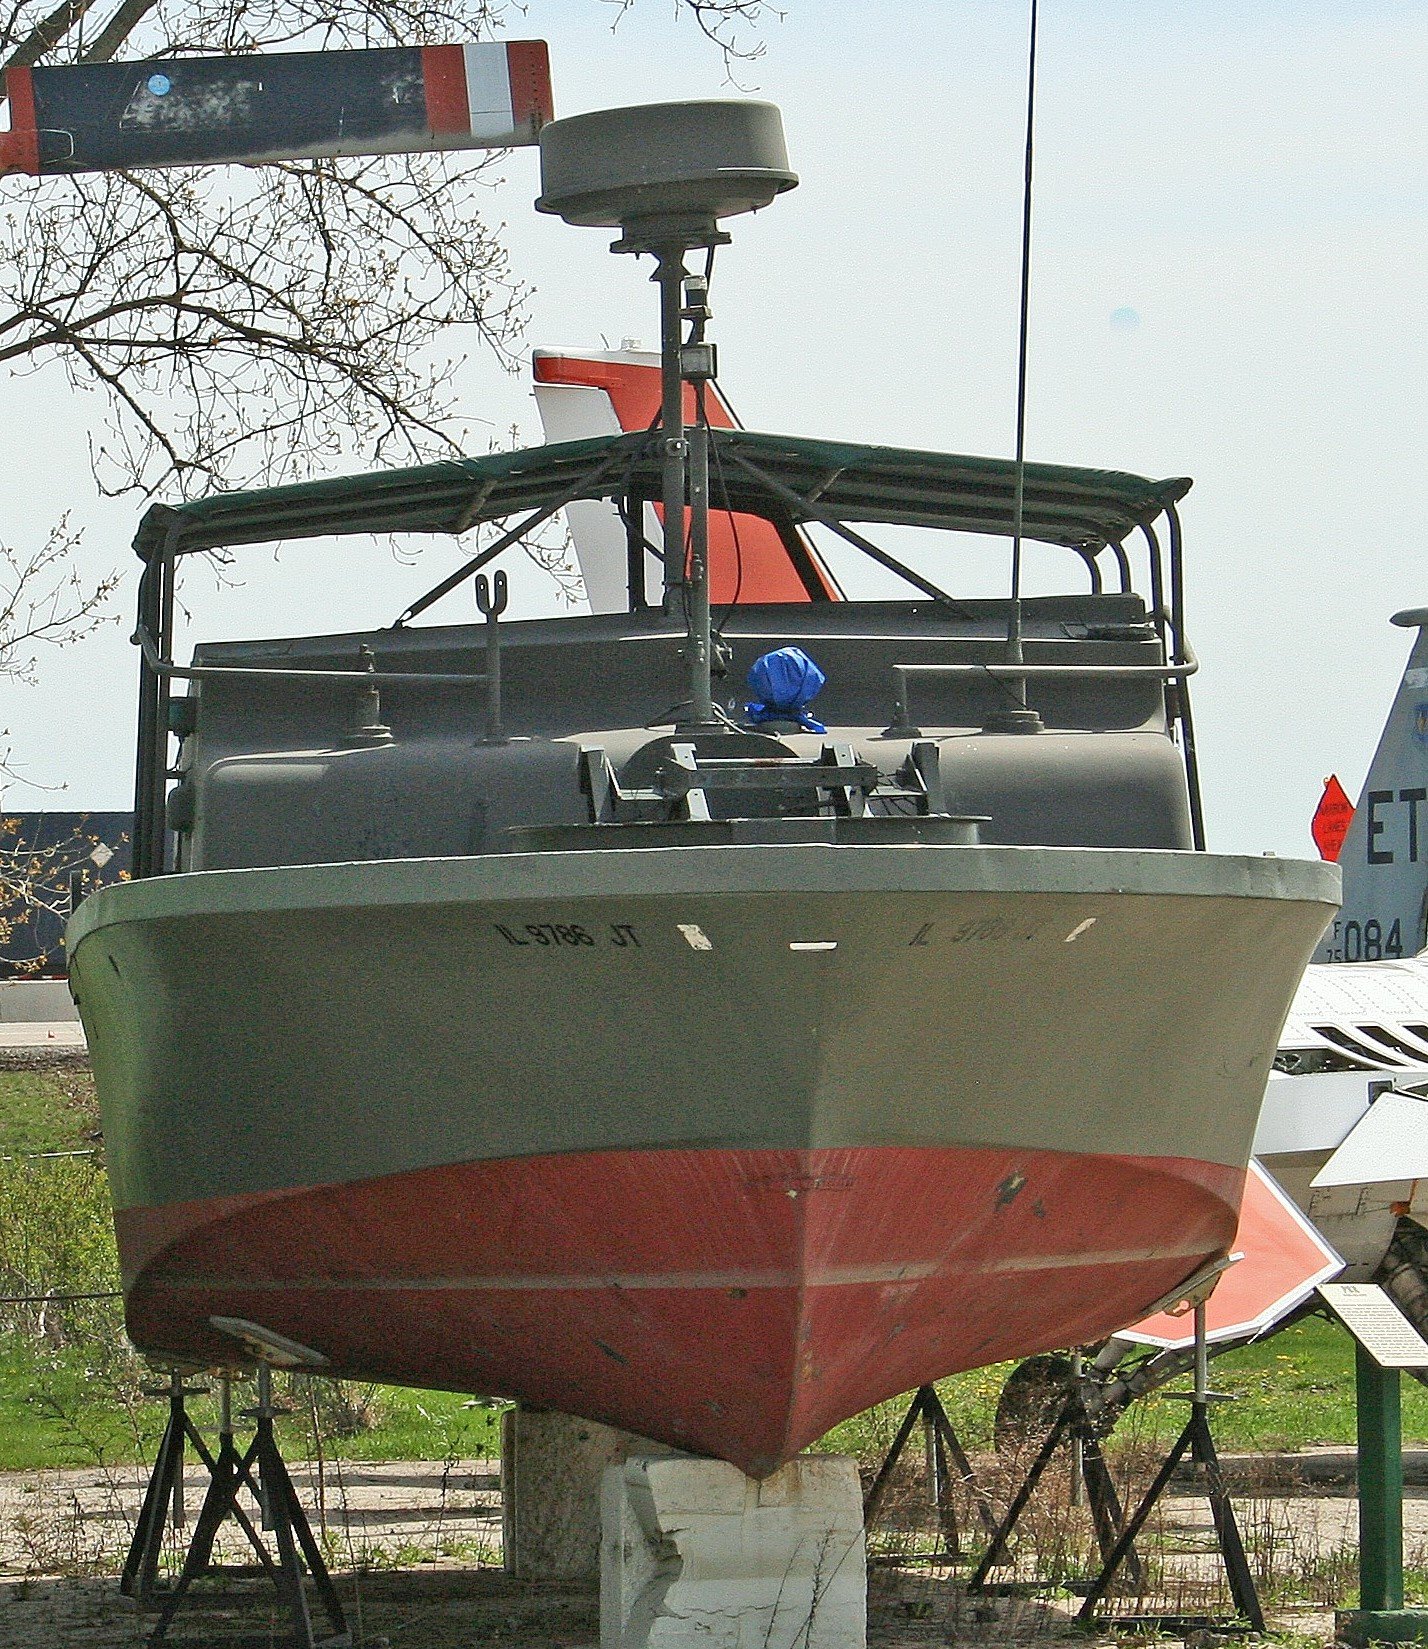
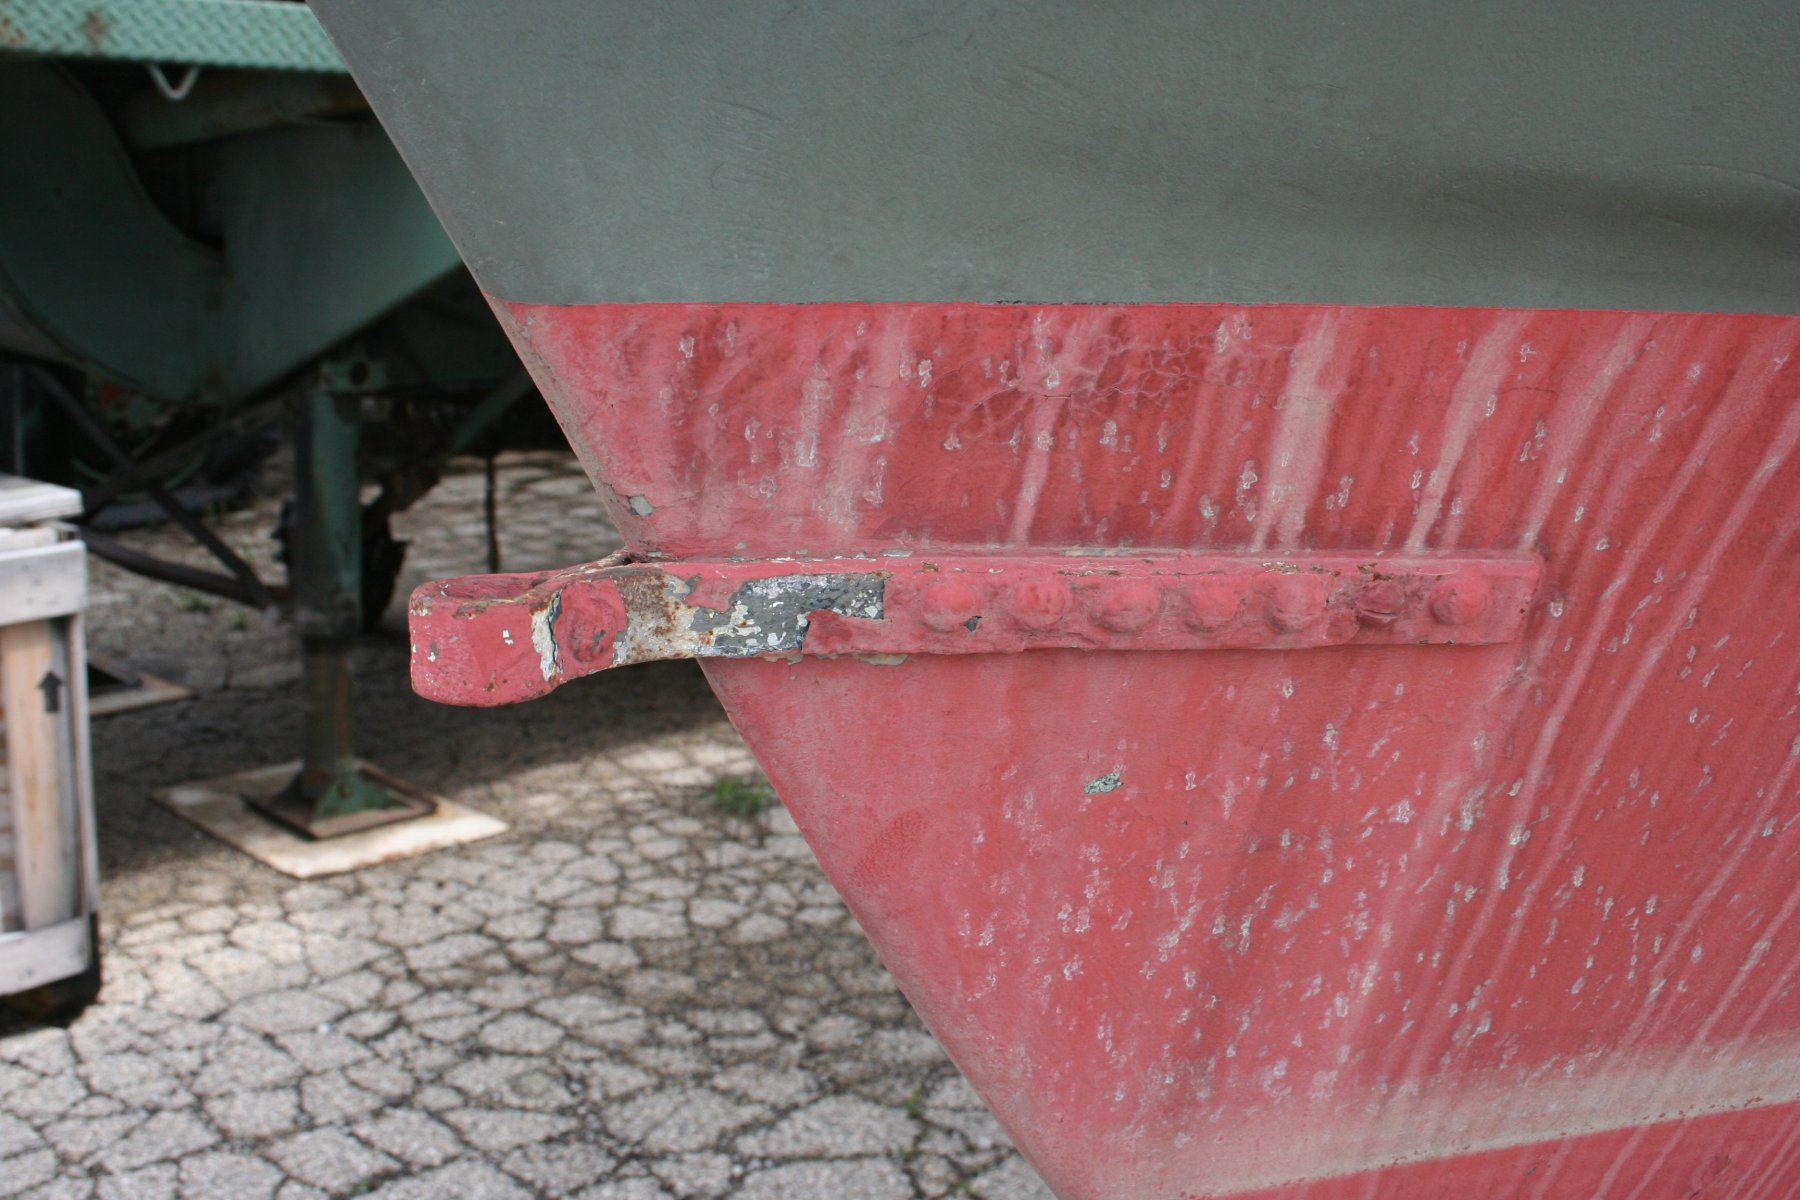
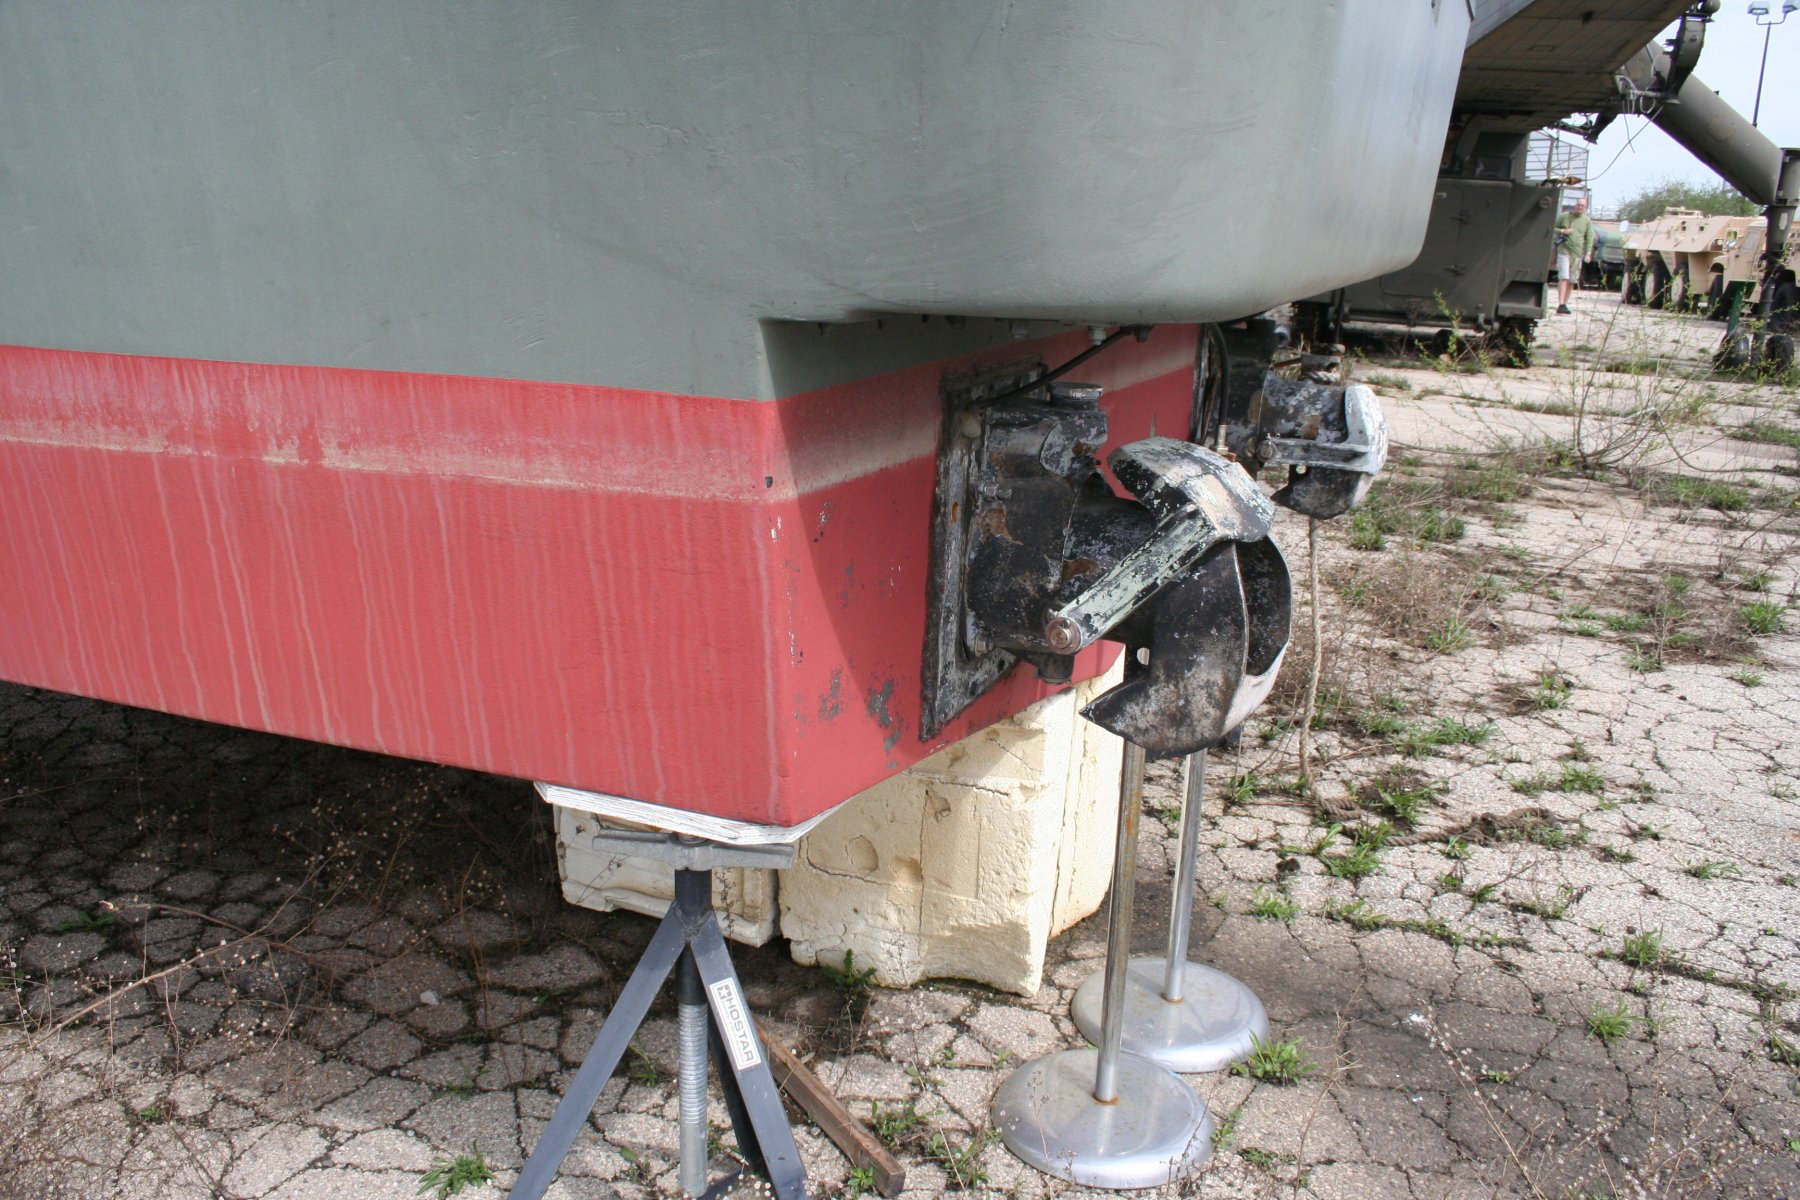
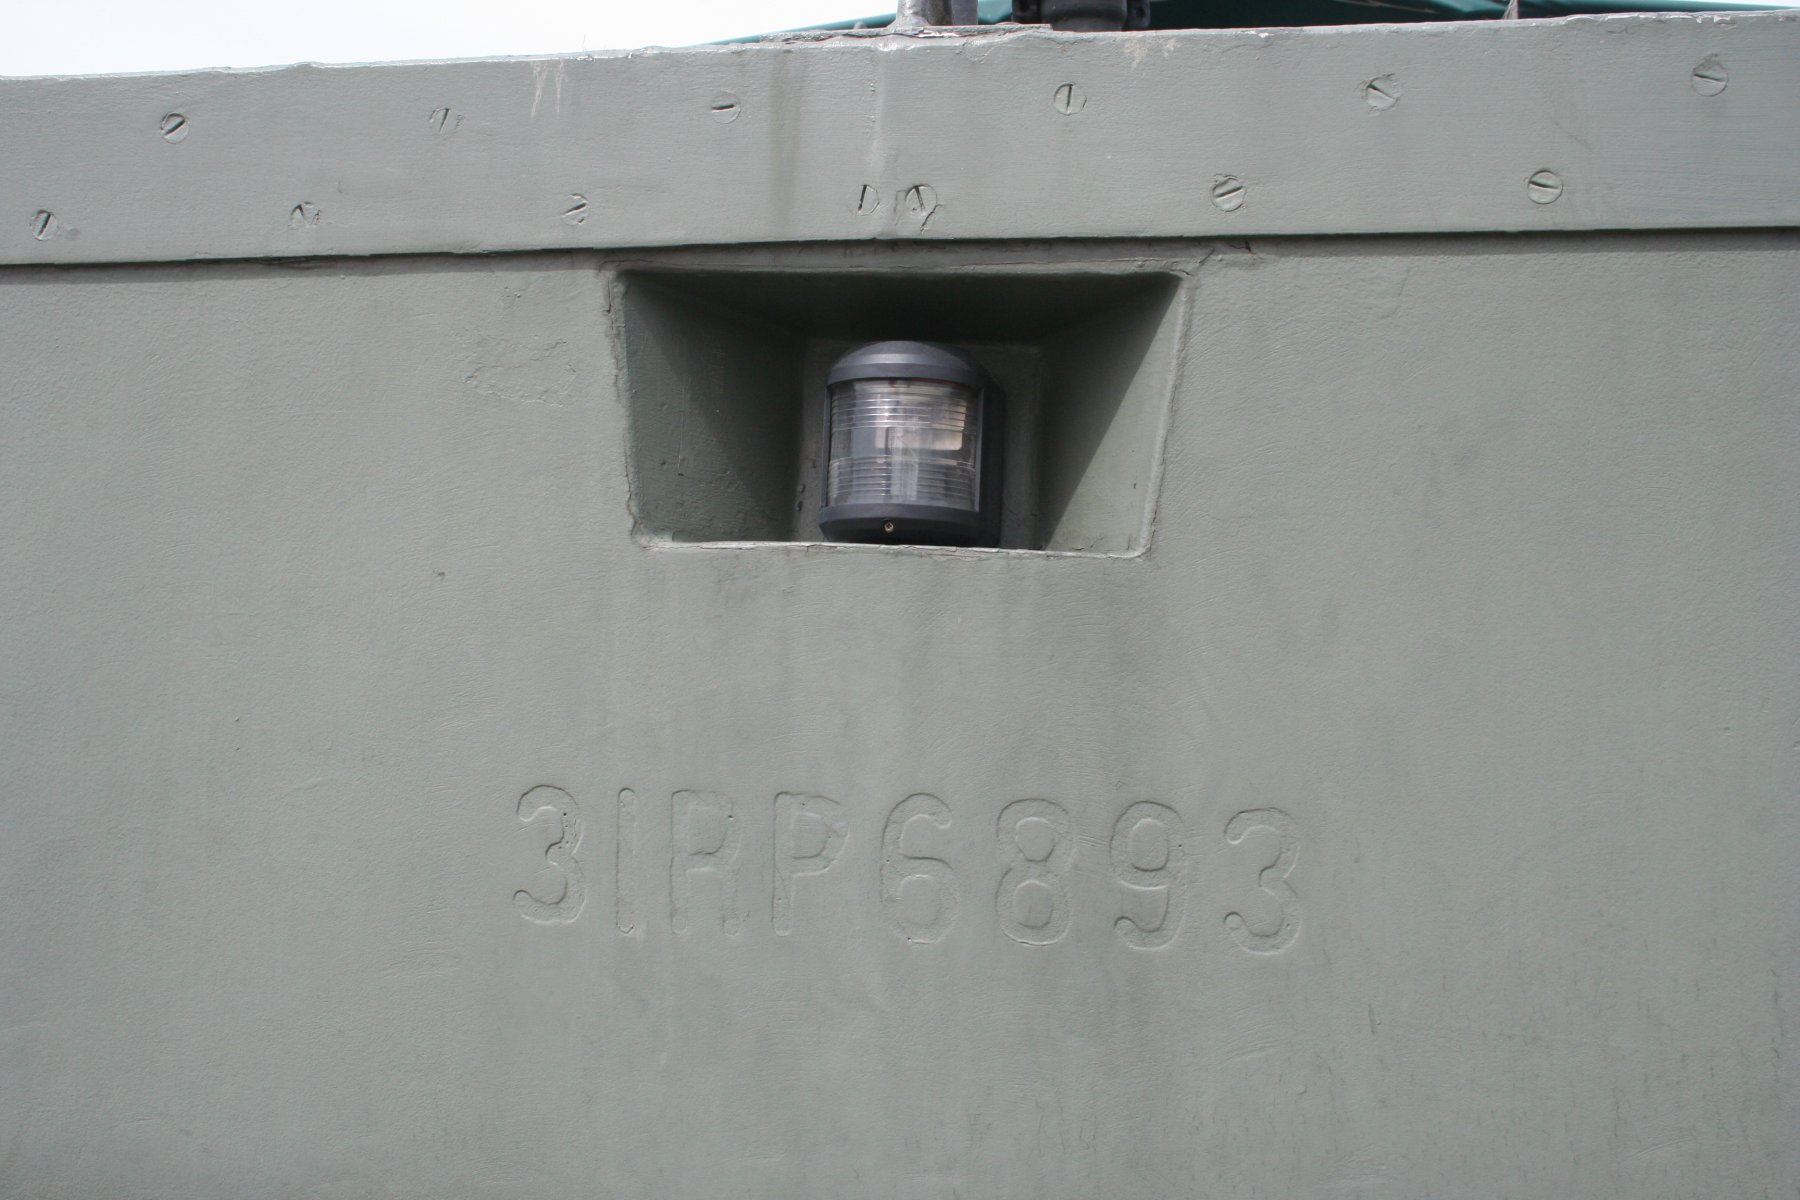
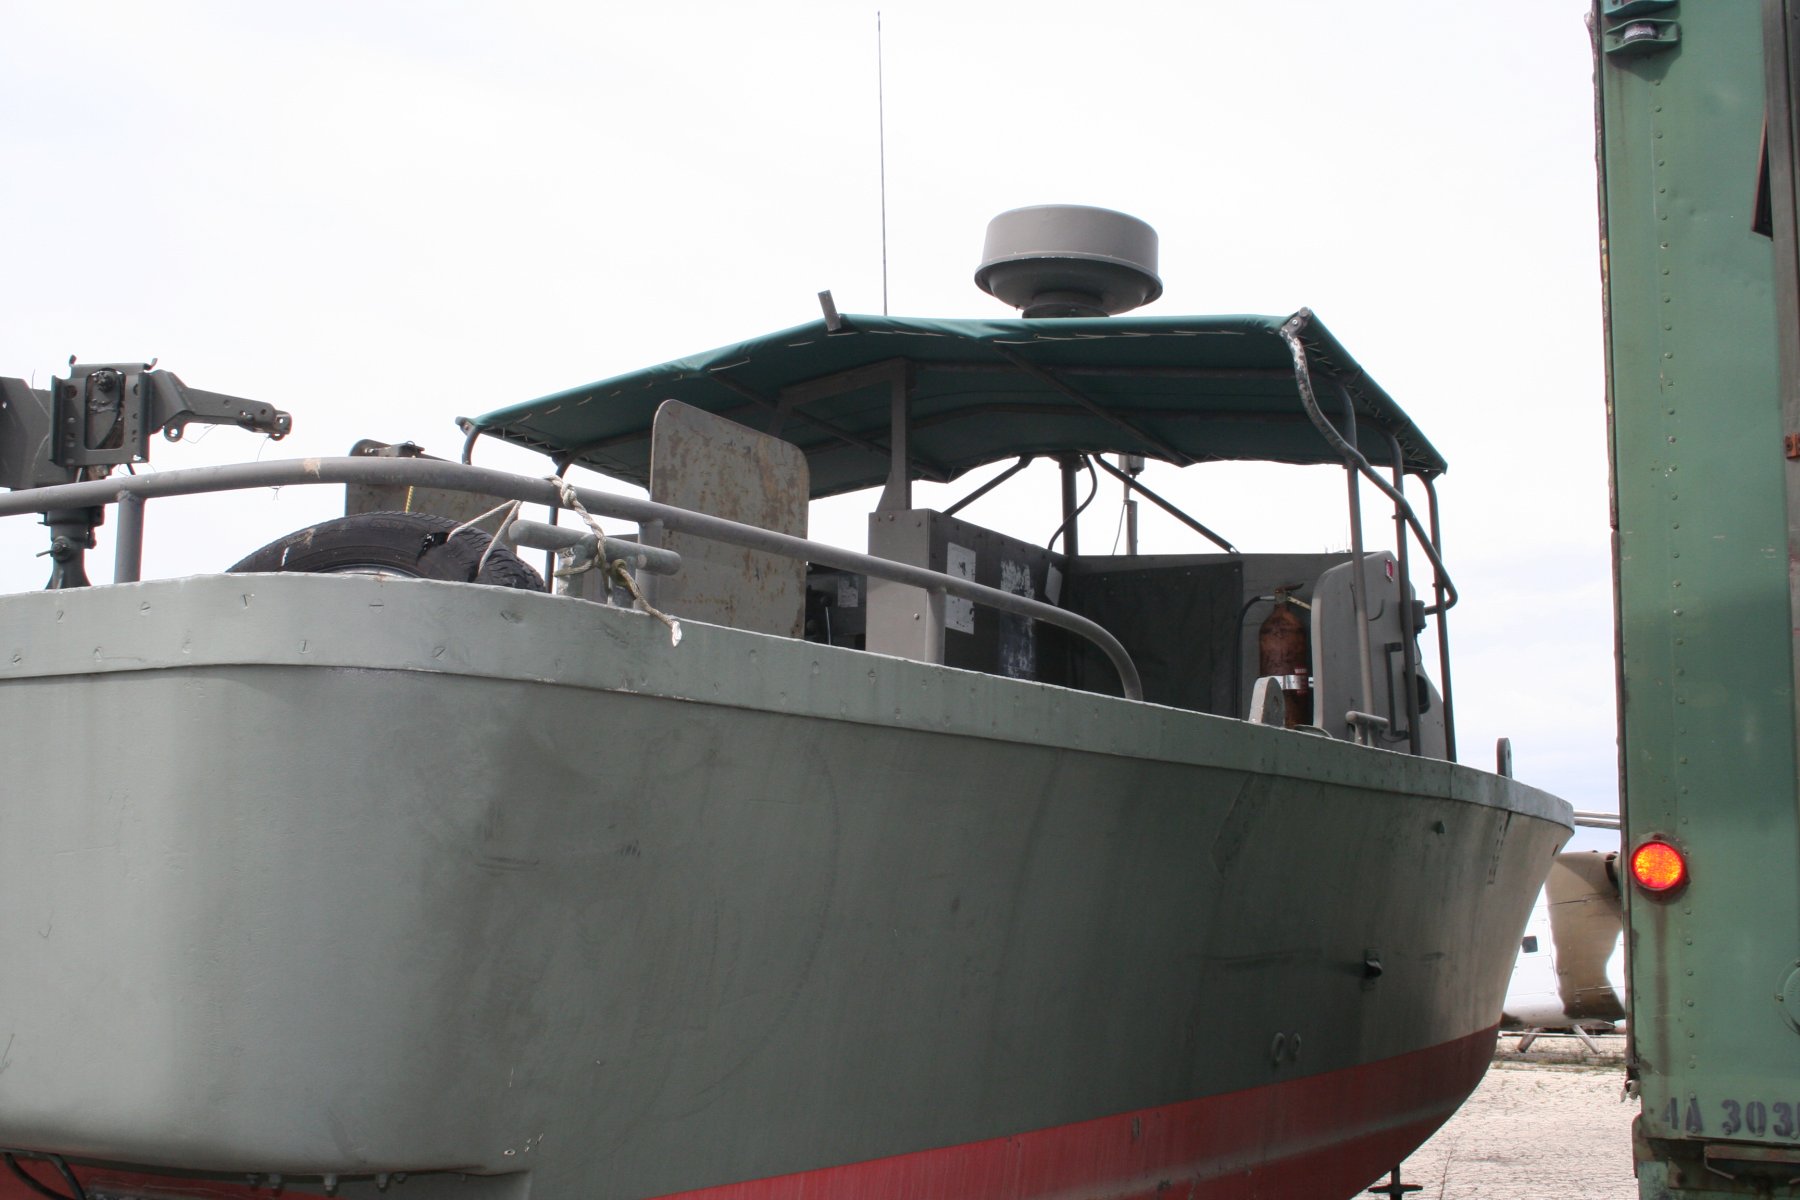
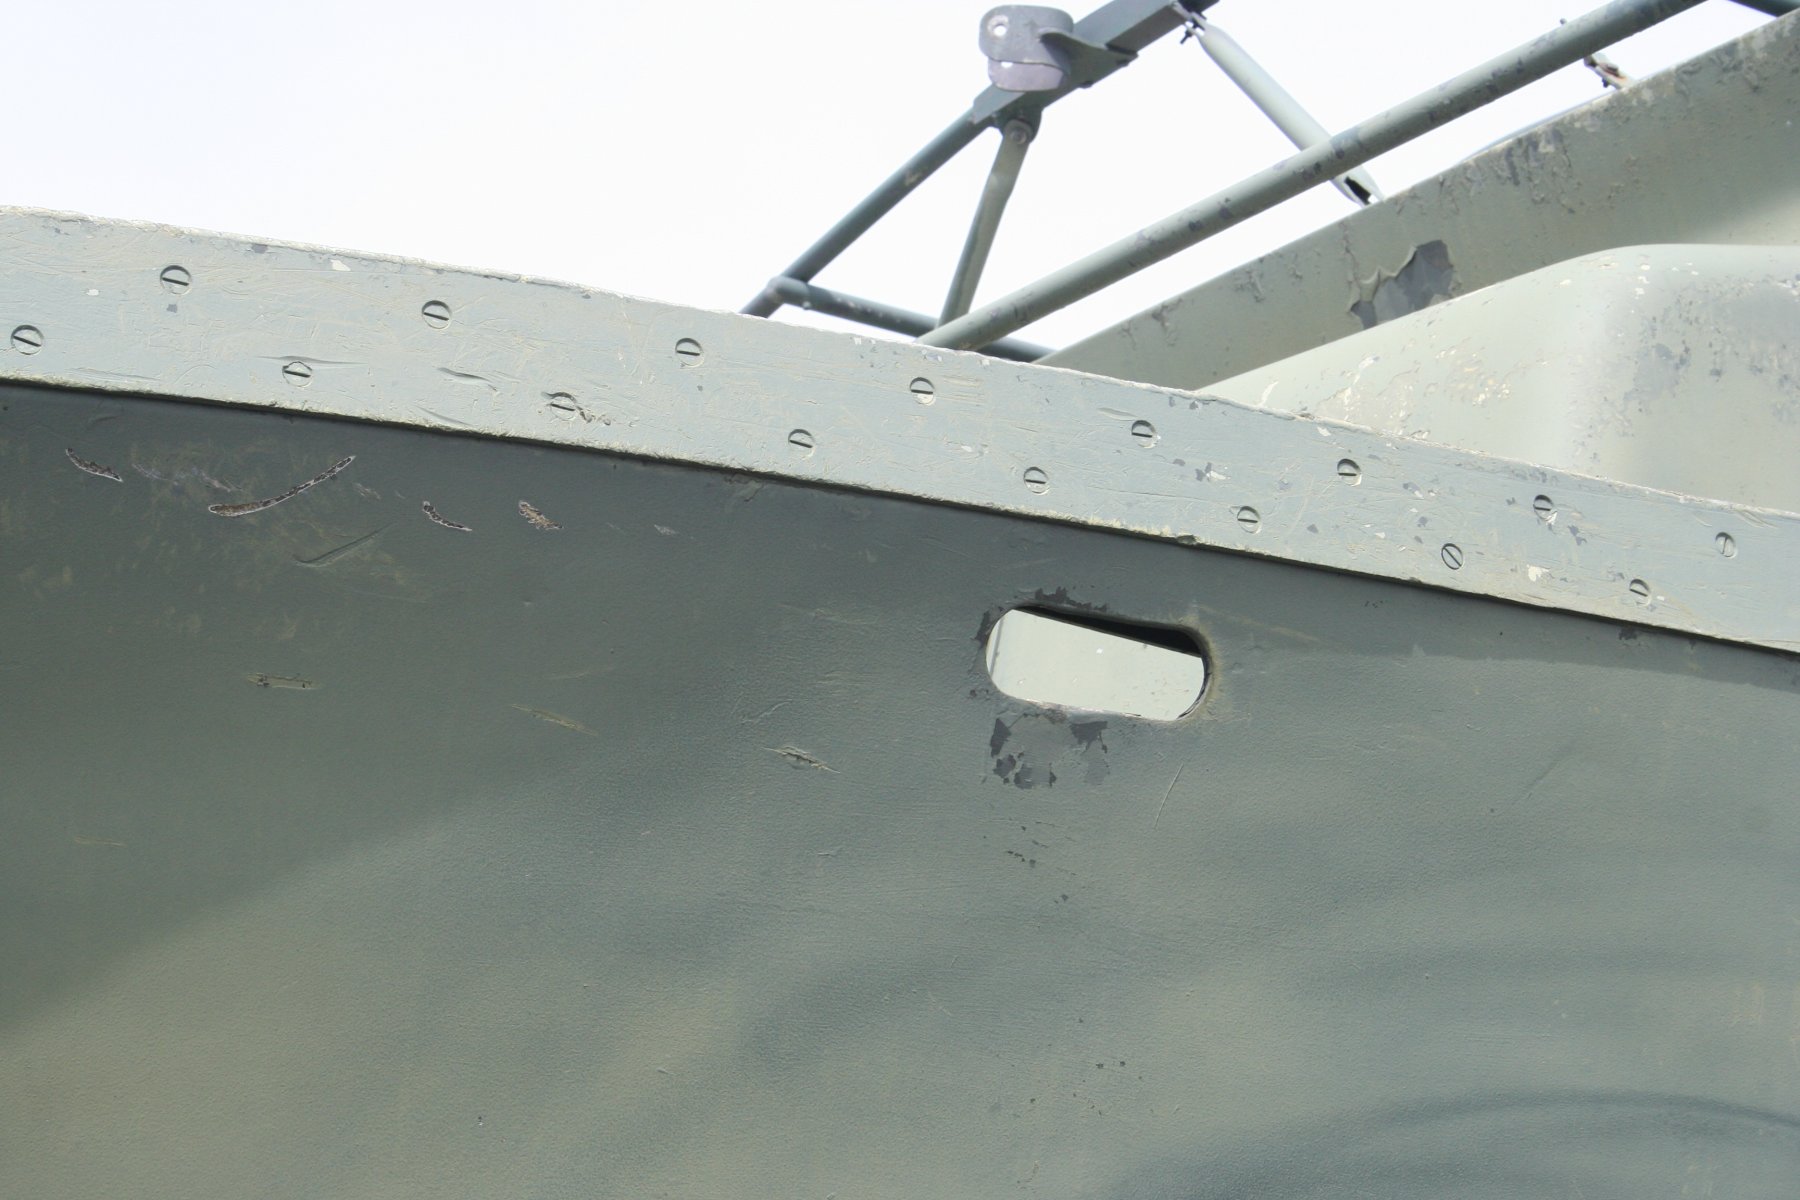
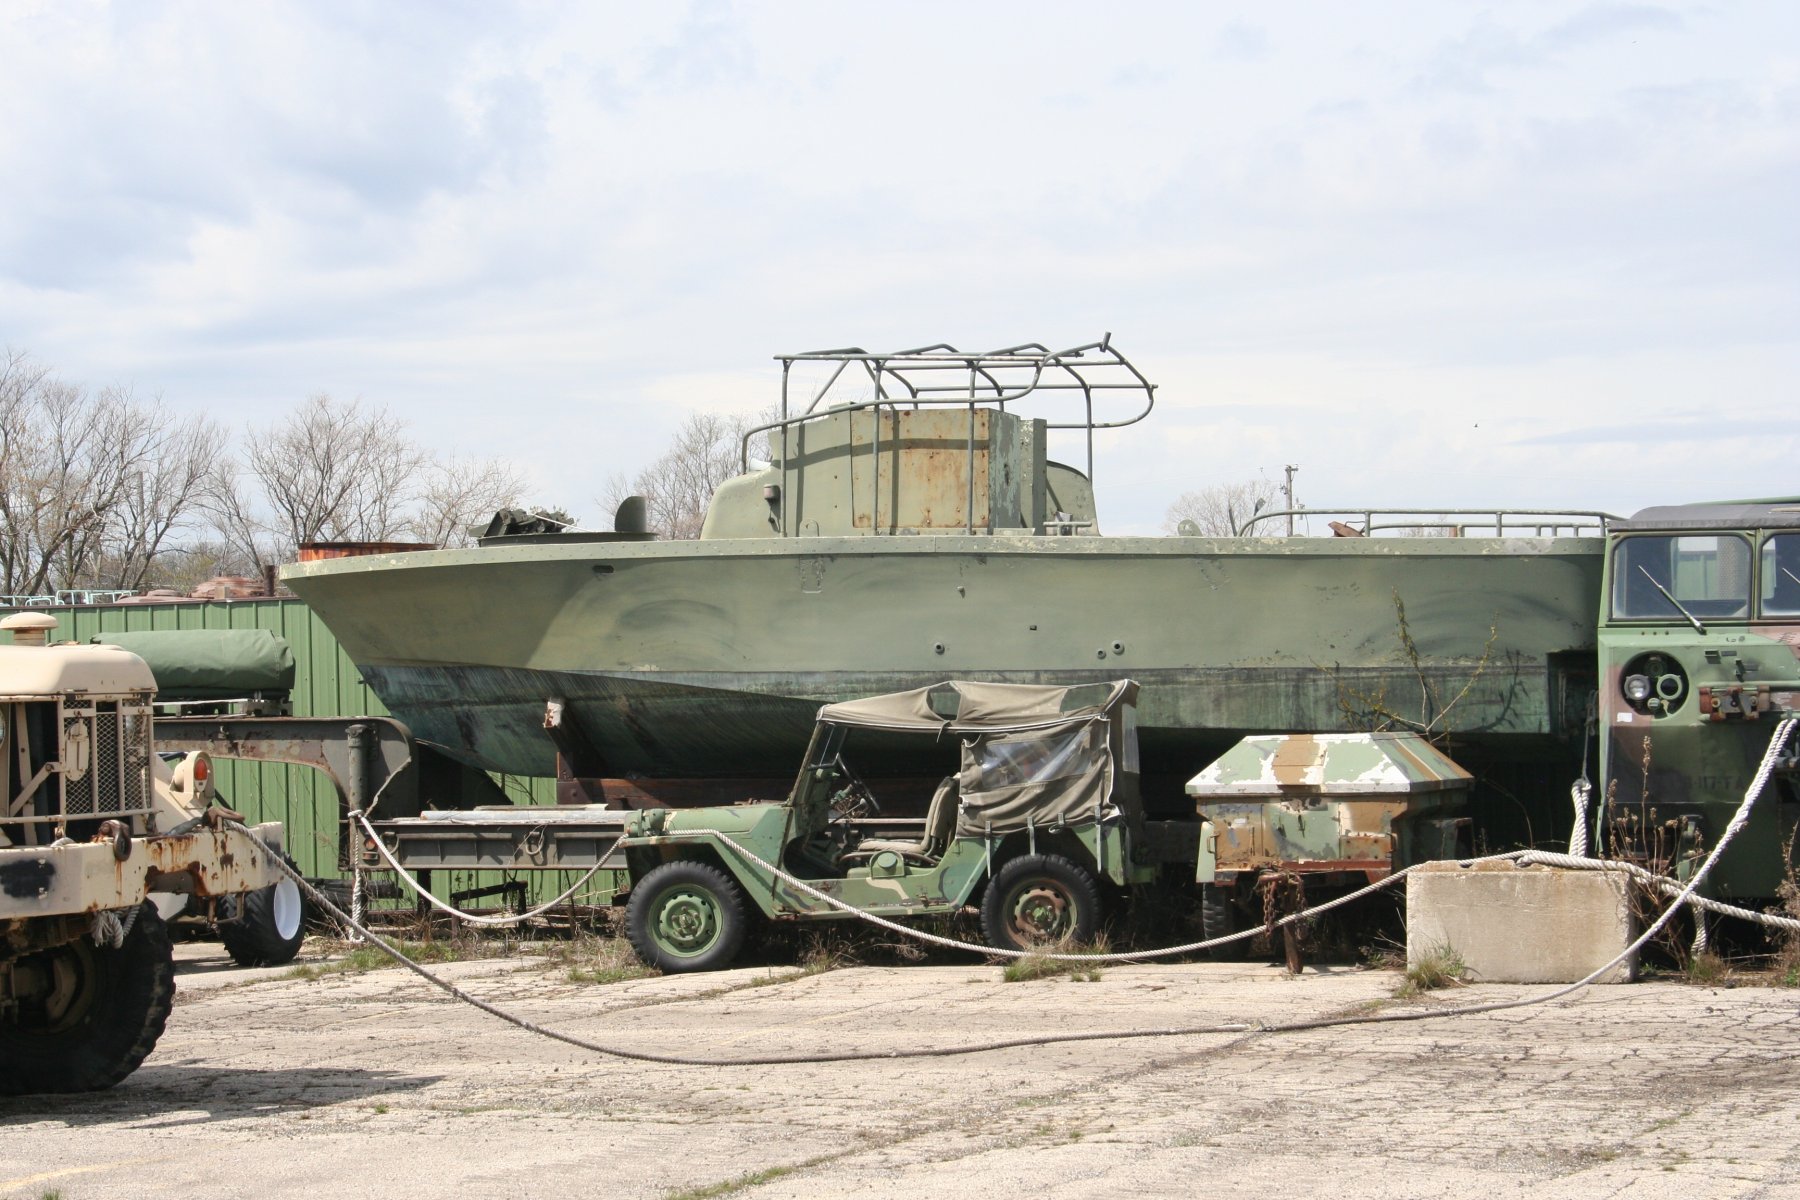
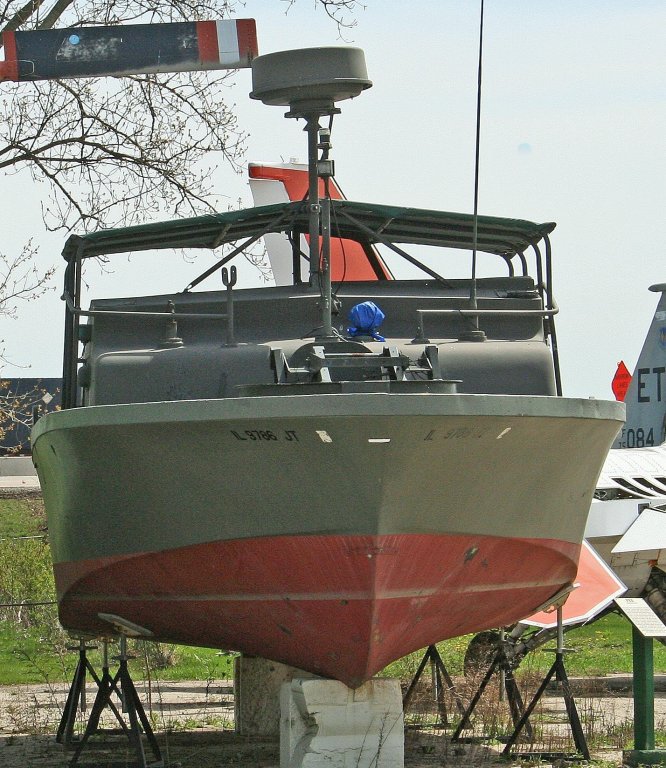
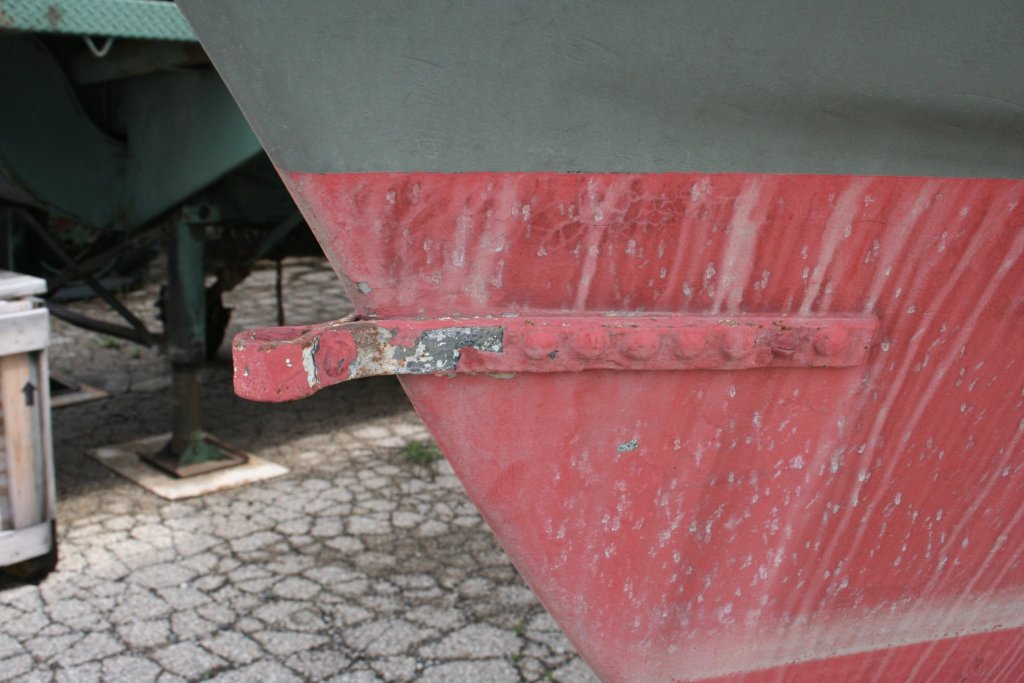
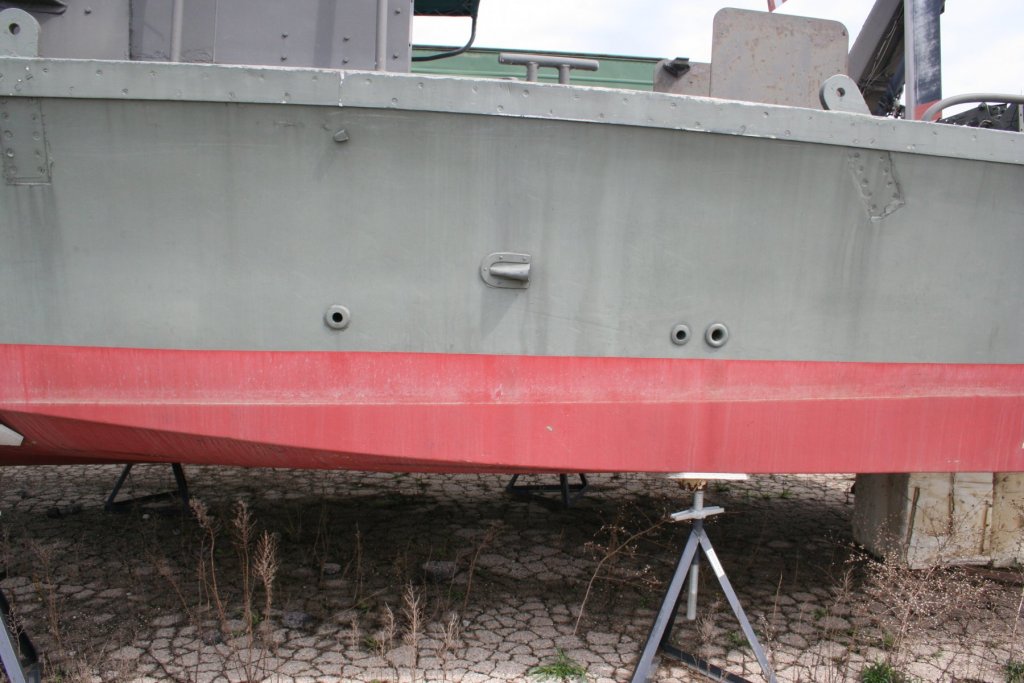
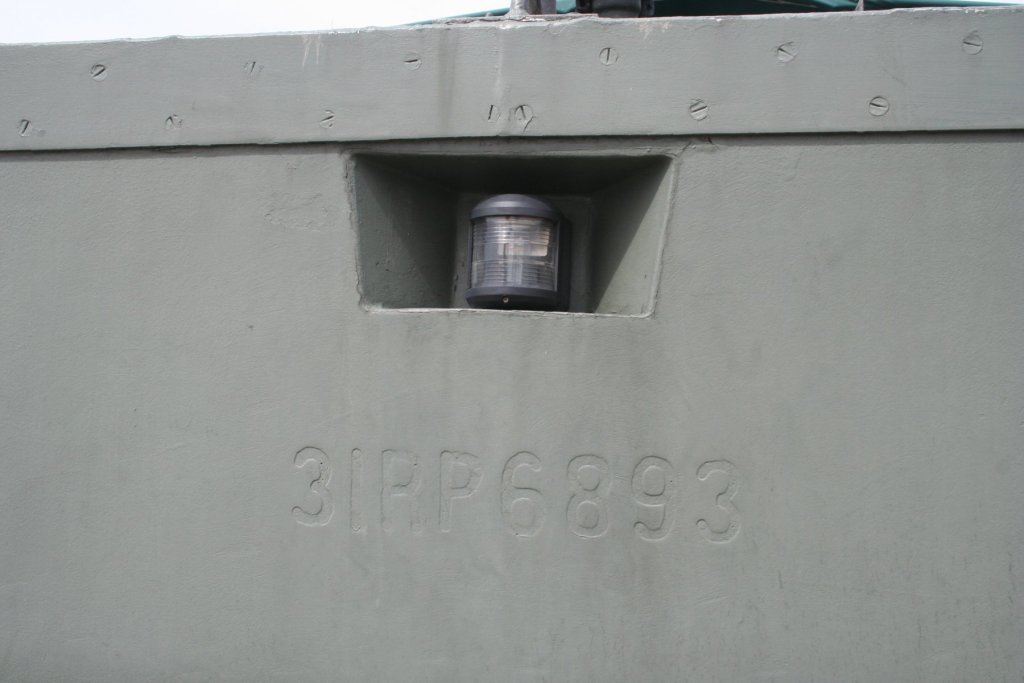
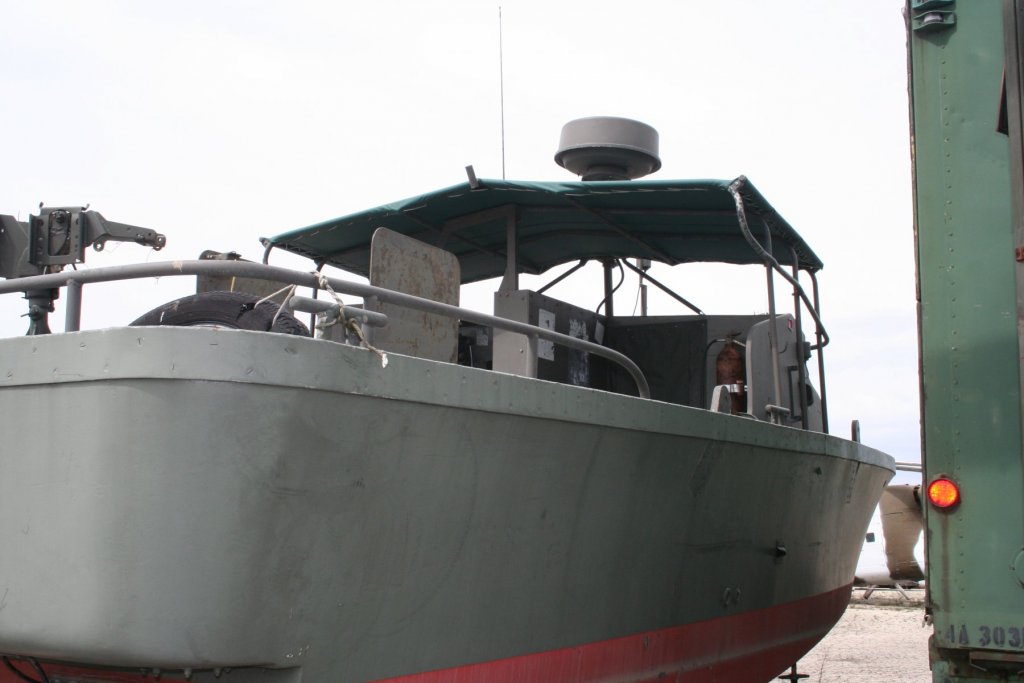
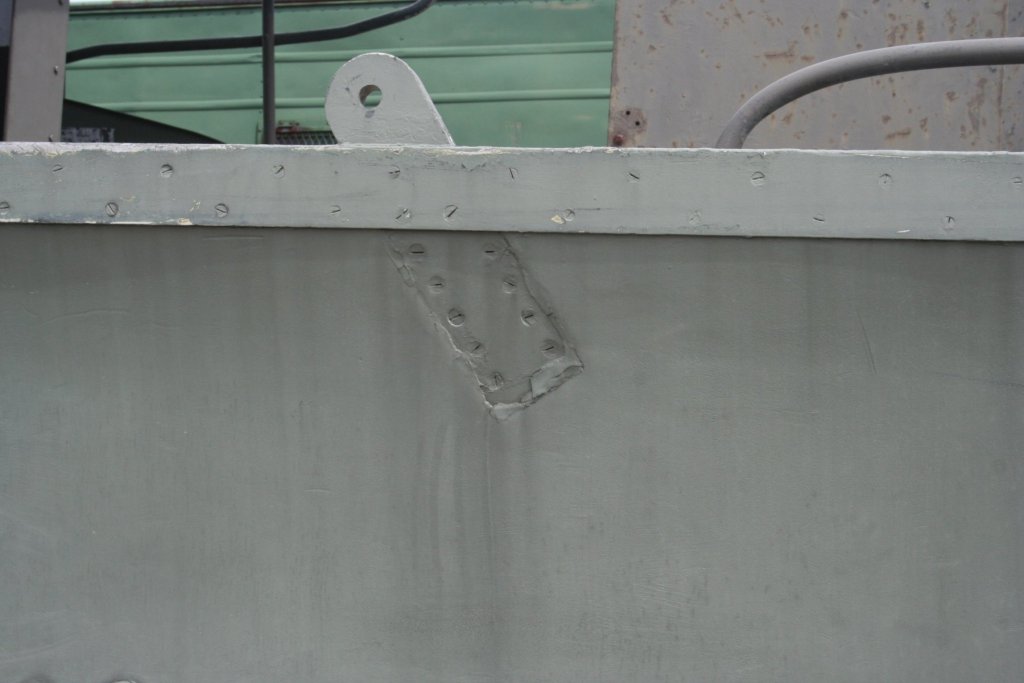
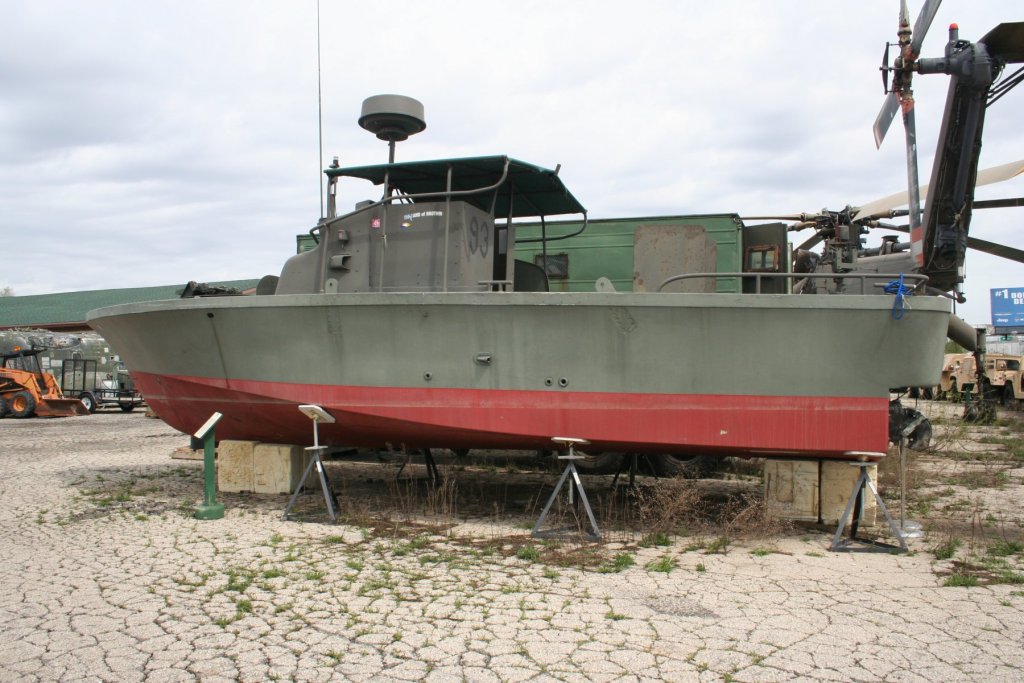
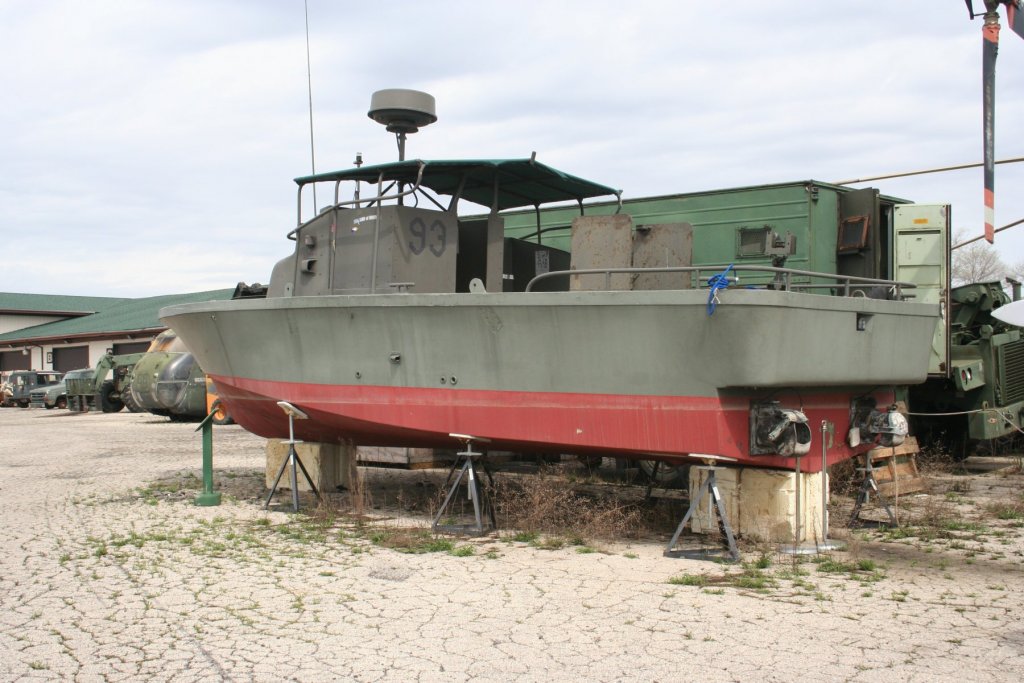
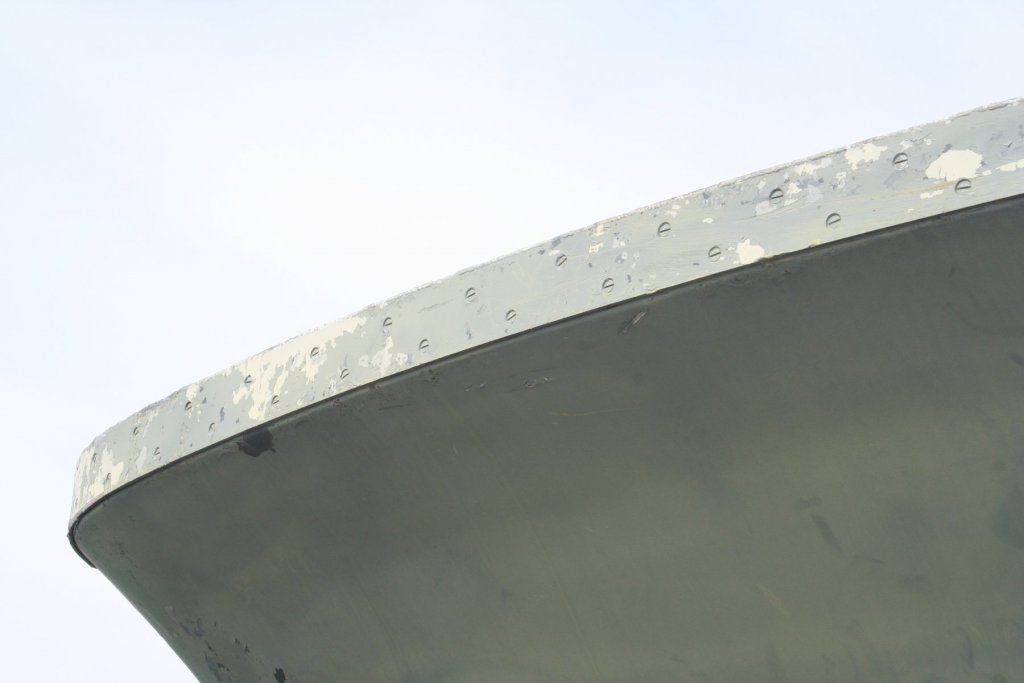
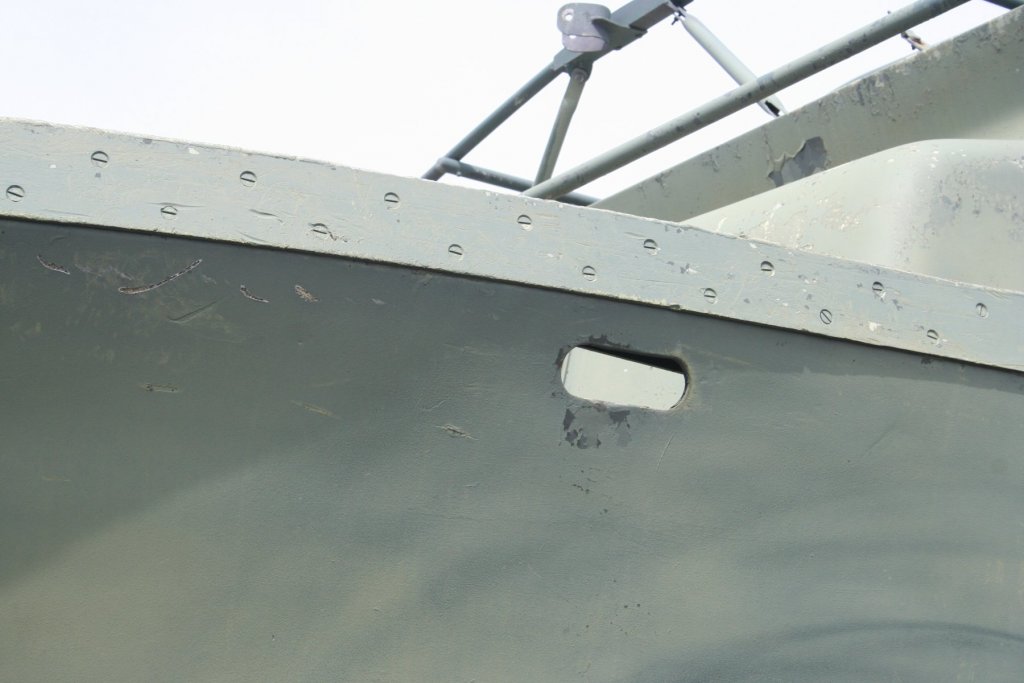
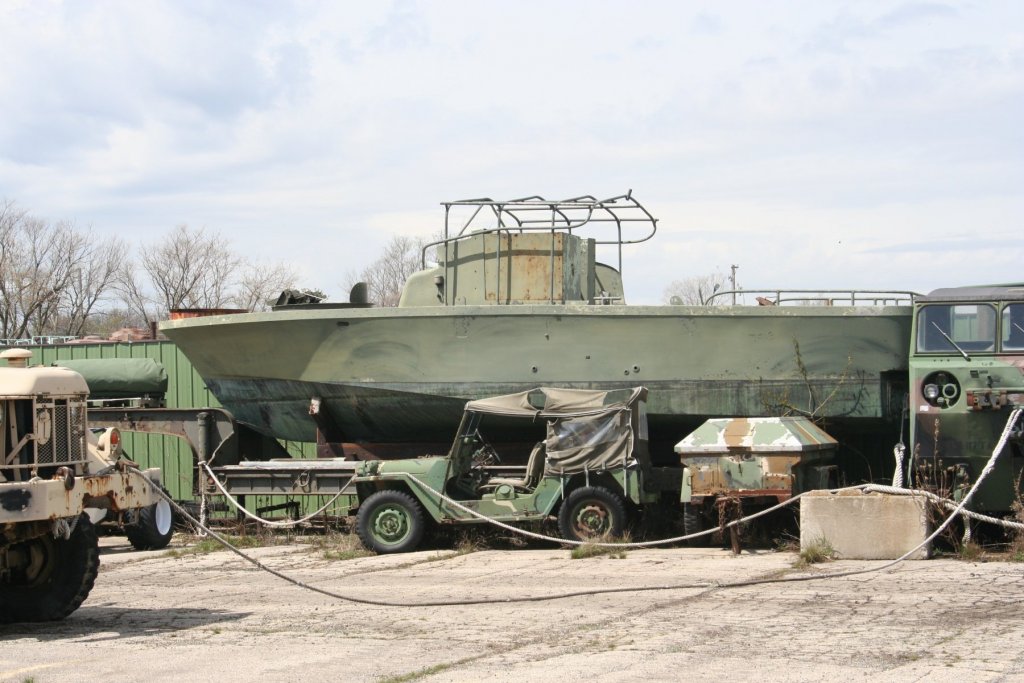
Roger: Yes, it's the Russell Military Museum accessed from Russel Rd. I always called it the military junkyard until I found out it was a "museum" of sorts. There are some real gems in the collections, some of which are enclosed, while others are just out in the weather. The one PBR is operational and is occasionally operated on the IL Chain of Lakes - thus the IL registration number on the bow shown in the first photo. A neat place to visit - in good weather as it gets muddy if it has rained recently - only $10 admission. Kurt
-
Learned something new. Had no idea there was a difference. Kurt
-
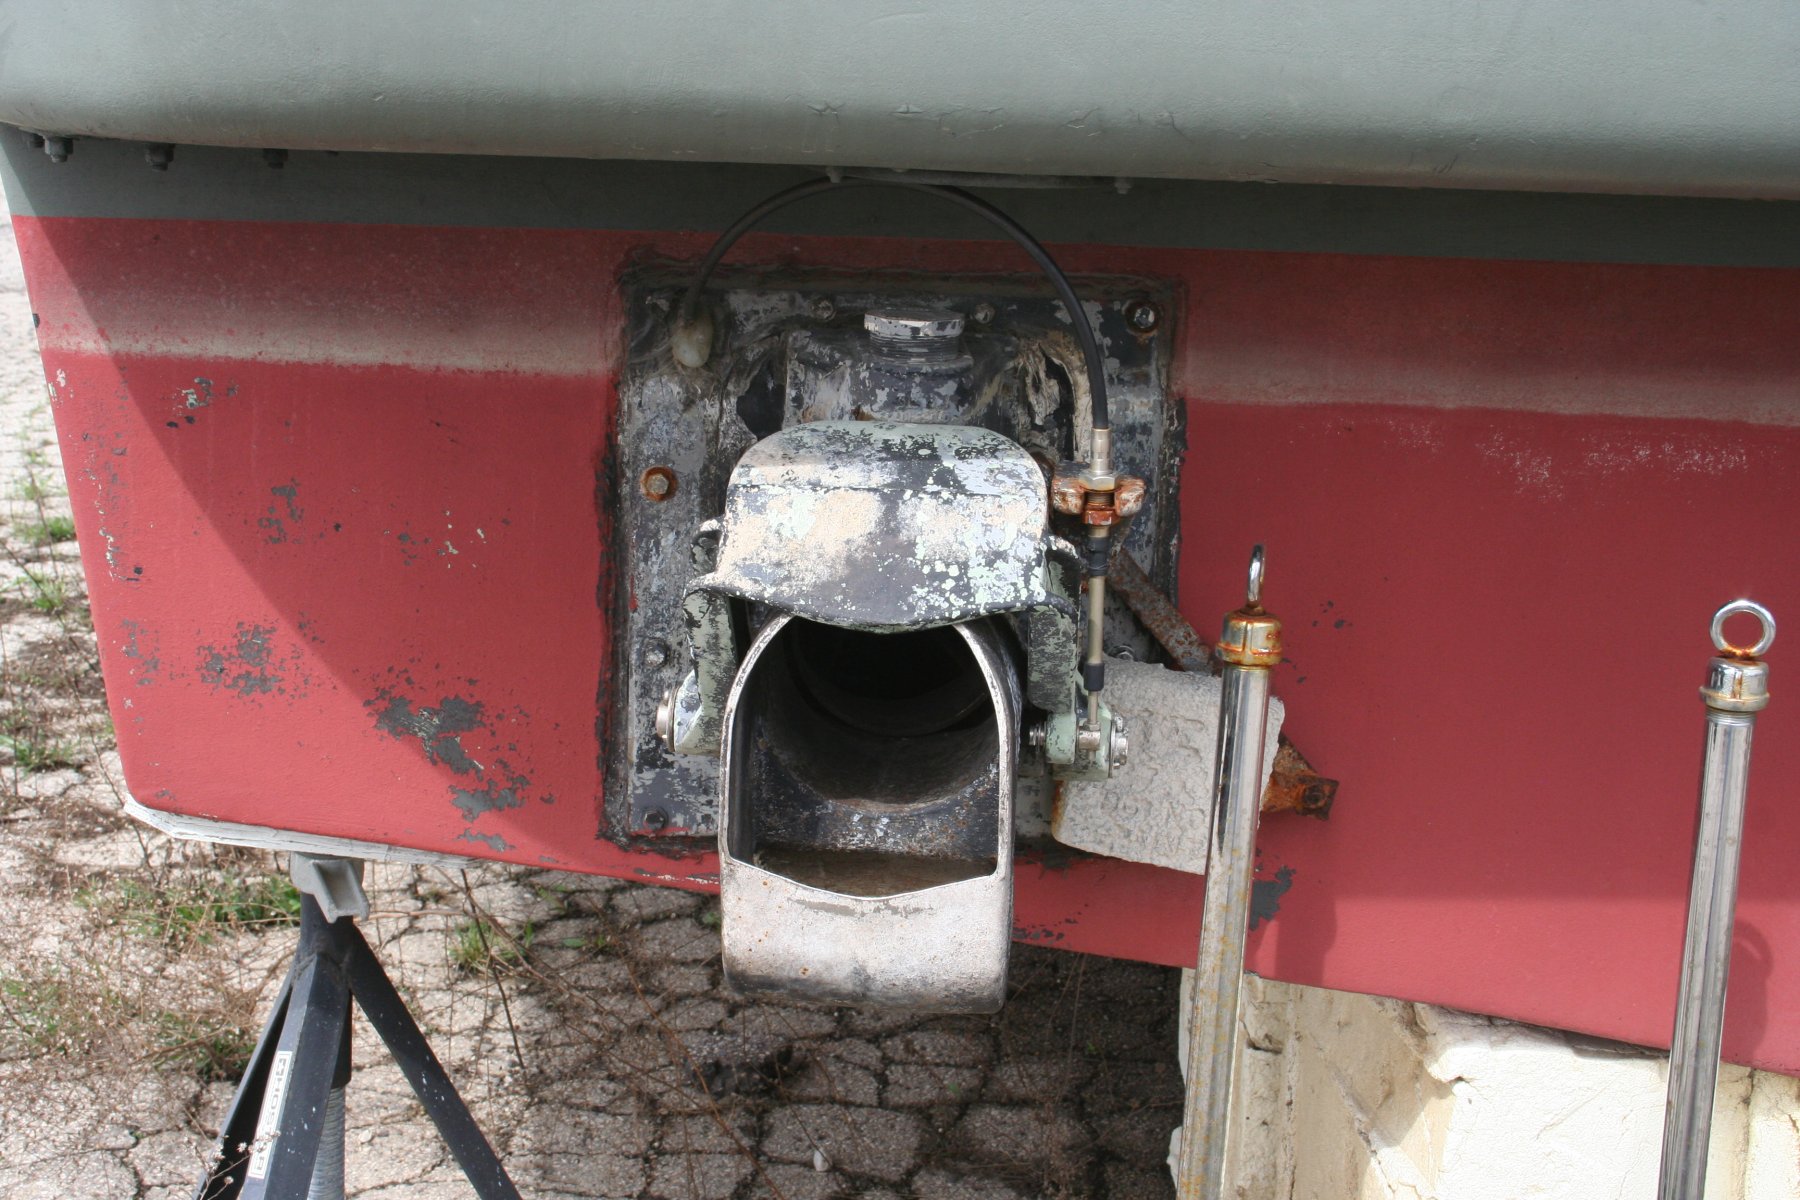
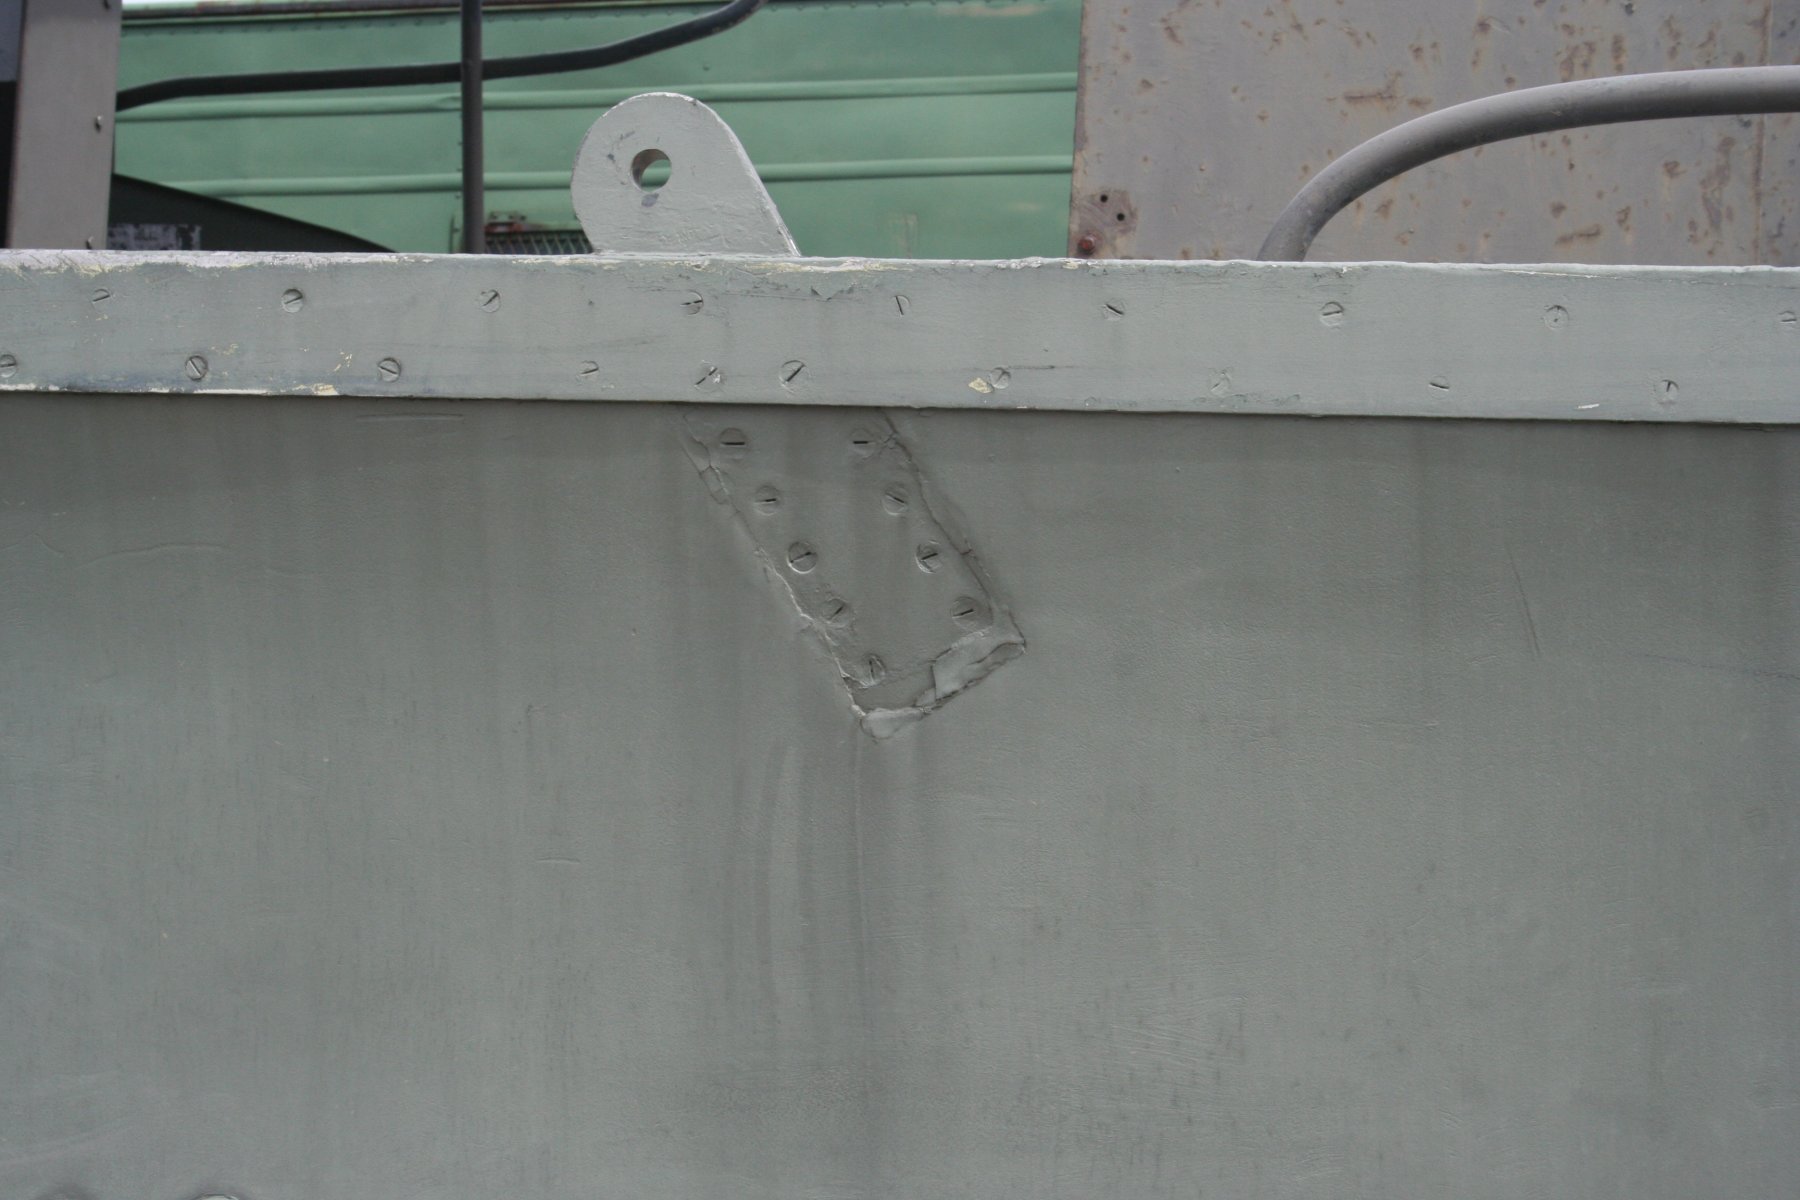
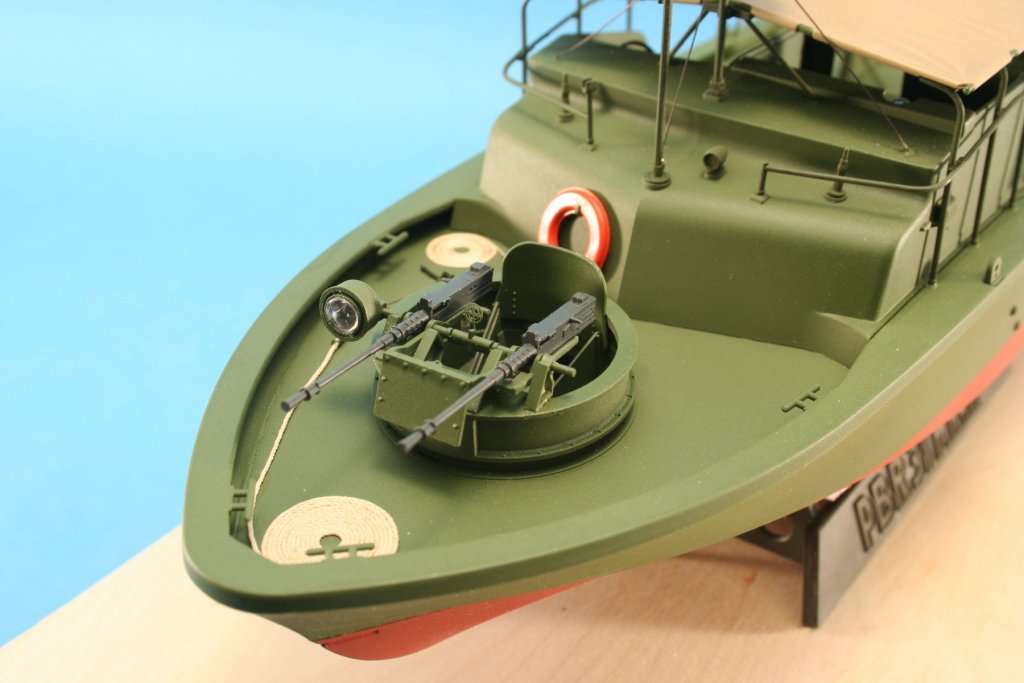
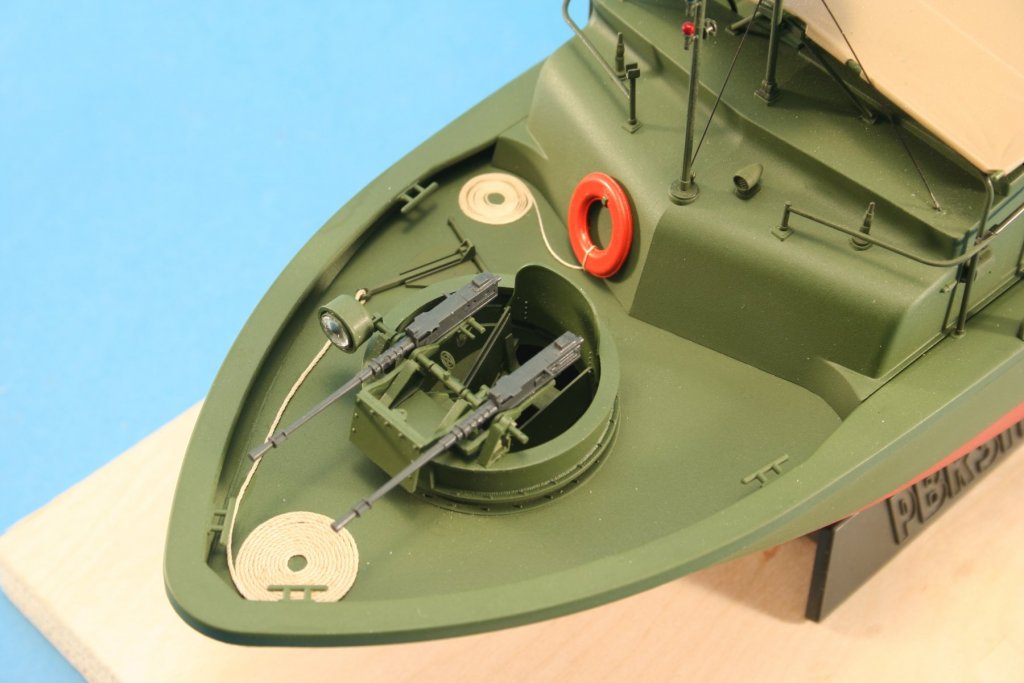
Here are some photos of a PBR that is at a "military museum" on the IL/WI boarder. Might be some details that help. The last 2 photos show the Tamiya PBR front gun tub so you get an idea of the detail in the kit. Kurt


-
You might want to consider picking up the 1/35 scale Tamiya kit of the PBR as the kit's pretty darn accurate and the gun tub details are very crisp and very detailed. Kurt
-
The list can be found here - just click on it and you can see the official up-to-date listing of the prohibited manufacturers. Kurt
-
Blacken-It is no longer produced. It was a small mom and pop place and they passed away in a traffic accident and the company went out of business. There are other blackening agents - just be sure to use one that is made for your metal -Brass blackening agents will not work on white metal and vice versa. As to using acrylic paints on metal - there is no reason not to. Just be sure to clean them well. A primer can help but also a bath in an etching agent gives a "tooth" to the metal that helps with paint adhesion. Again, be sure to clean off the etching agent. There are several threads on blackening metals that you can do a search for. Kurt
- 30 replies
-
- 3
-
-
- model shipways
- finished
- (and 1 more)
-
Larry: Welcome to the NRG's Model Ship World. Go to the Member's Build Logs section and click on the kit builds topic and there are guidelines on the first page to tell you everything you need to know. Happy modeling, Kurt
-
Preac Thickness Sander
kurtvd19 replied to zinfigman's topic in Modeling tools and Workshop Equipment
Roger is 100% correct. I once had the part number - direct from Charlie File's son - when I had to replace a bearing. Sold the sander and dumped the note but it was a standard bearing. Kurt