Seventynet
-
Posts
797 -
Joined
-
Last visited
Content Type
Profiles
Forums
Gallery
Events
Everything posted by Seventynet
-
 I raise a glass to you on finishing this very beautiful build Nick. I too will revistit this fine log as I progress on my Victory. Best, Ian
- 84 replies
-
- 1
-

-
- finished
- caldercraft
- (and 1 more)
-
What a pleasure it was reading through your build log Elijah and what a great thing it is to have such a young and eager ship builder on this forum. Thanks for sharing your careful build with us. I shall follow along from now on. Best, Ian
- 701 replies
-
- 3
-
-
- phantom
- model shipways
- (and 1 more)
-
A pleasure to follow your build as always Heinz. I shall be turning to this stage frequently when I get to it on my Vic. Best, Ian
-
Wow, gorgeous! That poly really brings out the beauty of the wood. Ver, very nice job Chris. Best, Ian
-
Mark, I hope I didn't cause offence with my usual over-enthusiastic know it all comments. Of course you would know when wood would good enough to reuse. Best, Ian
- 652 replies
-
- 1
-
-
- royal william
- euromodel
- (and 1 more)
-
Nice! I can never get over how long the bow sprit is and when the masts and rigging goes up it takes on a whole different character. By the way I really like the colour contrasts between your wales and the planking in-between. Best, Ian
-
Vinnie, very kind of you to make this comment, if not a little (a lot?) exaggerated. Unfortunately I don't hold even the dimmest candle to many Victory builders and I'm certainly not even in the same universe of many modellers. I think you will find that each Victory modeller will excel in some areas more than others while my small talent at this very early stage of the build may express itself in planking, other Victory plankers such as Heinz are more talented and experienced than I am. Thanks again and I am honored to have you follow my build. Best, Ian
- 191 replies
-
- 5
-
-
- victory
- caldercraft
- (and 1 more)
-
Looking very precise and neat Dave. I would go with Tony's advice and add filler blocks at the bow and stern - of say basswood. Balsa is fine for in-between all other bulkheads since they would likely be used for shape only, unless you figure you will have plank butts attachments in some of those areas. Keep up the great work, Ian
- 79 replies
-
- 4
-
-
- lady nelson
- amati
- (and 2 more)
-
The planking looks first rate Mark. Nice job. You may find that after a good scrape that the wood all of a sudden looks very nice. That's what I discovered with mine, even though I had a large percentage of really poor planks. The trick is to not go right through the planks, like I did once. Best, Ian
- 652 replies
-
- 2
-
-
- royal william
- euromodel
- (and 1 more)
-
I scraped the hull of my Victory to great effect. I started by experimenting with razor blades but moved on to proper scrapers - the Lee Valley ones in fact. One thing I learned was how quickly the scrapers dulled. It is the burr on a scraper that does the work - in effect it acts like a plane. Here's the video that was so helpful to me: http://woodgears.ca/scraper/index.html Best, Ian
-
Thanks for the comments everyone. Marcus, thanks for looking in and the comments. It is my intent to use native wood on one of my builds. Last year I cut branches off our ornamental plum and our mountain ash tree. Sorry I should look up the Latin names. I dimensioned some of the plum tree and sliced a plank off. Incredibly beautiful wood and perfect tight grain with a little purple colour showing on some of the grain lines. It is still a little green (wet) so the plank quickly warped so I'll have to wait a bit. I know this is off topic but the role of wax on the end grain versus where it got sliced off during the dimensioning process is truly remarkable - if there was ever any doubt about how effective it is for the drying process. I hope Spring isn't too crazy for you and that we see your latest update soon. Best, Ian
-
ancre La Salamandre by tadheus - 1:24
Seventynet replied to tadheus's topic in - Build logs for subjects built 1751 - 1800
Wow!! This is the kind of thing that keeps me going. I love your work! Best, Ian -
Fantastic, wonderful, thank you so much Michael, that is just what I was looking for. Now I will redo how many planks I use. They have used 15, including the garboard and the sheer plank (if you call it that) to my 24 and it looks by sweet. It's funny, I searched the net for a long time yesterday looking for just this thing and only found one that got as far as the garboard strake. What a beautiful job they have done on that cat. Best, Ian
-
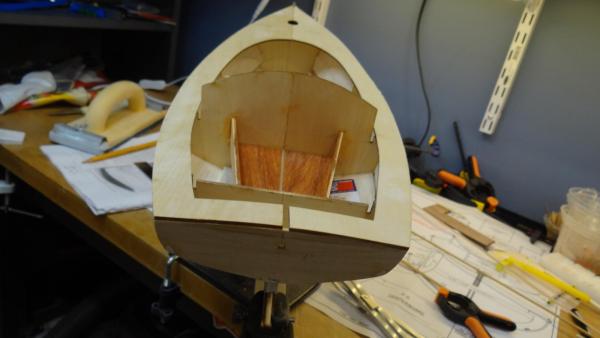
Hi Michael, thanks a lot for looking in. I really appreciate the suggestion. I think you think I plan six planks but what I tried to show was six bands with 4 planks (not marked out yet) in each band. So a total of 24 plank runs each side. But you're right a plank that is too wide is not going to mold around that bilge stringer very well. It is almost a chine so I tried to round it as much as I could. I wanted to say that I turned to your build a few times to figure out how I could copy your lovely center bow king plank to receive my converging pilothouse floor boards. I just couldn't make it work though, the angles would not allow me, so I just stuck a straight piece of walnut down the middle. I might be able to try it at the bow though, we'll see. Best, Ian
-
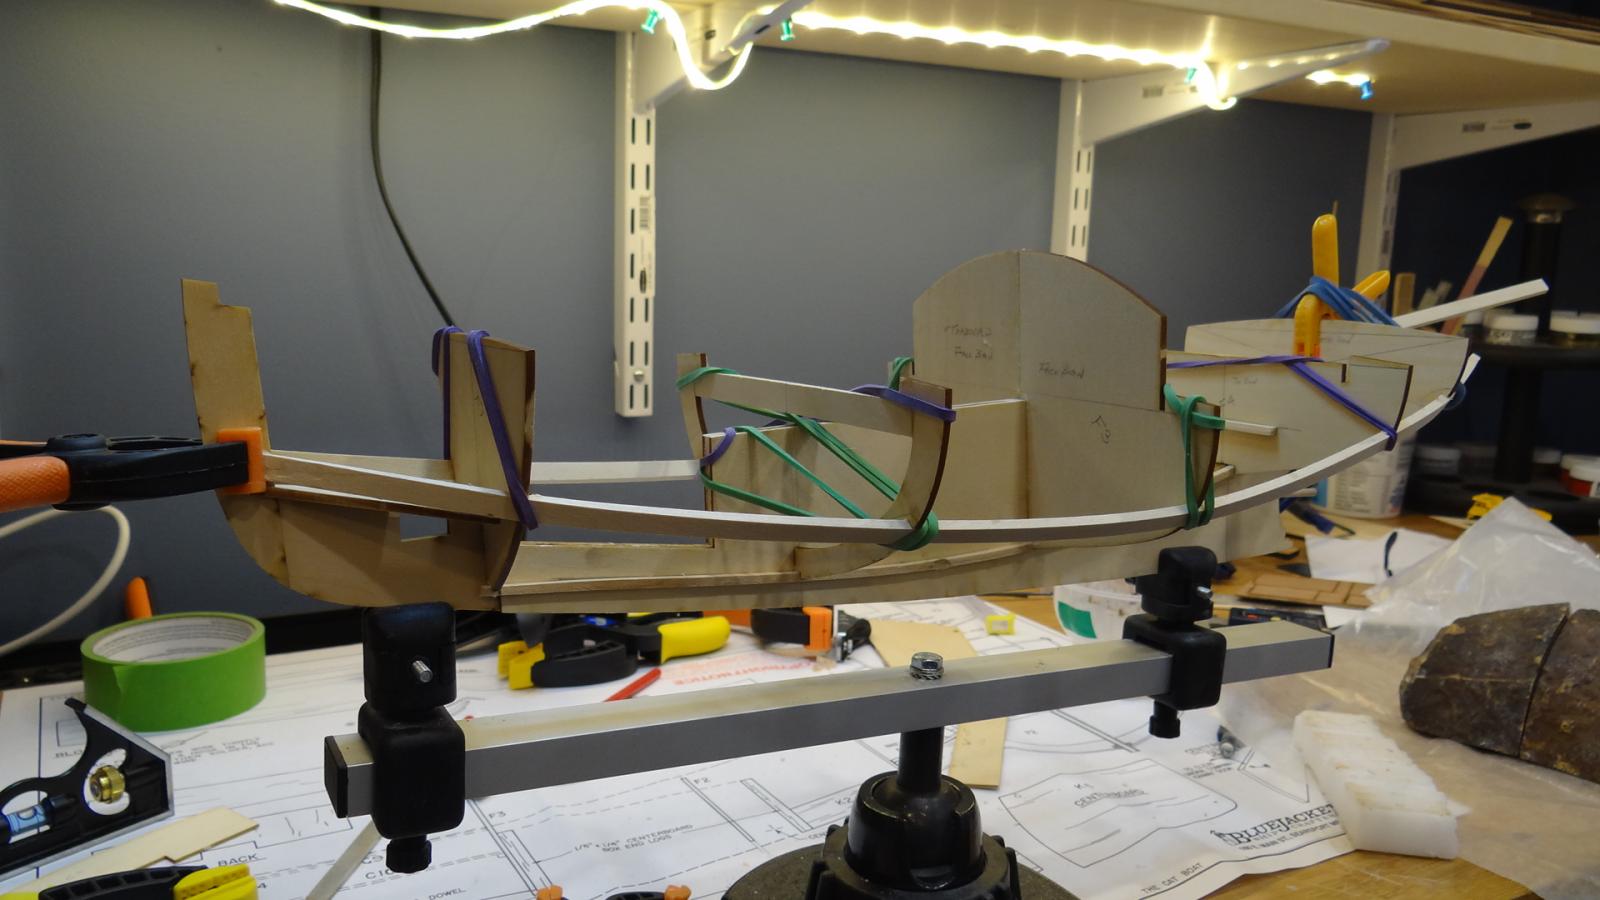
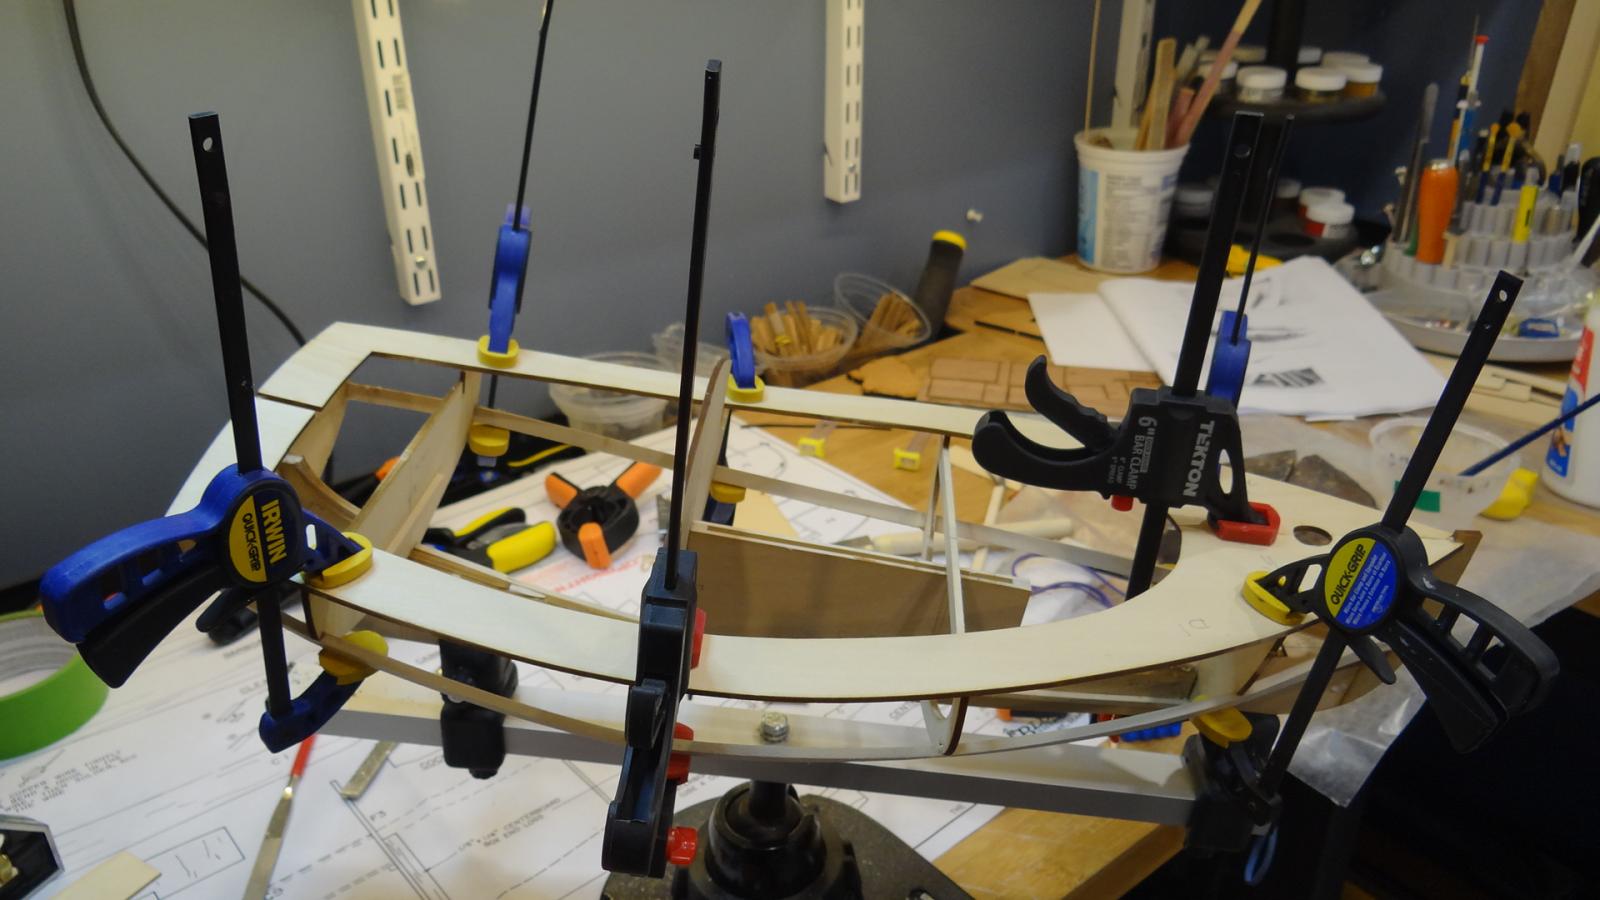
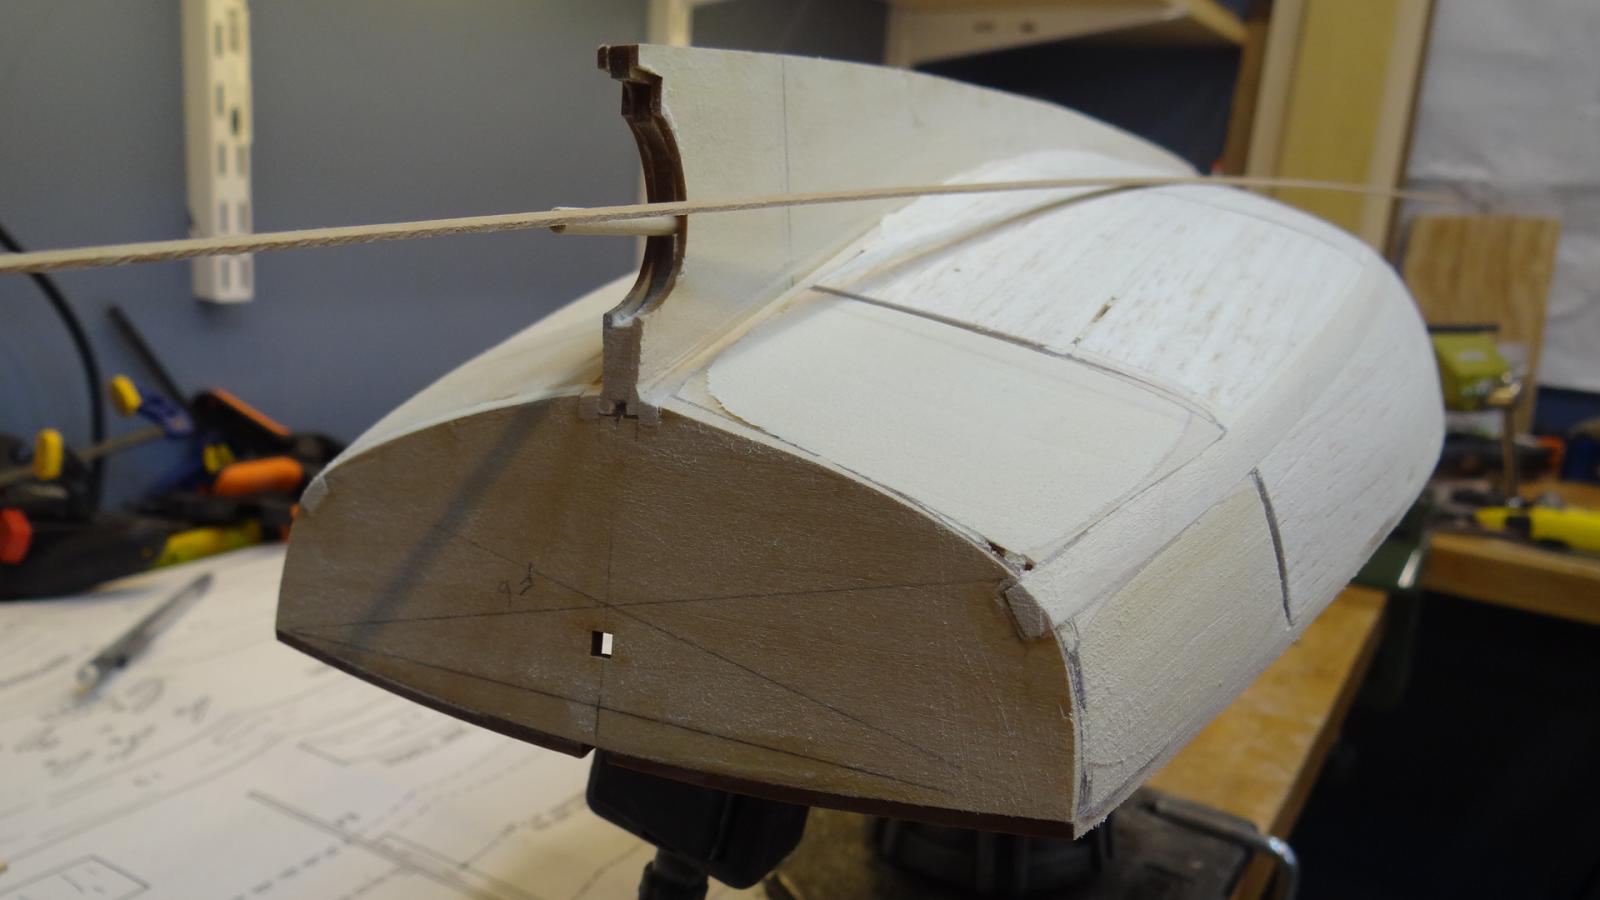
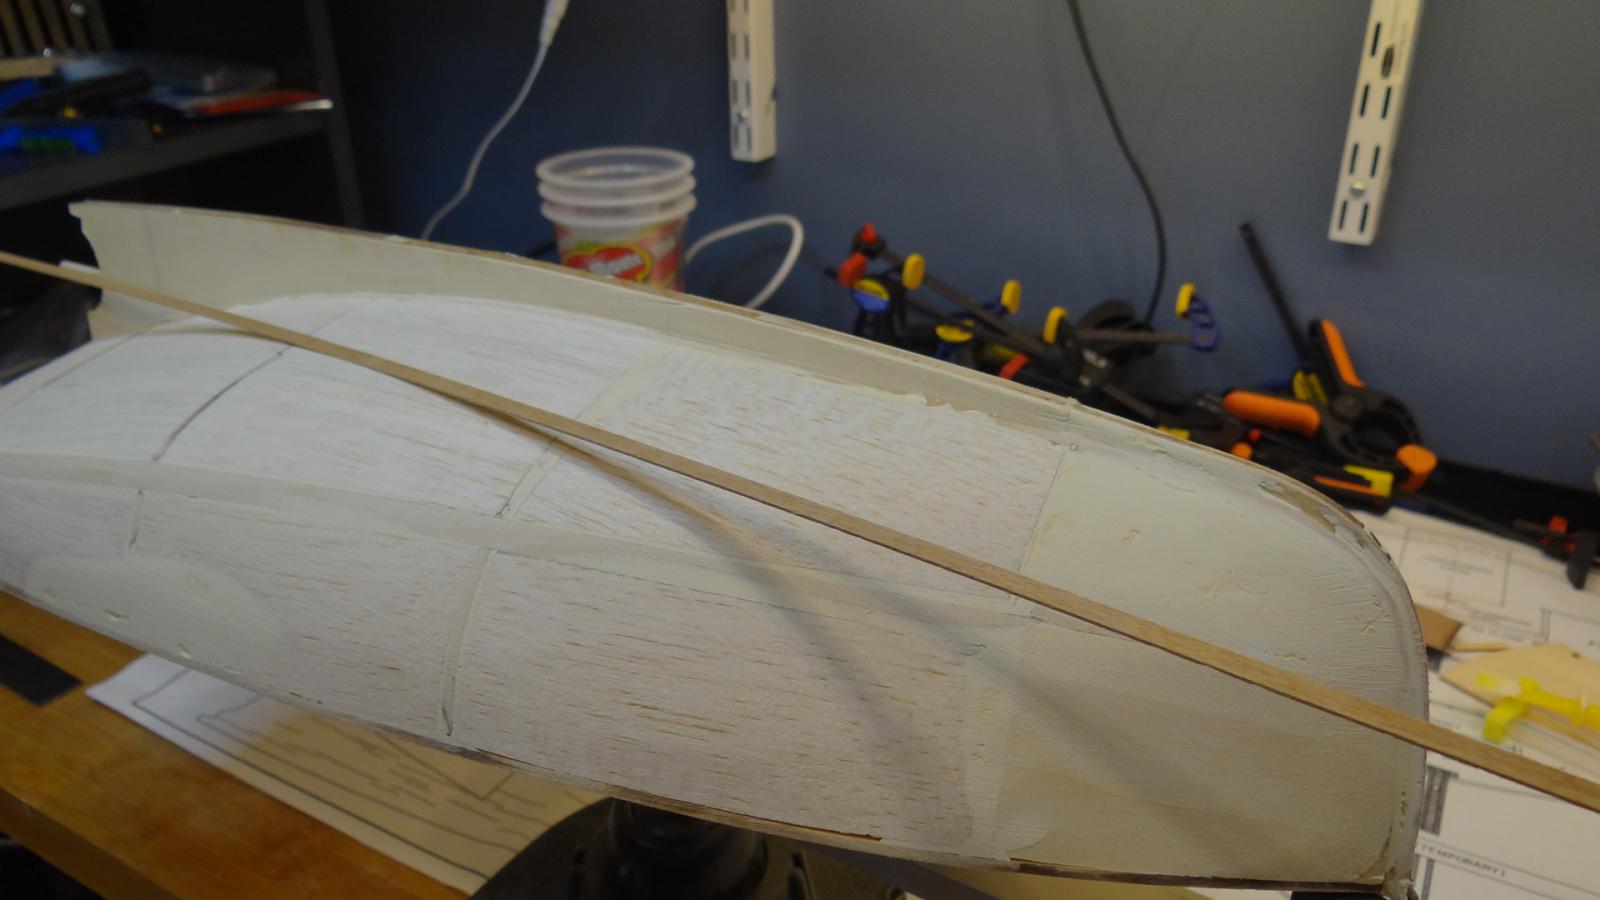
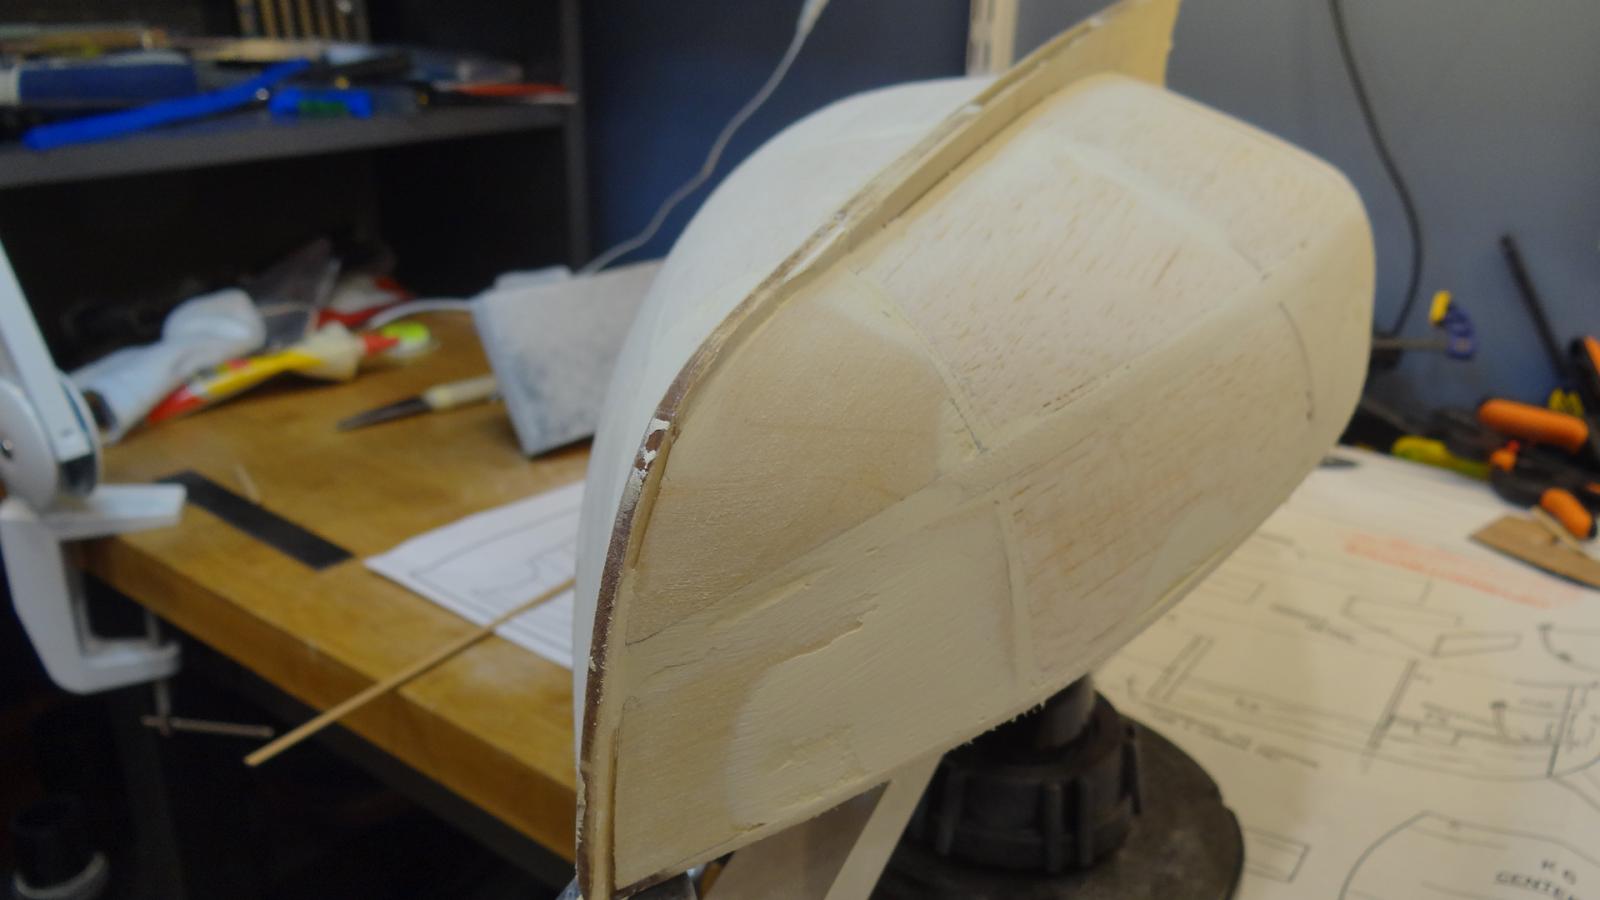
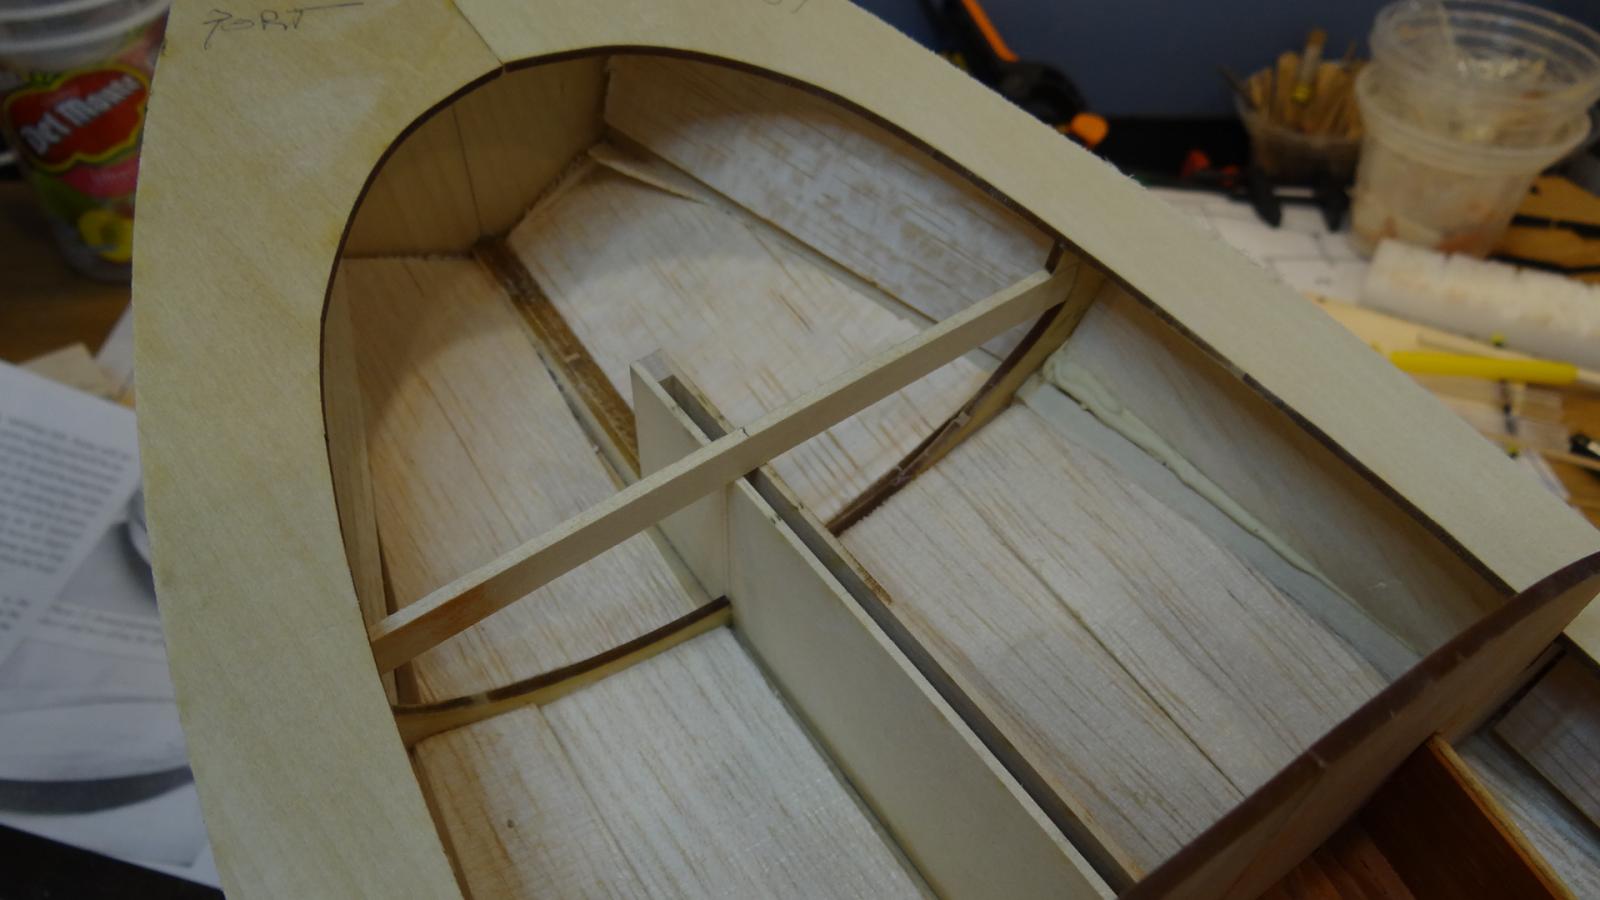
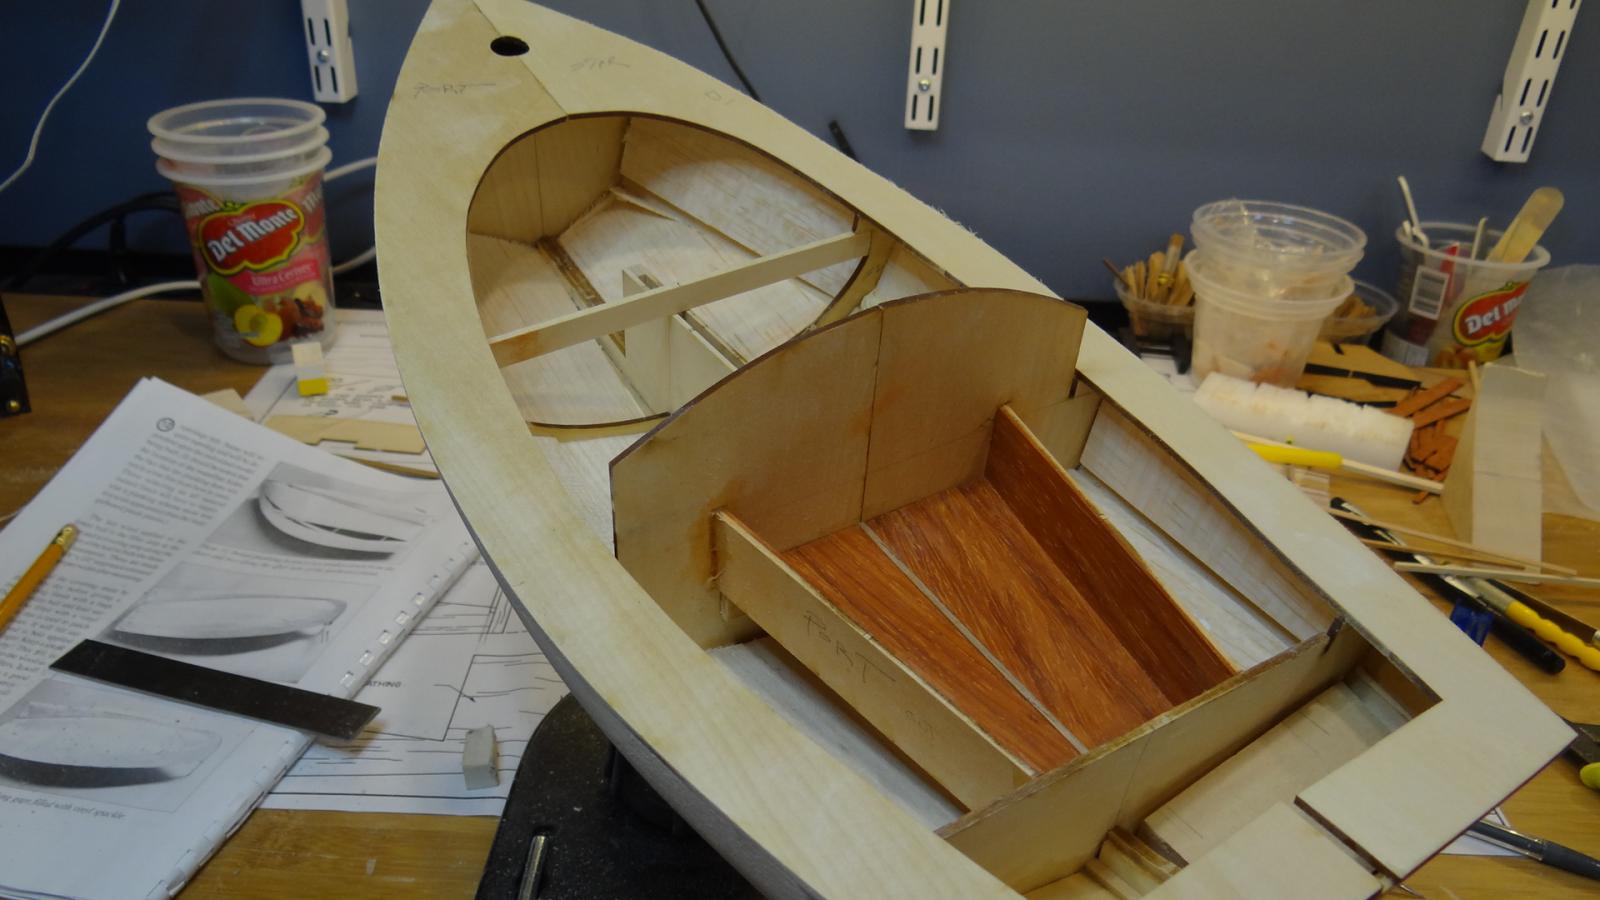
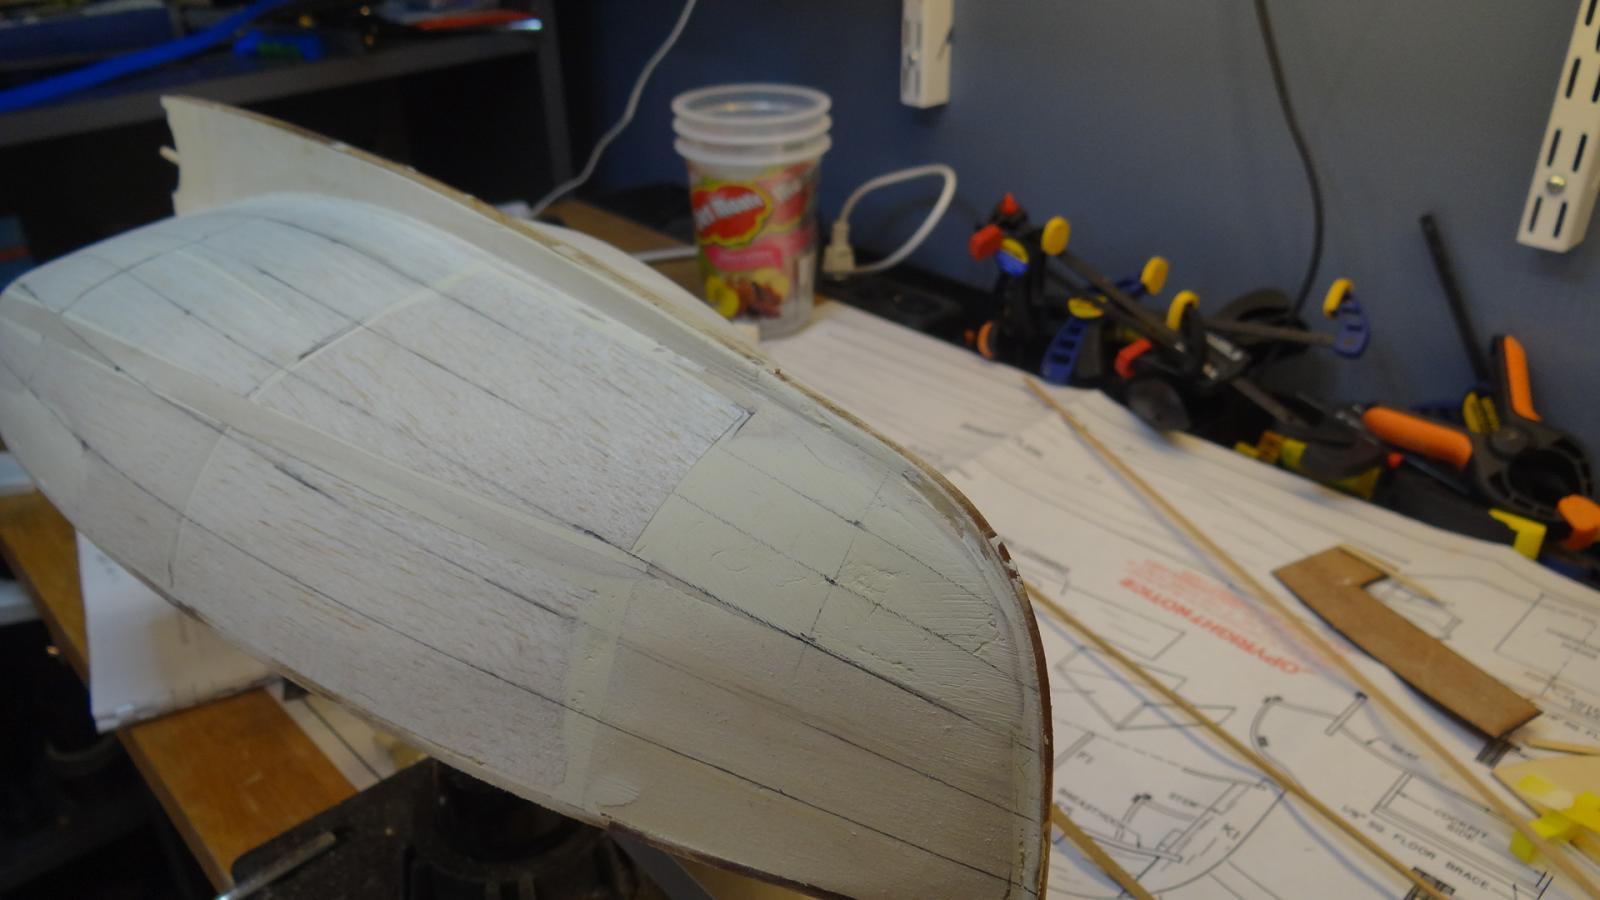
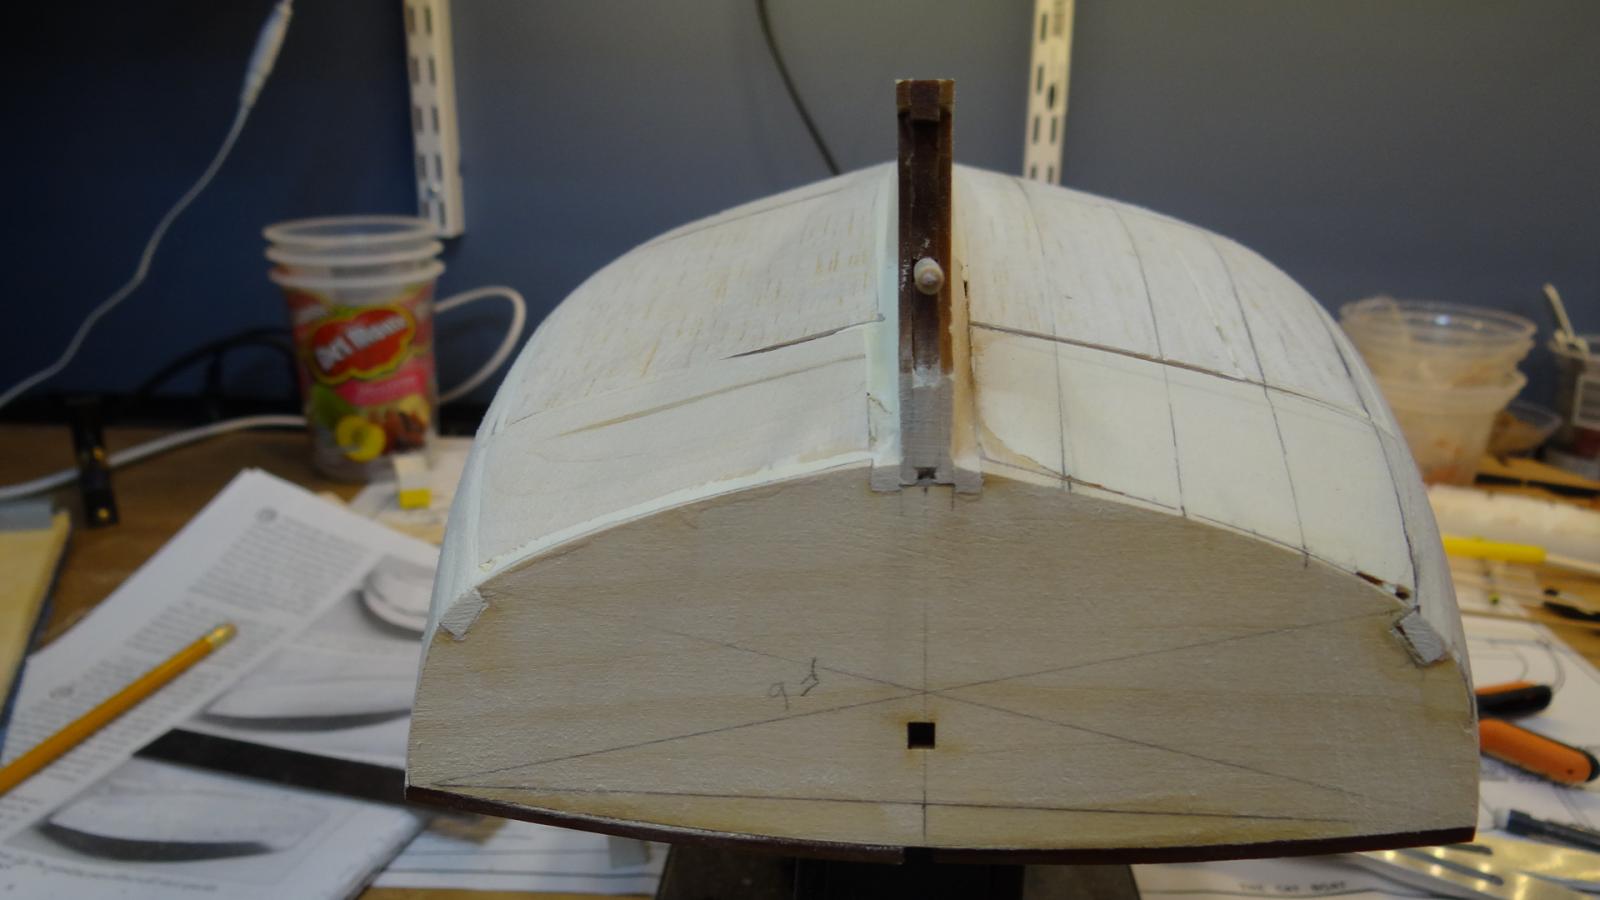
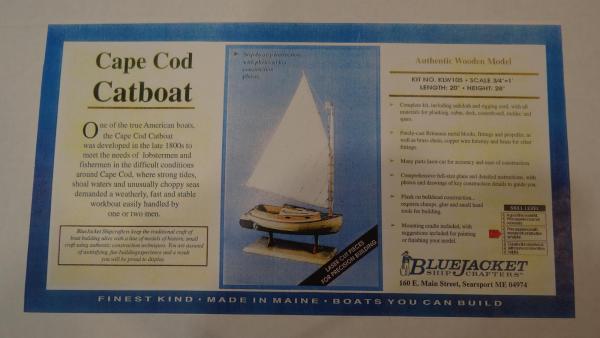
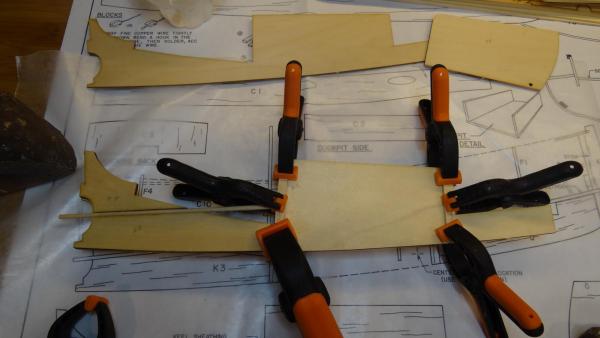
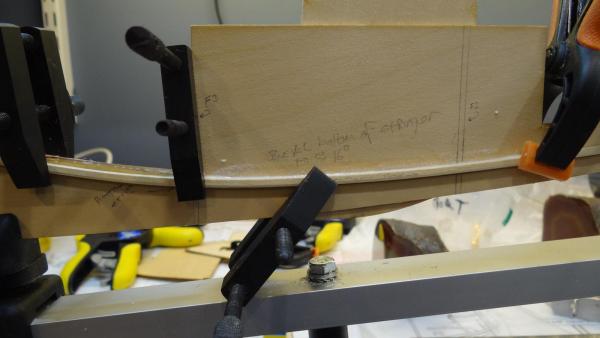
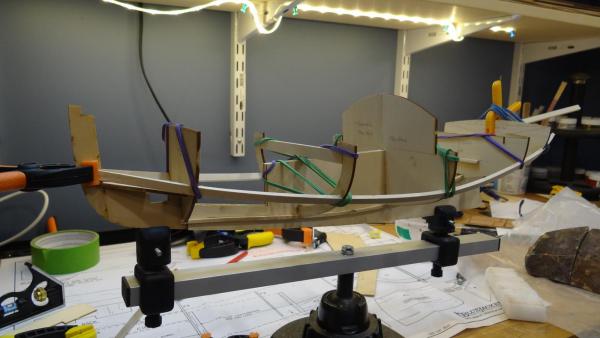
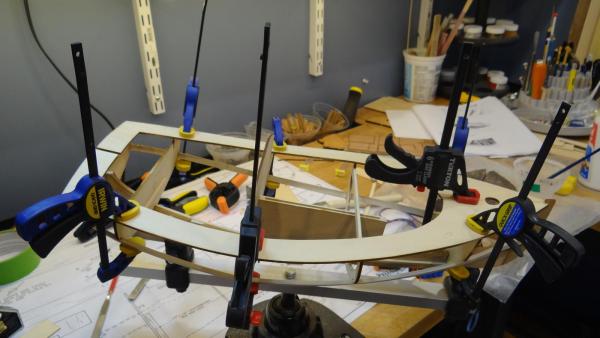
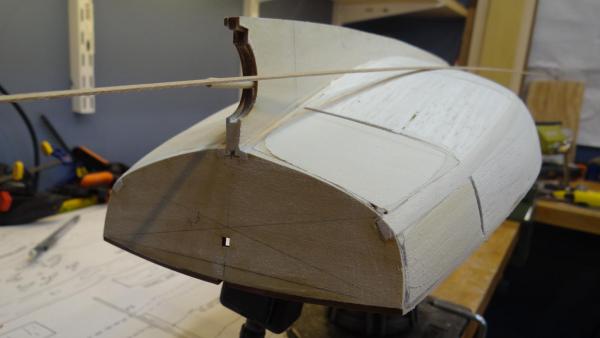
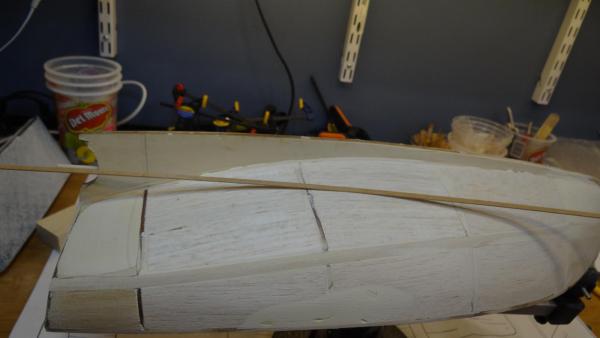
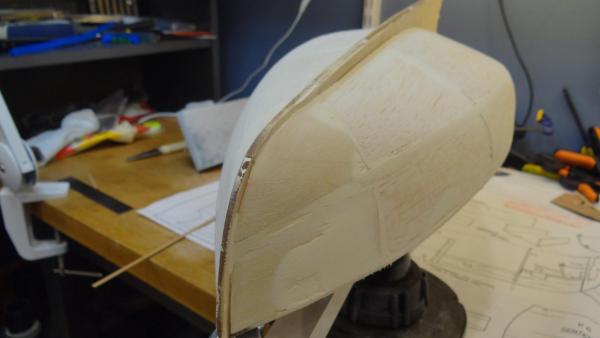
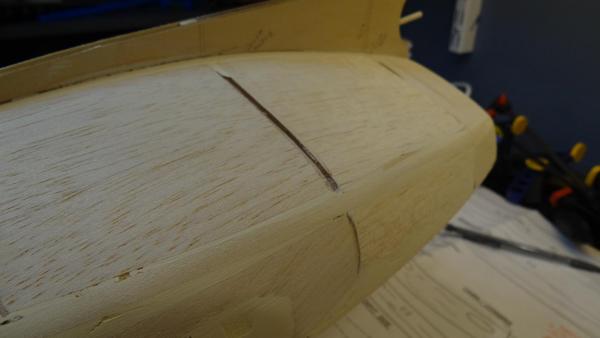
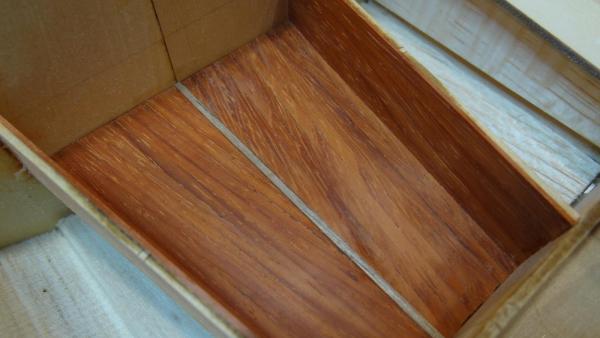
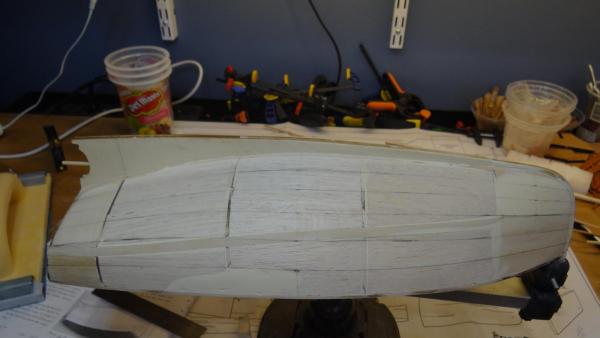
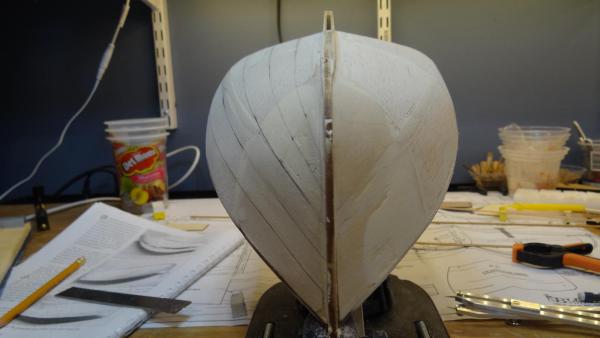
Hi all, I thought I'd start a build log for this little Cape Cod Catboat that the Admiral gave me for Christmas. I am following Marcus's excellent build log (http://modelshipworld.com/index.php/topic/11964-cape-cod-catboat-by-marcus-botanicus-–-bluejacket-–-scale-¾”1’/#entry362573). I am using my own milled wood: walnut for the hull and deck, Padauk for the pilot house area, maple for the deck planks. I am not painting. I will not spend time repeating aspects of the kit and instructions as Marcus has already covered that. Except to say that you must be very careful lining things up, thinking things through and reading between the lines of the instruction book. I'll point out a few areas. A am still very much a novice builder and I hope that people will feel free to make suggestions to improve the model and to point out mistakes or help me head off mistakes. Anyway, on to the pictures: Box cover of Cape Cod Catboat: Centerbox construction, keel stringer assembly. Frame 2 is very delicate (they all are) but the instructions and plans could have perhaps done a better job of showing exactly where the keel stringer is to be located and therefore the frame location. In fact the temporary frame horizontal must butt against the top of the centerboard box. That may have been obvious to others but not me. Deck assembly: Filler blocks and fairing. Instead of using the kit supplied garboard strake (almost half the width of the hull, if you can call that a strake) and the limited planking and spackling approach I have opted to use balsa filler blocks between all the frames and basswood filler blocks at the bow and stern where plank torque and attachment are more important than just shaping. This took me about two days including the fairing so I don't consider that too much of a penalty. Defining Hull plank run bands: I have added plank run bands, intended to contain four, 5mm planks each at their widest point. I located the widest point on the hull using string measurement then divided that into 6 equal horizontal bands. I then divided the stern and the bow into 6 narrower equal horizontal bands. The trick was to find the correct run of one or two of the bands and the rest followed. The next step will be to mark out the port side then use my proportional dividers to define each individual plank. Does anyone see anything I may have overlooked or done wrong? Thanks for looking in, Best, Ian


- 86 replies
-
- 13
-
-
Hi Alde, it looks like you are doing a fine job. I enjoyed reading through your log. Keep up the good work. Best, Ian
-
Spiling Tools and Questions
Seventynet replied to daveward's topic in Modeling tools and Workshop Equipment
I did a bit of spiling on my planking and wales at the bow. I have become very comfortable with the tape method and used a pencil to mark the tape - a sharpie made a mess when I used it. The tape was Scotch (3M) Matte Finish - about 3/4 inch. I have the Staedtler 971 but hardly use it. While I used my mini-band saw for cutting some of the planks it would not have been hard to use a blade. The nice thing about the tape method is that you can put the tape right onto the plank you're going to cut and sand. No matter what method you use to transcribe the curve to the board, there will always be fine tuning to fit the shape to the adjoining surfaces. Ian -
Beautiful pictures of a beautiful model Sjors. Thanks for sharing. Best, Ian
- 1,616 replies
-
- 5
-
-
- caldercraft
- agamemnon
- (and 1 more)
-
Beautiful work Ulises. Thanks for sharing. Best, Ian
- 786 replies
-
- 3
-
-
- Royal Louis
- Finished
- (and 1 more)
-
Rob I hope the artilliary fire hasn't been too taxing. Look forward to coffee when you get back. I've decided to plank the upper counter with the piece you gave me of the real Victory. Best, Ian
- 191 replies
-
- 2
-
-
- victory
- caldercraft
- (and 1 more)
-
Nigel you are right, it looks like the poly will bring out the diferences just enough to contrast the planks - although I wish I had planned this a little better. I think that my tastes and appreciation for this kind of thing has matured since I started this hobby. Up until now I have treated this as just one more thing that my skill level needed to catch up to. Best, Ian
- 191 replies
-
- 3
-
-
- victory
- caldercraft
- (and 1 more)
-
Thanks Nigel! Is white spirit the same as what we call mineral spirits?
- 191 replies
-
- 3
-
-
- victory
- caldercraft
- (and 1 more)
-
Heinz, I struggle to find suitable words of gratitude for your kind words and taking the time to make suggestions to improve my model. One thing I can say is that yours is the Victory model that has given me the most inspiration to try different things, including the wales. Along those lines your suggestion to create a narrow gap between the wale stock hit me right where the regret has been mounting since I started the operation. I should have applied a pencil line or something. But I will try a little experiment with a fine file to see if that will work. I will be slowing down on the Victory for a month or so, but not stopping, while I build a little boat on the side. It's a Bluejacket Cape Cod Catboat the admiral gave me for Christmas. It will be a nice distraction and will allow me to discard the first time builder collar. This little pause will also let me gather what I need for my surprise. Best, Ian
- 191 replies
-
- 2
-
-
- victory
- caldercraft
- (and 1 more)