Seventynet
-
Posts
797 -
Joined
-
Last visited
Content Type
Profiles
Forums
Gallery
Events
Everything posted by Seventynet
-
 Paul this is coming along beautifully. I can’t wait to see how the stern works get finished up. Ian
- 72 replies
-
- 2
-

-
- Glad Tidings
- Model Shipways
- (and 1 more)
-
Wow, just stunning work.
-
Thank you Paul and Mr French Bean. I just updated all of the photos to iPhone photos rather than the Paint saved jpegs which I was forced to use because of the crazy rotation issues. I followed guidance on this forum to take landscape pictures holding the phone so the picture taking button is always to the right. Ian
-
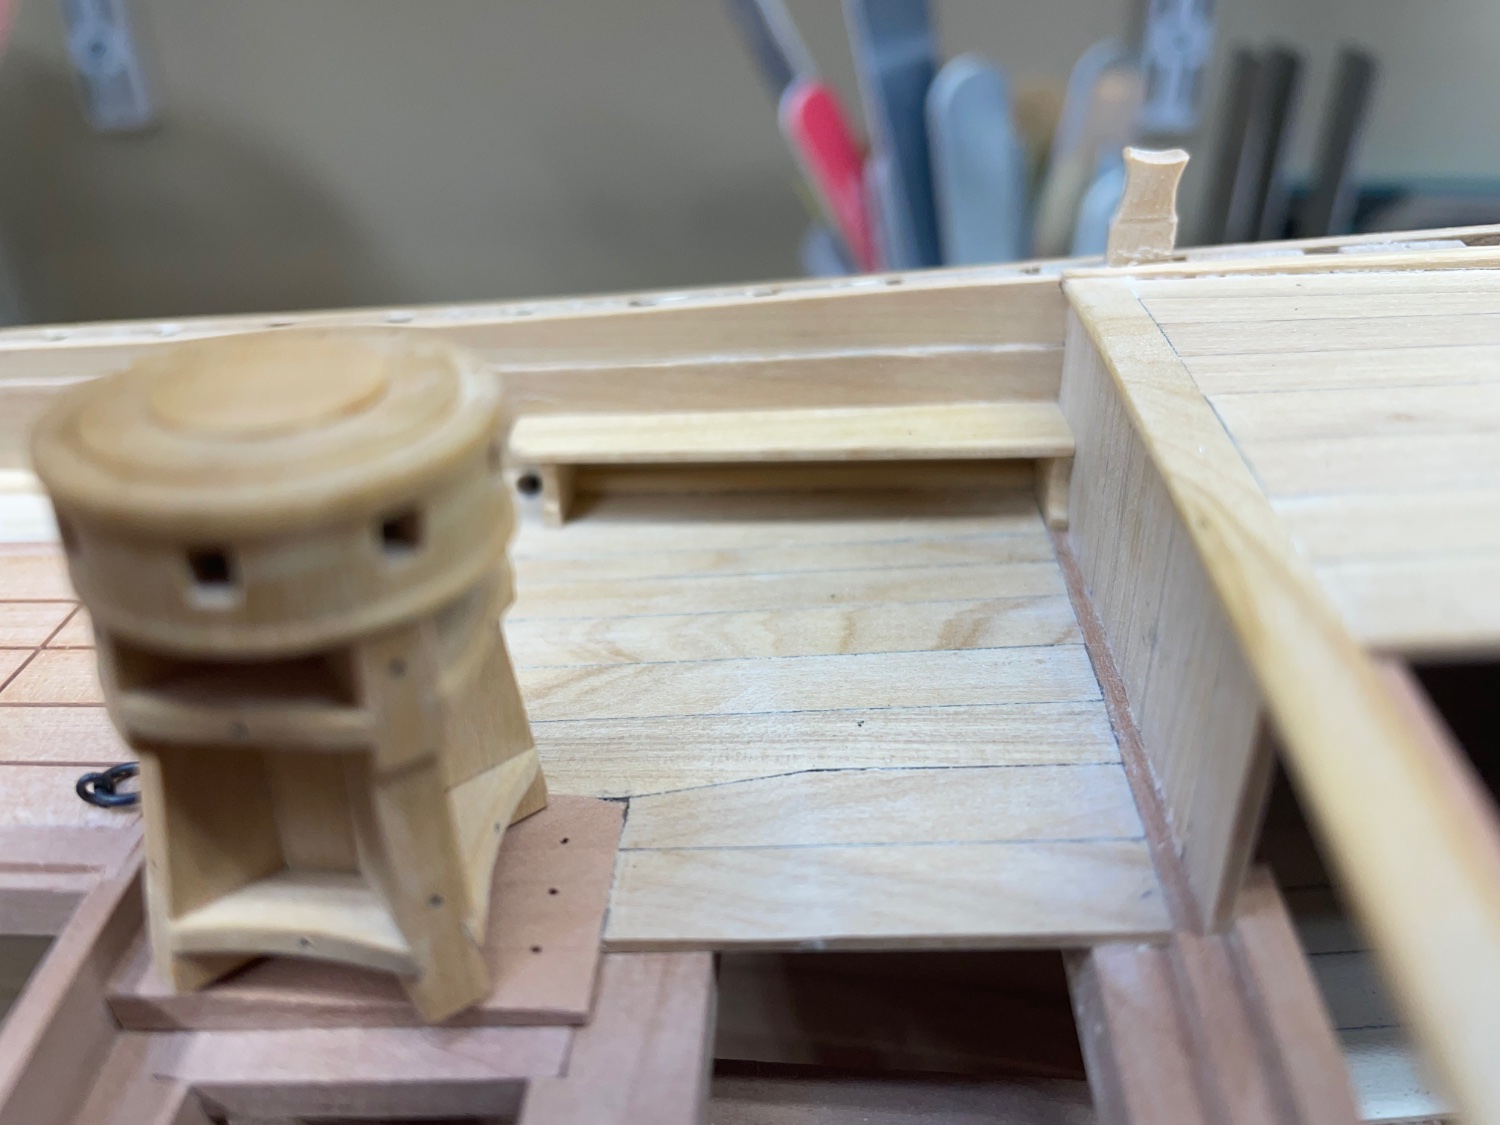
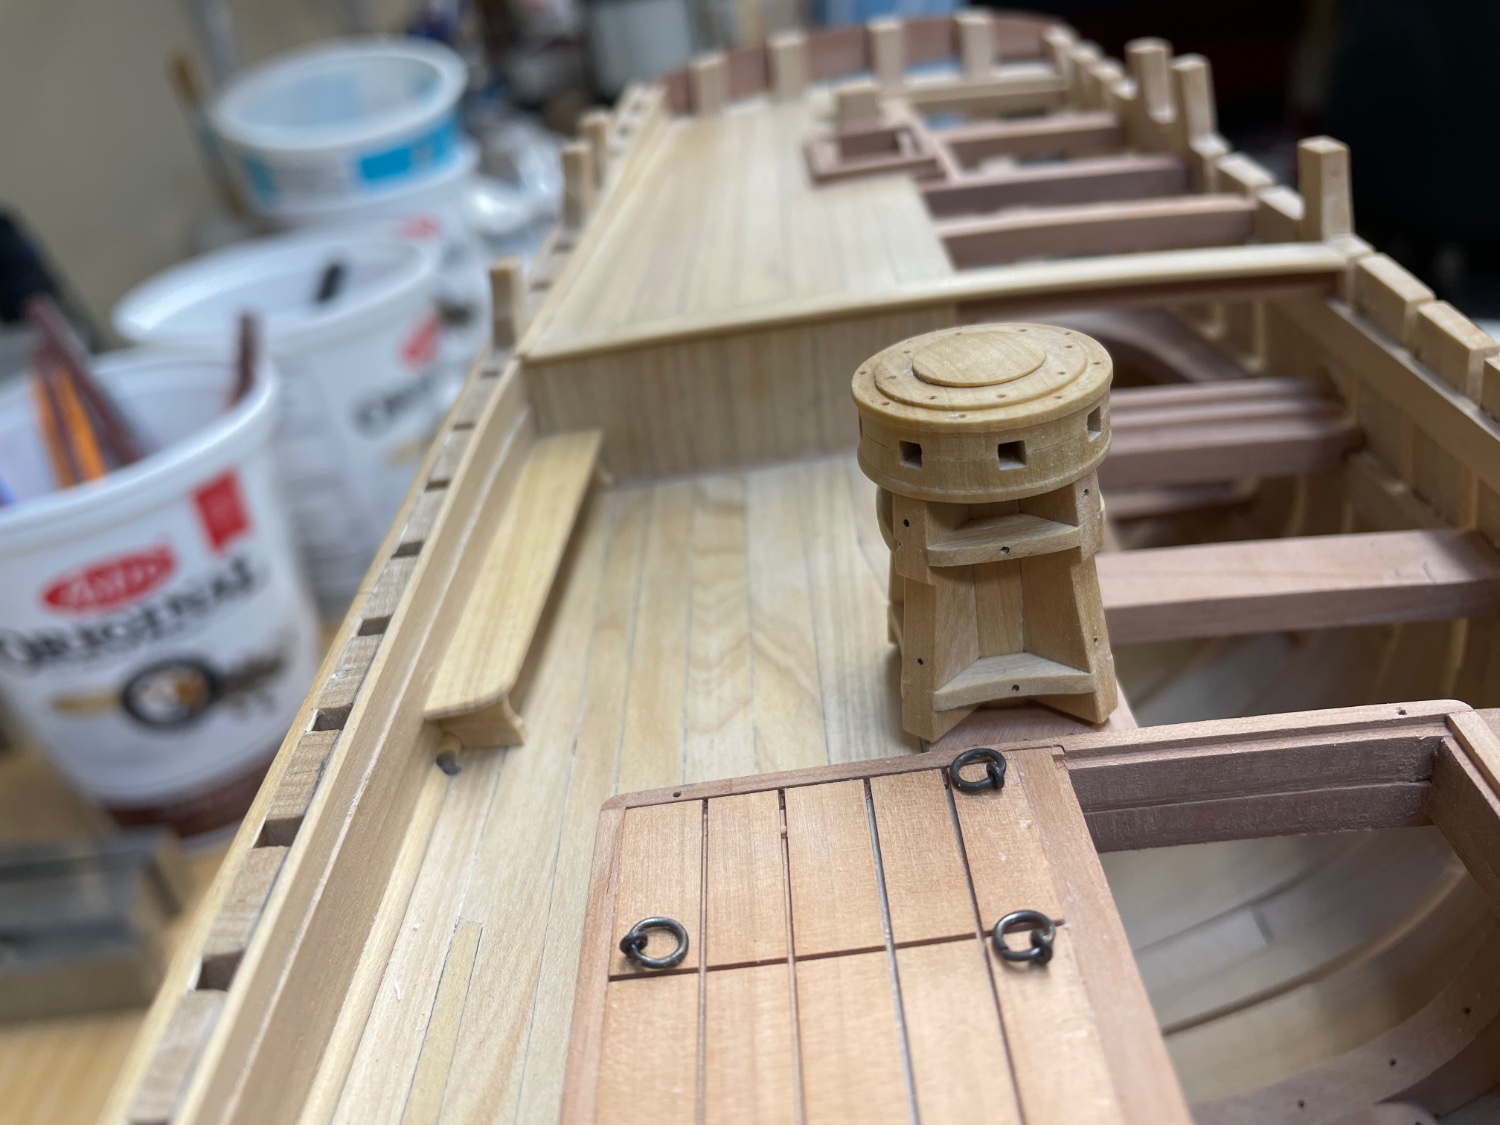
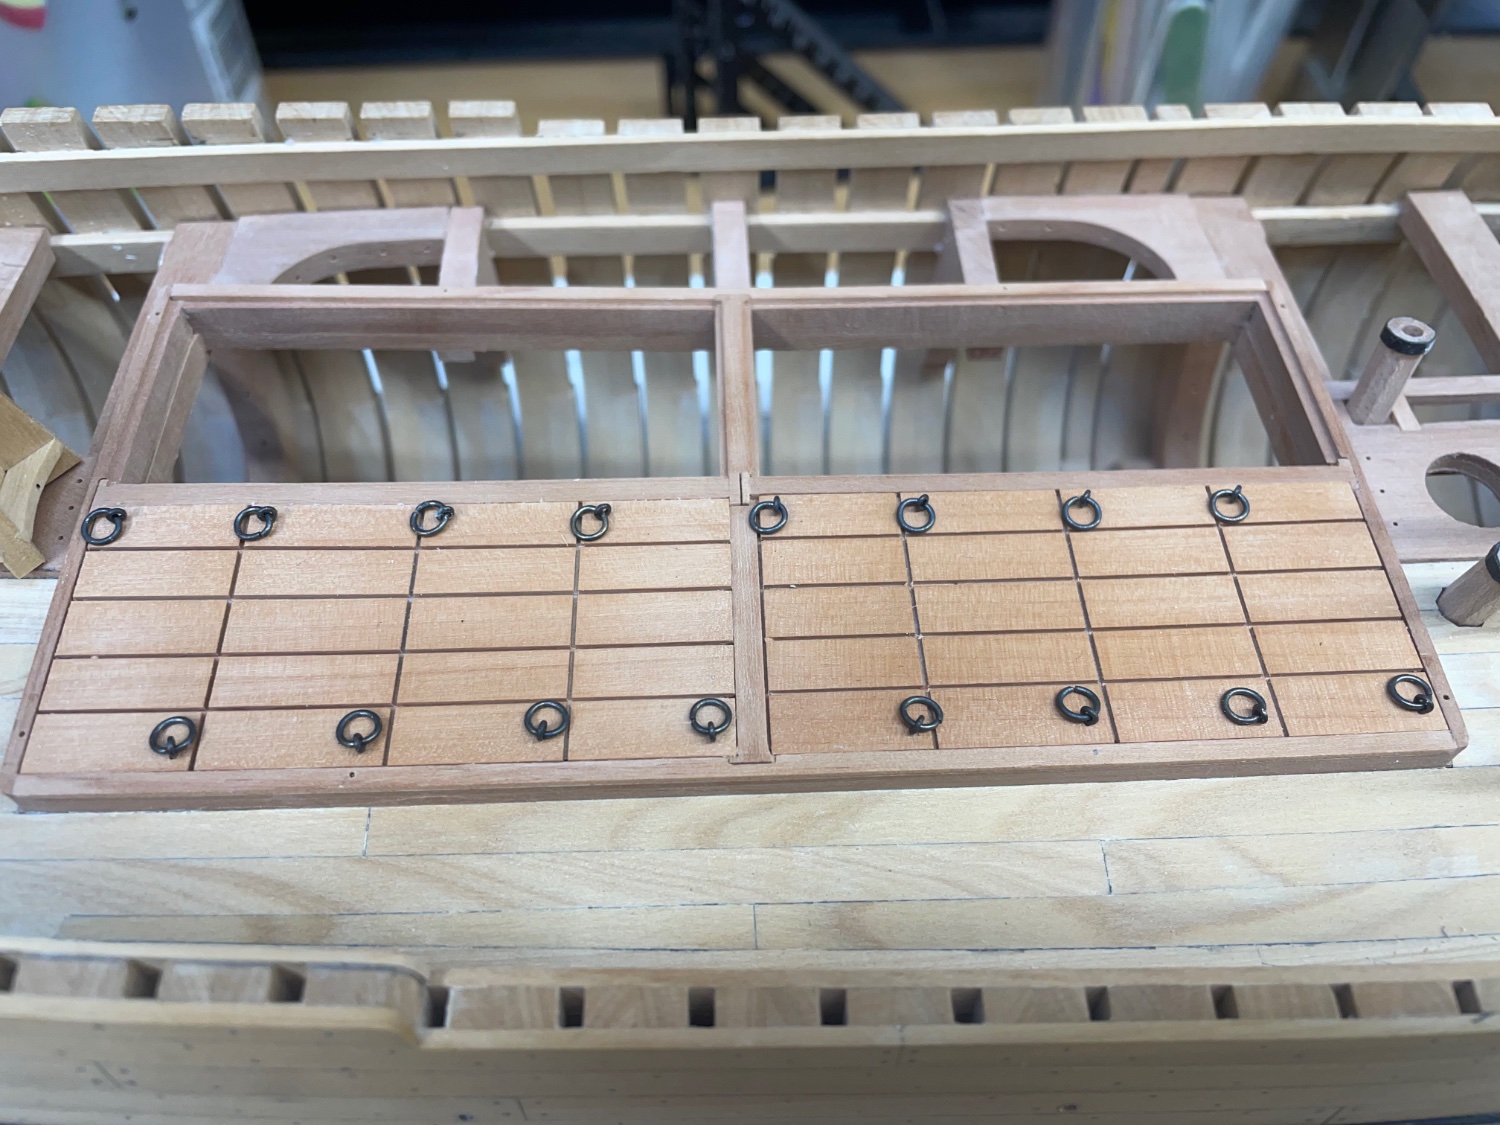
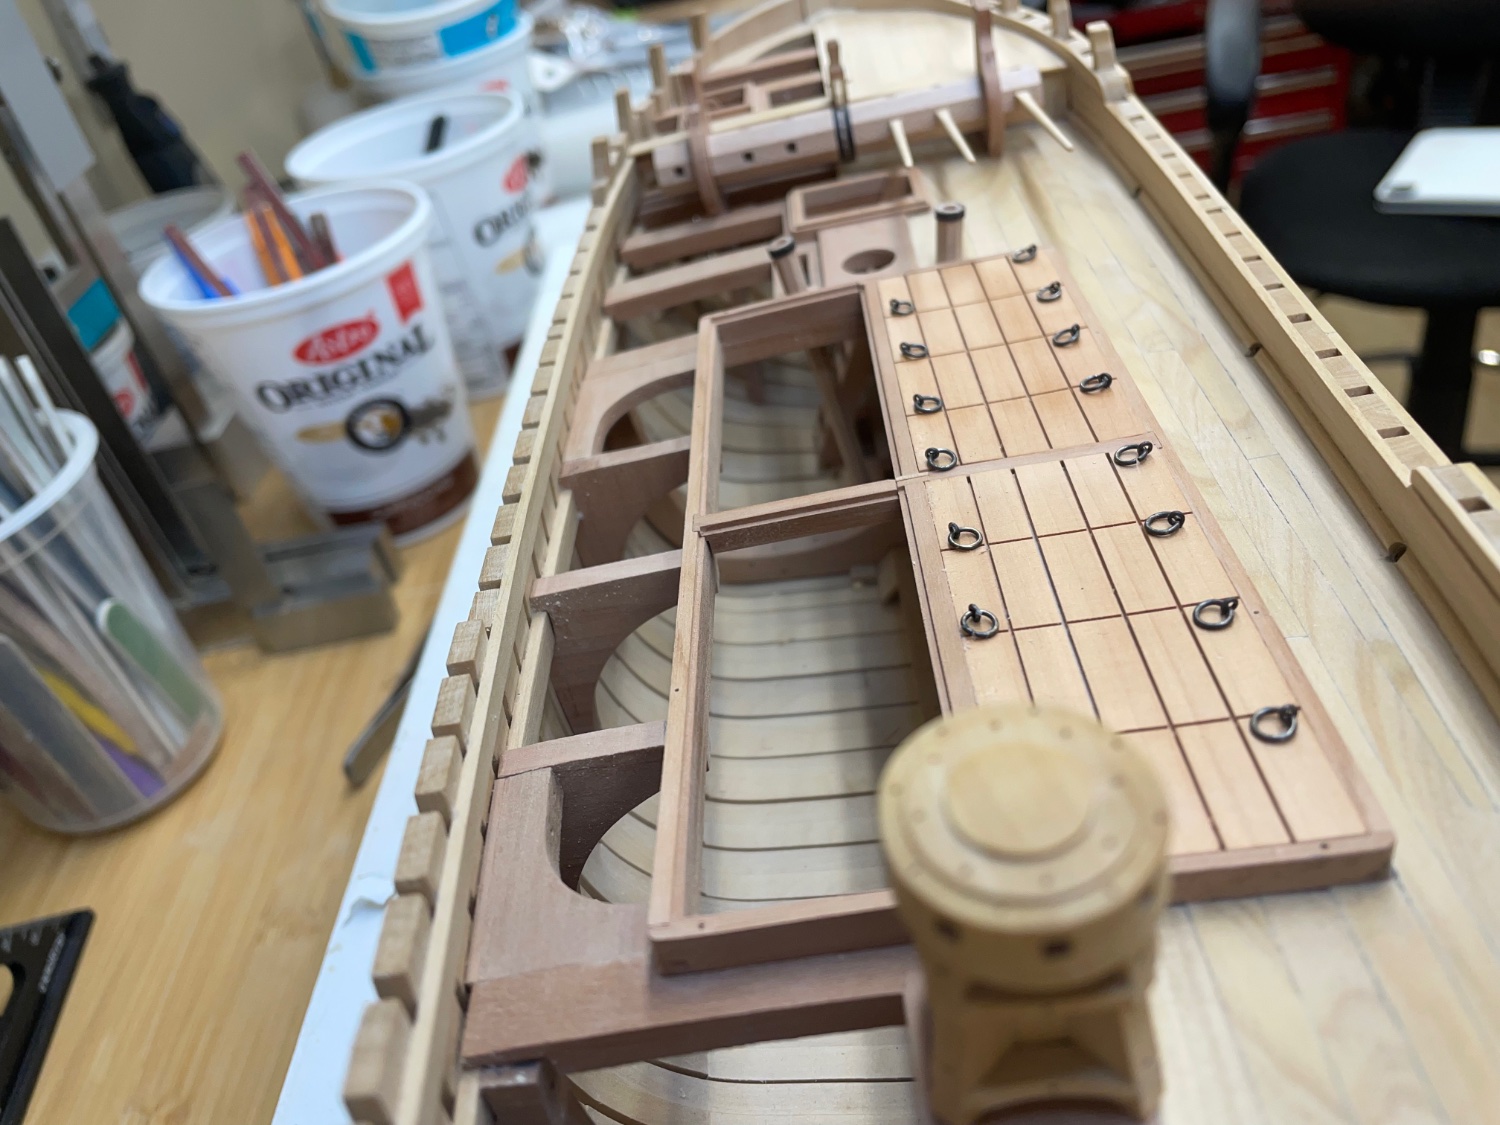
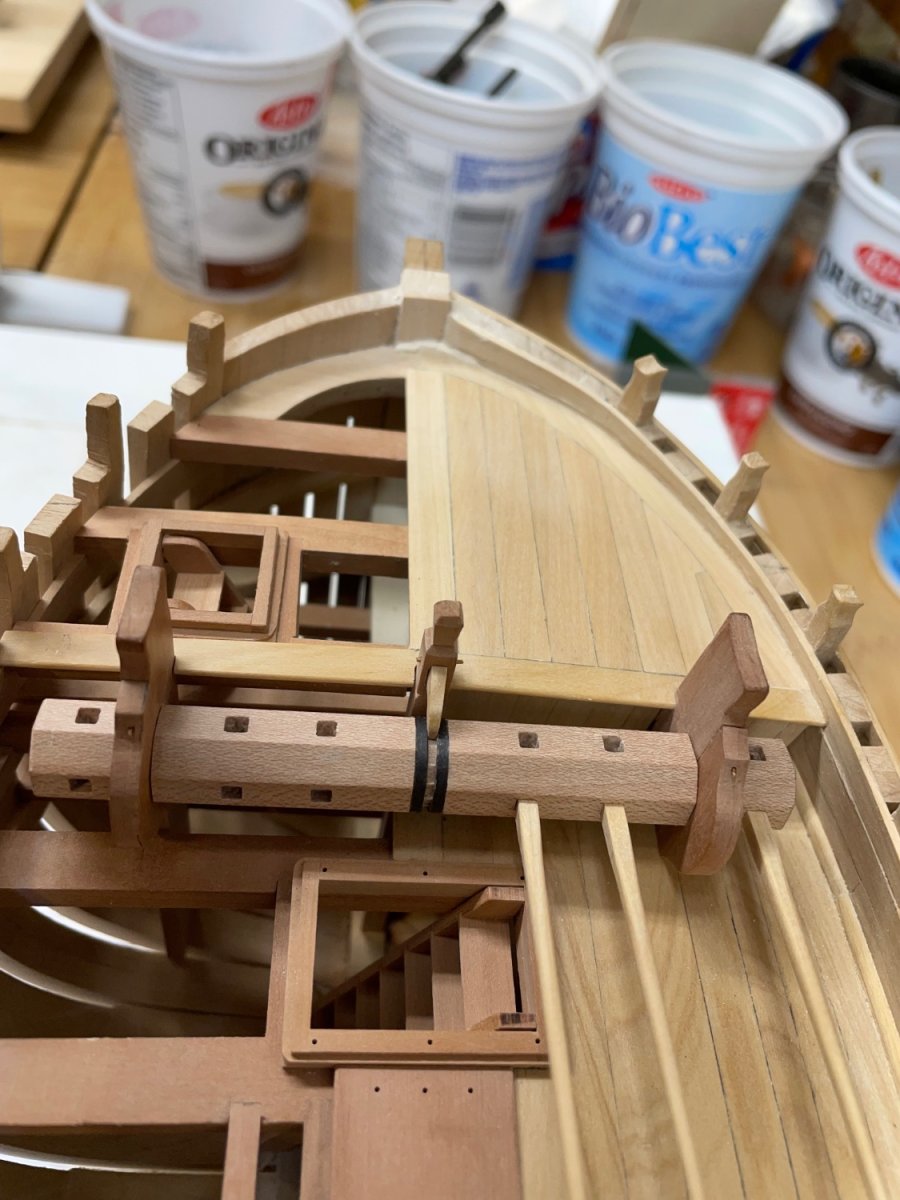
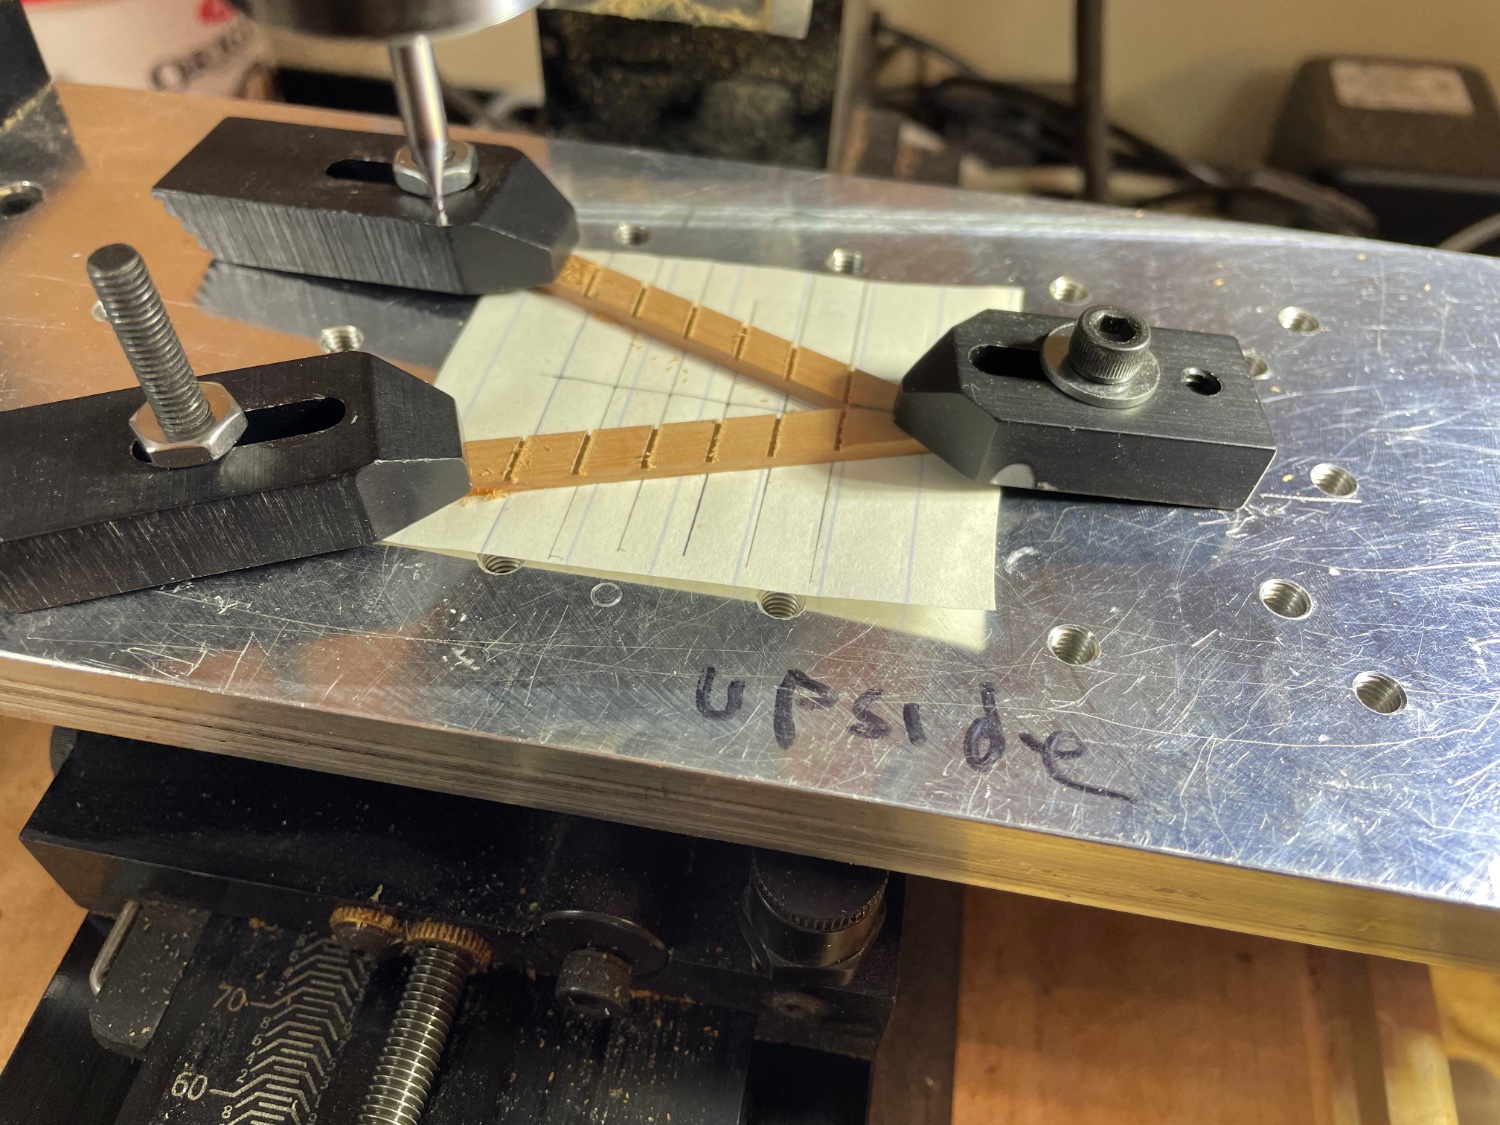
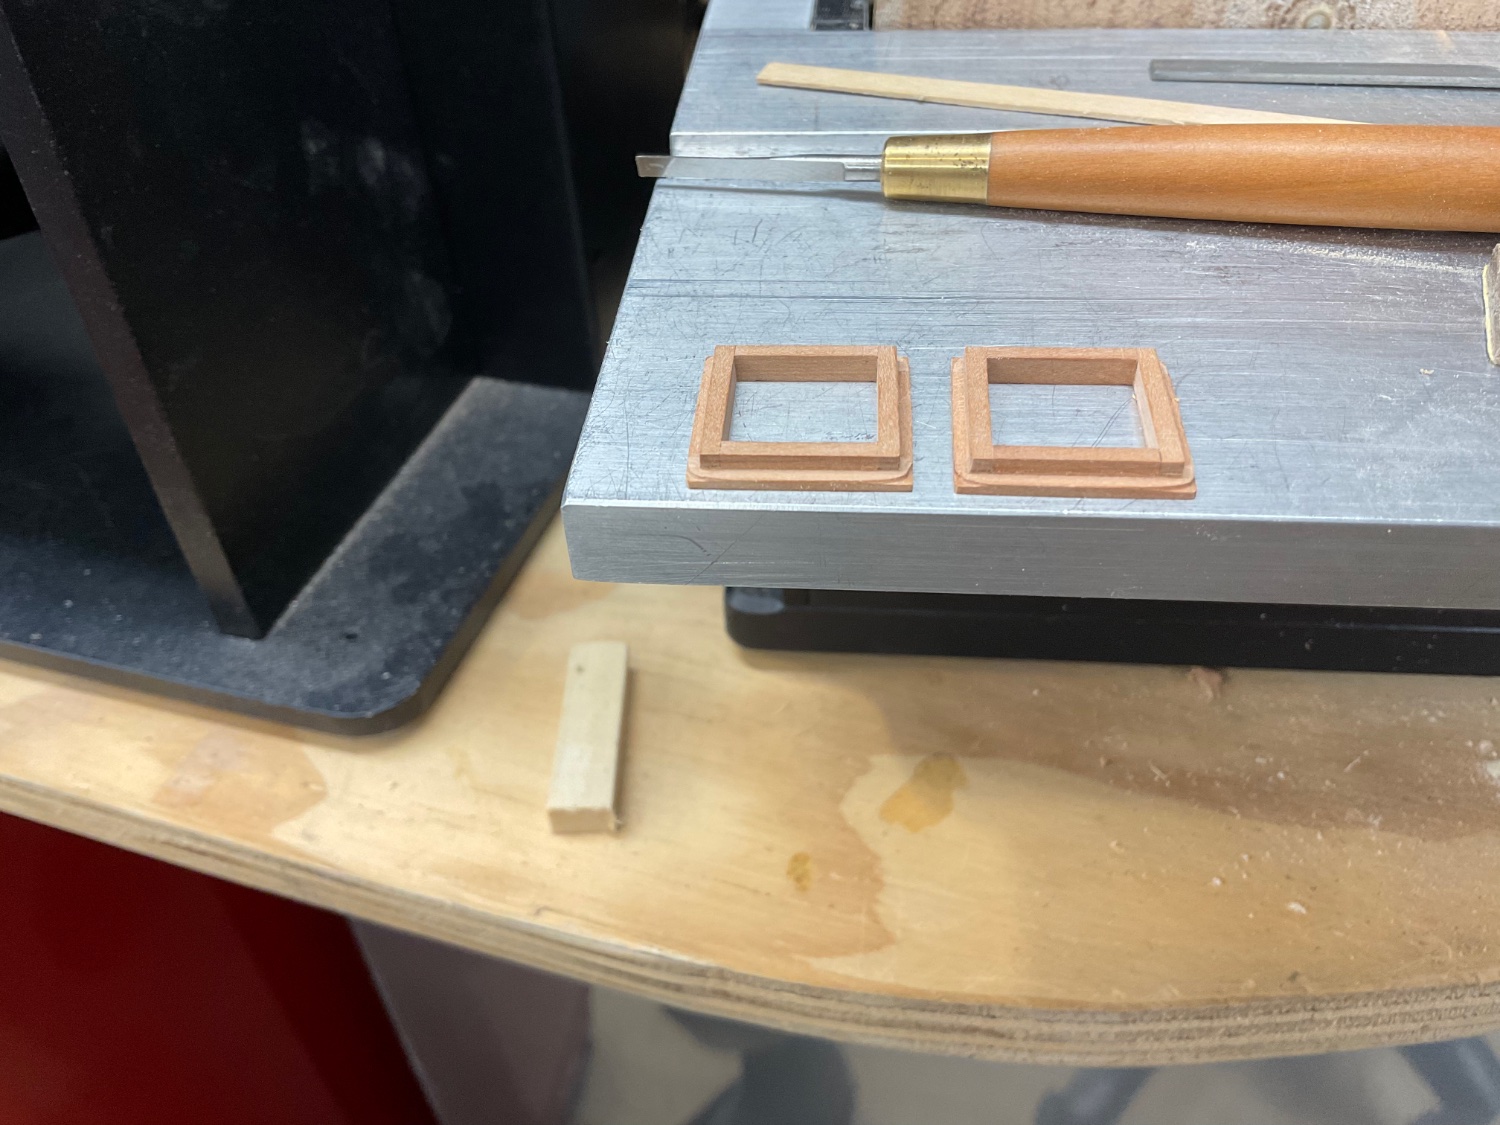
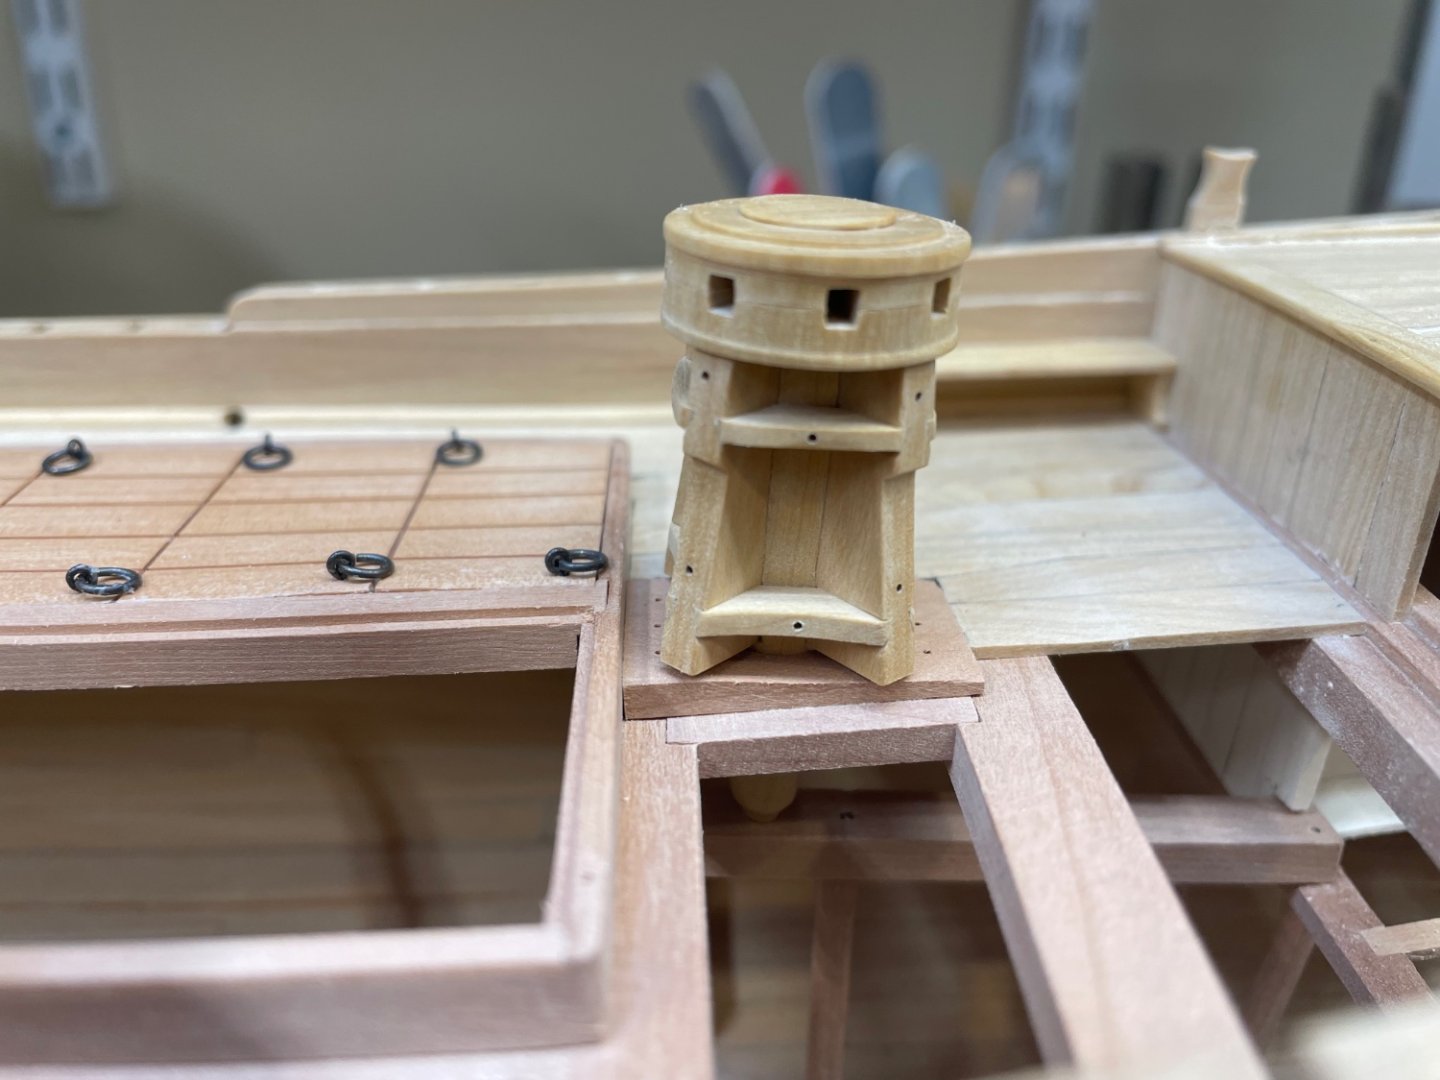
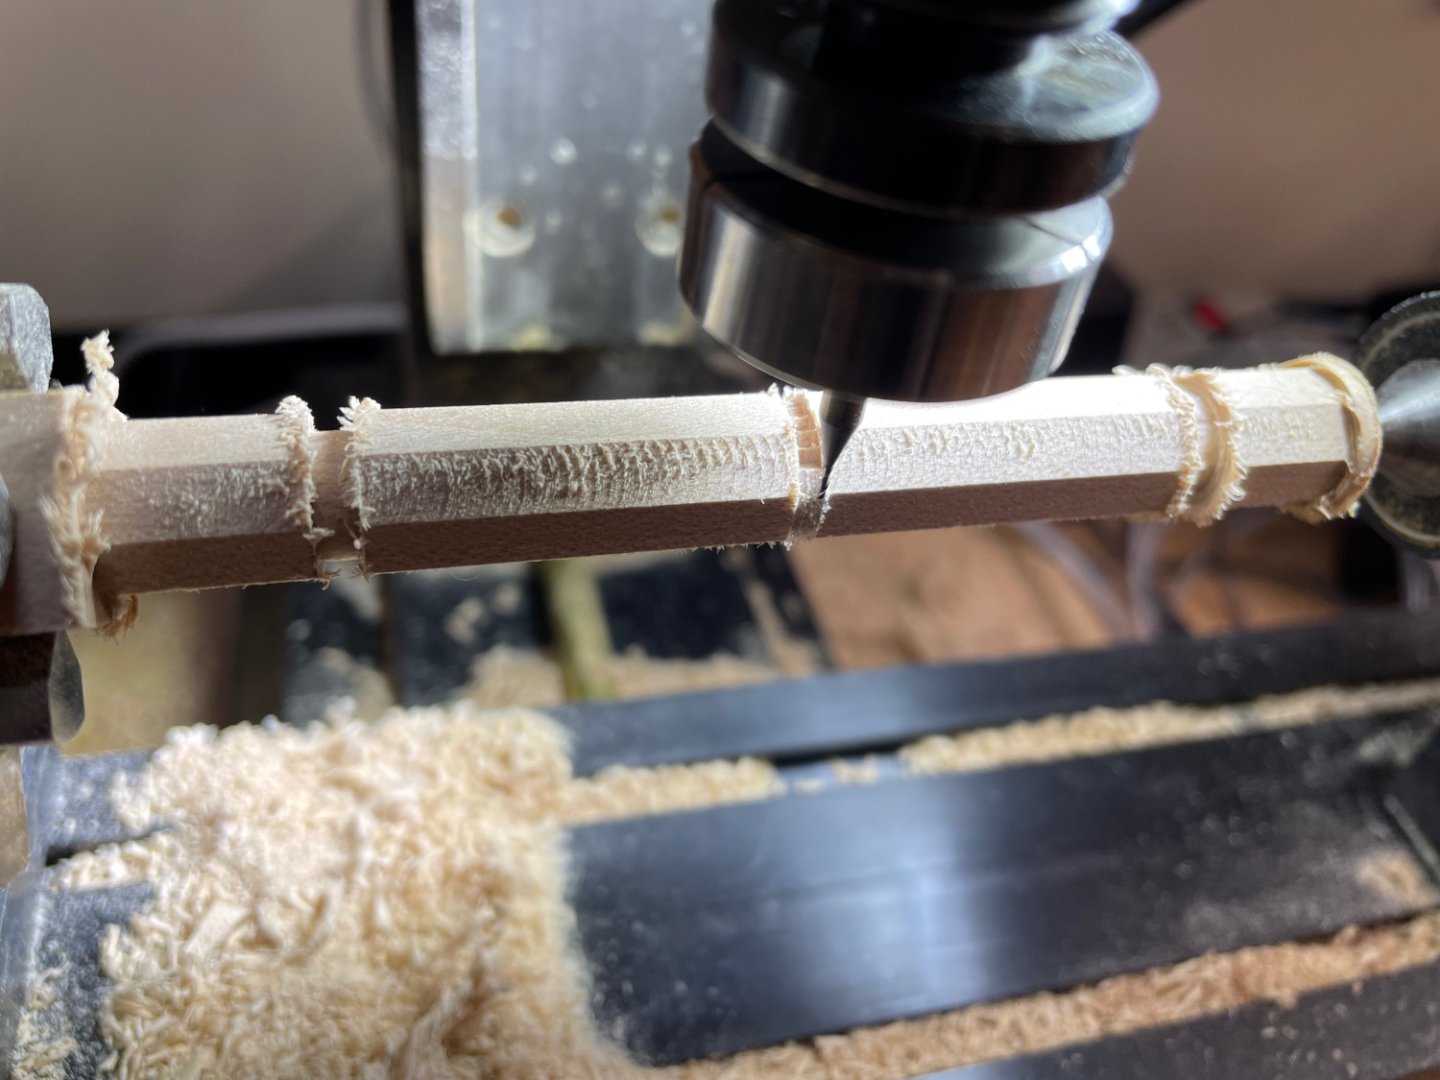
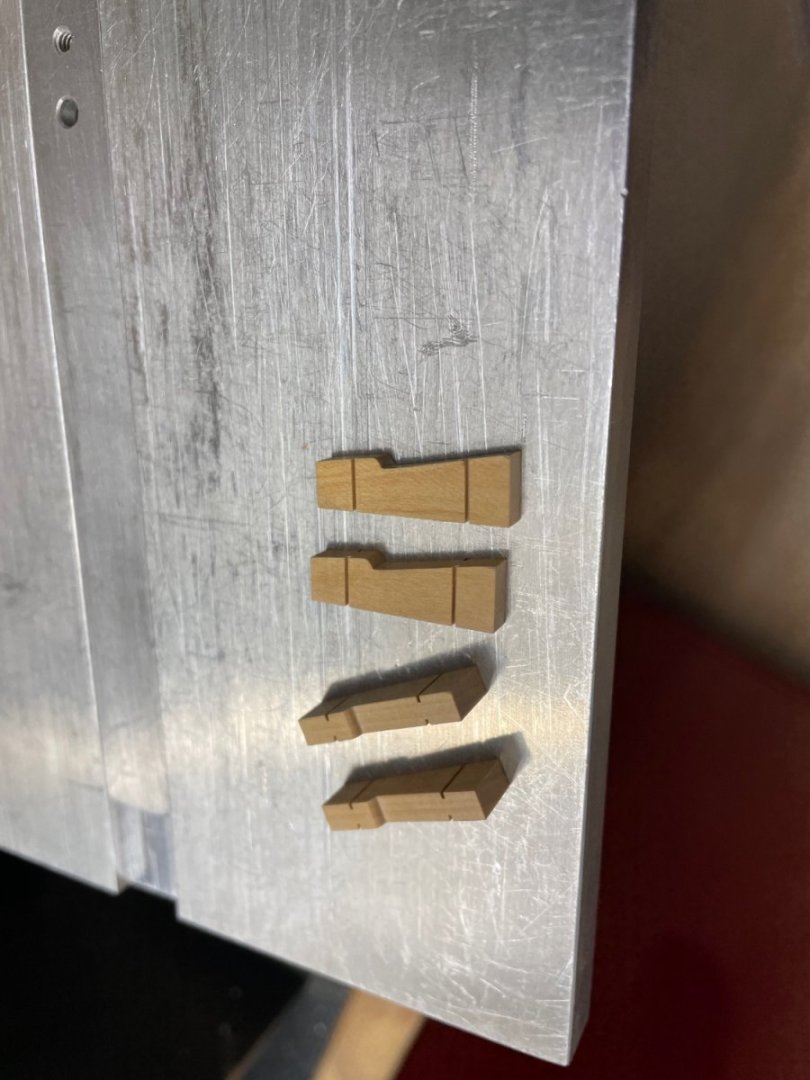
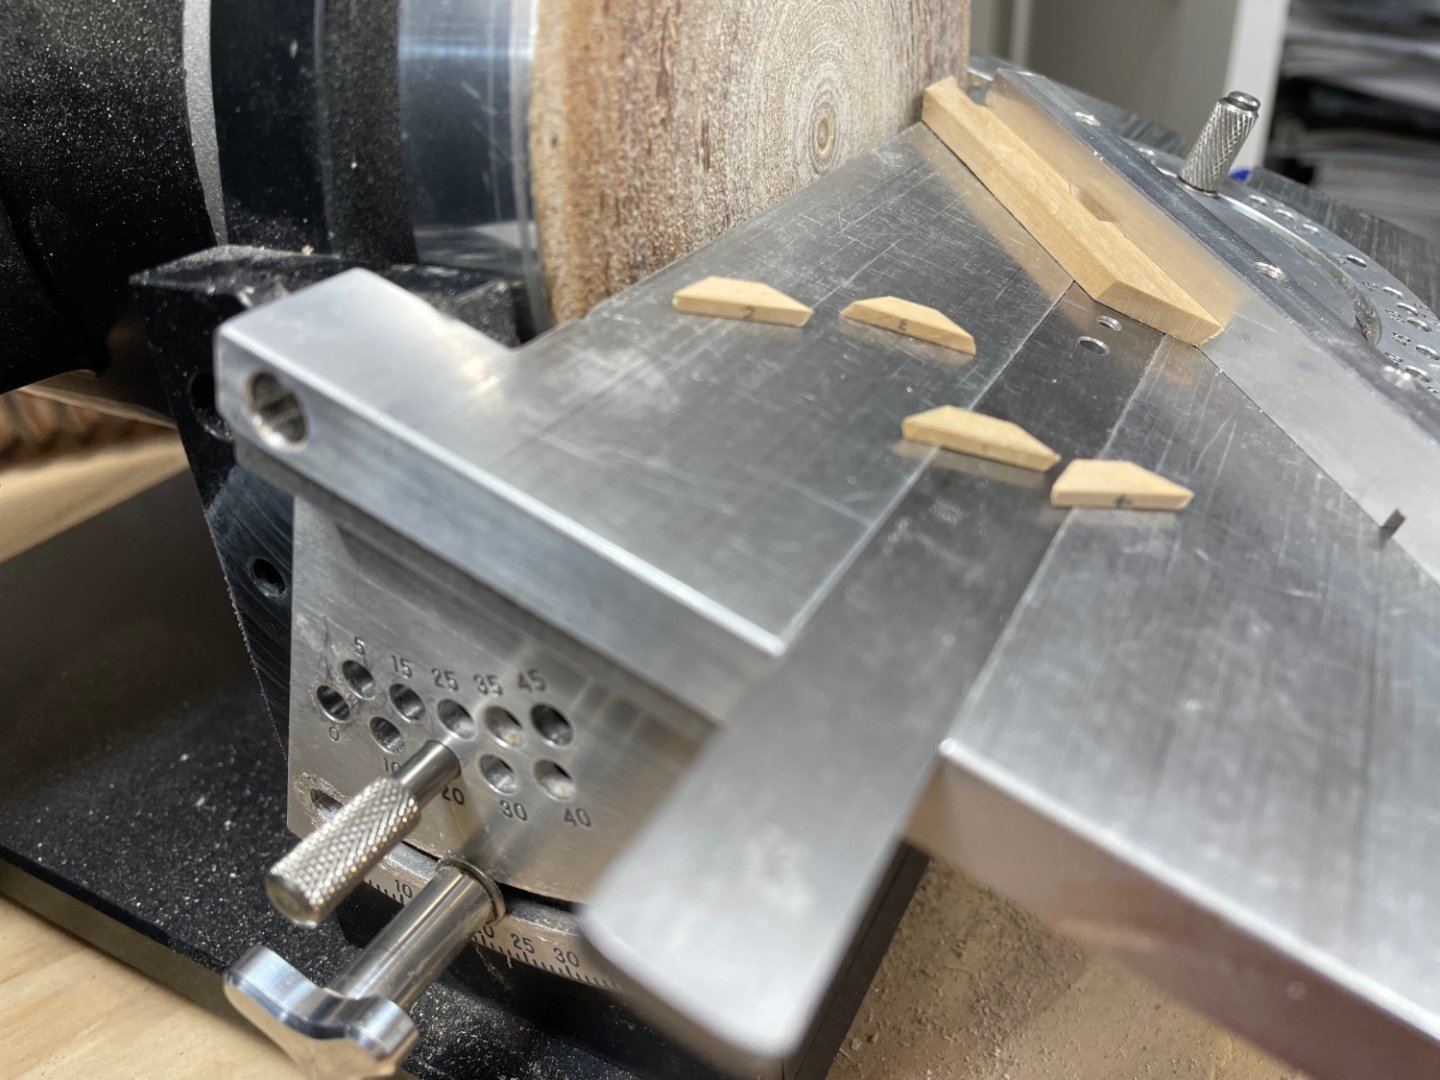
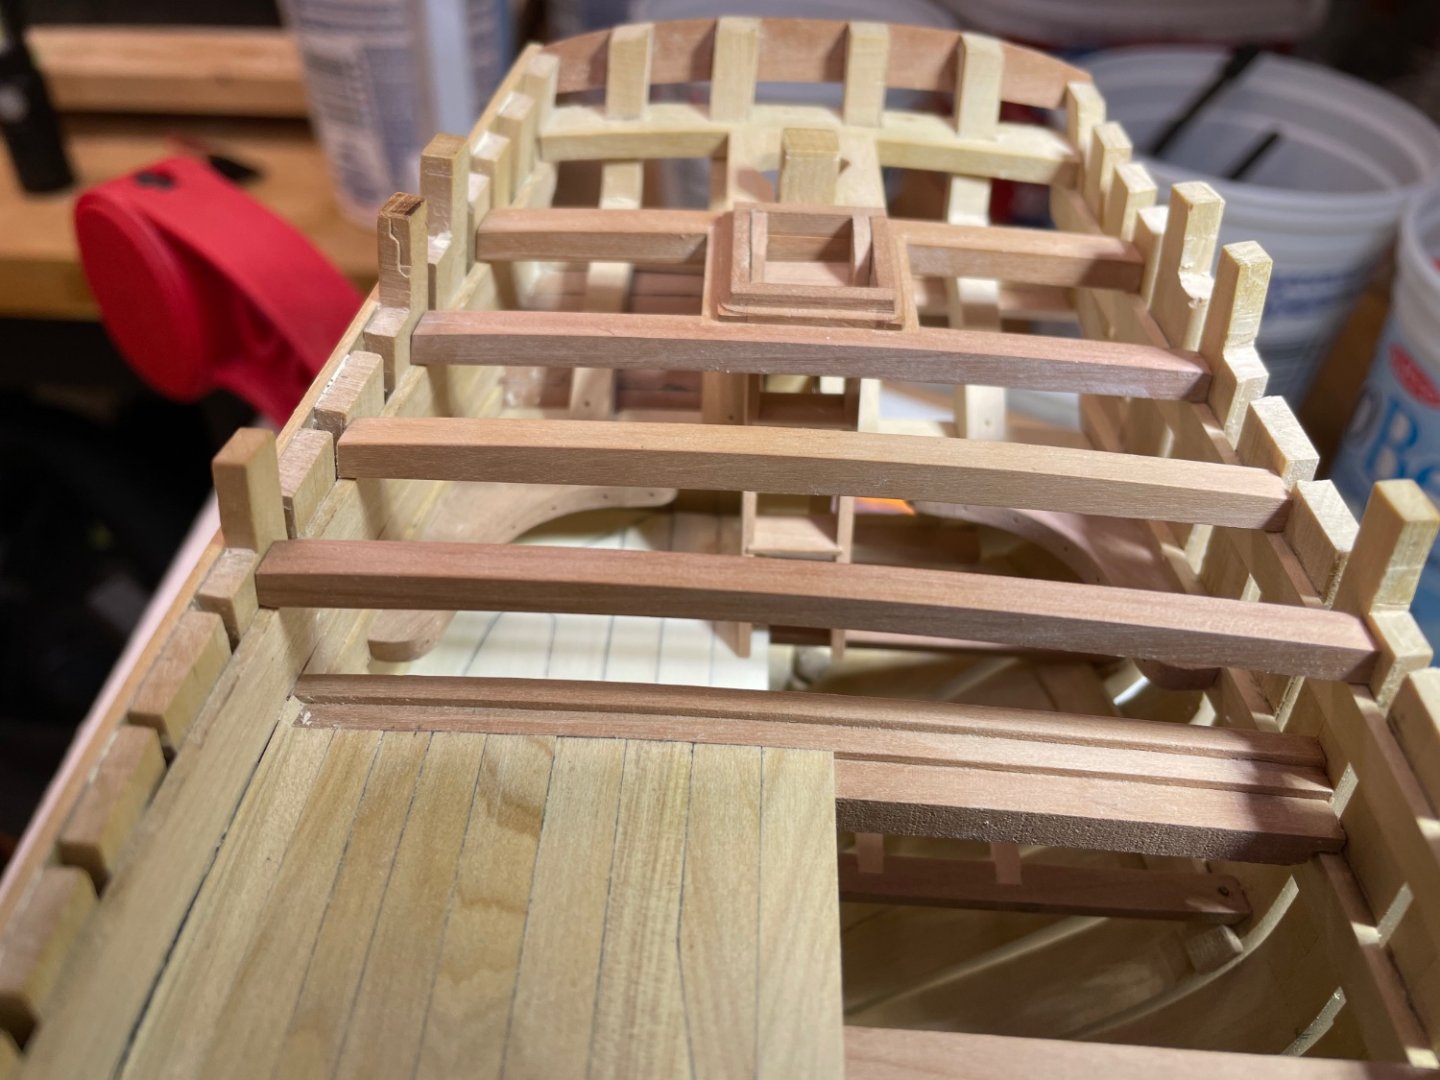
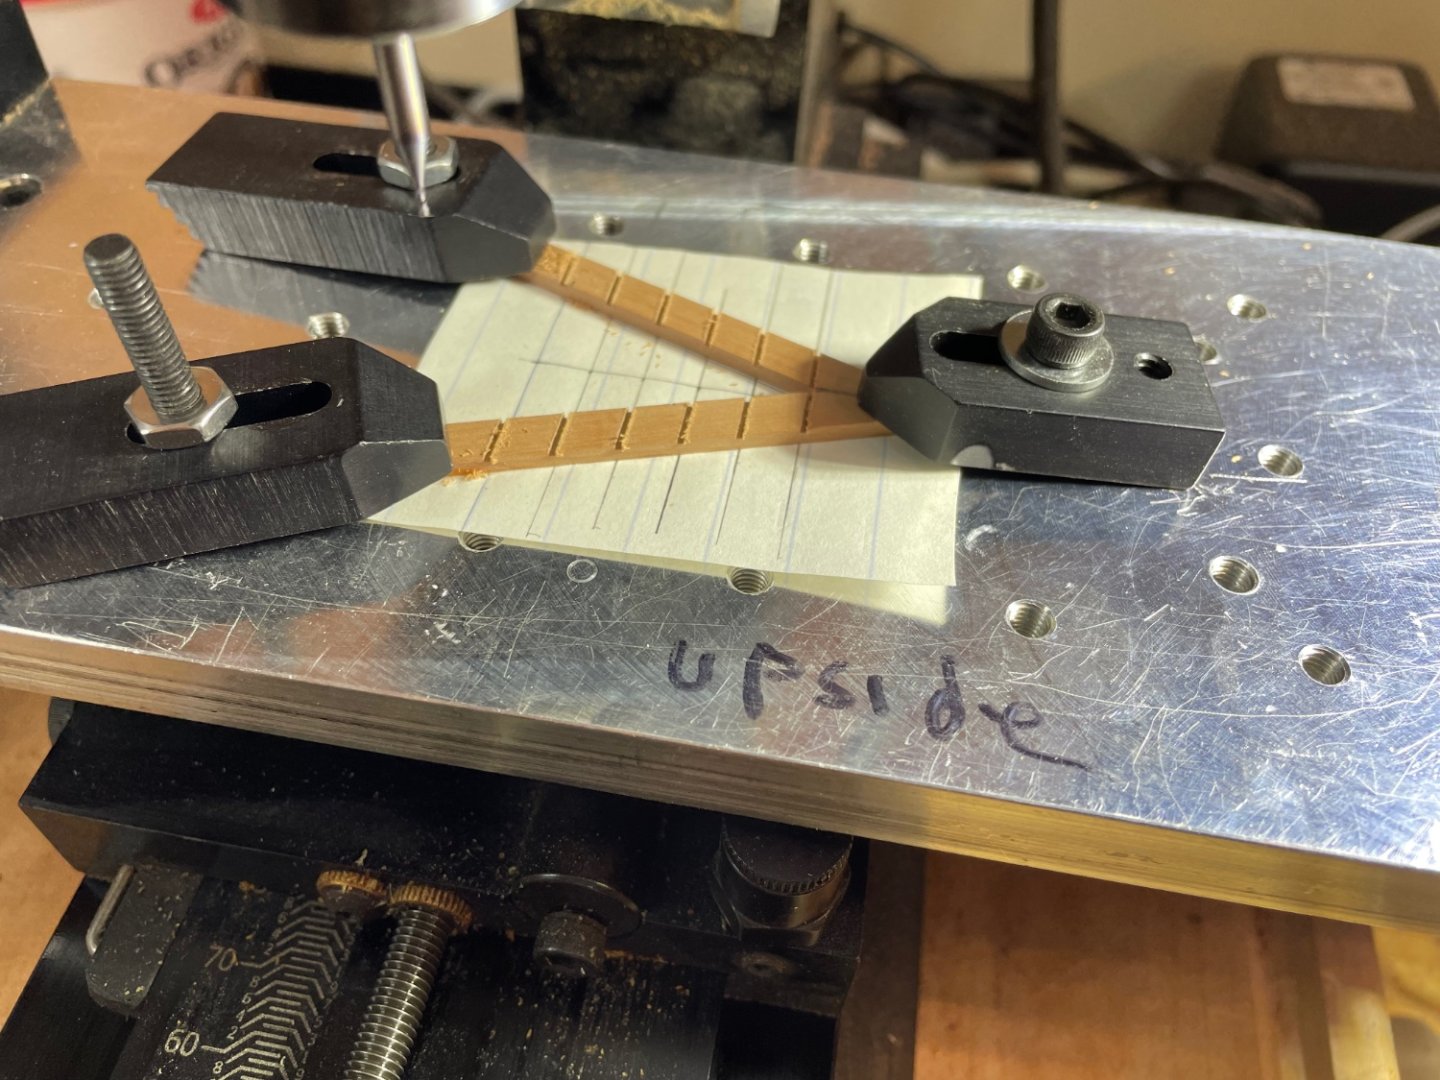
Good day shipmates, Thanks for the comments and likes, I really appreciate them. Since the last update I completed the windlass, capstan, hatch covers and bench. I made the windlass almost exclusively on the mill. I wanted to see if I could use the mill for the ratchet gear and after several tries I think I was successful. One learning is that as the radius changes so does the calculation of the number of gears. For example while the guidance says to chisel two teeth per octagonal side, it does not mean that you can set the number of revolution steps to 16. In fact I had to modify it to 12 to achieve the 2 per side. Probably obvious to anybody else but just in case someone follows my example this is just a reminder. 🤓 The picture shows an earlier attempt. The capstan was also mainly done on the mill and lathe. I learned from the last windlass I made how important it is to score the welps for the chocks in exactly the right place. The table saw and slitting blade came in handy for this. From there I chiseled the notches at 20 degrees to fit the chocks which had been carefully beveled at the same angle. The bench build was unremarkable. I cheated when it came to the main hatch covers. Instead of carefully arranging 40 hatch pieces on a backing I glued two pieces of pear to aircraft ply and used the slitting saw to cut the pattern. I actually did it both ways but was underwhelmed with the result so I put them aside (in case someone calls me out to say my alternative looks too perfect). And a final photo: See you next time. Ian


-
Thank you Giampieroricci! It has all been quite a learning adventure in my first scratch build. Ian
-
Hi Allan, thank you for the praise. I’ve never had a steady enough hand or simply never practiced enough with many hand tools to be satisfied with the results so I started my collection of power tools early on in this hobby. I also appreciate high quality power tools such as the Byrne machines (thickness sander, disk sander and table saw; my word they are good!), and Sherline lathe and mill. I use the Dewalt scroll saw and the Ridgid oscillating sander. I greatly admire those who instead rely on hand tools.
-
La Palme by Tobias - 1:36 - POF
Seventynet replied to Tobias's topic in - Build logs for subjects built 1501 - 1750
Looking really good Tobias! -
Thank you kindly Tobias. I draw inspiration from far superior builders such as yourself.
-
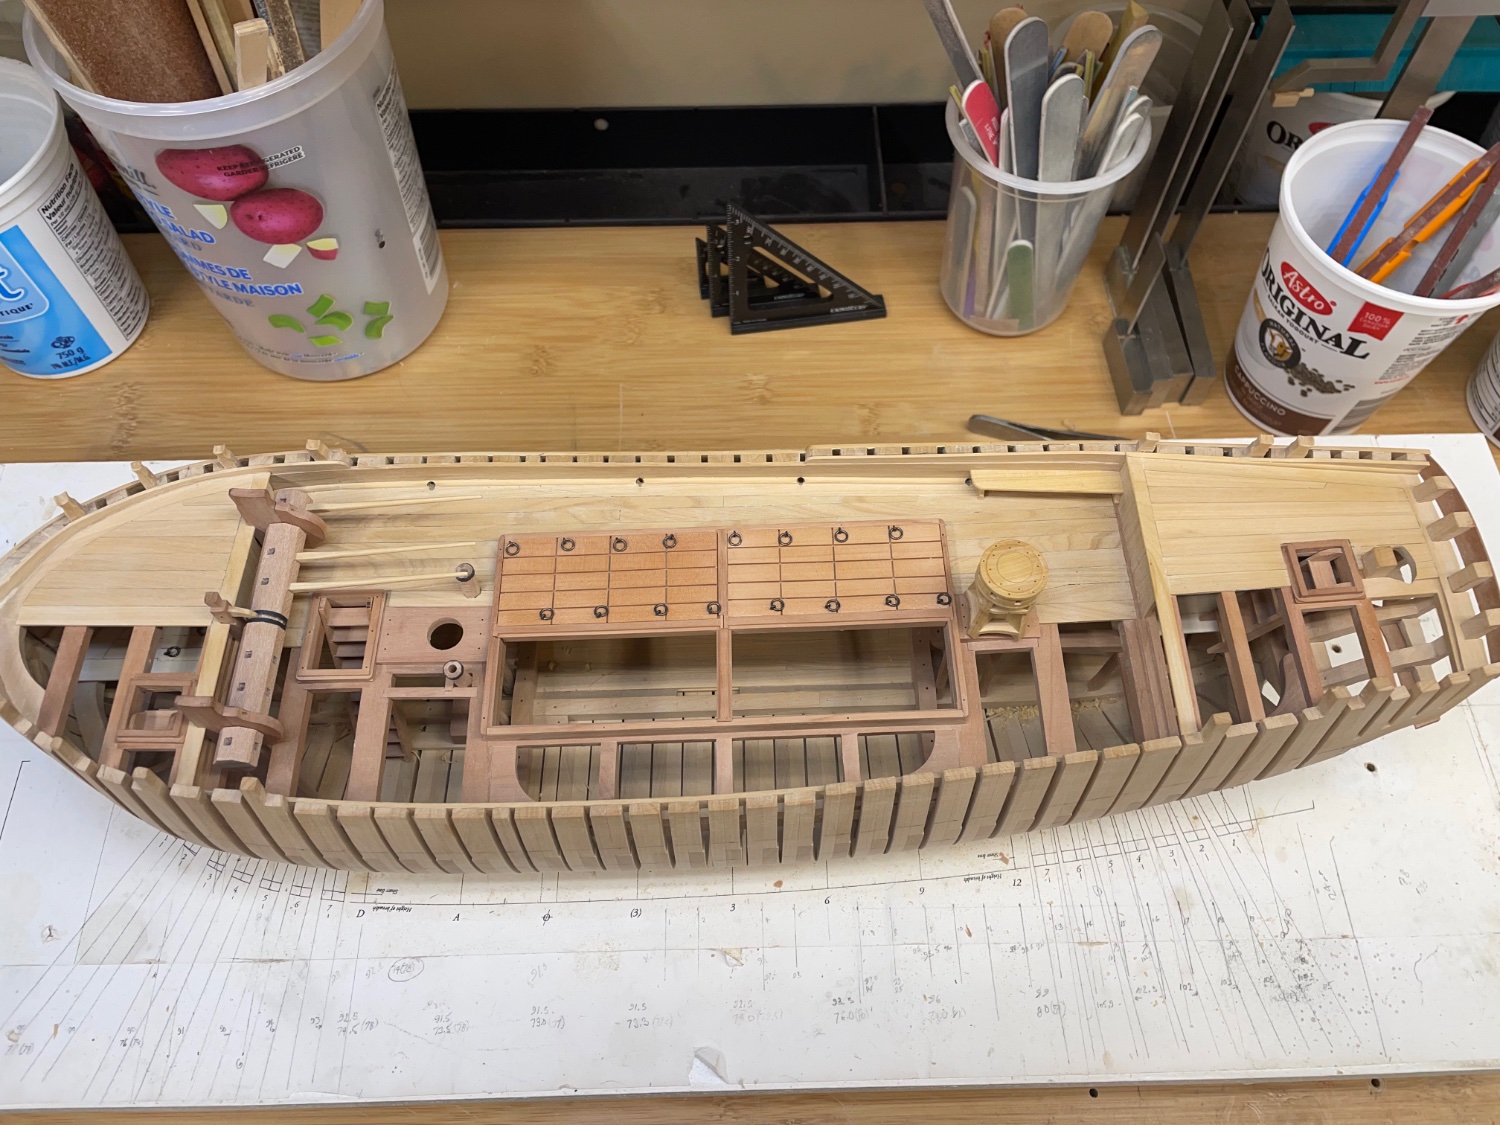
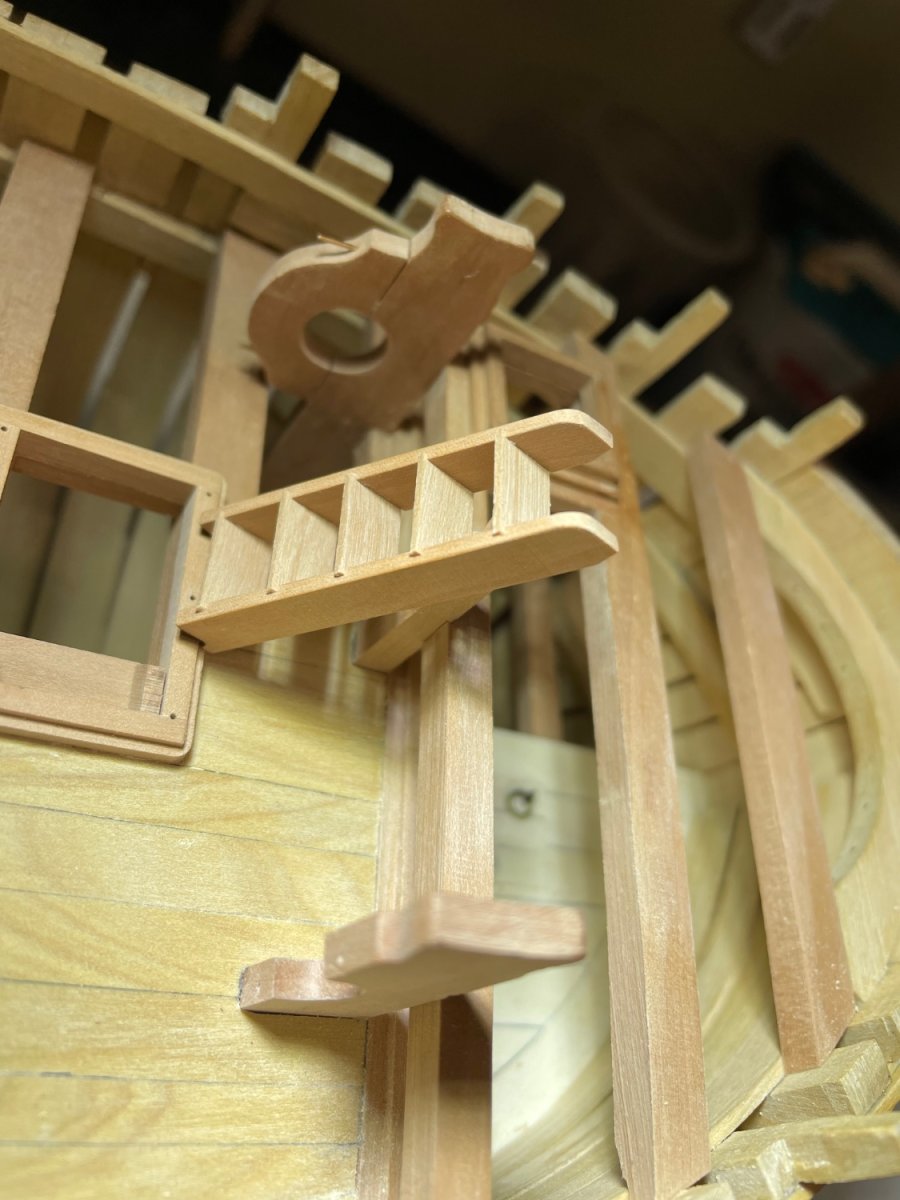
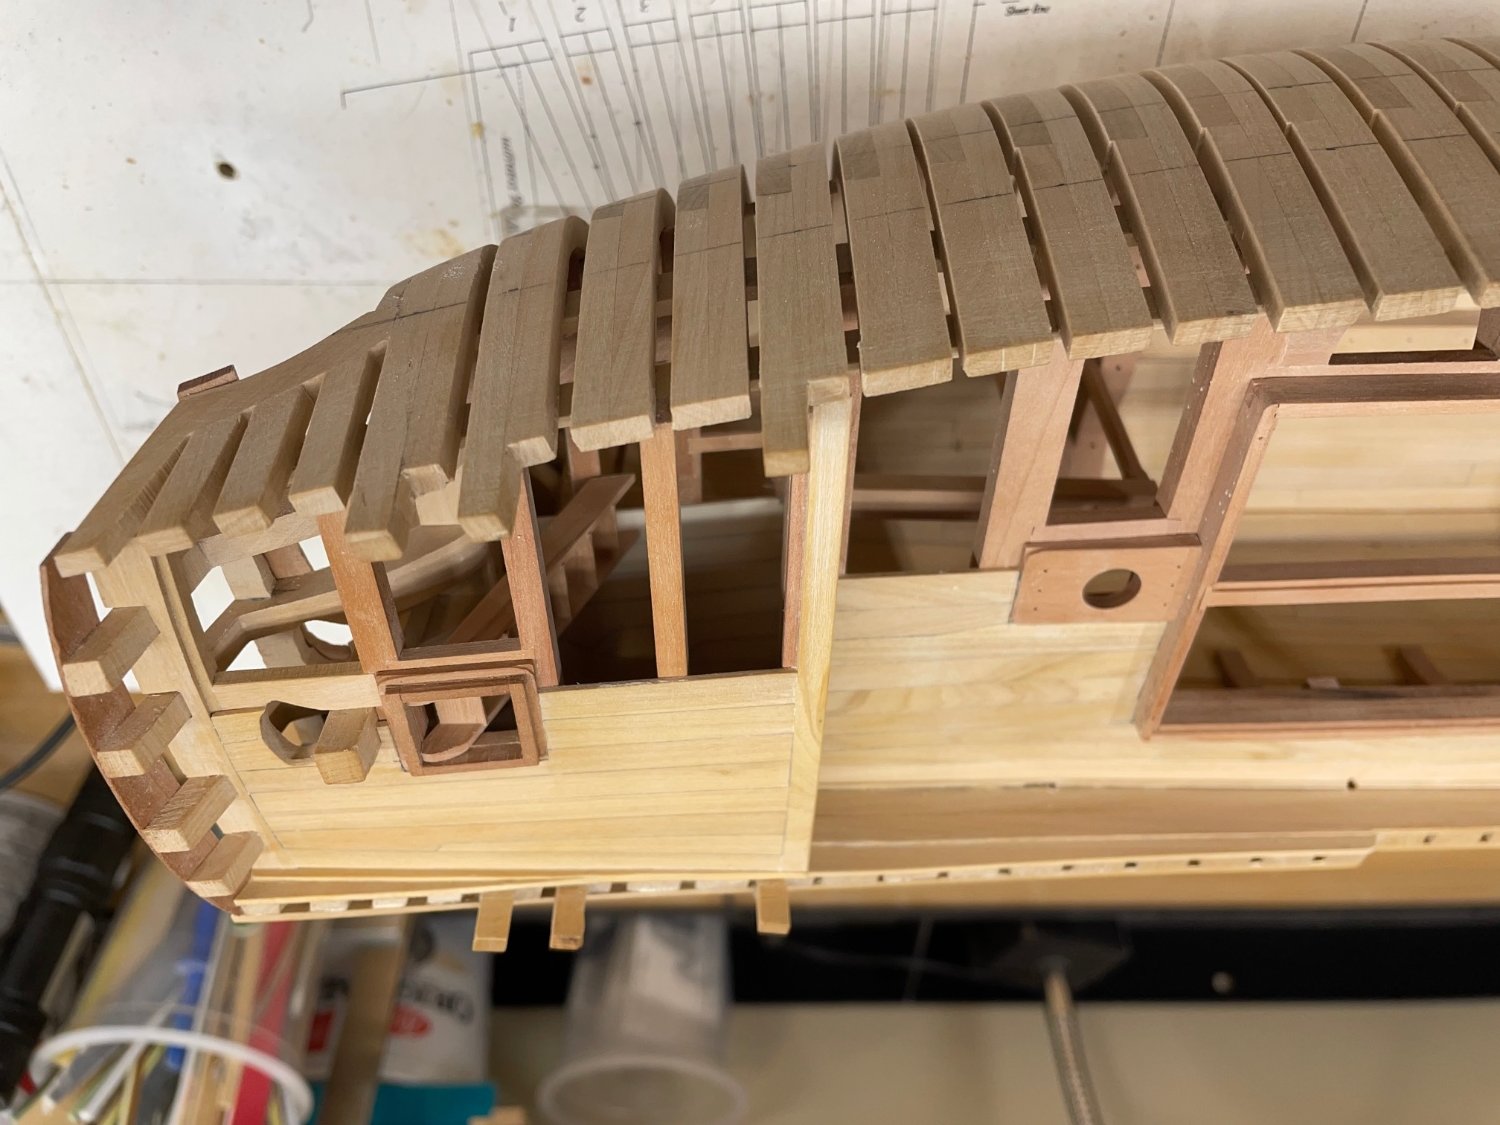
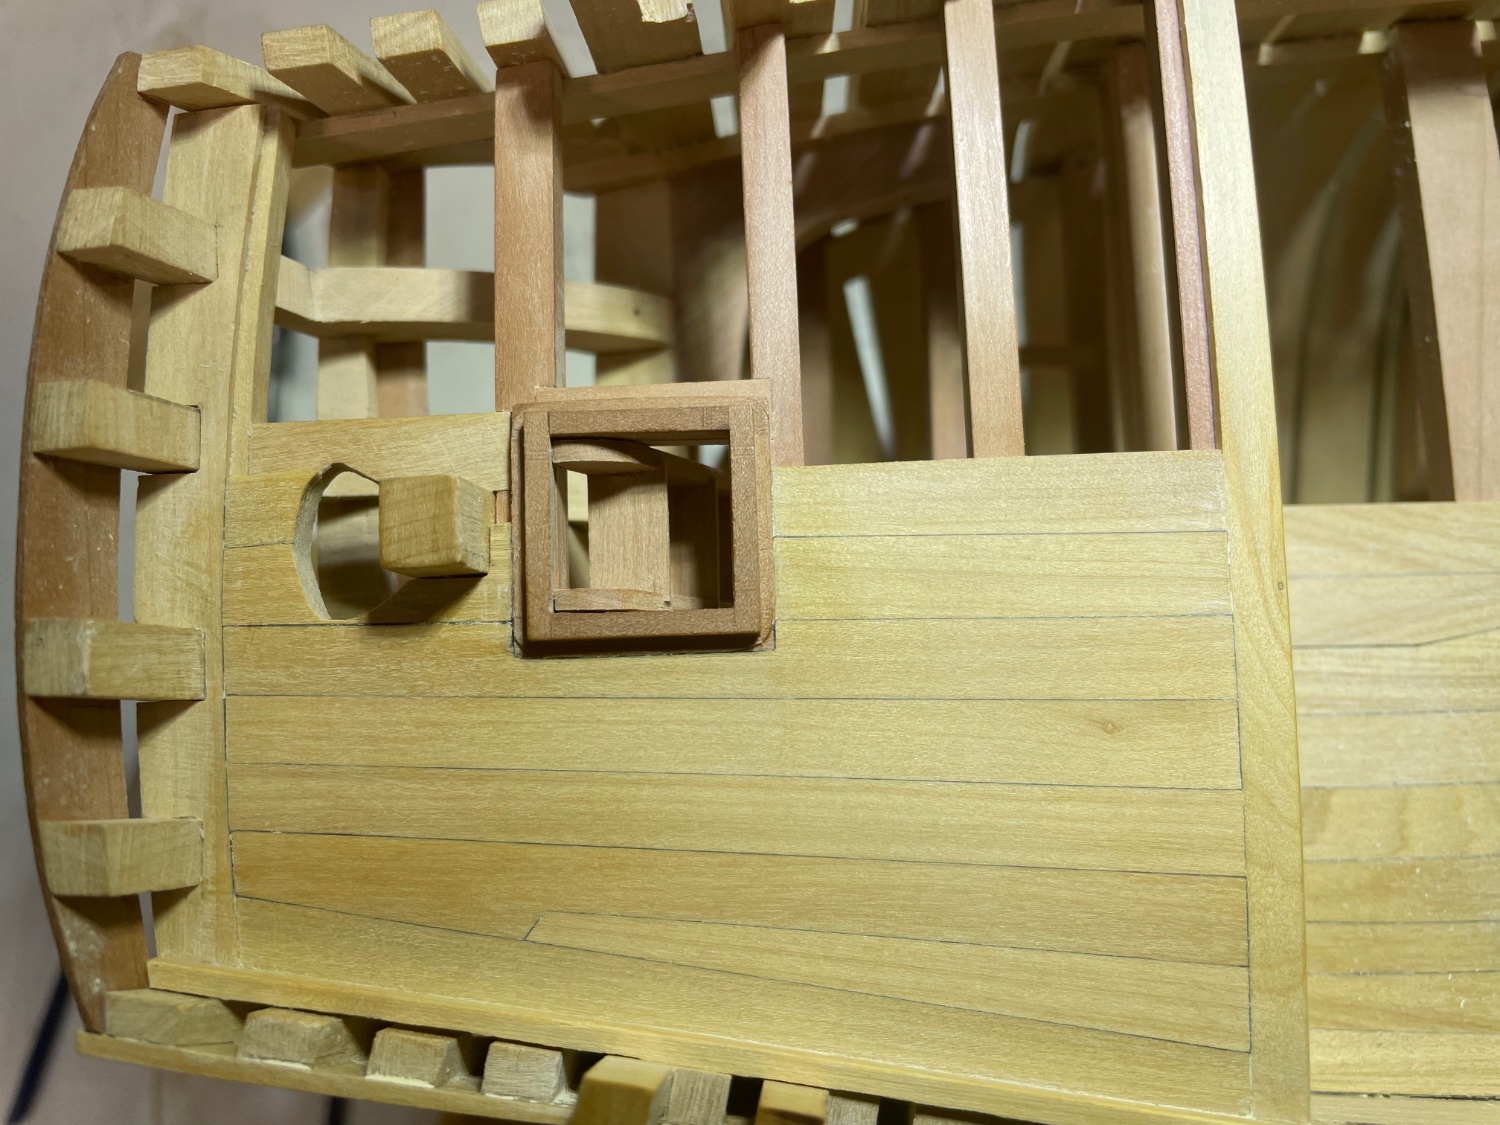
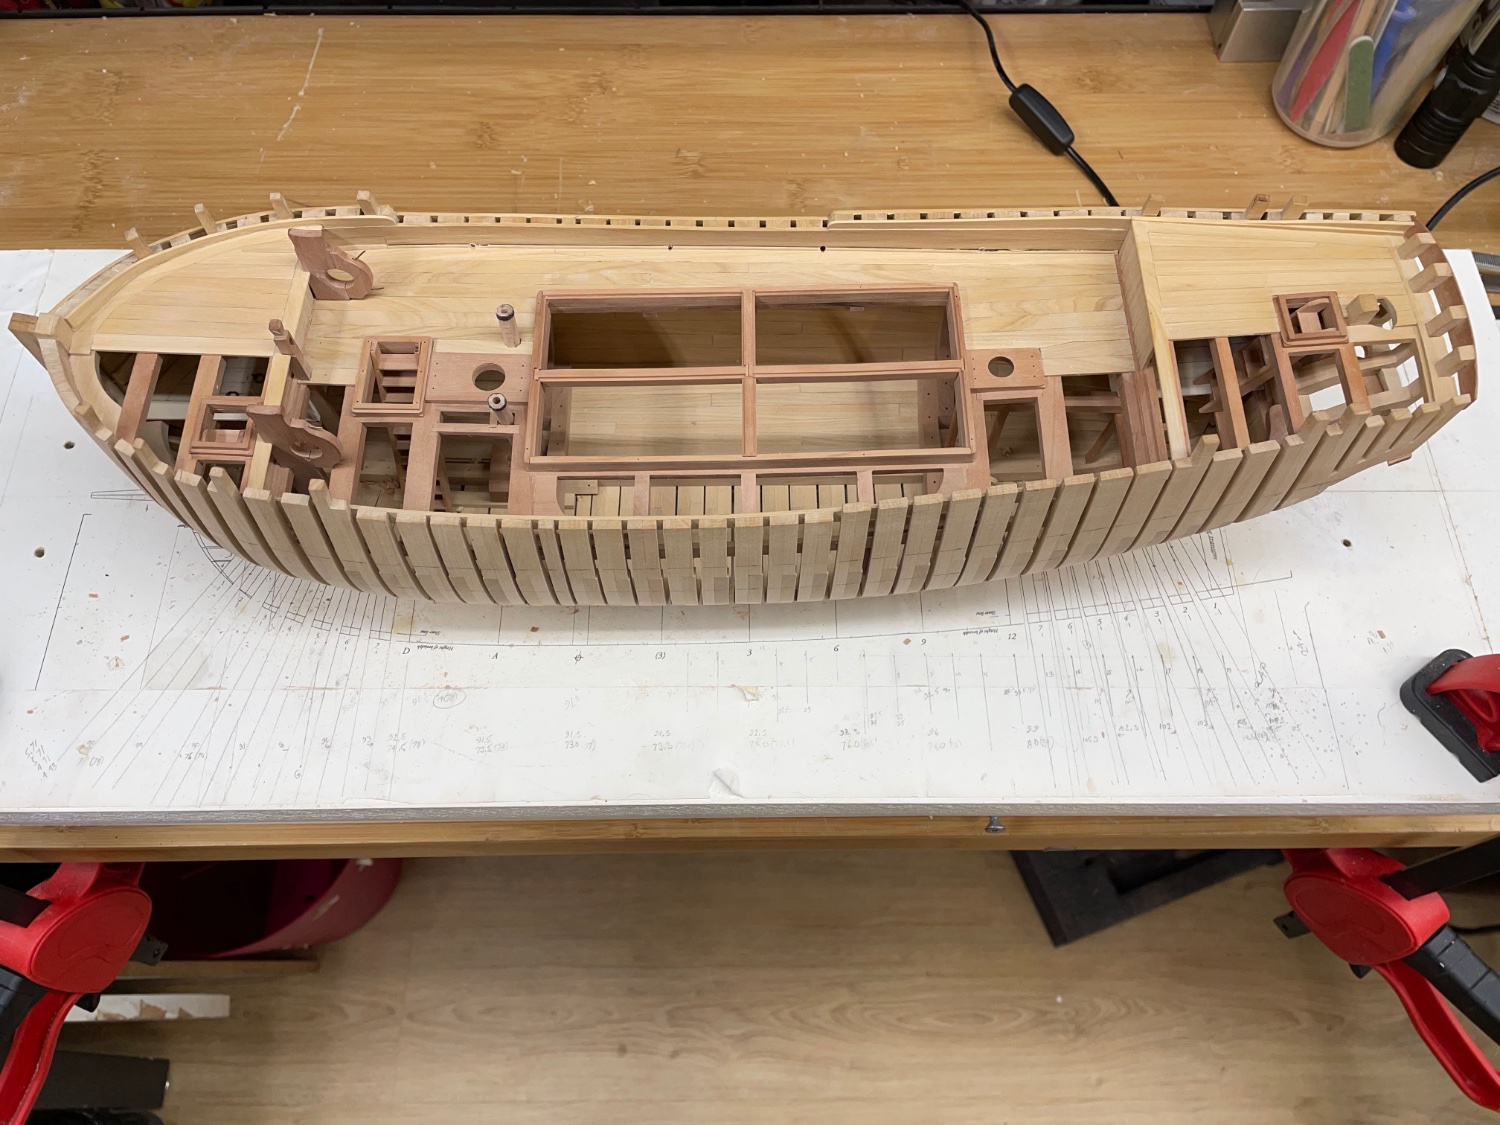
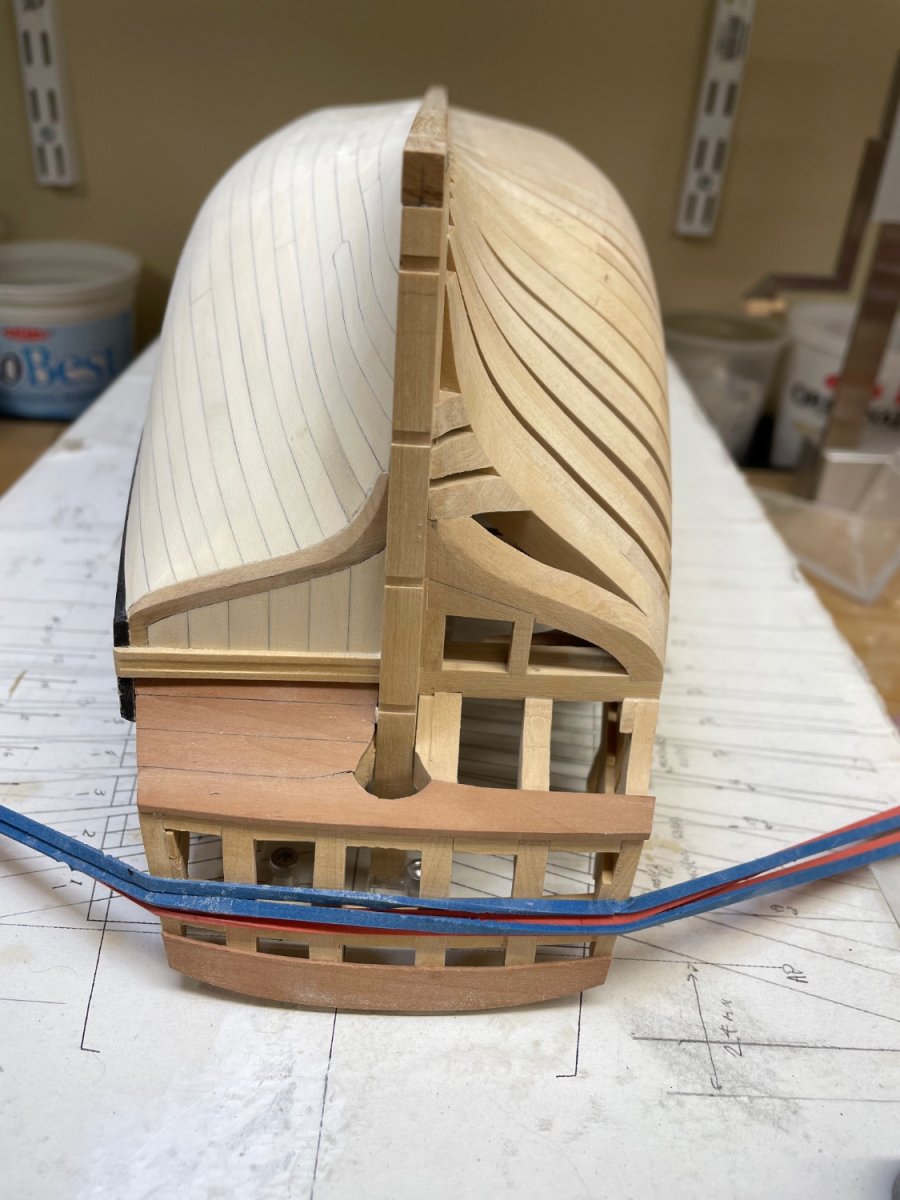
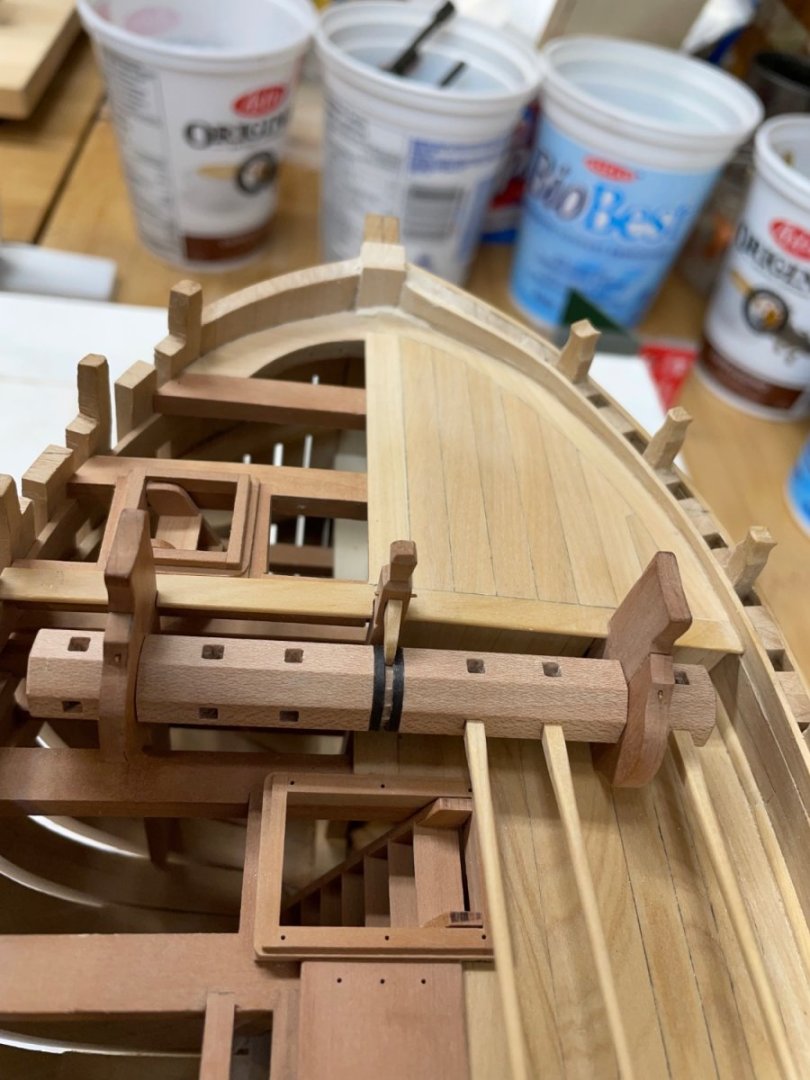
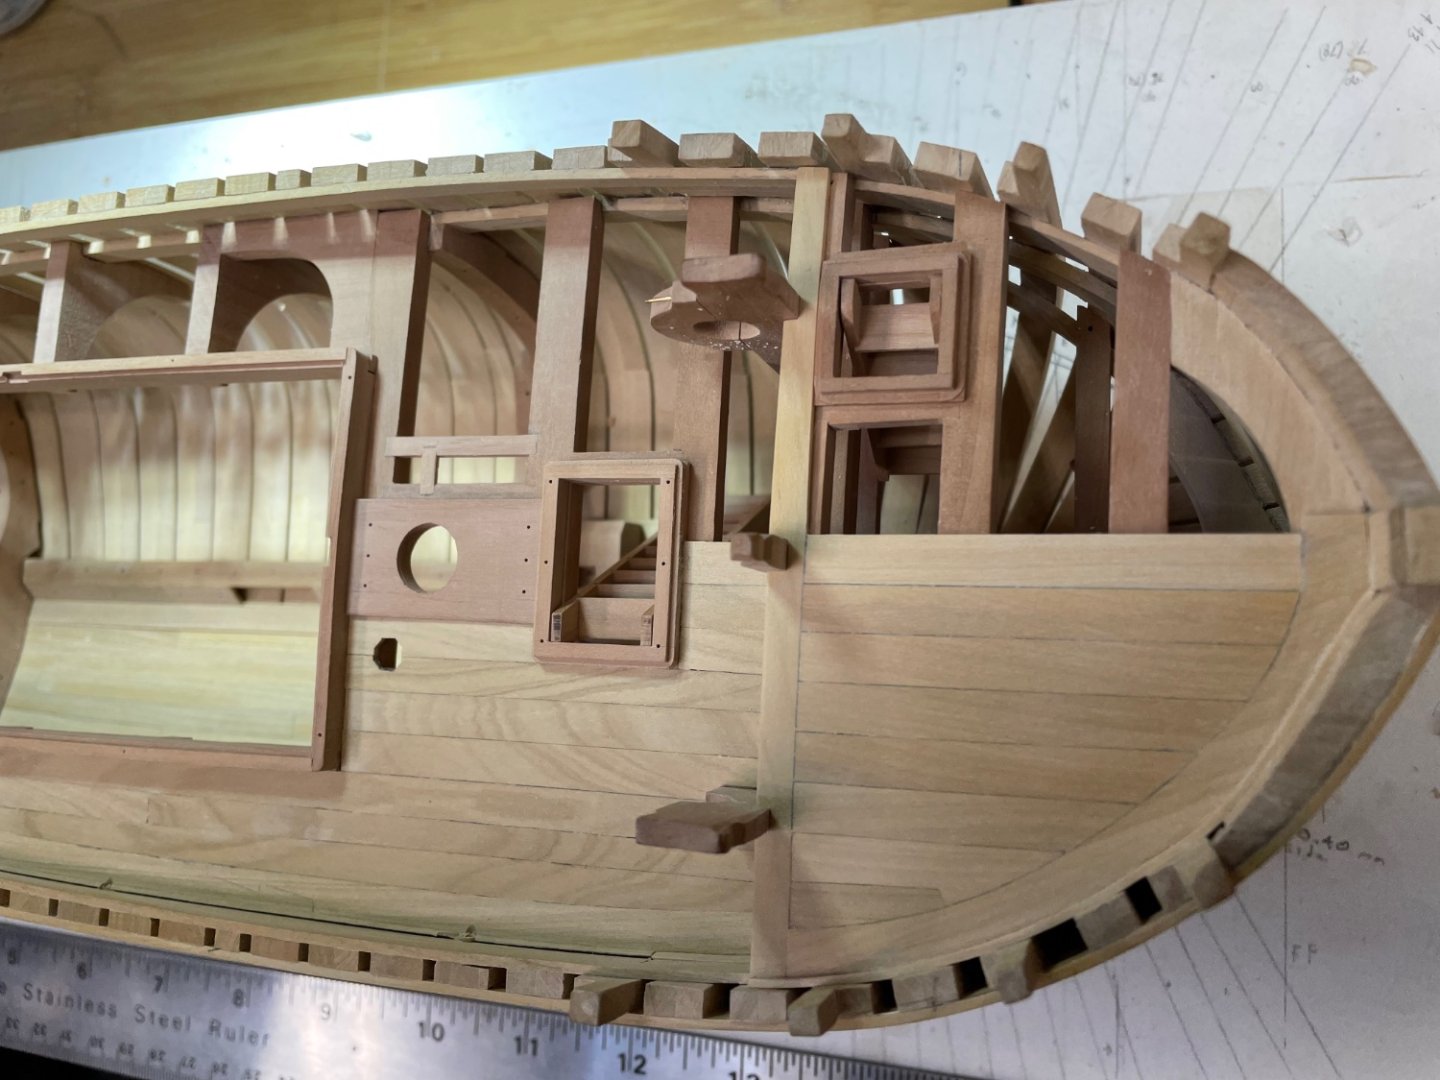
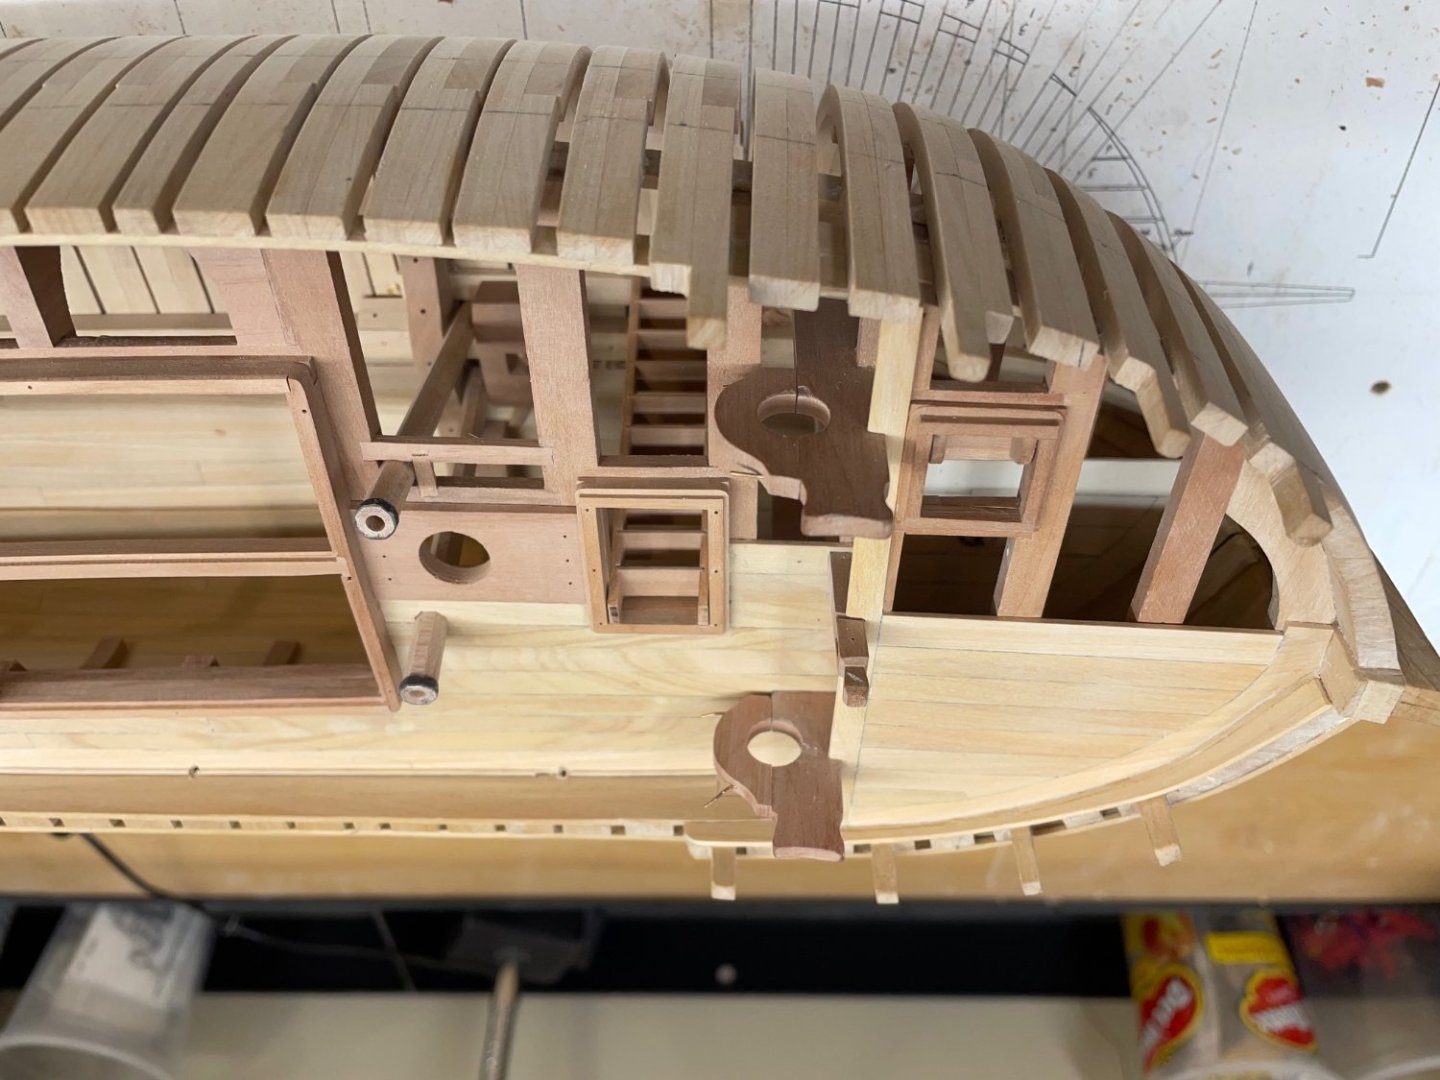
Hi everyone, Thanks again for the comments and likes. Since the last update I have installed the forecastle and quarterdeck beams and hatch carlings, coamings and ladders. The waterways were then installed along with the beam rabbets for the fore and aft planking. Finally I completed the bulwark planking. I am looking forward to building the windlass and capstan next. Until next time, Ian


-
Nils, what a delightful feast for the eyes! I really enjoyed your build and dialog. Ian
-
Beautiful build BE! Thanks for sharing your incredible skills. Ian
- 857 replies
-
- 5
-
-

-
- Sphinx
- Vanguard Models
- (and 1 more)
-
Chuck, congratulations on a fine build. This, as all of your builds, is such an inspiration to me and I eagerly look forward to the next project. Ian
- 1,784 replies
-
- 5
-
-
- winchelsea
- Syren Ship Model Company
- (and 1 more)
-
Thanks druxey!
-
Good day, Thanks for the helpful comments and all the likes. The drop planks have been extended which may look a bit better. Now it’s back to interior work. Until next time. Ian

-
Thanks for your valuable guidance as usual druxey. It shouldn’t be too difficult to fix. I know it would bug me forever if I didn’t fix it. Ian
-
Alan, Thanks for dropping by. I didn’t mean to upload that “movie”. I'll replace it when I'm home from the hospital’s lousy internet connection. Thanks too for your comment on the drop planks. All I needed was one comment to push me to the right conclusion but now that I have druxey’s opinion there will be no more hesitation. Ian
-
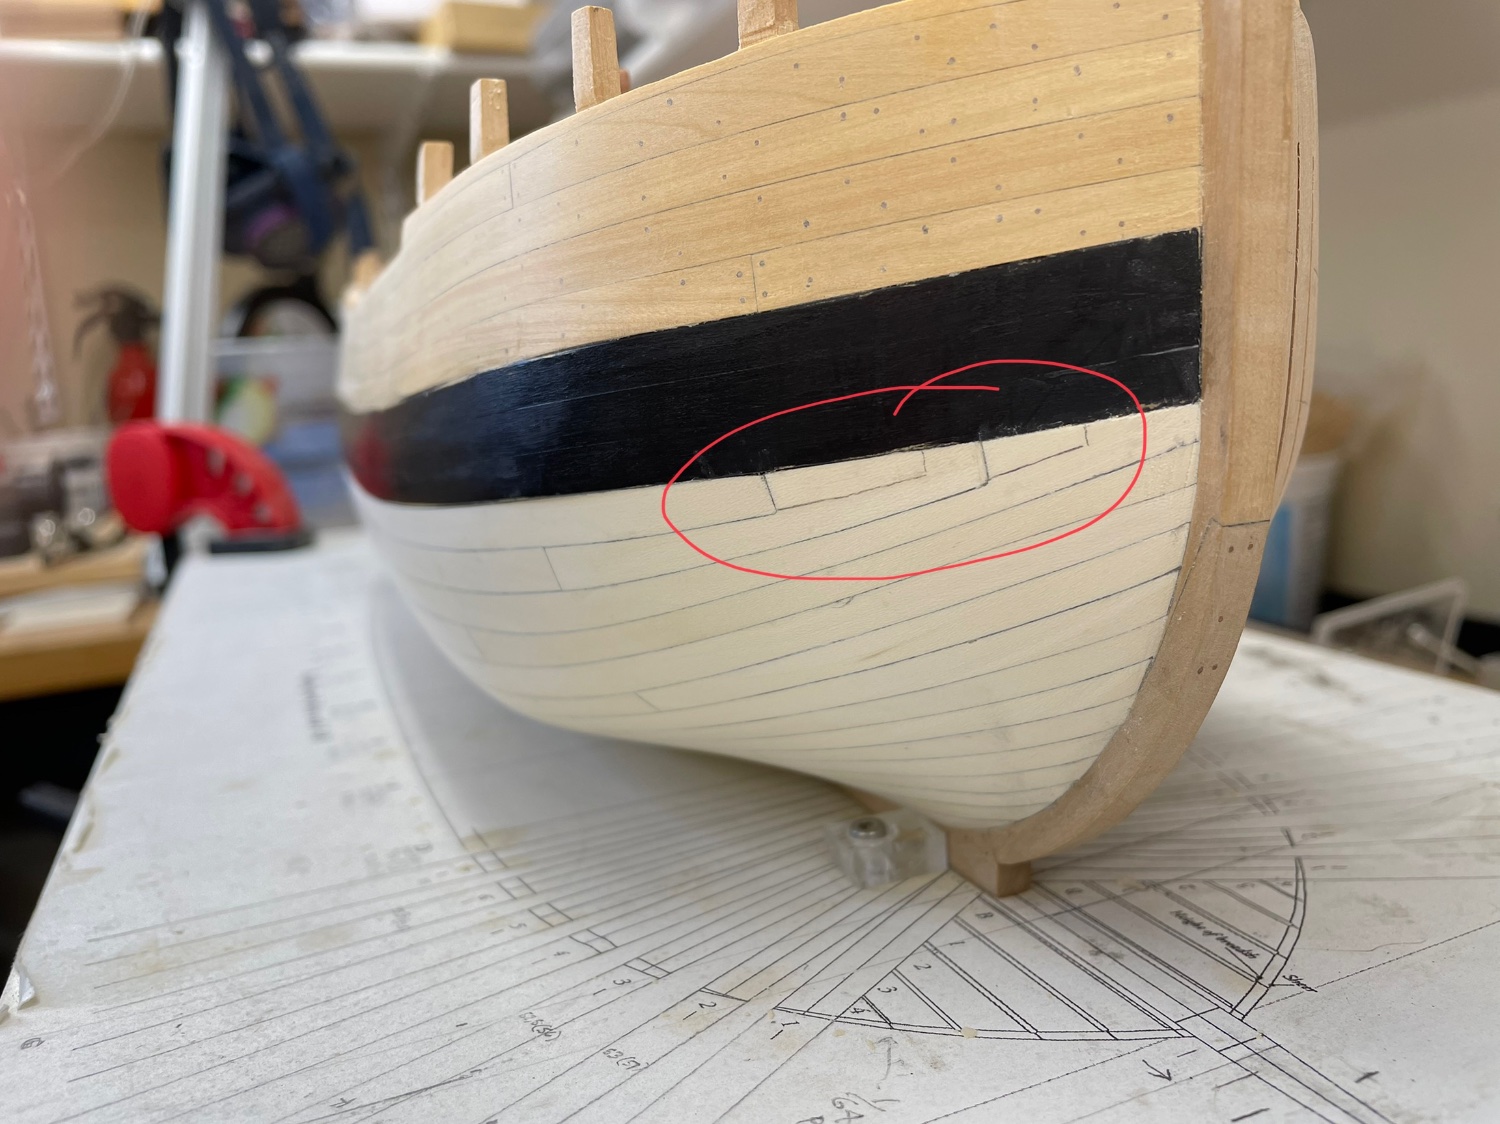
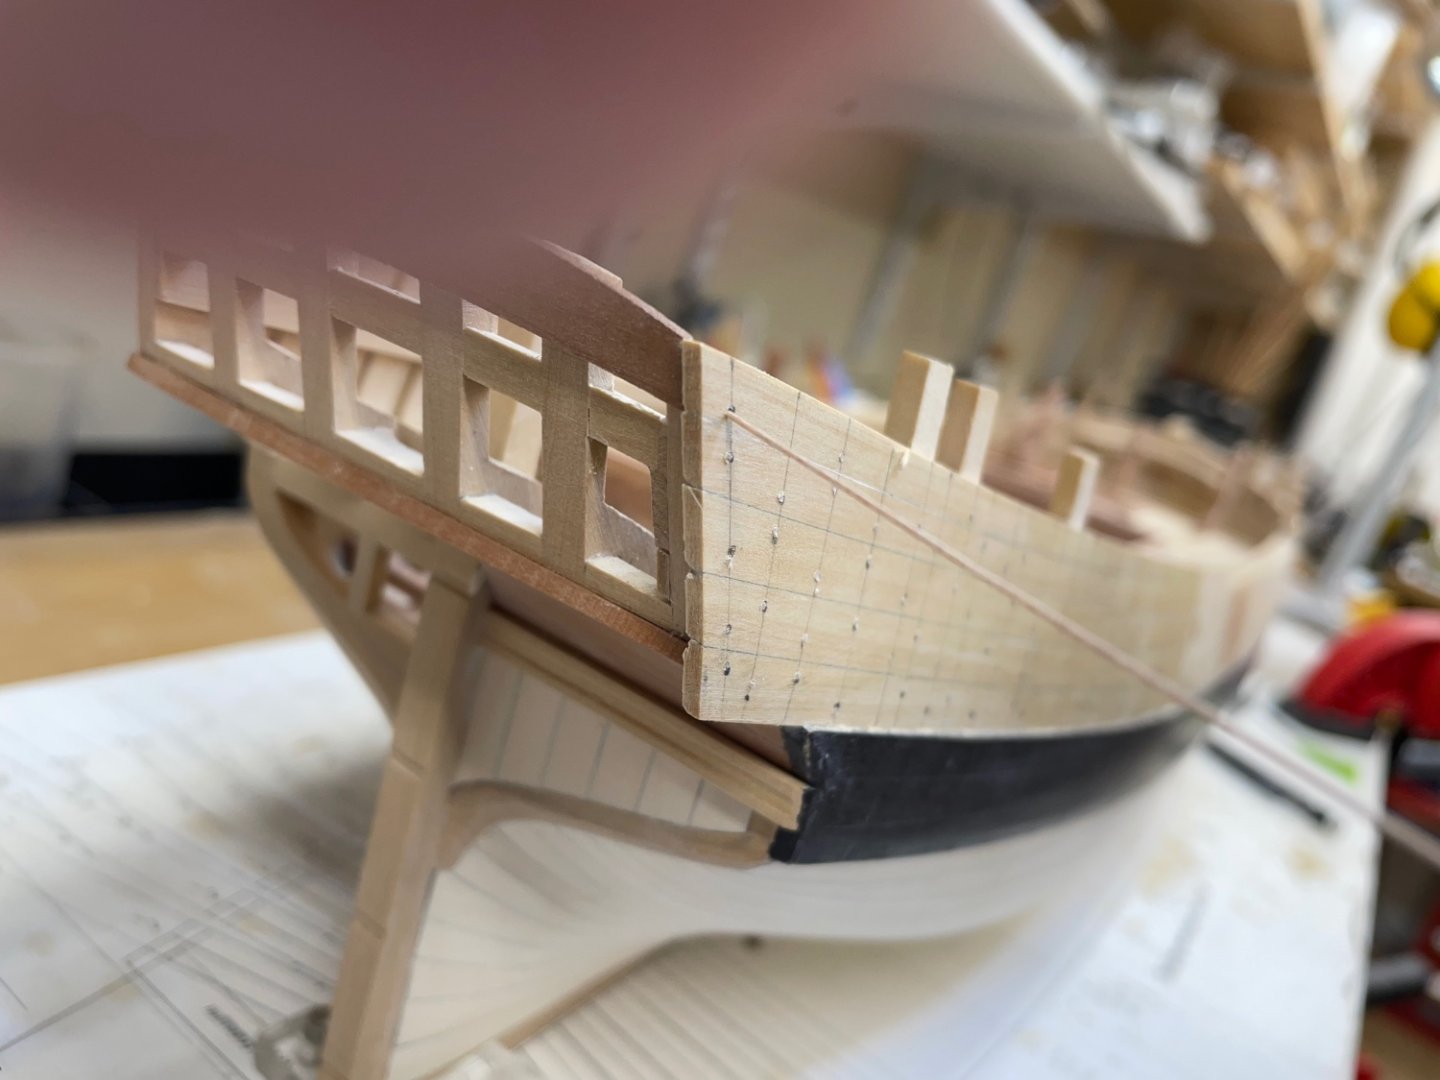
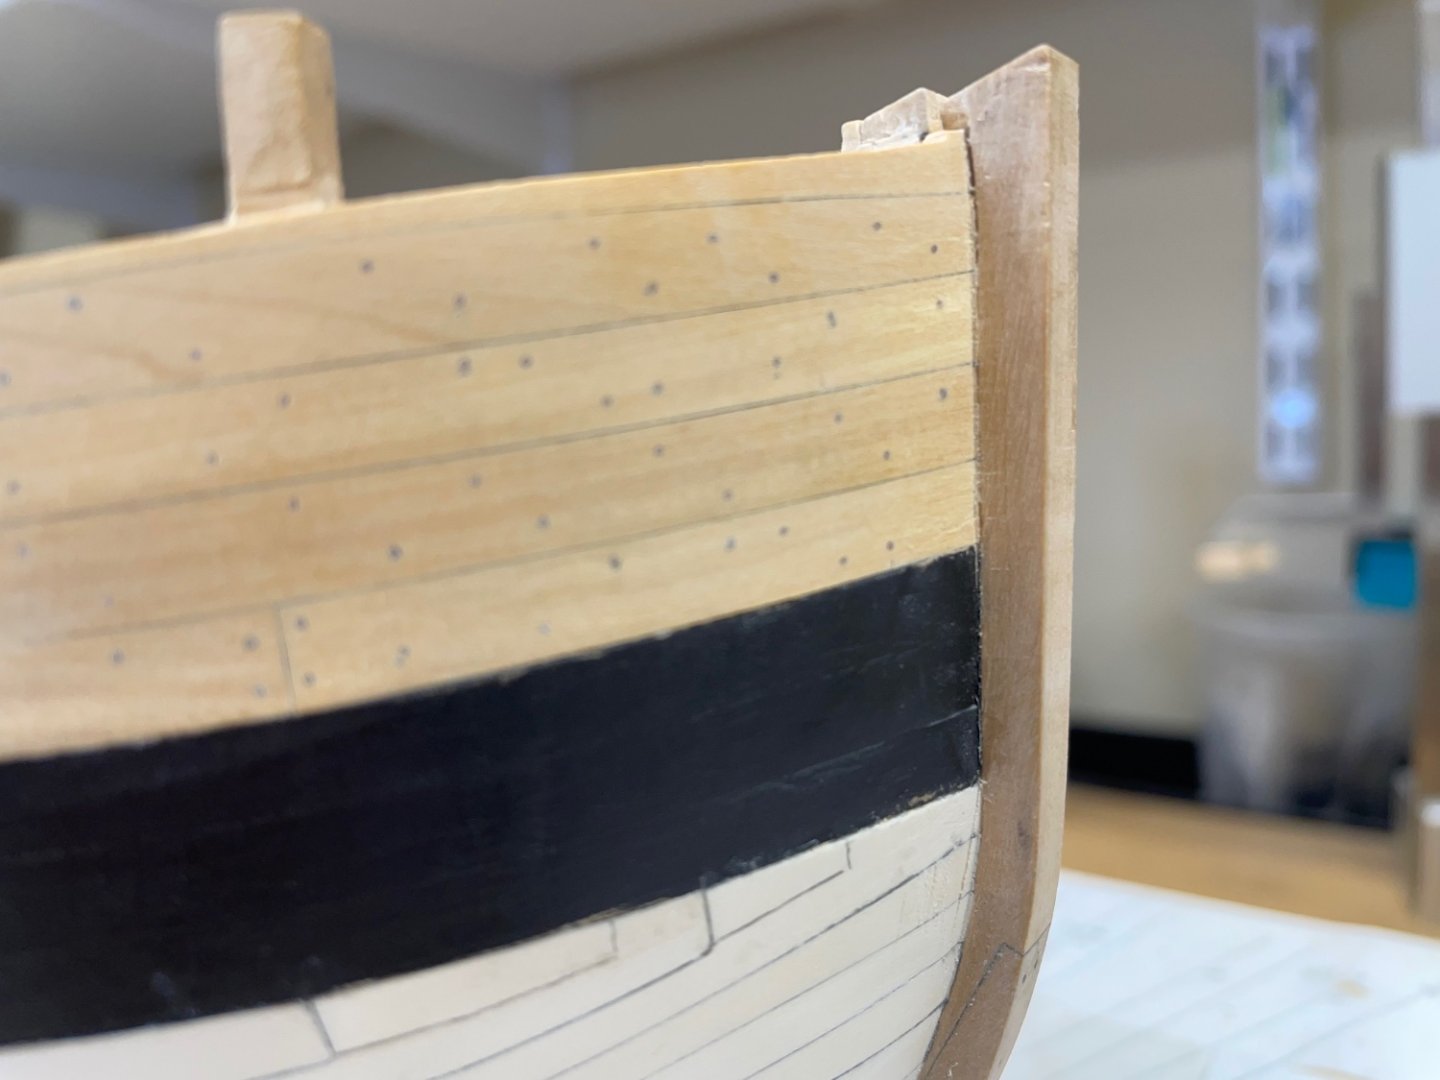
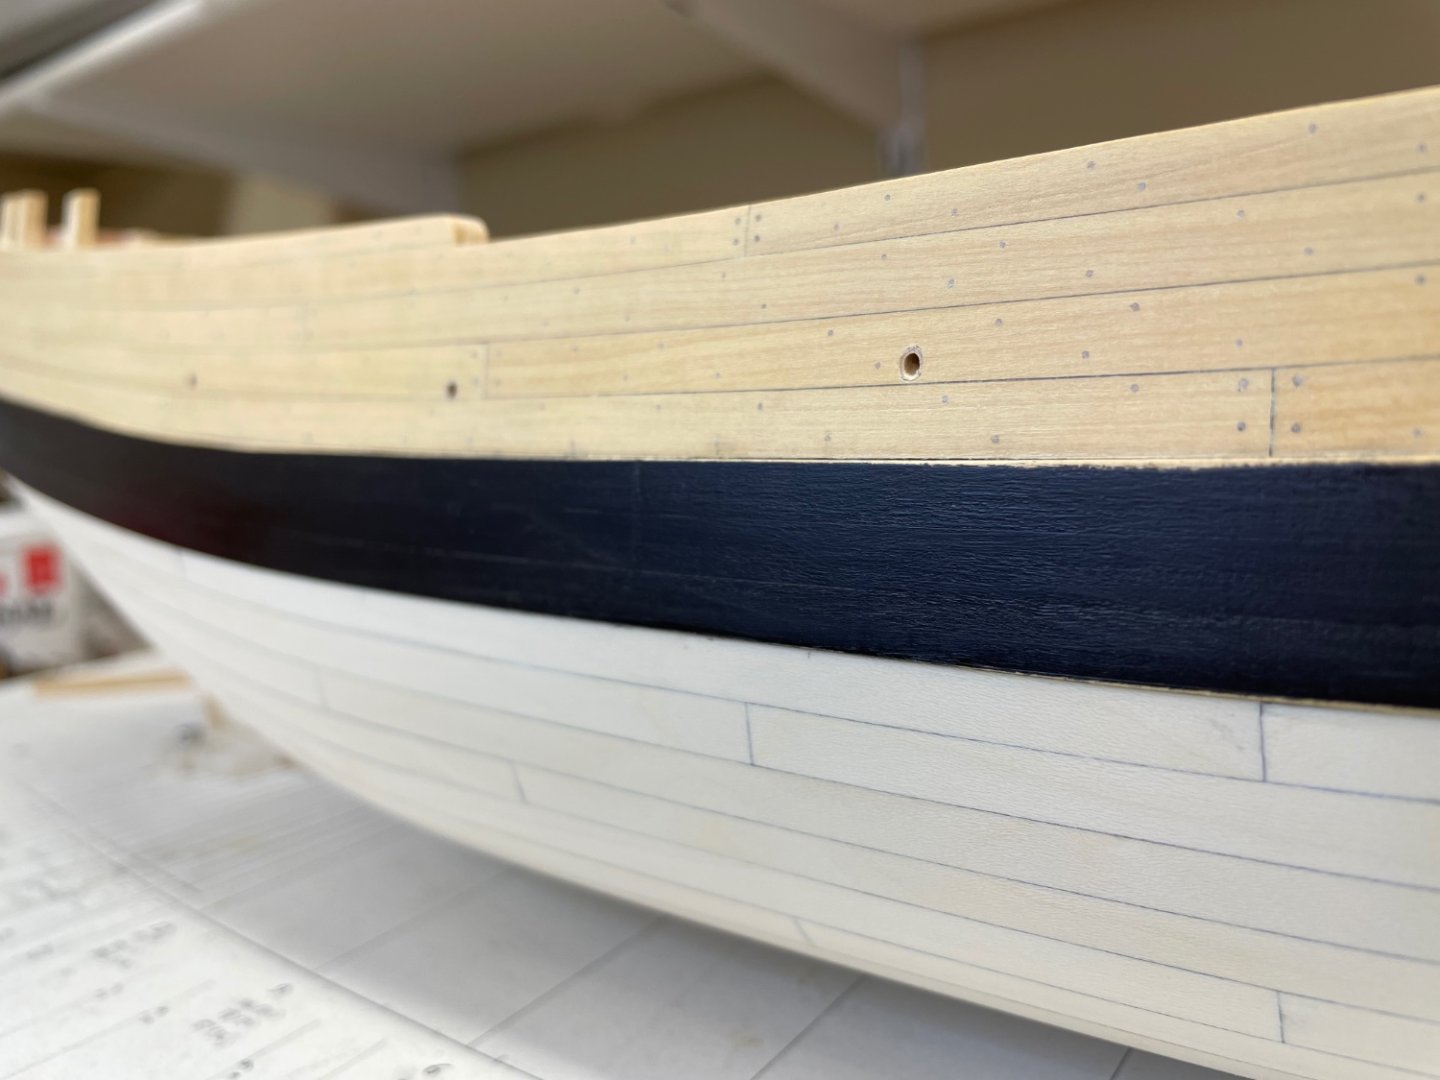
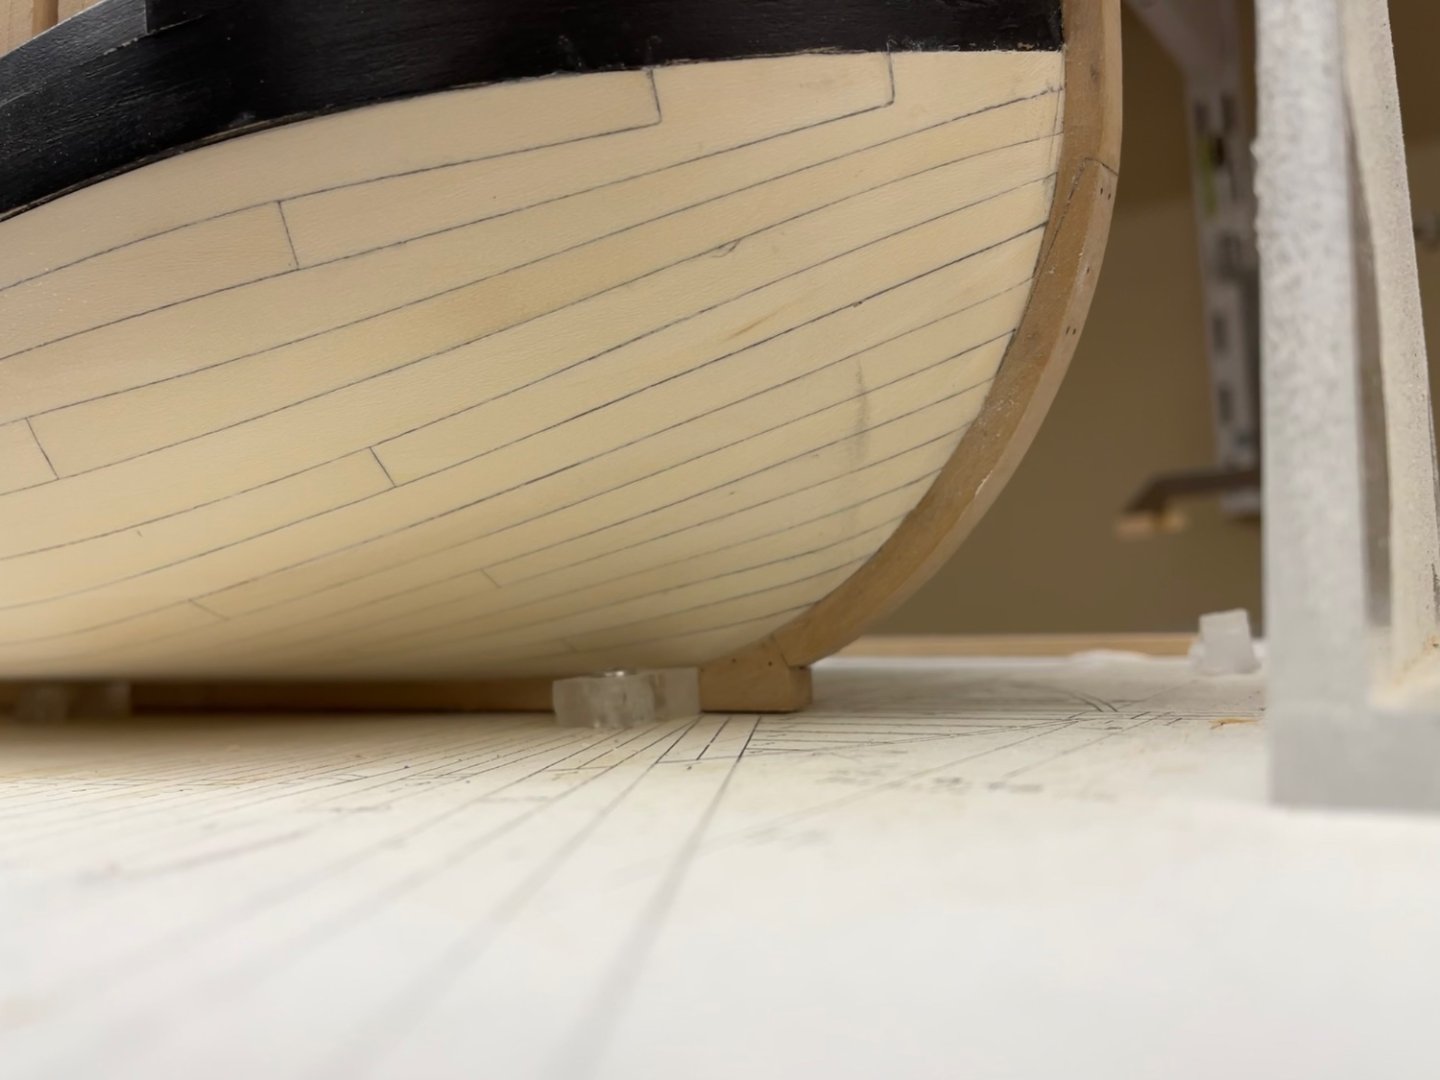
Good Day Shipmates, Thanks for all of your likes, I greatly appreciate them. This is a small update. I finished planking above the wale with Castello and carried on with treenailing, which is a first for me. The guidance suggests only treenailing above the wale but I am sure that is to not discourage first time scratch builders from the operation. I support that idea! 😀 Anyway, I did not have any luck splitting bamboo skewers so I used [English] boxwood in the Byrnes drawplate. I have a final question for anyone that has an opinion for this. I am not convinced that my drop planks under the wale look right. I’ve added pencil lines indicating perhaps where I should have ended them which may (or may not) improve their look. Thanks Ian

-
Pulling up a chair to watch another one of your beauties! Ian
- 72 replies
-
- 1
-
-
- Glad Tidings
- Model Shipways
- (and 1 more)
-
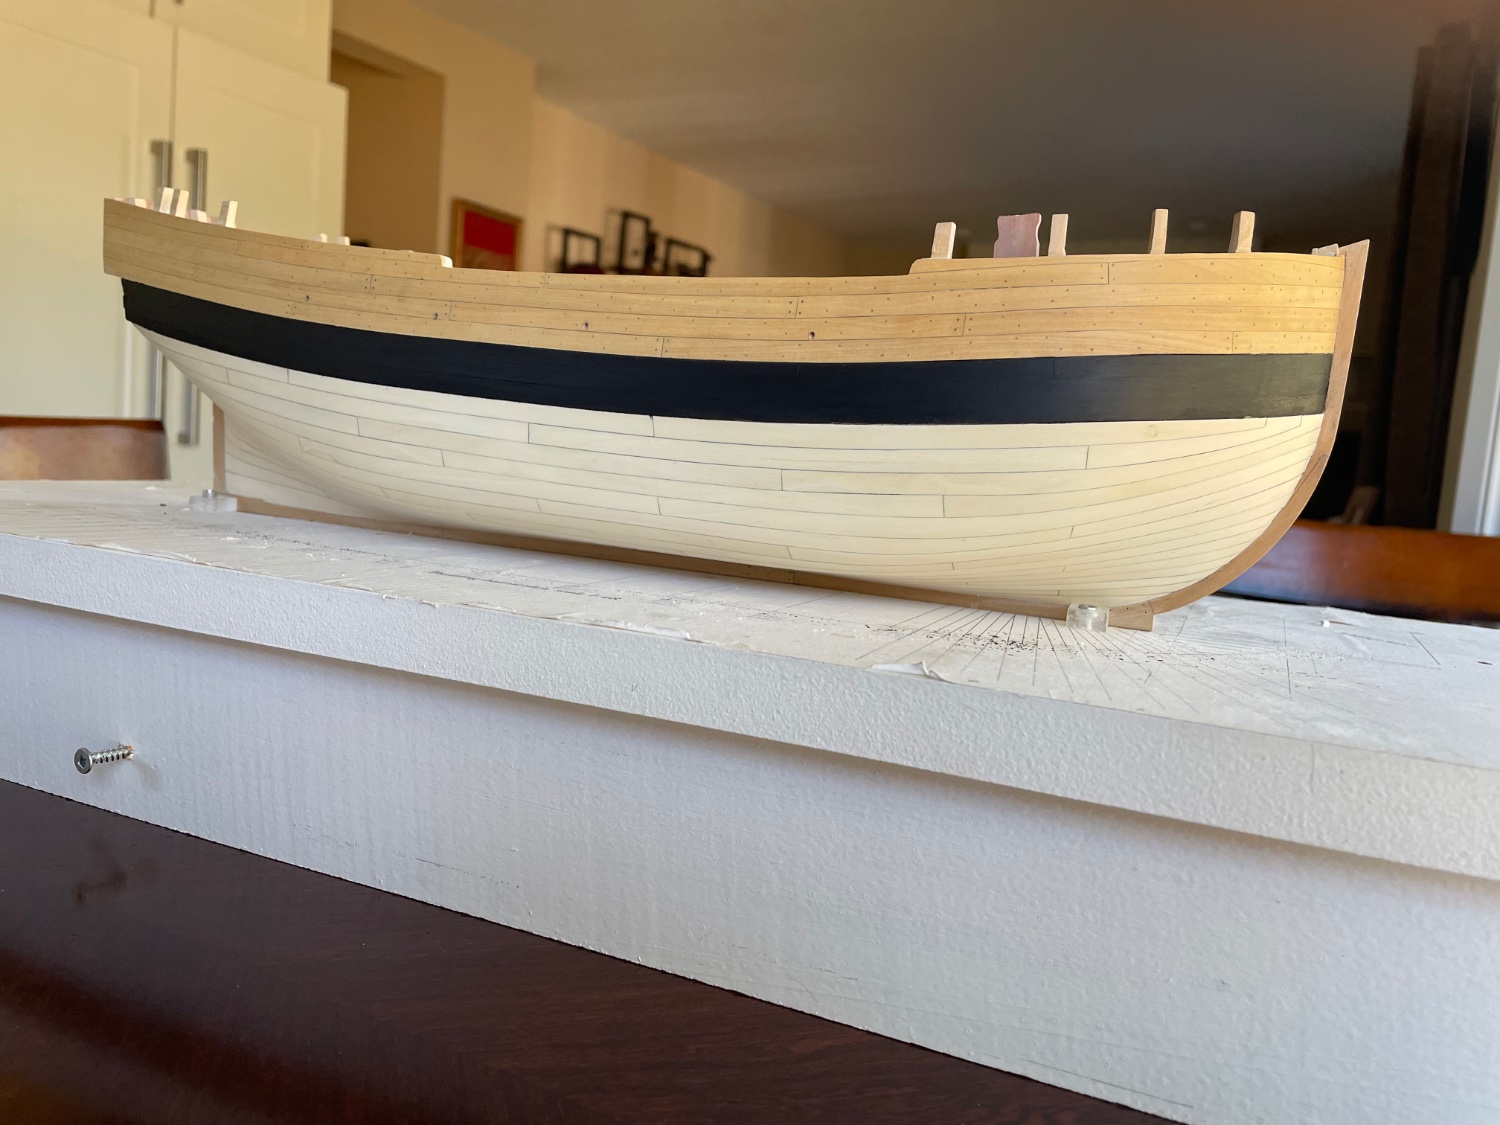
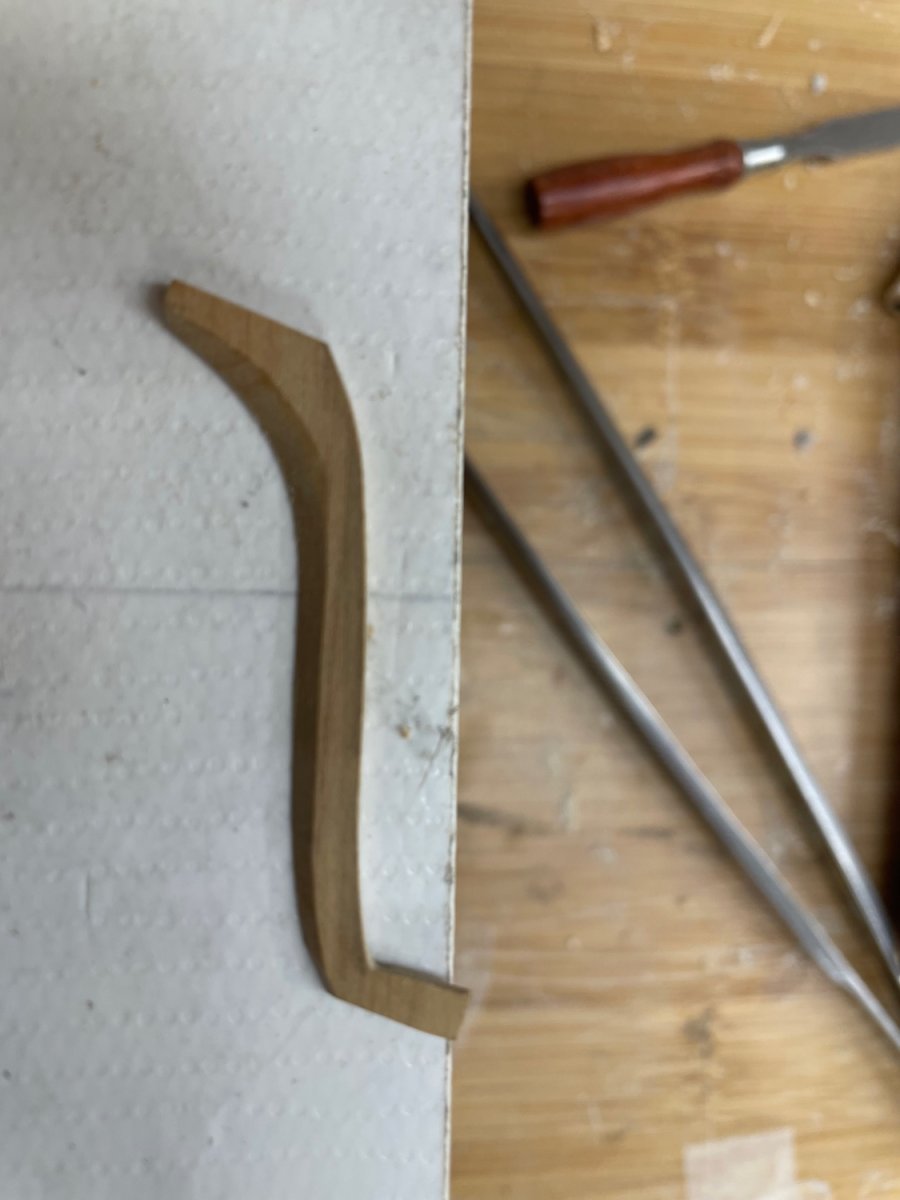
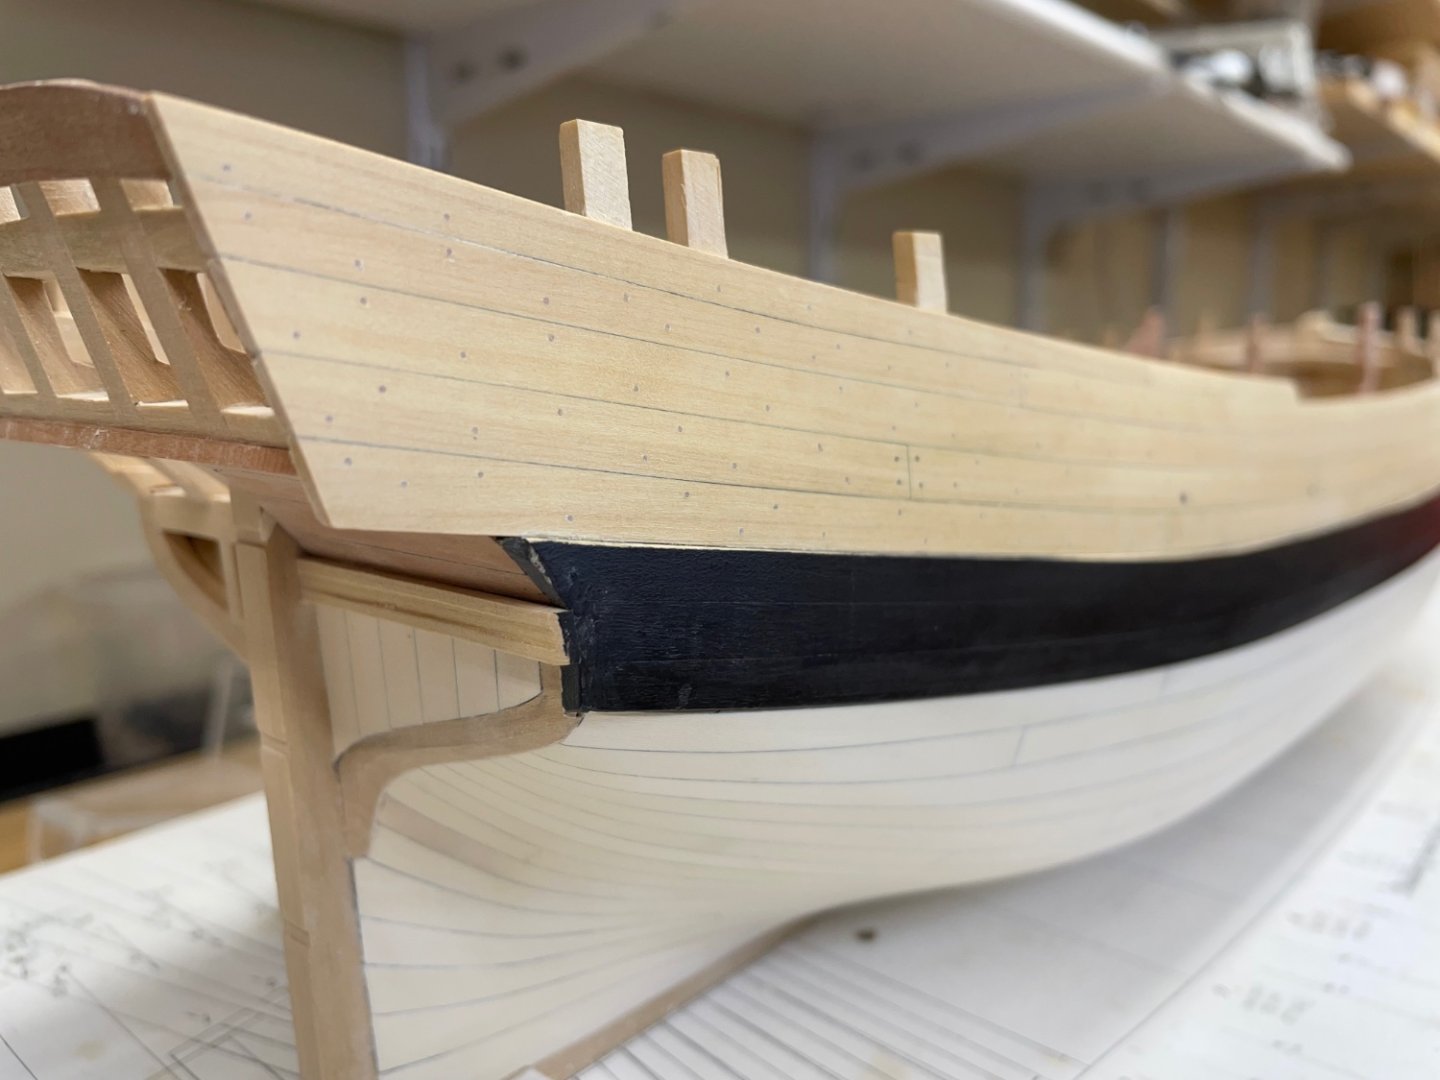
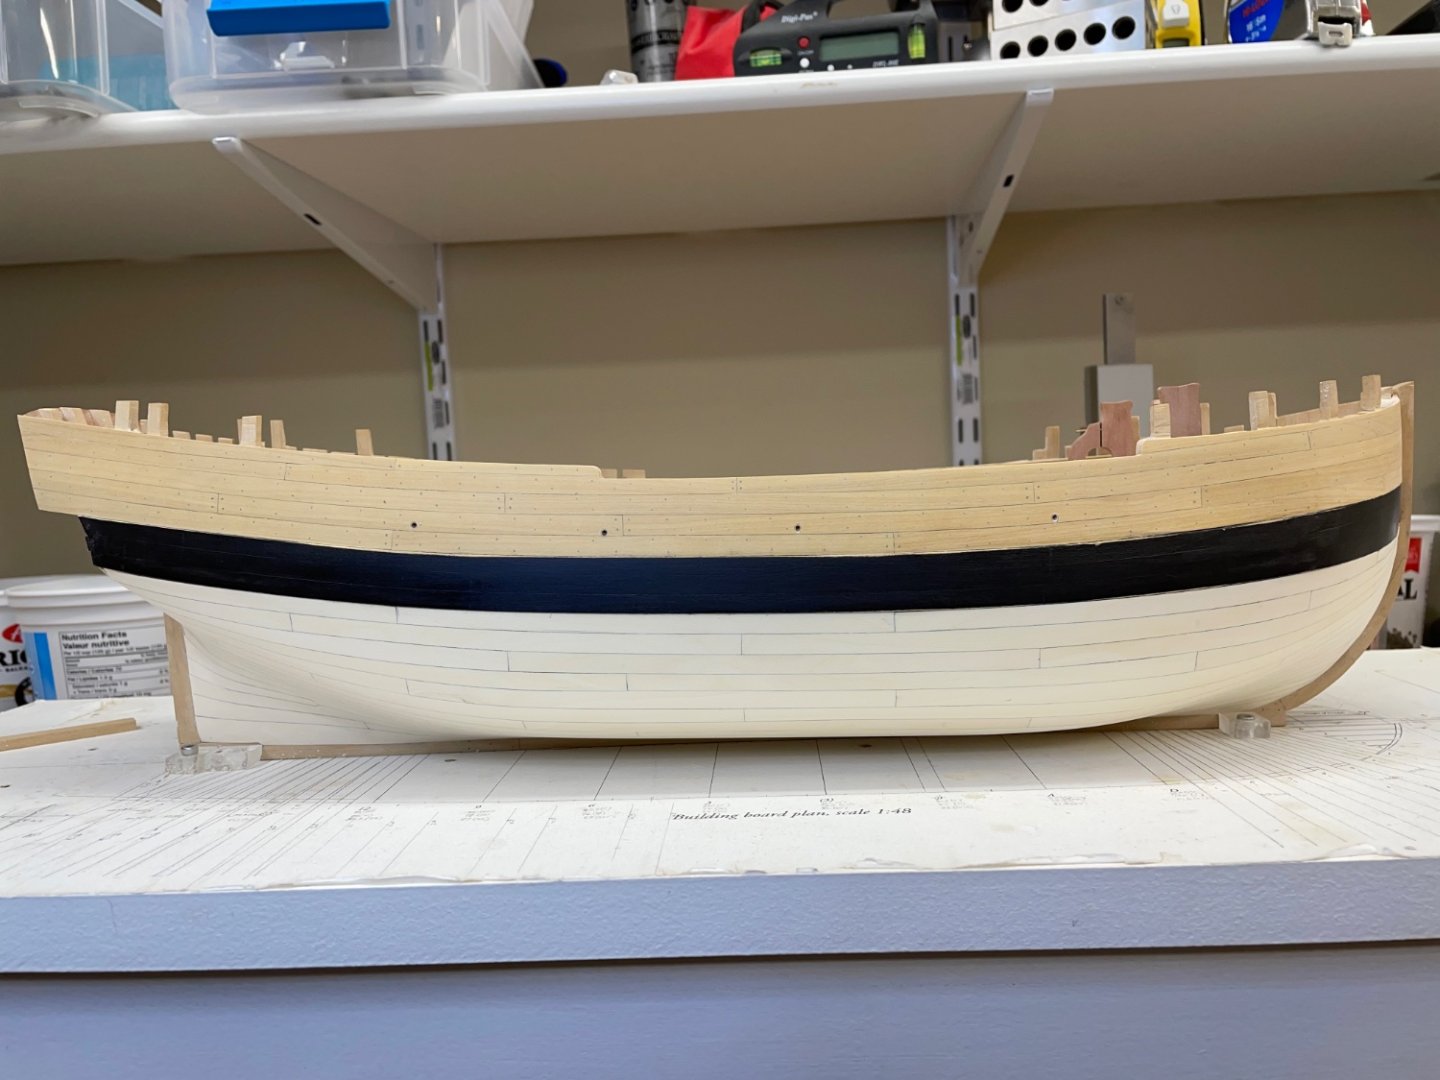
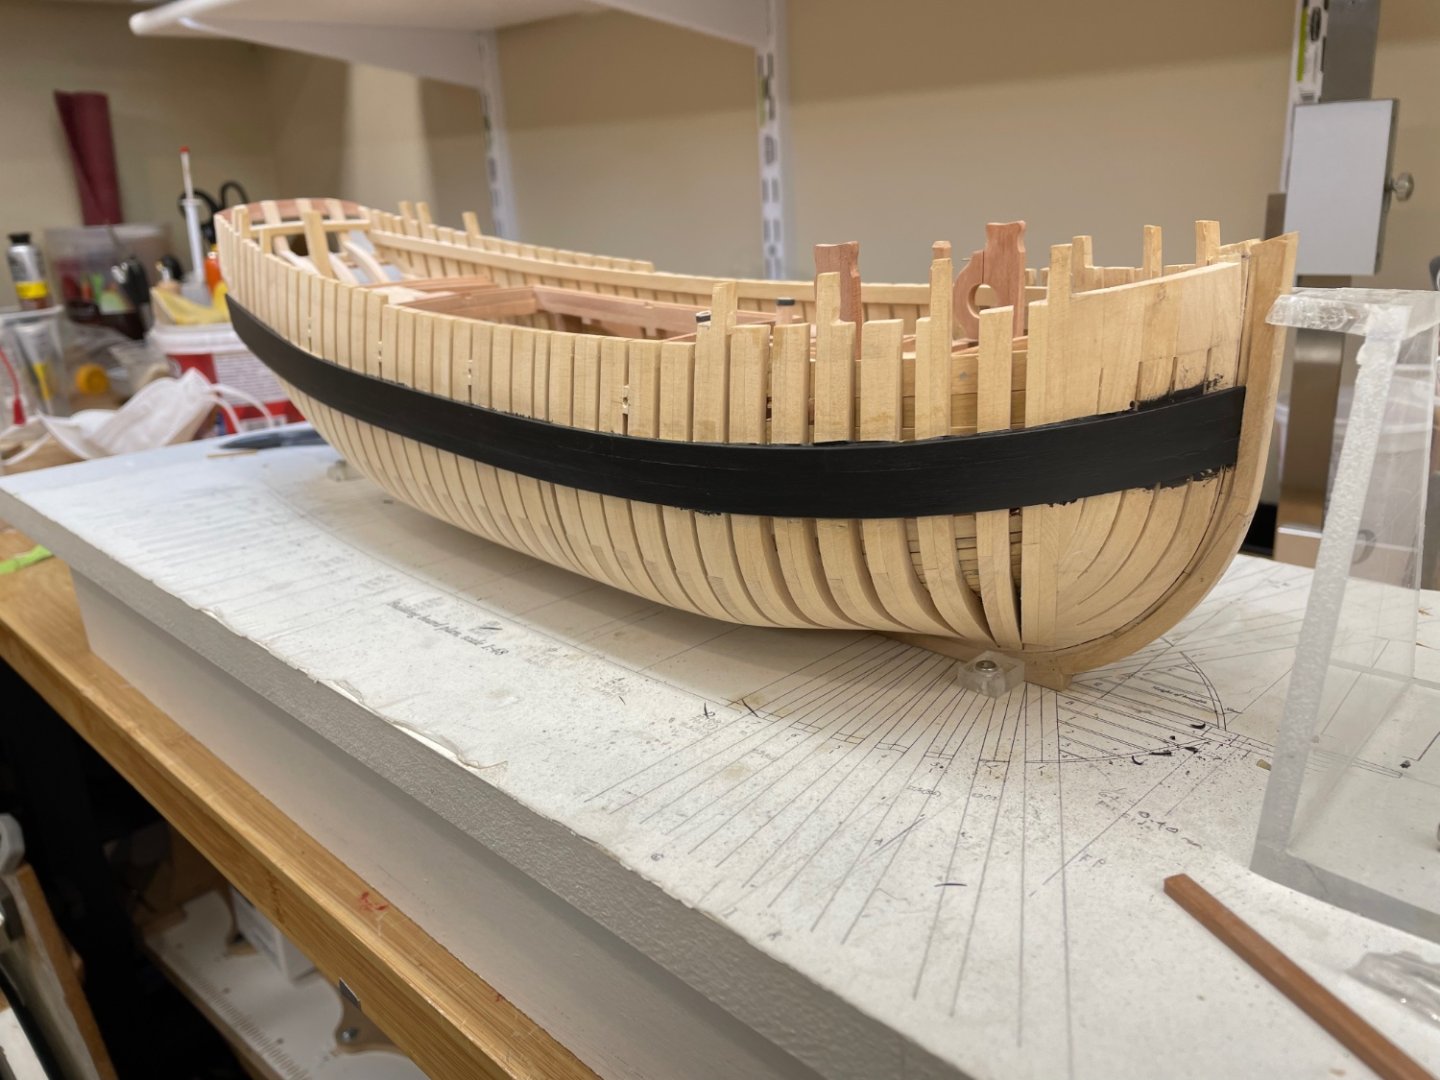
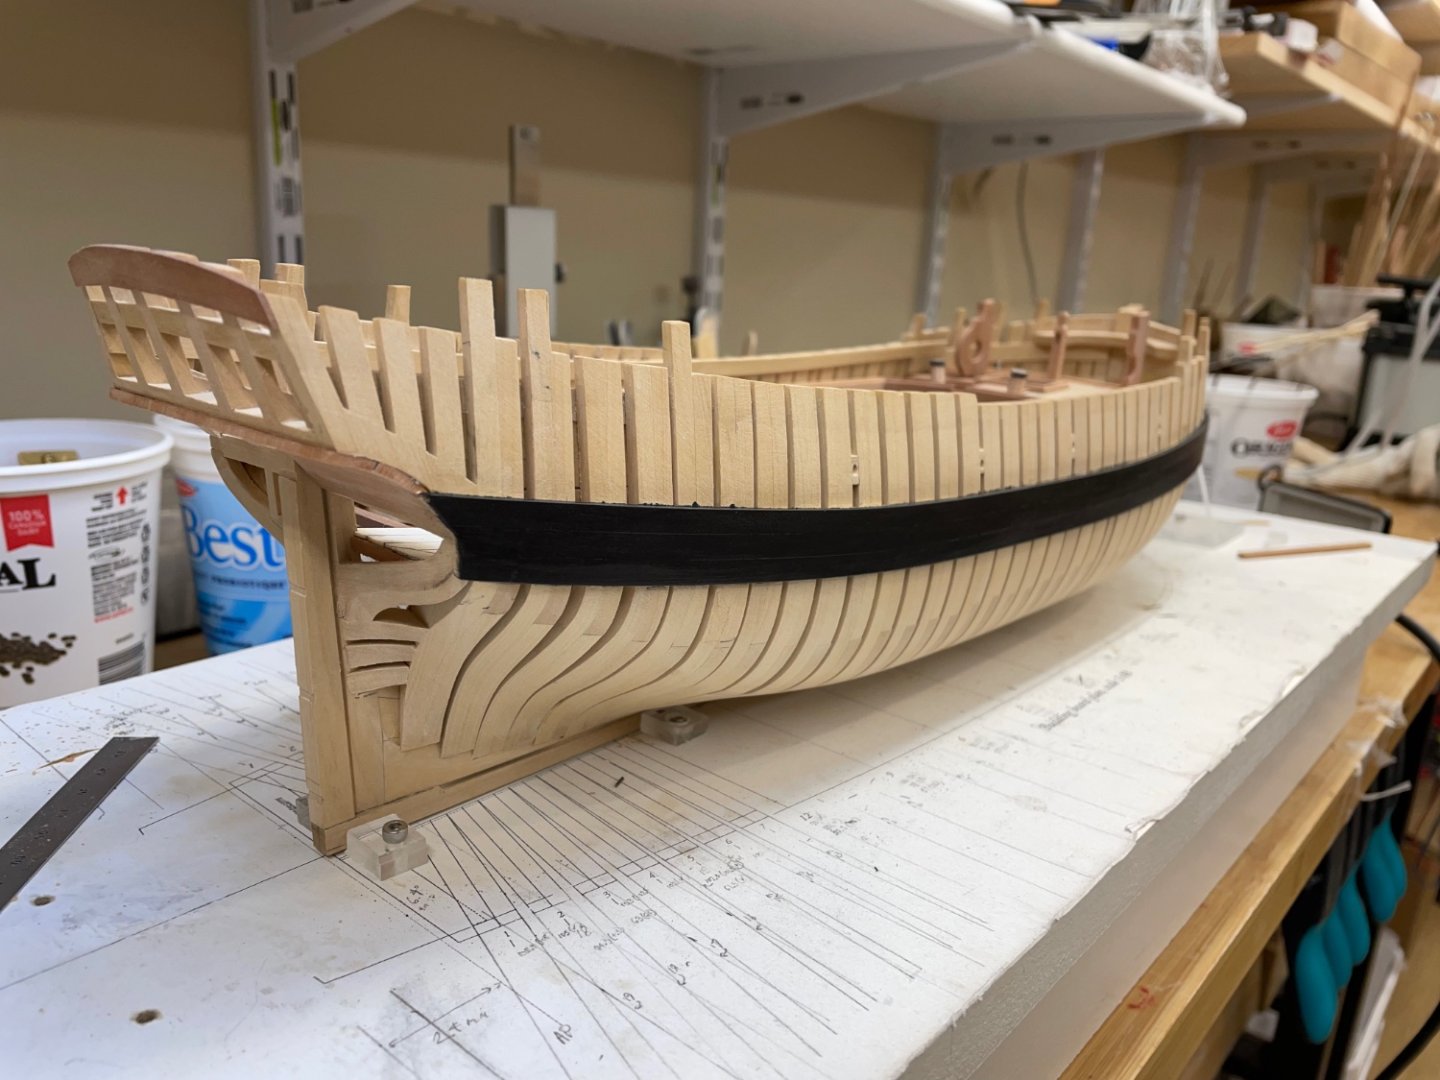
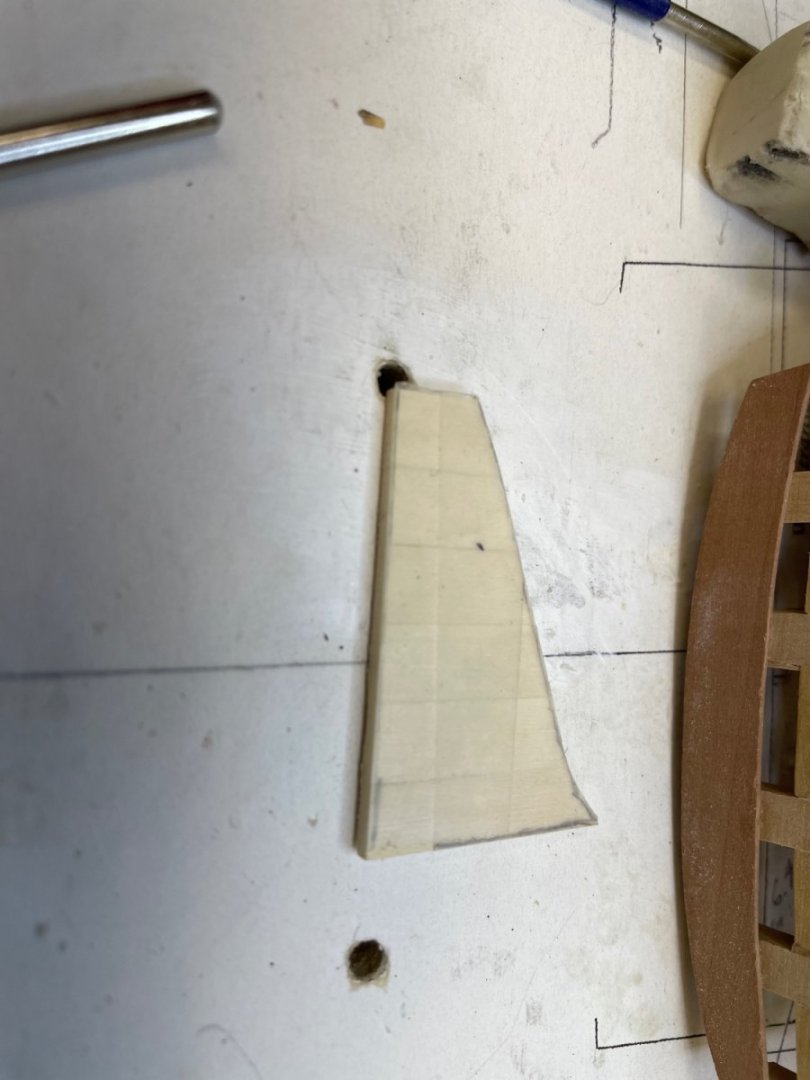
Greetings all, Some progress to report. I installed the starboard wale using Castello. Now that I’ve completed the hull planking I’ve discovered how bendable and easy to work with Holly is. I should have used that as David’s instructions suggested. Hull planking was straightforward except I ended up with two drop planks at the bow under the wale. Even though I had lined off the entire hill I let the bow planks use up too much room. I think it looks ok. The challenge with the fashion piece is to achieve a flush continuum with the hull planking. Don’t ask me how I know that. 😳 I covered the area between the fashion piece, stem and wale with scotch tape then traced the boundaries with a pencil. I removed the tape and laid 6.3 mm planks on the sticky side then sandwiched the whole thing in a layer of tape. That formed a very stable structure that allowed my to cut and sand the assembly to the outline then disable and install each plank one at a time. This required very little fitting. I moulded the tuck rail using 5mm Castello and a micro shaper I had lying around. Til next time. Ian


-
Just beautiful. Thanks for sharing this. Building one of these is definitely in my bucket list and this just increases my motivation. Ian
-
Absolutely beautiful model Paul. Congratulations on her completion! Ian
- 55 replies
-
- 2
-
-
-
- Nordlandsbaaden
- Billing Boats
- (and 1 more)