-
Posts
9,686 -
Joined
-
Last visited
Content Type
Profiles
Forums
Gallery
Events
Everything posted by Chuck
-

Why do some manufacturers make single plank kits?
Chuck replied to Meriadoc Brandybuck's topic in Wood ship model kits
For me personally.....its a matter of why plank it twice if you could do it properly with the first layer. As a MFG and designer it has nothing to do with cost. At least for me. It has more to do with the usual audience of folks who buy my kits. Single planked kits are targeted to more experienced builders who know how to plank. Once you learn how to properly plank a hull, why in the world would any builder want to be forced by the design of a kit to plank it a second time. So I would say that neither single or double planked POB kits are better than the other. I would instead say that they are directed toward different groups within the hobby. One is for those more experienced with planking. BUT... depending on the design....any single planked kit can be planked a second time if that is what the builder wants to do. I would however state that they should think about the thickness of those planks or even possibly sanding more off the bulkheads to compensate for the additional layer. But again...if you are comfortable with your planking as a more skilled builder there is no reason to do it. Any POF kit of course would never be double planked and the same is true for smaller open boats like the Medway Longboat which just wouldnt work. Chuck -
You would need a bandsaw to rip those pieces into sheets. Then thickness sander to make those sheets accurate......the Byrnes saw could then be used to mill strips from your finished sheets for sale. In addition you would absolutely need good dust control and possibly a jointer to help make life easier for you. I cant see those wood pieces to tell what they are. They dont look like the more sought after types that ship builders want. They look like the more common Cherry, Poplar and or maple which can already be bought in sheet form pretty regularly. Chuck
-
That is coming along beautifully.
- 160 replies
-
- cheerful
- Syren Ship Model Company
-
(and 1 more)
Tagged with:
-
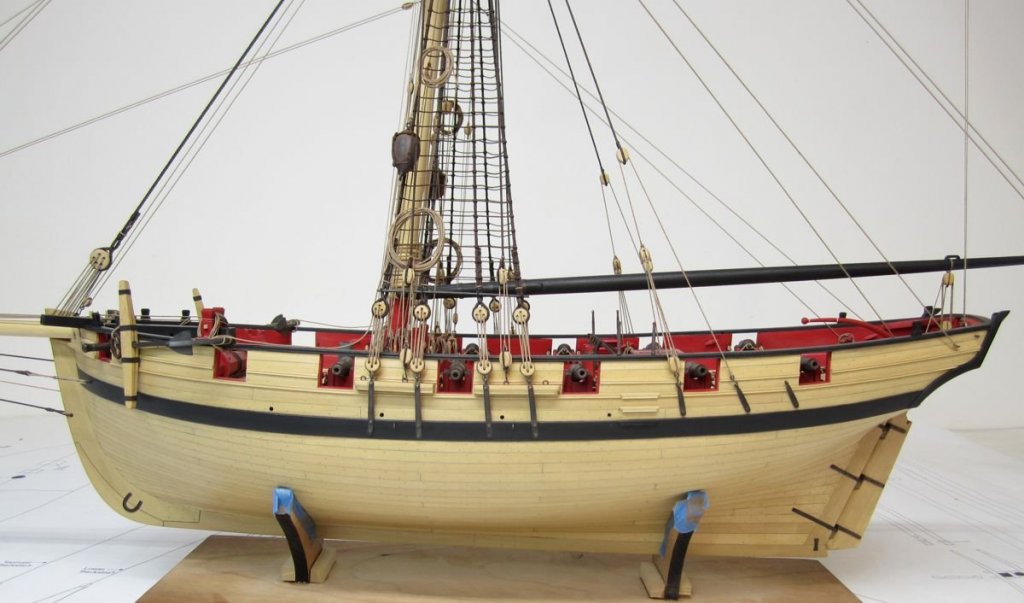
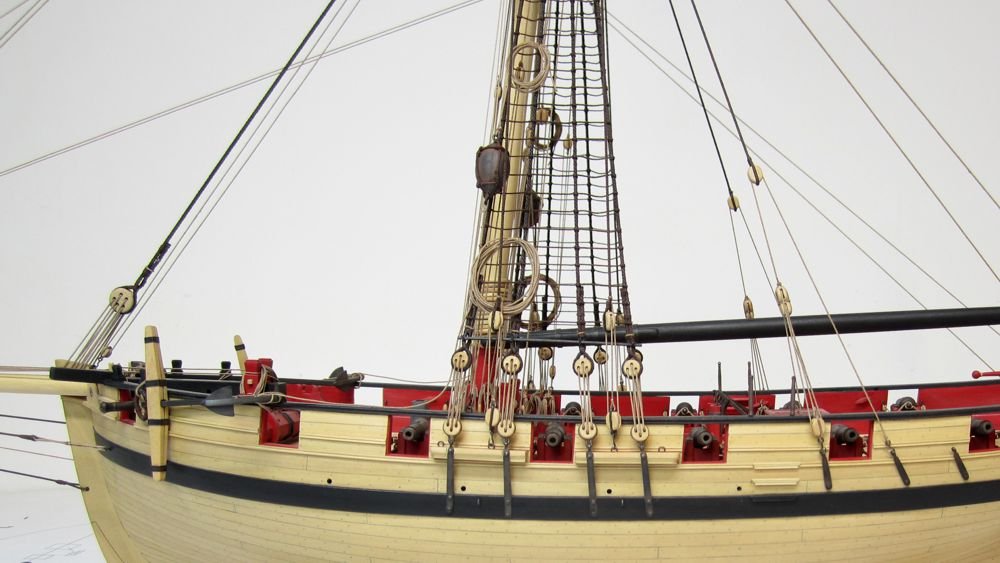
Beautiful model of the Cheerful Bill, Well done. Cant wait to see that next model come to life. Chuck
- 54 replies
-
- cheerful
- Syren Ship Model Company
-
(and 1 more)
Tagged with:
-
I actually developed a mini-kit for the winch. But then I made a conscious decision to not offer them. I wanted to leave at least one item that wasnt overly difficult to make as a scratch-only item. I wanted to encourage everyone building this model to at least try and build one fitting on their own......I am so glad I did that. Well Done. If you can make the winch you certainly could have made every other fitting which is the message I was trying to encourage. Well Done. Chuck
- 778 replies
-
- cheerful
- Syren Ship Model Company
-
(and 1 more)
Tagged with:
-

HM Cutter Cheerful 1806 by JpR62 - 1:48 scale
Chuck replied to JpR62's topic in - Build logs for subjects built 1801 - 1850
Beautiful start...looking forward to your procgress. -
They were before....from 1779 - 1780....everything happened around the same time though which also makes it very hard. One log book was from 1782. I cant remember from which came what info however. This was researched so long ago. About 5 or six years ago. So I am just trusting my findings from that time. I actually hired a researcher who dug deep into the archives over in England. He sent me his findings as he went because he couldnt take any documents from the buildings etc. I do have some photos taken on his phone though if I can find them. You can hire folks to do the research for you which is great. I forget the guys name...he did work for many people. He was like 100 back then though so I am not sure he is even alive today. I think his last name was Salt if I remember correctly. Its very expensive to to a deep dive into the research this way. Which is why it angers me so much when folks takes such a care-free approach to piracy. I spent big money on researching Winnie when I started. Including having the original building contract photo-copied and sent to me. Chuck
-
I read through the ships logs to find that info...so I think it may be reliable. What is interesting is that there were numerous notations of poor pump performance and they had them moved in the Americas. In addition.....the stove was moved also. As far as Carronades...I had seen someting about two 18 pounder Carronades on the f'castle but could not confirm this. My mistake earlier yes you are correct that there were 12 swivels. That is in my notes. Rather than muddy the waters I am going with what they had when the did some work on her in the north atlantic. Chuck
-
Its hard to say for sure but We are building her to a later appearance. After much research and even reading the logbooks for winnie, our plans reflect her appearance during the American Revolution. Such things found in the logs indicate the moving of pumps up to the gundeck as well as the stove. There are other minor changes as well. The winnie was certainly copper plated but this is a personal preference thing. This was in fact the first class of frigate ever copper plated. Based on log info 24 twelve pounders and 8 six pounders were used at this time. Also 10 swivel guns. Beyond that there are many inconsistencies in the source documentation but my plan shows her either during the revolution or shortly after. Chuck
-
Have you ever considered trying rowmark black acrylic......the solid black comes in .020 thickness. Its what I used to make my hooks from. https://www.jpplus.com/rowmark-fibergrave-black-engraving-plastic Its a flexible plastic but not too flexible. Great for small parts that wont require tensile strength. Anchors in particular. But this is the thinnest available. Its expensive but what isnt these days. Chuck
-
Low low power and low speed is my mantra. Every laser is different but I use just 8 power and maybe 18-20 speed for the Ivory stuff. I use a 65 watt laser. Very little to no laser burning at all. For example these monograms are super tiny and I use the black thin laserboard. No charring and a very thin kerf. Can hardly see the cut line. Otherwise these small items would not be possible. I know some guys that wont vector cut laserboard and they will raster cut or engrave through the board entirely. I prefer to do the line cuts however. Chuck
-
Yes...that is the ivory polybak. Each color is a diff thickness. I believe that is .016. there are different brands but this is the only one that wont kill you if you laser cut it. The other stuff is made with harsh chemicals and literally poison. I use three colors or 3 thicknesses. Black is very hard to come by and very thin.
-
I am not sure why you bought these as you wont really need them. You can download the materials list for each chapter to find out what size wood sheets you need to buy. I will replace these with the proper sizes of wood you will most likely need but you will need a lot more than just these 8 sheets. See here for the materials lists. Your order will probably ship out in two boxes as they wont fit in just one. Chuck
-
Thanks guys.....Trying to find some time today to do those cheeks.... But today is the first day after opening the store. Its been getting nutty. But maybe later tonight if I am not too tired. I forgot how crazy these reopening's get.
- 1,784 replies
-
- winchelsea
- Syren Ship Model Company
-
(and 1 more)
Tagged with:
-
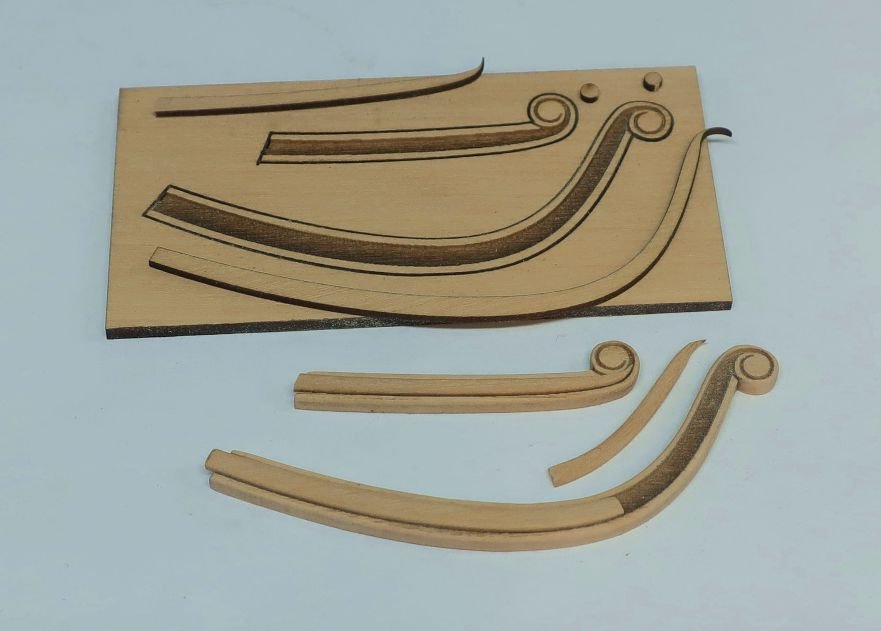
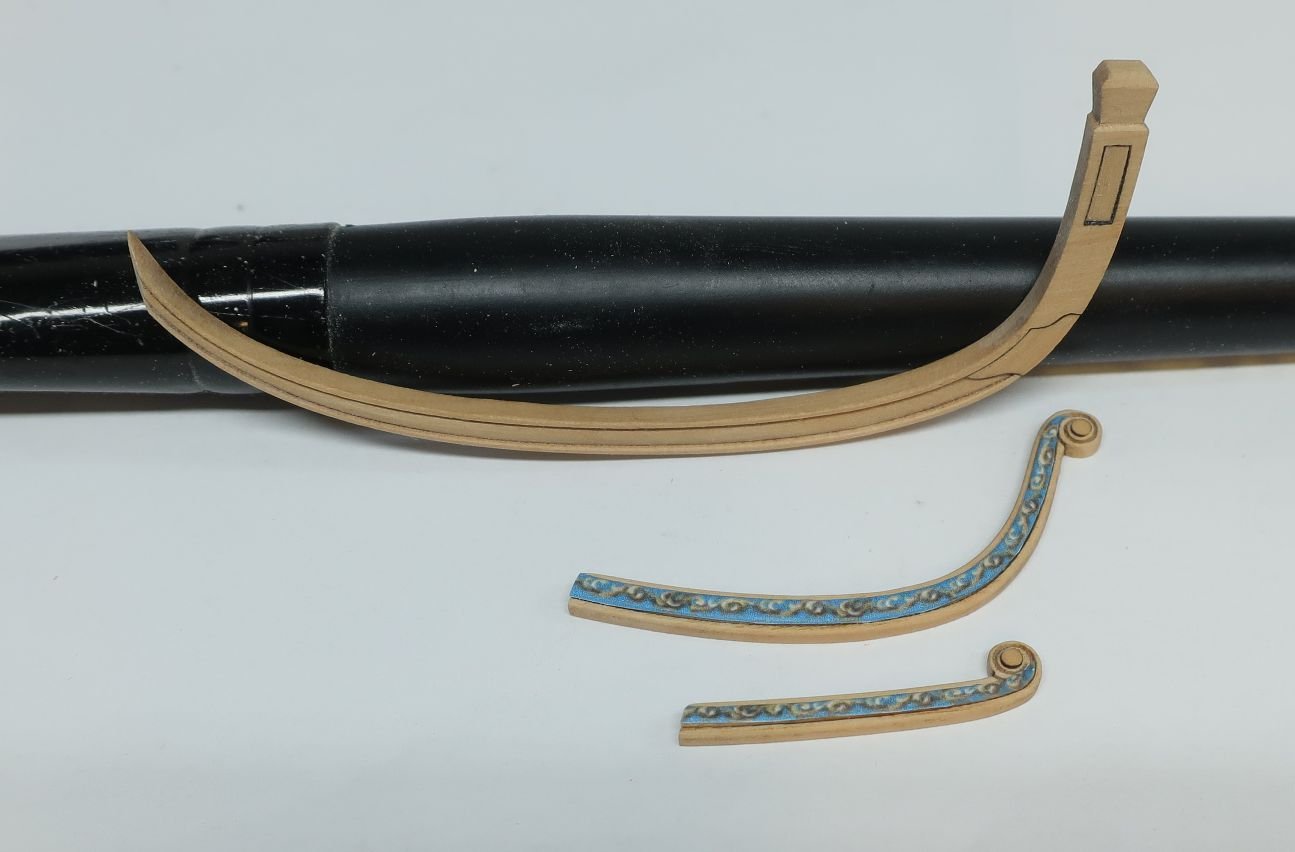
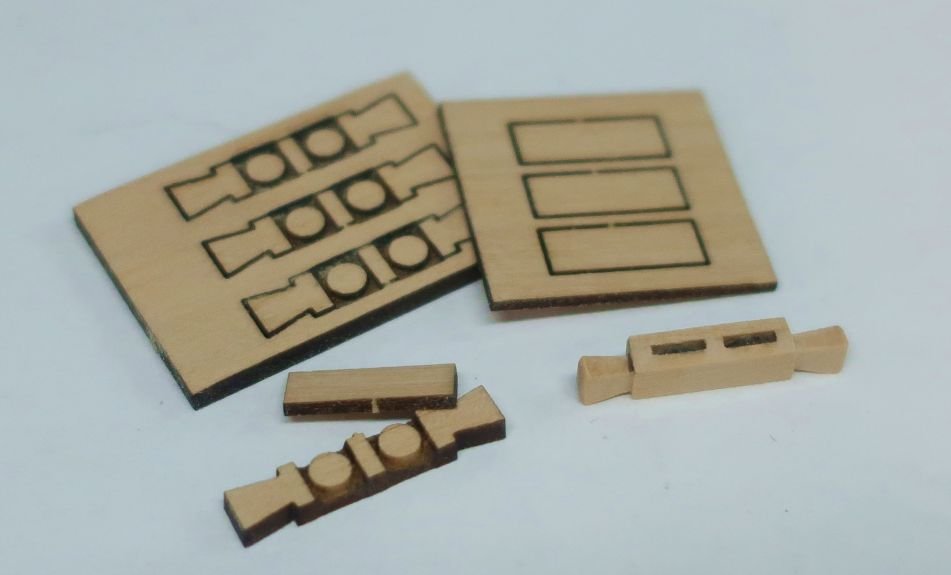
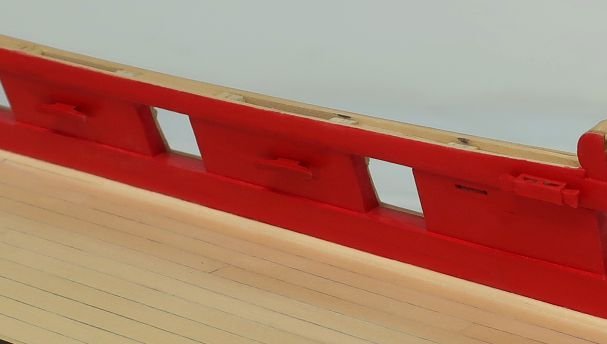
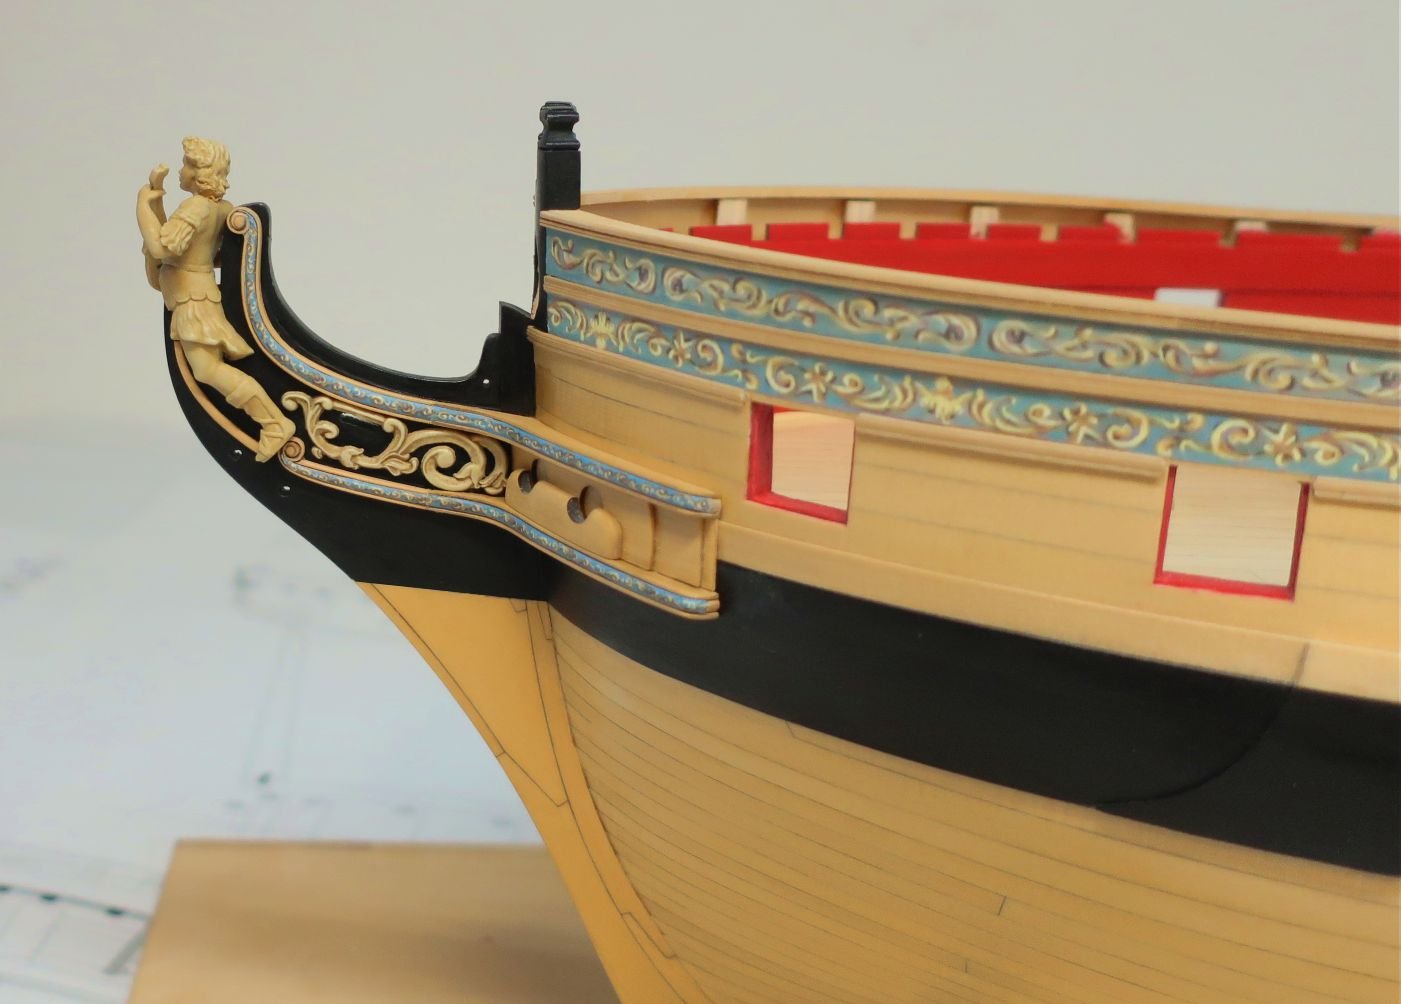
On the bulwarks you will see several cleats and a staghorn.... The cleats are self explanatory. Laser cut cleats were cleaned of laser char and painted. Then glued onto the bulwarks. You can peg them with some 24 gauge wire for extra security. There is one other feature on the bulwarks. I believe its called a staghorn or basically its a fancier cleat with some sheaves. Someone can correct me on the terminology as I seem to have a mind block as I am writing this. These are also laser cut for you from boxwood. They are quite small but add a nice detail seldom seen on most kits. But they are used in a bunch of places. But one is needed on the bulwarks on each side. Basically the first thing you do is add the backing piece which will enclose the sheaves. Those are laser etched as you can see above. The the two "horns" (for lack of a better word) need to be shaped. These are the ends which need to be shaped like a typical timberhead. I used a #11 blade to do this. A quick stop cut was used across the end to match the profile laser cut. Then I sliced towards the stop cut on an angle to give the end some dimension on the front side. Otherwise it would be flat ...you can see the front of the finished piece above. Then I lightly chamfered the edge...again like you would do with a timberhead. These were painted and glued on the bulwarks. Just check the plans for their locations. Its hard to see but below you can see one side of the bulwarks with some cleats and this "staghorn". Now I should start making all of those eyebolts for the gun tackles. Ugh! But I think I am going to skip ahead and start making the cheeks on the starboard side. If you recall I finished these on the port side already. I dont feel like making eyebolts and split rings today. Here is a shot of the cheeks and hair brackets on the port side. Let me detail how they are made next. Its quite a long process even with most parts laser cut for you. You start with the hair brackets.... These are the pieces on the stem, while those on the hull above and below the hawse holes are the cheeks. The hair brackets are laser cut for you. The first thing you do is lightly sand the laser char on the face of the sheet before you remove any of the parts. You can see in the photo that I tried something new. Cheeks and headrails always look pretty crappy on kits so here goes nothing. Hopefully a better result and not too difficult to build. They are laser etched with a channel down the center of them. Its not very deep but then it doesnt have to be. In this channel will be a precision laser cut insert. The hair brackets are 1/16" thick while the inserts are 1/32" thick. Once the inserts are shaped and positioned, they will stand proud of the hair brackets. To pull this off properly, you must first sand all the laser char from the edges or sides of each hair bracket. Then round off the outside edge. Just knock off the hard edge as it doesnt need to be over-sanded. Dont worry about touching the laser etched channel. Then carefully with a light touch sand the char from the edges of the inserts. These are thin and fragile. Then round off the edges of these along their entire length if that makes sense. In the photo below you can see an extra set of pieces not touched....note the flat inserts etc. But below that you can see the pieces all finished and being dry fit into the etched channels. To finish these up after you glue in the inserts, add the tiny laser cut button to the scrolls. These are 1/32" thick which are too thick. So once glued into position you must sand them thinner until the look right. They should be pretty thin. Lastly, I applied some WOP and then glued the friezes on. These are printed on regular paper like the other friezes. I used a glue stick. You can slide them around before they set. Then take the point of a toothpick and lightly burnish or "tuck" the edges of the frieze along the edges so its nice and neat. Thats it for the hair brackets. Tomorrow I will work on the cheeks and finish off all the other parts. This is also the method or design concept I will use to make all the headrails. You n see one test headrail in the same photo. I have made about 10 test examples so far and it looking good if I can just choose the one I like best. Each headrail is made up of between 5 or even ten pieces depending on which one I choose. I do like this one for its simplicity. But we wont need these until a lot later. So now its onto the cheeks. All of the elements come together well to create a pretty convincing execution. Keep in mind this is what we are trying to replicate without having to carve these from scratch.
- 1,784 replies
-
- winchelsea
- Syren Ship Model Company
-
(and 1 more)
Tagged with:
-
You havent faired the hull frames yet. Once you do that they will be fine. You will be removing more wood than you think. Plus you may have beveled more than needed which doesnt matter all that much at all. Just keep going. Nothing worse than analysis paralysis!!! I have seen many a newcomer suffer from this this. Just get all those frames on and then fair them very carefully. Chuck
-
Those fittings look great. Its the fun part. I am almost at this stage on the Winnie now so I am looking forward to it. Excellent work on that stuff.
- 778 replies
-
- cheerful
- Syren Ship Model Company
-
(and 1 more)
Tagged with:
About us
Modelshipworld - Advancing Ship Modeling through Research
SSL Secured
Your security is important for us so this Website is SSL-Secured
NRG Mailing Address
Nautical Research Guild
237 South Lincoln Street
Westmont IL, 60559-1917
Model Ship World ® and the MSW logo are Registered Trademarks, and belong to the Nautical Research Guild (United States Patent and Trademark Office: No. 6,929,264 & No. 6,929,274, registered Dec. 20, 2022)
Helpful Links
About the NRG
If you enjoy building ship models that are historically accurate as well as beautiful, then The Nautical Research Guild (NRG) is just right for you.
The Guild is a non-profit educational organization whose mission is to “Advance Ship Modeling Through Research”. We provide support to our members in their efforts to raise the quality of their model ships.
The Nautical Research Guild has published our world-renowned quarterly magazine, The Nautical Research Journal, since 1955. The pages of the Journal are full of articles by accomplished ship modelers who show you how they create those exquisite details on their models, and by maritime historians who show you the correct details to build. The Journal is available in both print and digital editions. Go to the NRG web site (www.thenrg.org) to download a complimentary digital copy of the Journal. The NRG also publishes plan sets, books and compilations of back issues of the Journal and the former Ships in Scale and Model Ship Builder magazines.


