michael mott
-
Posts
5,195 -
Joined
-
Last visited
Content Type
Profiles
Forums
Gallery
Events
Everything posted by michael mott
-
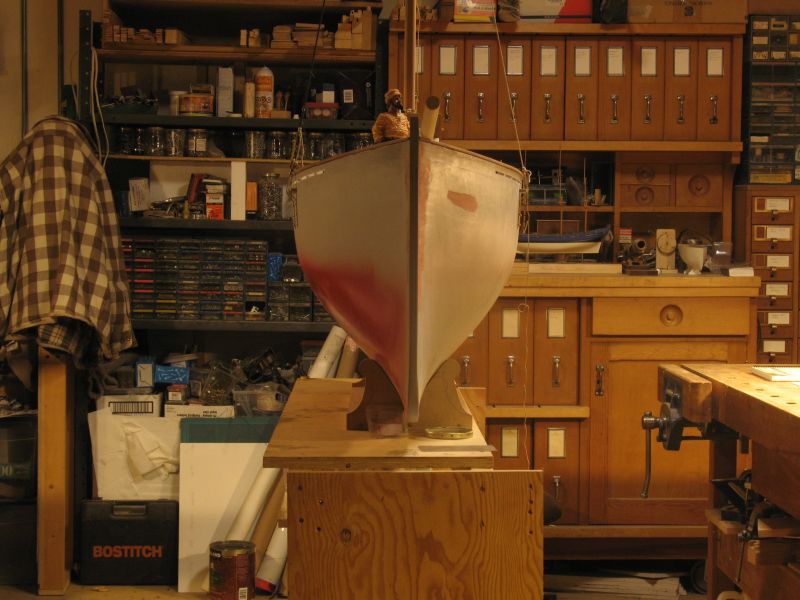
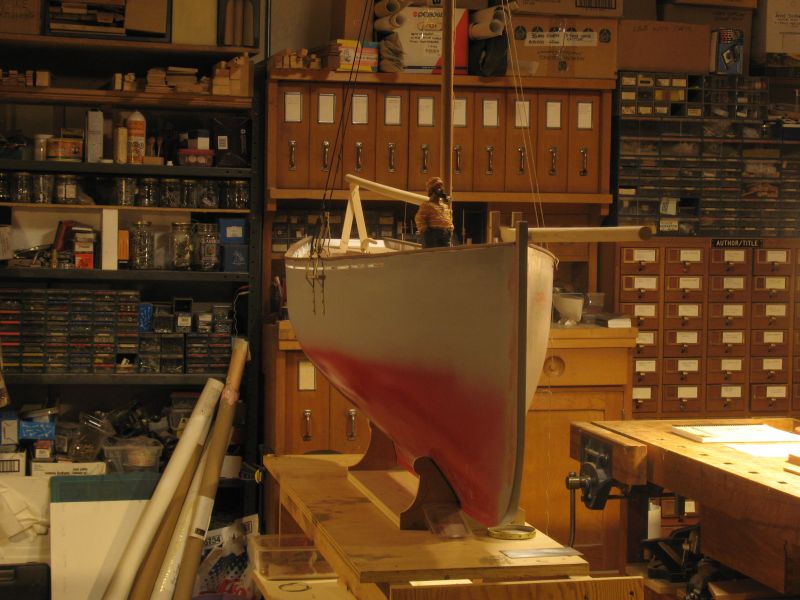
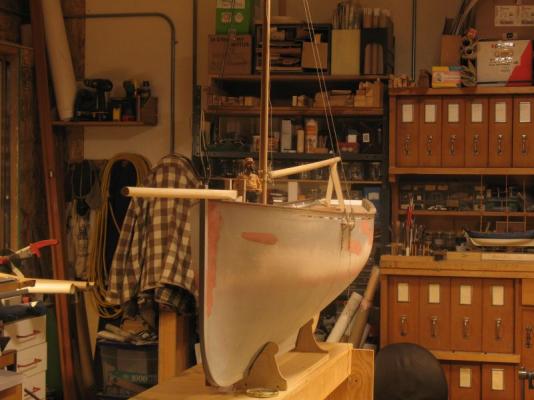
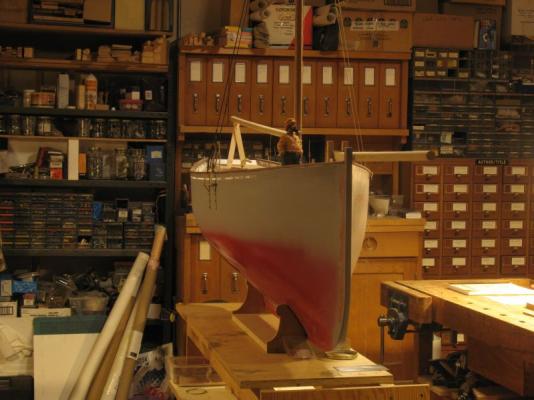
 Since it is my 65th birthday tomorrow I felt that the shop should be clean for my new life of retirement ....LOL I cannot imagine not being busy doing a dozen or more things every day. Anyway I moved the boat to a new position and did a major clean up organized all the strip wood I have cut over the past year. And spent the evening working on the port side cap rail. refining the profile and getting it ready to be glued down. It was great to get a bit of time this evening to work on the boat again, it is snowing again! Michael
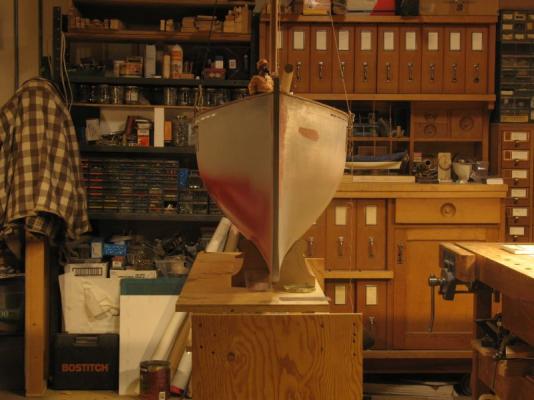


-
Hi Borge Just came to your build. What a beautiful sailboat, all of the brightwork and the varnished hull really make her stand out. I hope your elbow heals quickly. Michael
-
Hello Bill, I have just read the whole build that you have re-posted I missed it on MSW-1. Your tenacity regarding the working and reworking of details as your research progressed Is beyond what many of us would consider doing. It was also great to see the progress in your skills at carving which support my first impressions about your care and dedication to a work of research and beauty. Thank you for taking to time to rebuild your albeit condensed progress report of your model build. Michael
-
Sarah a nice finish on this fast build. Michael
-
Nico tell me more about your nickle plating. How do you accomplish this. Chemicals, electricity, etc. michael
-
Matt.........mind boggling I have run out of words. Michael PS love the little boat!
-
Tools That Are a Waste.
michael mott replied to fish's topic in Modeling tools and Workshop Equipment
Any tool that is purchased and not used! The whole Metric/Imperial debate is funny. The martians were laughing all the way to Jupiter eating their fig newtons about that crash. A bigger issue than Imperial /Metric is Chinese language versus English or Malian or Hindi or Turkish or Russian. Were all different it's a big world and it would be so boring if we all used the same language and measuring systems, there would be nothing to debate. All this is better than pointing sticks at each other though. Michael -
Chain pumps
michael mott replied to dvm27's topic in Discussion for a Ship's Deck Furniture, Guns, boats and other Fittings
I think we have forgotten just how skilled many craftsmen and skilled artisans were in the past. I believe that their skill was predicated on a greater amount of time honing their skills and being taught the value of doing a job with the greatest care and attention, and not necessarily the fastest cheapest way. 250 years ago some extremely fine optical and scientific instruments were made, not to mention clocks and watches, so I am not surprised by the quality of work done then. I am more surprised by that same quality today. We seem to be living in an instant world that is in a constant hurry to finish everything at the lowest cost. What I find so refreshing about this hobby is that this hurry is for the most part ignored. Michael -
Blue skippy I am guessing but your list looks like it comes from http://www.cornwallmodelboats.co.uk/acatalog/timber.html I would suggest an internet search that will give you the alternate names for these wood names and then information on their properties. I suggest this as one who lives in an area that is lacking in both supply and types of woods. Walnut is a fairly porous wood with an open grain structure, it sounds like you are looking for a more dense wood, of those you have listed the maple and cherry are both much finer grained (more dense) the Maple being mostly lighter in colour (can be quite variegated in colour depending on the minerals in the soil where it grows) but holds an edge very well, and the Cherry is a more reddish brown wood that also holds an edge well one of the things I have found with wood names and this seems to be a consistent issue is that different importers and suppliers of various hobbies and trades call a particular wood by a variety of names. Some of the names you list I had not heard of before, probably due to my being new to the hobby of model shipbuilding myself. I am sure that some of the model builders here will have more experience with the woods you have listed than I have.. I hope I have not confused you too much with my ramblings. Michael
-
Very Nice Jay. Yes Knex and Lego are great ways to build stuff. I am curious about the twisting at the rope forming end. Why does it need to be twisted. My own experience has the rope twist as a natural effect of the three lengths twisting up. I am not suggesting anything just curious about the method. Michael
-
Wow Remco very nice joinery indeed.I like the flourish on the cross beam, lovely touch. Michael
-
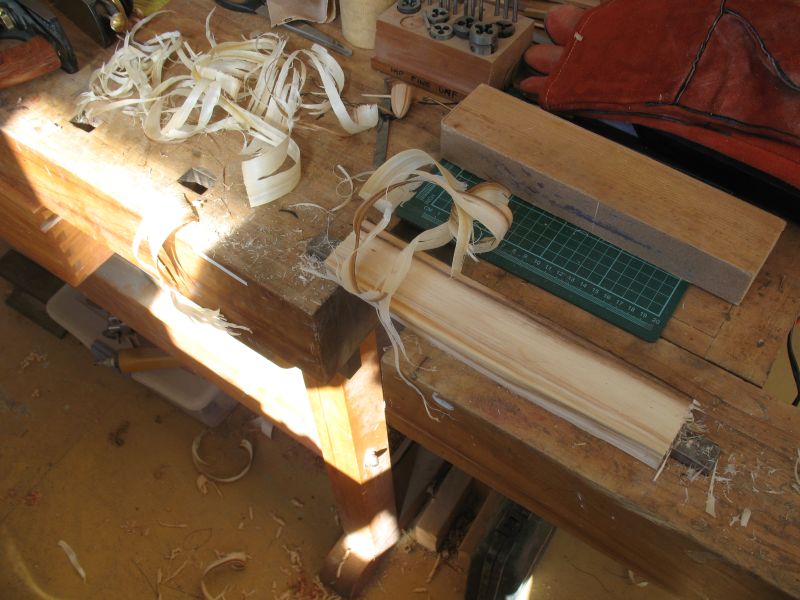
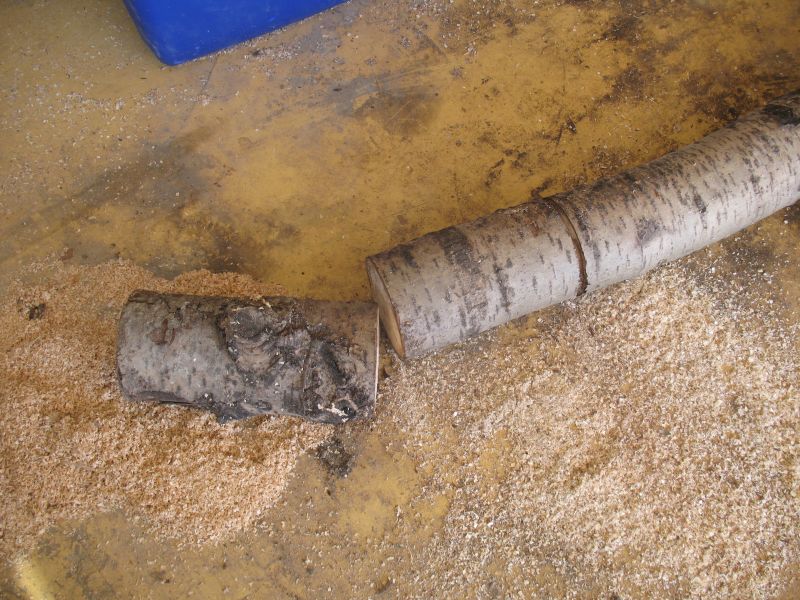
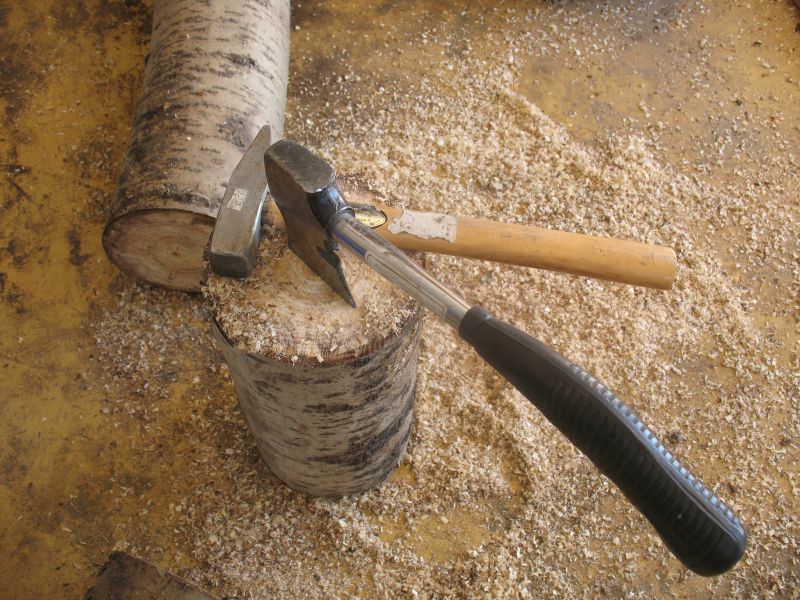
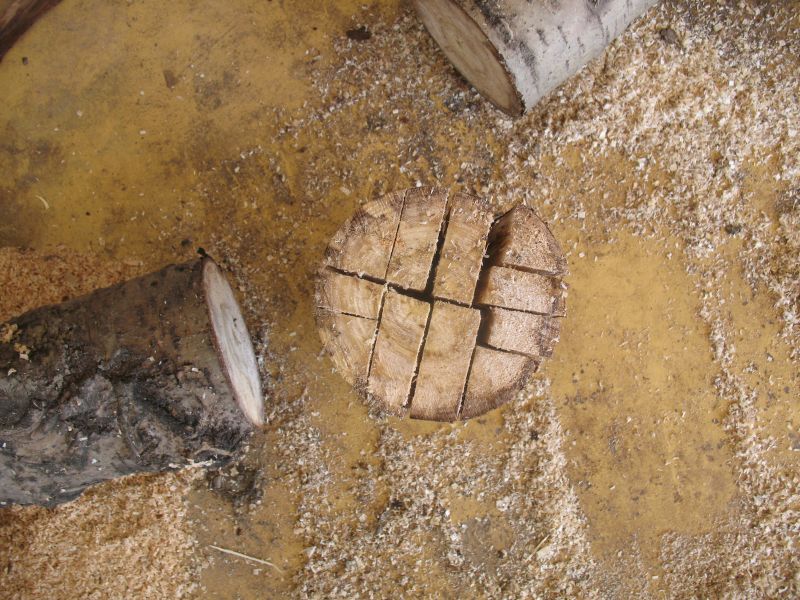
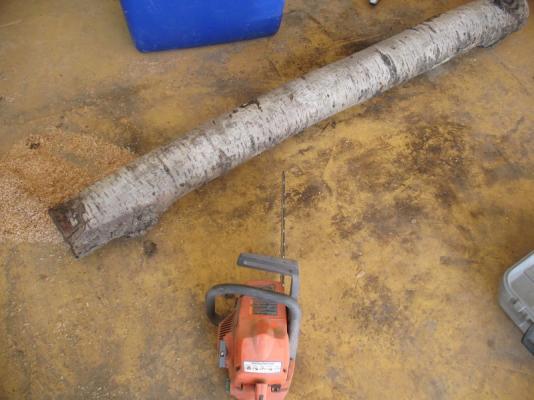
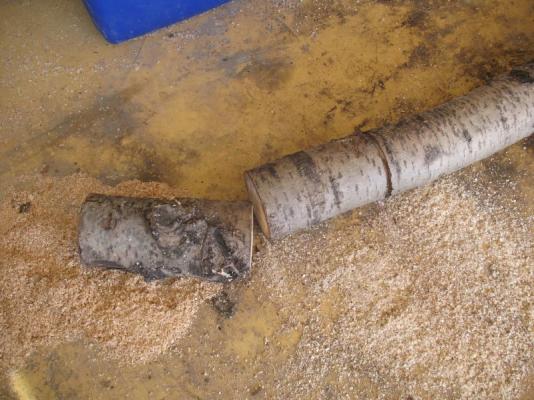
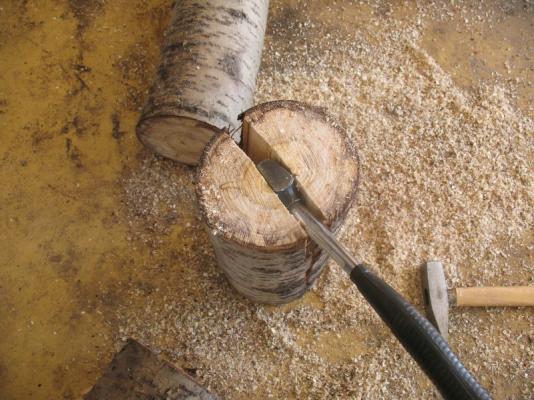
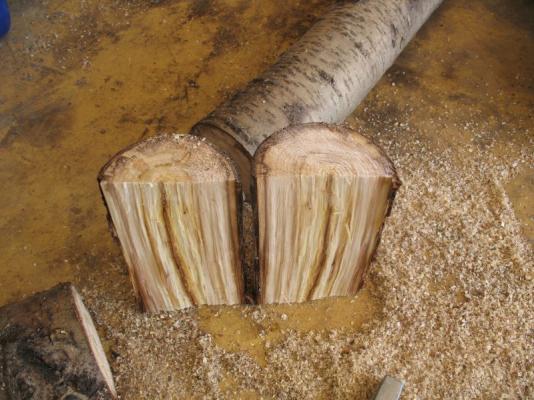
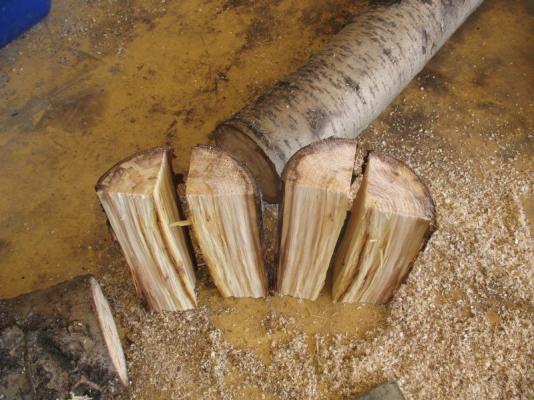
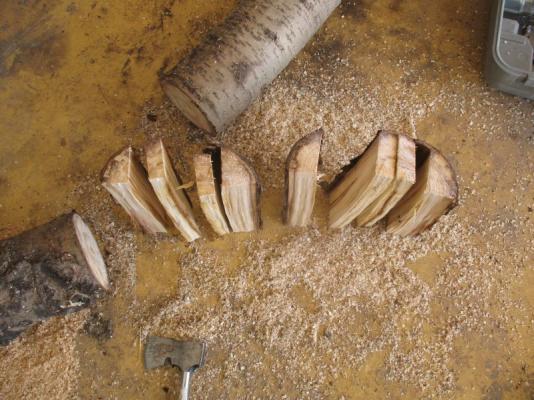
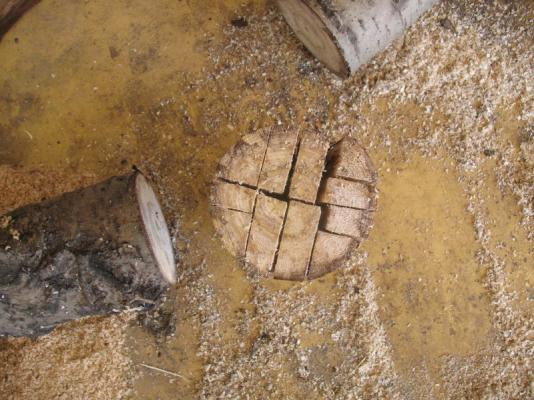
Rob perhaps if you cut them into shorter lengths then you could first of all split them in half with and ax and a small heavy hammer. Take say an 16 inch pieces which is approx 600 mm place the axe squarely across the centre of the log and hit the back of the axe with the hammer this will split the log lengthwise into two halves, take each of the halves and split them up into quarters. you can then set your axe to a position that is about 30mm parallel to one of the first split faces and repeat the splitting. I have done this on quite a few occasions, and the advantage is that the wood slits along the grain which relieves some of the inherent stresses the wood dries quite well this way. Here is a series of pictures that i just took perhaps 15 minutes worth of time to cut a 200mm log of wet aspen sorry I did not have any other on hand. 1 chainsawed the knot off the end 2 chainsawed about 14 inches of straight grain 3 Set axe across centre. 4use hammer to split wood 5 two halves ready to be quartered 6 set axe to approx 30mm and split again 7 and again 8 veiw showing the quarter cutting no sawdust yet other than the chainsaw 9 Piece clamped ready to smooth out a little prior to sticking few wet shavings the piece is ready to dry. Ron think about how long you really need the wood to be, most of us cut the wood up into shorter lengths anyway and a 12 -15 inch 300 to 400 mm length is easy to split with an axe. I hope this helps. good luck with the wood. Michael


-
Gaetan, thank you for the clarification. Michael
-
Gaetan, Thank you for your notes on soldering, If I understand correctly you are using lead free soft solder, or are you describing hard solder? Your photograph which includes the paste flux leads me to think you are using soft solder. Michael
-
Another Rope Walk
michael mott replied to michael mott's topic in Rope Making/Ropewalks's Rope Materials and parts resources
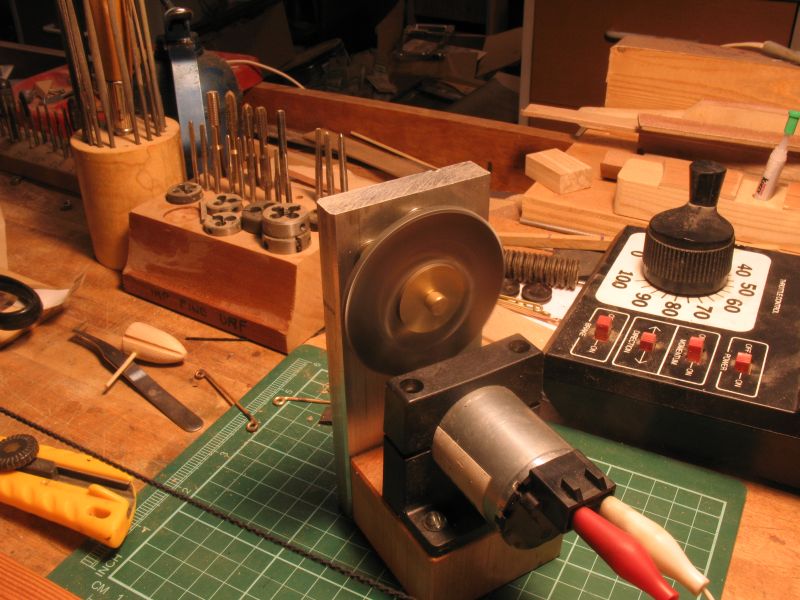
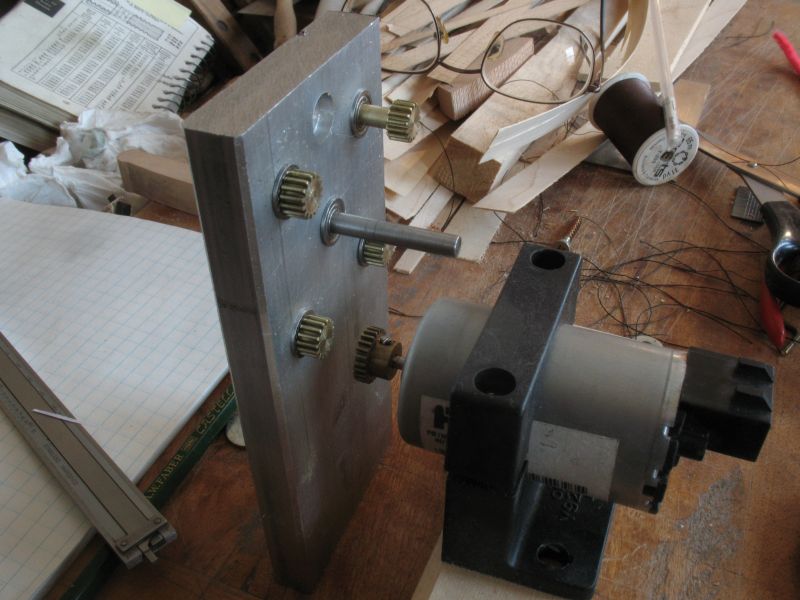
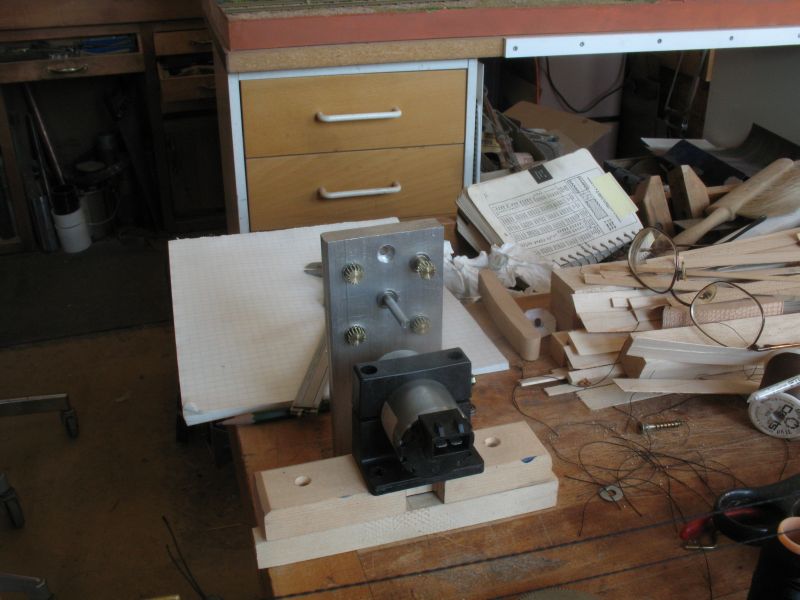
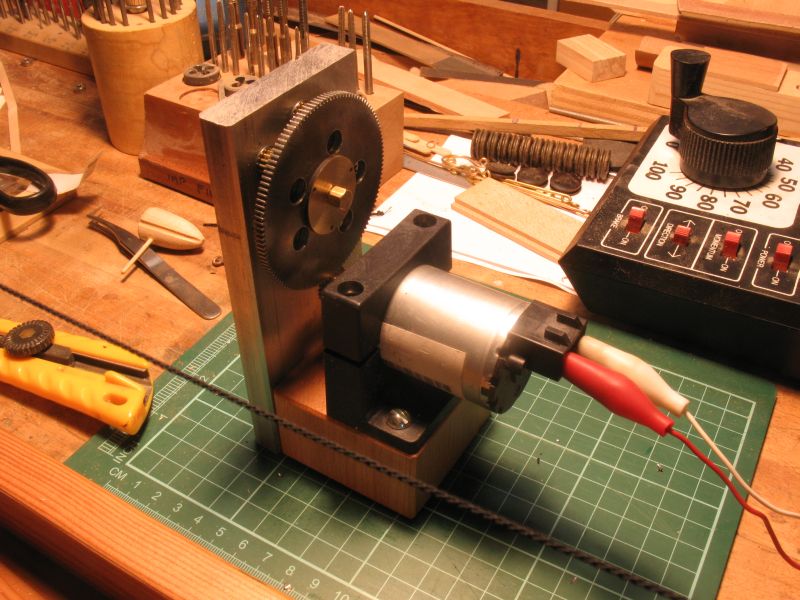
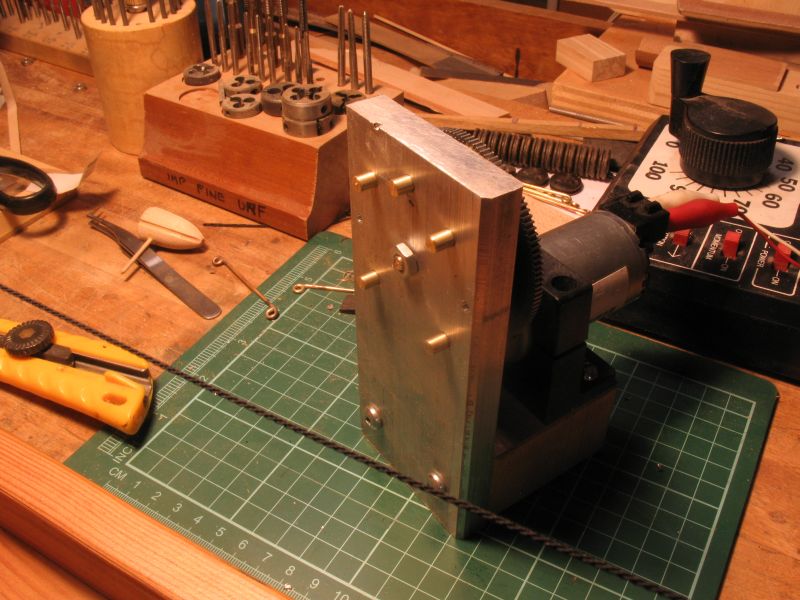
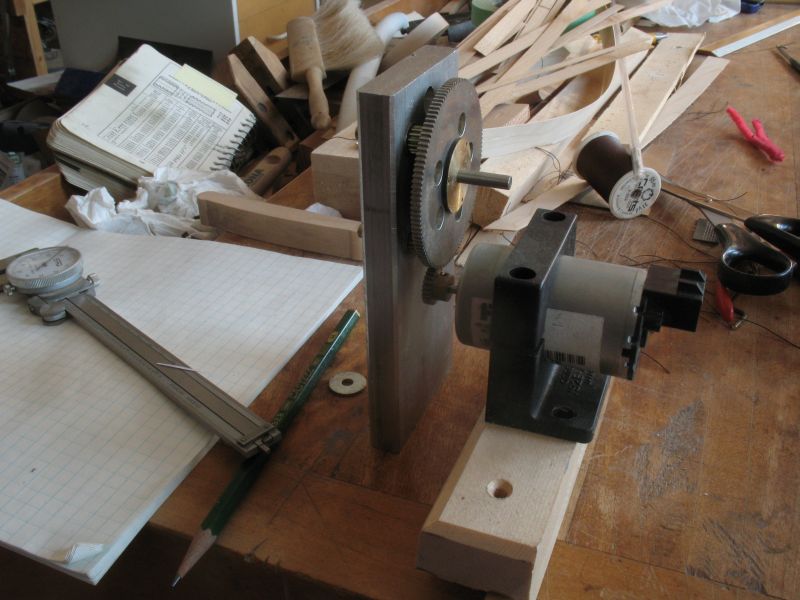
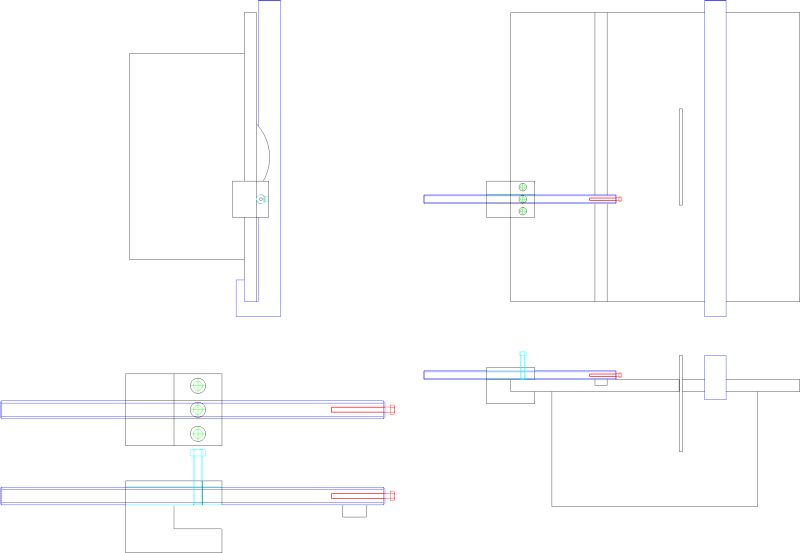
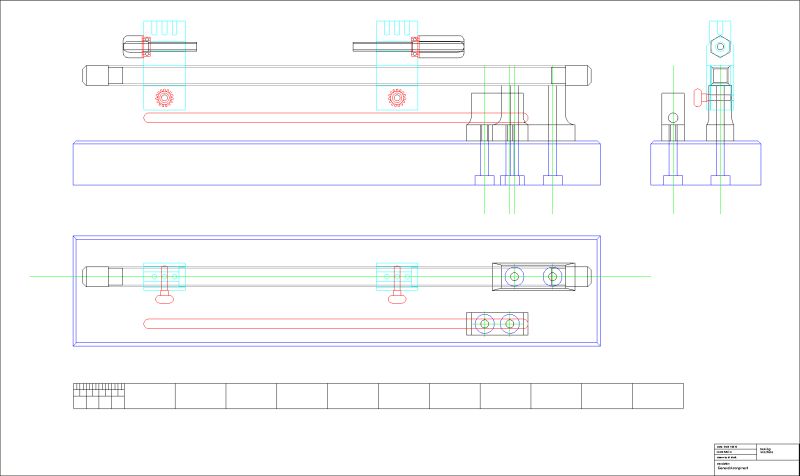
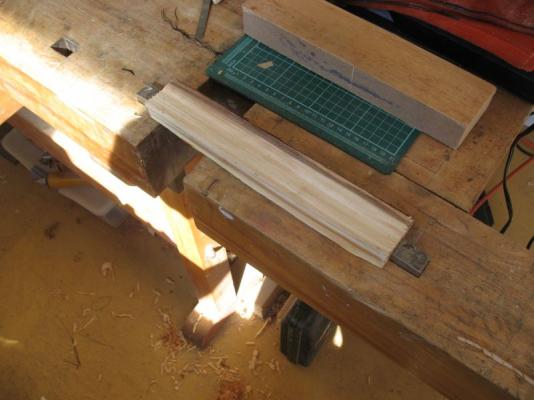
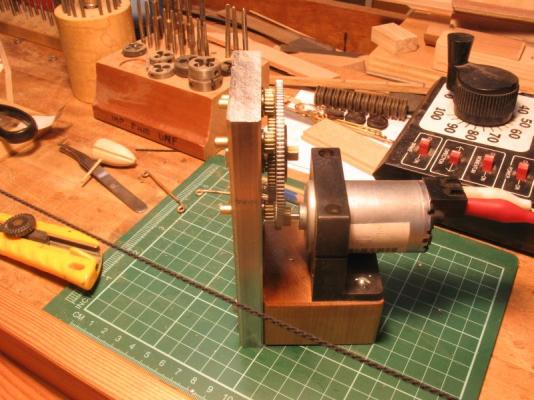
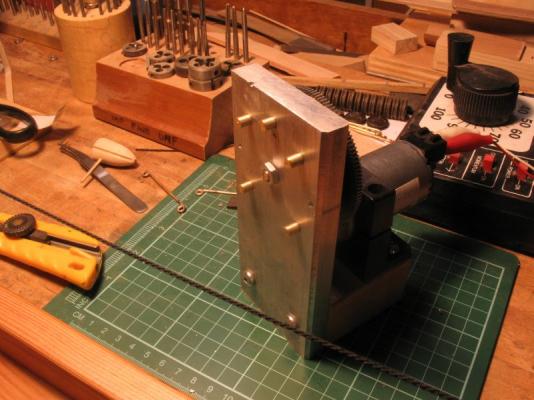
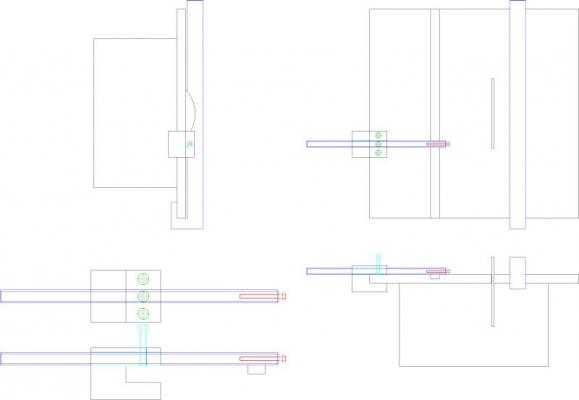
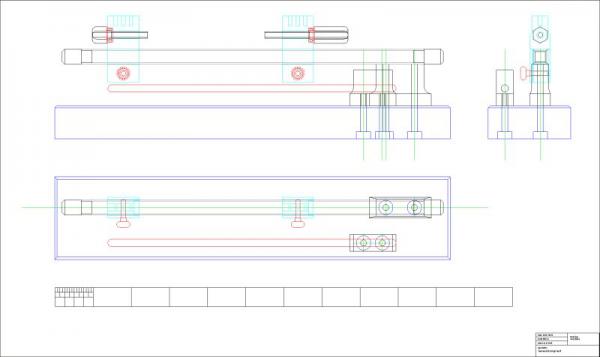
Making the shrouds requires quite a bit of whirl turning and so I made a decision to build an improved head end for the rope walk, which basically means building a new walk. I first raided the scrap box es for suitable items. a slab of 1/2 inch thick aluminum that was 5 3/8 by 2 2/8 inches. fine tooth gear that was 2 1/2 inches in diameter, another gear that was 1 5/8 inches and a length of the pinion stock that was long enough to make the whirls from. A small surplus motor from Princess Auto (a surplus and tool store) and a 1/2 inch diameter gear that fit on the 1/8th shaft of the motor. 6 3/8 x 3/16 shoulder ball races. The first task was to machine the pinion stock into the whirls, I made 5 so that I could set them all up in the headstock and not have to reconfigure them switching from 3 to 4 whirls. By setting the 4in a square and the 5th at the top it is easy to set up the 3 or 4 hooks. The 2 1/2 inch gear and the 1 5/8ths gears were sandwiched to form a way to keep the whirls from falling out. figuring the height of the motor relative to the big gear. A scrap of Maple from a pallet formed the block for the motor and after sanding it was bolted to the aluminum slab The front side showing the ends of the whirls, these will get a small cross hole drilled to accept the hooks made from bent 1/32nd brass rod I will also use a double wire guide level with the top block which will keep it moving more smoothly when forming the rope. The first top was made from wood the new one will be Nylon or some Delrin which is a more slippery plastic Finally a spot of oil on the gears and hooked up the motor to the speed controller (model train Track II ) and a test whirl.... this will ease the burden on my wrists. I will do a drawing when it is all finalized. Michael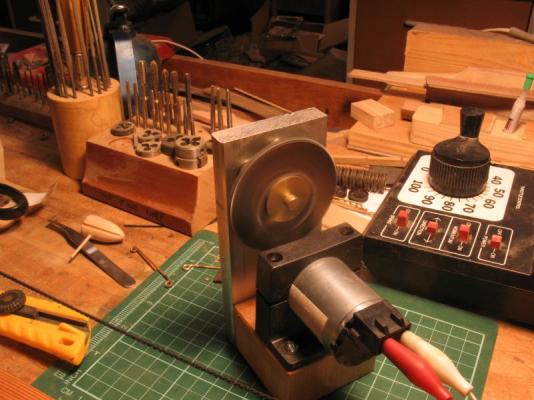


-
micro table saw stop
michael mott replied to michael mott's topic in Modeling tools and Workshop Equipment
Mark, thanks I am happy that it will work for you. Michael -
Guy, earlier I said this I think this will be enough a few more servings will let me know if it is in fact enough. Michael
-
From Marks Idea I have done this drawing of a micro adjustable stop. The main body can be made from a small block of 2x4 and the adjustable bar can be metal or wood dowel The threaded screw in the end is a 4x40 but can virtually be any small machine screw, in fact the smaller it is the finer the adjustment. The main bar has a flat cut or filed on one side to prevent it rotating as it is clamped The other two screws clamp the block to the table. Michael micro adjustment.pdf
-
Mark I have done a drawing that I will post over in tolls and equipment. I think you have a neat idea. Michael
-
Here is a drawing with an inch scale for proportions, of course these can be modified to suit anyones purpose. Michael serving machine_1.pdf
-
Druxey, the wood wedge was Dafi's Idea not mine, I used his method of securing the rope. So I cannot take the credit. I am putting together a drawing so that anyone can build one similar. michael
-
Hello Mark, I did add a little more about it in tools http://modelshipworld.com/index.php?/topic/1410-another-serving-machine-and-universal-clamp-for-seizing/ Not a lot more than her but a little more. I could do an as built drawing and post it if you think it would be of benefit. It is one of the things that i enjoy so much about this forum , all the wonderful sharing of Ideas that happens almost daily. I was in town today and picked up a few more different threads to try. The Black Gutermann upholstery thread look very promising, it is polyester so a little less fuzzy. Michael
-
Hello Walter it is great to see that you are progressing with this interesting build. Michael
-
Well it has been a Good Friday. Sherry, thanks for your comment on the new shroud test. Russ, Thanks, I will need to make enough lanyard now for all four sets of deadeyes, it will be simple 3 stand rope which will be much mor flexible than the 4 rope that I used for the new test. Carl, The jury is still out on the light verses dark rope for the lanyards, I have seen it both ways on the photos of the cutters and smacks. John, thanks for the info regarding the seizings. Mark thanks for your thoughts. I really do like making the small tools and devices. I am interested in your ideas about the adjustable stop. The snow is finally melting here still a fair bit to go yet before the lake thaws out there were still ice fishermen out there this afternoon. Michael
-
Hi Mario, I really enjoyed this build the first time round, I am happy that you are reposting it. Michael