
HOLIDAY DONATION DRIVE - SUPPORT MSW - DO YOUR PART TO KEEP THIS GREAT FORUM GOING! (Only 13 donations so far - C'mon guys!)
×


michael mott
-
Posts
5,195 -
Joined
-
Last visited
Content Type
Profiles
Forums
Gallery
Events
Everything posted by michael mott
-
 Lovely! back in 1972 I visited Bibury with my Mum"s sister and we had tea and scones in a little tea shop very close to this historic row, it was a memorable visit. Michael
 -
A small Crewe workhorse called Pet
michael mott replied to michael mott's topic in Non-ship/categorised builds
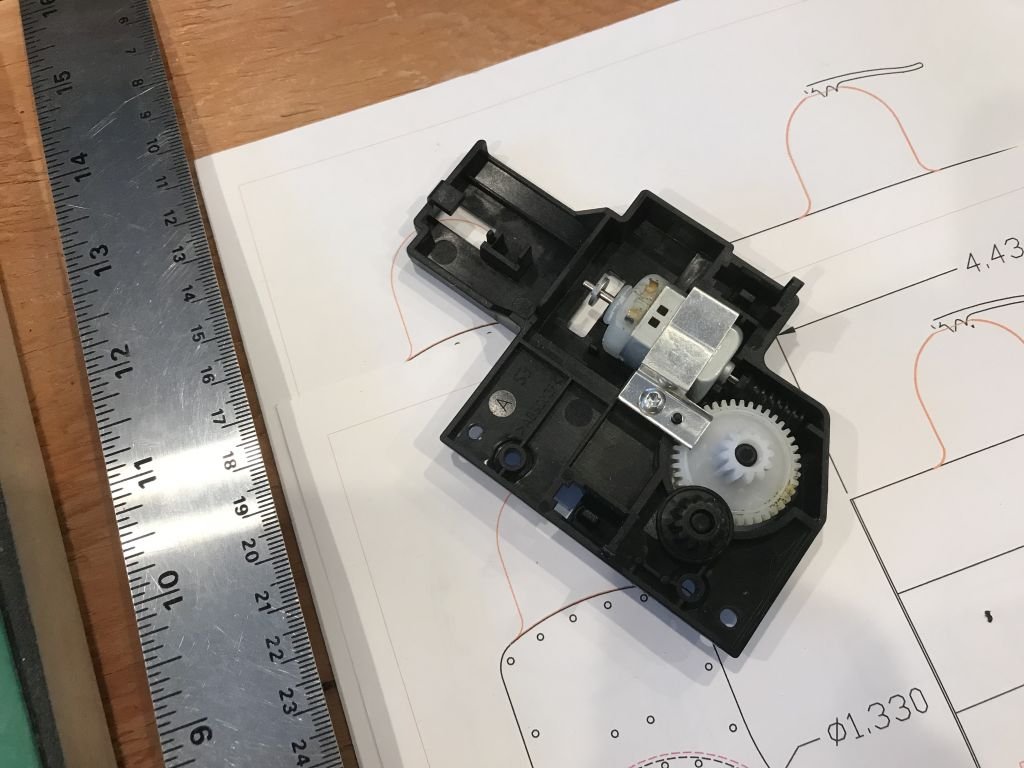
Denis Yes there are lots of surprises inside "dead " electronics I have one more printer that has ceased to function I wanted to get it repaired because the message was that the print head is missing or damaged. it is a 7612 HP and was a great printer that could print 13x19 sheets and scanned 11x17 It originally cost me $149 dollars. the cost estimates were $200= for the print head and more for labour amounting to over $400. I ended up getting a new printer for $200 and then it was another $200 for ink so a new glass worktop and more odds and ends for the electric motor drawer and all sorts of rollers and gears are sitting there in the form of the "dead 7612" I just wish I knew more about electronics. Michael -
A small Crewe workhorse called Pet
michael mott replied to michael mott's topic in Non-ship/categorised builds
Hello Tom, It is because I am a pack rat and was in the commercial model building business for many years, one thing that this project did do was force me into reorganizing my strip styrene collection which goes back to the late 70 and early 80's It has mostly been kept in closed cabinets in order to avoid the UV but some has become a little brittle. ine of the forum members had built a good storage using some clear poly packaging tubes and I purchased some of the same (much more expensive up here in Canada but still a good purchase). When I was working building the architectural models I purchased the various sizes from Evergreen in their commercial packages of 100 needles to say I still have lots of the small stuff. The sheet stock is stored separately. these tubes have really helped to keep things better accessible. Michael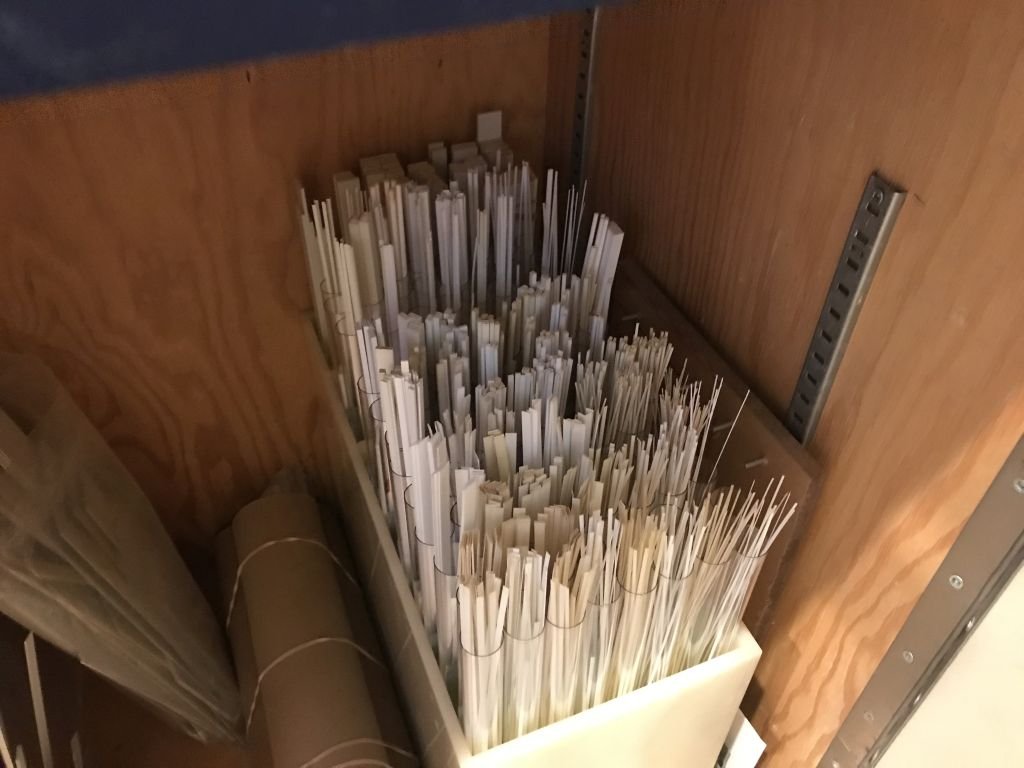
-
A small Crewe workhorse called Pet
michael mott replied to michael mott's topic in Non-ship/categorised builds
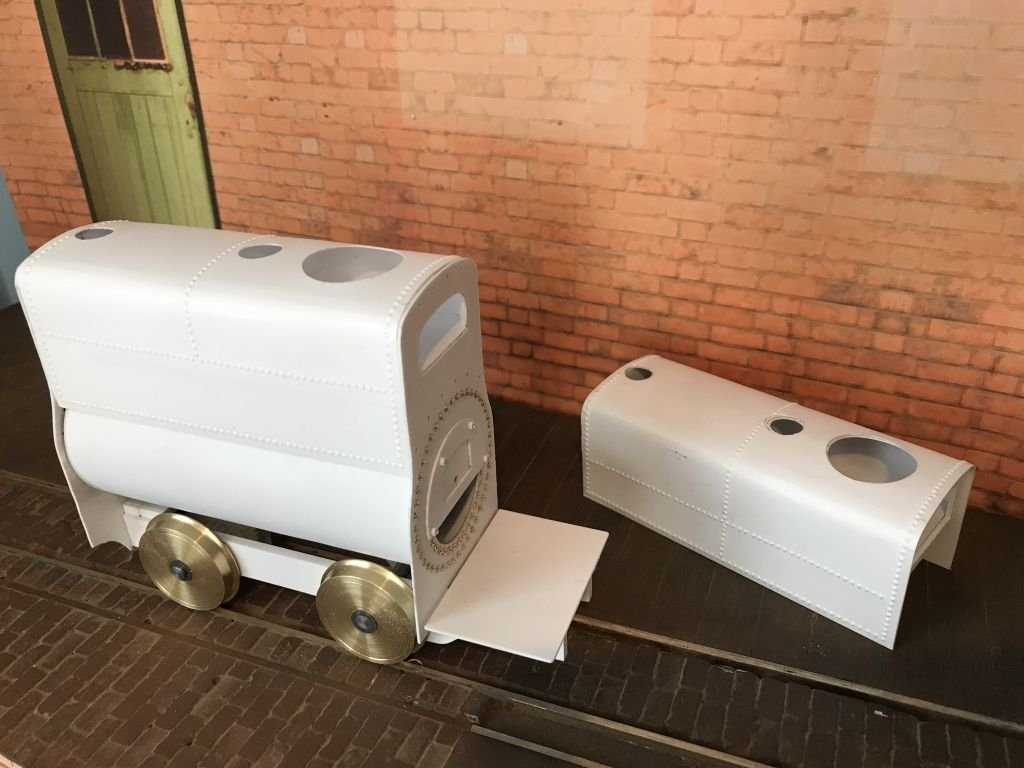
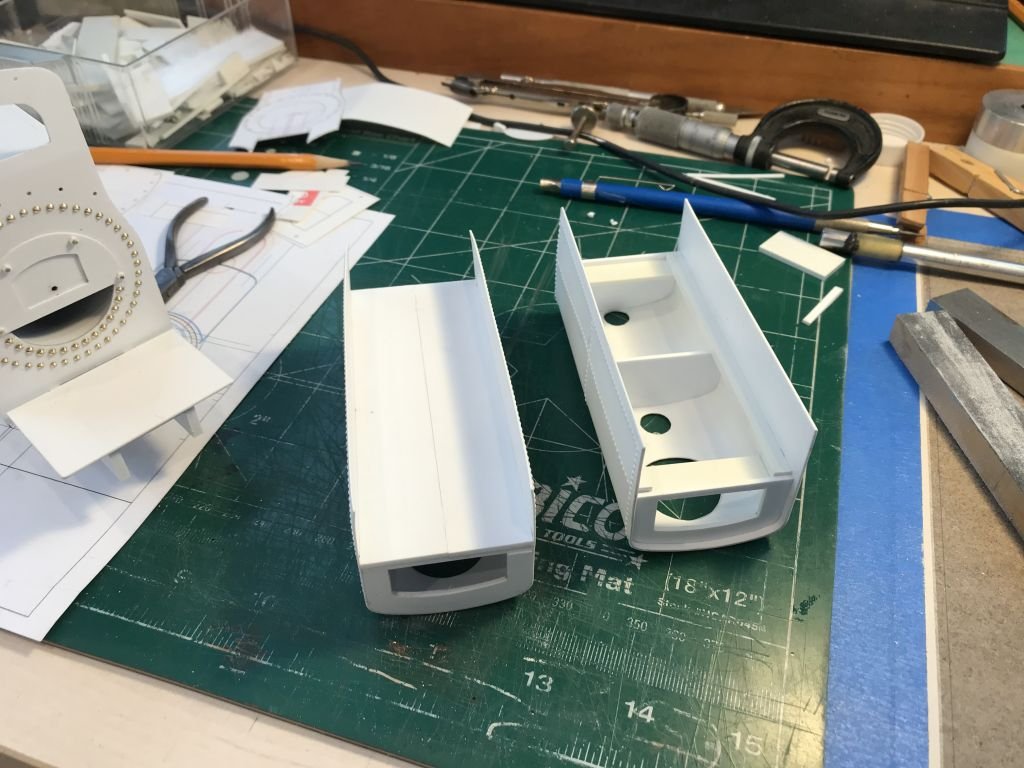
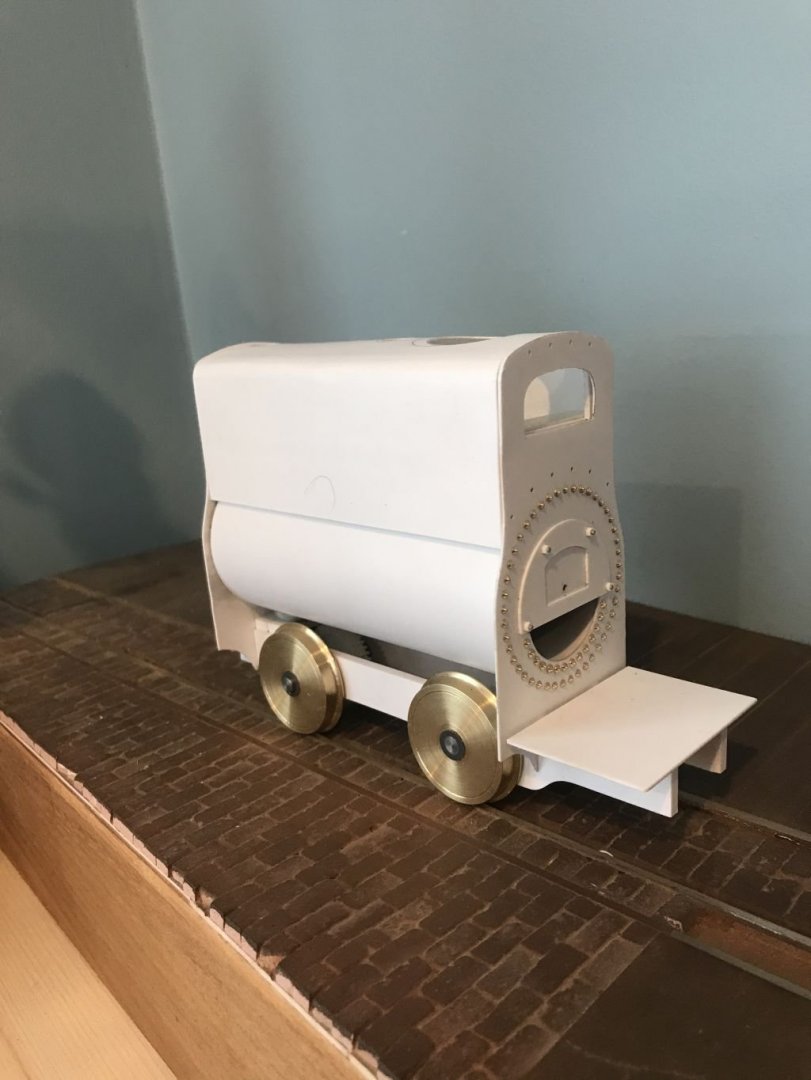
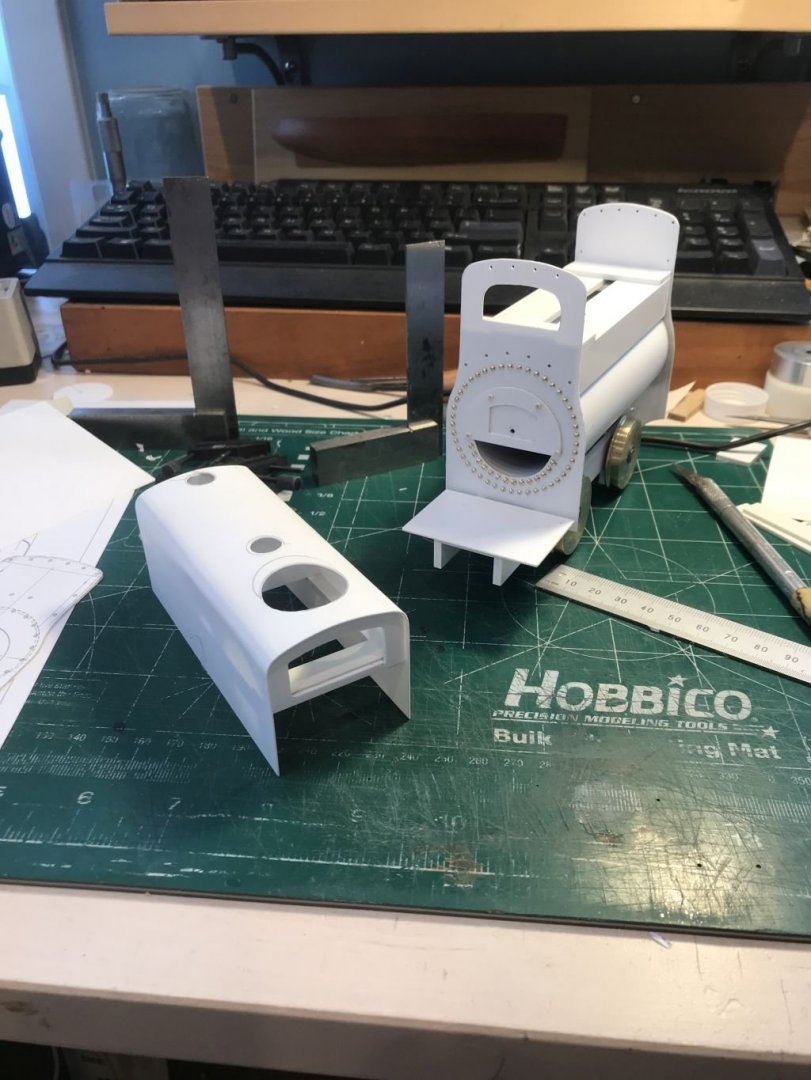
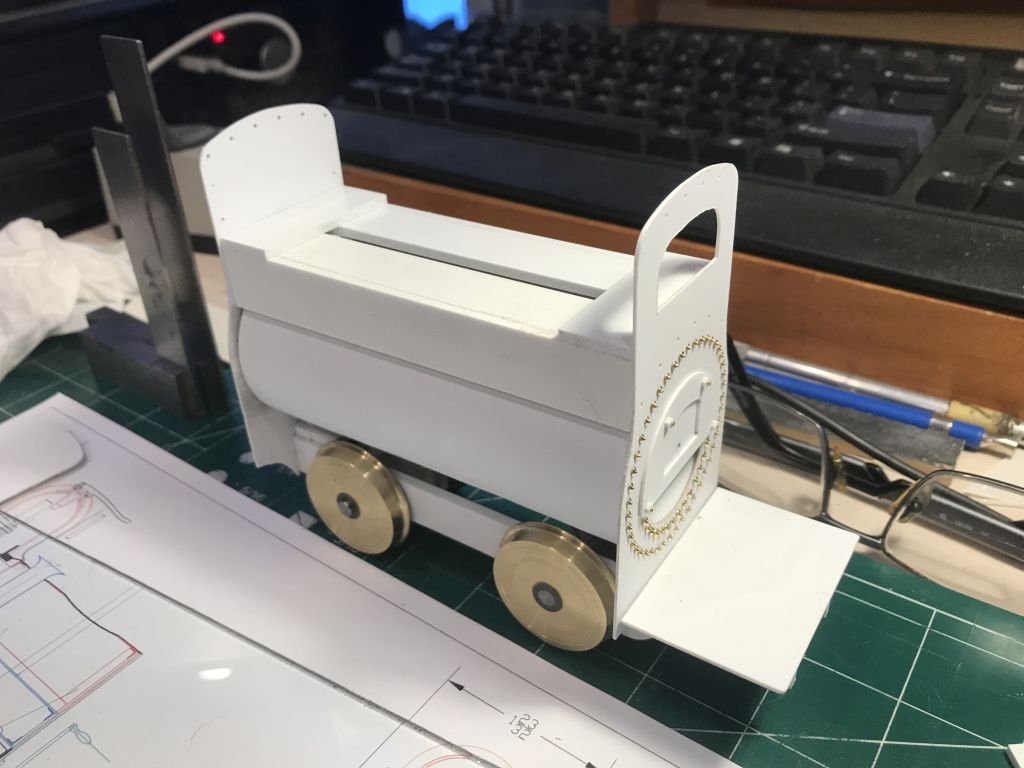
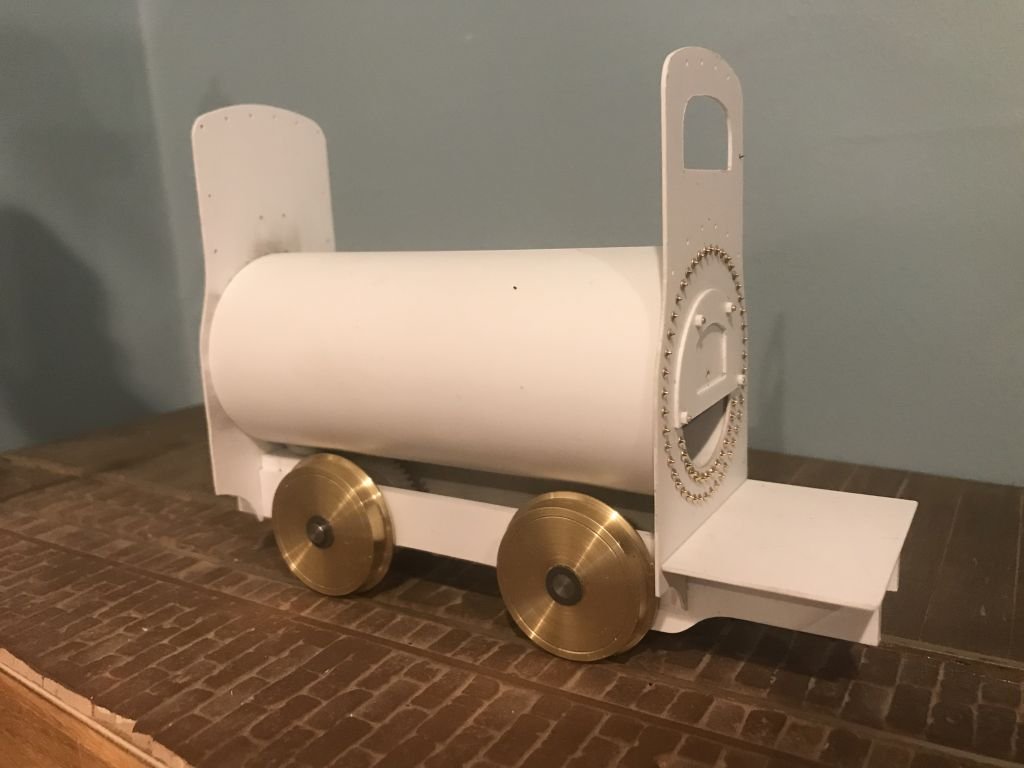
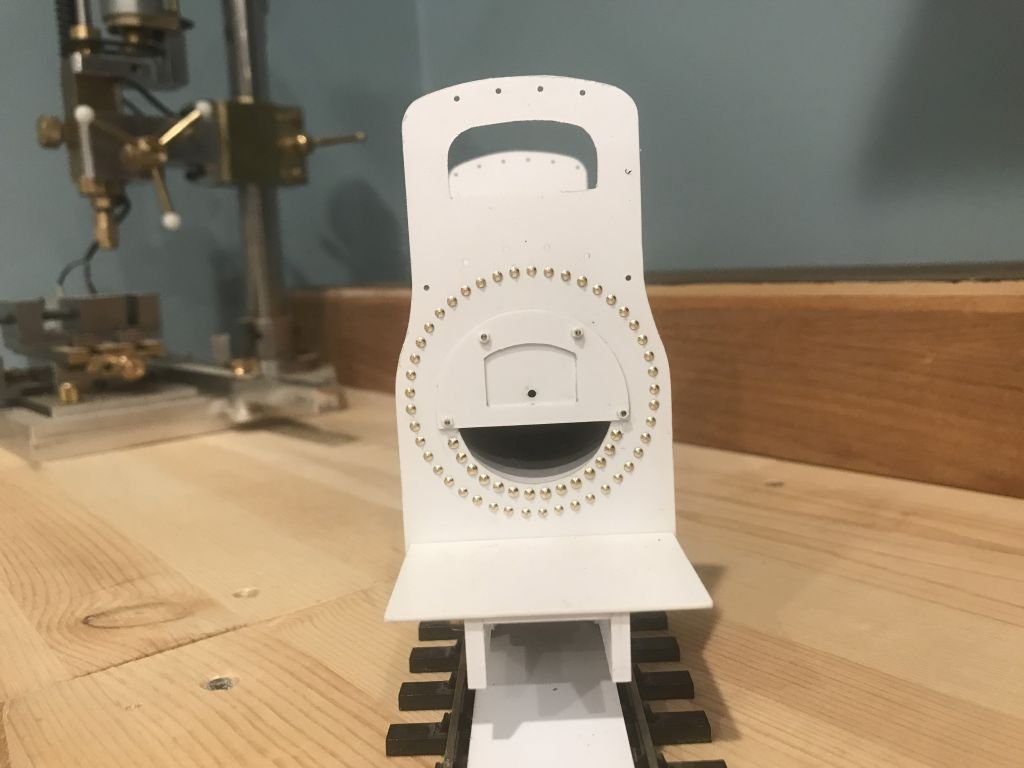
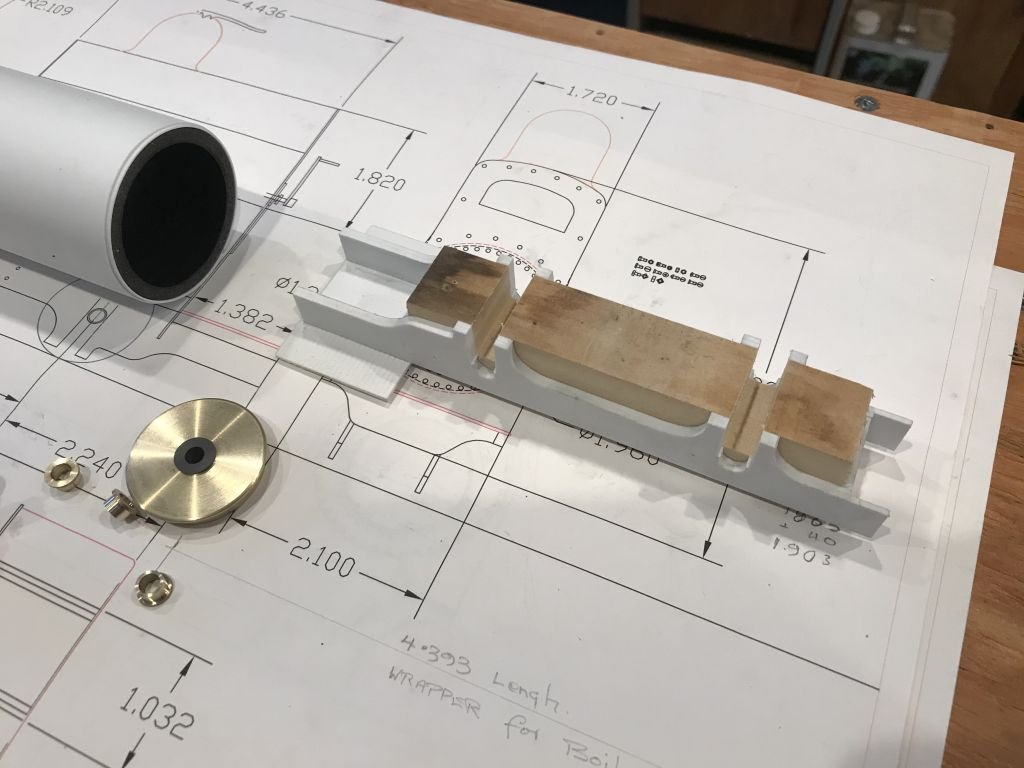
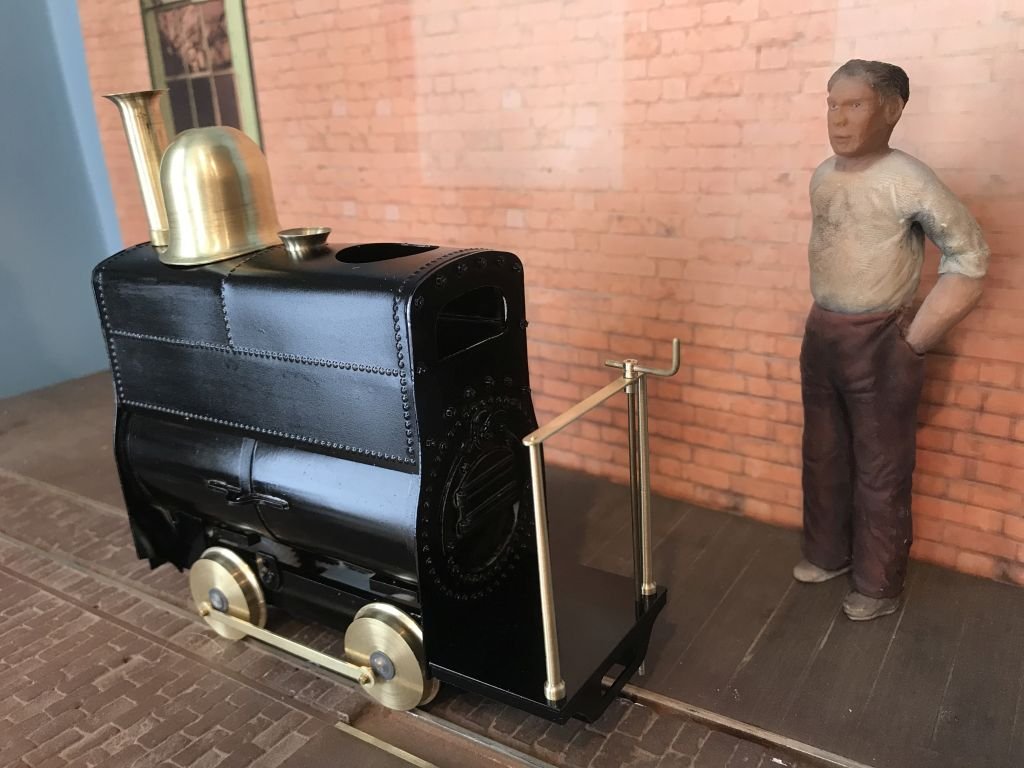
Part 2 The end plates contain a large number of conical rivets these were made from some 1/8th brass rod. The central part of the boiler is a piece of 1 1/2 inch ABS pipe covered with some .020" styrene. The top part of the loco contains the water tank and the coal hopper. The top of the boiler tube was reinforced with evergreen strips. The top elements have been made from sheet that was first prepared with the rivet forming tool. The first attempt at making the top part ended up not being practical for the change from track power to battery power. This meant making a new top with a different configuration. The second top was fabricated differently. Here you can see the difference side by side. At this point I also discovered that the wheels were the wrong size, this was caused by a print error and because I had accidentally resized the page with the wheels. Again one of those steps back. they were removed and reduced. To be Continued. Michael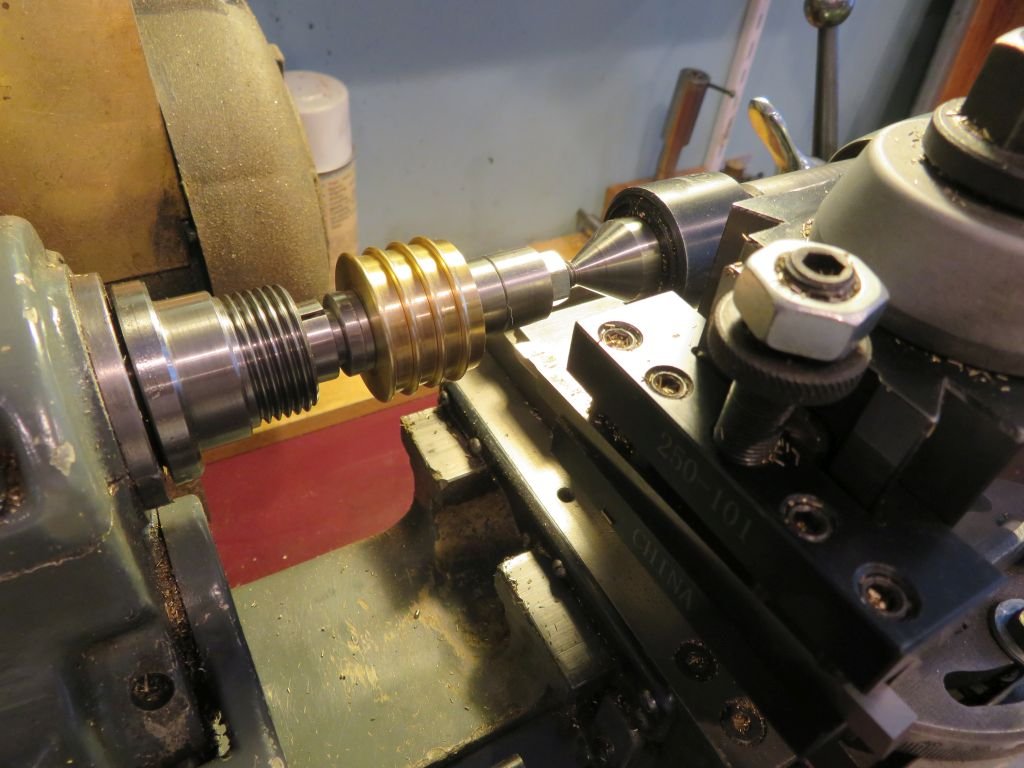
-
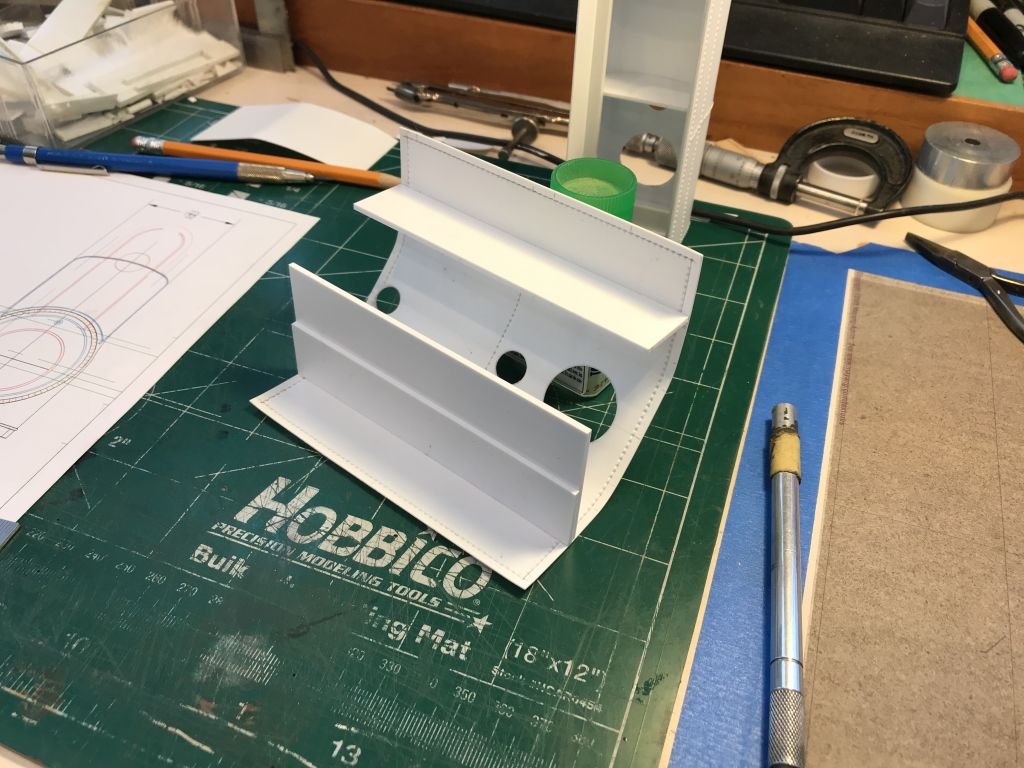
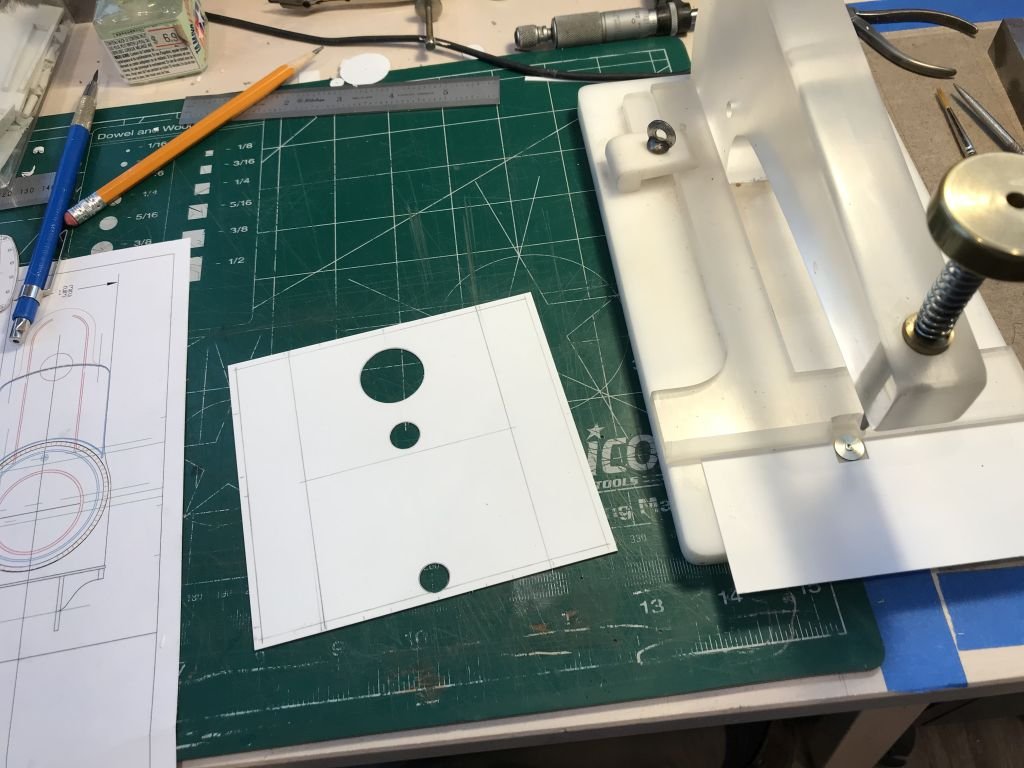
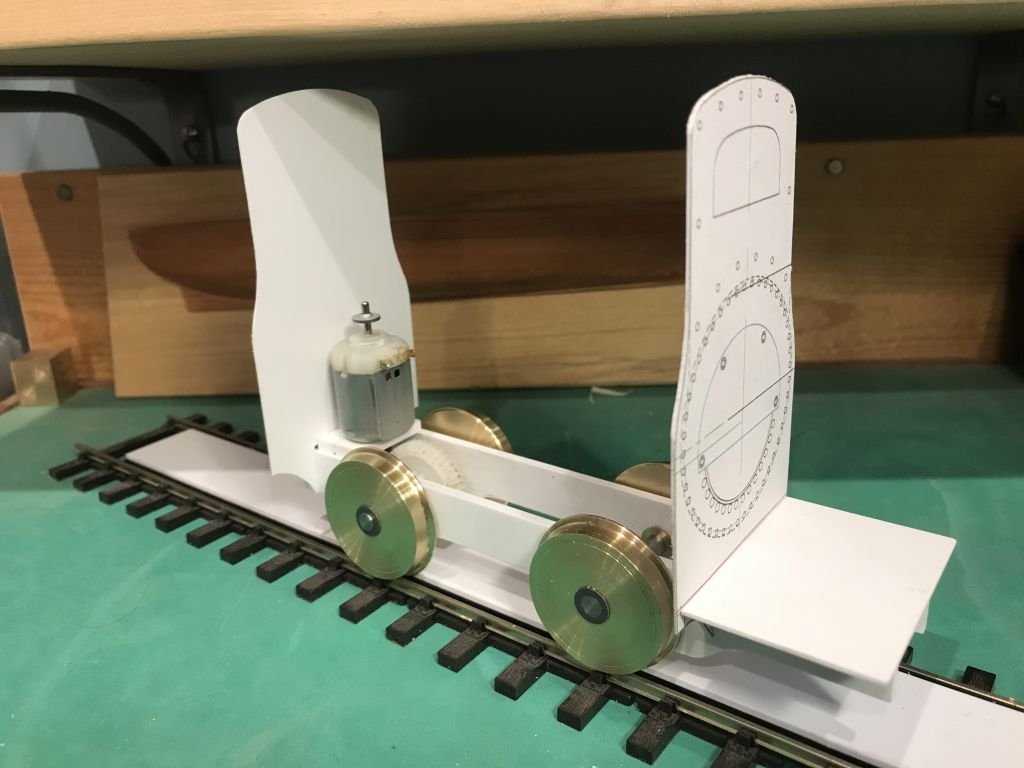
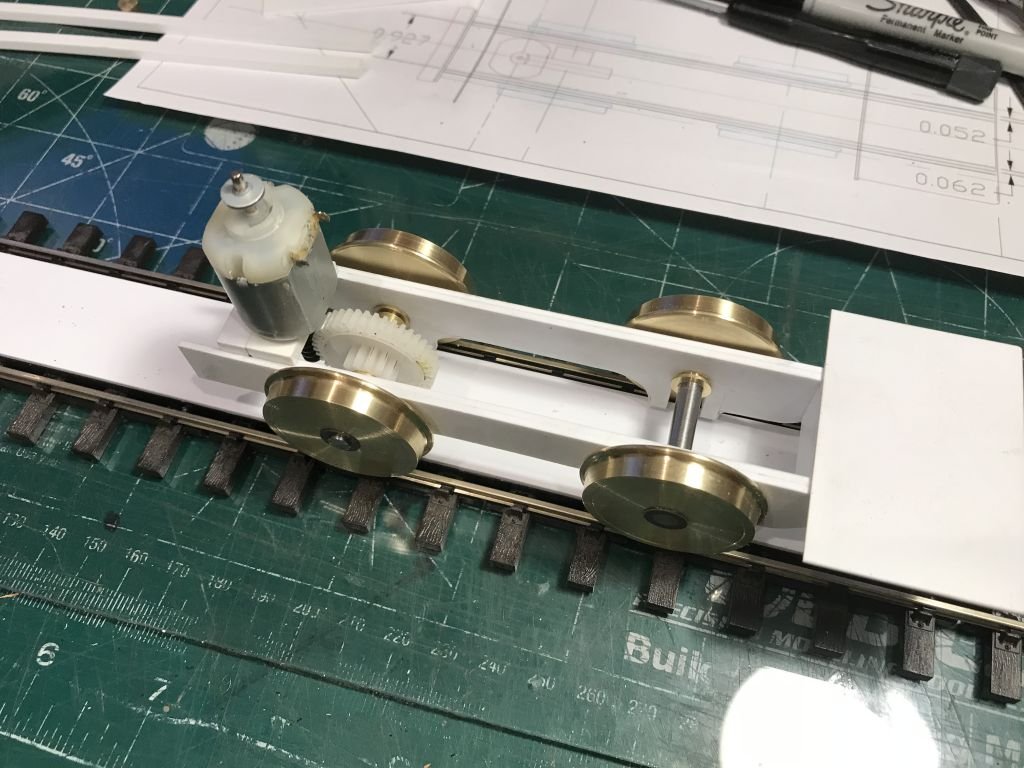
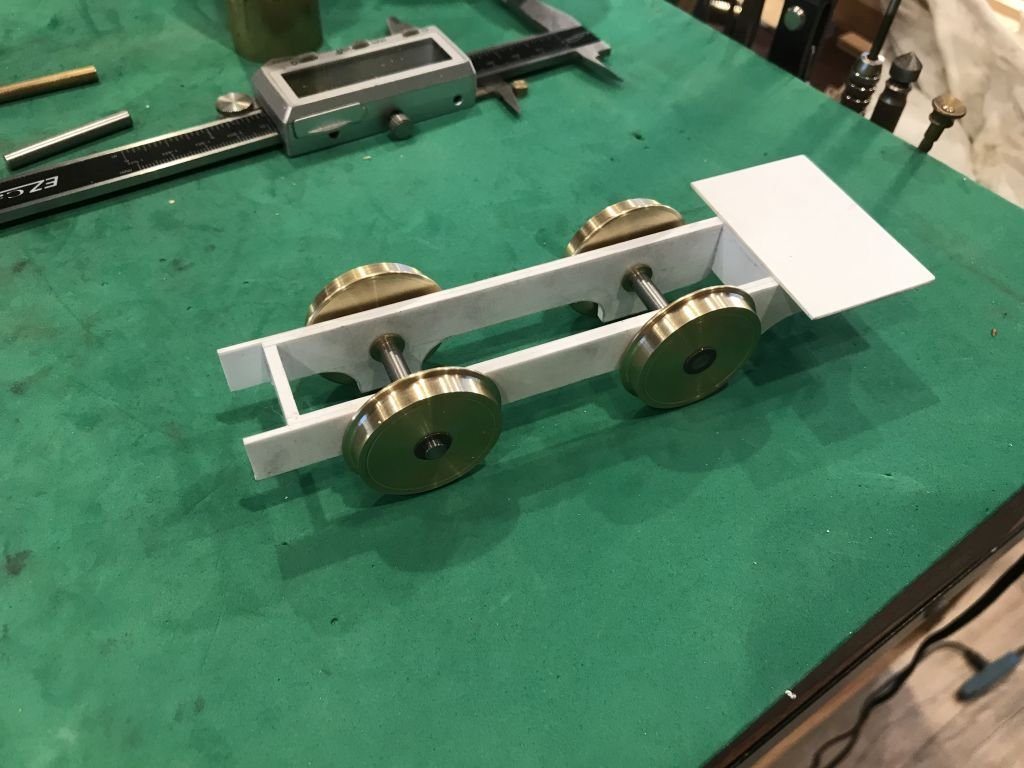
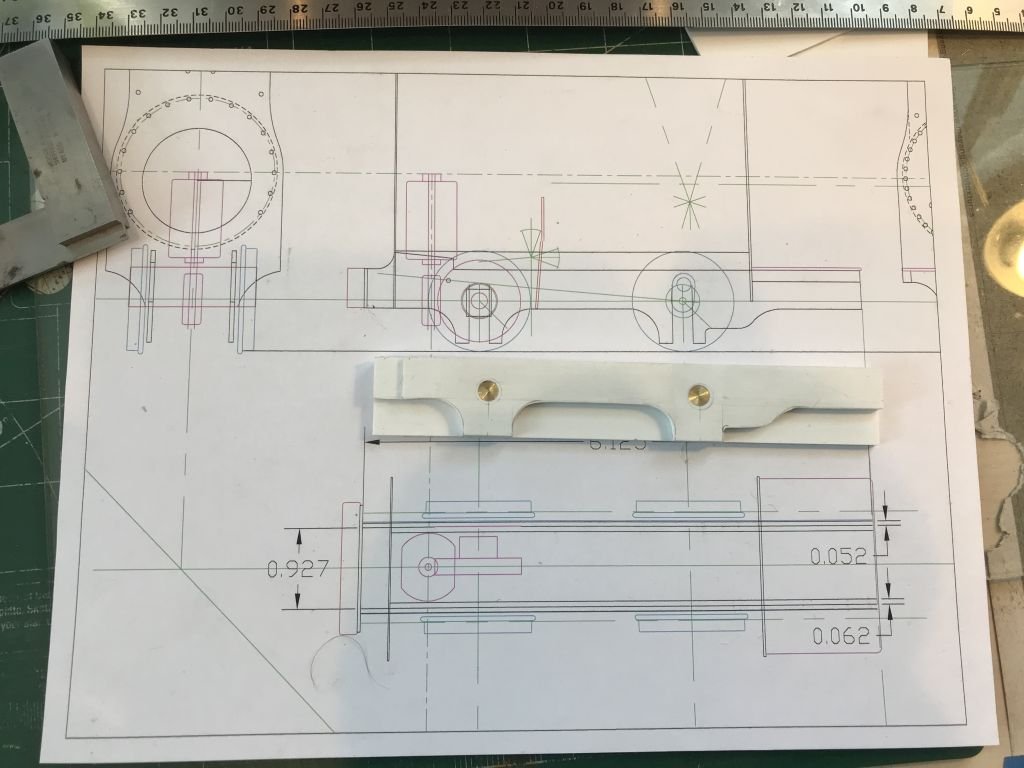
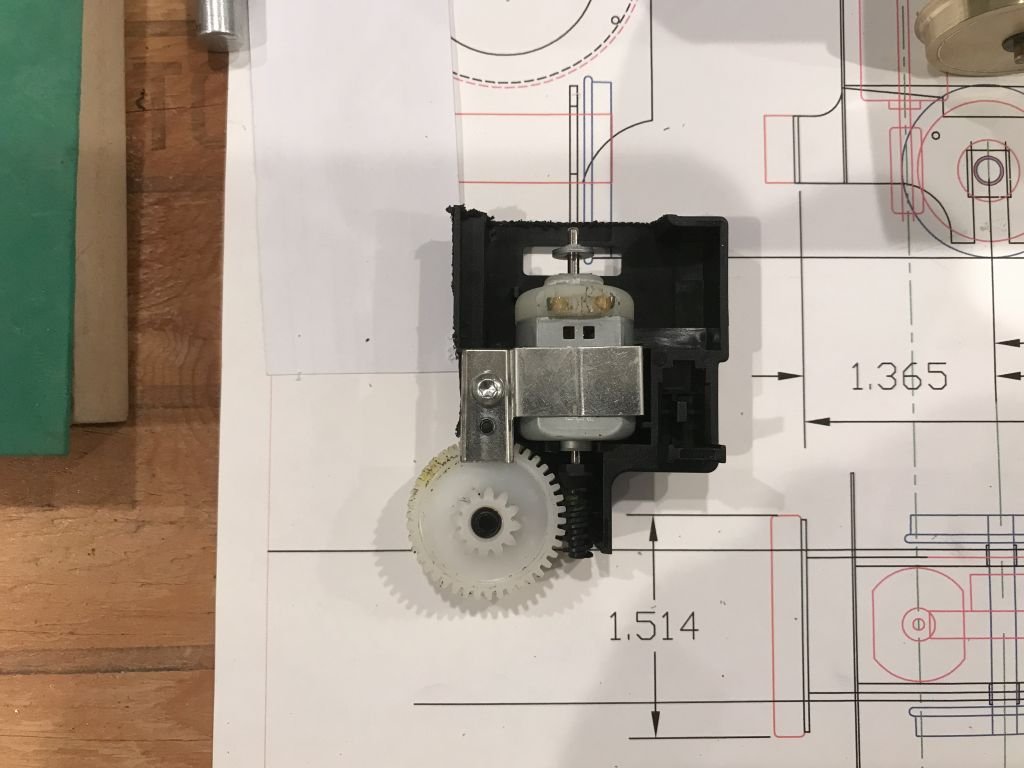
Part 1 Feeling a bit low a few weeks back I wanted to whip something up fast and as I have been working on transcribing a couple of the original drawings from the National Railway Museum at York of both the Horwich Locomotives and the Crewe internal tramway system locomotives I thought that a small O gauge quick styrene plastic model would cheer me up. Quick usually ends up tripping me up because midway through whatever I seem to be doing I take a step forward and then three back, There definitely seem to be a pattern here. What started out as something I thought I could do in a couple of weeks is taking a bit longer. but it will see me through a few days of social distancing. First I scaled the full size plans I am working on Using my old 2002 Autocad Lt to O gauge it works out to >070 to the inch or 27/32 to the foot (easiest to draw full size then scale to whatever scale I need later) The loco is only 7feet long in full scale and 18 inch gauge. The goal is to build a 3 1/2 inch live steam model down the road. Im probably just dreaming but it keeps me amused. the chassis was cut out of some white evergreen .060" sheet and laminated together to give .120" thickness I laminated them so that there would only be the scale (close) parts sticking out at the front What to power this with first thoughts was to rummage through the electric motor scrap box and I found a nice worm drive that I salvage from the last printer that died. A promising looking set up that seemed about right. With a bit of surgery with the jewelers saw things began to look quite good. Initially I had simply drilled the holes for the axles, remember this was a quick build nothing fancy. Here was the first problem! wheel quartering would be difficult The wheels were brass with rigid PVC centers so that they would not short out the track. (Old school 12 volt Trackmaster controller to make it go) So I popped off the wheels cut a block of wood to fit between the frames and cut a couple of slots in such a way as to create a snap fit for the 1/4 inch diameter bushings. The slots were cut on the sled with the table saw. The wheels could now be set up and removed easily without taking them apart. The motor was removed from the printer housing and made to be a press fit into a slab of 1/8th thick styrene. a couple of leads to the motor from the power supply confirmed that the motor was adequate for the job. The the main parts of the body began to take shape beginning with the end plates These were cut from some .020" styrene sheet, and then I pondered how to get the rivet detail which is quite prominent. The end plates were shaped with some printed drawings done with large label sheets stuck to the .020" (not easy to remove so I won"t be doing that again) To be continued. Michael
-
I had to take a break on this model in order to keep my sanity. it is on the shelf for a while, I will most definitely get back to it. Michael
-
Wow! impressive indeed. Michael
-
Hi Danny I really don't know what to say, that hasn't already been said. looking at what you have achieved with such precision with the humble card is inspirational. Michael
-
Looking great Eric ps I have not forgotten the jersey. Michael
- 599 replies
-
- 5
-

-
- sidewheeler
- arabia
- (and 4 more)
-
Eberhard and forum friends I'm OK Family is OK Mind has been focused elsewhere at the moment. One of my character flaws. https://vimeo.com/manage/396847956/general I am staying home keeping in touch with family by telephone and working in the workshop I needed a break from the woodwork and so have been attending my other passion the narrow gauge works locomotives. If anyone is interested i could do another thread in the non ship category model section. Stay safe everyone, My hands have never been cleaner that they are right now in fact I have been needing to use some hand lotion because they are vry dry from all the washing. Michael
-
Steve I really enjoyed the sailing video, I agree with Druxey your friends mainsheet is fouled probably because he was more concerned with teaching you and missed it The old saying about "there is nothing so nice as messing about in boats" comes to mind. The beauty of such small boats it that you really do get to feel the vagaries of our natural world and all its foibles, which teach us the best things in life. Michael
-
Keith I have to agree with Dan's comment, That really is a superb rendition of the subject, (and could only be improved if you added the welds) 😃 The other thing that always strikes me is the easy way you prepare the drawings, and yes I to would enjoy watching over your shoulder one of these days. Michael
-
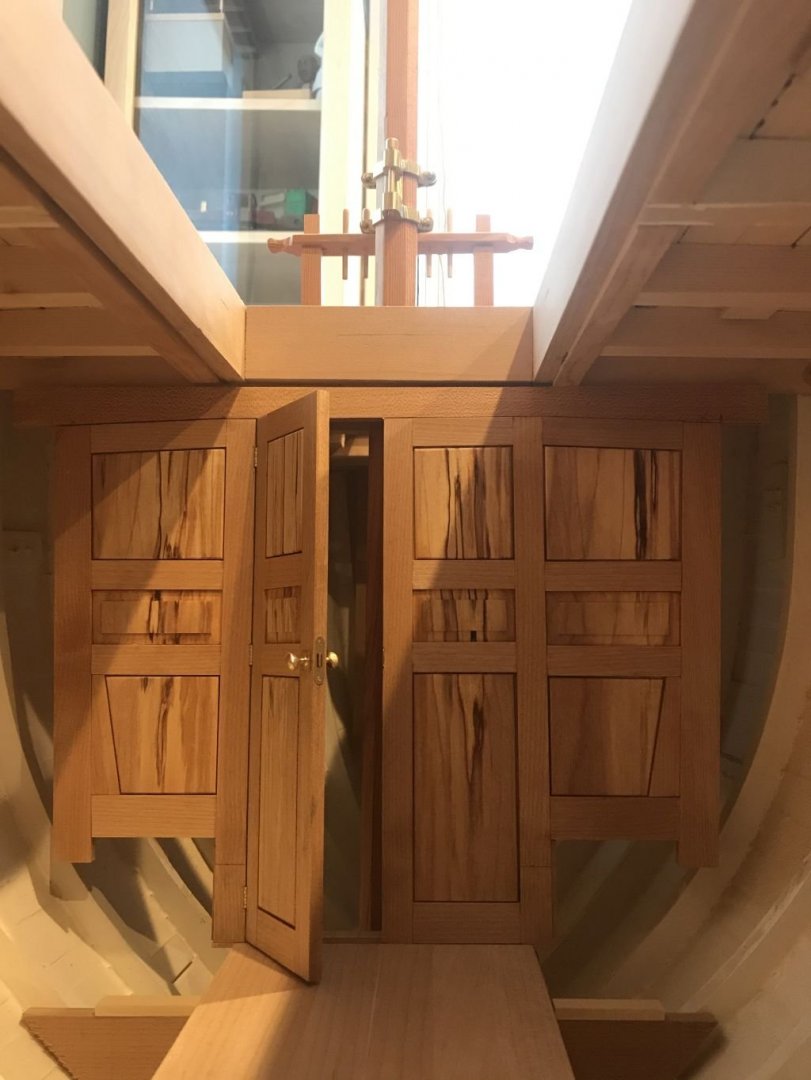
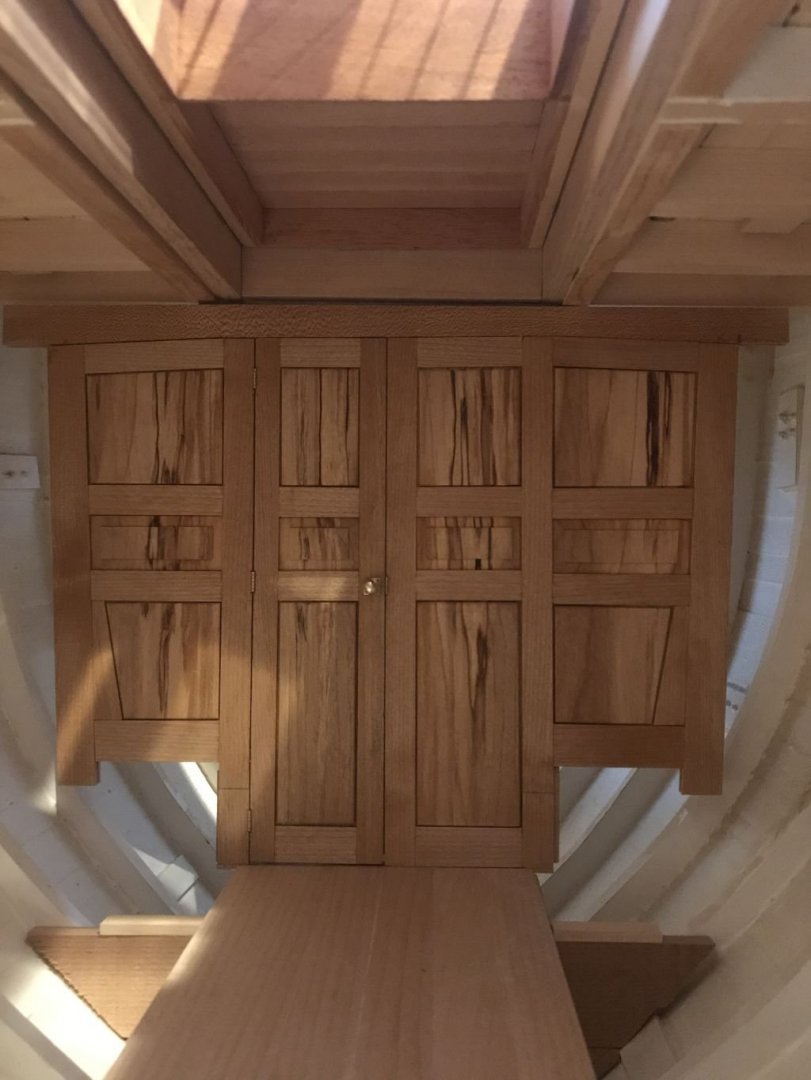
Steve, Pat, Bob, Geert, Eberhard, Keith and Johann thank you for you kind comments. The front panel is now assembled and the catch plate is fitted. I made sure the catch plate screw slots were vertical, the door will have to suffice with slanted screw slots. The tung oil really brings out the lustre of the inset panels and the ritch colour of the wood. The bottom of the panel fits into a slot in the floorboards which are now scraped Maple, there is a 1/6th bar glued across the bottom of the panel that is level with the floorboards, this allows for the door to be contained within the panel and the click when it closes is audible Next the rear panels to be glued up all the parts are cut already. Once they are done then the side panels can be fitted as they will hook into the bulkheads at the forward and aft ends. Michael
-
Very nice Steve Michael
-
Hi Steve nice solution, I remember when I was tackling thimbles I came up with a different way for making them, if you need a different size you could try this method as well. it is on page 11 of my cutter thread. Michael
-
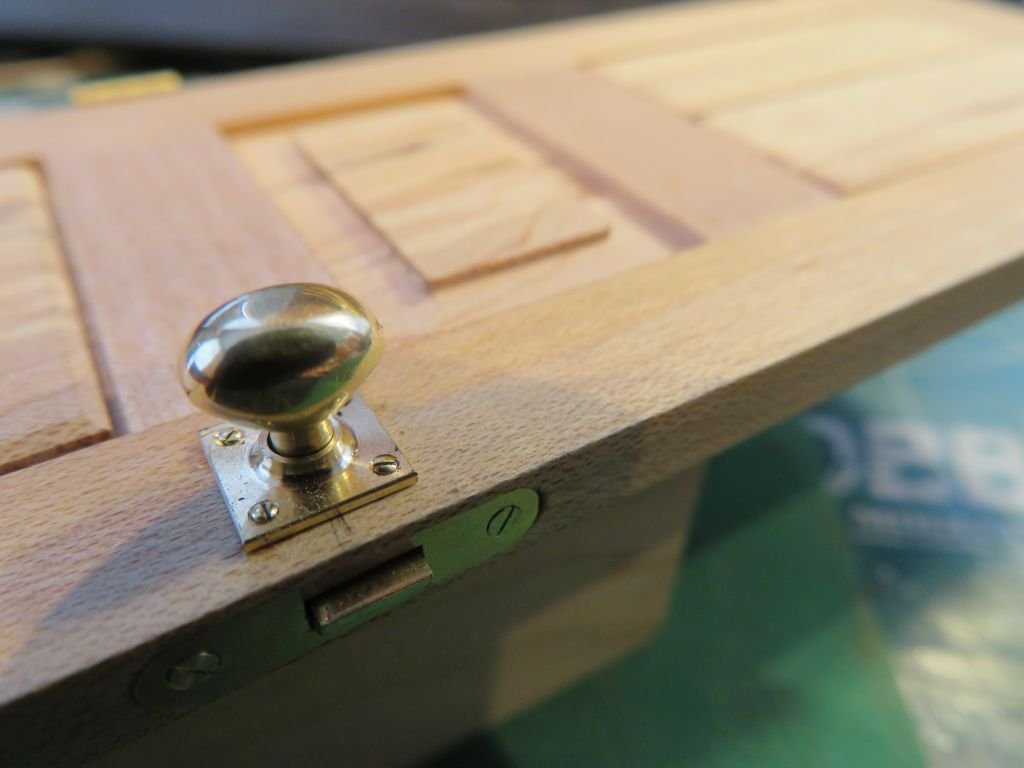
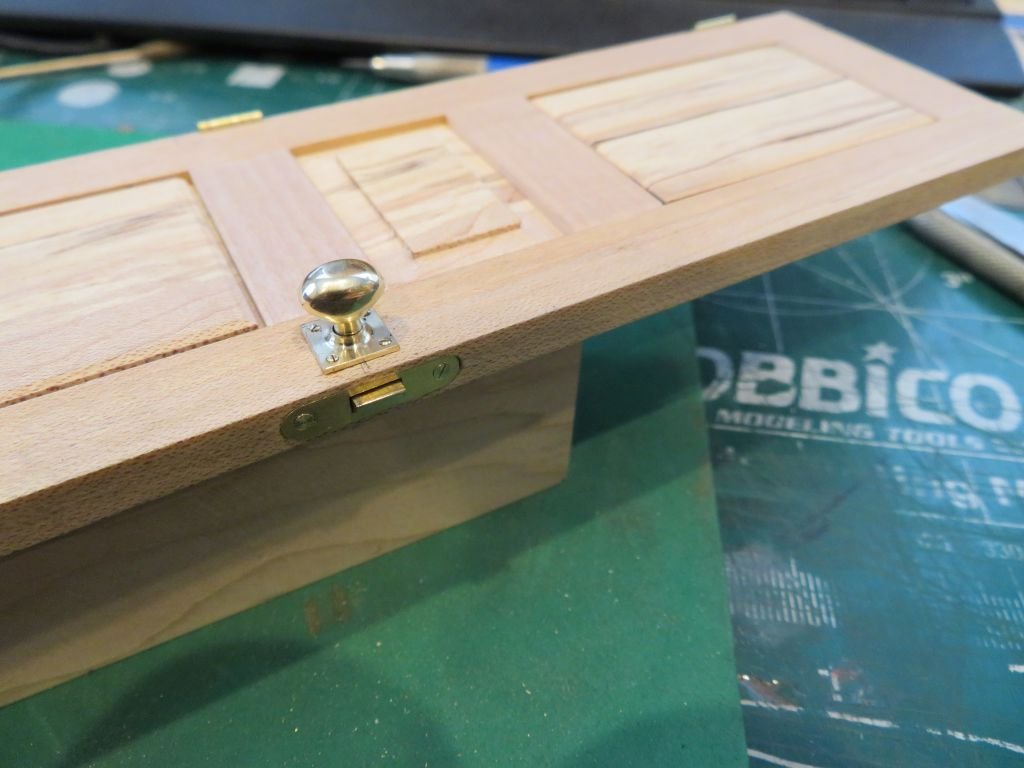
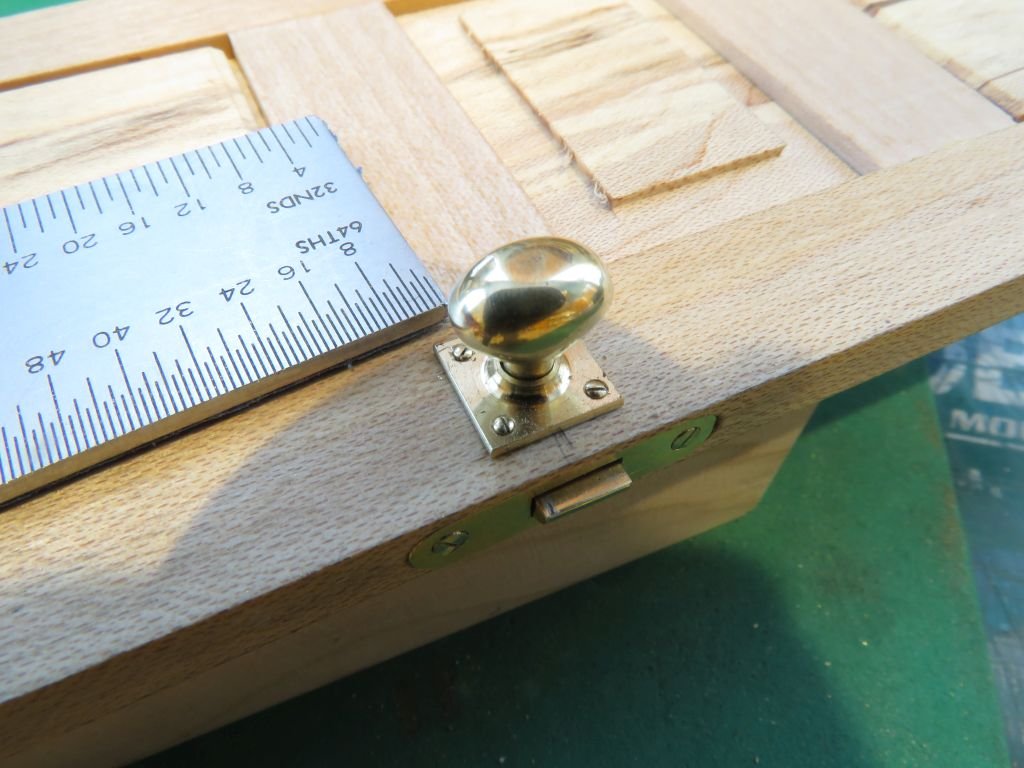
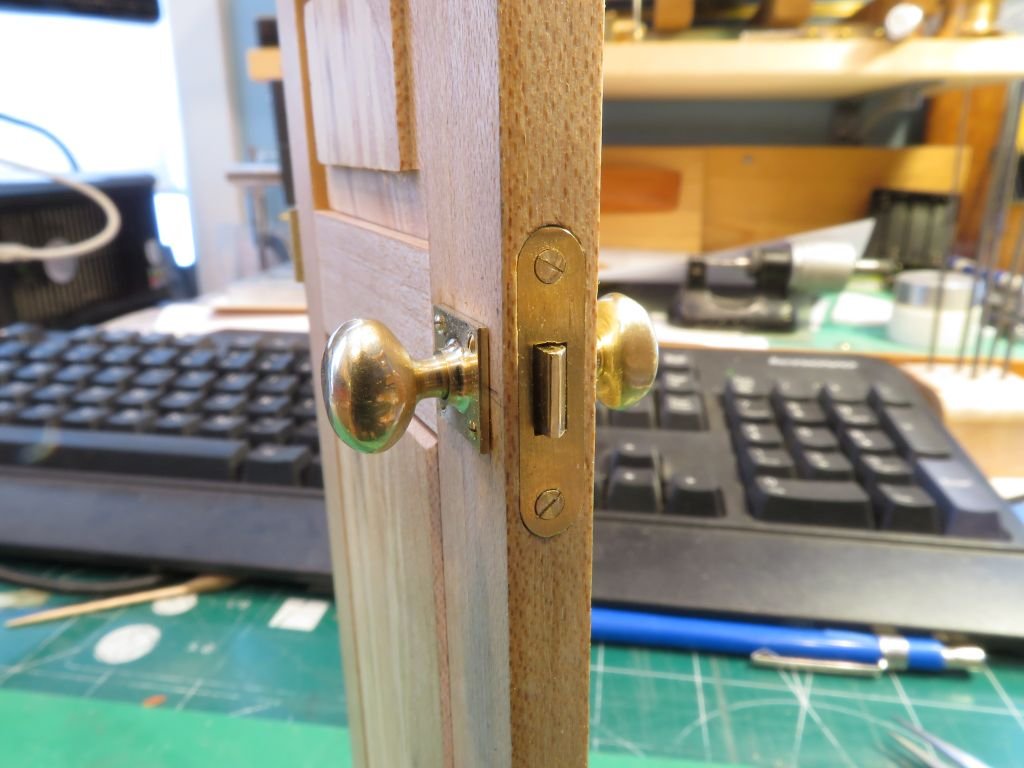
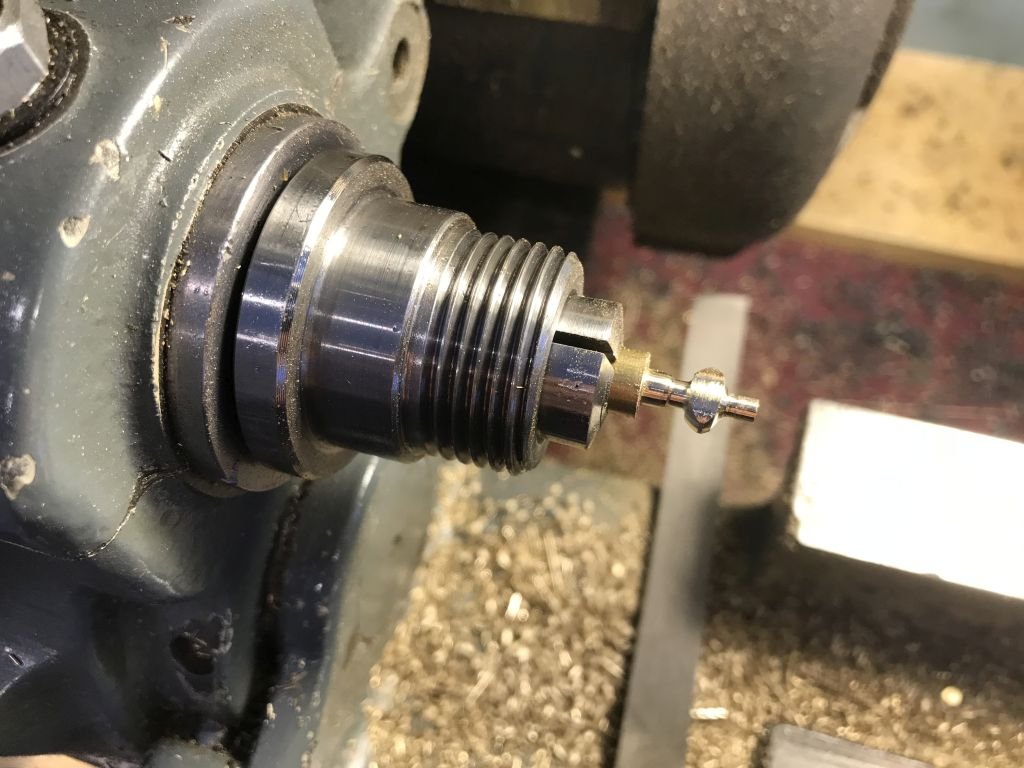
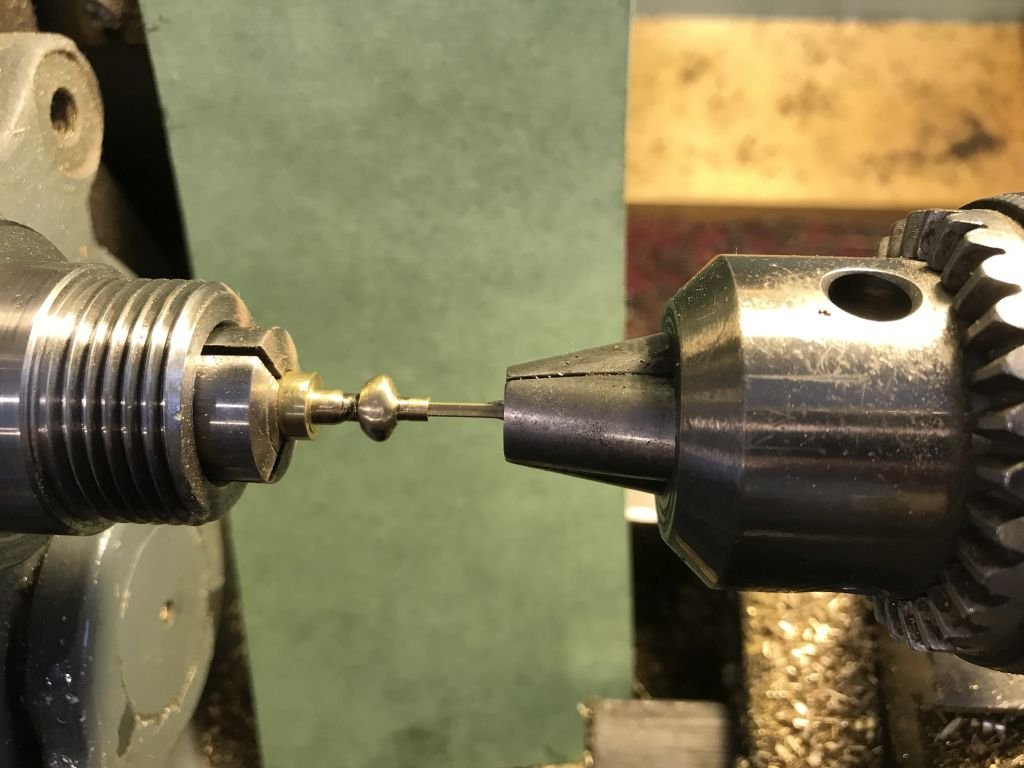
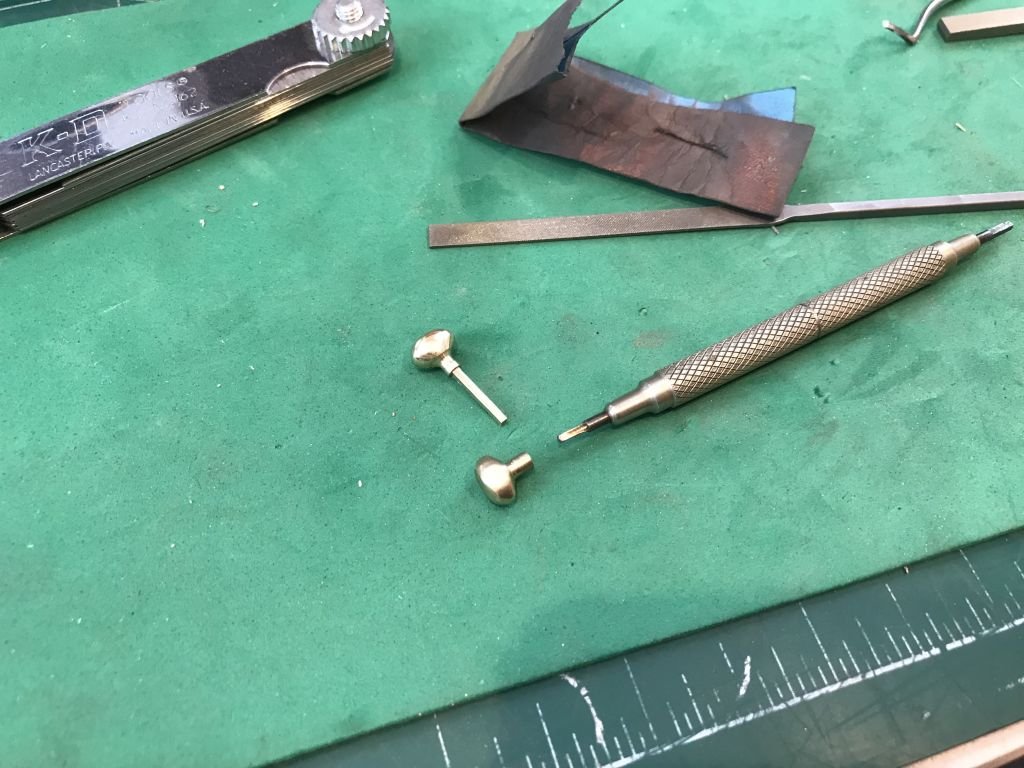
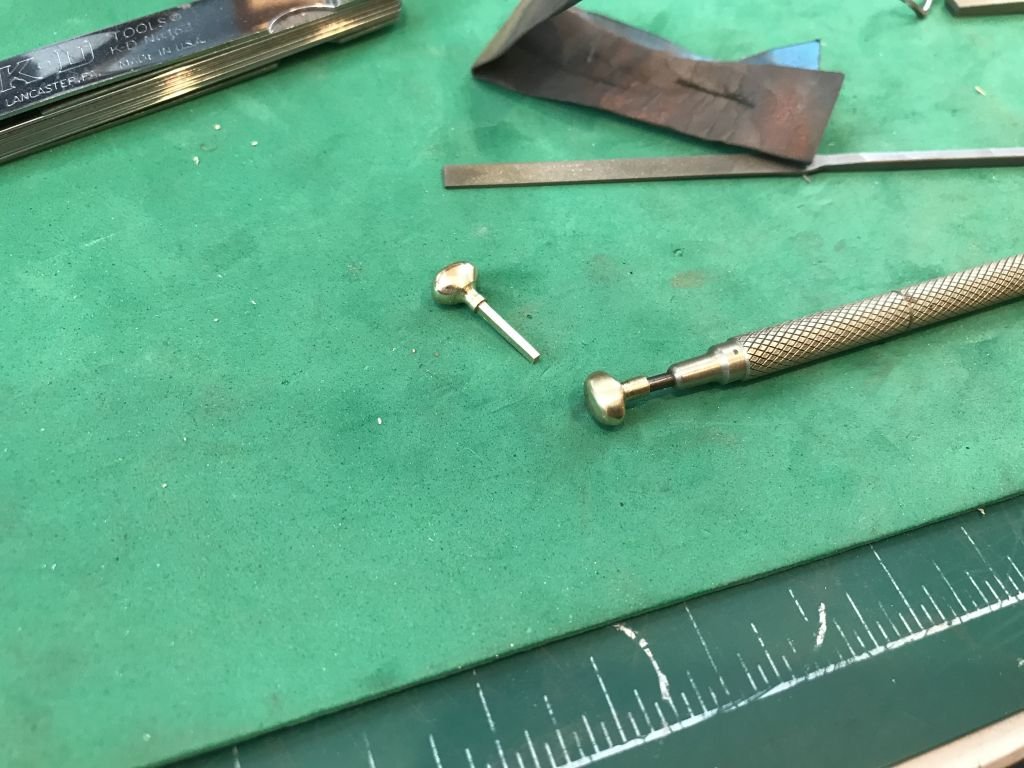
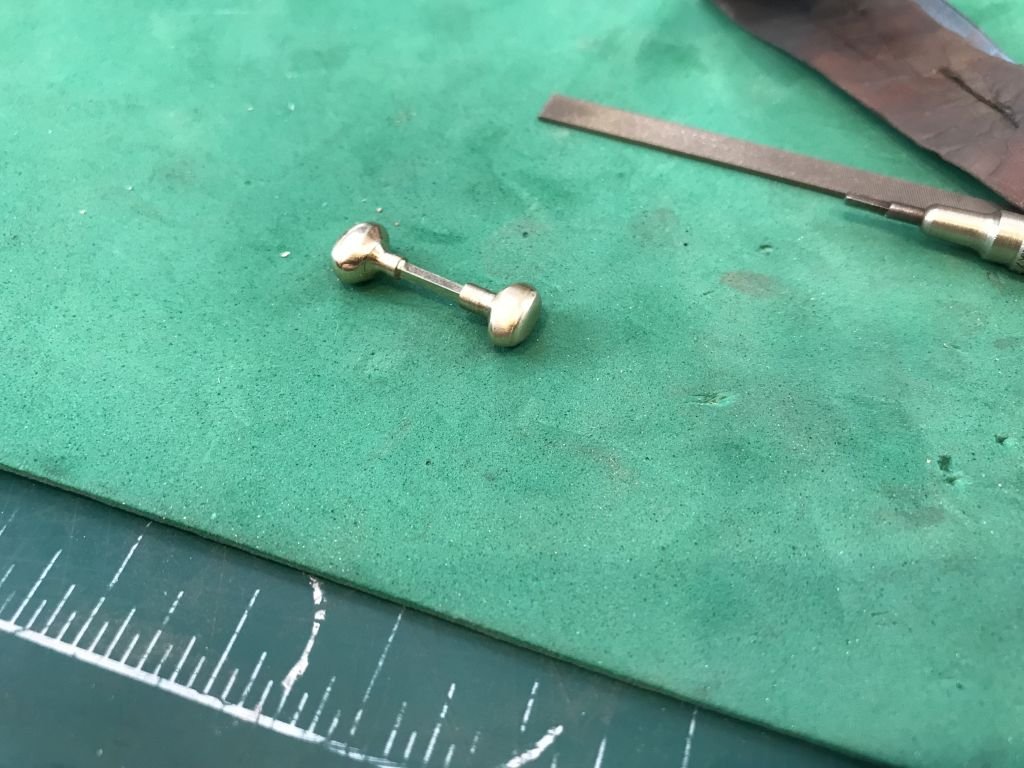
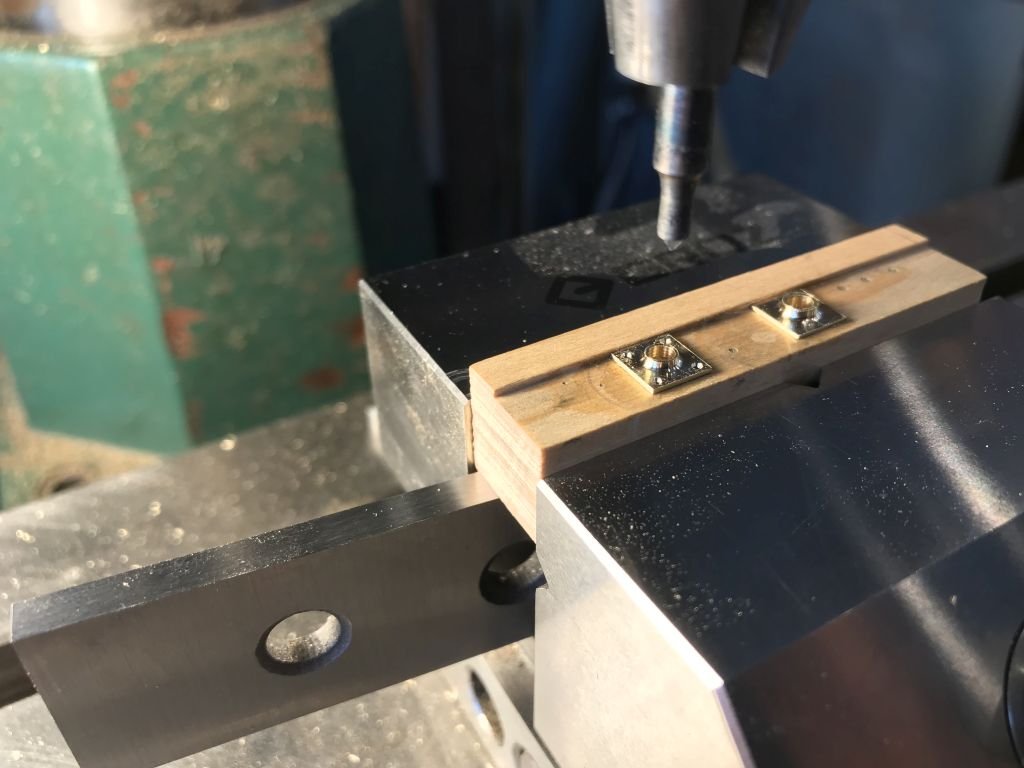
Greg, Druxey, Rick, Dirk, and Kurt, Thank you all for you kindness. I have just about finished the handles now, The second Handle require a slightly different approach because I needed to insert the square tube into it. and I needed to do that under pressure so a tight fit. first the rough shaping. Then after getting the handle shaped the square tube was pushed into the hole. Then cut off with the Jewelers saw. I used the watchmakers key tool as a holder for the final polishing. And the handles are done. Next the square roses were drilled and countersunk The fake screws are basically the same as the hinge screws except these are oval headed. and the back set mounted on the door as well, just four more screws. Time for a break today. Michael
-
Gary that winch is really impressive, clever solution for the cable on the drums. Michael


