michael mott
-
Posts
5,185 -
Joined
-
Last visited
Content Type
Profiles
Forums
Gallery
Events
Everything posted by michael mott
-
 Great to see your rebuilding you log Alex. Michael
 -
Steve that foredeck looks mighty fine, the white caulking turned out really well. Michael
-
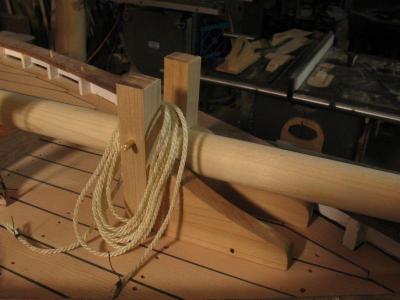
Ron glad you are enjoying this. Daniel thanks. Sherry, yes that was a fun movie. Mark, well we needed some bigger rope, so this evening I fixed the bug in the rope walk and made this new 3/4 inch rope for such tasks. as rappelling. Michael

-
It is interesting that you used Corel Draw, I also like to use it, I find it easier to use for lofting frames than Autocad. what type of paper did you print on? Michael
-
Jim I will be following along I really like these commercial fishing boats. your model looks great. That is a fair number of dories. Michael
-
Chuck thanks for re-posting this build It is one of those very inspirational ones the planking is superb. Michael
- 49 replies
-
- 1
-

-
- pinnace
- Syren Ship Model Company
- (and 1 more)
-
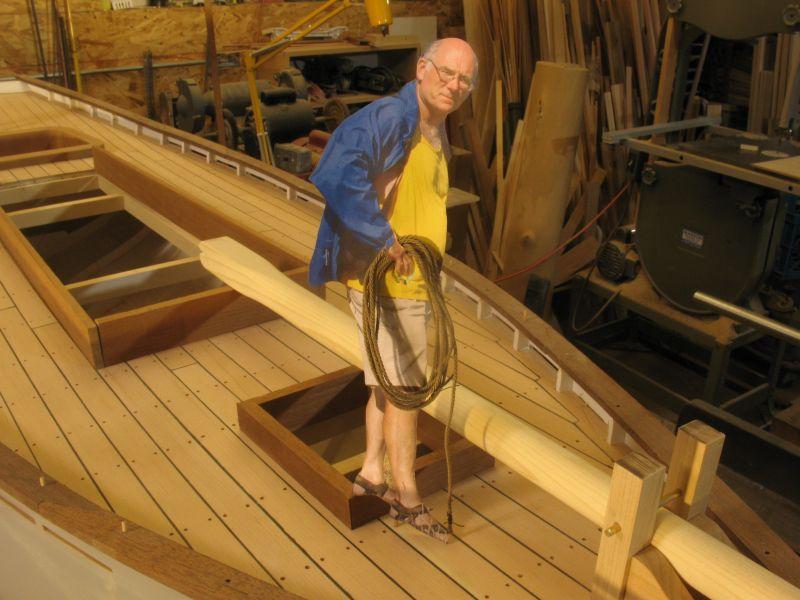
Daniel, now my secret is out. Carl don’t tell everyone! Druxley thank you, Your comment gave me an Idea. Russ thanks for looking in. Dafi I am glad that you like it. Well because I spent all day building a rope walk, mini me wanted to get in on the action so I gave him the rope. At least he has a way of getting down now Mark I heard him muttering all day. Michael

-
Another Rope Walk
michael mott replied to michael mott's topic in Rope Making/Ropewalks's Rope Materials and parts resources
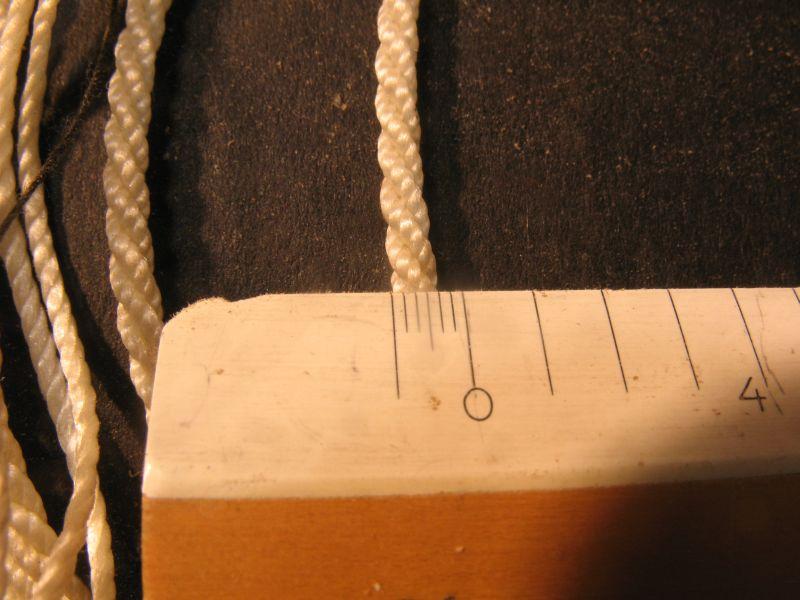
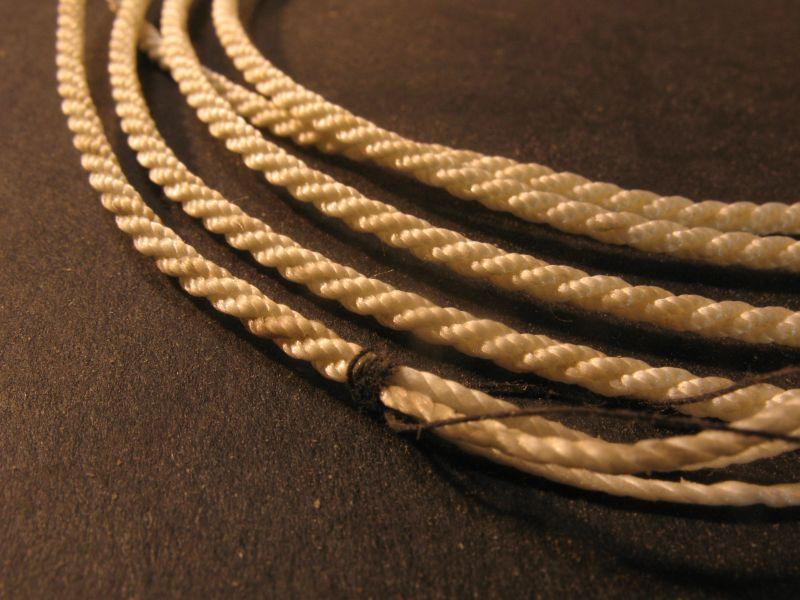
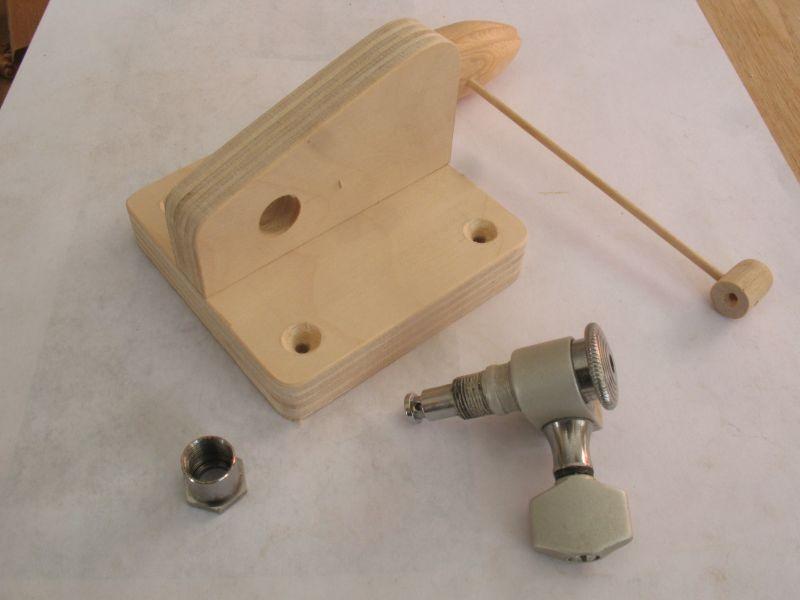
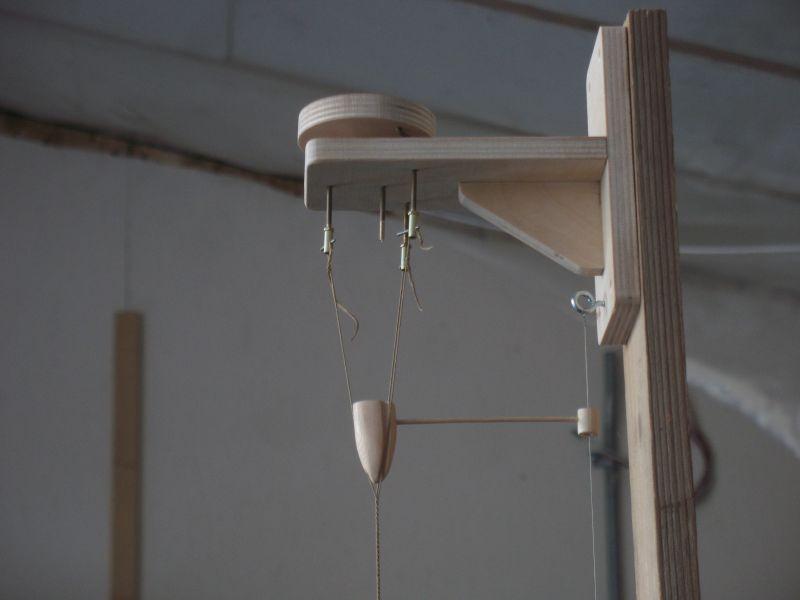
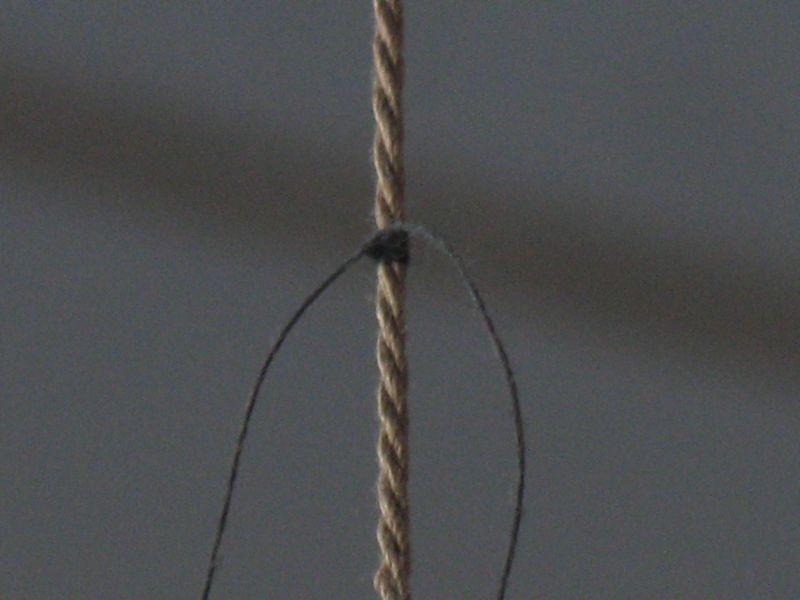
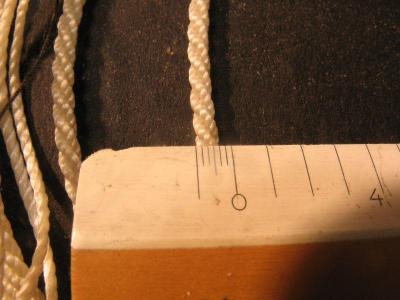
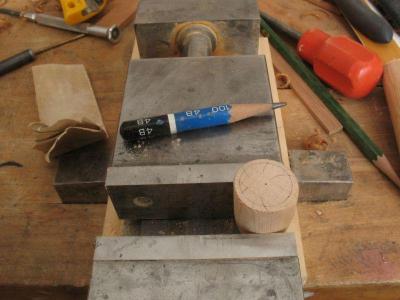
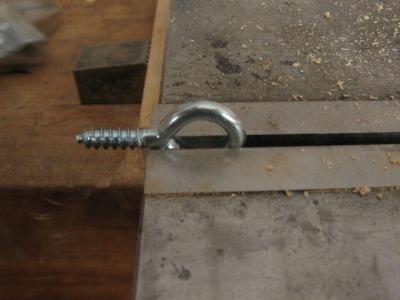
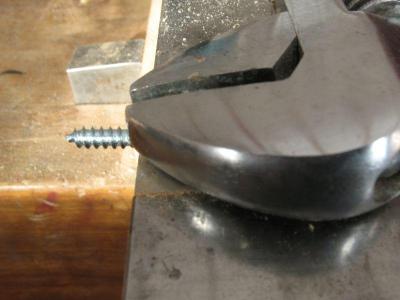
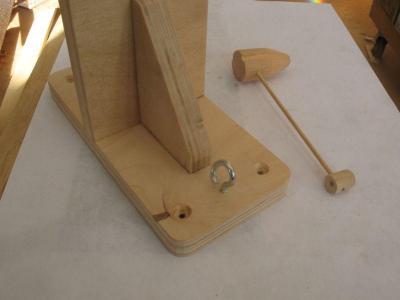
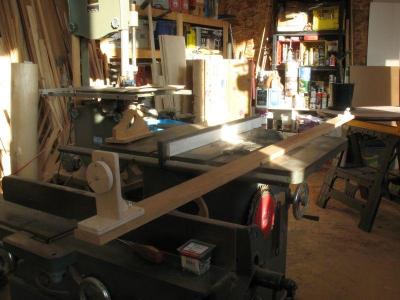
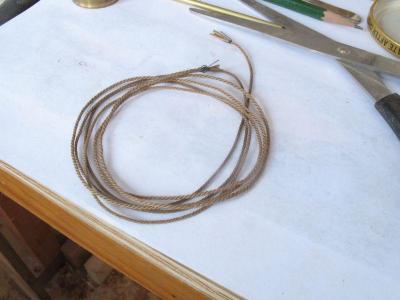
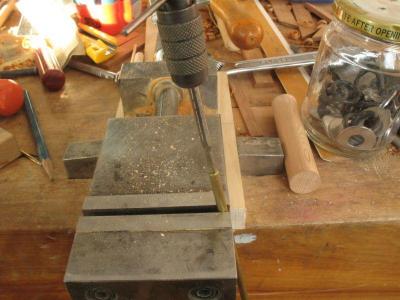
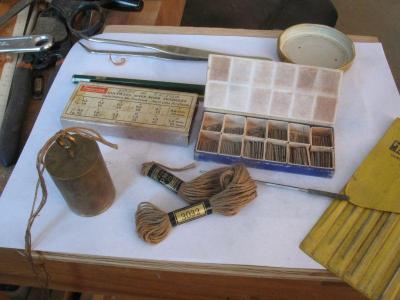
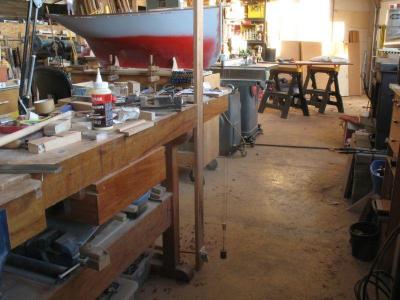
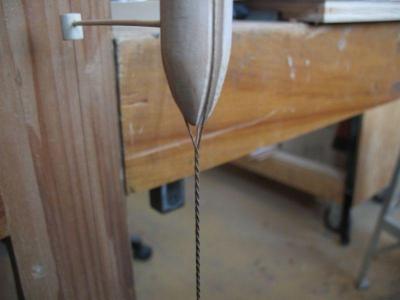
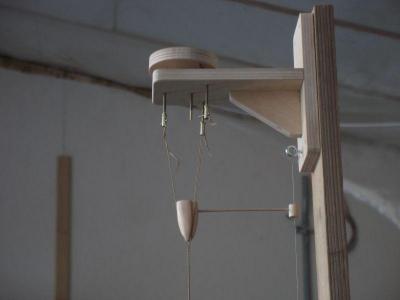
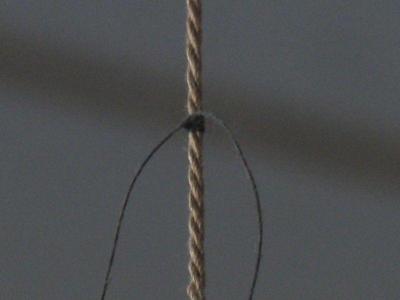
Part 2 14) The top was made from the cutoff from the top of the mast 15) the base of the whirls was made next and pre-drilled for the screws 16) next came the wire for the top guide, the wire is .011” music wire. 17) to secure the music wire to the whirl frame I opened up a small eyebolt with a crescent wrench 18) mounted it to the base. 19)The bottom end was formed with a guitar winder I had in the scrap box An over view of the entire contraption. 20) next the whirl hooks, because this is a prototype and I want to be able to take it apart(too many years fixing other people exhibits that did not account for maintenance) I threaded the end of some thick walled brass tube with 4x40 to match the rods 21) the tube was then cross drilled with a 1/16th drill for the taper pins. And cut off with a jewelers saw. They were locked onto the shafts with a lock nut threaded on first. 22)The only thread that I had handy was some cotton and the embroidery thread, so I opted for the embroidery thread. This was tied to the small brass weight that I made years ago for a weight drived clock. 23) the rope walk was clamped in the bench vise vertically 24) I started to wind the whirls 25) the weight just hangs , the one thing I had to do was help the top up because it jammed the same way an adjustable clamp works so a modification is in order I will add a length of brass tube through the middle of the guide dowel 26)The top end after about 5 minutes of turning. 27) tied off with a little black cotton 28) removed from the walk with the ends trimmed. There we go the rope is 57 inches long I started with three strand that were 72 inches long. With practice I think that I can improve the length . this machine would work really well in a stair well unfortunately I don’t have one so I had to stand on a step ladder to make the whirls turn. The rope looks a bit like the old hemp rope. Michael


-
Gaetan thanks for the information
-
Hi Gaetan the merged picture although it shows all the pictures it does not show them as larger when I click on any of the smaller images is this how the picture works. it seem to be a simple composite. Michael
-
Micro Power Sanders
michael mott replied to mtaylor's topic in Modeling tools and Workshop Equipment
Clever I like the way things are used for additional purposes than they were designed for. Michael -
Homemade tools collection
michael mott replied to greg-kam's topic in Modeling tools and Workshop Equipment
Gregory I like the way you have developed your tools using simple hand tools to become stationary ones. very clean designs. Michael -
All my homemade tools
michael mott replied to sonicmcdude's topic in Modeling tools and Workshop Equipment
Sinan, a great job on the tools I also particularly like the jigsaw and the sander variable speed control, looks like it came off a sewing machine. Michael -
And one more: Ropewalk for Miniature Ropes
michael mott replied to wefalck's topic in Modeling tools and Workshop Equipment
Oooh that looks like a gem. Michael -
Another Rope Walk
michael mott replied to michael mott's topic in Rope Making/Ropewalks's Rope Materials and parts resources
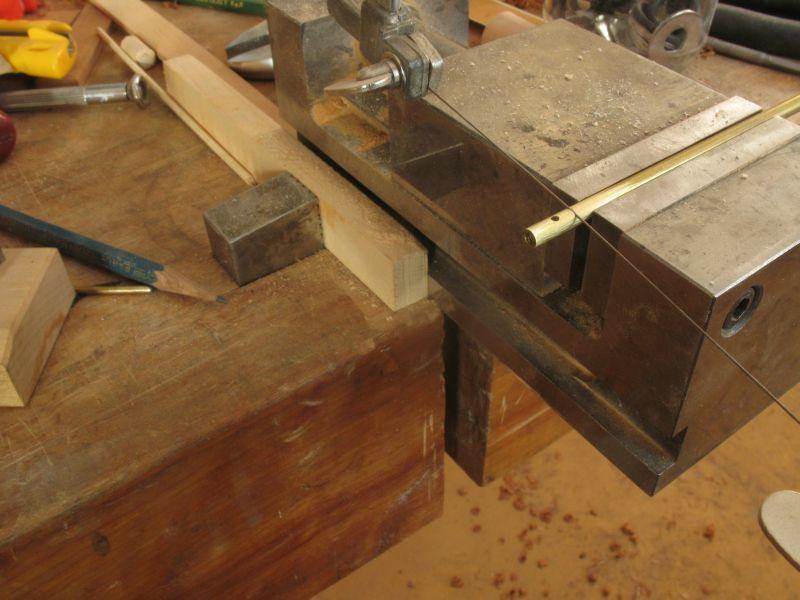
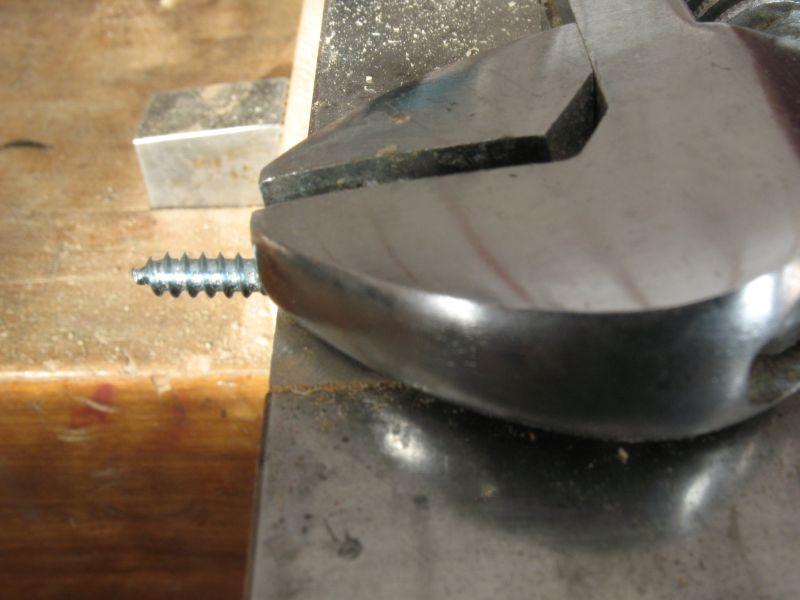
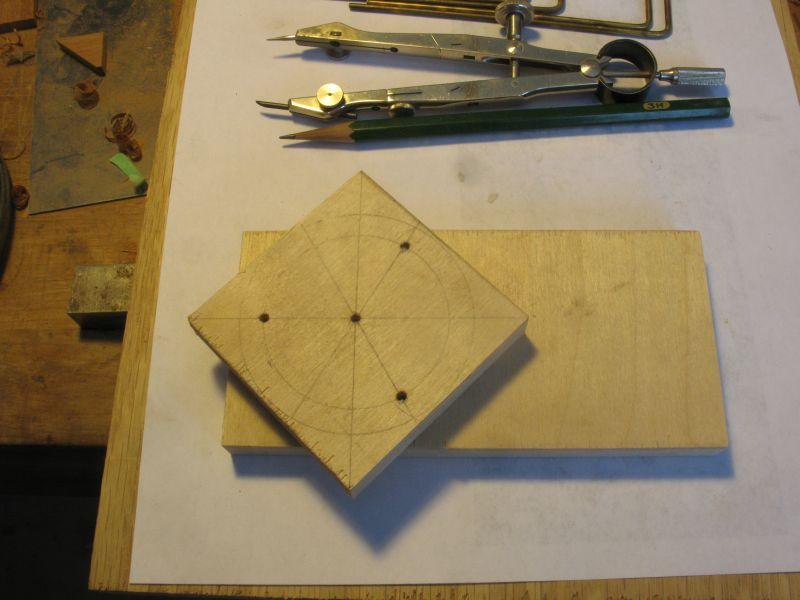
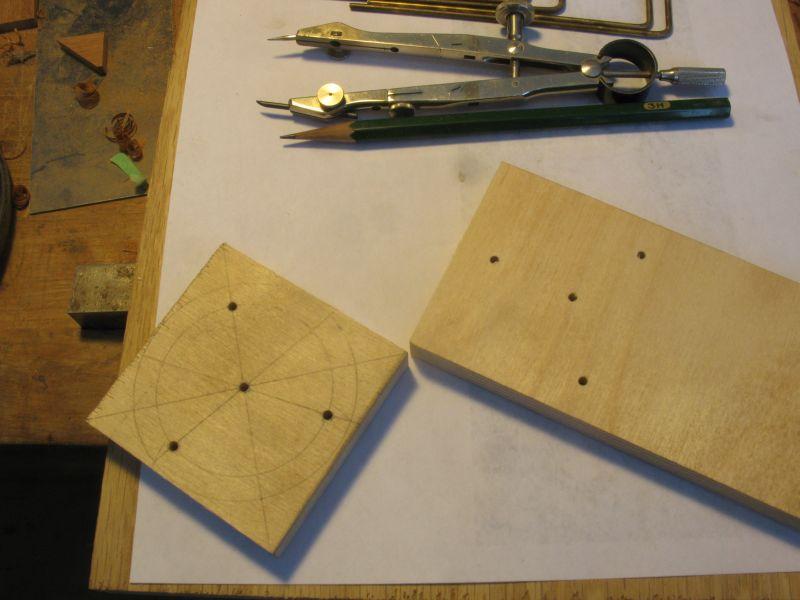
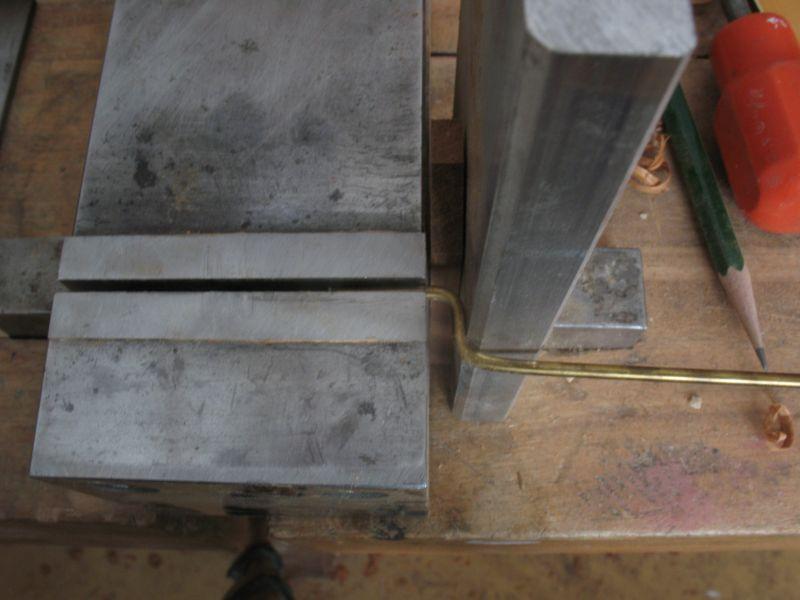
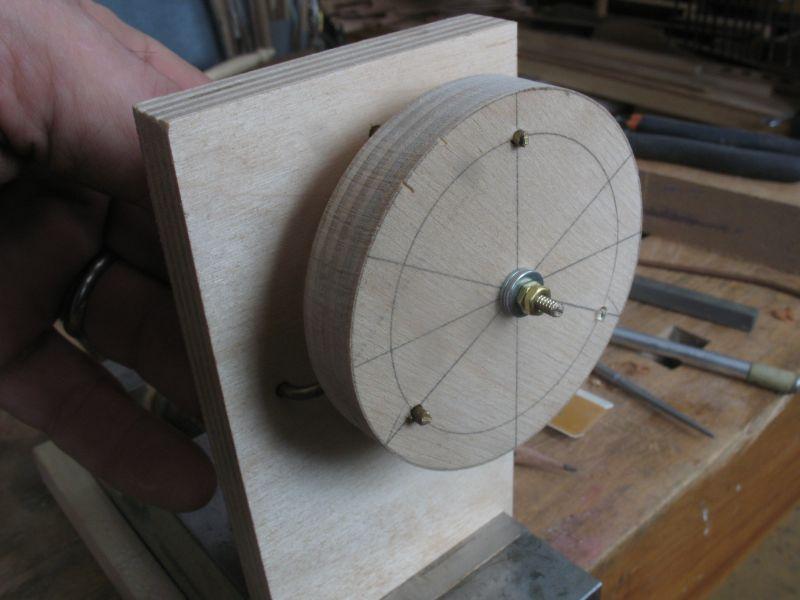
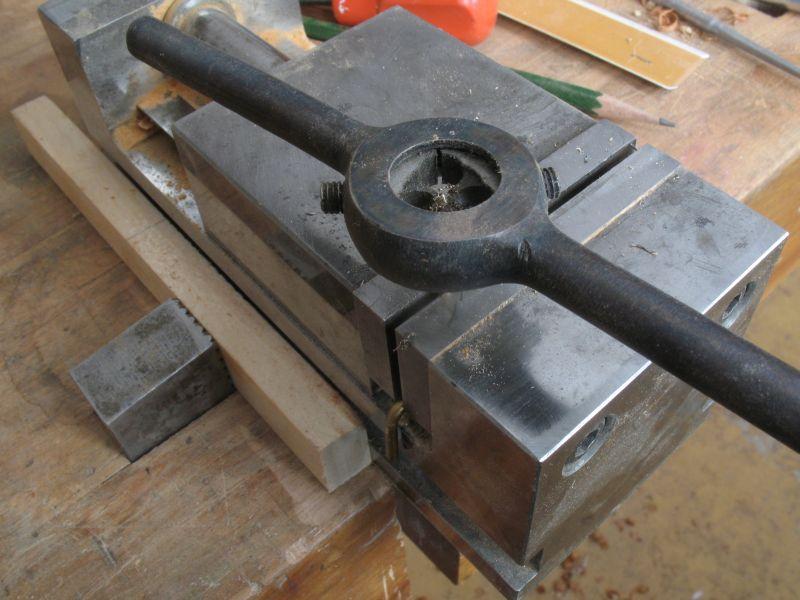
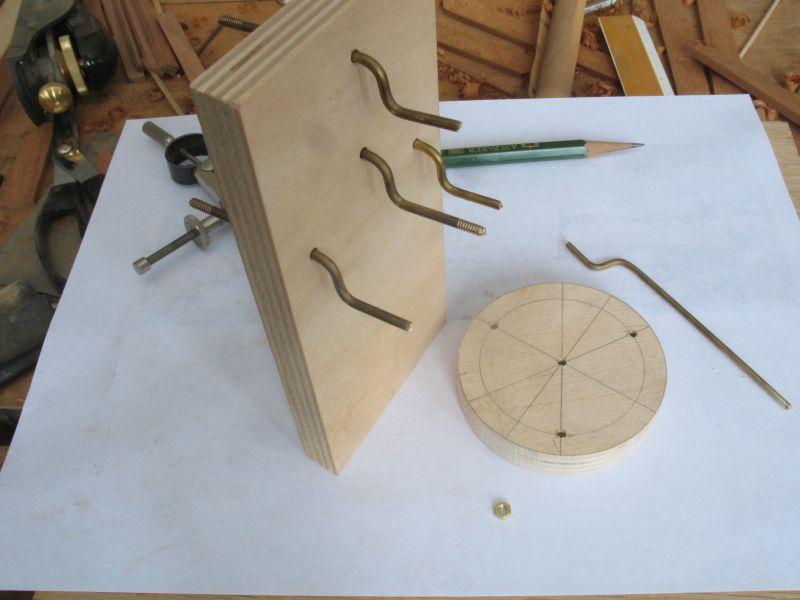
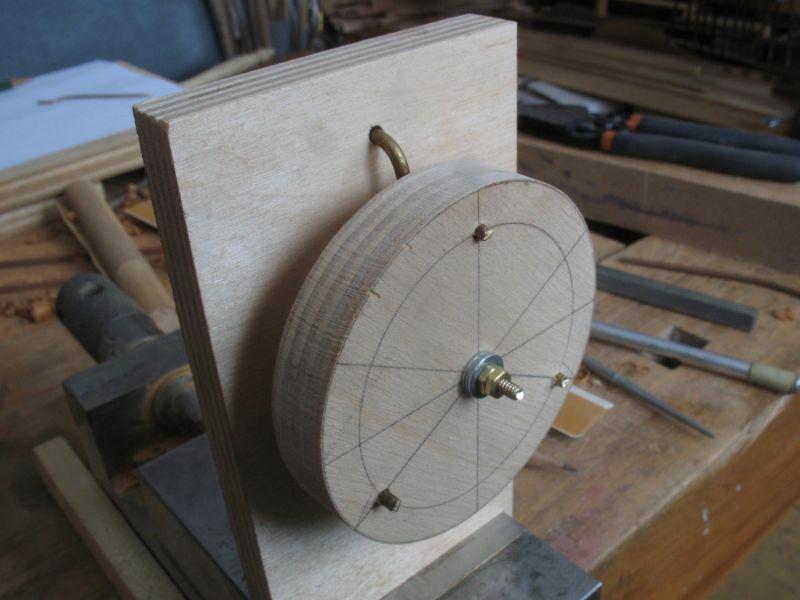
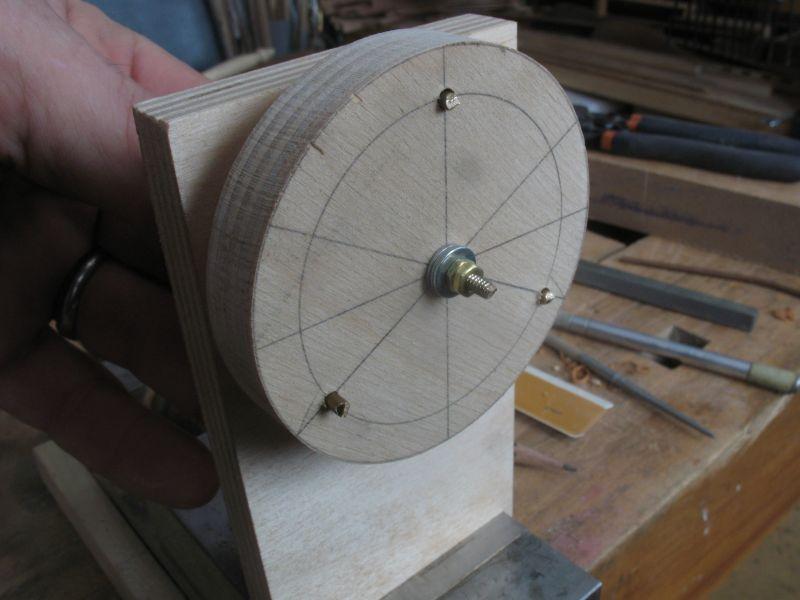
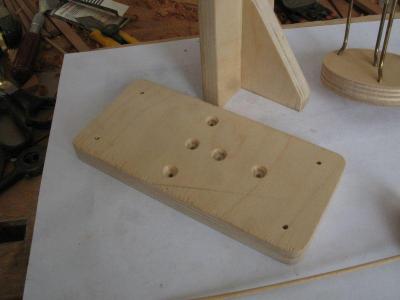
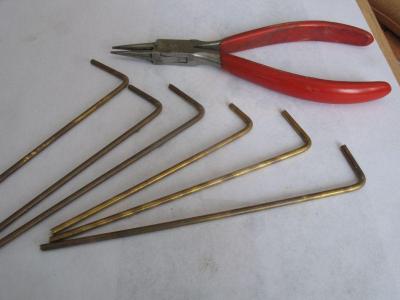
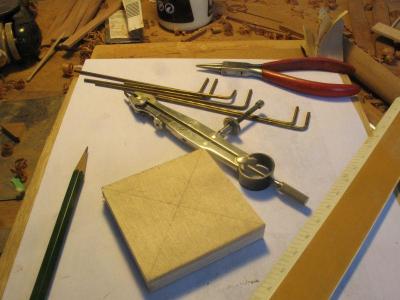
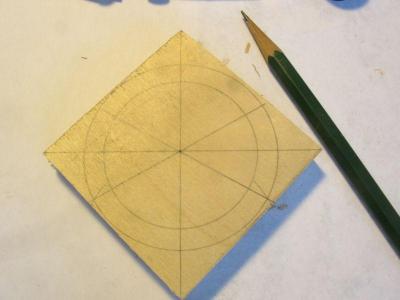
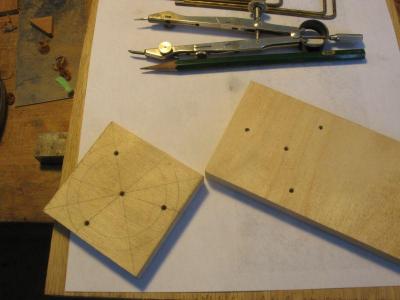
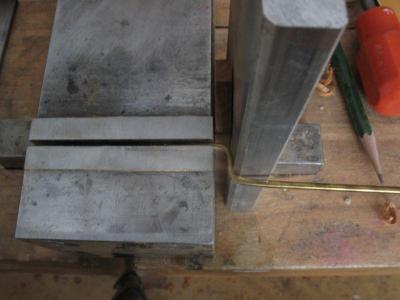
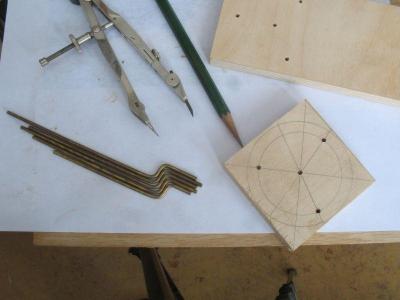
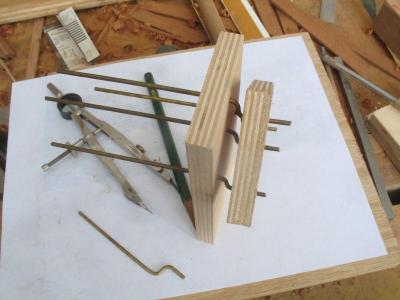
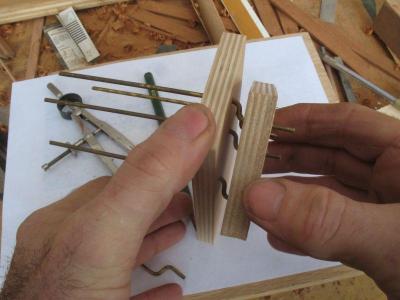
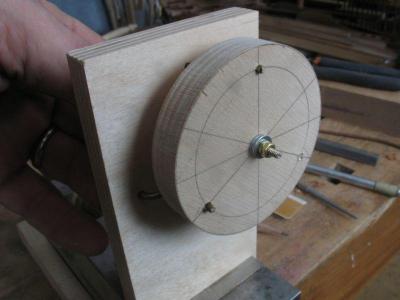
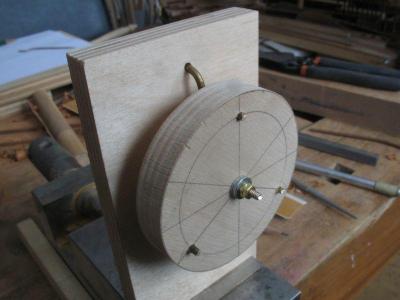
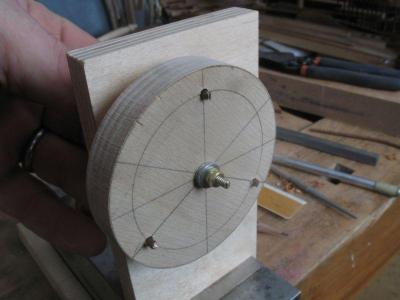
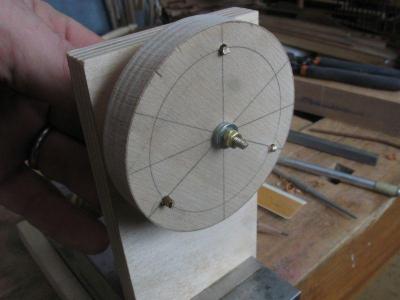
Today I began to make the simple rope walk the first step was to cut the two main components of the drive end. The first step was to use something readily available, I had a length of 3/32 brazing rod so the first step was to make sure I could bend it easily I used some round nosed pliers to make the first bend 2) Next I used some scrap 12mm birch plywood and cut of a square from one end. 3) The square was marked to find the centre. 4) then using the high school geometry lesson marked out the three equal points on the circles 5) after the three holes were drilled the square was stuck to the main plate with some double sided tape and the holes were transferred to the main plate using the first set as guides. 6)this ensured that both sets of holes were in the same locations. 7) the trickiest part was to ensure that all the bends were equal in length, I did this with a couple of scraps with the small vice clamped firmly in the wood bench. My goal here is to use the simplest tools and method. 8) lining up all the rough blanks to see that they are within a margins of sameness regarding the bends. 9)test assembly to see that the square piece rotated , there was no point continuing if is didn’t. 10) the holes were drilled with a number 36 drill which gave some looseness to the brass rods in the holes and it rotated easily with no binding at all, so on to the next step. 11) the centre shaft is the only one that needs to be captured so the .093” (3/32) rod was tapped with a 4x40 thread. I kept wanting to do things on the lathe with the machine tools but the goal to do as much by hand as possible because not everyone has a lathe 12) the three whirl shafts were cut to length by simply cutting them off with a pair of heavy side cutters with the round whirl plate in situ 13) the whirl plate is locked on with a couple of washers and two 4x40 nuts. Its lunch time and I’m waiting for some batteries to charge up so I will continue after lunch . Michael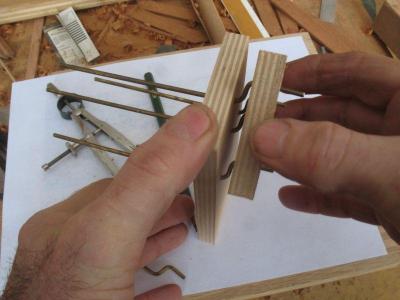


-
Another Rope Walk
michael mott replied to michael mott's topic in Rope Making/Ropewalks's Rope Materials and parts resources
GTM, thanks for the link very interesting. Michael -
Very interesting Helmut I will have to study your design carefully so that i understand how it works. Michael
-
Toni, I am always shocked when I see how small some of the incredibly detailed ship models are. Yours is no exception I thought it was at least twice as big as it is. Beautiful workmanship. Michael
-
What a lovely hull shape, I will be following along. Michael
-
Nice work Adam I like these smaller boats that are to a larger scale. Looks like you are zipping along. Michael
- 97 replies
-
- 1
-
-
- Willie L Bennett
- SkipJack
- (and 2 more)
-
Great to see that you are back up and running Clay. Michael
-
Nico, that is one gorgeous finish glad to see you back to continue. Michael
-
Good to see you back Walter, I am looking forward to seeing you get her in the water. Michael
-
:D Hadn't thought about that! Michael