michael mott
-
Posts
5,200 -
Joined
-
Last visited
Content Type
Profiles
Forums
Gallery
Events
Everything posted by michael mott
-
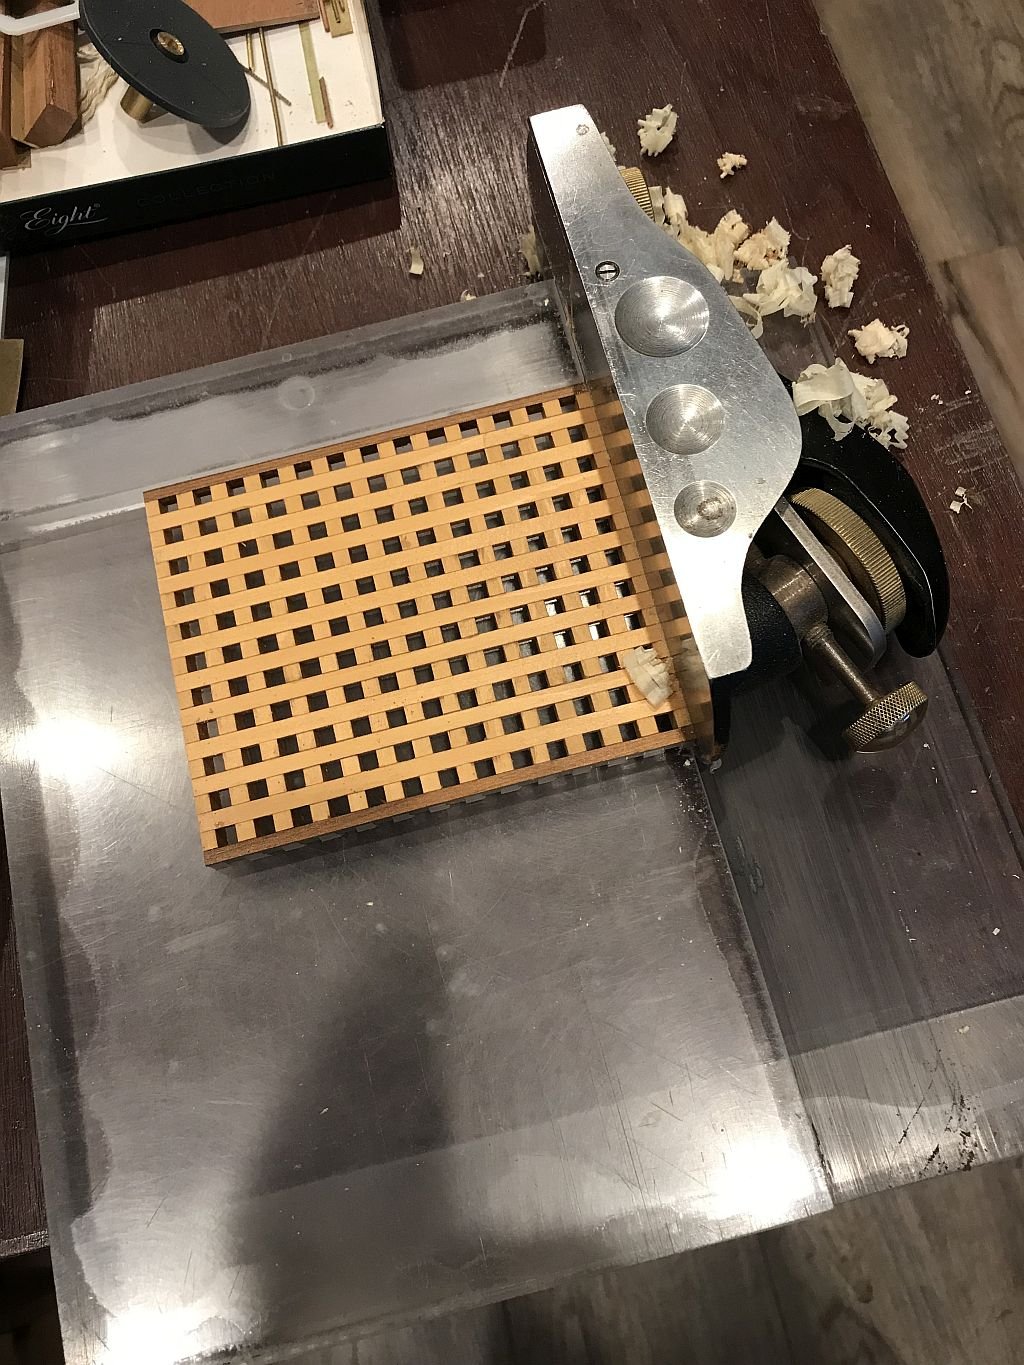
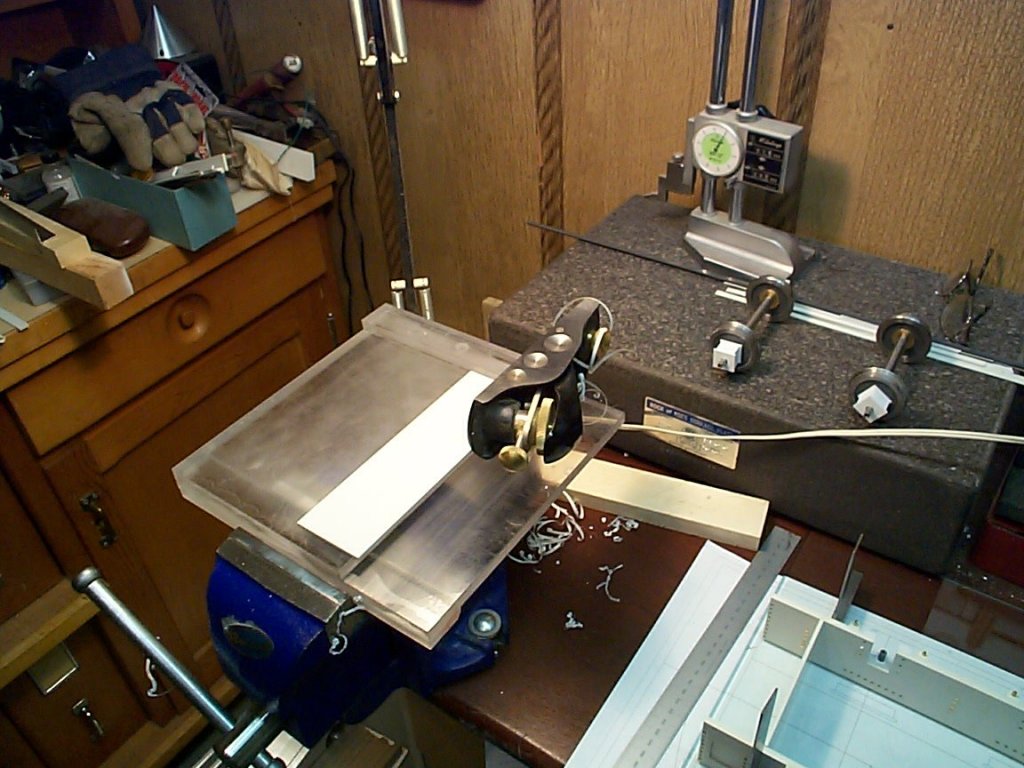
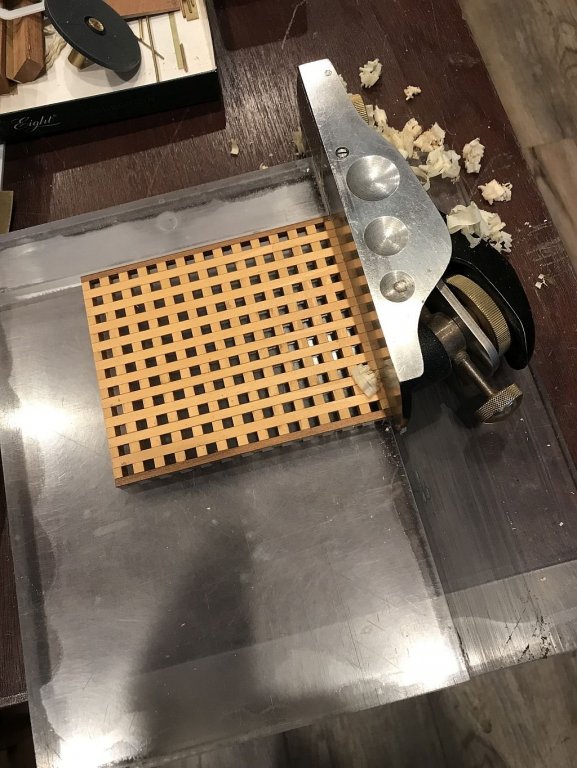
 Hi Mark the shooting board is made from a bunch of scrap pieces of 1/4 inch plex The styrene strips are 1/2 x 3/16 stacked glued with microweld I like to clean up the edges of the styrene with a plane because it leaves a perfectly smooth square edge Michael
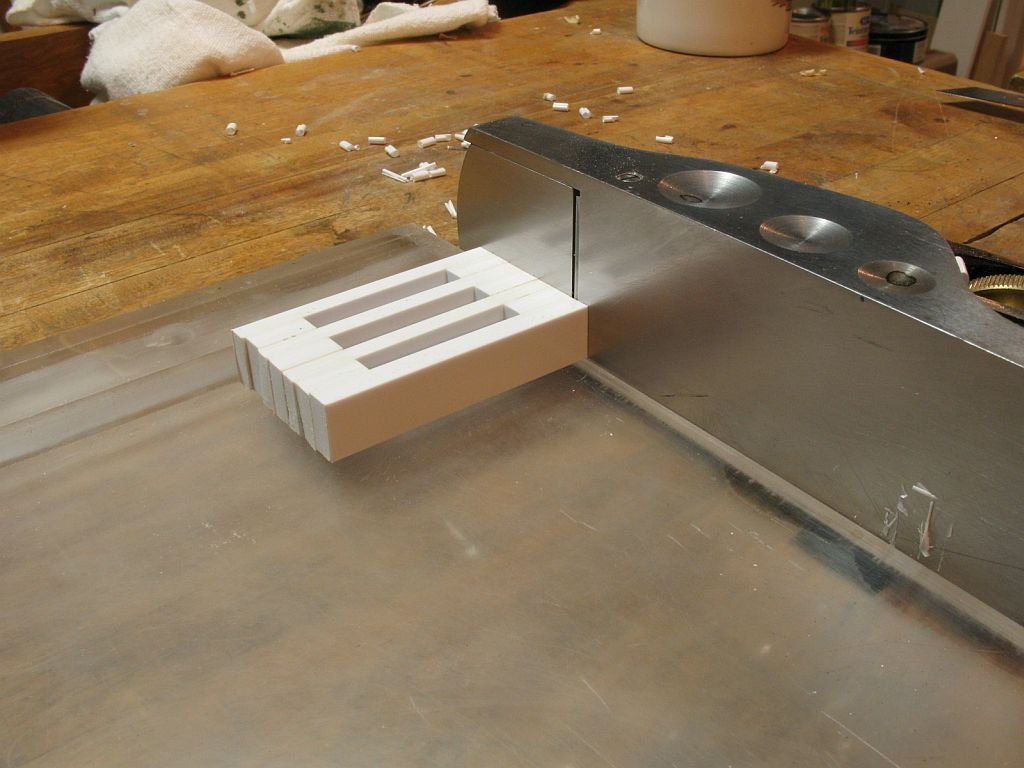
-
The model is looking good Frank. One thing you might experiment with for the crimping of the cables is to use some heat shrink tubing and give it a shot of silver paint. I found it worked very well on the cables on my Cutter. Michael
-
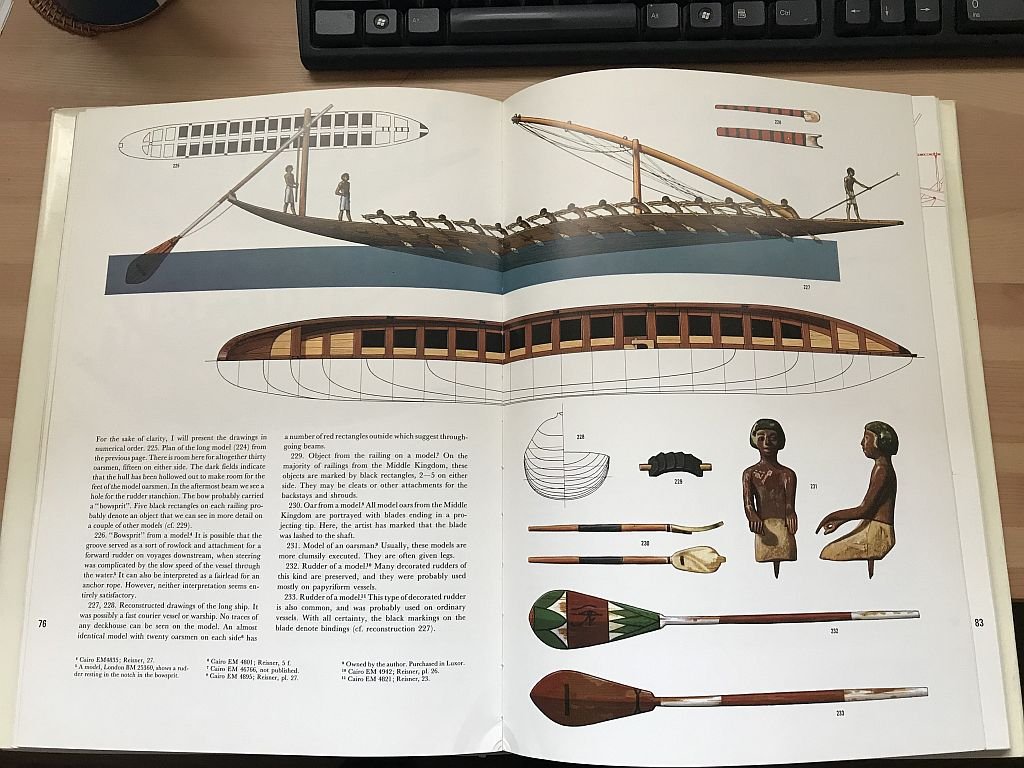
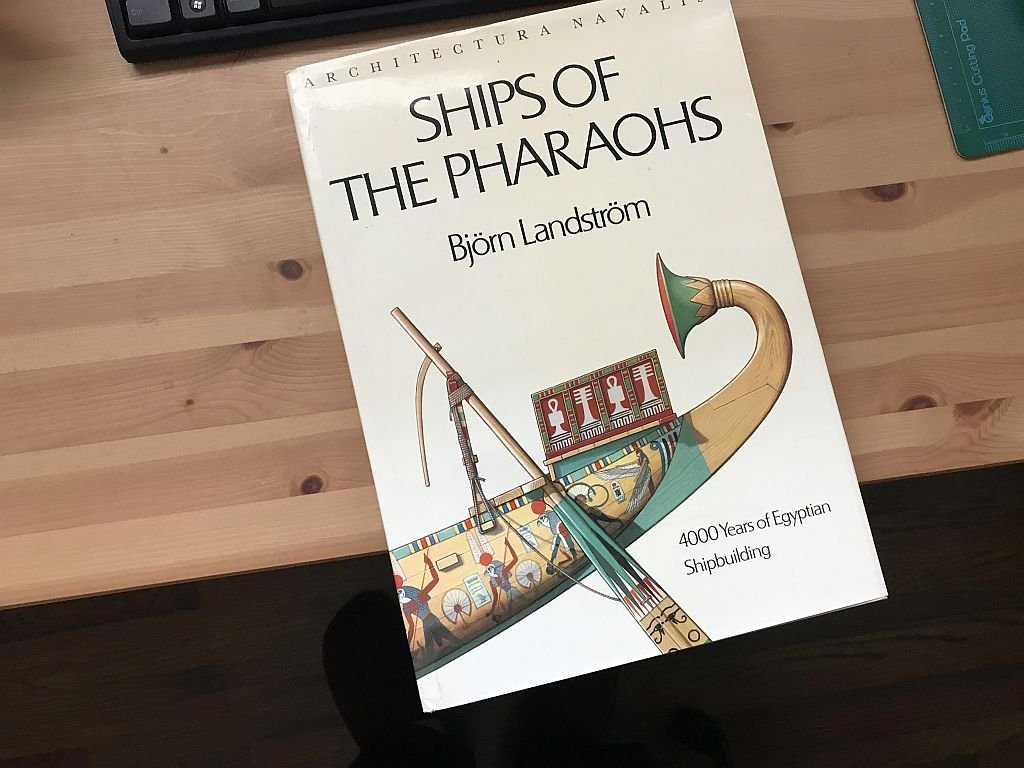
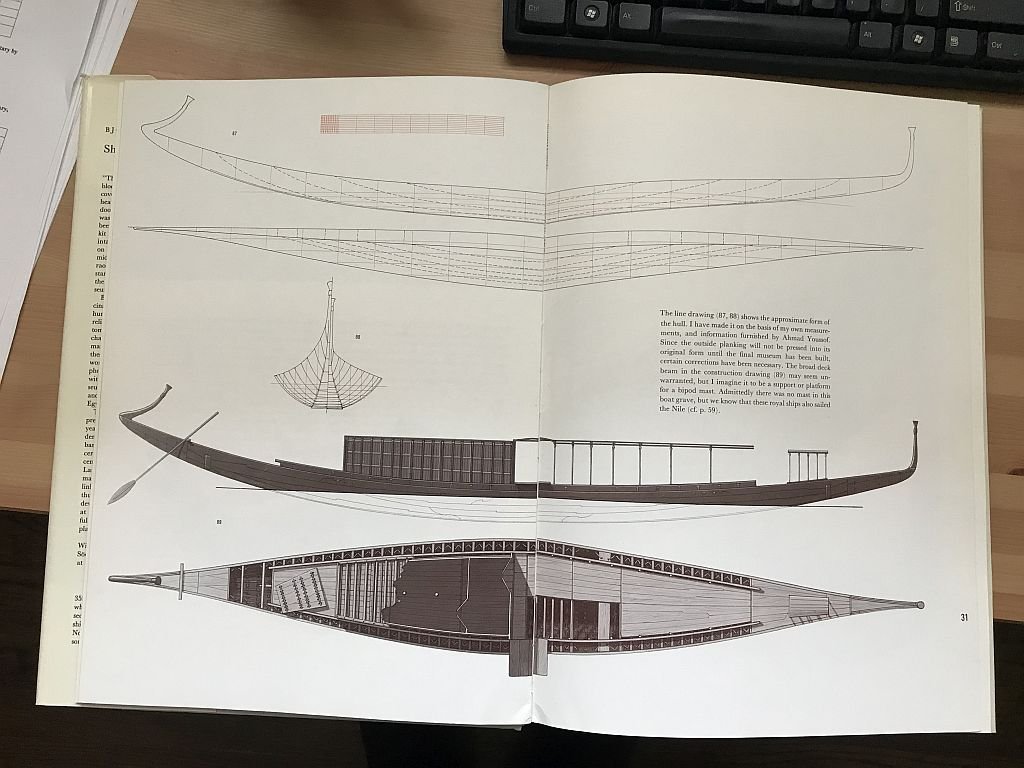
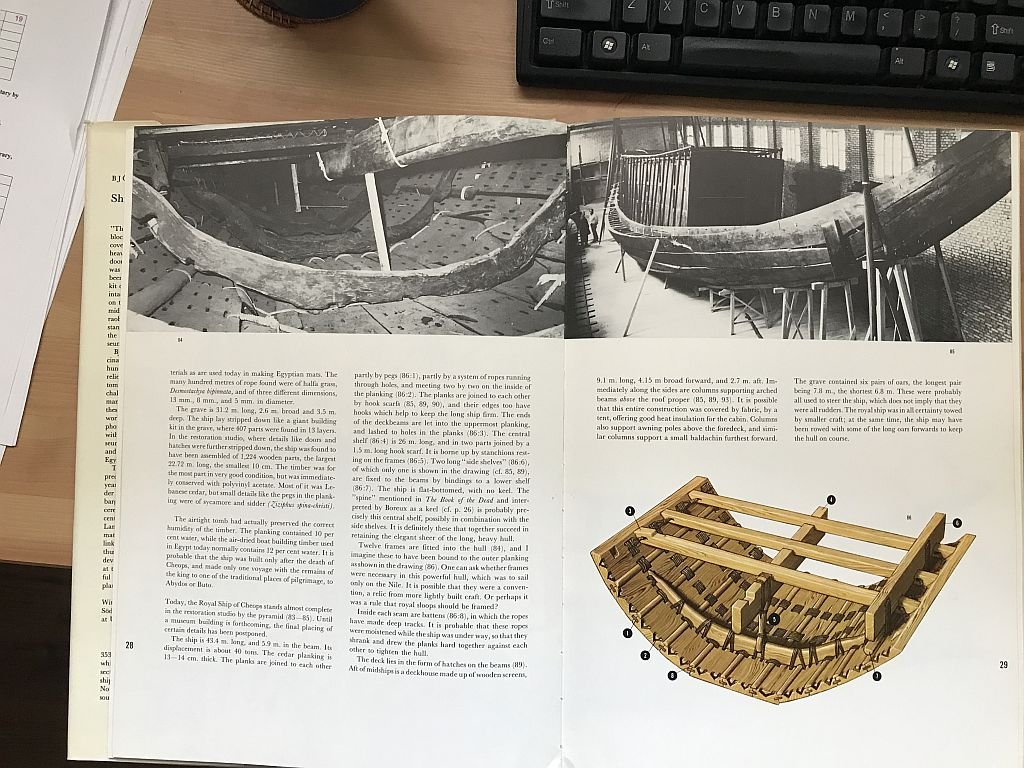
There is also a nice colourful book by and one with a lot of oars It is a lovely book with a lot of line drawings of smaller ships and photographs of Egyptian wall art depicting the ships. Michael

- 73 replies
-
- 5
-

-
- mediterranean
- galley
- (and 1 more)
-
Paul one thing I forgot to ask about the temp in your garage, that is not where you keep the model is it? I would be a bit concerned about the temp changes with all the glues and joints. Michael
-
Ah you mean like these only in green. These are on a 7/8ths scale inspection loco the levers on the sides turn the loco on and off and forward and reverse it is about 8 inches long and runs on 45mm gauge track. Michael
-
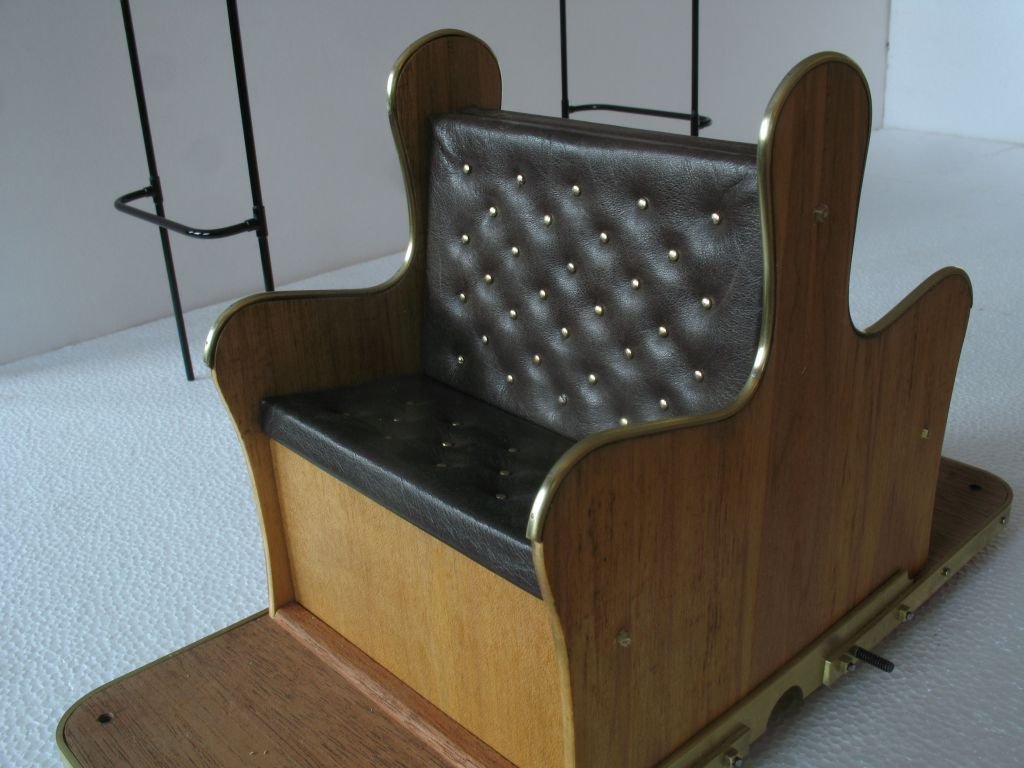
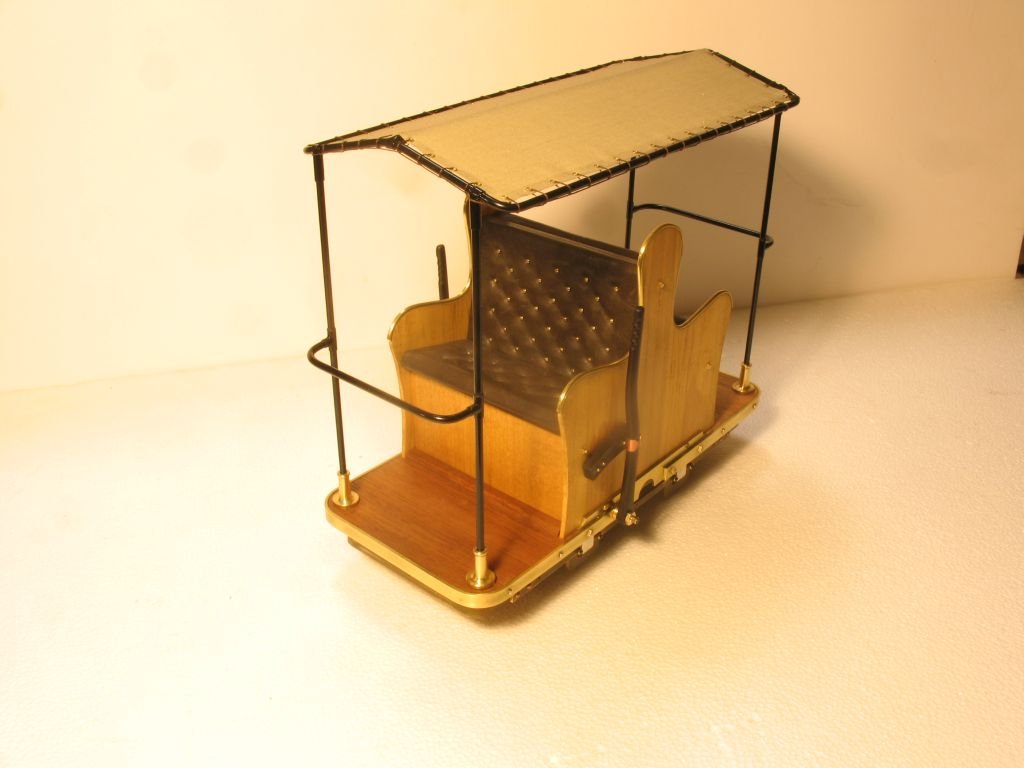
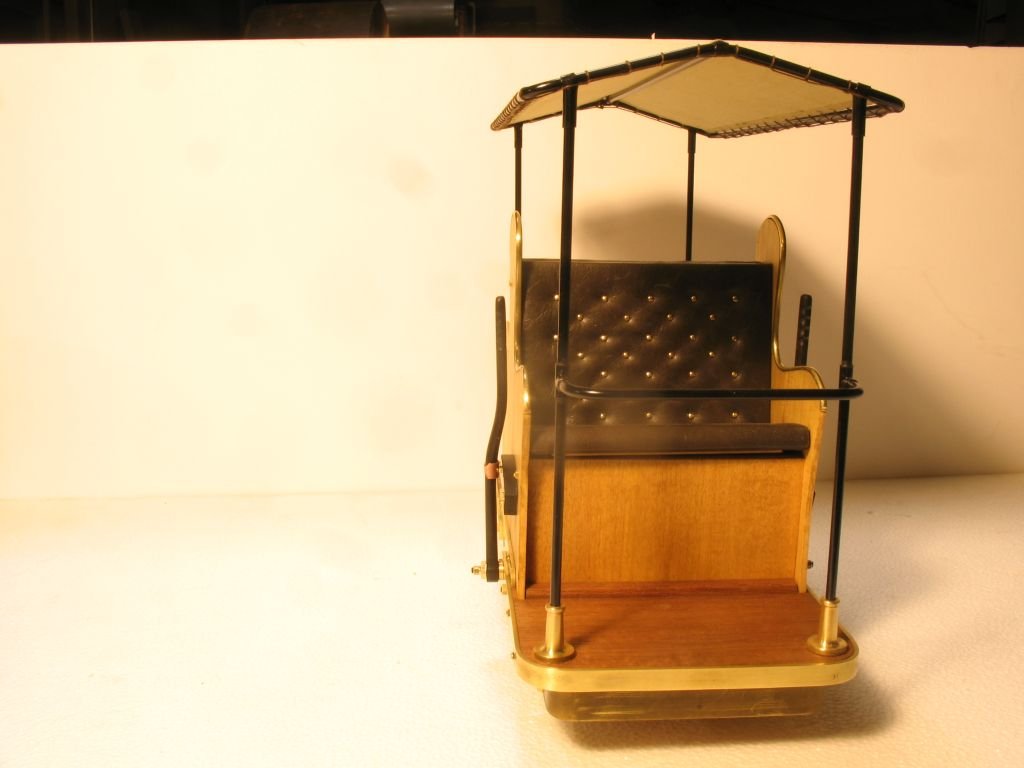
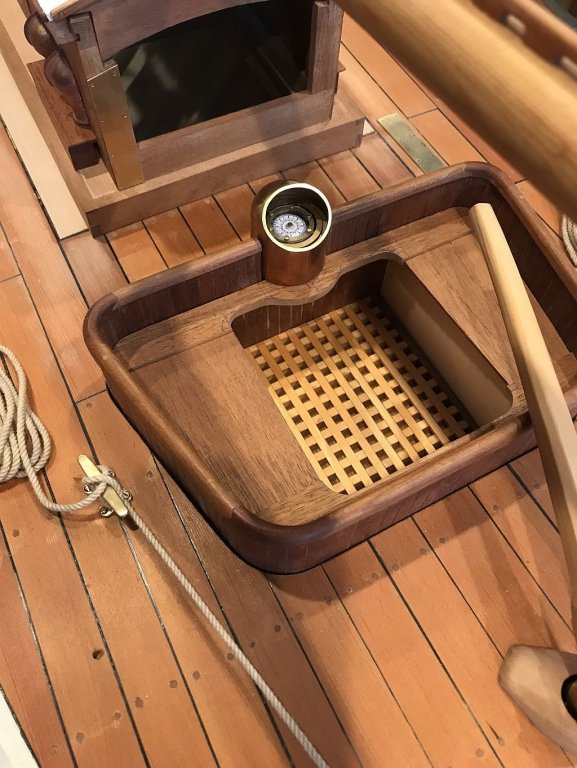
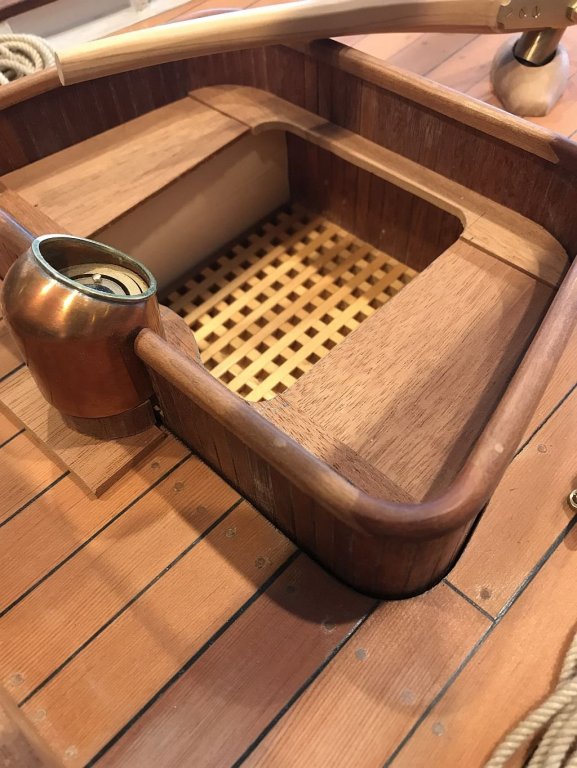
Thanks for the kind comments Mark. Last evening I was contemplating the way the cockpit looked and thinking about comfort etc. so did a bit of shifting things around raised up the top edge so that it is 11 inches above the deck and rough blocked in some seating which will have a couple of small tip out lockers under them. I want to keep the seats as a solid surface. First i took the earlier floor grating and rotated it 90 degrees to give me the width and cut the angled sides off with the jewelers saw then cleaned it up on the shooting board. Then roughed out a few scraps of Mahogany to sort out the shape of the seats, the final will be the same thickness obviously and a full 1inch thick (1/8th) The lower woodwork under the seats will also be mahogany and the lockers will open. Hmm... I still need to finish the cover for the compass. Michael
-
Doris, truly amazing!! Don't listen to Druxey he is just jealous.😉 Michael
- 1,035 replies
-
- 10
-
-
- royal katherine
- ship of the line
- (and 1 more)
-
A wonderful new subject. I really enjoy watching your builds come to life Javier. Michael
-
A great solution Valeriy. Did you form the flair with a steady smooth continuous pressure, and what did you use for Lubricant? It also looks like you formed the metal without annealing it. Michael
-
Beautiful Work on the pumps Gerald. I share your sentiment about wanting to know how something actually works when making a model or a part. Michael
- 281 replies
-
- 4
-
-
- falls of clyde
- tanker
- (and 2 more)
-
GL yes the fake screws are that small, I was later looking at the scale hardware site and was amazed by the small rivets, and I have been laboriously machining the heads of pins! I am going to pick up a selection of those tiny rivets to be able to make different screw simulations. Bob, It did occur to me that by lining up the slots to port and starboard then the water would drain out instead of sit there, likewise with the vertical ones being up and down. Thanks for noticing. Busted!! Rob I didn't!! I completely forgot... and I sail, I know that water gets everywhere. I shall have to run a bead around the inside. The pins are that pins and were tapped in the last couple of millimeters removing them would be difficult to say the least. it is really one of the reasons in 1:1 I much prefer real screws because you can unwind them out. Oh Well. Michael
-
It is all about the journey isn't it!....You will find a way. Michael
-
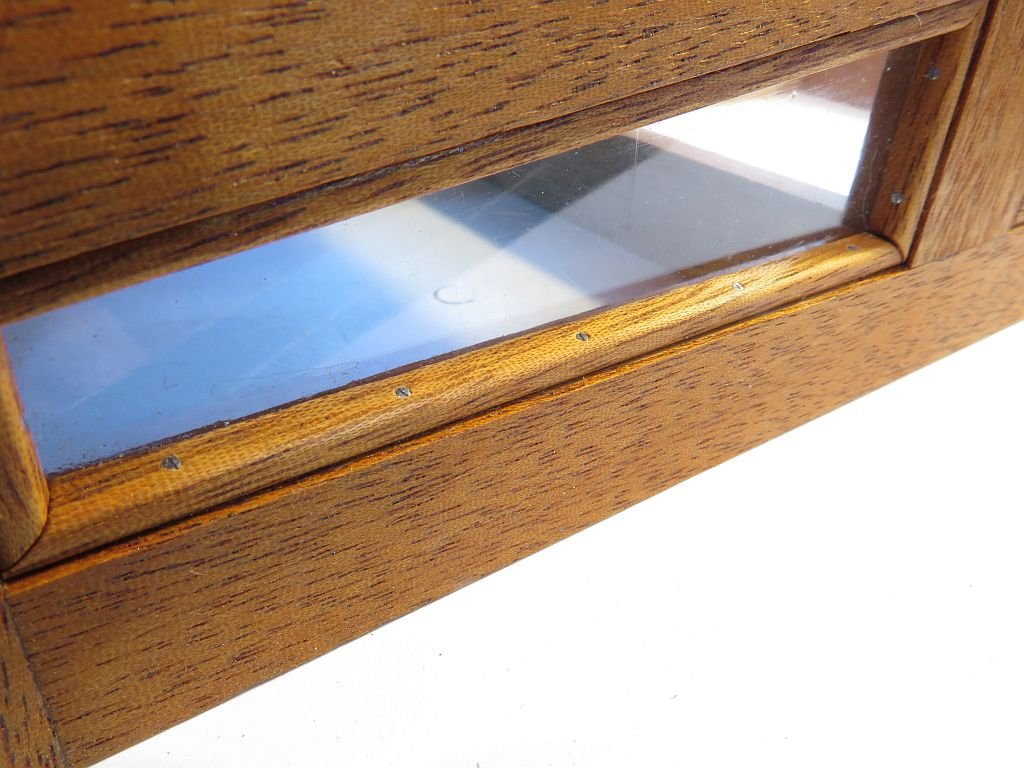
This morning i was able to get the retaining (screws) made for the port side window stops. They are made with the same pins as the round head wood screws, these ones are flat head and the heads are .037" diameter. Michael

-
HMCSS Victoria 1855 by BANYAN - 1:72
michael mott replied to BANYAN's topic in - Build logs for subjects built 1851 - 1900
Pat, you have done an outstanding job on the winch, it is a good job you placed the scale rule next to it! ( I'm gonna have to buy me one of those 10x larger than life steel rules for these types of pictures)😉 Michael- 1,021 replies
-
- 5
-
-
- gun dispatch vessel
- victoria
- (and 2 more)
-
I finally gave up on the scroll saw machines, I am thinking about a straight up fretsaw with the deep throat. I have also been thinking about a modification to an old idea, so that instead of a treadle type tool with the parallel arms. Of having only one arm on top that is flexible but long enough to eliminate the odd motion that the scroll saws seem to have, with a vertical shaft below that works only on the pull stroke and the arm pulls it back up. Ill keep you posted. Nice to see the frames taking shape, Keith. Michael
-
I feel the same way when I watch someone play the piano. The thing is as you know its the practice that is the key, and each piece affords a little more knowledge of the puzzle on the best way to proceed. Michael
-
Keith, the layout of the frames on the sheets brought a smile to my face. It really is satisfying to be able to use the symmetry of the hull form to advantage when organizing the layout for cutting. Michael
-
Another way to make shackles
michael mott replied to vaddoc's topic in Metal Work, Soldering and Metal Fittings
Nice to see some new approaches to the making of the shackles. they look good Vaddoc. Michael -
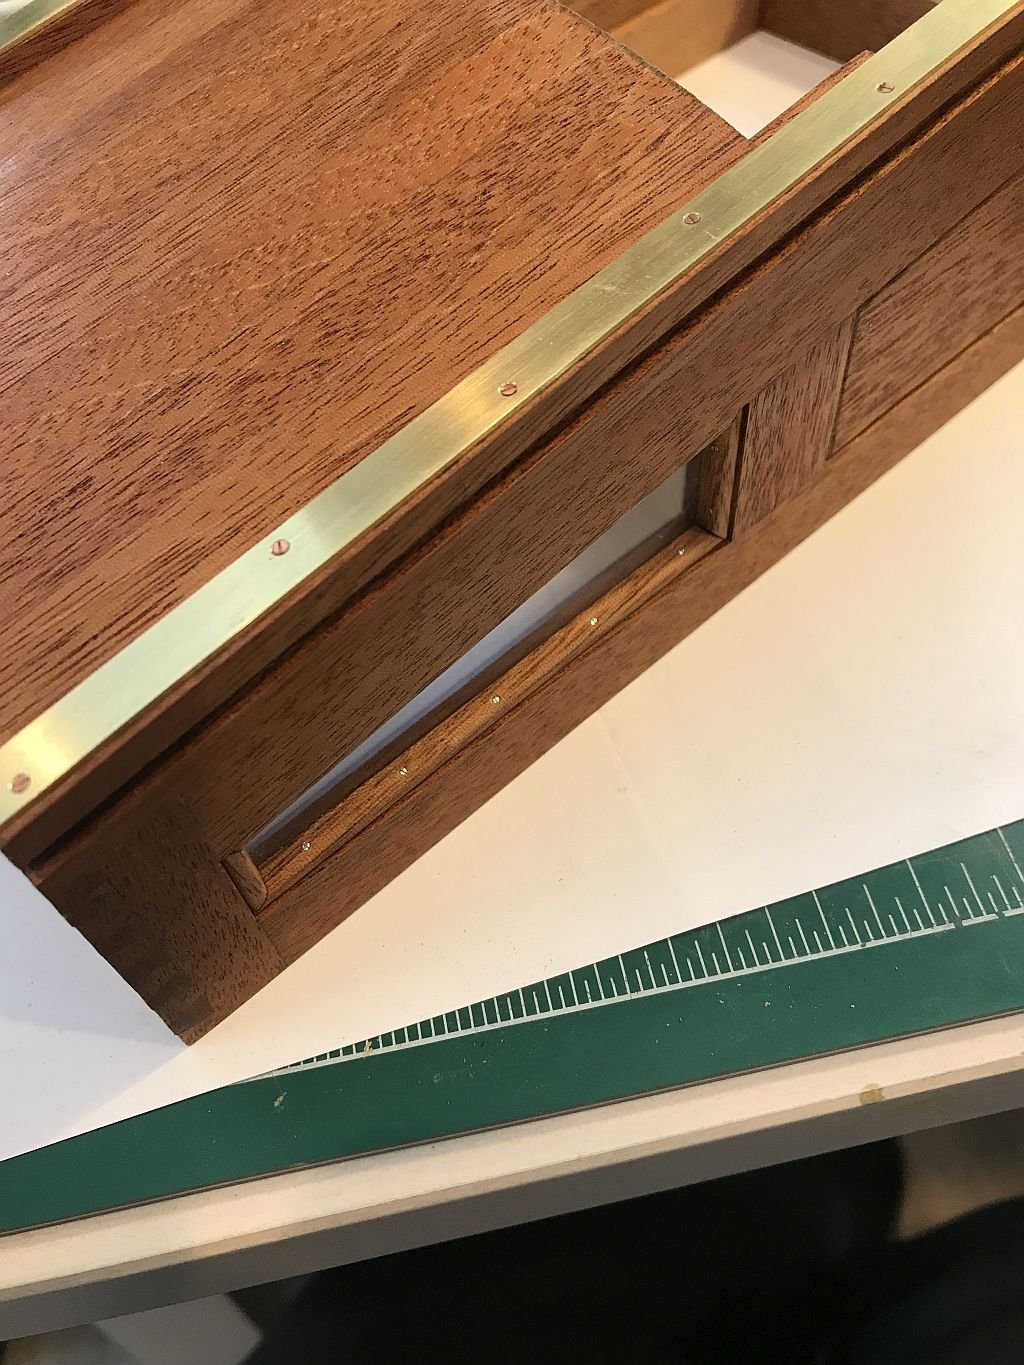
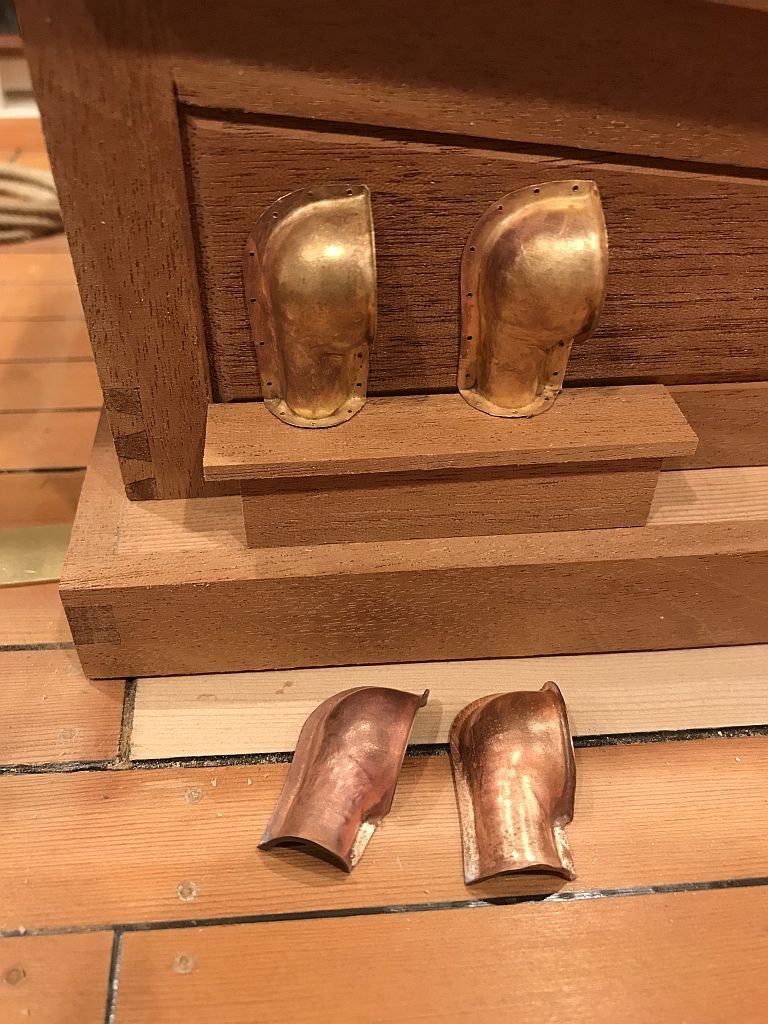
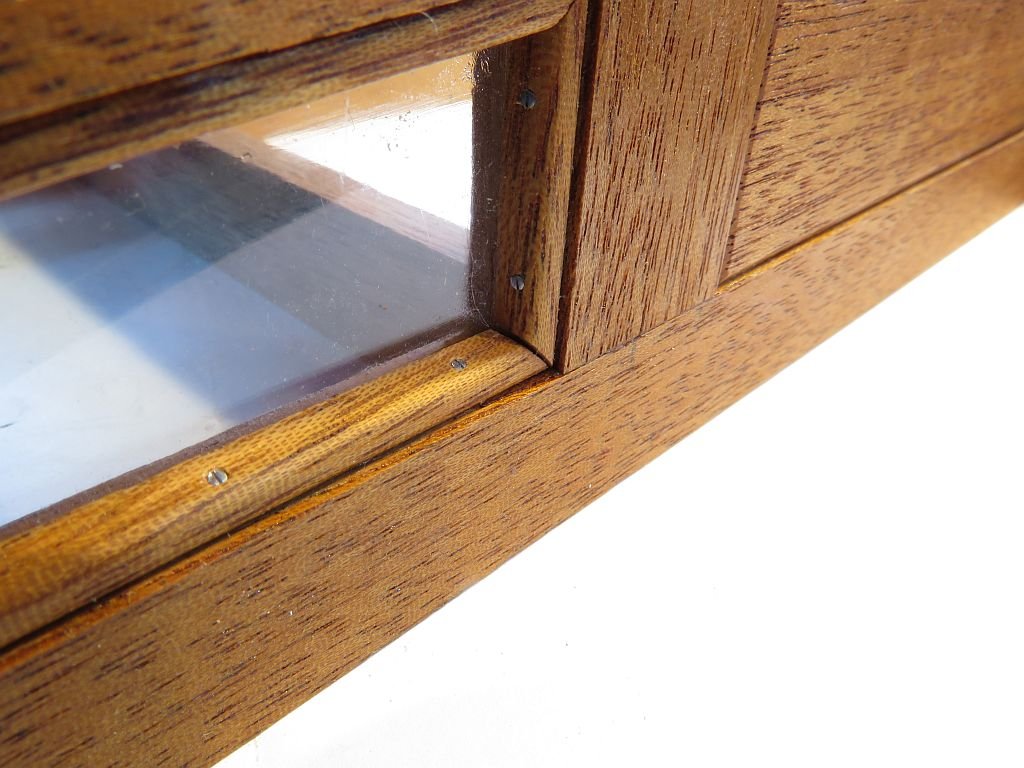
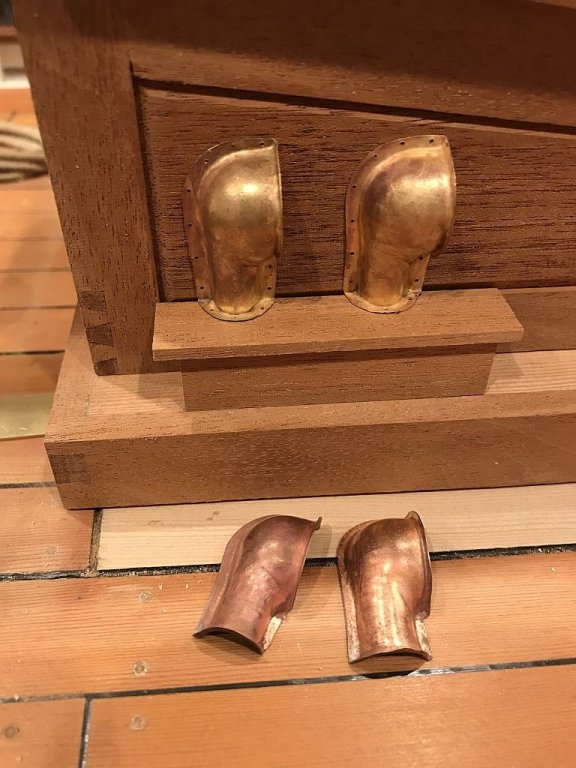
Thanks for the visits and kind remarks, they are greatly appreciated. Today I did some final shaping of the cleats to hold in the glass by making the section tapered rather than square, this will allow me to drill into the cleat while in situ so that everything lines up. I also gave the top and the port side a coat of teak oil. Before I can drill the holes I needed to finish drilling the holes in the starboard vents these were the first ones that I had made after the experiments. I did not get the flanges quite right so this morning I whipped up a couple more. Then was able to finish drilling the holes so that I can re-set the drill to drill the cleats for the glass. Next I can make the cleats for the starboard glass. Michael
-
Admiralty model query
michael mott replied to iMack's topic in Building, Framing, Planking and plating a ships hull and deck
I have also enjoyed this thread, and I agree with Druxey regarding what can be accomplished with a few basic tools. That said I also lust after some of the old tools and instruments. and I would care to guess that many a fine ship was done by eye, by a well trained shipwright, with nothing more that a crayon or chalk. Those sets of curves are beautiful though. Michael -
Straightening thin brass wire
michael mott replied to vossy's topic in Metal Work, Soldering and Metal Fittings
Let me add one one thing to try. I have found that gluing a couple of sheets very fine wet and dry paper to flat surface, then taking the wire and getting it red hot and quickly quenching it it will anneal the wire then rolling it between the two sheets. I have found this to work every time no matter how thick or thin the wire is. Also the brass rod that are sold for the hobby industry are great as well. Michael -
Funny thing Rob revisiting your build today, brought back memories of my ten year old self gluing the plastic billowing sails on a small airfix plastic kit, I cannot even remember what the ship was. You are certainly doing a wonderful job, with the sails. Michael
- 1,208 replies
-
- 4
-
-
- great republic
- clipper
- (and 1 more)