HOLIDAY DONATION DRIVE - SUPPORT MSW - DO YOUR PART TO KEEP THIS GREAT FORUM GOING! (Only 13 donations so far - C'mon guys!)
×


michael mott
-
Posts
5,197 -
Joined
-
Last visited
Content Type
Profiles
Forums
Gallery
Events
Everything posted by michael mott
-
 Rob I will put something together. Druxey no it is 30mm to the foot scale which makes 45mm(1 3/4") gauge the equivalent of 18" gauge at 1:1. Michael
 -
Ed I am simply lost for words regarding the work you are doing to show all of this rigging, I am not sure that Longridge went this far, and if he did then he would be smiling I'm convinced. Michael
- 3,618 replies
-
- 1
-

-
- young america
- clipper
- (and 1 more)
-
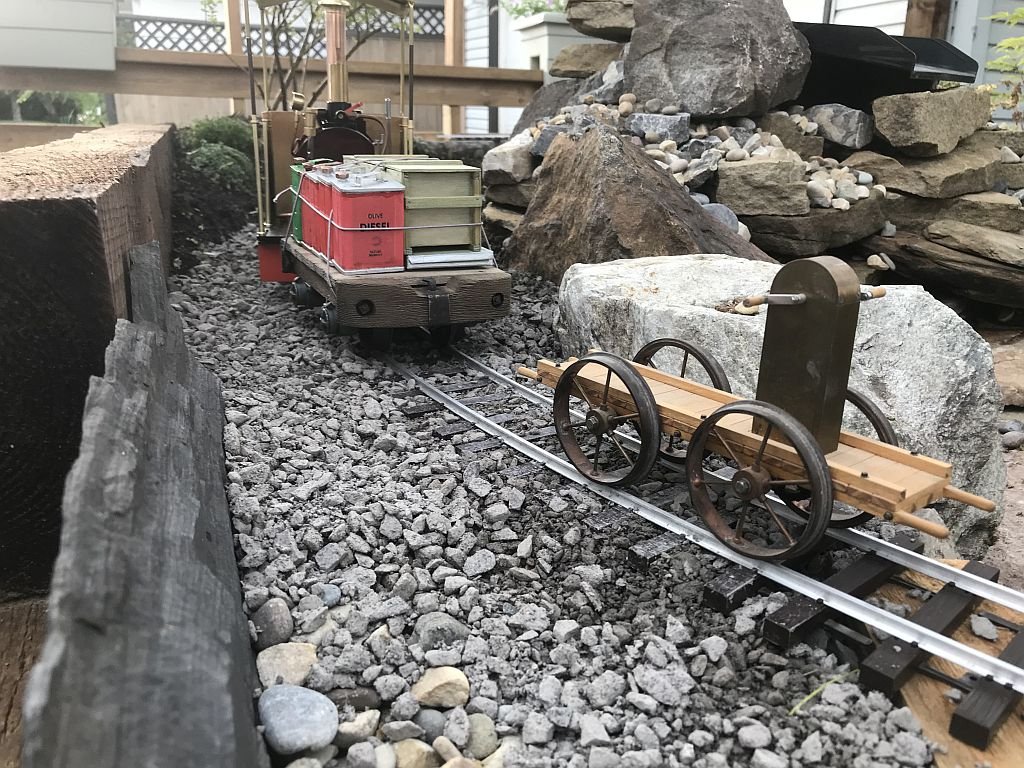
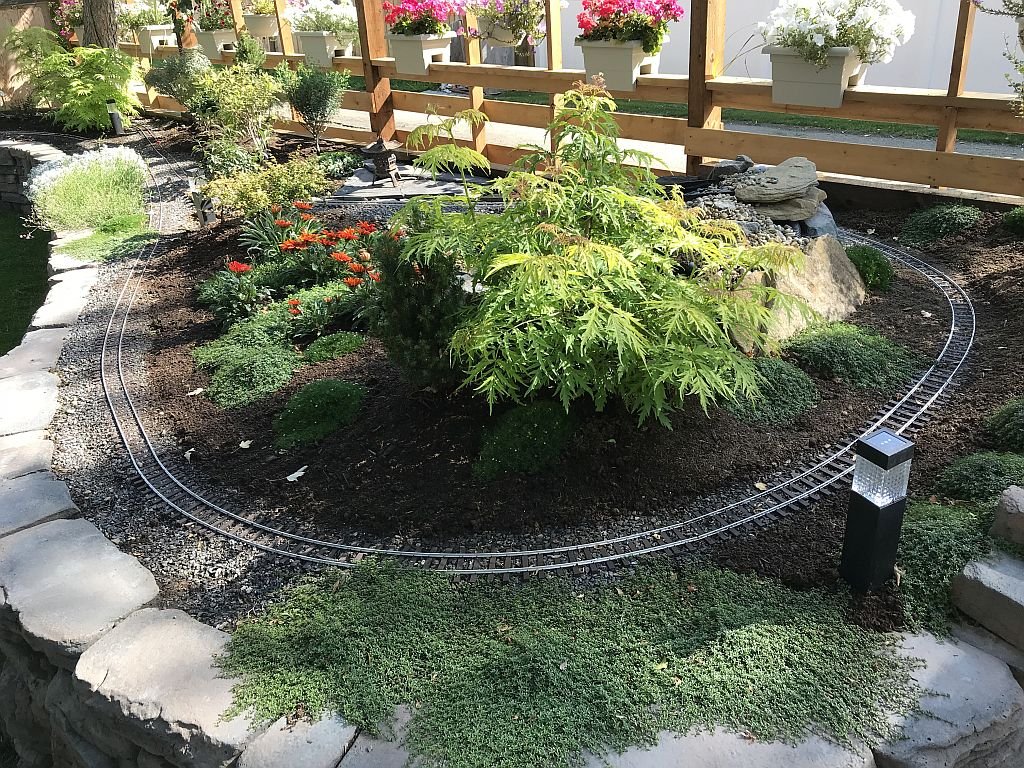
Good Morning Rob, Yes you caught a glimpse of one of my other passions. The track you see up against the wall is indeed "O" gauge track. I also have a fair bit of "HO" and more 45mm gauge track. like this. But Not to hijack my own thread. I can talk about my interest in model live steam railways and other model railway stuff in shore leave if you are interested. Michael
-
Sharpie by Jim T - Scale 1:16 - SMALL
michael mott replied to Jim T's topic in - Build logs for subjects built 1851 - 1900
Well that looks fantastic. see you can teach an old dog new tricks 😀 Michael -
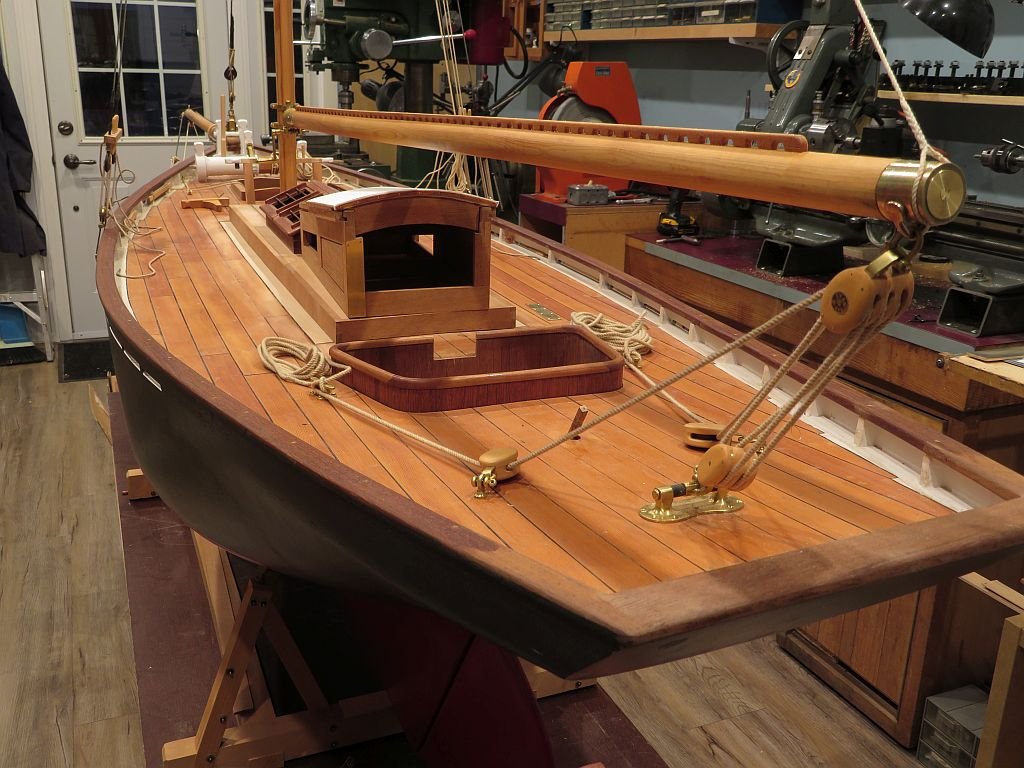
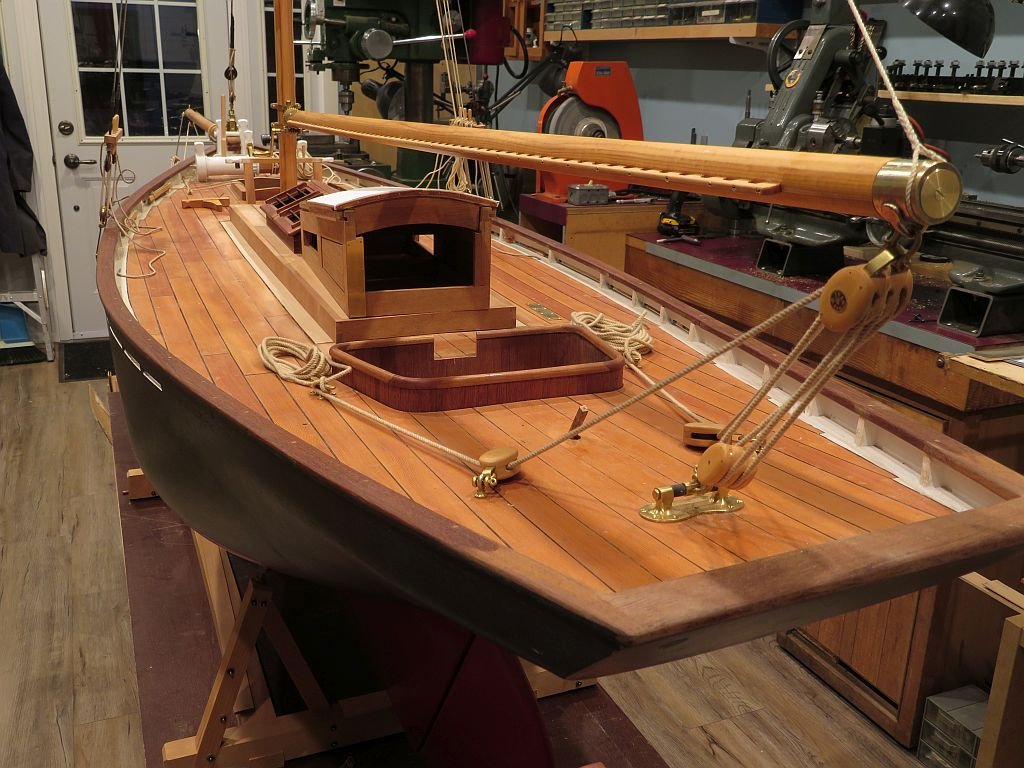
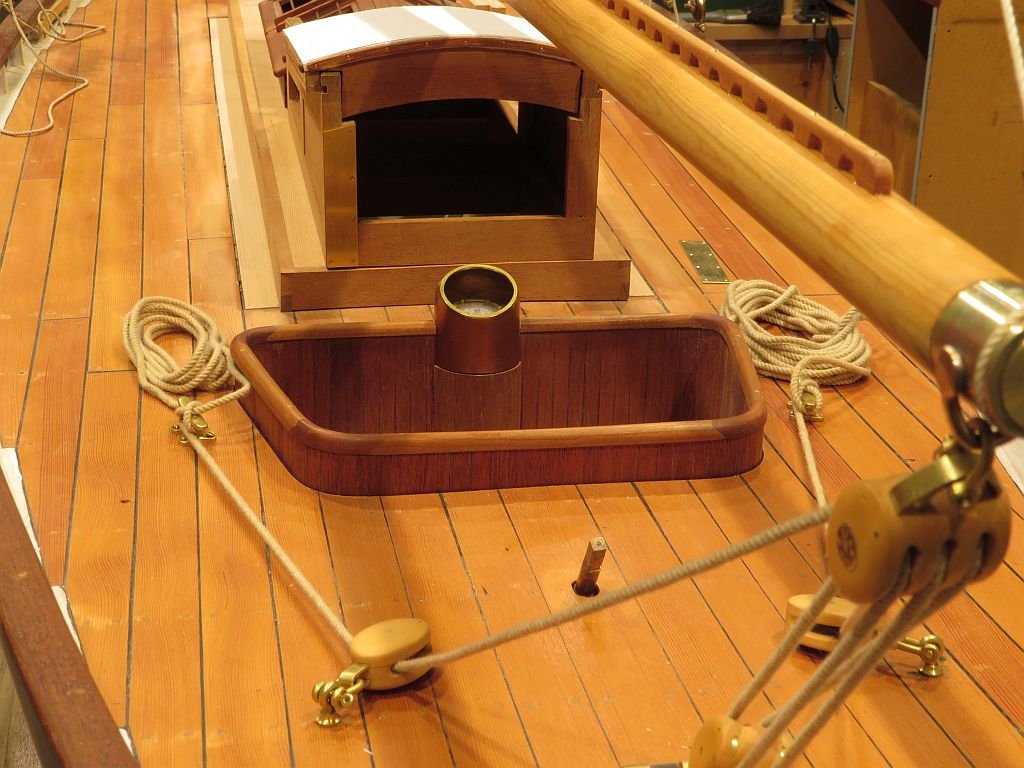
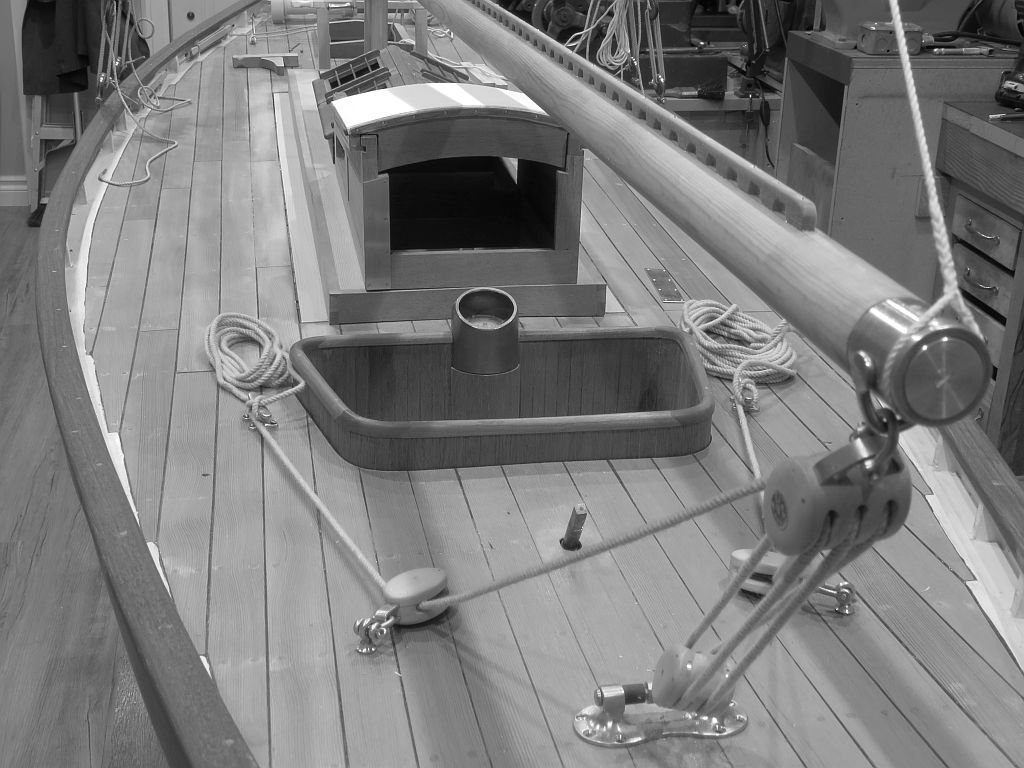
Thanks Rob. I did a little test this afternoon to see how the boom fitting would work with the mainsheet set up. in the vertical position then rotated a couple of fun shots I need to finish up the companionway next. Michael
-
Sharpie by Jim T - Scale 1:16 - SMALL
michael mott replied to Jim T's topic in - Build logs for subjects built 1851 - 1900
Jim I also have a 10 in Rockwell Unisaw I picked it up back in 1979 about 10 years ago I swapped out the 2 hp motor for a 3/4 one as i am not ripping up commercial quantities of lumber any more. What I really like about it though is the rigid, and solid nature of the blade mandrel and the cast top. The thin curf blade that I mentioned earlier that is designed for non ferrous metal gives and almost mirror finish on thin wood. I also use a micro adjustable fence that I show in this thread Michael -
Looking good Denis, I like your portable workbench as well. Michael
-
Catching up a bit Patrick, my goodness you are able to pack a lot of detail into these small boats. The style of this one isn't really my cup of tea but you are doing a fantastic job of a very complicated yacht. Michael
-
Clever idea using some sacrificial wood for the template, Maury. I like the gauge that you are using to transfer the info from the drawing, do you have any further details about it? Michael
-
Hi Dan, amazing work so far I am envious of how quickly you are putting this all together. Michael
- 238 replies
-
- 4
-
-
- leviathan
- troop ship
- (and 2 more)
-
Sharpie by Jim T - Scale 1:16 - SMALL
michael mott replied to Jim T's topic in - Build logs for subjects built 1851 - 1900
Looks like a great start Jim, I shall be following along, you mentioned that the yellow cedar was right off the Byrnes table saw, I am guessing that you meant the strips and not the sheets. The Keelson looks great. Yes the 1/8th scale is fun but one is limited to the size of prototype to model, for small craft it really allows for some nice detail work. Michael -
Thanks for all the visits and kind remarks and for all the folk who added a like for the work. Bob Thanks for your observations on the shortcomings of the roller reefing. I have read elsewhere of the difficulties encountered with actually using this system of reefing. And as you also pointed out I will certainly not be dealing with the same issues. As I indicated in an earlier post my own personal preference is for a loose footed sail, which I have on my full size gaff rigged sailboat. This is a model and it was certainly fun building the roller reefing and the comb cleat, of course the model will be spending most of its time being looked at rather than sailed. The real fun and challenge is putting in all the lines and blocks etc on with real sails all functional. One of the reasons for raising the pin rail was because I was having difficulty easily cleating off lines with my fingers, I need to be able to belay them without tweezers. Michael
-
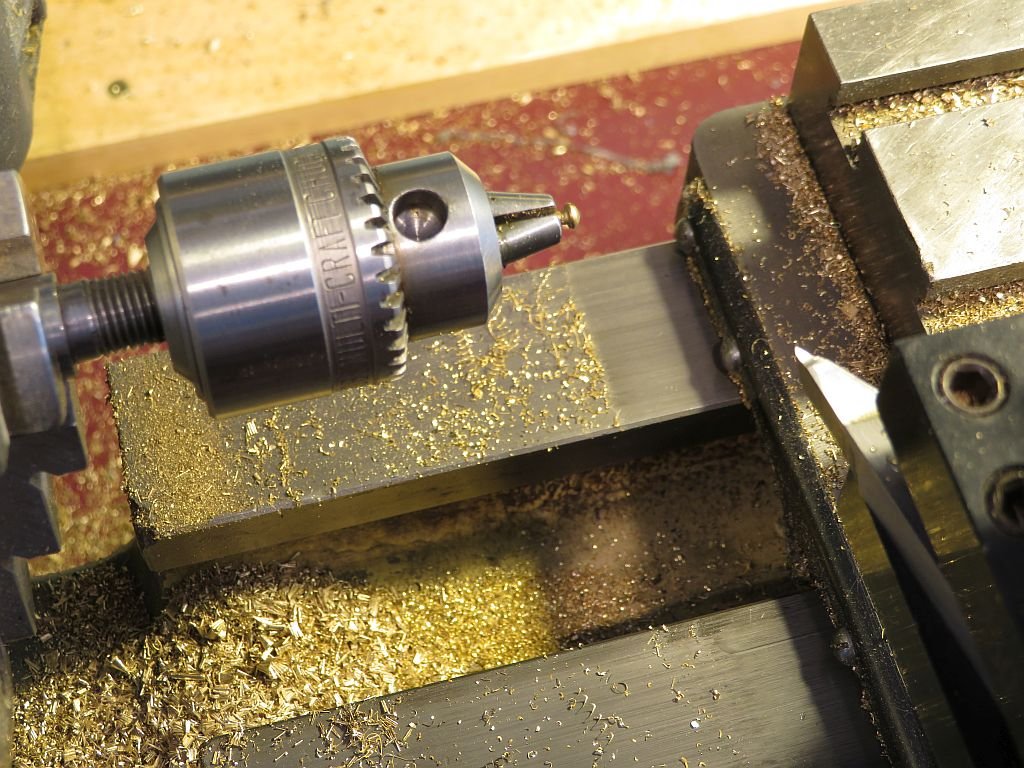
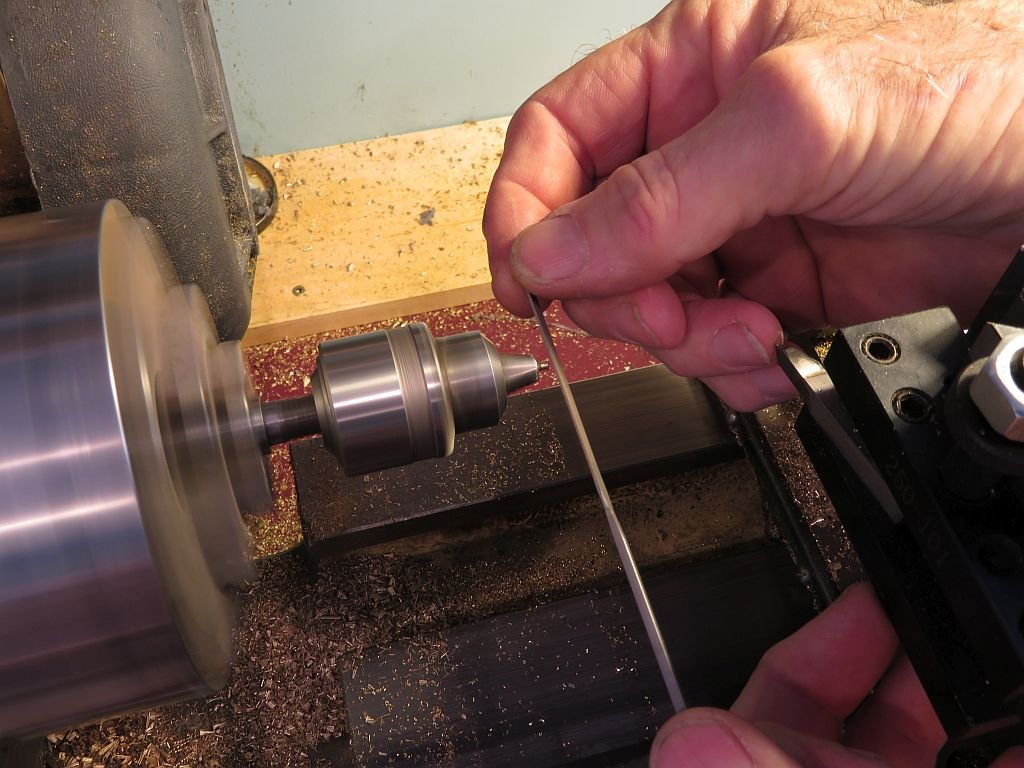
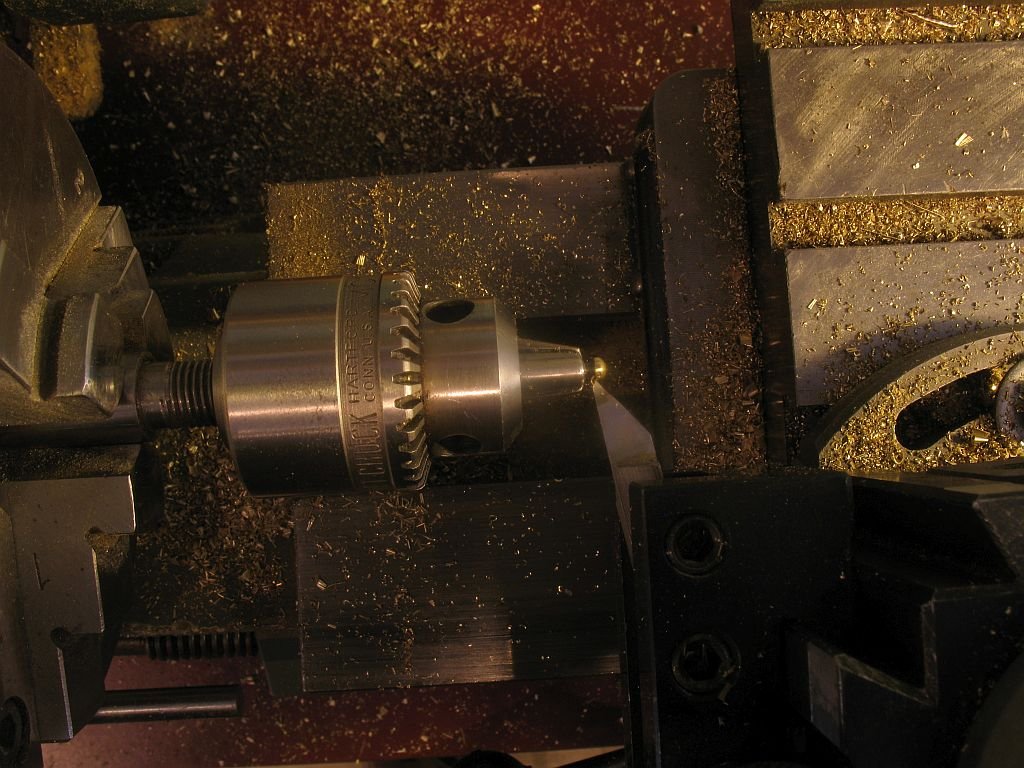
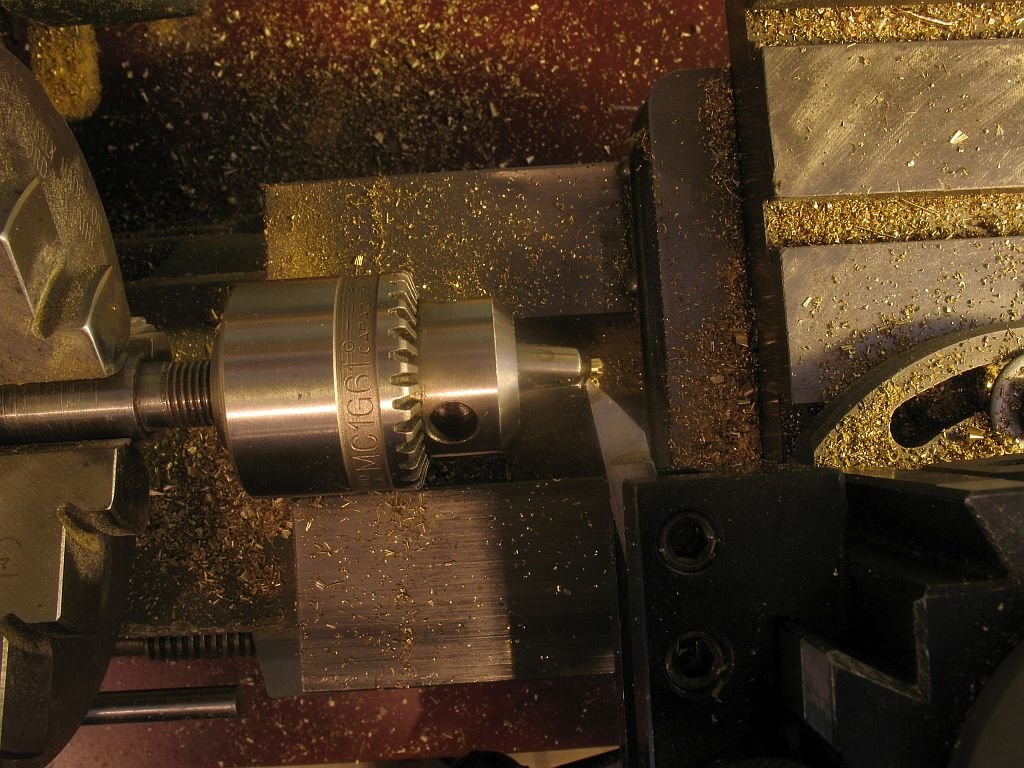
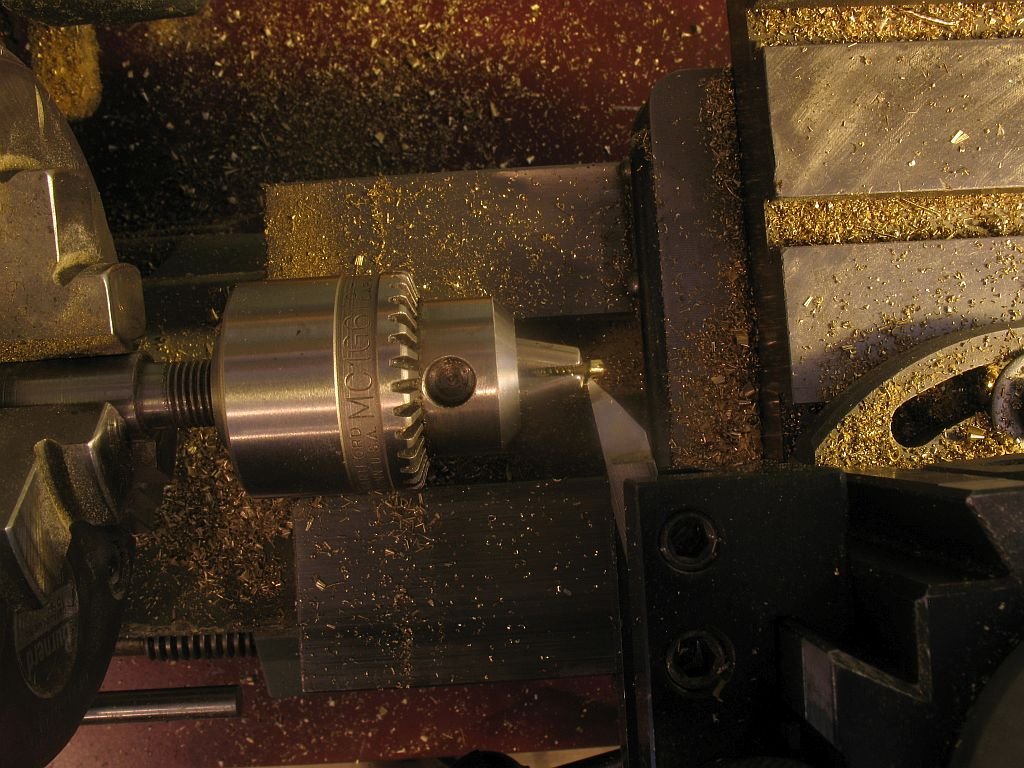
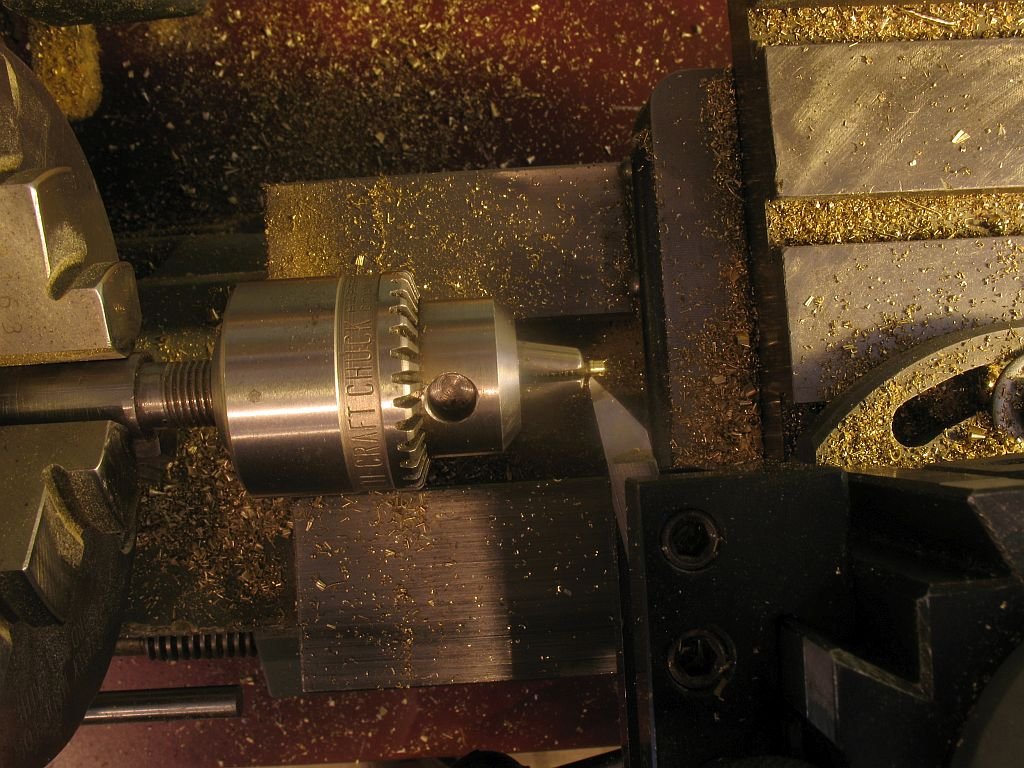
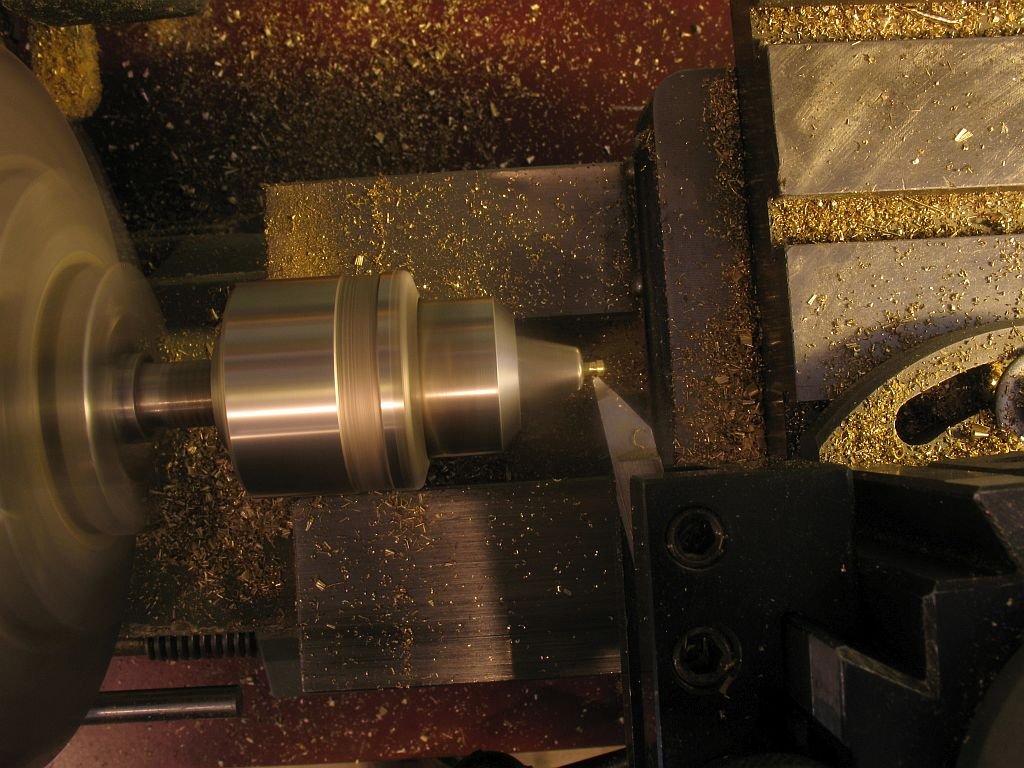
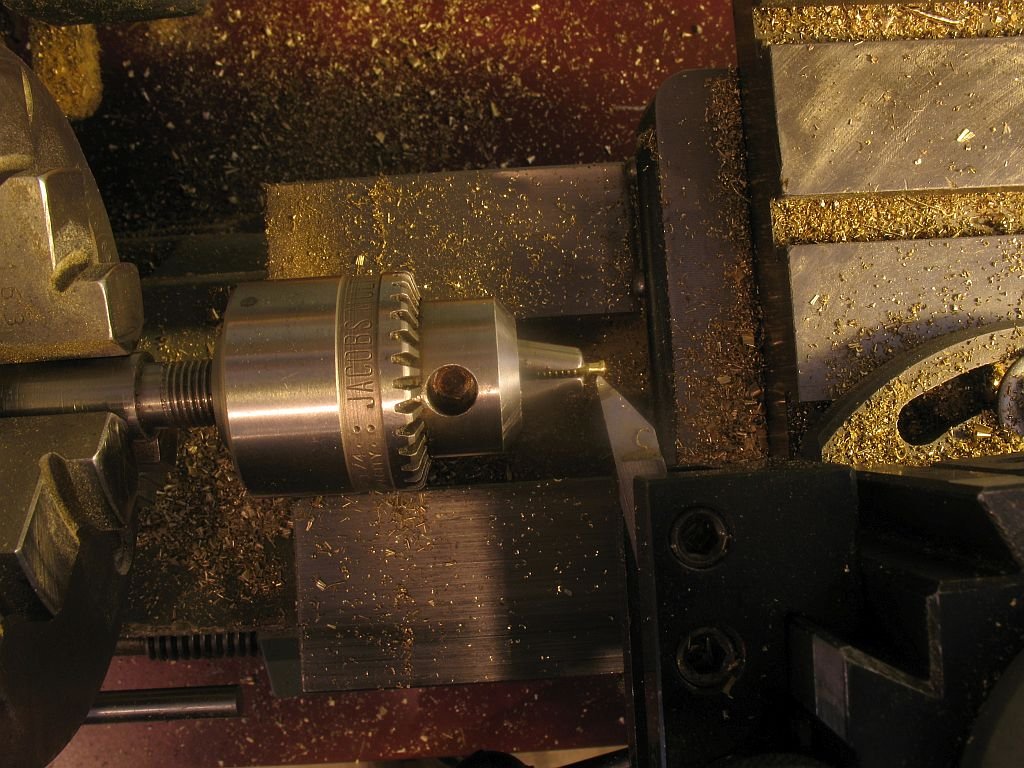
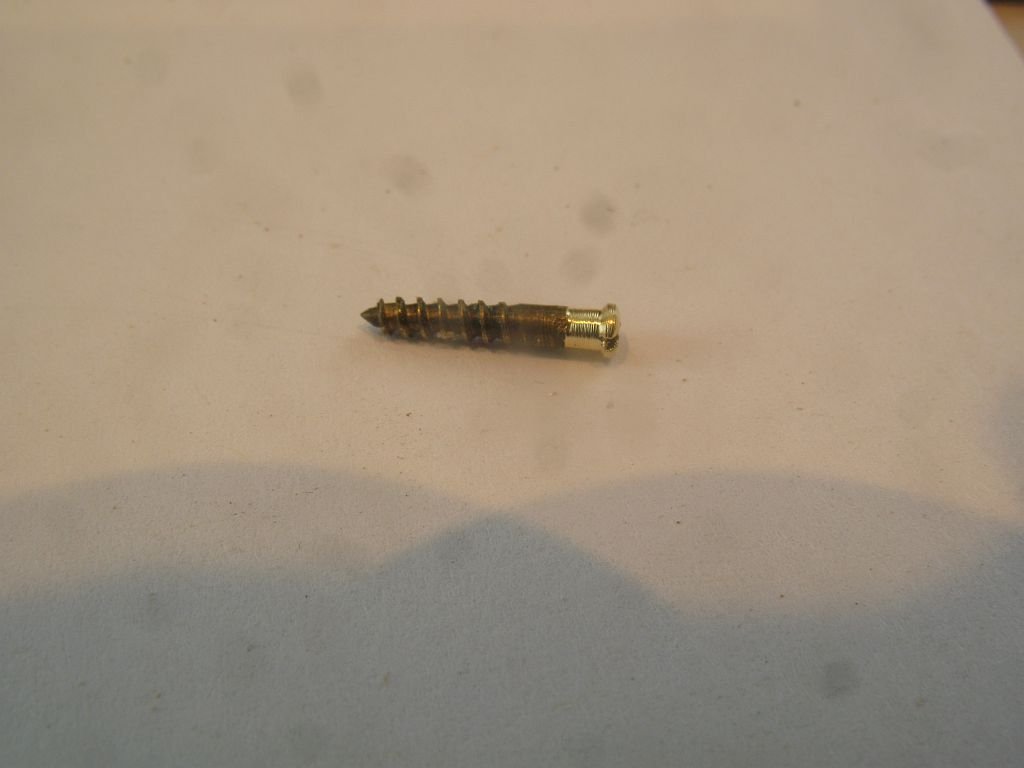
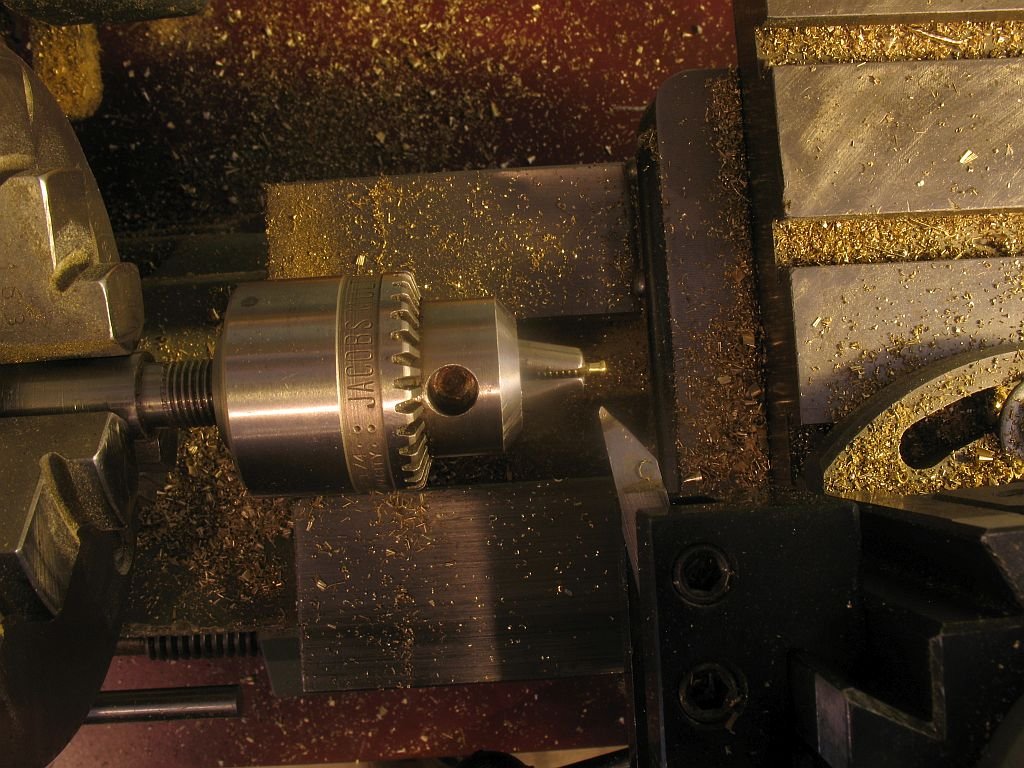
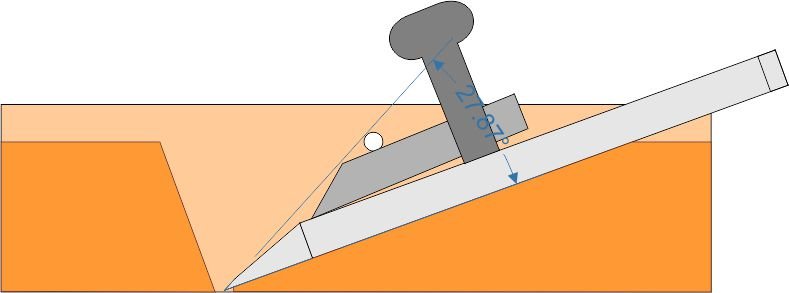
Good morning Druxey thanks I knew you would appreciate that. Jim, here is the Step by Step as promised. 1) I have mounted a small Jacobs chuck in the three jaw on the Myford, but any small chuck would suffice this could also be done with files in a dremel or similar rotary tool. 2) I set up a very fine 60 degree cutting tool for this work (this cutter I use to cut threads normally) taking a .010" cut make the first cut to reduce the diameter. The dial on my cross slide reads 90 on a dial that reads from 0-100 3) The second cut is .020" the reading on the dial is 0 my dial does mot compensate for the full diameter so when I move it from 90 to 100 or 0 (back to the beginning) it removes .020 twice the amount on the dial because the material is being removed on the circumference so there is .010 gone on the opposite side to the cutter as well. 4) The next cut was moved to 5 taking another .010" off. 5)The next cut was dialed in to 10 so another .010" taken off. I shifted the cutter out and back on this final diameter reduction to ensure that the cutter was not deflecting the screw away from the cutter at the same time it was reducing the diameter these cut are all done by moving the carriage back and forth by using the carriage hand wheel and taking the feed very slowly. I have a carriage stop so that I cannot run into the chuck. 6)The cutter was left to the chuck side of the screw head and the dial on the cross slide set to 20 thereby moving it .010" toward the body of the screw this was done with the chuck rotating because the tip of the cutter actually engages with the shaft of the screw a fraction, the carriage is then slowly moved away from the chuck cutting the tiny bevel, this is approx 40 degrees or so to suit the angle of the small beveled cutter that I am using as a countersink. Once the cutter is as close to the end of the flat reduced section. (basically the junction between what is left of the rounded portion of the top of the round head screw, and the reduced diameter, The cutter is retracted. 7)The carriage is then moved away from the chuck and a final tough up is done with a #4 cut needle file. 7) This is the result. not perfect but sufficient for what I need. I hope this is helpful. Michael
-
Miniature wood plane
michael mott replied to michael mott's topic in Modeling tools and Workshop Equipment
Pat as we say your welcome. I did make a new body today and flipped the blade over so the opening is even wider but the gap between the blade and the front of the throat is narrower. the back one is from Lee Valley the middle one I did today and has the blade flipped over, and the front one is from yesterday. I was lazy and didn't make a new blade. Michael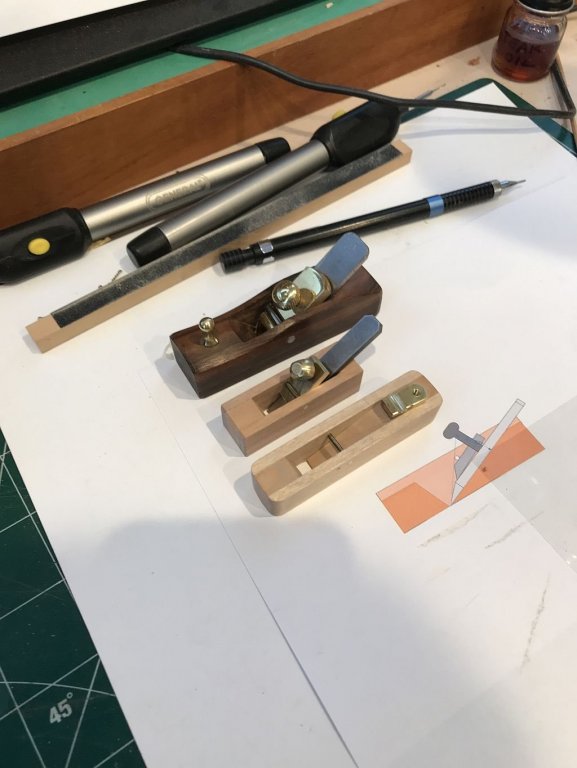
- 5 replies
-
- 10
-
-
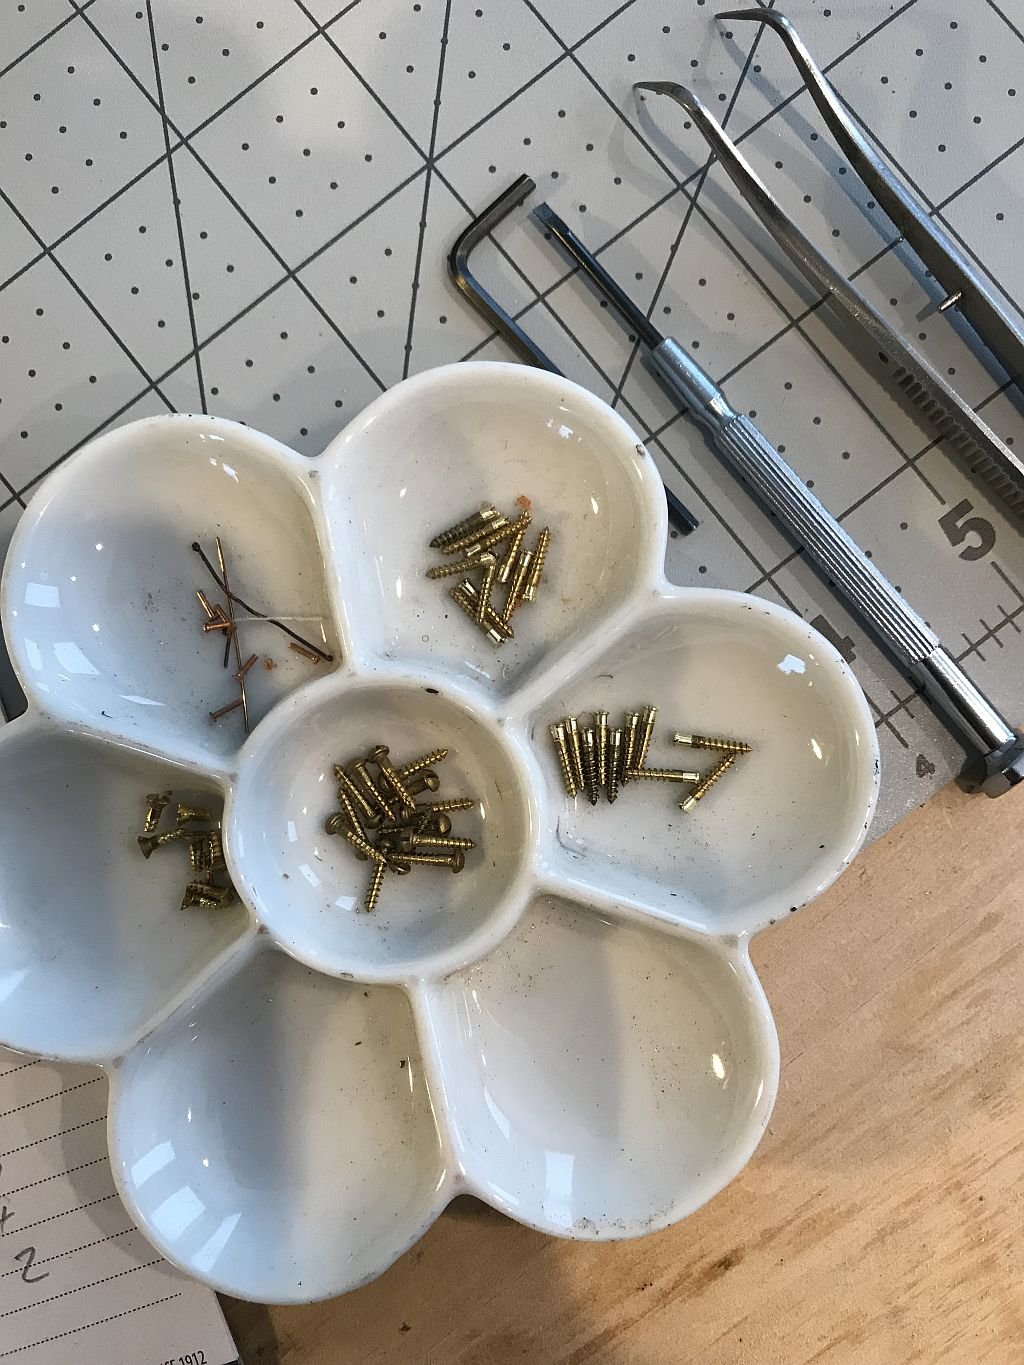
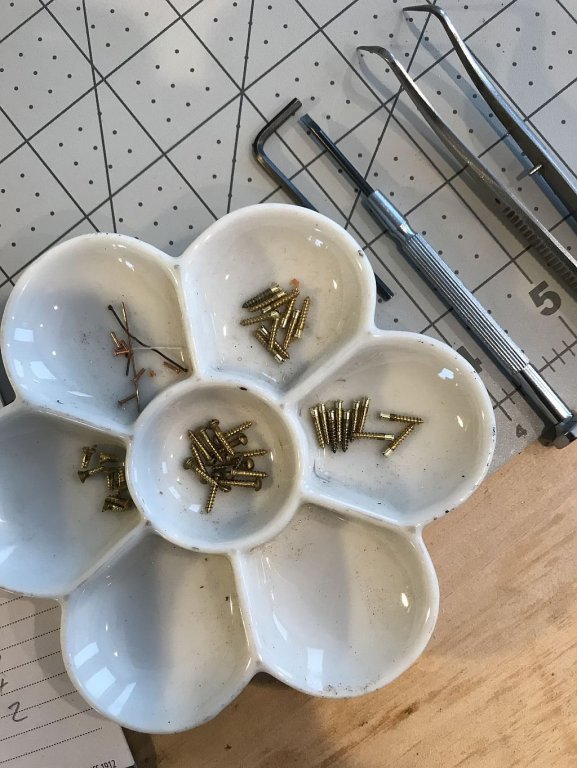
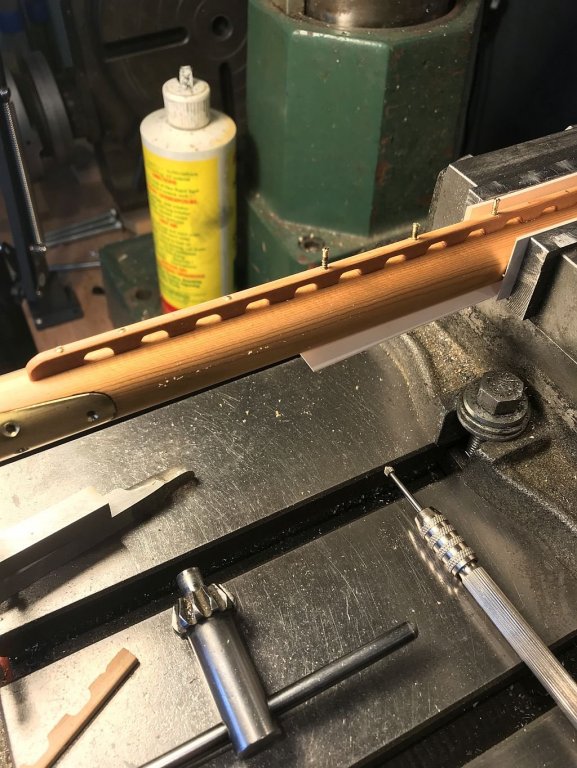
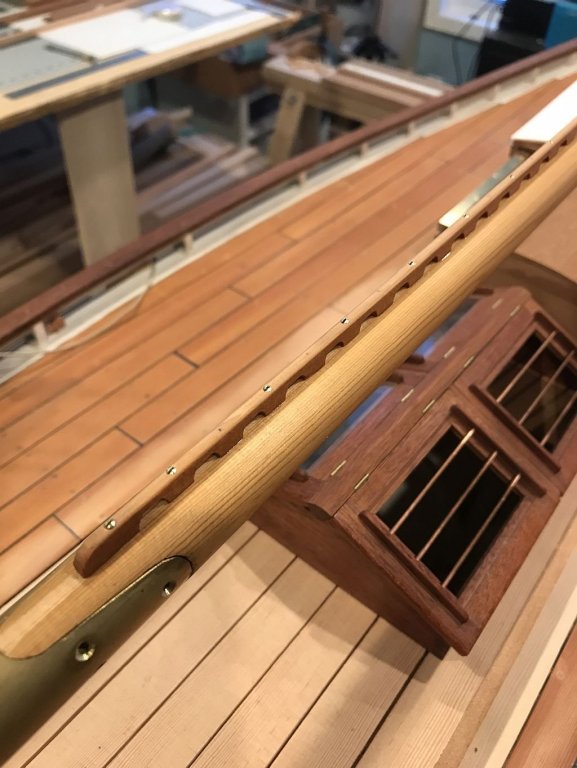
I mounted all the screw in the comb cleat today. 31#1 roundhead screws were converted to oval head of .085" diameter with a .062 body. I used some card double sided taped to the mill vice jaws to clamp the boom. I used a beveled burr by hand to form the countersink. Michael

-
Stunning work Doris, I was grinning from ear to ear when you showed the secondary tools first, and then the main ones, and it is so clear that you love this work. I hope that the things in life that are harder for you, become easier. Be well! Regards Michael
- 1,035 replies
-
- 9
-
-
- royal katherine
- ship of the line
- (and 1 more)
-
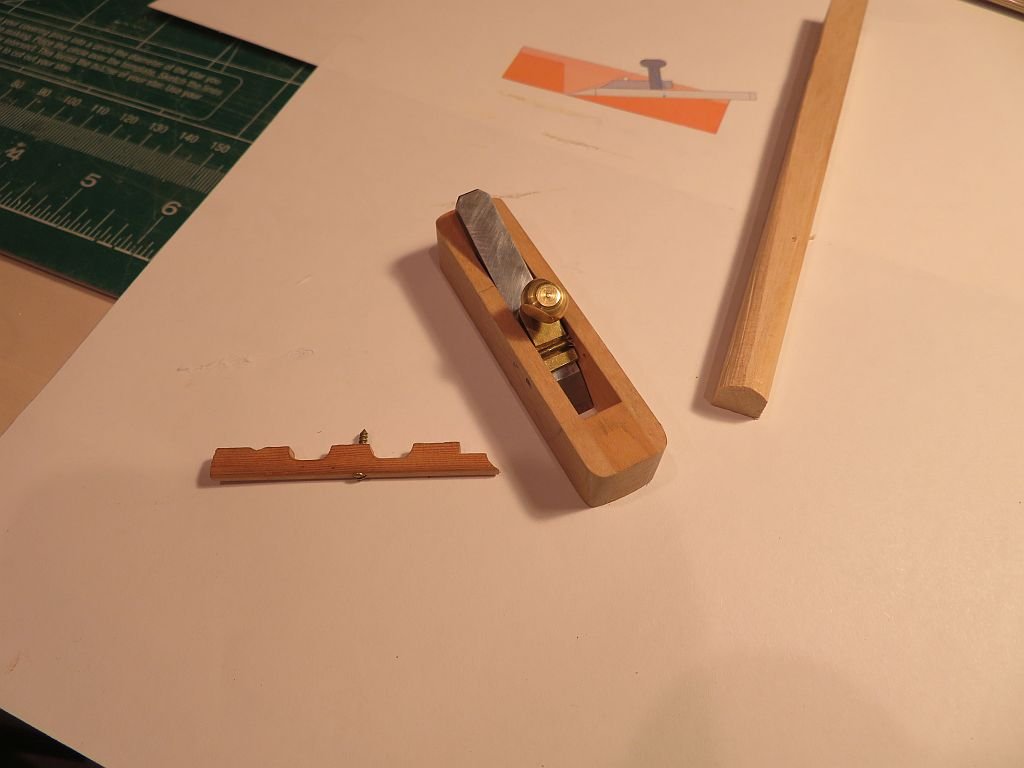
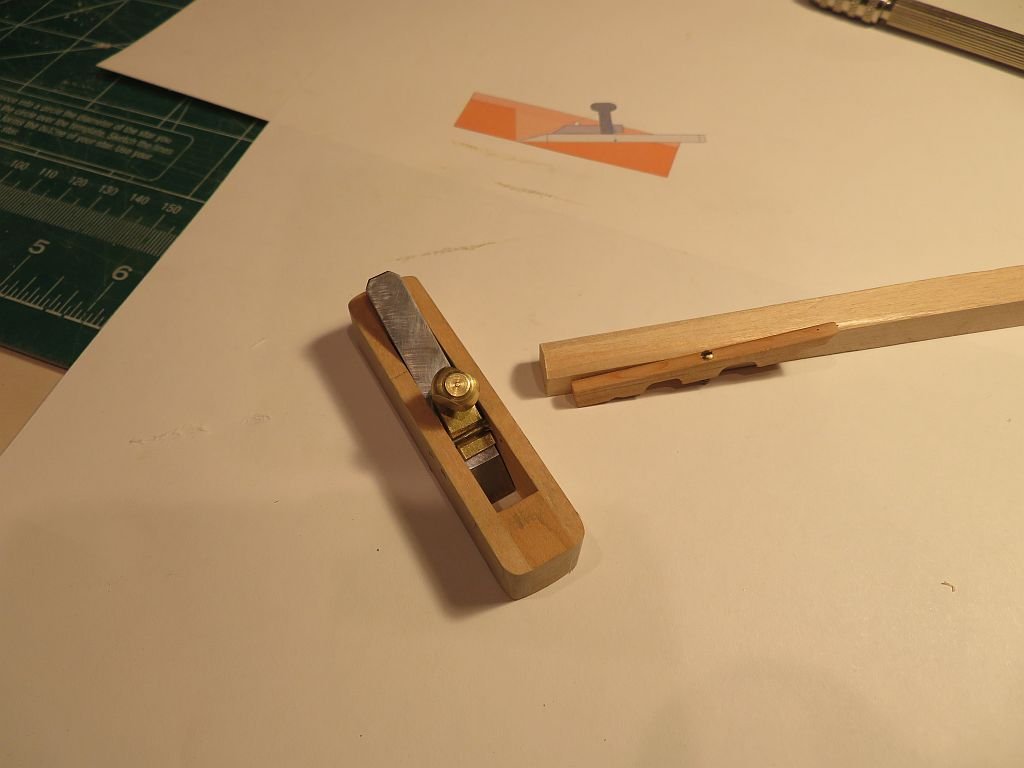
I took a break to make a small wood plane the blade is a piece of 1/8th gauge plate x 5/16 wide heated cherry red and quenched in oil. then sharpened on the wet stones The body is maple assembled from 4 pieces with a 1/16 retainer bar, and a scrap of brass with a 4x40 thumbscrew to lock the retainer plate. The throat opening is a bit too wide. I might just make another body or add an adjustable throat to this one. The picture also shows the #1 roundhead wood screws that i am modifying for fixing the comb cleat. the head diameter is .087" The plane is approx 2 inches long miniature plane.pdf Back to work on the boom tomorrow. Michael
- 5 replies
-
- 19
-
-
Nice pictures of the tests Johann. The clarity of the last shot is a bit deceptive regarding the sizes for me. The ropes are beautiful in and of themselves, could you post the picture of the ropes at a 1:1 scale for reference? Michael
-
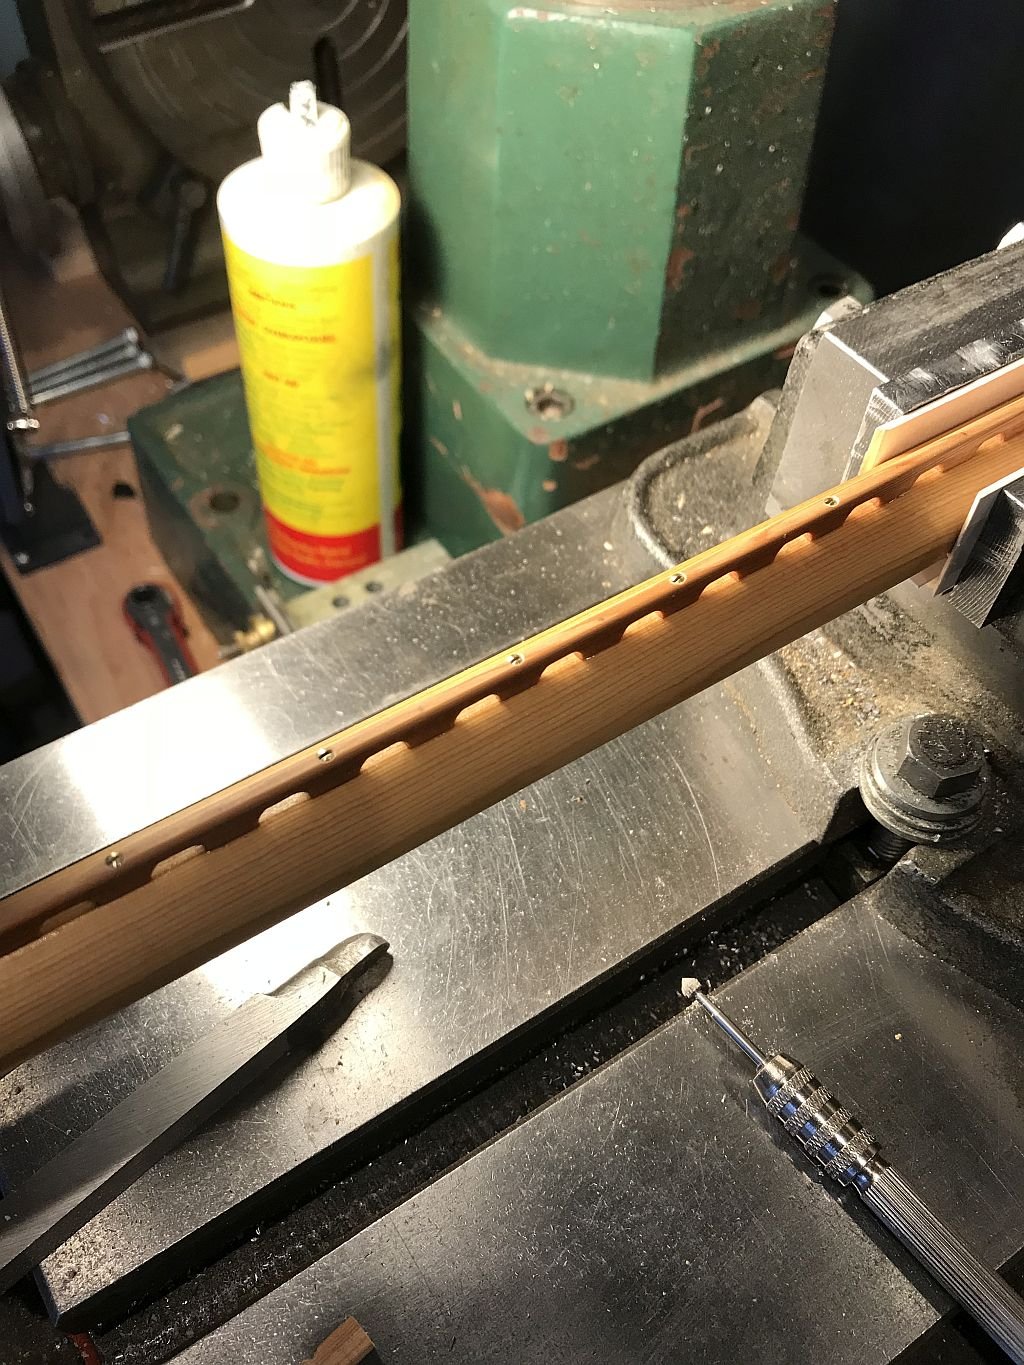
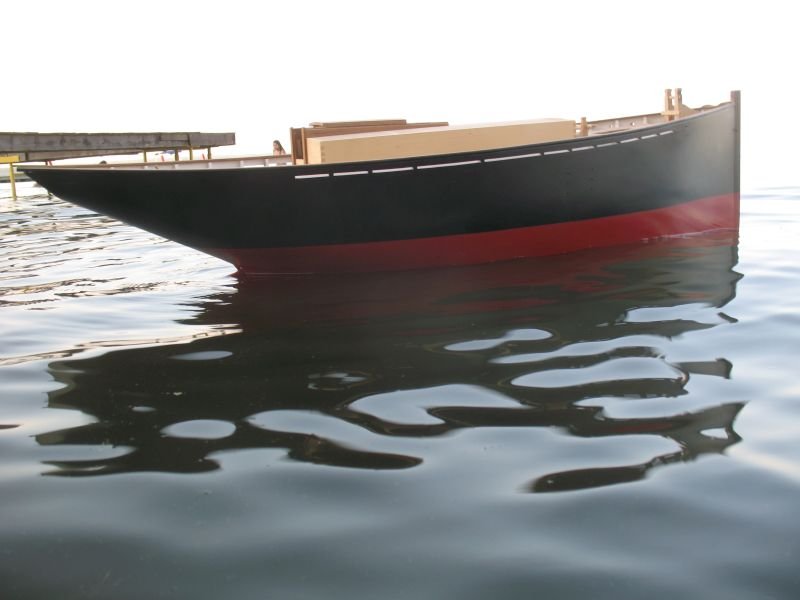
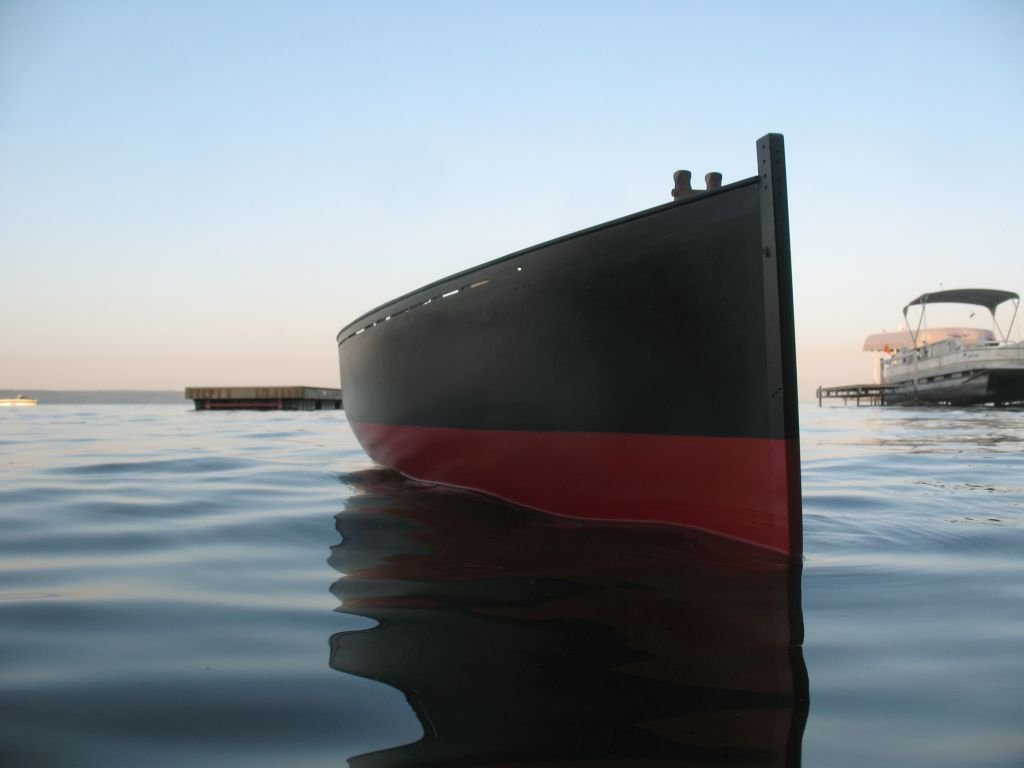
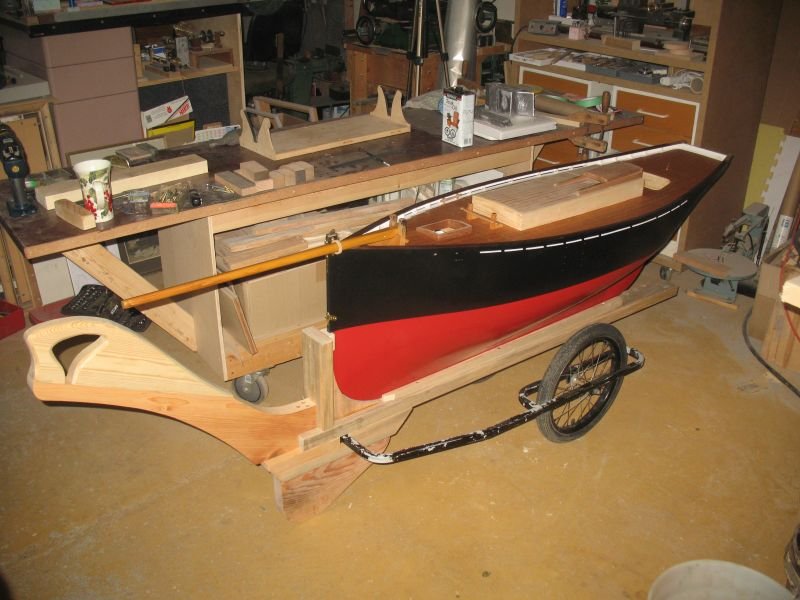
Good afternoon Mark in answer to you question I though a simple sketch might help with my answer. After cutting the strip that was to become the comb I switched over to the sled on the saw. beginning with the right hand end of the strip I set the strip over about 5/8th of an inch (I just guessed the distance) and having the blade set high enough to cut about 3/32 depth I made the first cut. Then made incremental cuts net to it until I had cut approximately 1/4 inch slot. then I penciled a line on the sled at "a" Next I moved the comb again to the right until the edge of the slot was approximately 3/8th of a inch further to the right and marked another line "b" started the cutting all over again until the next slot lined up with line "a" indexed it to line "b" and so on. It was slow but worked well and my fingers were tired from all the gripping. There was minimal break out or fuzz on the exit side of the comb because of the support on the fence of the sled. The blade is new and I am very happy with it's performance The blade is an HSS N/F SAW 200 D x 1.2 K x 5/8 B A-Toothform 180 teeth. I had it custom made at ALL BLADES CANADA INC for $82.91 Canadian. it is basically a slitting saw 8 inches in diameter with 180 teeth I cannot cut through thick wood because it heats up too much and warps, but when I use it with a zero clearance insert and cut up to 1/4 it gives a glass smooth finish. I hope this helps answer your question. Kurt, yes the intention is to sail her here is a picture of the water test some time back, there was 66lbs of lead ballast in her with still 2 inches to go to get to the waterline. so I will need to use the trolley when I launch her to sail. I have struggled with the whole radio control issue but have decided to free sail her like the old pond yachts. I am not going to sail her a lot just enough to know that she sails. Michael indexing comb cleat.pdf


-
Your not kidding. I am going to have to get your books Ed just to understand all of it. Michael
- 3,618 replies
-
- 1
-
-
- young america
- clipper
- (and 1 more)
-
I decided on not using the ball races they were a bit over the top. So inserted and fixed a brass plug and used a retainer plate to hold the end collar on there is enough clearance that the collar rotated smoothly. Off to the year end party at the yacht club. Michael
-
Tools, tools and more tools....
michael mott replied to CPDDET's topic in Modeling tools and Workshop Equipment
Ditto! which remind me I want one of those tiny brass thumb planes, I have some scrap brass....hmmmm Michael