donrobinson
-
Posts
1,909 -
Joined
-
Last visited
Content Type
Profiles
Forums
Gallery
Events
Everything posted by donrobinson
-
I hear you on the chipping, I myself have never used any blackening agents so can't really comment. I was just curious, haven't heard any reports about the toxicity of these agents, but certainly what goes down the drain should be a concern.
- 50 replies
-
- 1
-

-
- cutty sark
- artesania latina
- (and 1 more)
-
I agree with Joe, they need to be tapped down lower, they should be flush at the top.
-
She looks good, the detailing you have done is superb. One question is why you left the eyebolts natural(brass) rather than painting or blackening? Is this your preference or is this how the Cutty was? Either way I like it, I have the Billings kit on the shelf so I"m always watching . You are doing great, all those deadeyes scare the h.ll out of me though!!!!!
- 50 replies
-
- 1
-
-
- cutty sark
- artesania latina
- (and 1 more)
-
Looks good Pierre, they may "bounce" back a little so you might need to do this a second time. But you are on the right track, welcome to edge bending I used a hair dryer at this point just to speed things up.
- 46 replies
-
- 3
-
-
- batelina
- marisstella
- (and 2 more)
-
Comparing Amati Swan Class Victory Models
donrobinson replied to dchrismiller's topic in Wood ship model kits
good for You, looking forward to seeing your log- 12 replies
-
- 2
-
-
- Amati
- Amati Victory
- (and 6 more)
-
Hey Mike, I think the way you have your hammocks tied looks real good, I wasn't suggesting you change them I was just curious how the ":real ones" may have been tied. And I sure wasn't thinking you should sew ropes to the sides of the hammocks either that is............unless I can come watch ....from a distance of course.
- 843 replies
-
- 2
-
-
- niagara
- model shipways
- (and 2 more)
-
Hey Mike, just a couple of thoughts on the hammocks and cranes: 1) the hammocks would have had ropes sewn on each side with tails on each end to secure or a post or hook. Do think they may have used these to tie up the rolled hammock or used a separate piece of rope to get the nice bundle as Joel showed(I like the looks of these) 2) canvas vs netting, which would have been cheaper as that is probably what they used then. 3) I like the looks of the canvas sides, but don't think the hammocks would have been wrapped up in a "tube" like that. It would be just another place for water to collect and rott the canvas 4)I'm thinking if canvas was used and they were to cover the hammocks it would be the outside piece being longer in order to fold over the top or a separate piece that was lashed to the top 5) Do you would think that there would be some sort of grating or rails to hold the hammocks off of the surface of the main rail in order to allow air flow and to prevent water from wick-king into the hammocks? Just some thoughts. They have special tape for making hems that is just ironed on, any fabric or hobby store usually have this, try using that before cutting the material it should prevent any fraying.
- 843 replies
-
- 2
-
-
- niagara
- model shipways
- (and 2 more)
-
the tops of bulkheads 5, 6, and 7 are removed after the plywood side pieces are installed and first planking is finished. You may want to remove the planking around these bulkhead tops now and finish it after these bulkhead tops are cut off. Other than that it looks good
-
You can never go wrong with swiss pear it always looks good, although, I would have a hard time painting or staining it. Mostly because I don't have a huge slab of it in my shop
-
Looks good Mike, I never realised or thought of the purpose of the canvas but it all certainly makes sense. I do, however, like how you left the inside with not canvas I also like the looks of it. Good stuff!!
-
Hi Zoltan thanks for the comment. It is an open deck I am trying to think of ways of filling it up a little more
- 653 replies
-
- 5
-
-
- trabakul
- marisstella
- (and 1 more)
-
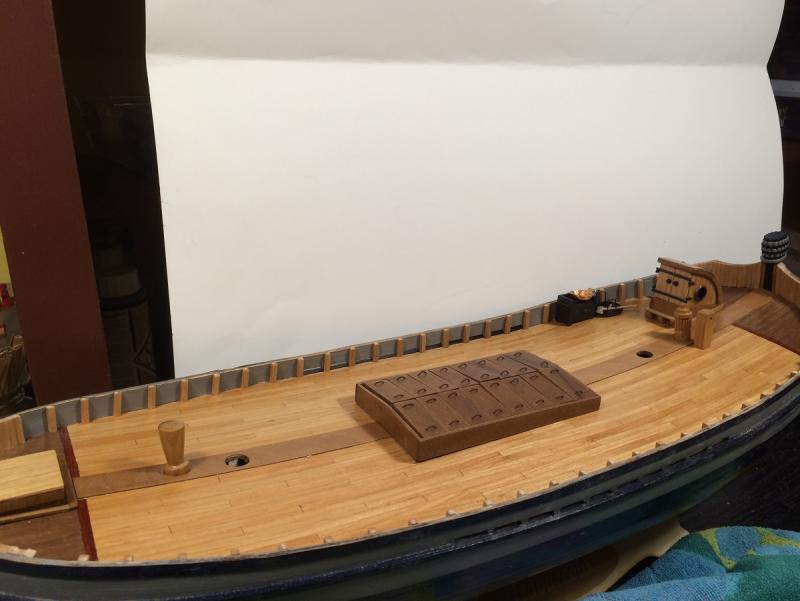
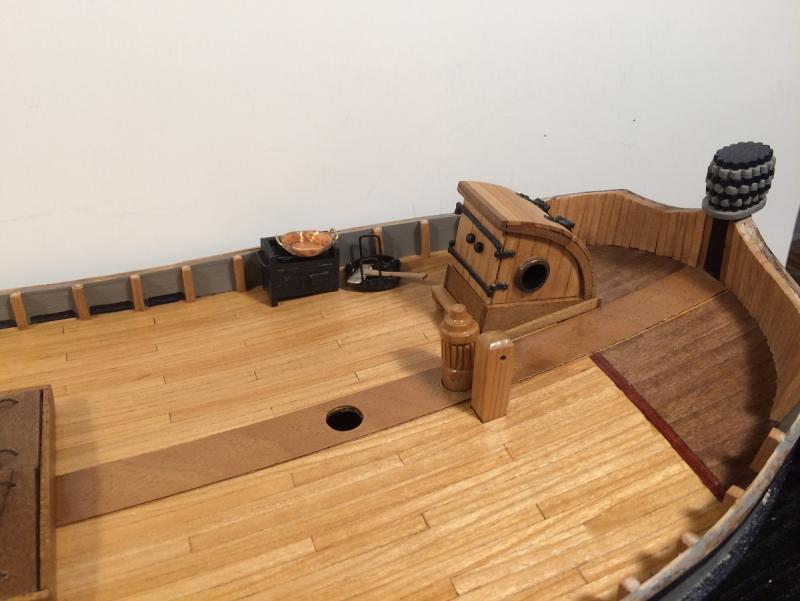
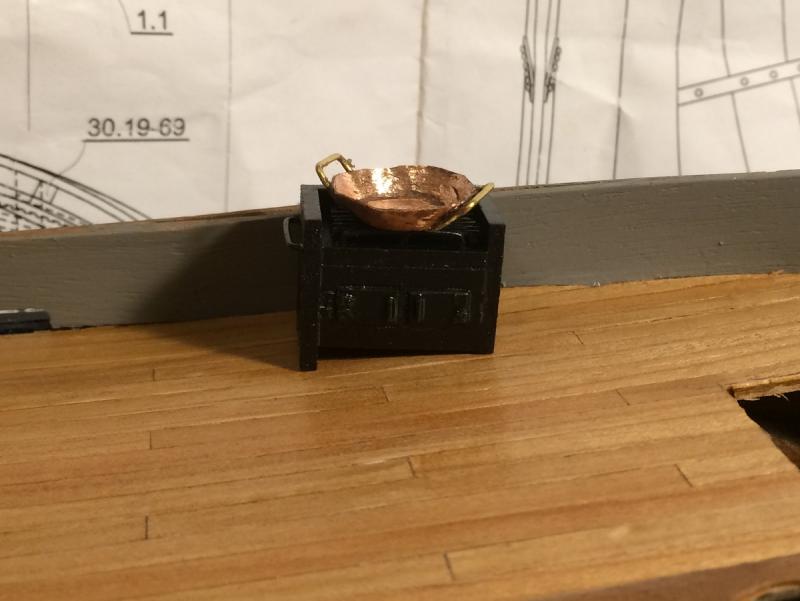
Hey Mike, Thanks for stopping in. The stove stays on deck, I am still unsure as how I will secure it as I would think it might have been portable. The coin I just heated it up pounded it with hammer until thin enough then just shaped over a 1/2" steel rod. I should have taken some pictures. If I get the chance I will do it again and document
- 653 replies
-
- 6
-
-
- trabakul
- marisstella
- (and 1 more)
-
Bob, E.J., Dave, Pierre and Elijah Thanks guys for stopping by and for your inspiring comments they are very much appreciated. I will keep plodding along and hopefully have more updates in the near future. Thanks Again
- 653 replies
-
- 5
-
-
- trabakul
- marisstella
- (and 1 more)
-
Not sure why you are worried it all looks nice and tight, you are doing fine. Many people use the first planking as just a base and do not put any real thought into it as filler will fix everything(I've been there more than once ) and although this is not wrong nothing is really learned. You are learning now what single planking is all about and are doing fine, when it comes to the Santa Maria you'll breeze through it. Furthermore after finishing these first two, single planked, kits you'll be striving to make your first double planked kit into a single planked one, then you will be happy happy!!
- 46 replies
-
- 6
-
-
- batelina
- marisstella
- (and 2 more)
-
Very impressive Elijah, you certainly have learned lots throughout this past year and it is really showing. Keep it up
- 701 replies
-
- 3
-
-
- phantom
- model shipways
- (and 1 more)
-
Looks good, those stern extensions caught me until it was pointed out to me. Luckily I only used white glue and ca glue to attach them(real easy to get off ). Look forward to seeing more, supports for that plywood decking is a real good idea.
-
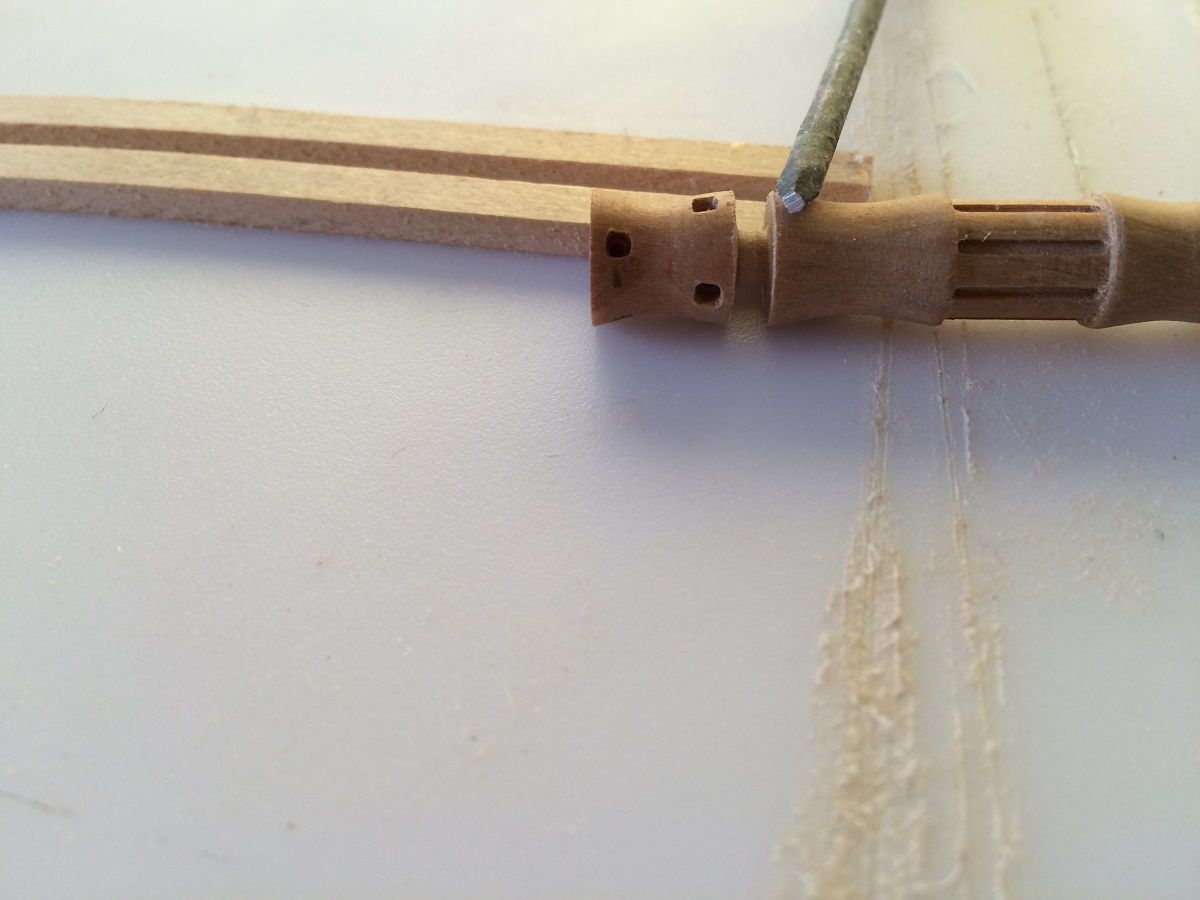
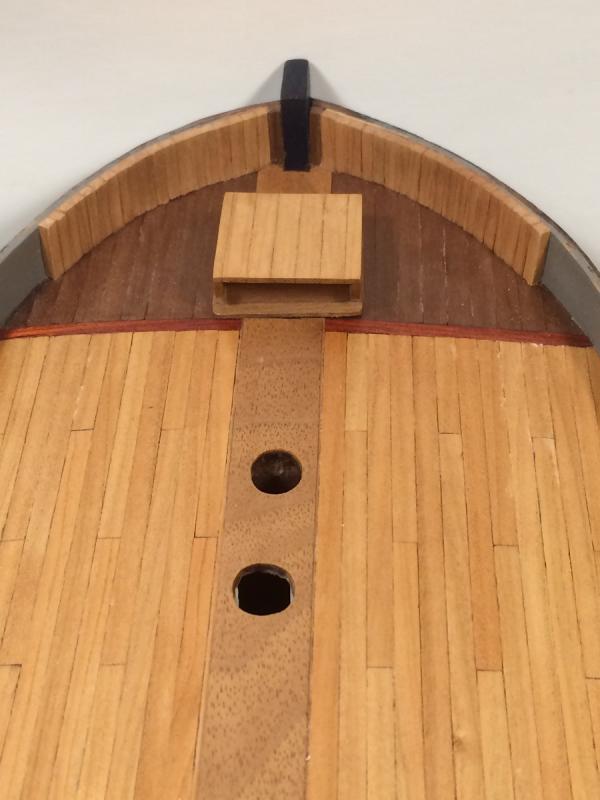
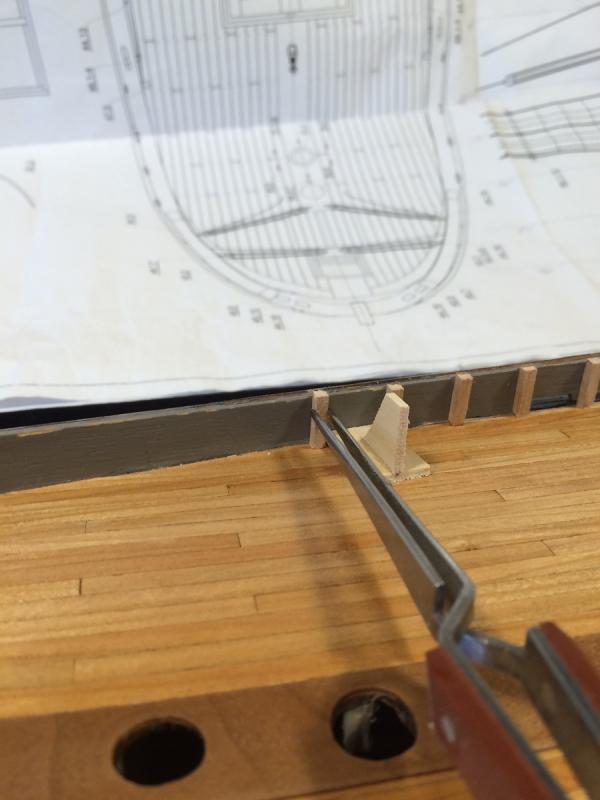
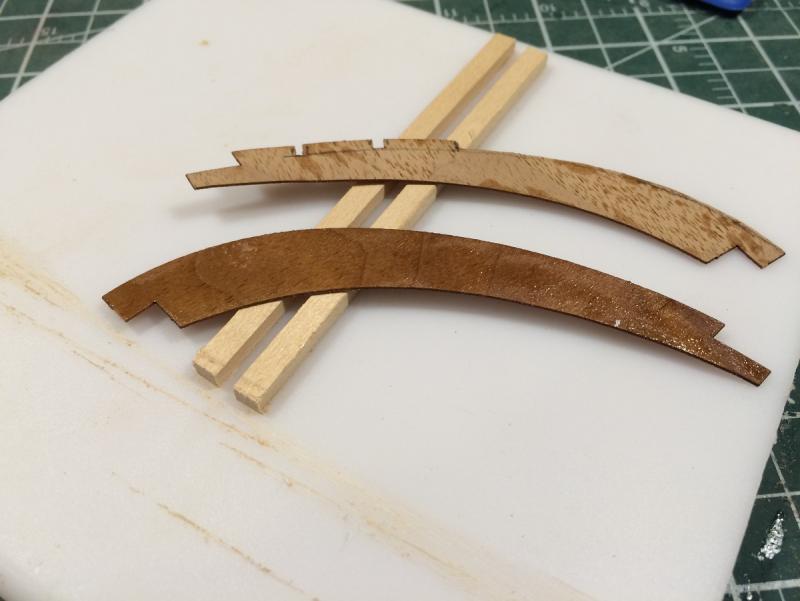
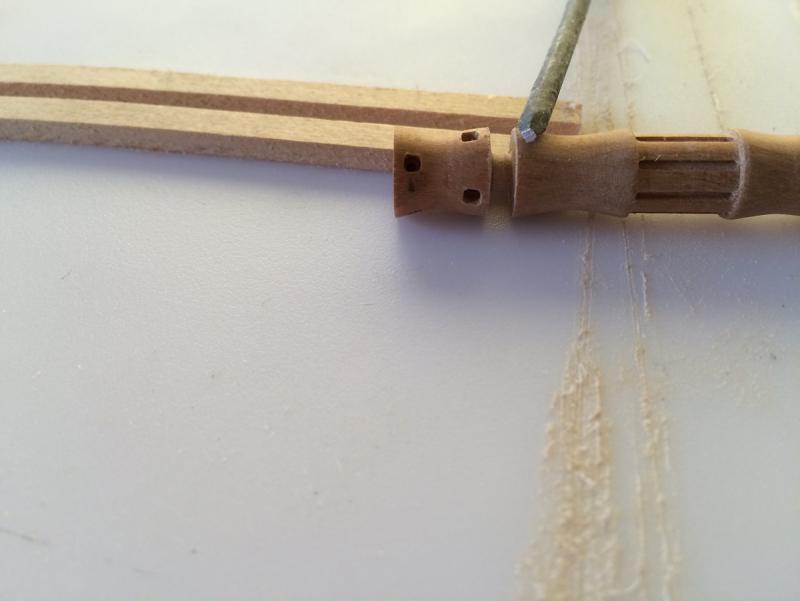
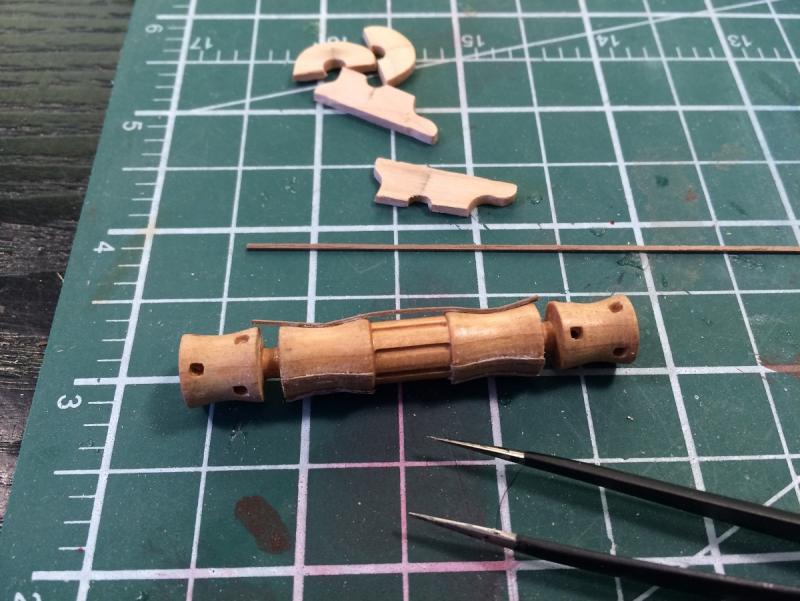
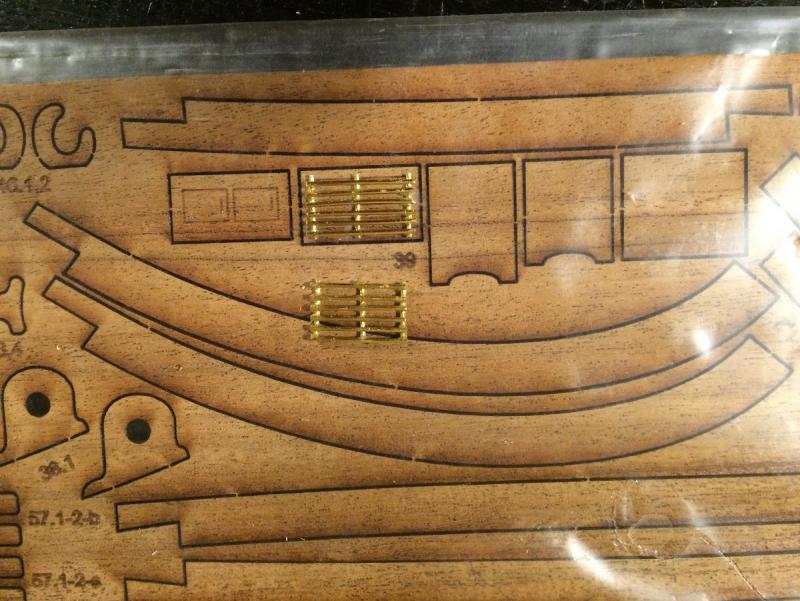
And some more: Installing knightheads( 3 x 3 mm) and top timbers There are waterways to be installed, mine kept splitting on me so I spread some ca on them to strengthen them, and as you can see it bled though to the good side. Time to make new ones. Then I decided rather than cutting out notches for all the top timbers in the waterway and going through more frustration I will install them on top of the waterway so.............. then I decided it was time for a change...the windlass. This was made from cherry turned on the lathe what you see here is the fourth attempt, I also replaced the supports and made them from cherry also. This showing the filed down nail used to make the holes square. This is an idea I got from DocBlake. Gluing .5 x 1 mm strips onto drum The finished product, still needs one or two more coats of wipe on poly. The fancy ends are inspired by B.E.'s cathead decoration on his Pegasus Thanks for stopping by

- 653 replies
-
- 27
-
-
- trabakul
- marisstella
- (and 1 more)
-
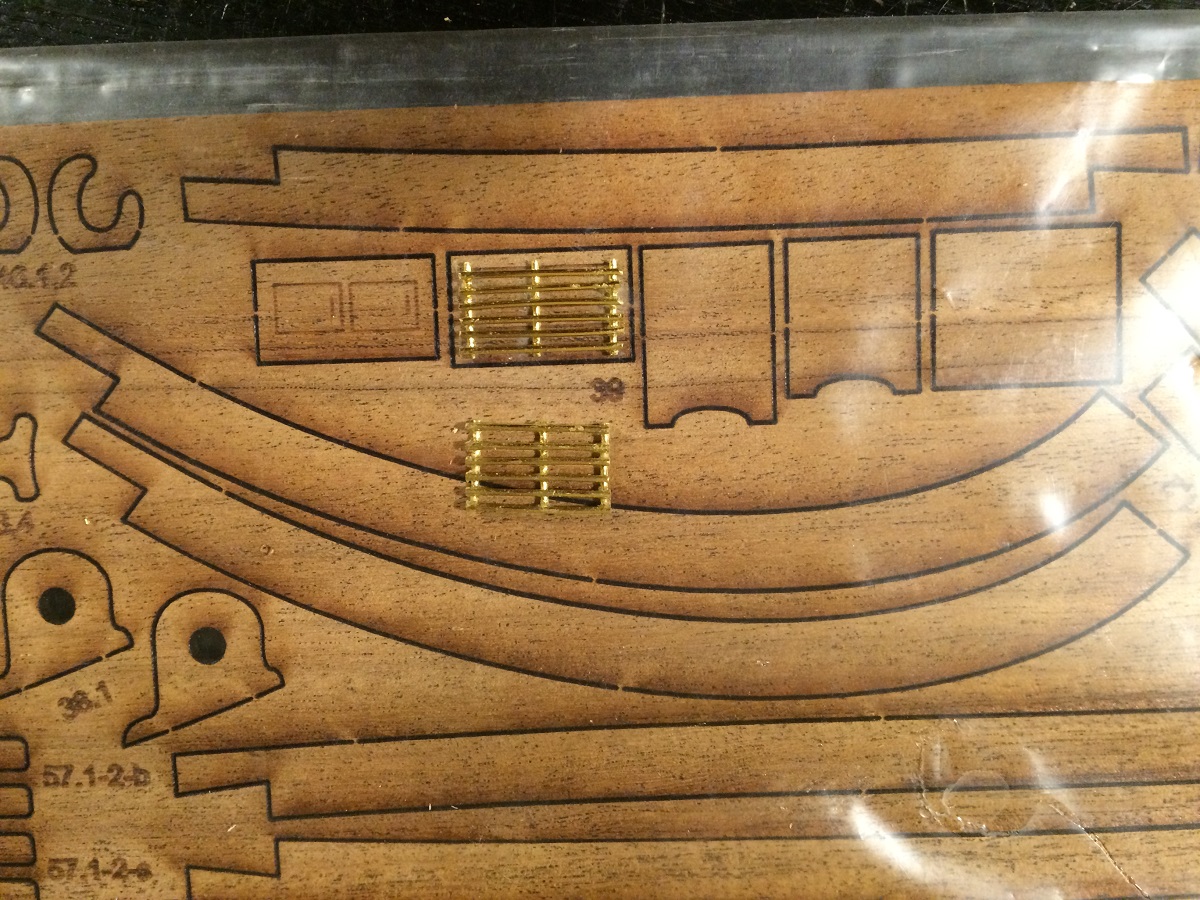
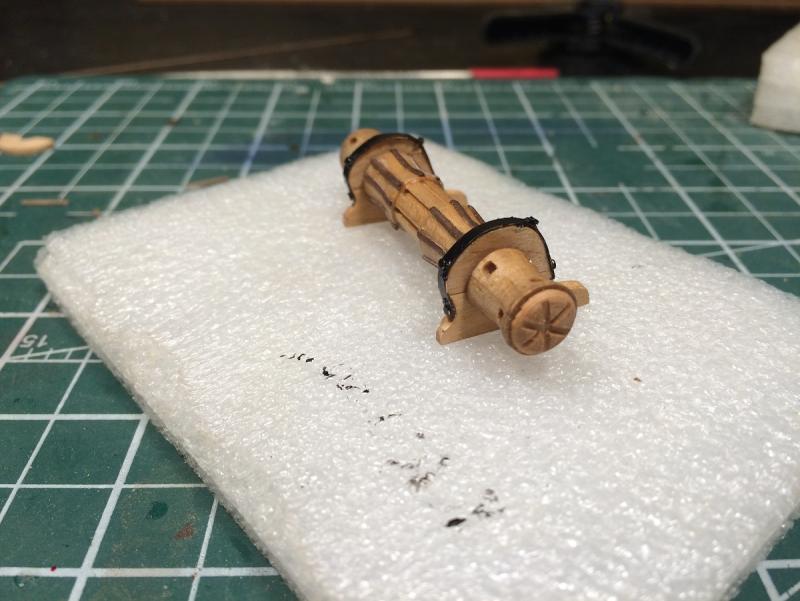
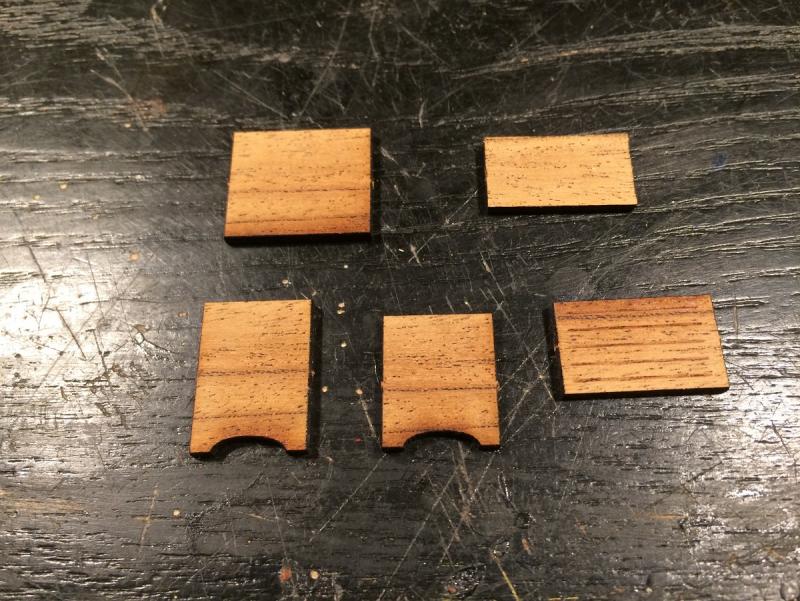
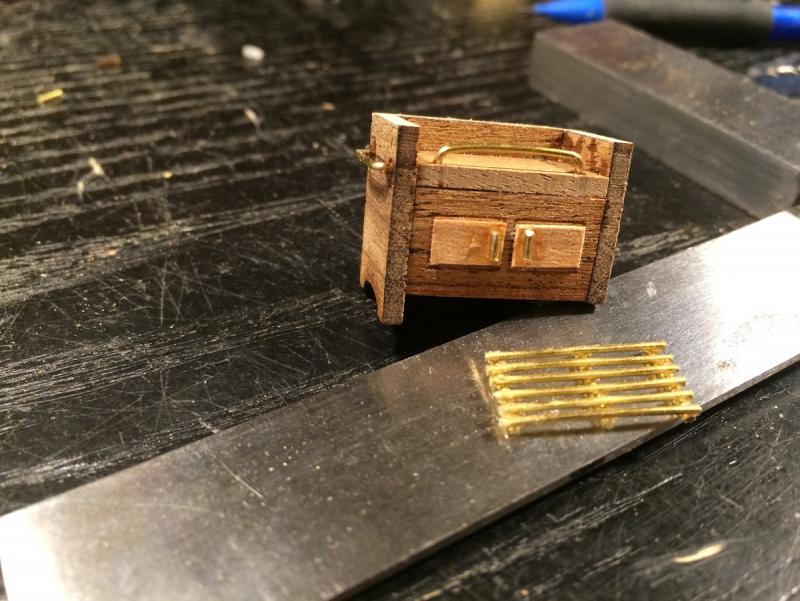
A little update: Grates for ship's stove, just brass rod ca'd together The pieces for stove Completed, added handles and hangers. The pot is a flattened out penny with brass rods soldered on for handles
- 653 replies
-
- 22
-
-
- trabakul
- marisstella
- (and 1 more)
-
You should talk to Rick at Modellers Workshop, http://modellers-workshop.com, he carries several brand names including MarisStella. He is located in Montreal and is a great guy to deal with and would be happy to help you with your choices. Going small at first is not a degrading thing to do, actually a very wise step in this hobby. I built the MarisStella Batelina as my fourth build, and found it very challenging and rewarding, few tools required and it teaches many of the skills required in the more advanced kits. Welcome to MSW and have fun in your retirement and this great hobby
-
welcome to MSW Kiran, enjoy yourself here and will be looking forward to seeing some of your builds
-
Cutty Sark kit. Sergal 789 circa 1976
donrobinson replied to Luapdraw1234's topic in Wood ship model kits
You may have a hard time finding parts, I wish you luck. I am surprised it has laser cut sheets in a kit that old. It's -23 C today in my part of Saskatchewan, enjoy your day -
Welcome to MSW, I wish you luck in your search. I have a build log for the AL Mayflower, see my signature, that may help