HOLIDAY DONATION DRIVE - SUPPORT MSW - DO YOUR PART TO KEEP THIS GREAT FORUM GOING! (Only 13 donations so far - C'mon guys!)
×


donrobinson
-
Posts
1,909 -
Joined
-
Last visited
Content Type
Profiles
Forums
Gallery
Events
Everything posted by donrobinson
-
I missed this, looks great!! The shipyard looks too organised though
- 608 replies
-
- 4
-

-
- la couronne
- corel
- (and 1 more)
-
Thanks for dropping in JPAM, I am just starting the planking now and should have some updates soon
-
have fun with your build
-
Thanks for stopping in Lawrence, I should have something next week.
- 653 replies
-
- 5
-
-
- trabakul
- marisstella
- (and 1 more)
-
Looking good Pierre, not sure where you are thinking about treating. As long as you don't have to glue to the surface later you could treat it now, I always tend to get a little excited about how it's going to look and give it a coat early on in the game.
- 46 replies
-
- 2
-
-
- batelina
- marisstella
- (and 2 more)
-
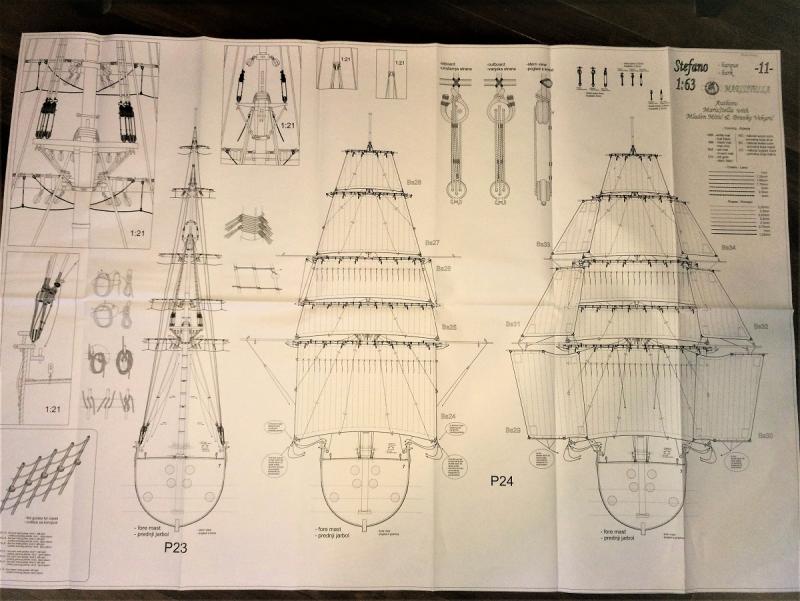
Yep Mike lots of warm clothes would be a good idea. I have been running to and from my garage today in a pair of shorts and it's -23 C. It is, although only about 20 m. from my house and garage is heated . The plans are really something, they don't miss a thing it's just a matter of sitting down and looking at them. A problem I seem to still have
-
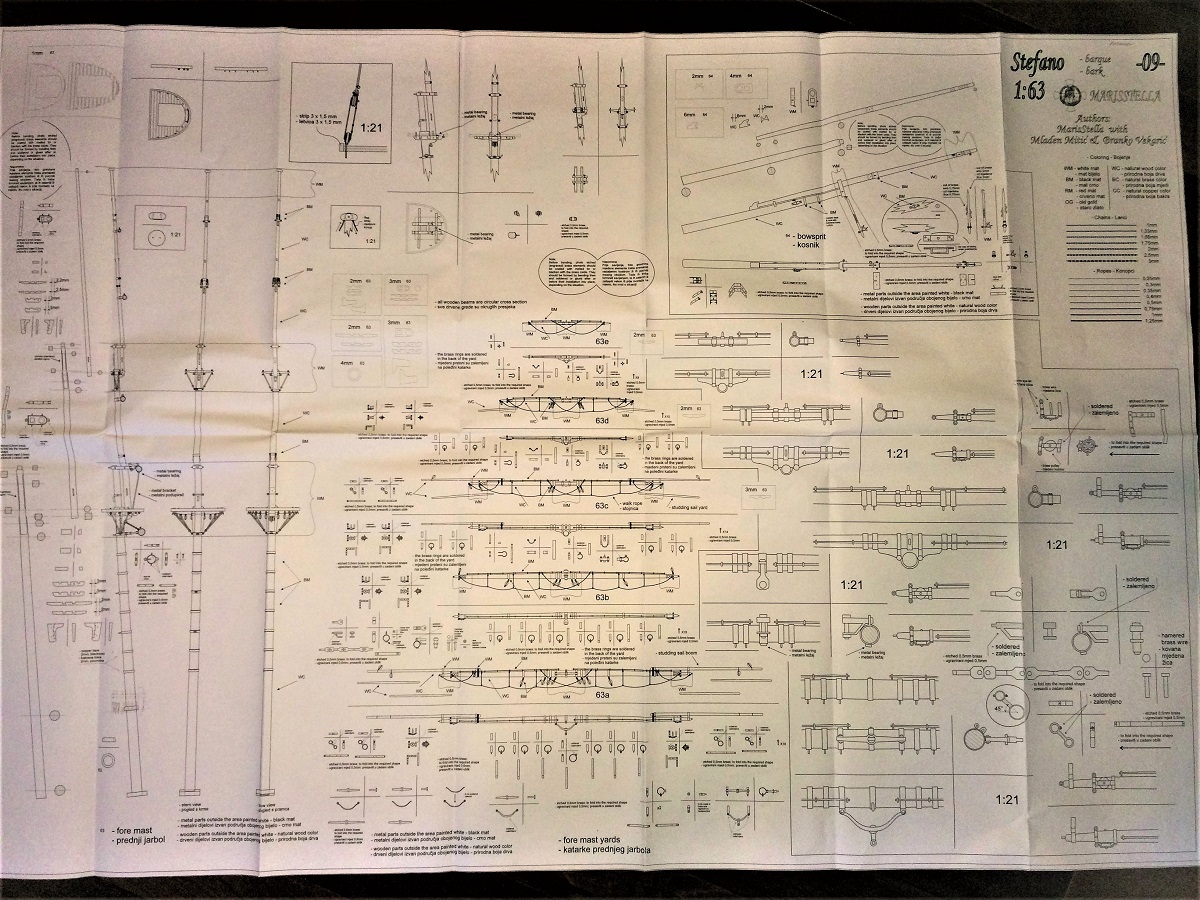
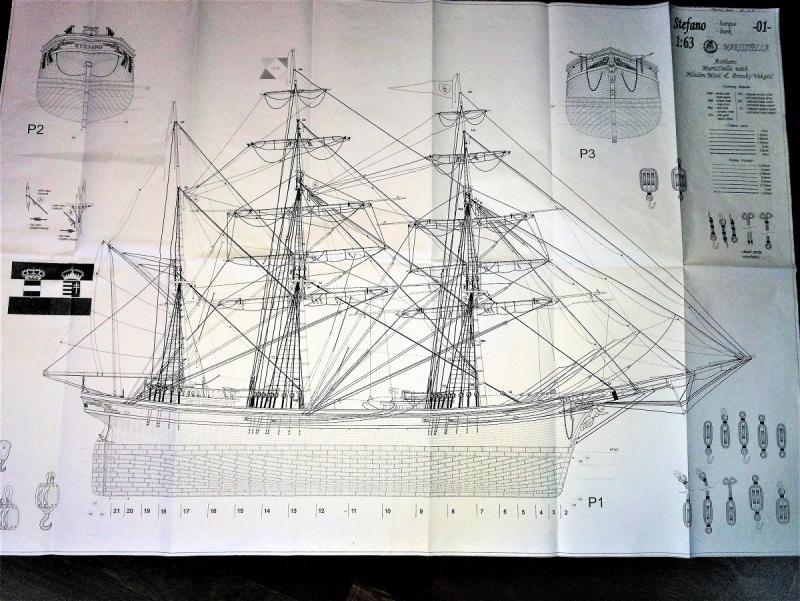
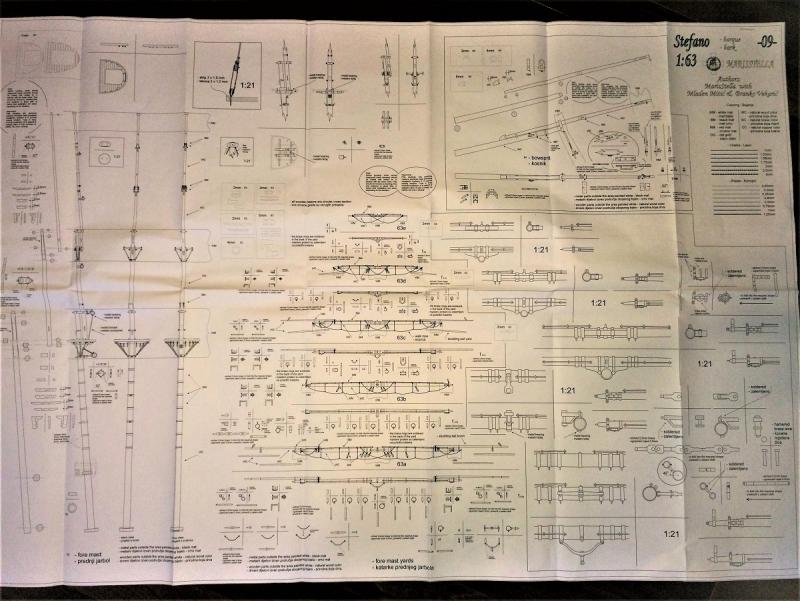
Here are some of the plans, first one is an overall, second one showing how to build masts and spars and the last two are all about the rigging these are just for the foremast. The plans are all scale size so any measurement can be accurately taken off of them , I believe they are 35" x 50" and there is 14 of them. The main mast has three dedicated sheets and the mizzen has one. One sheet is all about the sails and the rest are the construction of hull and various items required. The instruction book is 36 pages which may seem small but with all the information you need on the plans the instruction book is more than adequate. It does an excellent job of outlining the various steps and is easy to follow.

- 223 replies
-
- 13
-
-
On the top of the plank, the taper is always on the edge that is going to butt up to the last plank installed
-
That is funny Mike, when I bought the kit I was real new to this hobby and I to promised myself I would not change anything. Heck I even said I was going to leave the photo etch plain and not paint or blacken it, well I'm very certain I will break this part of the promise to myself . As for the rest I'll see how things go
-
Thanks for stopping Bob, I probably wouldn't use "better", crazy may be more applicable. She is a wonderful kit and full of surprises, the quality of the contents are exceptional and the plans are second to none. If you happen to like sails, there are 34 I believe including stunning sails. Both the fore and main mast have two full pages of plans just showing rigging and sails, on these plans there is also bow up sections showing the trestle trees and all the blocking which is really going to help. If I get time I will post some pictures of these. I would be more than happy to put a hold on mine and follow you and your build
-
Thanks Mike, it is a good system. If you could handle it to see how solid it is you would really be impressed. Come on over sometime and check it out.
-
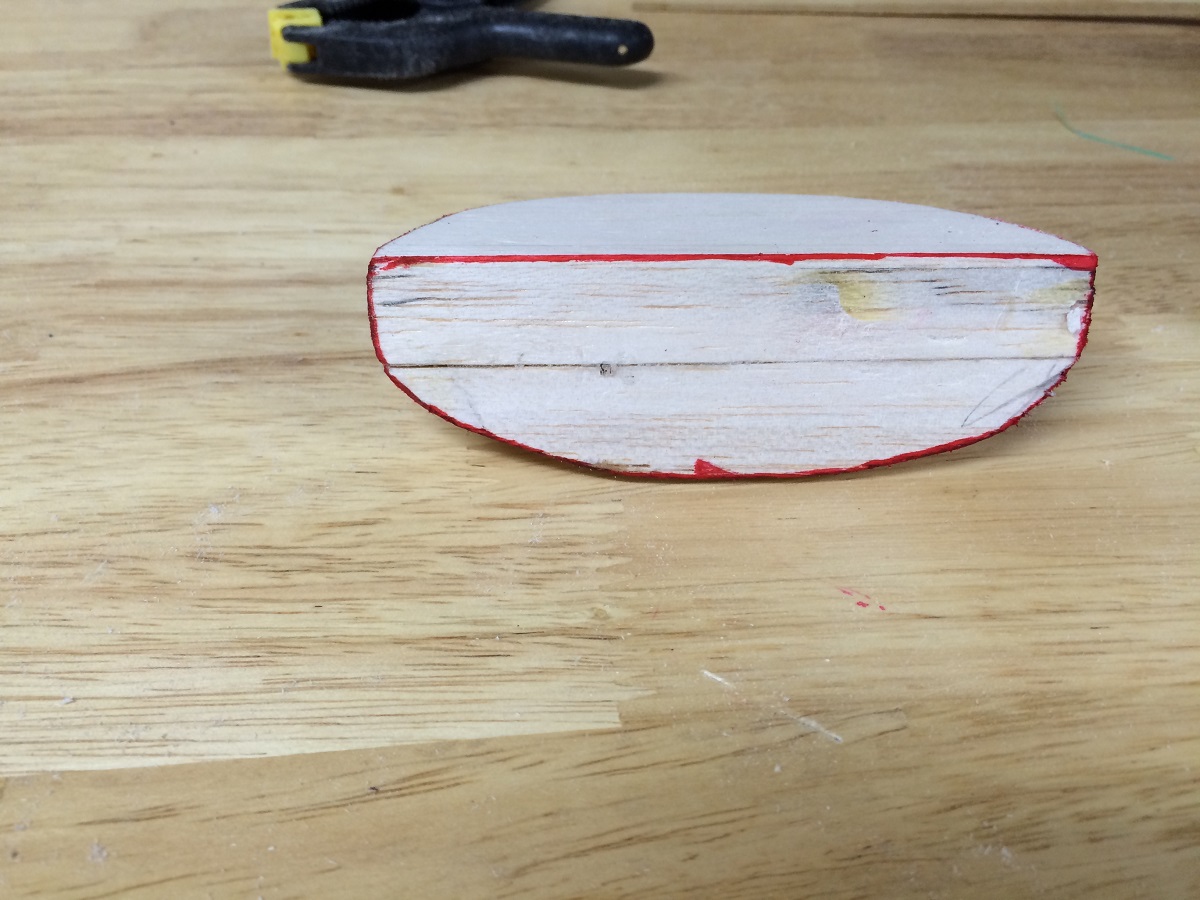
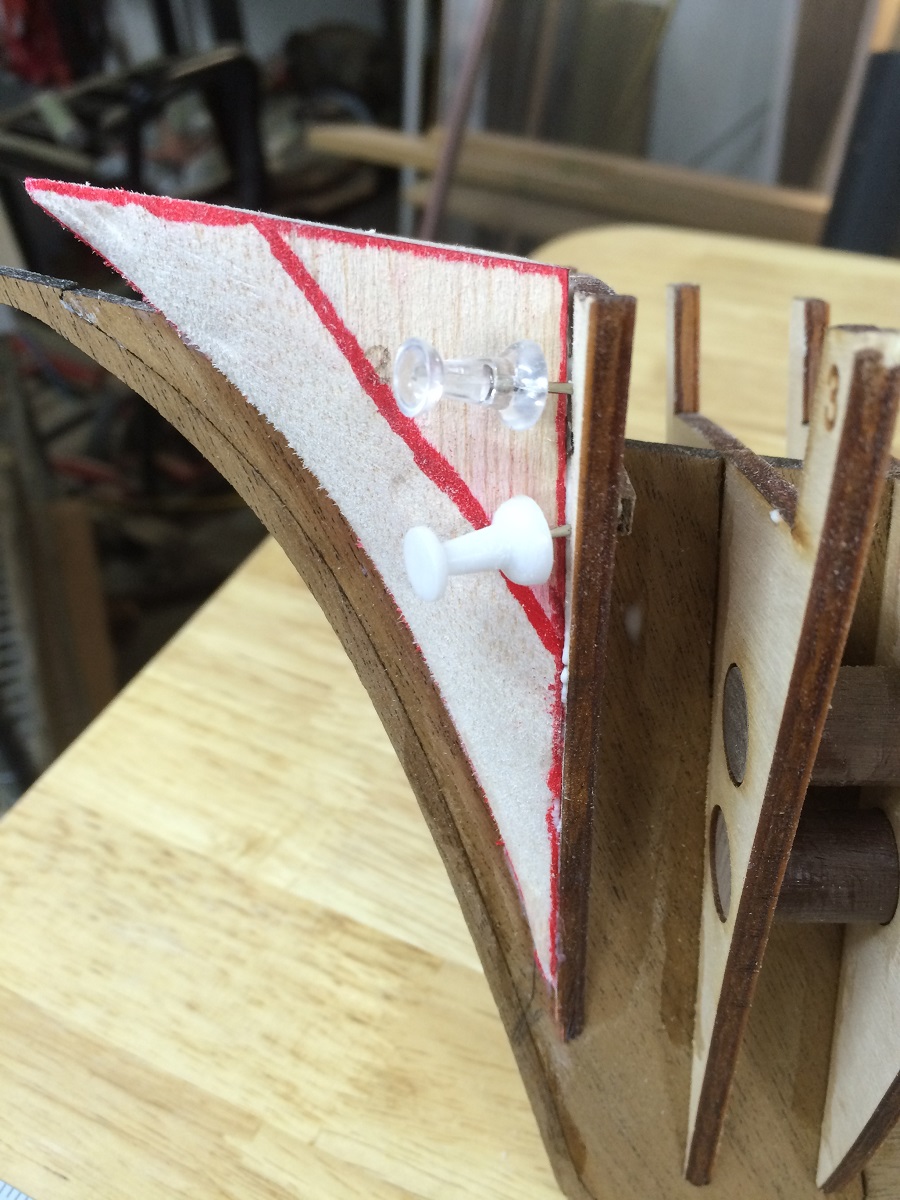
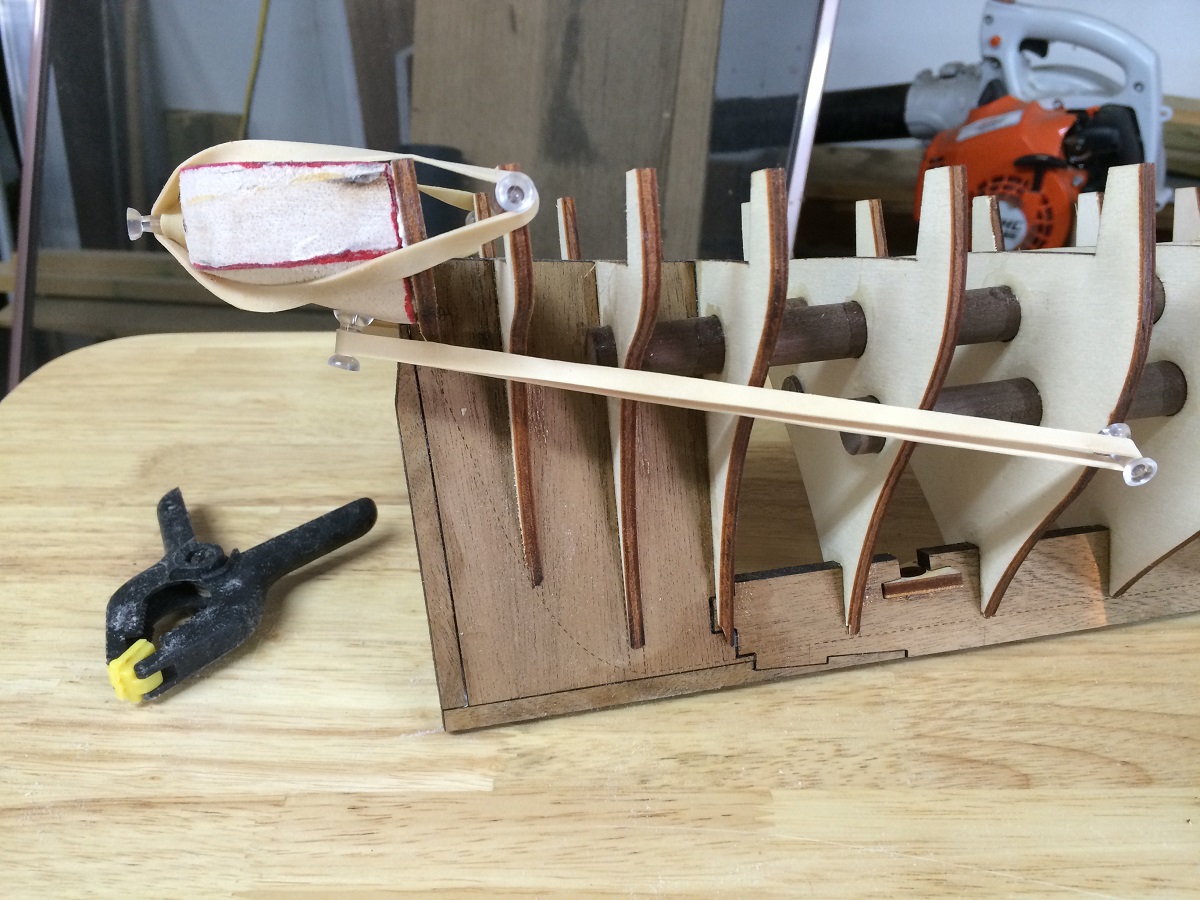
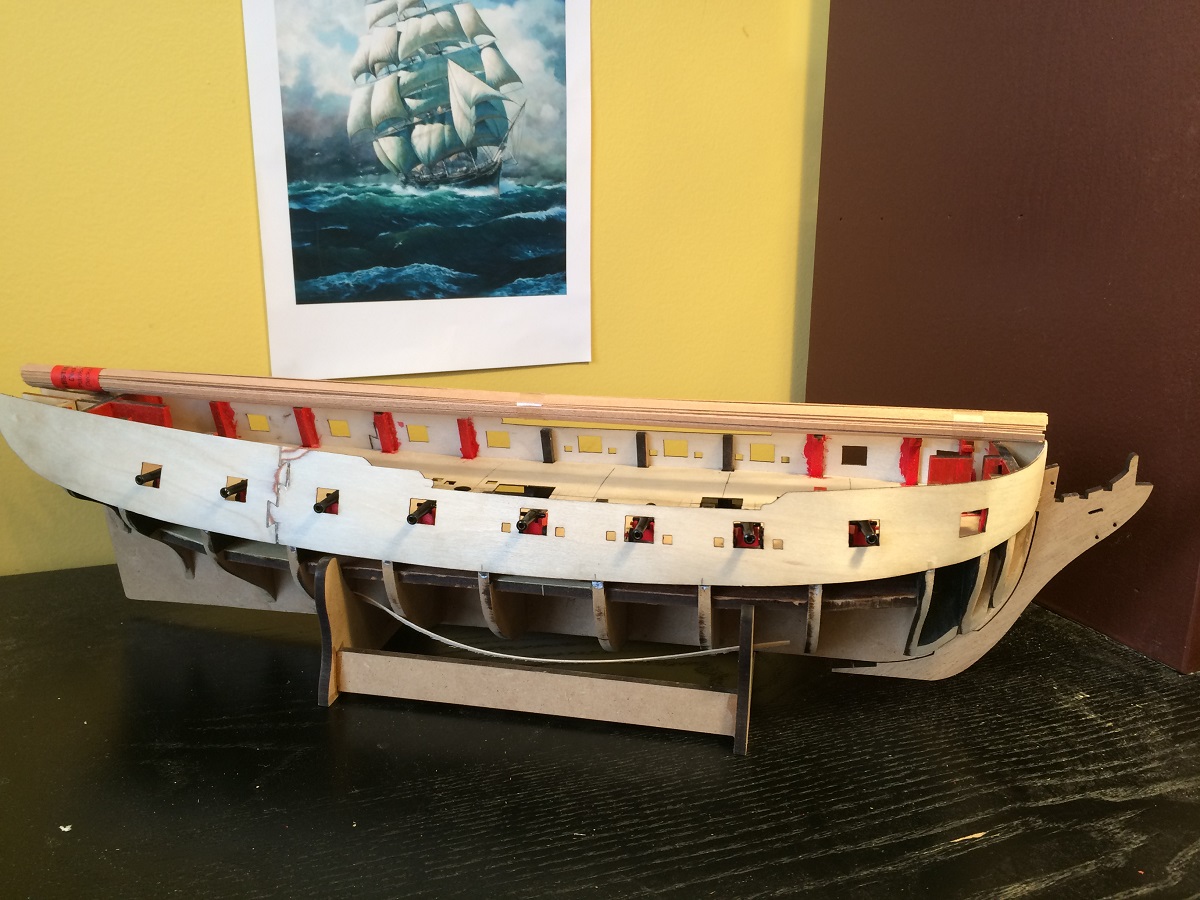
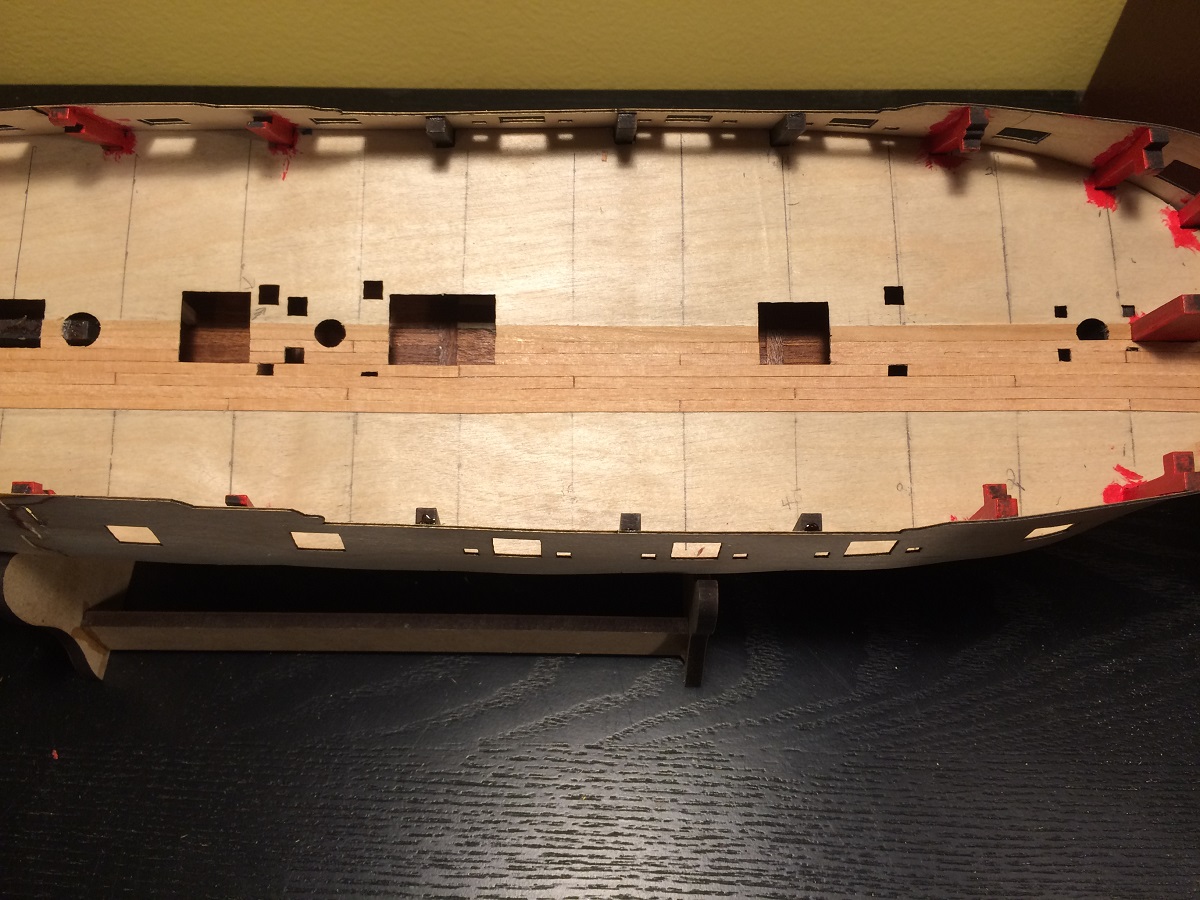
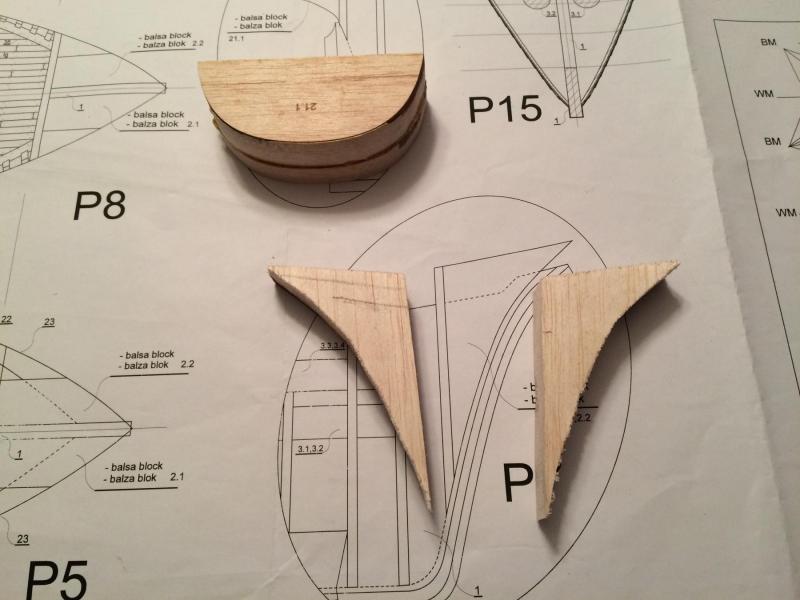
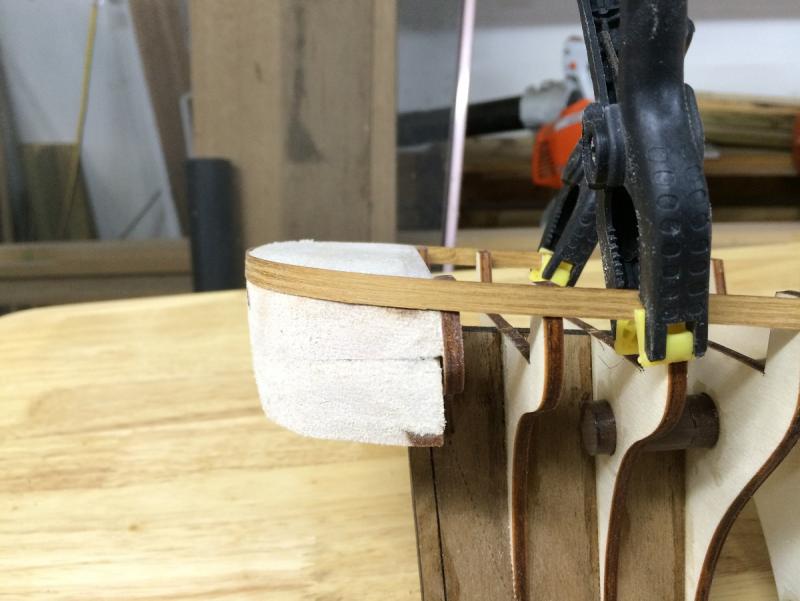
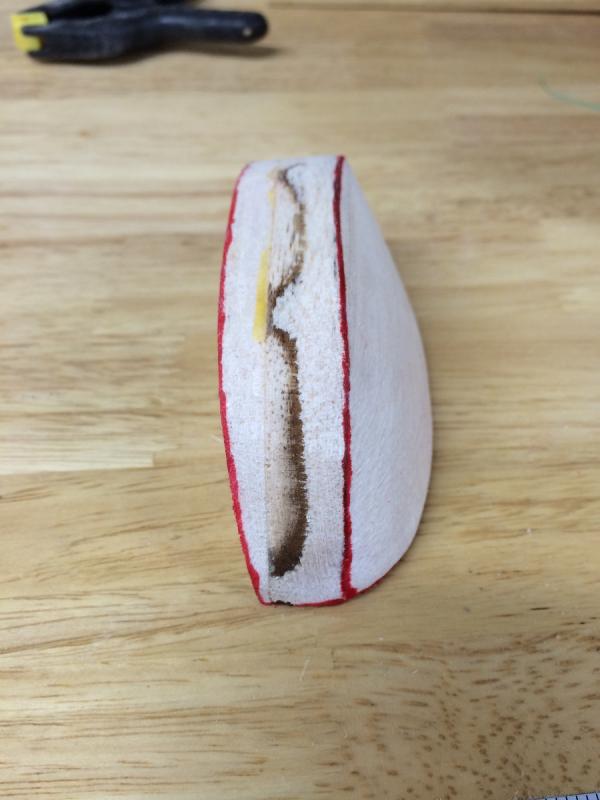
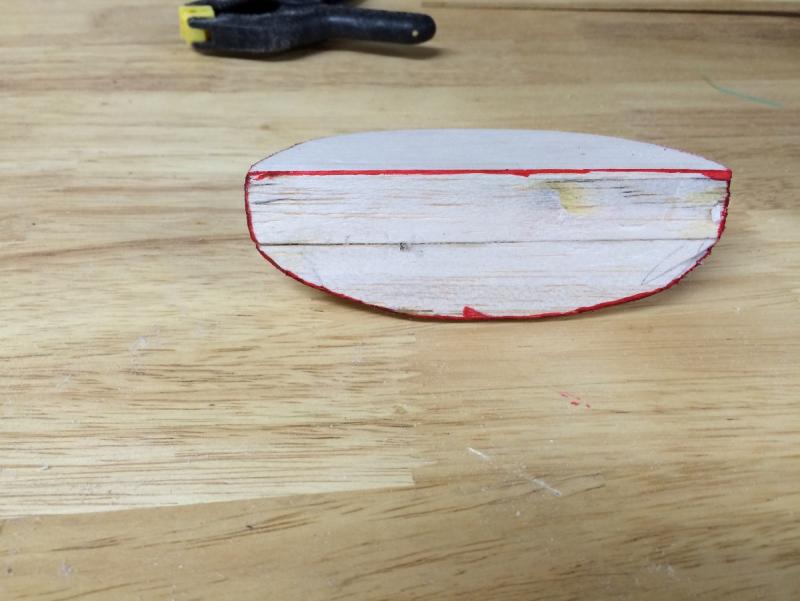
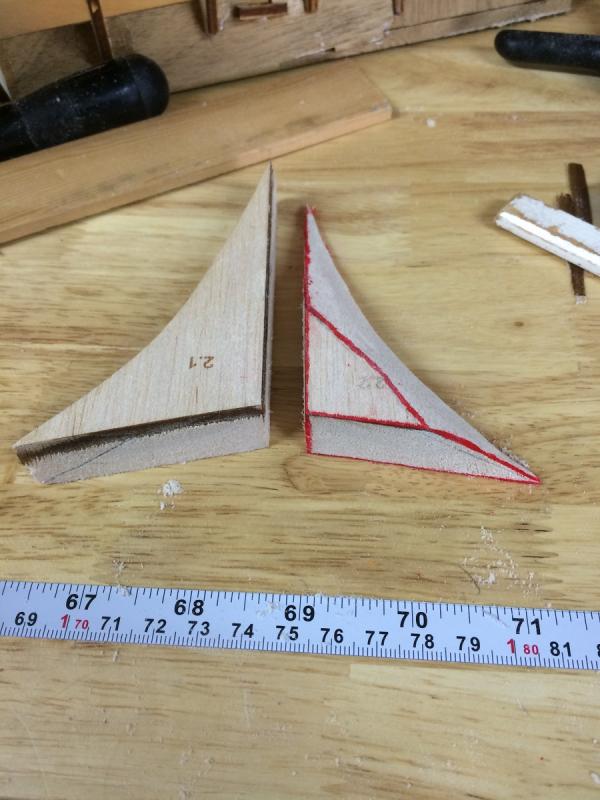
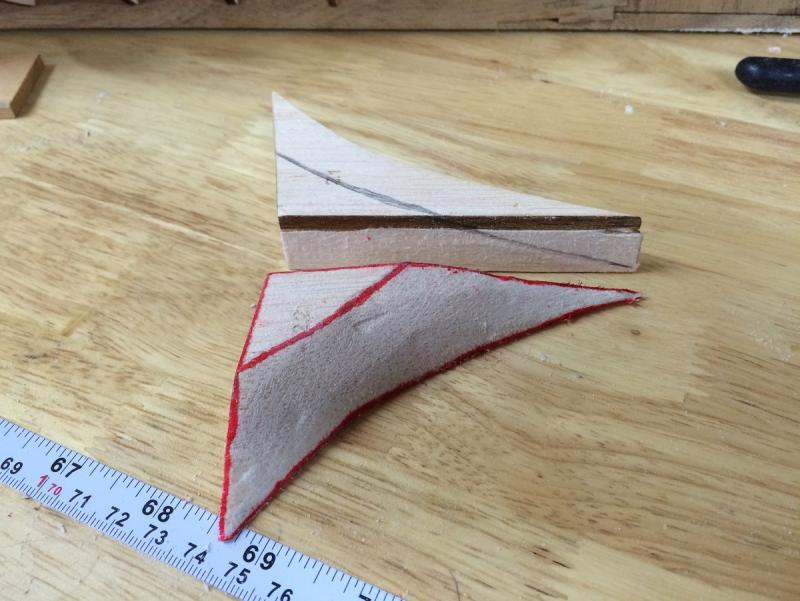
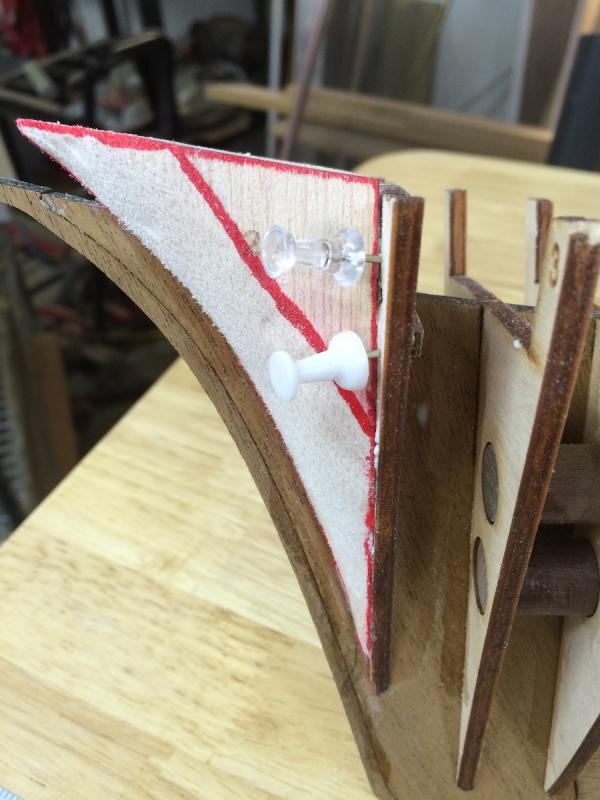
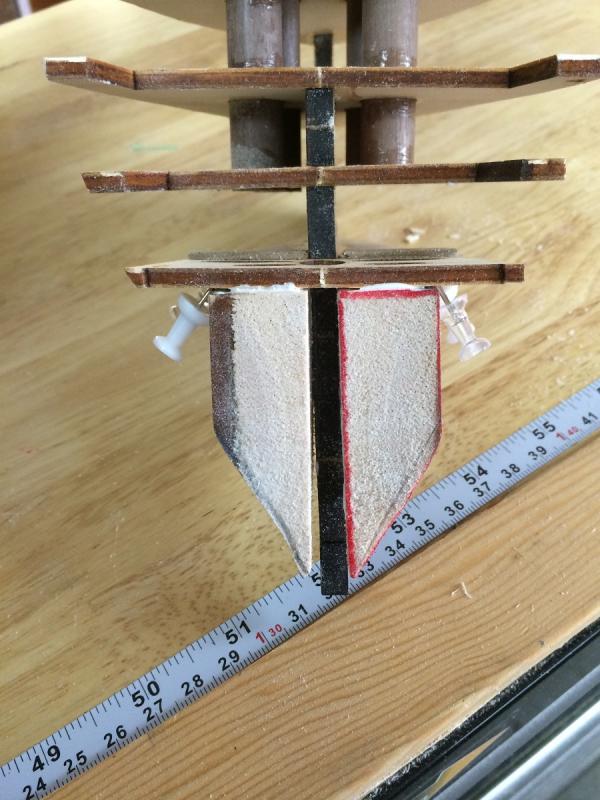
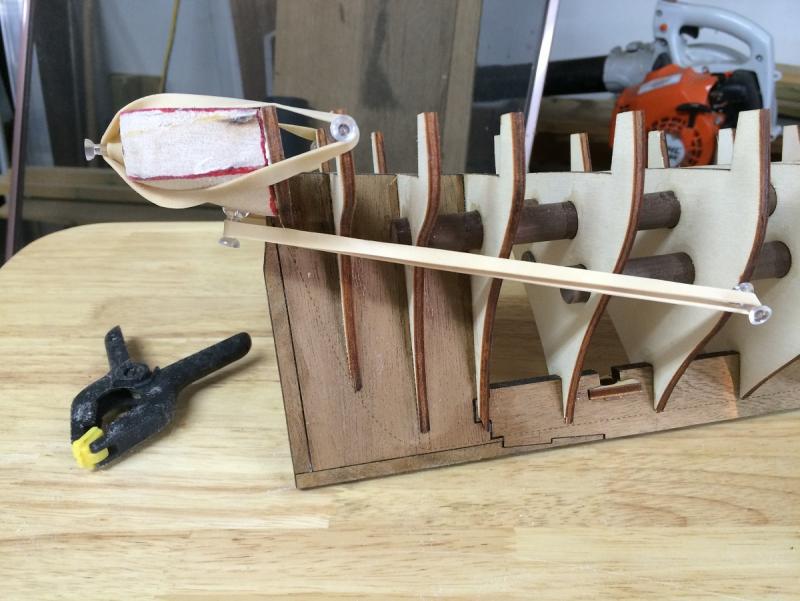
Hello All, Thanks for your comments, likes and for stopping by This is Barque Stefano week for me so I will show you some progress from this morning Today was bow and stern filler blocks, the kit supplies these in a block that is partially laser cut I finished cutting mine with my scroll saw. The stern filler block requires you to glue three 20 mm thick pieces together, then shape accordingly. The top of the filler block rises to the stern to allow for the planking or madiere, this rise is approx. 7-8 mm. This should be done first, the next profile can then be made by measuring down approx 20 mm from this edge. The last profile is made by tracing the outline of the last bulkhead from the fore side. Blocks cut from blank Showing the rise of filler block and how planking will fit Showing the formed blocks, the red marker is just added to better see the lines Stern block attached The bow blocks are much easier to make and follow the same principle, marking the profile lines and shaping This last picture is just to show the lines of the hull, started to fair the starboard side to show how things should meet up. Still required are two small pieces of filler on either side of bow, then start fairing tomorrow. Ignore gap on starboard side, that was fixed. Tools used were belt/disc sander, dremel and sandpaper. Have a Good Day

- 223 replies
-
- 11
-
-
Thanks Mike, I have looked over your log concerning the hatch and bit location and I will have to give that some thought. I do not have any of the TFFM books, my hope for my Pegasus is to have one that pleases my eye so that may not include all the historically correct additions or changes. I love what you have done with yours and really enjoy watching you work on her, I'm afraid my talents are not up to yours so I will not be attempting some of the changes you have masterfully completed. Maybe on my next Pegasus . I sincerely appreciate you looking in and helping me out, if it wasn't for you and your log (which I have used lots) my progress to date would have been a lot more difficult. Thanks Again
-
You certainly have accomplished lots in two months. Nice work
- 144 replies
-
- 2
-
-
- surprise
- artesania latina
- (and 2 more)
-
Thanks Dave, I had a quick look at that site and it looks pretty good. I am going to have a closer look and maybe take some notes.
-
Thanks for stopping in and for your comment Martin. I will have to check out the gun carriages a little closer and see how they are fitting.
-
I have found that when using a hair dryer to bend planks that if I use dry wood there seems to be a lot of spring back. If I soak it even for a minute or two then apply the heat it holds the bend much better and there is little or no spring back. Might be worth a try
-
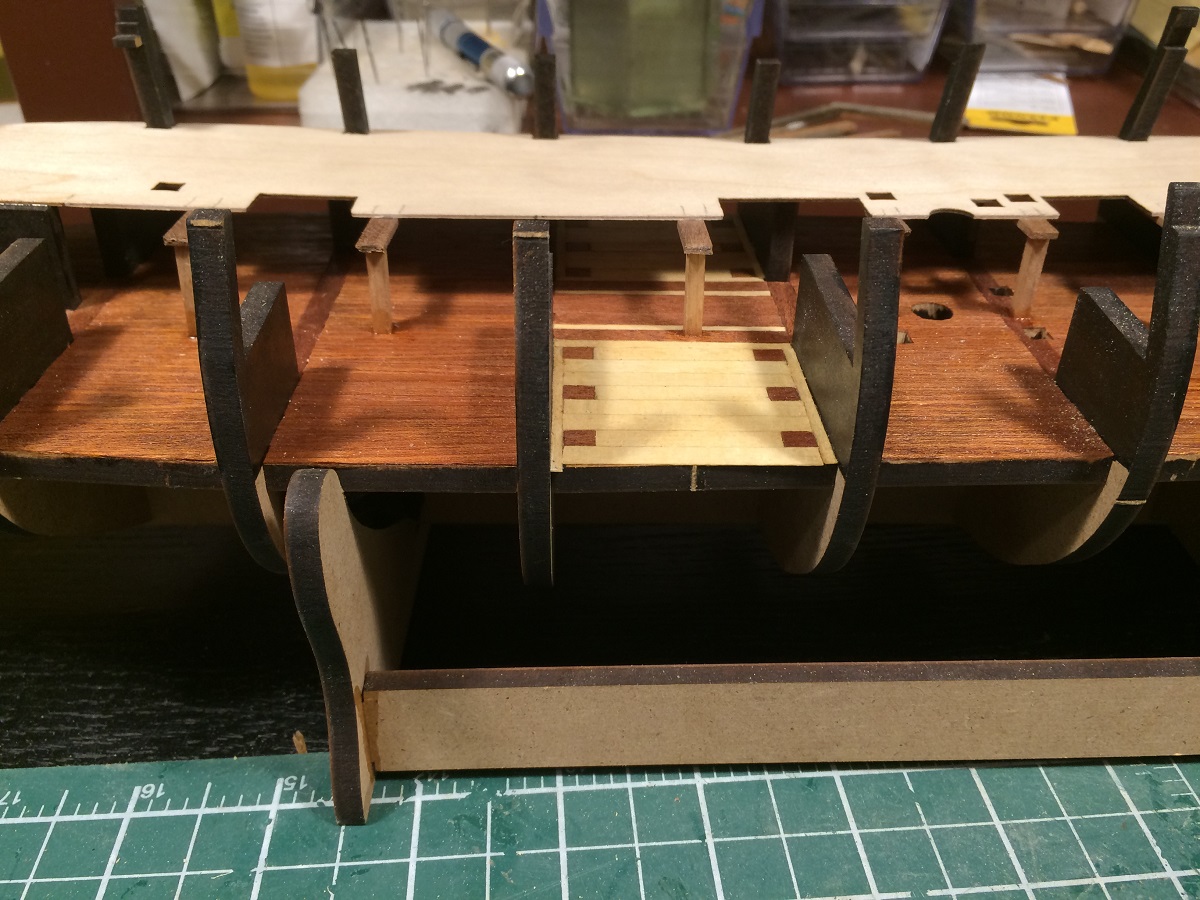
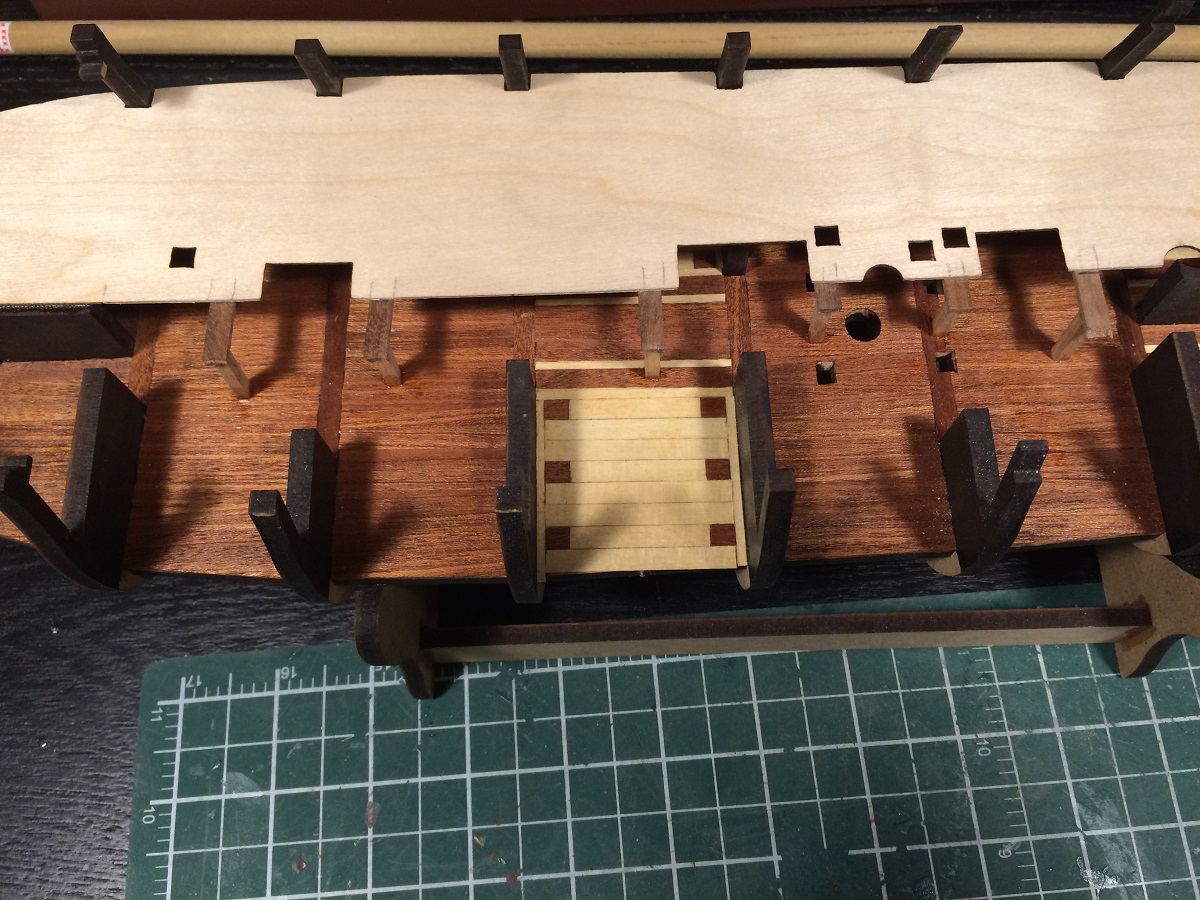
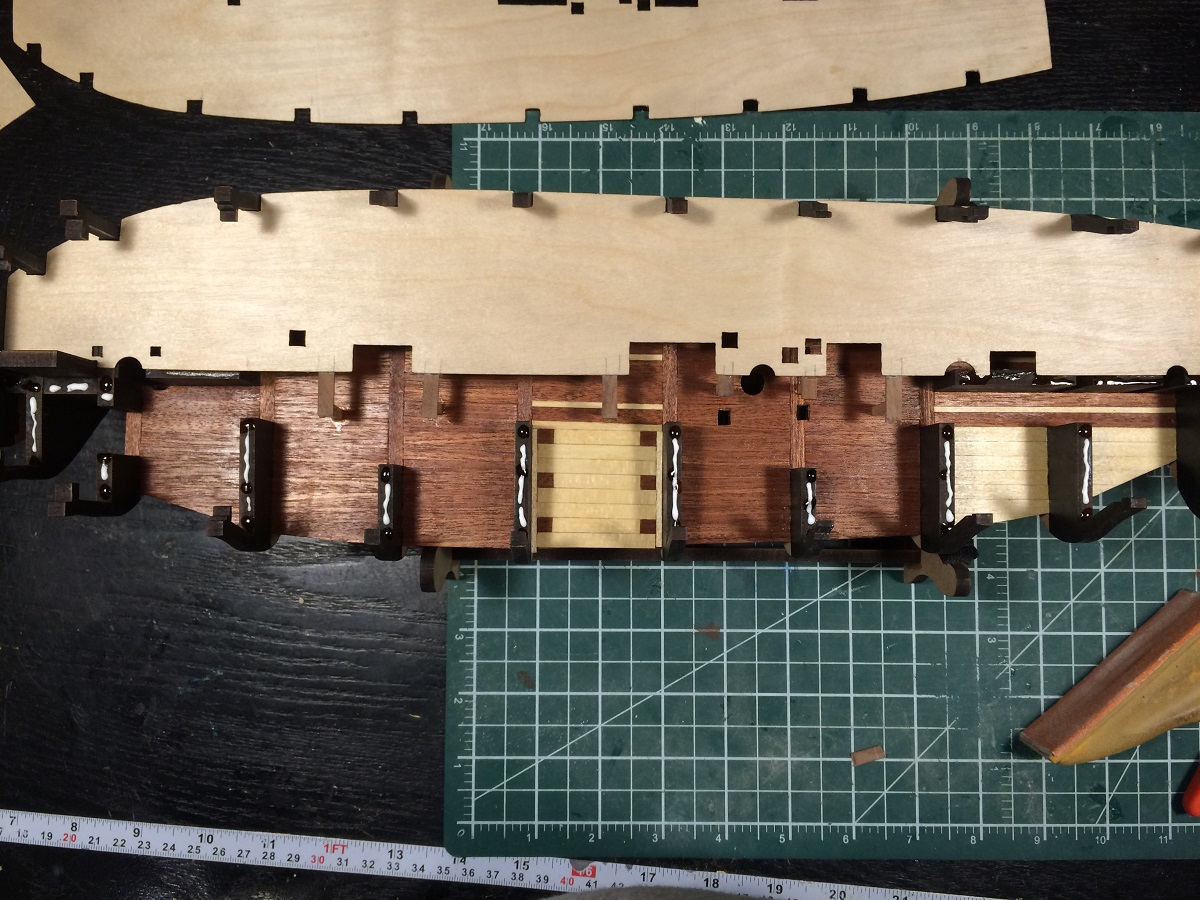
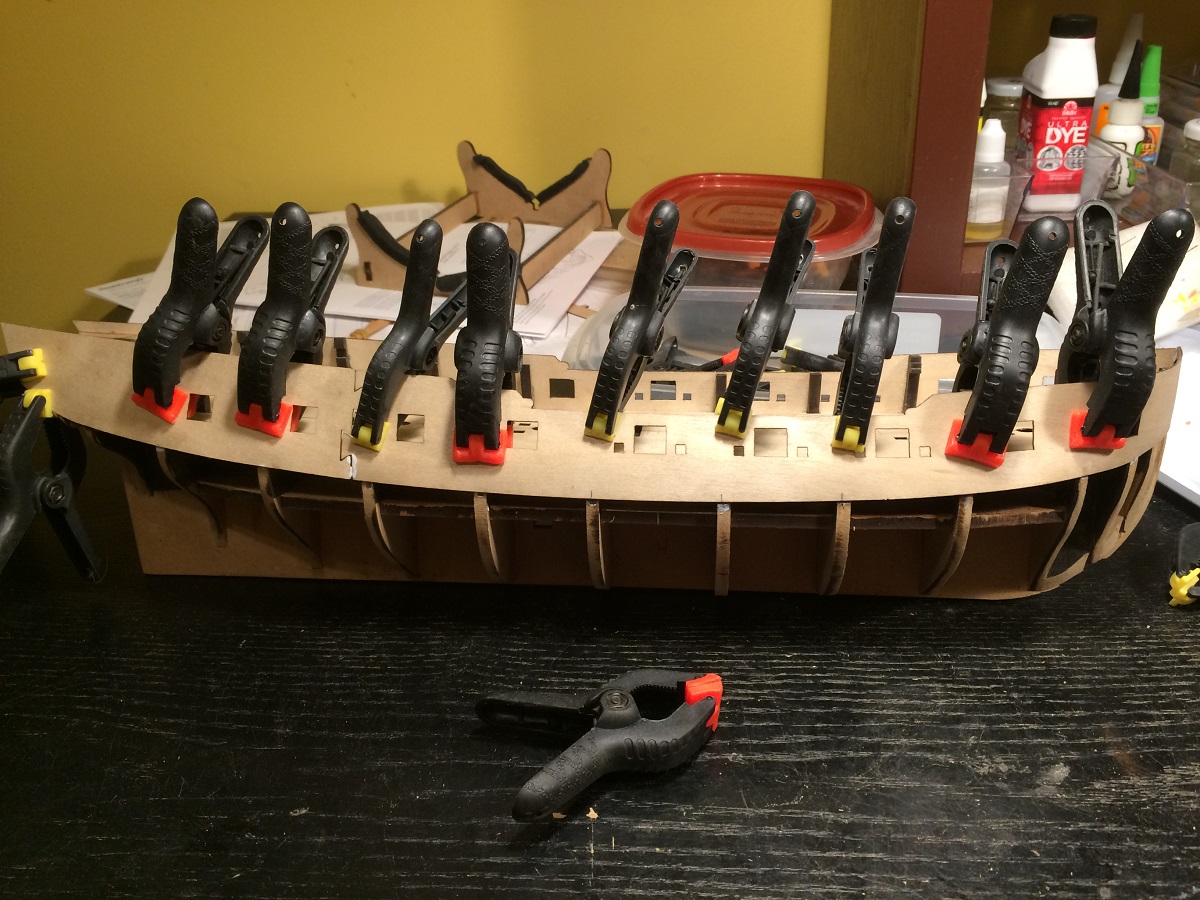
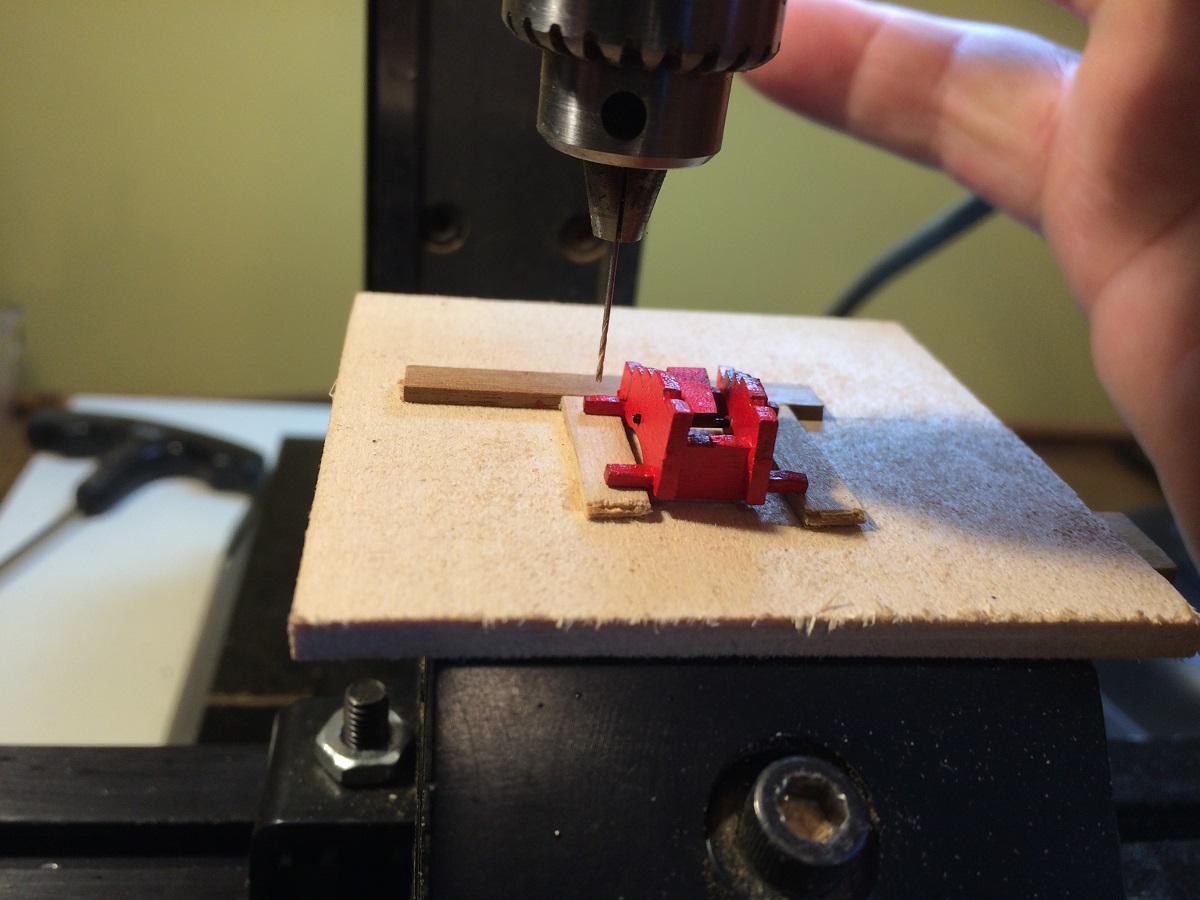
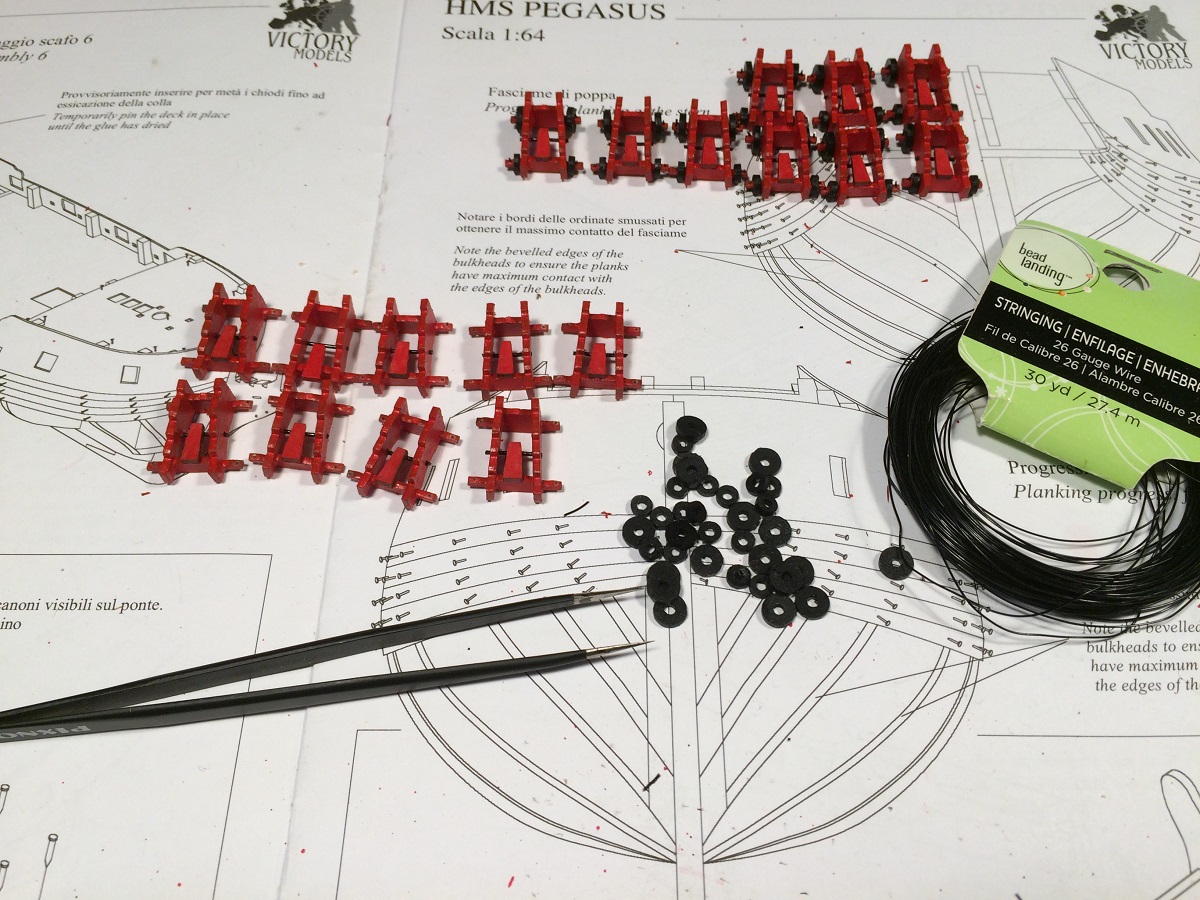
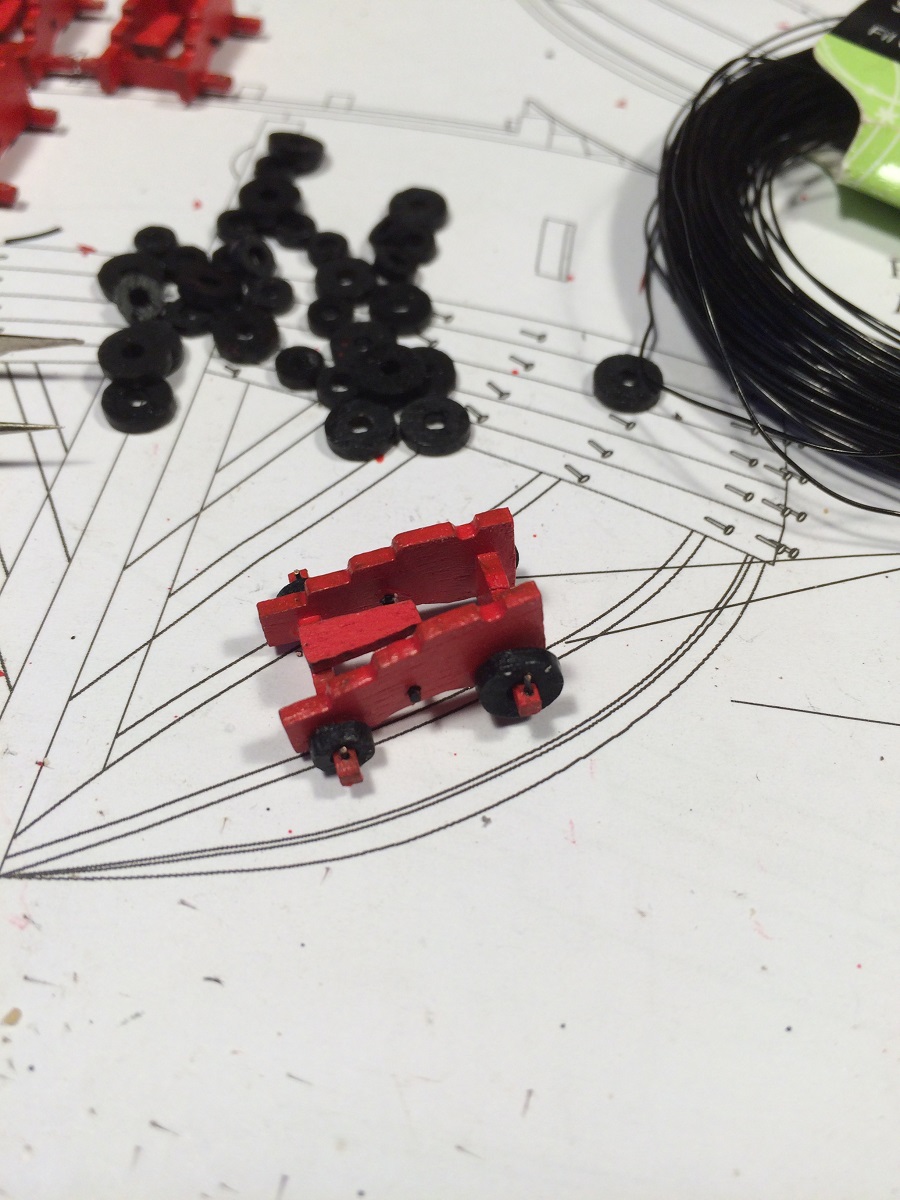
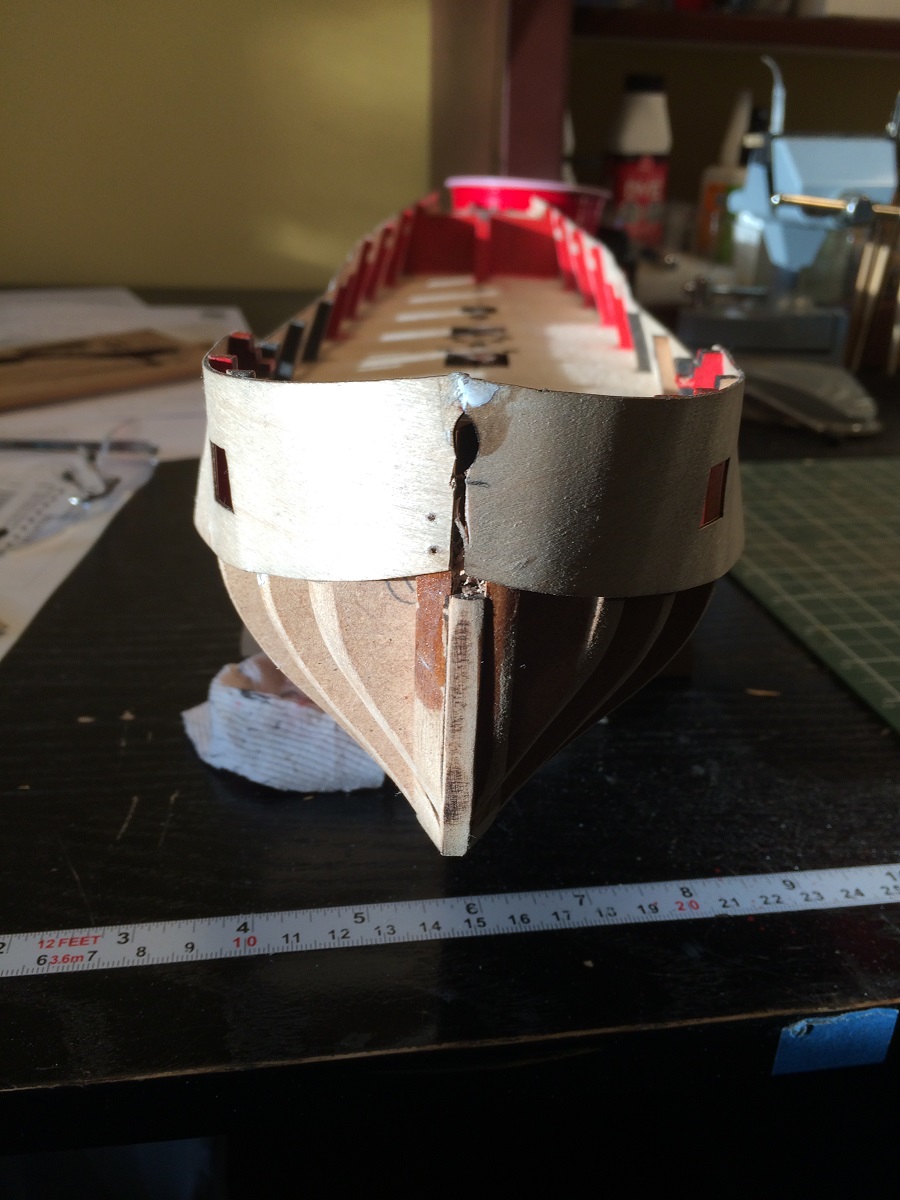
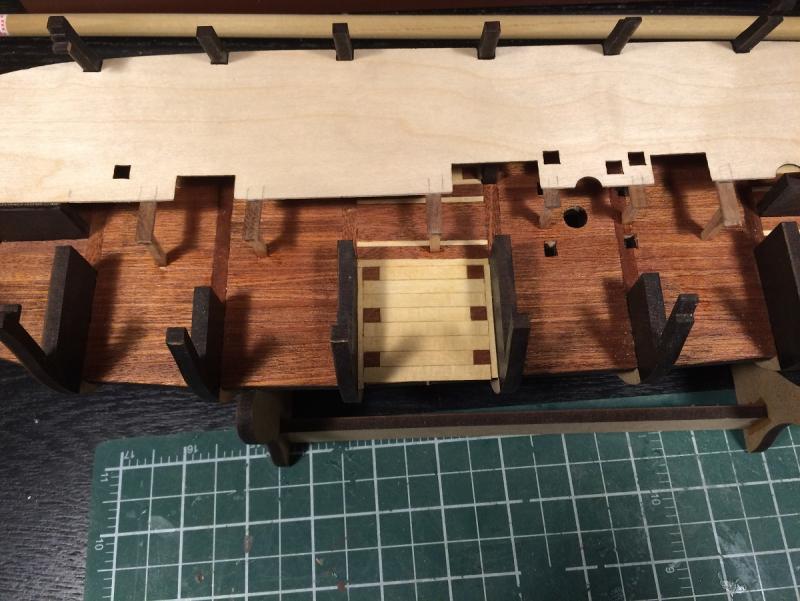
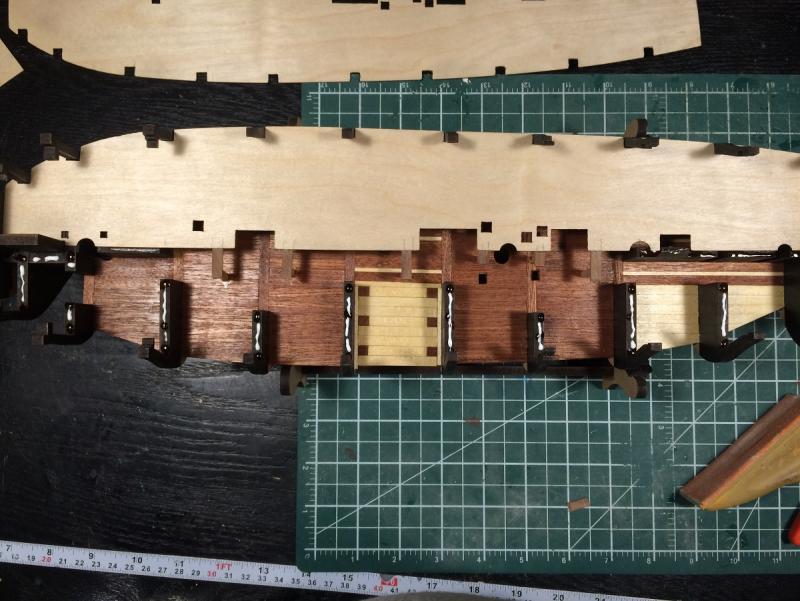
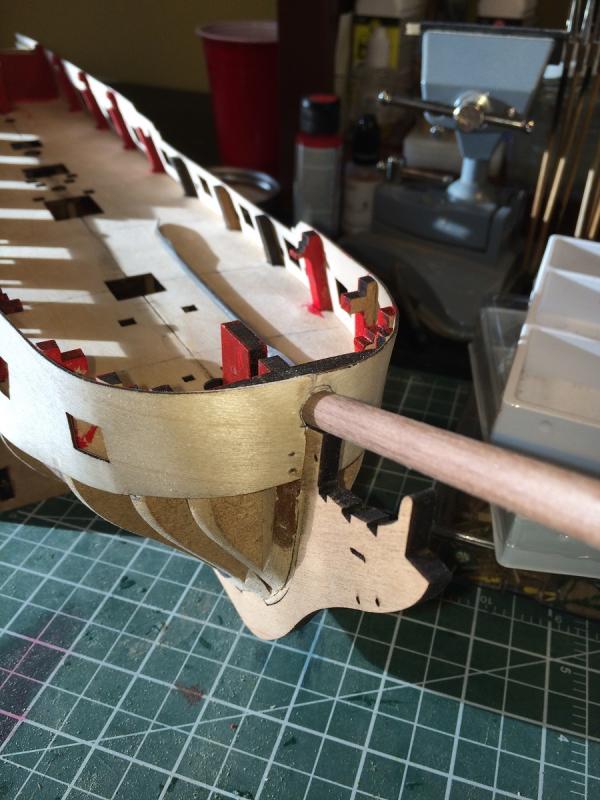
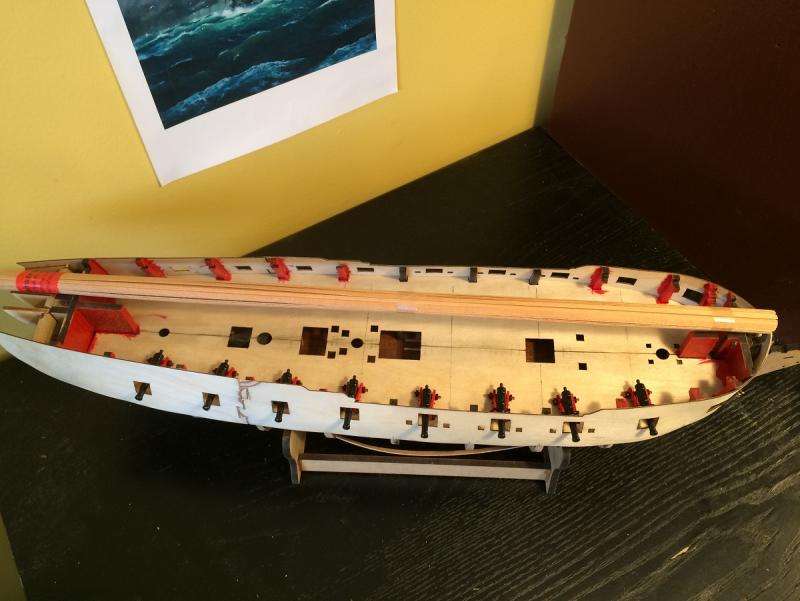
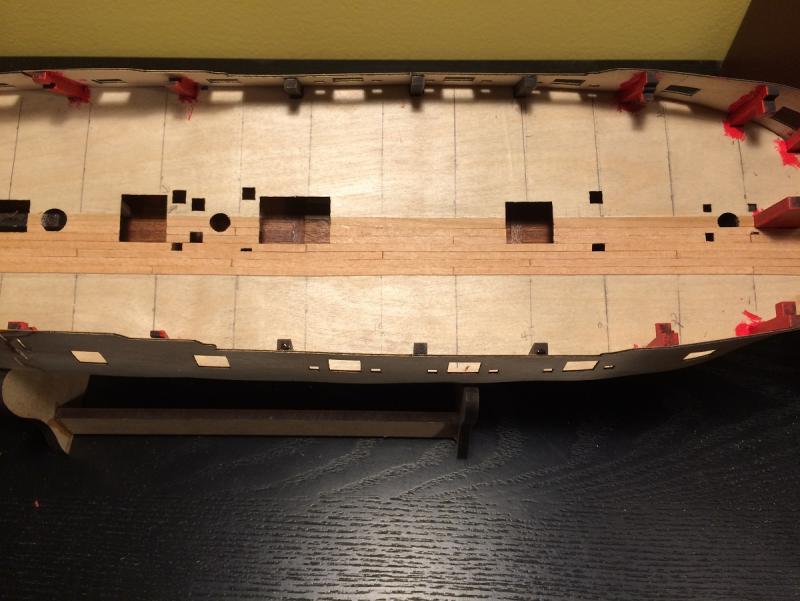
Good Morning All, I trust and hope you all had happy holidays and are now back to the reality of life once again. I took the last five days off of my Trabaccolo build to do a little work on my neglected Pegasus, she was very happy to be in the shipyard once again. First up was fairing the hull, sorry no pictures, then was to install the plywood gun deck. Before doing this supports were required as per so many other logs such as Mike's(Landlubber Mike). So you can see in the pictures how I accomplished this using some 3 x 3mm posts and 1.5 x 5 mm planks. Next was the infamous plywood gunport pieces, I had little problems with these which still worries me . I soaked them for about an hour then bent them using a curling iron. I needed to move them approx 5mm forward as one of the oar holes was being blocked by a bulkhead, but other than that it went smoothly. While waiting for glue and paint to dry I thought I would put together the cannon carriages. Many have complained about the Amati carriages , mostly about the quality of the plywood. I am thinking they must have changed their stock as I found these ones to be quite durable and easy to work with, you can be the judge as to how they look. Amati does include 18 carriages and 16 cannons, I'm thinking these extra carriages will work fine as stocking stuffers next Christmas or even mount some chocolate in them and they could be a Easter bunny thing, at any rate they will not go to waste. A point to note is Do Not paint the bulkheads black above the deck if you wish to paint red later . Mine took a minimum of ten coats to cover then I just quit. Here I am using the mill with the sensitive drilling attachment to drill the axles for the pins that hold the trucks on, then it was on to assembling. A little out of order but here you can see the result of moving the gun port sides ahead by 5 mm. The stem post and bowsprit are not glued in place, looks so good I feel like making the real bowsprit now. And here she is ready for a battle, well kind of, and loaded up for next stage of deck planking Here the planking has started using the kit supplied planks. I decided on a four plank shift using 120 mm planks. I built the aft bits as they are noted for not fitting properly mine required minor adjustments and fit perfectly. So with the gunport sides causing no problems and now the bits fitting good I am really getting concerned about my usual not so good luck. In my excitement to start planking I forgot I should have built the hatches first, I don't think this will pose too much of a problem, I will carry on as is and see what happens later with the hatches. Have a Good Day


-
Looks nice Zoran, it is a beautiful kit and reminds me that I should get busy on mine
-
Hey Dave, all is looking real nice. Without any carvings on the transom I think I would skip any quarter badges. Some lights would probably look good, and would be interesting to watch you build and install them . If you were thinking of carvings possibly the ones Chuck(NRG) is offering could be fashioned to fit, obviously not the crown but the viney things. At $5 a set it may be worth a try, and if they don't work at least you have gained a little carving experience.