HOLIDAY DONATION DRIVE - SUPPORT MSW - DO YOUR PART TO KEEP THIS GREAT FORUM GOING! (Only 27 donations so far out of 49,000 members - C'mon guys!)
×

CDW
-
Posts
7,747 -
Joined
-
Last visited
Content Type
Profiles
Forums
Gallery
Events
Everything posted by CDW
-
 Can you imagine being a kid and having a grandfather like Nils? Visiting his home and seeing his models would be like going to heaven for a child...and for an adult like me. Just beautiful and so entertaining to see. It enlightens all the senses.
- 2,625 replies
-
- 9
-

-
- kaiser wilhelm der grosse
- passenger steamer
- (and 1 more)
-
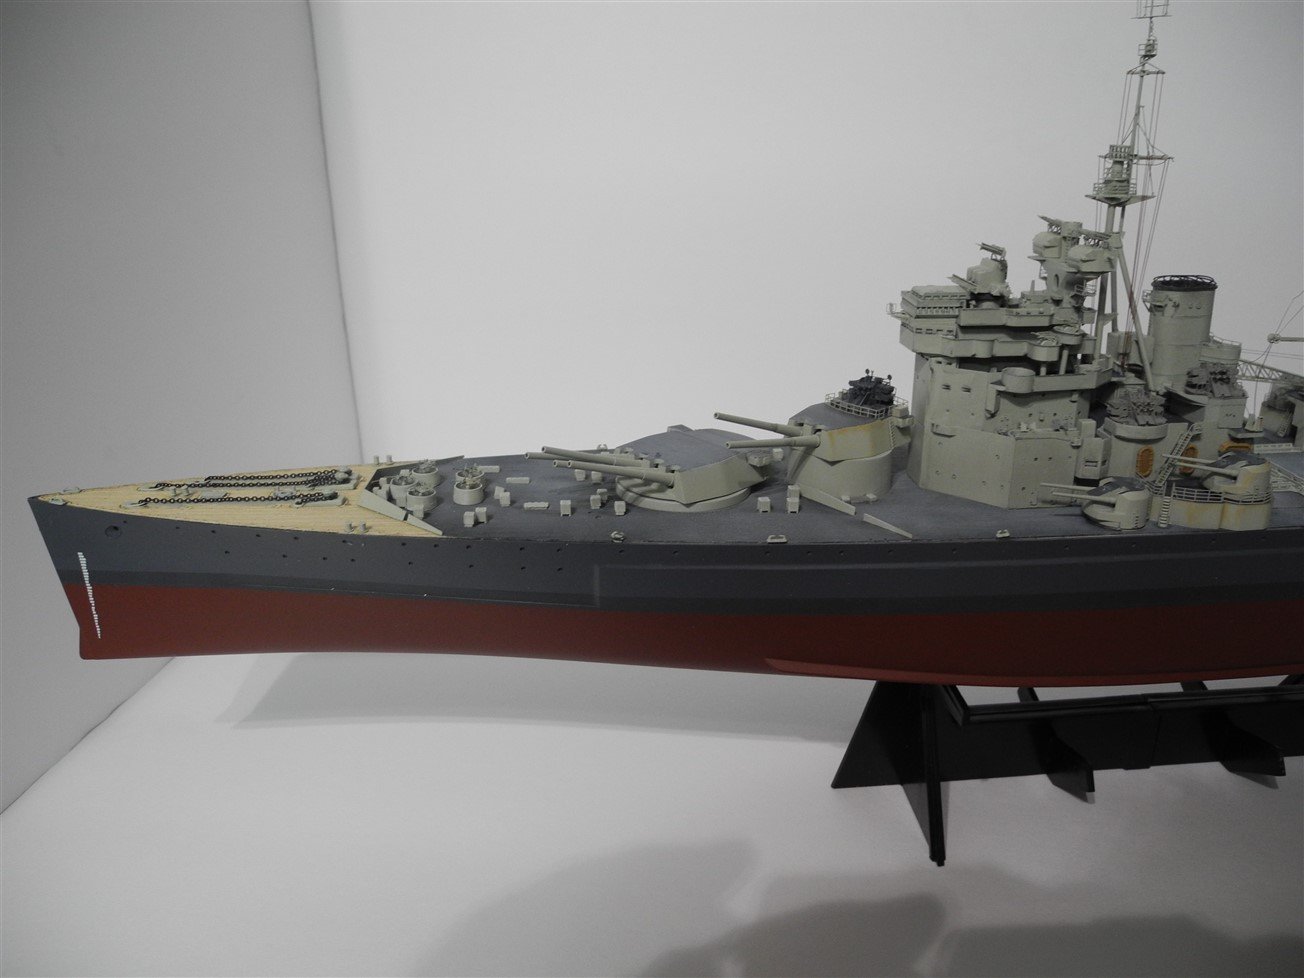
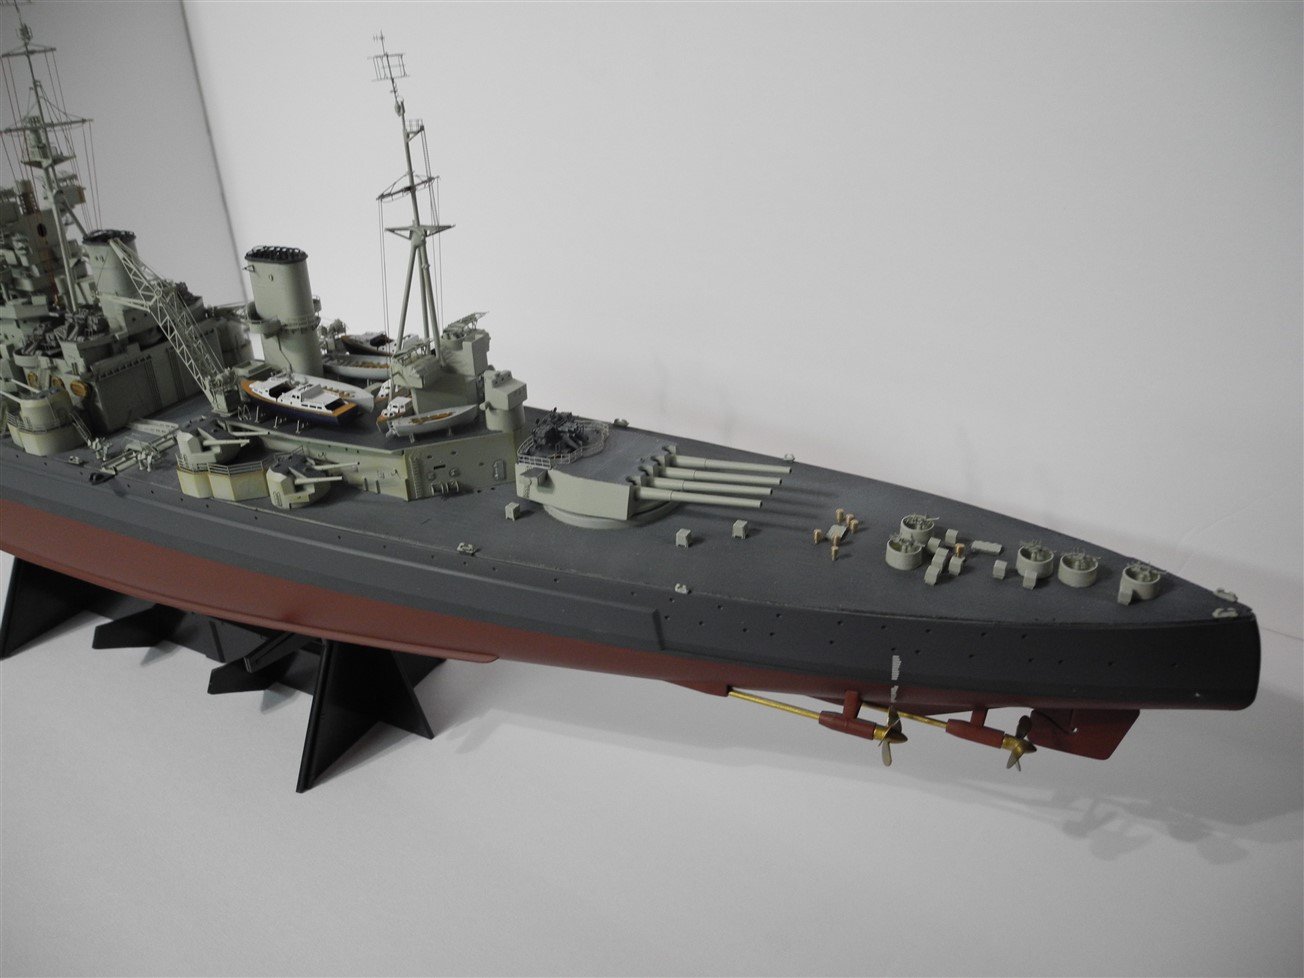
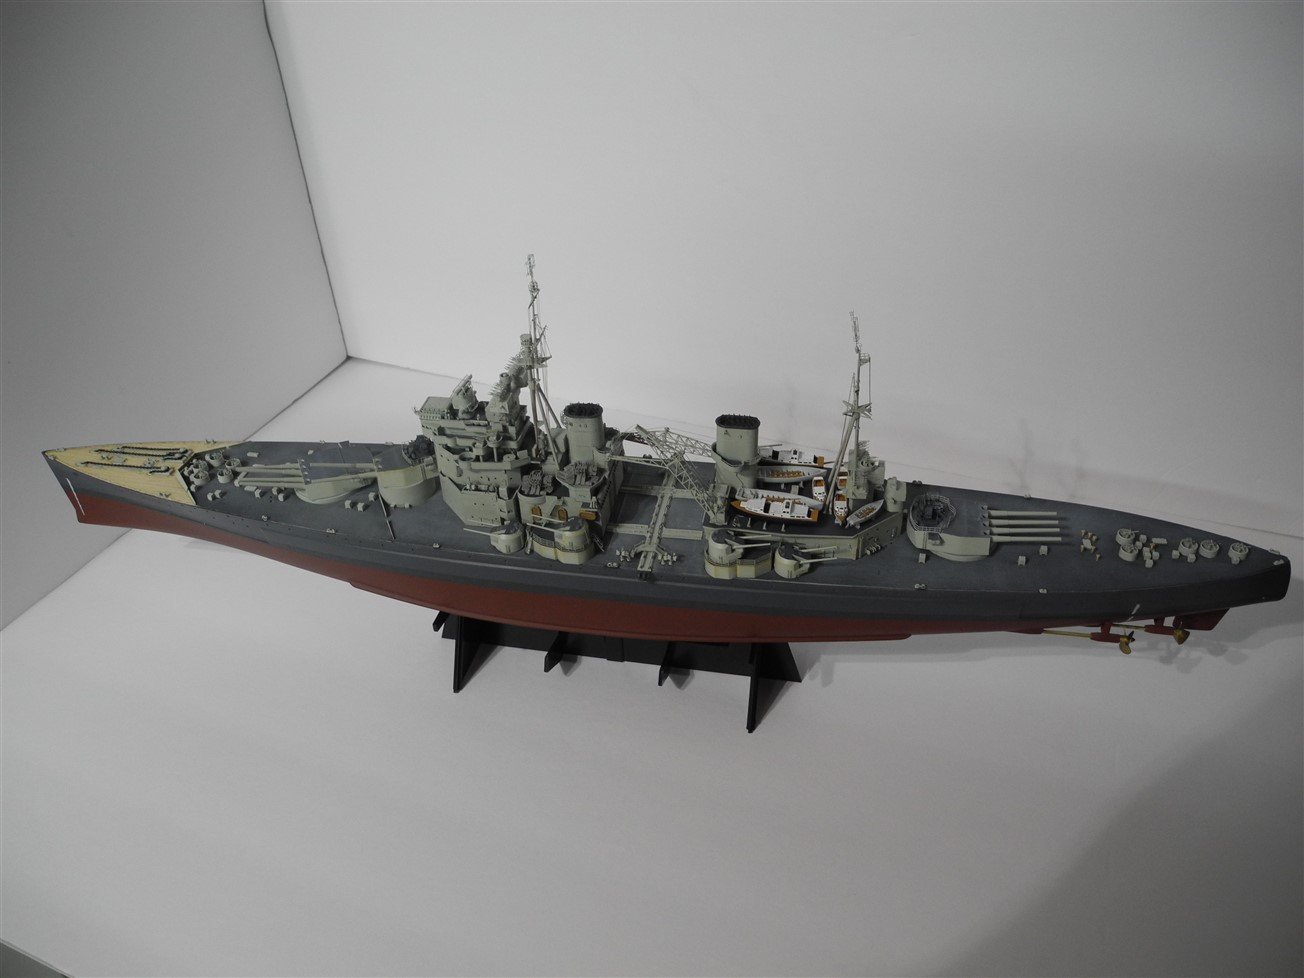
Really like those last two photos of ISE. How does the size of the hull compare to Yamato? Looks like a huge ship. I was surprised at the size of my Akagi. Much larger ship than I expected. Any yes, buying directly from Japan these days can be a bargain.
-
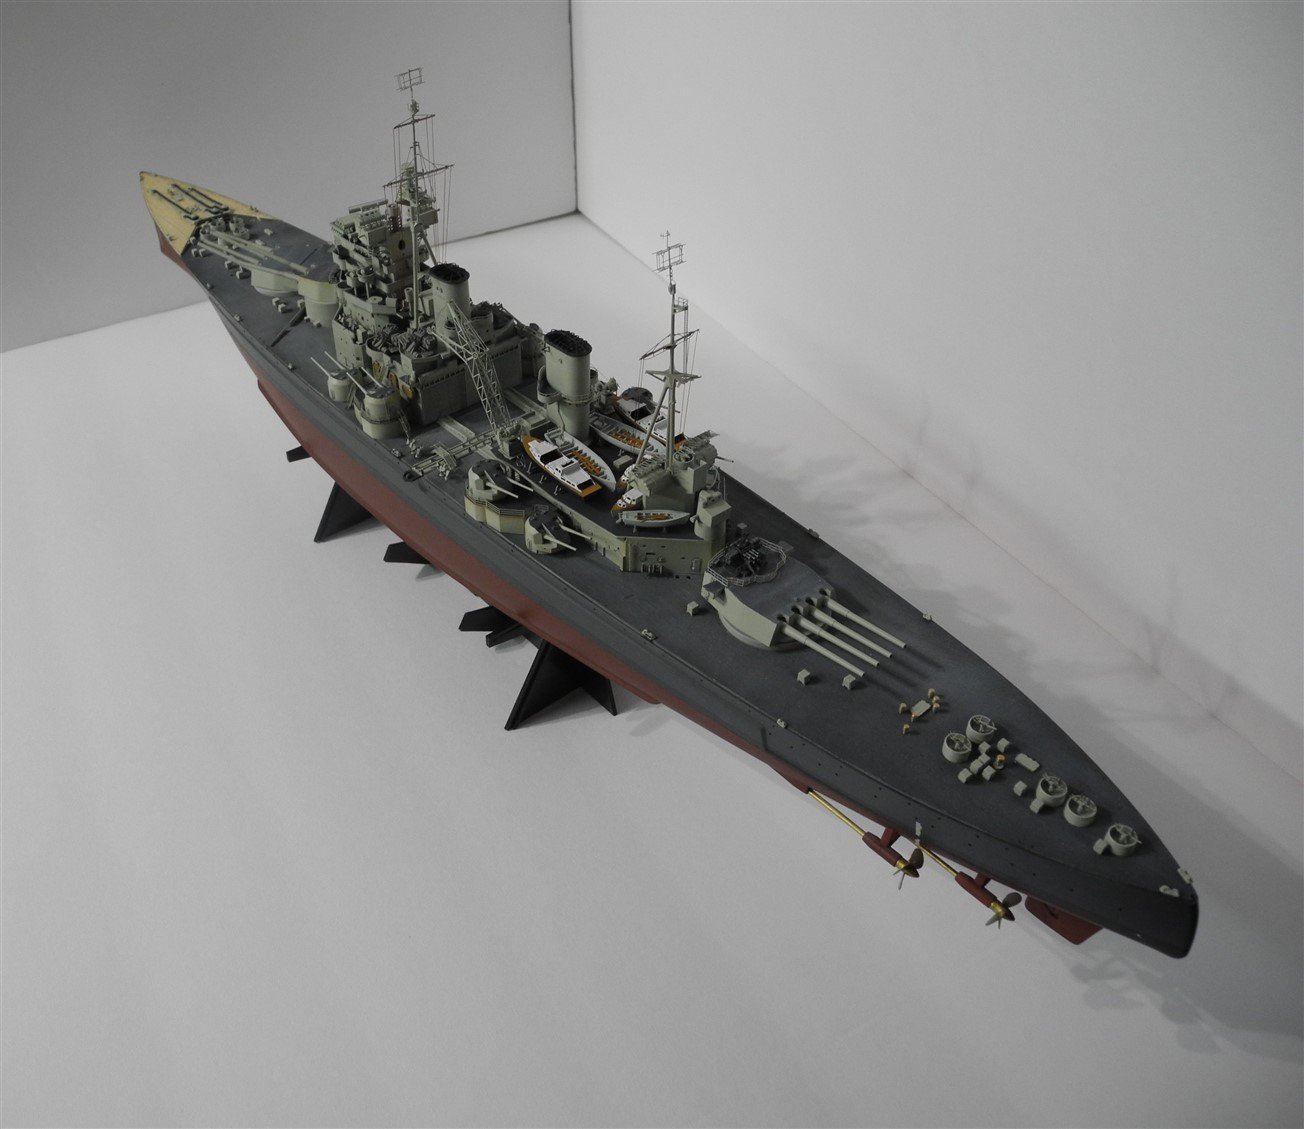
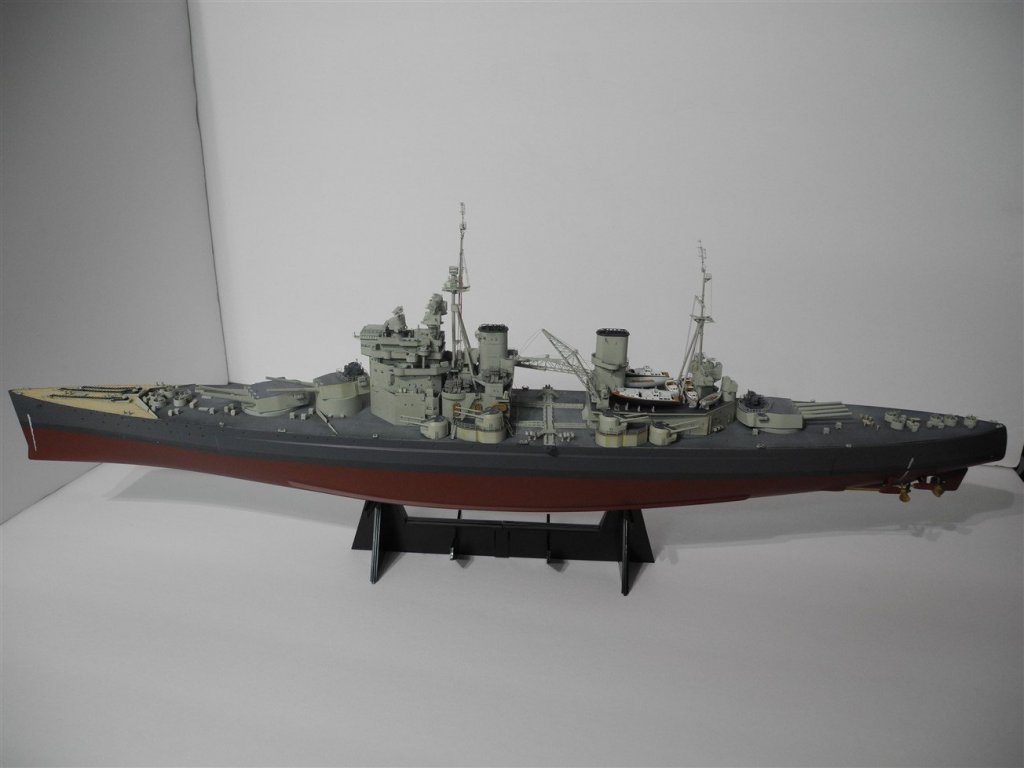
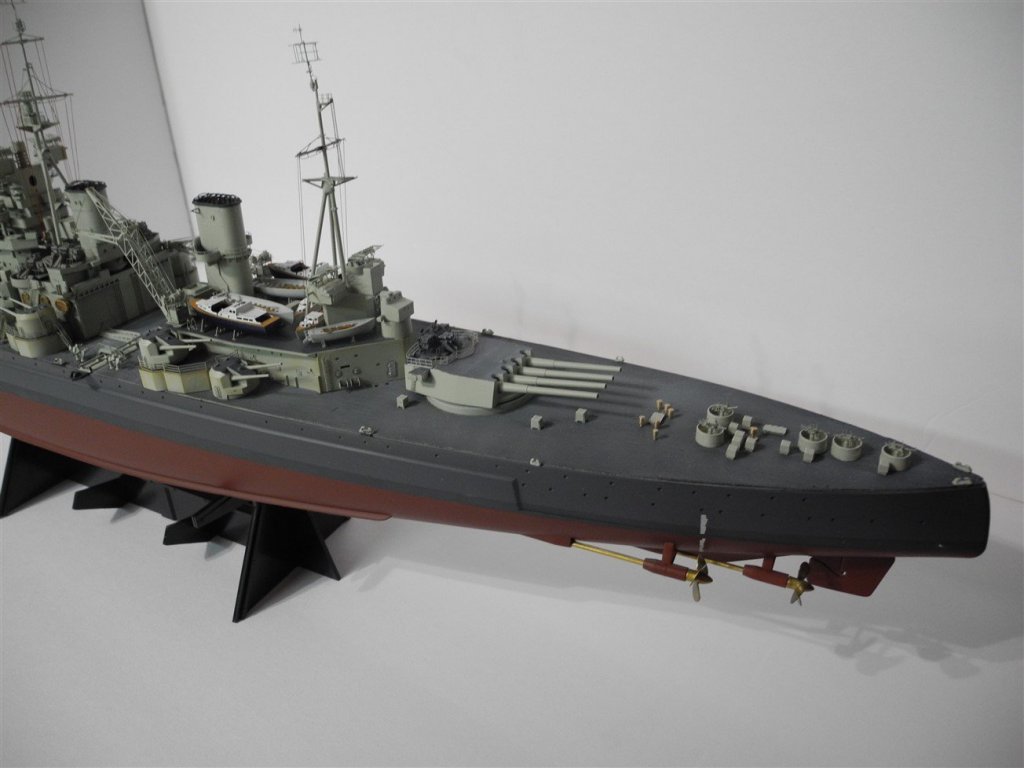
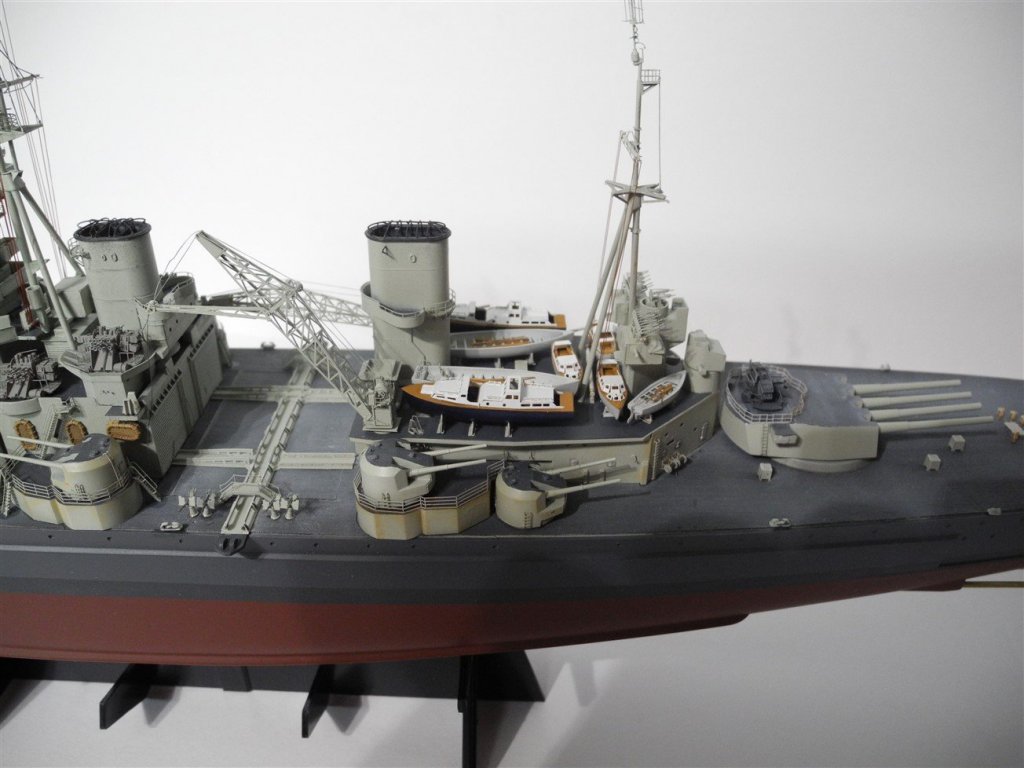
I get to a certain point in the construction of these ships when I'm not motivated to take pictures because it seems all the things added don't amount to a picture taking event. But then after a while, it's either grab a picture or two now, or else you'll be completely finished. And that's where I am now. Still have to add the railings, some AA guns, searchlights, some rigging, flags, and a tad more weathering here and there. Can you believe I got this far before I realized my kit didn't have the ship's aircraft, the Walrus? Don't know if it was missing from the packaging or if I lost it in the past. In any event, I ordered some Trumpeter Walrus and will add it after the set arrives.


- 151 replies
-
- 10
-
-
- duke of york
- tamiya
- (and 2 more)
-
Glad to see you aboard, Syd. Hope you get a lot of joy from the hobby.
-
Clare It looks like you use a rubber or vinyl cover on your scalpel handle. Where do you find those? I love my scalpel, but am not crazy about the all-metal handle and think something rubber to cover the metal is a great idea. I've just never seen them for sale.
- 106 replies
-
- 2
-
-
- digital navy
- v108
- (and 3 more)
-
That makes two of us. Bought one on Ebay for a discounted price. Now to find a detail set. Huge box, longer than the 1:200 Iowa box.
-
I need to take a trip to the art supply store to have a look at water color paints. Just having a hard time getting my mind wrapped around water color paints. All I can recall are the little sets of kid's water colors...and I am guessing there must be some adult variations on the water color paint theme. Right? Whatever it is, you seem to have mastered it to the degree necessary to do touch up paint that is darn near a perfect match for your printed parts. You are setting a high bar for anyone who tries to follow in your footsteps with this build.
- 295 replies
-
- 6
-
-
- amatsukaze
- halinski
- (and 2 more)
-
Love the Scharnhorst. Will follow with enthusiasm. So wish the Hachette partwork series were for sale in the USA, but alas.
-
If someone just looked at the pictures of the completed assemblies without reading any of the text, would most likely not realize this model is made from paper/card stock. The way you are blending in those seams make it look as though you've been building this type of model for a long time. Beautiful workmanship.
- 295 replies
-
- 6
-
-
- amatsukaze
- halinski
- (and 2 more)
-
Fokker Dr.I by Torbogdan - FINISHED - Model Airways
CDW replied to Torbogdan's topic in Non-ship/categorised builds
Uh, ohh....photo bucket strikes again with it's 'third party hosting' message. -
Wow, that was some real overhaul right there. Glad you are back and hope you mend quickly. Don't over do anything and get plenty of rest. Regards CDW
-
+1 This. It's the quickest, cleanest way to add weight that I know of.
-
That's very nice detail. Just the right scale for a destroyer model.
- 295 replies
-
- 4
-
-
- amatsukaze
- halinski
- (and 2 more)
-
Just now realized you are going into the hospital. Wishing you well and a speedy recovery.
-
Overall it looks superb. Those guns you just finished are great, too. The 25mm singles are particularly nice. But it's easy to recognize the potential eye strain they present when building. Have never seen a set in person, but the Fine Molds injection molded guns look quite nice from pictures I've seen. Not easy to find in this country, unless ordered directly from Japan through Ebay.
-
A tiny dab of clear epoxy will make a very nice lens.
- 295 replies
-
- 5
-
-
- amatsukaze
- halinski
- (and 2 more)
-
Greg Curious if you have tried any of the Infini Models detail pieces yet. I just bought various IJN and US gun mounts and other accessories from them last week. They look real nice but haven't put any together yet. They are designed by Park, the same fellow who did the Pontos sets. I guess he left Pontos for greener pastures.
-
Clare When you check photo etch railing options, make sure to look at individual stanchions sets in your scale. (GPM makes a set) You use wire to complete the railings, but the individual stanchions will allow you to place them where you want/need each one rather than "wherever they fall".
- 106 replies
-
- 3
-
-
- digital navy
- v108
- (and 3 more)
-
Going to pull up a chair and follow along. Looks great so far, Clare. PS: My wife's mother is a Hess...from West Virginia. Grandfather was a coal miner.
- 106 replies
-
- 3
-
-
- digital navy
- v108
- (and 3 more)
-
I like it all, but the props look very convincing. Even better than some of the plastic kit props.
- 295 replies
-
- 4
-
-
- amatsukaze
- halinski
- (and 2 more)
-
She's big, beautiful, and impressive. Outstanding effort and really appreciate the way you hung in there to "getter done". You've got something to be proud to display. Looking forward to your future builds.
-
Very educational for me. Great primer on card models.
- 295 replies
-
- 5
-
-
- amatsukaze
- halinski
- (and 2 more)