HOLIDAY DONATION DRIVE - SUPPORT MSW - DO YOUR PART TO KEEP THIS GREAT FORUM GOING! (Only 13 donations so far - C'mon guys!)
×


AntonyUK
-
Posts
1,190 -
Joined
-
Last visited
Content Type
Profiles
Forums
Gallery
Events
Everything posted by AntonyUK
-
 Hi Jeff. That's a lot of treenails. Nice to see the correct patterns on your deck. The treenails are not to prominent. You have then as they should be. As Dan pointed out. It's worth doing and they are a focus of people when they are looking at the deck. A truly excellent build. Regards Antony.
 -
Hi David. That has been one enjoyable build... I have enjoyed every minute of it. Top of the class in workmanship. With the mods you have made it's turned ot to be a real masterpiece. Congratulations of your compleasion of the Mississippi King. Regards Antony.
- 104 replies
-
- 2
-

-
- king of the mississippi
- artesania latina
- (and 1 more)
-
Hi Jonathan. Welcome to MSW. Nice choice of kit. Lots of rigging nice to get you tangled up. Watch there are NO warps in the board as they will get transferd into the model. Even the smallest warp will be devastating. All the best. Will be watching this wonderful ship being assembled. Regards Antony.
-
Hi Nils. Nice find the fancy decore. They are spot on for your Chebec. Regards Antony.
- 692 replies
-
- 5
-
-
- eagle of algier
- chebec
- (and 2 more)
-
Hi Dave. Been a while since I've seen a cross section here on MSW Gotta follow along with this build. Keep it square and centred. Looks a nice kit. Regards Antony.
- 75 replies
-
- 3
-
-
- constitution
- mamoli
- (and 2 more)
-
Hi Zapto. Very nice work with your Friesland. Must say your workmanship is outstanding. Hint :- Hiding your led lighting wires in the mast. I used a knife and just cut a slit into the mast on each side. And then I pushed in a single strand of steel wire with the back of my knife into the slit. The wood closes up after inserting the wire. And it totally unnoticeable to the eye. (Copper wire is to soft to do this with) Have a nice new year. Regards Antony.
-
Hi Dave. That's a lot of progress. Coming along very nicely. Take your time with the planking. Can Not rush it. Nice work with the clamps above. Have a nice new year. Regards Antony.
- 6 replies
-
- 1
-
-
- artesania latina
- Virginia
- (and 1 more)
-
Hi Mike. Steam and heat bend them. My method is to boil a kettle on the stove and hold both planks into the steam. Then wrap them around the kettle to cool down. Holding the planks in place with a strip of cloth. Yea it takes time but the planks are always over bent and that helps. Your planking looks spot on. Have a good new year. Regards Antony.
- 204 replies
-
- 1
-
-
- trajta
- marisstella
- (and 1 more)
-
Hi Carl. There has been a few models by Young Modler builds on MSW. There kits are quite unique and mostly Korean. I have there Korean Turtle Ship. (The bigger scale) Wishing you all the best. Regards Antony.
-
Hi Nils. Sorry it's Off topic . Will you be doing a Junk ?. Looking at doing one as my next scratch build. Did you get any plans or are you going to use the Amati plans or the Artesania Latina red dragon plans. Regards Antony.
- 692 replies
-
- 4
-
-
- eagle of algier
- chebec
- (and 2 more)
-
Hi Nils. Like Michael above. Just catching up... wow amazing work on the stern and deck. And I've gotta remember your excellent method of cuttng round holes in the hull or deck. Have a nice christmass. Regards Antony.
- 692 replies
-
- 4
-
-
- eagle of algier
- chebec
- (and 2 more)
-
Hi David. That's a real nice looking model you have created there. Is there no handrail around the rear black stacks.? Finish in time before your next christmass gift model ? 4 days... Regards Antony.
- 104 replies
-
- 2
-
-
- king of the mississippi
- artesania latina
- (and 1 more)
-
Hi.
You posted some inteesting junk drawings.
Would you mind sharing the link with me.
Regards Antony.
-

Hi.
If the website is the one prohibit by chunk,i'm sorry that i can't publish or disseminate it in the forum.Another site, which contains many Chinese ship drawings, has been closed.
If you need some drawings for research purposes, I can consider looking for it for you.
It may be different from what you think. It's so rare that the ship model drawings drawn by Chinese . Instead, the European ship model company has developed a lot of Juncke drawings.
HJX
-
-
-
Hi Dave. Welcome to MAW. Nice choice of kit for you to start with. Yes... sort the keel out first. Dampen the keel and lay it on a flat surface with the bow and stern toching the surface. The gap should be in the middle now. Place a 4mm packing under each end of the keel. Now place a weight in the centre on the keel. And leave it for 24 hours. Basically over bending it and hold in position for 24 hours. Take the opportunity to look at other builds logs. Regards Antony.
-
Hi Larry. Looking good. Take your time with the planning. Welcome to MSW . Regards Antony.
-
Hi David. I'e just finished the Sicilian cargo boat. And now I will continue with the Korean turtle ship. Wow the stacks are the making of this boat. David... we all have the skills. I look at your ship and I think wow. It's what we do. Will you be keeping her to display ? Regards Antony.
- 104 replies
-
- 2
-
-
- king of the mississippi
- artesania latina
- (and 1 more)
-
Hi David. Excellent progress with you ship. Liking all the mods you have made on the way. Regards Antony.
- 104 replies
-
- 2
-
-
- king of the mississippi
- artesania latina
- (and 1 more)
-
Hi. Nice build. If it helps with the plank bending .... try a shot of whiskey in the glass before use. Will follow along with your build. And watch the progress as she grows. Regards Antony.
- 59 replies
-
- 2
-
-
- artesania latina
- san francisco ii
- (and 1 more)
-
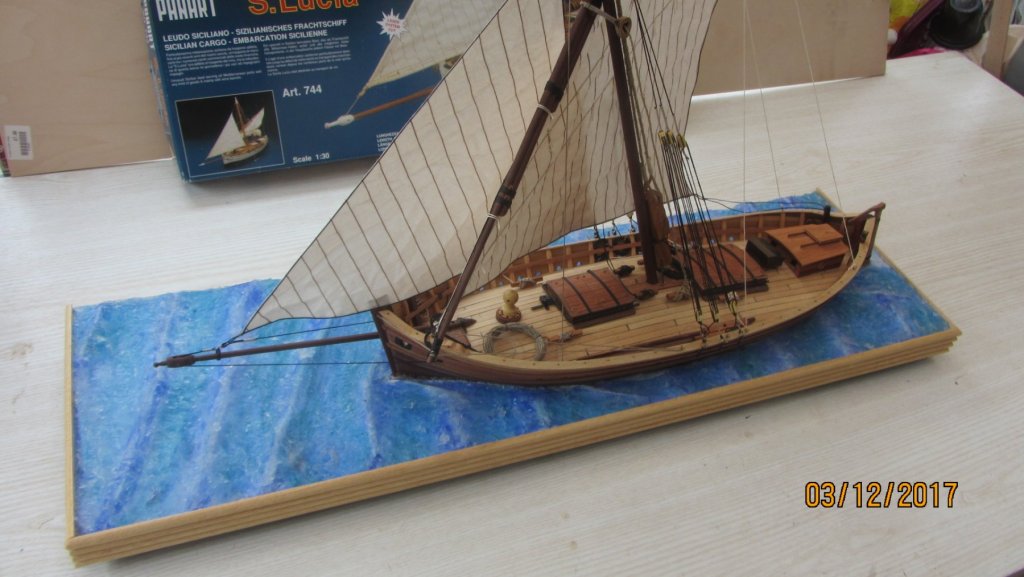
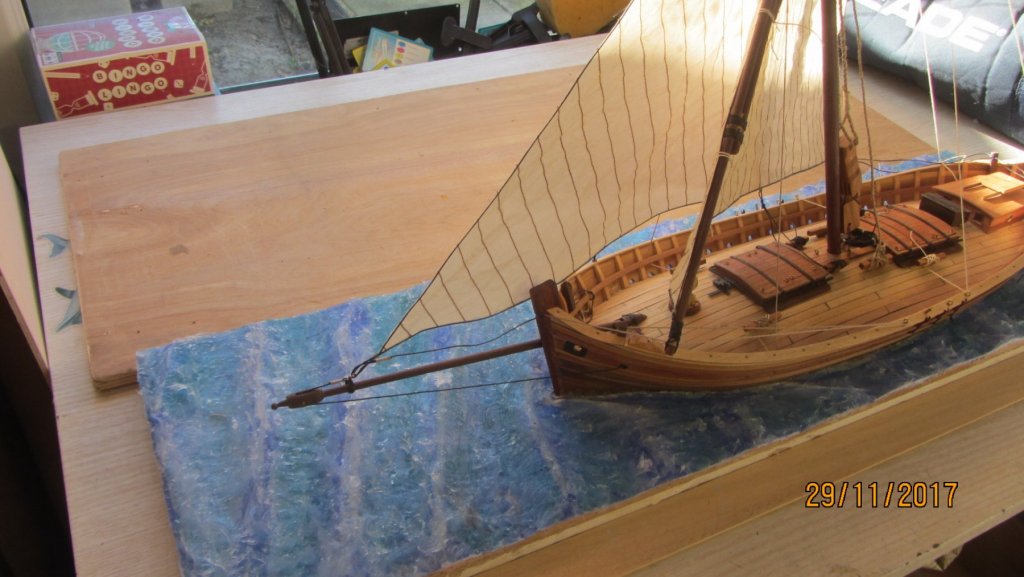
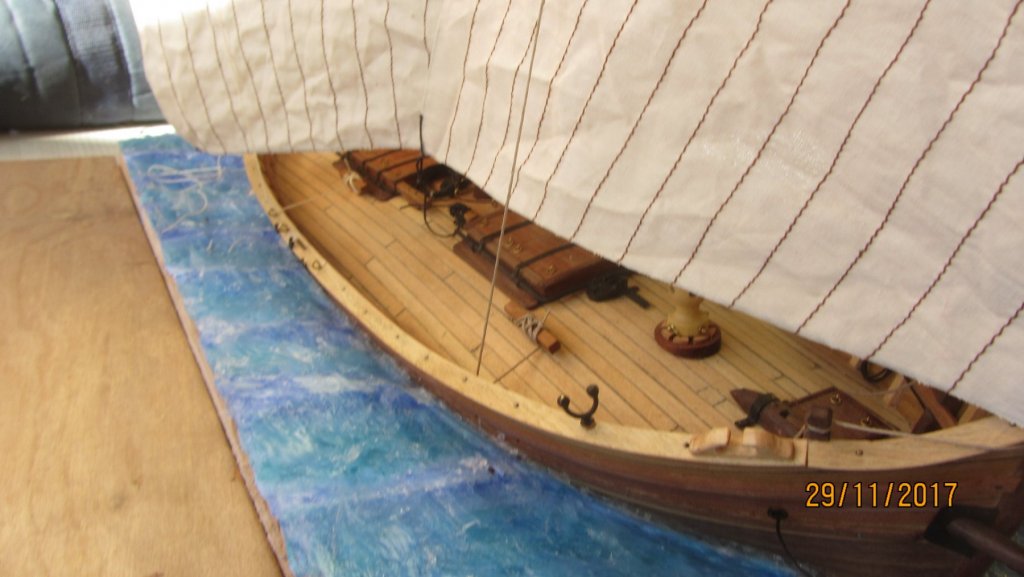
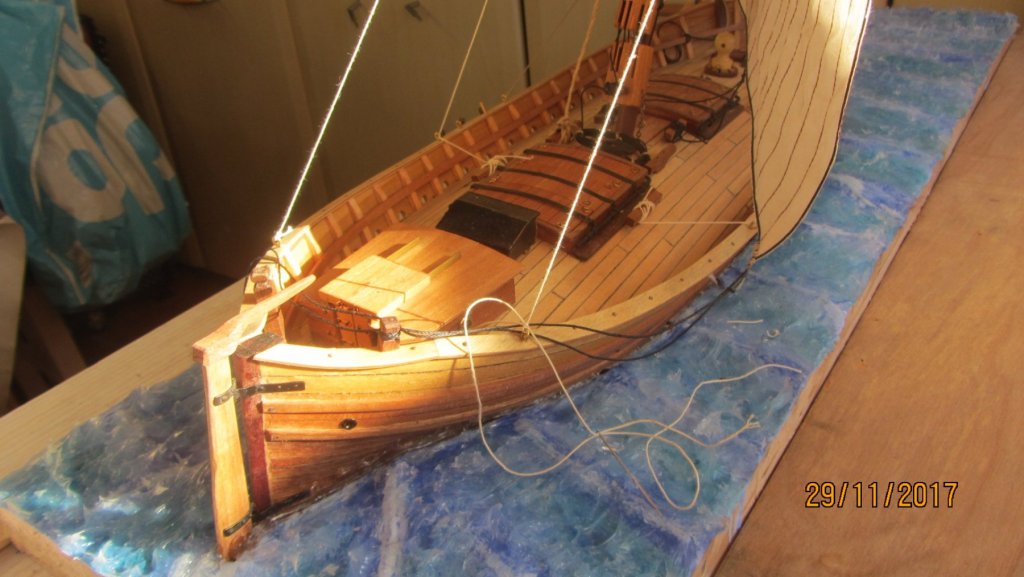
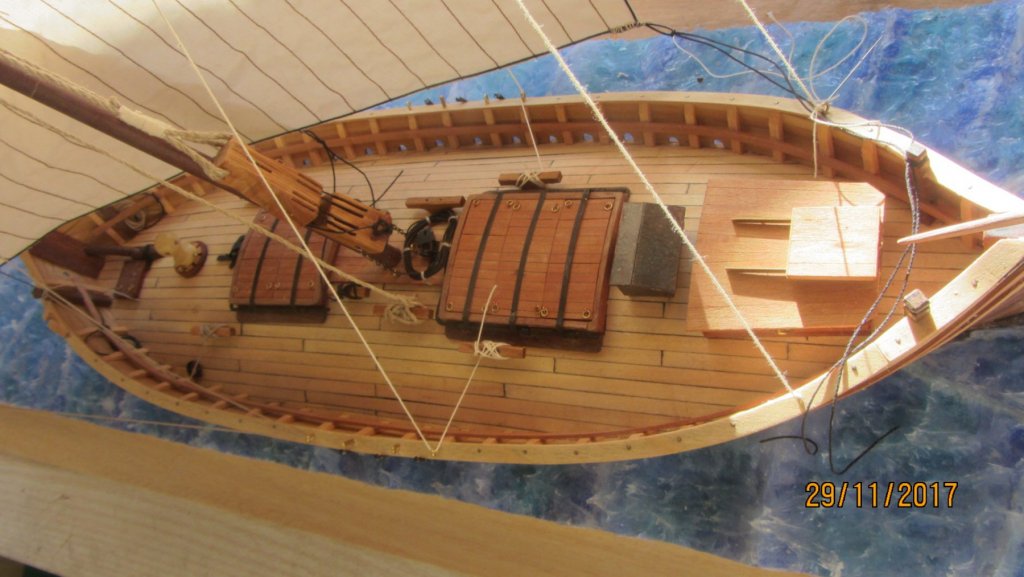
Hi. Well that another one finished and delivered to my Niece Sam. She is happy with the model and seascape. Thanks for all the likes. Regards Antony.
- 32 replies
-
- 1
-
-
- santa lucia
- panart
- (and 1 more)
-
Hi Rossi. Looking forward to you building this kit. Quite a size in length. Regards Antony
-
Hi David. You are making a stunning model from this kit. Maye some people might like to add the tables chairs and other bits on the interior of the boat. Yes I think Chris is right... put some trim around the skirting. Regards Antony.
- 104 replies
-
- 2
-
-
- king of the mississippi
- artesania latina
- (and 1 more)
-
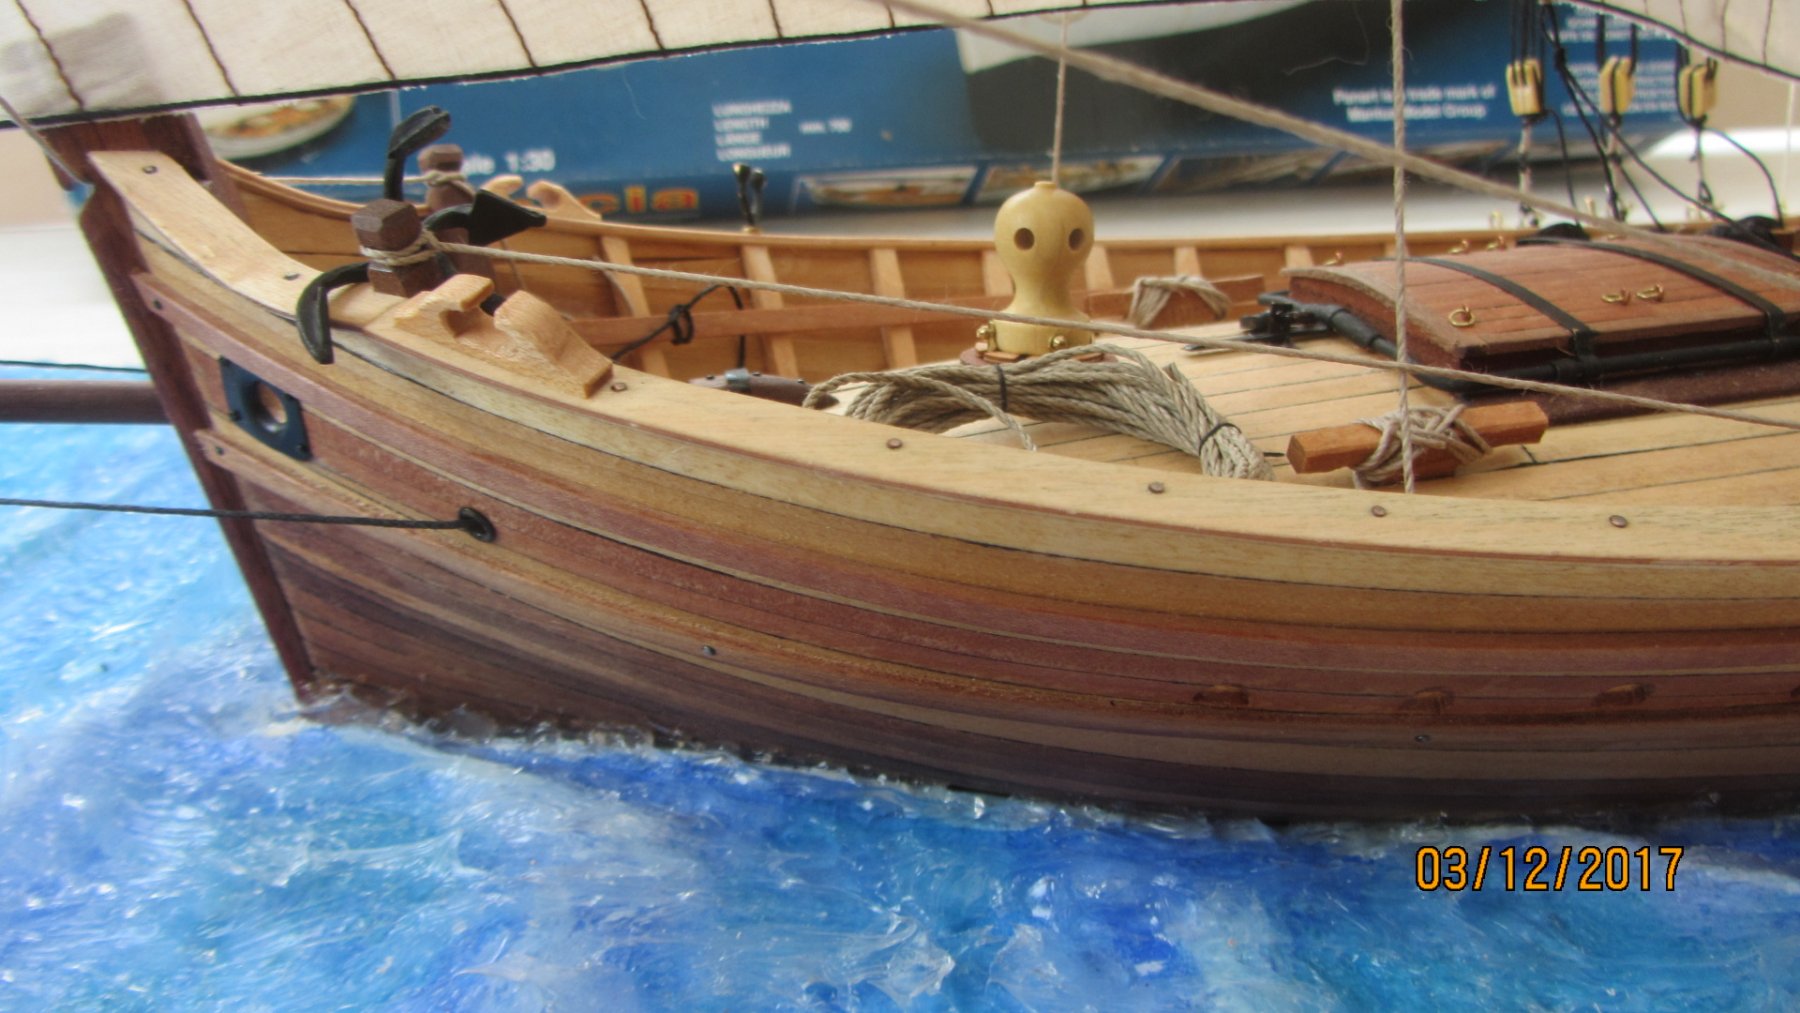
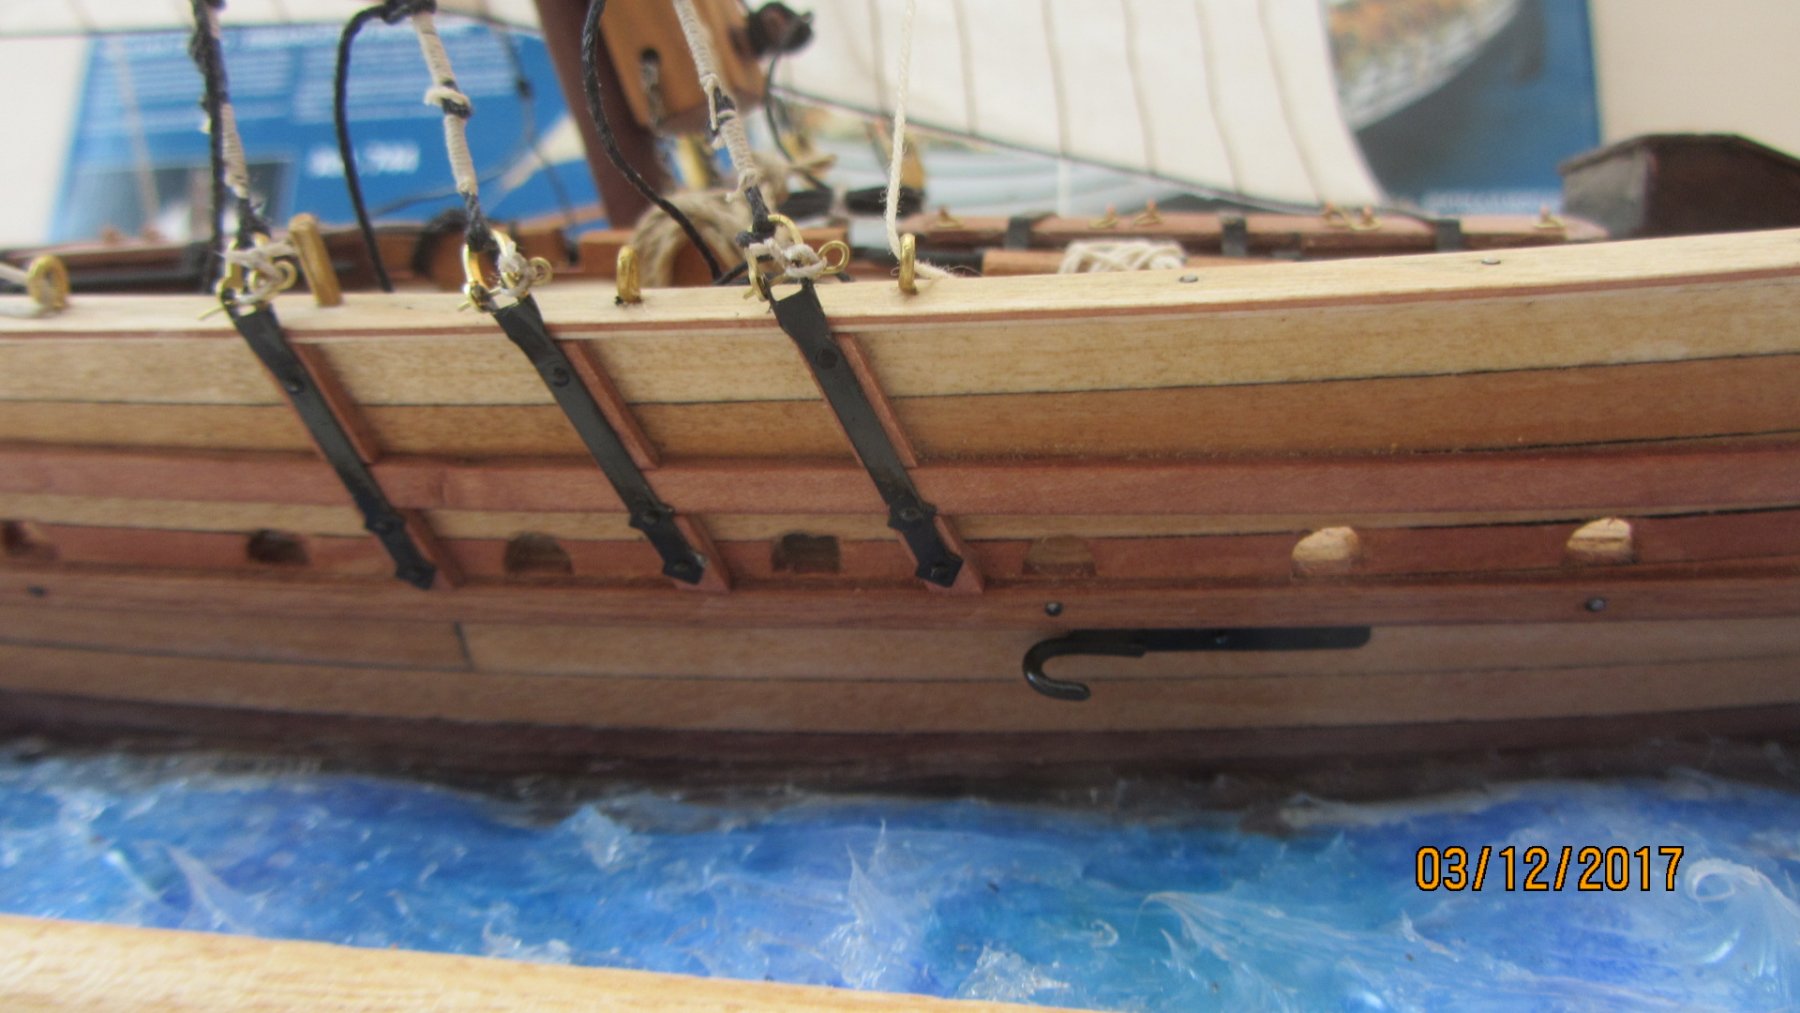
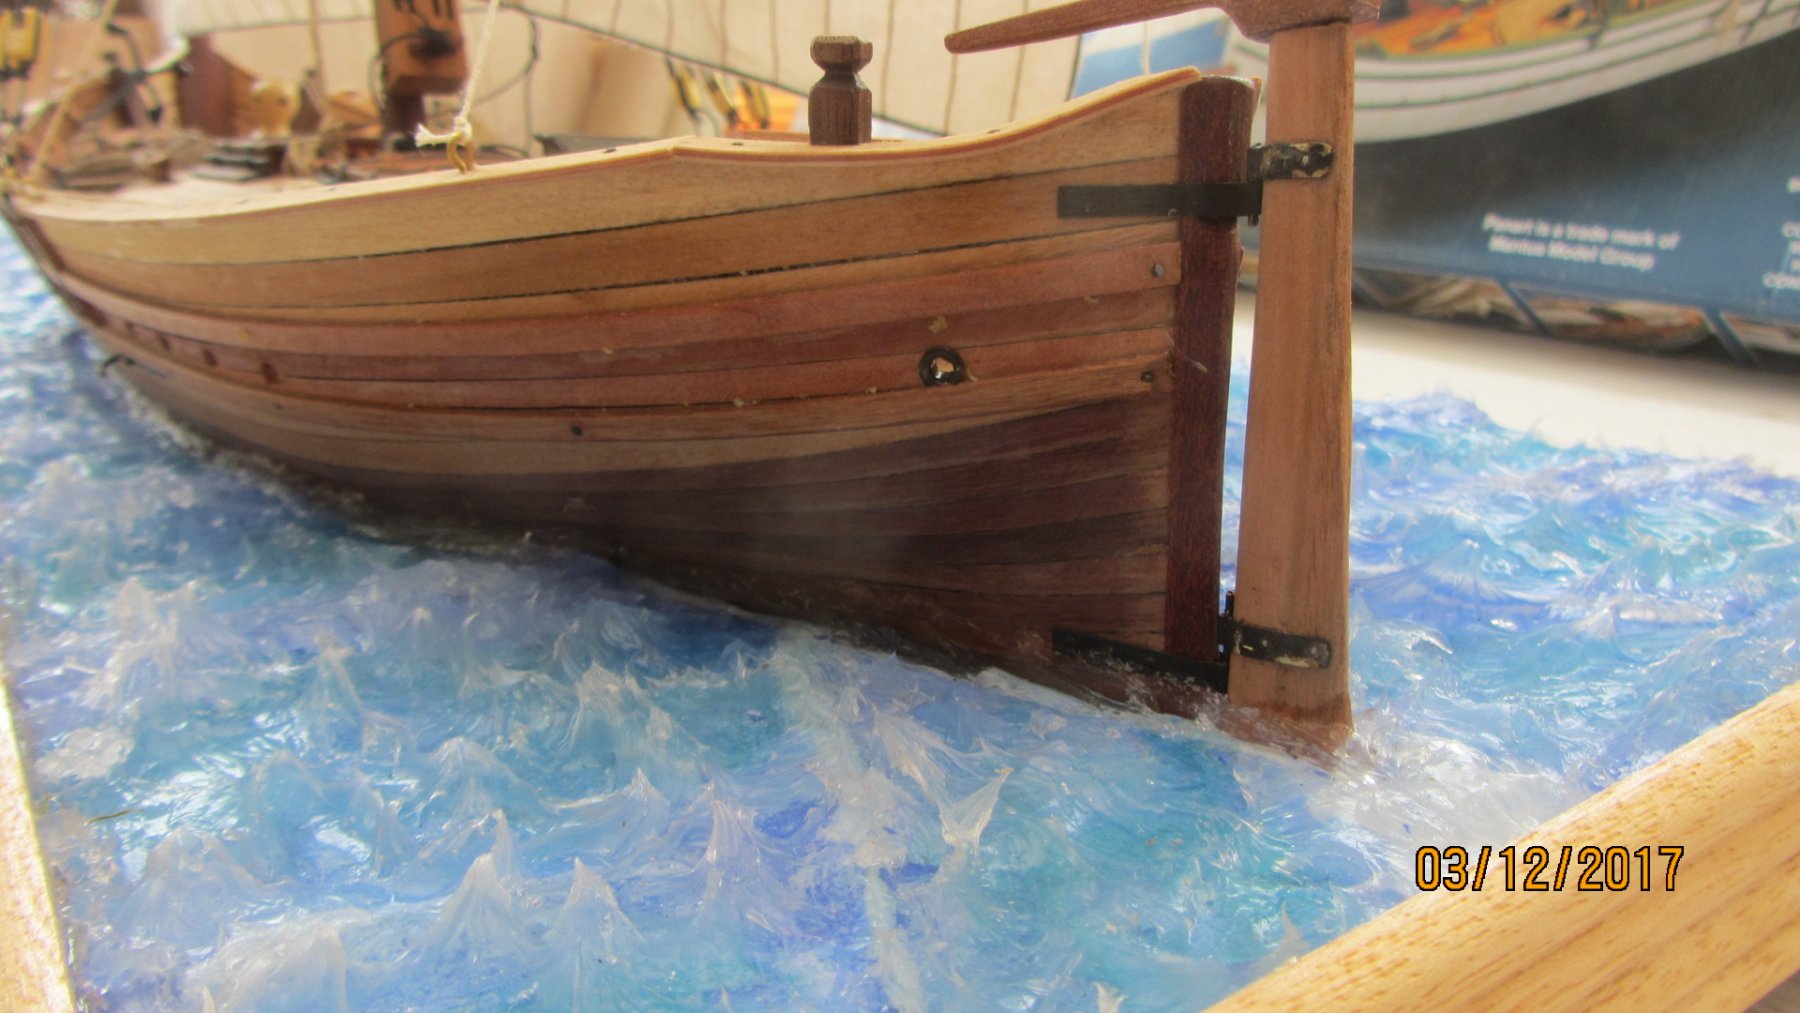
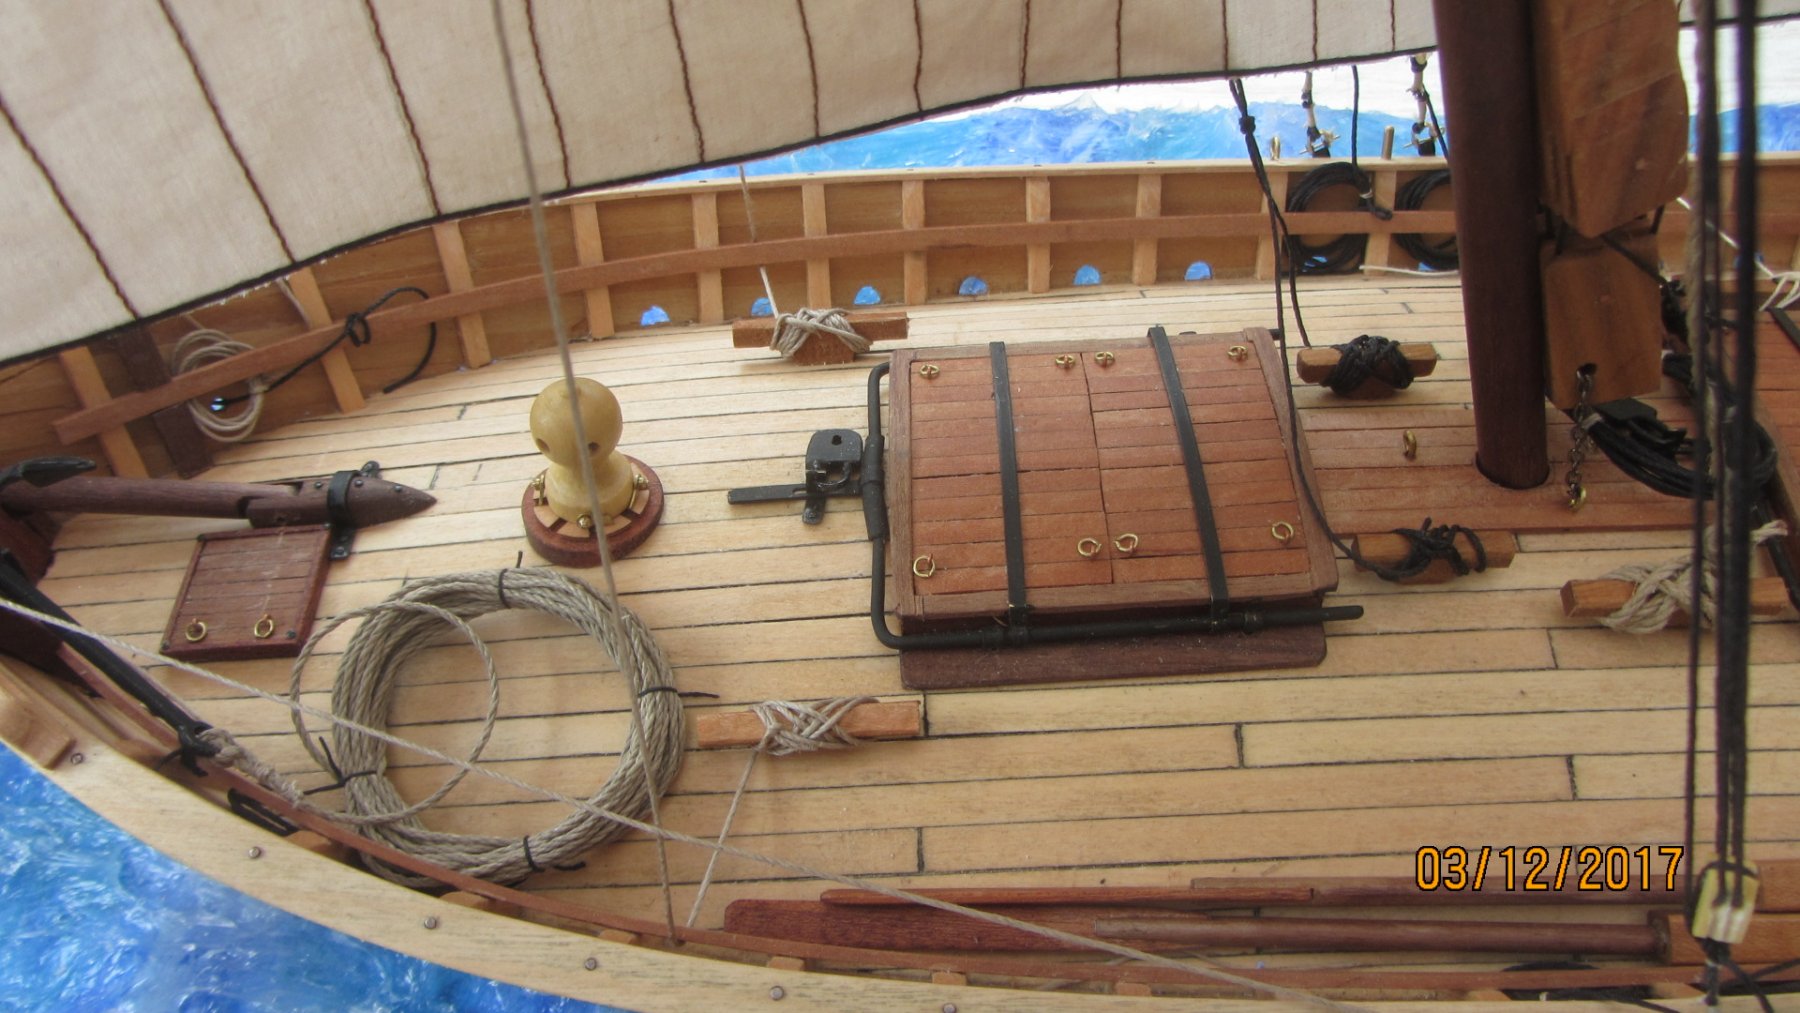
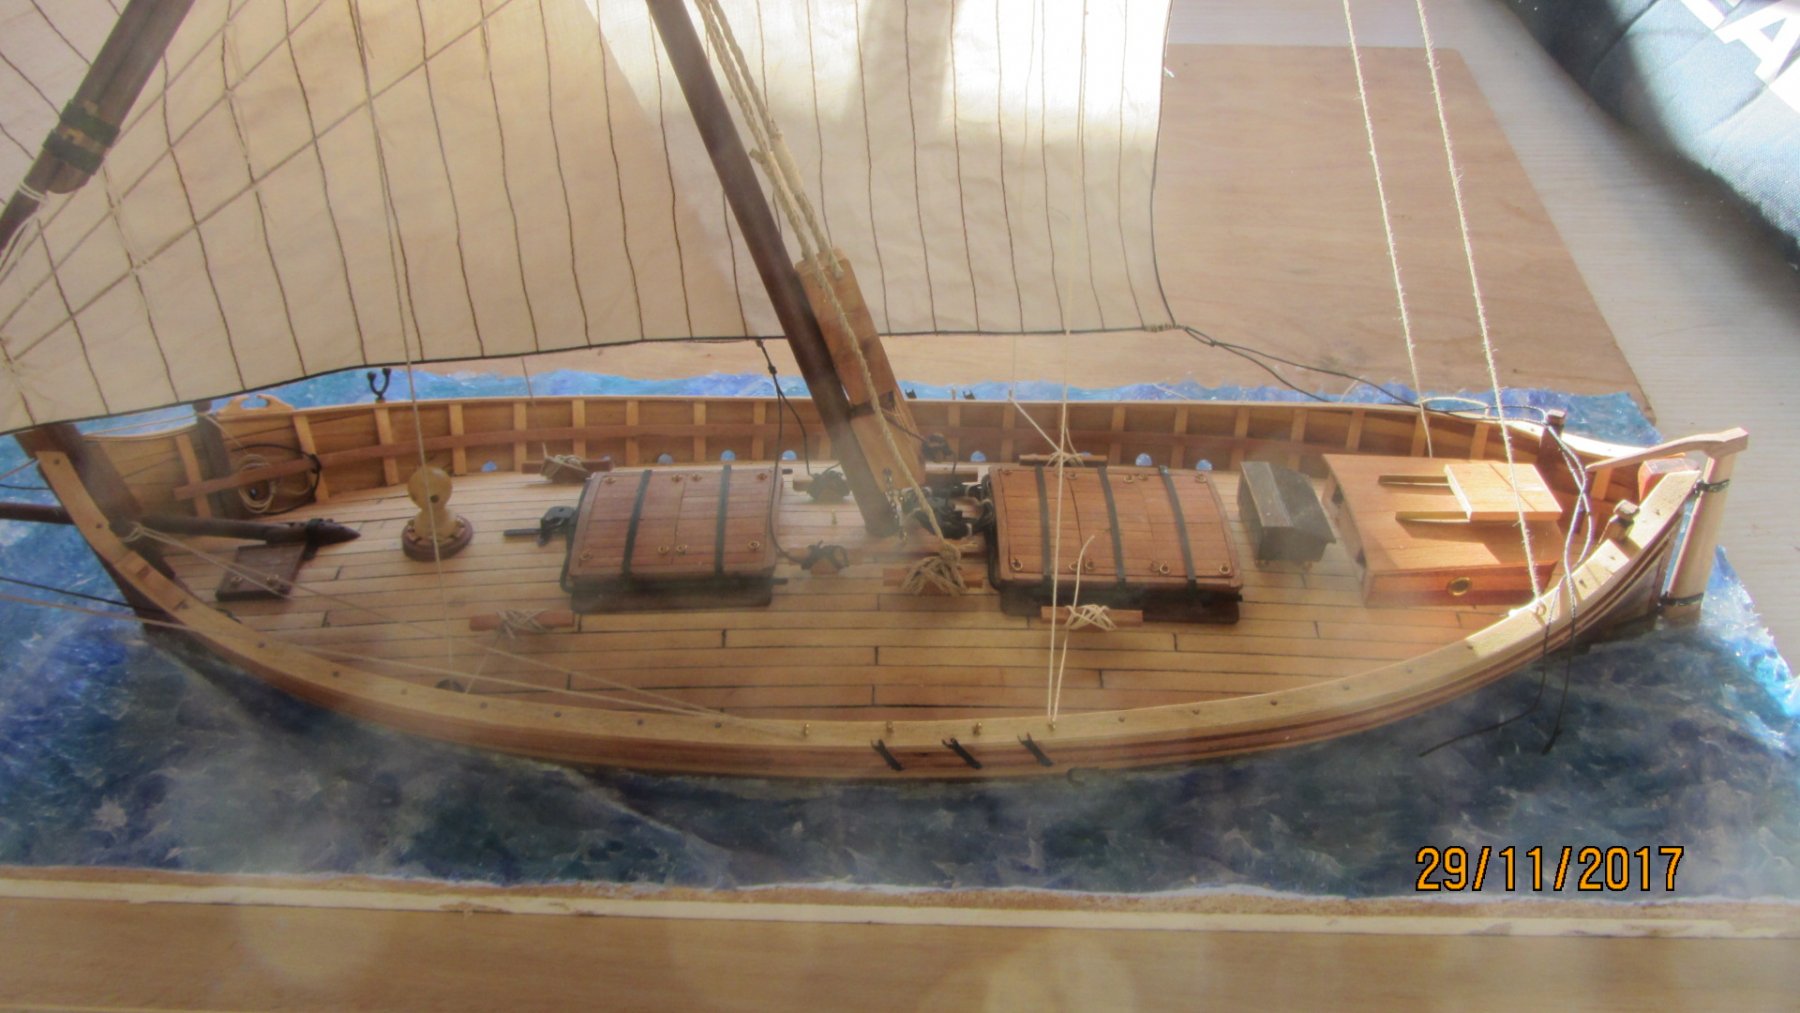
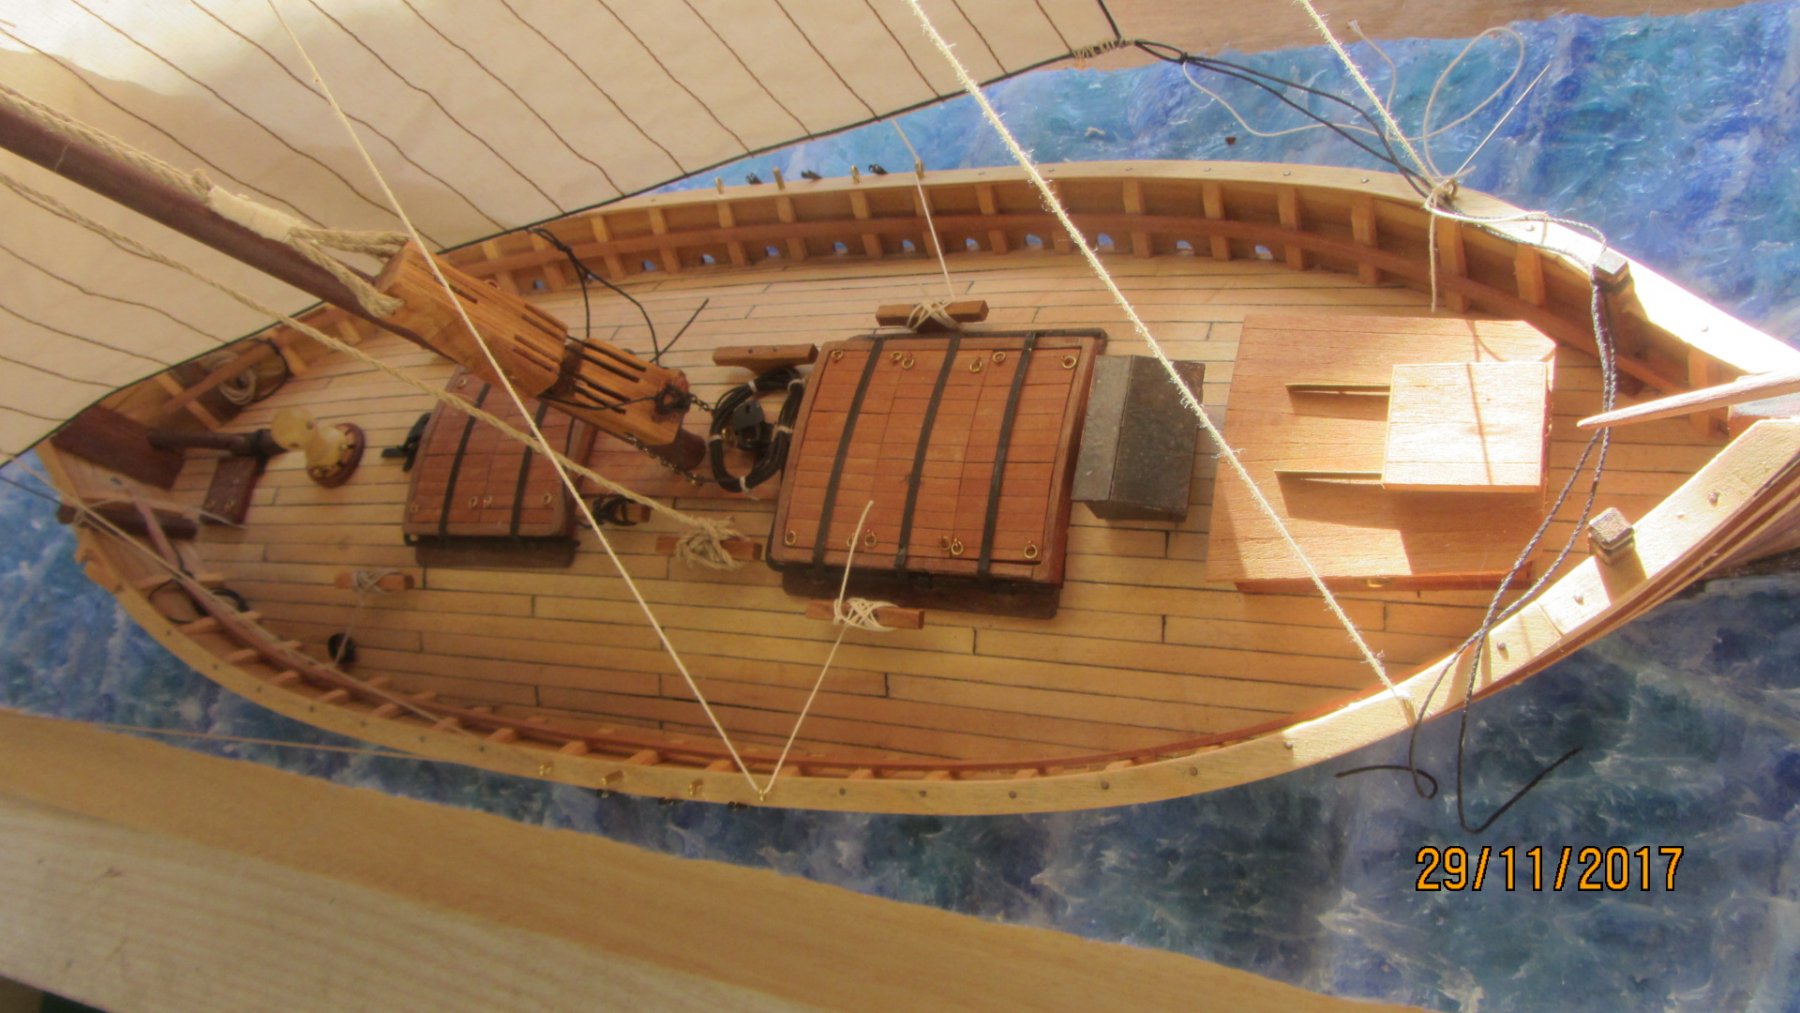
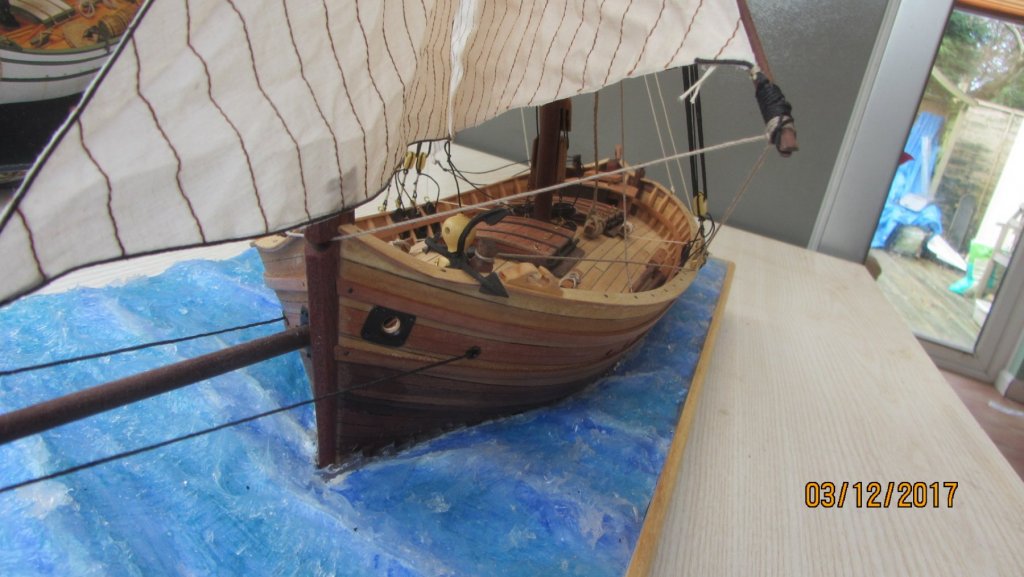
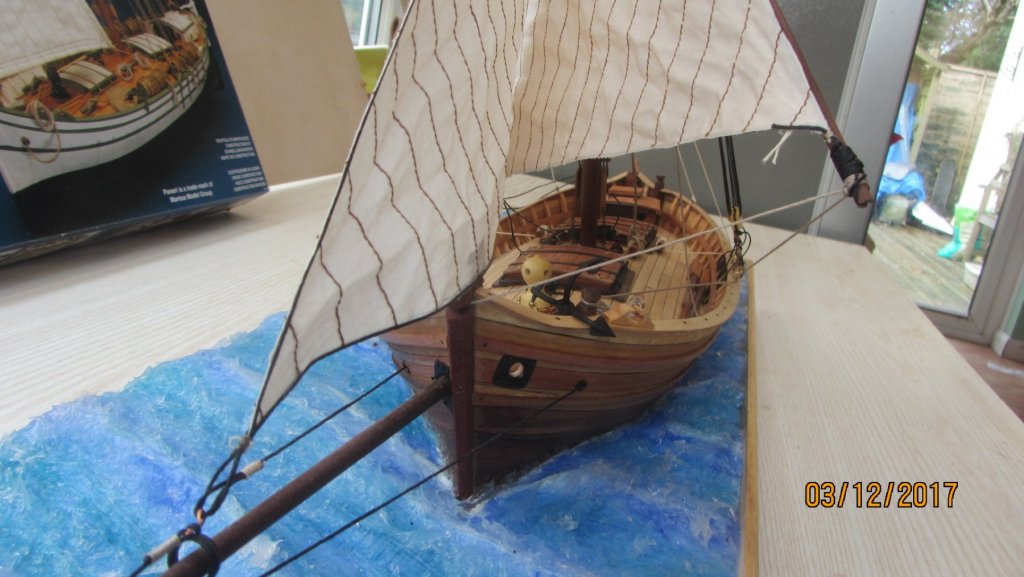
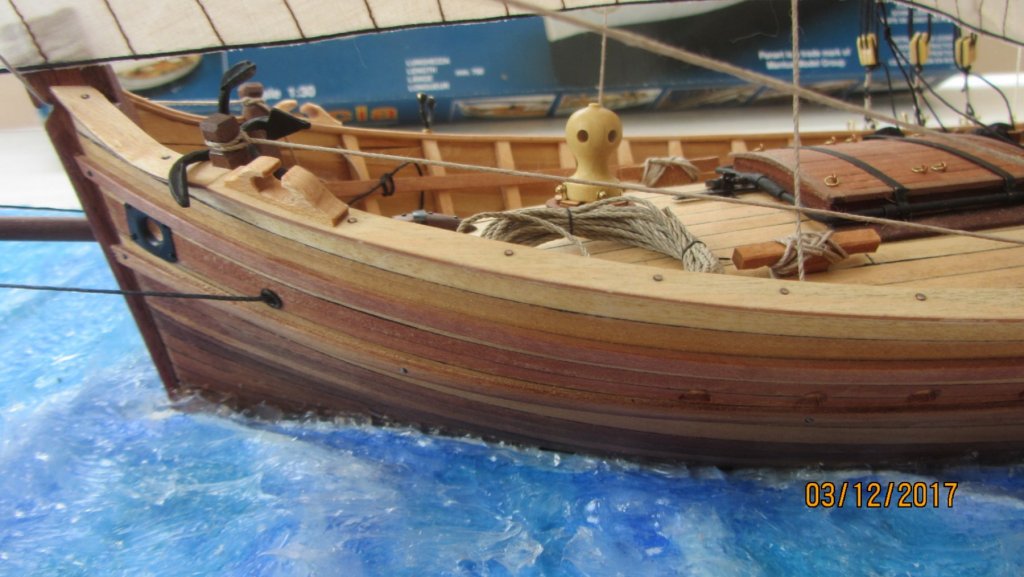
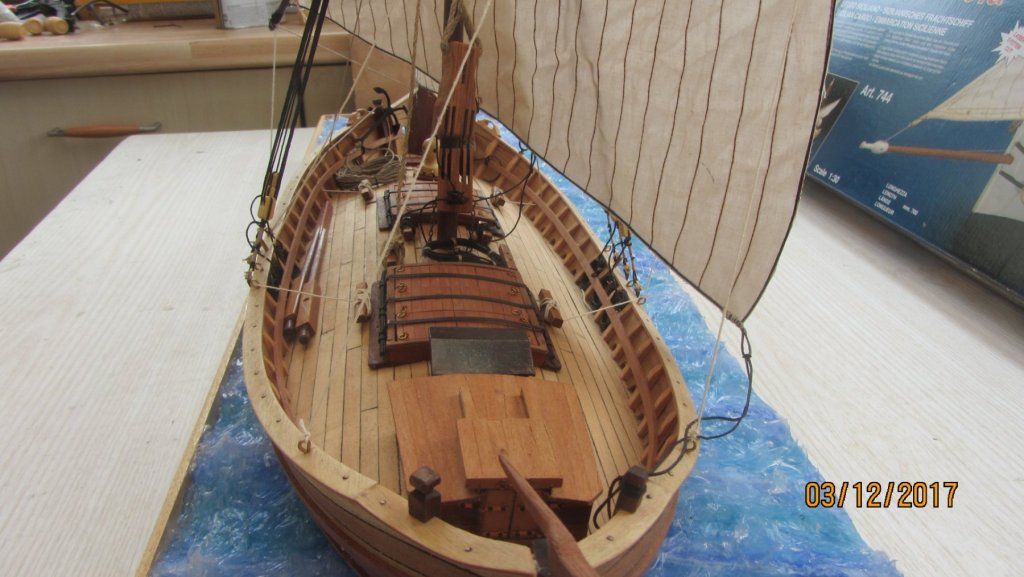
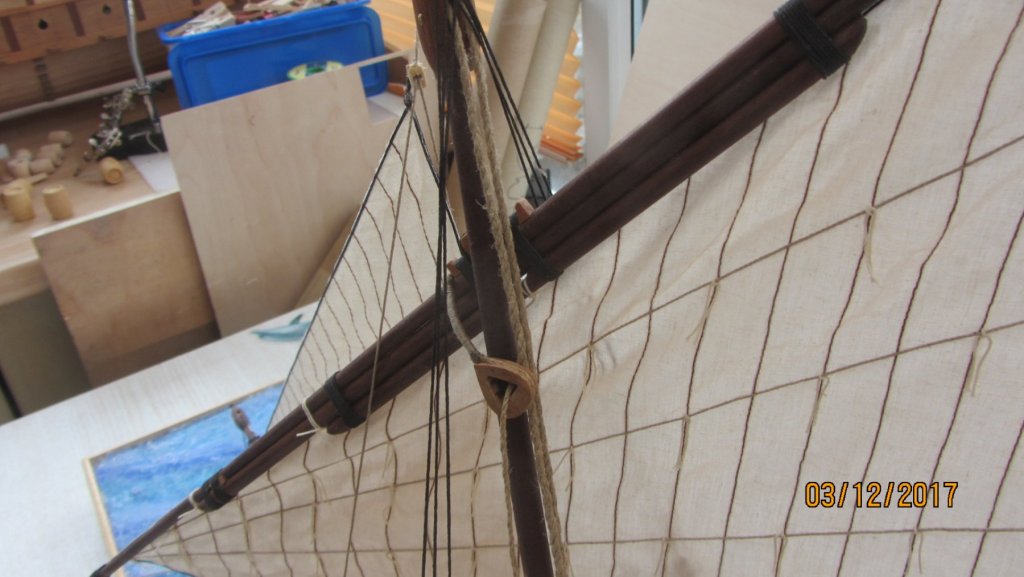
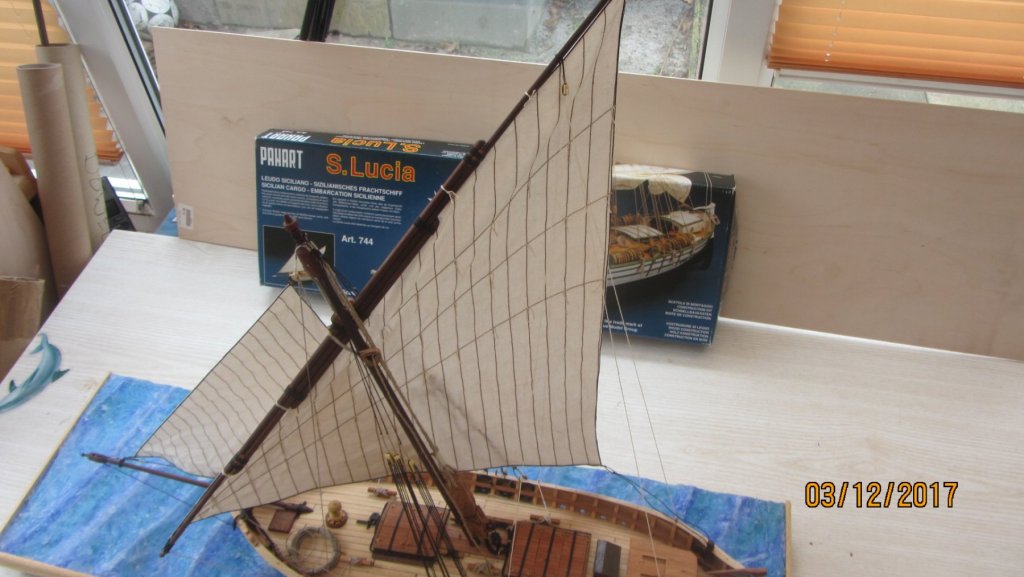
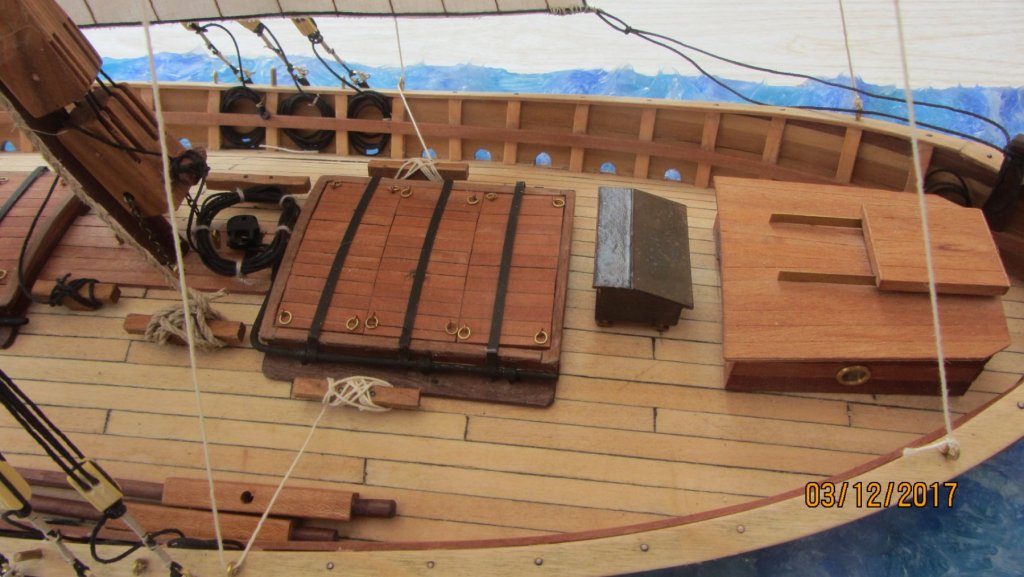
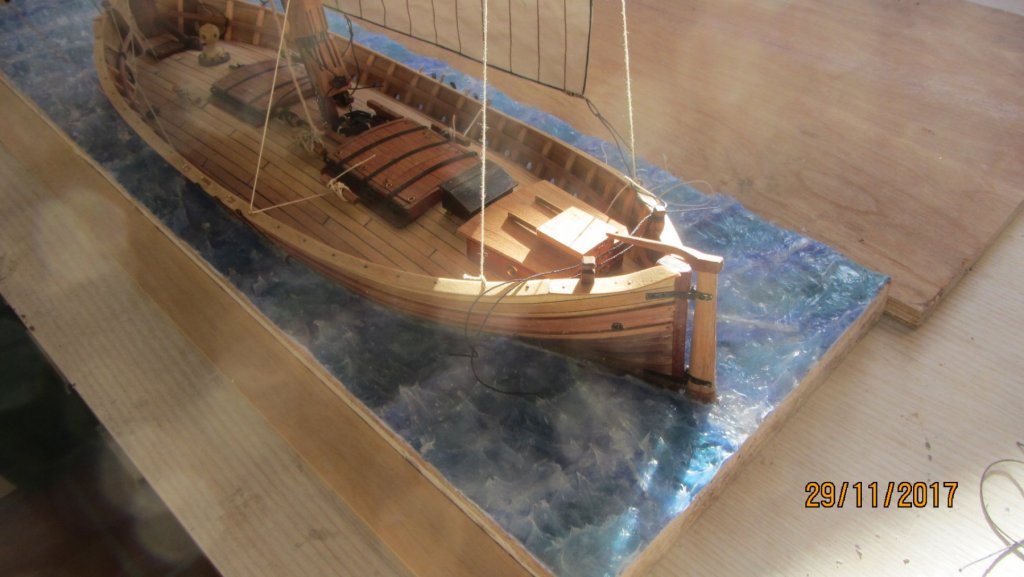
Hi. The model is now complete. Now for my kit review. At first glance to kit looked to be real good. but as I started to build the quality of the plywood became clear that the plywood quality is not that good and I found a few areas that were missing the centre layers of ply. The instructions were very poor. Almost generic and not to this model at all. Beginners would struggle without good instructions. Plans were good and a lot of information is there and needs to be self interpreted. The Keel and frames were a good fit and was very easy to do. The Planking on the other hand was not so easy if you do not want to paint the kit.(My choice) Easy just to plank and fill and then paint. Sail cloth ....Did not use. I used Egyptian cotton 400mesh. The fittings were OK but not to the plan. Rope was like string . This was binned and replaced with my own. Worth the cash... Only just YES. The photos below are the finished kit. Well that's it for this one... Gonna finish the Korean Turtle ship next. then ?? Regards Antony.


- 32 replies
-
- 8
-
-
- santa lucia
- panart
- (and 1 more)
-
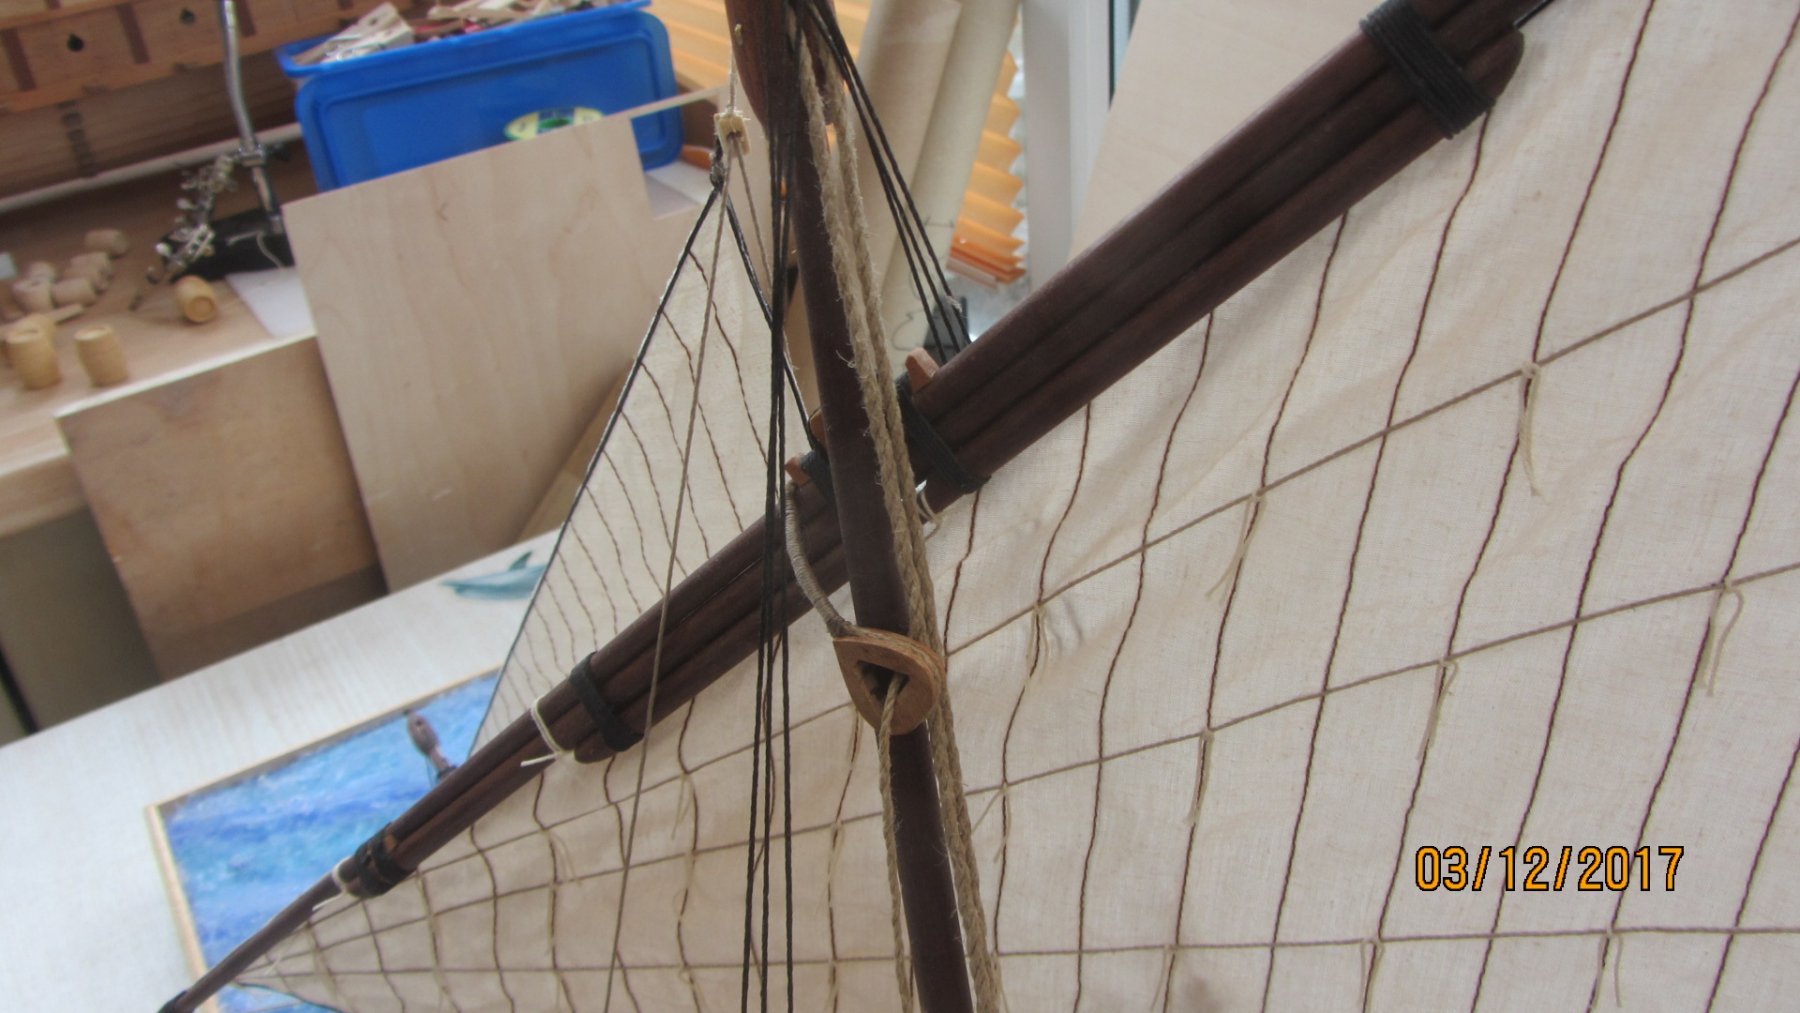
Hi. Almost done now with a little rigging and then tidying up. Base is now complete. with silicon as water with poster paints mixed and spread around with a finger. Will not be adding any crew as I cannot make figures and cant find any that matches the model. Sails were stitched by a friend of my wife.. And I must say she made a excellent job of them for me. Will post a few more pictures when she is finished. Regards Antony. Thanks for looking by. Antony.

- 32 replies
-
- 5
-
-
- santa lucia
- panart
- (and 1 more)
-
Hi Fernando. I will post some updates later on today. I read the so called instructions and did not reference them once. Bad instructions even in Italian. Made some changes to the deck fittings and the rigging.. other than that it's the kit build. You will find the planking a nightmare due to the shape of the hull. But saying that I did not want to paint my ship. Filler will hide 100% of errors while planking. A few intresting links for you.. http://www.cherini.eu/etnografia/Italia1/index.html http://www.modellismo.net/forum/modelli-terminati/79409-il-mio-leudo.html http://forums.airbase.ru/2008/10/t57414_14--chertezhi-parusnykh-korablej.html http://www.modellismo.net/forum/navi-e-velieri-work-progress/75397-leudo-siciliano-1-30-santa-lucia-panart-mantua.html https://www.shipmodeling.ru/books/leudo Regards Antony.
- 32 replies
-
- 1
-
-
- santa lucia
- panart
- (and 1 more)
-
Hi Tim. Nice work on the planking. Make a nice soft cradle to protect your planking. It's gonna get trashed if you leave it on your current cradle. Never used heat to cure wood glue before... might just give that a go on my next build. Regards Antony.