


AntonyUK
-
Posts
1,182 -
Joined
-
Last visited
Content Type
Profiles
Forums
Gallery
Events
Posts posted by AntonyUK
-
-
Hi Nils.
Like Michael above. Just catching up... wow amazing work on the stern and deck.
And I've gotta remember your excellent method of cuttng round holes in the hull or deck.
Have a nice christmass.
Regards Antony.
- popeye the sailor, Piet, mtaylor and 1 other
-
 4
4
-
Hi David.
That's a real nice looking model you have created there.
Is there no handrail around the rear black stacks.?
Finish in time before your next christmass gift model ? 4 days...
Regards Antony.
-
Hi Dave.
Welcome to MAW.
Nice choice of kit for you to start with.
Yes... sort the keel out first.
Dampen the keel and lay it on a flat surface with the bow and stern toching the surface. The gap should be in the middle now. Place a 4mm packing under each end of the keel. Now place a weight in the centre on the keel. And leave it for 24 hours. Basically over bending it and hold in position for 24 hours.
Take the opportunity to look at other builds logs.
Regards Antony.
-
Hi Larry.
Looking good.
Take your time with the planning.
Welcome to MSW .
Regards Antony.
-
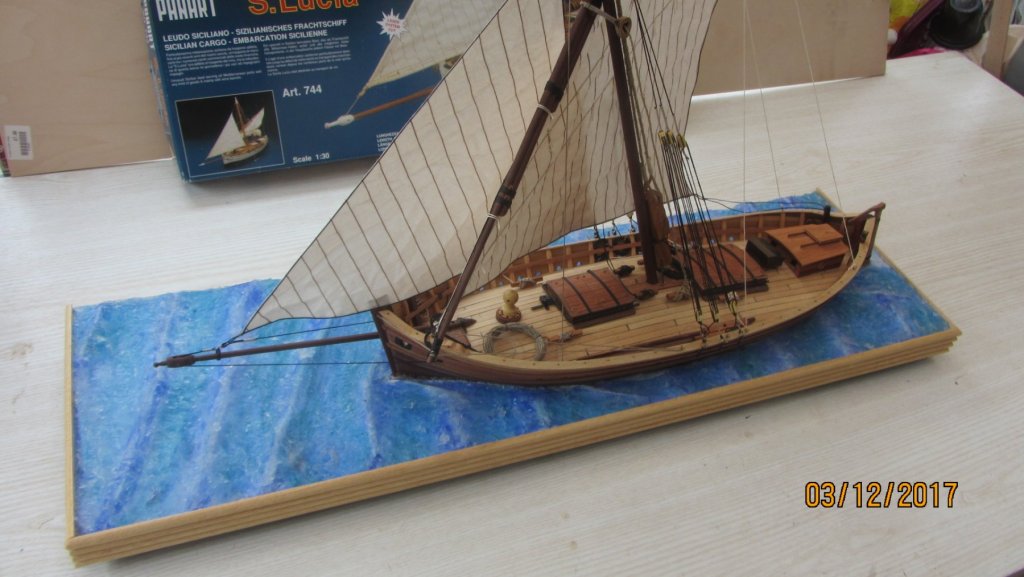
Hi David.
I'e just finished the Sicilian cargo boat.
And now I will continue with the Korean turtle ship.
Wow the stacks are the making of this boat.
David... we all have the skills. I look at your ship and I think wow. It's what we do.
Will you be keeping her to display ?
Regards Antony.
-
Hi David.
Excellent progress with you ship.
Liking all the mods you have made on the way.
Regards Antony.
-
-
Hi.
Well that another one finished and delivered to my Niece Sam.
She is happy with the model and seascape.
Thanks for all the likes.
Regards Antony.
-
-
Hi David.
You are making a stunning model from this kit.
Maye some people might like to add the tables chairs and other bits on the interior of the boat.
Yes I think Chris is right... put some trim around the skirting.
Regards Antony.
-
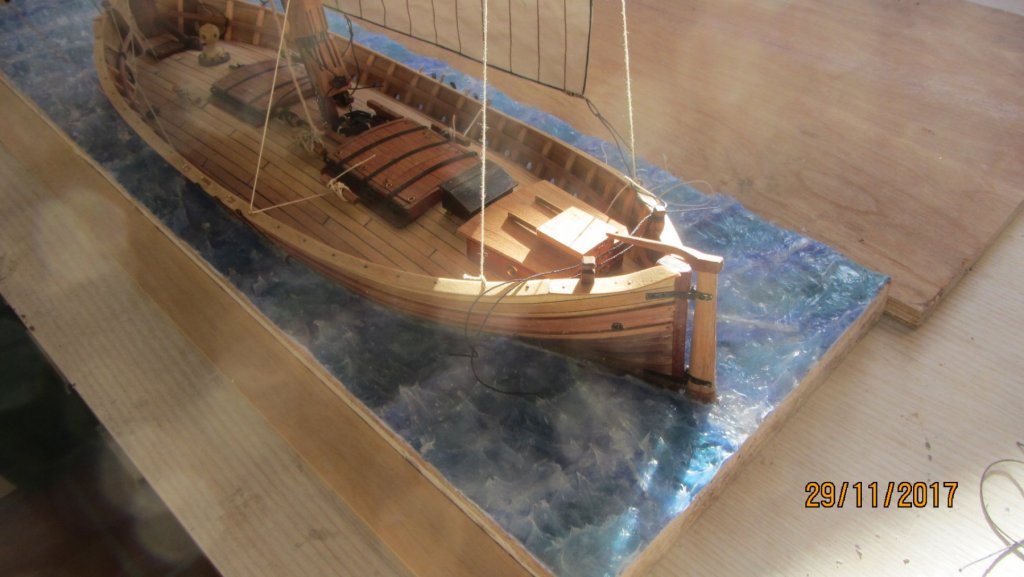
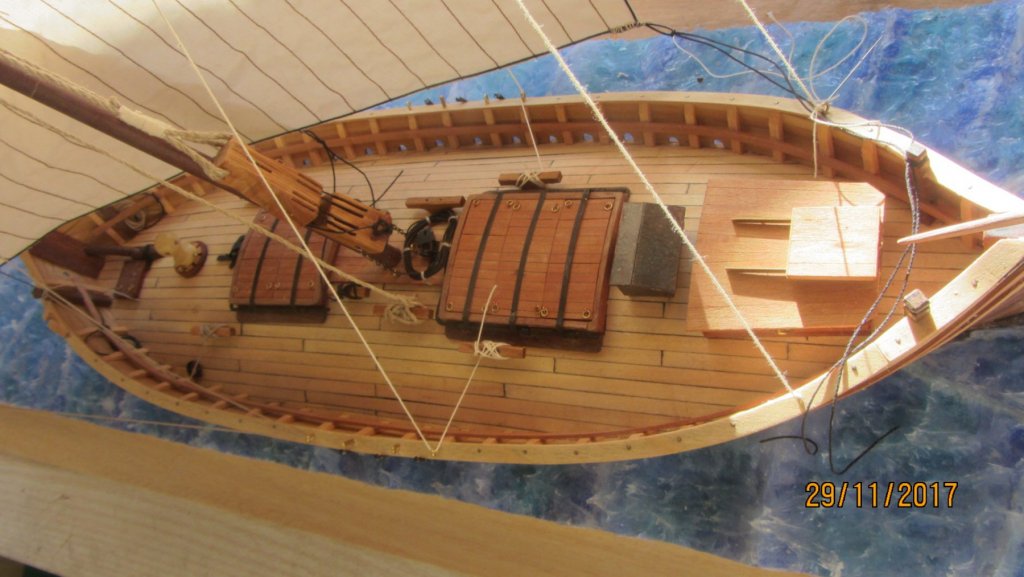
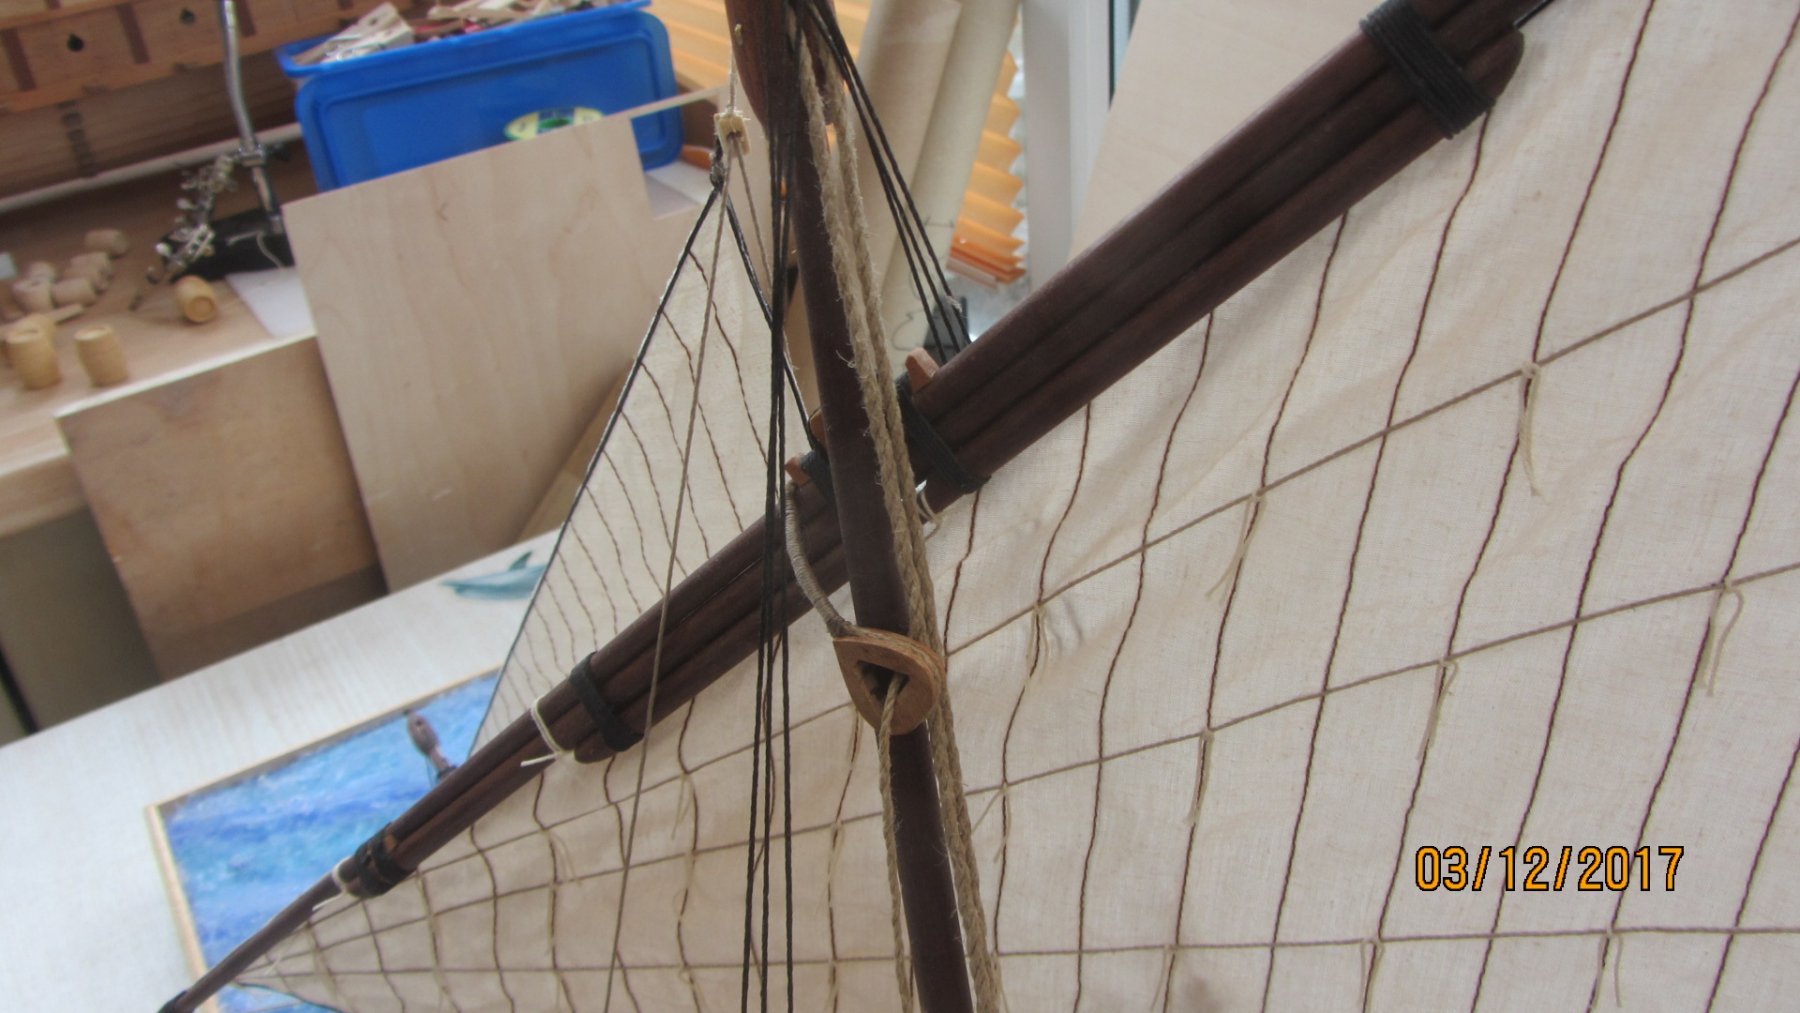
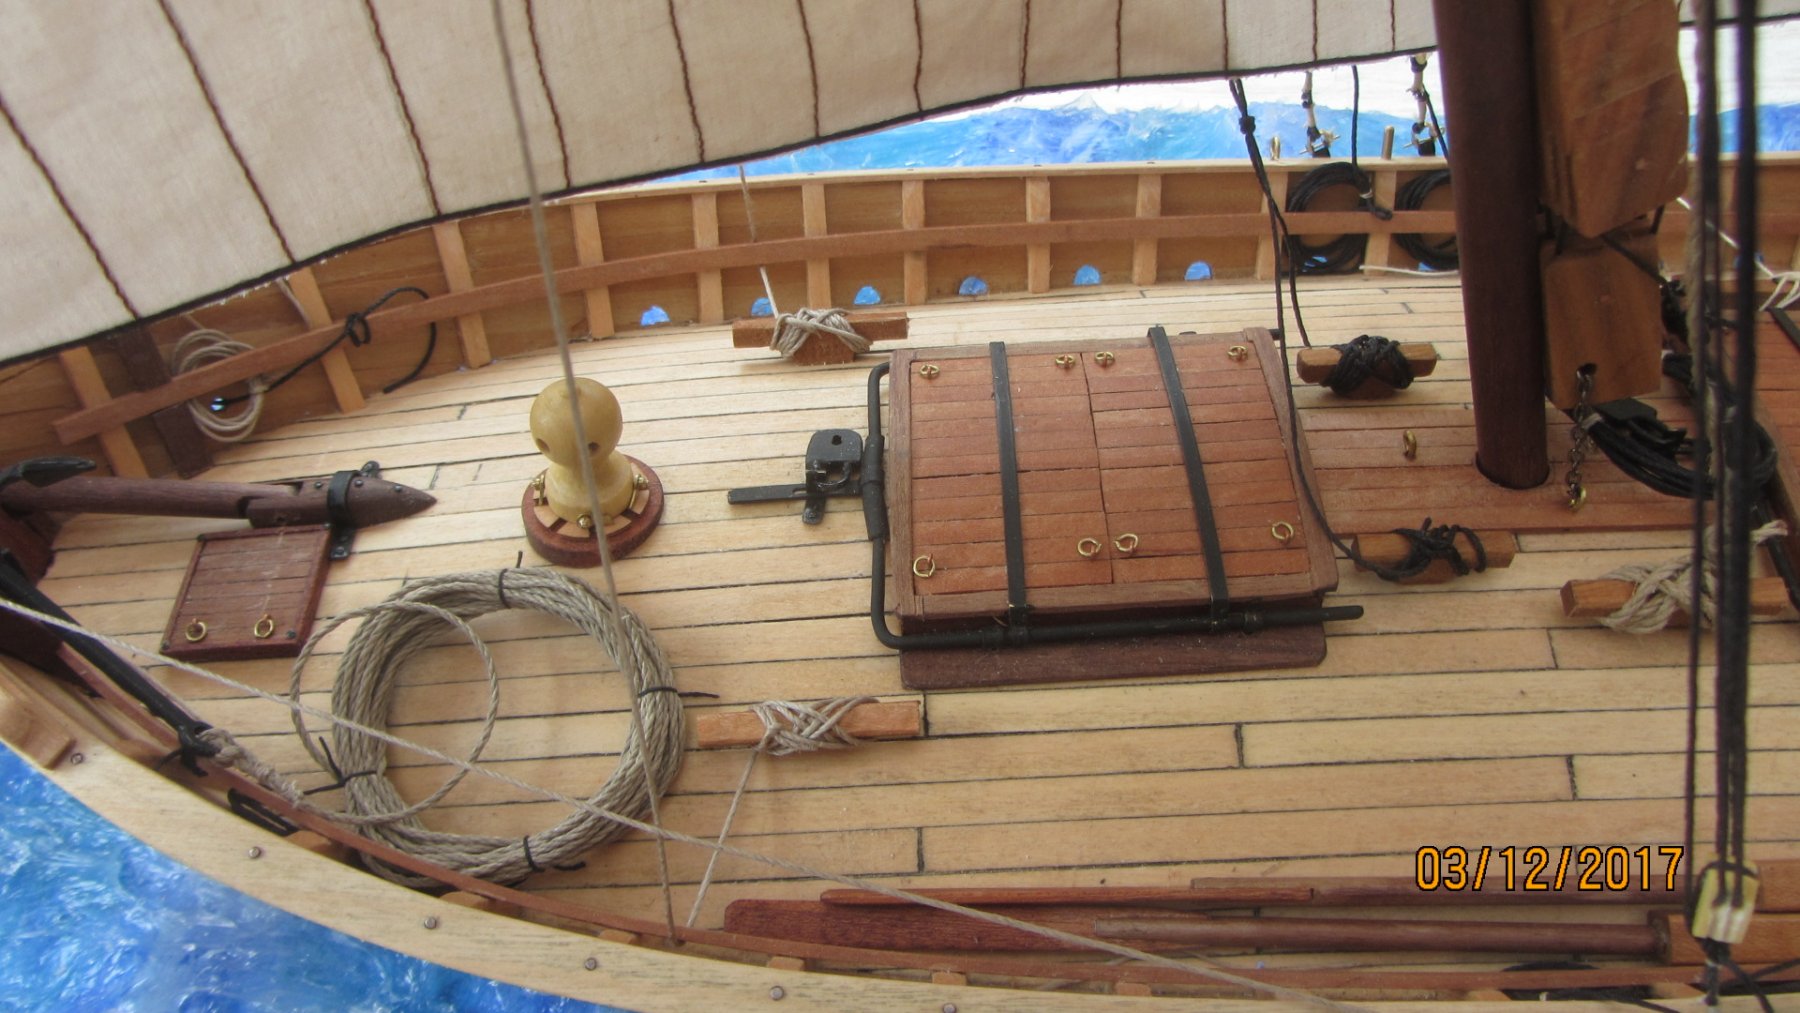
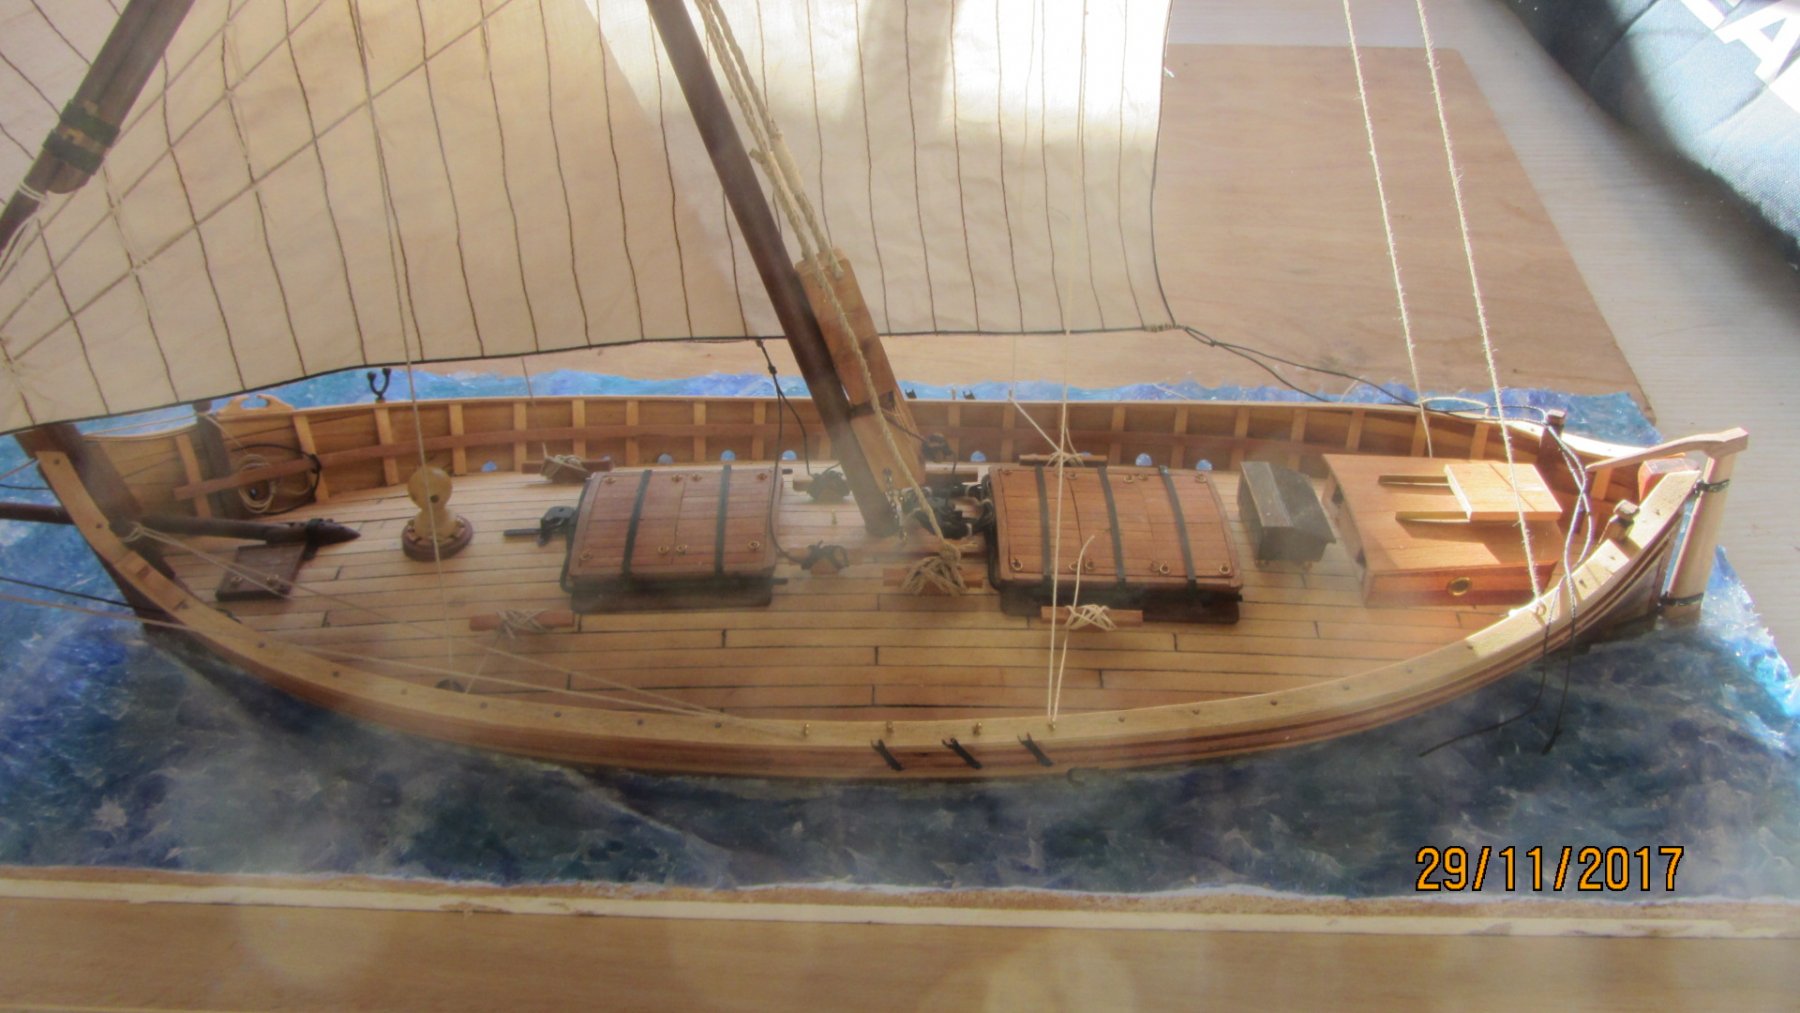
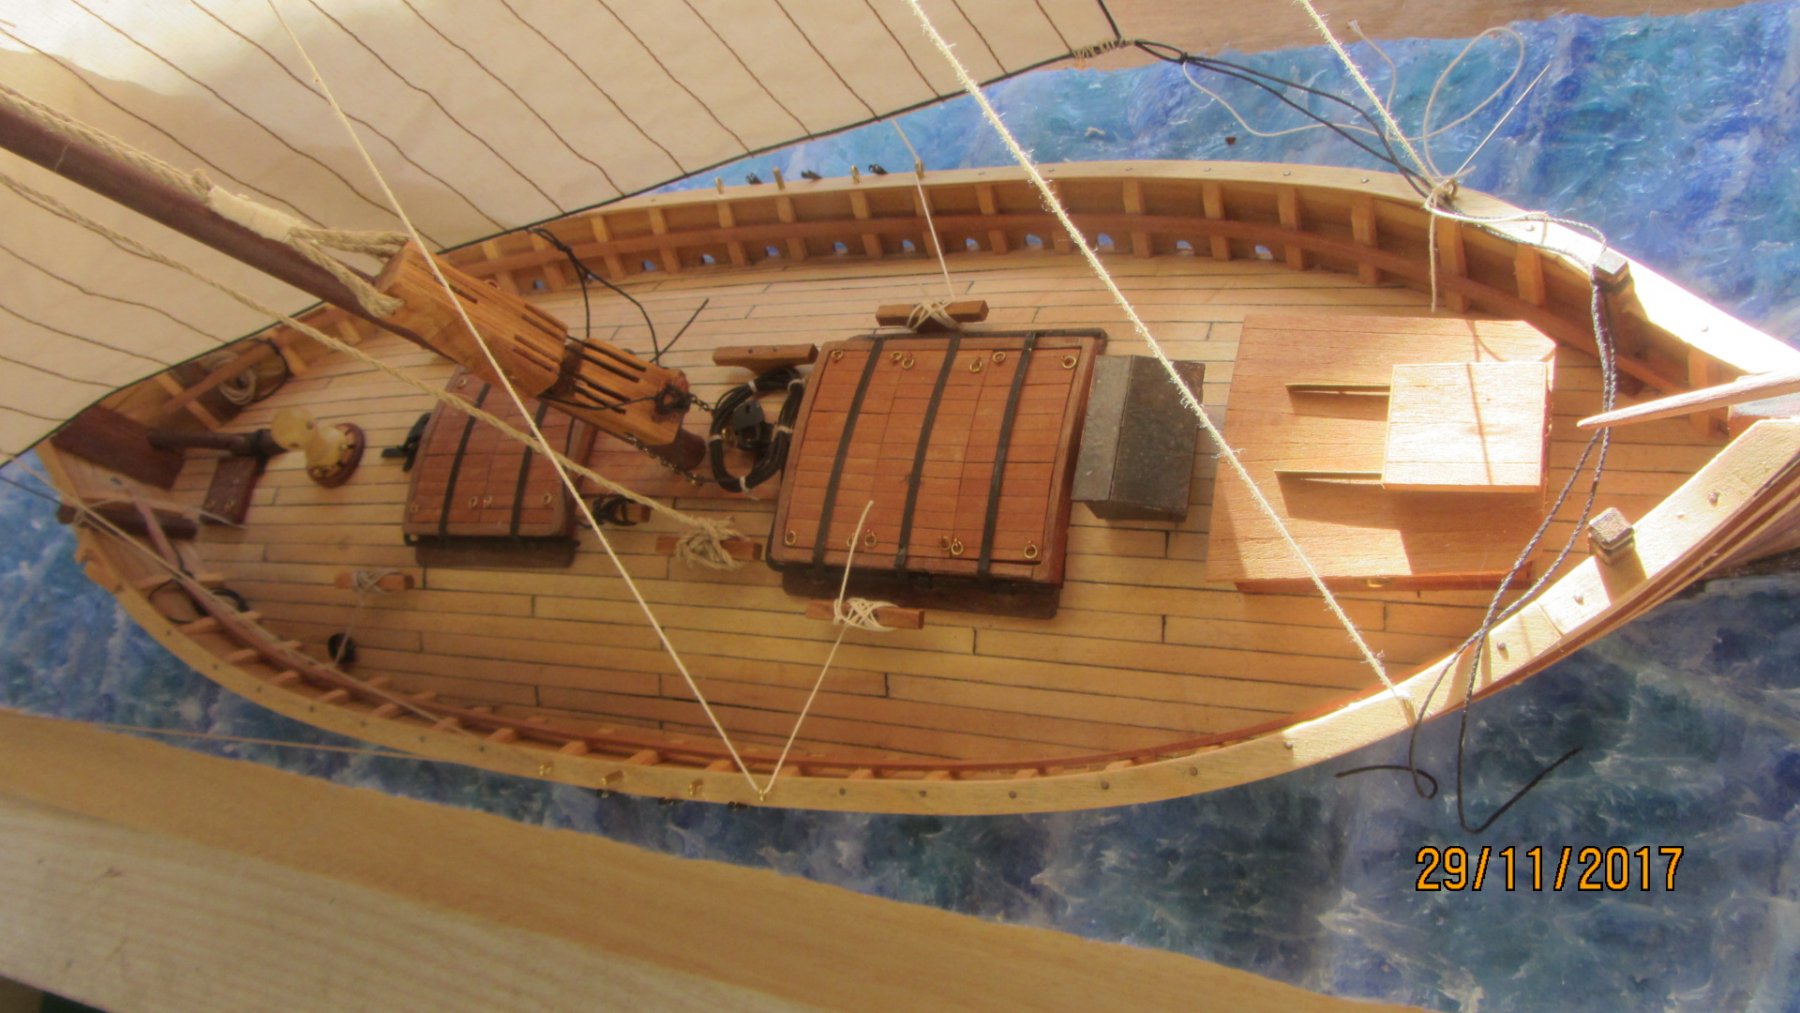
Hi.
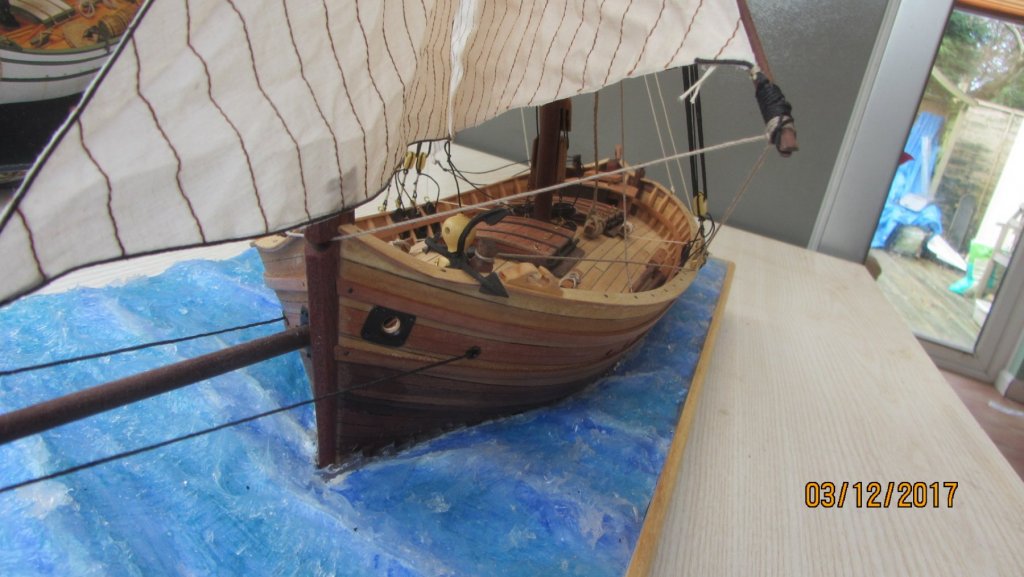
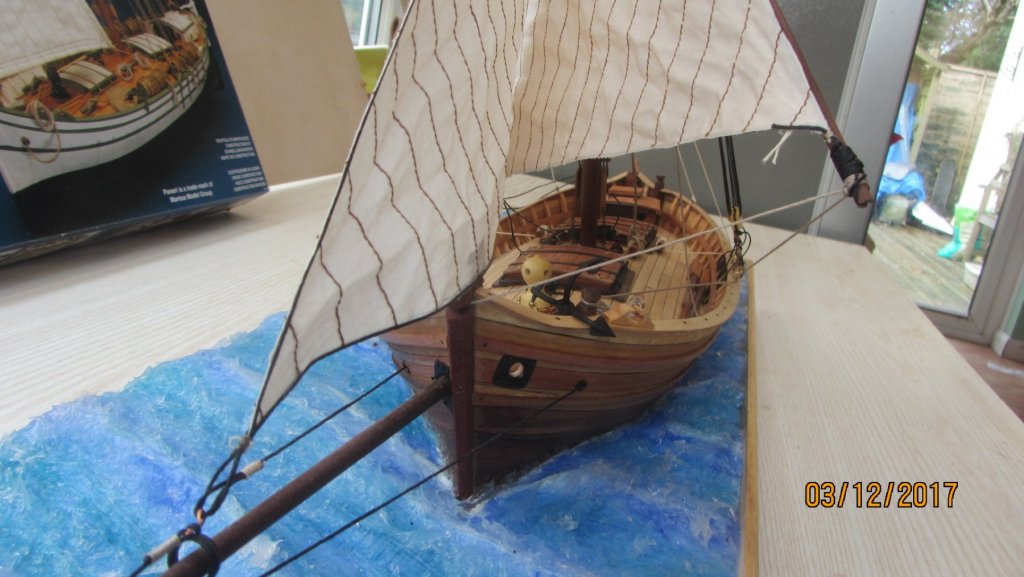
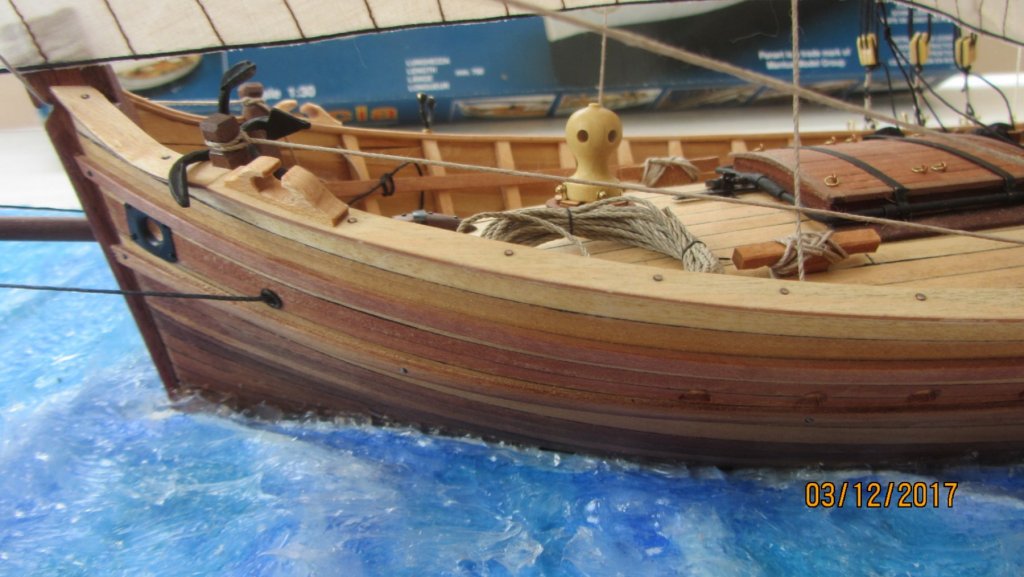
The model is now complete.
Now for my kit review.
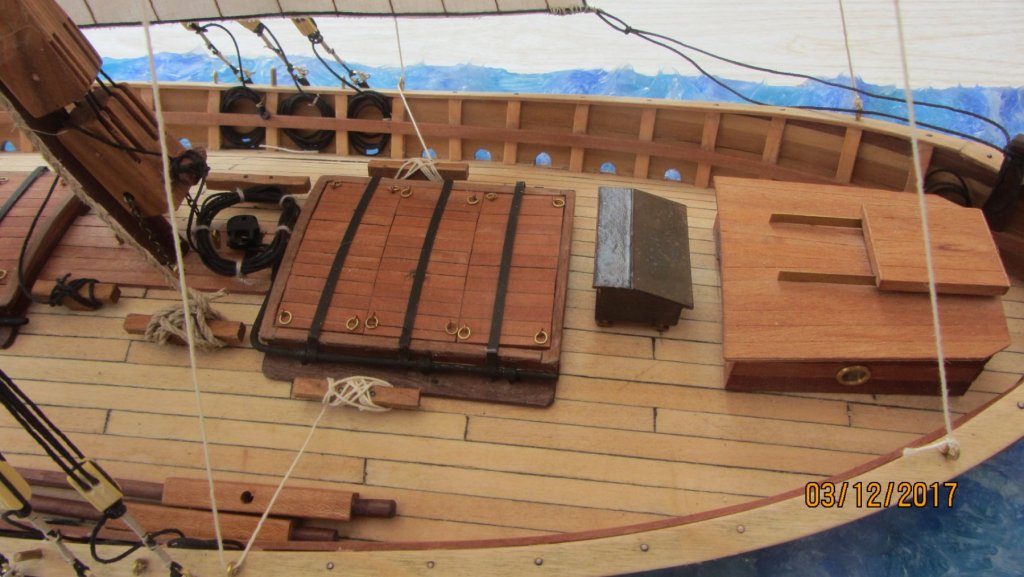
At first glance to kit looked to be real good. but as I started to build the quality of the plywood became clear that the plywood quality is not that good and I found a few areas that were missing the centre layers of ply.
The instructions were very poor. Almost generic and not to this model at all. Beginners would struggle without good instructions.
Plans were good and a lot of information is there and needs to be self interpreted.
The Keel and frames were a good fit and was very easy to do.
The Planking on the other hand was not so easy if you do not want to paint the kit.(My choice) Easy just to plank and fill and then paint.
Sail cloth ....Did not use. I used Egyptian cotton 400mesh.
The fittings were OK but not to the plan. Rope was like string . This was binned and replaced with my own.
Worth the cash... Only just YES.
The photos below are the finished kit.


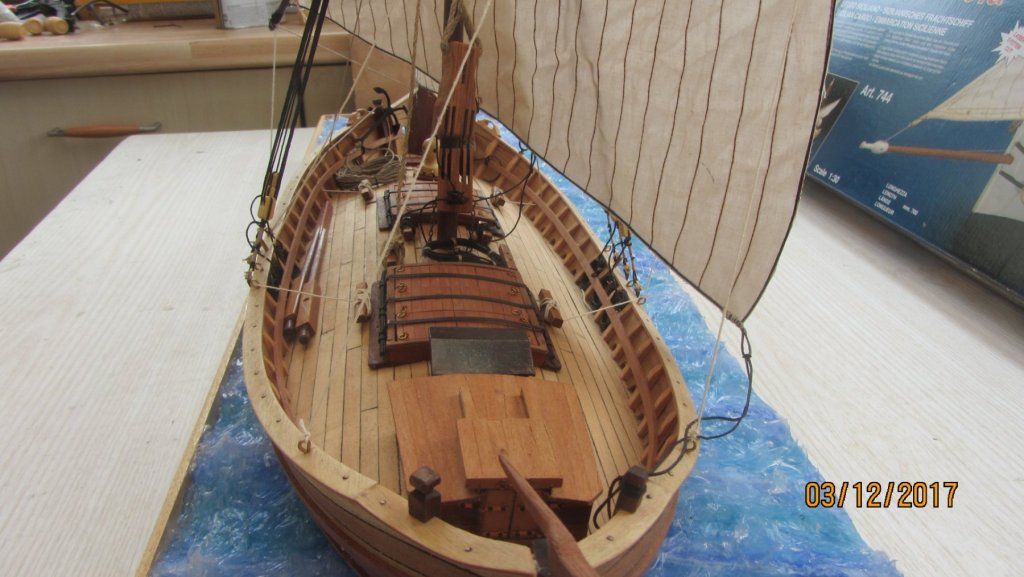
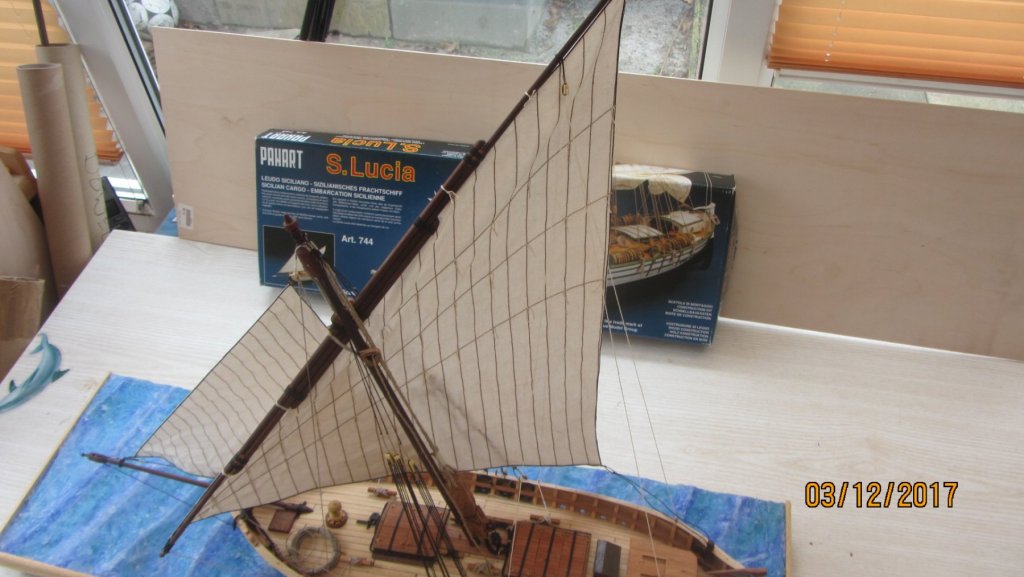

Well that's it for this one... Gonna finish the Korean Turtle ship next. then ??
Regards Antony.
- yvesvidal, Fernando E, Nikiforos and 5 others
-
8
-
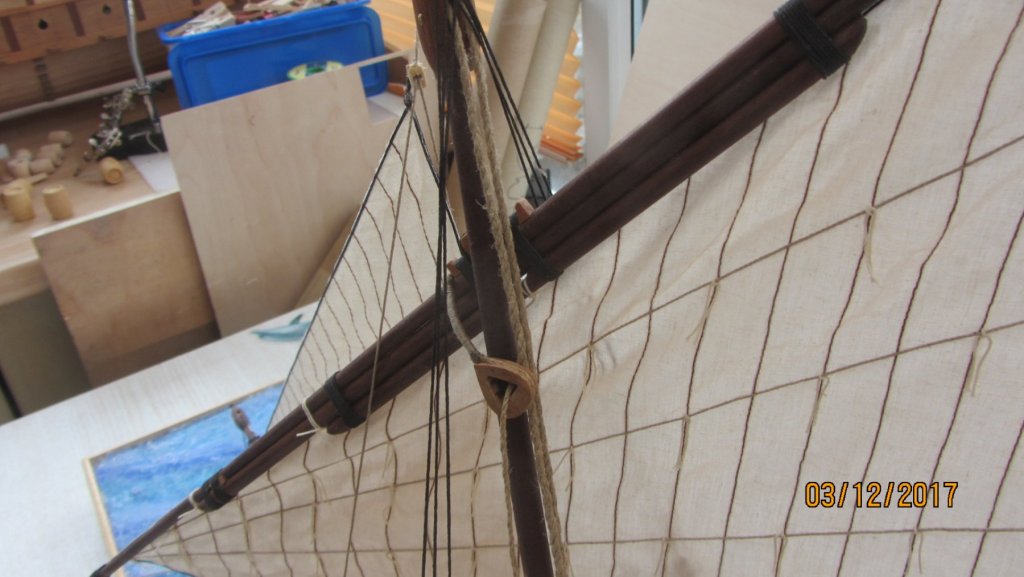
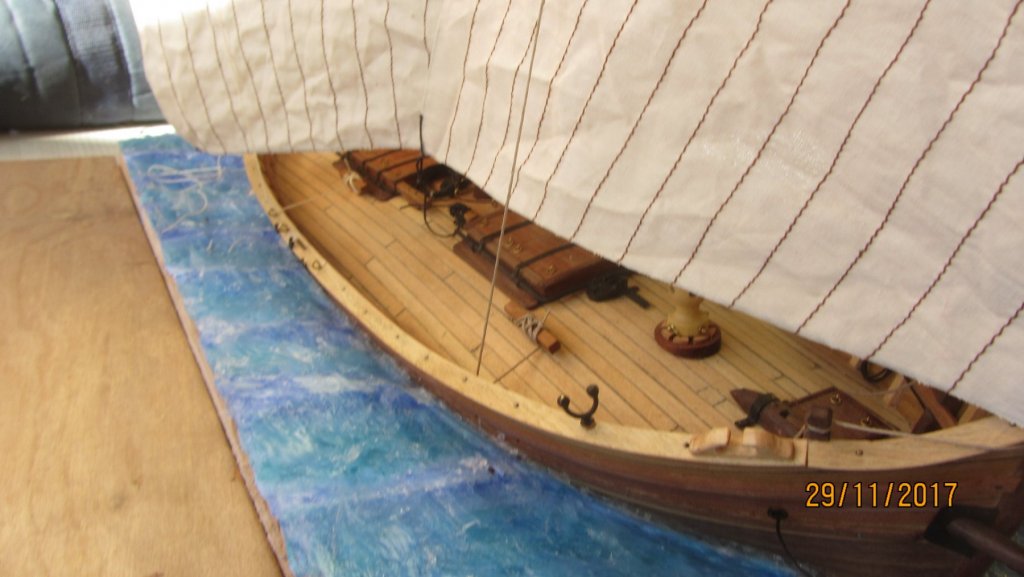
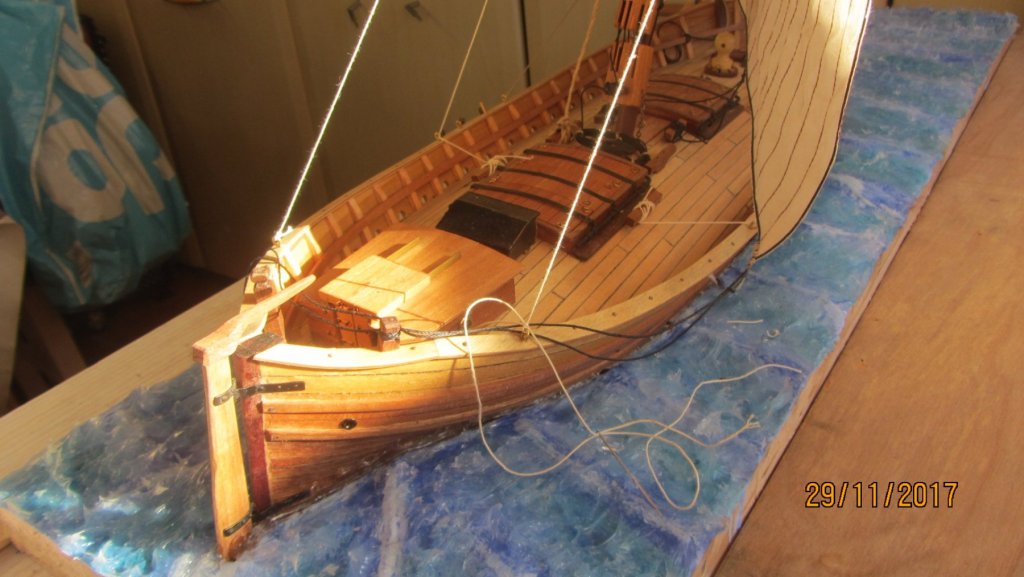
Hi.
Almost done now with a little rigging and then tidying up.
Base is now complete. with silicon as water with poster paints mixed and spread around with a finger.
Will not be adding any crew as I cannot make figures and cant find any that matches the model.
Sails were stitched by a friend of my wife.. And I must say she made a excellent job of them for me.
Will post a few more pictures when she is finished.
Regards Antony.

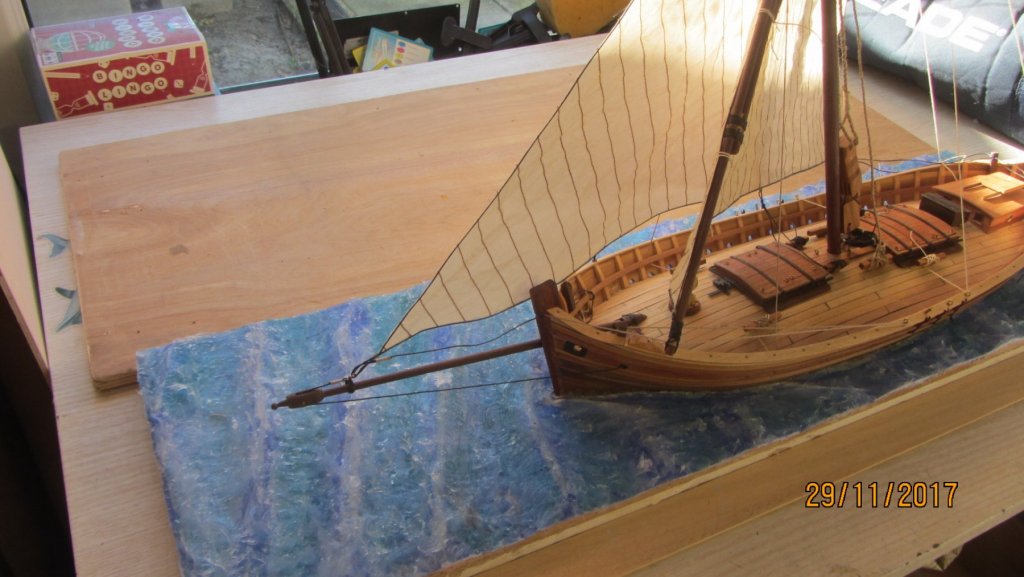
Thanks for looking by.
Antony.
-
Hi Fernando.
I will post some updates later on today.
I read the so called instructions and did not reference them once. Bad instructions even in Italian.
Made some changes to the deck fittings and the rigging.. other than that it's the kit build.
You will find the planking a nightmare due to the shape of the hull. But saying that I did not want to paint my ship.
Filler will hide 100% of errors while planking.
A few intresting links for you..
http://www.cherini.eu/etnografia/Italia1/index.html
http://www.modellismo.net/forum/modelli-terminati/79409-il-mio-leudo.html
http://forums.airbase.ru/2008/10/t57414_14--chertezhi-parusnykh-korablej.html
https://www.shipmodeling.ru/books/leudo
Regards Antony.
-
Hi Tim.
Nice work on the planking.
Make a nice soft cradle to protect your planking. It's gonna get trashed if you leave it on your current cradle.
Never used heat to cure wood glue before... might just give that a go on my next build.
Regards Antony.
-
Good morning Nils.
Nice work on the stove and cooking pot.
A question... Will you be covering the plywood frames ? Sorry if you have already covered this topic.
As I said before.. outstanding photos.
Regards Antony.
- mtaylor, Mirabell61 and Omega1234
-
3
-
-
-
Hi Tim.
Very nice work with some brilliant scratch bits being put in.
Your dog is such a cuitie.
Do you have your own laser cutter ?.
Gonna follow along with this build...seat booked.
Regards Antony.
Edited :- I've just read your introduction log.. Yes you do have a laser cutter.
-
Hi Jeff.
Well done for spotting that error. And nicely fixed as well.
Coming along nicely with the build.
Regards Antony.
- Bill Morrison and zappto
-
2
-
Hi Kevin.
Fantastic build. The use of so many different building materials makes this a intresting build for me.
Lots of real nice details you have added and the shear size makes this a real display model.
With your skill's building the launcher will not be too much of a challenge. Make a jig for the frame work as you will need 6 off the same if I remember correctly. With slight modes to each frame. Go for it..
Will you keep her ? You might need a extension built.
Late I know But I gonna follow along with your excellent build.
Regards Antony.
- Piet, Old Collingwood, Kevin and 2 others
-
5
-
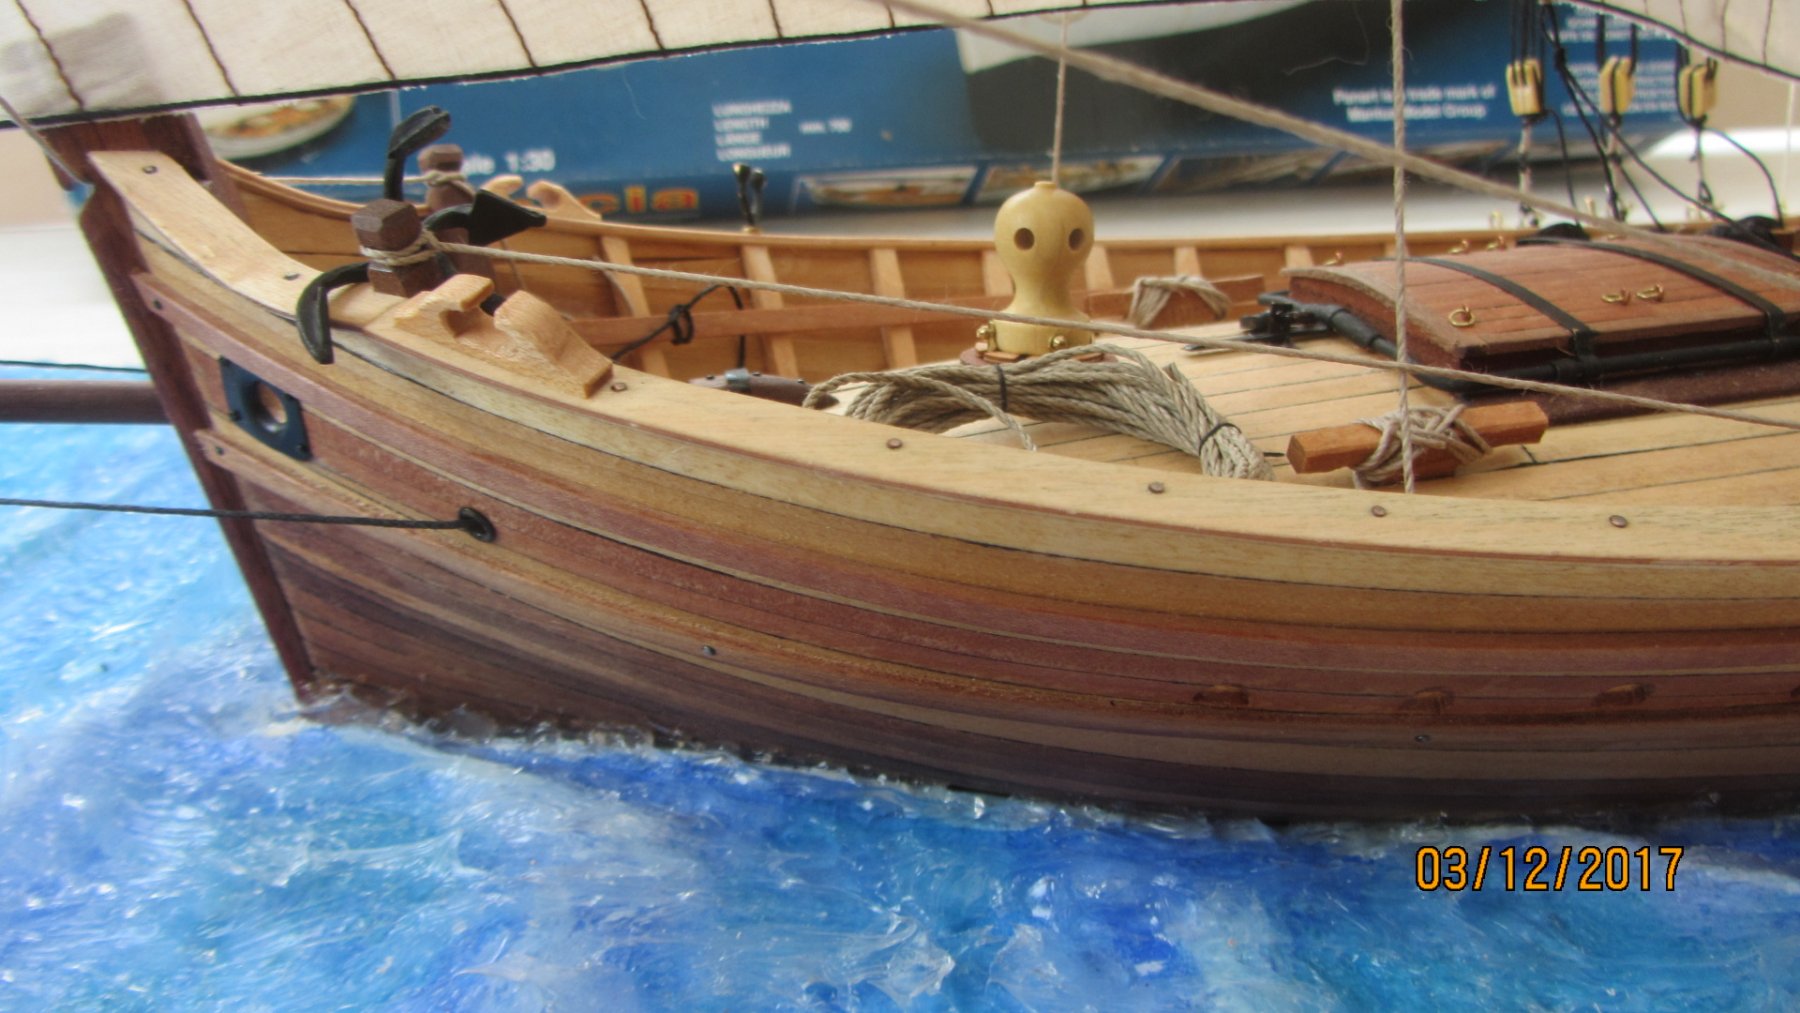
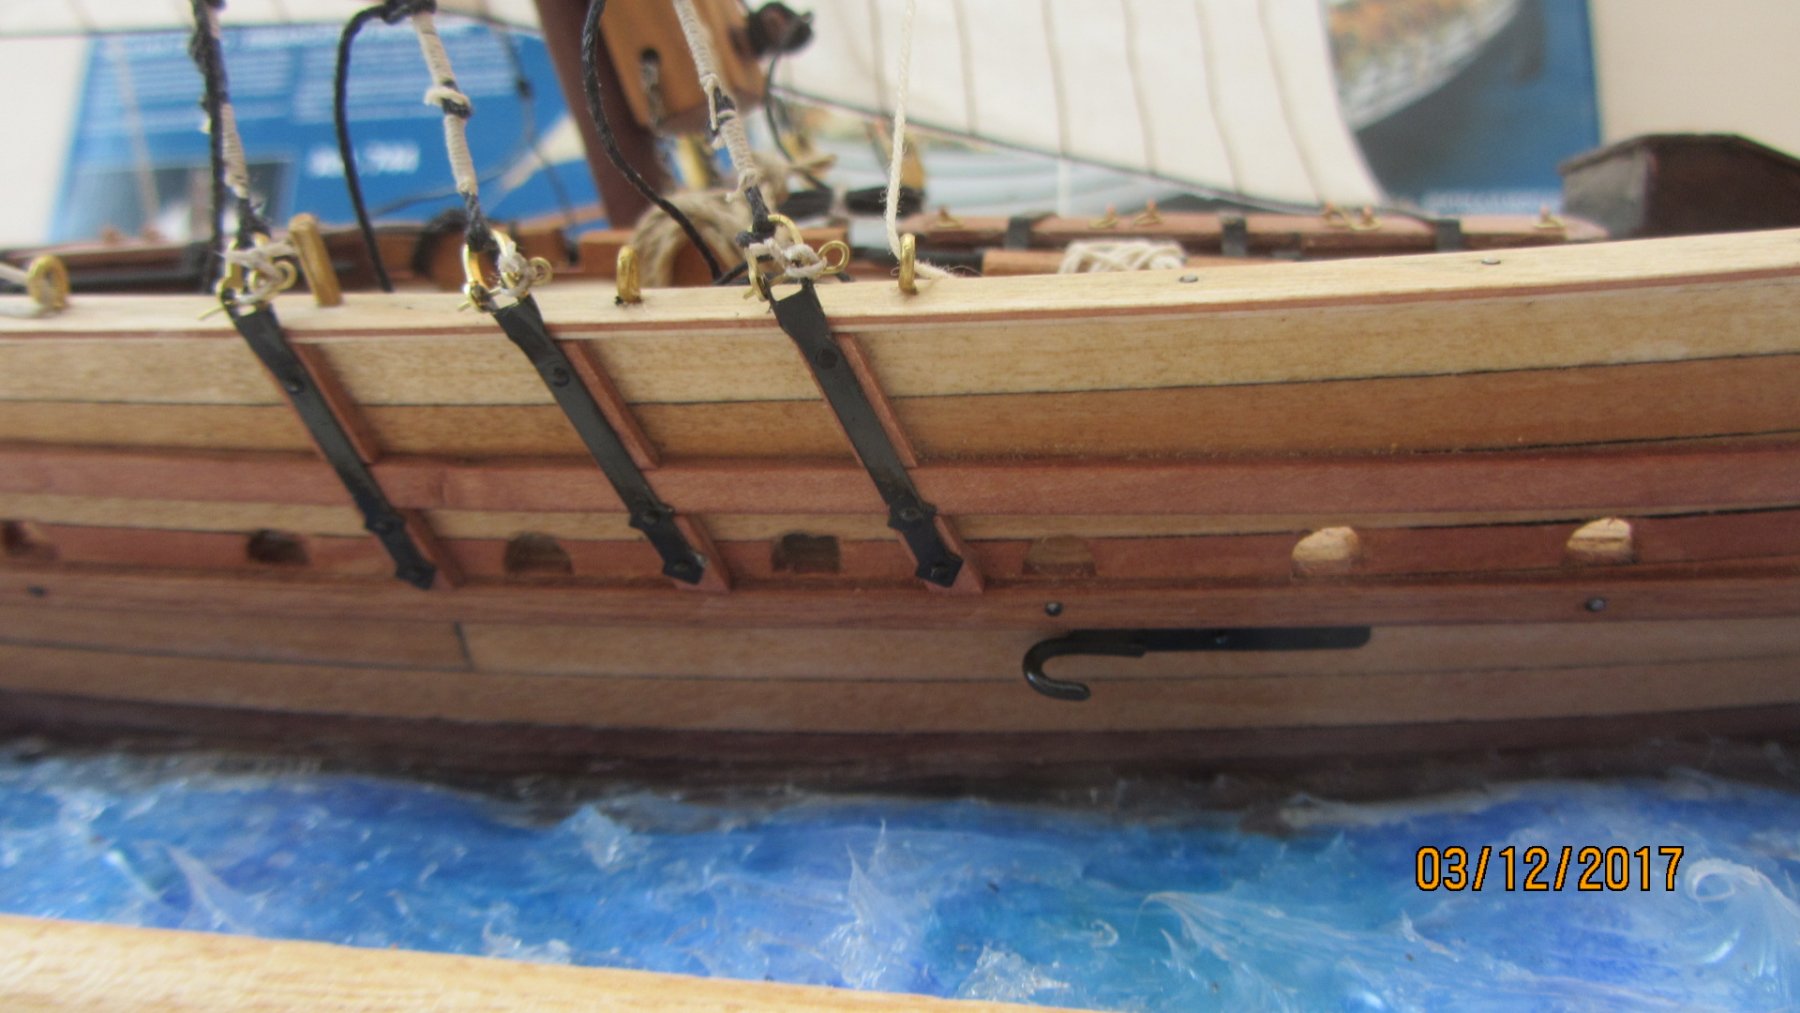
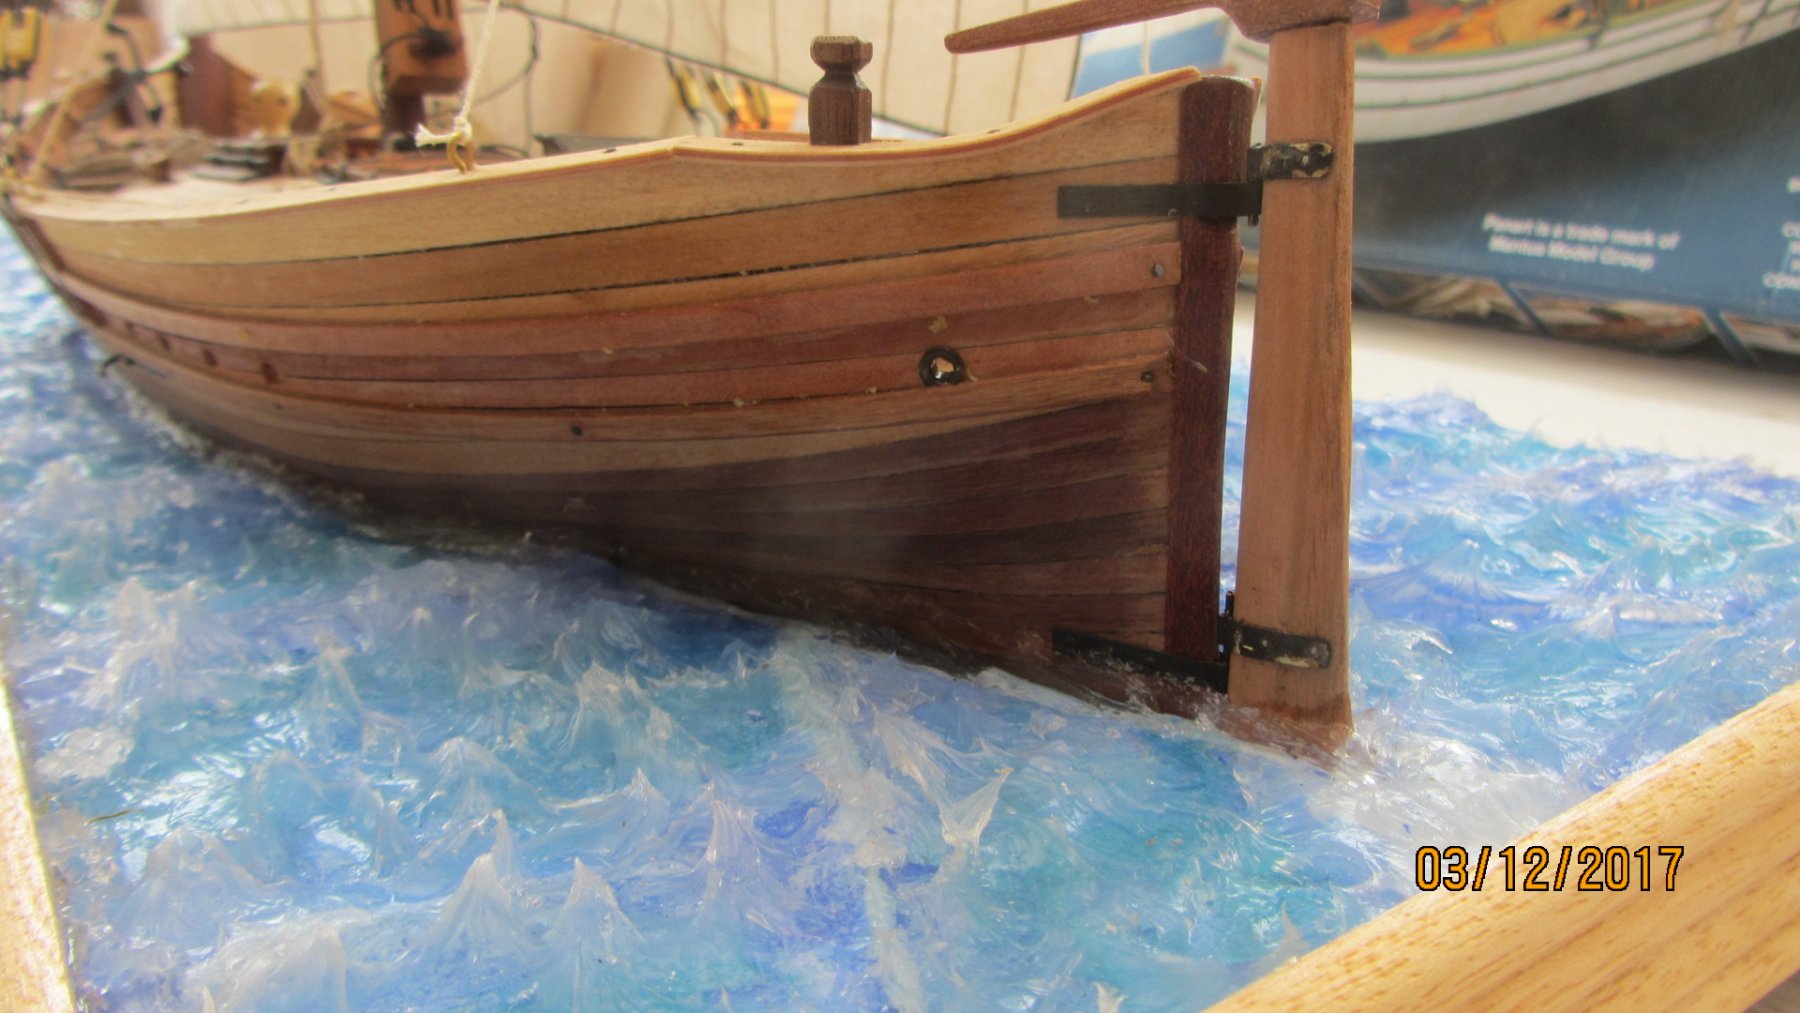
Hi Nils.
Very nice work on the planking.
Now I can see those beautiful lines of this boat.
That is one stunning photo of the bow area.
Consider using Gold leaf on your castings. Looks so much better than paint... assuming you will be going for gold.
Regards Antony.
- Piet, Landlubber Mike, Mirabell61 and 3 others
-
6
-
Hi Jeff.
The instructions look good for Amati.
Check and double check everything. And anything.
I will be following this build as it's the first time I'e seen this kit.
Regards Antony.
-
Hi Jack.
Stunning work.
I never really looked at the lines of this ship till now. WOW I like this beautiful ship.
Why is it my photos are rubbish compared to you people. Yours are outstanding.
Looking forward to your next progress post.
Regards Antony.
-
WOW Nils.
What excellent work.
She is looking real good.
Nice photographic pictures as well.... is there anything you cannot do ?.
Regards Antony.
- Mirabell61, Piet, cog and 2 others
-
5


Eagle of Algier 1753 by Mirabell61 - FINISHED - 1:48 - Chebec - Nils Langemann
in - Build logs for subjects built 1751 - 1800
Posted
Hi Nils.
Sorry it's Off topic .
Will you be doing a Junk ?.
Looking at doing one as my next scratch build.
Did you get any plans or are you going to use the Amati plans or the Artesania Latina red dragon plans.
Regards Antony.