


Brucealanevans
-
Posts
450 -
Joined
-
Last visited
Content Type
Profiles
Forums
Gallery
Events
Posts posted by Brucealanevans
-
-
The presence of 10 davits and 10 lashing posts makes the rigging work a real challenge. One might consider adding them later. Doesn't help with the shelter roof tho. One might consider dry fitting that until the rigging is done. That probably presents another set of issues tho.
About to hoist the topsail yard and sail, but I have to wait for some small chain to arrive from ME. The halyard is almost all chain and I've run out. Suspect I've used smaller chain in some places where the larger chain should have been used since I have a lot of that.
On another topic my wife bought a wooden chocolate frother the head of which as too big to fit the chocolate pot she bought. Asked if I could sand the four extensions down? I said sure and was back up from the shipyard in one minute. Gotta love that Byrnes sander!
-
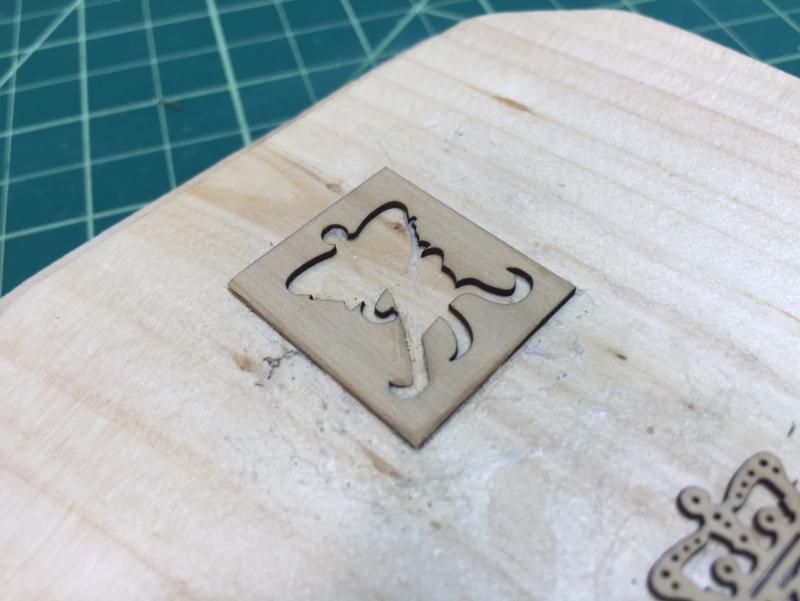
I worked on the scrap piece a bit. Experimented with removing the char, as well as getting a feeling for working with the grain. Also interested in how long the xacto blade tip stays sharp enough to remove thin shavings - hint; by the time I did this much, the blade needed to be changed earlier.
The work was on the two straight edges bottom and left, and the part of the curves near the lower left corner. First removing the char which worked best shaving from above at a slight angle to create a sloping side, then rounding after that.
I am getting a feel for this to a small extent.
I'm using an optivisor and would not be at all comfortable trying this only with my (old) unaided eyes with reading glasses.
- mtaylor, Canute, Ryland Craze and 2 others
-
 5
5
-
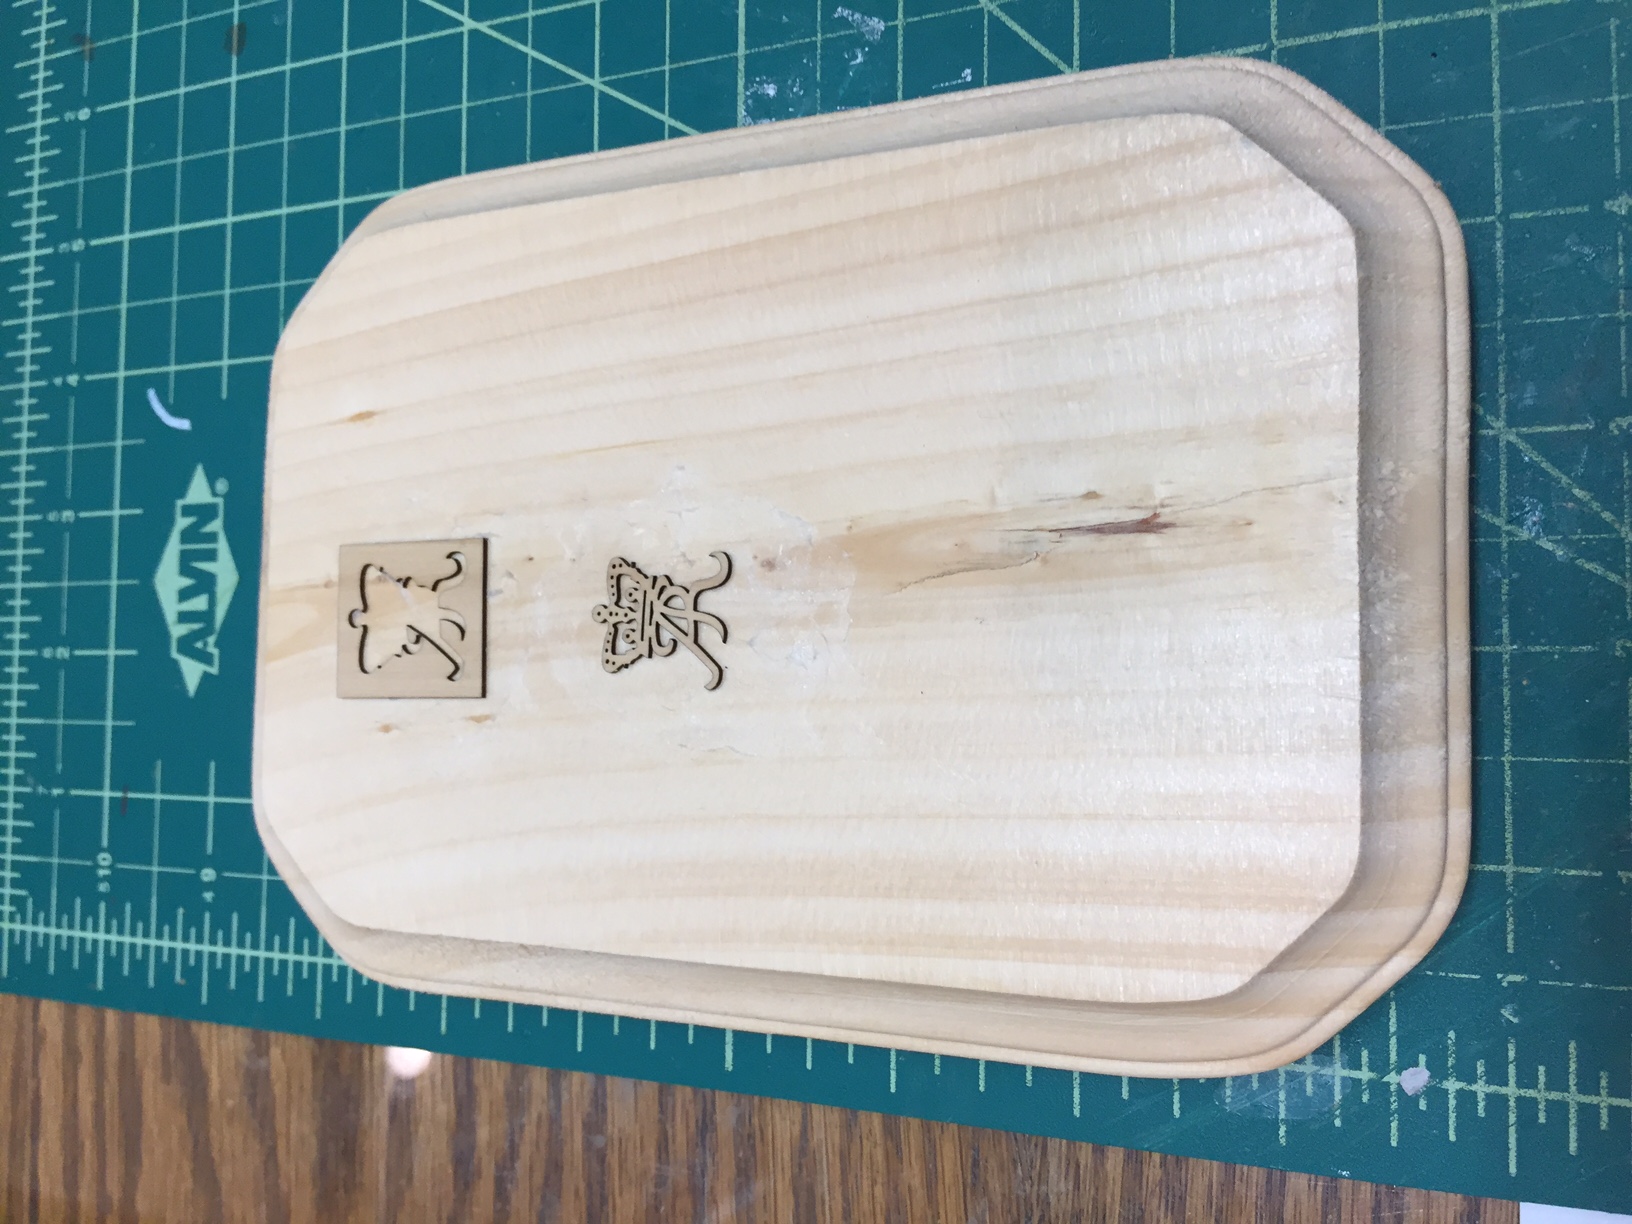
I'm waiting for an order from Chuck to continue running rigging and sails on my C W Morgan, so I thought I'd give this a try.
Used glue stick to fasten carving to a cheap wood plaque my wife picked up to try some paint/stenciling on (the reverse side) and now I'm ready to go. Also fastened down the scrap piece to practice on including best way to remove the char.
Until Syren order comes, I'll play with this.

- Canute, Ryland Craze, Jack12477 and 3 others
-
6
-
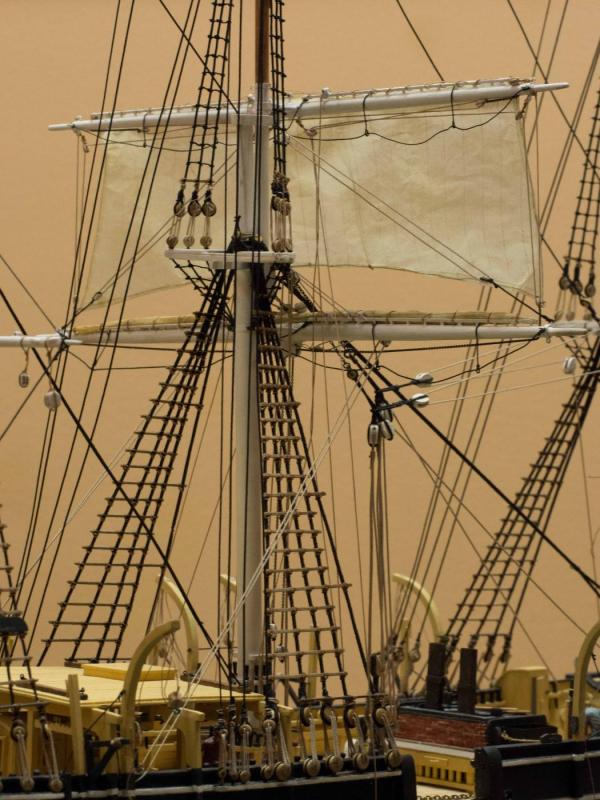
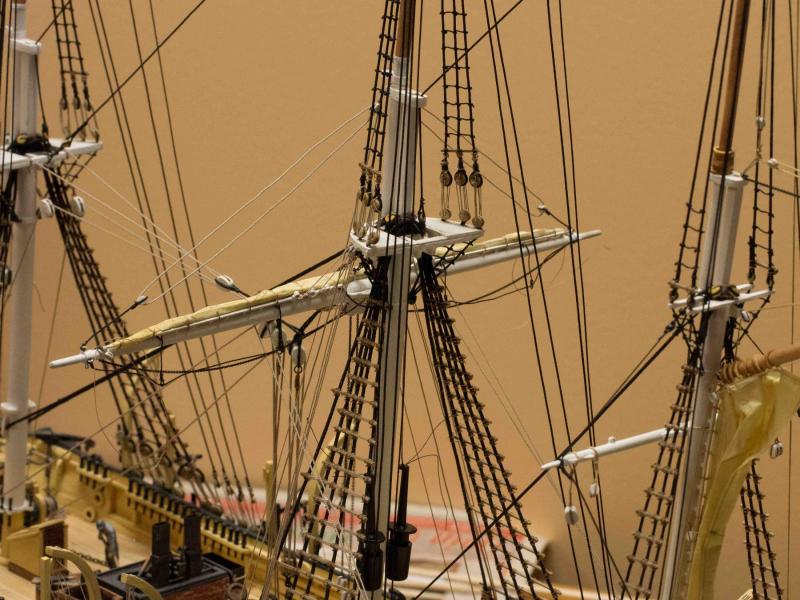
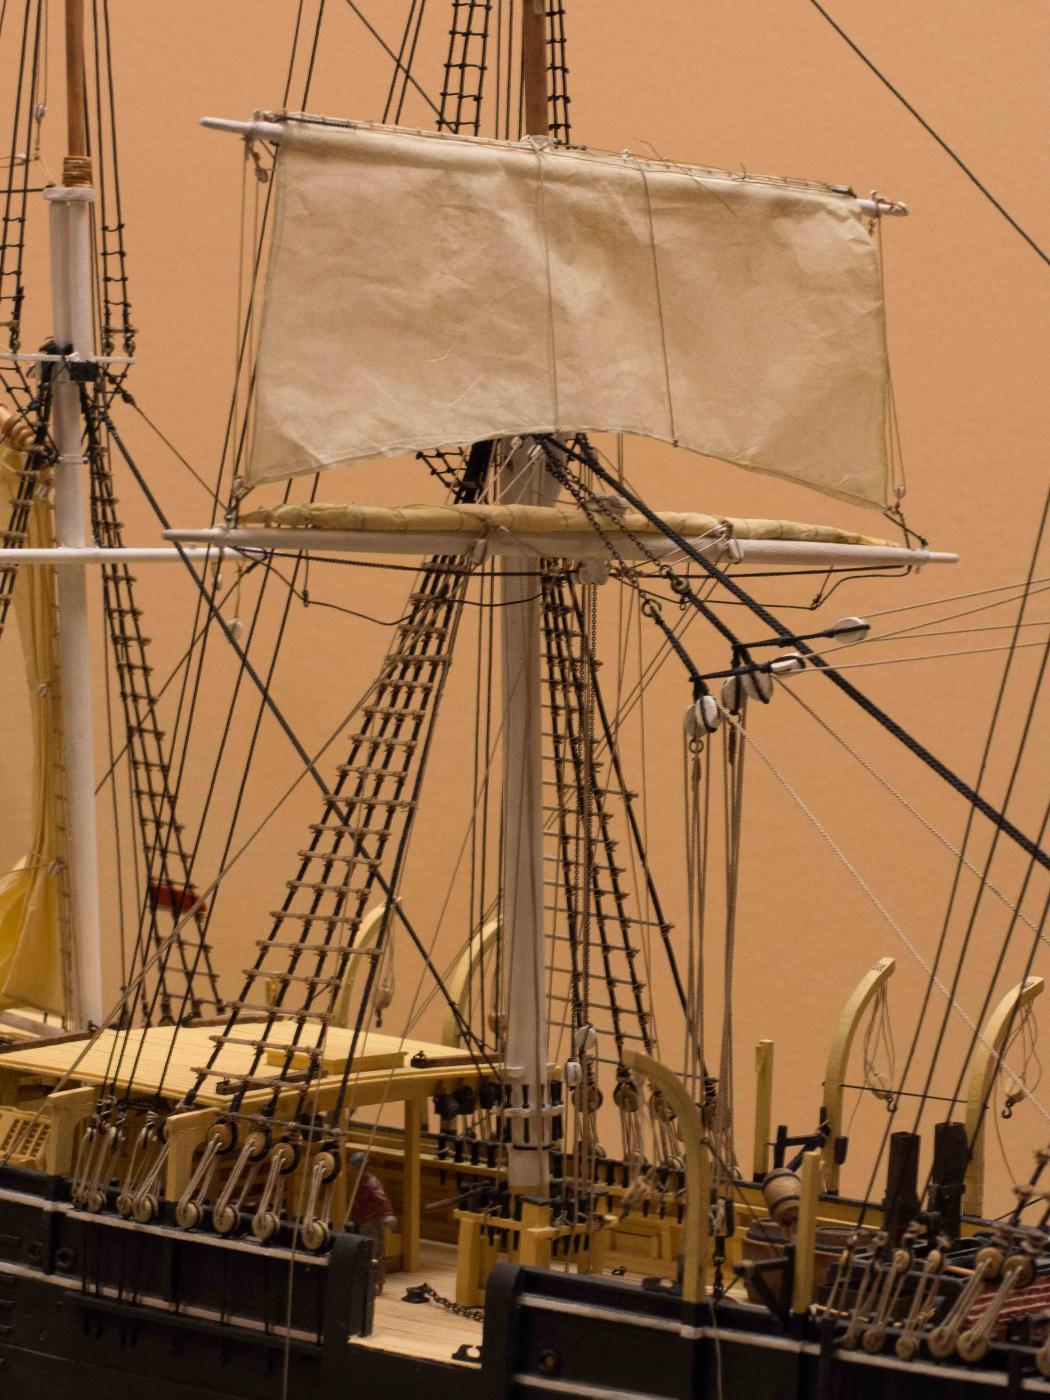
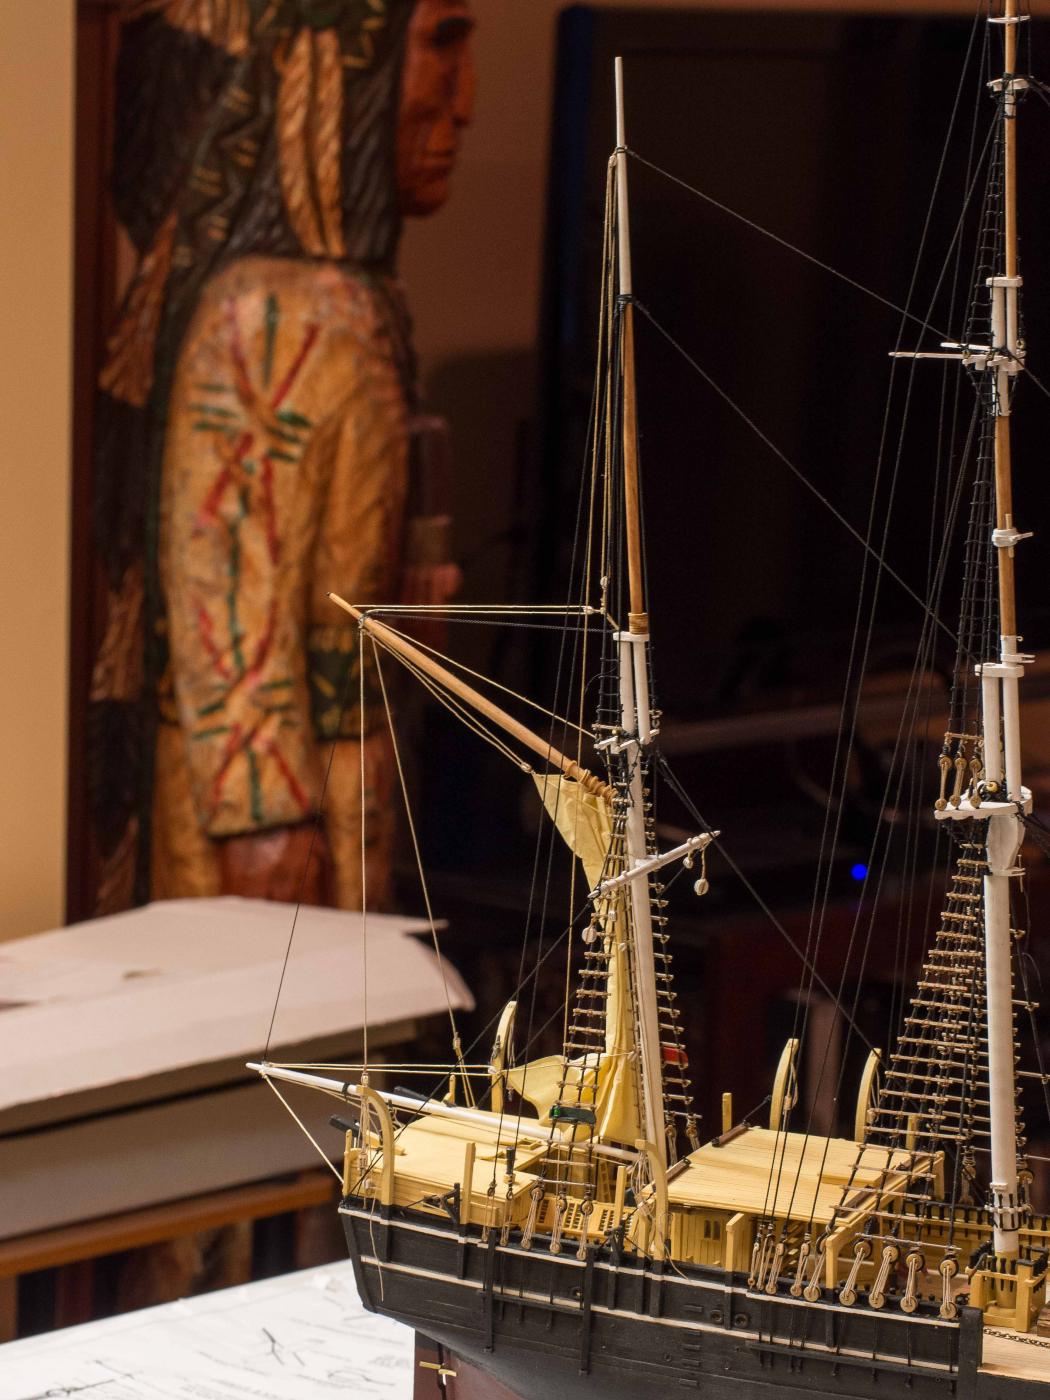
The lower topsail is now up and rigged except for the braces which I'll add later (like the Lower main yard).
It turns out the hardest thing is tying off the lines, especially on the pins that are along the sides - they're hard to get to, I'm working at a distance, and I simply can't make the nice loops to tie them off authentically and pretty. Hopefully rope coils will hide a multitude of ugly ties.
The next yard up will also have the sail set, and the top sail will be furled.
I'm not fitting the fifth yard since as far as I can tell that was not rigged when two lookout stations were fitted.
The good news is each successive yard moving up is less complicated.
(Until I get to the foremast lower yard).

- rafine, Ryland Craze, jwvolz and 3 others
-
6
-
Er ....
Maybe not today. One of my blocks was wrong and the topsail sheet - a combination of chain and rope - was more fiddly than anticipated. Got those done and the stirrups up. Run some lines tomorrow and up she goes.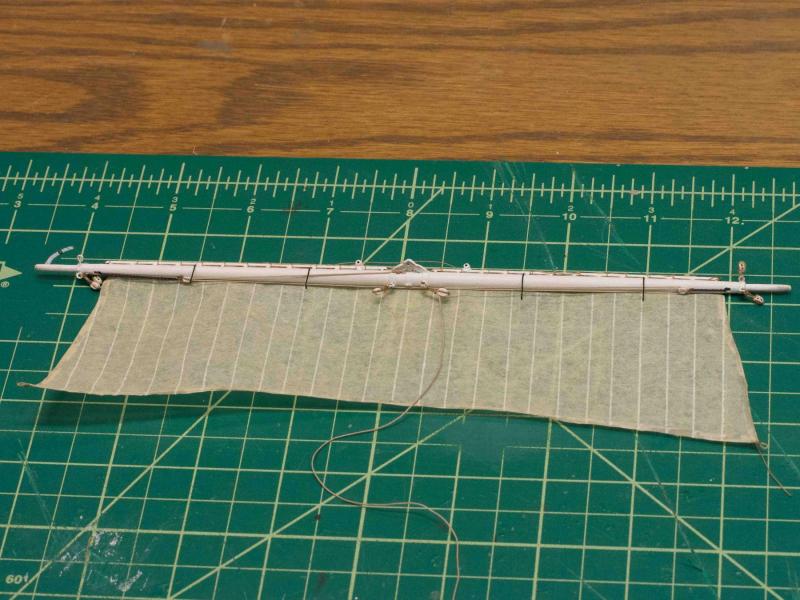
- Captain Poison, Ryland Craze, russ and 1 other
-
4
-
Thanks al.
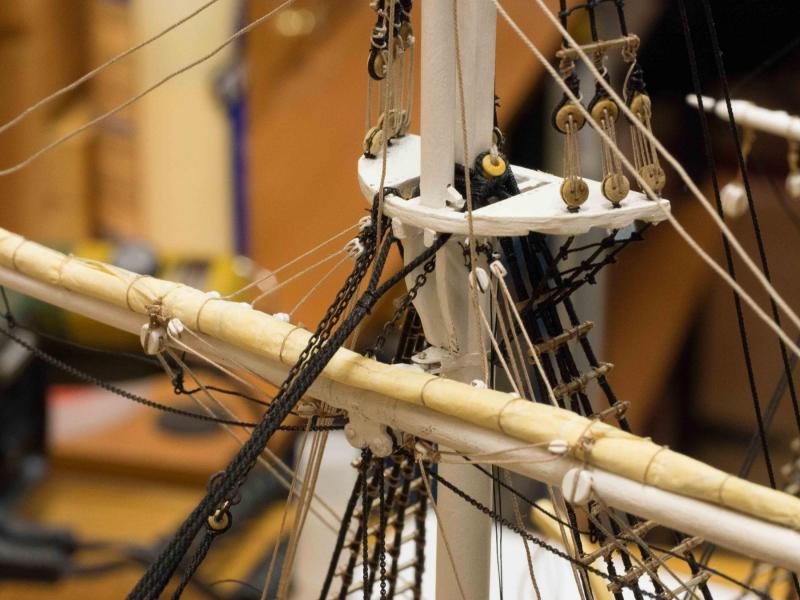
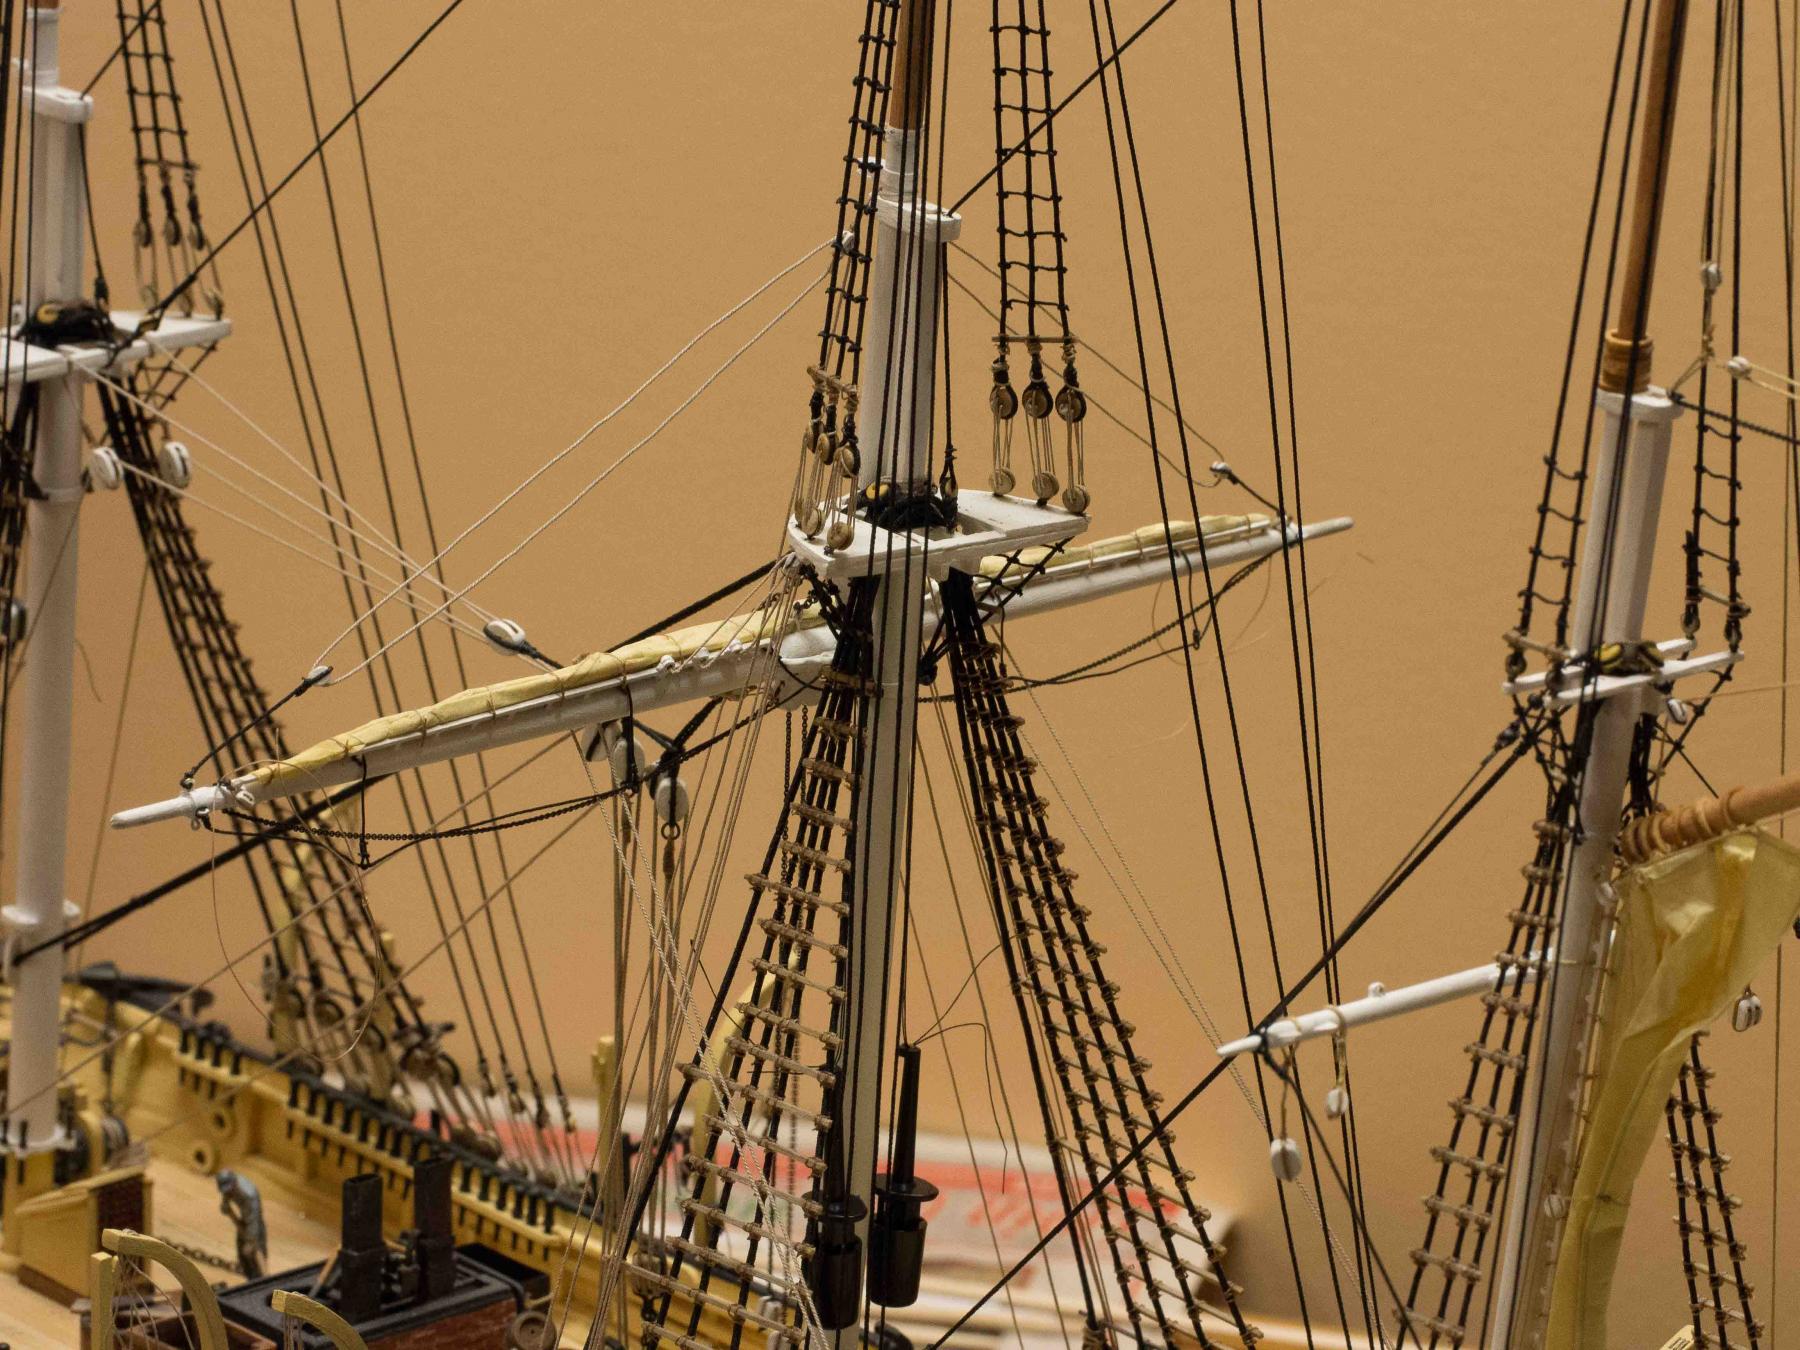
Working on the 2nd yard now.
All blocks and hanging chain attached.
This yard wil have a sail set. I bent the sail to the jackstay this morning. I poked holes in the upper seam and reinforced them by poking a pointed probe with some CA on it. Since the holes are below the line embedded in the seam it's strong enough and the mounting went well once I figured out how to rig the running line to the sail and jackstay.
Now the foot ropes/stirrups, topsail sheet, and buntlines to attach.
This yard wii be mounted today!
Pictures coming.
-
Thanks
Tomorrow I tie down the lines and start on the next yard up.
-
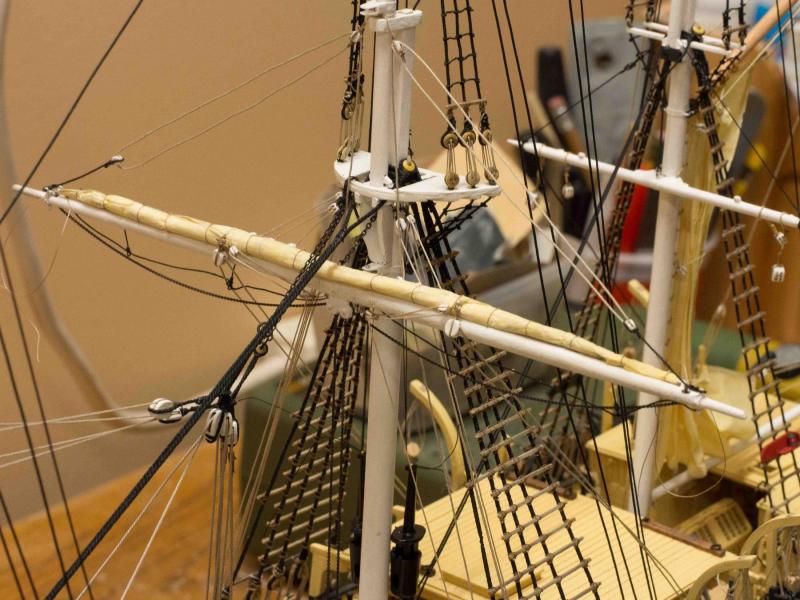
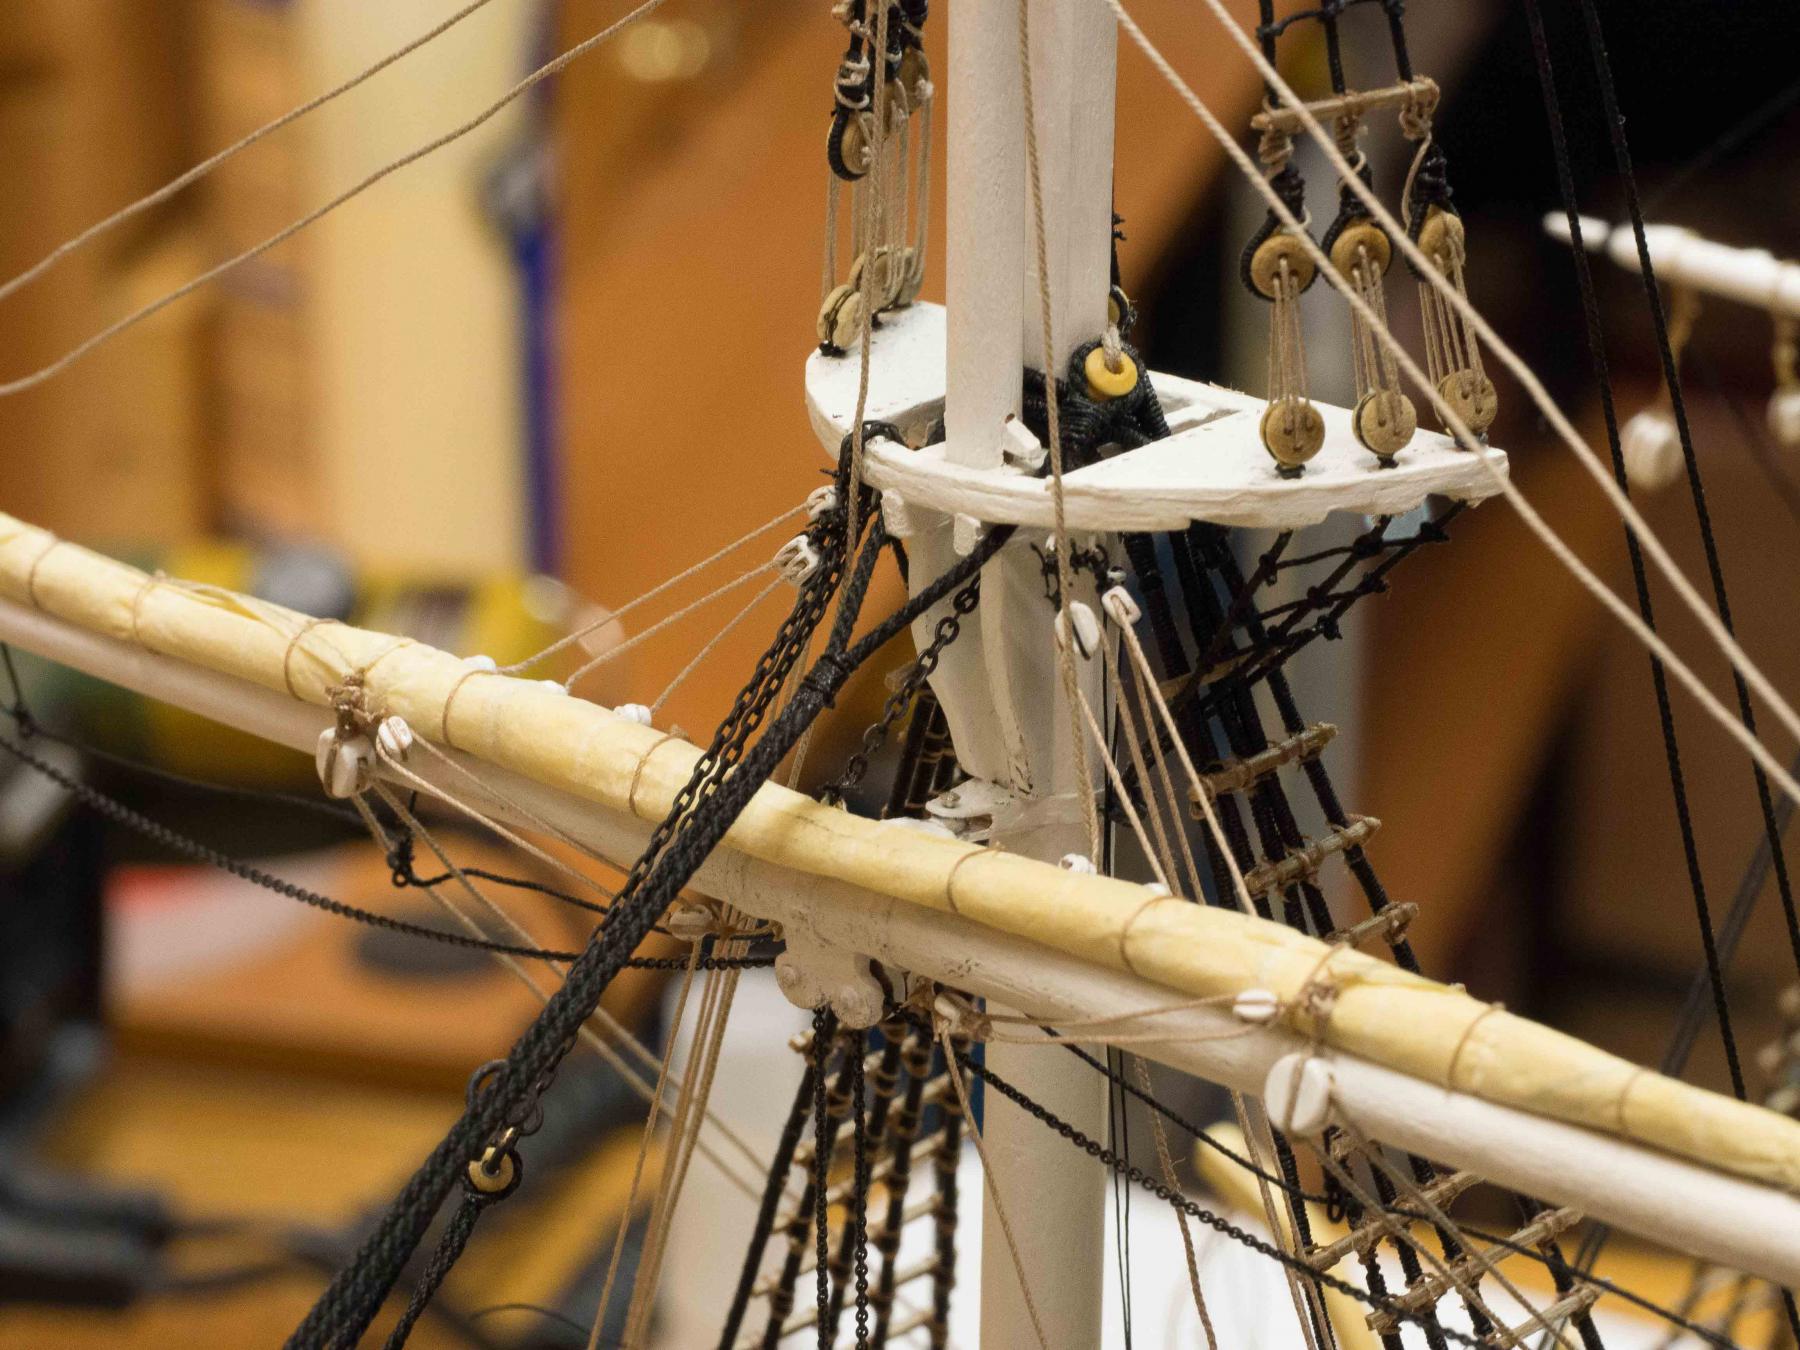
Well I began working on the spars, starting with the lower main yard.
Oof - I was afraid I'd really hit the wall on this one. Where you look at the plans and what you've already put together and what you've mounted and say to self "how in the world am I going to be able to do that?"
Lessons learned in working slowly past that low point:
Look at the plans again and again and again. Note everywhere there is a block attached and do it with the spar in hand so that a nice seized end is possible. I ended up with too many ugly tie in place knots.
Look at the plans again and again to make certain every eyebolt is in place while the area is accessible. If it's going to be hard to get to tie a loop of line through it for later. When I was building the mast I saw that the eyebolt for the chain from which the yard hangs was going to be poorly accessible due to the cheeks so I put a loop of line through it and was able to tie the end of the chain to it using that line when the yard was mounted. It would have been better to attach a length of chain to it right away before mounting.
For blocks that will be hard to get to - and maybe for all blocks - go ahead and measure and put the final line through them before mounting. You will end up with a nest of lines to manage but the alternative of trying to get the line through the blocks when things are mounted is, at least for me, extremely difficult. I have snapped off and repaired 4 (!) davits while rigging this yard because of this. I'm gradually learning to be very aware of how I withdraw my arms/hands and tweezers from a tight place after rigging something. When mounting blocks to eyes either before or after confounding bits of construction, remember to check carefully whether the block needs to have the "origin" line stropped to it. I had to remove a couple of blocks are re-rig them because I missed this.
I've rigged a furled sail for this yard and didn't leave "ears" that were quite long enough. This reduced the visual prettiness of the main sheets.
Aside from that a couple of challenges of the model itself:
The chain block (attaches to the underside of the yard and passes the upper main yard's sheets from a sheave on the ends of the main lower yard down towards the deck for belaying) in the kit is a simple piece of solid metal. I couldn't do anything with that so I had to fabricate one that would not only pass the chains but allow them to be adjusted. Unfortunately my skill level is not such that I was able to do this in scale so the chain blocks for the main and fore lower yards are too big. Oh well, looks OK to me.
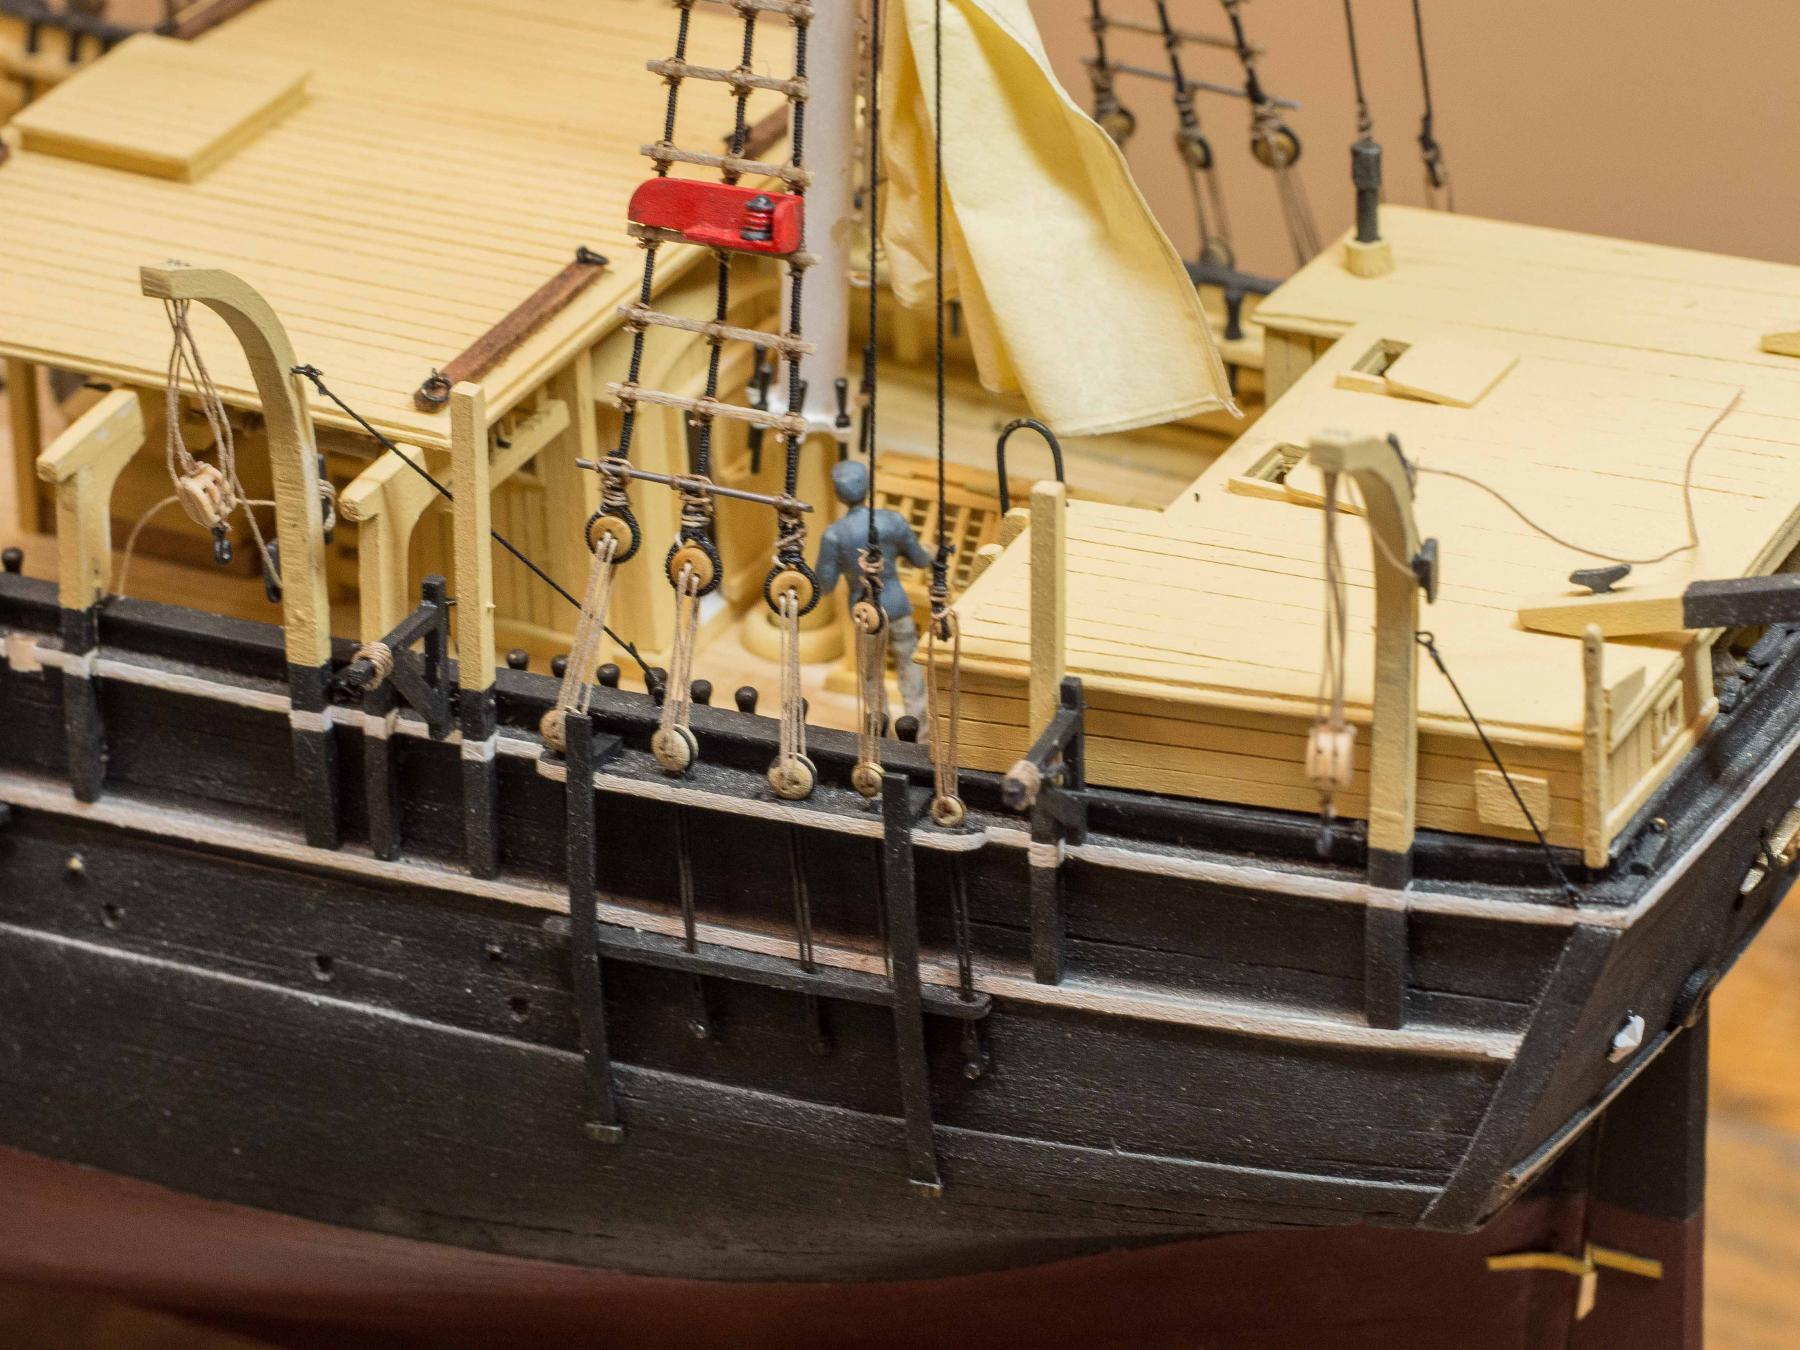
The lower mainsail sheet passes through a sheave in the hull outside to inside and ties off to a pin that is nearly inaccessible due to the shelter roof. It goes up to the block at the corner of the sail - on the yard in my furled sail - and back down to an eye on the rail near the sheave. There would be no way for me to adjust and tighten this line at the belaying pin. Using a right angle forceps with tiny remove action jaws I was able to snag a loop onto the underside of the pin and twist it over the top and pull it tight with a tweezer. Then I rigged the line "in reverse" and will adjust and tighten it at the eyebolt which is accessible.
None of the lines have been tied off yet. There are so many with partially opposed actions that adjusting them is going to be a bit of a challenge. I just finished the last line - the main yard lifts - this morning and I think I'll let things sit for a day or two before I tied them all off.
Overall this one yard has been much more work and anxiety than I had ever anticipated. Hopefully with lessons learned the next one will be easier. I'm going to have one or two upper sails set on the main and fore masts - we'll see how that works. There is a barely accessible eye just under the main top for a block that is part of the lower foremast brace. I'm already concerned about being able to rig that without further destruction.
I'm using silkspan painted with dilute yellow woodglue and a bit of ochre paint after drawing the panel seams with a sharp white pencil. I fold the seams around a line (about 3 mm overlap) and glue them with fabric glue while drawing out a small loop at each corner and tying it off.
This kit is much more of a challenge than I expected when starting it. I'm learning a lot to apply to my next build if I ever finish this one.
-
Welcome to the multiple thumbs club.
I also snapped a davit I had to glue back together.
All back together now.
Let's see how much damage I can do when I come to rig the main yards.
I have a set of micro reamers from micromark that work well to enlarge the holes in blocks and deadeyes twirling by hand. I bought a second set cause I broke one and they're not quite as good as before (especially the finest one). They must have changed the manufacturer.
- popeye the sailor, Elijah and Eddie
-
3
-
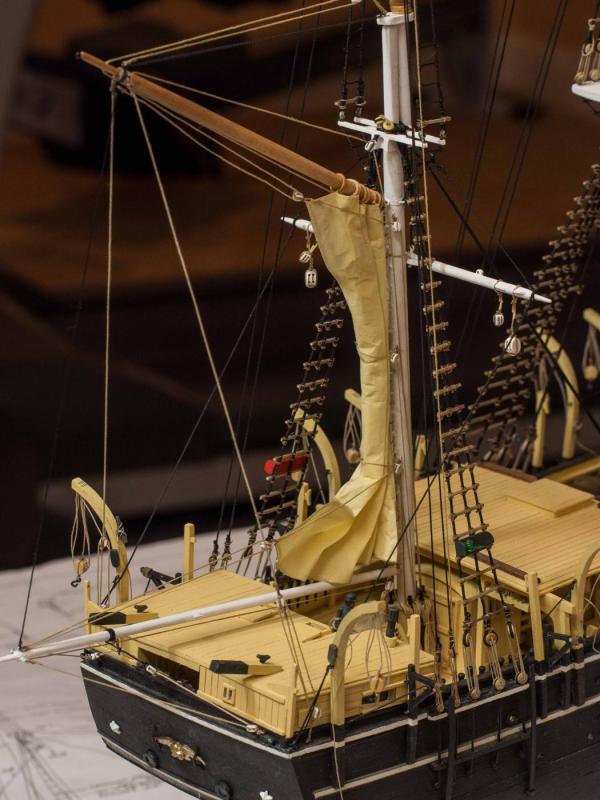
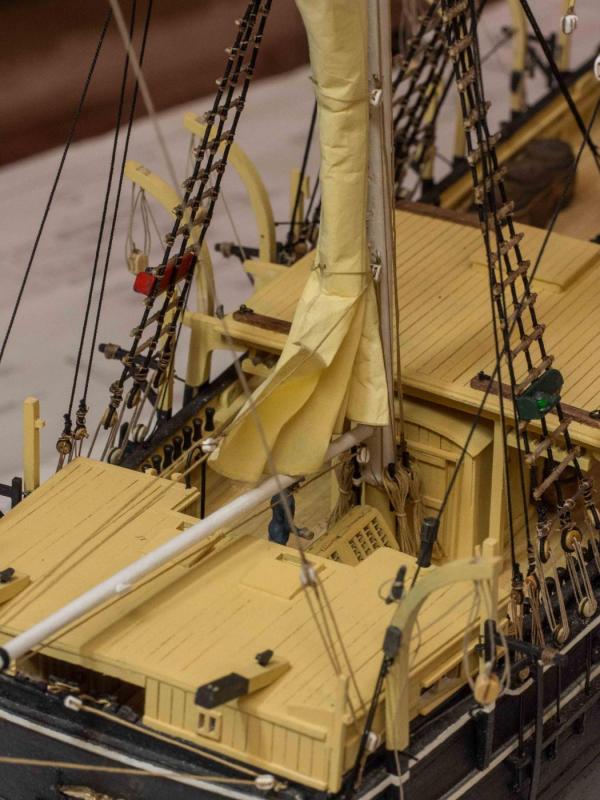
I've finished the running rigging for the Mizzen. Thought it was nearly perfect until I snapped the boom lines with a wandering elbow while tying off the final jackspar lift line. The repair is OK, but the nice symmetry and nice tight lines I had prior are, well, not so perfect now.
Earlier, I had notice that I forgot to install the cleats on the inside rim of the aft rail that needed to go on before the hurricane house was roofed. I had just stuck them on the top of the rail but every time I looked at the aft view it irritated me as the two cleats pretty much obstructed the view into the hurricane house showing the wheel, the lifesaver, and other details.
I finally just cut them off to force myself to figure out a way to glue them to the inside edge of the rail through the small opening. I ended up putting a pin head into the base of two wooden cleats, drilling small holes through the rail from the outside, and after covering the pin with medium CA guiding them into the hole from the inside with an angled tweezer, then turning them 90 degrees before the glue set. Not perfect, but better than before especially once the boom lines were tied off to those cleats.
I put in all the lines to handle the spanker, including head and foot uphauls/outhauls and downhauls/inhauls, as well as the brails for gathering the sail into its current configuration. Since I am not setting the gaff sail I simplified the rigging there.
Next I'll start on the mainmast yards completing them off the ship. Will have to figure out how and to what level of detail to handle the sail rigging since they all will have furled sails. I may take a bit of a break to put together my HobbyZone shipyard building board for a change of pace and to get ready for the next ship.
Current plan when running rigging is complete is to add the cutting stage which will complete the model except for the whaleboats. I'll likely start the next ship then (probably Grenado) and work on the whaleboats on and off at that time. I don't want them to detract from the model so I don't think I want to sit down and make all 7 without something else to work on to keep from rushing the repetitive work involved.
Here are a few pictures. -


-
Homer
Me too!
Just finished running rigging on my Morgan's mizzenmast. Would go faster and look better if I'd stop snapping things when working elsewhere. Klutz.
Thinking ahead to next build which I'll likely start while working on the 7 (!) whaleboats when I finish the standing rigging. To do shelf will unfortunately likely outlive me or my dexterity.
I think Granado although also plan Echo cross section to try my hand at a smaller scratch frame project. Confederacy still muttering to me from the shelf. I Just gave away a previously purchased Victory since once I started building my own models I tired of telling people "I didn't build that one". Unfortunately I had already bought a display for the Morgan so now I have a large unoccupied case. That's the biggest argument for the fully masted Granado over the Confederacy. Must stop buying models for a while.
The admiral just smiles.
-
-
-
I'm in the US.
Went to Lowes today and they only had one scroll saw which was too big.
The $500 was absolute top for highest quality. Would prefer to spend much less but needs to be a clear upgrade or I'll get by with the micromark saw as long as it lasts if it will cut the .5 cm holly when I start my Granado build.
-
Hi all
I have read all the posts about scroll saws, band saws, etc.
I have a rather specific set of requirements and would like some advice and directions from owners.
I will be cutting some pieces for my next build from holly for the bow pieces, and my micromark microliux mini scroll saw isn't up to the job. I also don't like that it doesn't have a vacuum port or blade dust blower. Looking for a replacement that is more capable and higher quality. .
I have a Byrnes table saw so no need for ripping or straight cuts.
Would like it to have vacuum port but not a deal-breaker.
Unlikely to be cutting more than 1/4 or perhaps 3/8 inch woods including boxwood, cherry, holly, and ply. No metal or plastics.
Will be doing a cross section in the future so capability to cut frame pieces inside and outside curves essential. I don't have the patience or dexterity to do this work with a coping saw.
Modeling work only and space is constrained so don't want or need a "full sized " tool. A footprint similar to the micromark saw would be ideal.
Willing to pay for a good tool but realistically $500 tops would prefer less.
Is the similar sized and priced Proxxon an upgrade? Other suggestions feom users with similar tasks?
Bruce
-
Bob
I believe I'm going to do this ship next.
I love the look of the holly below the wales.
Can you tell me how much holly you needed for that?
How many strips? Did you rip them from 1mm sheets, from 5mm sheets, or buy milled strips.
Haven't used custom lumber (or in fact anything but basswood) before.
Bruce
-
-
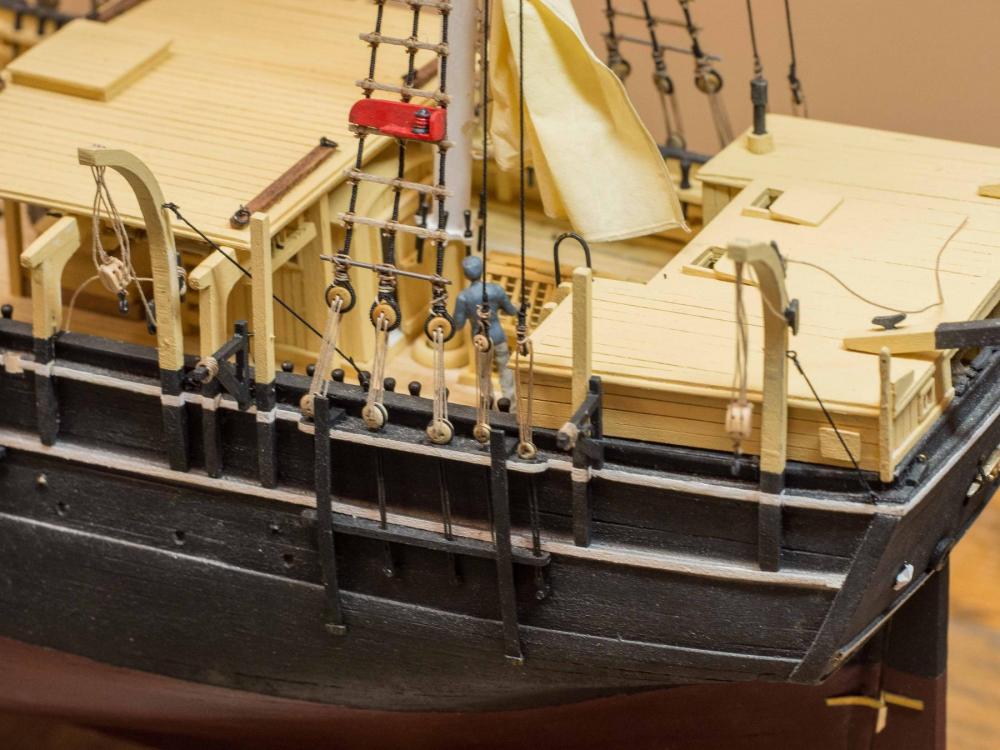
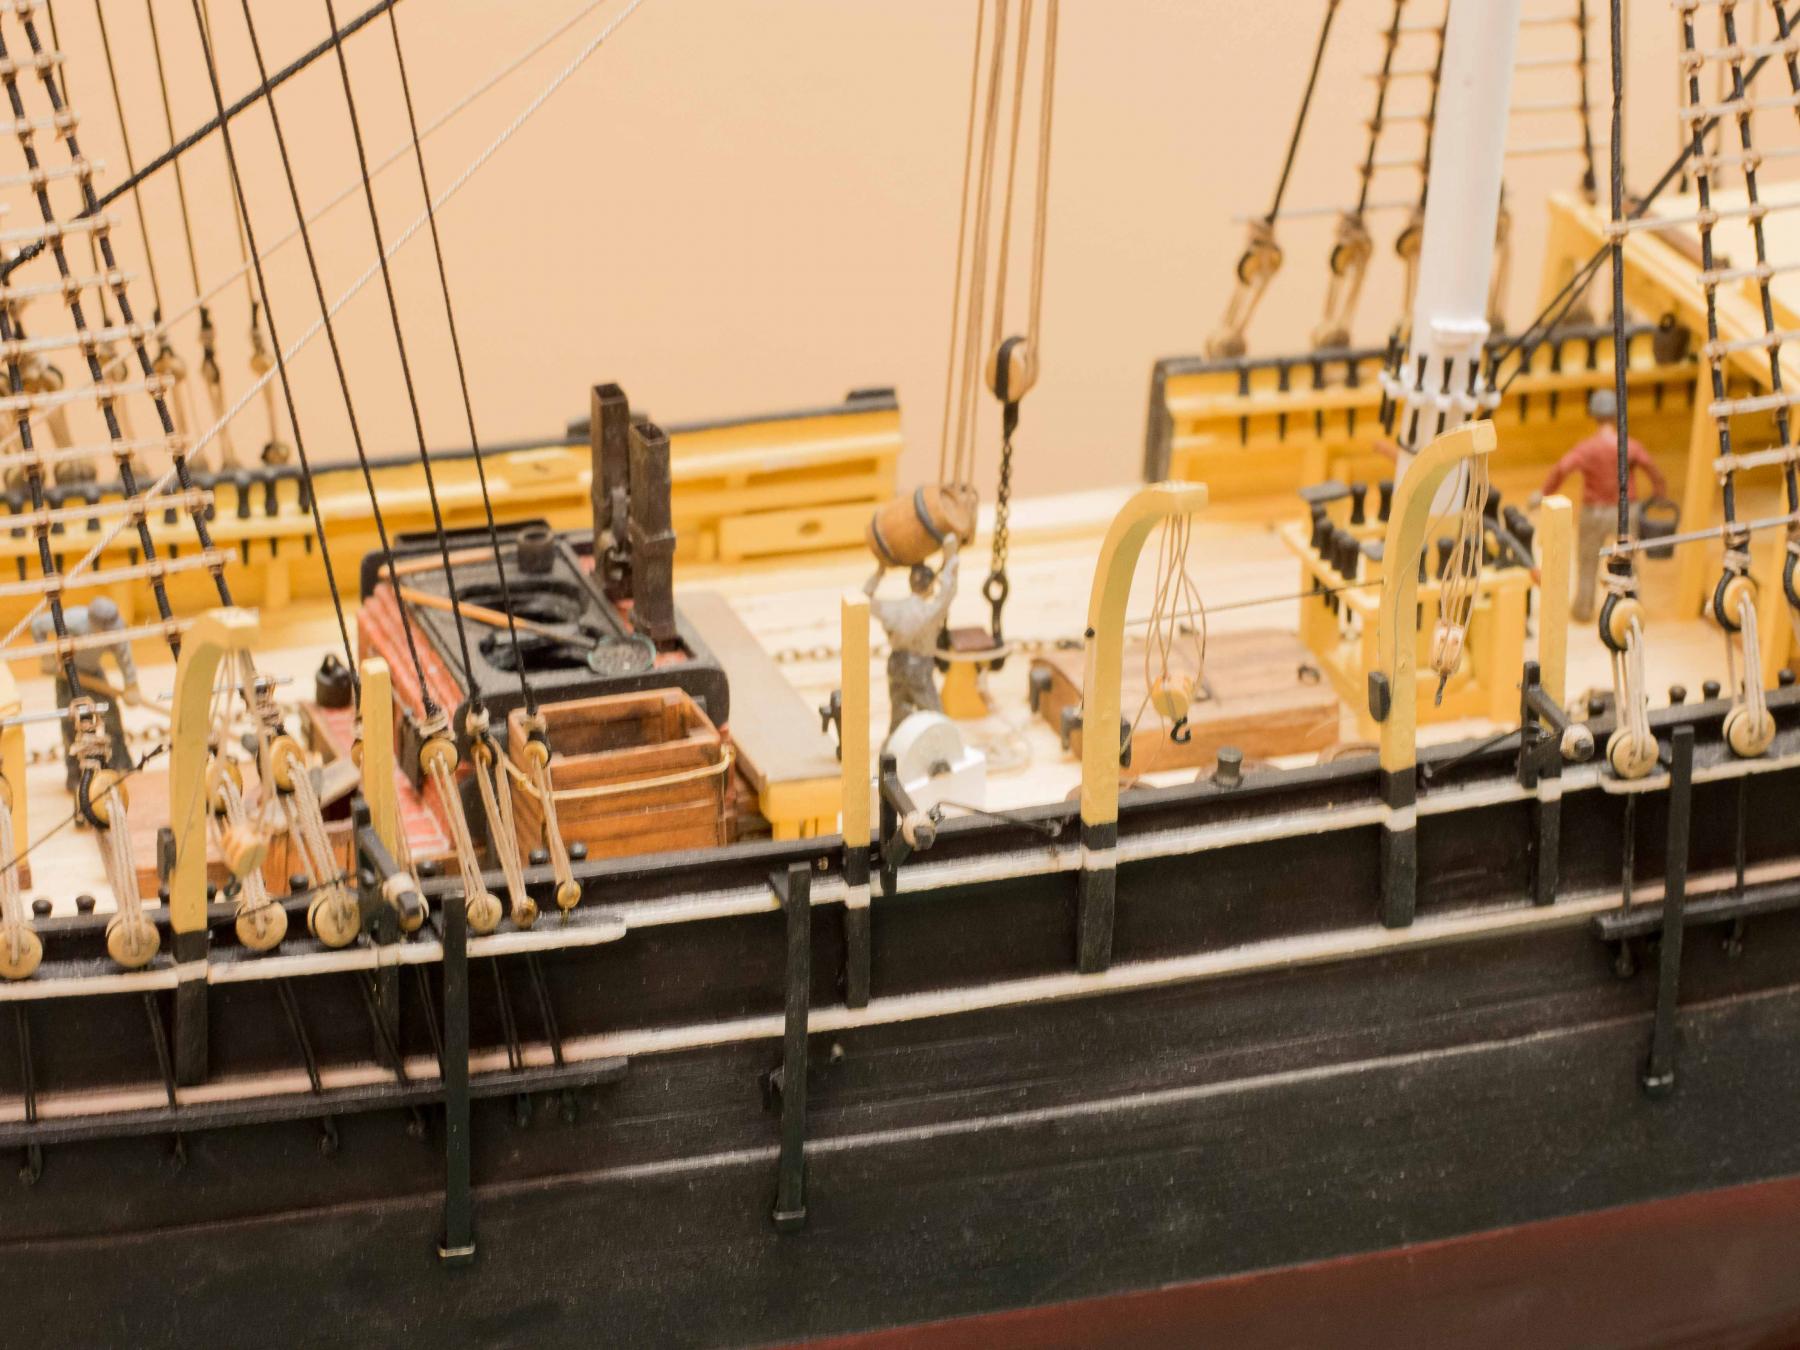
Yup I have harpoons and lances in racks under the shelter roof.
-
I'm going to do the whaleboats after I finish the running rigging.
The amount of equipment to include I each isn't clear to me. Mast/sail and oars for sure, but I don't think the line tubs, pointy things , and so on were put into the boats until they were getting ready to launch.
Anyone know?
Maybe I'll have one partially lowered and fully equipped.
-
-
Gone on a family trip for a while, and I always have trouble motivating myself to beaver away on a repetitive job - in this case building the whaleboat stations as I finish off the standing rigging and prepare for the running rigging.
I finished the 3 portside stations.
I now - but not earlier - appreciate the precision with which the positional interplay of the channels, deadeyes/chainplates, shelter platform supports, and the components of the whaleboat stations need to be carefully worked out very early on. Because of even minor variances, I have had more than a little trouble with the davits and lashing posts and their rigging interfering with the shrouds and deadeyes. Consequently, I have some distortions and/or twisting I'm just going to have to put up with on the finished model. This is one of my big takeaways from this - my first really challenging build. I was a bit cavalier in placing the channels and the chainplate holes in the channels at that point. Well, build and learn.
Eyeballing the starboard side, I think the 2 stations there will be less of a problem, especially as I am now forewarned about the clearances I will require.
Here are a few photos of the port side stations with the blocks and hooks rigged. I used Syren Co. laser cut black hooks - I like the way they look.

-
OK, so the whaleboat stations are a lot more work than I was anticipating.
I've finished the aft port station, and have the approach figured out, so hopefully the rest will go more quickly.
The cut-outs, painting, and crane construction are all done for the other 2 port stations.
I've used black laser cut rigging hooks from Syren for the boat hooks.
Drilling 2 sets of 3 adjacent holes in the 1/8" ends of the davits to simulate 3 sheaves was fun.
The hinges for the cranes were done with 2 eyebolts in the crane edge and 2 right angle steel wire "pintles" in the lashing posts, with more steel wire used to make the rigid supports to hold the cranes perpendicular to the hull.
Although he's looking away at the moment the captain is keeping an eye on things!
- russ, jwvolz, Captain Poison and 3 others
-
6
-
-
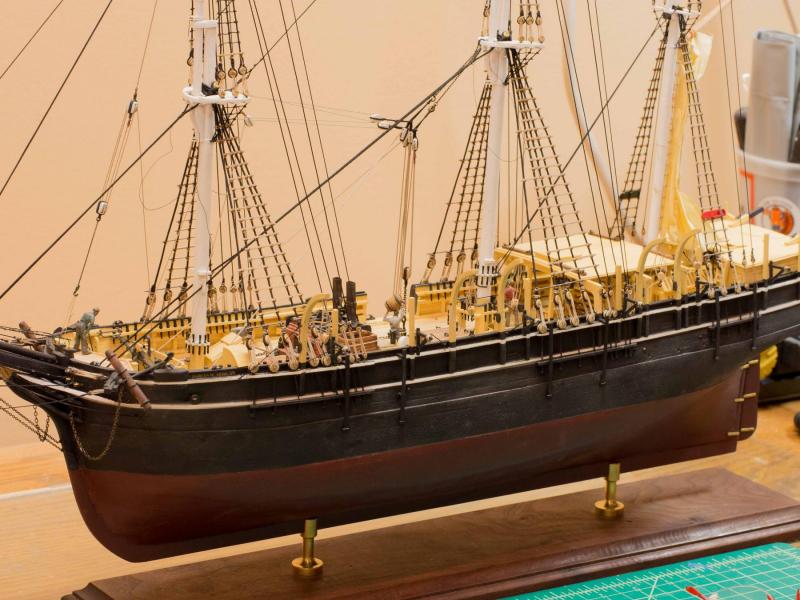
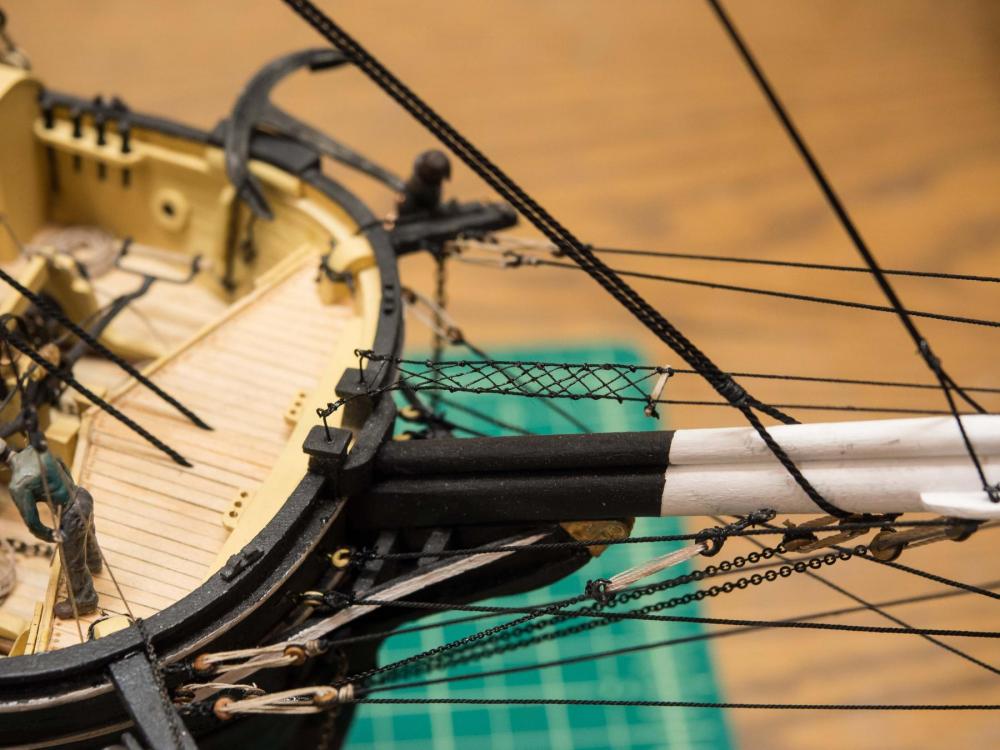
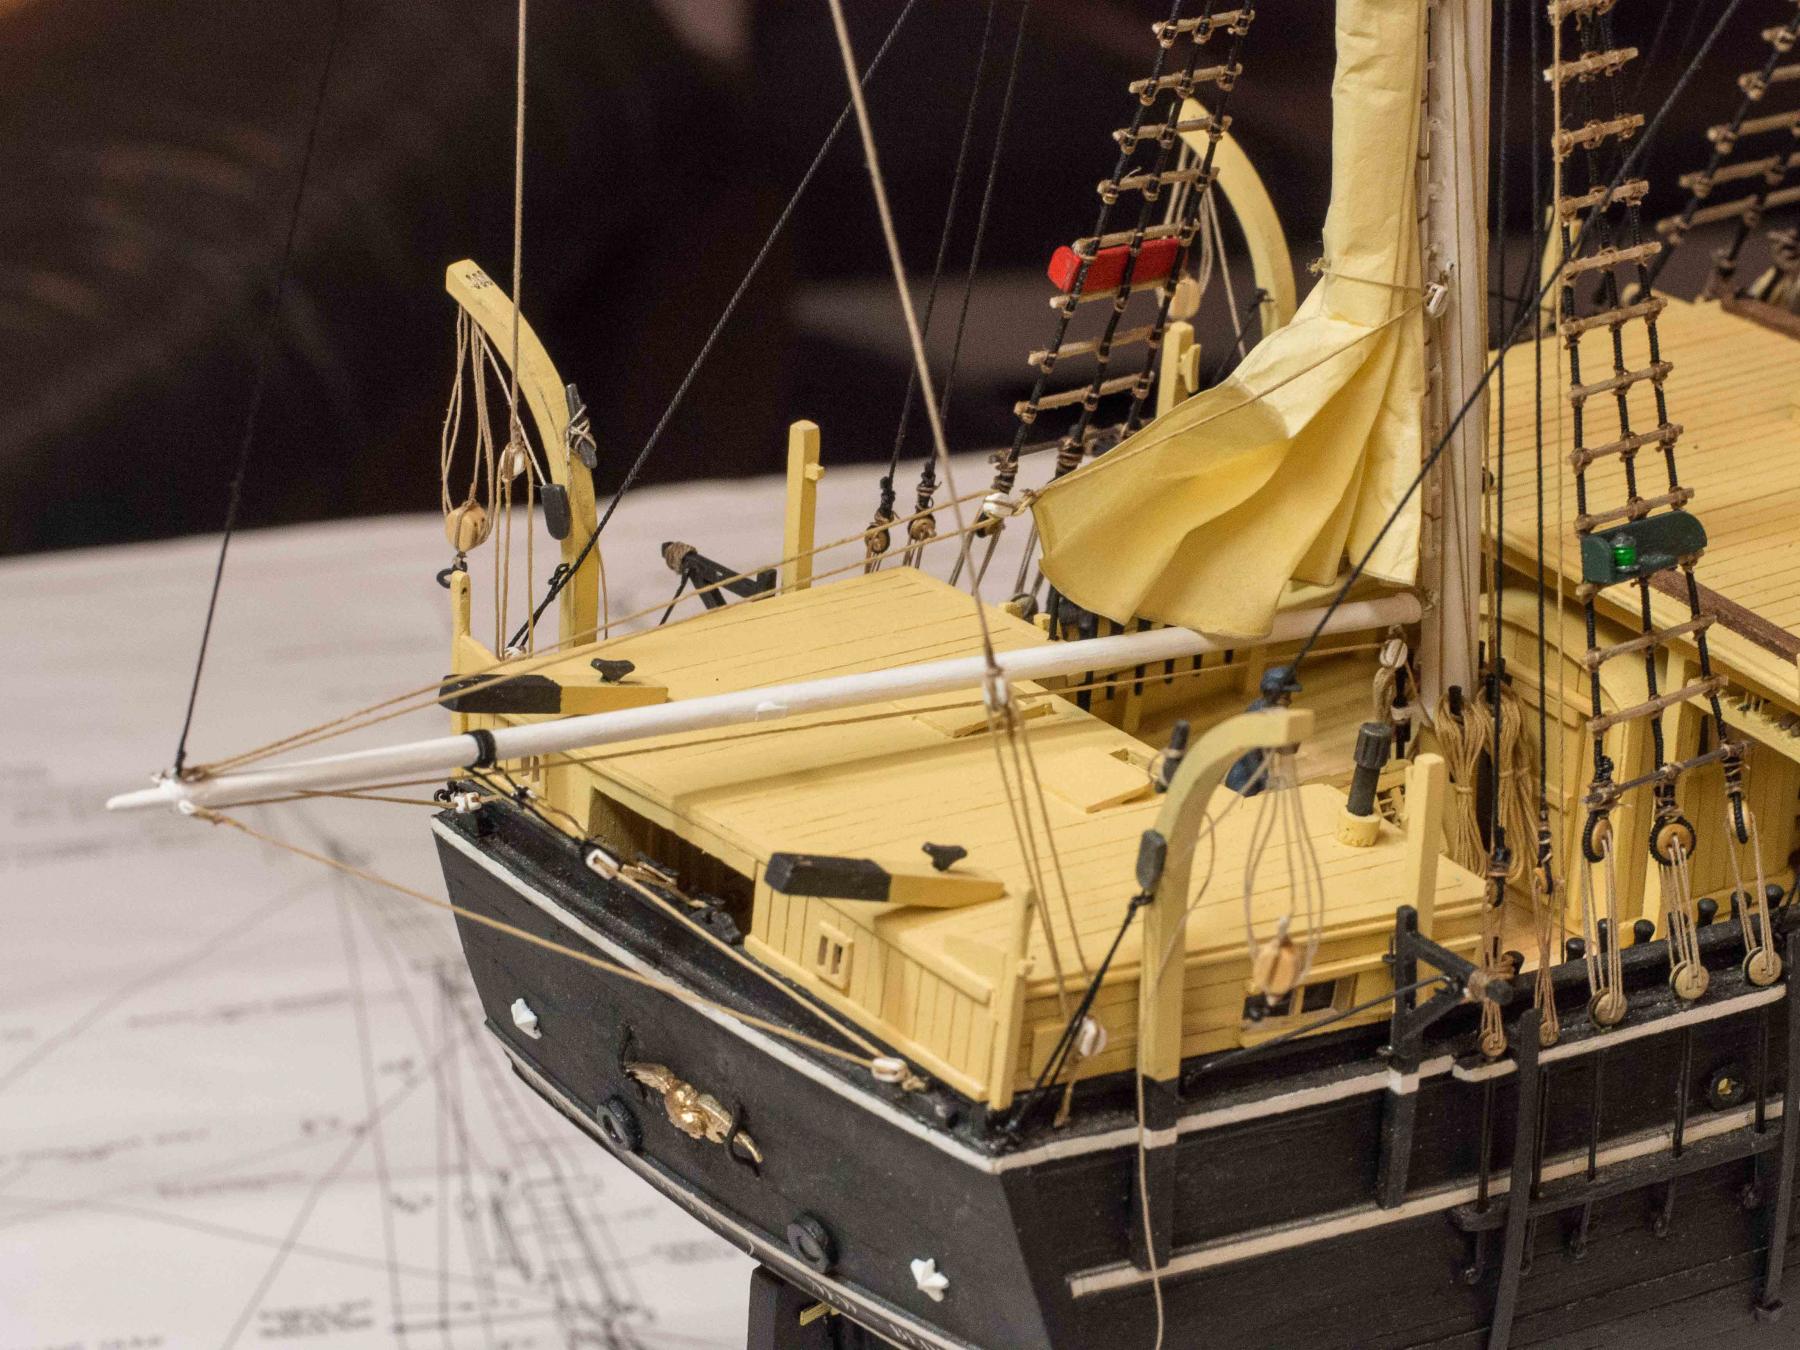
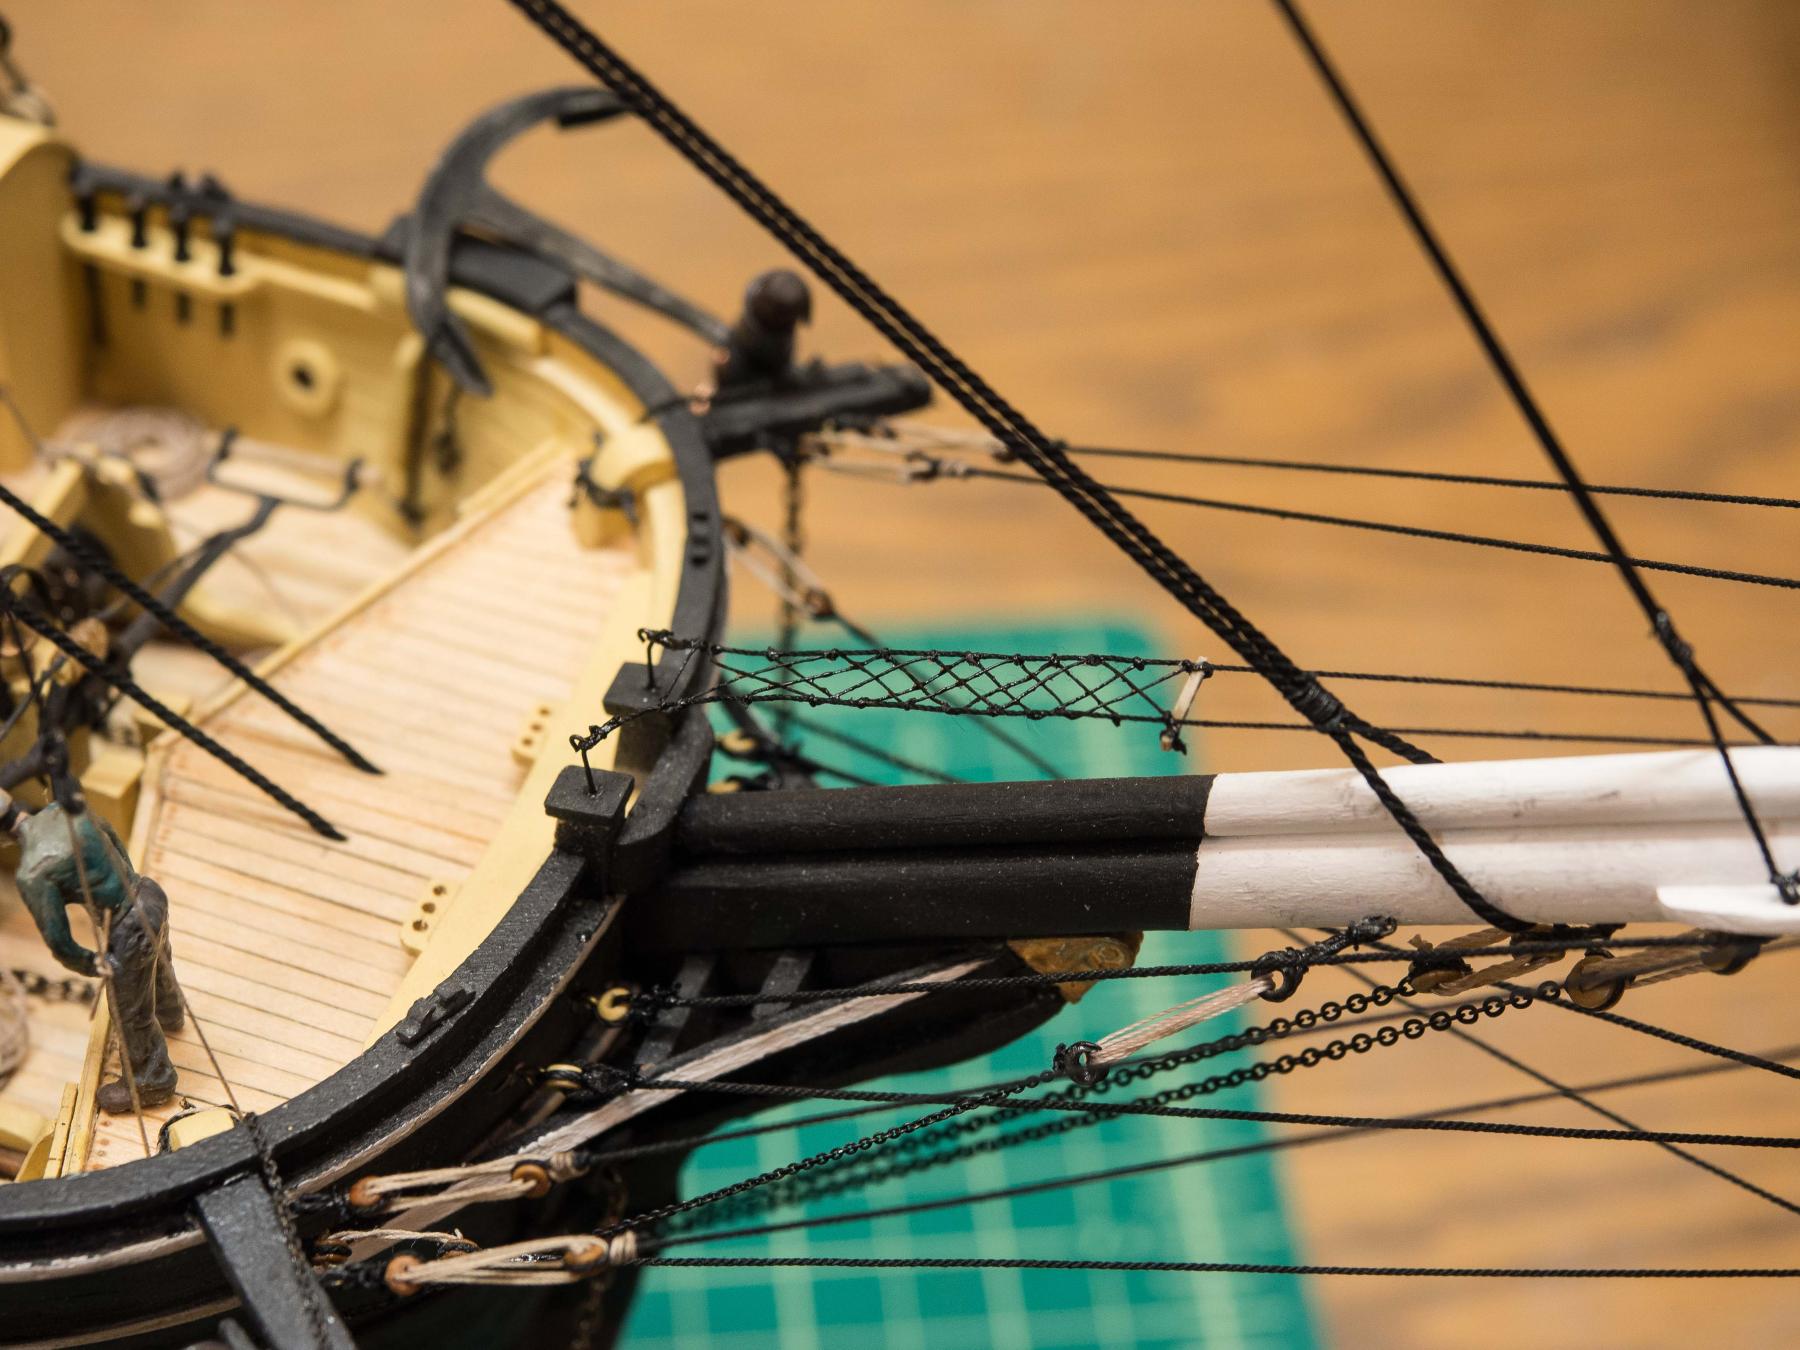
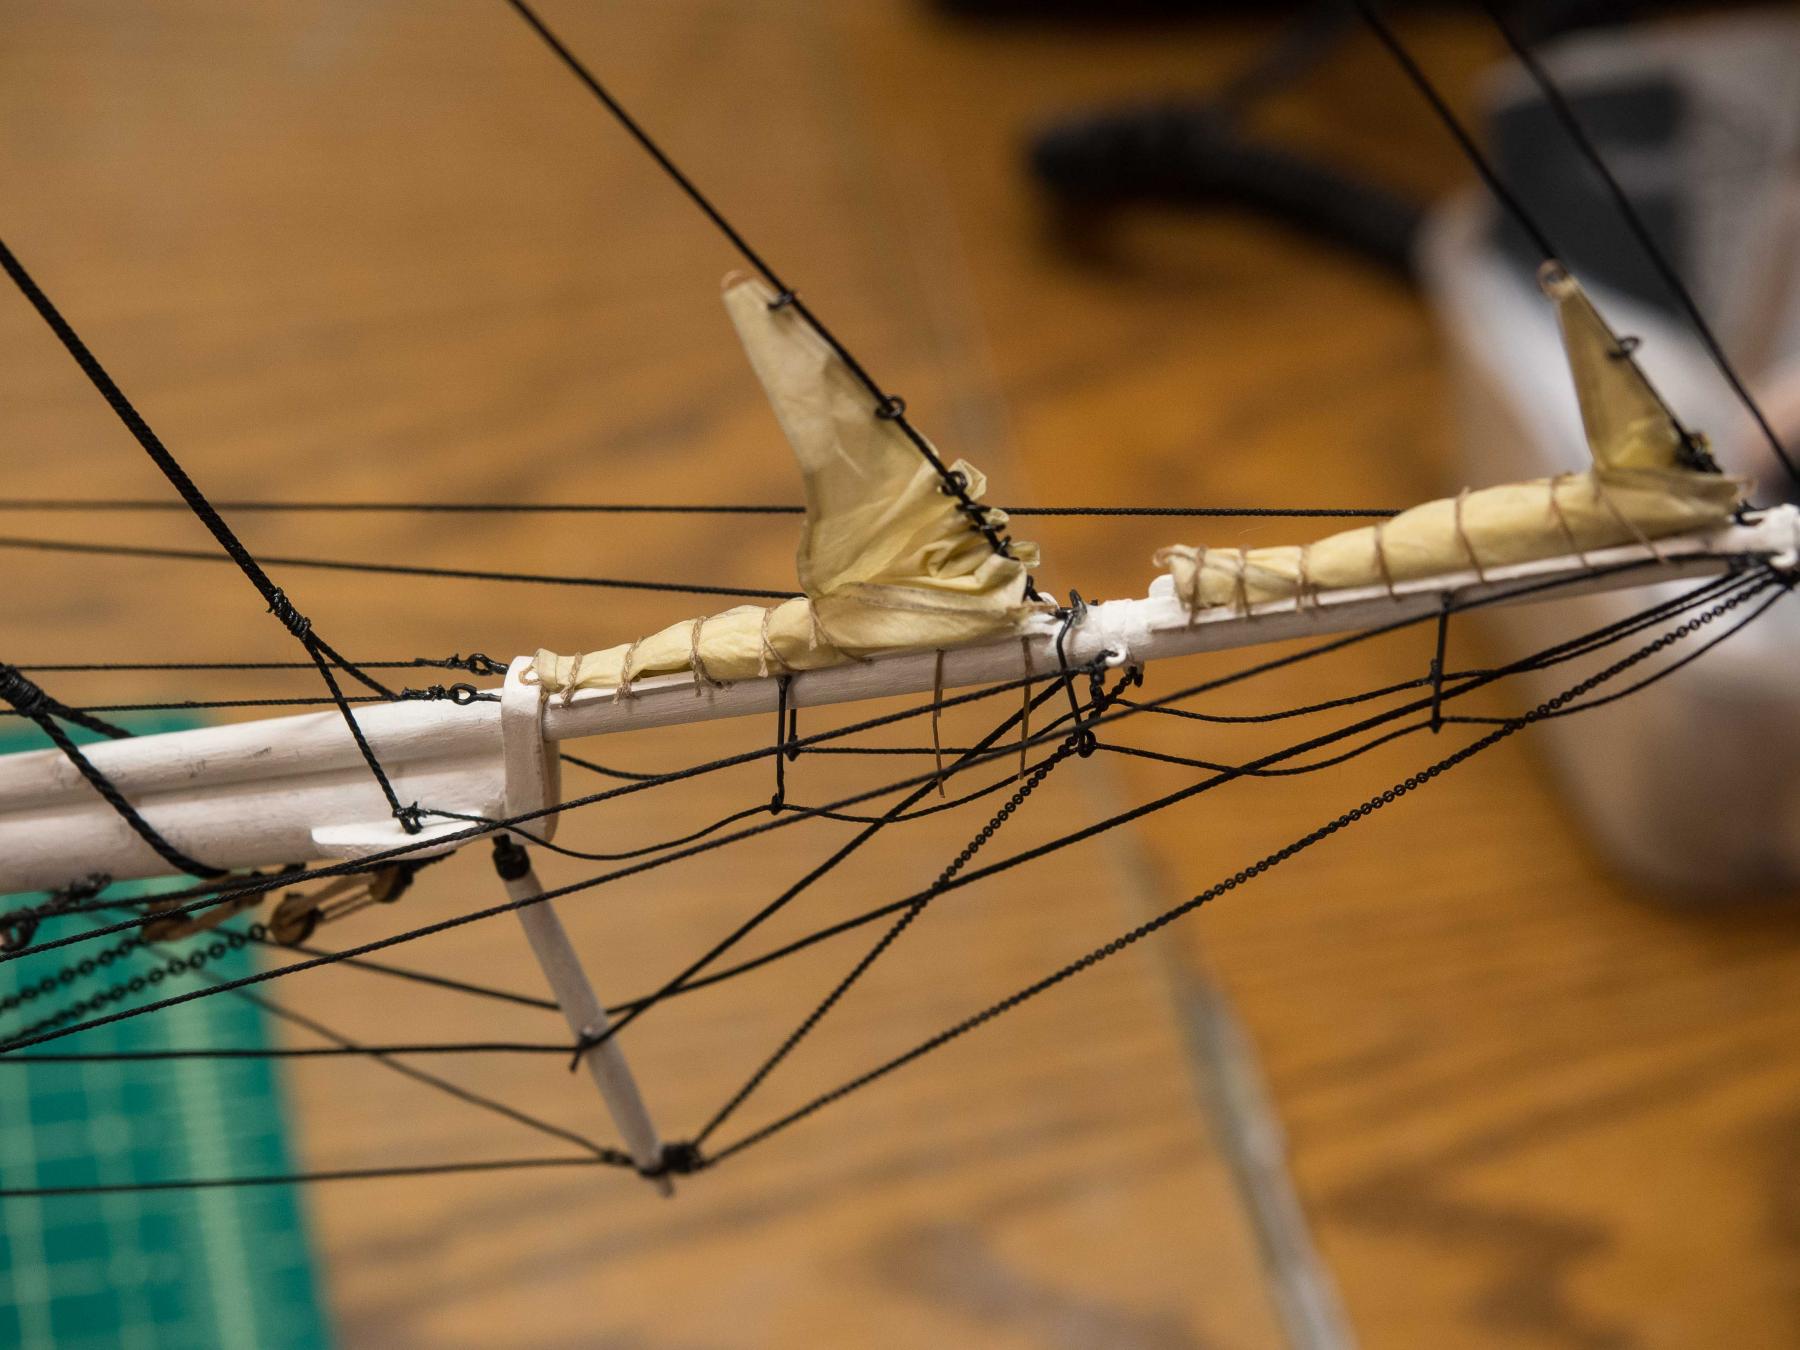
Minor sidestep to add the foot ropes and netting to the bowsprit.
The foot ropes (at least the stirrups) should have been added prior to all the other rigging that gets in the way.
I had to use steel wire for the stirrups for ease of mounting thru all the existing rigging. Looks ok except for the size of the "eye".
Now work on the davits.


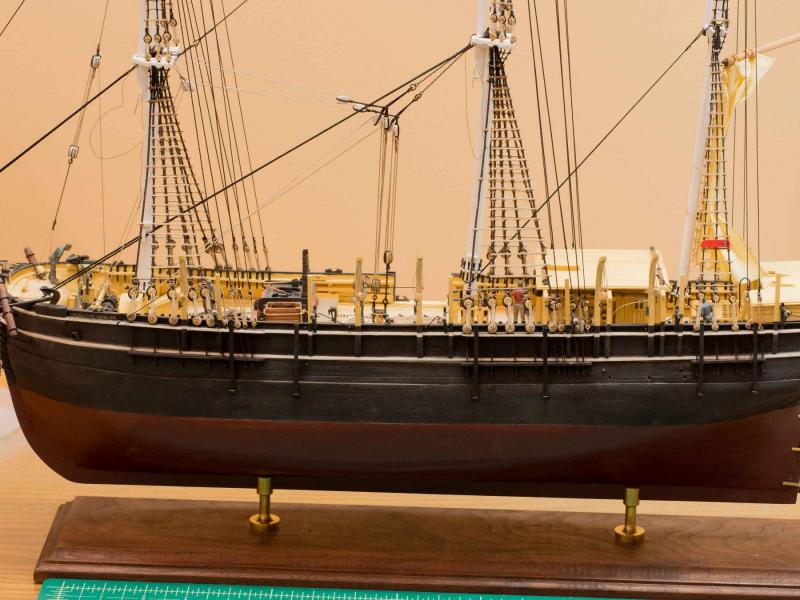
Charles W Morgan by Brucealanevans - FINISHED - Model Shipways
in - Kit build logs for subjects built from 1801 - 1850
Posted · Edited by Bruce Evans
A stressful and disappointing morning in the shipyard ....
All I had to do today was tie off two topsail clew lines and add a couple blocks and the static lift.
Unfortunately, tying off the two lines was very difficult due, again, to access to the belay points. In manipulating a 6" tweezers through a maze of obstacles, I managed to tie them off at the cost of breaking off a couple of lower main yard blocks when putting unintentional pressure on the main lower yard and "plucking" several foremast stays to the extent that they are now slack. Very unsightly.
I repaired the broken ties to the blocks and restrung things, but lost the perfect 90 degree placement of all the yards whose lines are already tensioned and tied off. I still don't know exactly what I'm going to do about the stretched and slack fore-stays, but I think I'm going to have to walk away for a few days. I was hoping to get the last top-gallant yard up before taking a break, but that's not going to happen.
Ups and Downs; lots of "next time I'll do it THAT way", etc.