Tigersteve
-
Posts
1,327 -
Joined
-
Last visited
Content Type
Profiles
Forums
Gallery
Events
Everything posted by Tigersteve
-
 Model Expo is good about the replacement parts. I think you should use this opportunity to teach how to scratch a new transom using the laser cut sheets as a template. A new one can be easily crafted by using the hobby knife to make the rough cut and sand paper and files to get the precise shape. Steve
 -
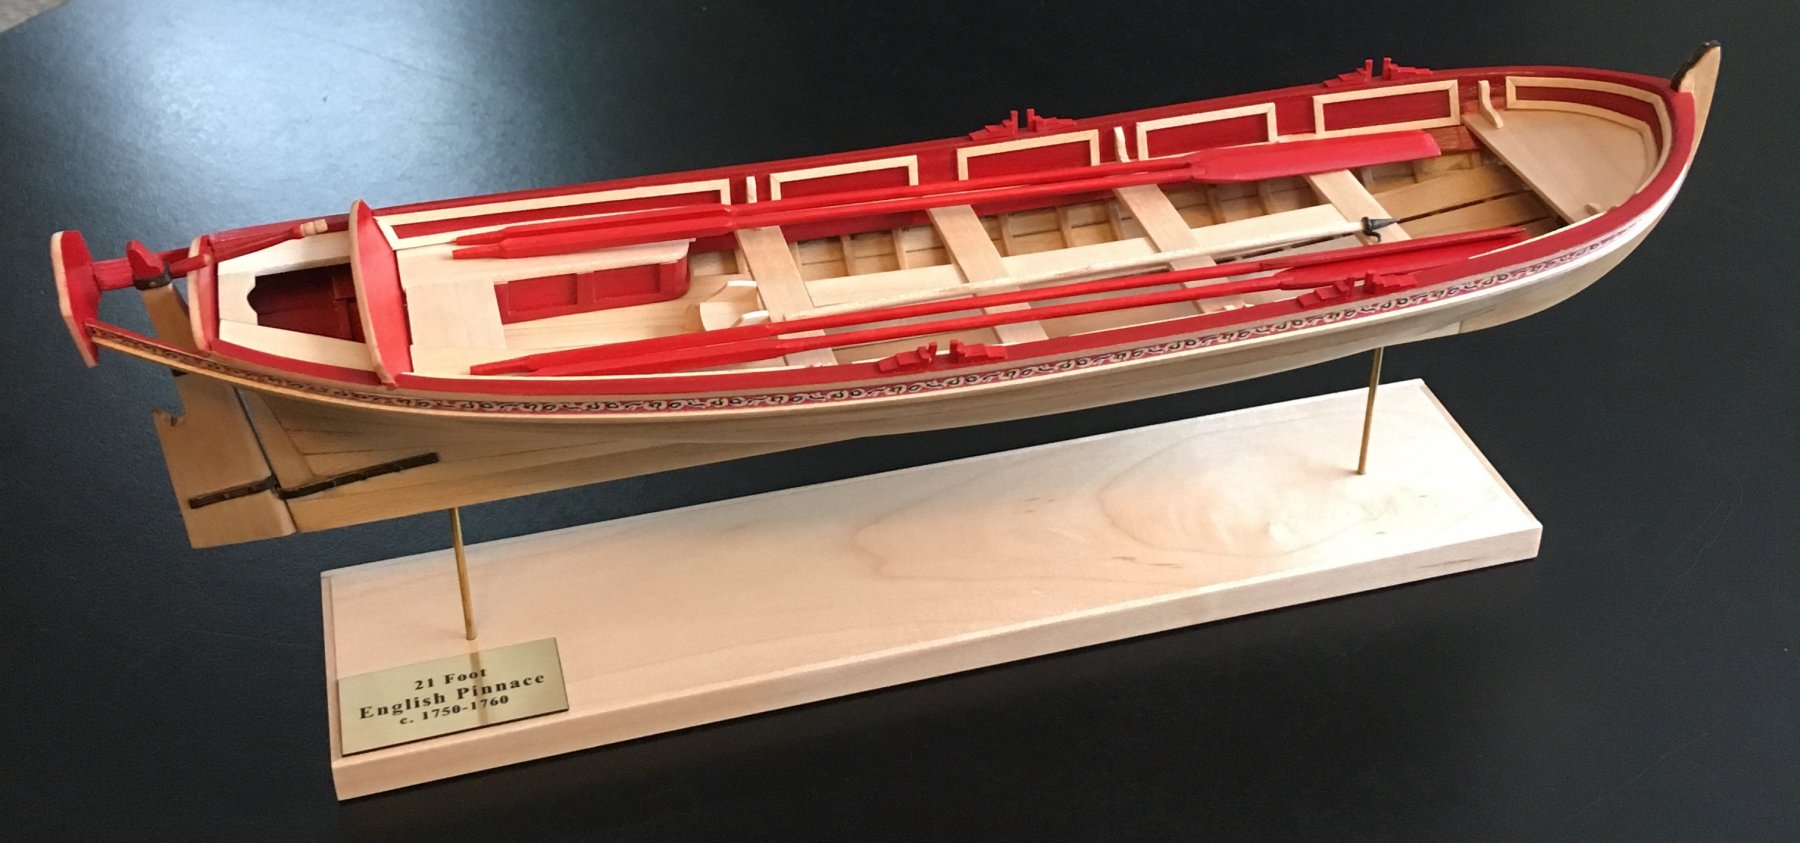
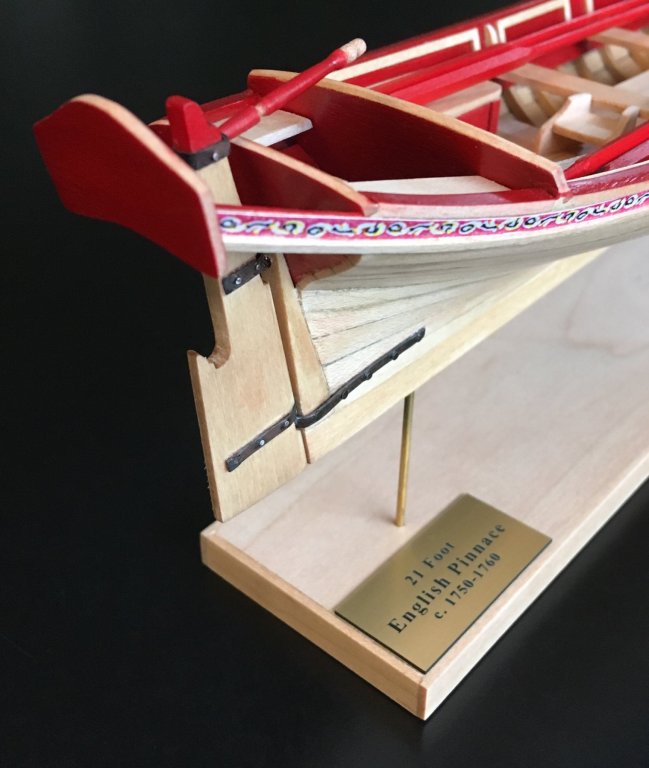
Thank you everyone for the compliments. Working out the dimensions for a case if I decide to go that route: the base is 9” x 2” and the model height is roughly 3”. Case dimensions would be 13” x 6” and 5” tall. This leaves roughly 2” breathing room around the model. The case would be acrylic like the one for the longboat, but the base would be black. Steve
- 190 replies
-
- 2
-

-
- pinnace
- model shipways
- (and 1 more)
-
The base really compliments the model. Well done. Steve
-
I think it’s ready for lining off the hull and planking now. Don’t forget to put the transom back on at some point. Steve
-
Roach- Just my iphone with the model placed on a black table. Natural light mostly. I took many photos from different angles and cropped the best ones. Steve
- 190 replies
-
- 1
-
-
- pinnace
- model shipways
- (and 1 more)
-
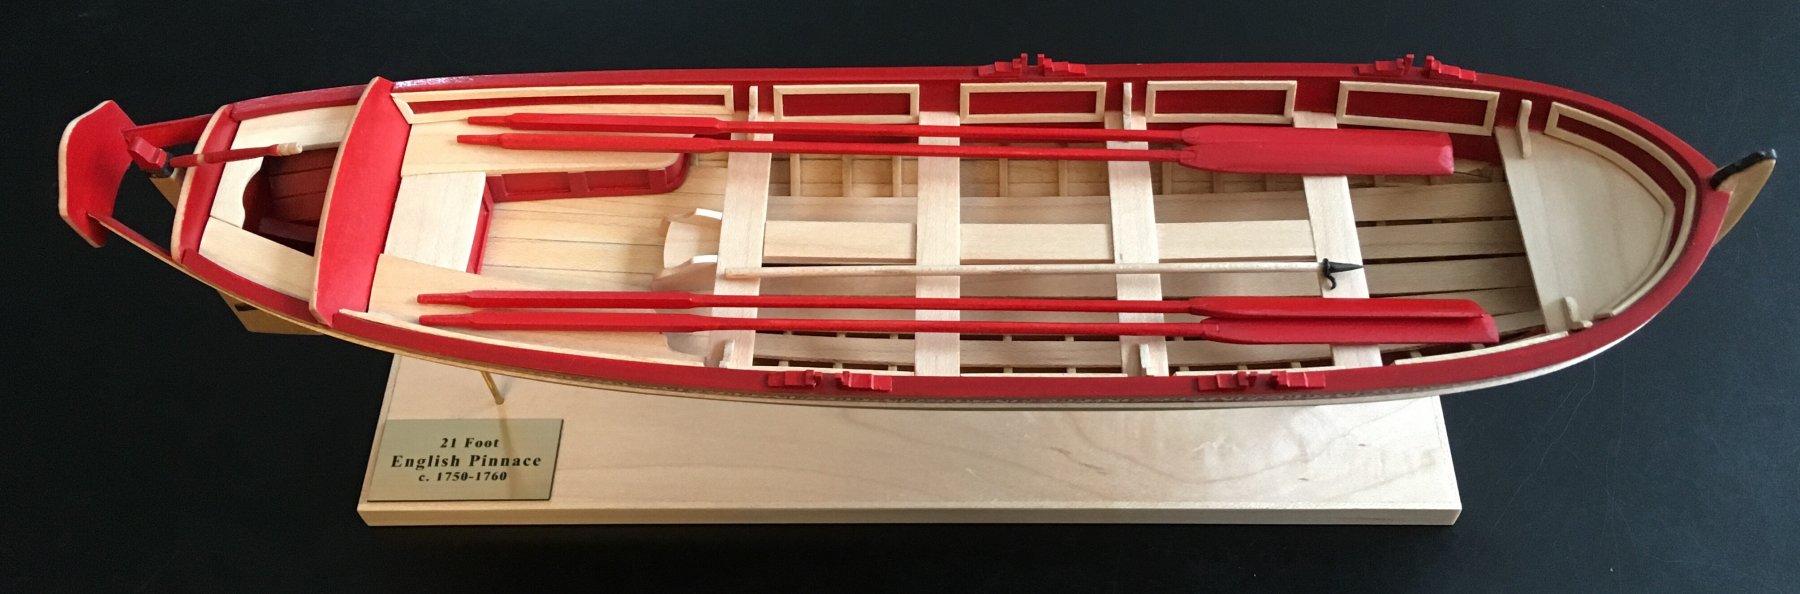
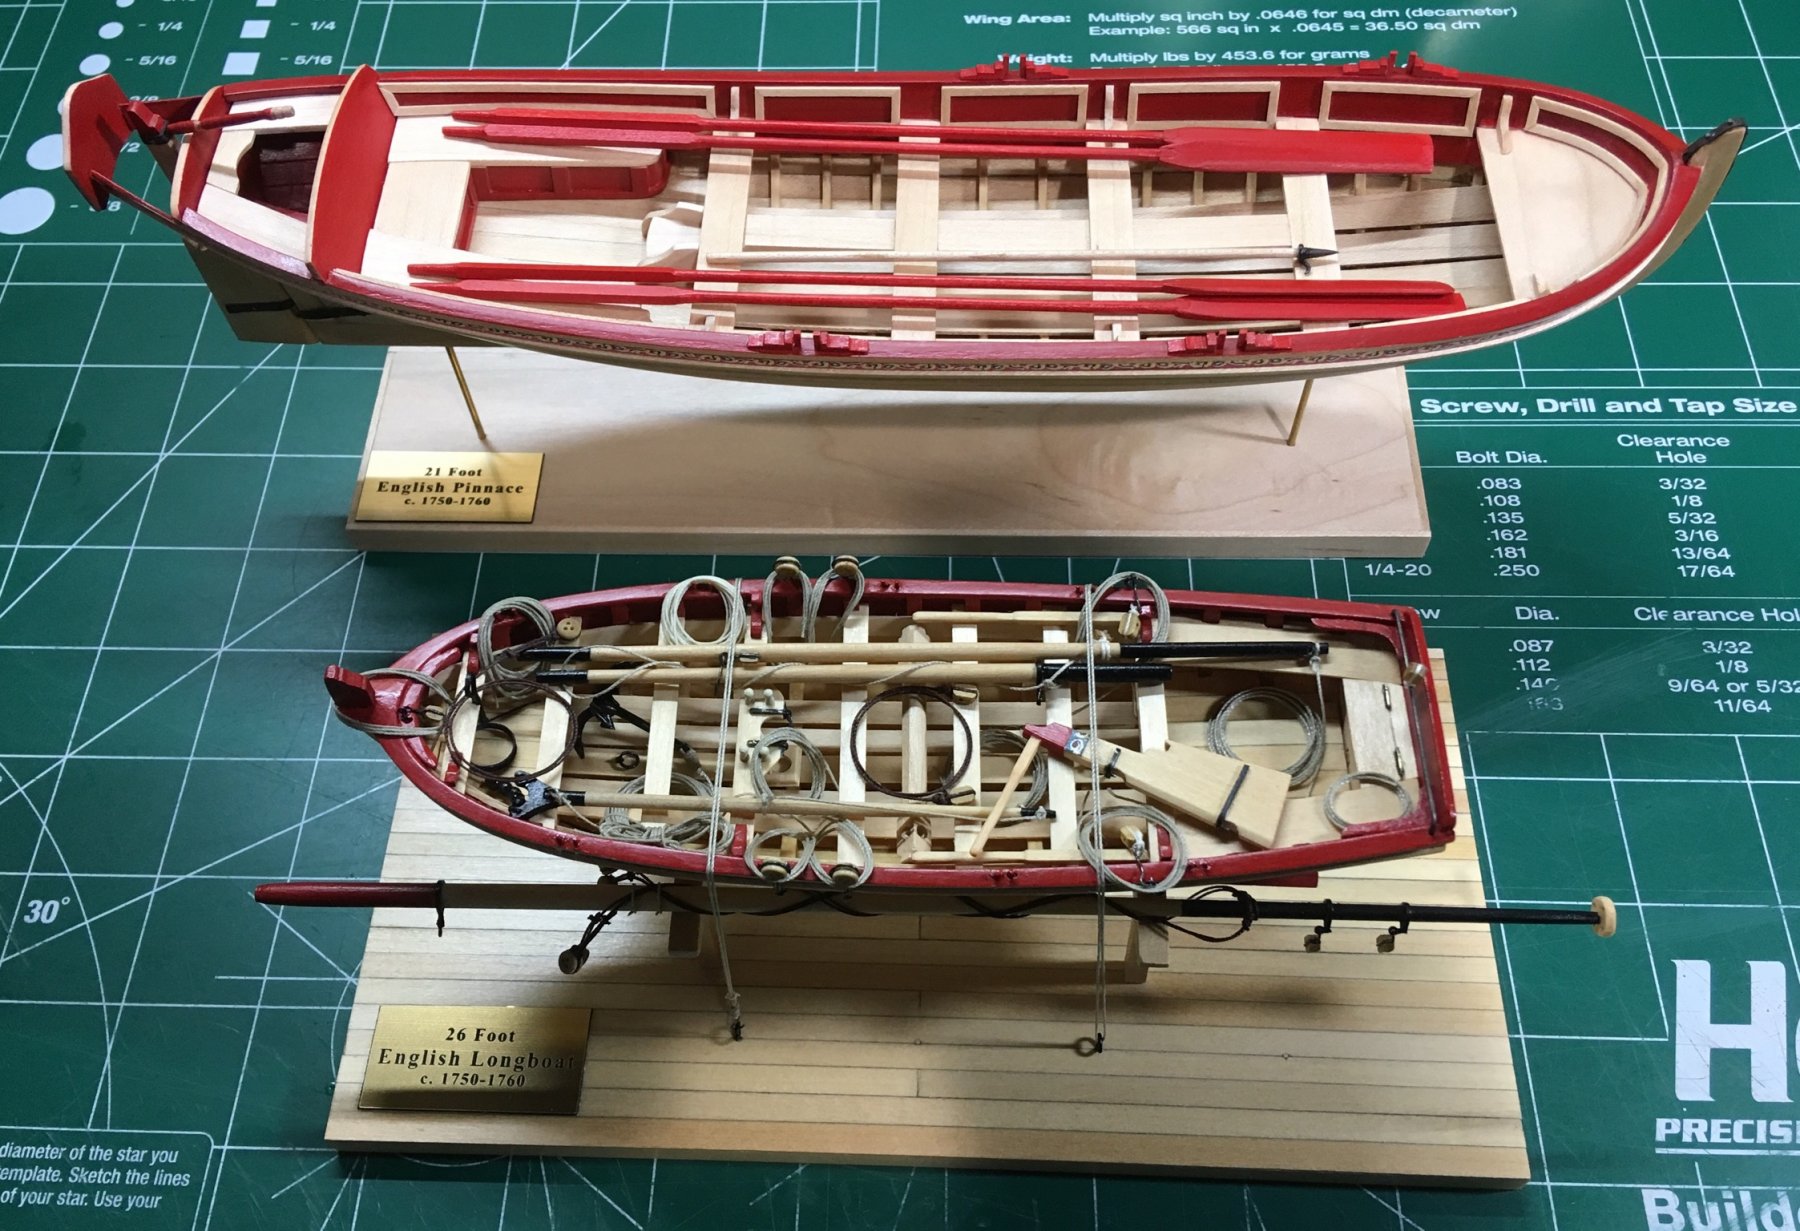
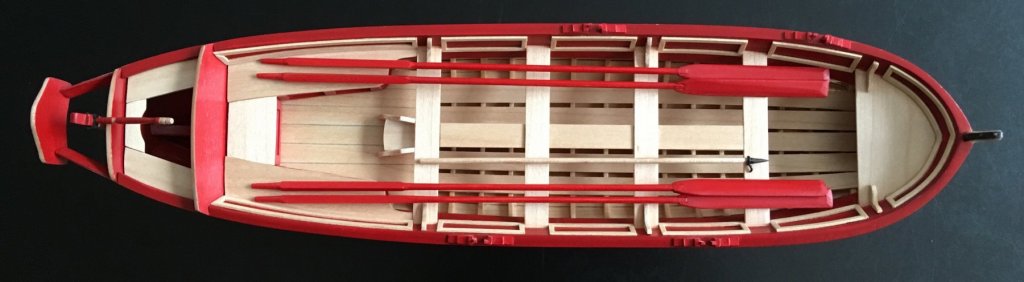
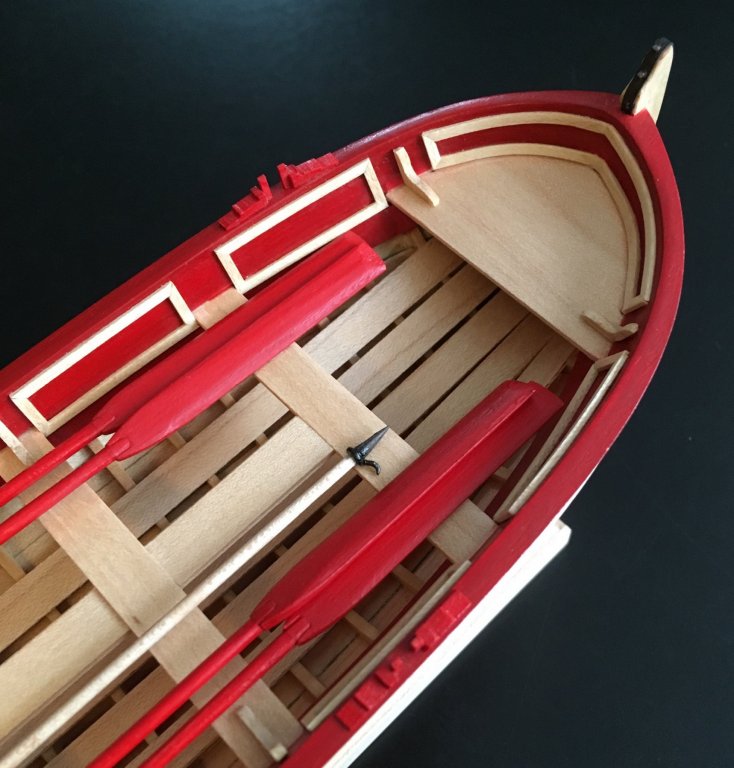
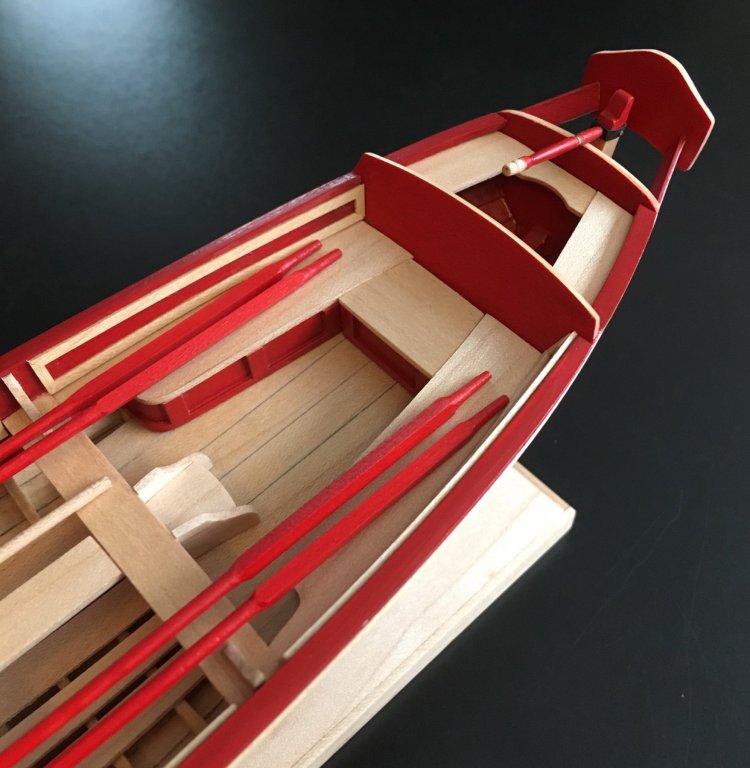
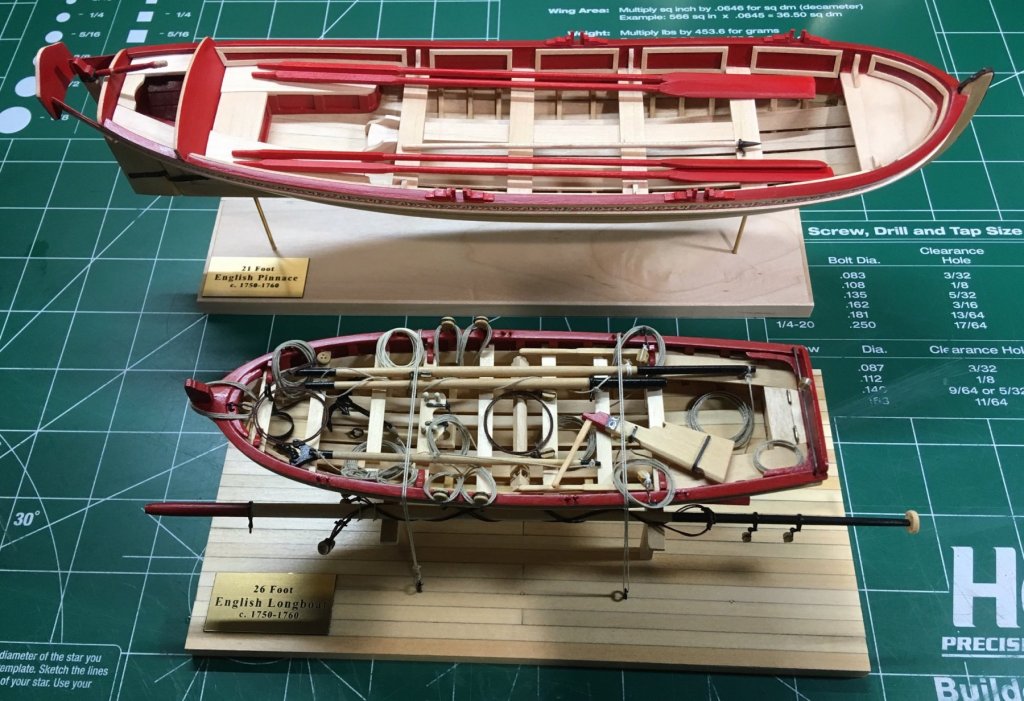
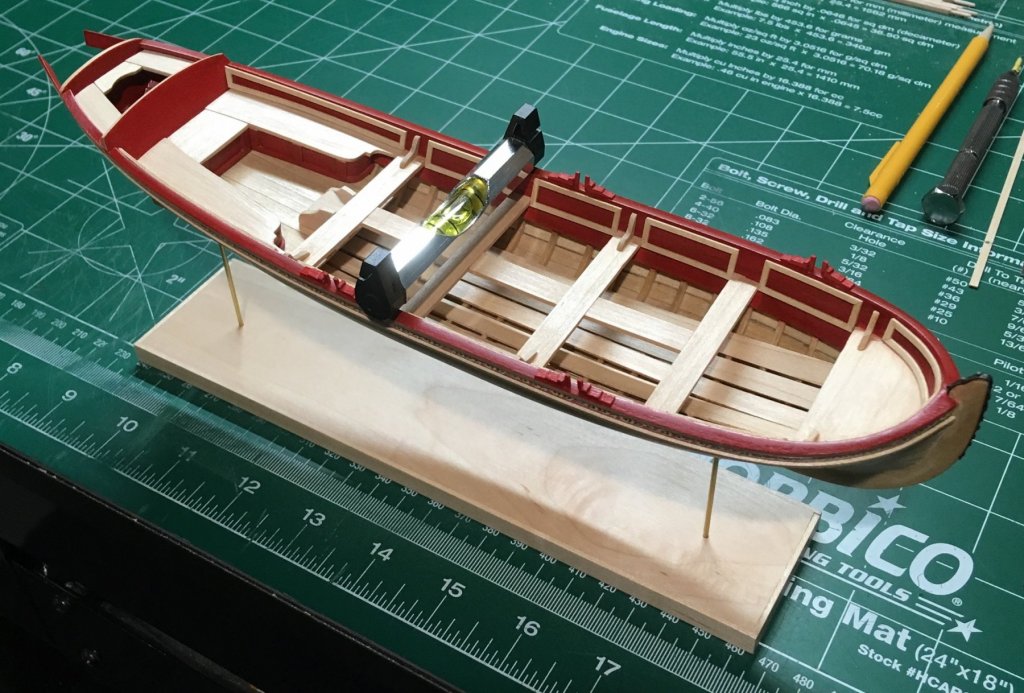
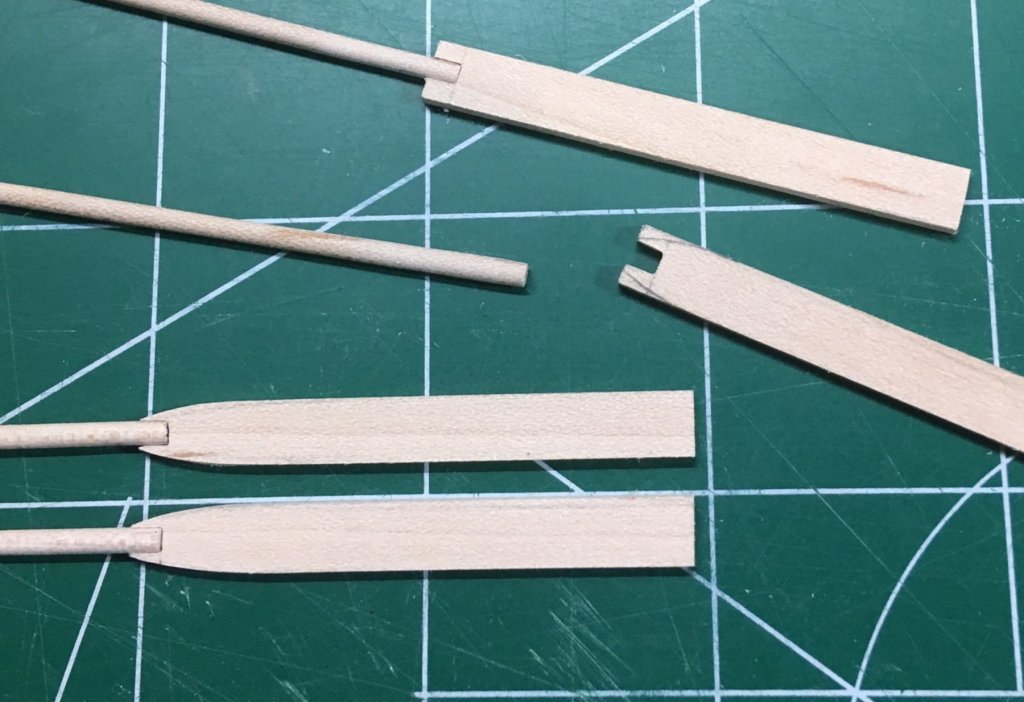
Very happy to close up this project! The boat hook was made with a strip of maple lathed with my rotary tool. I used some wire from the kit to make the hook. I was going to add the grapnel hook and had even made a ring for it with some wire, but the line from the kit was unusable so I tossed that idea as I did not want to invest more money into this project. Some final thoughts and again I will compare this kit with the longboat kit. Both challenging kits for sure. I think the planking on the Pinnace is more difficult due to the length and curves of the hull. Additionally, you must plank inboard. I enjoyed making the modifications such as the panelled supports under the seats and the longboard that runs down the center of the boat. Looking back, I wish I had added the stretchers for the rowers. I think that would have been another nice touch. I decided to leave out the splash guard panels as well. Just for kicks I took the longboat out of its case to take a group photo. Thank you everyone for your interest, likes, and support throughout what was probably the slowest build of the English Pinnace. Steve


- 190 replies
-
- 23
-
-

-
- pinnace
- model shipways
- (and 1 more)
-
Very nice model. Congratulations! Steve
-
Fairing is coming along nicely. Did a bit of shimming myself like some other builders. It doesn’t show on the finished model, but one must be careful to do it neatly. Steve
-
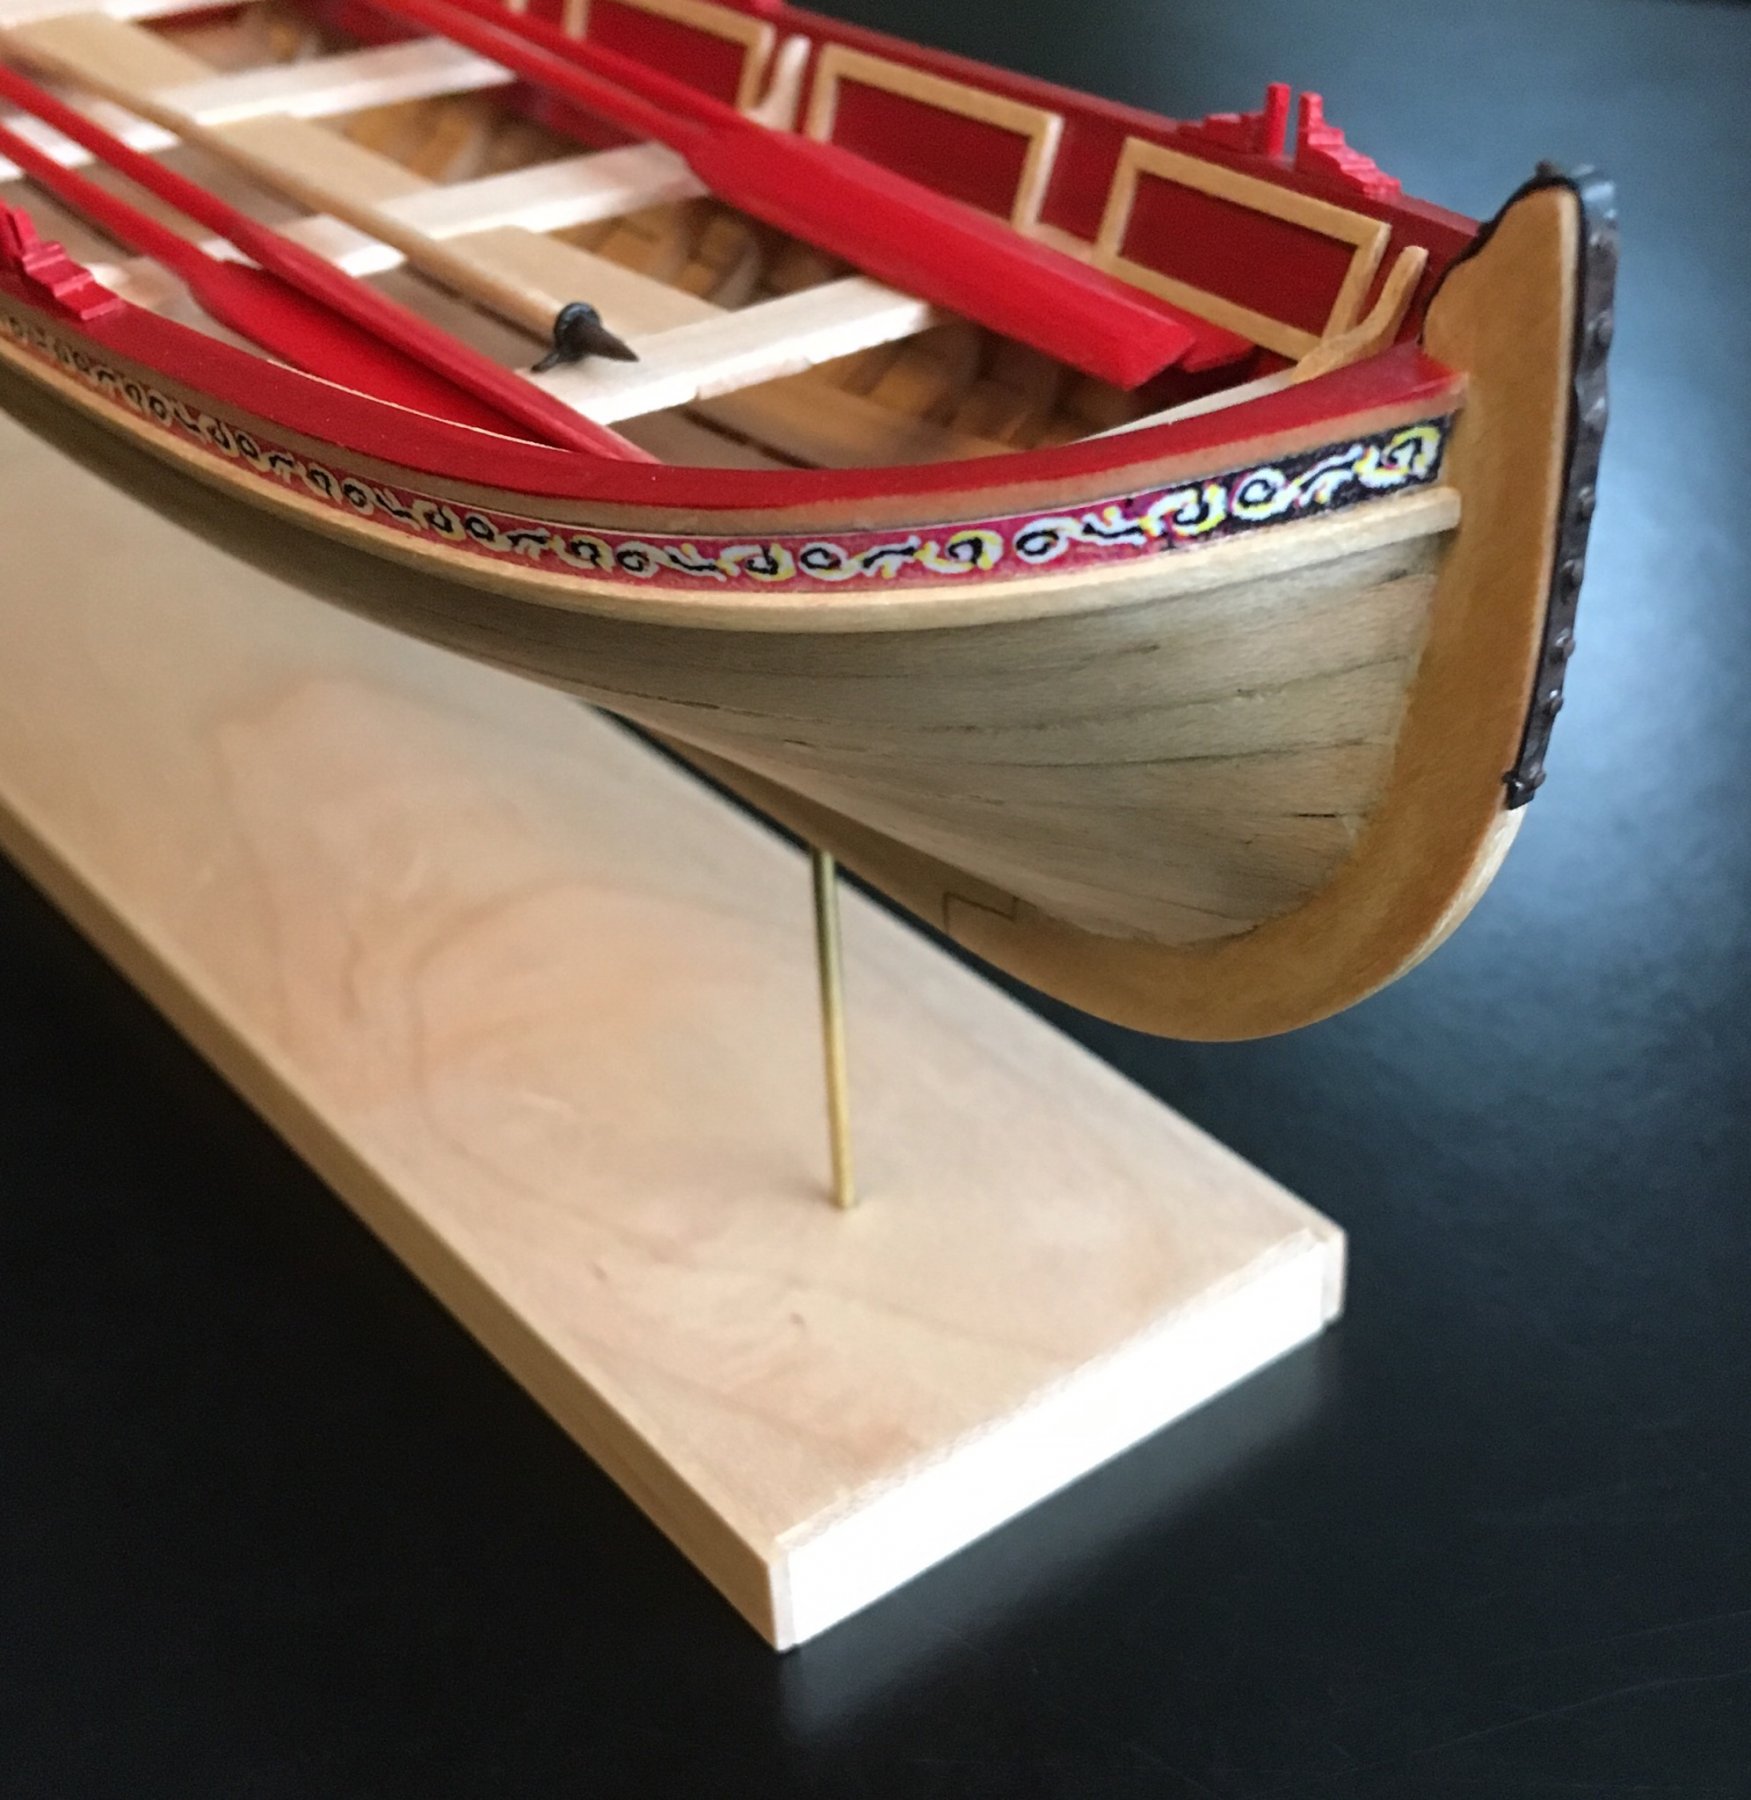
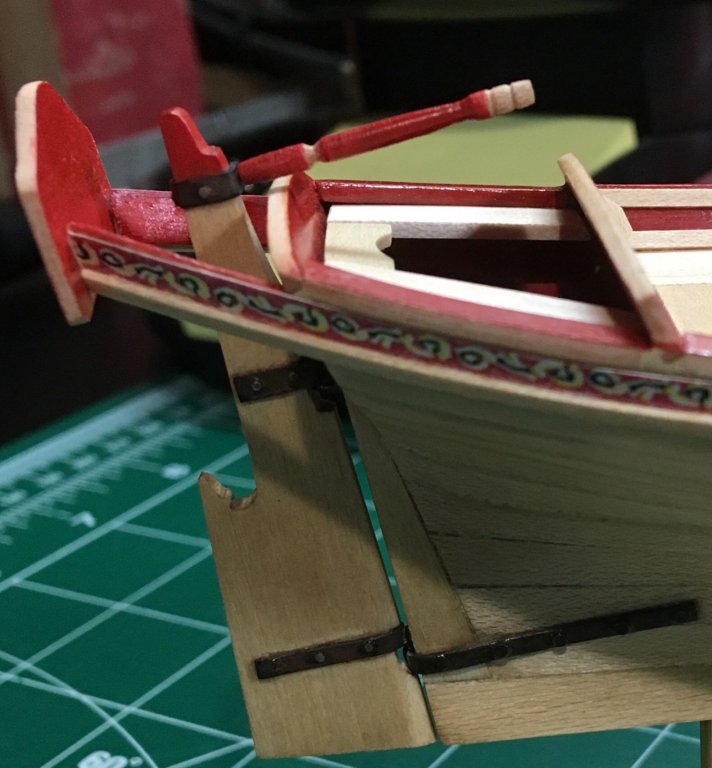
Just about finished up with this project. The rudder and flying transom were installed. The flying transom was tricky to install as you can imagine. The rudder should fit more tightly against the stern, but I had trouble with the fit earlier on and decided to accept it. The brass tubes used to mount the boat were cut down to 1 1/2” and CA was necessary to create the bond for the brass and the display board. After I create the boat hook I will take the final photos. Steve
- 190 replies
-
- 11
-
-
- pinnace
- model shipways
- (and 1 more)
-
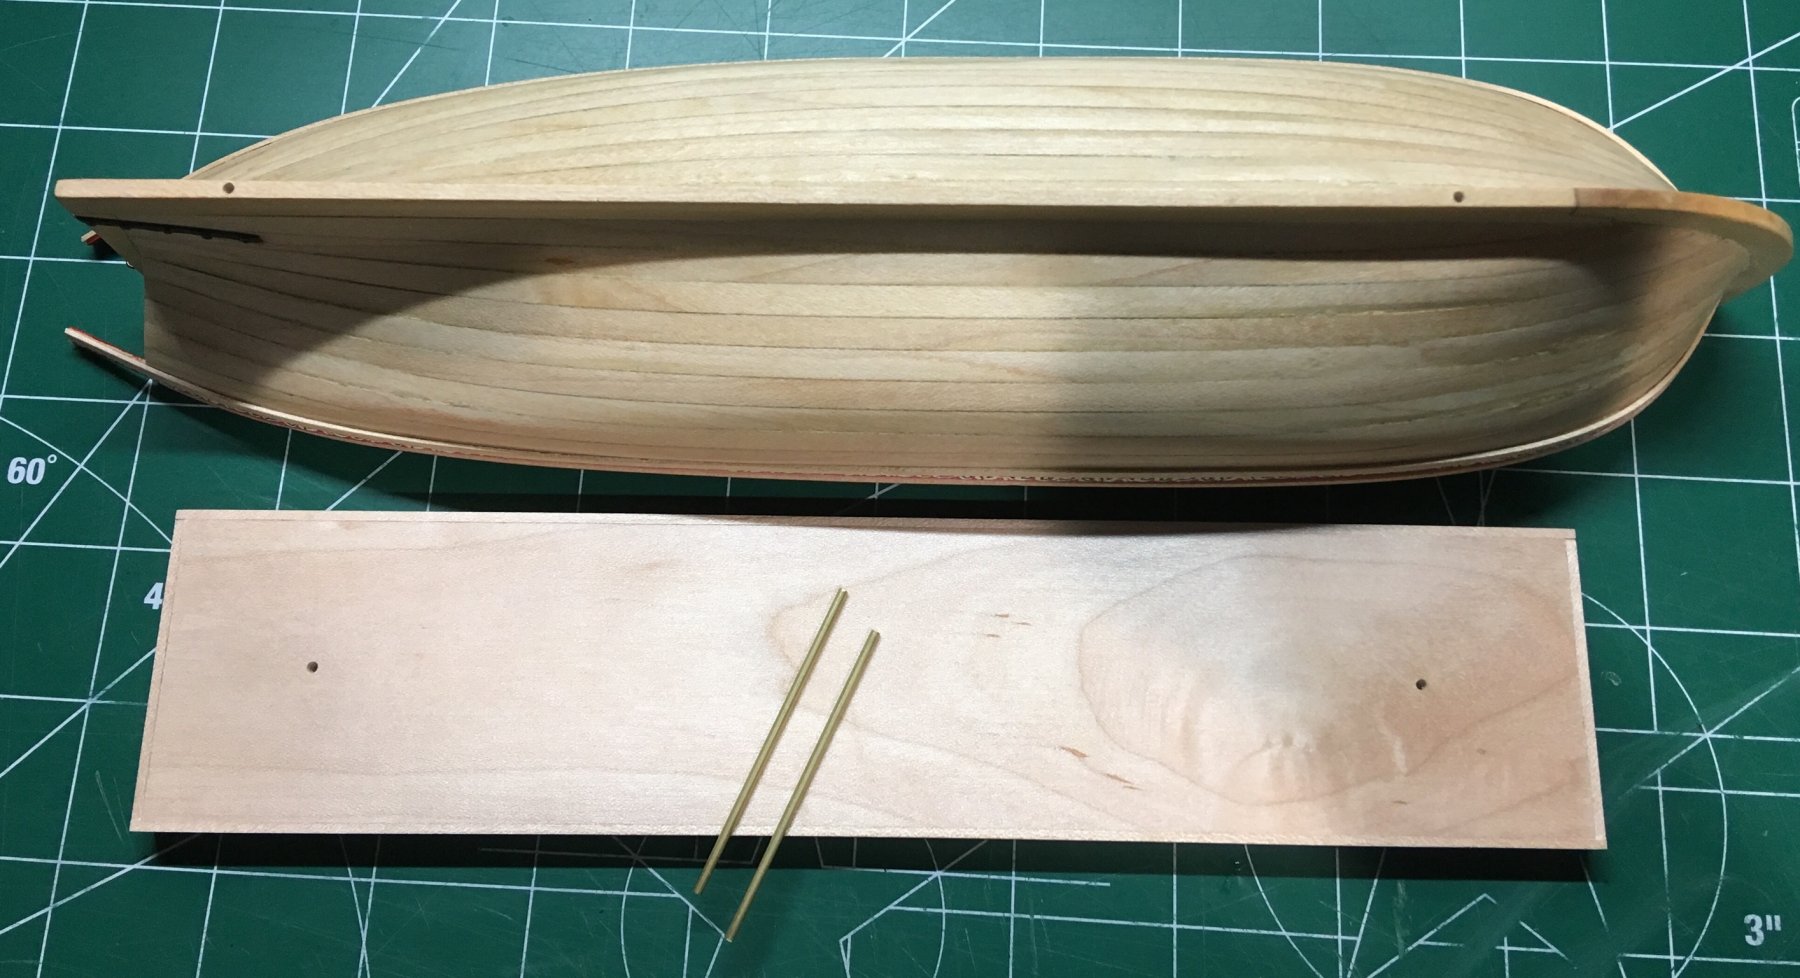
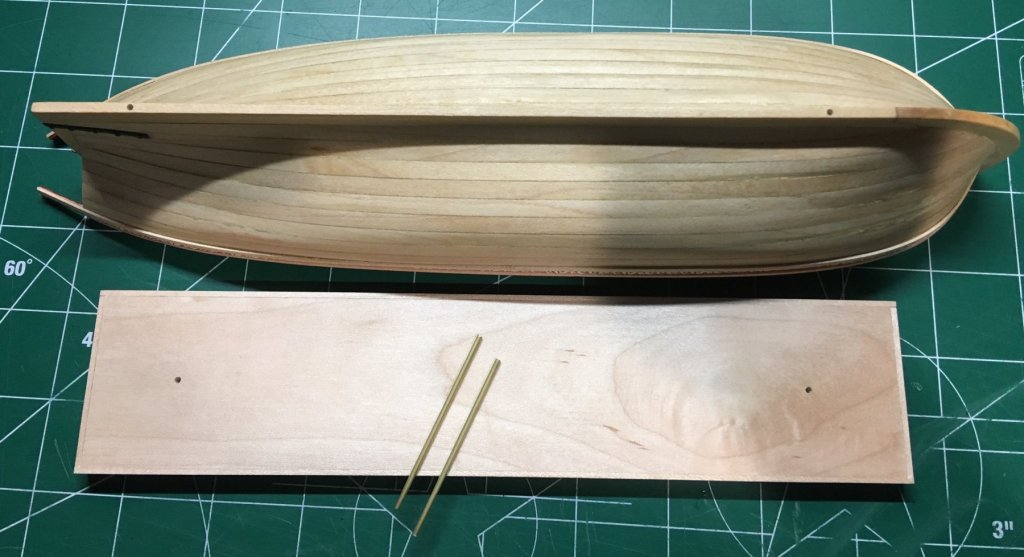
At the start of this project I had a different plan for the presentation. Holes were never drilled into the keel from the start. Drilling them with the boat on your lap is not recommended. It worked fairly well though. Dry fitting reveals holes not drilled perfectly vertical. I opened up the diameter of the holes slightly so everything can be leveled during installation. I’m hoping I can use wood glue for these bonds so I have enough time to adjust the fit. I might cut the brass tubes from 2” to 1 1/2”. The boat is sitting a bit high for my taste. Is it a mistake to use wood glue for this installation? I really need the open time to make leveling adjustments. Steve
- 190 replies
-
- 11
-
-
- pinnace
- model shipways
- (and 1 more)
-
The support strips along the top are sufficient and do not allow much give at all. I think many would agree. I am very interested to see how you proceed with planking. Steve
-
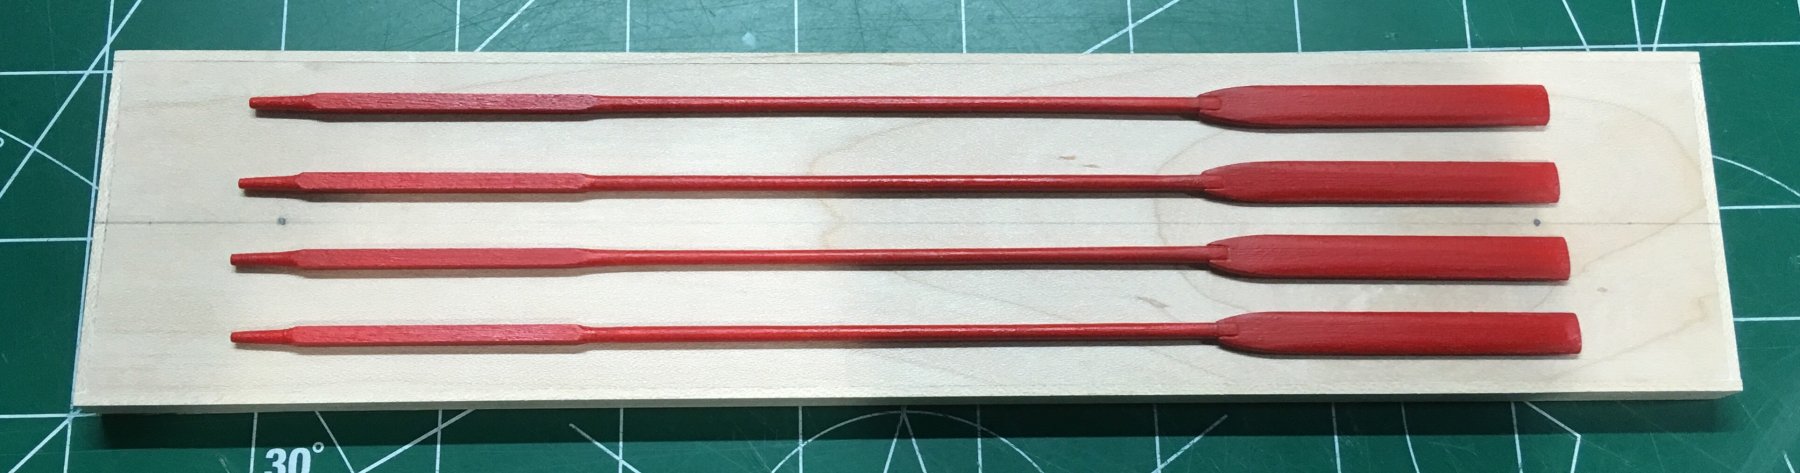
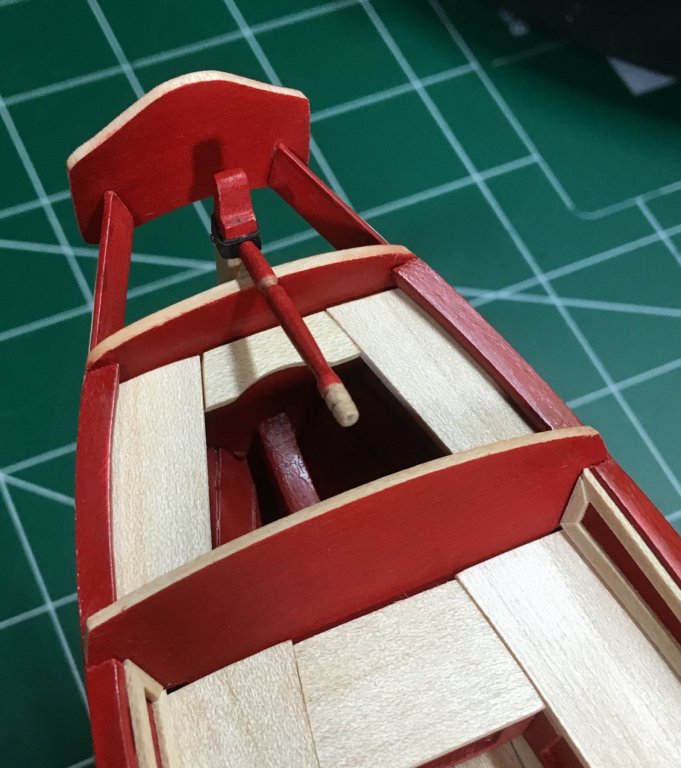
The completed oars rest on the display board, which still needs to be drilled and finished. This was difficult to properly photograph. I’m not sure if I’ll add the boat hook as it looks a bit busy when the oars are stowed in the boat. The boat will be mounted on two 1/16” thick brass tubes inserted into the display board. I was considering blackening them, but I think I’ll leave them as is. The tubes will be cut in 2” lengths. Any advice on this procdure? Cutting disk on the rotary tool or razor saw? Steve

- 190 replies
-
- 14
-
-
- pinnace
- model shipways
- (and 1 more)
-
The new design looks great, Chuck. I say leave scale as is. Feeling very compelled to contradict what I said and build one of these when it’s available. Steve
- 421 replies
-
- 3
-
-
- medway longboat
- Syren Ship Model Company
- (and 1 more)
-
Good points indeed, Cathead and Jim, especially if you look at the amount invested in the kit and the tools. Steve
-
Ok- regarding the rotary tool. You can get one for $20. A good idea even for a beginner. Steve
-
How long is the model going to be? Awesome to watch your kit development take place. Steve
- 421 replies
-
- 4
-
-
- medway longboat
- Syren Ship Model Company
- (and 1 more)
-
Requesting feedback for future MSW Group Projects
Tigersteve replied to Chuck's topic in Group Projects on Model Ship World
Chuck- You could probably just offer a full kit with parts, rope, blocks, etc. I wonder if a starter package is even necessary? This kit will fly off the shelves. Maybe just a choice of Cedar or Cherry wood if possible. Price difference as appropriate. I can’t commit at this point to the group project as I’m about to come off a marathon of building your MS boat kits and need a break from boats. ;-) I will be interested in your kit a bit down the line for sure. Steve -
Thanks for posting that video, Doris. What material are you using? Is it Sculplay? Steve
- 1,035 replies
-
- 3
-
-
- royal katherine
- ship of the line
- (and 1 more)
-
Where is the video you mention on Doris’ sculpting procedure? Steve
- 1,035 replies
-
- 3
-
-
- royal katherine
- ship of the line
- (and 1 more)
-
Agreed- don’t forget to brace the transom. Steve
-
Requesting feedback for future MSW Group Projects
Tigersteve replied to Chuck's topic in Group Projects on Model Ship World
I look forward to your next longboat. Steve