HOLIDAY DONATION DRIVE - SUPPORT MSW - DO YOUR PART TO KEEP THIS GREAT FORUM GOING! (83 donations so far out of 49,000 members - C'mon guys!)
×


Tigersteve
-
Posts
1,327 -
Joined
-
Last visited
Content Type
Profiles
Forums
Gallery
Events
Everything posted by Tigersteve
-
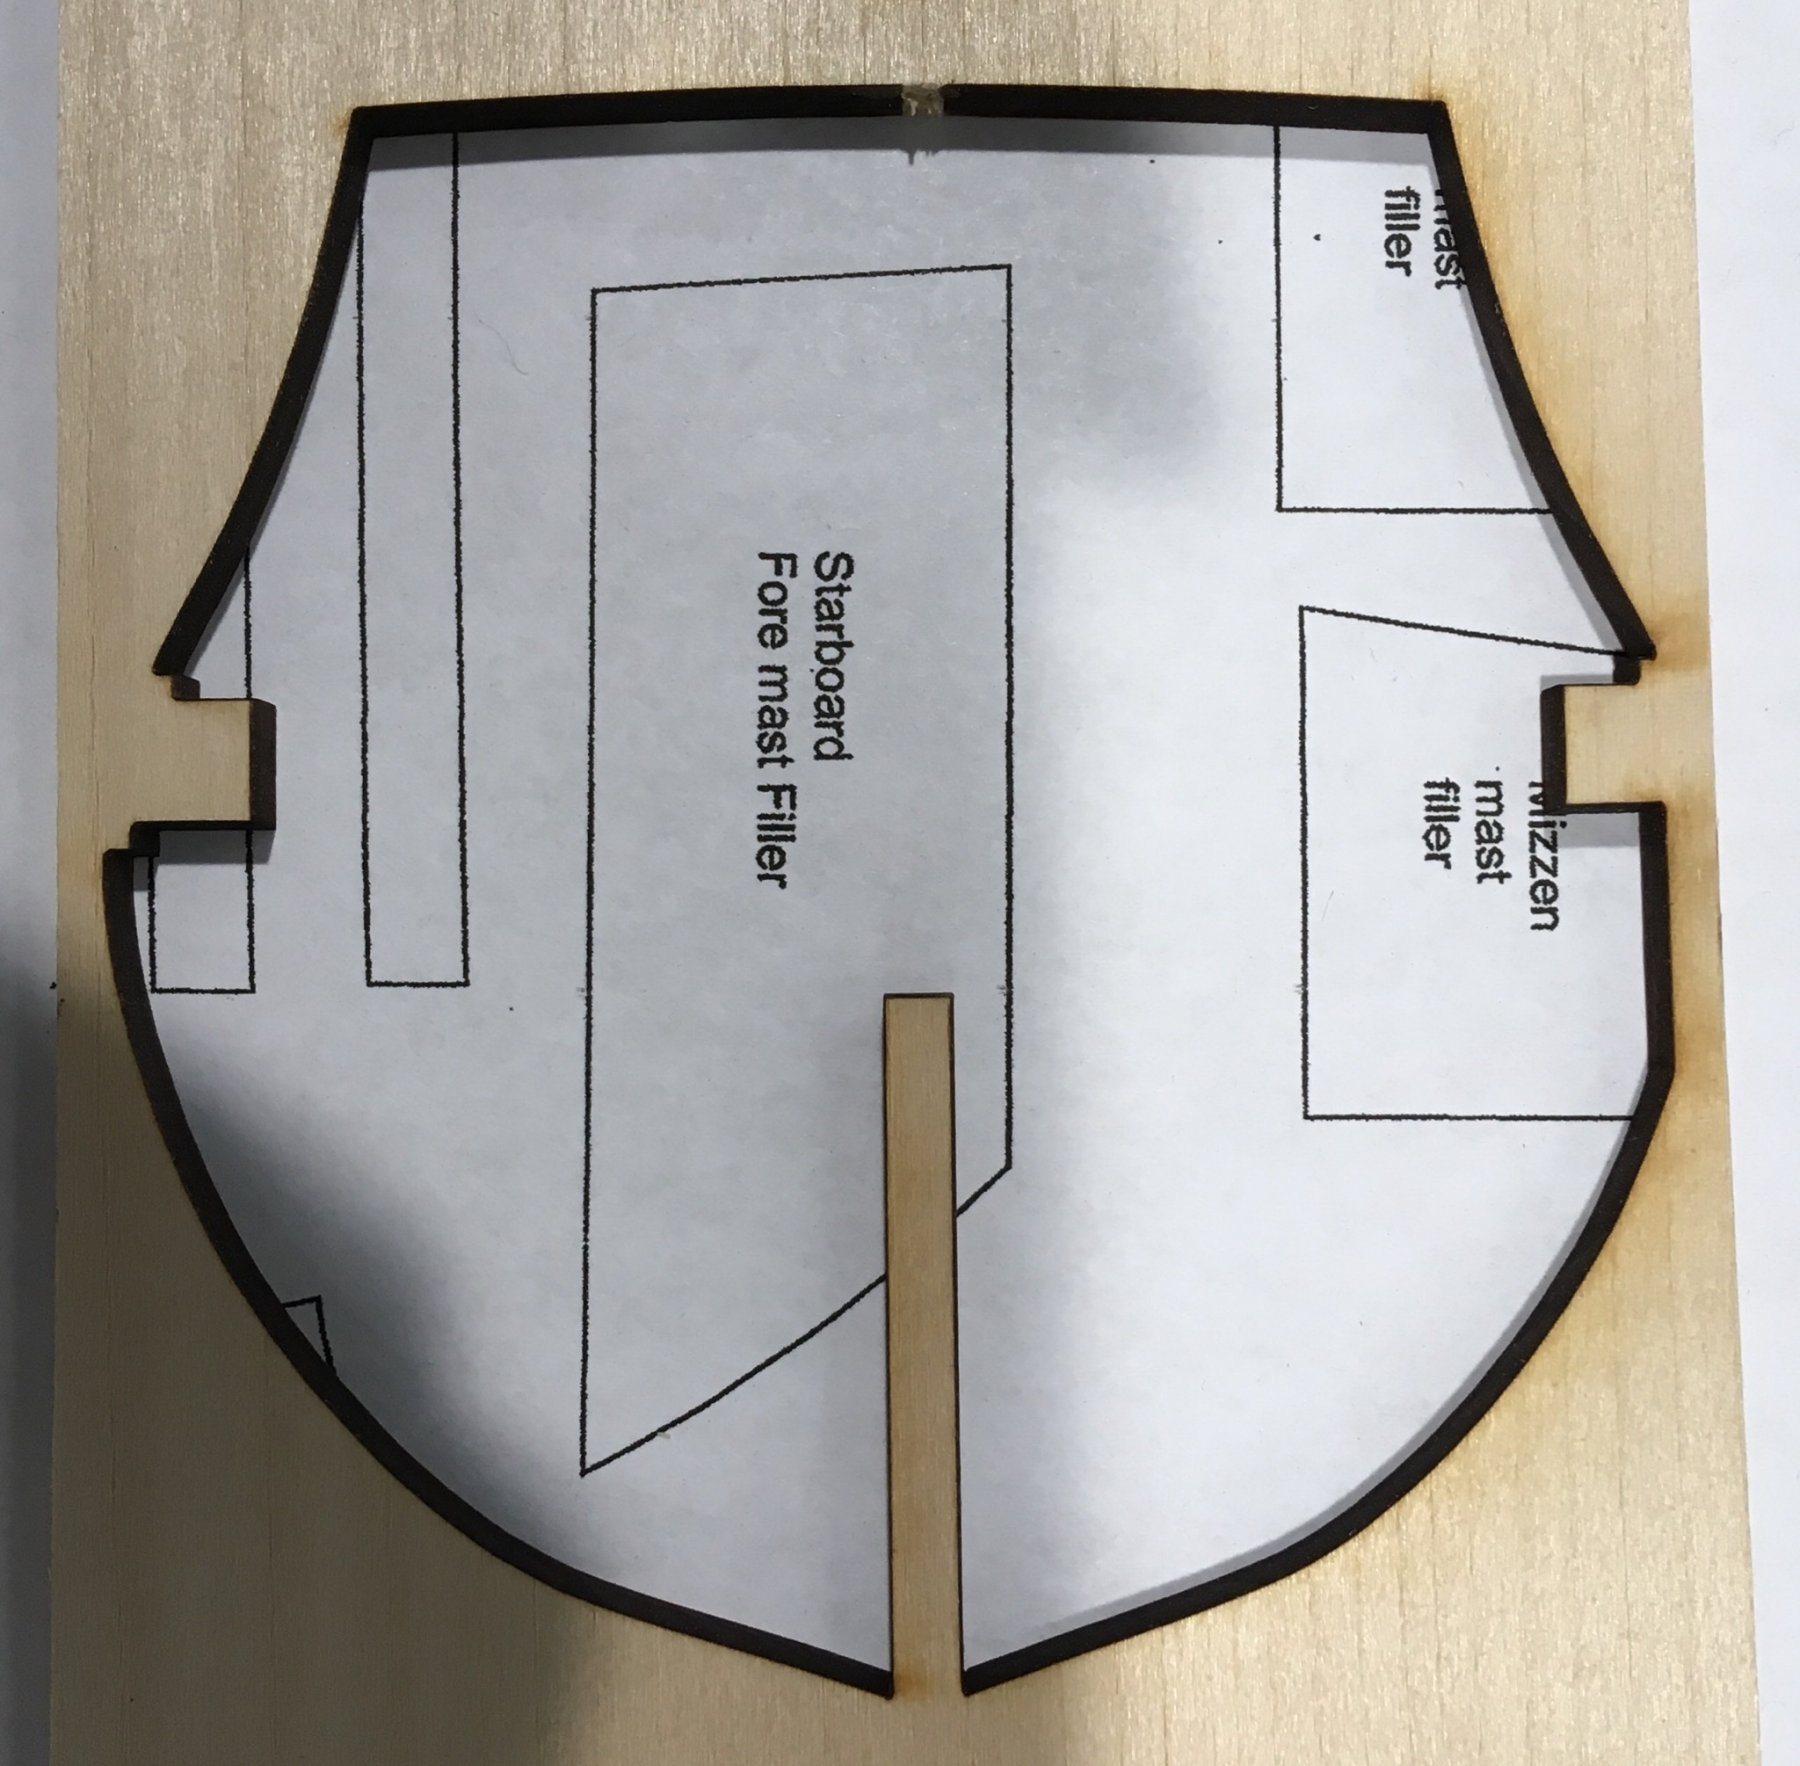
 Good morning, gentleman. I’ll attach a photo of the sheet to clarify. Jim, I do not think it was a design mistake on Chuck’s part. It seems like the shape of the bulkhead was altered by Model Expo to fit the sheet. That still makes little sense. Osmosis, I could definitely contact Model Expo, but at this point I will most likely just make the modification myself. Steve
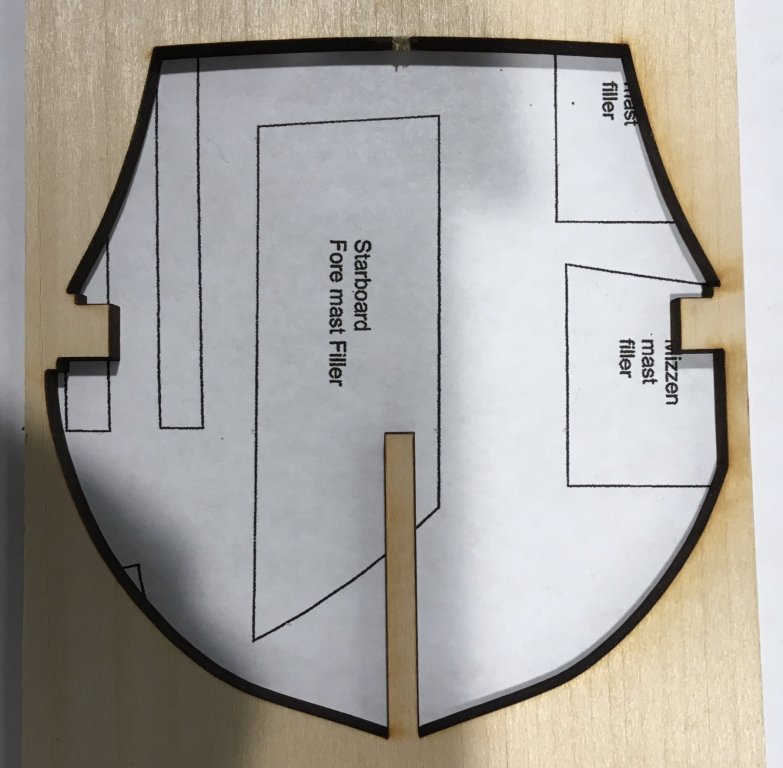
-
As expected there are a couple of discrepancies with Model Shipways’ laser cutting and the plans. Bulkhead 2b is flattened on one side where it should be round. The bulkhead former is not an exact match to plan sheet four. Although, it seems to match on the other plan sheets. Not major issues, but annoying nonetheless. The bulkhead can be adjusted easily enough. I wonder why these discrepancies happen. Steve


-
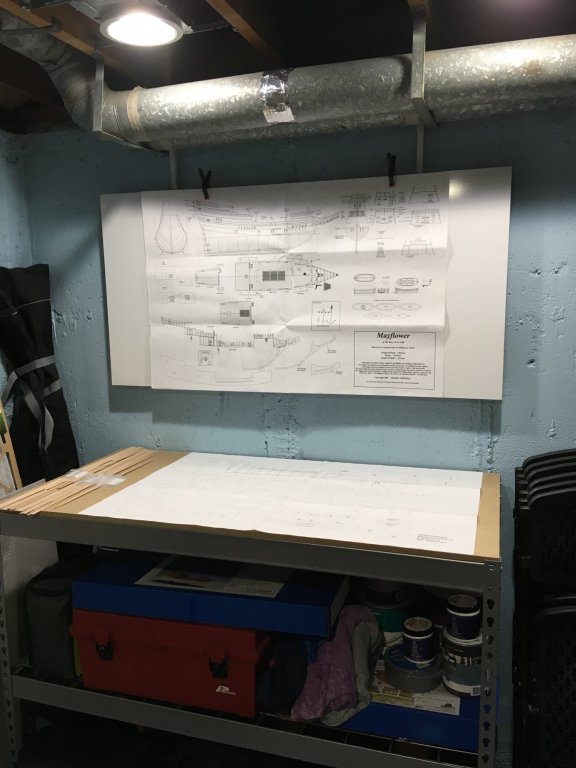
After much planning, trial, and error, I was able to retrofit this dry-erase board to part of my workspace. The board was no more than $10 at Home Depot. Not magnetic, unfortunately. It is mounted with two closet brackets also from HD. Scrap wood was used to space the board from the wall. It holds the Mayflower plans nicely. Steve
-
HMS VICTORY 1765 by albert - 1/48
Tigersteve replied to albert's topic in - Build logs for subjects built 1751 - 1800
Awesome Steve -
Chuck, the model is looking really sharp. Great work. Steve
- 421 replies
-
- 3
-

-
- medway longboat
- Syren Ship Model Company
- (and 1 more)
-
Very clear tutorial. Nicely done! Steve
- 1,035 replies
-
- 7
-
-
- royal katherine
- ship of the line
- (and 1 more)
-
Hi Ken, All of the photos. Very strange. Steve
-
Looks great! Make the rest now while you have the momentum. Steve
-
What happening with the distorted photos, Ken? Steve
-
Congratulations an a fantastic model. Steve
- 1,350 replies
-
- 3
-
-
- constitution
- model shipways
- (and 1 more)
-
Hi Moab and welcome. There are a couple of sources I will check out. https://www.crowntimberyard.com/ http://www.ocoochhardwoods.com/ Steve
-
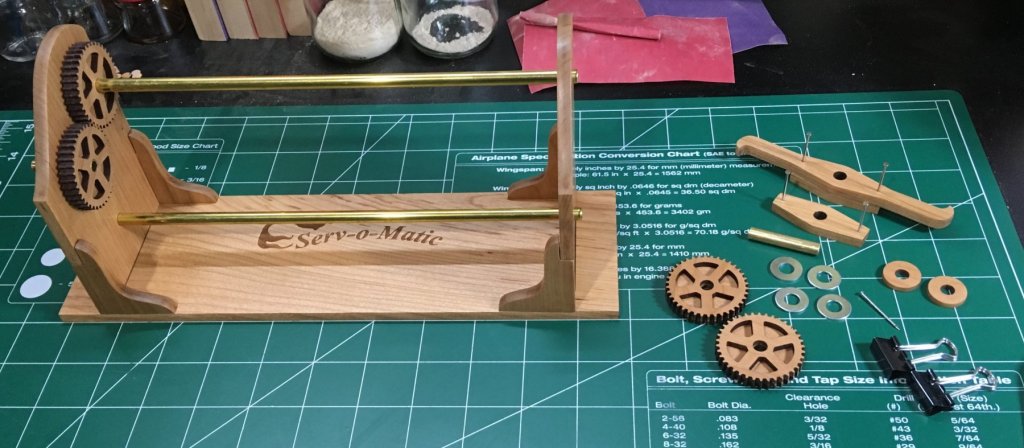
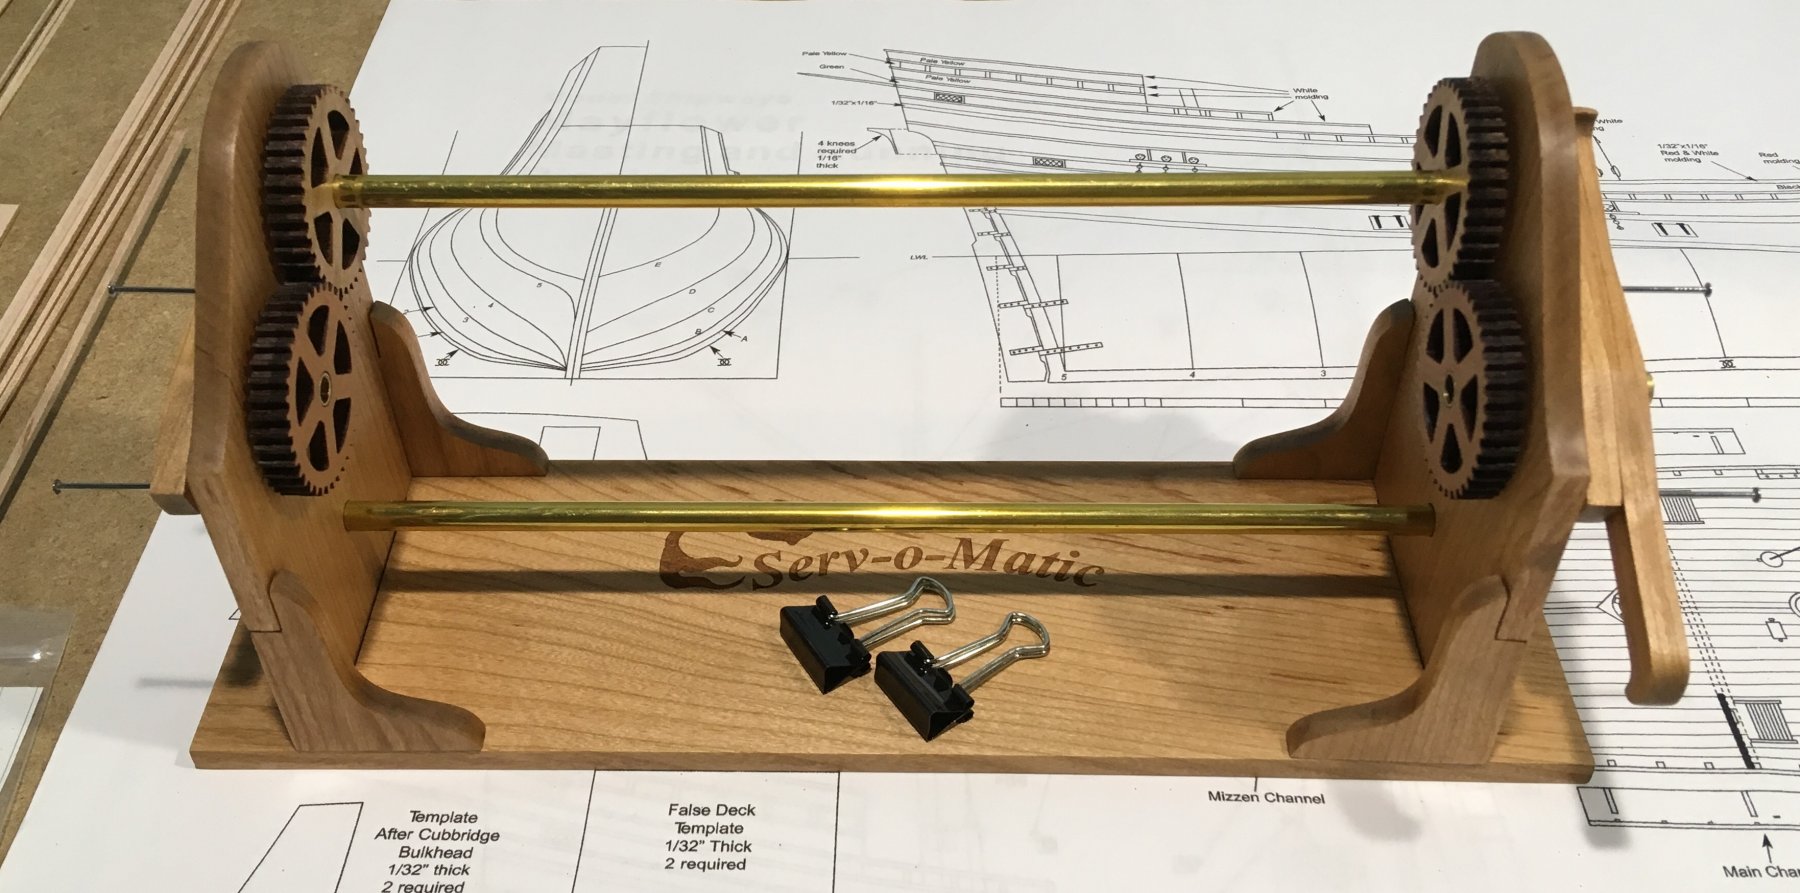
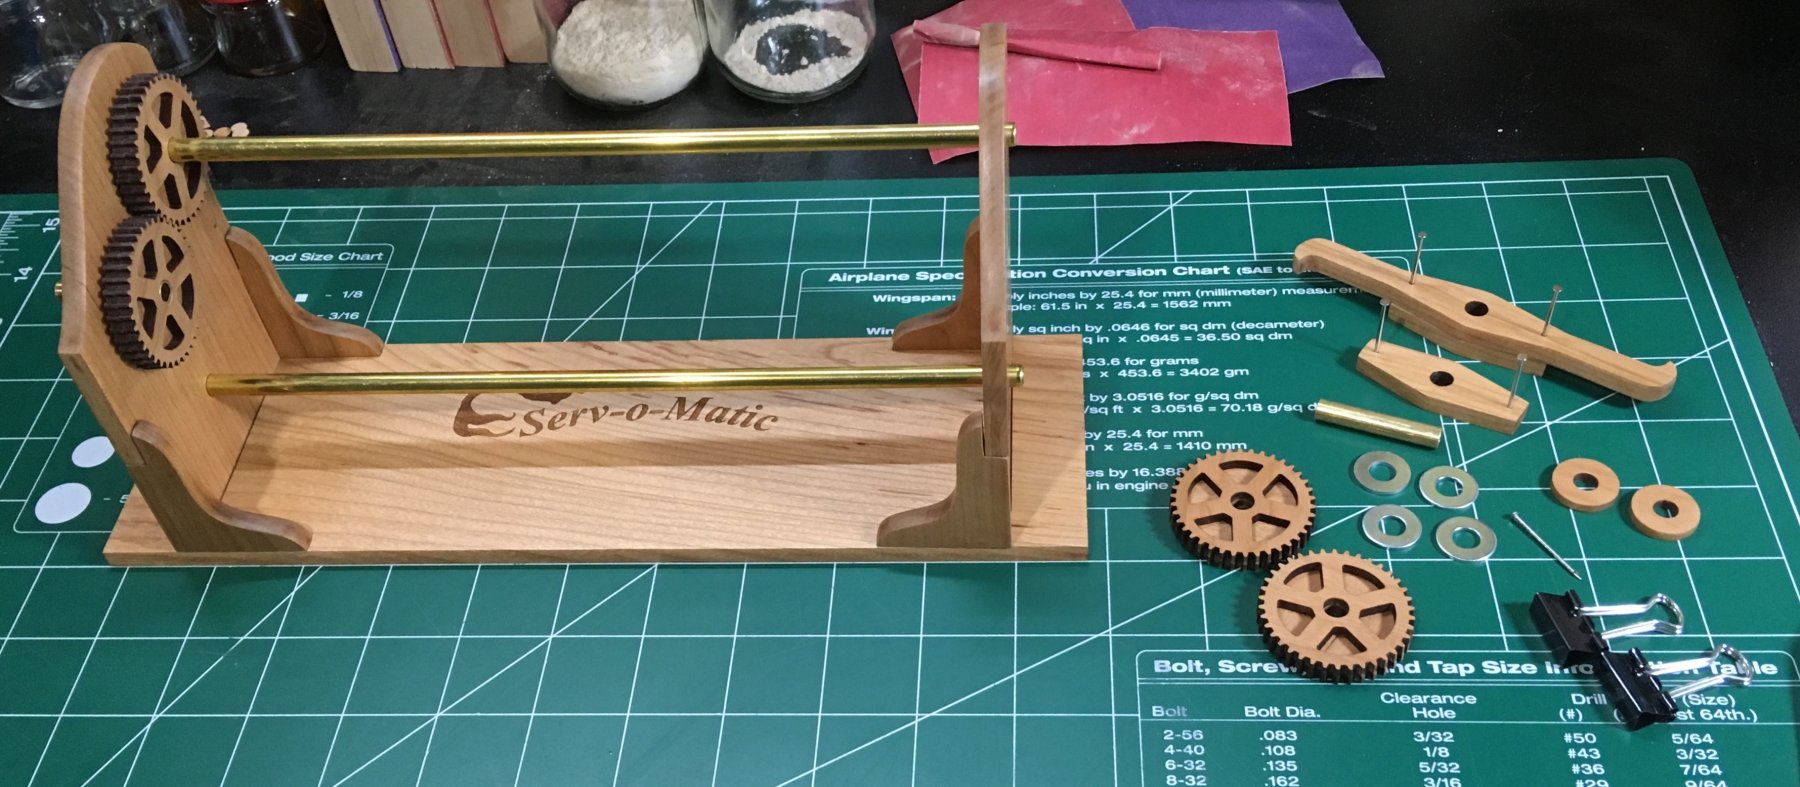
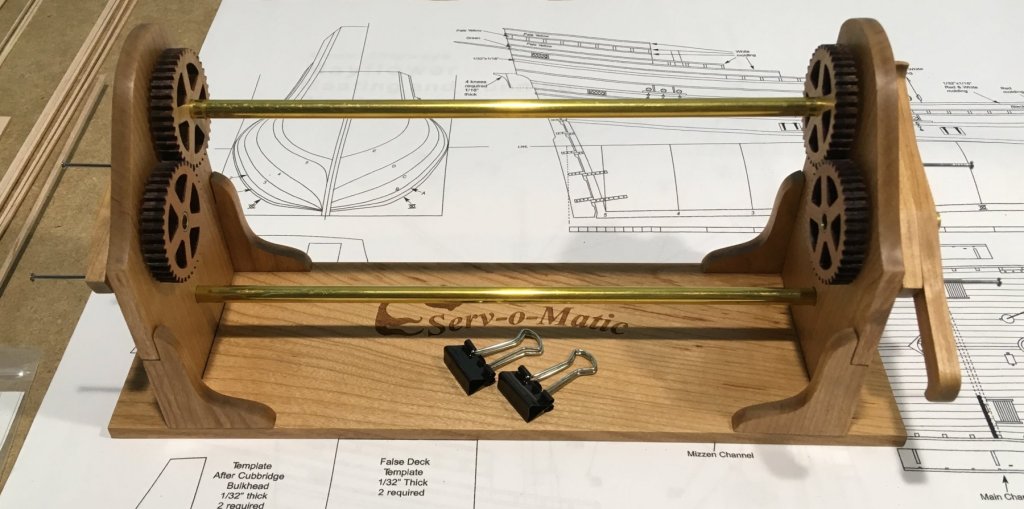
Probably not the smoothest functioning Serv-o-Matic, but it’s functioning fairly well and complete. Chuck sent me a new set of gears so I have a couple of extras. I’m making a couple of adjustments to my workspace. Mayflower construction will begin soon Steve
-
Disk attachment. The drum attachment will destroy the frames. Steve
- 90 replies
-
- 1
-
-
- english pinnace
- Finished
- (and 1 more)
-
Would the baseboard in cedar be too soft? Steve
- 421 replies
-
- 3
-
-
- medway longboat
- Syren Ship Model Company
- (and 1 more)
-
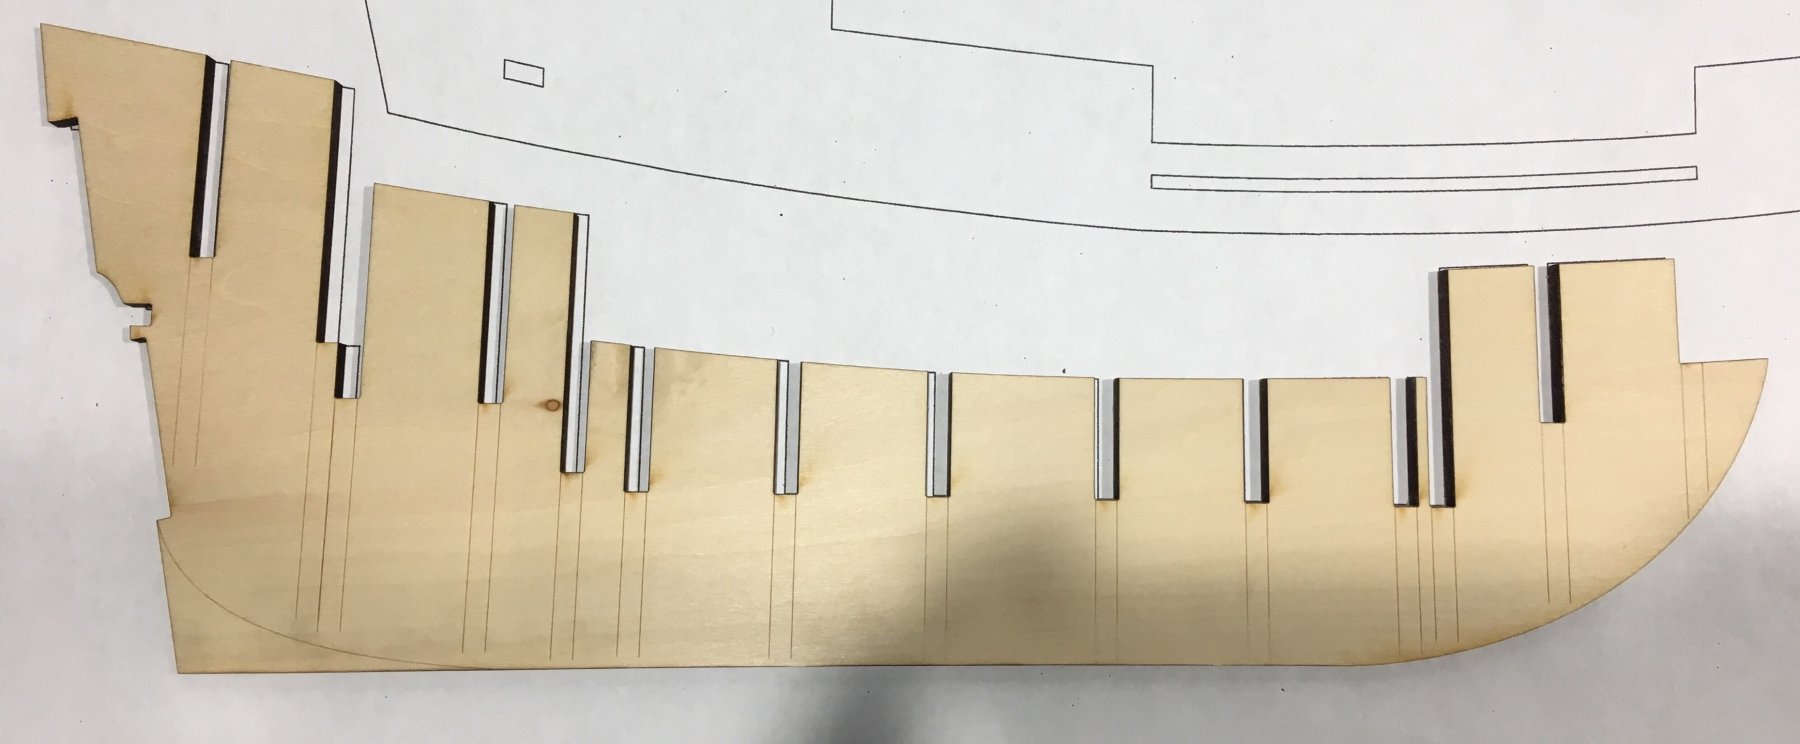
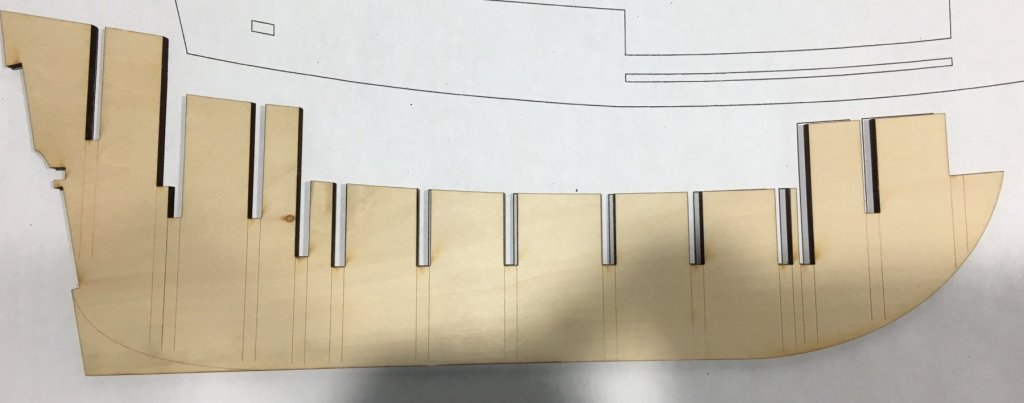
Good choice. Lots of sanding next. I was able to use my rotary tool for some of the sanding, especially at the bow and stern. You would need to be careful though. I hit this part in several sessions. It’s tedious, but very important. All the remaining work rests on these frames, which need to be very thin. Steve
- 90 replies
-
- 1
-
-
- english pinnace
- Finished
- (and 1 more)
-
Thank you. It is a beautiful machine. I’m not looking forward to gluing with CA, but it must be done. The cherry wood is very nice and perfect for this. I’m looking forward to clearing this little project off the work space and starting the Mayflower. Steve
-
Partial assembly of the machine. The gears are not glued to the brass tubes. I suggest test fitting the gears and rotating them before you glue to make sure they rotate freely. Two of my gears were just a bit off when I glued them and this caused them to not rotate freely. Parts are laser cut precisely. Chuck is mailing me some new ones. Before assembly, a third sanding and coat of Wipe-on-Poly was applied. A very smooth finish was the result. Steve