Tigersteve
-
Posts
1,327 -
Joined
-
Last visited
Content Type
Profiles
Forums
Gallery
Events
Everything posted by Tigersteve
-
 Luckily I did another dry-fit before any gluing. Turns out there was an error in marking the longboard location on the thwarts. Either that or I misfiled the notches. I should be able to redo two of the four thwarts and be more on point. This particular modification with the longboard is tricky. A slight error becomes very obvious. This revision will take a while. I will post after all is installed. Steve
- 190 replies
-
- 7
-

-
- pinnace
- model shipways
- (and 1 more)
-
Really fine work all around. Steve
-
Very nice work. Steve
-
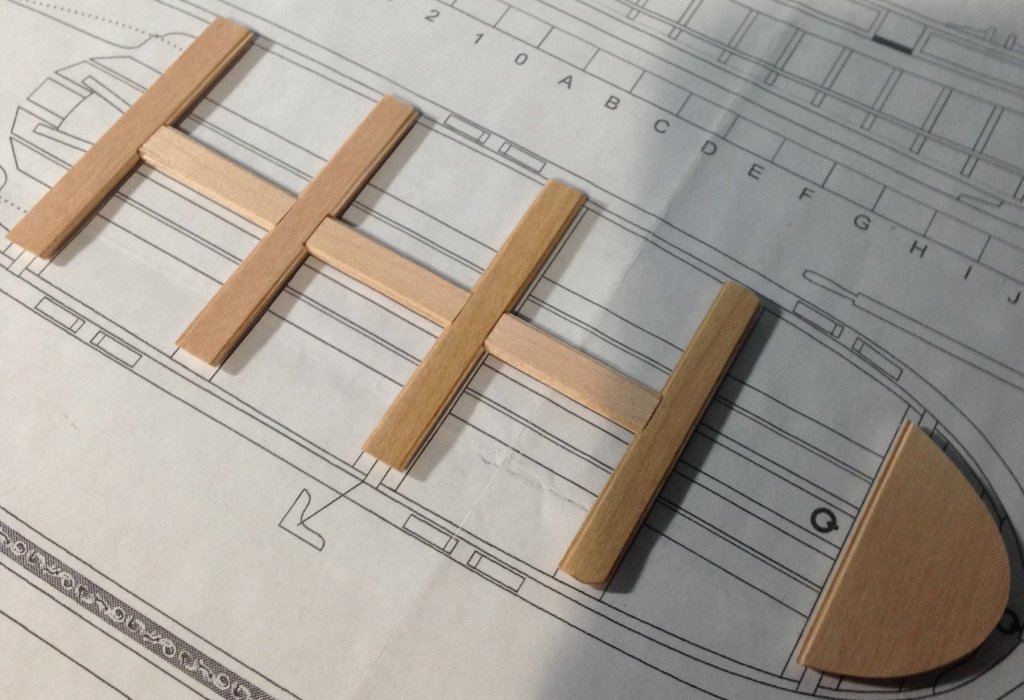
The thwarts were recut and scrap wood was used to keep the proper spacing according to the plans. The grooves were made with a hand razor saw and miter box. After all thwarts were cut and placed, I used a scrap piece of the same width to mark the center lines for the longboard. The notches were filed last. Here's a photo after two coats of Wipe-on-Poly. I plan to glue all this together prior to installation. Steve
- 190 replies
-
- 11
-
-
- pinnace
- model shipways
- (and 1 more)
-
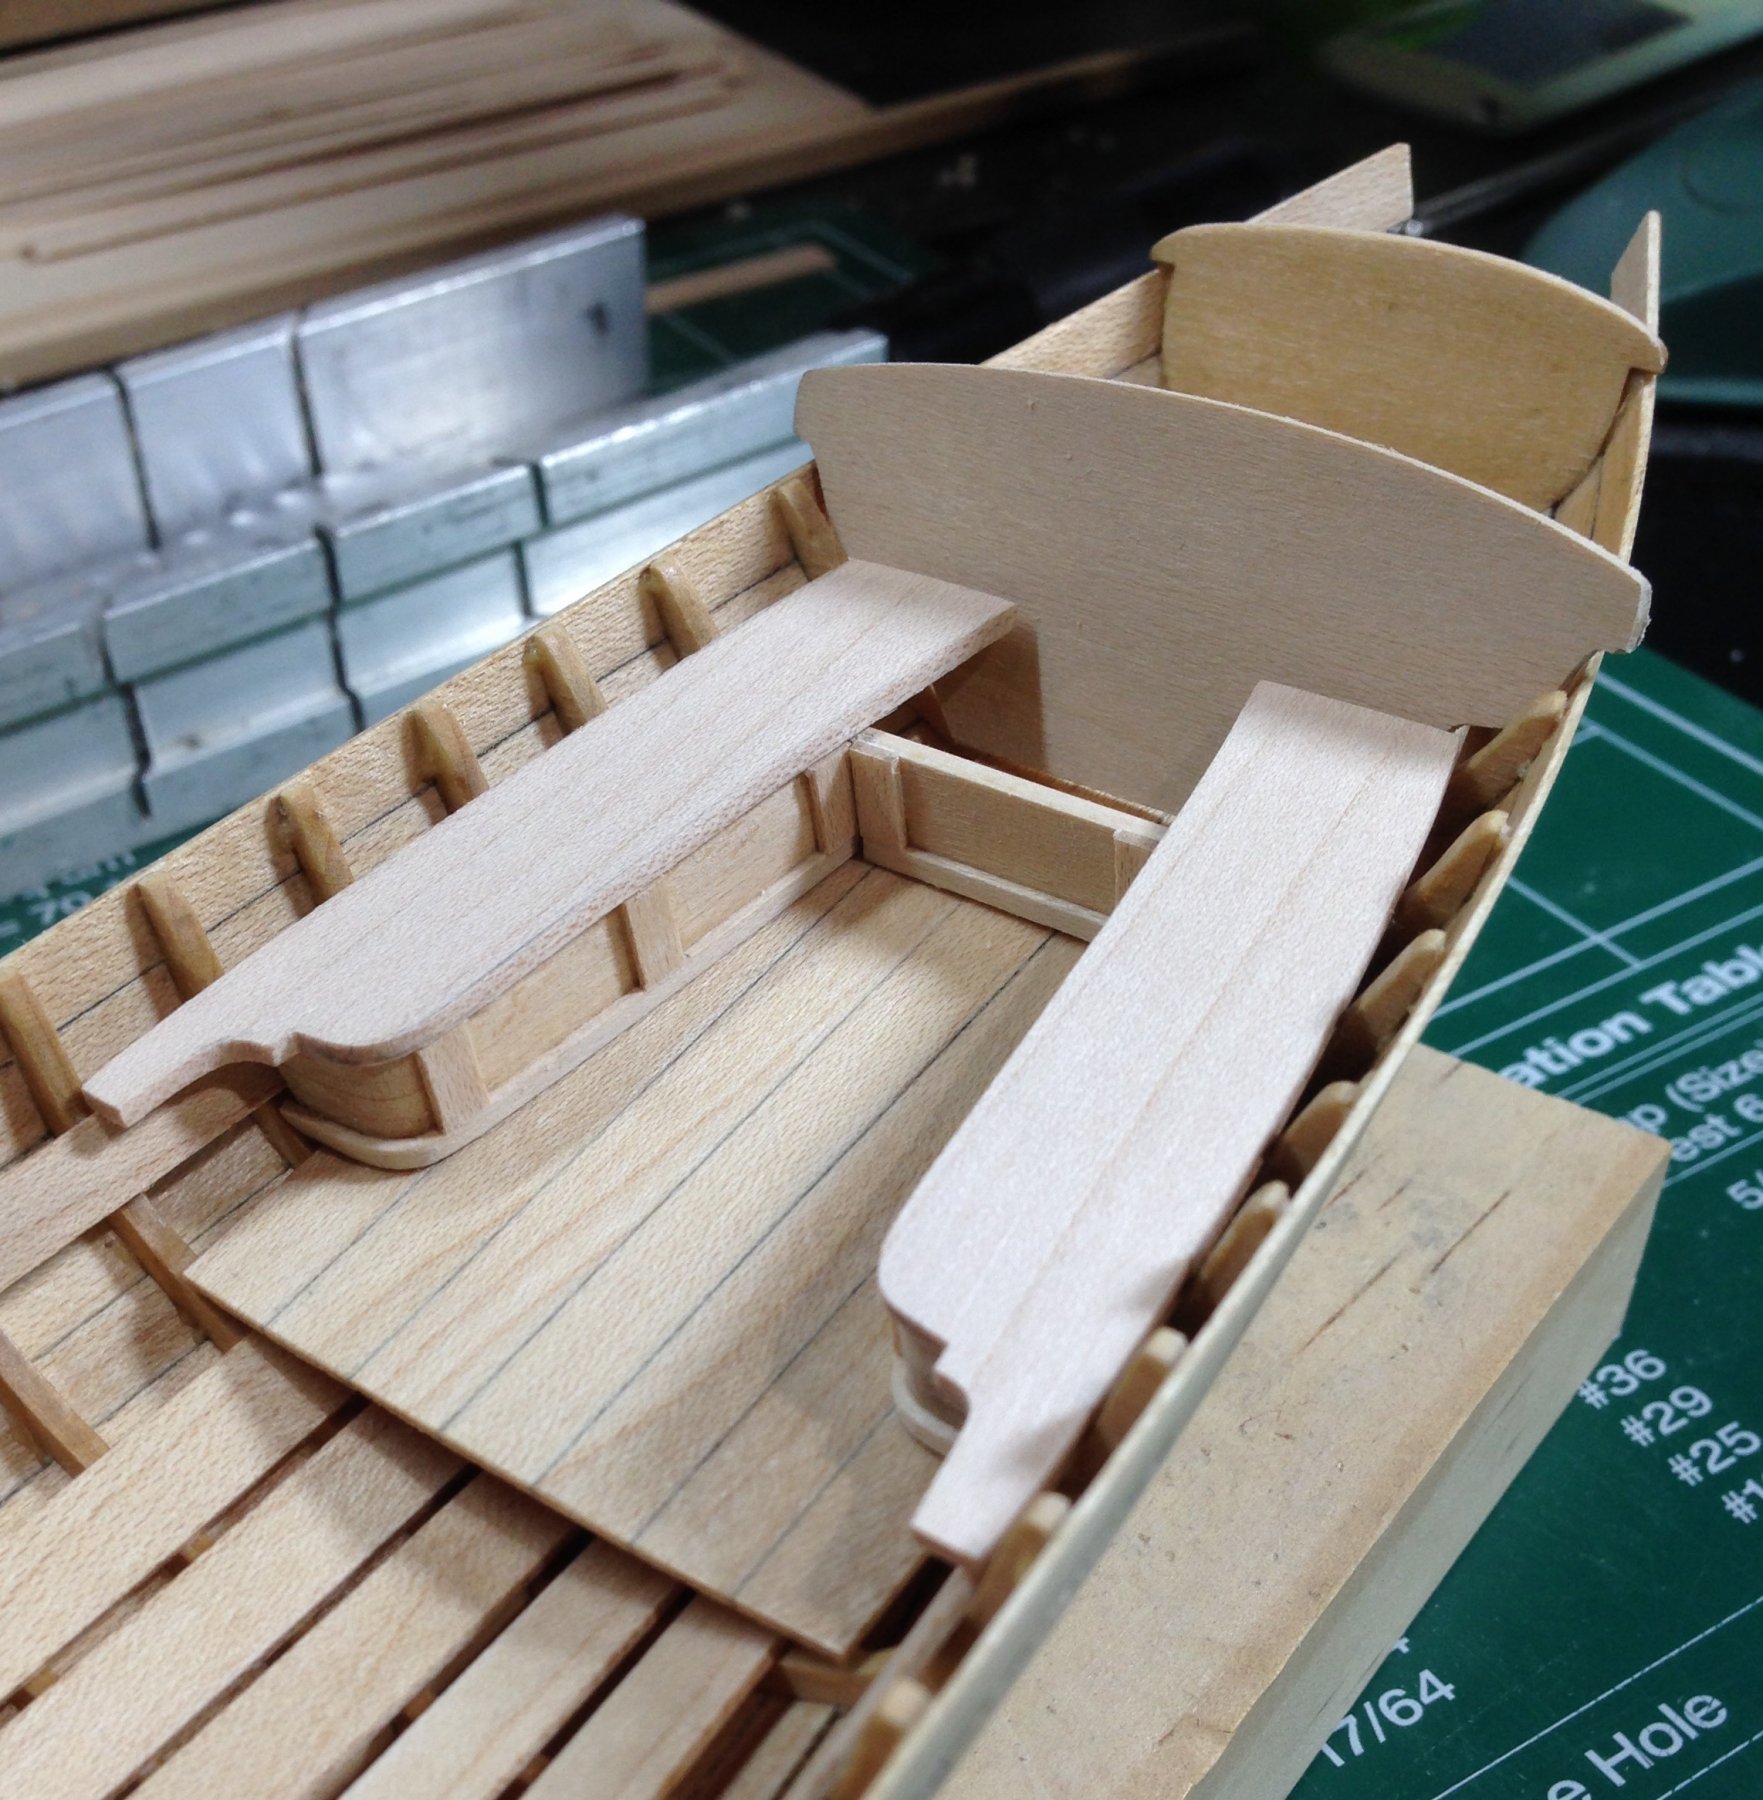
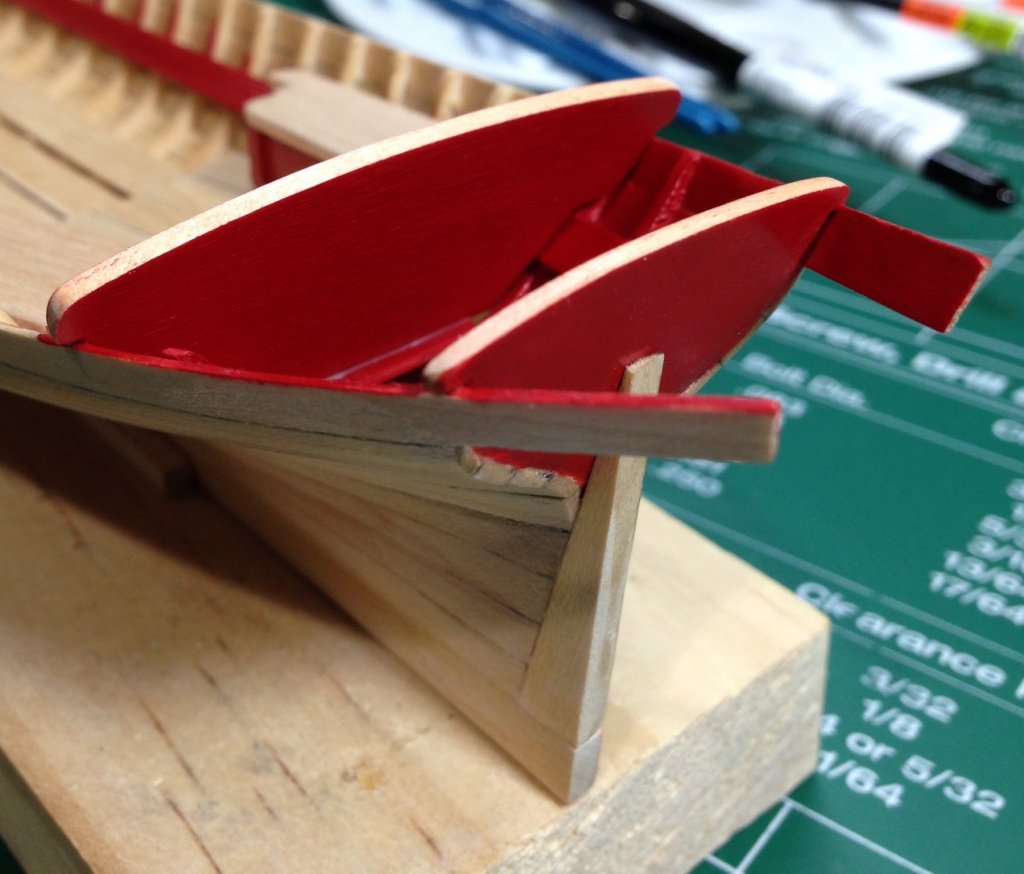
Thanks everyone! I will remake some of the thwarts. Mike is correct. They should butt up against the frames. Installed the stern post, cockpit seats, and seat supports. Steve
- 190 replies
-
- 13
-
-
- pinnace
- model shipways
- (and 1 more)
-
Thought I'd take a small break from painting to dry-fit all parts again. While there are several more coats that need to be applied, I believe it's getting closer to an acceptable finish. In this dry-fit I am looking at the thwarts and questioning if they butt up against the frames enough. I feel I may need to redo these so they butt up against the frames more. Any thoughts fellow Pinnace builders? Will this be a problem during inboard planking? Steve
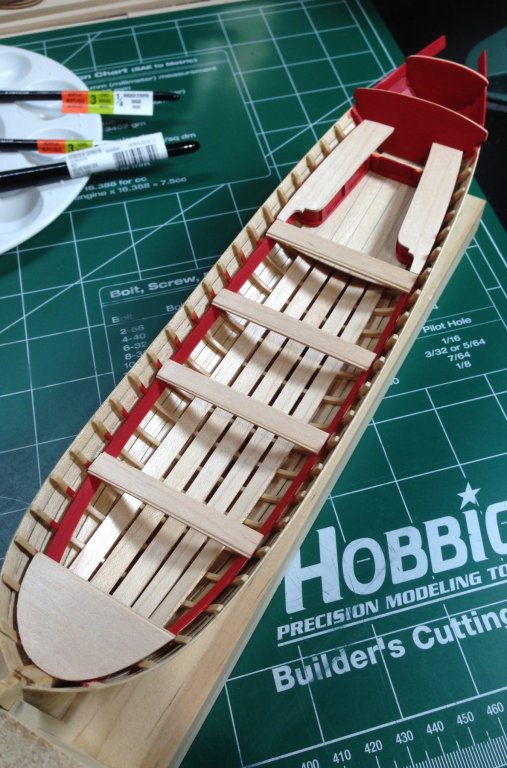
- 190 replies
-
- 15
-
-
- pinnace
- model shipways
- (and 1 more)
-
Keeping an eye out for the updates as well. Steve
-
What kind of scrapers are you using? Steve
-
Fantastic work with this kit. I agree you need to make the bucket. Steve
- 82 replies
-
- 5
-
-
- naval smoothbore
- model shipways
- (and 1 more)
-
Very nice! Steve
-
Volume 3 will be a good investment for many of us. I'm happy to purchase your book in support of your thorough research on this massive rig and to complete the set! Steve
- 3,618 replies
-
- 3
-
-
- young america
- clipper
- (and 1 more)
-
Look forward to watching you re-rig this one. Steve
-
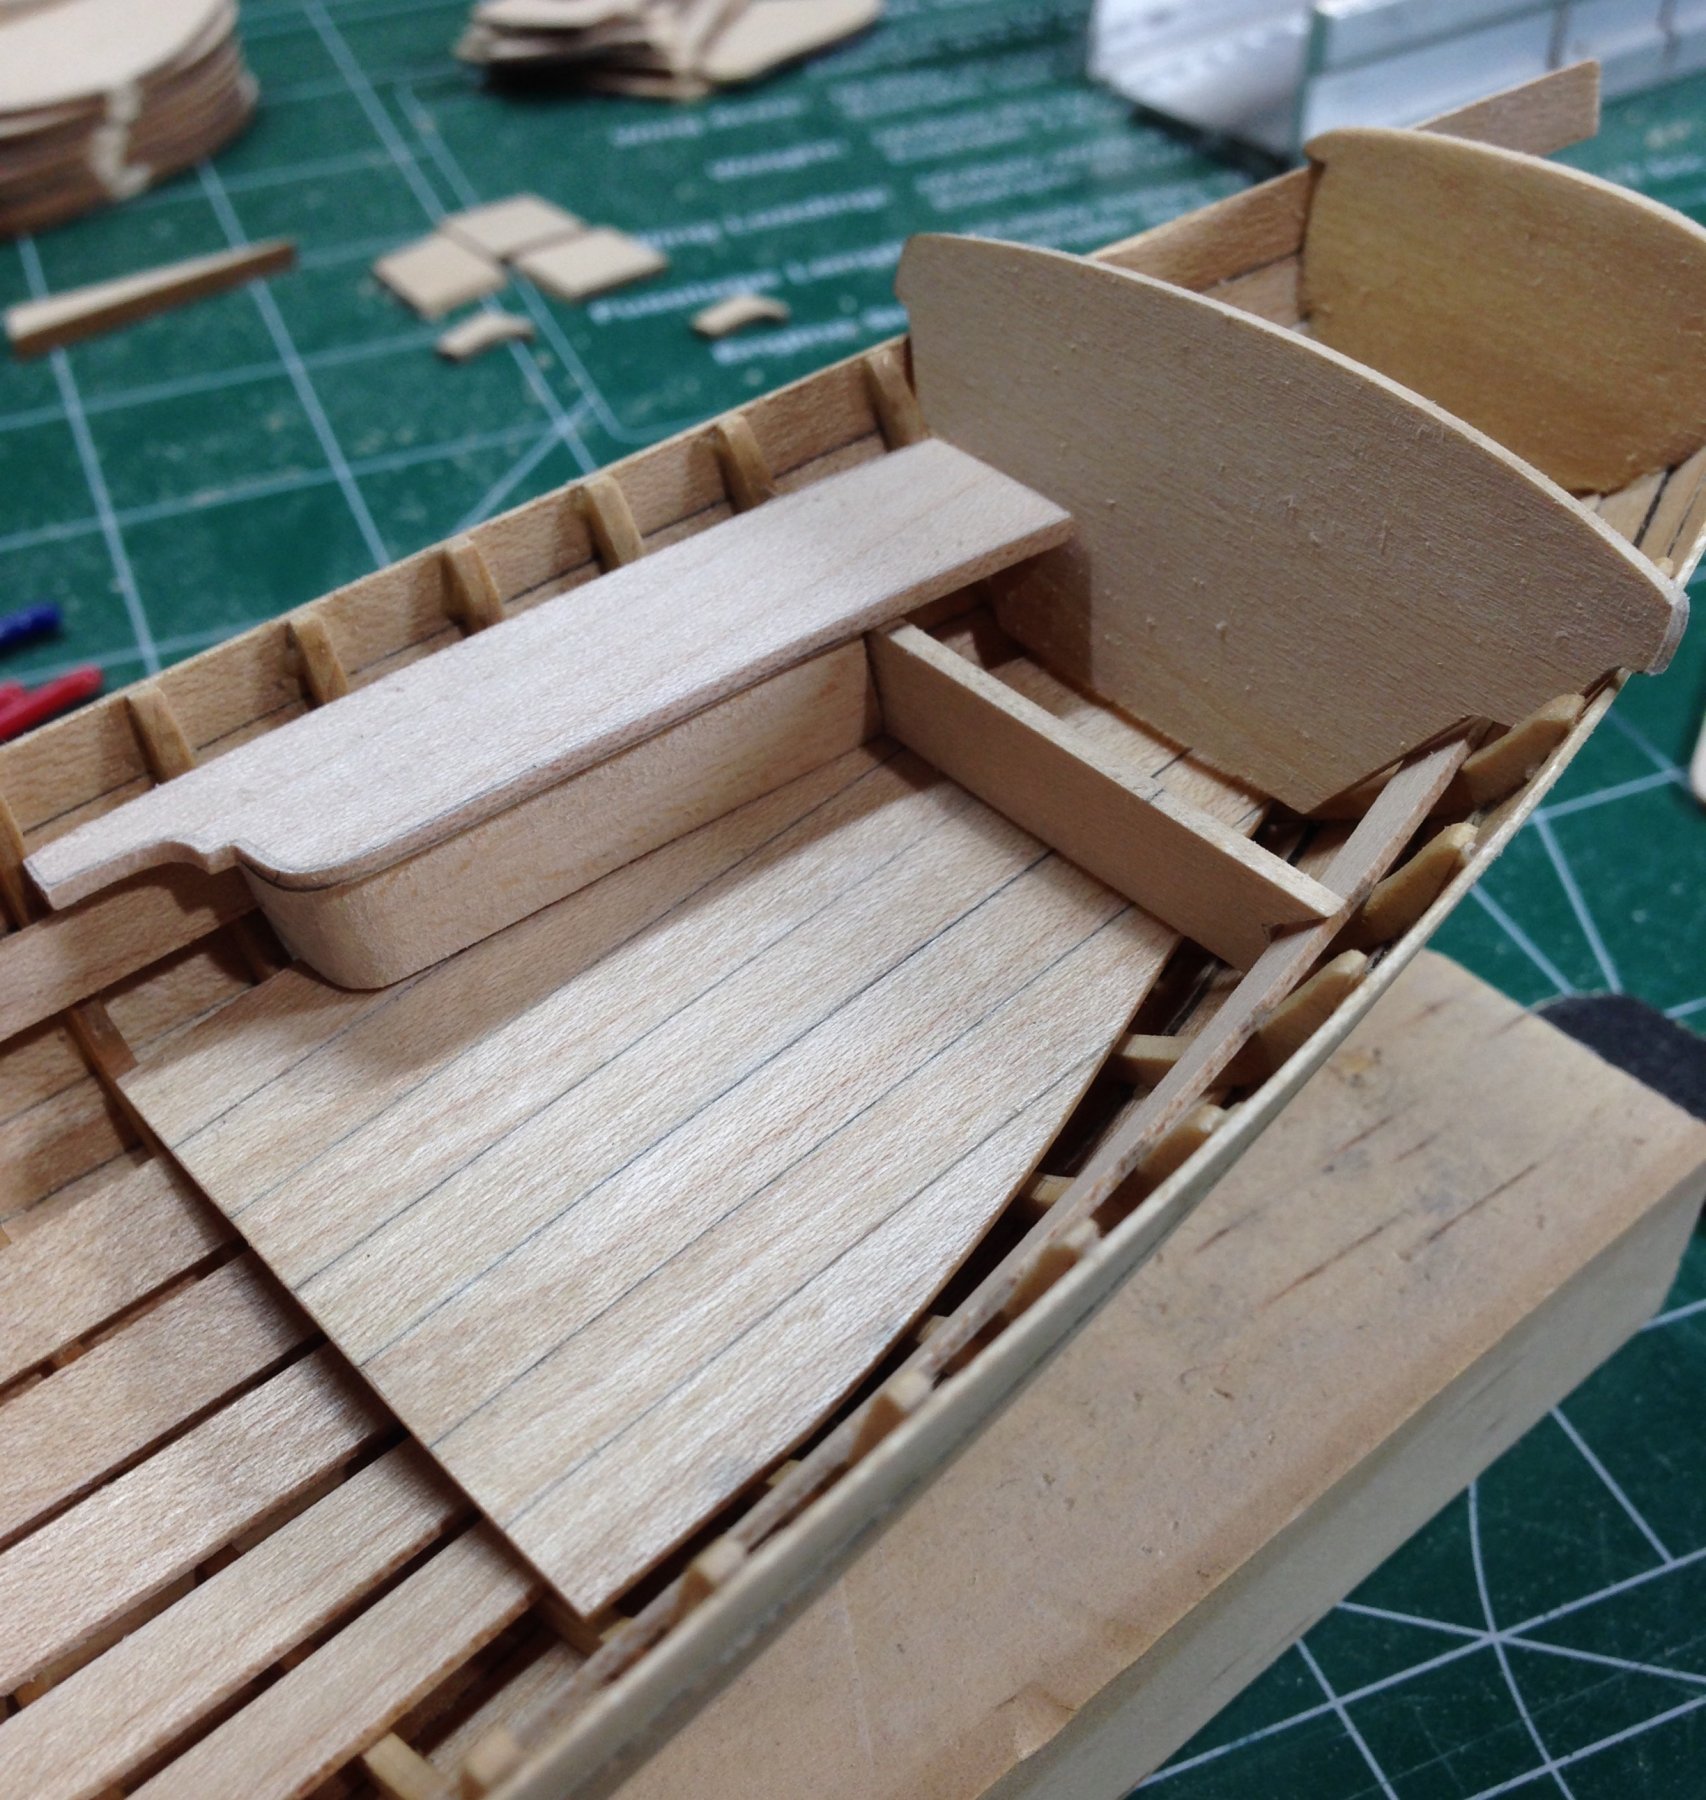
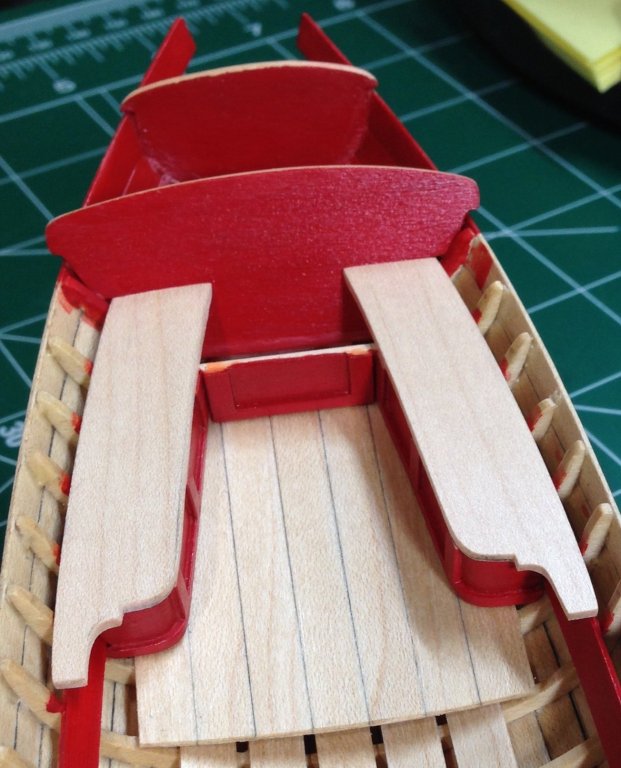
1/16" x 1/32" maple strips were soaked in hot water for several minutes to create the curved base moulding around the supports. 1/8" x 1/32" maple strips were used for the vertical moulding. Some minor adjustments are needed before installation. Steve

- 190 replies
-
- 18
-
-
- pinnace
- model shipways
- (and 1 more)
-
ancre Chebece 1750 by Jeronimo - FINISHED
Tigersteve replied to Jeronimo's topic in - Build logs for subjects built 1501 - 1750
Wow and wow again! Steve -
Thank you Mike and everyone for the likes. It seems like it should be a quick project, but that's not the case. The modifications I'm adding are not necessary, but I think they add something unique to the project. Can you believe Model Expo has this kit listed as "entry level" on their revised website?! Steve
- 190 replies
-
- 4
-
-
- pinnace
- model shipways
- (and 1 more)
-
Looks great. I like the pedestal profiles also. Steve
- 310 replies
-
- 2
-
-
- cheerful
- Syren Ship Model Company
- (and 1 more)
-
The cockpit seat supports were shaped with the rotory tool, sandpaper, and files, With one completed, I was able to trace its profile onto the other to make the shaping easier. The moulding is next before I add any paint. Steve


- 190 replies
-
- 9
-
-
- pinnace
- model shipways
- (and 1 more)
-
Good point! I will omit them. Steve
-
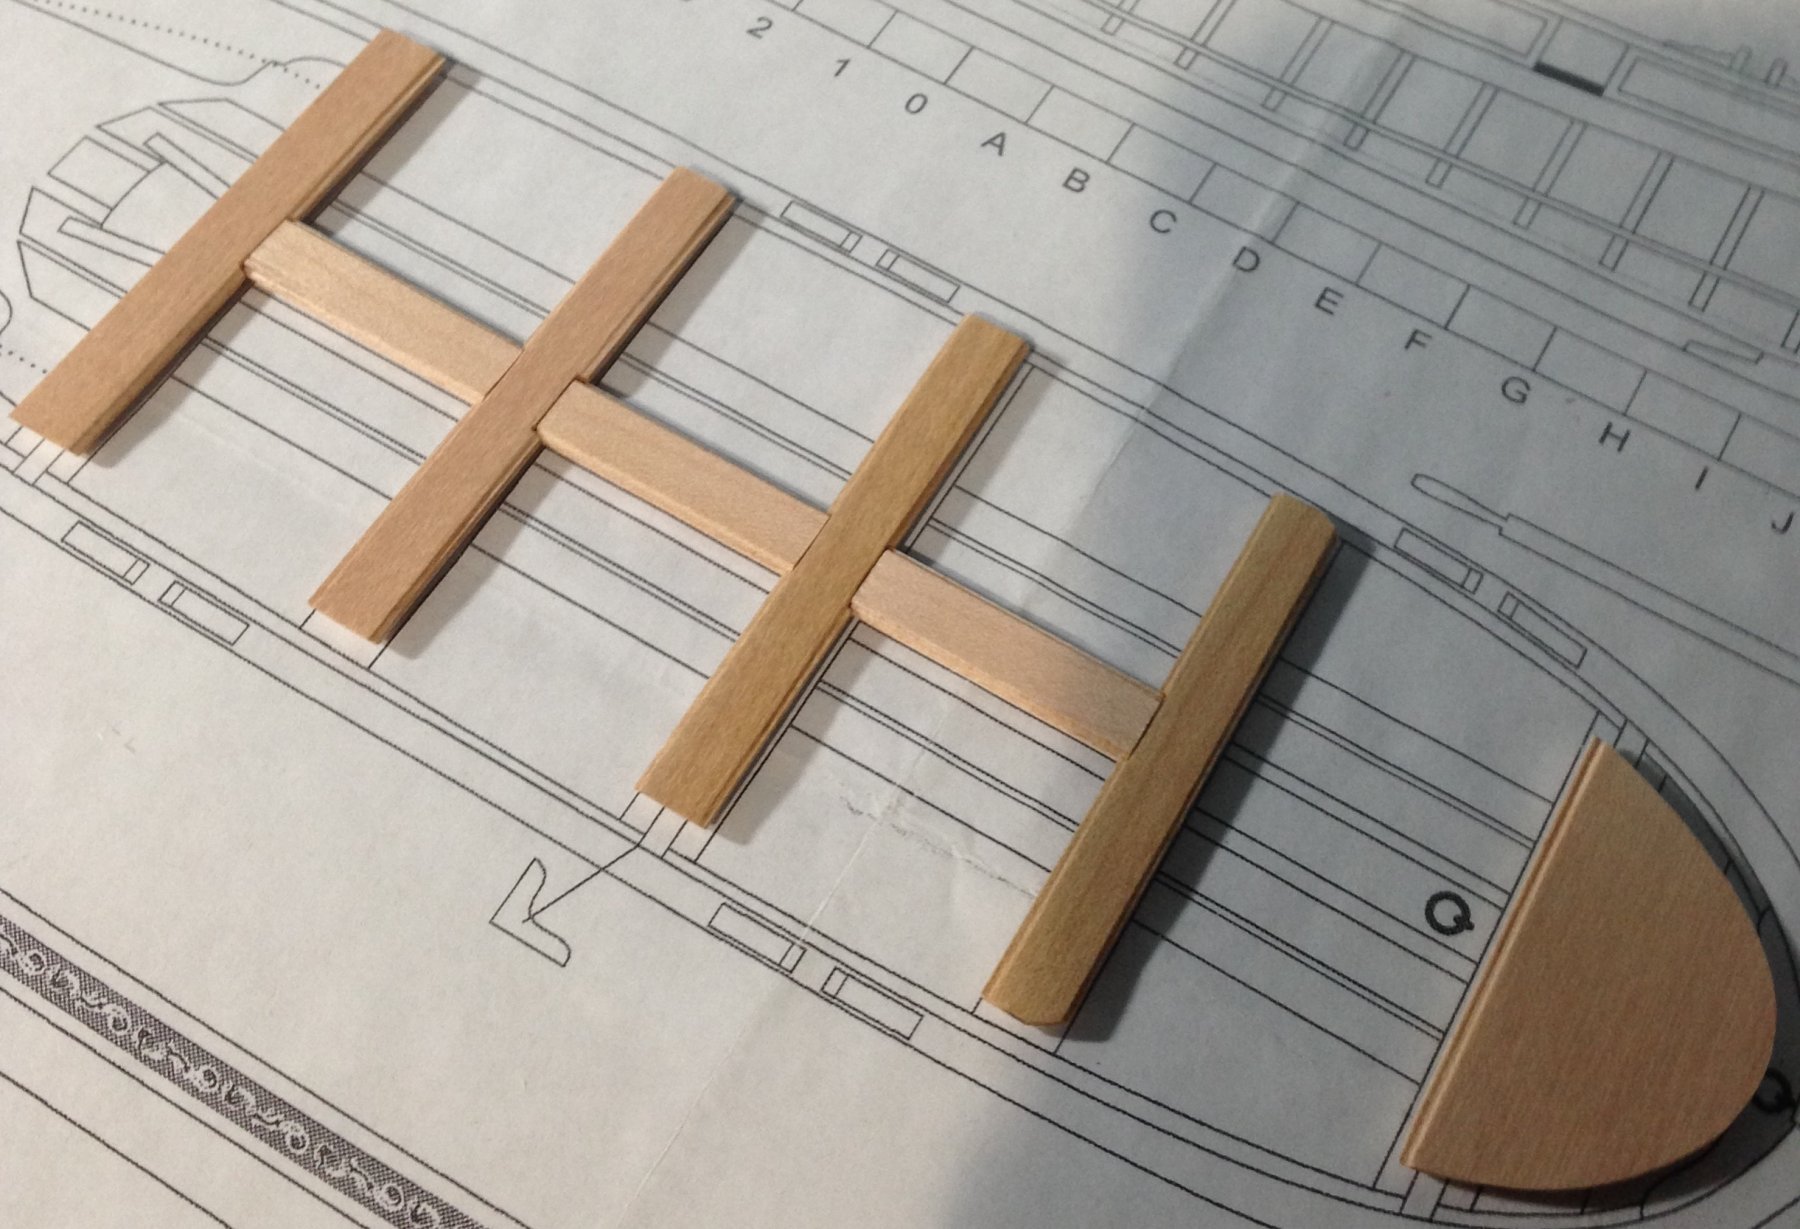
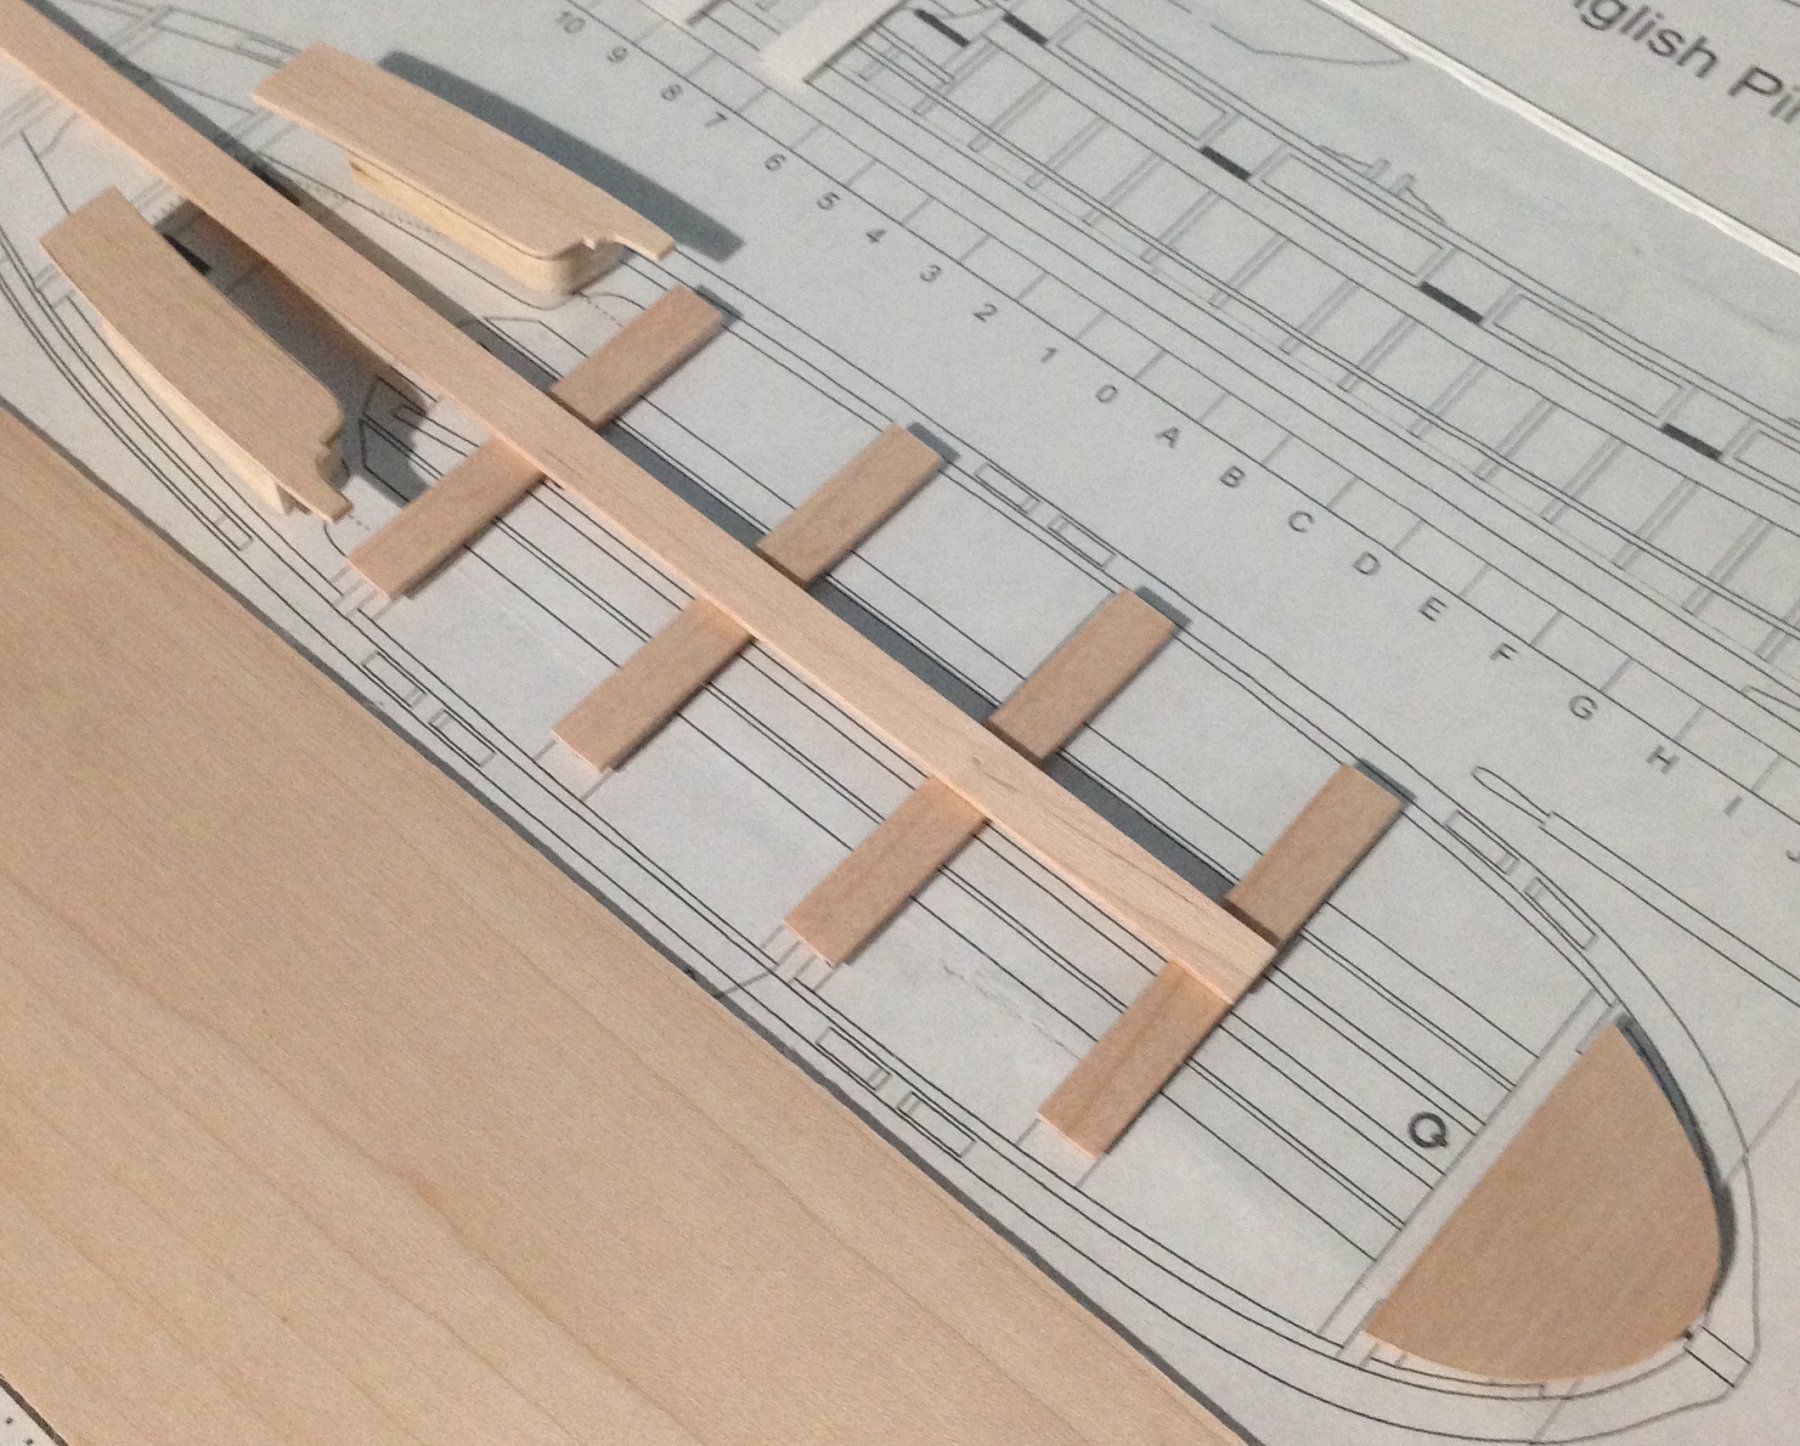
The thwarts were sized and cut after I made templates out of index cards. There will be grooves notched into them and the longboard running down the center. This board will be sectioned off and lay flush, in-between the thwarts following Chuck's Barge example. Under construction are the supports for the cockpit seats. They will be similar to the example shown in my November 18th post. Steve

- 190 replies
-
- 8
-
-
- pinnace
- model shipways
- (and 1 more)
-
Glad you're starting this one. You are so right- not many logs on this one. This one for me is more difficult than the longboat kit. Both great kits though. Steve
- 90 replies
-
- 2
-
-
- english pinnace
- Finished
- (and 1 more)