Hubac's Historian
-
Posts
3,314 -
Joined
-
Last visited
Content Type
Profiles
Forums
Gallery
Events
Everything posted by Hubac's Historian
-
 Tres interessant! Well, as you say, that is a whole other realm of confusion that I will soon enter into. I don’t have ready access to the rest of the kit, at the moment, but I will when I visit my Dad in January. When I do, I’ll bring back my gun barrels and port lids. Progress on the actual model has slowed quite a bit because I haven’t had anything easily transportable that I can take to work with me for breaks. I plan quite a bit of detailing for the inside surfaces of the port lids: alternate direction lid linings with nailing detail, rings and lanyards for closing, and fleur de lis for the lower battery lids and shells for the upper battery lids. Sometimes, I see two rings in contemporary drawings for the interior lanyard, but more often I see one, so that is what I am going with. I was making good progress on scraping the lower hull, for painting, but I am in full holiday swing, at the moment, and nothing is really happening right now.
- 2,699 replies
-
- 3
-

-
- heller
- soleil royal
- (and 9 more)
-
Hey Mark! Thanks for weighing in. Your point about ventilation makes good practical sense because, more often than not, it was rot that sealed these ships’ fate at the wrecking yard, as opposed to the enemy line of fire. I have to ask you, though, what are bucklers?
- 2,699 replies
-
- 1
-
-
- heller
- soleil royal
- (and 9 more)
-
A few notes on armament, according to Winfield and Roberts. Prior to 1693, the practice of piercing an unarmed bow chase port on the first battery was common. For Soleil Royal, upon completion in 1670, this amounted to 15 armed ports, per side that were a mixture of 36 and 24-pound guns. The book does not make it explicitly clear, but my presumption is that the heavier 36-pound guns would be placed forward, over the fullness of the hull, and the somewhat lighter guns would be placed aft. After 1693, piercing for the chase port ceases out of concern that it unnecessarily weakens the bow structure. Presumably the chase ports in the forecastle provide sufficient forward fire power. Another insight from the book is that, despite artisitic and modeling conventions that often show the stern chase ports armed, in practice like the bow chase ports, they would only be armed when needed; the aft two guns, per side, would be shifted into position. This makes practical sense when you consider the working room and recoil allowances that would be necessary for safe operation of the broadside guns. If this is true for the bow, where the turn of the deadwood into the stem creates intersecting recoil paths between the bow chase gun and its next neighbor aft - then it is an even more acute problem, at the stern, where the guns are perpendicular to each other. The other point of note is that SR and Royal Louis are often assigned a “notional” rating of 120 guns. I suppose this accounts for the maximum possible armament, if all chase ports were armed, and perhaps, if you added another four guns between the forecastle and quarter decks. As that served no practical purpose, however, the actual armament tended to be significantly less. With all of that in mind SR’s initial armament would have amounted to 106 guns, distributed accordingly (W & R, pg 60): LD: 16 36lb guns + 14 24lb guns MD: 30 18lb guns UD: 26 8lb guns QD: 10 6lb guns FC: 6 6lb guns Poop: 4 4lb guns It should be noted that on these first vessels of the Premier Range Extraordinaire, all of their guns would be bronze, as iron was not practically safe for larger calibers until after 1691, according to (W & R, pg 55). After her refit in 1689, her “notional” rating was reduced to 110 guns, however, her actual armament was 104 guns (W & R, pg 60). For a very brief time, she was experimentally armed on the LD with a mixture of 48lb and 36lb guns, however, the immense size and weight of these guns made them un-weildy for efficient operation. SR’s armament at the time of Barfleur consisted of 104 guns that were distributed, accordingly (R & W, pg 60): LD: 28 36lb guns MD: 30 18lb guns UD: 30 12lb guns QD/FC: 12 6lb guns Poop: 4 4lb guns The happy accident for me is that by scribing in a representational 15th bow chase port, my modified Heller model now has an appropriate refit lower broadside of 14 guns. The same good luck does not hold on the middle and upper deck batteries of the Heller kit, which are only pierced for 14 a side. That is, unless the middle and main deck bow chase ports are actually armed. Not sure about that. W and R only discuss the LD bow and stern chase ports. Whatever the case may be, if you count in my representational bow chase port on the LD (but exclude the four new octagonal ports on the poop deck), my Heller model could carry the notional rating of 110 guns. If W and R’s 30 gun distribution for the middle and main decks is, in fact accurate, and if it includes guns at the forecastle chase ports, then the Heller kit is closer to correct for 1689 that I previously supposed. Distribution on the quarter deck is where it gets murky; she only carried six guns on the QD, post refit? A few other interesting things to consider are that, for one, Laurent Hubac had passed in 1682, so the task of re-building her fell solely to his son, Etienne, in 1688/89. Apparently, the rot was extensive - affecting not just the top timbers, but significant portions of her hull framing, right down to her keel (W & R, pg 60). What this means is that Etienne rebuilt a virtually new ship upon the original keel. I think one can only presume that enough of the original transom framing remained intact, so that the re-built SR might still exhibit the four stern chase ports as being positioned below the widest point of the transom. This presumption stems from the apparent conflict between the change in ship design where, by this time in 1688, master shipwrights would be framing the transom so that the chase ports were in line with the widest point of the transom, yet Berain’s ornamental scheme for the stern still shows the earlier 1670 transom. I am not really sure what to make of this because, if the frame bends at the transom remain the same, one must wonder whether the hull, at mid-ships was reconstructed as originally, in 1670, or in a more contemporary (to 1688) form that was then faired into the old transom. This question takes on more significance when one considers that Etienne petitioned the king aggressively, in 1692 (following the loss of SR at Cherbourg, and subsequent orders to re-build her), to convert his Foudroyant (newly on the stocks) to the replacement SR. Apparently, Etienne still had the framing moulds (W & R, pg 67), and while the new SR was dimensionally larger (5 1/5’) than her predecessor, this implies that Etienne would have framed the new ship much as he did, the rebuild SR in 1689. Apparently, also, the lower battery was still armed for 14 a side. I don’t necessarily think there are answers, here, but the questions are interesting, nonetheless. For my part - and thinking about a future full scratch-build of SR, 1689 - my preliminary thinking is that the recently published (J.C. Lemineur) framing of the St. Philippe of 1693, is probably a sound basis for creating a framing plan of SR. A ship re-built in 1688 would probably have been architecturally very close to a ship built new in 1693, or so I suppose. As yet, though, I have not seen that monographie and have no informed opinion about it.
- 2,699 replies
-
- 3
-
-
- heller
- soleil royal
- (and 9 more)
-
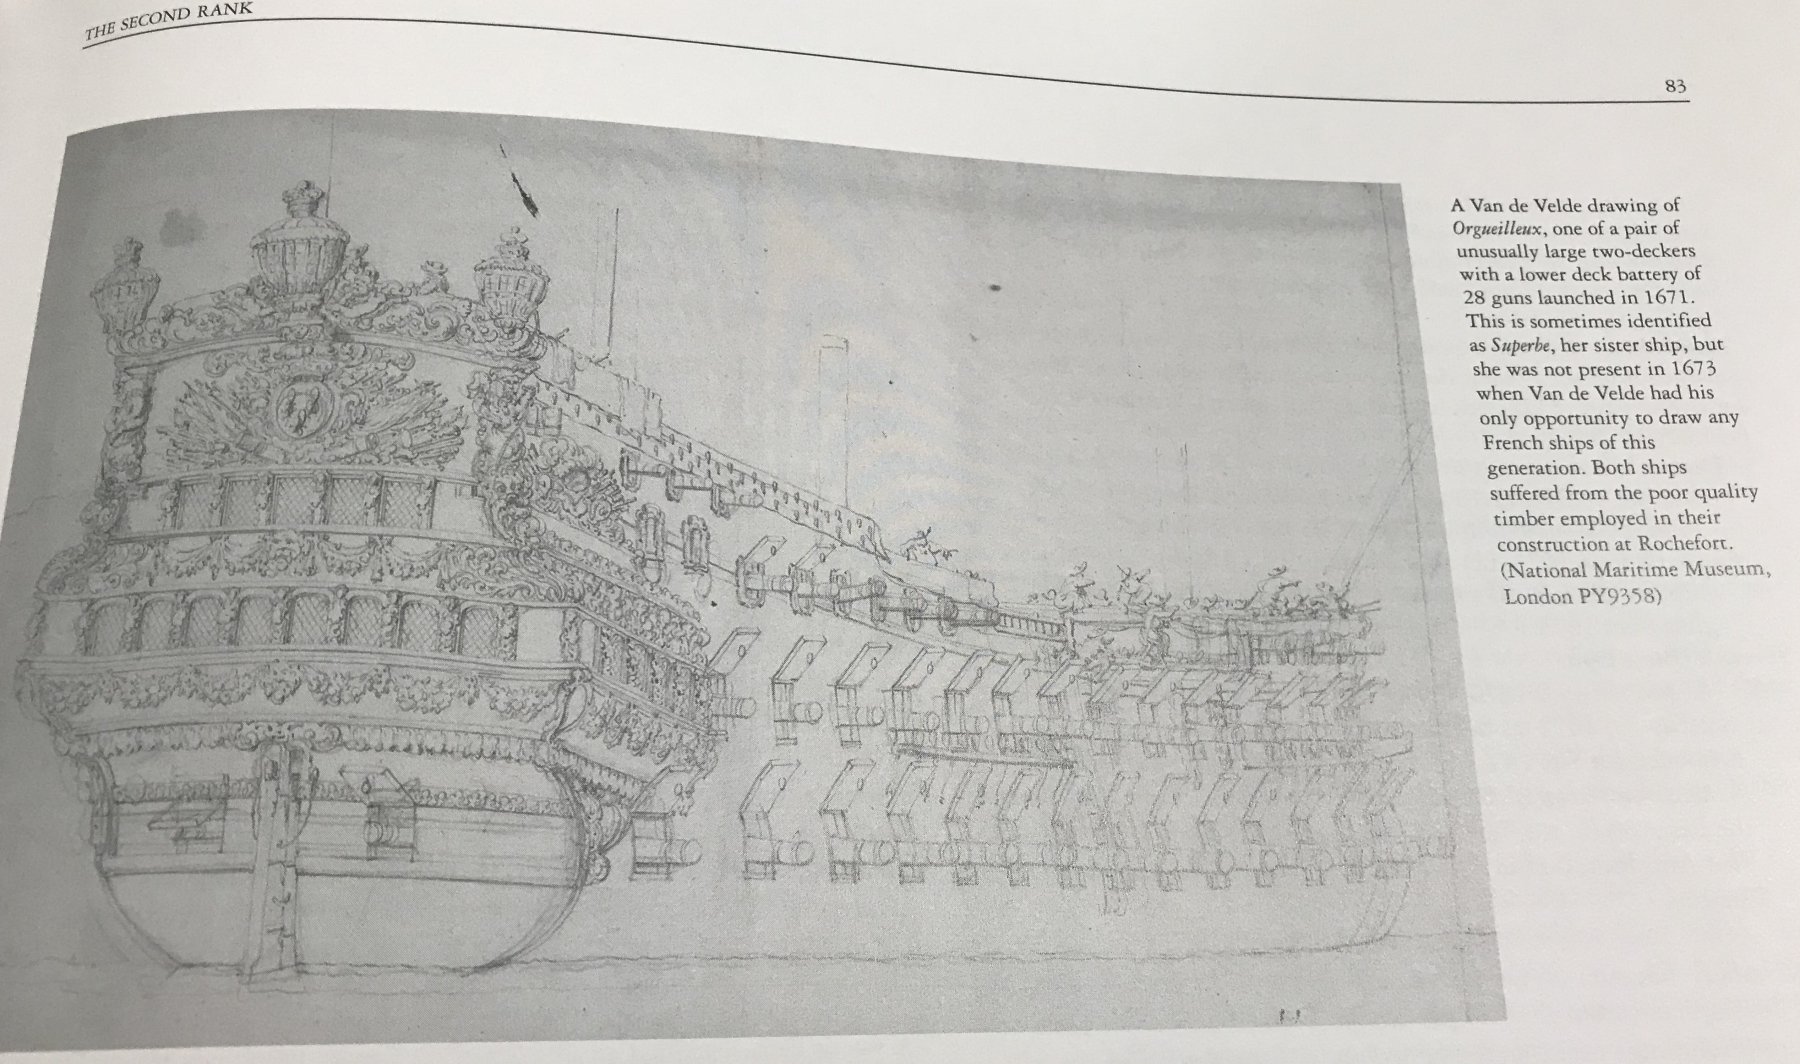
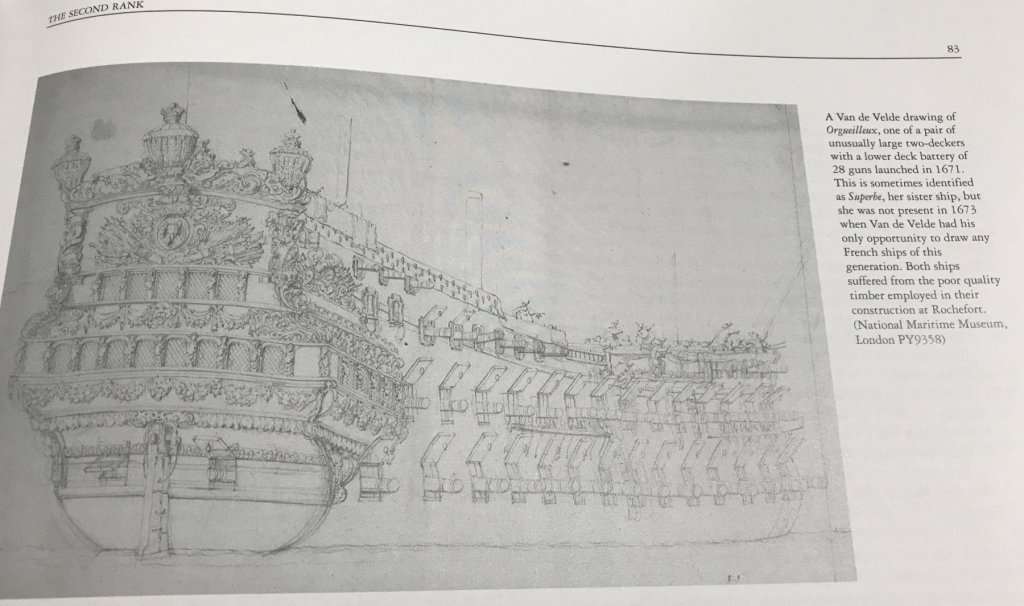
THE CORRECTIONS A few posts earlier, I was delighted to discover a picture of L’Orgueilluex in Rif Winfield and Robert’s new book French Warships in the Age of Sail 1626-1786. Here is what I said on the matter: “In a previous post, I had noted that I had no photographic record of Le Orgueilleux. Well, that’s because the above vessell is always labeled La Superb. According to Winfield, though, that is a mis-attribution. Apparently La Superb and L’Orgueilleux are sister ships and this vessel pictured is the latter. So, it is very dicey, indeed, trying to ascertain what is what in the murky First Marine. With that discovery, though, the similarities between both Hubac-built ships, La Reyne and L’Orgueilleux become ever more apparent:” Well, that’s great and all, as it relates to the picture of L’Orgueilleux, but I am wrong in assuming that the L’Orgueilleux pictured is the same ship that Laurent Hubac built at Brest in 1670. It is not. The L’Orgueilleux pictured actually began her career in 1670 as the Faucon. She was built in Rochefort by F. Pomet and renamed L’Orgueilleux in 1671. Her armament varied from 68 to 70, and finally 76. Her sister ship, the Vermandois, was built in the same yard, in the same year, by the same designer, and the changes in her armament also correspond. Her name was changed to La Superb in 1671. So the reason for any resemblance between Hubac’s La Reyne and these two sister ships would be purely conjectural. Perhaps, Pomet admired La Reyne and wished to emulate her in these lesser rated vessels. I have no idea really. Anyway, I apologize for the mistake, I should have waited to actually read the book before posting. In another post - when I have the book in front of me - I will detail Winfield’s discussion of Soleil Royal on launching, her refit and eventual replacement. There are a few interesting tidbits, there, that lend a little more clarity to the picture. In particular, he explains the difference between a “notional” rating for 120 guns (which she never carried) and her likely armament at different stages of her career - including the common practice in the early First Marine of mixed calibers on the three main batteries, so that some ships carried up to seven different calibers of gun. Really a great read, so far, and very insightful in terms of the evolution of the French rating system into the ships of the Second Marine.
- 2,699 replies
-
- 2
-
-
- heller
- soleil royal
- (and 9 more)
-
That sounds like a reasonable accomodation, EJ. Perhaps builders left a section of bow deadwood over-long, to one side of the stem so that bowsprit could be fayed into it? What say the experts?
- 1,035 replies
-
- 5
-
-
- royal katherine
- ship of the line
- (and 1 more)
-
I am fascinated by the Science Museum Model of the Prince. I can appreciate the practical considerations for off-setting the bowsprit to the side of the mast and stem, however, I had always thought the stem was an essential support for the bowsprit. Or, is it the case that between the gammoning and the fore stay(?) weights and tensions are balanced?
- 1,035 replies
-
- 6
-
-
- royal katherine
- ship of the line
- (and 1 more)
-
I agree with that, as well, EJ. If we simply accept that the knowledge is lost, and no one asks the question - then, we certainly will never arrive at an answer or a different view of a subject. My hope, via the internet forum, is that others will see the things I post and that might jog their memory of something related that they’ve seen, taken a picture of, or otherwise have in their collection. If they are willing to share their findings, the knowledge base has a chance to grow. As a child of the 80’s, this is my answer to the milk carton approach to research: Have you seen this vaisseau? As you say EJ, Even with the Vasa researchers are continually discovering new things about her construction, her appearance, and the people who built and sailed on her, however briefly. Knowledge of these subjects is so deep as to be seemingly infinite and enough to keep one occupied through several lifetimes of model-building. Unfortunately, not everyone feels the same way about this, though. Some like to hold on to what they have - or much worse - be deliberately misleading. That, in its own way, has the potential to be very damaging to public apprehension of a subject. One just has to keep their 👁s peeled for the occassional red herring.
- 2,699 replies
-
- 2
-
-
- heller
- soleil royal
- (and 9 more)
-
Thank you, Dan! I will keep on posting things as I find them. I plan to also start printing out a copy of my build-log because I do think that a fair amount of this research could be the basis of a book some day. Tentatively, I think I will call it: Versailles de la Mer An Exploration in Archival Archeology of Laurent Hubac’s Soleil Royal 1670-1692 by Marc LaGuardia ©️
- 2,699 replies
-
- 2
-
-
- heller
- soleil royal
- (and 9 more)
-
Well, EJ, the purpose of this research/build log was to compile as much First Marine imagery as I could find and attempt to make enough cross-references that I could begin to verify, in my mind at least, the veracity of what I have seen, and the decade to decade progression of alterations. I am, as you have seen, applying what I reasonably can to this Heller model, but just as you have suggested, I am fascinated by the notion of attempting to model SR in this earliest phase. With so little to go on, the ornamental tableaux would be almost entirely conjectural, on my part, but structurally a picture is beginning to emerge that I find highly plausible. I think I have the artistic talent to design something that is of the epoch, and I am fascinated by what Doris does with card. I think it would be a really fun project to design an SR1 that resembles something like my mystery ship and build it in card and clay. I understand why purists scoff at the notion of building “fantasy” ships. I think, however, that it is a matter of how you present a model; if you were to say “this model is the definitive truth about SR as she first appeared....”. Then, that is an utter falsehood. If, however, you say “this is a model that draws upon known period practice to create a composite of what SR may have looked like...”. Then, that is a different presentation. I kind of like this idea of archival archeology; assembling known fragments of information around a framework of more reliably known information. One approach seeks to be the end all/be all, the other seeks to spur debate.
- 2,699 replies
-
- 3
-
-
- heller
- soleil royal
- (and 9 more)
-
Thank you very much for that reference Chapman! It will be well worth the 20€ to maybe achieve a little clarity as it relates to the differences between the Monarque and the Royal Louis of 1668. The drawings I have posted of the Monarque are actually the Monarque, and one of which (drawing of the starboard quarter view) is even inscribed, as such. However, I have seen a few drawings of the stern of a ship that very much resembles the Monarque, and these (simplified with somewhat flawed perspective, in one case, and by the hand of a child, in another) drawings are almost always labeled as the RL. Well, the cover art for this German book is the first serious drawing of the RL that I have seen. What is visible of the drawing - with a few small exceptions - is nearly identical to the Monarque. Anyway, it would be useful to get some clarity on that. Especially, in light of the book that arrived just yesterday: Winfield and Roberts’s book French Warships in the Age of Sail 1626-1786. The book is dense and fascinating, and I’ve only yet leafed through it, but in doing so, I found this: In a previous post, I had noted that I had no photographic record of Le Orgueilleux. Well, that’s because the above vessell is always labeled La Superb. According to Winfield, though, that is a mis-attribution. Apparently La Superb and L’Orgueilleux are sister ships and this vessel pictured is the latter. So, it is very dicey, indeed, trying to ascertain what is what in the murky First Marine. With that discovery, though, the similarities between both Hubac-built ships, La Reyne and L’Orgueilleux become ever more apparent: With the exception of a projecting main deck stern balcony and the presence of an amortisement on L’Orgueilleux, they are architecturally almost the same. I’ma keep digging!
- 2,699 replies
-
- 3
-
-
- heller
- soleil royal
- (and 9 more)
-
When I was last interested in obtaining this book, it was out of print. With the St. Philippe monographie out, I am more focused on that, for now, as I see this ship as a useful bridge between the First and Second marine. However, if I ever took a stab at SR1, prior to 1689, then the L’Ambiteaux would be required reading, yes.
- 2,699 replies
-
- 2
-
-
- heller
- soleil royal
- (and 9 more)
-
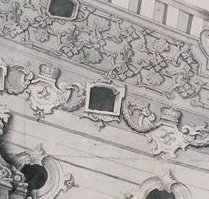
I will also add that if you really study the very detailed arrangement of the Monarque’s stern, above, I think you can find very direct corrollaries to the fuzzy stern of my mystery ship. First of all, on the Monarque there are two projecting stern balconies at the middle and main deck levels. What is particularly interesting to me is the inward sweeping curve of the lower balcony, moving inward from the ship’s side toward the middle two figures supporting the main deck gallery above, which mirrors this profile. This appears to be the same arrangement on the mystery ship. Also, the appearance and arrangement of the larger supporting figures seems to correspond between the two separate portraits. As I said before, I believe that Puget’s horse head supports of the lower stern balcony are present in both portraits. So, naturally, this raises the quite reasonable question as to whether this is simply another portrait of the Monarque. I am going to persist and say that I do not think that is so. The minimum likely armament of the mystery ship is greater than that for the Monarque, and the shape of the Monarque’s tafferal is quite distinct as compared with the reverse-cyma curved tafferal of Soleil Royal, as drawn by Berain, and still faintly evident here. A higher resolution image of my mystery painting, I might add, might also clarify the question of whether the forecastle deck is armed or not. Again, my supposition here is that the underlying architecture of SR would have remained largely unchanged, from pre to post re-fit in 1689. There is survey documentation of how rotten SRs top timbers had become, over the course of her first 18 years, and yes, I think that much of her superstructure would have been re-built. That doesn’t necessarily mean, though, that they would not have recreated the reverse-cyma curved tafferal - particularly if the reclining figures of Europe and Asia were part of the original allegory to be re-incorporated in the new design. What may have happened during the refit is that the poop-royal deck was eliminated and the sheer lowered to a corresponding degree. The placement of the octagonal port windows on Berain’s drawing of the starboard quarter seems to suggest that the re-fit SR still had a poop deck, but perhaps only a very shortened poop-royal, if at all. Overall, as it relates to these two portraits, what I think may be the case is that Puget had developed a particular arrangement of structure and ornamental work that he applied to two distinct vessels. The main differences would be in the thematic allegory of the ornamental tableaux. I’ve remarked before that the Monarque may be the closest model of what SR1 really looked like, and I feel more strongly, still, that that may be the truth. All I need is a better image of this painting to either prove or disprove my theory.
- 2,699 replies
-
- 4
-
-
- heller
- soleil royal
- (and 9 more)
-
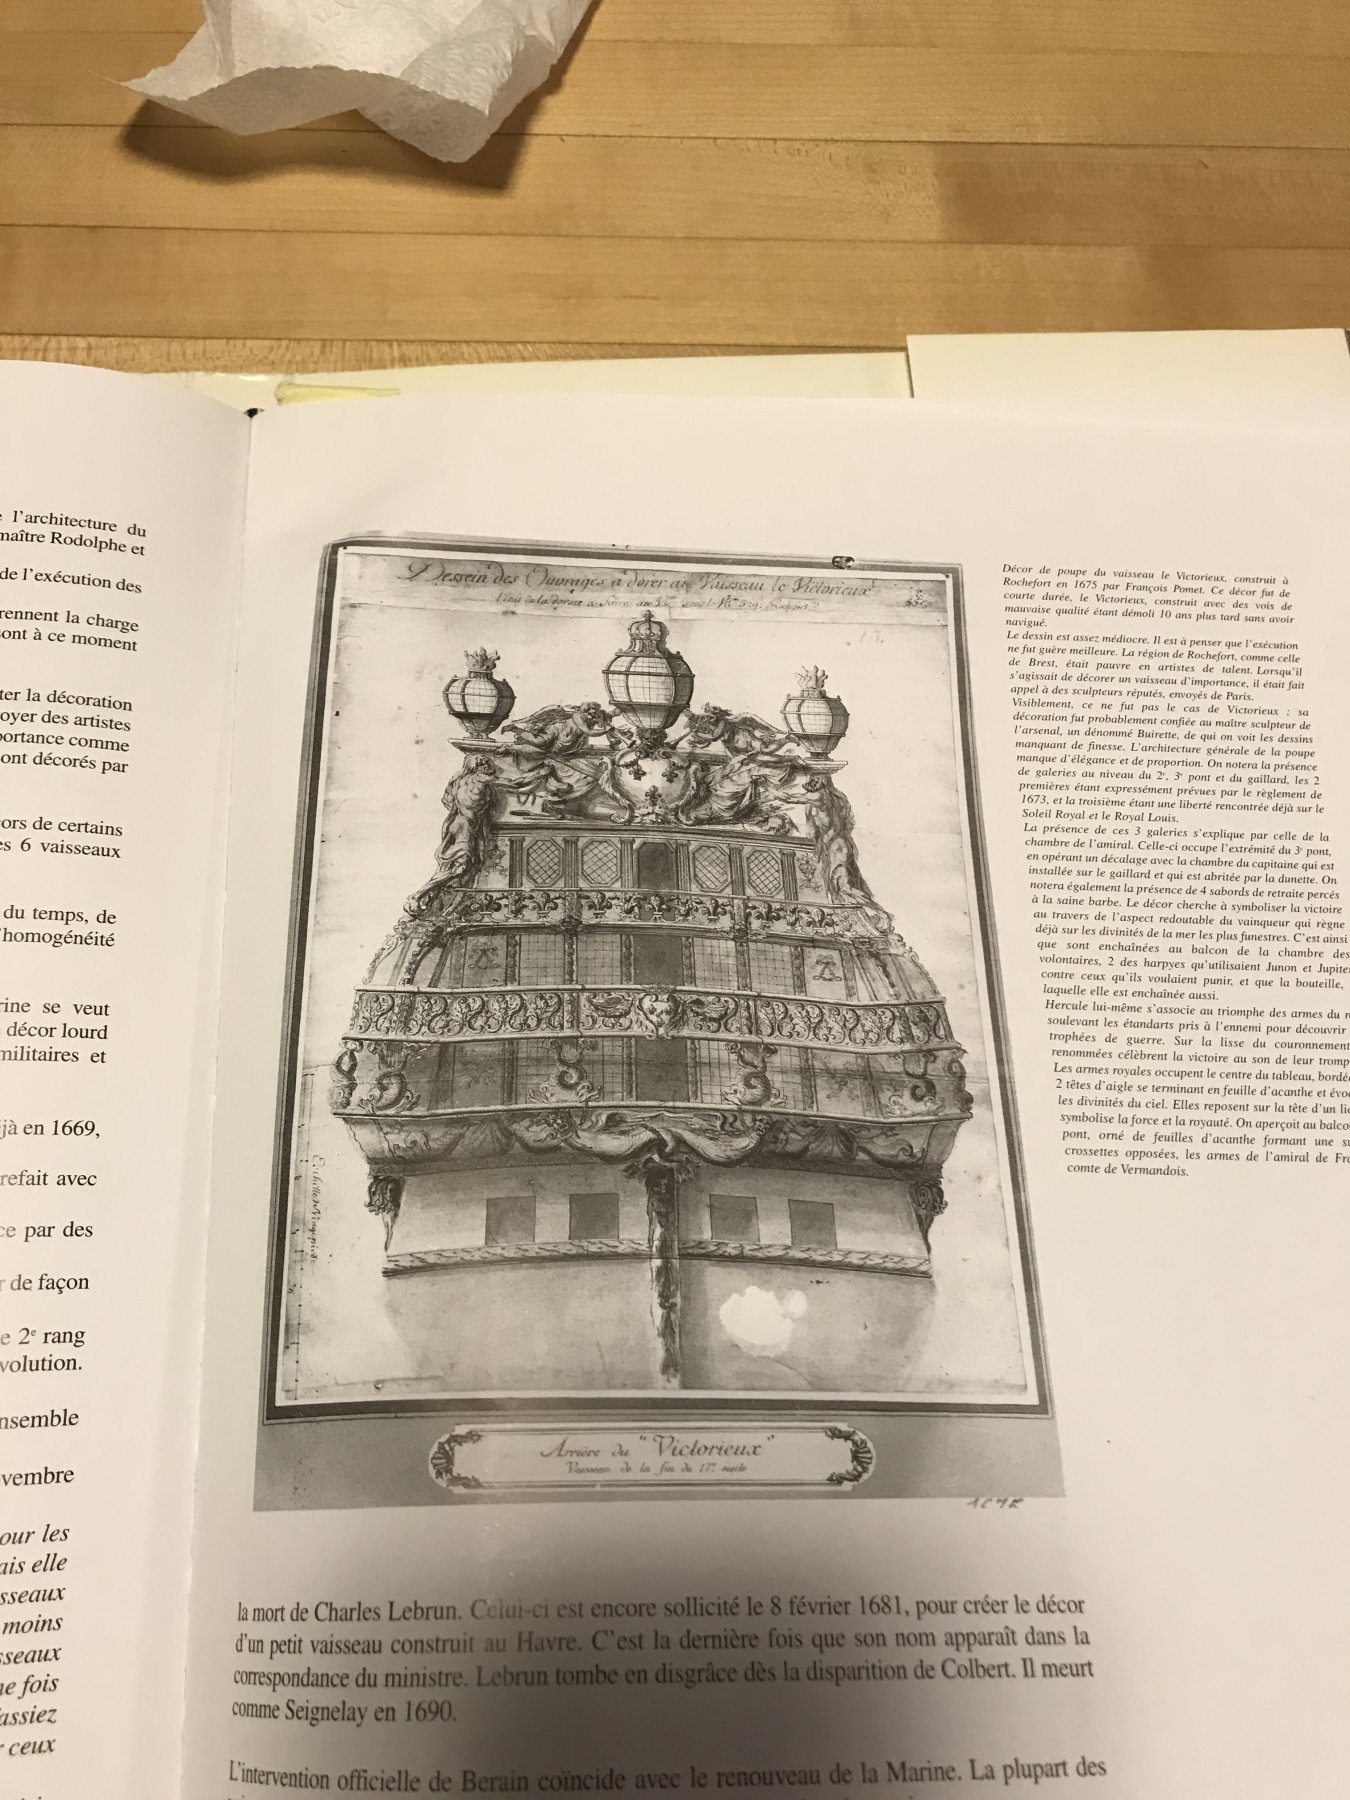
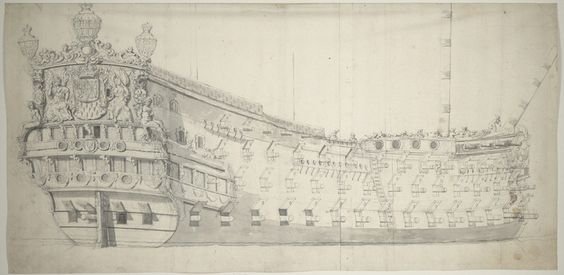
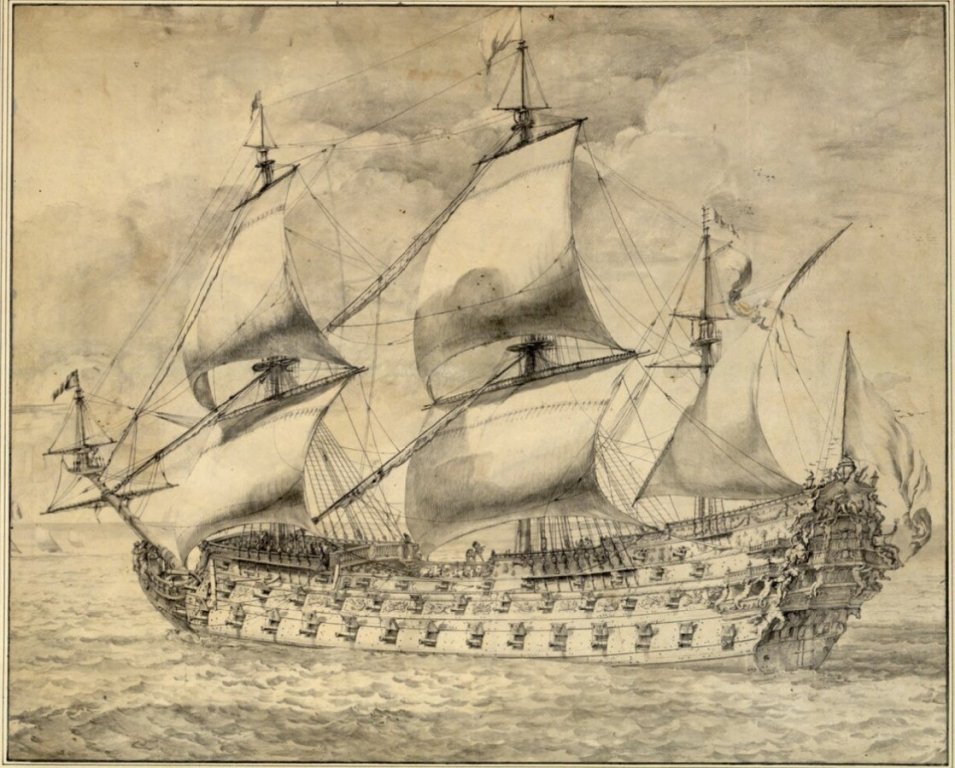
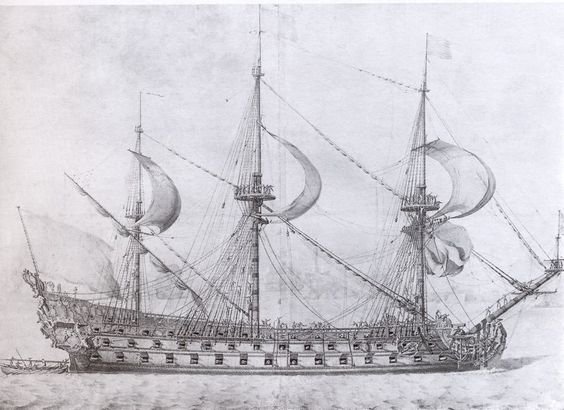
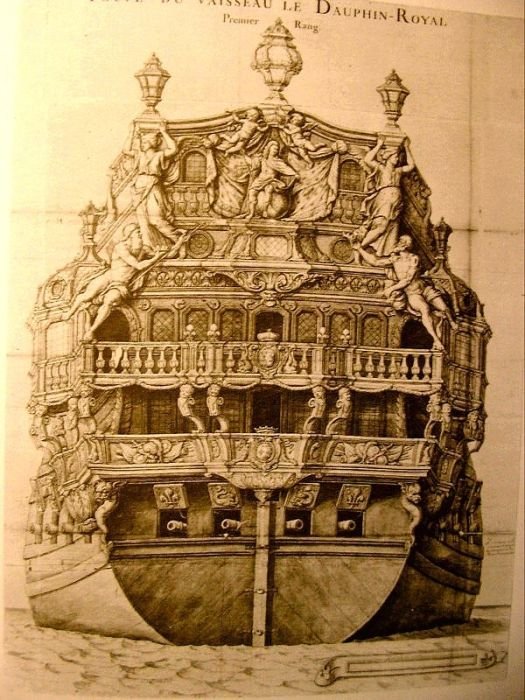
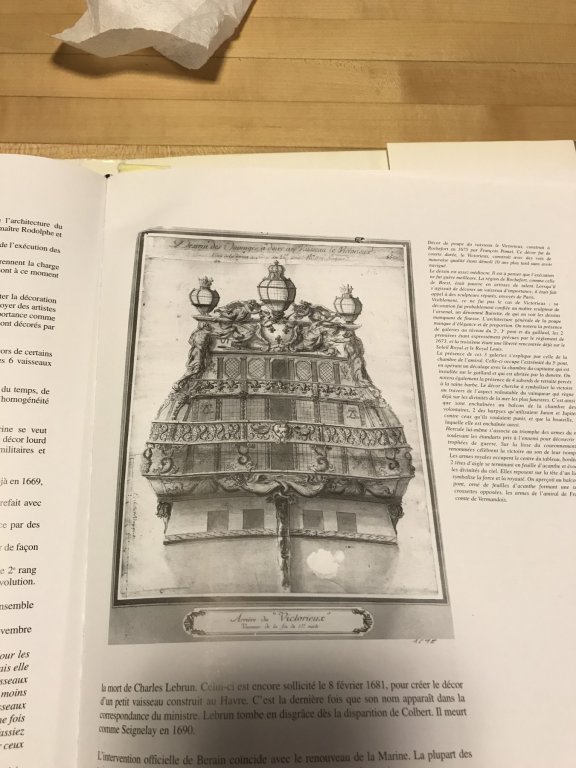
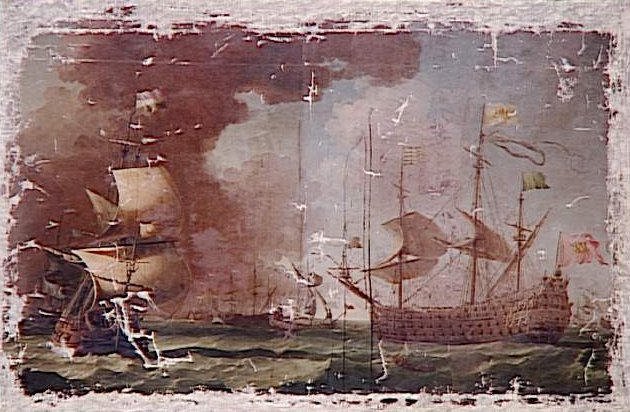
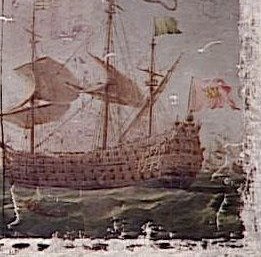
This gauzy image of a French first-rate has really captured my imagination. Previously, I scanned through a Wikipedia listing of French first-rates during the time of Louis XIV, however, one must consider their source, and Wikipedia is not always complete or accurate. So, I decided to scour through the lists printed in the back of J.C. Lemineur’s book Les Vaisseaux du Roi Soleil. My search parameters were as follows: First-rates, only, carrying 94 guns, or more, and constructed between 1666 and 1690. I chose those criteria because, if one were to count only the visible (barely) guns in this portrait, then you arrive at 82 guns total, among the lower, middle and main deck batteries (28/26/28). Then, if one were to make a reasonable assumption of at least 8 more guns on the quarter deck, 6 more on the forecastle deck, and 4 more at the stern chase ports - then you are up to 100 guns, minimum. Add another 2-4 bow chase guns, and you arrive at the reduced armament often cited for Soleil Royal - 104. With that in mind, the lists become much shorter, when searching for vessels that even come close to this armament. Here is what I found: Le Dauphin Royal - 1669 Toulon by G. Rodolph, 100/104/100 As she appears in 1669: As she may have appeared after 1671: Le Monarque - 1667 Toulon by L. Coulomb 94/84/80 As she appeared around the time of launching: The Monarque is equiped with a forecastle, however, at less than 100 guns she would be classed among the Premier Rang Ordinaire. Le Orgueilleux 1670 Brest by L. Hubac 88/90/88/90 I have no visual record of what this ship looked like, and it’s a shame; she’s a Hubac-built ship that is a very near contemporary of SR. Despite that fact, though, her listed armament falls pretty far short. La Reyne -1668 Brest by L. Hubac 104/100 As she appeared in 1673: I have said many times that I consider La Reyne a near sister to SR. Le Royal Louis - 1668 Toulon by G. Rodolphe 120/104 While I am unsure of the ship this degraded photo represents, it is heavily armed with well over 100 guns visible, and 16 guns on the first battery, and a forecastle - which only SR and RL (within the Premier Rang Extraordinaire) were said to be equipped with. The open balustraded quarter galleries mark this as an early ship of the First Marine. This second portrait, which is often listed as the RL of 1668, instead and in my view, must actually represent the RL of 1692. The gun count of 110-112, depending upon the number of bow chase guns, as well as the partially closed QGs, and the triple-arched style of the headrails seems to confirm this. Le Victorieux - 1675 Rochefort by F. Pomet 108/100 We also have some sense for this ship as she may have first appeared: So, with the exception of Le Orgueilleux (which is too lightly armed, anyway) and Le Royal Louis of 1668, we have a pretty solid idea what these ships all looked like. And that leaves us with SR. Le Soleil Royal Brest by L. Hubac 120/104 If what we are really talking about, here, is a 50/50 chance that my mystery ship is either SR or RL; and if we acknowledge that, in both cases, the armament may have been greatly reduced shortly after 1671, then I am going to bet that my mystery ship actually represents SR sometime between 1670 and 1689. What tips the scales for me is the seeming reverse-cyma curve of the tafferal and what appear to be large figures between the stern lanterns. Without a better image, it is impossible to definitively say, but the architecture, there, seems to correspond with Berain’s drawing of the stern. As I have said earlier, it is not hard for me to imagine what might be LeBrun/Puget carvings being preserved and incorporated into Berain’s refit ornamental tableaux. I have sent these images to the archival department of the Musee. We’ll see whether they have anything to say about it. I have also contacted Nicolas Mioque of the excellent weblog Des Trois Ponts, to see whether he has any familiarity with the painting. Of course, I don’t know if what I am saying, here, is actually the case, but I do think this is a reasonable argument. Without any professional reputation to uphold, I'm just going to go out on a limb and say that I think this may, indeed, be Soleil Royal as she appeared some time between 1670 and 1688. I invite the blogosphere to weigh in, if they can make a sound argument to the contrary; by all means - fire away! Sometimes, though, life’s great mysteries really are hiding in plain sight. We shall see.


- 2,699 replies
-
- 5
-
-
- heller
- soleil royal
- (and 9 more)
-
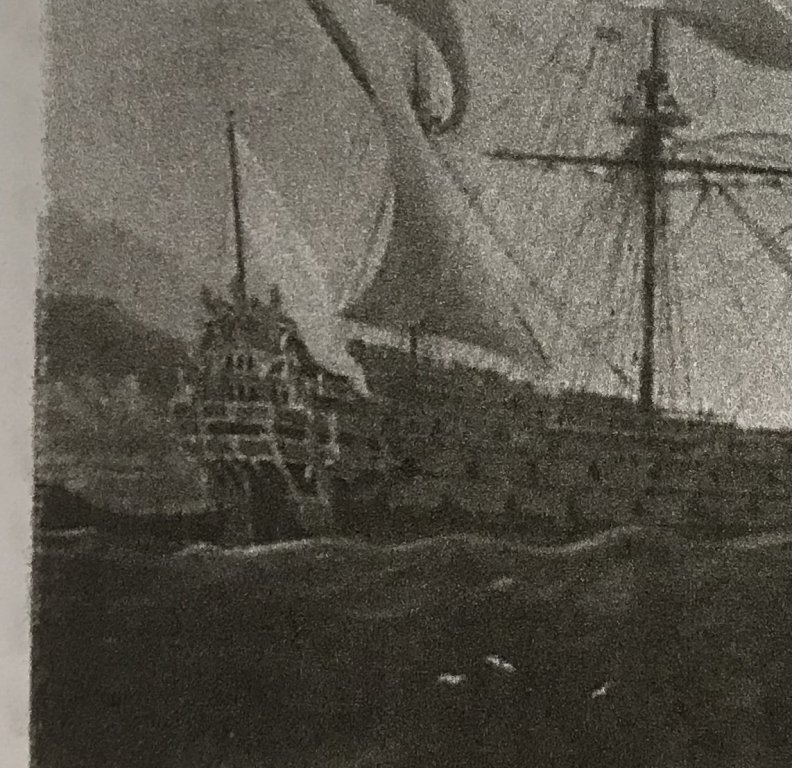
Yes, I noticed this detail in another closeup of the Vale painting. It appears to be placed a cannon port further aft than is customarily depicted (on other ships), but then the anchor shank is shown to be correspondingly long. The sweep of this anchor and the placement of the lining in the Vale painting correspond nicely in the Vale painting. I am not sure what the correct answer is, there, but I suspect it can be seen more clearly in one of the Van de Velde sketches of the ship. Having just done that - at least one VDV portrait (which doesn’t actually show the lining) shows an anchor being raised (or lowered?) along the side of the ship, in the same location. Perhaps there are other, more detailed portraits, but it would seem Vale and VDV agree with each other.
- 1,035 replies
-
- 5
-
-
- royal katherine
- ship of the line
- (and 1 more)
-
Will you represent the anchor linings, beneath the fore chanels?
- 1,035 replies
-
- 5
-
-
- royal katherine
- ship of the line
- (and 1 more)
-
In English, those pieces are known as skids.
- 1,035 replies
-
- 7
-
-
- royal katherine
- ship of the line
- (and 1 more)
-
Excellent info, EJ. Thanks for taking the time to explain all of that. And, yeah, I was thinking about a serving machine.
-
What are your impressions of the Syren line, EJ? I've read nothing but good things about it. In my living situation, space comes at a premium, so I'm less inclined to build a rope walk and make my own line, but maybe... I was thinking Syren's line would be my big splurge.
-
Doris - have you ever considered applying your ornamental talents to a French ship? Any projects you are kicking around for the future?
- 1,035 replies
-
- 5
-
-
- royal katherine
- ship of the line
- (and 1 more)
-
Now, I really have to wonder whether this relatively primitive portrait of Soleil Royal (please follow link below) isn’t the same ship portrayed above. There is some similarity in their aspect and bearing. https://goo.gl/images/yXgoXi While we are at it, why not re-visit the following imagery, which was previously identified as, perhaps, the Royal Louis of 1668. She is depicted as carrying 16 guns on her lower battery. Are these all the same ship? The quarter galleries, however fuzzy, do seem to bear some resemblance to those in the prior post. Hmmmmm...
- 2,699 replies
-
- 3
-
-
- heller
- soleil royal
- (and 9 more)
-
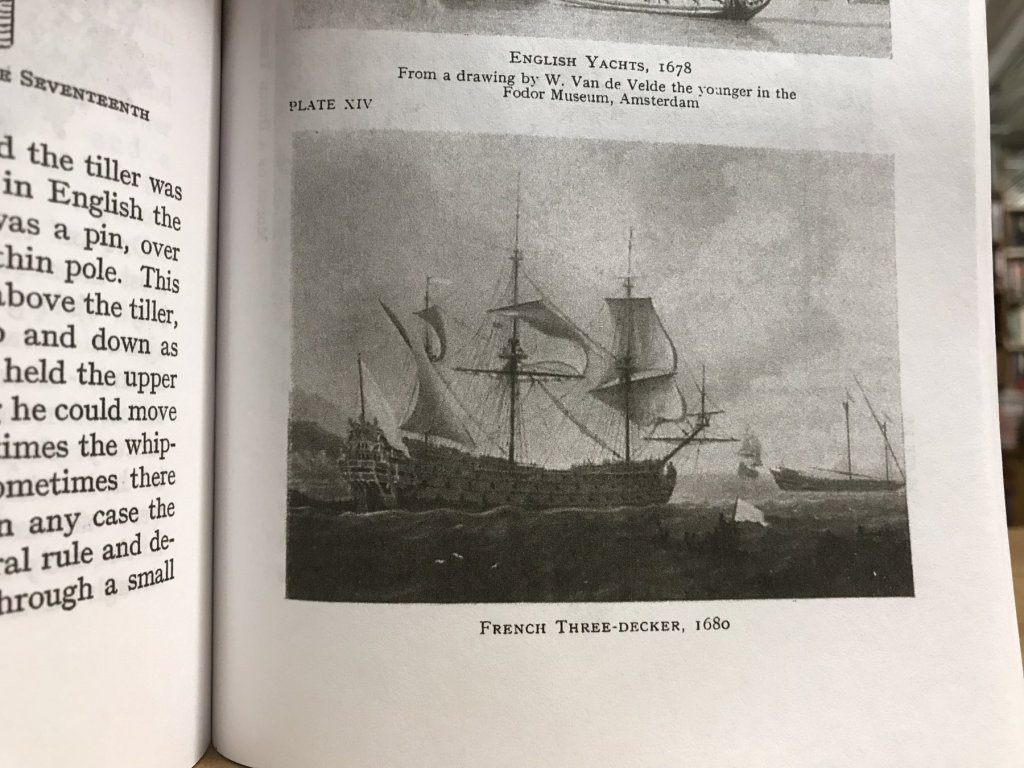
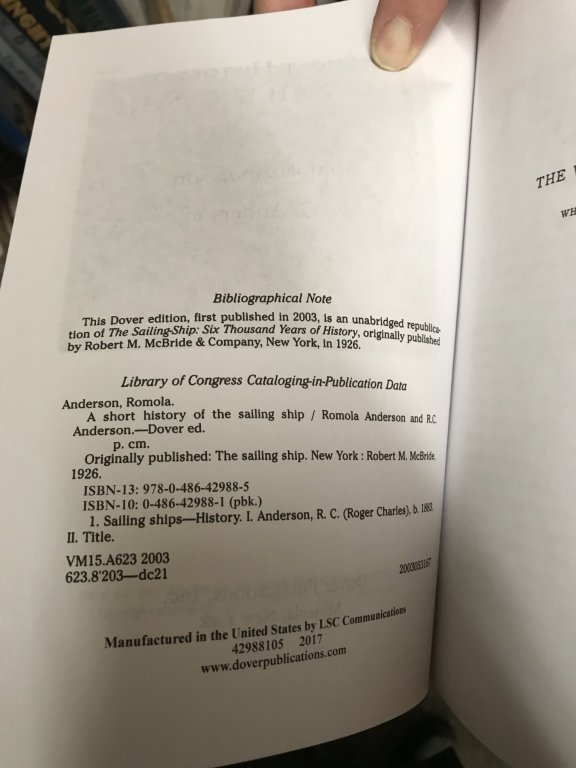
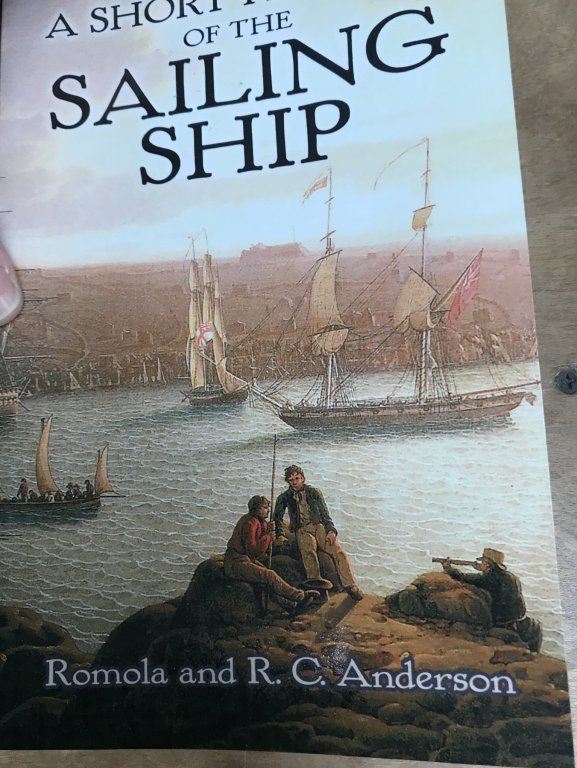
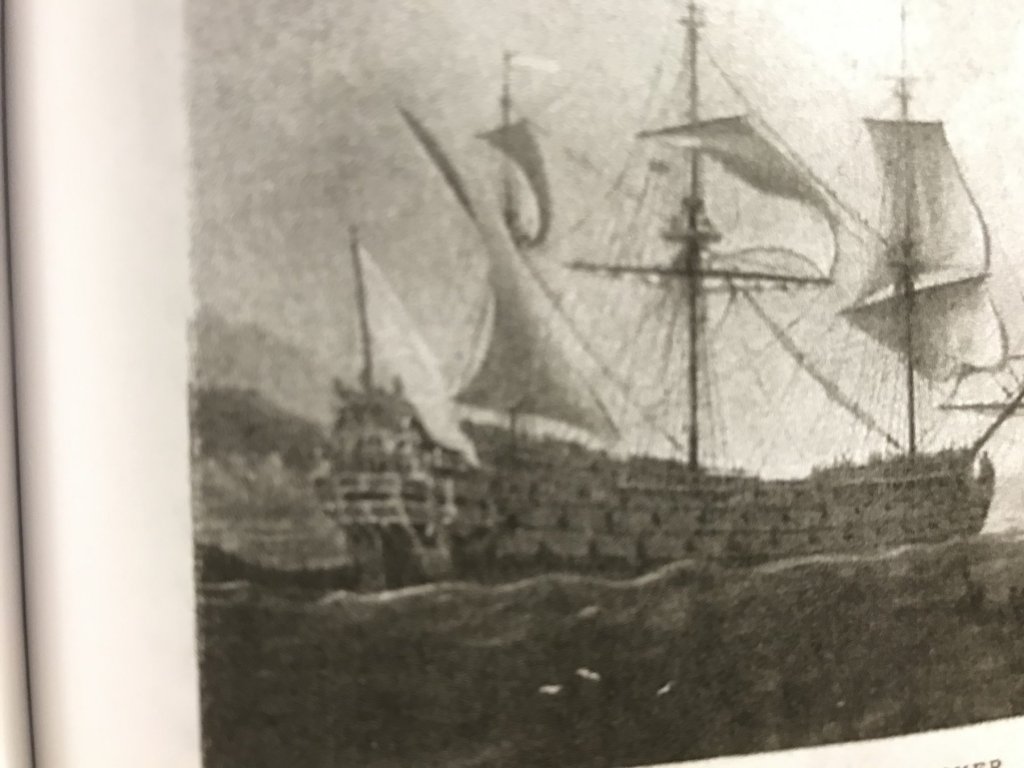
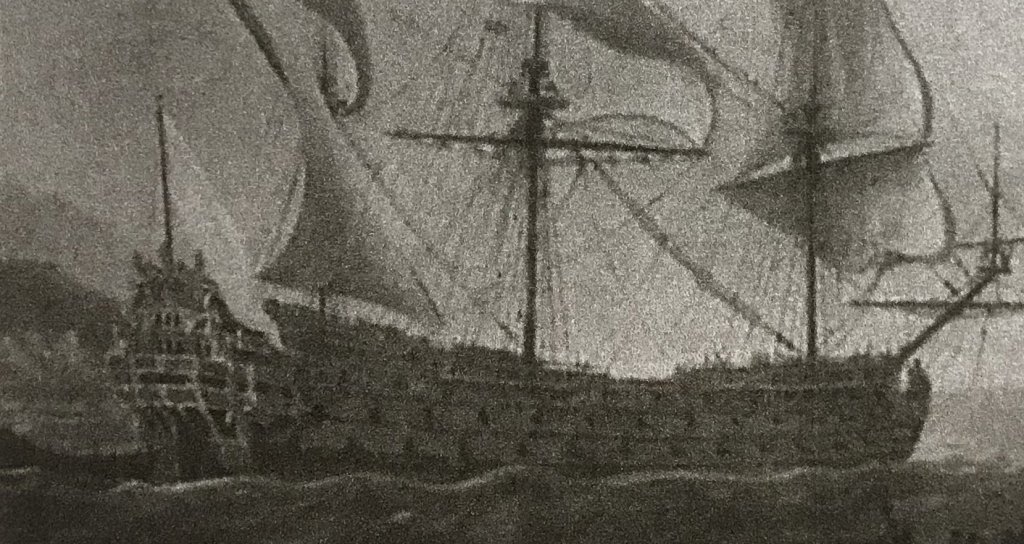
I stopped by The STRAND bookstore, today, hoping for a little bit of treasure, and I was not disappointed! Now, I really can’t say WHAT this is, but it IS interesting, and I can say where I found it. Here is the title and accompanying copywrite page: Hmmmm... R.C. Anderson. He might have known a thing or two about these old ships, from the days of the spritsail topmast. And look here, on page 156(?) of this unabridged reprint: Wow! That looks like an important three-decker of the first marine!! But, which important three decker could it be? The caption only says “French Three Decker, 1680” Well, it isn’t the Monarque because we know what she looked like. Also, as becomes more clear in the Wikipedia explaination below, the Monarque would have been classed as a ship in the Premier Rang Ordinaire, with less than 100 guns. The ship pictured almost certainly carries somewhere between 100 and 106 guns. In addition to all of that, we know that the stern of the Royal Louis of 1668 appears to have more in common with the large figurative carvings of the Monarque. The stern of this vessel does not appear to be teeming with huge figurative carvings. We know what La Reyne looked like from the Van de Velde sketch of 167(3)? - which may have been an altered appearance, following the reglement of 167(1?). We know what the Dauphin Royal of 1668 looked like. We also have an idea of what she might have looked like after 1671. So what does that leave us with - of the remaining six first-rates from the initial building program in 1670? Only Le Soleil Royal and La Couronne. However, Couronne - while having three flush decks, would not have carried guns in the waist, on her main deck. Though she was constructed at Brest by Laurent Hubac, she only carried between 80 and 82 guns. The ship pictured carries many more than that. I have no idea what this 1669 version of La Couronne looked like, though. Here is an excerpt from Wikipedia explaining the principal differences between ships of Le Premier Rang Extraordinaire, and Le Premier Rang Ordinaire: Vaisseaux de Premier Rang ExtraordinaireEdit The largest and most heavily armed First Rank ships, effectively those carrying 100 carriage guns or more, were placed in a sub-category of Vaisseaux de Premier Rang Extraordinaire. Only a few of these were built, but they always provided the flagships of the two Fleets - the Flotte du Levant (on the Mediterranean coast of France) and the Flotte du Ponant (on the Atlantic and Channel coasts). They were all full three-deckers, i.e. with three full-length gun decks, with the uppermost of these surmounted by an armed forecastle, quarterdeck and poop. Royal Louis 104 guns (designed and built by Rodolphe Gédéon, launched 1 February 1668 at Toulon) – renamed Royal Louis Vieux1692 and broken up 1697. Nominally assigned 120 guns, but never carried more than 104. Dauphin Royal 100, later 104 guns (designed and built by François Pomet, launched 29 March 1668 at Toulon) – broken up 1700 Royal Duc 104 guns (designed and built by Laurent Hubac, launched December 1668 at Brest) – renamed Reine in June 1671 and broken up 1688 Soleil Royal 106, later 110 guns (designed and built by Laurent Hubac, launched 13 December 1669 at Brest) – burnt by the English in an action at Cherbourg in June 1692 Victorieux 108 guns (designed and built by François Pomet, probably launched in late 1675 at Rochefort) – broken up 1685 (badly built and never brought into service) Royal Louis 110 guns (designed and built by François Coulomb snr, launched 22 September 1692 at Toulon) – broken up 1727 Foudroyant 104 guns (designed and built by Étienne Hubac, launched 24 December 1692 at Brest) – exchanged names with Soleil Royal in March 1693 (see below), broken up 1714 Terrible 100/104 guns (designed and built by Blaise Pangalo, launched 21 February 1693 at Brest) – broken up 1714 Foudroyant 104 guns (designed and built by Blaise Pangalo, launched 14 November 1693 at Brest) – originally to have been named Soleil Royal, but exchanged names with Foudroyant in March 1693 (before work on her began), and broken up 1714 Vaisseaux de Premier Rang OrdinaireEdit While the smaller First Rank ships also had three full-length gun decks, the uppermost of these before 1690 generally carried carriage guns only on the forward section and on the after section of that deck, with a section between them in the waist of the ship where no guns were mounted (and no gunports fitted). These ships had no forecastle or poop, so that the two sections of the upper gun deck served the function of forecastle and quarterdeck, while the nominal quarterdeck was short and served in effect the function of a poop. All First Rank ships built from 1689 (until 1740) had three full-length gun decks, usually plus a number of smaller carriage guns mounted on the gaillards(i.e. the quarterdeck, forecastle and possibly a poop deck). Some of the earlier ships built before 1689 received extra guns and gunports fitted in the waist section of their upper deck around 1689, to bring them up to 80 guns or more. Vendôme 72, later 66 guns (designed and built by Laurent Hubac, launched Spring 1651 at Brest) – classed as First Rank in 1669; renamed Victorieux in June 1671 but hulked in the following month and taken to pieces in 1679. In 1660 the 72-gun Vendôme was the sole ship which met the criteria of carrying more than 70 guns, and she retained this First Rank status in spite of being later reduced to fewer than 70 guns. Saint Philippe 78, later 84 guns (designed and built by Rodolphe Gédéon, launched 3 February 1663 at Toulon) – classed as 1st Rank in 1669; burnt by the English in the Battle of La Hogue in June 1692 Monarque 84 guns (designed and built by Laurent Coulomb, launched 28 April 1668 at Toulon) – broken up 1700 Île de France 74/80 guns (designed and built by Louis Audibert, launched 16 February 1669 at Toulon) – renamed Lys in June 1671 and broken up 1691 Couronne 80/82 guns (designed and built by Laurent Hubac, launched 18 February 1669 at Brest) – broken up in 1712 Paris 72/80 guns (designed and built by Jean Serrin, launched 13 March 1669 at Toulon) – renamed Royale Thérèse in June 1671 and broken up in 1692 Henri 80 guns (designed and built by Jean-Pierre Brun, launched April 1669 at Tonnay-Charente) – renamed Souverain in June 1671, then renamed Admirable in June 1678 Sceptre 80, later 84 guns (designed and built by Laurent Coulomb, launched 11 February 1670 at Toulon) – broken up 1692 _____ So, in summary, I’m not saying this is a portrait of Soleil Royal, in her first incarnation. What I am saying, though, is that the portrait warrants further investigation. Sure, if one were to count the visible gunports of the first battery, they will come up short of 16. There appear to only be 14 visible, with a possible hunting port, out of view. These kinds of discrepancies, however, were not un-common among even the best artistic depictions of the day. I have read, on several occasions, that some of the sculpture of the first Soleil Royal (Puget) was re-incorporated into Berain’s refit ornamentation of 1689. To what degree, or even if that is so, I cannot say with any certainty. A little closer now: A little closer, still, before the image breaks into pixels: Are those Puget’s signature horsehead figures supporting an open stern balcony above the stern counter? Maybe. Are those the Four Seasons busts supporting the main deck balcony? Too fuzzy to say. Isn’t the shape of the tafferal, itself, interesting; is that a reverse-cyma curve? Absolutely too fuzzy to say. I can say, though, that the style of the quarter galleries is definitely consistent with the ballustraded open walks of the first marine. Whatever the truth may be - looking at this portrait - it is not difficult for me to imagine Berain’s scheme translating well to the underlying structure shown here. A good starting point to begin answering these questions might be with the original edition of this book from 1926, which I would guess has much larger and clearer pictures. Does anyone out there have that edition? Can you find this plate? For my part, I will contact the publisher and see whether they have any better images of the painting, or any additional information about its origins and provenance. Who is this fuzzy ghost? I have no idea, but I will try to figure it out. After all - having spent the first 20 years of her life waiting for the big dance - wouldn’t it make sense that there would have been a number of original portraits of Soleil Royal? Certainly, the mercilous ravages of history and the closed curtains of private collections have done their part to obscure the truth about these great ships. I am aware, of course, that not all that glints is Soleil Royal gold. It never hurts to ask the question, though. Could that be Soleil Royal?
- 2,699 replies
-
- 2
-
-
- heller
- soleil royal
- (and 9 more)
-
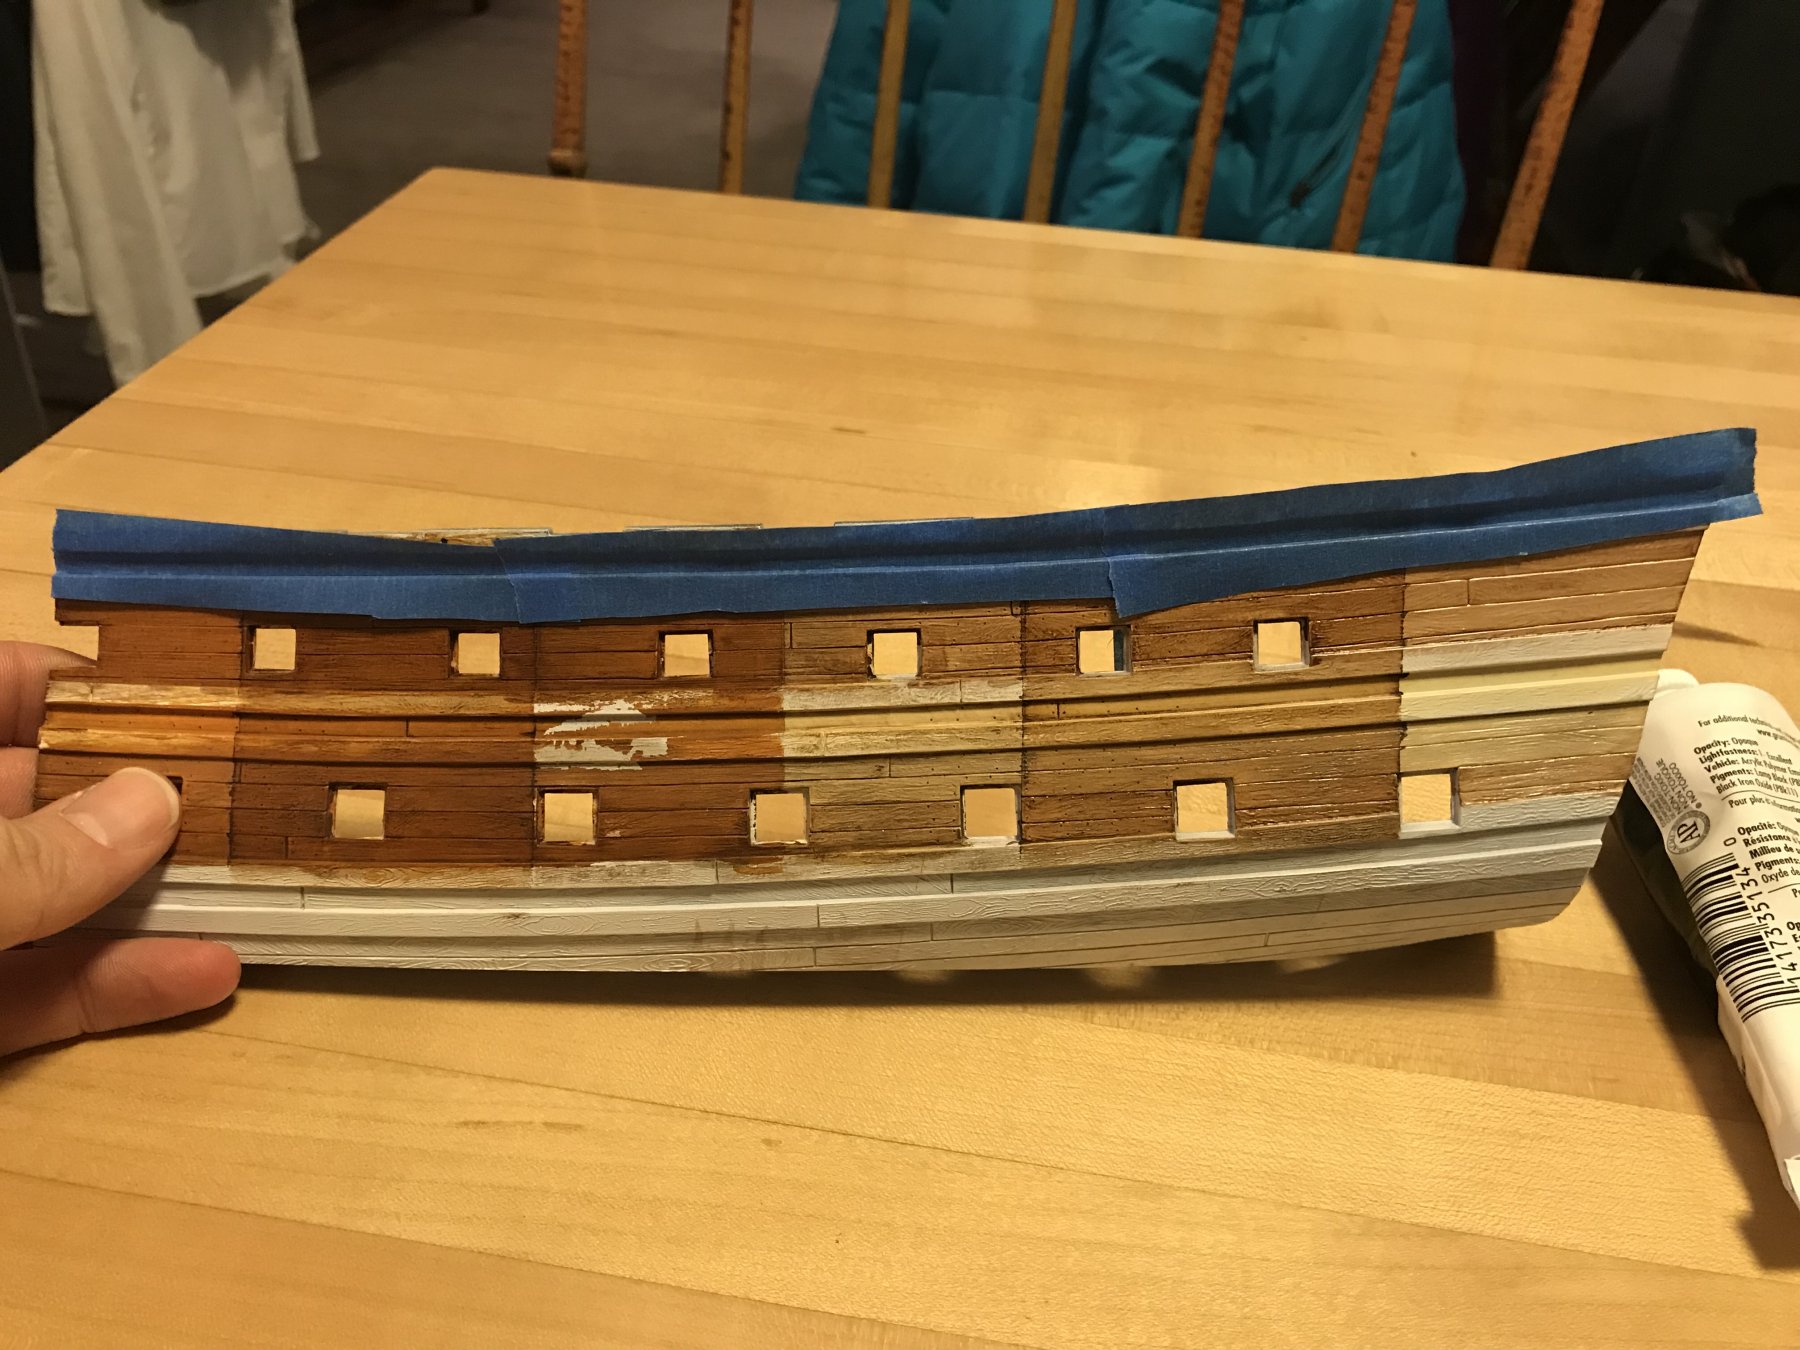
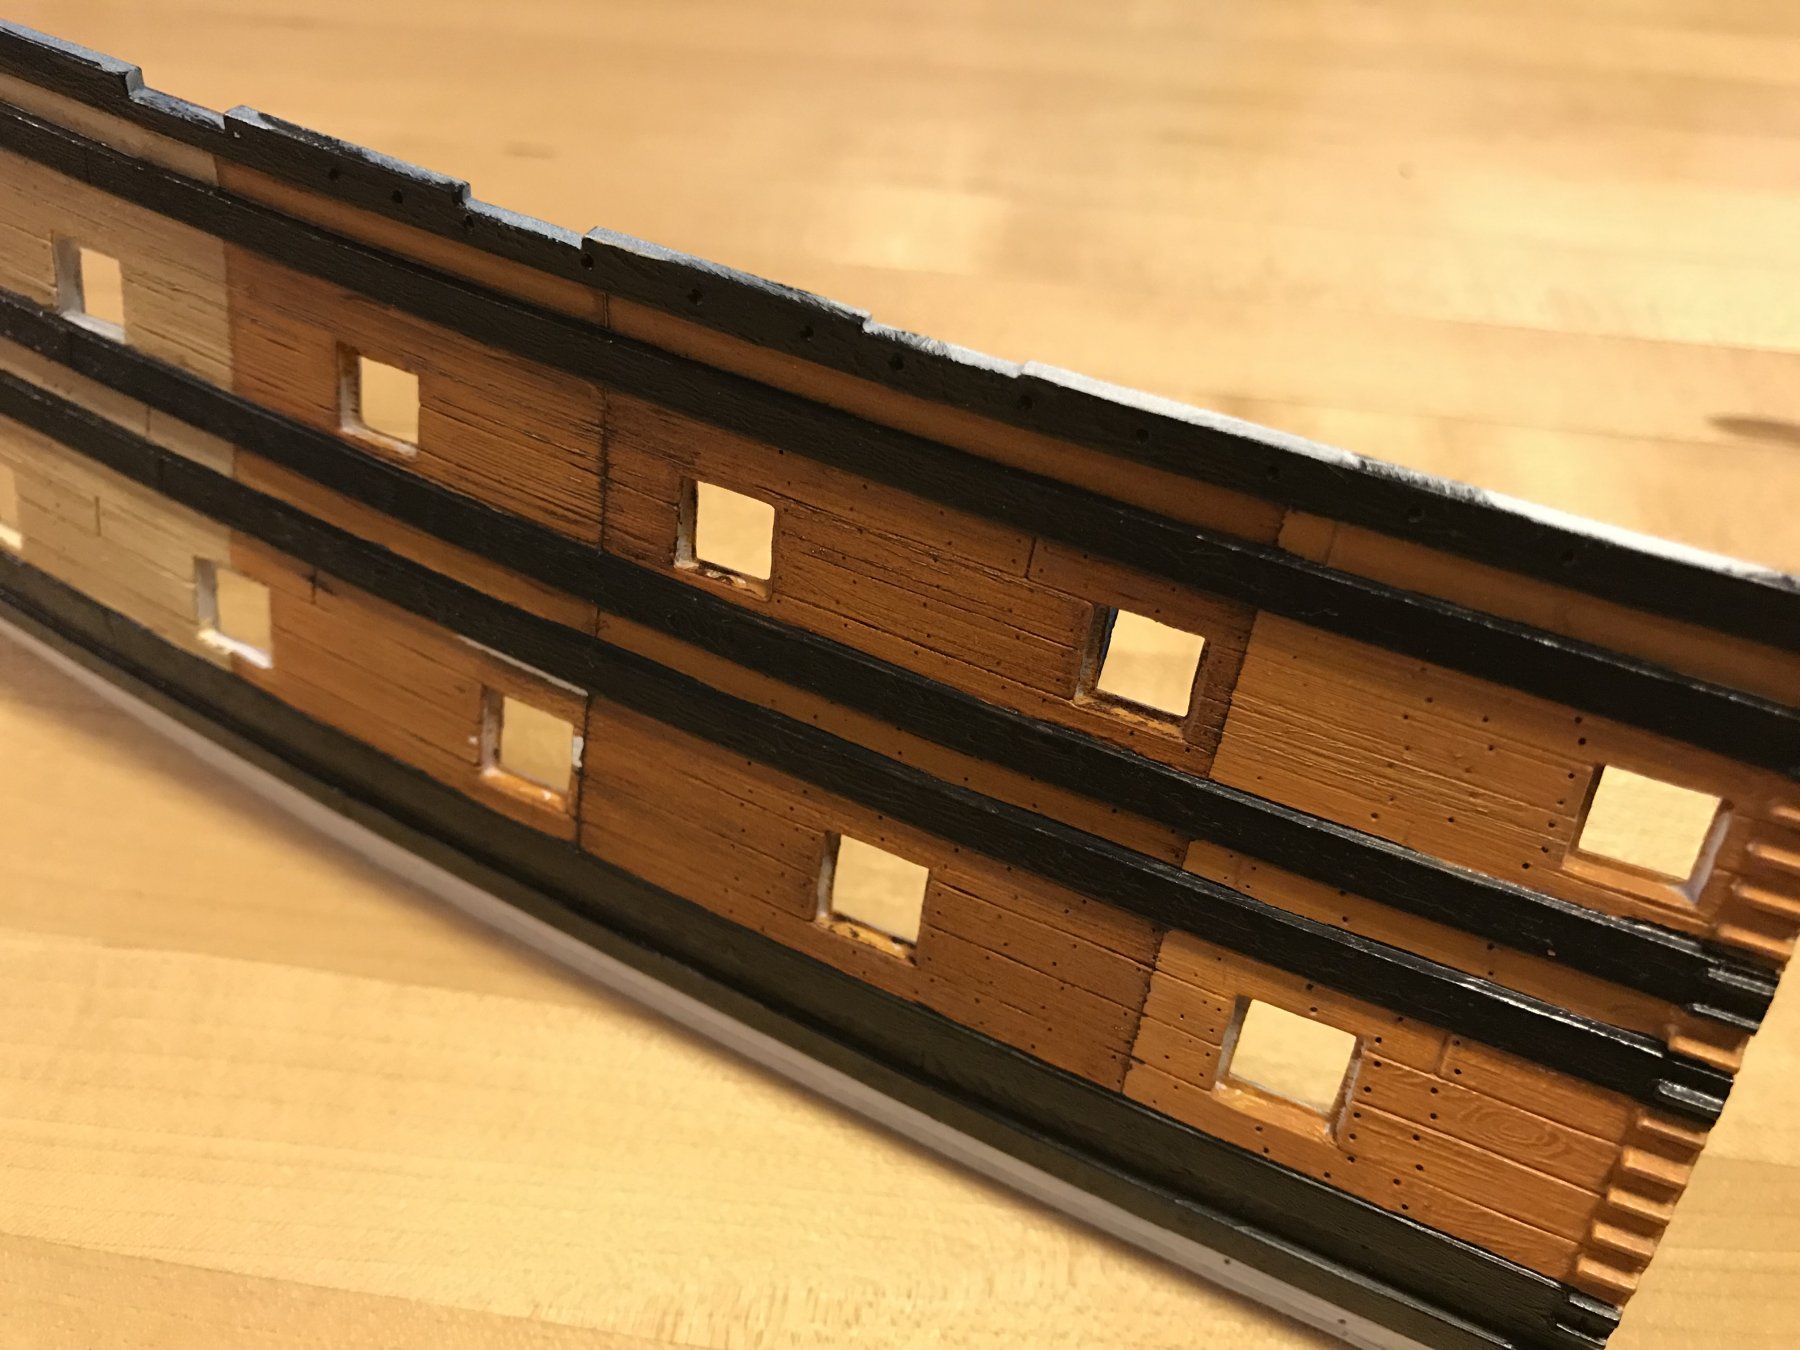
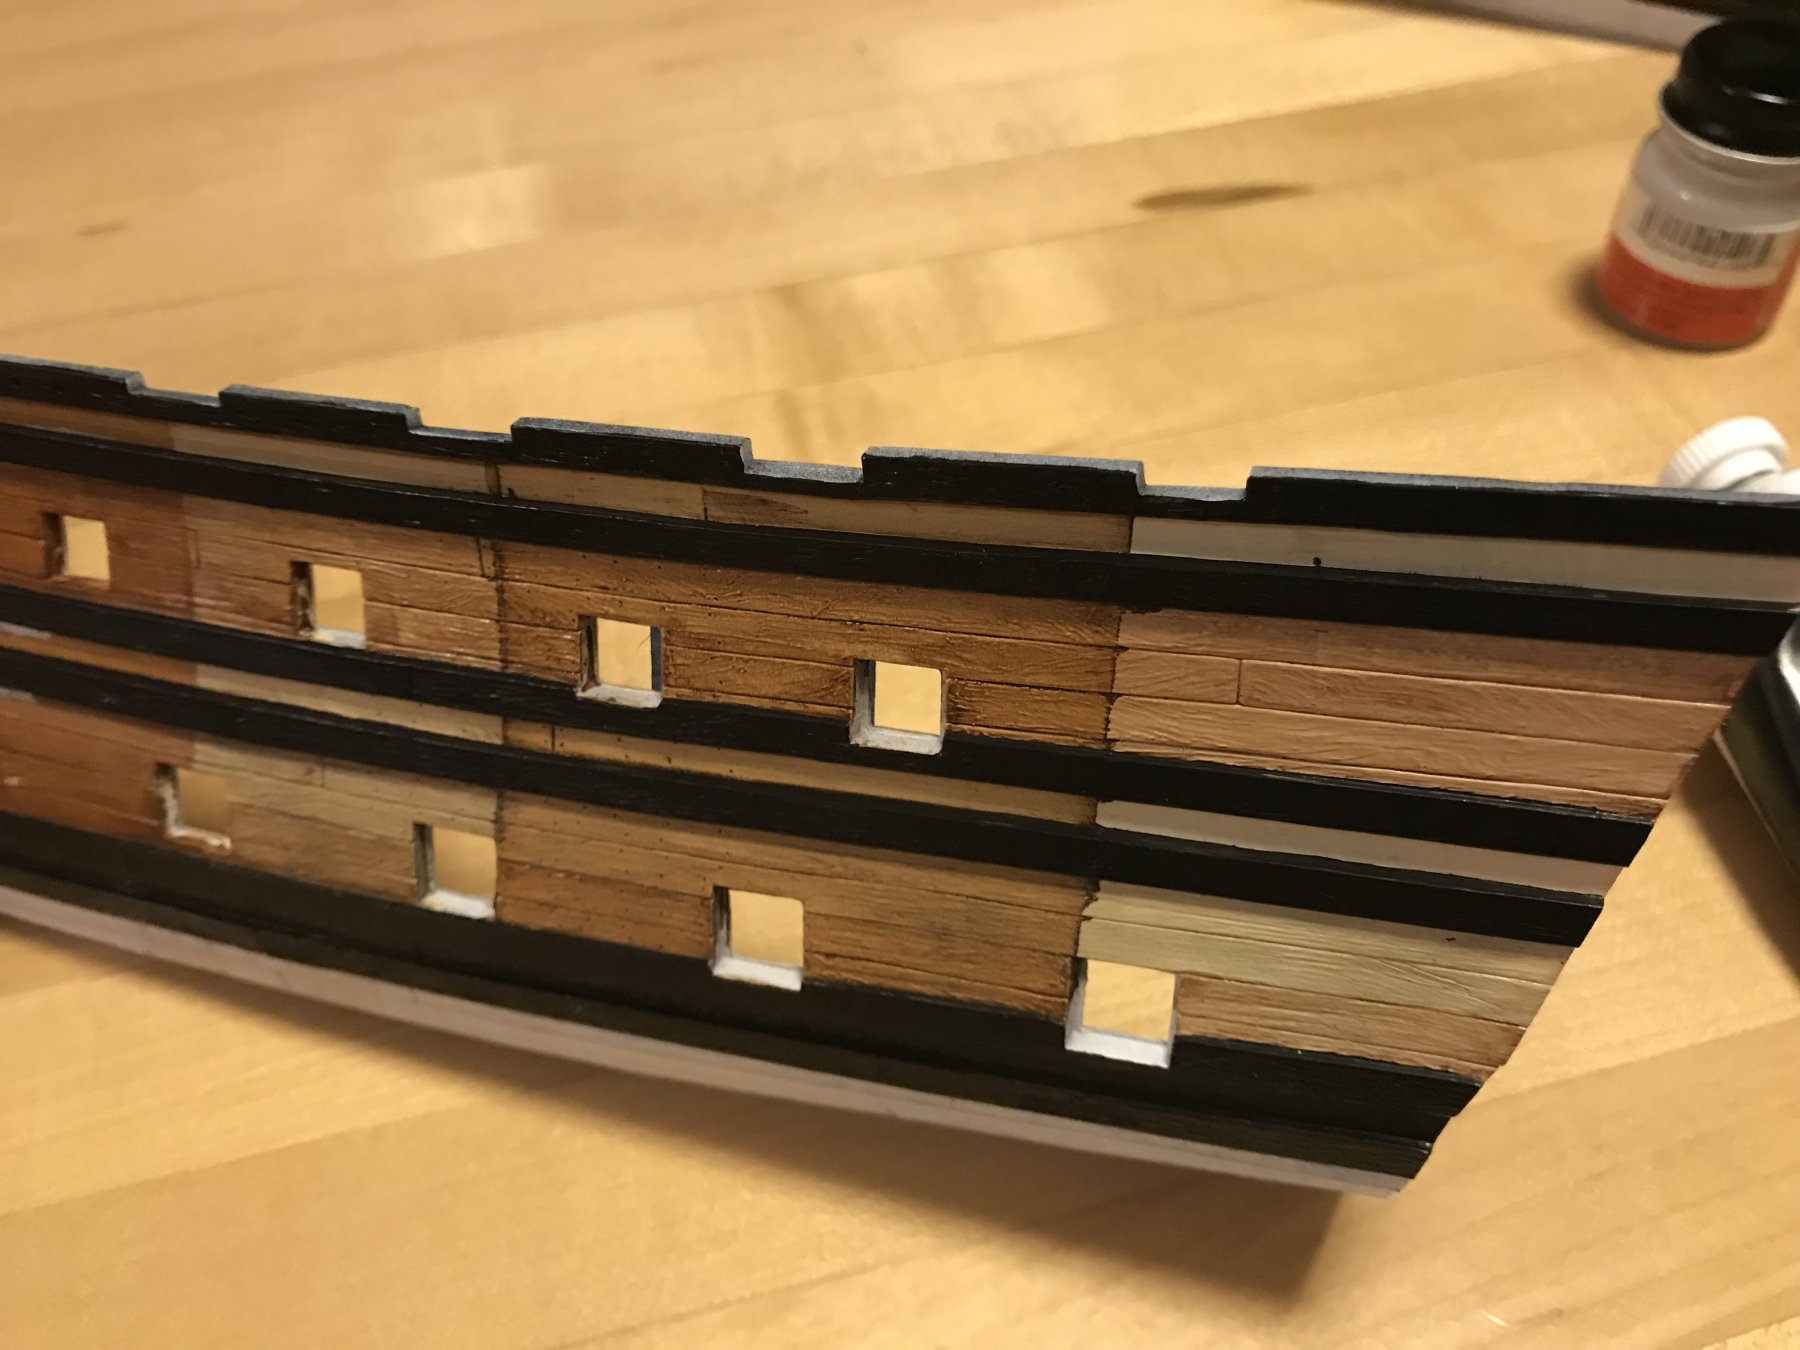
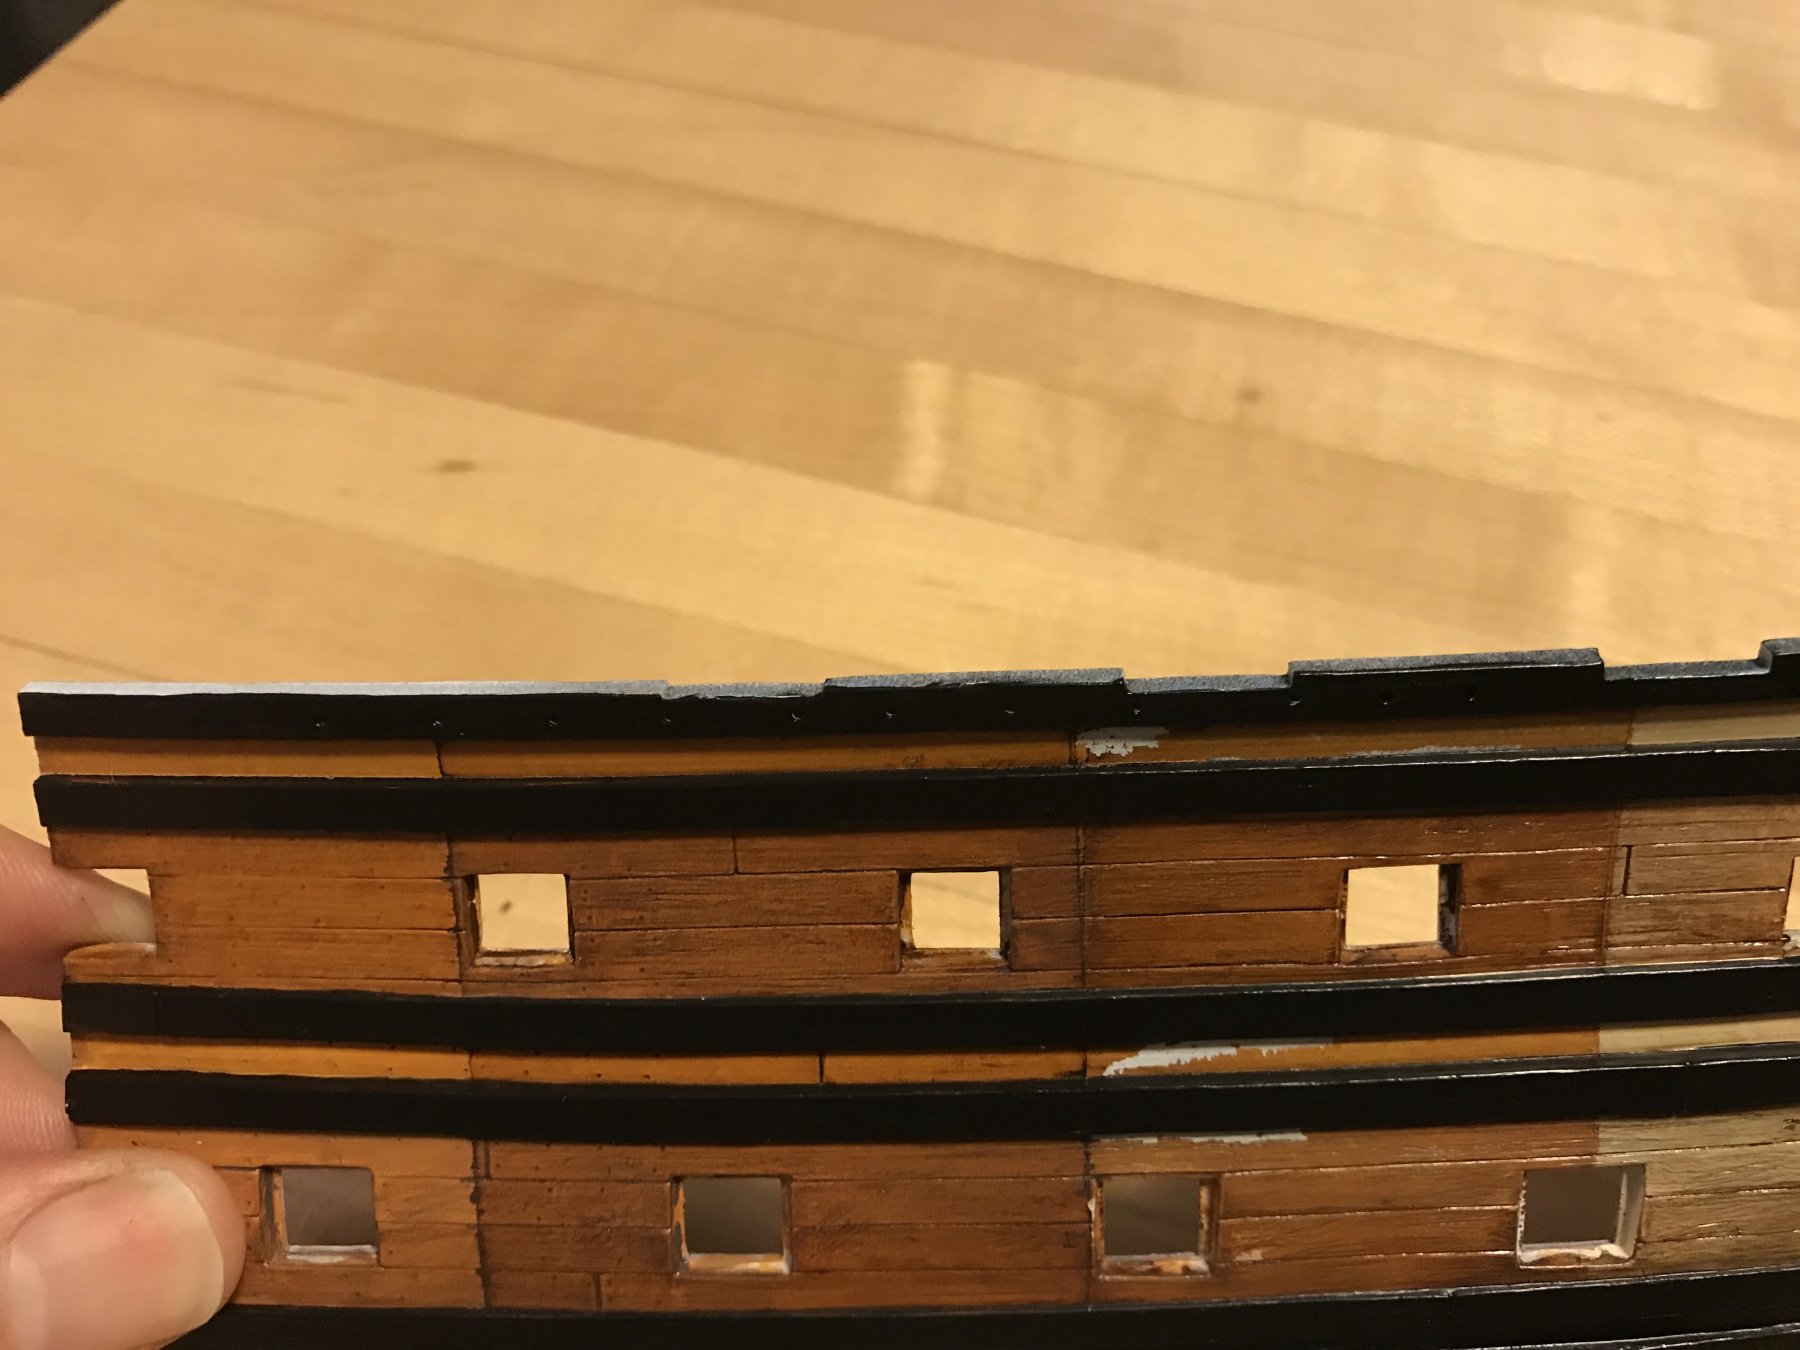
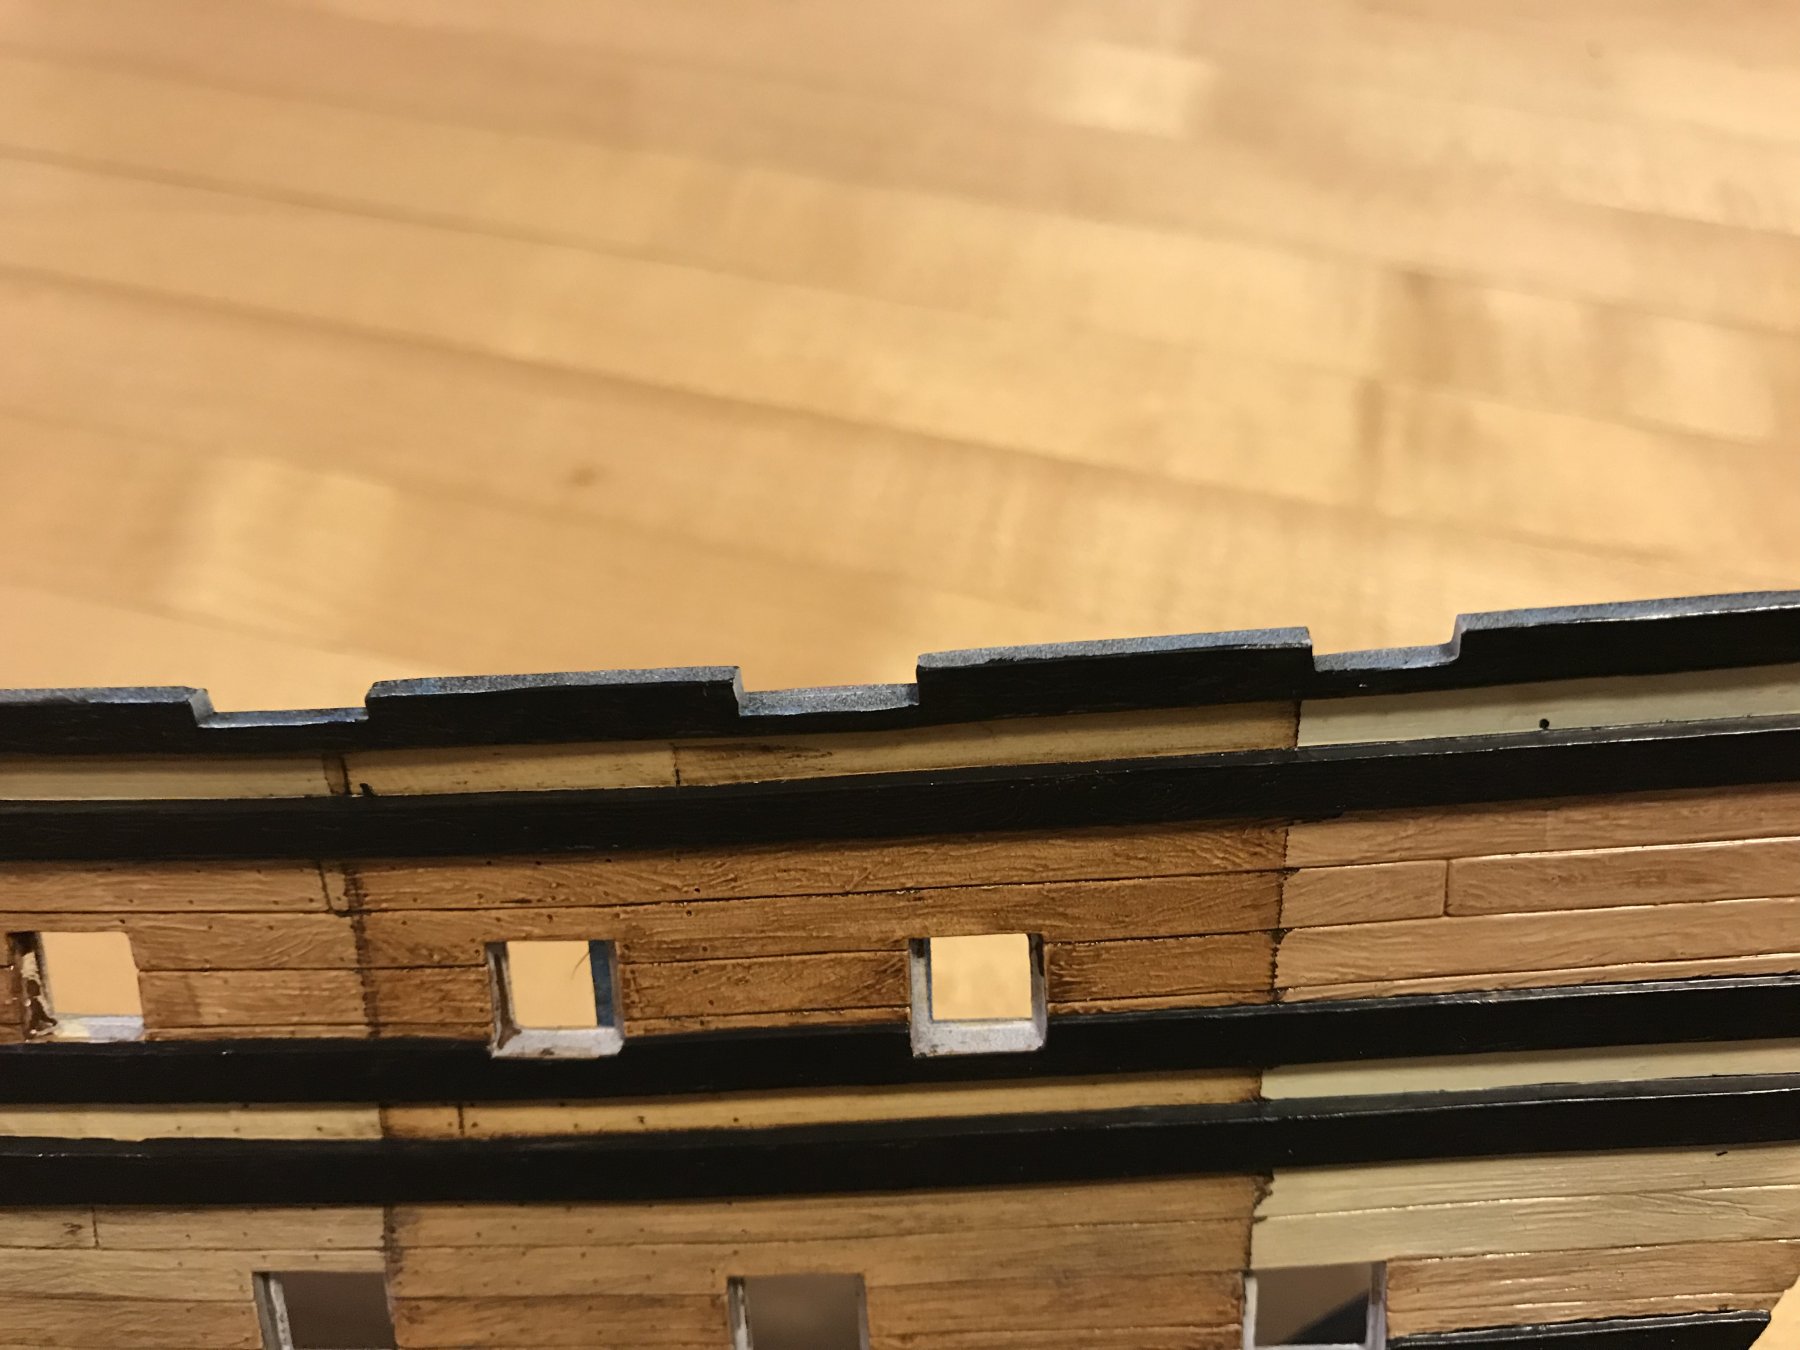
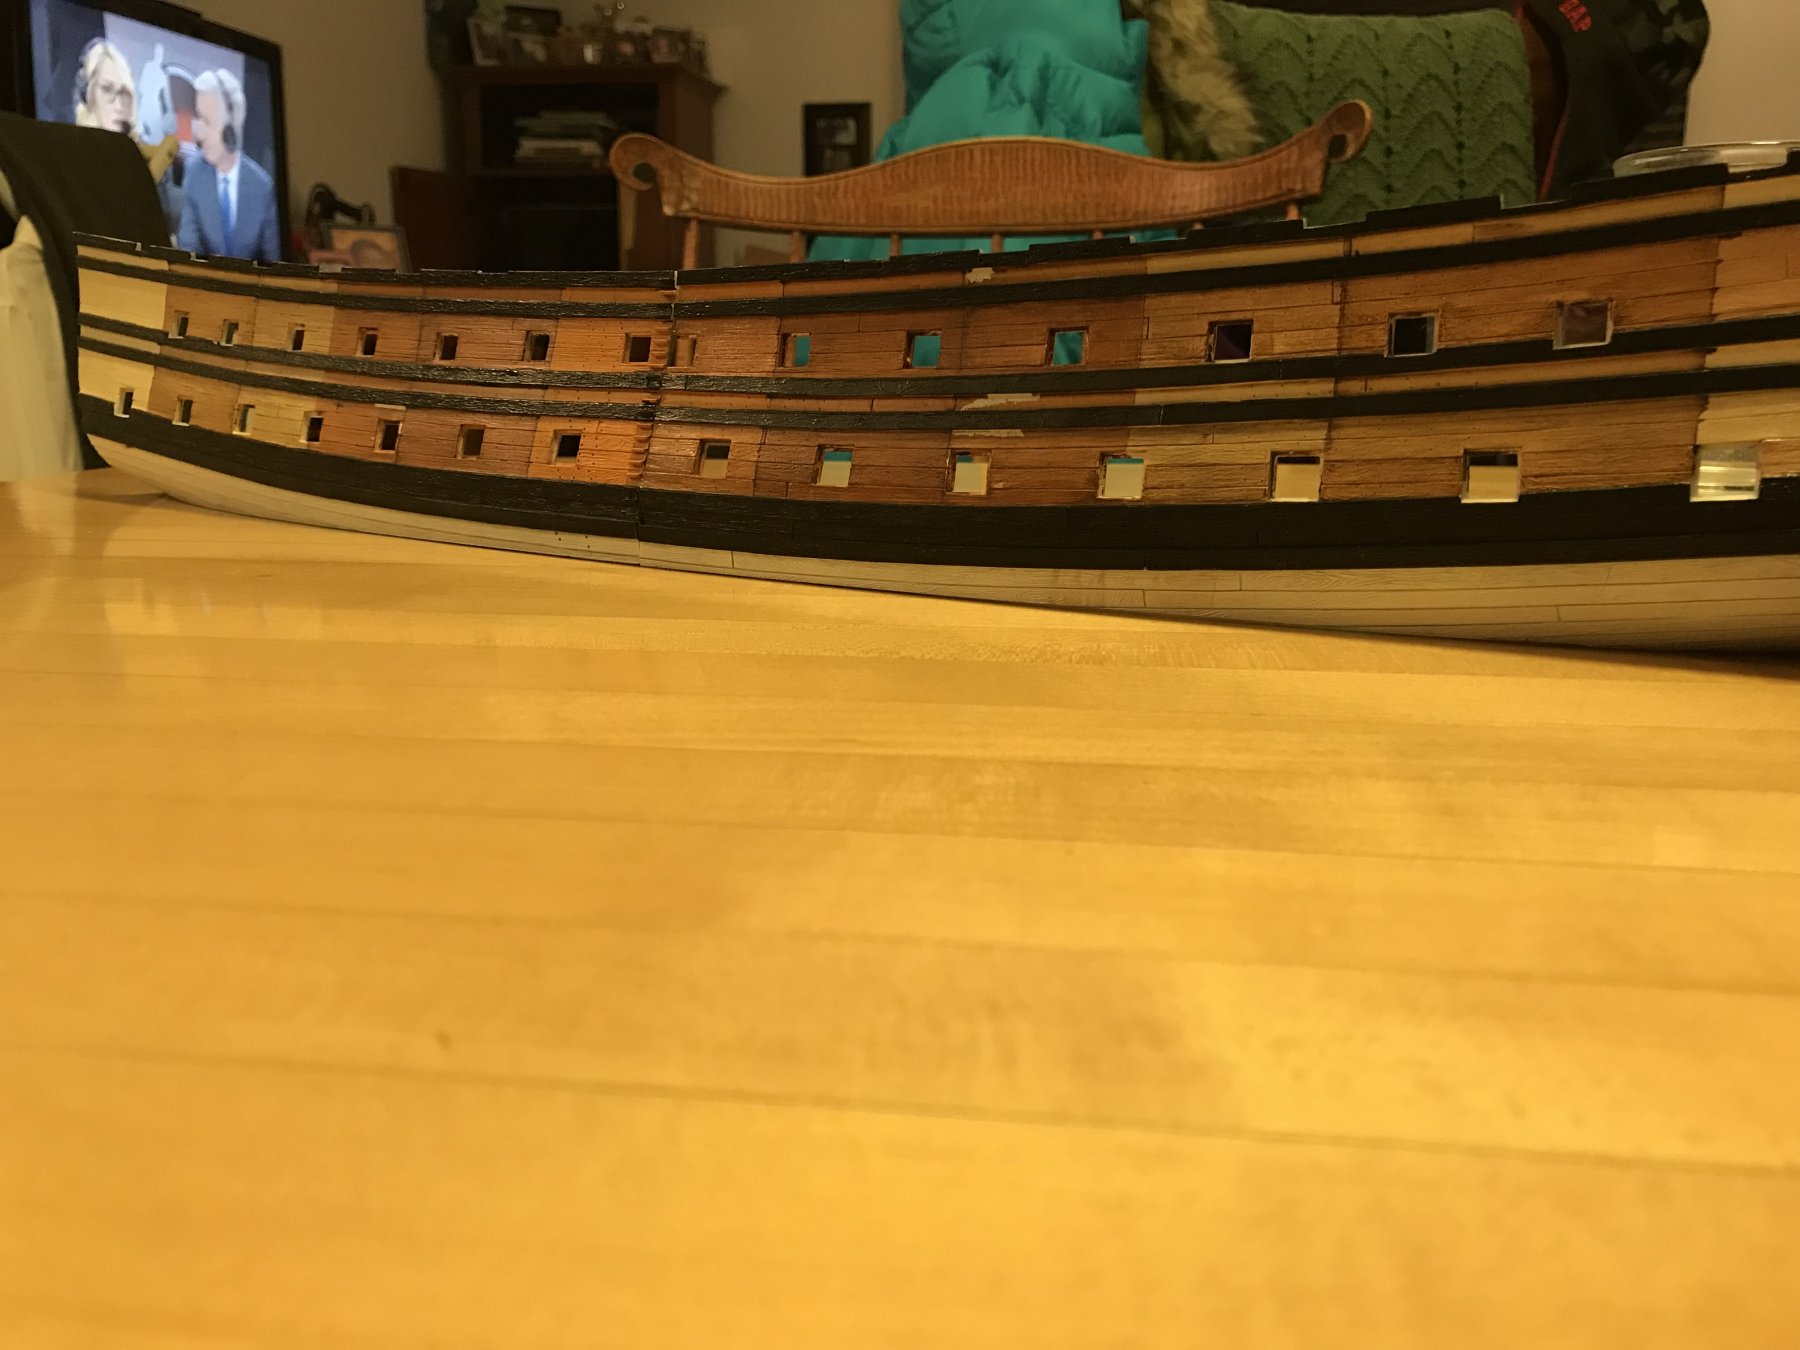
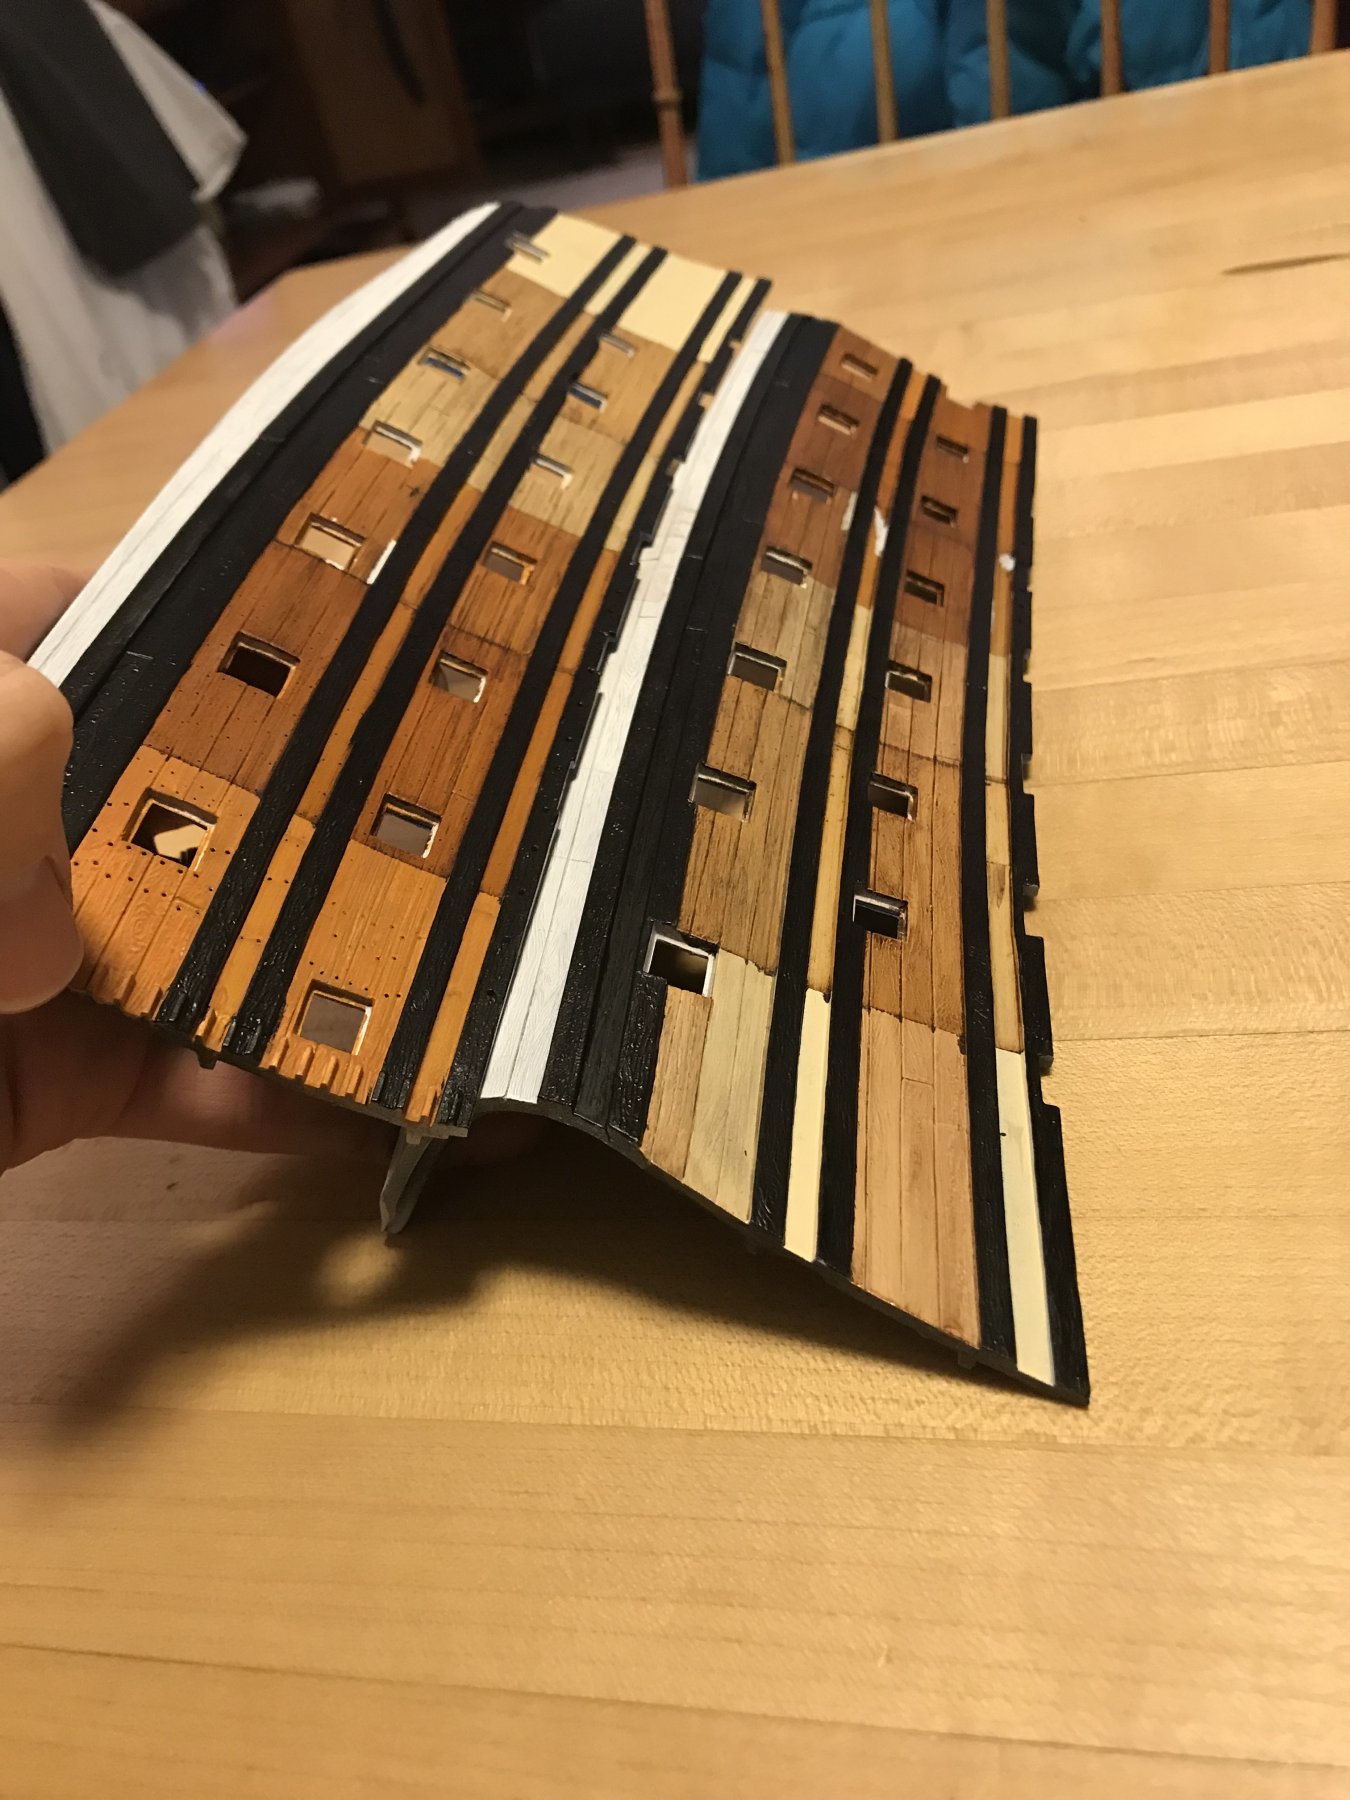
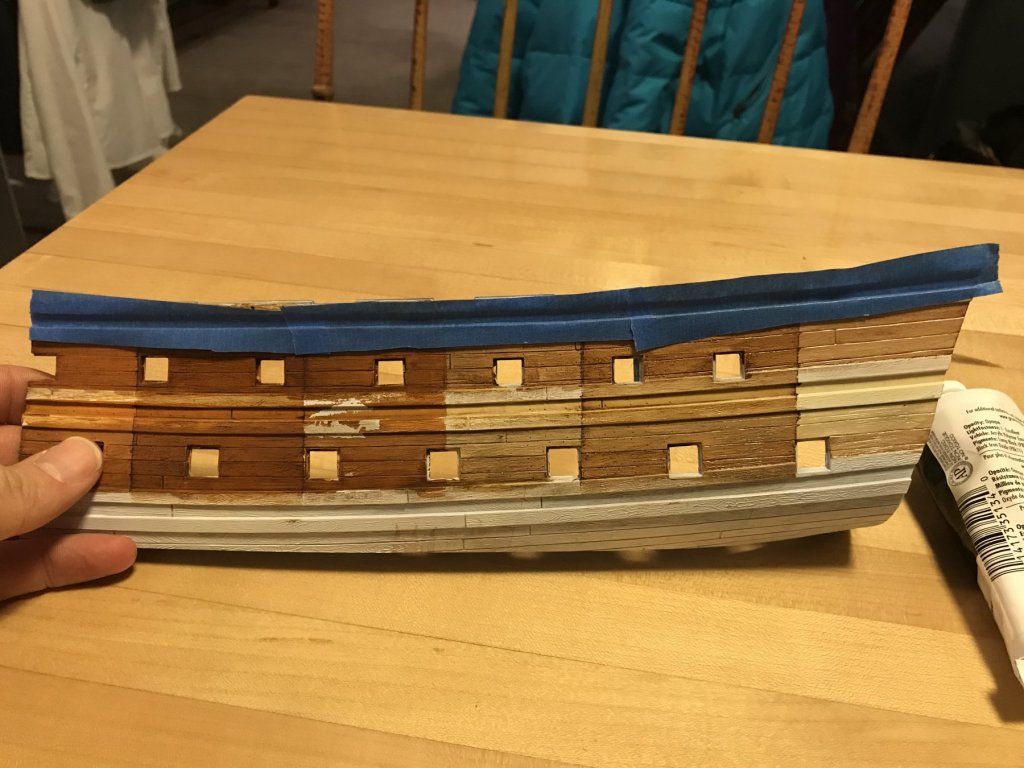
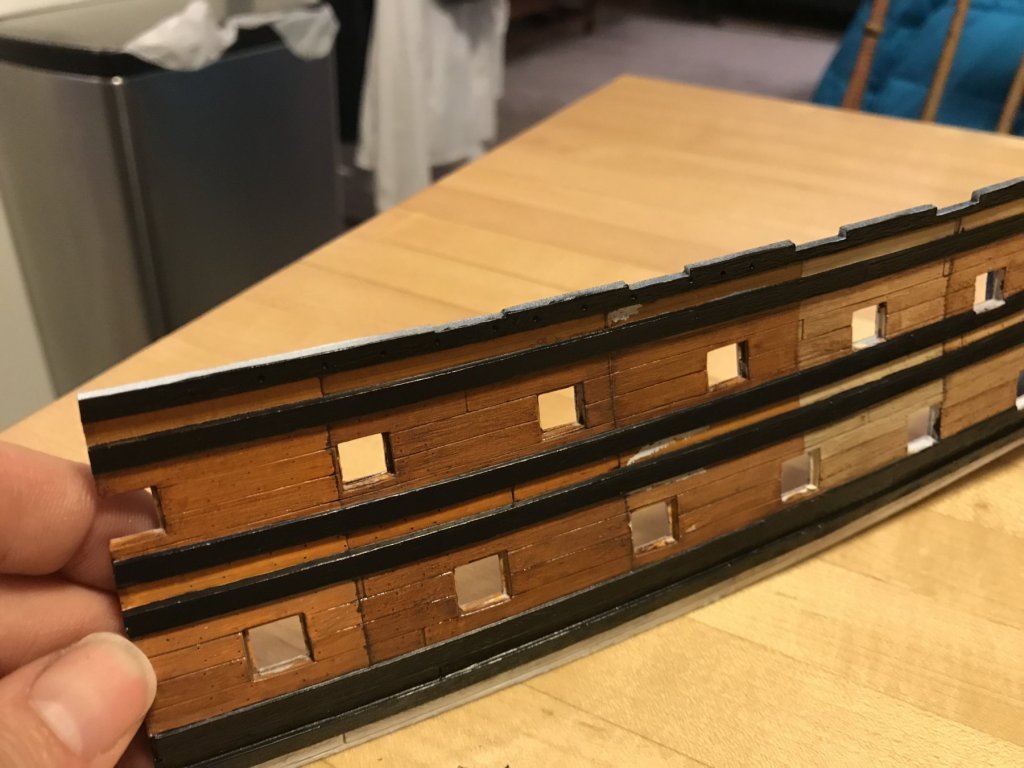
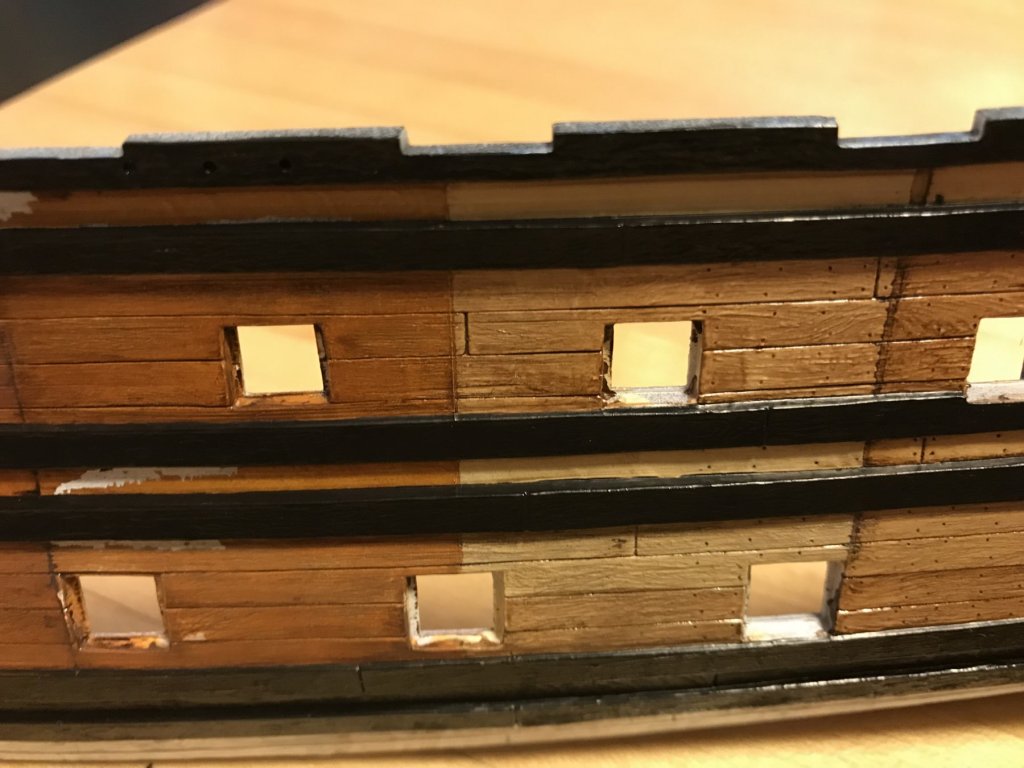
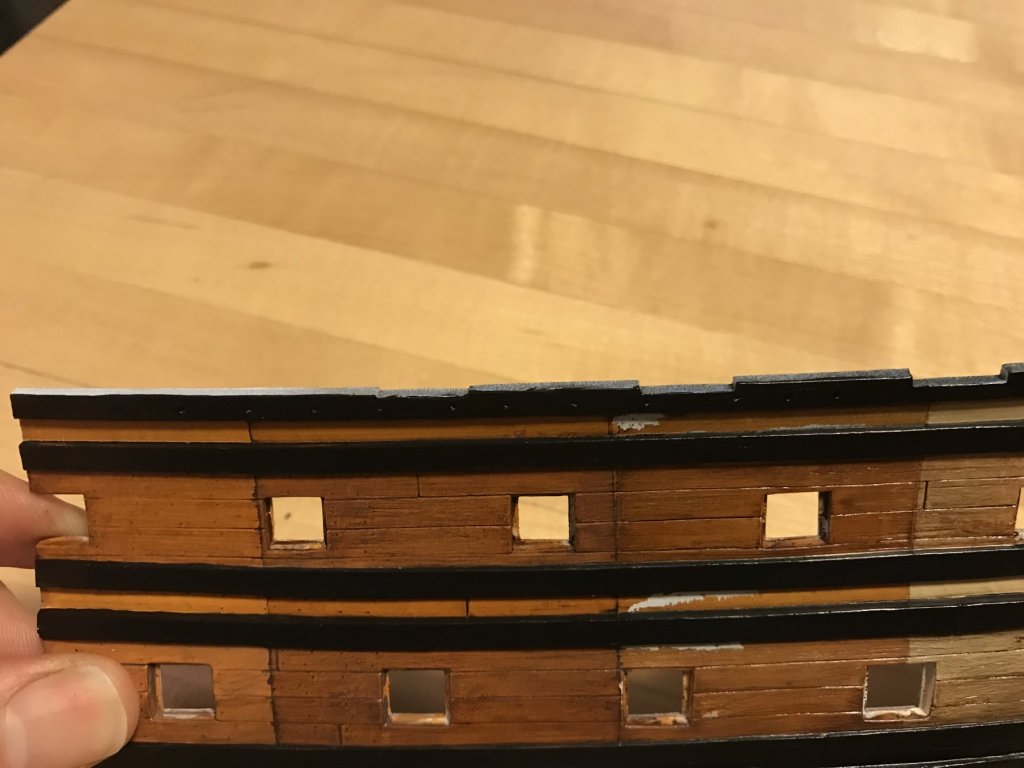
Thank you everyone for your likes and looking in, and for your thoughts and suggestions as to whether to mask, with what, or not at all. Last week, I rather casually cut in the starboard side wales by hand. I didn’t take as much care as I should have, and the results were decent, but not great. Tonight, for the port side, I committed to taking my time and to trying a little masking experiment. STARBOARD SIDE OVERALL IMPRESSIONS (fore to aft) You can definitely see some wobble, here and there, over the crease line. PORT SIDE OVERALL IMPRESSIONS: I burnished and cut in a mask for the flat between the top wales. Then I brushed a thin coat of dullcoat along the tape crease for the forward half of the wale. I decided to see whether burnished tape would be enough for the aft half of the wale. Overall, the hand cut-ins were much cleaner when I took my time. No surprise there. I had one wobble over, that isn’t terribly noticeable: And as for the taped wale, the dullcoat side came out without a single blemish: The aft side had two bleeds: Multiply that by a lot more, if I tape the whole thing, and I think the better approach is just to do what Henry suggests, and trust my hand and eye. Also, then I don’t have to be concerned with the tape pulling away any of my acrylic base color, or any of the simulated bolting that covers the wales. If not for those additional factors, I suppose I would go the dullcoat/sealer route. Here are a few side by sides: This picture, above, reminds me of a famous print advertisement that Plymouth developed for the 1970 Barracuda, which was painted in vertical stripes with every factory color option. I don’t think the car actually existed, at the time, however someone after my own heart has gone ahead and recreated that car with one half of the car a stock green and the other striped from bumper to bumper. Awesome, but I digress... This one shows the difference in crispness better: I have to say that I really like these Grumbacher acrylics. I thin them just a little bit with distilled water, and they go on and get into detail like a dream. There’s a good art supply store out near where I’m working in Brooklyn. Tomorrow, I’ll see if I can find a good color for the port lids and linings. I’ve been hunting for it, but most of what I’ve found is either too vivid/scarlet, or too drab/maroon.


- 2,699 replies
-
- 5
-
-
- heller
- soleil royal
- (and 9 more)
-
Thank you, Druxey! I really wanted to explore a less pristine model, for a change, and now I feel liberated by the discovery of just how easy it is. And it is really helpful to be able to paint spare parts, in order to get a really good idea of what things are going to look like, without sweating the application too much. I cut in the wales on one of the sample pieces, and though I worked pretty quickly, the top edge was a pretty clean line. Nevertheless, even tiny blurps onto the flat between wales can quickly spoil the effect. On the next sample piece, I’ll pull those strokes a little more slowly and deliberately, and see how that goes. But I’ll also try masking with this FROG tape that Dan has had success with. Maybe cut in the mask with a knife, burnish with a Q-tip as another poster cleverly noted on Dan’s Leviathan log, brush on a clear seal coat (Dullcoat) along the tape seam, and then brush in the black. I will prolly have a go at that later tonight.
- 2,699 replies
-
- 2
-
-
- heller
- soleil royal
- (and 9 more)
-
Thank you very much Dan and Henry! Hopefully, it won’t take as long to paint as it did to make. But, we’ll see. And, really, if it weren’t for your donating your old kit parts, Henry, this build would not be possible. The stern extensions buy me the extra real estate I need for the frieze and the new quarter galleries.
- 2,699 replies
-
- 1
-
-
- heller
- soleil royal
- (and 9 more)
-
I wonder what Jimmy Hendrix would have thought of that, if he could see it through his purple haze periscope. What a learning experience, and effort well expended. The dazzle really came out beautifully. Interesting period pics, as well. It really is confusing to make out the shape of the bow on that pic of the ship in port.
- 238 replies
-
- 4
-
-
- leviathan
- troop ship
- (and 2 more)