Hubac's Historian
-
Posts
3,314 -
Joined
-
Last visited
Content Type
Profiles
Forums
Gallery
Events
Everything posted by Hubac's Historian
-
 You are welcome, Jay. In truth, though, I owe my understanding of the allegory of SR’s stern to Michel Saunier and his painstaking research for his completely scratch-built model. Michel is the primary researcher of this ship. If you haven’t seen his model, you should look it up on MSW.
 -
I really appreciate that, Mike. I feel sometimes that I overdocument the minutea, but that’s just who I am - a classic over-sharer 😀
- 2,699 replies
-
- 2
-

-
- heller
- soleil royal
- (and 9 more)
-
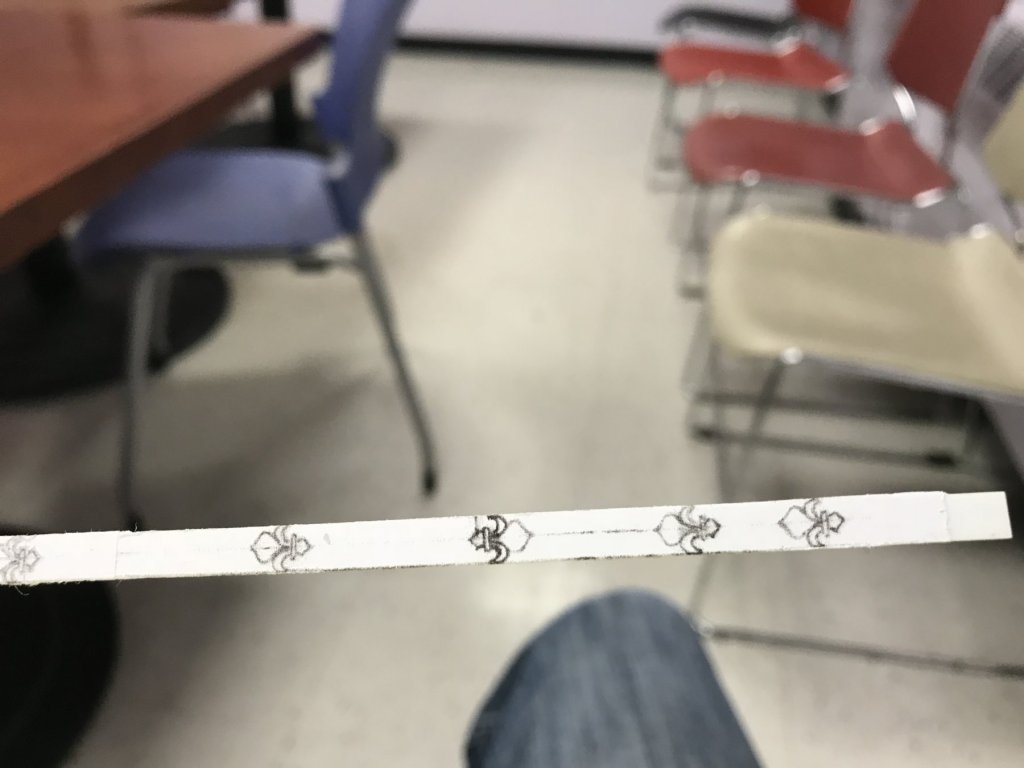
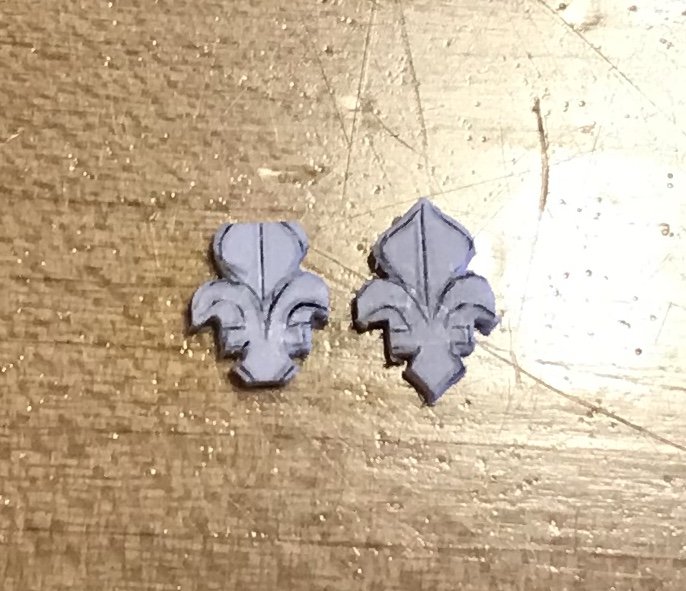
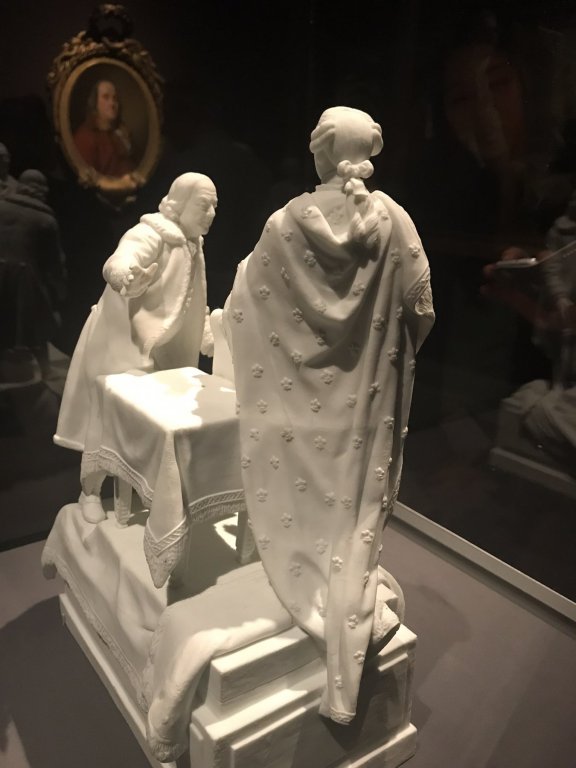
In preparation for my week off, in Cape Cod, I am trying to prepare fleur-de-lis carving blanks for the frieze. My current inability to print my GIMP drawing, to scale (or at all, really), has me improvising in ways that are somewhat successful and in other ways not. I’ve been taking measurements off my flat computer screen with my Starrett rule, to determine that my fleur-de-lis for the frieze should be very nearly 3/16” x 3/16”. Great, I think to myself - I have styrene strip that is 3/16” x 1/16” thick! So, on a piece of vellum, and within these perameters, I begin to attempt drawing my fleur-de-lis. This takes a few hours to arrive at proportions that are pleasing and approximately close to what I could achieve on the computer. For reference, though, I went back to pics from a recent visit to the Met, which featured an exhibit on the court of Louis XIV. Among the exquisite items and artifacts, on display, was this relatively small marble study, that depicts Benjamin Franklin and Louis XVI, on March 20, 1778, signing the Treaty of Alliance. Aside from a relationship that would help (tremendously!) forge our American independence, what I was most drawn to were the perfectly rendered fleur-de-lis that adorn Louis’s cape. Look, Ben’s going in for the Bro-shake: This is, in actuality, a very small-scale sculpture of this event in Amero/Franco history, but the carving of the marble is remarkable in its detail and consistency. Here, it seemed to me, was a perfect example of everything a fleur-de-lis should be. With that settled and the first flower drawn, I next folded the vellum over that first drawing, and made a series of tracings, all in a row - 8 in all. My objective, ultimately, is to make carving blanks from the five best tracings. Reasonably satisfied, and reasoning as always, that I can correct shaping discrepancies with the tools, I pasted a photocopy of my drawing to a strip of styrene. I wanted to preserve the original drawing for the several other sizes of fleur-de-lis that I will need elsewhere on the ship. Here is a photo montage of my mixed results and several epiphanies along the way: These look decent. Workable. After filing a few to profile, though, I discovered that they did not fit neatly within the sheer strakes at the fo’csle and quarter deck levels, as I had previously drawn. Keeping them, at this size, would necessitate letting them into the sheer strakes at these most narrow points. While this was an acceptable accomodation to me for the upper arches of the domed port enhancements, along the main deck level, I feel that this will not look passably ok with an ornament that would, naturally, be scaled to fit the available space. The middle fronds of the fleurs are small enough as it is. So, I decided to chop the points from the top and bottom of the flower until they, at least, fit within the sheer strakes. Above is a good comparison of the difference in proportion, from where I started to where I need to be. They should, in fact, be even a little smaller! But, here are two revised flowers, side by side: My experience, thus far with this casting process, is that I inevitably end up with ornaments that are larger or smaller, depending upon a number of variables related to the process of removing the ground and defining the perimeter. There will be plenty of extras to choose from, that will fill these more narrow spaces without seeming too large, relative to the frieze lattice. Whatever other differences, in size throughout the frieze, should contribute (hopefully, in a good way) to the handmade quality of the model. I can’t wait for vacation!! 🌞🌊🏊🏻♂️⚓️


- 2,699 replies
-
- 10
-
-
- heller
- soleil royal
- (and 9 more)
-
I'm just re-visiting favorite build-logs, and I'd like to say that one of the things that is so pleasing about this model is the side-to-side symmetry and your perfection of line, Siggi. Just awesome!!
-
Hey EJ - great work on your figure of the “Americas”! Looking as closely as I can at Berain’s drawing of the stern, it appears that this figure, on the port side, is not holding anything. Her left hand is perched, at her side, upon the arched pass-through that she sits upon. Her right arm is raised, crossing her body with the hand resting on the quarter piece that supports the side lantern. It is the figure of “Europe,” astride her horse (perched upon the left side of the taffrail) that appears to be holding a pointed spear, or scepter. This would make sense, thematically, as Europe was the dominant continental power, with “Asia” (on the right side of the taffrail, astride her camel), the next leading world power. The neo-classical robes of Europe and Asia are emblematic of their self-conception as developed cultures, while the Americas and Africa are mostly bare-skinned and wearing only primitive vestments.
-
Incredible work, Vic. She really cuts a fine figure on the water!
- 213 replies
-
- 1
-
-
- la couronne
- 74 gun
- (and 2 more)
-
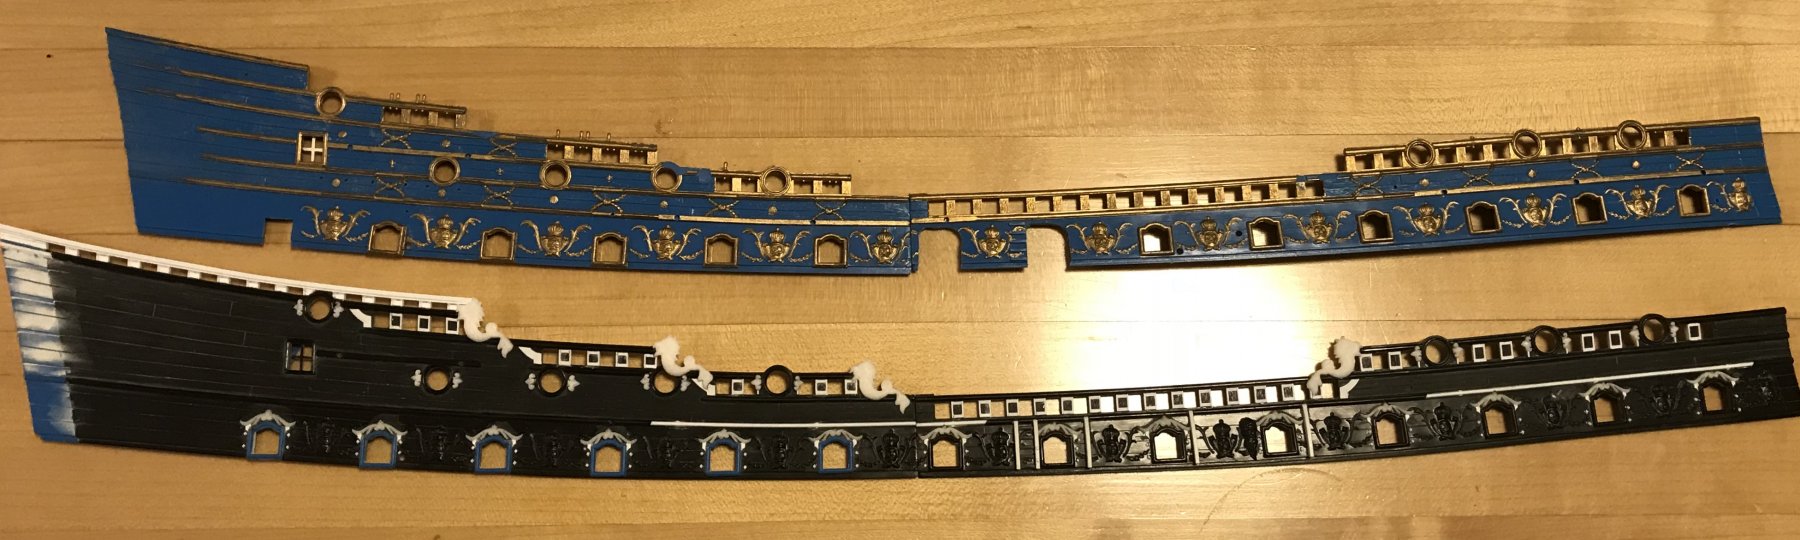
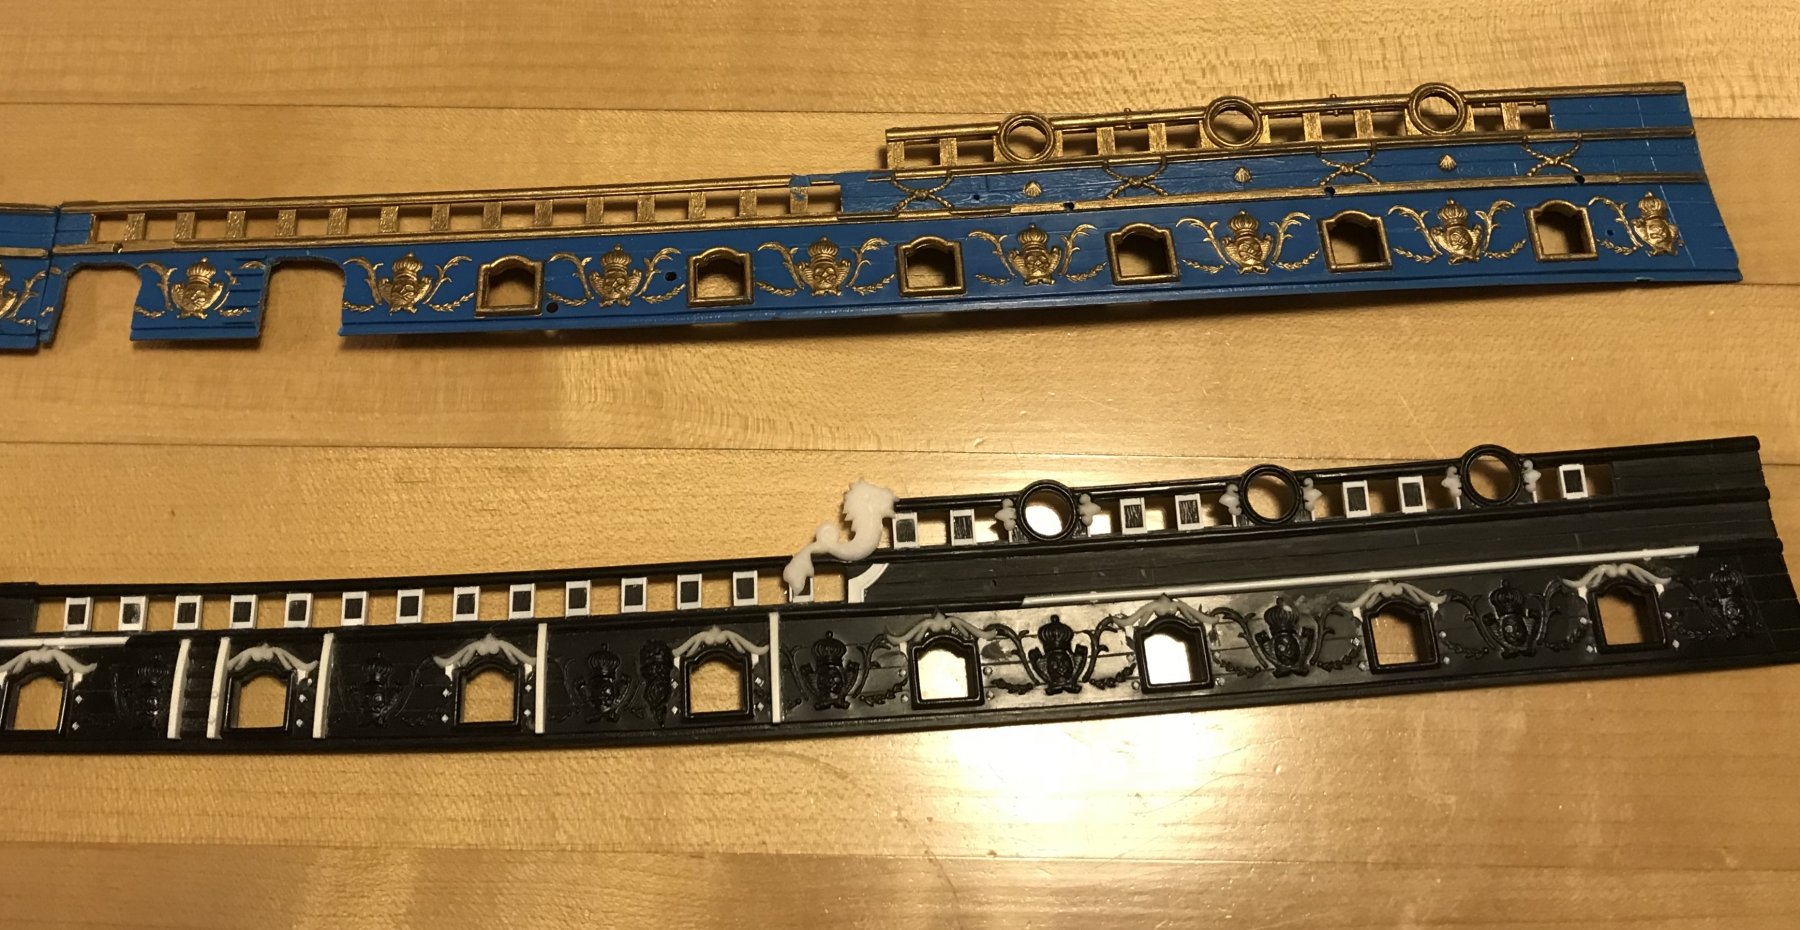
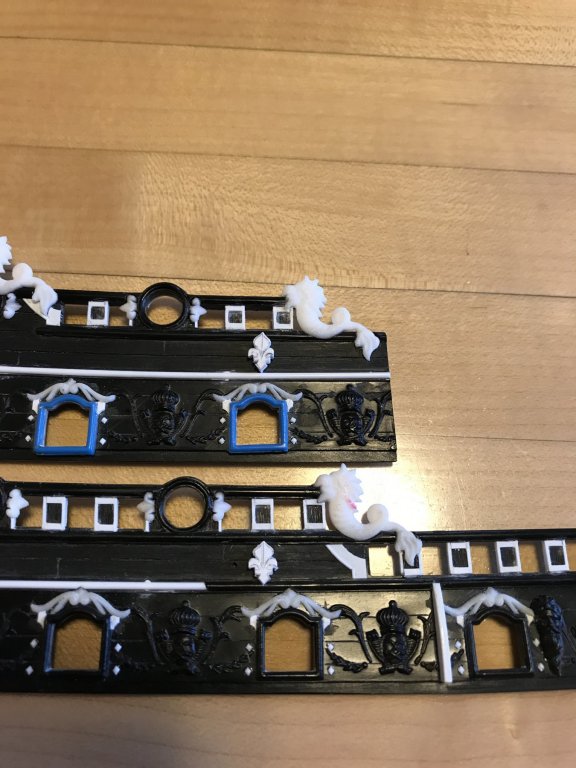
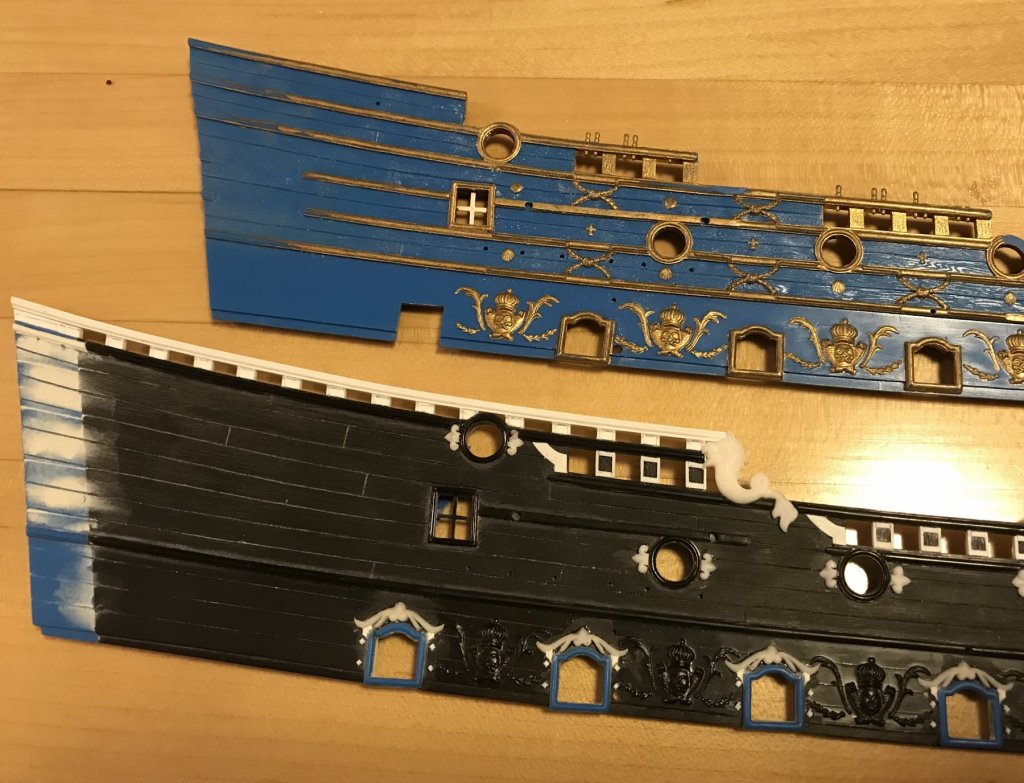
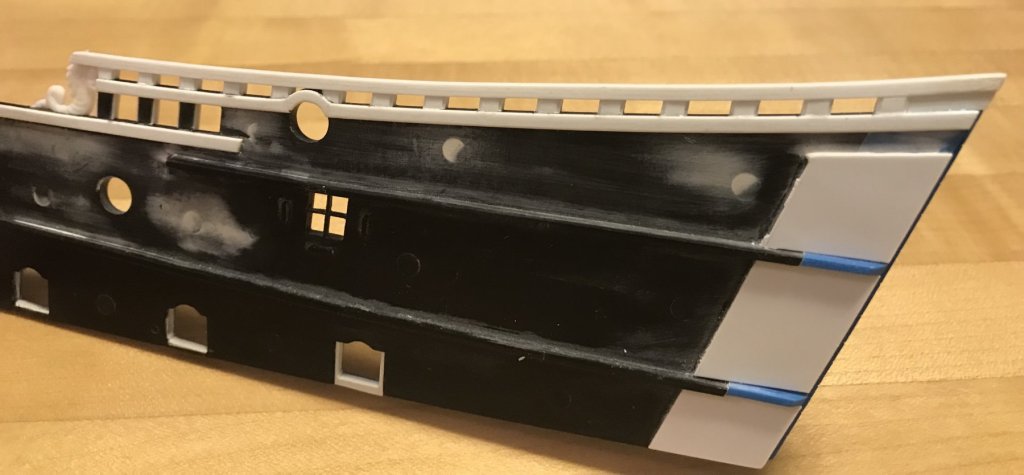
Now that all of the sheer-rail detailing is done, and dolphins installed, and all of the round port enhancements are let in place - here is a bit of a before and after comparison with the original kit parts: I’d like to note that, only here at the transition from waist rail to the f’ocsle rail, does the dolphin nearly align with the scalloped hancing detail, below it, as drawn by Berain. For the stern upper bulwark pieces, I felt that at least having the dolphins and hancing steps present was enough, without going the extra mileage to extend the piercing of the timberheads, so that the hancing pieces all lined up under the dolphins. In at least one instance on the quarter deck, the presence of a round gun port prevented that alignment, anyway. By not doing so, I afforded myself more room for a more complete layout of the lattice frieze, which I felt was a more important detail. Now, I will begin making all of the fleur-de-lis, shells, scrolls and folliate diamonds that ornament the new lattice frieze, which will fill all of this newly cleared space on the upper bulwarks. At some point soon, I will need to figure out where I went wrong in my GIMP drawing process, so that I can print what I have for the lattice frieze and the amortisement of the quarter gallery, to scale. Presently, the entire drawing is crammed into something like 1/300 - 1/350 scale. I made some error in importing the scans of my hand drawing into a workspace that was unnecessarily too large. To work on the drawing, I really have to zoom in. All of this, in some way or how must be why working on the drawing slowed to a near standstill because I had many thousands of data points crammed into too small a space. Anyway, Much as I would like to, I don’t need to finish the drawing in order to complete the model. It would just be really helpfull to extract that frieze layout because it should be a perfect match for the upper bulwark pieces. I’m also hoping to salvage my bow angel and the trailboard frieze for between the knees of the head.


- 2,699 replies
-
- 9
-
-
- heller
- soleil royal
- (and 9 more)
-
I think that, as long as the guns are not less than five scale feet from the water, then her waterline should be fone where it is.
- 213 replies
-
- 3
-
-
- la couronne
- 74 gun
- (and 2 more)
-
WOW - I am speechless, Vic! You have done it again! Absolutely spectacular.
- 213 replies
-
- 2
-
-
- la couronne
- 74 gun
- (and 2 more)
-
SPEC-TAC-U-LAR After shaping the tafferal and compartmentalizing for the zodiac symbols, all of your hard work is rounding into form. Excellent work on the quarter pieces that support the side lanterns! I’m excited to see what you do with The figures of Europe and Asia, whom recline upon the taffrail.
-
Hello Doris, Your figurehead is amazing! There is little I can add to the compliments you have already received, and which are richly deserved. What I would like to say is how much I like the focused, and incremental progression of your work, as it is reflected in this build log. We are on a journey with you, and your candor with your methods and reasoning, combined with your research are really eye-opening. You have captured the imagination of us all, and that us what I have always thought this hobby was about, in the first place. KUDOS to you, my friend!
- 1,035 replies
-
- 8
-
-
- royal katherine
- ship of the line
- (and 1 more)
-
Hello Dziadek, I meant no dis-respect, and I can understand your faithfully following through with what you have commited to. Thank you for that link to the Modelbeau website, Jasseji. I was unable to open the instruction guide on my phone because I’m in an area with poor reception. Nevertheless, I believe what you are both saying about the kit instructions is true. It is just puzzling as to why, considering the lengths D’Agostini went to to produce an, otherwise, authentic model. The only possibility I can think of that makes any kind of sense to me is that, after planking over the stem, one could then veneer over that with an assembly of stem timbers, so that the hull planking appears to neatly tuck into the stem rabbet. This possibility, however, would not provide a similarly neat resolution of where the hull planking meets the stern post; the veneered-over stern post would step down to the planking in this area. Anyway, it is a strange feature of the kit. I was able to watch the videos, though, and I am impressed by the amount of internal structure that they designed into the model. The laser-cut parts appear to tuck neatly into place without a lot of fiddling - so long as you have squared your construction, along the way.
- 146 replies
-
- 4
-
-
- deagostini
- vasa
- (and 1 more)
-
An interesting subject and excellent work, so far. I will gladly follow along!
-
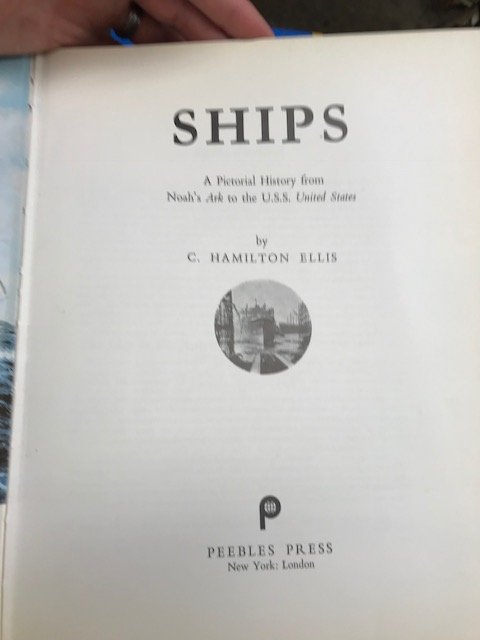
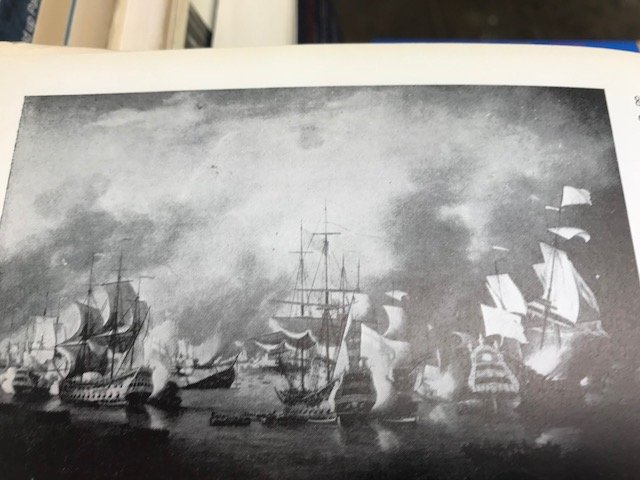
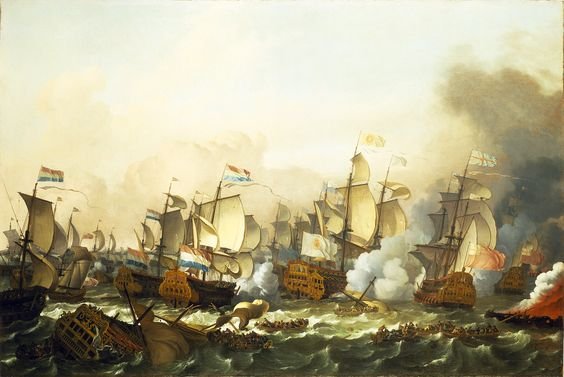
Today, I visited the Strand bookstore, just south of Union Square. I like to go there, when I'm in the area, because they have a decent maritime/nautical history section, and I sometimes find some gems for my collection. Well, today, I found a different depiction of the burning of Soleil Royal at La Hogue, that I have never seen before. Below is the title page of the book, a picture of the composition as a whole and a close-up of SR: There was no artist attribution in the caption, and I can only guess that the painting was done sometime between 1700 - 1730. I think this may be so because the stern of SR bears little resemblance to Berain's design, and appears to feature set-back, screen bulkheads, where the stern windows are located. To my knowledge, this feature of stern construction did not become commonplace until the first half of the 18th Century, and then, more often on English ships. I'm not positive about that, but I seem to remember that being a point Andrew Peters made in his book, Ship Decoration 1630-1780. While I don't think there is much that can be taken as literal truth, from this portrait, I like it because it conveys a sense of the drama of the scene and the grandeur of Soleil Royal. Here, Soleil Royal is shown only with two stern balconies, and only two small port windows to either side of the tafferal frieze, on the quarter deck level. Interestingly, the appearance of screen bulkheads and only two stern balconies also appears in the Bakhuizen portrait of Barfleur, where there is at least some vestigial evidence of Berain's design: If anyone knows the artist that is attributed to the black and white portrait, above, I would very much like to know who that is.

- 2,699 replies
-
- 2
-
-
- heller
- soleil royal
- (and 9 more)
-
You know, Vic, I think you’re right about this. EJ has imparted so much of himself into his interpretation of the carvings that this model is completely unique. This phase of his build was what I was waiting for most eagerly because EJ seems an ambitious builder, and I wanted to see where he would take it all. Well, he has not disappointed in the least!
-
I agree with you, EJ, that technology is opening the door for modelers to do previously only dreamed about things. In particular, 3-D printing and 3-D computer modeling are already affordable and accessible options that many on this forum are already using to great effect. On his excellent scratch-build of the Italian liner, The Michelangelo, Dan Pariser sourced a 3D printing firm to create the complicated, tapering lattice frameworks that surround the ship’s funnels. Could Dan have devised a way to build them, himself? Absolutely. However, sometimes, the computer can do things like this in a fraction of the time and to a standard we can only dream to match. That way, we are free to concentrate our efforts on the other, more rewarding aspects of our build.
- 2,699 replies
-
- 1
-
-
- heller
- soleil royal
- (and 9 more)
-
The horses really came out well, EJ. And the middle stern balcony is a stand-out job of integrating the ornamentation. Congrats on your work, so far!
-
Is that a Vancouver colloquialism, Vic? Shookum! I’ll take it as a compliment 👌
- 2,699 replies
-
- 2
-
-
- heller
- soleil royal
- (and 9 more)
-
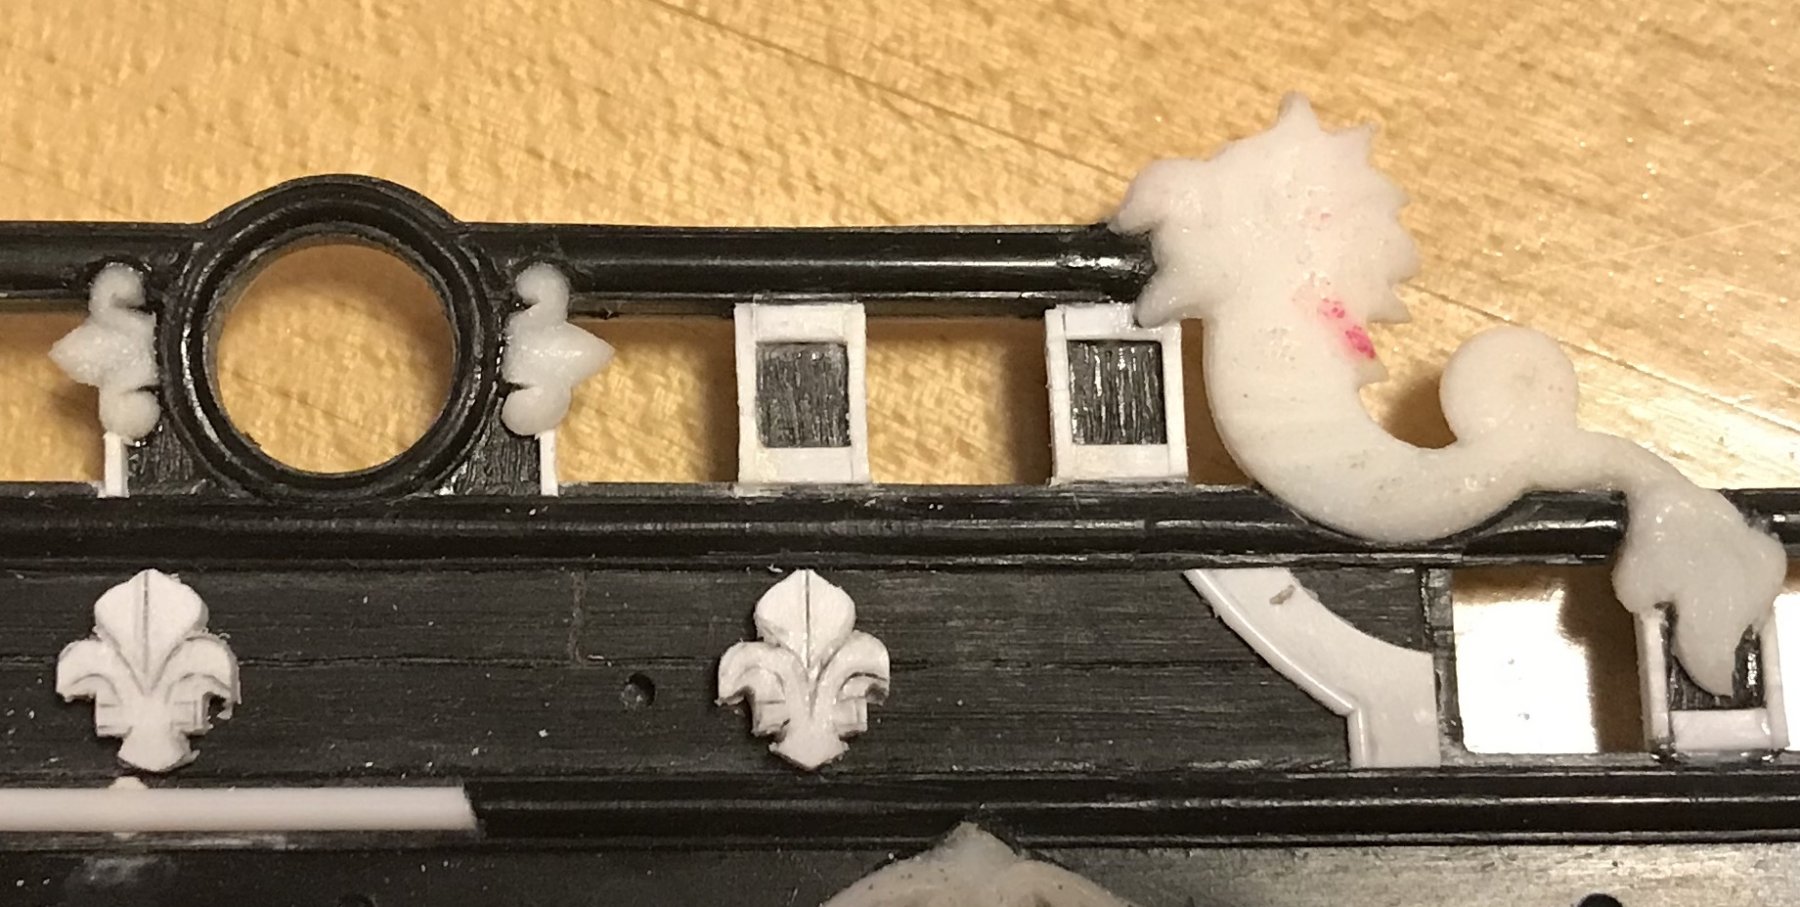
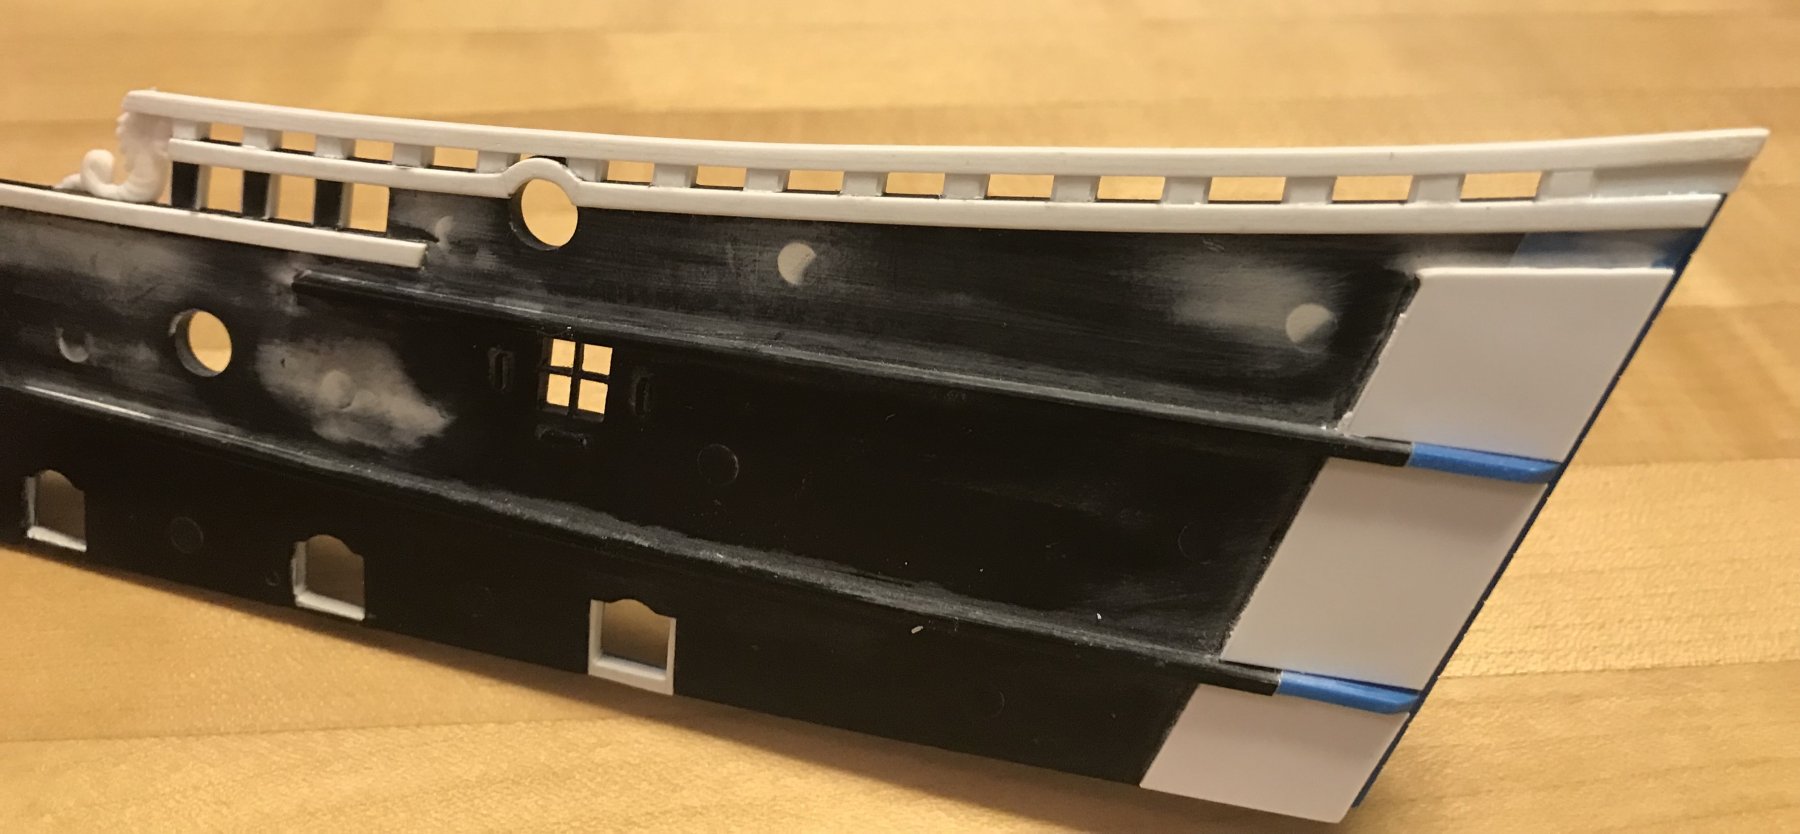
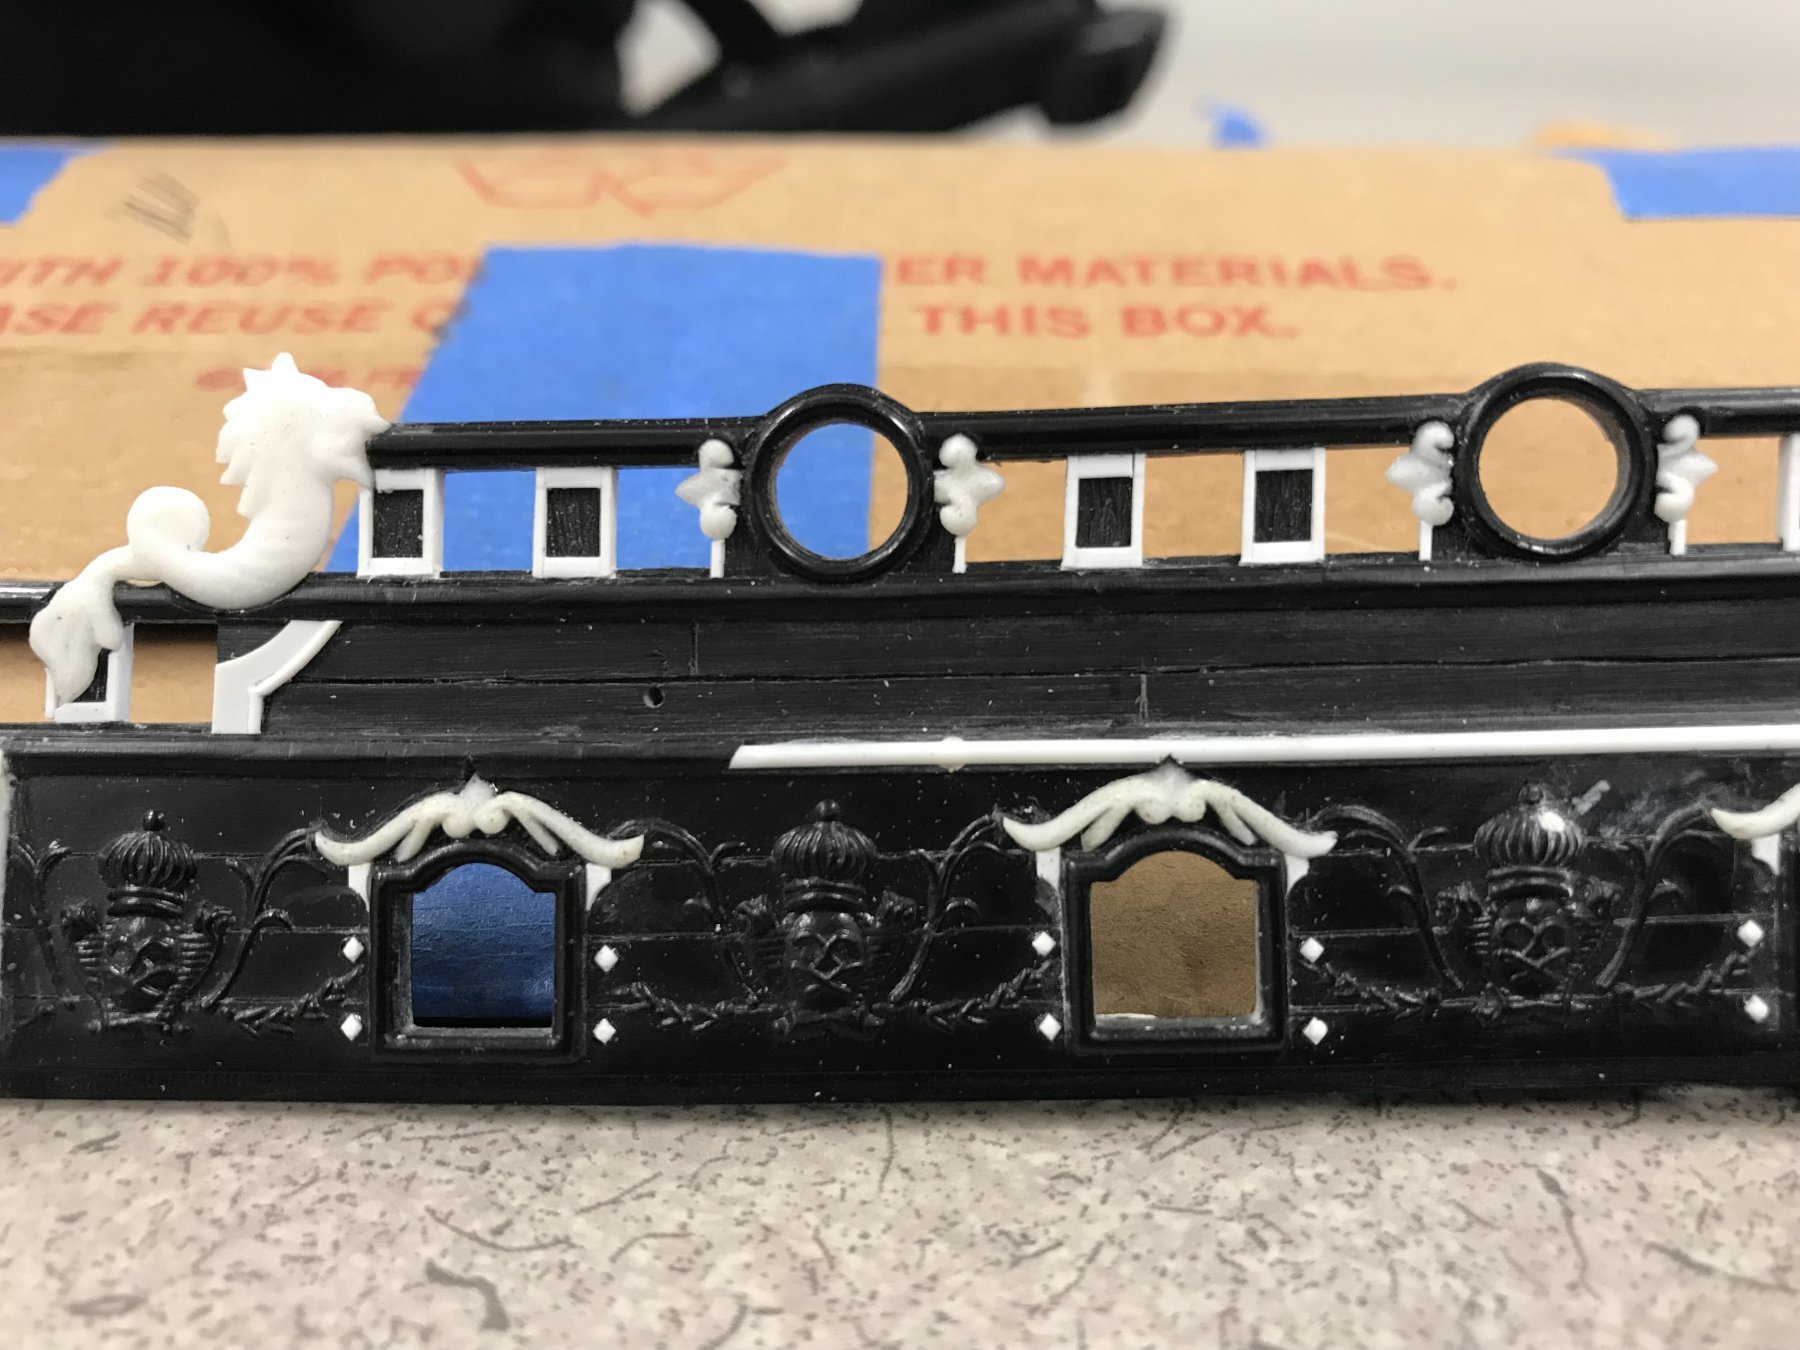
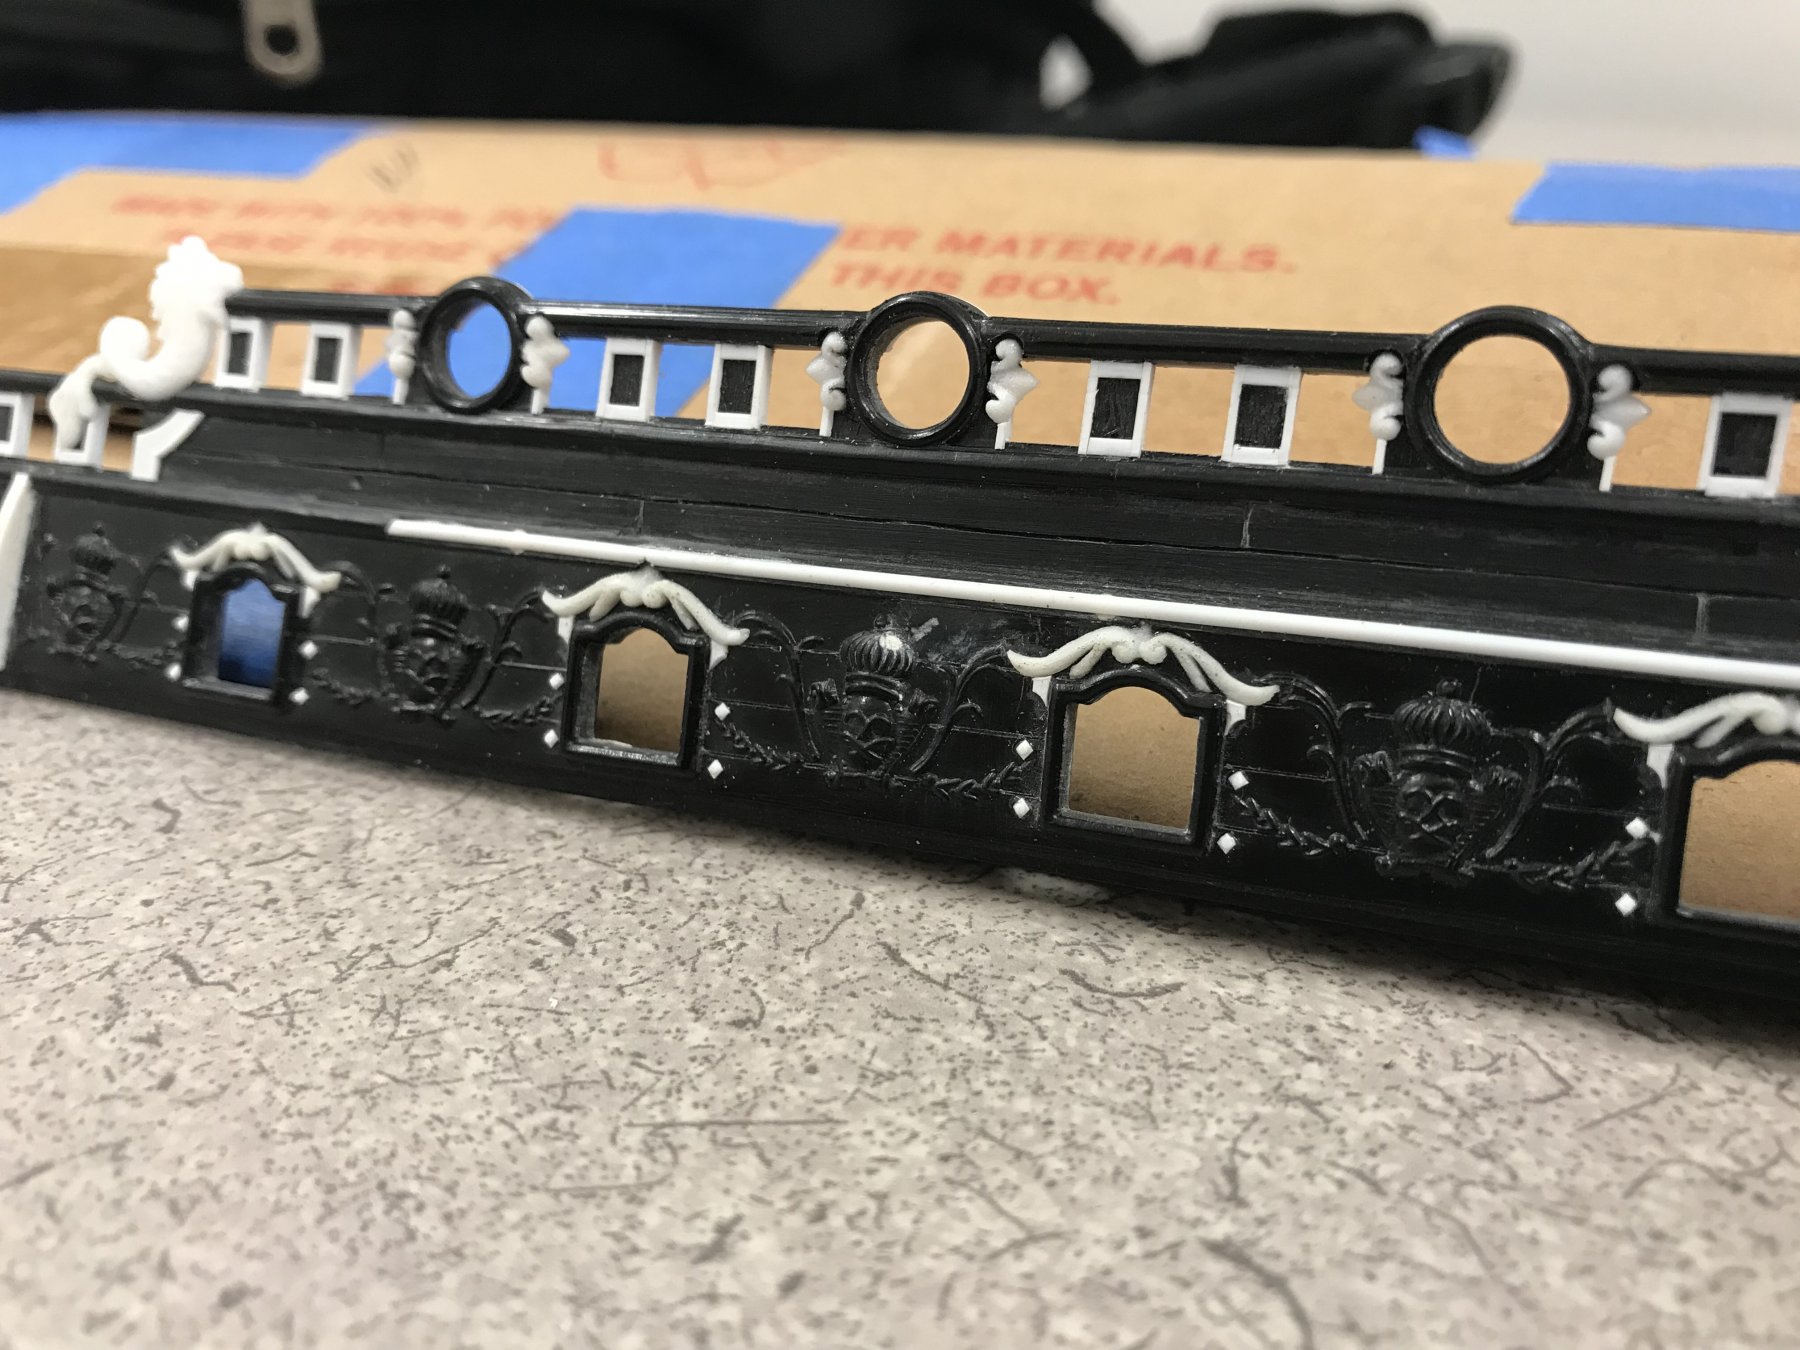
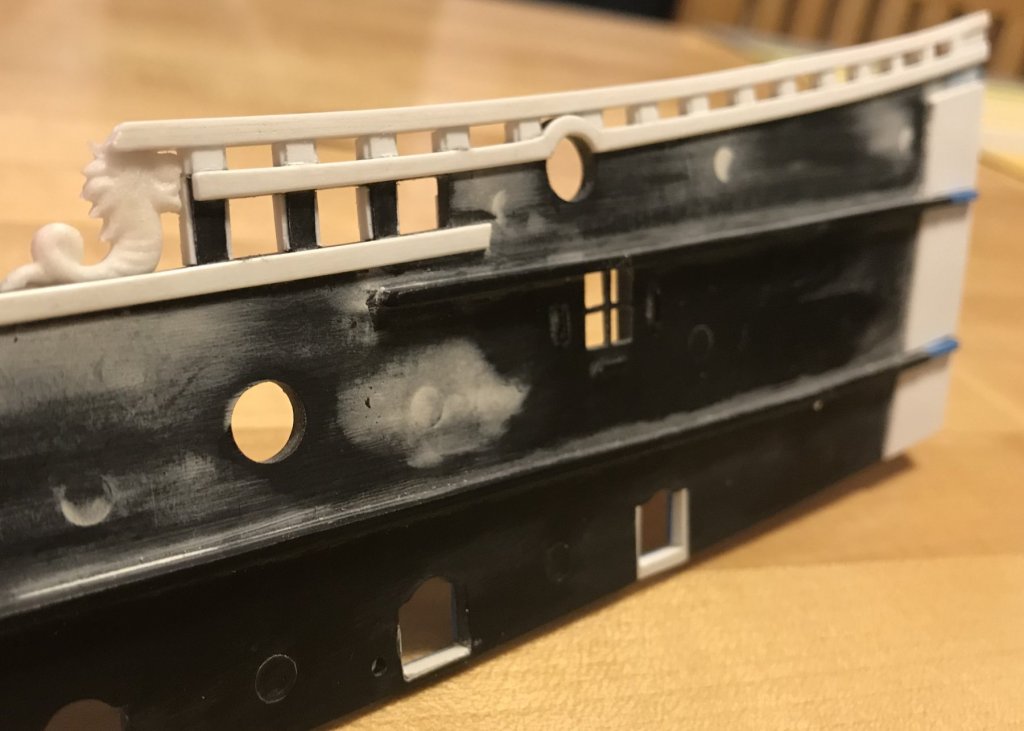
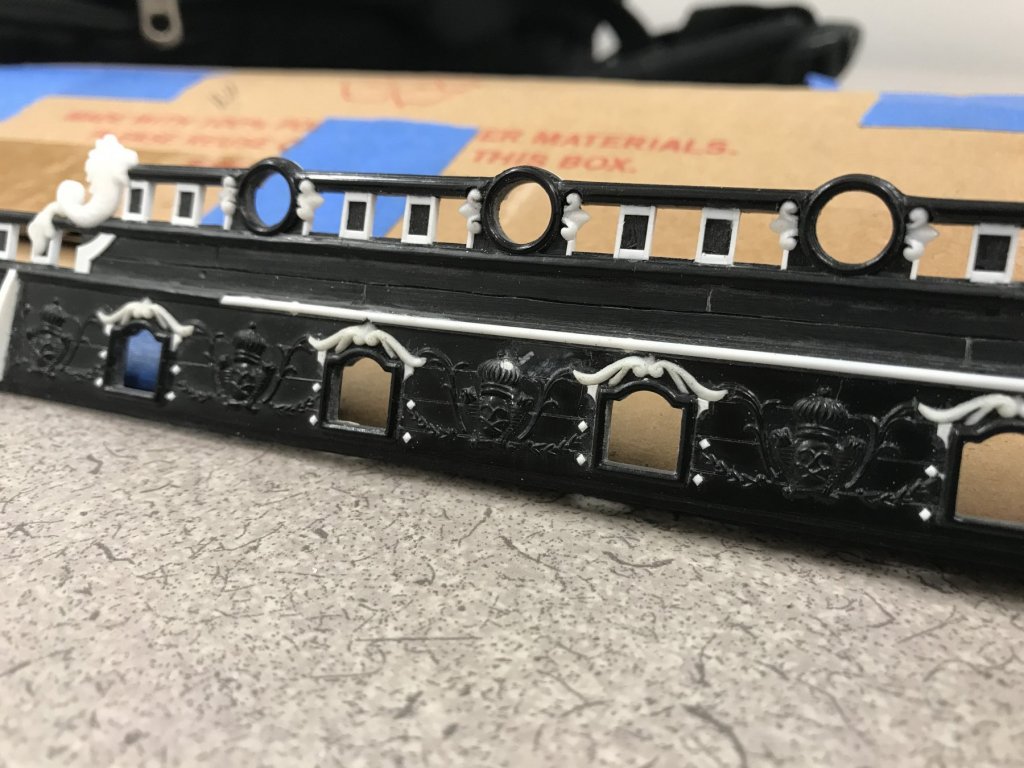
Work on a number of aspects of the upper bulwarks continues. Having freed the round-port enhancements from their backgrounds, I have begun inletting them into the forward upper bulwarks. There has been some discussion on Doris’s build log for the Royal Katherine about the merits of sculptung each ornament, individually, versus casting repetitive ornaments. Consencus, there, has been that making each ornament individually, with the inherent small variations in execution, contributes toward the unique and handmade character of the finished model. I also agree with this. What I have found with the casting process, on the other hand, is that these castings require a significant amount of cleanup and rework so that - in the case of these round port enhancements, for example - the tiny scrolls are identifiably small scrolls. In the end, though, all of this re-work results in each ornament being slightly different in size and shape. With this in mind, I cast an extra four pairs of port enhancements so that I could mix and match similarly sized and shaped pairs, using only the best of what is available to me. So far, this seems to be working out well for me. These pictures are illustrative of a number of things. First of all, the ornament I ended up carving is not what I originally drew; the original intent was a tiny tulip flower nestled between the scrolls. At this scale, I found that extremely difficult to draw, let alone carve. Simplified fleur-de-lis seemed a reasonable compromise. The other challenge, here, was letting the enhancements into the sheer rail. This required, first marking the lower scroll onto the white timberhead stile with a sharp knife. Leveling the waste area of the stile down to the timberhead surface. Then, finally, lightly scribing the upper scroll into the sheer rail with a sharp EXACTO, while holding the ornament in place with your thumb. A small round DREMEL burr is then used to waste away for the upper scroll head. Challenging, but doable. So, that’s where I’m at for now. There are still many more of these to place. I still have work to do on my dolphins, and my port poop-royal railing is almost complete.

- 2,699 replies
-
- 11
-
-
- heller
- soleil royal
- (and 9 more)
-
Hello Dziadek4444, You are building a very good D'Agostini model of the Vasa. All of the work is truly excellent - particularly the first planking, in preparation of the second planking and your crisp cutting to the outer borders of the ship, above the waterline. Surface prep, for preliminary finish/sealer looks great! All of this looks like it will shape up to a tremendously successful model - because you have clear talent and precision in your execution. Forgive me, in advance, because I will take exception with one aspect of your build that I frequently see in kit builds, and it just bothers me. Often, the builder is extremely meticulous in their execution, and the work done is beyond reproach. However, in an effort to make plywood keels and stems look more harmonious, builders sometimes choose to continue the plank seams from the hull, into the stem. I love what you are doing with this model, but this particular aspect of it is completely wrong - and more importantly - it detracts from all of the other excellent work you have done, so far. Think of it this way; a keel is, literally, the backbone of a wooden ship; it must be strong, in order to withstand the tremendous wracking forces at work, upon it, all of the time. That strength is a result, at least in part, of dimensional girth, and mechanical joinery; a keel is always scarfed at appropriate intervals and lengths, according the the length and breadth of the vessel. The cut-water, or stem, is no different. The stem requires compass-cut timber, at appropriate scantlings, that are joined with bolstering scarfs, at the right locations, in order to solidify the entire bow structure, which receives the full brunt of whatever seaways through which it passes. Even if one doesn't wish to build a completely authentic model of whatever the subject may be, there usually exist a plethora of documented examples, of similar types, that show exactly what the stem-head of the ship was constructed of. The Vasa is a prime example, of course, because the ship survives, intact. You are making an excellent model of this great ship. Please go the extra mile and correct this.
- 146 replies
-
- 4
-
-
- deagostini
- vasa
- (and 1 more)
-
I tend not to look as closely at time periods outside of my specific interest (17th C.), but that is obviously a mistake on my part! WOW!! Johann, your ship chandlery skills are second to none, as is the fashioning of all the rest of the ship. What a beautiful model! I'm late to the party, but I will catch up and follow along until the end.
-
Just catching up with your build, EJ. Your carving skills are steadily improving and the work you have done, here, is really outstanding. This is such a better model than when you first opened the box Also nice to see the upper decks in place, so that you can soon begin fitting them out. One area of research I will have to delve into more deeply is the question of belaying points. Popeye2Sea has done a truly excellent job of factoring the utility of the running rigging into the practicality of where to belay and to what. I will begin with his log, which I’ve been following but not fully digesting yet, in its entirety. All of these single-post belaying points, arrayed around the mast are interesting, but I would think they clutter and interfere with steady operation of the guns; that being the number 1 priority of this type of ship. I still can’t help but wonder whether the French had warmed to the use of pinrails, by this stage, in the latter half of the 17th Century.
-
This model you are making, Farbror, is really interesting on many levels. I will be following along with great interest.
-
Your painted scrolls/acanthus really came out beautifully, Siggi. If you are unhappy with the results, I am not seeing why?
-
Thank you, EJ! I think the best I can strive for with this model is historical plausibility. That being said, I take many of my cues from Michel Saunier and Marc Yeu, whom I consider the un-paralleled experts on the ship. The nice thing is that, like all art, the execution of the sculptures is an act of artistic interpretation, and everyone’s efforts will reflect something of their own personal style. As always, I appreciate your thoughts and for following this build.
- 2,699 replies
-
- 2
-
-
- heller
- soleil royal
- (and 9 more)