HOLIDAY DONATION DRIVE - SUPPORT MSW - DO YOUR PART TO KEEP THIS GREAT FORUM GOING! (Only 75 donations so far out of 49,000 members - C'mon guys!)
×


Hubac's Historian
-
Posts
3,296 -
Joined
-
Last visited
Content Type
Profiles
Forums
Gallery
Events
Everything posted by Hubac's Historian
-
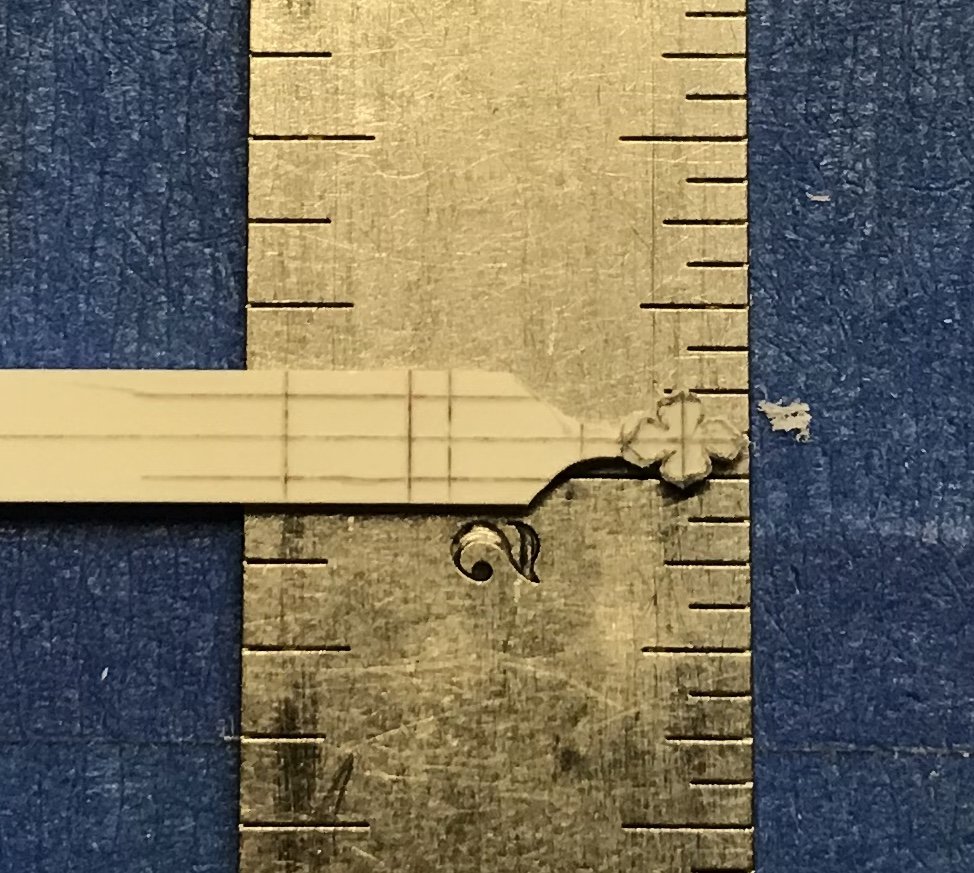
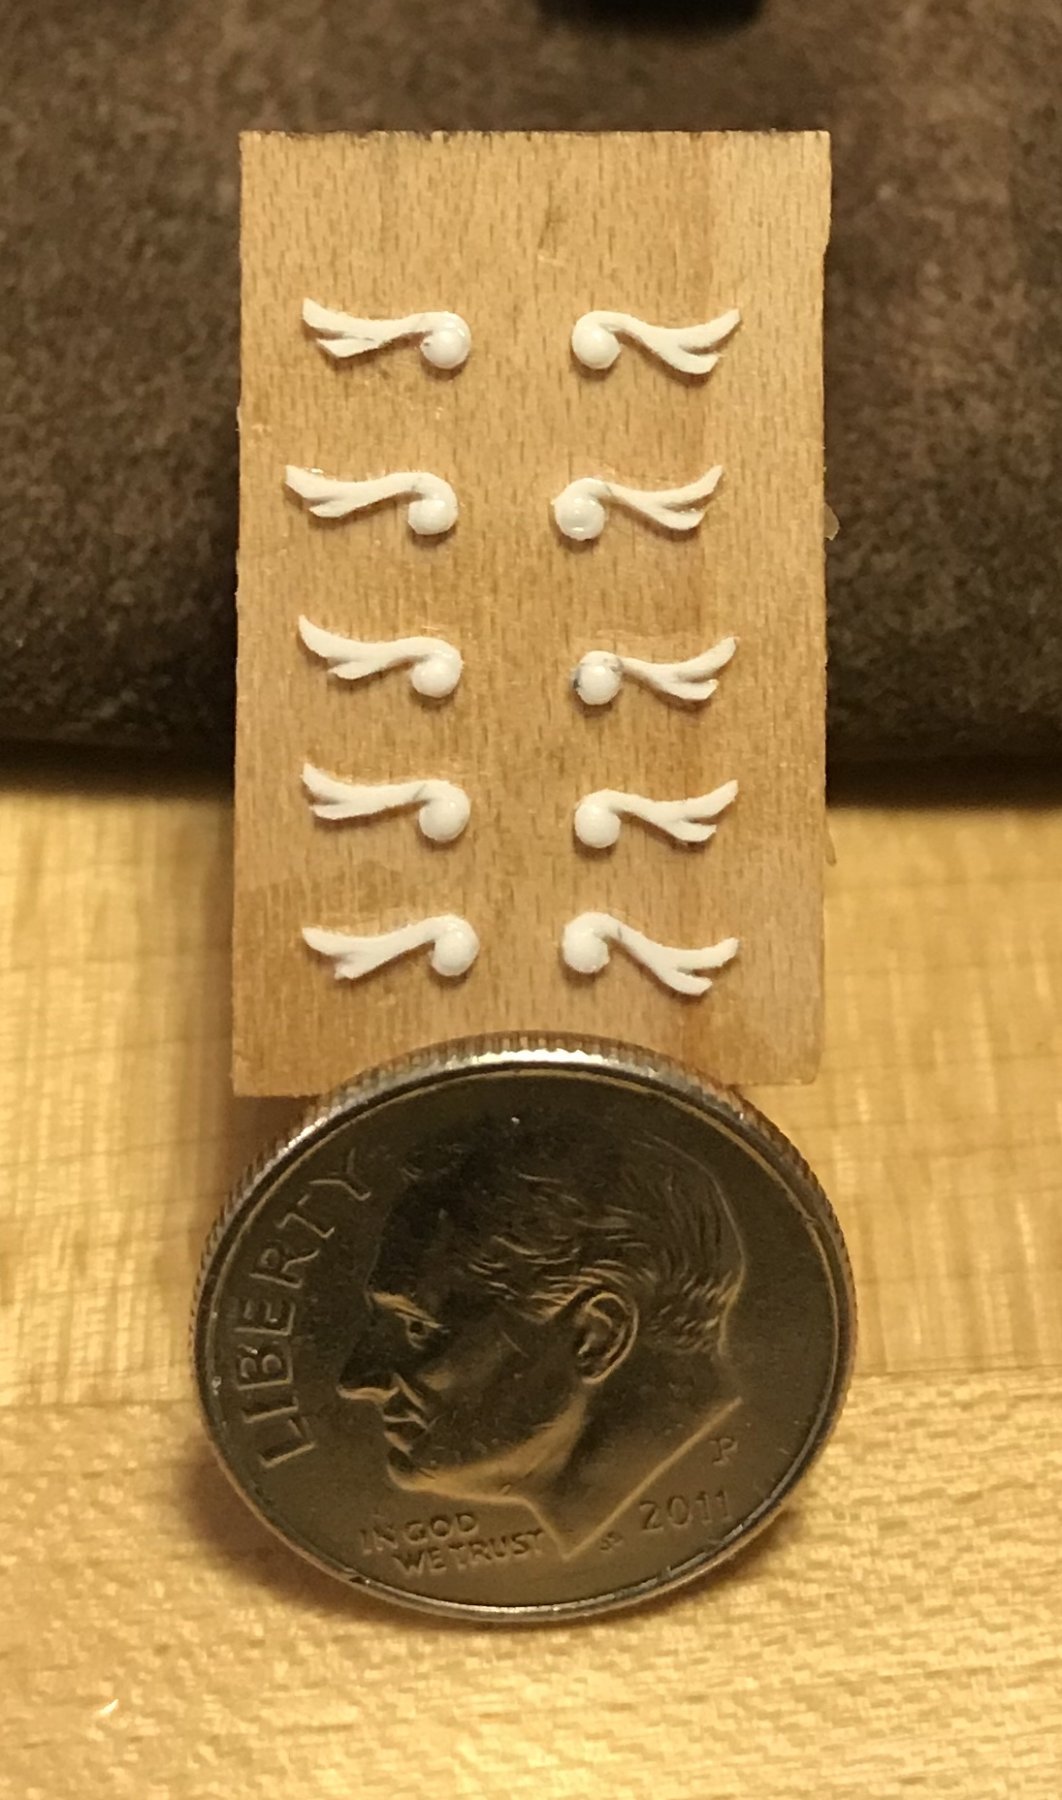
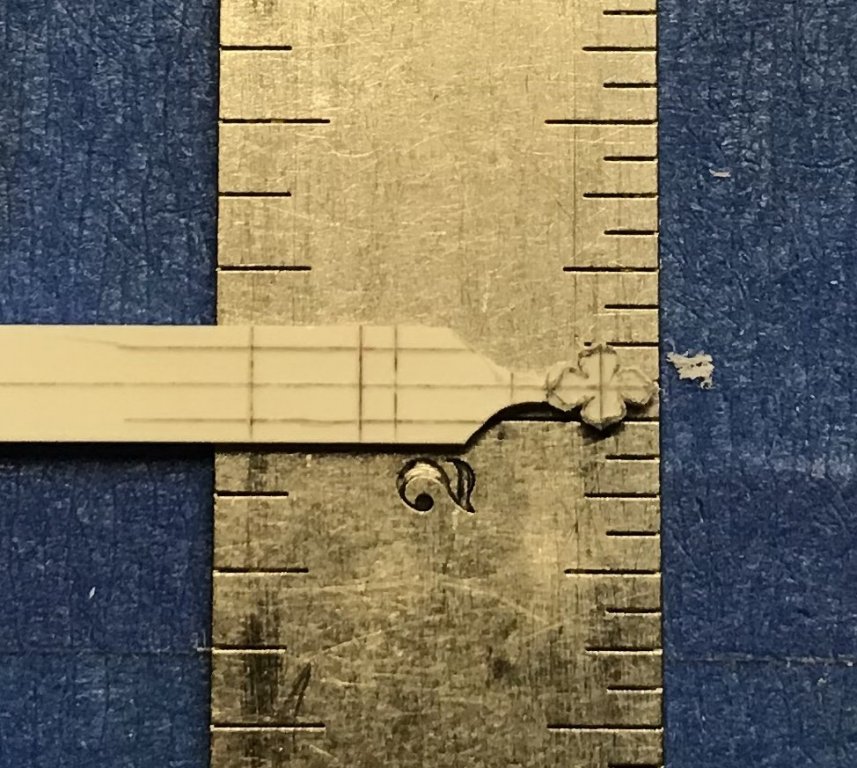
 Hi Jan, One inch is equivalent to 25.4mm, so each 1/16 of an inch is equal to 1.58mm. With that in mind, my carvings measure: 4.76 x 3.17mm Not quite micrometer-worthy, but small, nonetheless.
- 2,697 replies
-
- 1
-

-
- heller
- soleil royal
- (and 9 more)
-
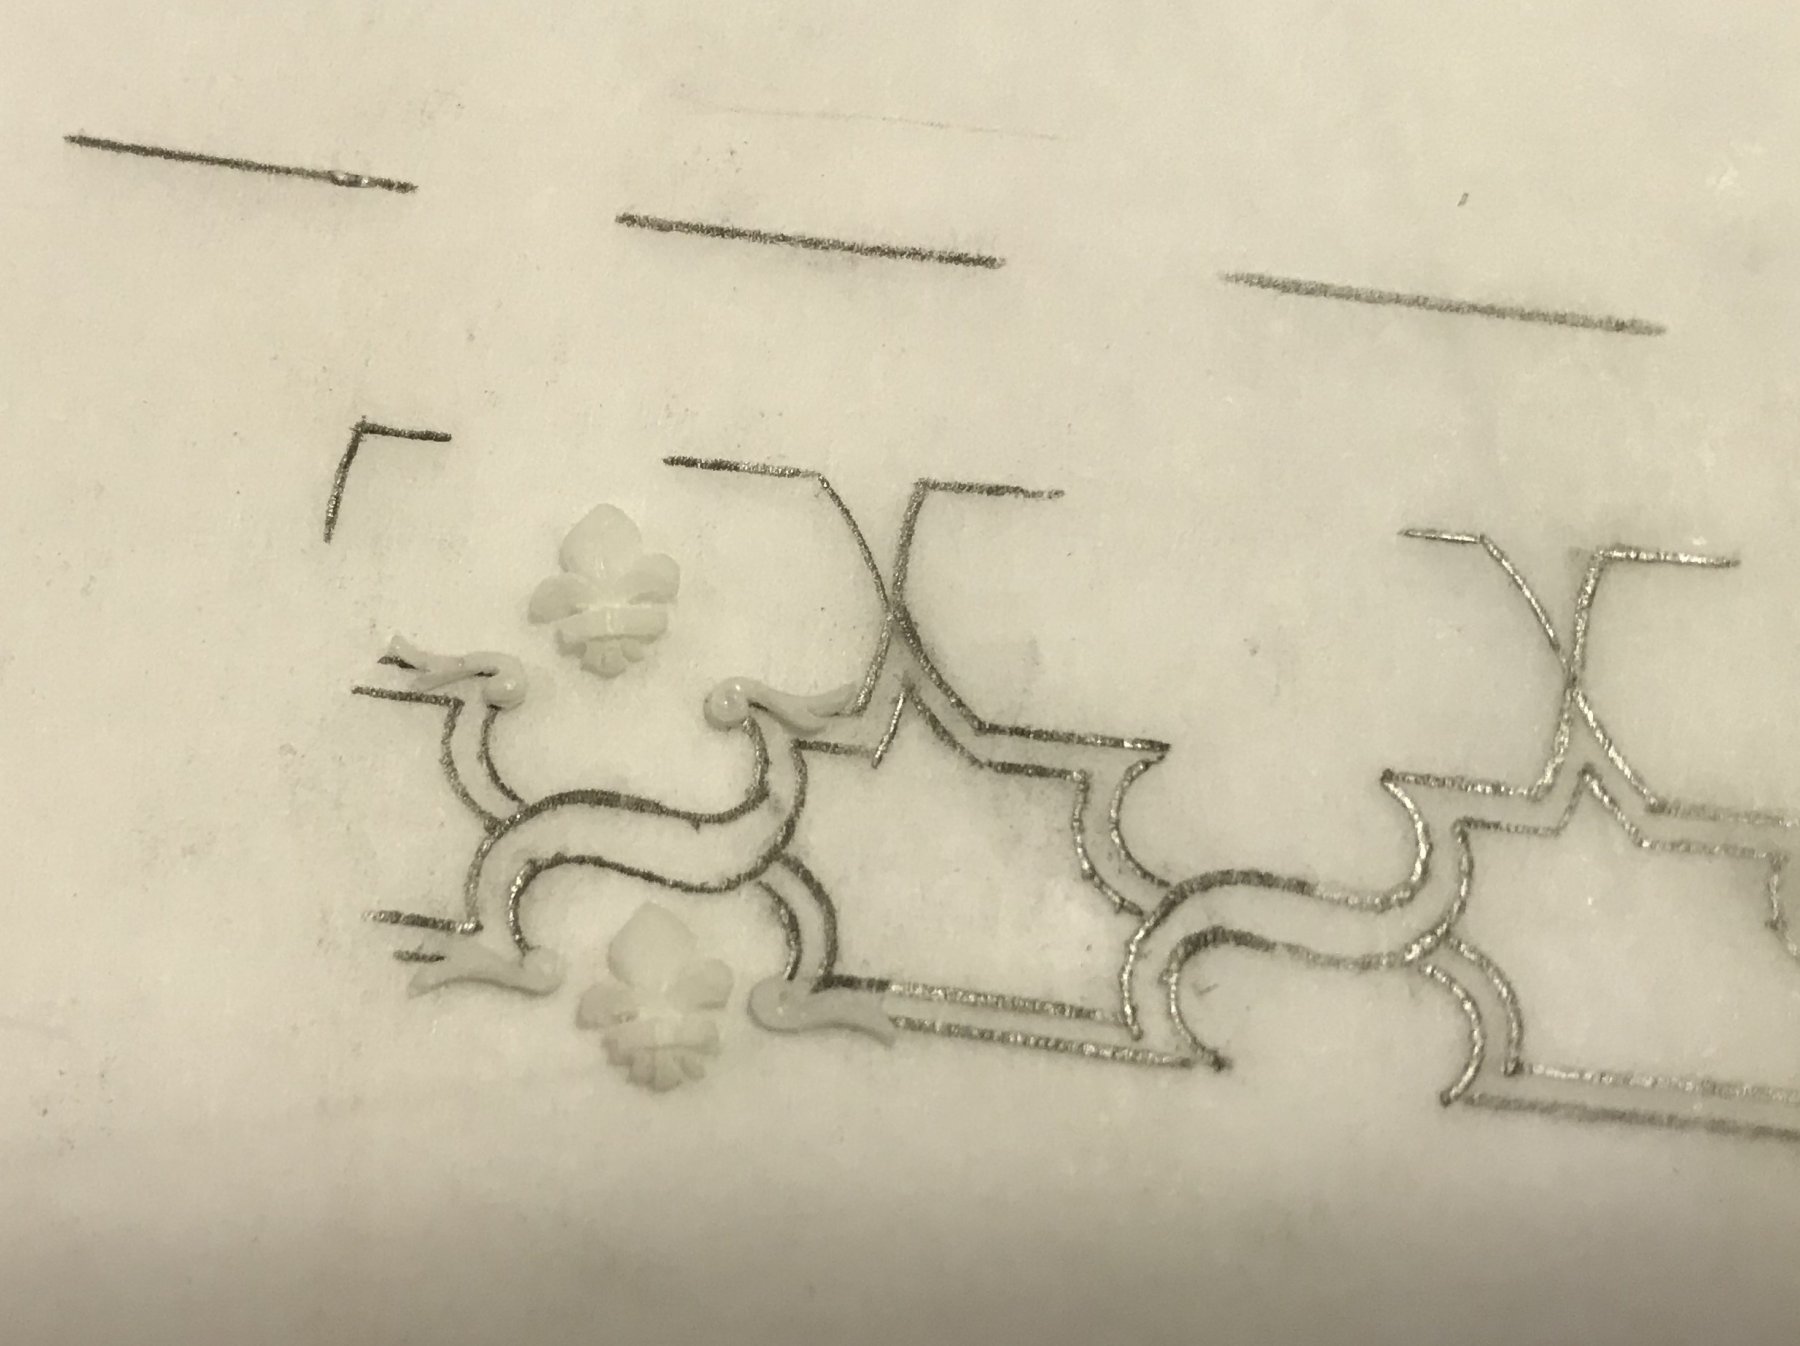
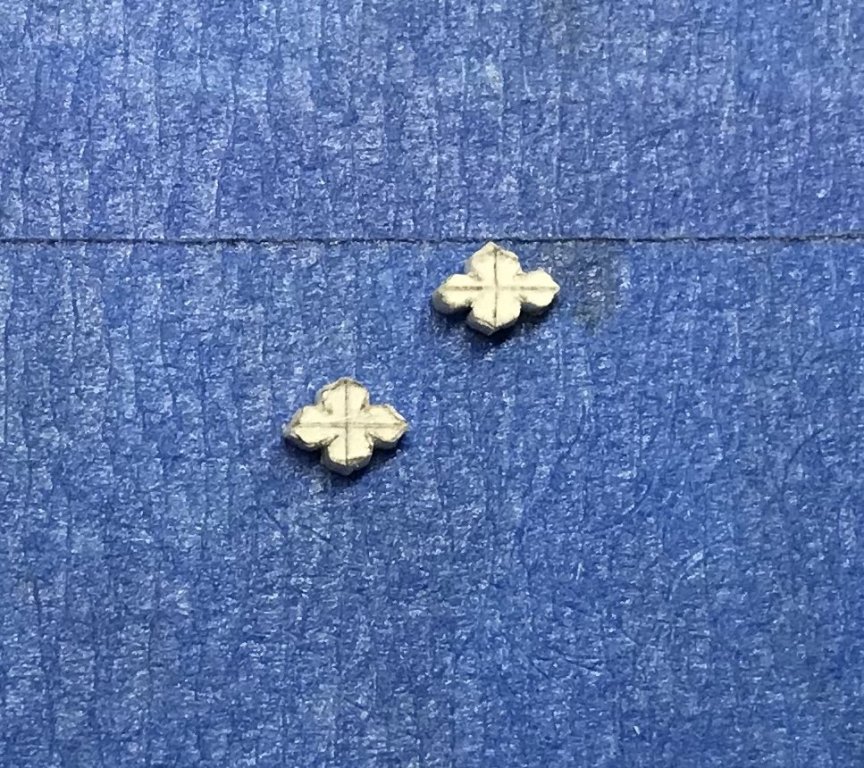
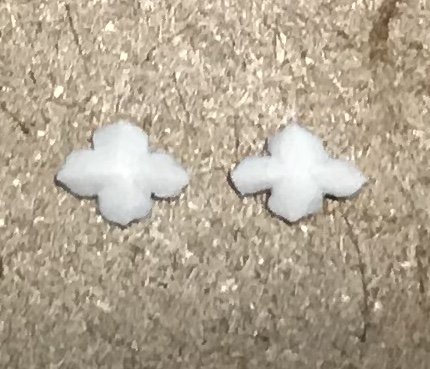
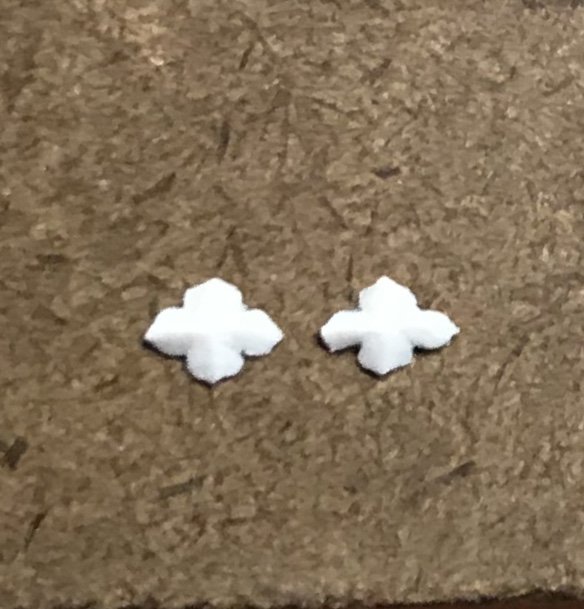
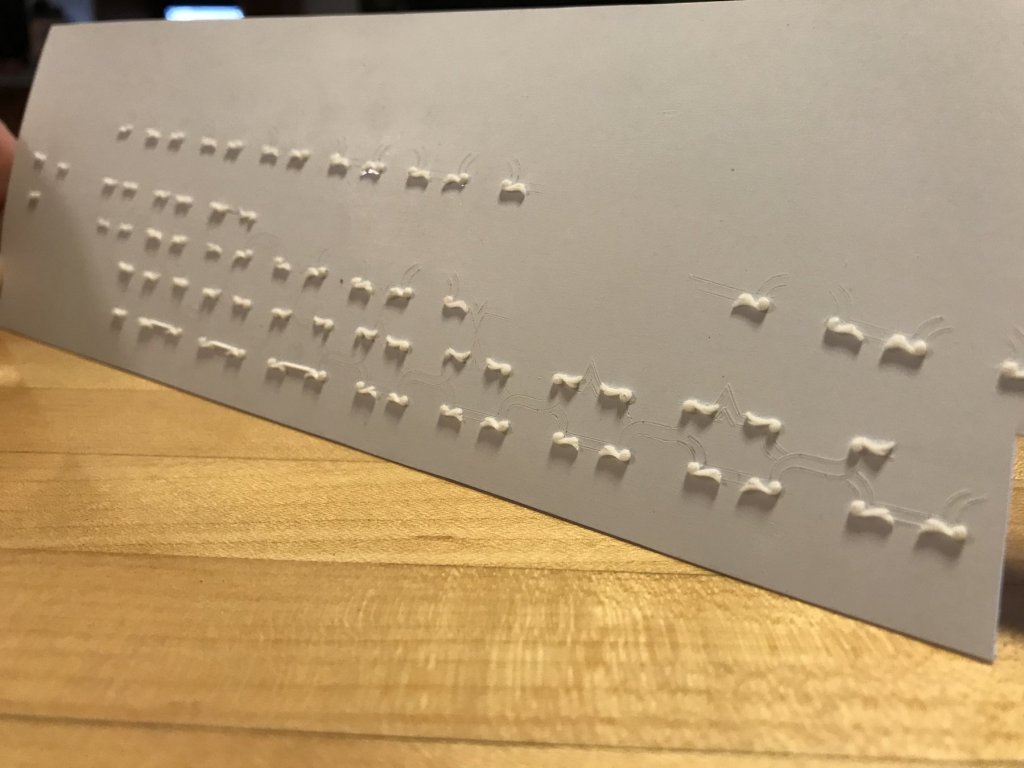
So, these folliate diamonds proved to be the most vexing little things to draw! It was important to me that I hold a specific size - 3/16” x 1/8”, in order to better accommodate the fleur-de-lis positioned just below the Xs. While bigger than the scrolls, conveying a slight sense of asymmetry among the four fronds was more difficult than I expected. Both finished carvings are faceted along the fronds, and I will add a round button to the centers, before making my moulds. Below, you can get a sense of the pre-carving rounding over of the fronds: Although, the overall dimensions are exactly the same, the visual weight between the carvings varies: I will use this to my advantage by placing the heavier looking ornament on the Xs, and the lighter ornament between points of the frieze lattice. Try as I may, I just could not get a decent shot of the faceting of these things, but they are much crisper, in person, than these pictures would have you believe.


- 2,697 replies
-
- 3
-
-
- heller
- soleil royal
- (and 9 more)
-
Hello Force9, I am fascinated by your excellent modification of this iconic kit. The standard you are working to is quite high, and perfectly exemplifies the notion that one can make a serious model from a plastic kit. I will be following along with great interest. All the best, Marc
-
Hi Jan, thanks for looking in and for your gracious compliment. In answer to your questions: Yes, I am confident that I will be able to cut the scrolls out without damaging the frieze lattice. As it stands, I have mostly scored through the .020 styrene sheet for the lattice and it won’t take more than a few passes to free the lattice. However, before I do so, I will use the same shallow sweep gouge that I used to cut out the scrolls, to cut around them and down through the .020 sheet. In answer to your second question: Maybe. I’m not sure, yet, whether I am okay with the weight of the frieze lattice. I figured I would err on the side of heavier, and then if I didn’t like it, I could pare it down from the inside edges (opposite the edges that the scrolls are mounted to). And, as a matter of fact - while I was scribing through my paper pattern, I was cutting along the middle/inside of the line, in an effort to ever so slightly reduce the weight of the frieze, as compared with what I drew. This operation will be facilitated by the process of cutting out the lattice that I intend to follow; I will first cut out the enclosed negative space in the inside, before freeing the scrolls and Xs on the outside. This affords me an opportunity to make adjustments while the frieze is mostly supported. You may have noticed that I am experimenting with a raised half-round moulding, between scrolls, along the bottom and eventually the top of the frieze. The weight of this moulding leaves just the slightest shoulder flat, to either side, so I think that tells me that the weight of the frieze will be okay as is. I wanted to add back this subtle detail because it was one of the elements that I had to scrape away, along with the old layout. Anyway, In either case, it will be a process of feeling it out as I go. Lastly, as I mentioned, I will be cutting shallow reliefs on opposite sides of the X intersection to give a more three-dimensional appearance, here. I can’t actually complete this step until after the lattice is glued to the bulwarks, but it is my experience that it takes surprisingly little to create the illusion of depth. This, too, will have an impact on how the frieze looks when it’s done. I will probably use the aft-most segment of the frieze to experiment because this small section is separated from the rest of the frieze by the upper finishing of the amortisement. If I guess wrong and screw it up, it won’t be a big deal to re-scribe this small section.
- 2,697 replies
-
- 4
-
-
- heller
- soleil royal
- (and 9 more)
-
Thanks, Mark! I was aware that I could delete a pic from my photo cache, while in edit mode, by clicking the trash can. This deletes the pic from the post, altogether. My issue is that, sometimes but not always, a picture will get “stuck” at a place within the post where I don’t want it to be. This sometimes happens even when I very deliberately placed the cursor where I want the pic, but then it places the pic at the end of the post. Sometimes, but not always, I can simply highlight and delete the pic within the post, and then re-position the cursor and re-load the pic from my cache and it works. Still, other times, the program will insist on placing the pic at the end of the post, after deleting within the post and saving. This is a vexing problem because it doesn’t happen all the time, but when it does, I am always posting from my phone, which is how I make the bulk of my post entries. Maybe it’s an issue with my phone. Your solution works, Mark, but it deletes the pic from the post, altogether, and if I want the pic to remain in the post, albeit in a different place, then I have to re-load the pic. Not really a big deal, but a little cumbersome when sometimes it just allows me to make the simple edit. For the record - I’m totally okay with the fact that you deleted the pic. That was helpful 👍
- 2,697 replies
-
- 2
-
-
- heller
- soleil royal
- (and 9 more)
-
Really a lovely model, Aviaamotor! I really like the use of heat to highlight the banner carving border; it reminds me of shading in marquetry. I will be following along with great interest.
-
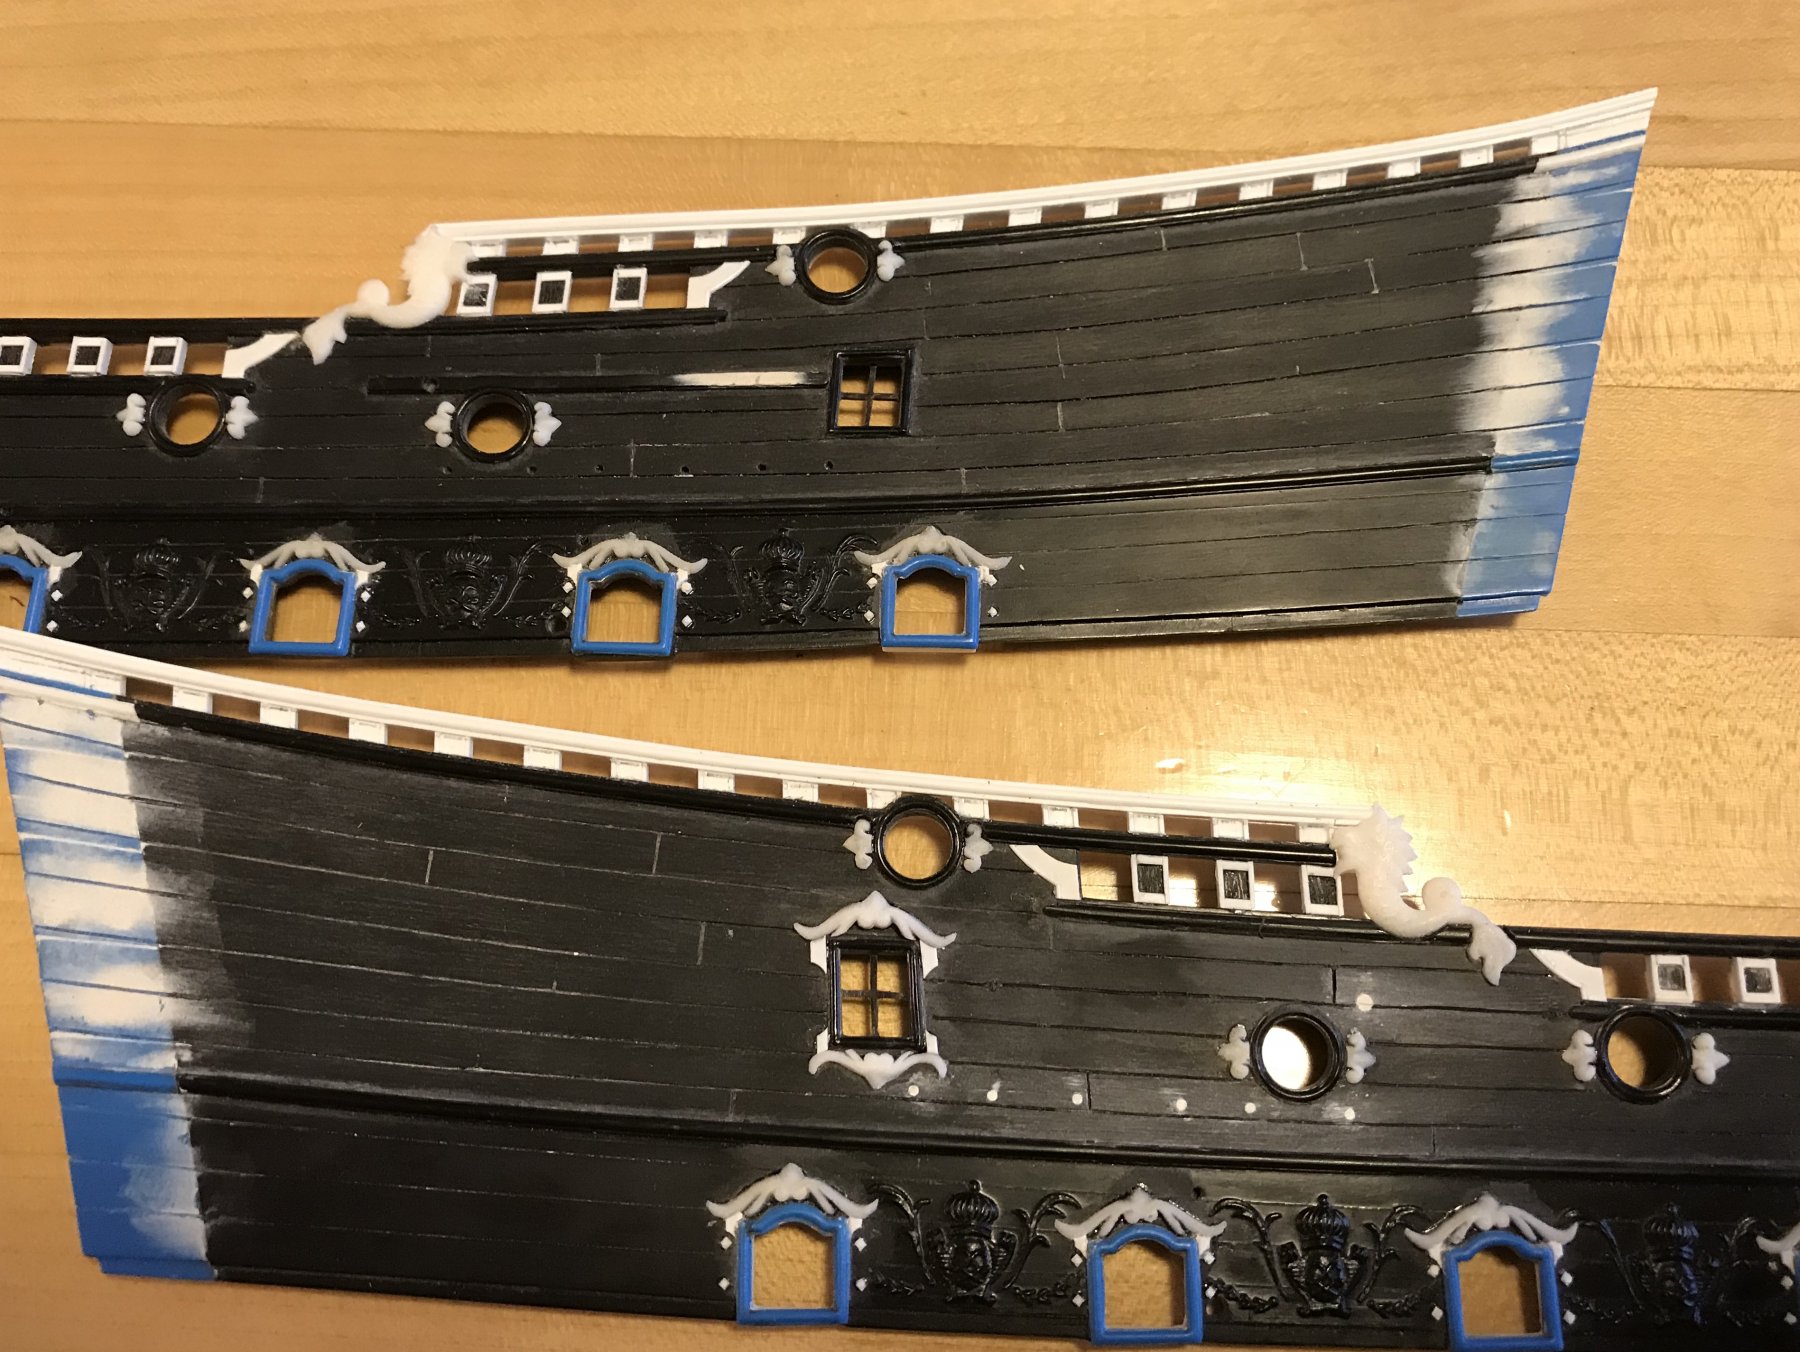
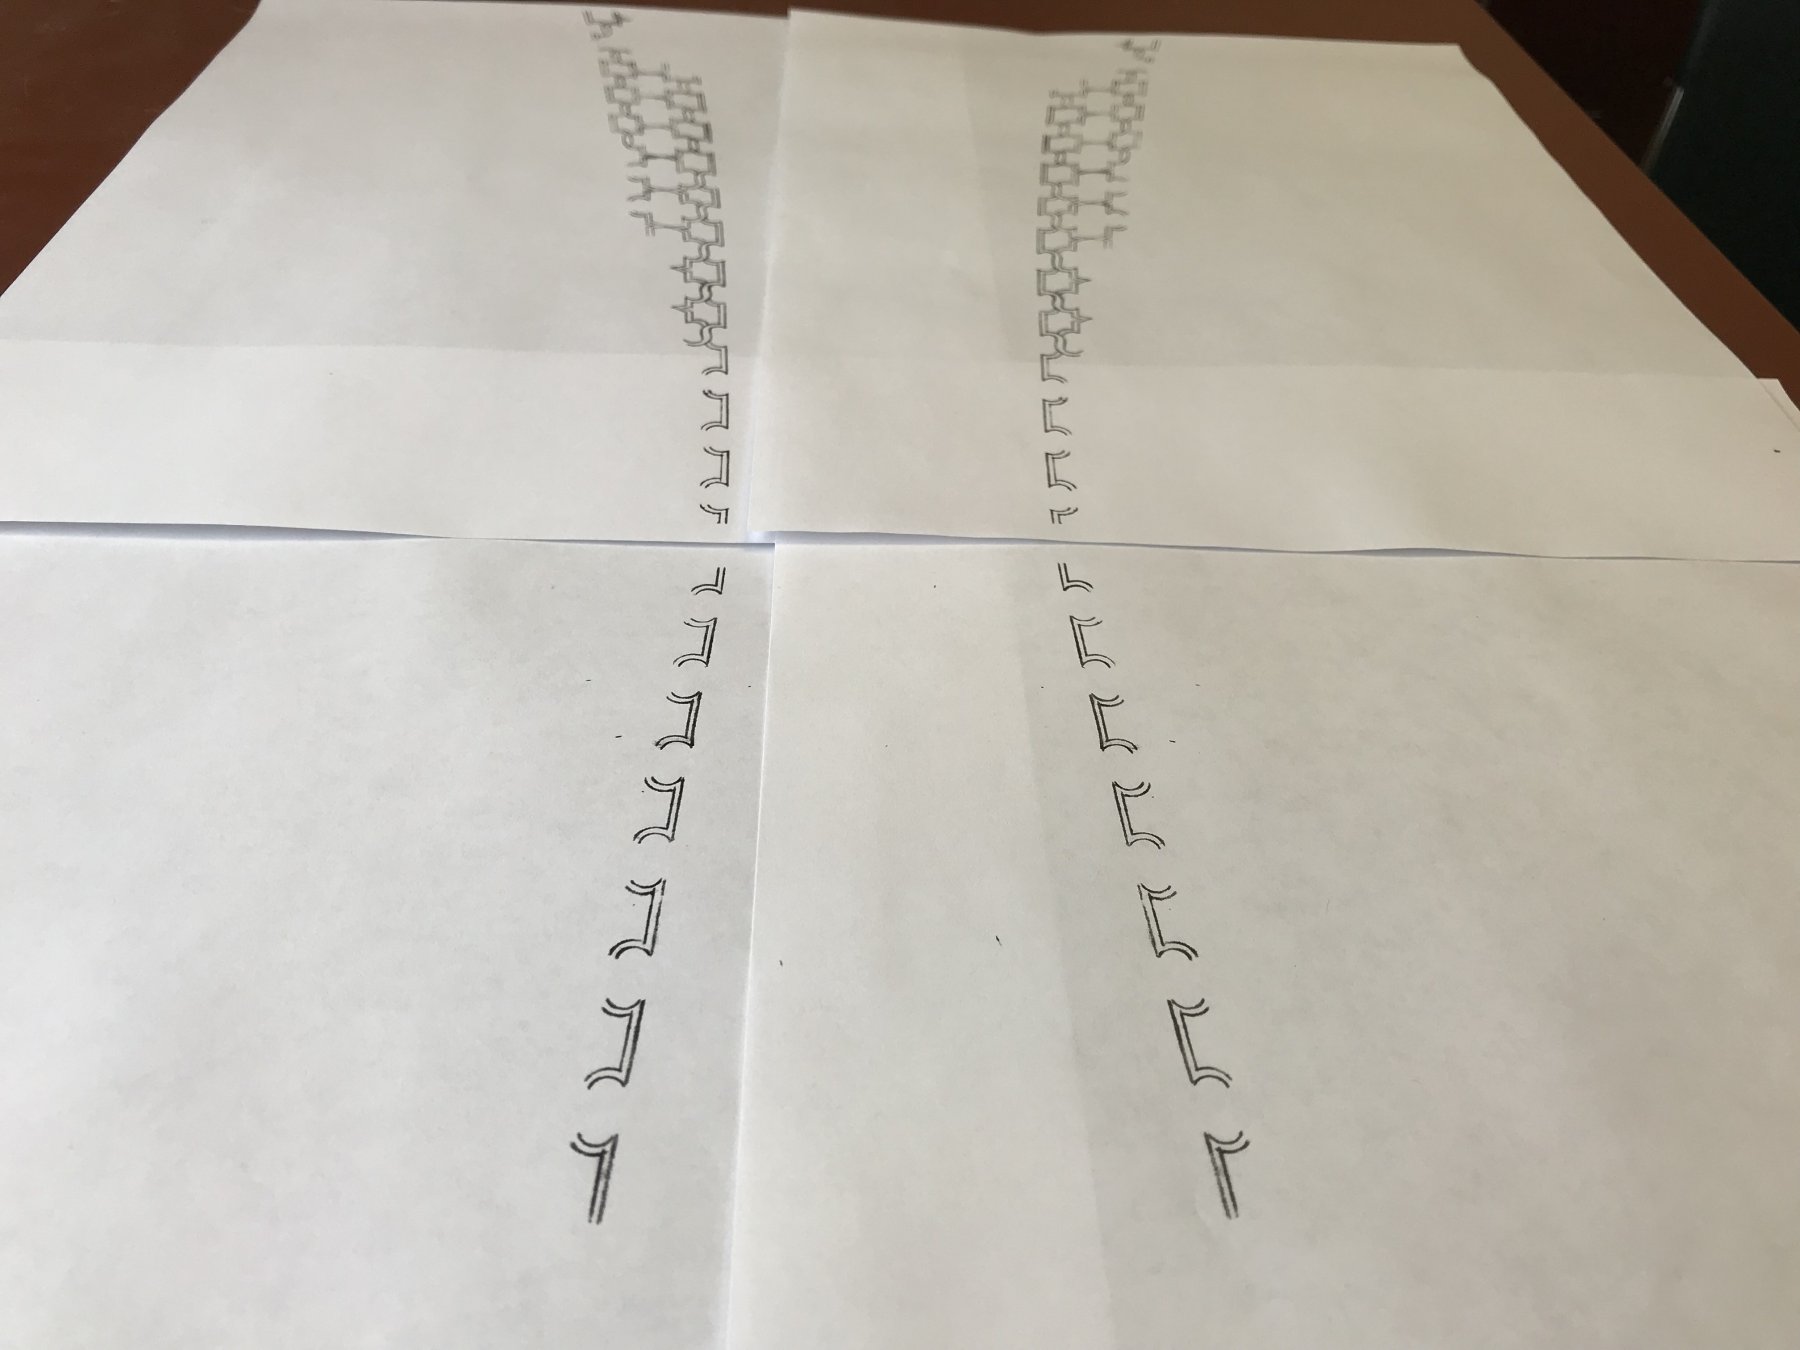
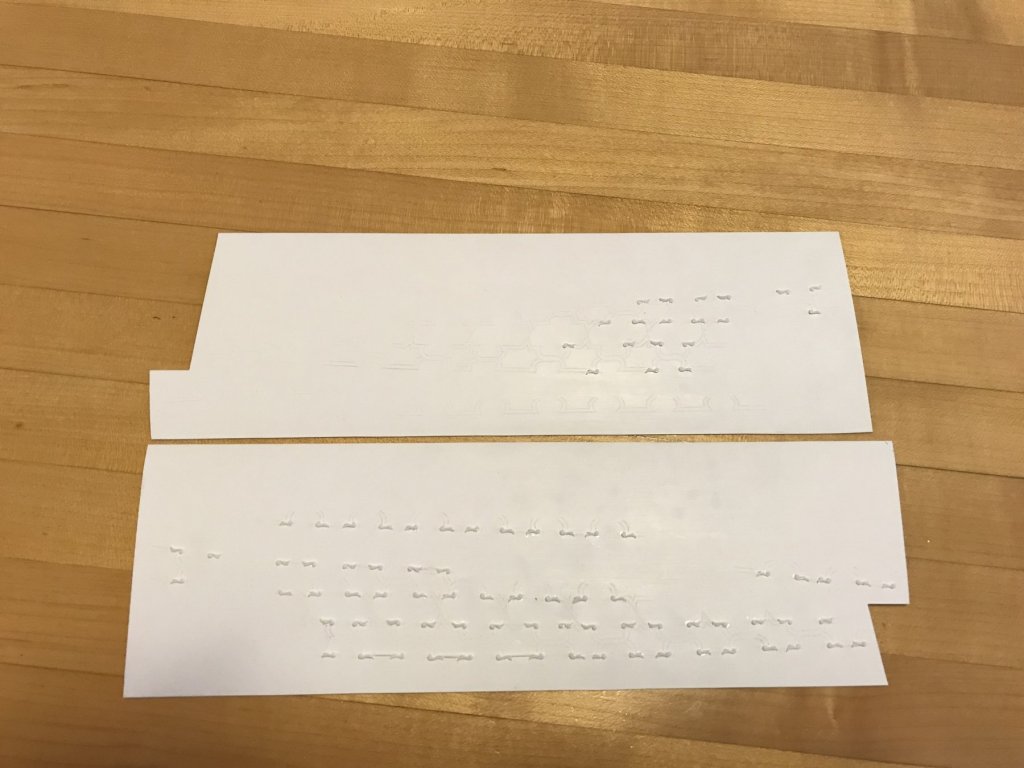
Work on the frieze continues, un-abated. I transfered my layout to .020 styrene sheet. This thickness will be better than thinner, I think, because I will be doing a little light relief work around the Xs to highlight their intersection. More on that later. The design was easy enough to transfer with a sharp EXACTO, after having pasted it on with a children’s glue stick. After the scribe, and carefully checking to make sure I hadn’t missed any lines (I still did miss a few!), I soaked the plastic in a tray of water to remove the paper. Then, it was just a matter of placing the scrolls onto all the pointy corners: It was better to glue the scrolls in place before cutting out the frieze lattice, because the scrolls overhang the frieze lattice. So, now, when I do cut out the lattice, the scrolls will be fully supported upon the upper bulwarks. I really am not good at counting because I will need way more than the first 100 scrolls that I made. Each side, including the forecastle, requires about 70 scrolls. But, in the grand scheme of things that is not a big deal. I’ve already made the rough castings and started extracting them. The pattern you are seeing above is the port and starboard side nestled opposite each other, and then cut in half to make it easier to transport to work. So, I apologize if this all appears a little jumbled right now. It’s a work in process, and it will all come into sharp relief soon. My other side project is the last bit of prep work on the upper bulwarks to prep for the frieze. I’m not sure why, but I had initially preserved the mounting strip for the mizzen channels (which is still evident in the picture below, port side). Finally, it dawned on me that I will also be lowering the mizzen channels to just above the main deck guns (on the same line that Heller originally placed the main and fore channels). There is plenty of contemporary portraiture of first-rates to support this arrangement, and the less my frieze is interrupted - the better. The other big epiphany I had was what, exactly, I was going to do with the “coach” window to dress it up a bit. I never really liked what I drew, in the first place, but then I realized that the main deck port enhancements would be perfect, here, and would lend ornamental consistency to the whole design. I added haunches, of differing widths, to the top and bottom scrolls to give the gingerbread framing effect that I was after, in the first place. I think this will blend in better with the surrounding frieze and it just looks more 17th C. to me. In my opinion, and for the record, the coach window is too large to begin with, but I won’t go to the trouble of filling it in and re-cutting, etc. For my purposes, on this model, good enough is well enough. Next, I will finish the port side window, and then finish glueing scrolls to the port frieze. After that, I will begin to carefully extract the frieze lattice and glue it in place. Again - it is so annoying to me that this website sometimes does not allow you to erase duplicates of a picture without completely deleting and re-uploading the pic. Anyone else have this problem?

- 2,697 replies
-
- 6
-
-
- heller
- soleil royal
- (and 9 more)
-
How goes it, Cedric? Anything new in the shipyard?
-
Likewise, EJ, I will be watching with great interest to see what direction you take. Everything you have done, so far, has made for a really terrific model, and you have really transformed the kit. As always, thank you to everyone for continuing to check in and for your likes and comments. I know this is really slow, but comparatively speaking (to 2+ years ago, when I started this), we are really close to painting and assembling something. This ship is all about the ornamentation, though, so this is why I have spent so much time trying to make this happen. I promise this will soon pay off into something worth seeing. But, again, thank you guys for sticking around. I really appreciate it!
- 2,697 replies
-
- 2
-
-
- heller
- soleil royal
- (and 9 more)
-
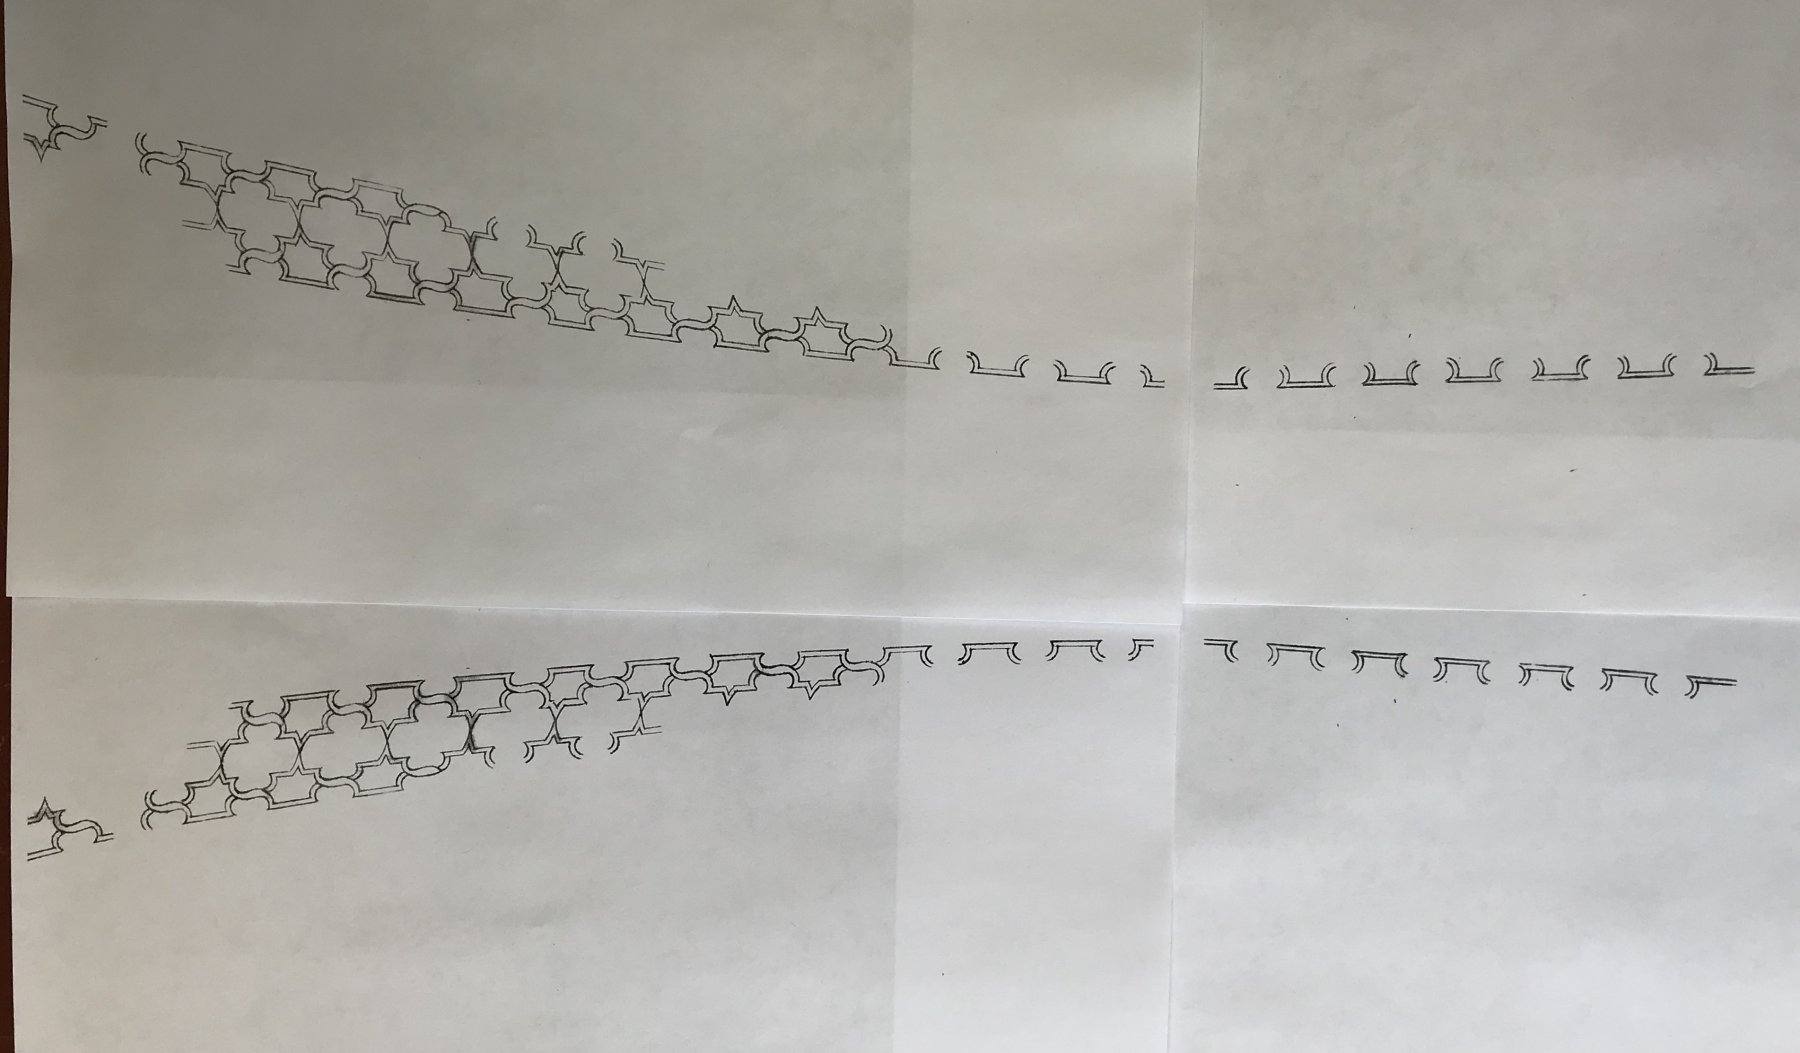
Alright! I have a workable layout that I was able to make mirror copies of for both the port and starboard sides. Standing apart from the structure of the bulwarks, it sure doesn’t look like much, but this lattice is the framework for the new ornamental scheme. I’ve finished making all of the tiny scrolls. I made over a hundred, so that I would have plenty to choose from. I can now begin cutting out and mounting the lattice, and decorating it. I still have to make the folliate diamonds and the shells, but the scrolls and fleurs are more than enough to keep me busy in the evenings.

- 2,697 replies
-
- 8
-
-
- heller
- soleil royal
- (and 9 more)
-
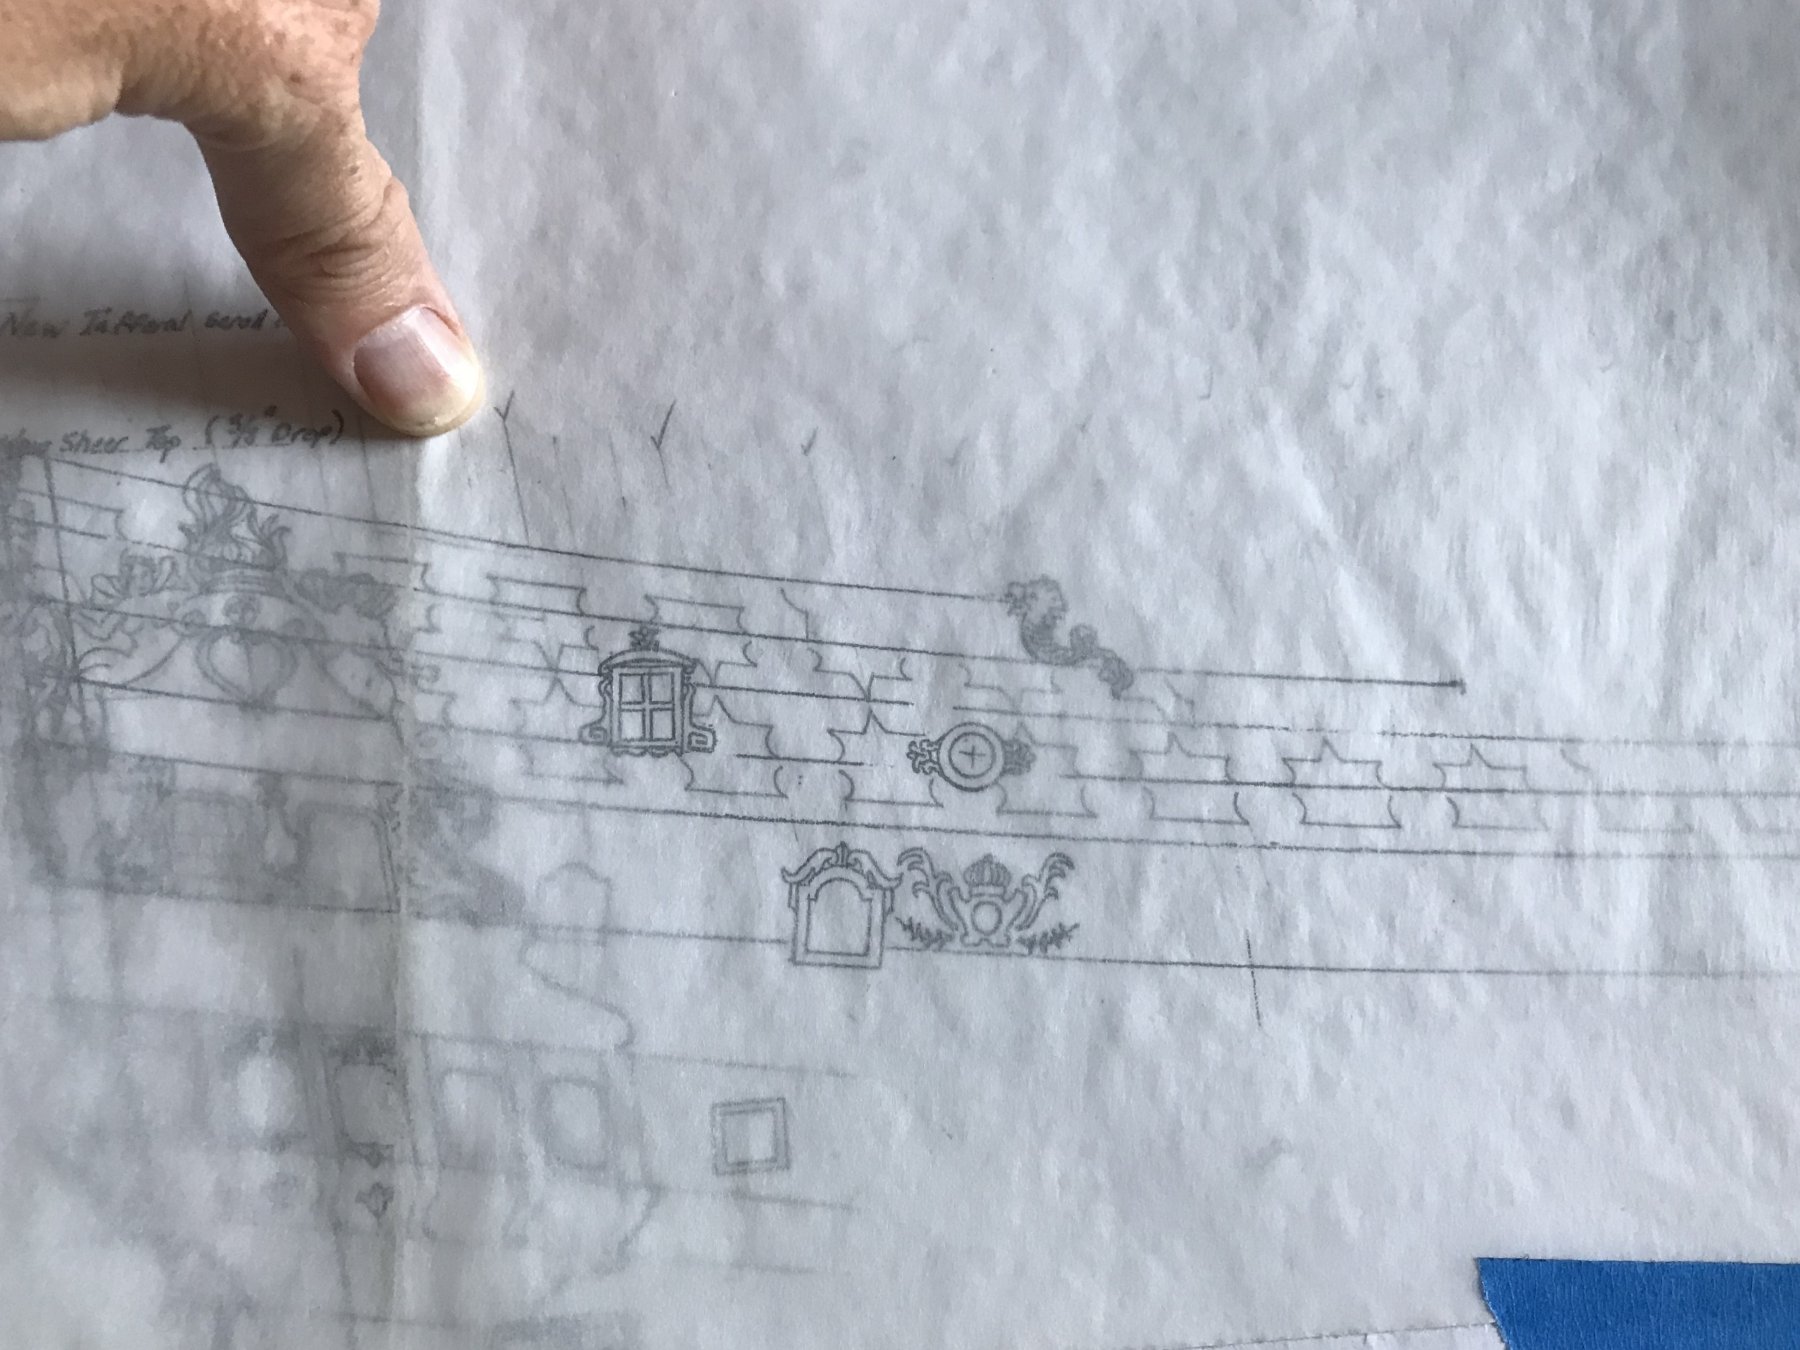
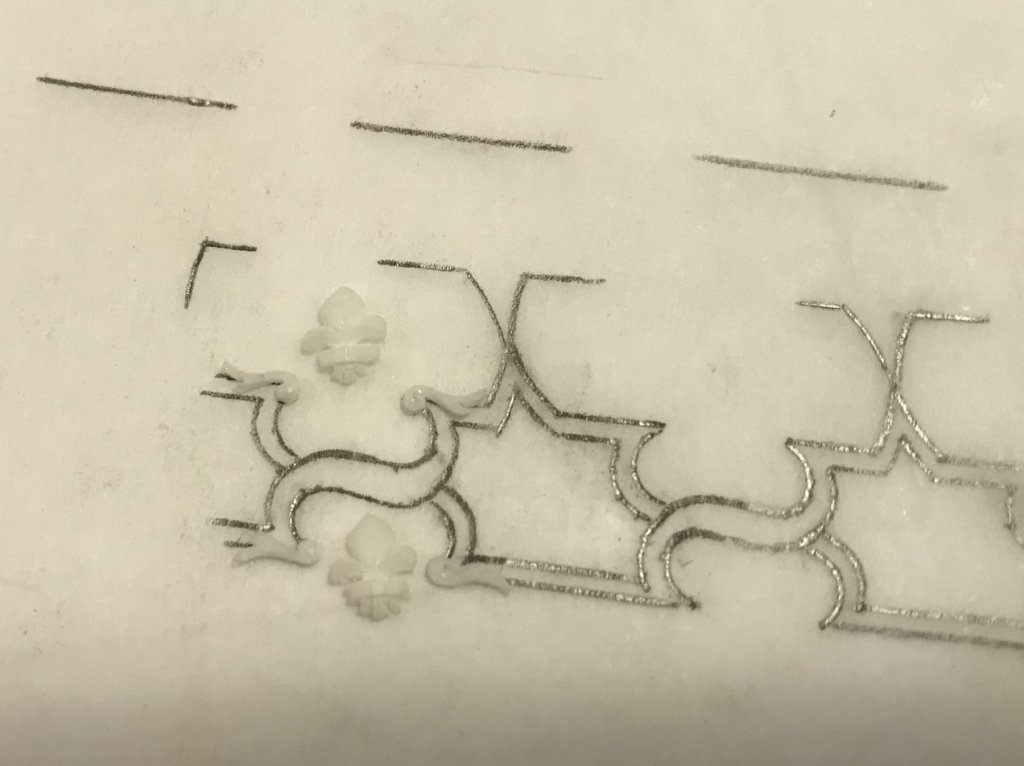
With such a dense profusion of ornament, I thought it might be wise to do a clearance check to see whether the actual size of my fleurs and scrolls are going to work together. Below is the Berain drawing upon which my frieze is based: As drawn by Berain, all of the ornaments are really closely clustered together. My intention for this model was to use the full space of the upper bulwarks, above the main deck guns, to spread the frieze out a bit, so that it wouldn’t appear quite so cluttered. I mentioned, earlier, that perhaps I made the fleurs a bit too big. Well, this does appear to be the case: Part of my problem has to do with an artistic decision, on my part, to add a row of fleurs all along the bottom of the frieze, and just above the main deck guns. I have done so, because (almost) every contemporary sketch I have seen of important French ships of the period has shown a profusion of fleurs. This extra row of fleurs will stand out nicely against the band of ultra-marine blue that will delineate the lower border of the frieze. I will not, however, be attempting to make even smaller fleurs for the frieze. Now that I can really see the scale of things, I will adjust the size of the folliate diamonds (that will be centered on the “X” between fleurs), so that the two ornaments have at least a sliver of space between them. I would prefer more space, but there are limits to my willingness to redo some things, and the spacing won’t be worse than what Berain drew, in the first place. One of the interesting challenges of hand-drawing the frieze - which I had forgotten since doing the digital drawing - is that the whole of the frieze tapers wider, as you move aft. This would be one of the inaccuracies of the Heller model, as in actual practice the planking strakes of the upper bulwarks would have been of a uniform width. It is what it is, as is often said. The result of this variance is that the Xs get bigger, and each one has to be drawn to scale, accordingly. The differences are slight, but over the span of a few inches, they add up. This has meant that I could not simply apply one tracing pattern to all of my Xs.

- 2,697 replies
-
- 5
-
-
- heller
- soleil royal
- (and 9 more)
-
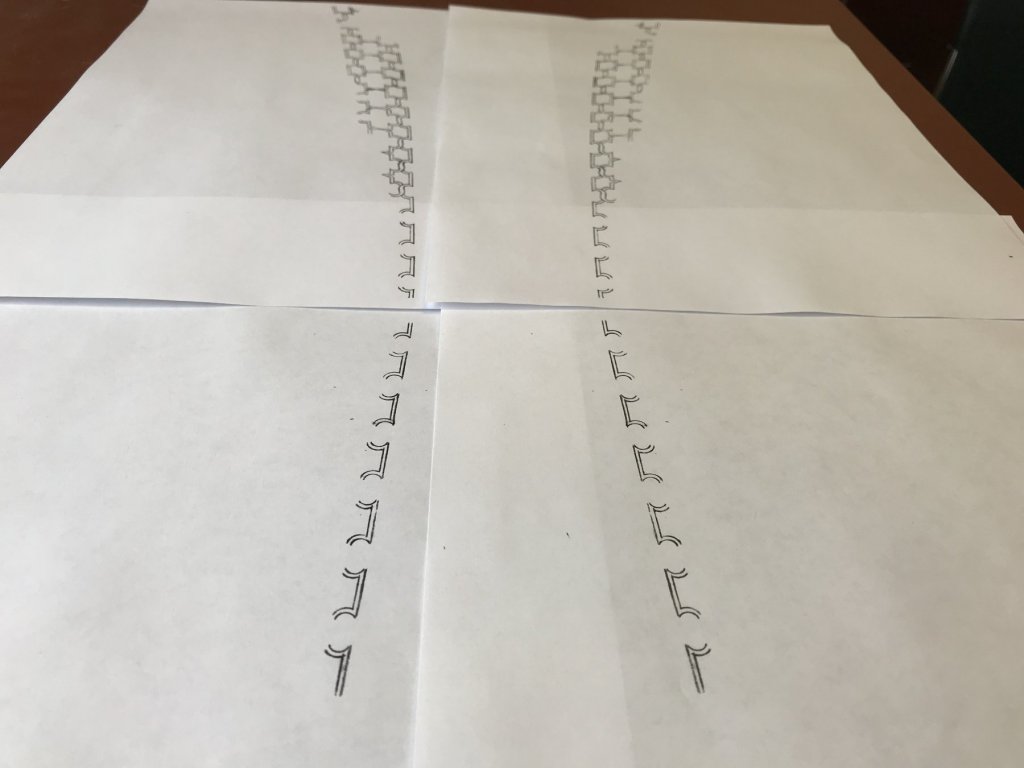
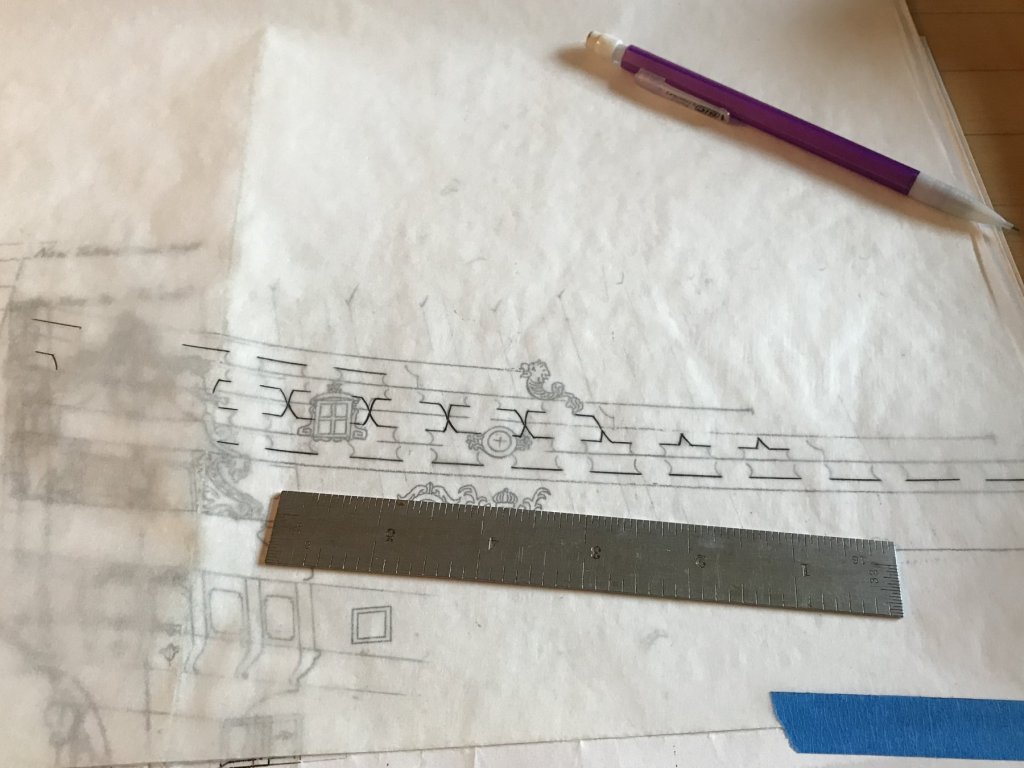
So, kinda’ blows, but I have to go analog in order to retrieve my layout for the frieze. I have neither the patience nor the time, right now, to figure out all my errors with GIMP, so I am using the original paper layout (which was subsequently scanned for the digital drawing) to retrace the frieze lattice on vellum. It’s moving quickly enough, and I’ll easily be able to make a reverse copy on the photocopier. Before I started, I made sure that the outline of the upper bulwark pieces lines up with the actual parts, and it does! There will be a few places where I extend lines on the tracing, in order to give myself a little extra leeway around ports and hancing pieces, and such. I’ll have to make a tracing pattern for the X’s, upon which the folliate diamonds are centered. I should, though, be able to make one vellum tracing directly from the computer screen, at 1:1, and re-trace that, as needed. A little backwards to go forwards, but faster than any other path.

- 2,697 replies
-
- 5
-
-
- heller
- soleil royal
- (and 9 more)
-
A remarkable restoration, Micheal! There were so many daunting challenges you resolved with such skill and seamless integration.
- 749 replies
-
- 6
-
-
- albertic
- ocean liner
- (and 2 more)
-
I did not know that, actually, about using a flame to remove air bubbles. I'm not sure I could manage that, after pouring the resin; the moulds are just too small. The resin is free of bubbles, while it's still in the cup. The bubbles only happen as air gets trapped during the pour. However, Vic, you raise an interesting possibility with vibration. Skinhead that I am (naturally, not philosophically), I do own an electric razor that might just do the trick!
- 2,697 replies
-
- 3
-
-
- heller
- soleil royal
- (and 9 more)
-
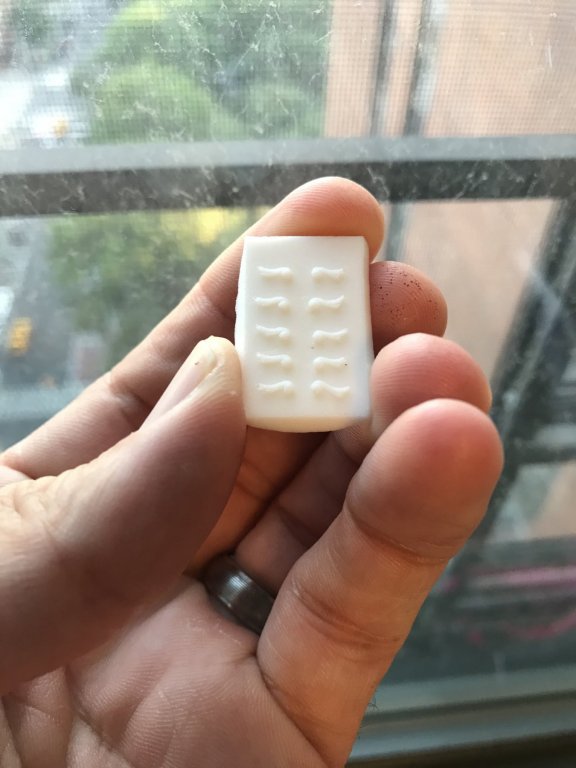
Thank you, Mark. It is much appreciated. Well, early returns on the first sample casting are promising, if not perfect. I learned a few things. Usually, I use a toothpick to fish the air-bubbles from the points and crevasses of the mould, after pouring the resin. A toothpick, however, is not a fine enough instrument to get into the tails of the scrolls. I had a lot air pockets, in these areas, that spoiled about half the castings. The other mistake was attempting to sand the background so thin that the scrolls would almost free themselves with sanding alone. The trouble, here, is that the scroll heads lose too much of their substance or volume. In truth, it only requires one small gouge and the tip of a sharp EXACTO to free them. And there’s only the smallest bit of picking that has to be done where the scroll head meets the neck, and between the fronds of the tail. It isn’t like the fleur-de-lis, where I am doing a significant amount of re-shaping. I can cut one of these things out and be done with it in a minute or less. So, I’ll make another couple of moulds, take more care to eliminate bubbles, and I’ll leave the ground backer a little thicker. I suspect that these second castings will have the weight and crispness that I’m after, without having to move on to 3D printing. Also, yesterday, I went to a plastics place on Canal street and bought a largish sheet of .020 white styrene for the frieze lattice. I would prefer a somewhat thinner sheet, though, because the relief would then be a little lower and more subtle. .010 is probably ideal, but .015 might be workable, as well. It will also be easier to cut the lattice out with just a steel rule and a pen knife. Thinner sheet is easy enough to source on-line, and I can always use the .020 stuff as substrate for my new decks. I’ll just order a few different thicknesses, and see how they work out.
- 2,697 replies
-
- 6
-
-
- heller
- soleil royal
- (and 9 more)
-
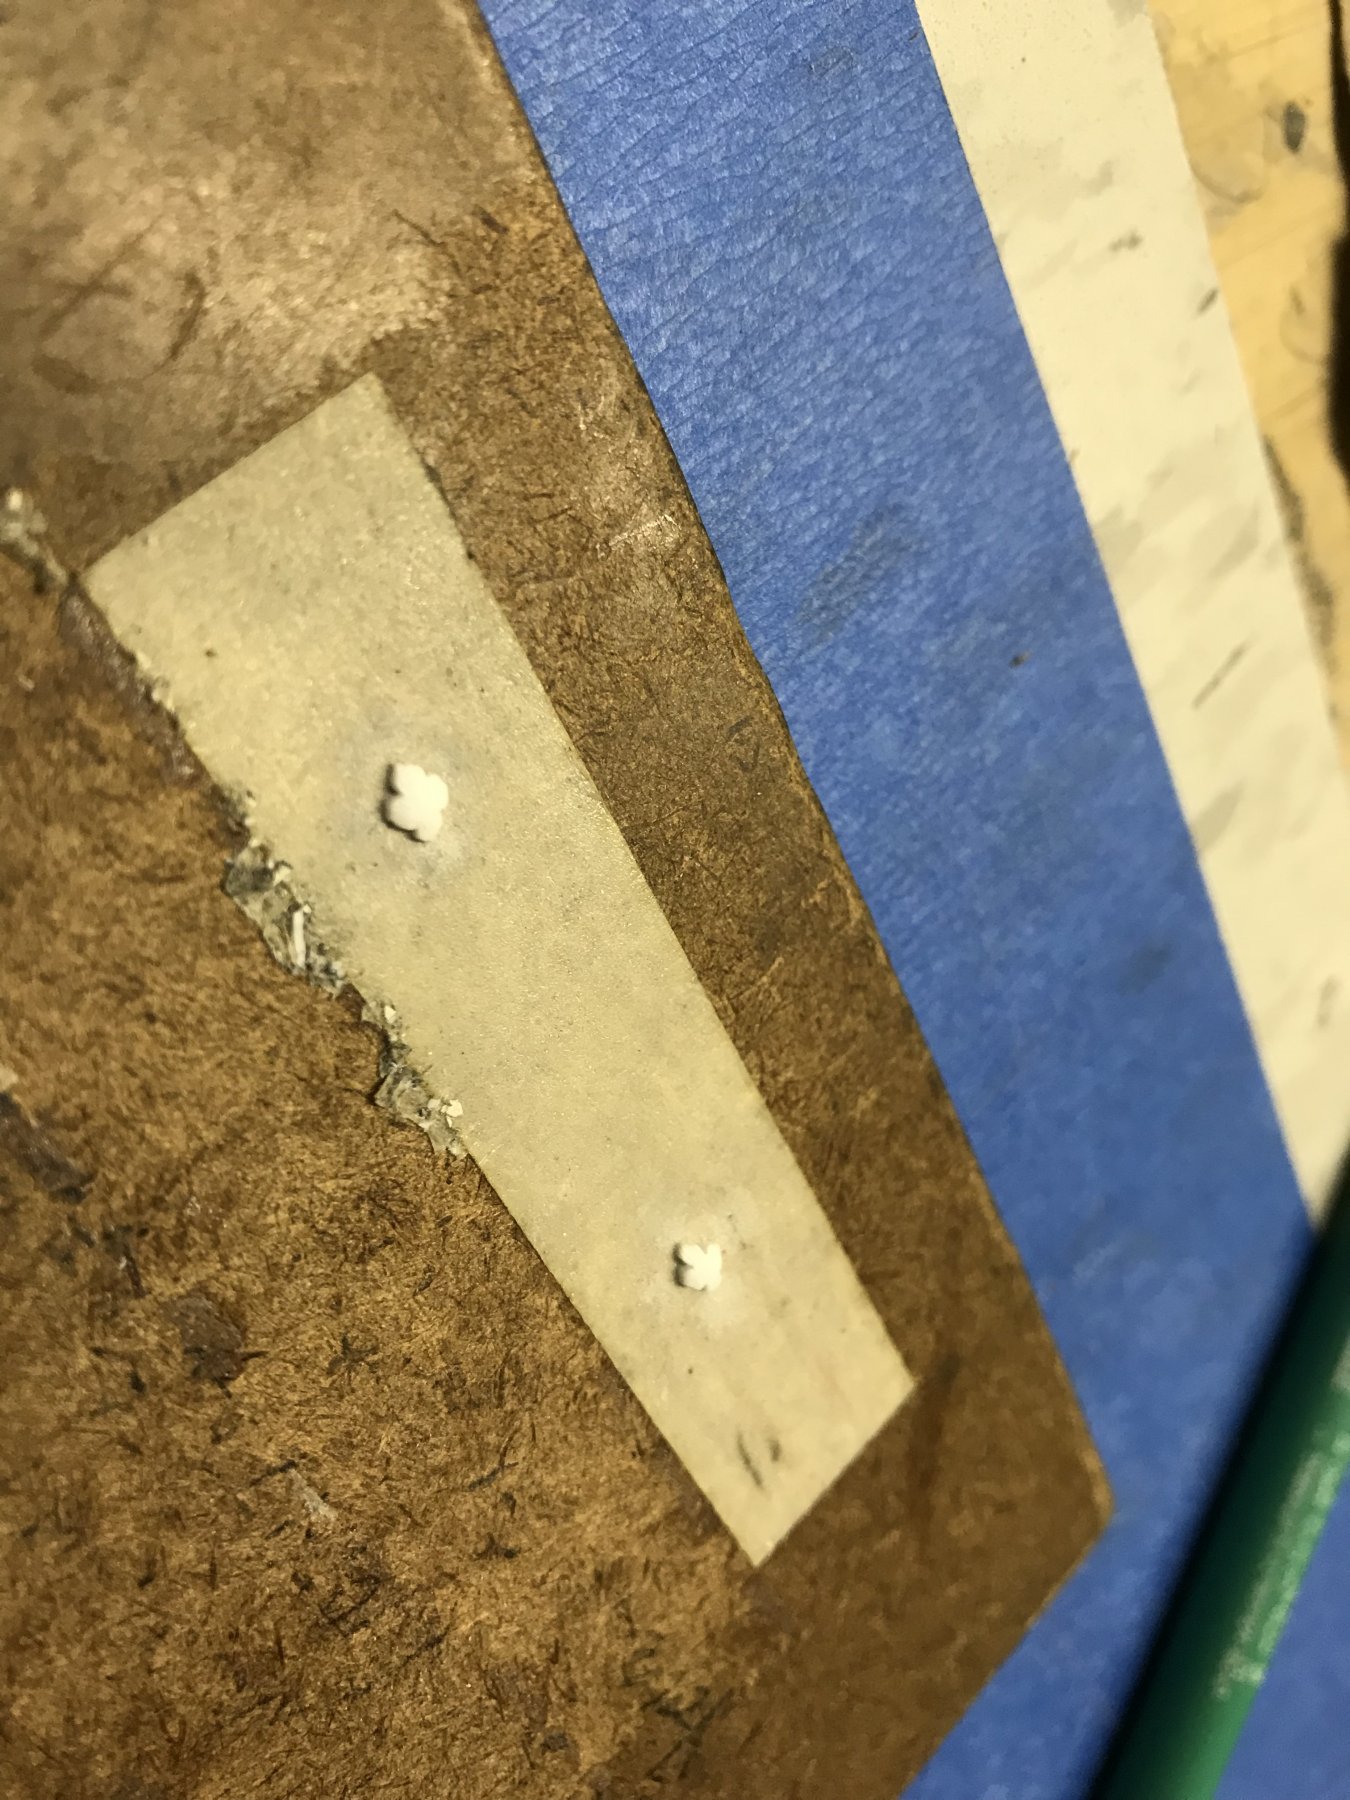
MASTERS MADE I was speaking with Dan, yesterday, who gave me some really helpful tips for mounting objects this small, with thin-set cyano. The basic idea was to hold the part in place on the mount with, in this case, the tip of a pen knife, while applying a small drop of cyano to one side of the part; capillary action will wick the cyano beneath the part. A quick touch with the edge of a paper towel wicks away any excess, thus reducing the corona of excess glue to nearly nothing. In practice, I found these scrolls even too tiny to reliably hold down with the pen knife. It didn’t help, of course, that the other side of the mount had a dolphin master mounted to it, and so it was wobbly on the table. I haven’t had access to a table saw, lately, so I haven’t been able to cut up more mounting stock. My solution was to hold each scroll by the tail, with a fine tweezer, while applying a drop of cyano to the back. I then touch the scroll down to a paper towel to wick away the excess, and then mount to the block. This left only a very little bit of squeeze out, that was then wiped away. Here are the masters in high-definition, highlighting the remaining discrepancies and imperfections in their shaping. I will touch the tail of the upper left scroll with the tools again, but I am otherwise satisfied with their symmetry. They were too small to attempt tracing a pattern, so instead I just nipped away at uniform blanks (1/16” x 3/16”) with the tools until I liked the shape. Also, I found it necessary to simplify the scroll a little - eliminating a teensy spur from one side of the tail - because it was just too small to cut into the plastic. What is difficult to see are the small domed accents that I added to the scroll heads. This will only show, on the finished model, as the smallest glint of reflected light, but it helps give the scrolls just a little bit if shape and dimension. Applying these domes was much easier than trying to carve them into the blank. Next, I’ll make a trial mould and casting, and we’ll see how they turn out.

- 2,697 replies
-
- 10
-
-
- heller
- soleil royal
- (and 9 more)
-
Roter Löwe 1597 by Ondras71
Hubac's Historian replied to Ondras71's topic in - Build logs for subjects built 1501 - 1750
This is just delightfully clean and precise work you are doing, Ondras! -
Thanks, Dan! This morning, I profiled one hand of the masters, and later today, I should be able to make decent inroads on the other hand. Now that you mention it, I remember your davitts are in plastic! Well, it’s all a grand experiment, so we’ll see how it goes.
- 2,697 replies
-
- 2
-
-
- heller
- soleil royal
- (and 9 more)
-
Hey Dan - thank you for weighing in, and thank you to everyone else for your likes and looking in. Would it be correct to presume that laser cutting/etching is strictly for wood? If so, I think these things might just be too small, not to disintegrate under the laser. My blank size works out to 1/16” x 3/16” on .020 styrene sheet. I suspect that the best fall-back option is 3D printing, or maybe even photo-etch. Fortunately, owing to their small size, very little modeling of the parts will be necessary. I’ve decided to try the DIY casting method, in order to see what that process yields. For the masters, I will focus on cutting proportional outlines that I will then add a small domed accent to the scroll head. Although I will probably engrave-in a few small accent lines on the masters, I will reserve any attempt at further modeling the parts until after the resin ground has been wasted away. I’ll need to make both right and left corollaries. I’ll make one sample mould and see what I come up with. If I don’t like my castings, I should be able to use my masters for 3D printing. I’ve prepared a blank. I’ve resharpened all of my knives. So, I guess we’ll just have to see how they turn out 🤞🏻
- 2,697 replies
-
- 3
-
-
- heller
- soleil royal
- (and 9 more)
-
I am also interested in your deck layouts, Mark, as you have paid particular attention to the French style of laying a deck. I’ll definitely be doing some look-backs to that section of your log.
- 2,697 replies
-
- 2
-
-
- heller
- soleil royal
- (and 9 more)
-
Well, that’s appropriate, because the frieze-lattice is exactly that - a Christmas tree for ornaments 🎄
- 2,697 replies
-
- 2
-
-
- heller
- soleil royal
- (and 9 more)