HOLIDAY DONATION DRIVE - SUPPORT MSW - DO YOUR PART TO KEEP THIS GREAT FORUM GOING! (Only 13 donations so far - C'mon guys!)
×


Hubac's Historian
-
Posts
3,292 -
Joined
-
Last visited
Content Type
Profiles
Forums
Gallery
Events
Everything posted by Hubac's Historian
-
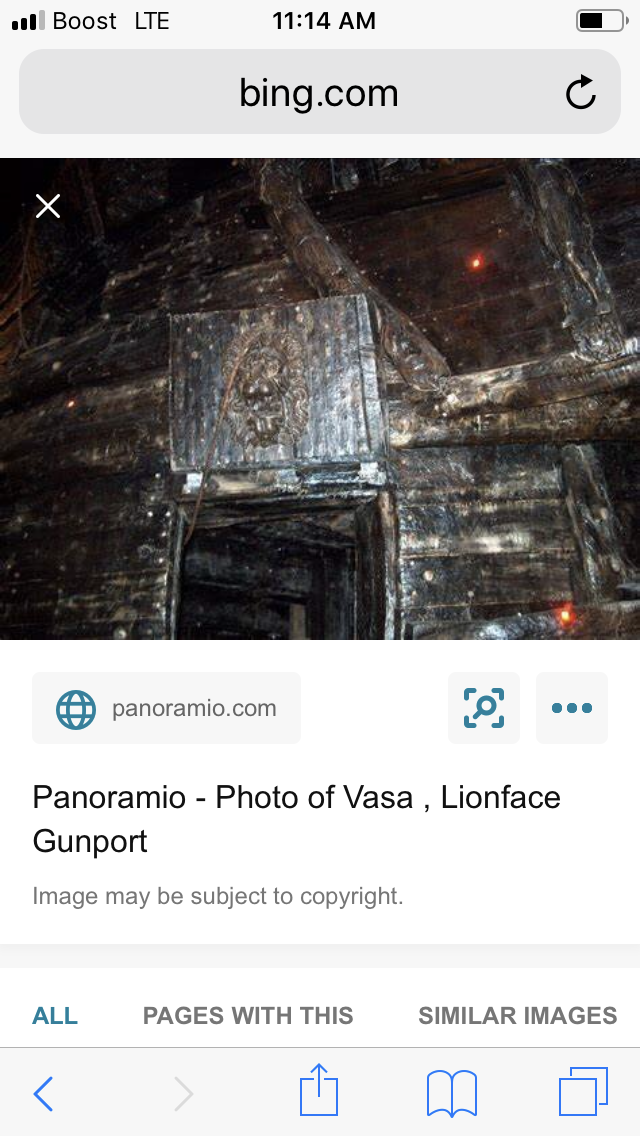
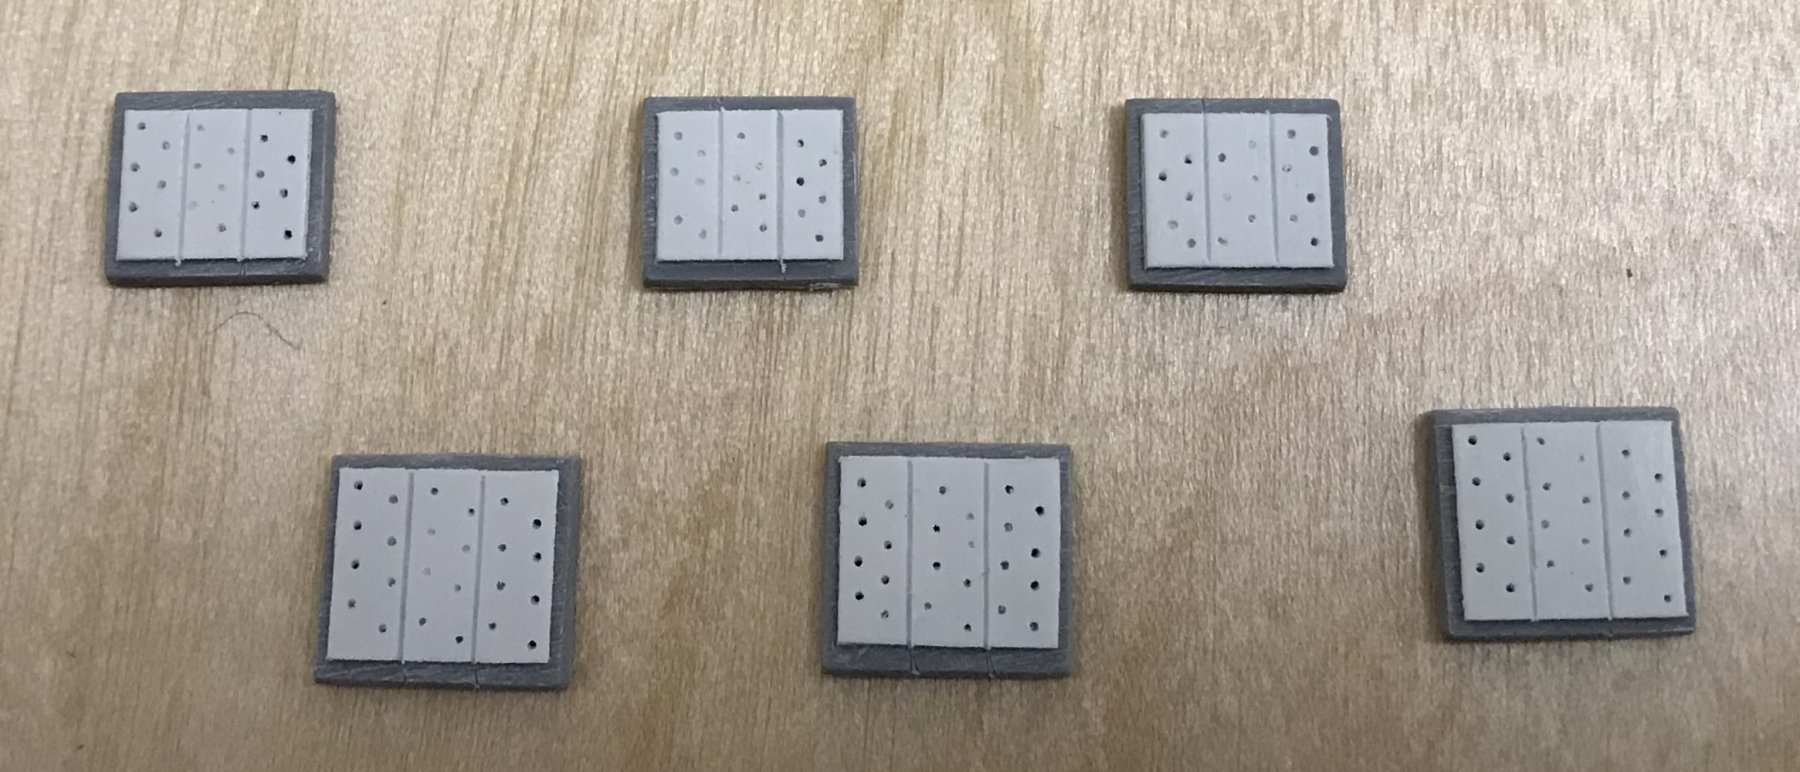
 A reasonable question, Dan. I’m not sure that I have an answer to the issues of compression/drilling, etc. Yet a field of lid-liner nails appears to be a documented detail of 17th C. practice. the Vasa: And the modern reconstruction of Batavia: I’m sure if I search my image database, I could pull up a few VDV, the Elder portraits that show the detail in the 1650’s. Perhaps Lemineur takes artistic license, but maybe not as much as it may seem. If anything, I am surely under-representing them.

- 2,696 replies
-
- 3
-

-
- heller
- soleil royal
- (and 9 more)
-
I think a few things are worth considering for this approach. First, I think it would be most advantageous - for the subsequent thinning and shaping of the keel and stem - if the visible portions of the keel, as well as those portions where the plastic hull joins it, are made from solid wood. You will never be able to convincingly conceal the fact that you have carved through the outer layers of plywood to form your new keel shape; not without a mess of epoxy fillers, anyway. A solid wood keel can be carved back cleanly, and the longest stretch of it, beneath the hull, can even be reduced on a router table, if you were to make a sled for the hull that maintains a parallel relationship between the keel and fence. However many passes it takes to achieve this safely, and then turn the sled, and repeat on the other side. The drawback of this approach is that the stem and sternpost will still have to be carved by hand. This is an advantage, though, if you intend to taper the stem and sternpost as eould have been done in full scale. My suggestion would be to edge glue solid stock to plywood of an appropriate thickness - which would, in effect, serve as a sort of central bulkhead former, up to the main deck level. This approach would even enable you to mimic the appropriate joinery of where the stem and sternpost meet the keel. Now, speaking to the problem of the rise of the stern deadwood - I think your cut line needs to be as close to the flat as you can make it. If you have access to one, the easiest way to achieve this would probably be to sand it off with a machine table belt sander. You could also probably rig up another kind of router sled and get even better results. Now, even if you are a little bit off with the deadwood - as long as you have very carefully removed the keel from the rounded portions of the hull, you should end up with a nicely mating joint to your new keel former for approx. 75% of the hull. Any discrepancies along the stern deadwood could, perhaps, be backed by sections of your expansion-foam plug. A resin-based epoxy filler could then fill-in any discrepancies and be faired back into the hull form. If there are big gaps, you will have to be careful to select a filler that does not kick off with too much heat, or you must take extra time to fill the gap in stages.
- 244 replies
-
- 3
-
-
- heller
- soleil royal
- (and 1 more)
-
I have certainly sacrificed scale accuracy for detail, and some sense of depth, on the carvings. Little by little, though, technique improves. I appreciate the thought, EJ.
- 2,696 replies
-
- 4
-
-
- heller
- soleil royal
- (and 9 more)
-
What you are doing is the extra effort required of making an exceptional model. Really impressive work!!
- 510 replies
-
- 2
-
-
- reale de france
- corel
- (and 1 more)
-
Oh, okay. Good to know. I’ve been thinking about what I might use to bond wood to styrene. I’ll be scratch-building all my masts and spars in wood, but stepping them into a plastic hull; in certain applications, I need strength.
-
Thank you, kindly Vic - and you are my better in many ways; a master of scale, an eye for fair lines, resourceful in finding novel ways to represent fine detail, and an architect of working sailing ship models!
- 2,696 replies
-
- 2
-
-
- heller
- soleil royal
- (and 9 more)
-
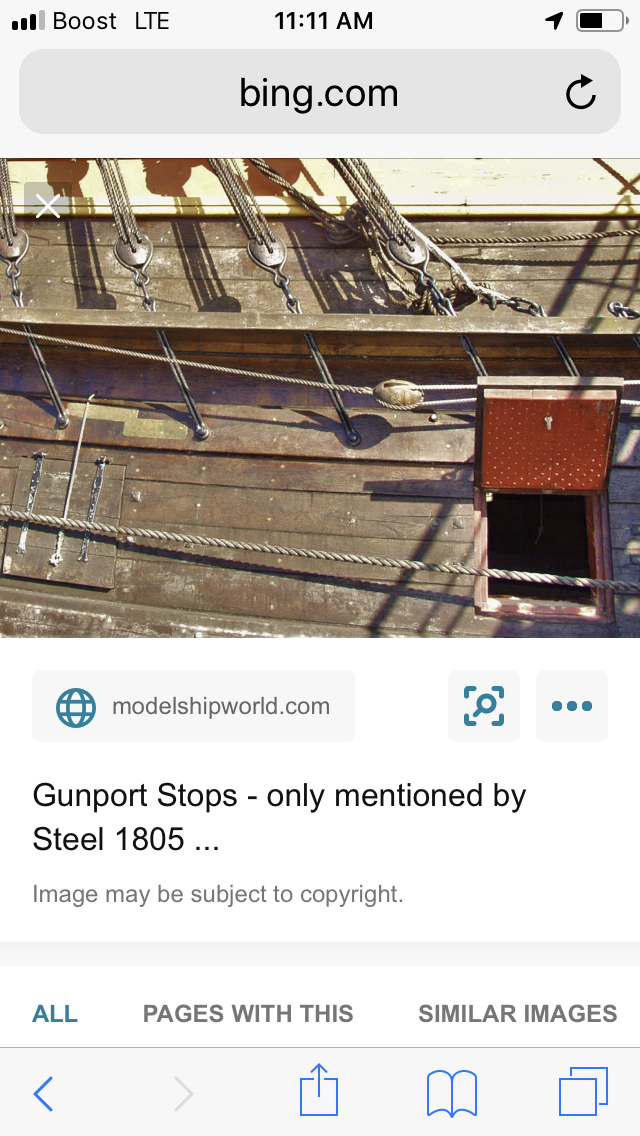
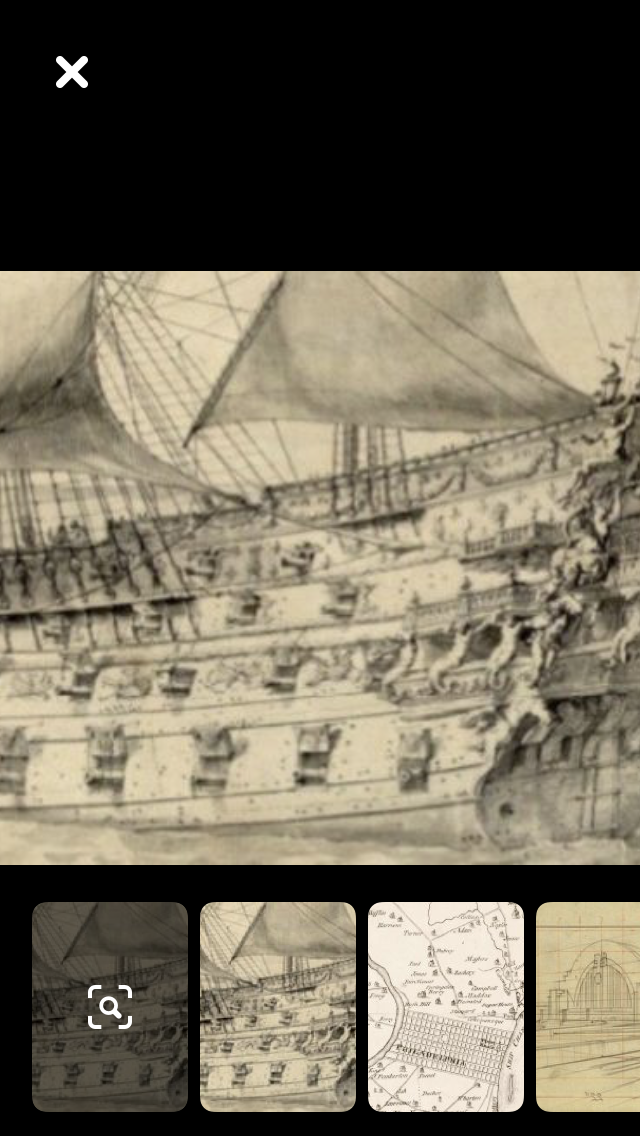
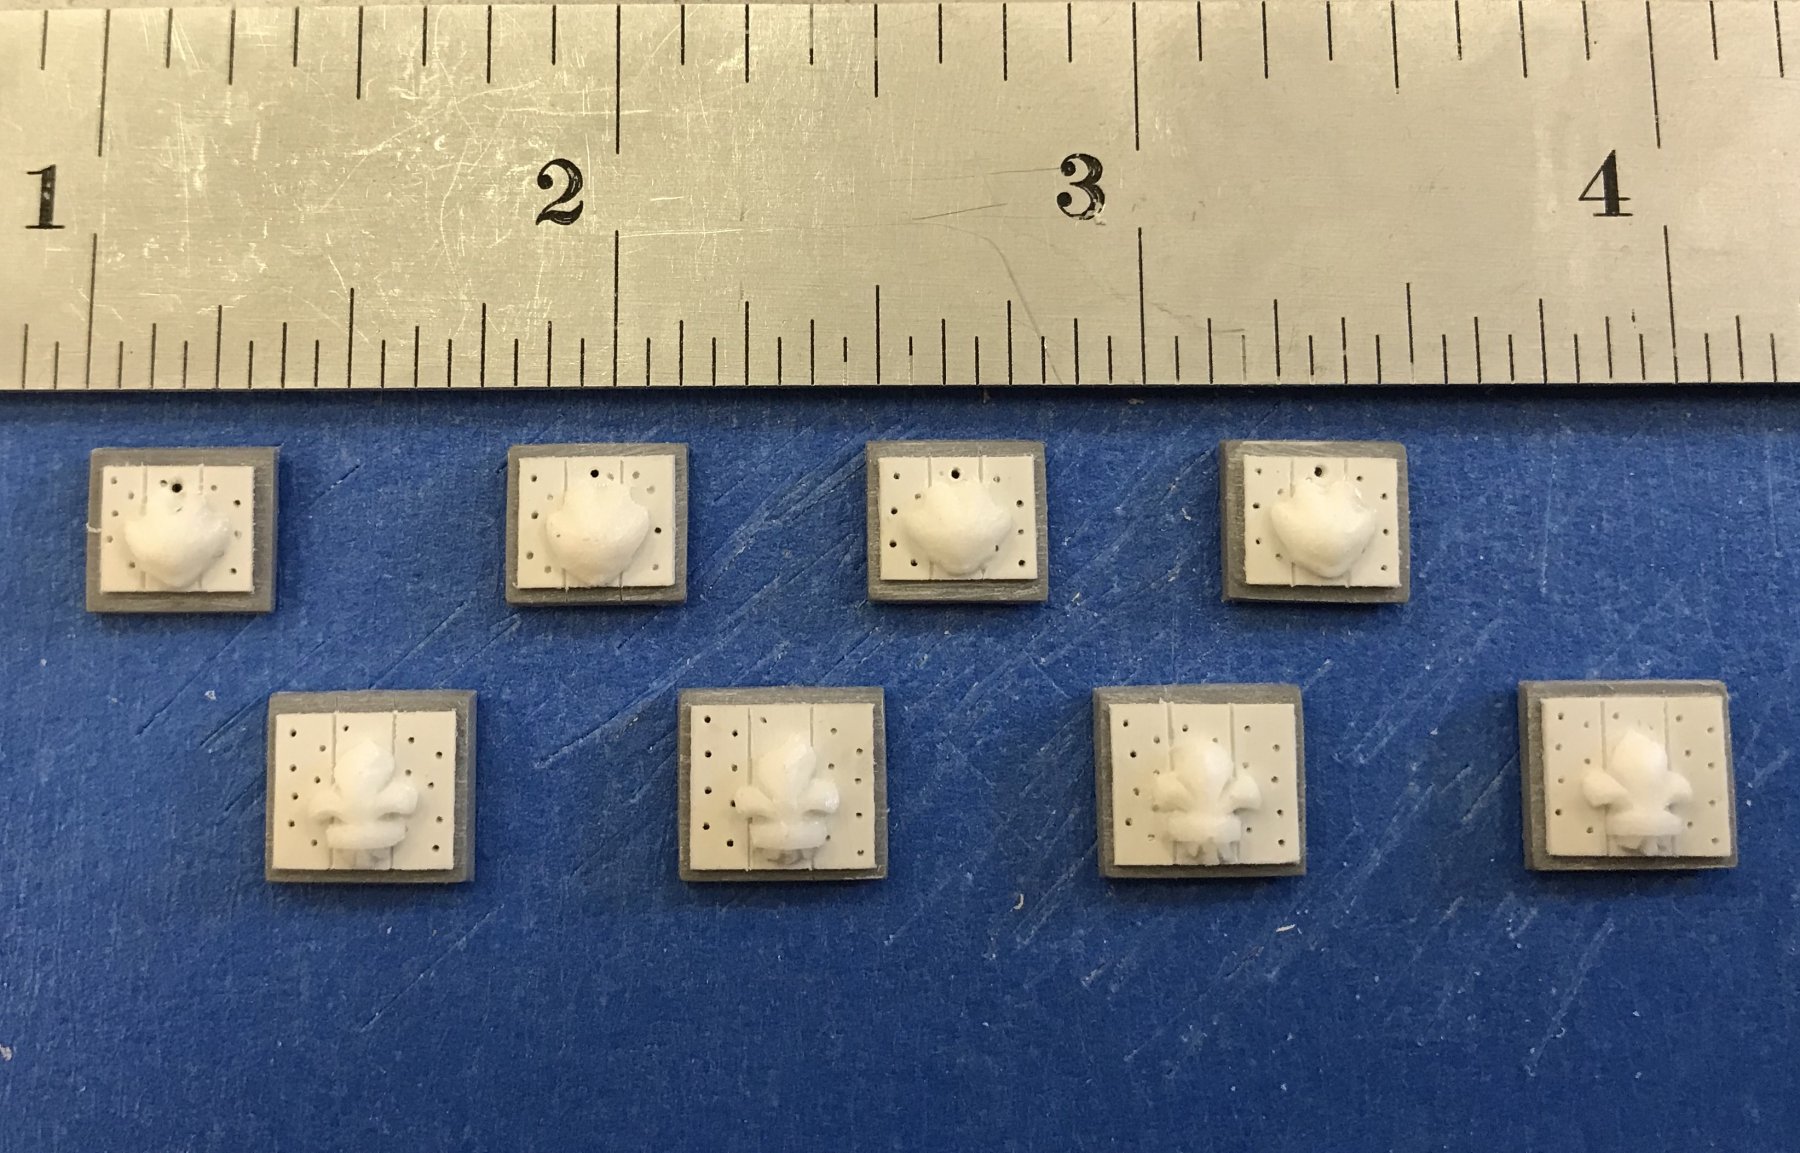
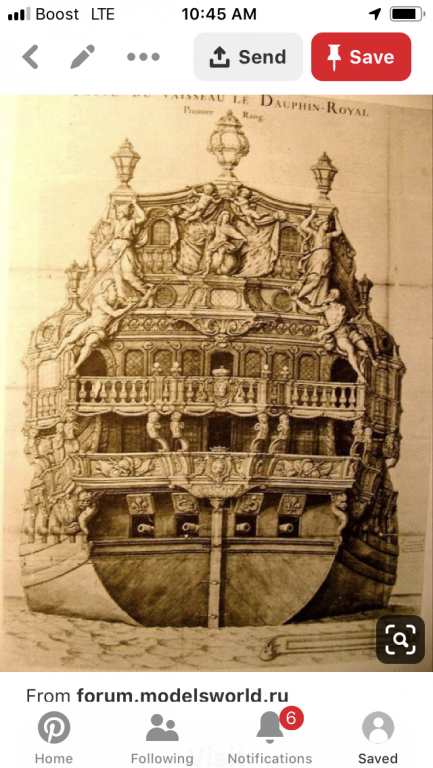
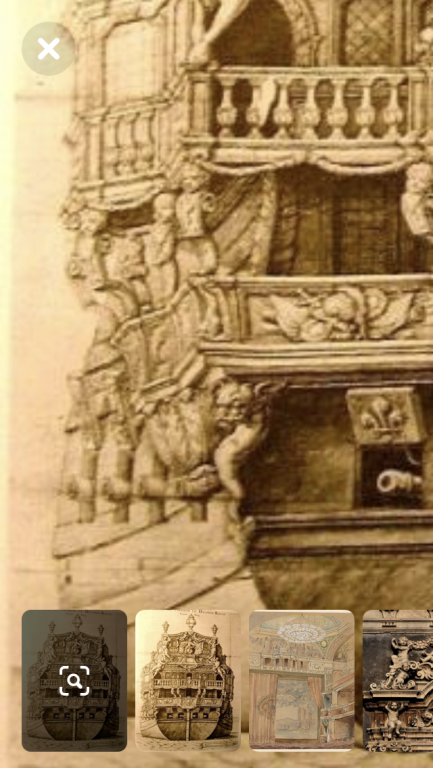
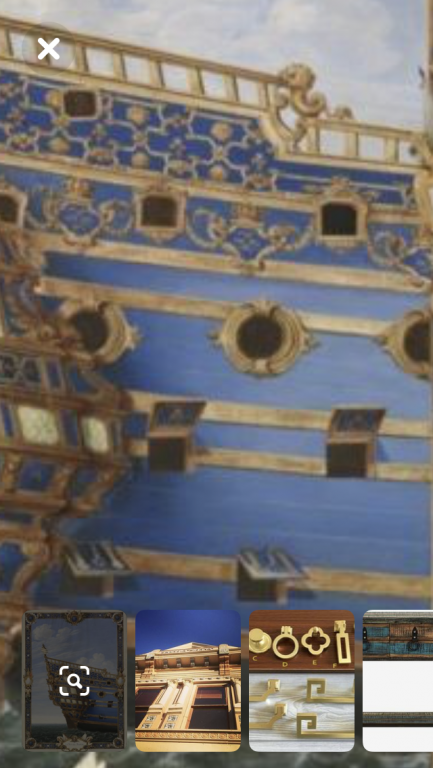
I appreciate the kind words, Dan! Well, Brooklyn is certainly a feast for both the eyes and belly - and, increasingly, populated by concrete canyons. Affordability, though, is a relative concept. In either case, we are thrilled to be there. Now, the presence of fleur-de-lis on the inside of the port lids would have been a pretty sure detail. Whether they were merely painted, or existed as full relief carvings is a matter open to debate. Here are a series of contemporary portraits that, in close-up, seem to suggest relief carvings. Granted, the enlargements are not clear: In the early years of the First Marine, and particularly for the prestige ships of the Premier Rang Extraordinaire, it would seem likely that no expense would be spared. As the French navy evolved toward the Second Marine - 1693 and thereafter - the likelihood that these ornaments may have been painted-on seems plausible, as well; apparently, this is how Mr. Lemineur chose to represent his monograph models of the St. Philippe. Although, in fairness, they may be low-relief trompe l’eoil. Would a re-constructed SR, in 1689, still have had carved port ornaments? I can’t say for sure, however, I don’t think there is enough contemporary evidence to definitively say that they weren’t carved. Soleil Royal was the greatest of the prestige ships, so I chose to go with carvings. Of course, this is also a convenient excuse for applying more of the ornaments that I worked hard to create and chase, after casting. At the very least the Vasa, though a good deal earlier, provides concrete evidence for lid carvings.


- 2,696 replies
-
- 6
-
-
- heller
- soleil royal
- (and 9 more)
-
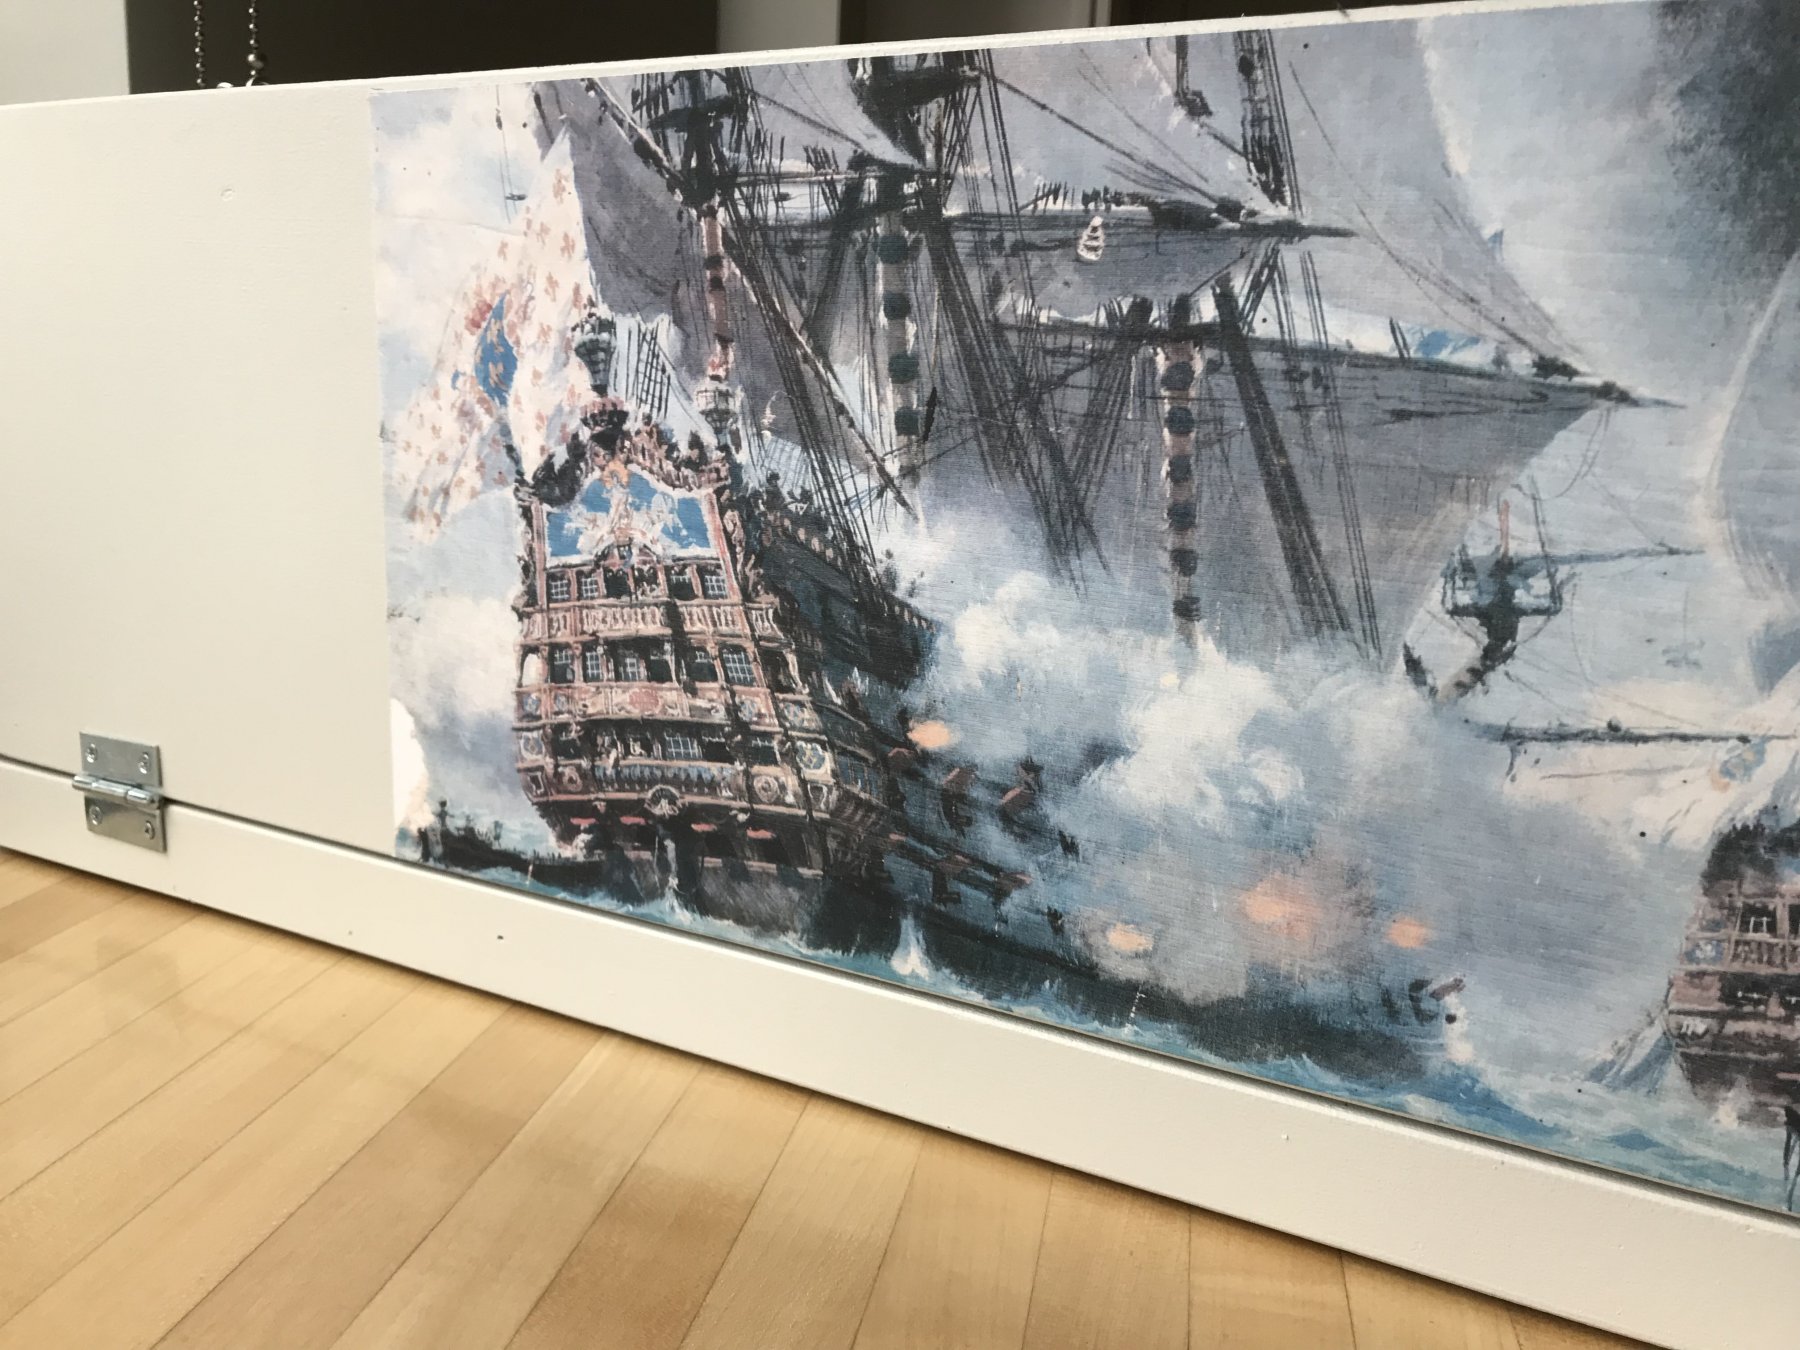
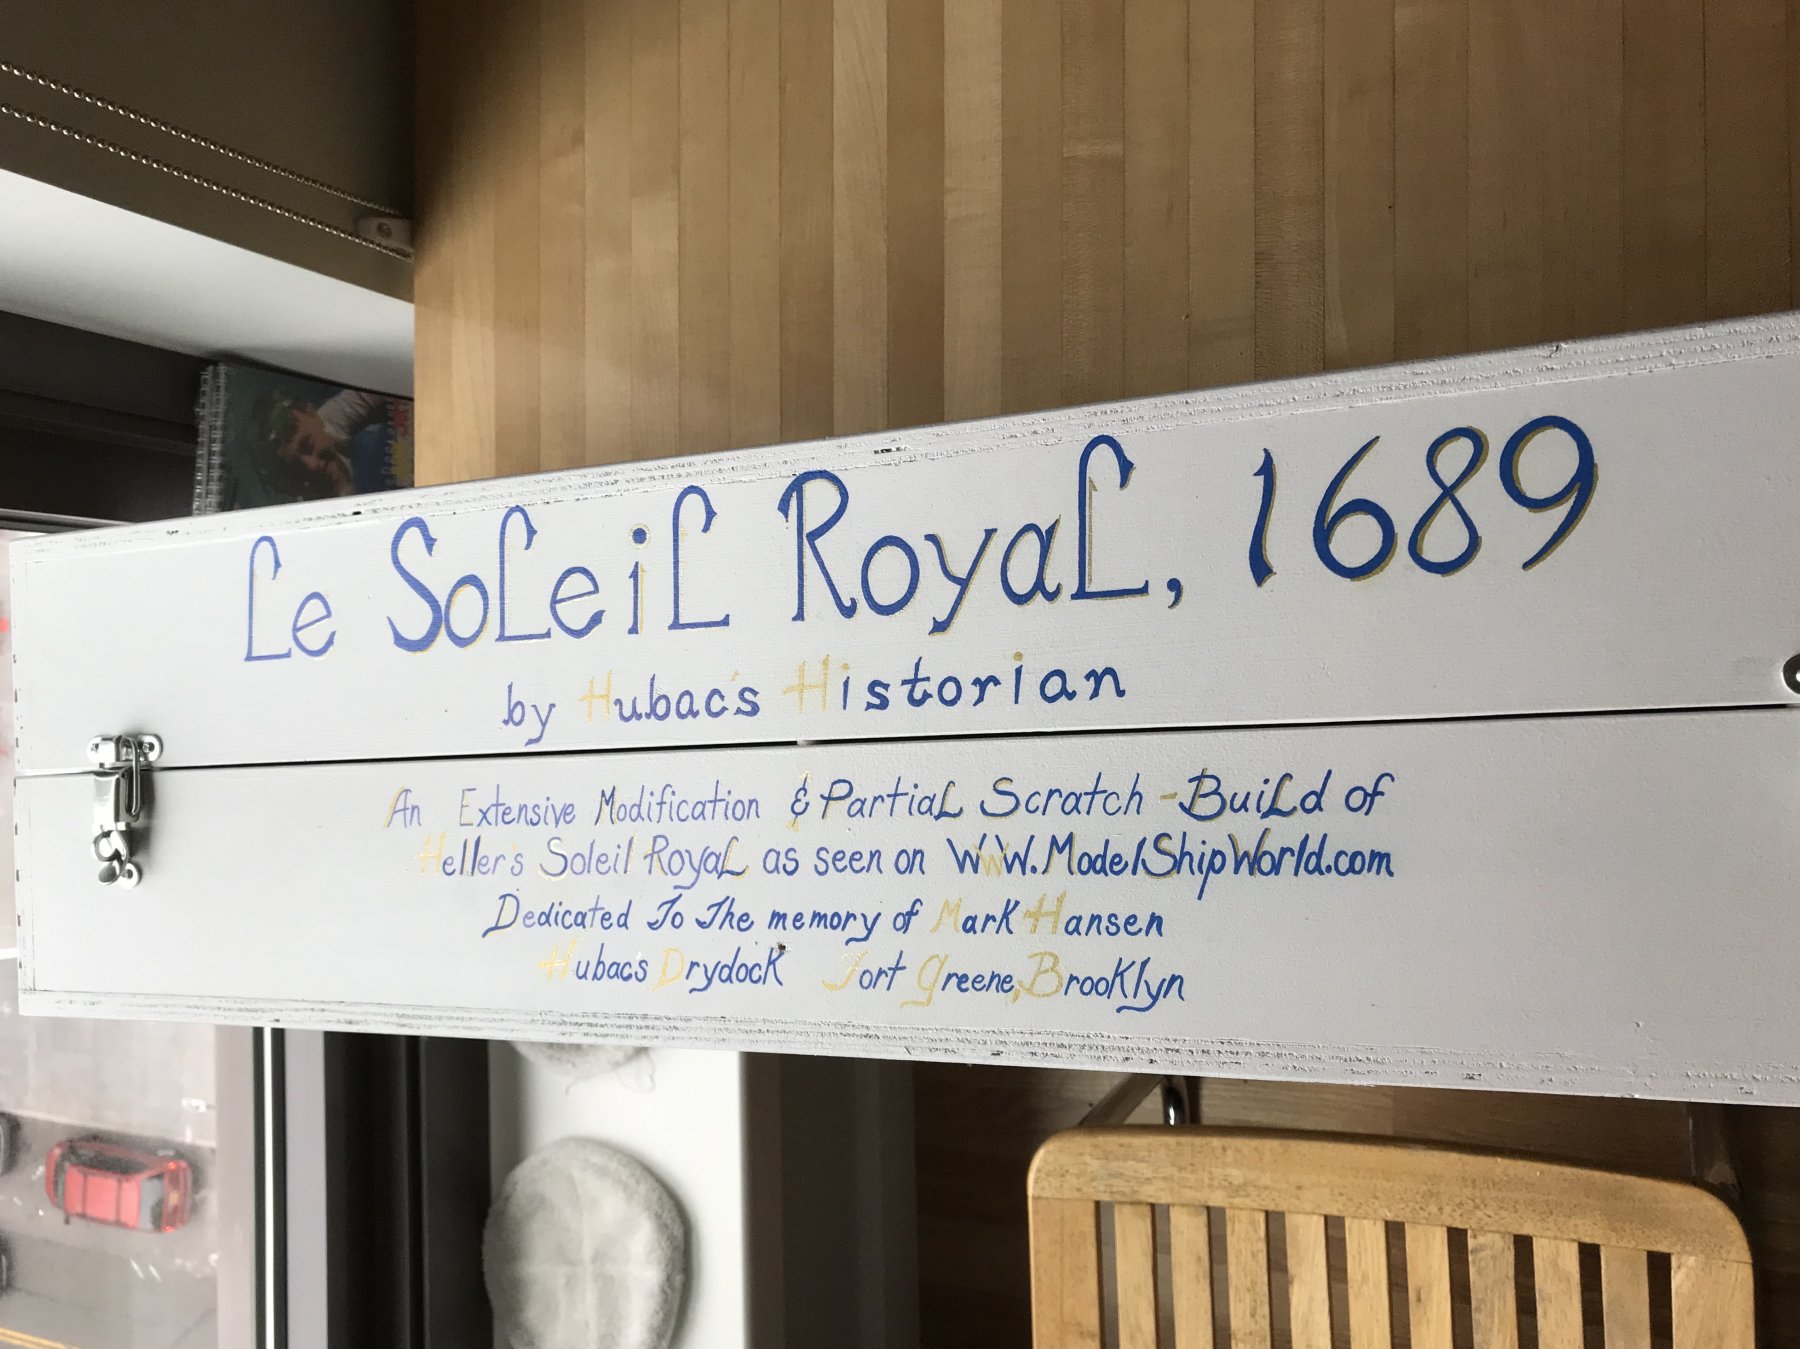
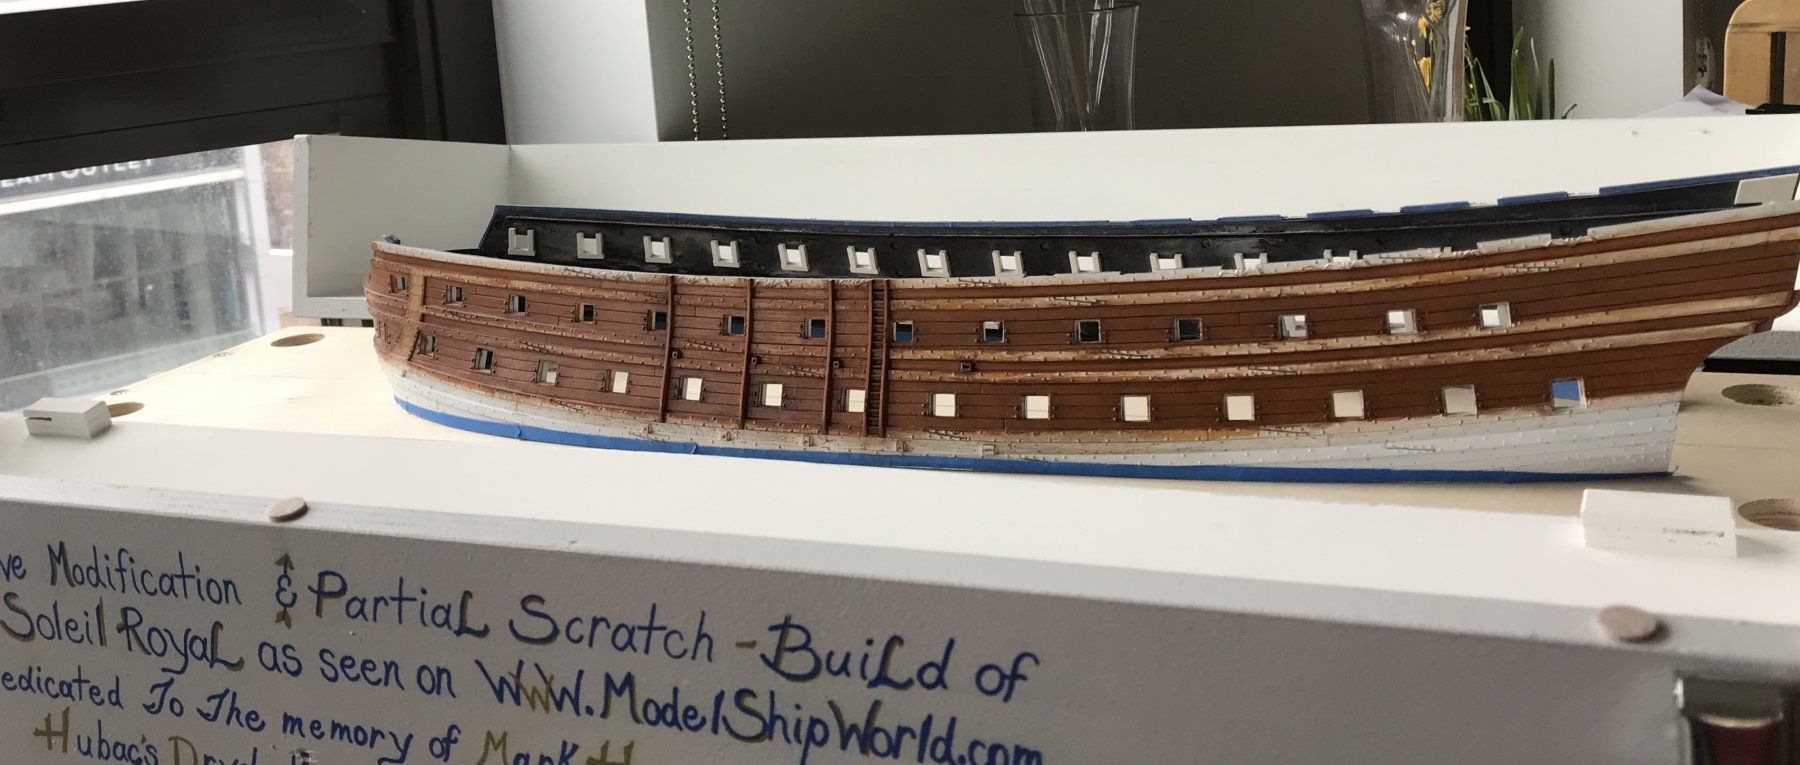
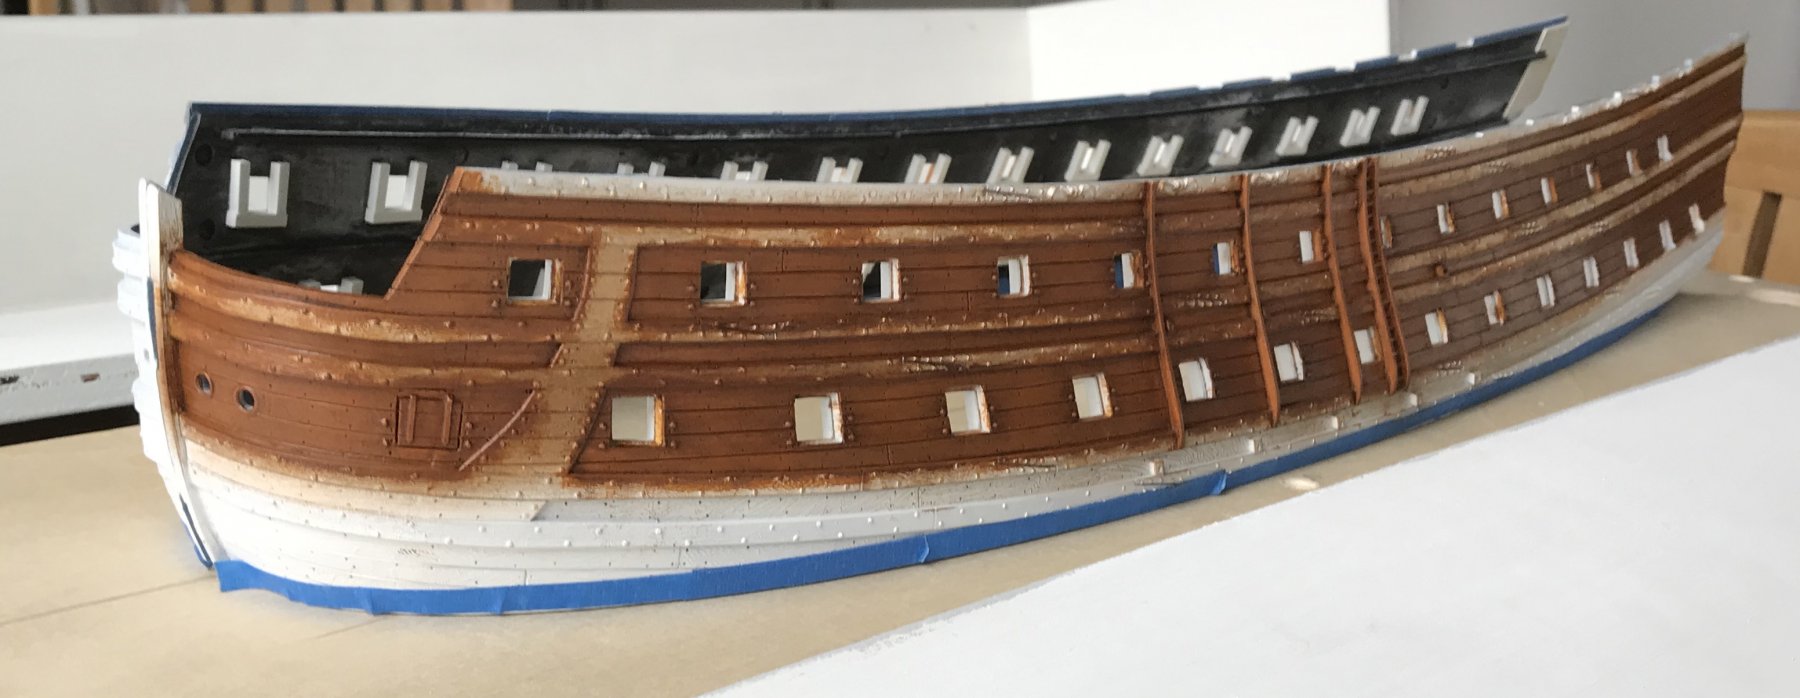
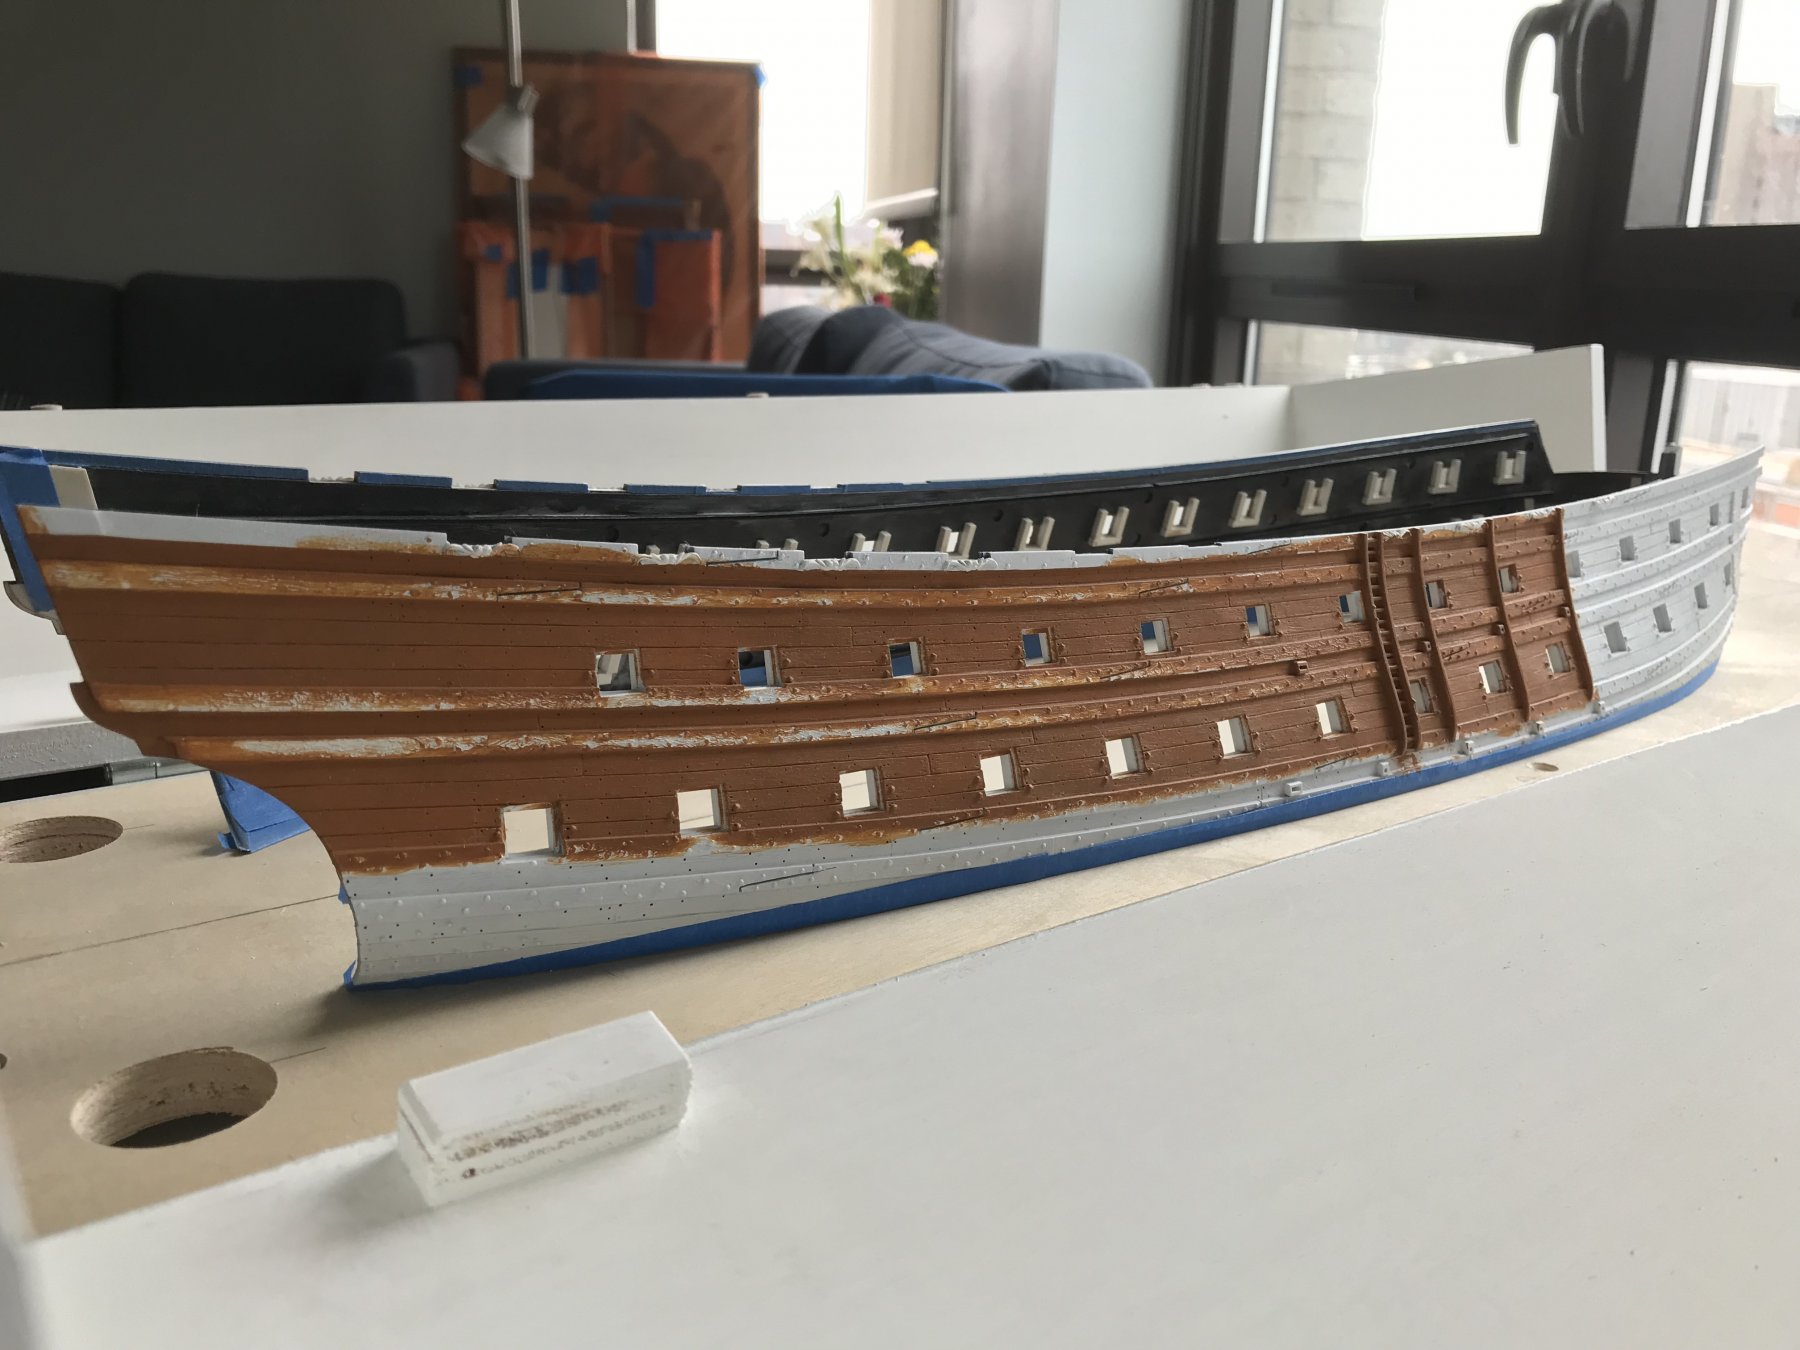
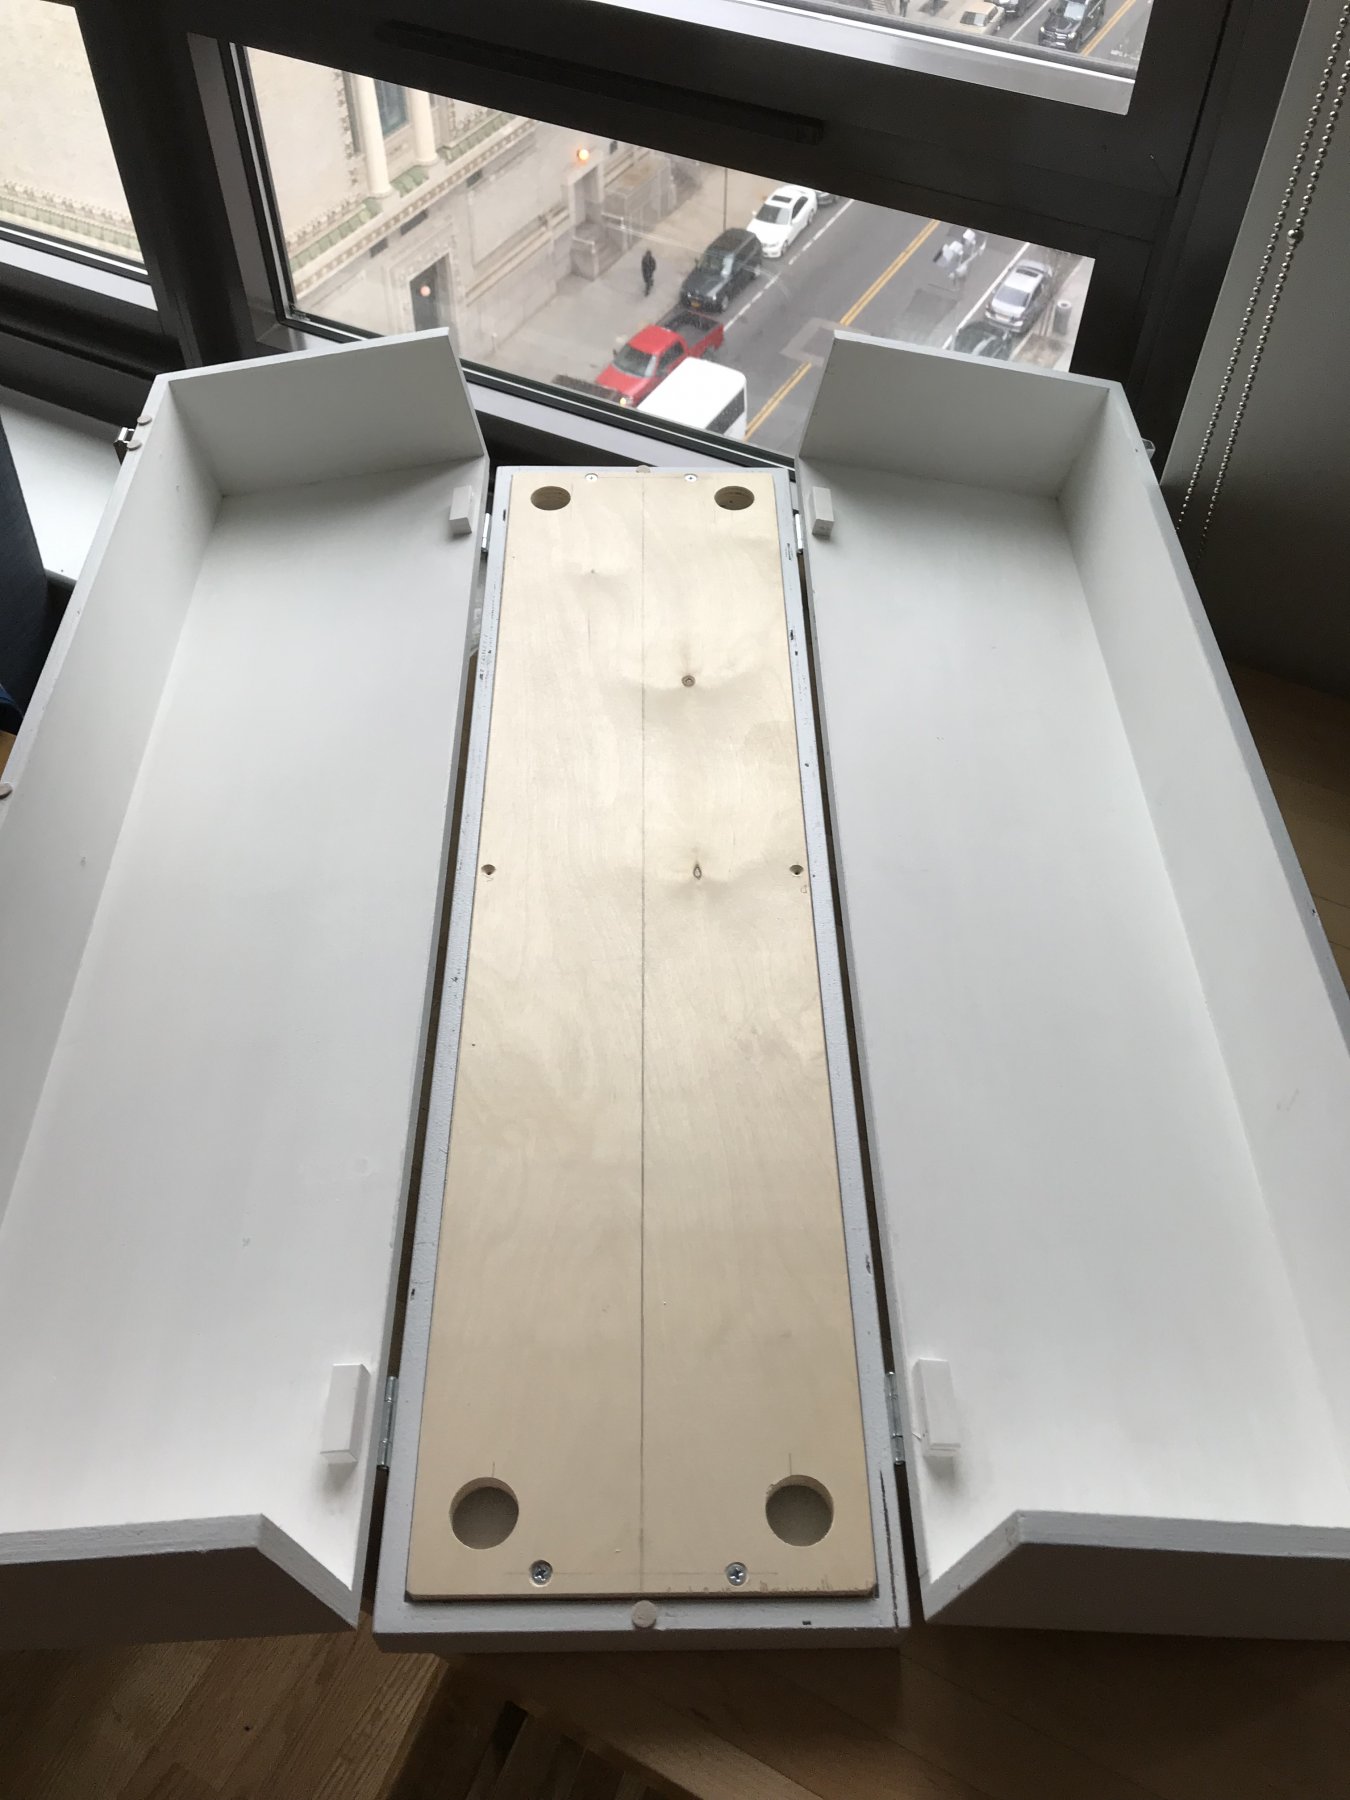
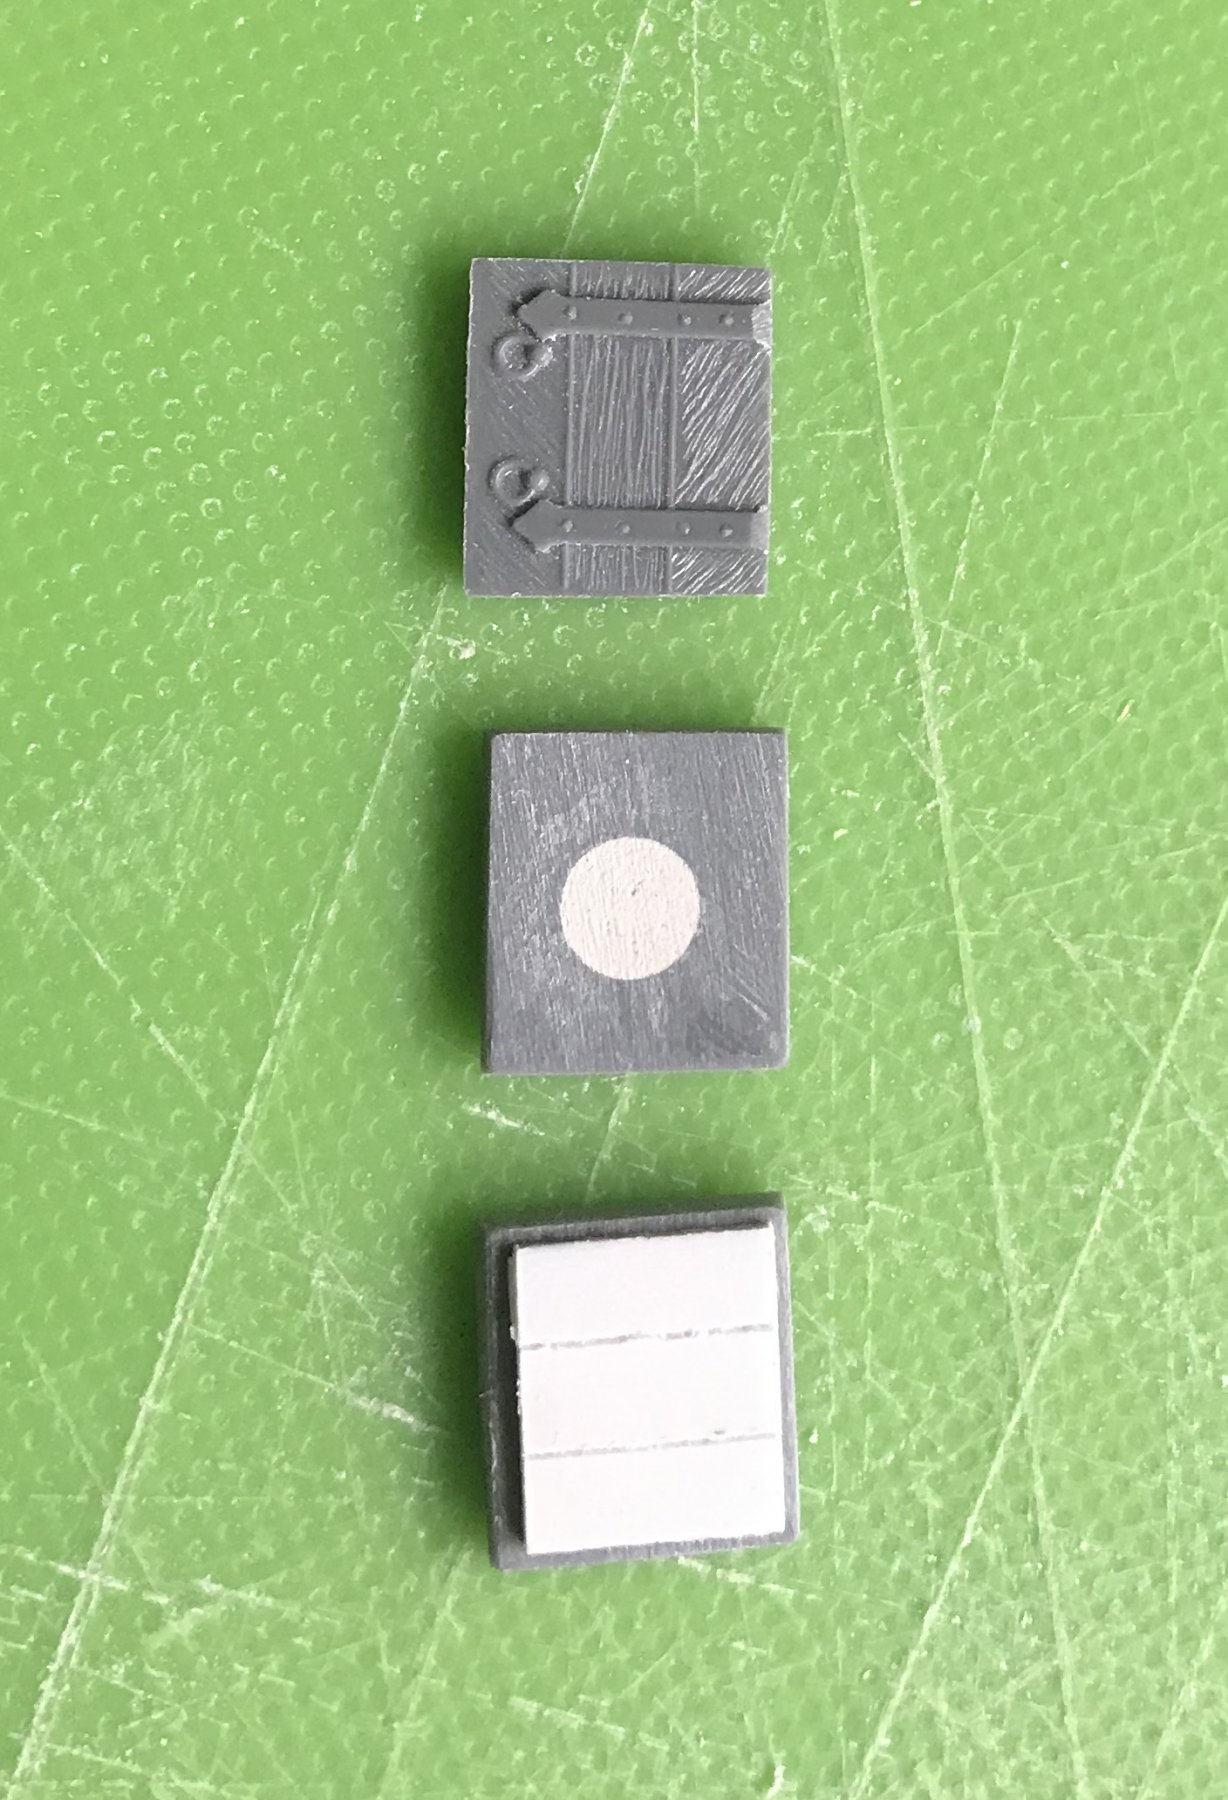
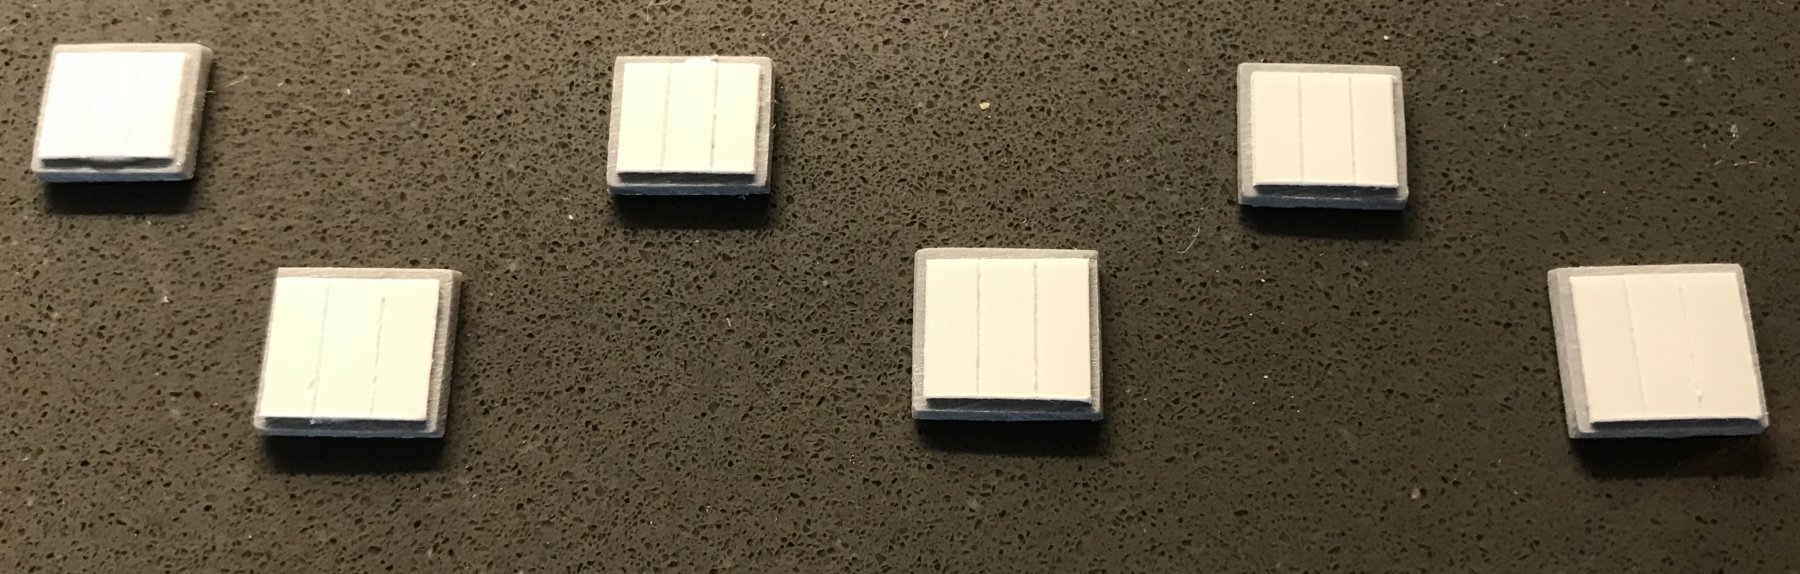
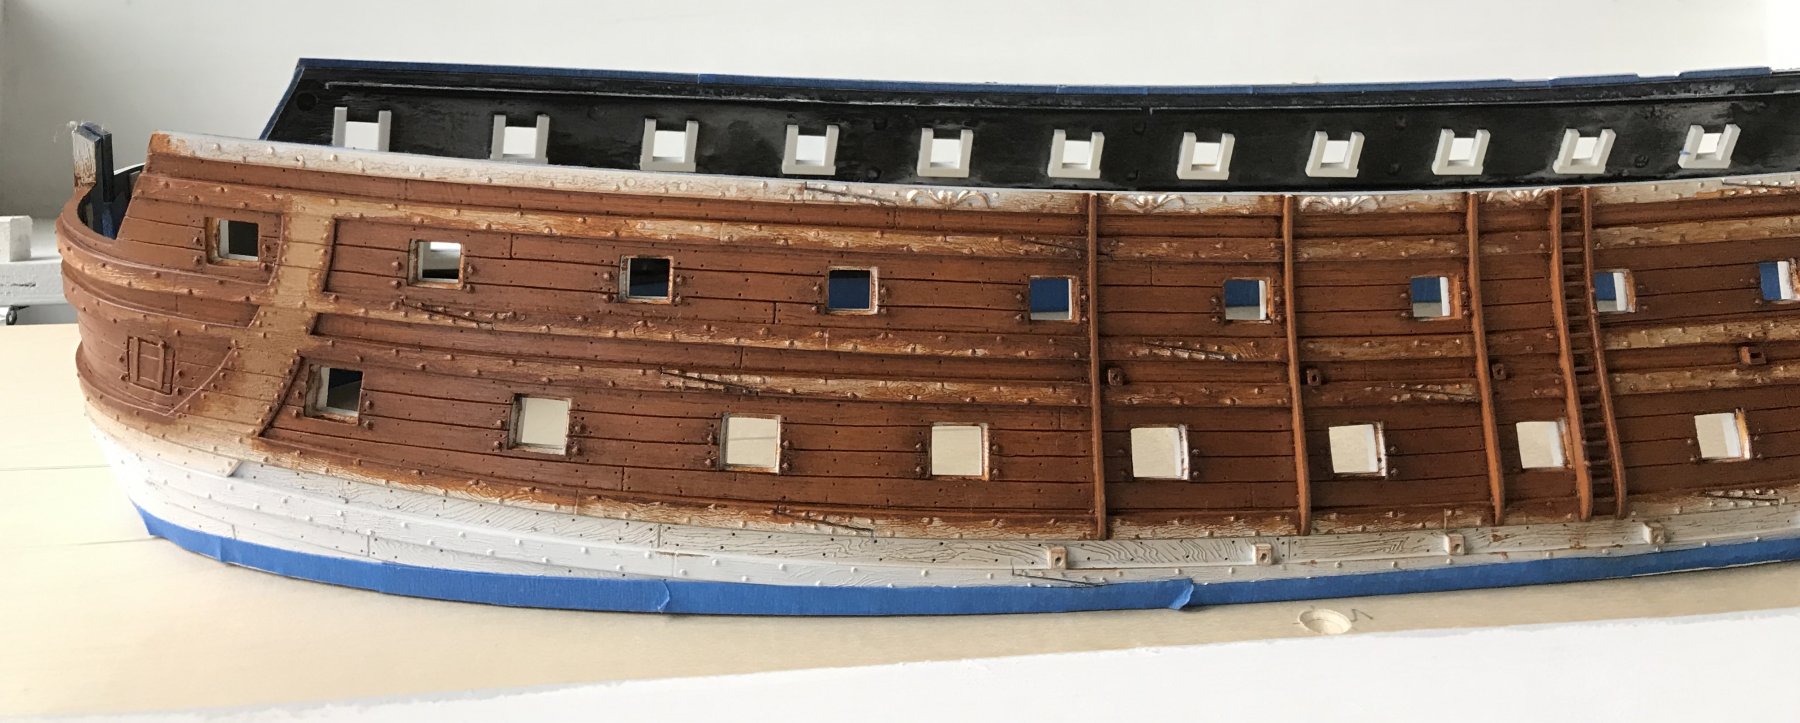
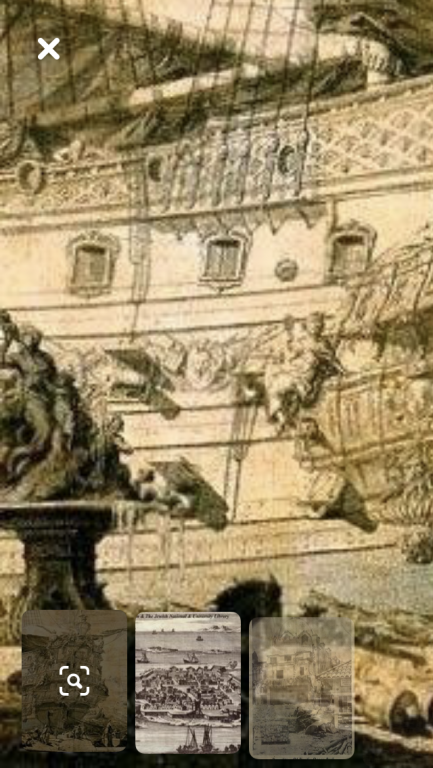
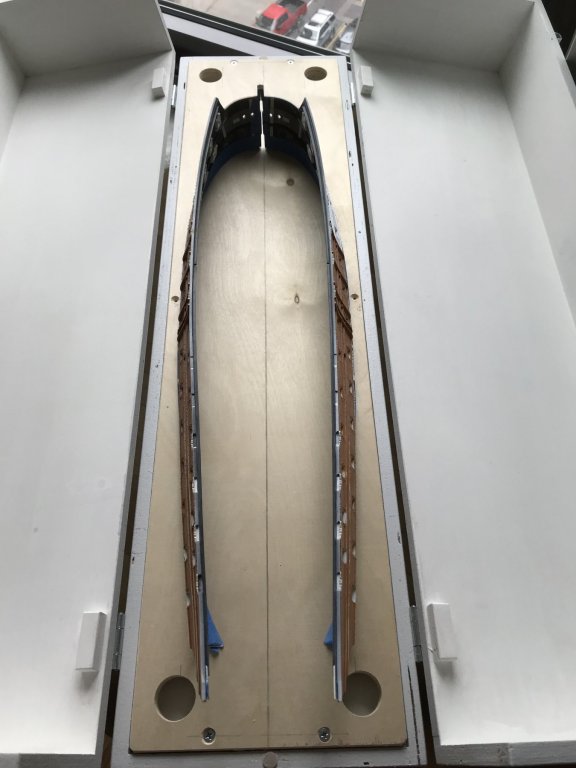
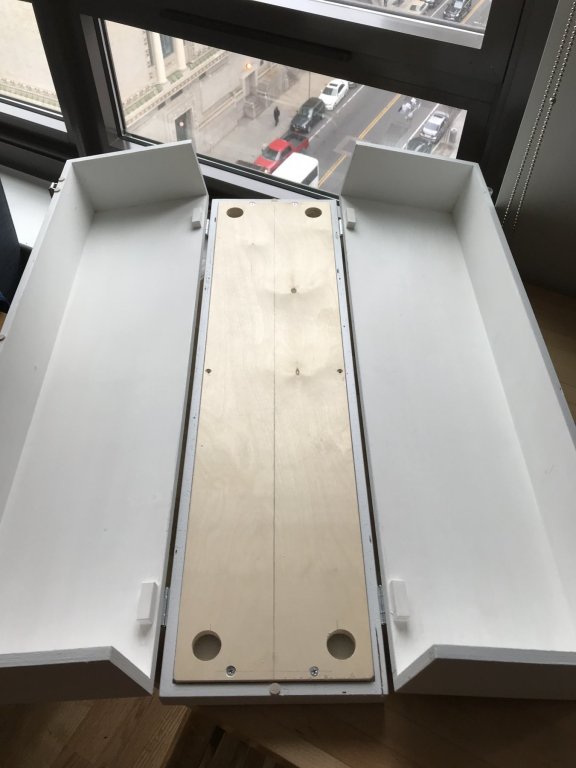
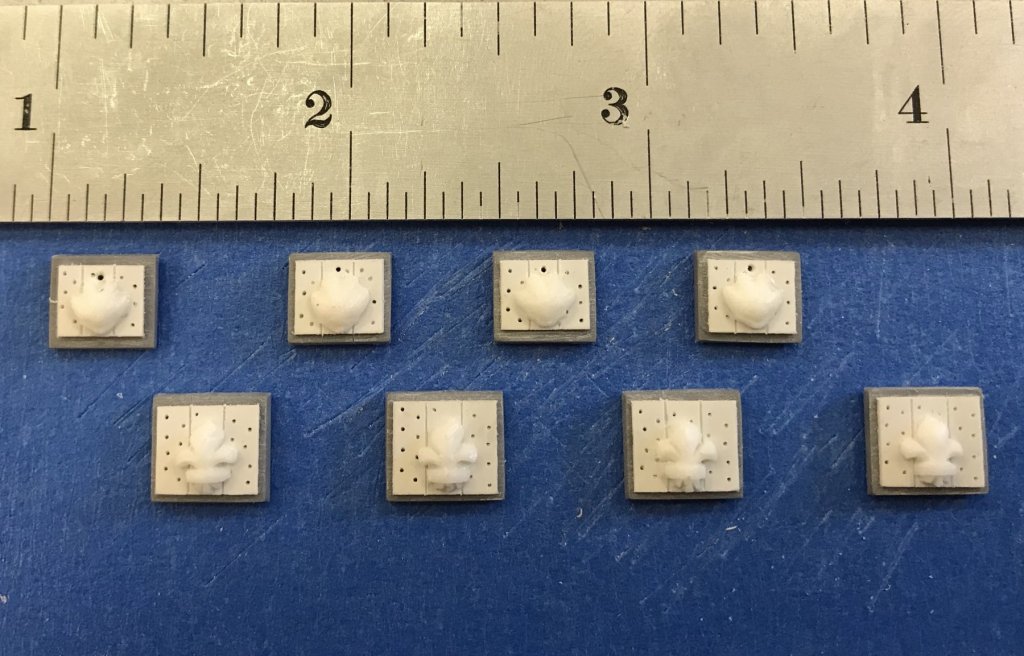
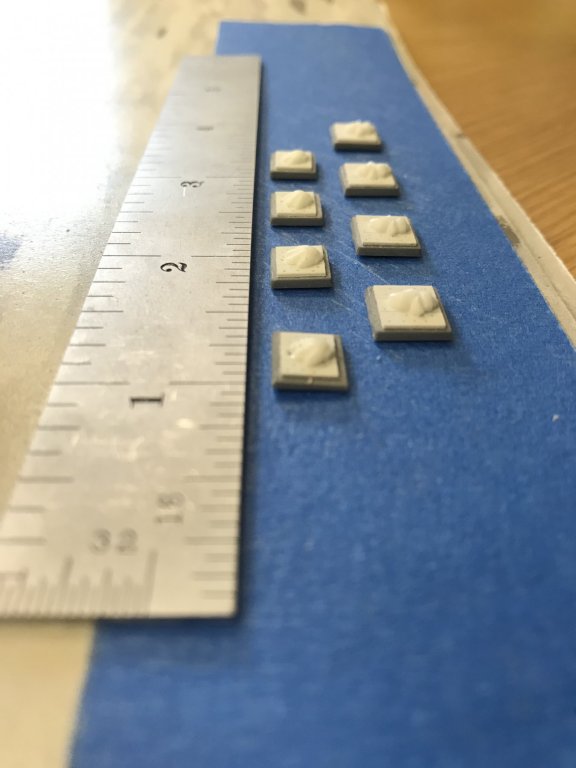
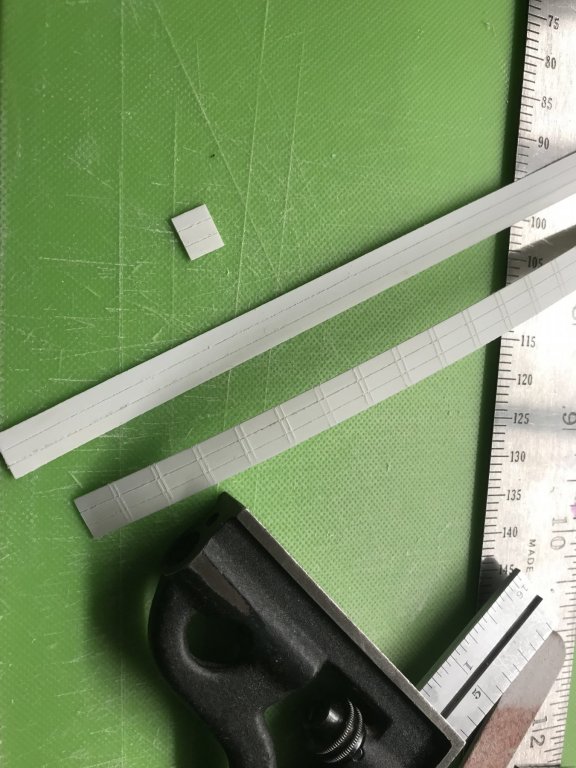
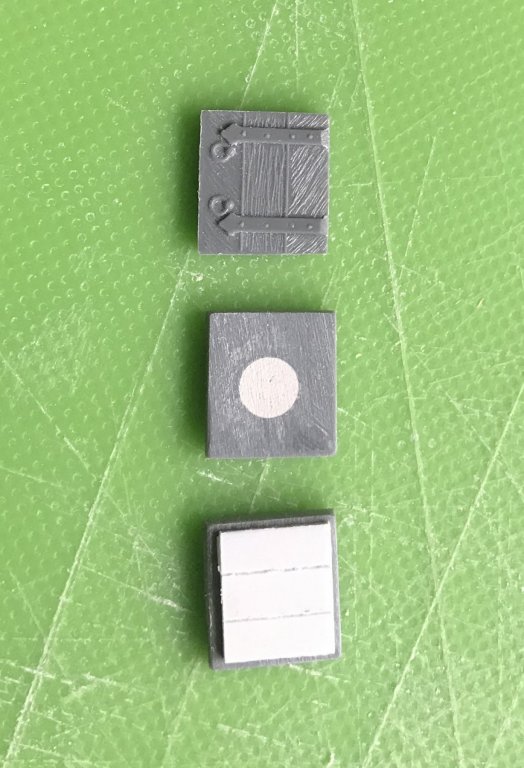
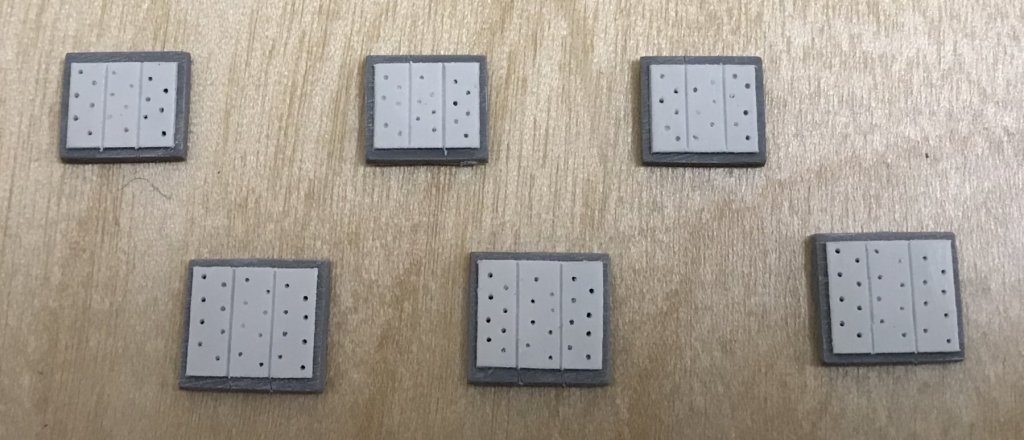
Well, the move to Brooklyn has kept me busy - consolidating and replacing old furniture that doesn’t work in the new (smaller) space. Lately, though, I’ve been able to make some progress on the model. The first order of business was to create a protective build-box for the model, for the next how-ever-many-years it takes to build her. The model, itself, will be temporarily mounted to a removable platten (the unpainted plywood). I was able to make pretty good use of an Albert Brenet print of Soleil Royal (Thank you, Neko 😀) in action at the Battle de Beveziers, in order to dress the box up a bit: Here are a few shots of the lower hull with the distress washing complete on the port side, and base-coating underway on the starboard side: I am also completing the modification/detailing of the gunport lids. While I won’t paint them, install the lanyard rings or place them on the ship until much later, this is one of those good, small-work projects that I can carry around and work on in my downtime: While I continue with the painting, at home, I will soon begin my next small-work project, which will be an attempt to scale-up the kit gun barrels, a bit, for the lower and middle batteries.


- 2,696 replies
-
- 10
-
-
- heller
- soleil royal
- (and 9 more)
-
I have seen this approach on Pinterest: Is this what you were thinking to make masters for making the moulds?

-
So, you are going to cast guns for both the SP, and the RL? Will they be resin castings or white metal?
-
It is interesting that the Heller parts co-incide with the draughts for the St. Philippe as closely as they do. However maligned the Heller kit may be, it is an extremely close copy of the Tanneron model, proportionally speaking. Tanneron likely would have been working from draughts dating toward the last decade of the 1700s, so his lines should at least be close to period practice. And so, they seem to be. it’s an interesting idea to cut away the keel and stern deadrise, and simply glue them to a plank that is thick enough to allow for both the keel and the necessary increase in width. You could, then, carve and fair your way back to the keel by hand. It seems doable. It would probably require scribing in plank lines to continue the run of planking from the plastic hull. Or, if you really want to go nuts, you could smooth over the whole suurface and plank with evergreen strip, thus correcting the layout and run of the kit planking.
- 244 replies
-
- 2
-
-
- heller
- soleil royal
- (and 1 more)
-
I think that, in order to achieve this, you will have to perform a complicated surgery along the rise of the stern deadwood, so that your sternpost remains a normal width. I think it may be possible, but very tricky. You could, for example, sand away the keel and stem, and then connect the hull halves to each other, at the appropriate new distance, by means of plastic futtock floor “timbers,” which would give you a surface to plank to with styrene strip. Blending new material into the bow and stern deadwoods would be a master class in plastic modeling, though. Personally, I don’t have that kind of intestinal fortitude. Perhaps, though, your foam plug could be of some help in arriving at the shape of those floor timbers. Or, maybe, you could cut that plug in half, along the center-line, and vaccu-form styrene sheet around it to form a shell; maybe, then, you could excise extension filler(s) that can be pieced-in to fill the gaps, somehow. Of course, the entire hull is one big compound curve, and such a course may accomodate hull expansion in one direction, some of the time, but not others, the rest of the time. On the other hand, a tea lite for some judicious heat forming may help ease transitions... And down the rabbit hole, we go!
- 244 replies
-
- 1
-
-
- heller
- soleil royal
- (and 1 more)
-
Yes - many beautifully executed models within the model. I’m really enjoying your patient approach to this project.
-
Well, this should be a truly fascinating project, and one that several others have expressed interest in attempting. Whether one plans to build a representation of the Monarque of 1667, or the Royal Louis of 1668, I think the principal difference, there, will be in how one presents the number and arrangement of guns. From the standpoint of the Heller kit, what I think would be interesting to experiment with would be a lowering of the forward sheer of the wales, and a corresponding relocation of the decks. Making these adjustments will enable you to lower the knees of the head and create the lower sweep of the headrails. The issue of the bowsprit entry point and step is tricky because I believe it is also lower than depicted in later century portraits of French ships. Cedric L makes mention of this in his build-log for La Reyne conversion project. Moving aft, I would be interested in increasing the sheer of the wales to some small, but noticeable degree. Ultimately, this will require adjustments (built-up) to the upper bulwark sheer line, and the number if sheer steps, but I think that these adjustments will provide a closer facsimile of the RL/Monarque silhouette. Then, the rest is mainly a layering of ornamentation.
-
On third look, I think there are issues of image alignment, vertically, and horizontally. Correctly oriented, and in the same scale, the drawings should correspond.
- 244 replies
-
- 2
-
-
- heller
- soleil royal
- (and 1 more)
-
Upon closer examination of the picture above, though, maybe not. ‘Don’t know what to make of that. Will have to take a look at the plans later.
- 244 replies
-
- 2
-
-
- heller
- soleil royal
- (and 1 more)
-
I think the transom/stern drawing is an elevation (that do agree with each other), but you have oriented the transom centerline to be parallel with the rake of the stern profile; re-orient the stern drawing so that it’s centerline is perpendicular to the lowest point of the keel (plan view) aft, and the details should line up. Parallax is the problem, I think.
- 244 replies
-
- 2
-
-
- heller
- soleil royal
- (and 1 more)
-
Well, my email will never be boring with this many great projects going on! I’m headed over to your RL page, now.
- 244 replies
-
- 2
-
-
- heller
- soleil royal
- (and 1 more)
-
Hello Heirich! The funny thing is that I did a GOOGLE search for “Versailles de la Mer,” because I had mentioned someday writing a book by that name. Well, this German title is what I discovered, so it appears someone beat me to the copywrite. Based on the review you linked to, it certainly sounds like it has some useful data for mining! I was at my father’s, this weekend, and I brought home with me all of the kit decking, as well as the lower gun-deck cannon barrels, and all of the port lids. These are perfect small work projects to bring to work with me. All of SR’s guns would have been bronze, and with that in mind, I will work up a darker bronze basecoat, over which I will apply a semi-transparent ver-de-gris wash. I have an idea that maybe I can improve the scale of the kit barrels by sandwiching .030 styrene sheet between the halves. Because the kit barrels have wonderful detailing with beautiful fleur-de-lis ornaments cast onto the barrels. I think the ver-de-gris will catch these details. I’m still busily painting the lower hull. I have the port side painted and distress-washed, but none of the wales, or other details picked out yet. Over a large surface area, the color and tonal qualities of the VDB are exactly what I was hoping for. It really looks great. I have signed on to do a table demonstration of this technique at the North East Joint Clubs meeting in New London, CT, on Saturday April 27th. I will be using the kit upper decks to demonstrate just how easy it is to apply a few different types if washcoat, and the instantaneous and near effortless patina that results. I may or may not bring the actual hull because it still won’t be assembled into anything stable, at that point. Nevertheless, I would be able to transport her in her new custom drydock/build-box. It would be a fun time to really introduce the project to a wider audience, so I will consiser that, as the conference draws near. If any of you will be attending, stop by my demonstration table and say “hello.”
- 2,696 replies
-
- 2
-
-
- heller
- soleil royal
- (and 9 more)
-
Doris’s update: Well, since I saw you last, I’ve completely armed the whole ship - proofmarks and All. All of the upper decks have been framed and laid with their accompanying bulkheads and deck railings. I’ve also decorated said bulkheads, fabricated and installed all of the driftrails, and completed the lighting. I’ve also pressed the extra crew from the Caroline into service for her sea trials. It has been a busy morning! My update: Well, since I saw you last, I’ve opened a jar of paint. It was a stubborn lid, and I had to run it under the hot tap to soften the dried paint. More to follow. Thanks for looking in! As ever, I have never been happier to be shamed with your prolific output and pace; it is a joy to see the Katherine rise. I continue to be inspired by your innate sense of scale and proportion. When I look at the ornament of the upper bulwarks, it seems to me that there is a perfect balance between the heraldic ornaments against the blackness of their ground; they are also appropriately shallow, relative to the gunport wreathes and window embellishments. It all looks impossibly realistic to me! And, yet, there it is. Well done, Doris!
- 1,035 replies
-
- 8
-
-
- royal katherine
- ship of the line
- (and 1 more)
-
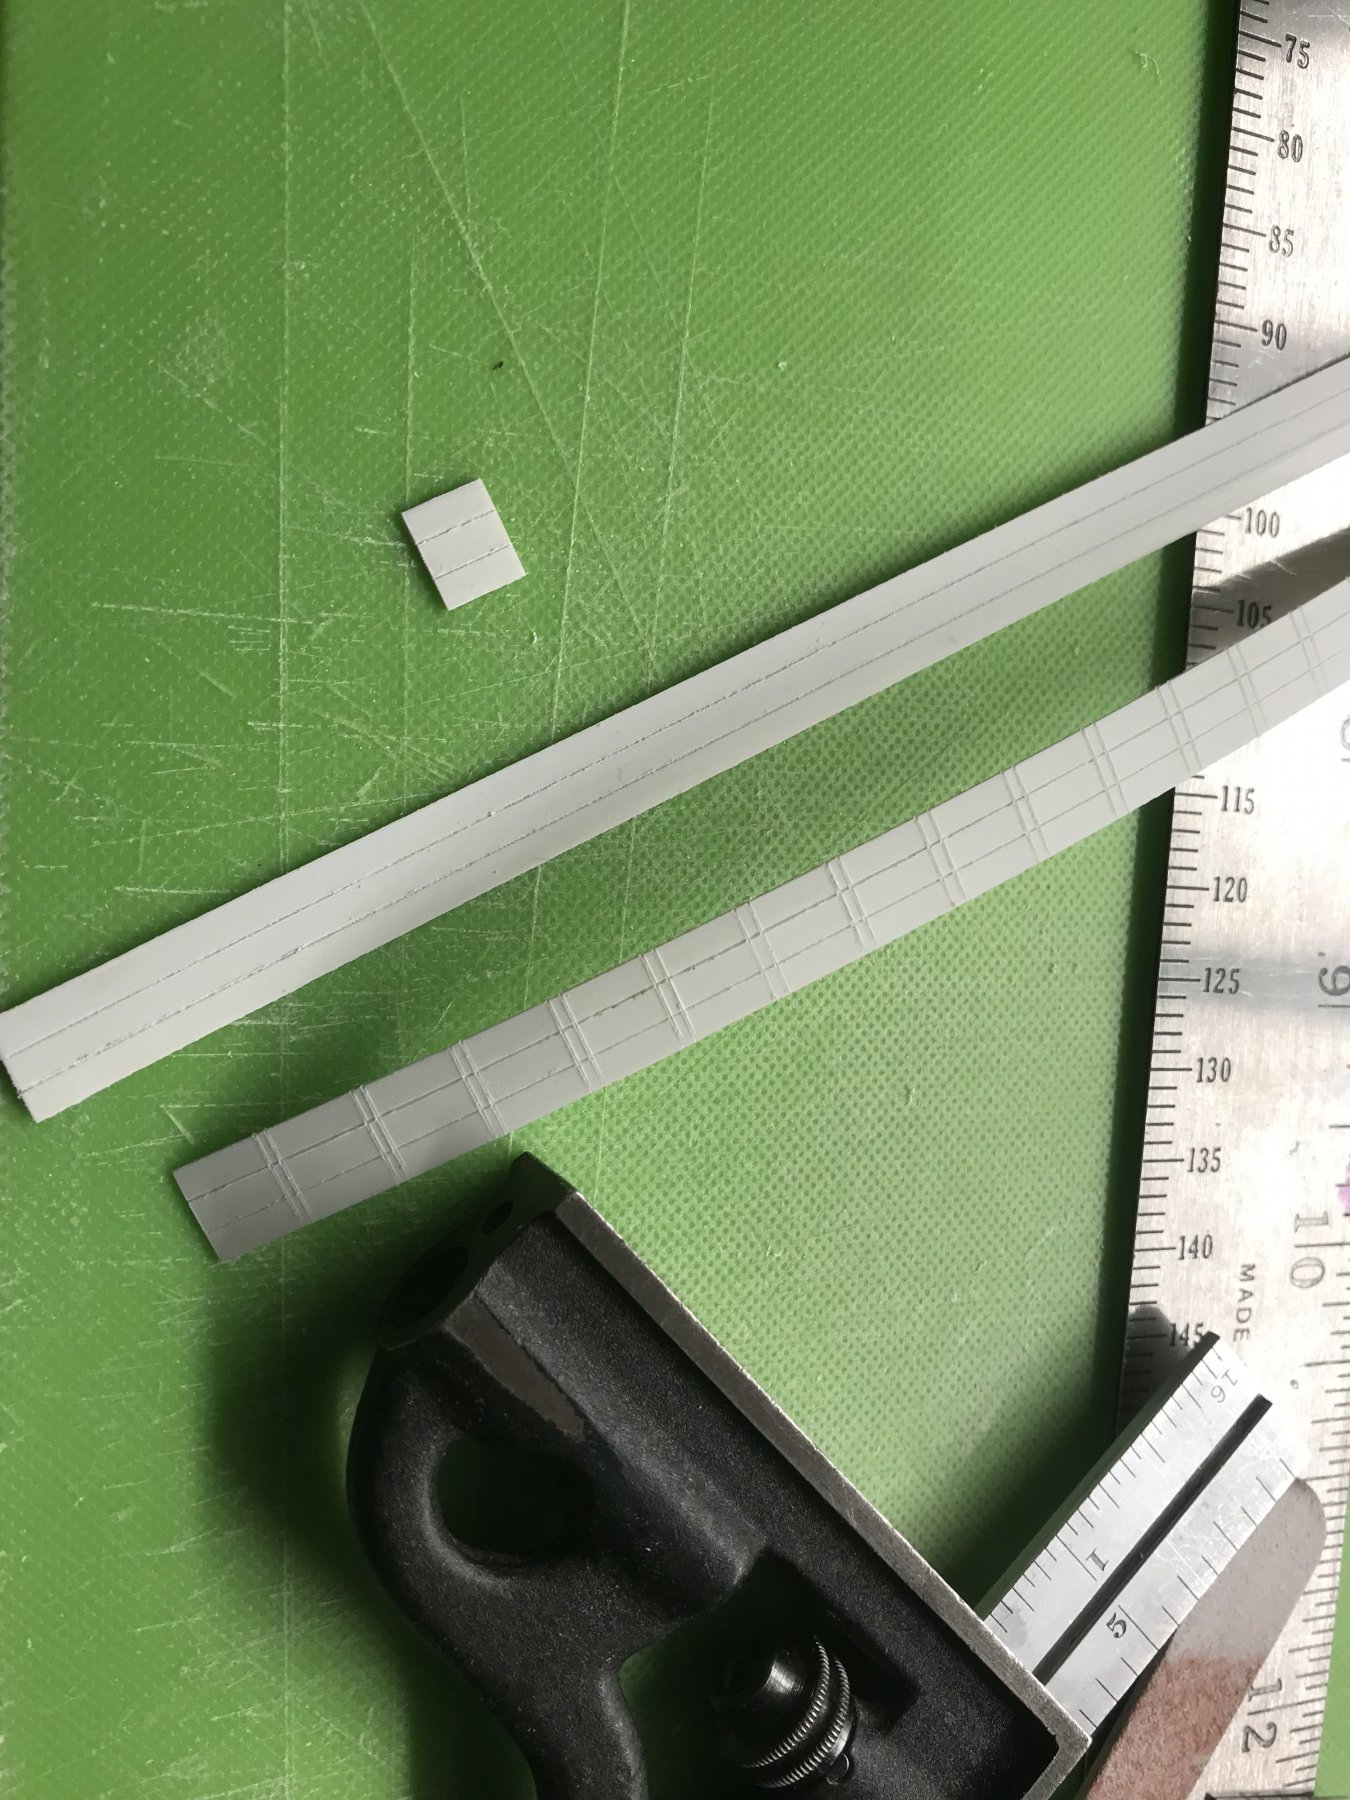
Hi Heinrich! In all likelihood, I will make my decks from styrene sheet that I scribe in with plank lines and joints, and then scratch the surface with coarse sandpaper for wood grain. I liked one of my lighter paint work ups, and think it would make for a realistic looking deck. I think I used walnut wash on that sample, instead of the VDB. I will build this model with all guns blazing. No closed ports. I will not spend any time fitting out interior cabins, though. I am very familiar with Dafi’s excellent Victory, but I do not wish to take it to that level. It might be interesting to do a larger scale model (maybe 1:50) of the coffered great cabin ceiling, which could be displayed alongside the diorama. During the survey of the ship, in 1688, a sketch of this ceiling was made with descriptions of the various portraiture, labeled A-G. If I could somehow get a sense for what those portraits might have looked like, then maybe I could re-create them, in miniature, in their corresponding panels of the ceiling. At least, with this pesentation, one would really be able to see and get a sense for how the interior of these great ships was fitted out. I, too, am not that thrilled with the kit gun barrels because they are too spindly and lack the appropriate scale. Someone once referenced an excellent source for model ship chandlery that had really excellent representations of Soleil Royal’s cannons. I thought to order an assortment of scales to see which might look best at each level of the battery. Of course, that link is buried somewhere in the 26 pages of this build-log. I will have to take a look. I only need dummy barrels for the lower and middle decks. The main thing is the scale of the guns. All Van de Velde portraits give an excellent sense for the heft of the artillery, and Heller’s efforts fall far short, here. For reference, Doris is now completing the artillery for her excellent Royal Katherine. Everything about her guns is spectacular, and frankly - amazing. But the thing that is most satisfying, IMO, is the scale; her guns look right, poking out from the ship’s sides. Michel Saunier and Marc Yeu went partners on a series of cannon for their respective SR builds. The scales they are working in are different, but the castings they ultimately produced are magnificently detailed and correspond exactly to the one remaining gun from SR. Again, though, for this project I think that is going a bit further than I am willing. The hull will be mounted to 1/16” styrene sheet and re-enforced from within. It is not necessary to use anything so heavy as 1/2” stock.
- 2,696 replies
-
- 2
-
-
- heller
- soleil royal
- (and 9 more)