Keith Black
-
Posts
6,681 -
Joined
-
Last visited
Content Type
Profiles
Forums
Gallery
Events
Everything posted by Keith Black
-
 Sorry, Grant, I was yankin' your chain, no penguins this expedition. I looked hard thinking I might see a black speck and claim it was a penguin but alas, none to be found.
 -
3d printing crew figures
Keith Black replied to highlanderburial's topic in 3D-Printing and Laser-Cutting.
All's well here, Gabe, thank you. Just trying to teach these shaky old fingers how to rig in tight quarters. It's a slow process. -
3d printing crew figures
Keith Black replied to highlanderburial's topic in 3D-Printing and Laser-Cutting.
Gabe, good to see a post from you! I hope all is well with you and yours. Are you able to print 1:96 figures easily? I thought I might populate the Tennessee with a few of the crew but I can't find any 1:96 US Navy figures from the 1850 to 1900 time period. If someone has a lead, please advise. -
Rob. welcome to MSW. Glad to have you aboard.
-
Dan, welcome to MSW. Hope to be seeing you build log in the not too distant future.
-
NAIAD 1797 by Bitao - 1:60
Keith Black replied to Bitao's topic in - Build logs for subjects built 1751 - 1800
Bitao, welcome back. Always a pleasure seeing updates of your beautiful work. -
Simon, there are several Cutty Sark build logs and you need to study them. Below is a link to one. Rob's Great Republic is another build log you should study for rigging starting on page 16. Search, 'Great Republic, finished' You're ahead of me on rigging, hopefully I'll catchup in the not too distant future. IMHO, rigging is the hardest part of ship modeling. The amount of information one has to absorb is incredible. Then teaching your fingers how to run line in tight spaces is a mind bender in and of itself.
-
Simon, the block on top at the yardarm is a lift block to aid raising the yard into position where the sail can be unfurled. In some cases that block is left off and the lift line is shackled to the yardarm with the line running to a block attached to the cap where the line then travels to its respective halyard block and belaying pin. Do you have a copy of the rigging plan for the Cutty Sark? Below is a link to CS build and rigging plans. I think the last one is the best. https://www.hismodel.com/cutty-sark-21
-
Keith, more beautiful details. Seeing the Germania fitted with her completed mast is going to be a treat.
-
Lynn, good to see you back and a nice start to coppering the hull.
-
Eric, congratulations. Yes, please provide details of your photograph.
-
Glen, glad she's in the bottle. I just realized I was staring at the above photo waiting for something to happen.....duh
-
Simon, tell me the post # you're taking about where I can look at the post/picture and I'll try my best to explain.
-
I think it would be pretty hard to achieve the look of leather with silkspan. Getting the edge to roll as per the photo would be difficult, IMHO.
-
Jud, this why I think barrels would have been left below securely lashed. Even if securely lashed would you want a water barrel on deck where it could possibly be contaminated with seawater? Why couldn't buckets of salt be brought up from below as needed? I commercial fished salmon in Bristol Bay, Alaska as a deckhand on a 32 footer. One stormy day we swapped ends with a single wave and everything not tied down flew overboard including my favorite pick.
-
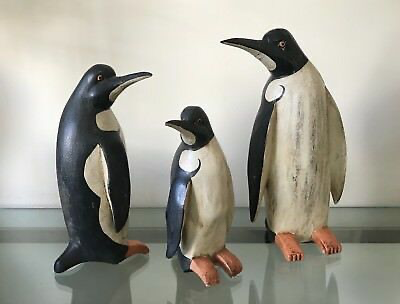
Hold Fast, welcome to MSW. it was probably made in Germany in the 30's. Look for a tag on the port side attached to the keel near the rudder marked 'Germany' They're fun models as they are windows in history but as David said, it's a decorative model with little value.
-
Juhu, I think you first have to decide what size barrel/barrels you want to portray as that's going to have bearing on how that particular size barrel would have been secured on deck, IMHO.
-
As close as I can figure......According to Mr Google, Antarctic penguins are 24 to 30 inches in height. A foot at 1:500 scale is .024 inches, correct? That would make 30 inches = to .060 inches. Having worked at 1:120 for so long I can easily visualize tenths and hundredths. Better not use course ground pepper and sea salt. Glen, the ice pack turned out great, it looks very convincing. Is the big push in short order?
-
Glen, just think of the awesome amount of detail you could get in .06 inches ............Can you imagine trying to carve anything that small? I'd try to replicate something that small with a tiny drop of paint and be proud as punch if the paint drop didn't spread beyond .06 inches.
-
Capn, welcome to MSW. The Victory is gorgeous and the weathering on the sub is very nice. I look forward to seeing more of your work.
-
rbcwarbucks, welome to MSW. Is there a time period that you favor more than others?
-
Grant, I've got faith in Glen. I bet he's able to whip out penguins to the rate of about one an hour. I mean, how hard can it be?