

Jim Rogers
-
Posts
1,381 -
Joined
-
Last visited
Content Type
Profiles
Forums
Gallery
Events
Posts posted by Jim Rogers
-
-
11 minutes ago, Chuck said:
Yes indeed it does Greg
And just to clarify...when I say POB it isnt the traditional POB. I have known for some time that few would ever pay this much money for a quality POF kit. I have planned for the last year to make sure that I could recoup my initial investment. I have had a design in POB made and ready to go for a while now. Just in case.
Forget everything you know about previous POB designs. This version will look identical to the fully framed version. But it will let you fully detail all of the interior. It is basically the same kit with less than half the frames.
The only difference is the number of frames and they are even more simplified. They will also be made from Basswood. This will allow me to charge around $250-$275 for the same two chapters in this version and it will look identical. The only difference being you will need to fully plank the external hull. This is very much like the original contemporary model and will in fact look almost identical to it. All frames will still have to be made giving those who build it a good idea of what a fully framed model entails. Chapter 3 onward will be exactly the same.
I will also need a volunteer to receive the first two POB or dare I say the cheaper Fully Planked chapters to prove out the modified design...All of the parts will be yellow cedar or Boxwood except for the frame components and jigs which will be basswood and ply.


I’m in. Reserve me one, either version.
- mtaylor, Canute and thibaultron
-
 3
3
-
1 hour ago, Chuck said:
Thanks for the feedback. It was very helpful. I will be making just 5 of the POF kits. That is it. It is sure to become a collectors item. After talking to many kit mfg’s about the economy and current sales trends this is the best option. Maybe in the future there will be another run of 5 kits.Please send me a PM to
reserve one as a pre-Order reservation.
The cost for the first 2 chapters is $800.
Beyond that, each chapter will be considerably less with the completed kit costing around $2300.
I will however begin work on a POB Version. This will be considerably cheaper. The starter package costing about $250. No reservations required.
This will be a fully rigged model.
Chuck
Email sent. This will probably be the last model my old age permits me to build.
- thibaultron, Archi, Canute and 3 others
-
6
-
2 hours ago, Chuck said:
Crazy thing...I rarely shop for rigging blocks for obvious reasons. But I was searching online for info on rigging blocks so I can start making CNC fiddle blocks and Hearts...
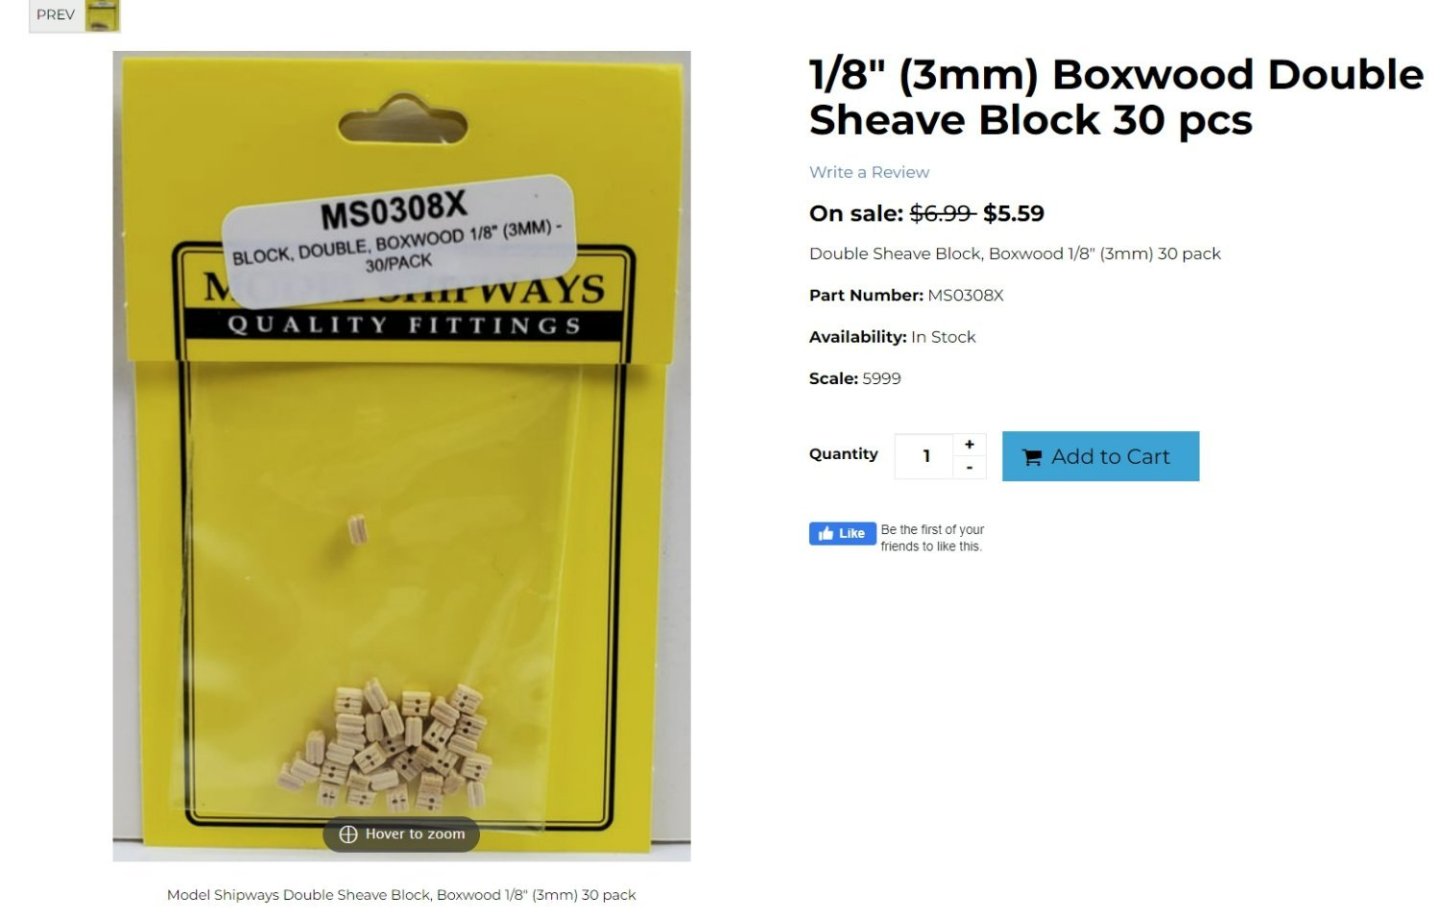
LOL...I came across the typical square blocks which are abominations that come in most commercial kits. I couldnt believe the price. They are selling these things for $5.50 per package of 30.
It just hit me that my bargain blocks are the same price....I think my bargain blocks are a steal for the price. I cant believe how out of touch I am when it comes to how much money folks are charging for this stuff. I thought they were maybe charging $3 for a package. Crazy stuff. Anyway....enjoy them while I can offer them. I should have another size in stock tomorrow some time.
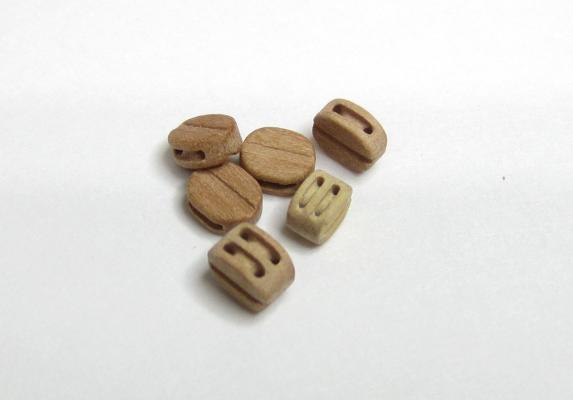
I have thrown away hundreds of those Model Shipway blocks. First thing I do when ever I get a new model is trash the blocks and rigging line and replace with Syren blocks and line.
- Gregory, thibaultron, Nirvana and 5 others
-
8
-
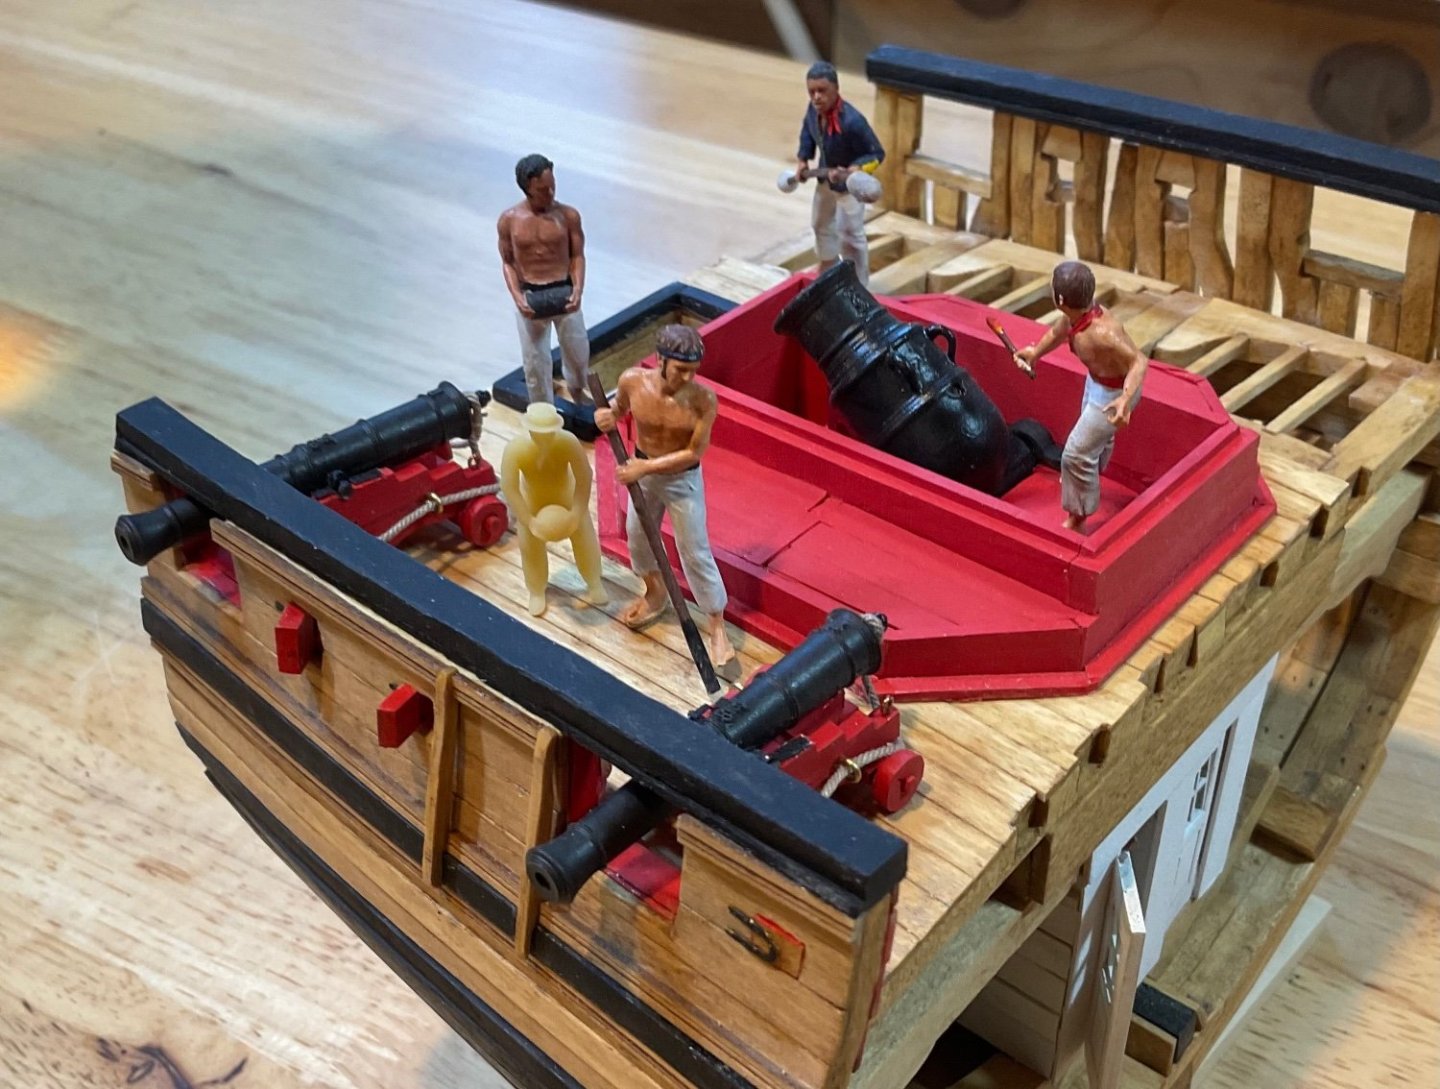
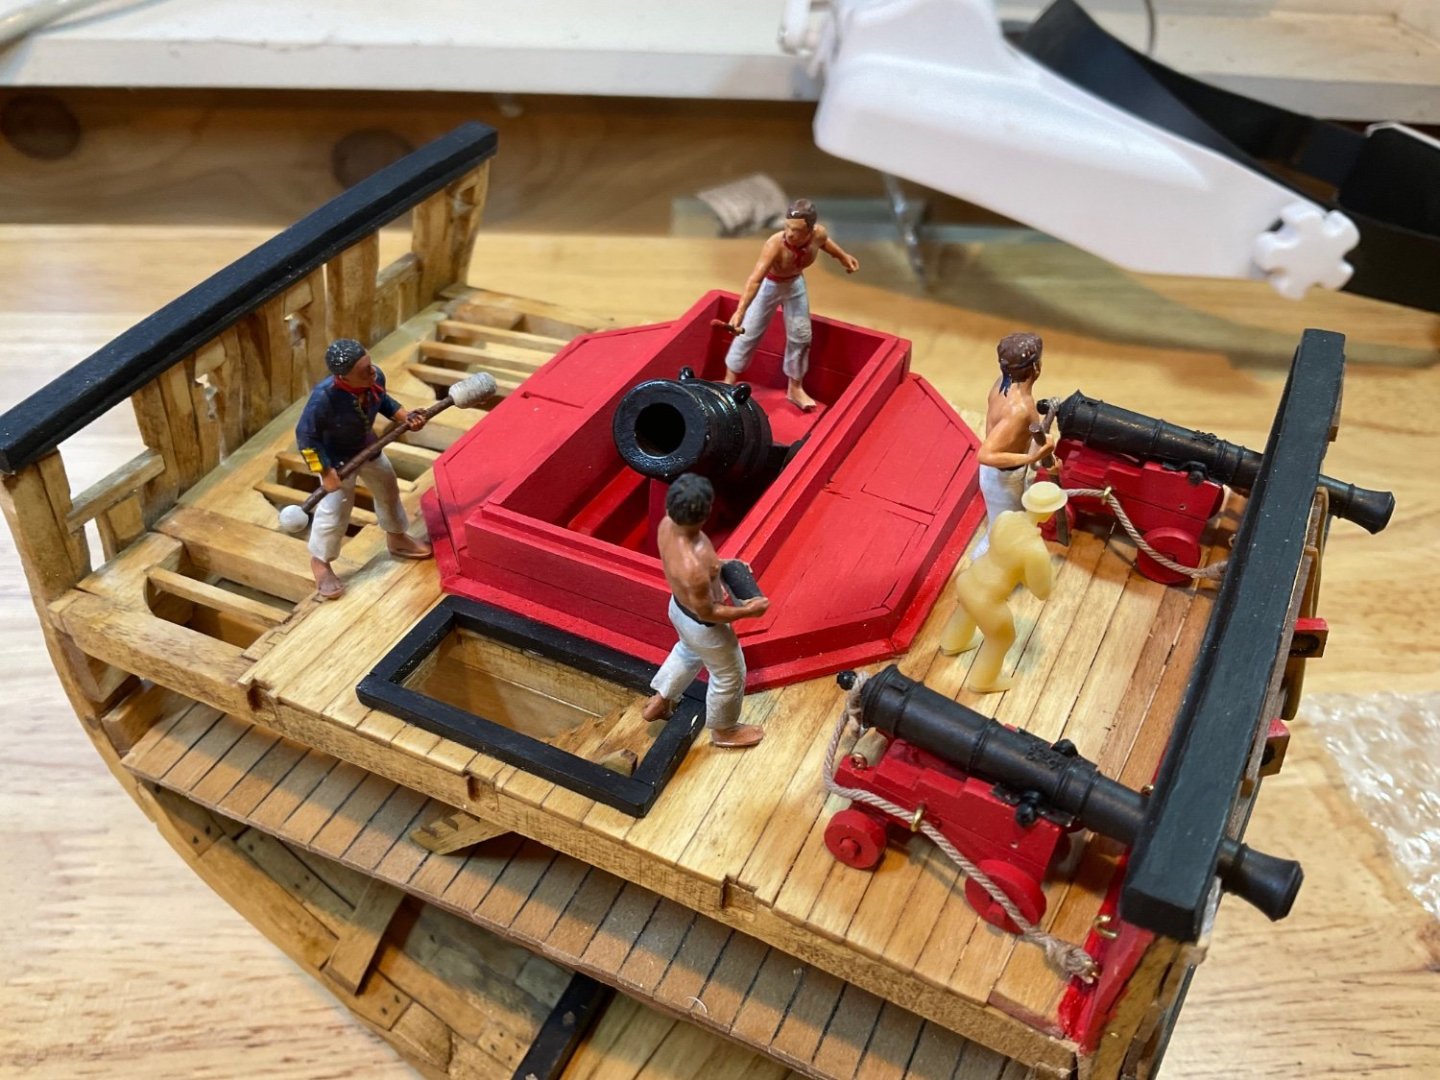
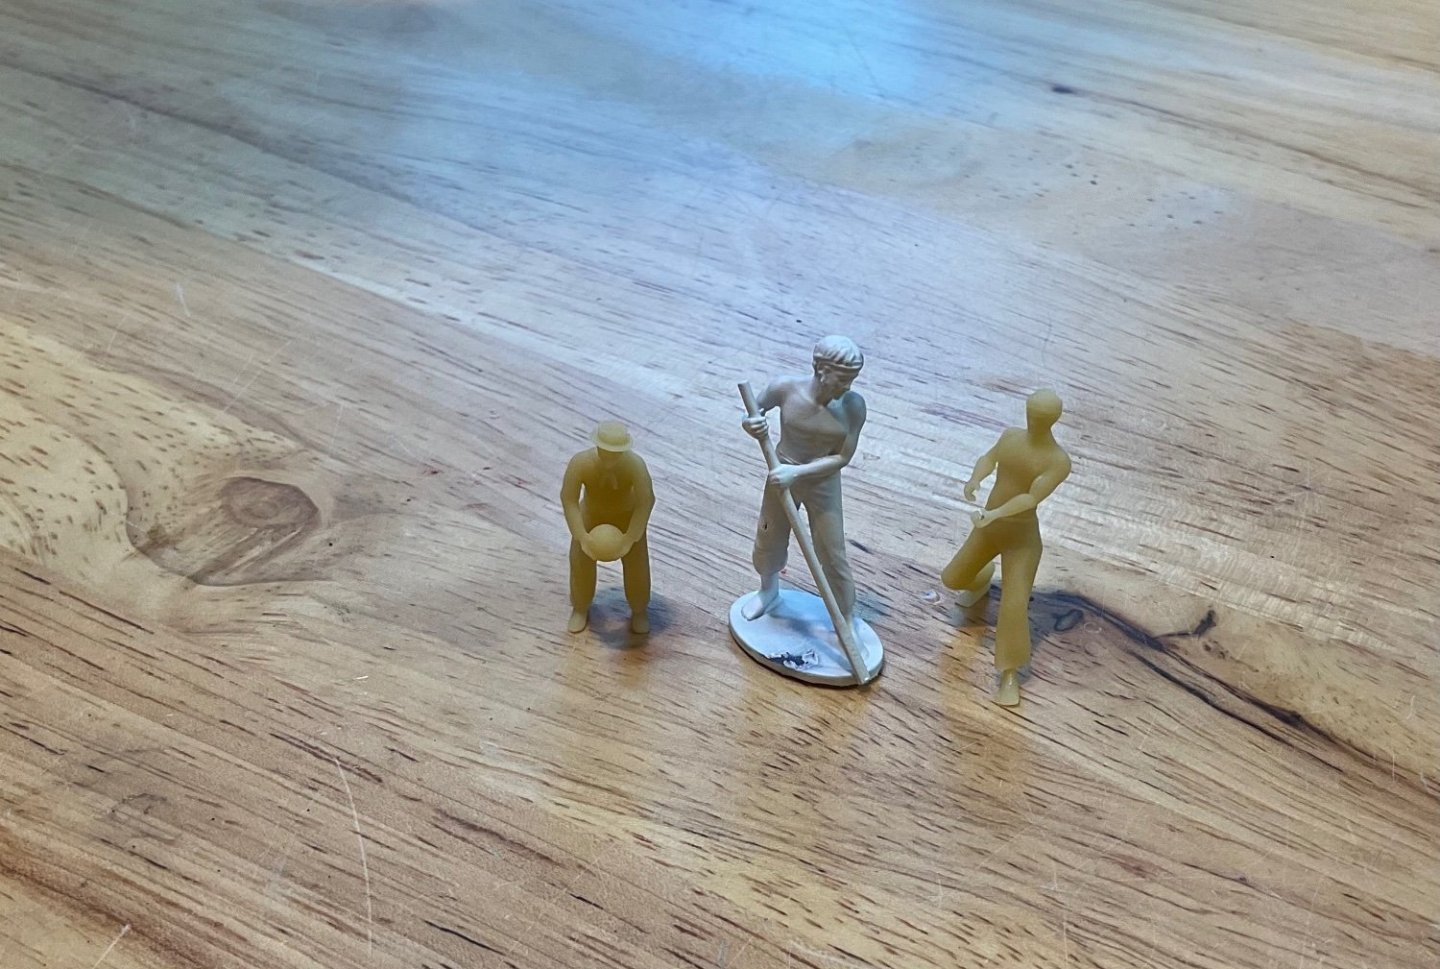
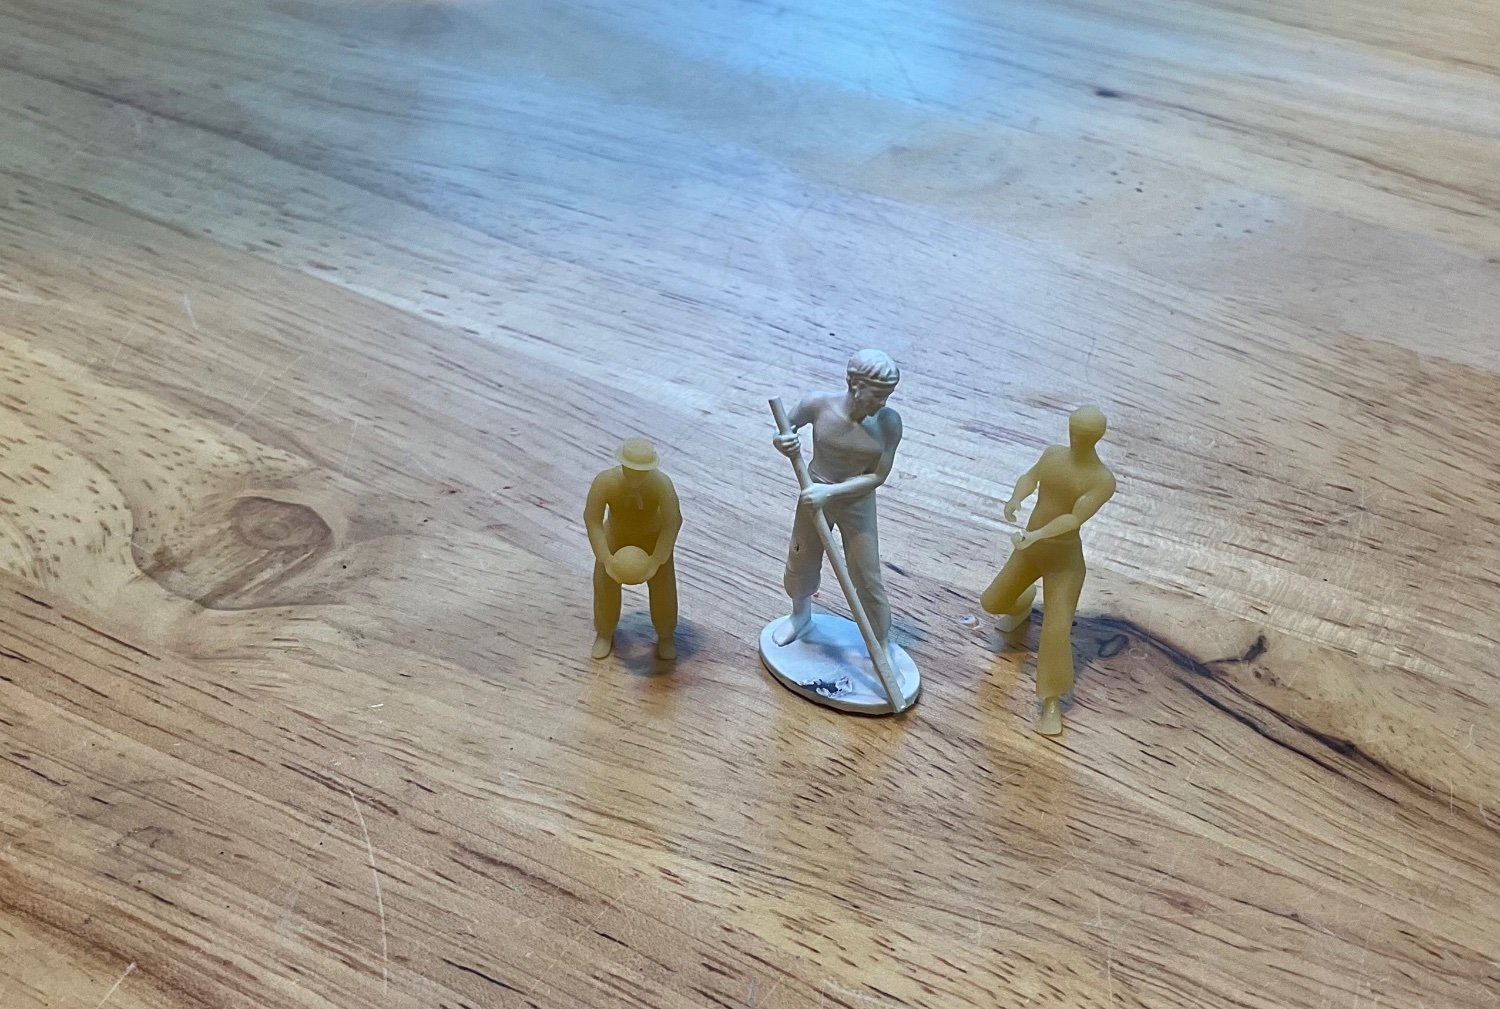
I am having a issue with figure scales. I had purchased some 1/48 scale figures ( gun crew, cook) from Vanguard and loved them, so I bought another set to use on another 1/48 scale model. I was getting tired of the same figures on different model so I started searching around and found some on Shapeways. Ordered a couple 1/48 scale to see the detail and such. So why aren’t ALL 1/48 scale the same size. I contacted Shapeways and the say all their figures ate based on a 5’6” to 5’8” human and 1/48 should be 1 3/8 inch to 1 1/5 inch (I have never seen a measurement displayed as 1 1/5 but maybe that is just me) see photos for issue. What the heck.
- Canute, mtaylor and thibaultron
-
 3
3
-
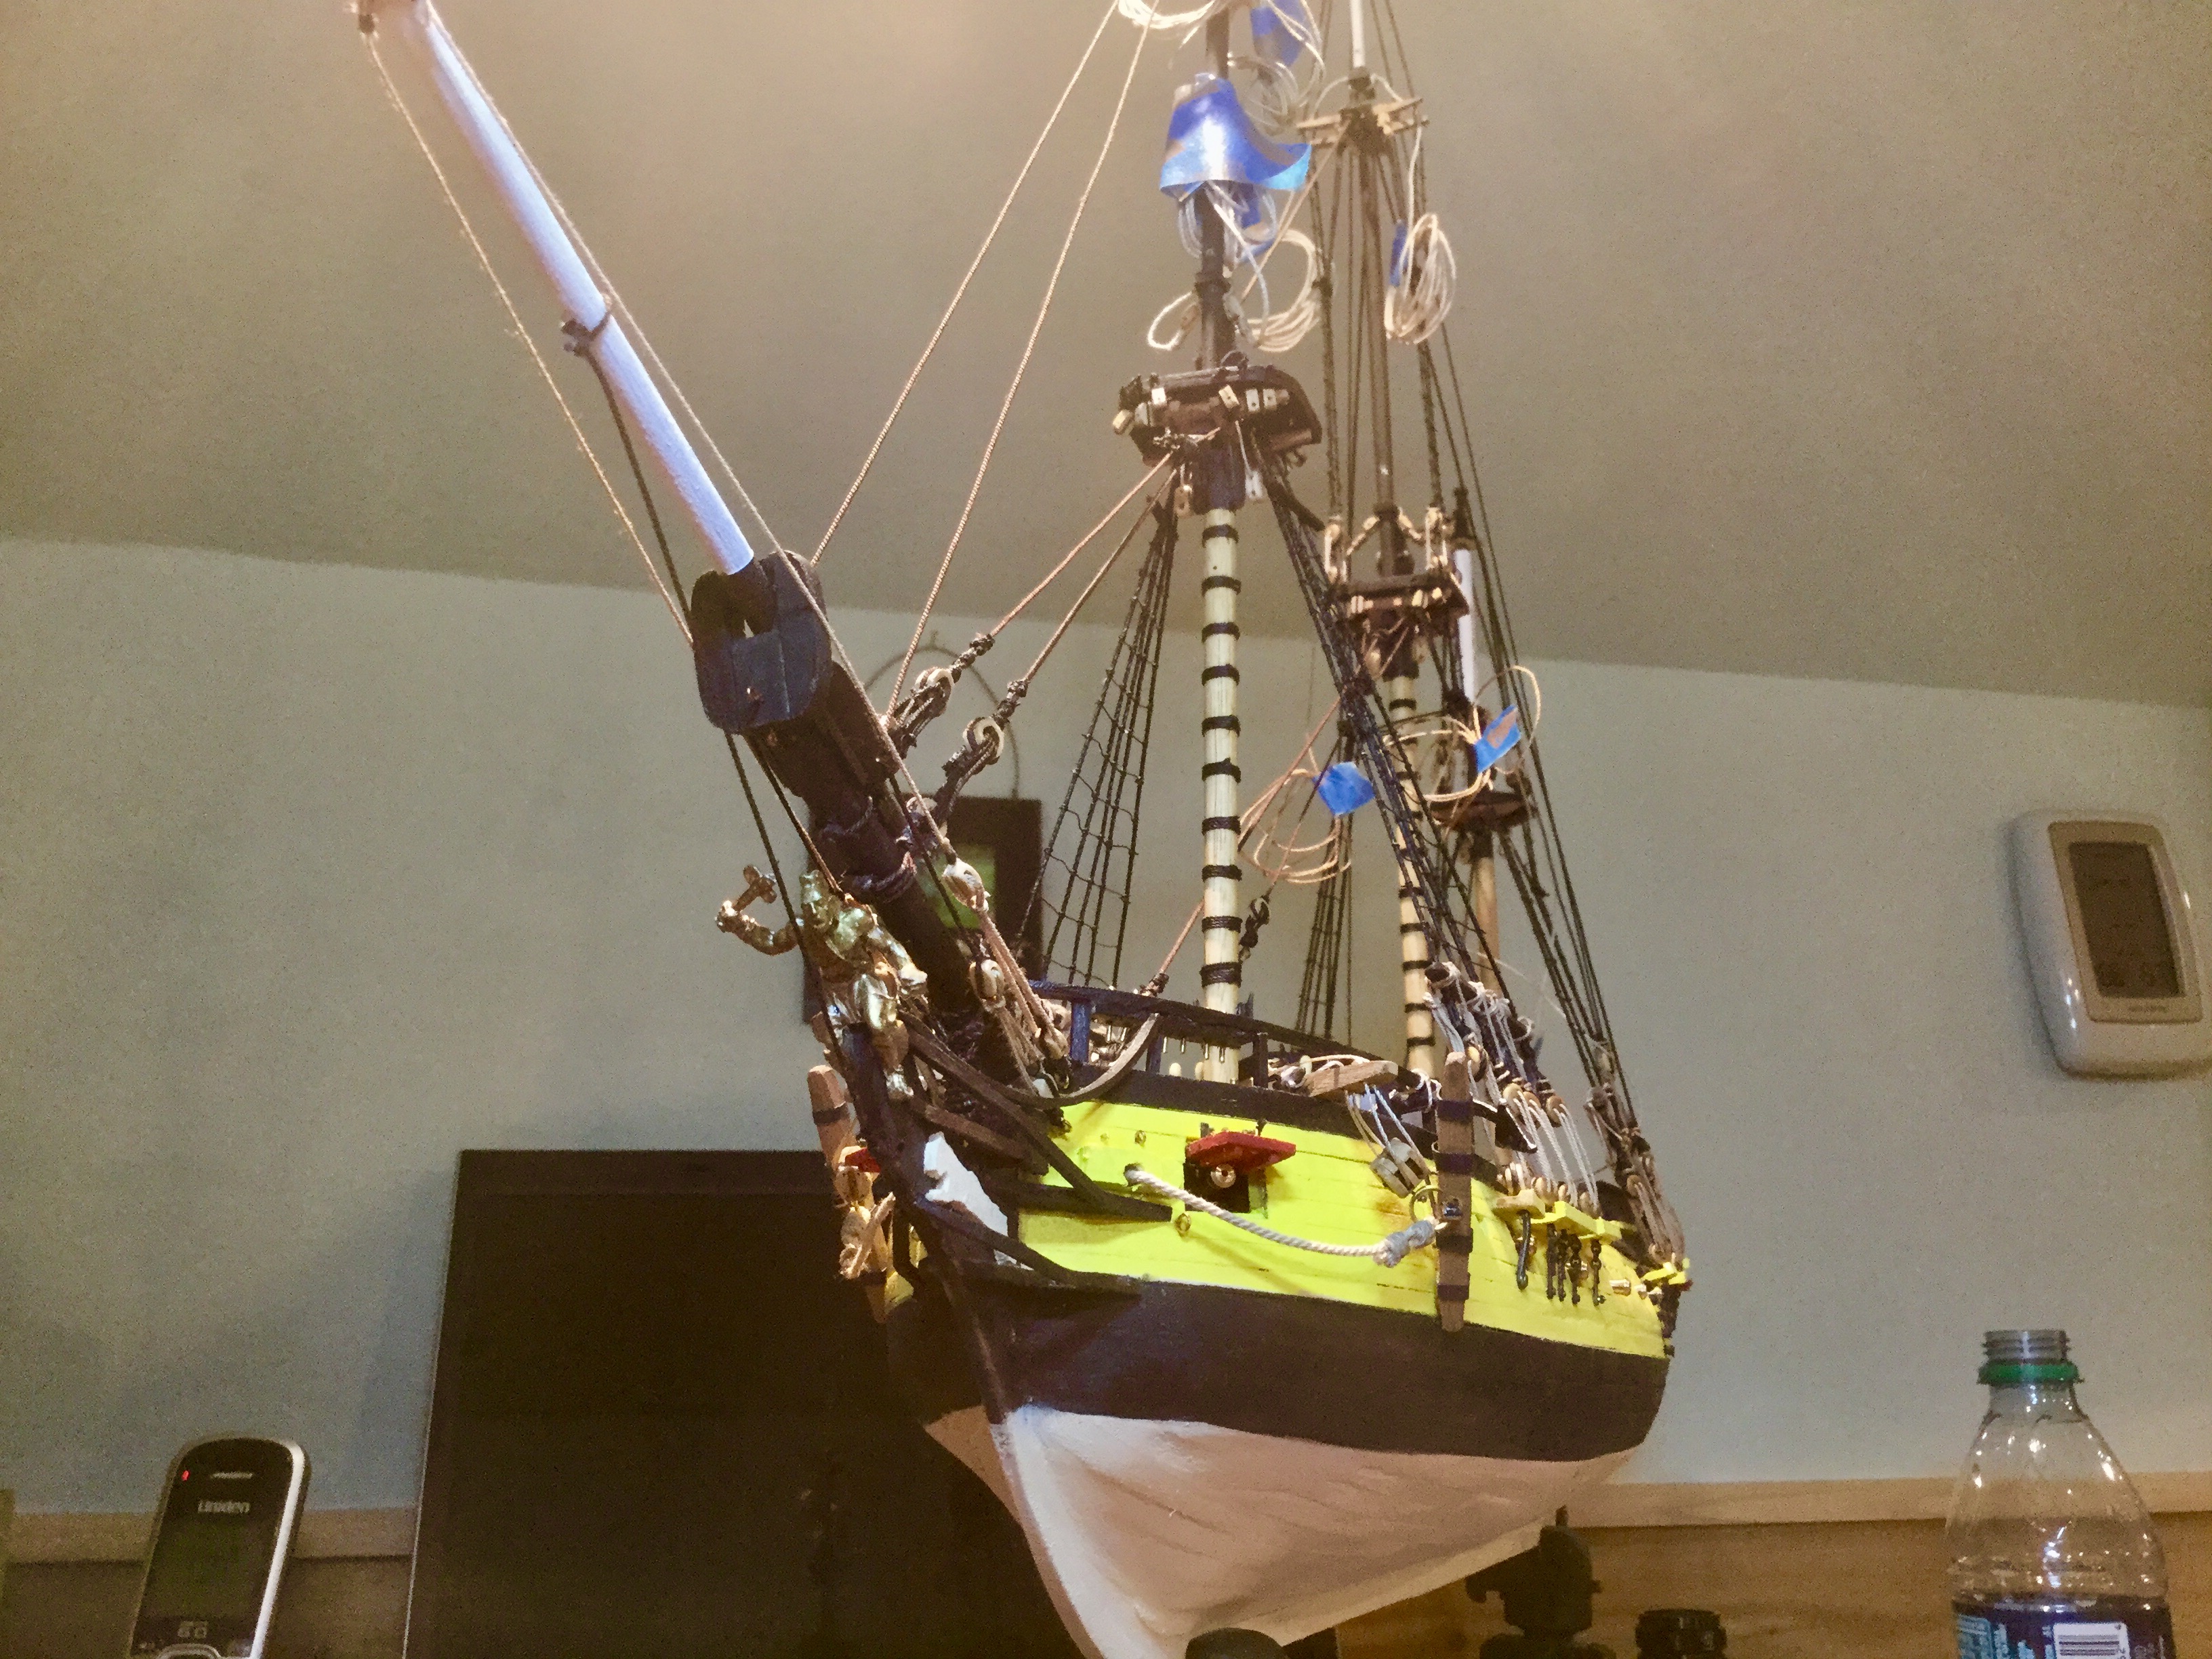
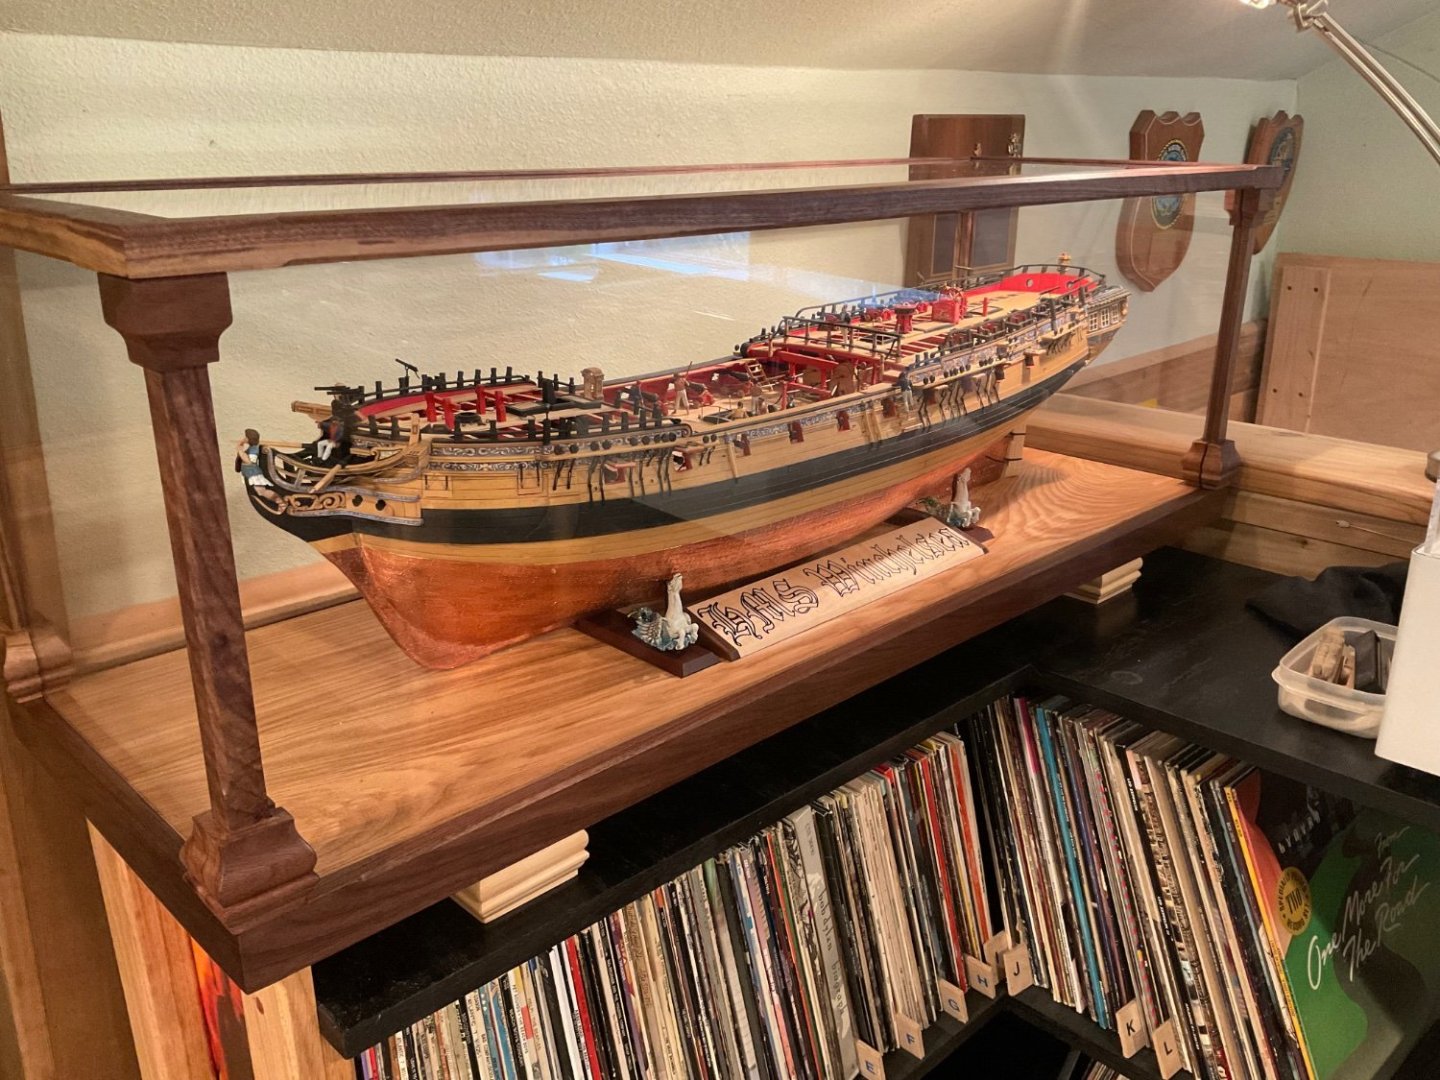
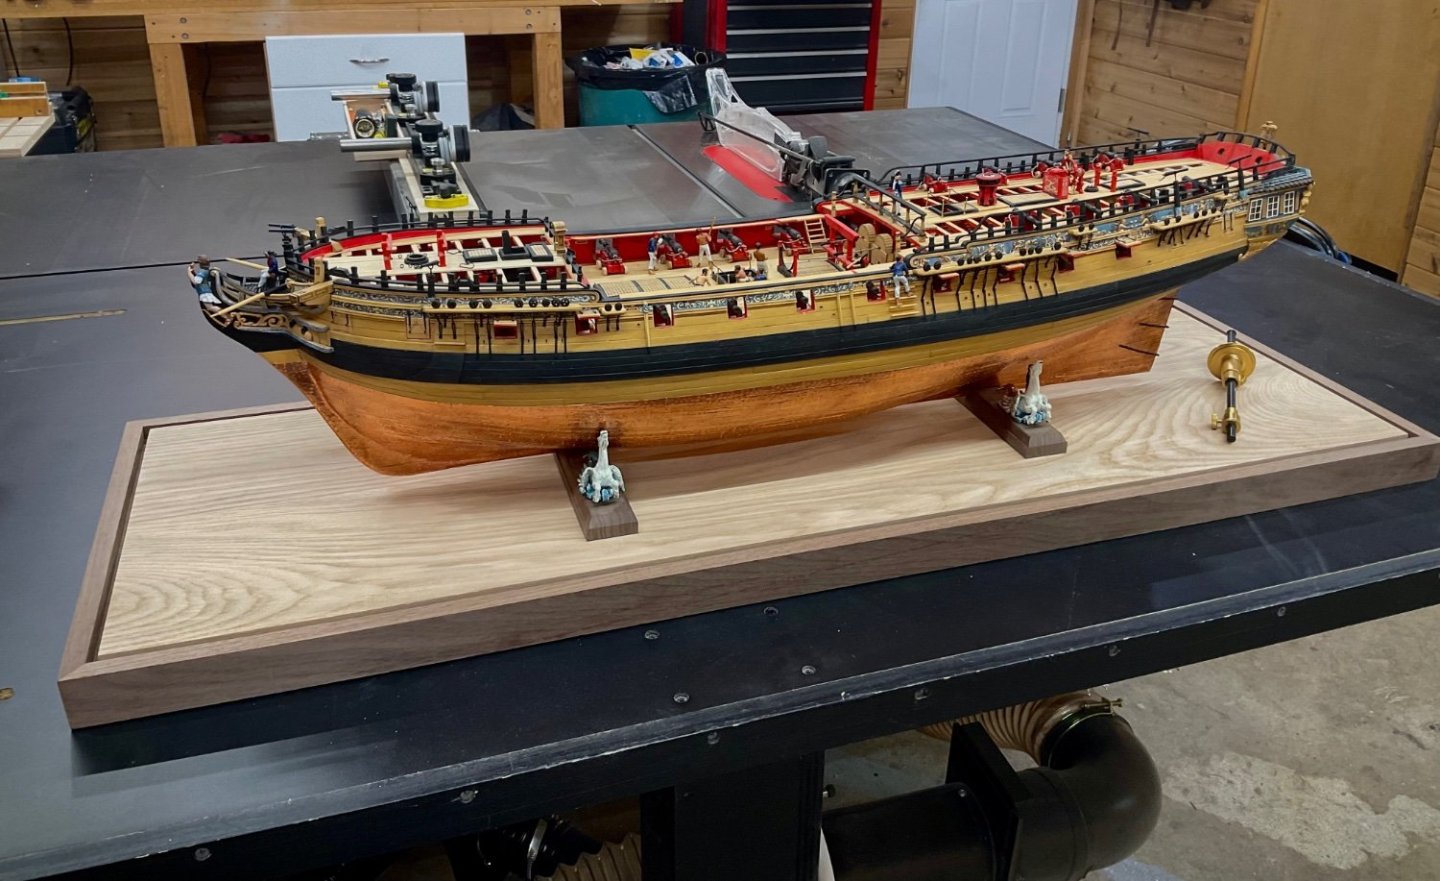
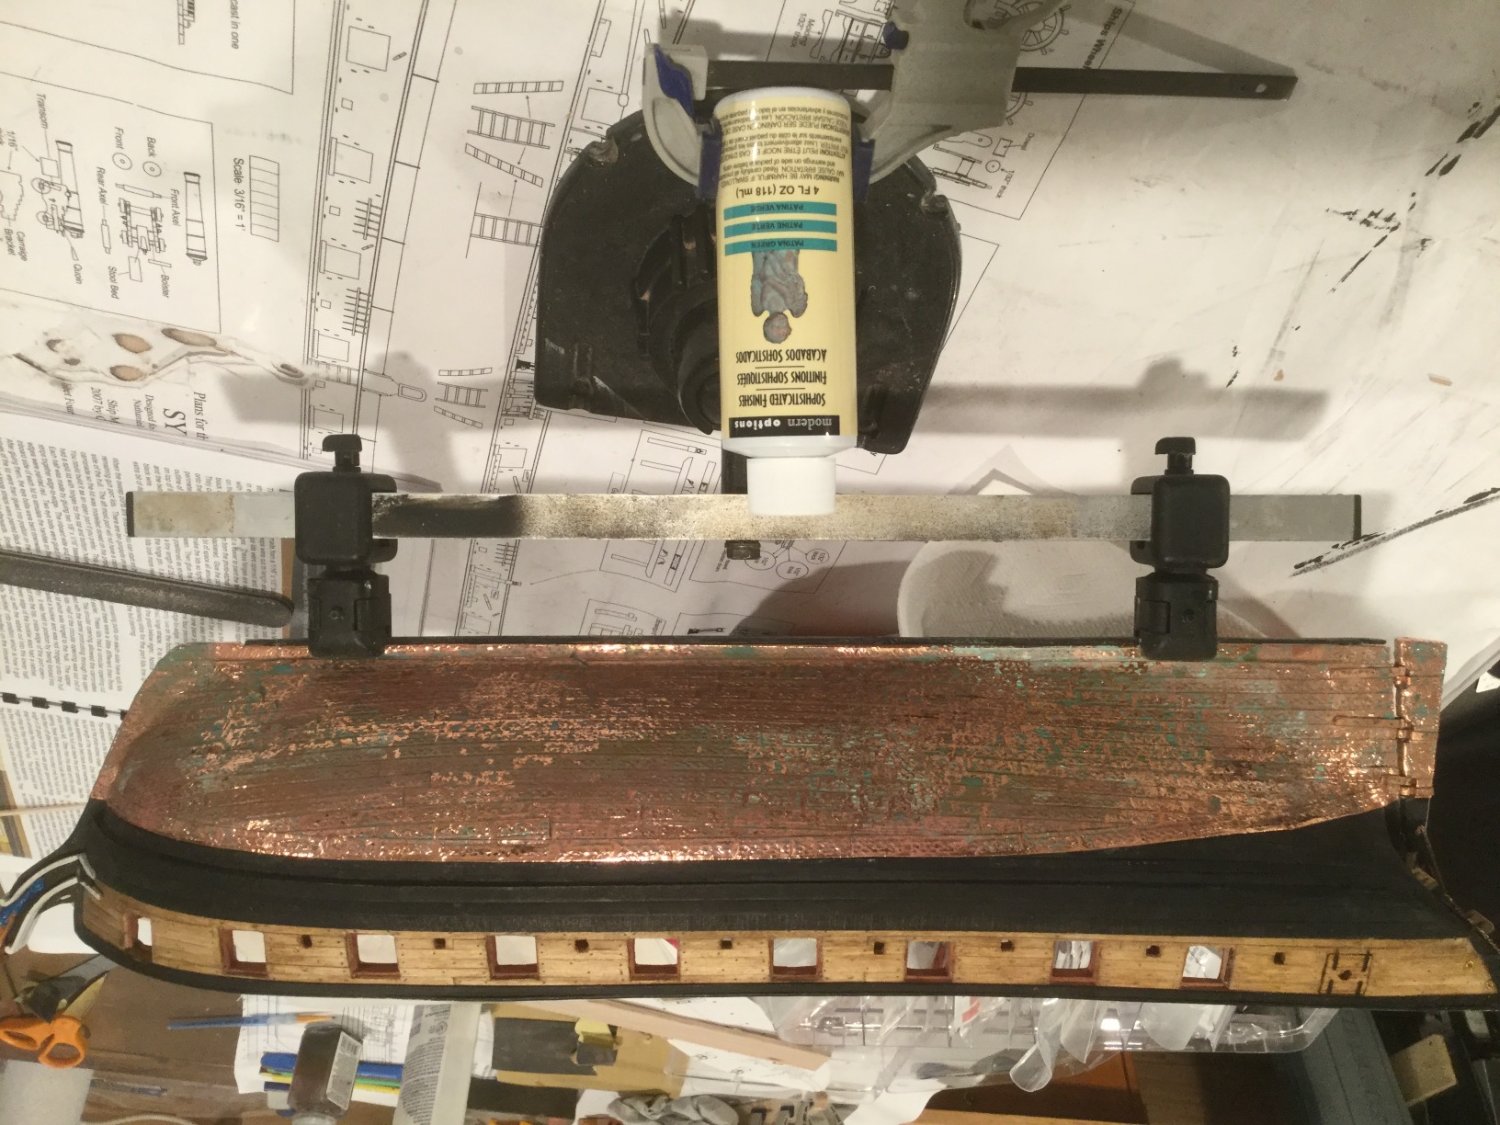
Carol have you found someone to restore your Morgan? I live in Bremerton and if you can get the model to me I’ll give it a go. You would need to pay for material, I usé primarily Syren Ship Company products. I am NOT a professional and will charge nothing for restoration.
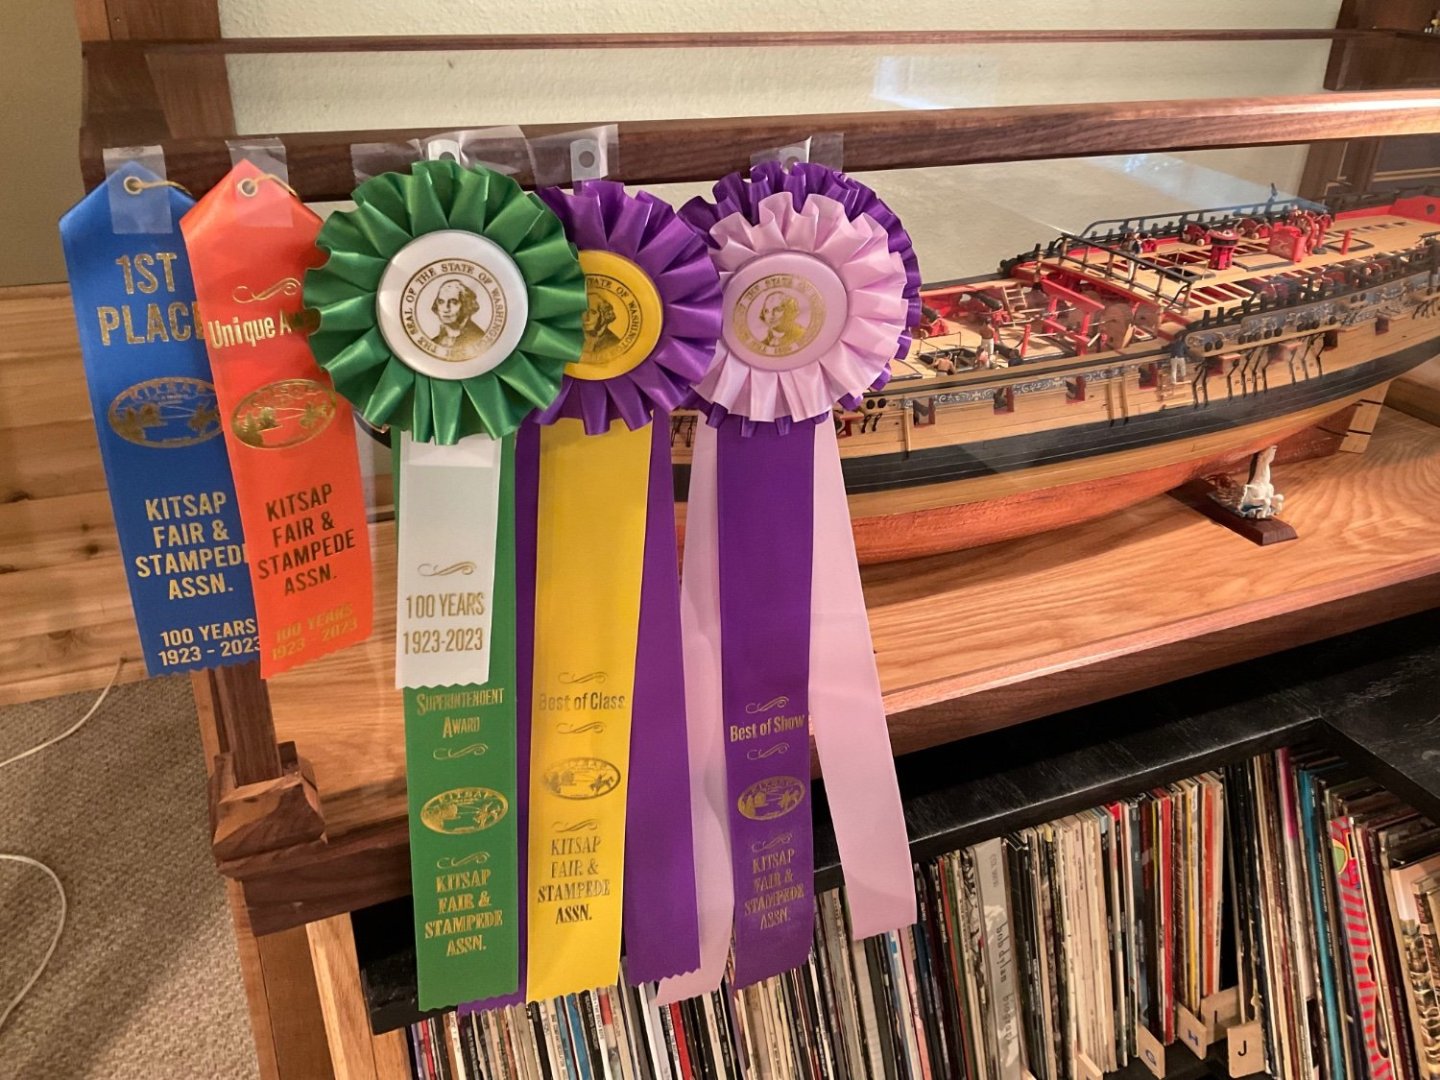
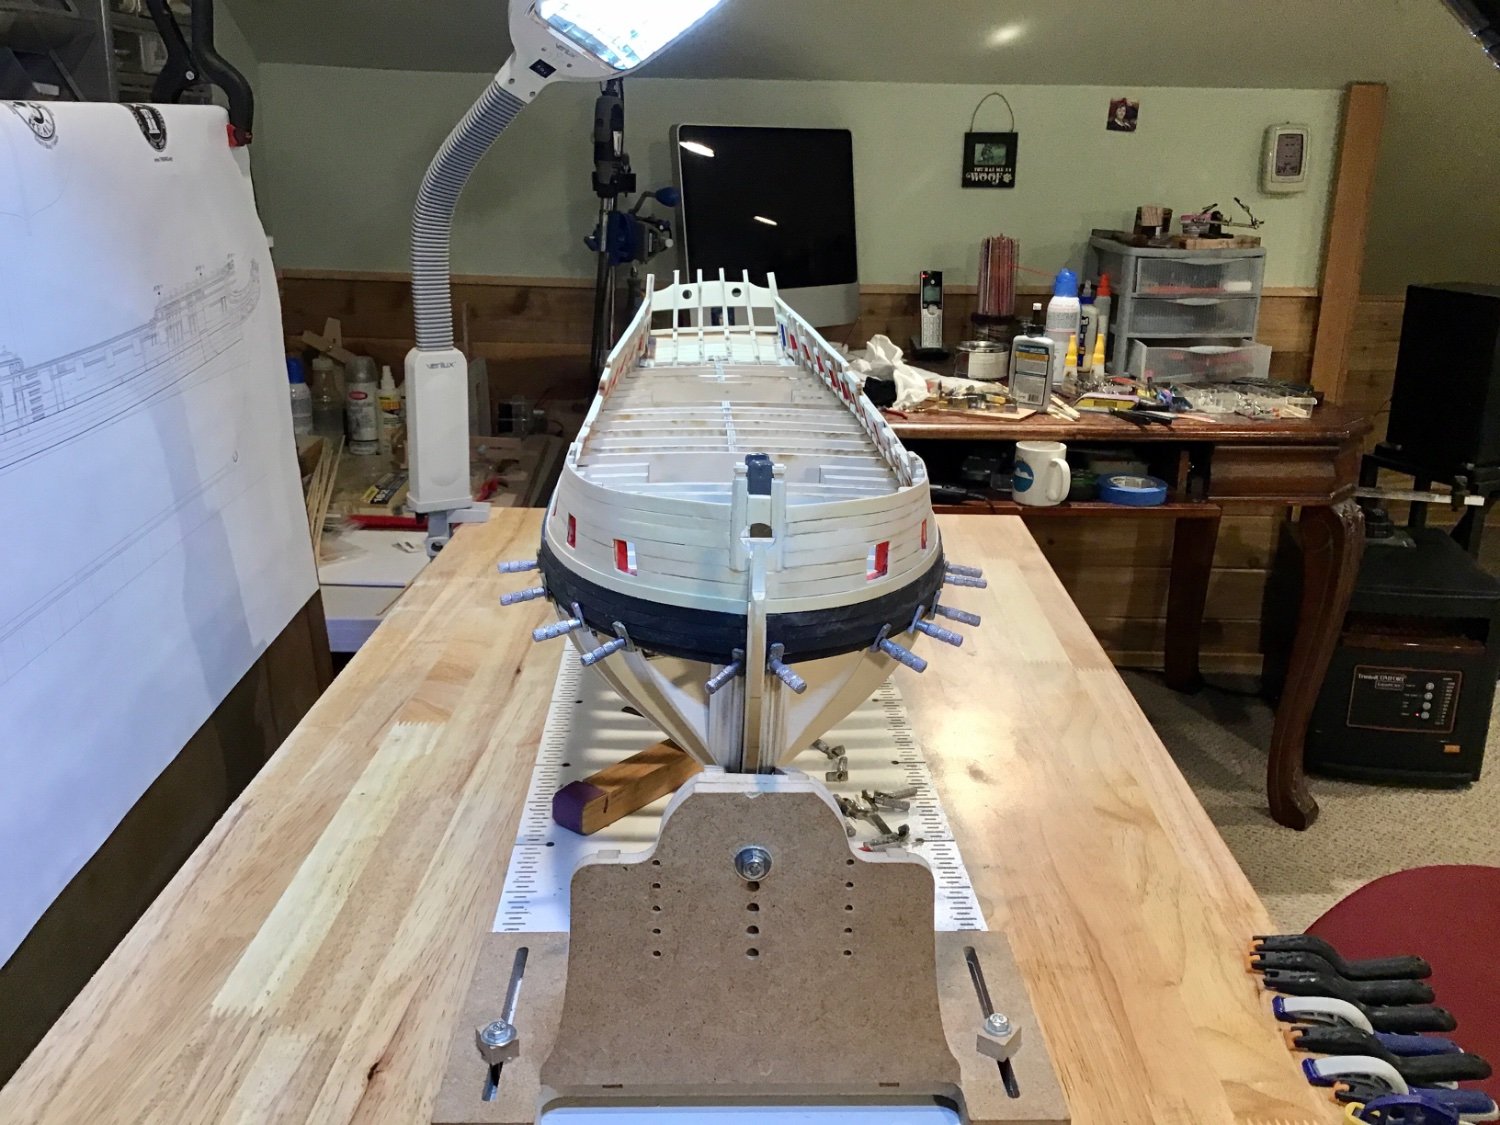
Here are a couple of photos of my last build.
- mtaylor, Roger Pellett, Mike Y and 1 other
-
4
-
-
-
6 hours ago, Chuck said:
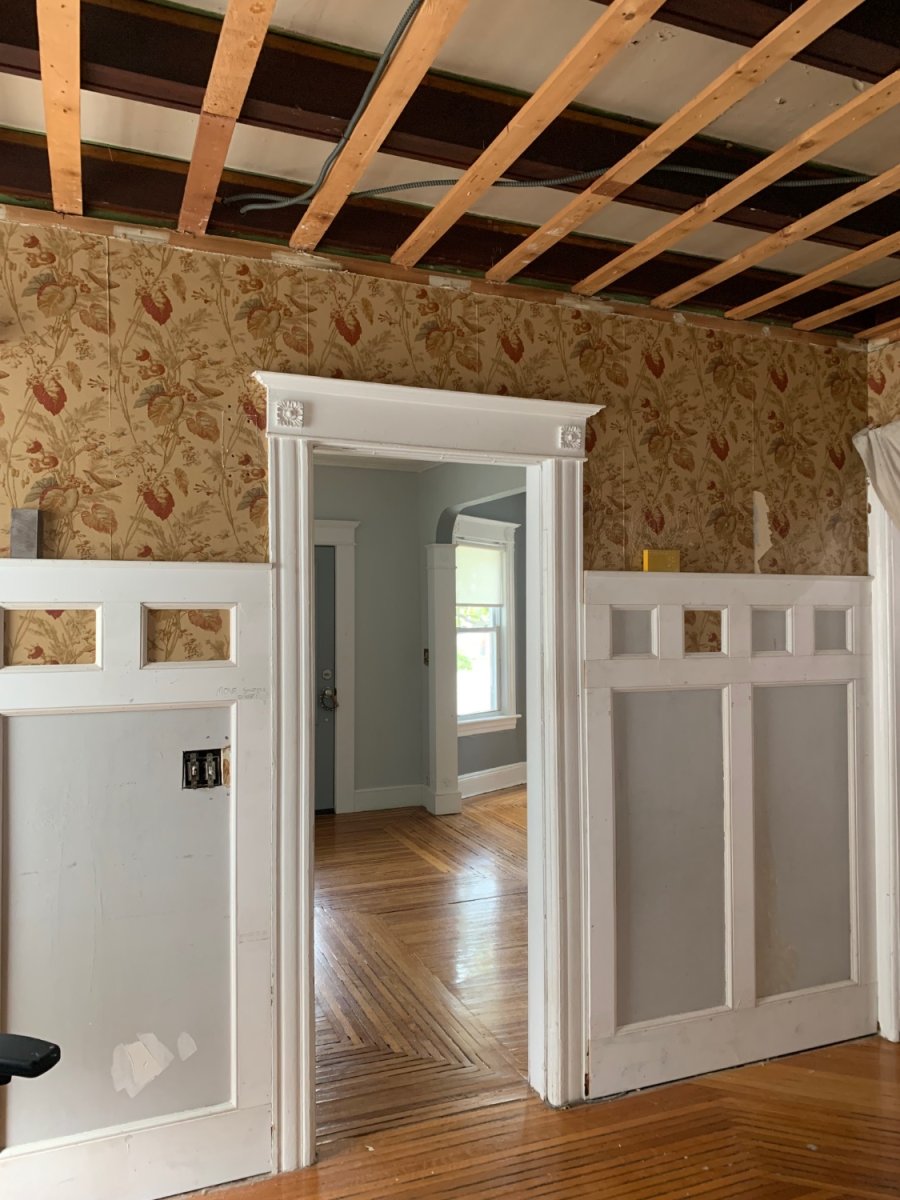
A mess….trying to restore as much as possible. We have the coffered ceiling too but sadly that may have to go.
It has been pretty sucky this week but I see the light at the end of the tunnel. All just to sell it in the spring!!! No more old houses for me. Too old for this stuff. Plaster walls are a real mess. Again sorry for the delays restocking stuff.

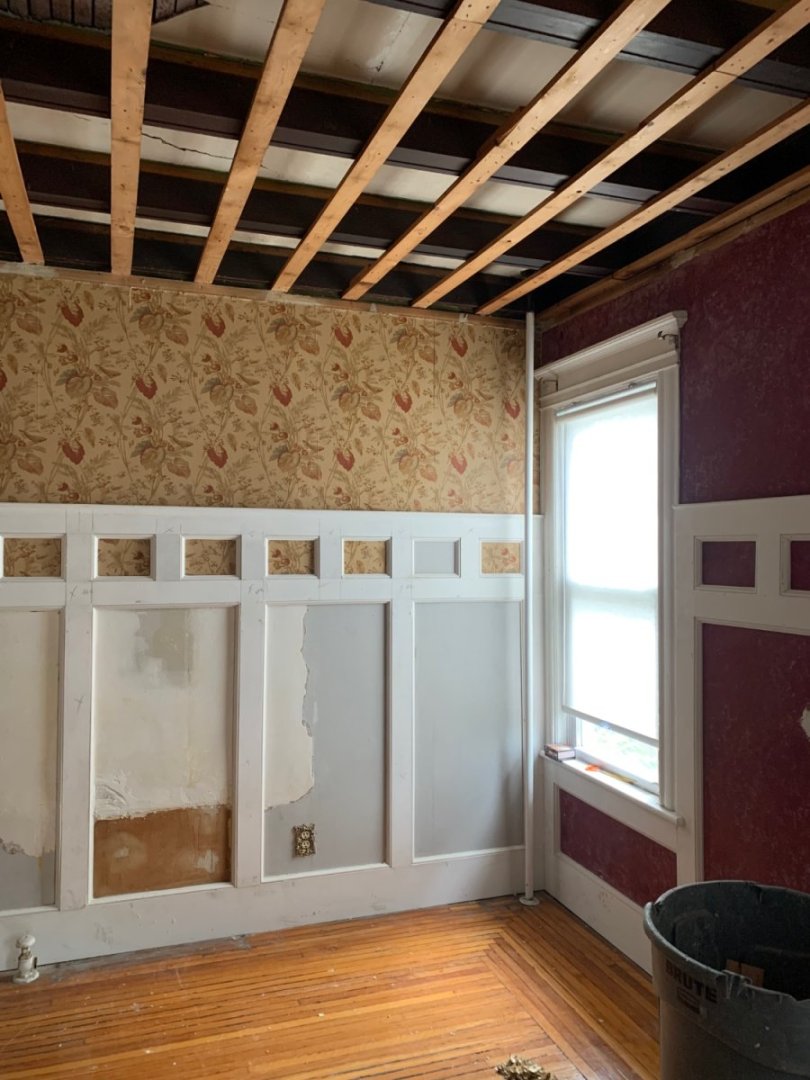
Looks like the perfect place to display ship models.
- thibaultron, Canute and Chuck
-
3
-
10 hours ago, thibaultron said:
There should have been a roll of plans showing each assembled frame in scale. I scanned each frame and used the prints of each as a pattern when assembling them.
Thanks Ron, I didn’t even look at the rolled up paper, thought it was protection for wood strips I wouldn’t need until later. Are you any further along? I can’t find any log entries on any bodies build log past 2021.
-
On 4/23/2021 at 5:02 PM, thibaultron said:
Part 004
Got a little accomplished today. I took the weights off the frame sheet, and the shims had glued down nicely.

To prevent the frame pieces from sticking to the shims and frame sheet, I was going to used wax paper, but decided that it was both too thick, and opaque, for the job. Instead I used Scotch tape.
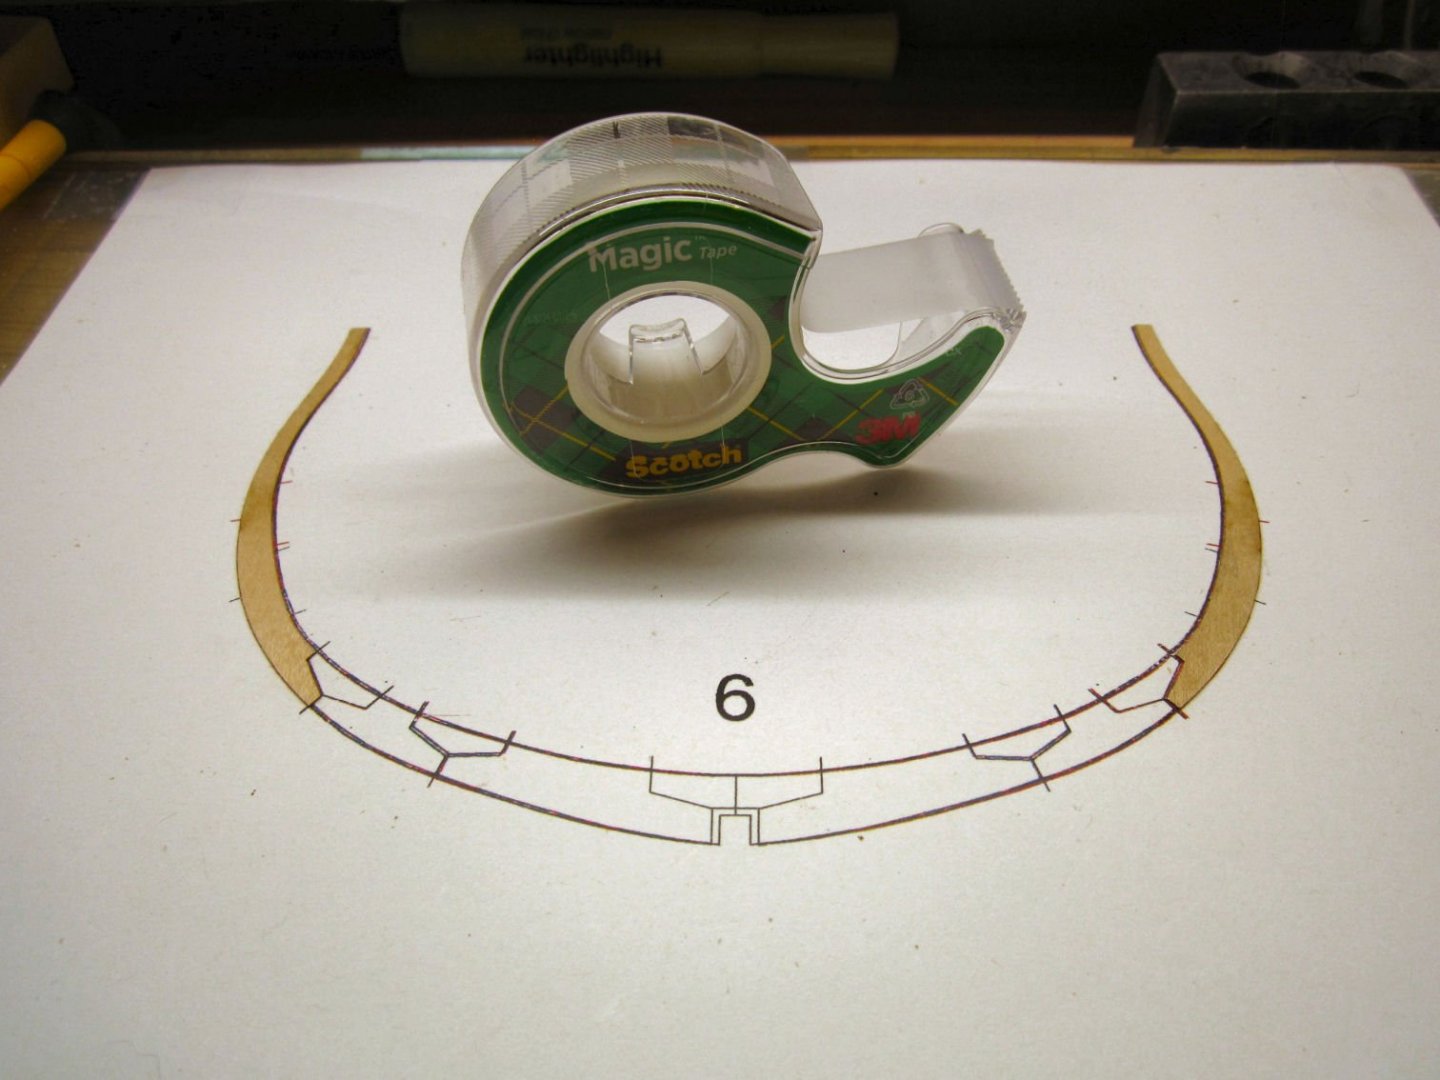
First I put a long piece the length of each shim, then cut carefully around the bottom of the shims, pushing the tape end down onto the paper, covering the area that the chucks will sit down on. Then I covered the rest of the bottom of the frame area, leaving a good length sticking up on the ends. I then cut across where the bottom tape crossed over the pieces left from covering the shims. Then, I pulled the cut ends off, leaving only a short area where the taped was double thickness.
I noticed that the sheet was not completely flat near the top, so I placed a weight across that area.
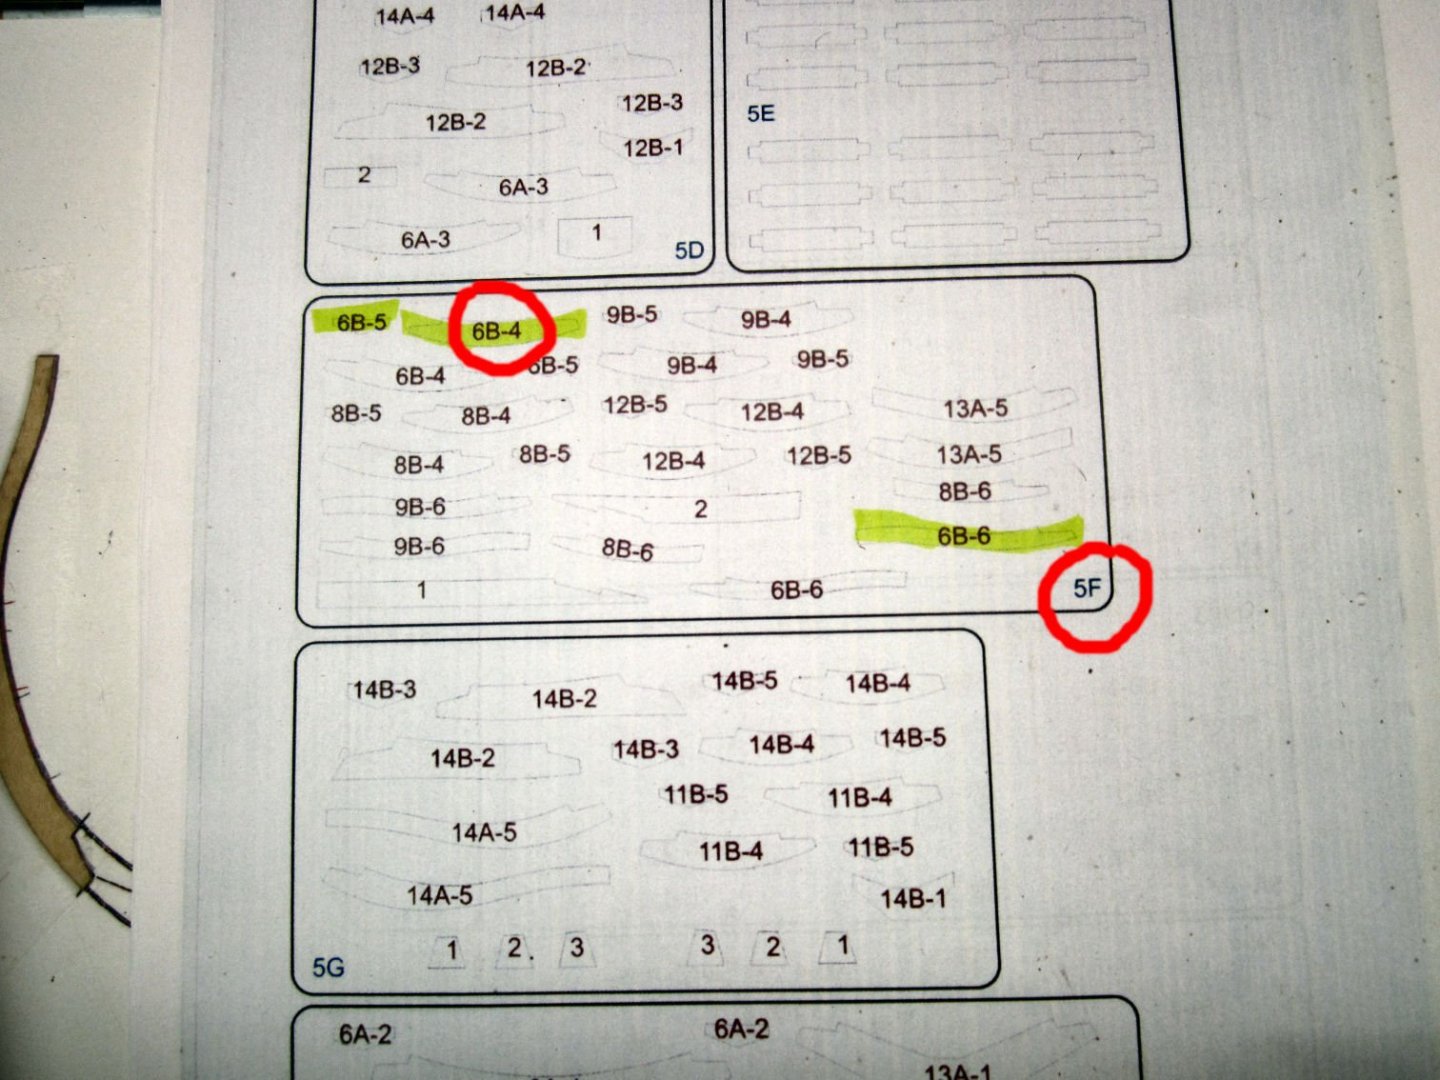
The parts numbering was a bit confusing, at first, until I examined the parts sheets.
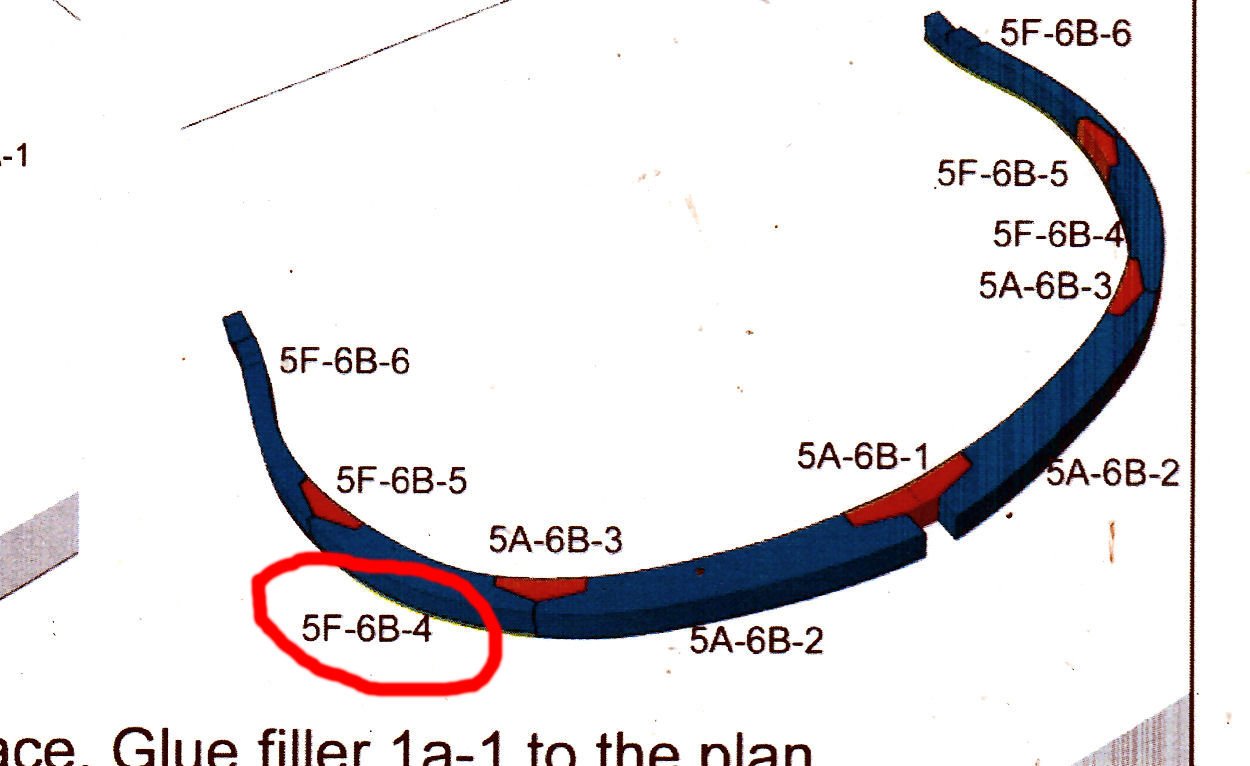
5F-6B4- For instance translates as, Parts Sheet 5F part 6B-4, as shown in the parts diagrams in the book. This picture also shows one of the reasons I scanned the instructions. As I find and remove the parts, I highlight them. As I progress, this will make finding the parts easier, by process of elimination. It will also, hopefully prevent me from ending up with parts left over, when I finish!
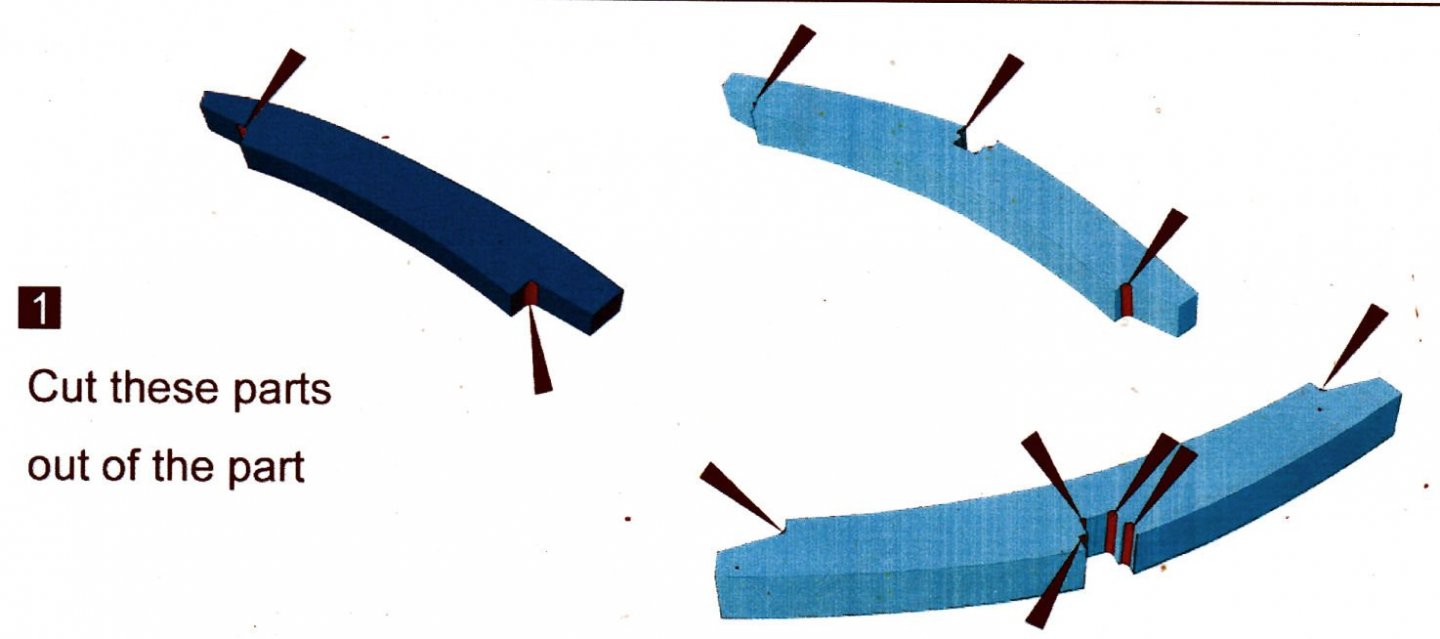
I still have to cut out the rounded areas left when the parts were CNC routed, so I’ve only cut out the three parts highlighted.
I have to figure out how to mount my lighted magnifier lamp “eyes” to the new work bench, as I had to leave off the built in vise at the right hand end, now that the spray booth sits there. The workbench top is too thick, to mount the factory “C” clamp.
I’m using a second compartmented box, like the one I put the small parts in , to store the frame pieces, while I’m assembling them, or when I finish for the day.
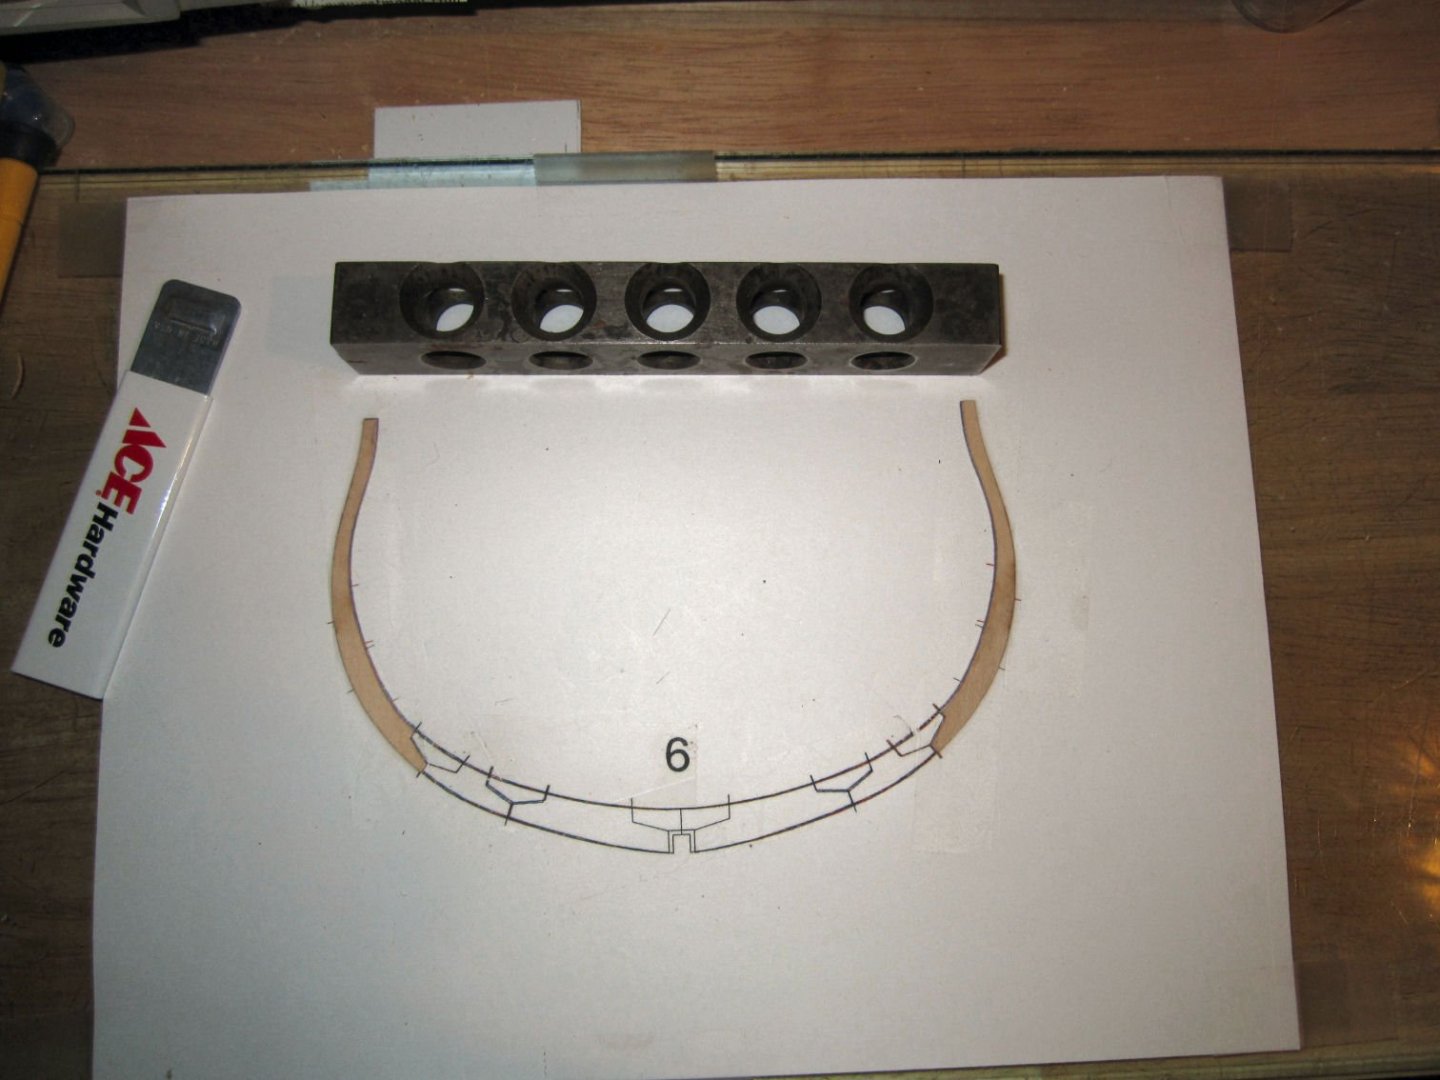
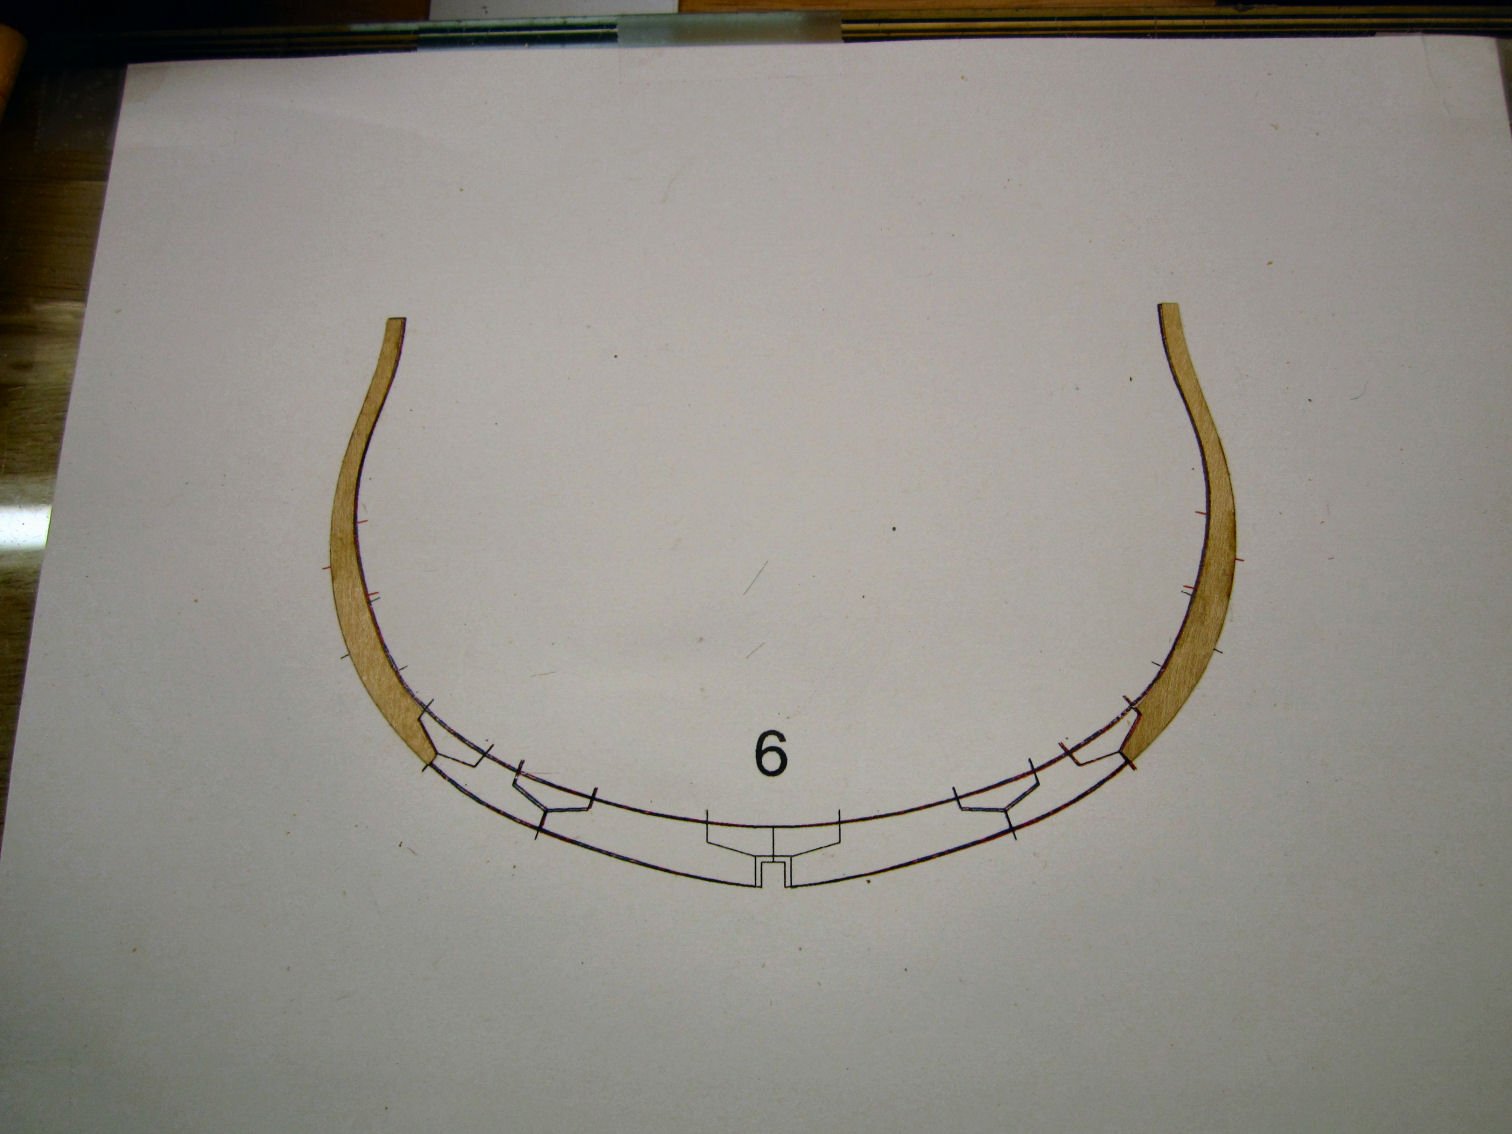
After some consideration I decided that I needed to be able to pin the frame sections in place while the glue dries, so I need to move the frame drawing from the glass plate to a wood base.
I did not have any wood that was flat enough for my satisfaction, so I needed to buy another piece. The best type of wood to insure flatness, is butcher block types. I went to Home Depot, and found a 17.5”X 1” thick disk butcher block piece. Even then most of them were far from flat. I went through them and only found three of a dozen or so, that were close to flat. I selected the one that was the flattest, and bought that one. It is still a little bowed, but very close to dead flat, and close enough for this application.
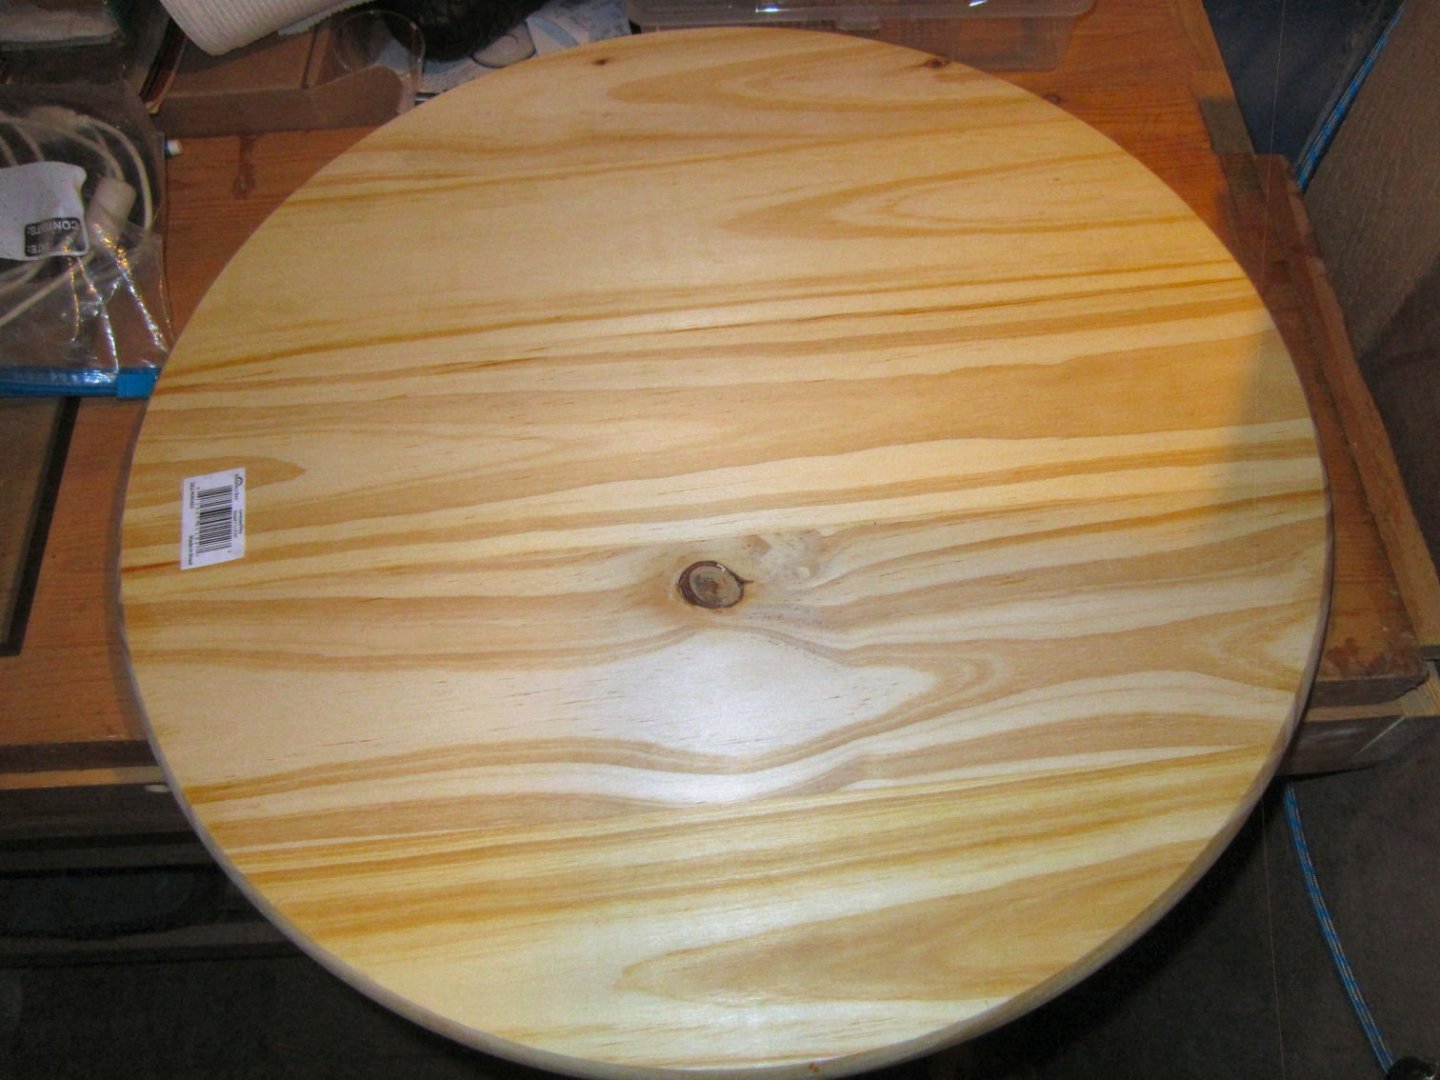
So I transferred the frame drawing from the glass to the disk.
I also bought a short MDF shelf, that I will cut into sections, and glue sandpaper to. This will give me nice flat surfaces to sand “stuff” on.
I received my kit yesterday. Where are these rib drawings located? All I have is the assembly instructions and parts list/drawings.
-
I would like to suggest Bremerton WA. You have the Naval Museum at the Puget Sound Naval shipyard and the Undersea Warfare Museum at Torpedotown Keyport Wa and I know the undersea museum has plenty of space.
- Azzoun, Justin P., Chuck Seiler and 1 other
-
4
-
Chuck I know you are quite busy. I have a question. My brother wants to purchase a Medway Longboat Kit and I note they are out of stock. Do you have plans on restocking?
- Canute, thibaultron and mtaylor
-
3
-
Easier way….order resin replacements from Syren Ship Company.
otherwise use a #11 blade and scrape off the big stuff, then file, then paint with primer, hit it with some 400 sand paper, prime again, drill out the muzzle a little and paint.
- John Ruy, mtaylor and thibaultron
-
3
-
-
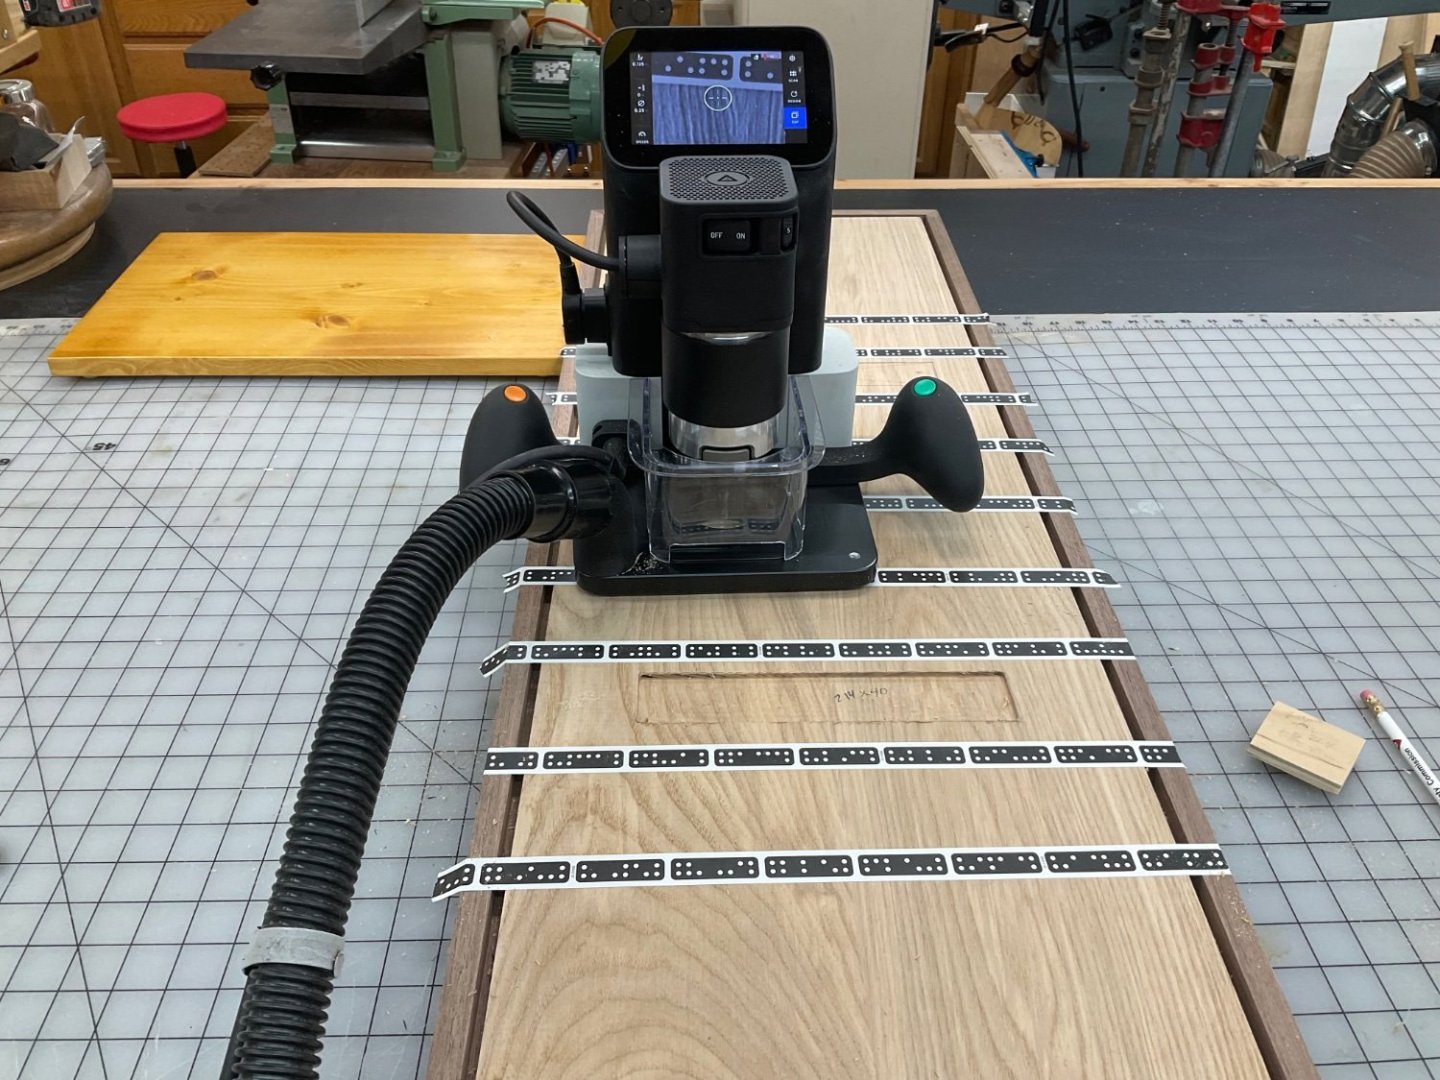
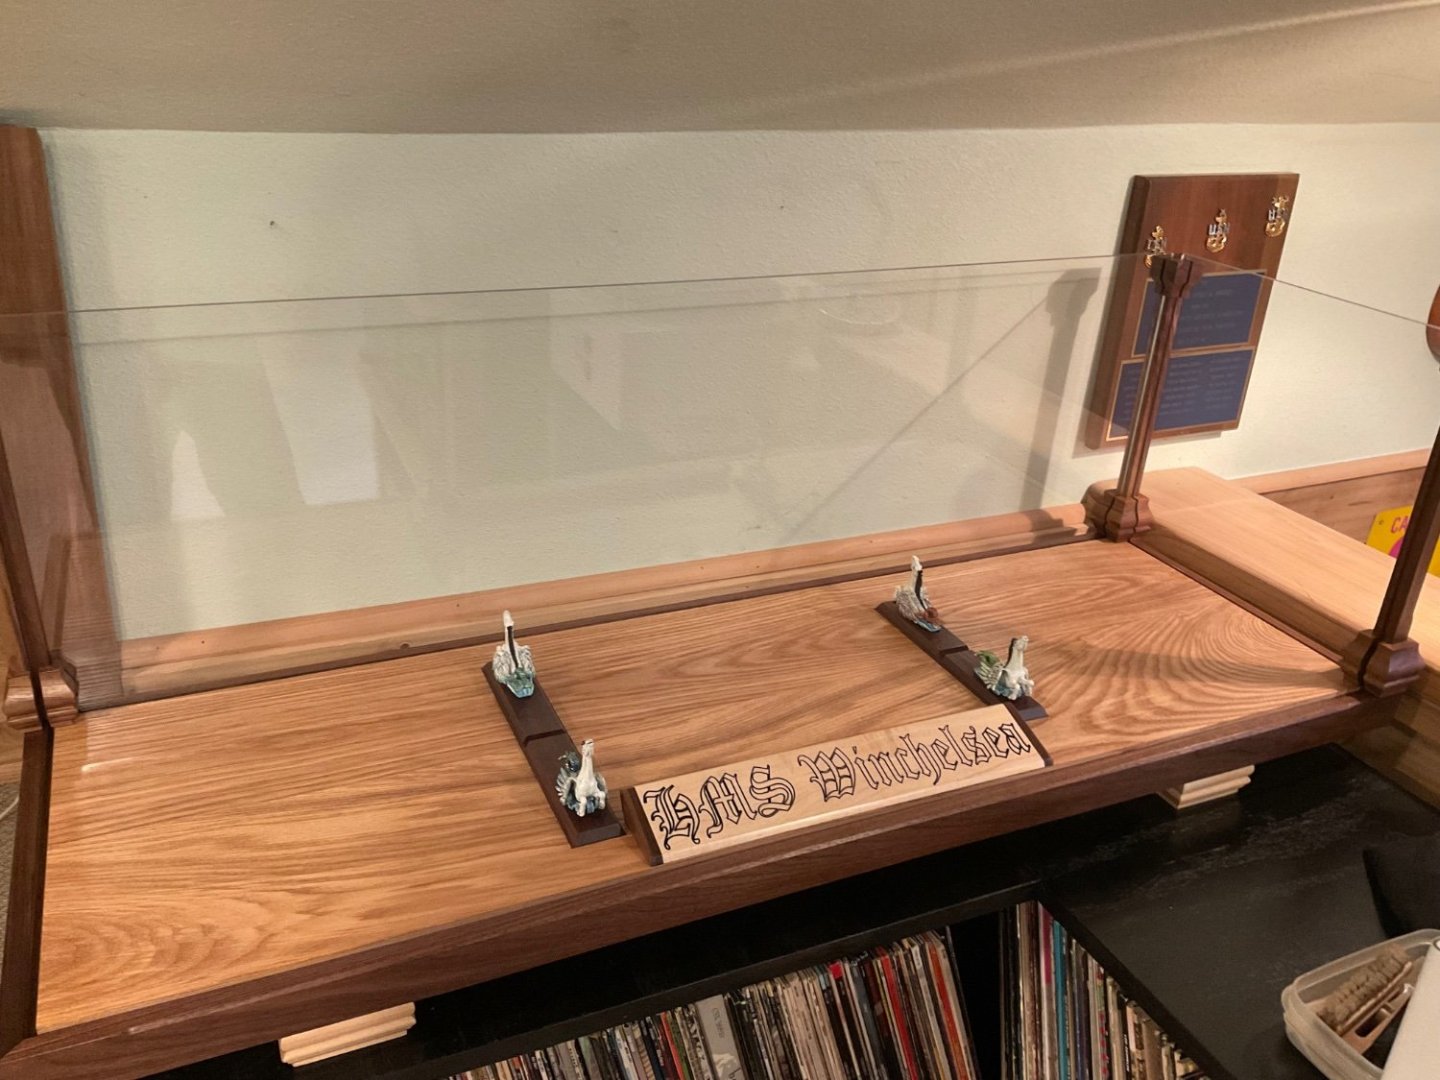
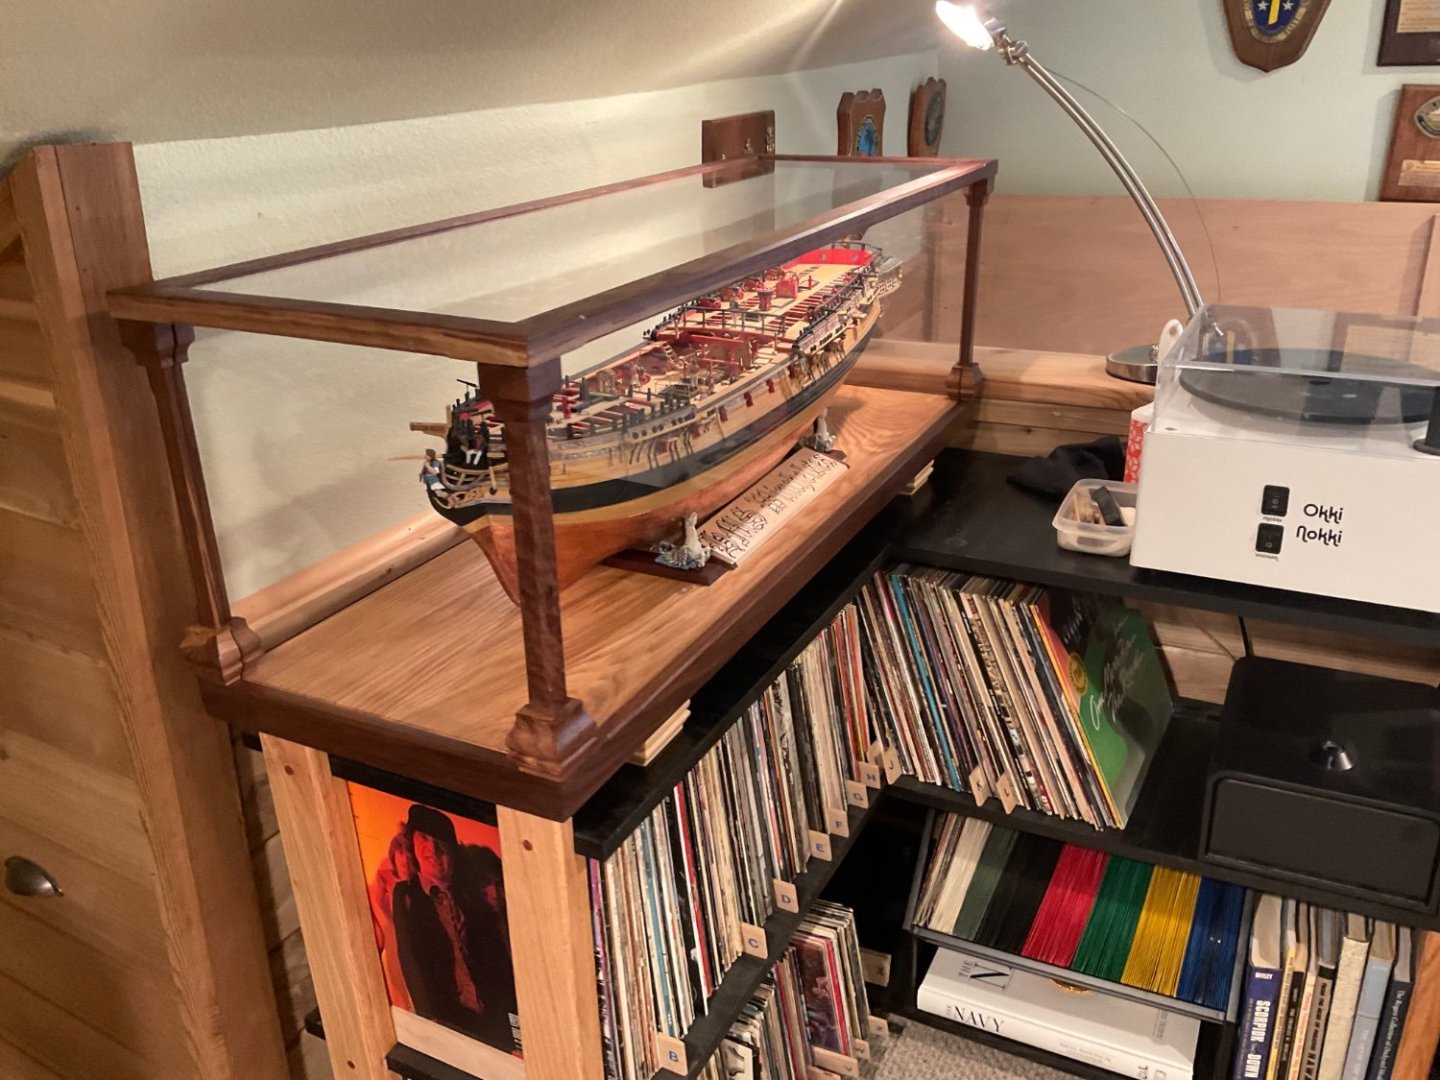
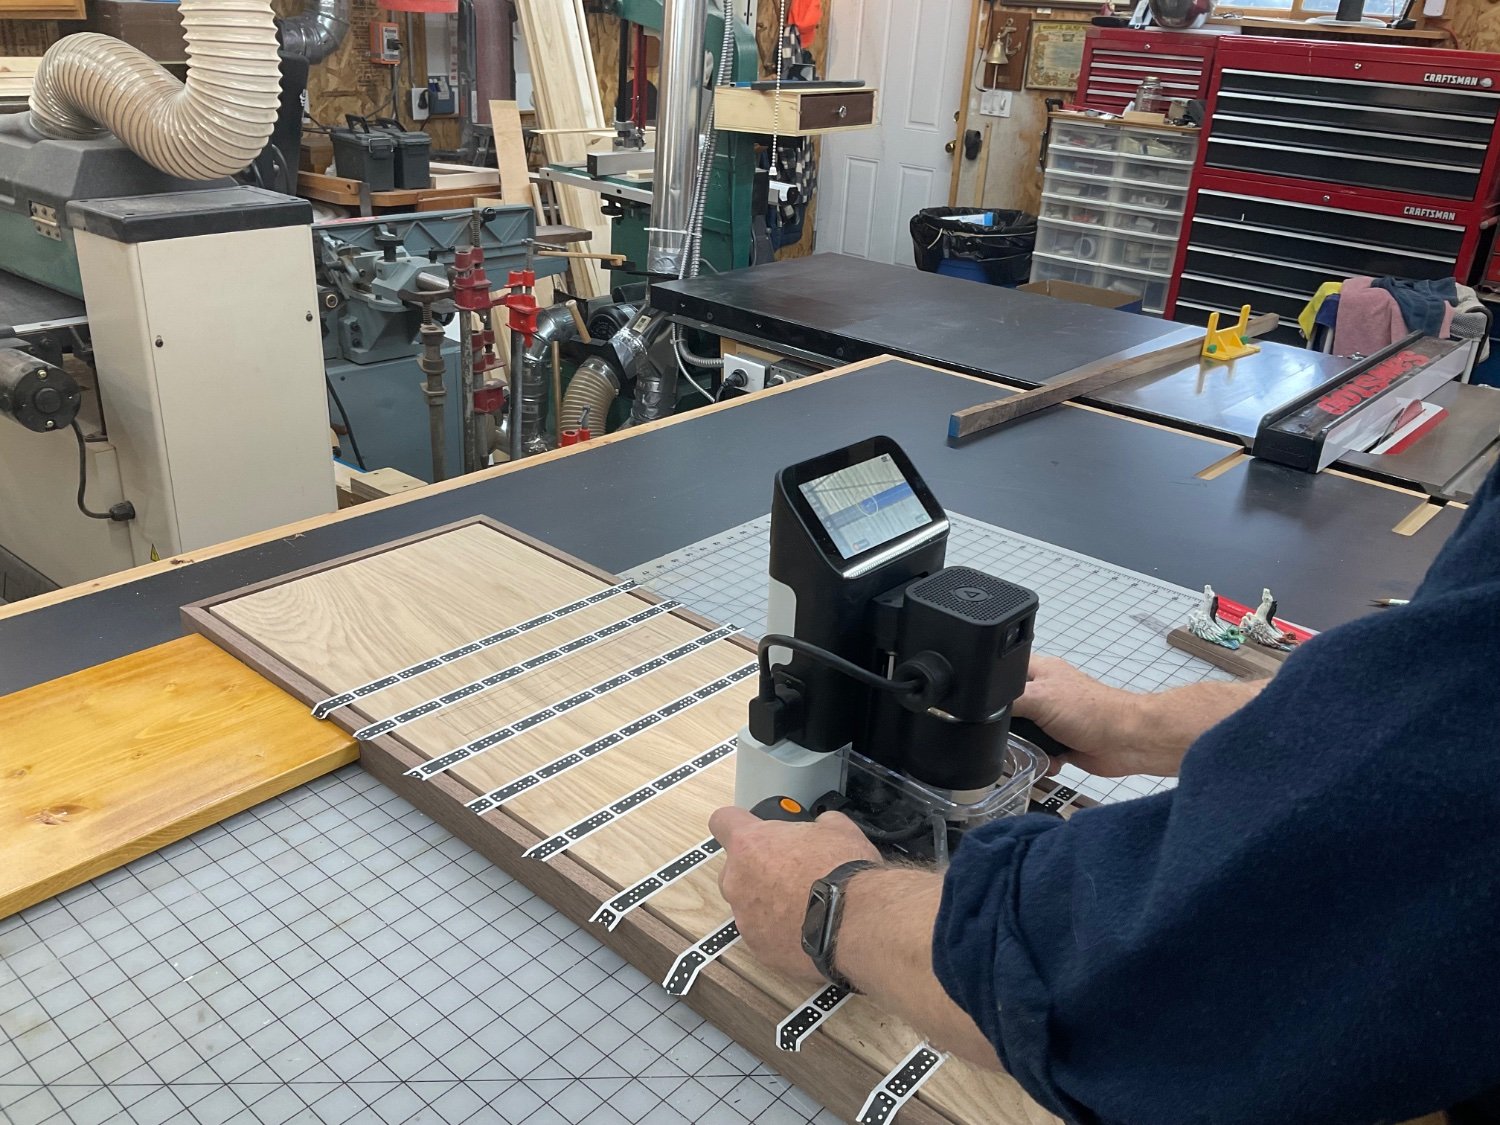
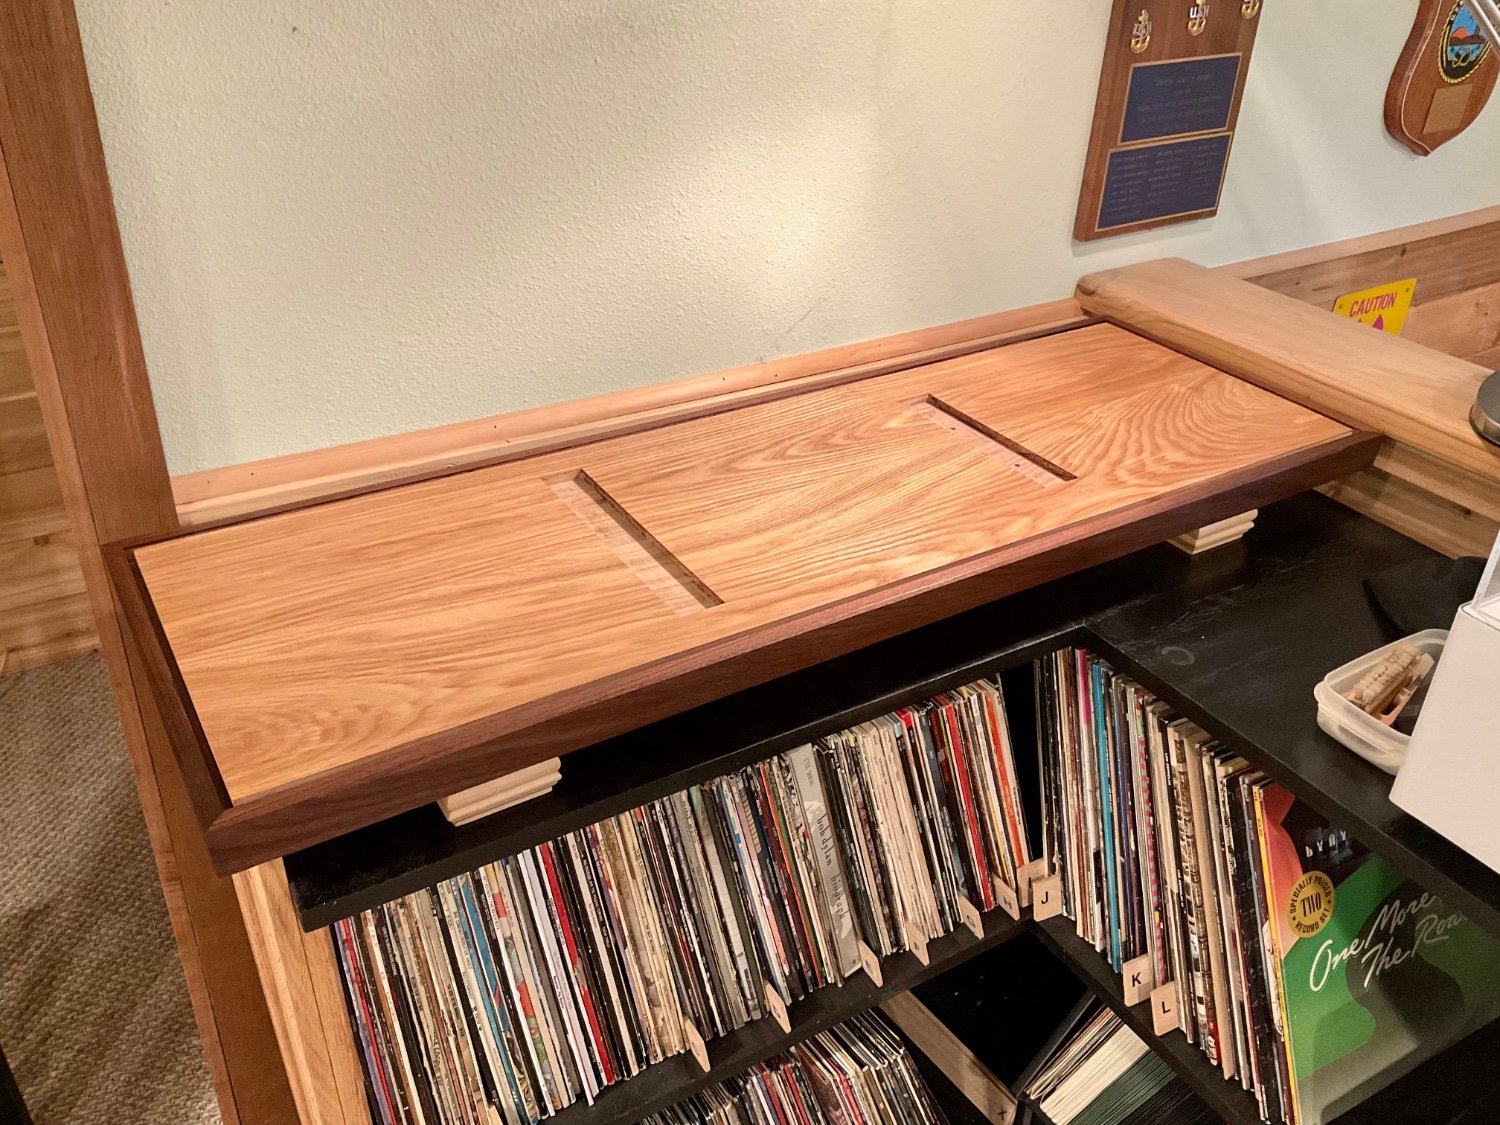
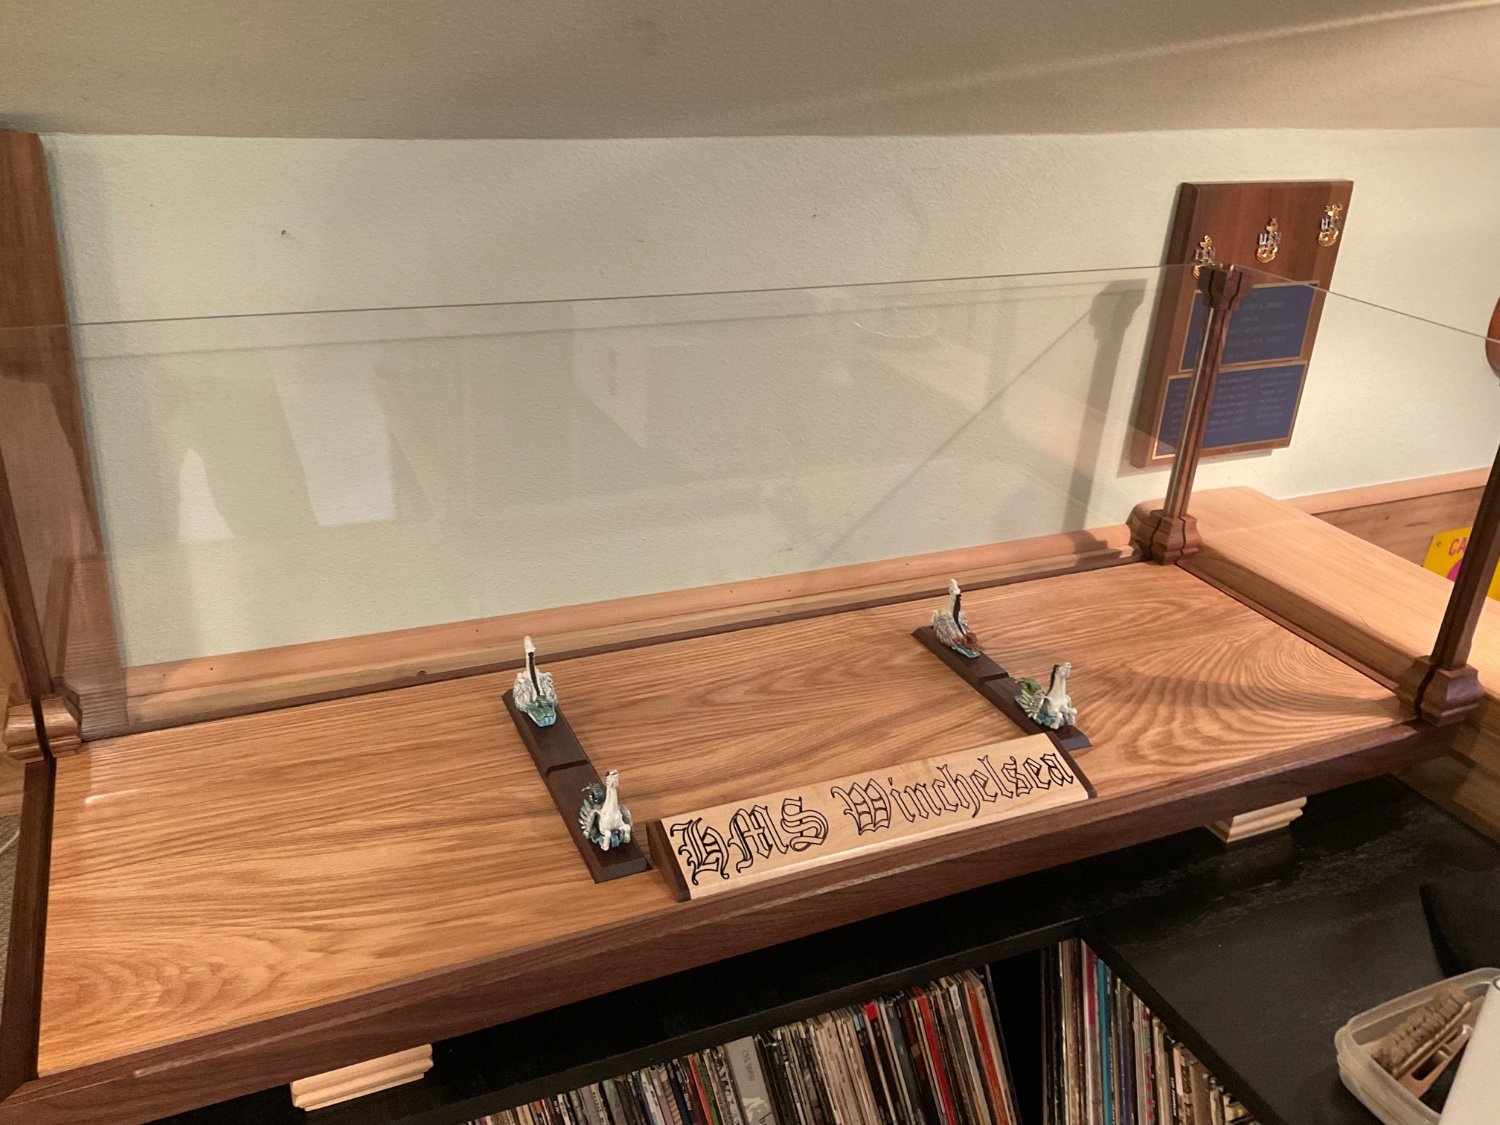
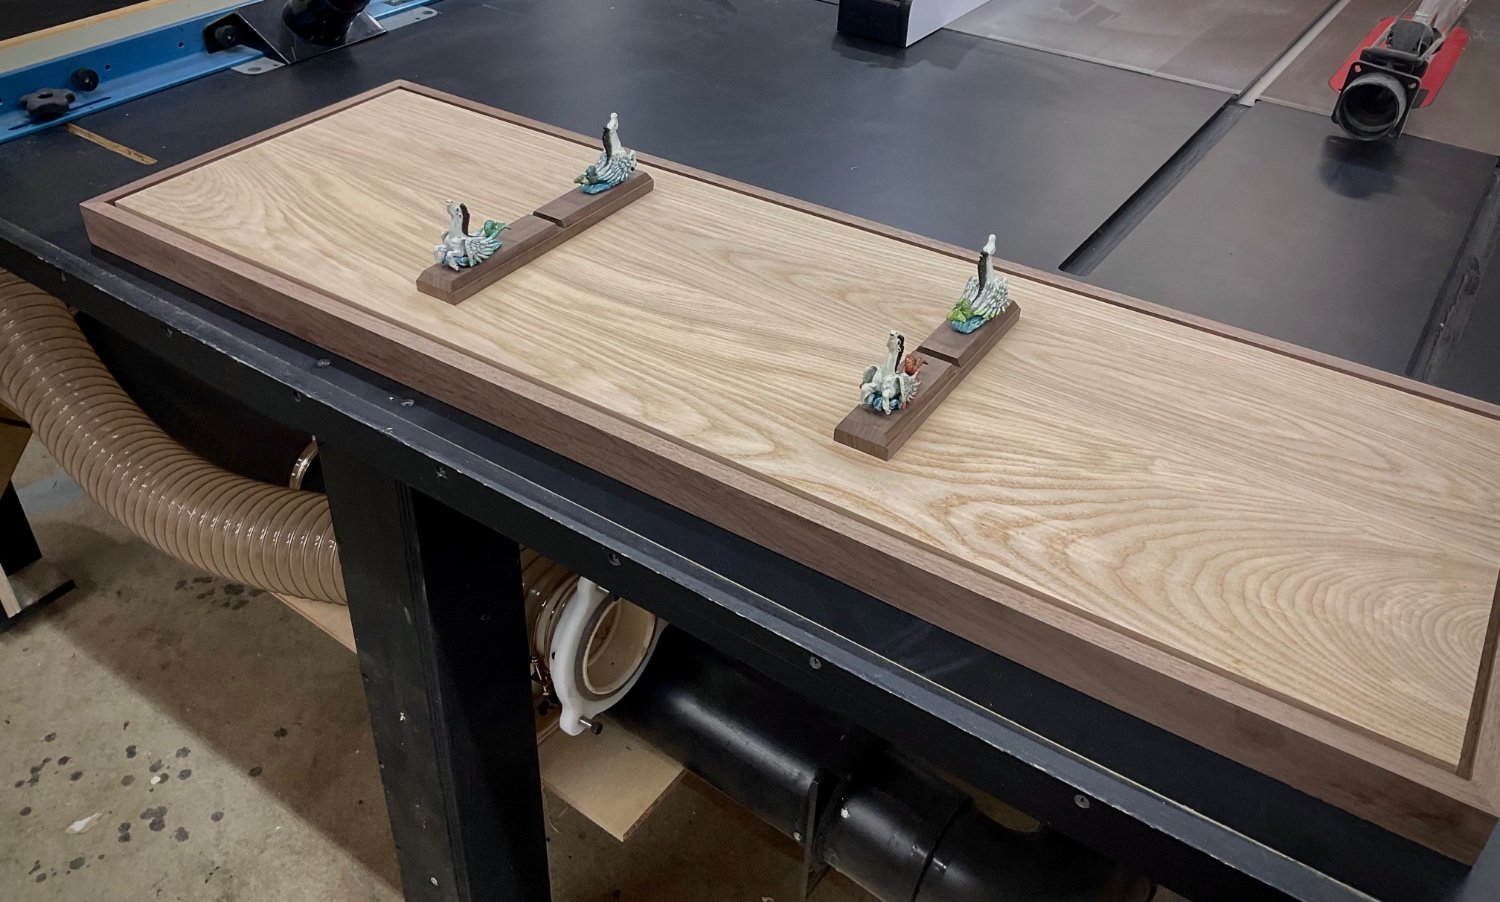
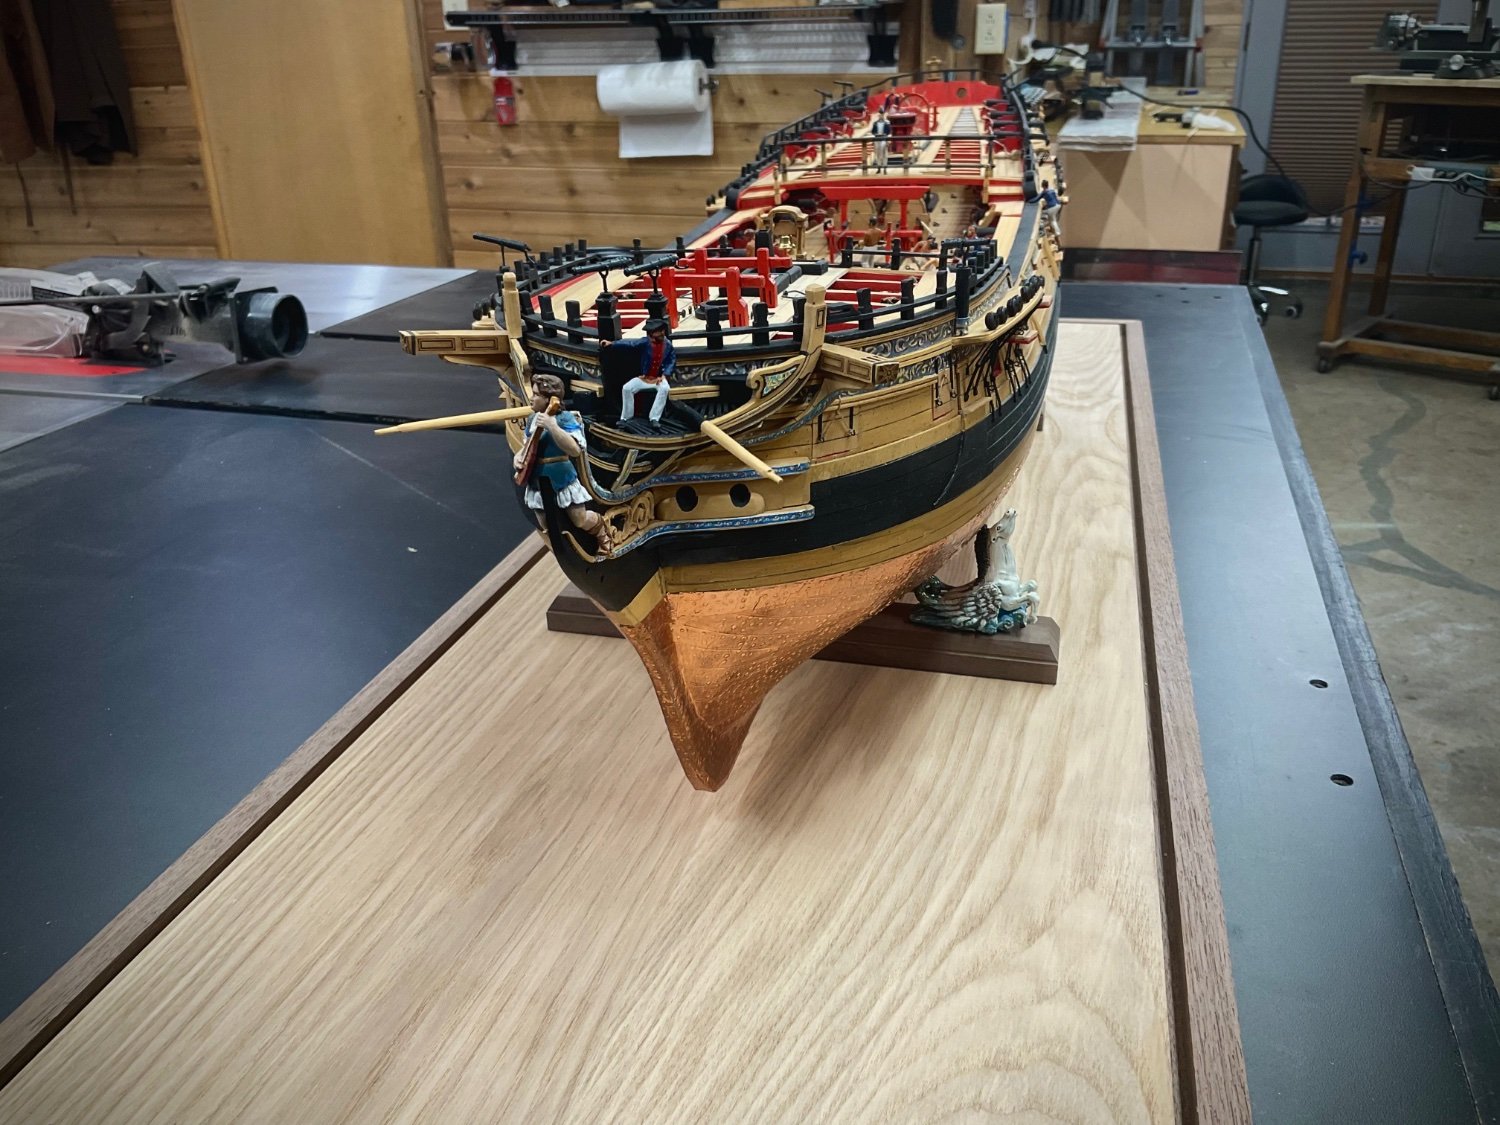
The case is finished with the Winnie installed. I think they really compliment each other. The Pegasus stands were inset using the Shaper Origin, as was the name engraving. The design of the case uprights were all my buddy Joe Kaare. He is a great wood craftsman. We have been designing and building my ship cases together for years. Here are some finishing photos


-
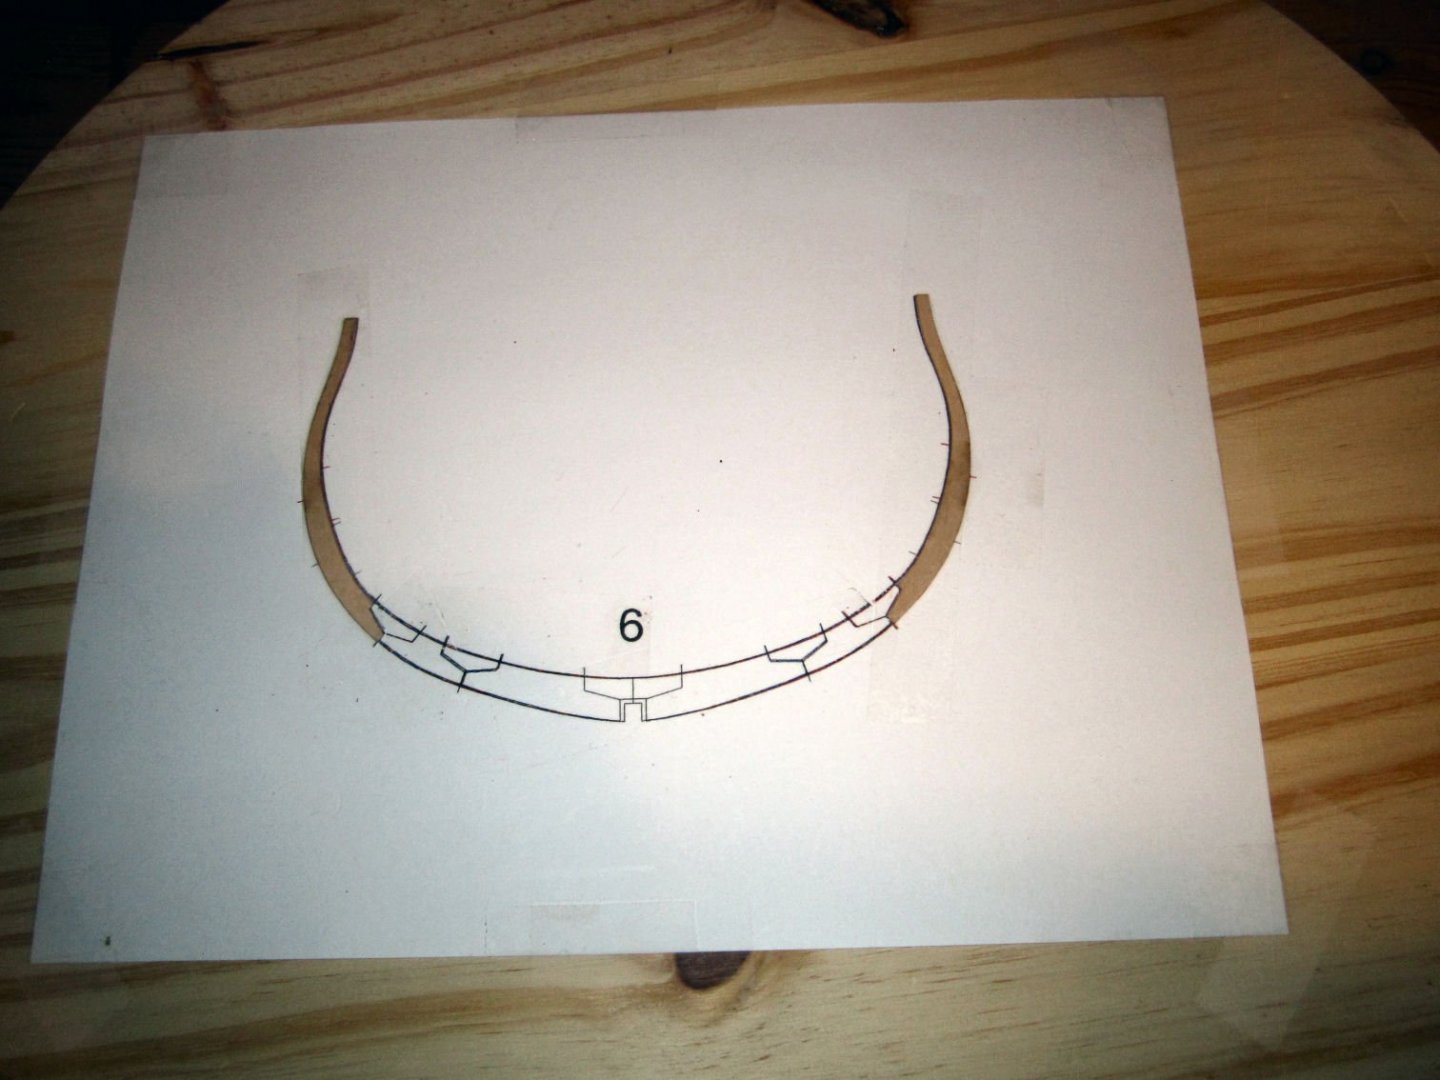
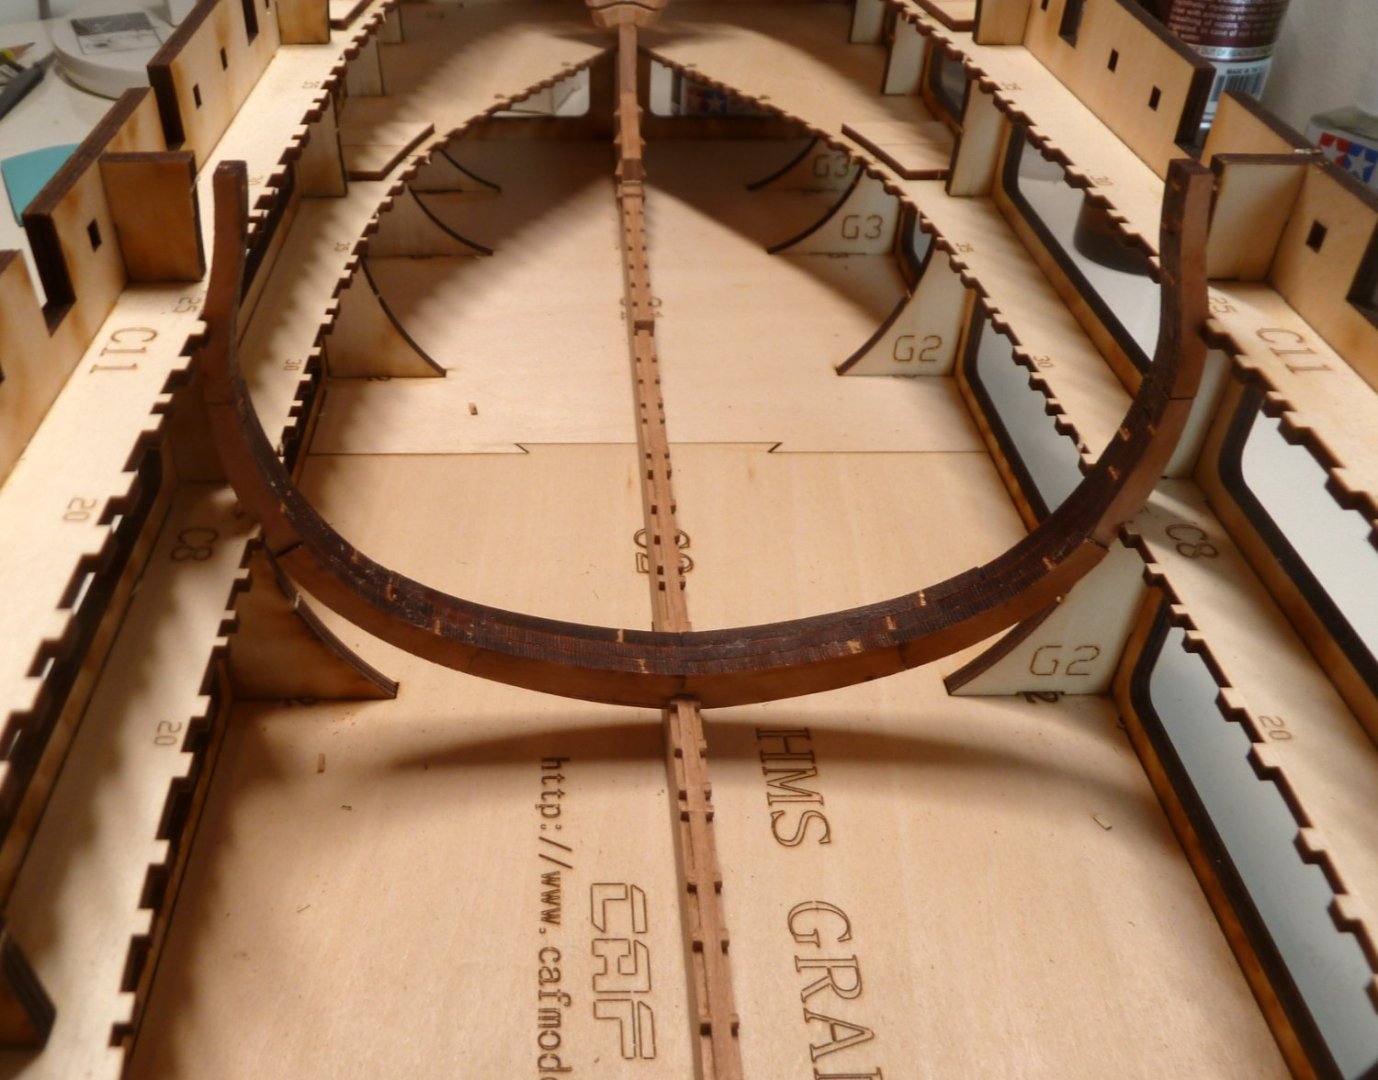
On 4/12/2023 at 3:29 PM, ir3 said:
Lessons learned. Build each frame over the plan to make sure it is not too wide. Fit the frame to the keel. Adjust the slots in the jig as needed to slide the frame in. After correcting frame 25 and widening the slots in the jig, the frame fits nicely. Forty plus frames to go.
And poof just like that new skill acquired. Good job! And as a great sailor once said ‘ Don’ t give up the ship’
- HardeeHarHar and mtaylor
-
2
-
-
19 minutes ago, Rustyj said:
On my my my. That is soooo small and soooo tempting. I'd really have to give it a go if it becomes available. The swear jar would get a hefty donation too!
I’d have to make an Autopay account to the swear jar.
- Rustyj, Ryland Craze, bdgiantman2 and 5 others
-
1
-
 7
7
-
-
In 1977 I was stationed on the USS Piedmont AD17 and we were in dry dock at the Todd Shipyard in Norfolk VA. They decided to refloat the ship on a Sunday afternoon using the duty section. I was sleeping down in the ASROC shop when one of my buddies comes running down screaming ‘Jim they just passed Abandon Ship’ I told him that was ‘ BS you don’t abandon ship in a dry dock’ and then I hear ‘All Hands Abandon Ship, this is not a drill ‘. HOLY CRAP. Off we dash up to the main deck. Then over the 1MC, ‘All Hands belay our last. All hands move to Starboard side Main Deck and remain until further instruction’….
What had happened was they had removed all the machines from the starboard side of the machine shop and left all the matching machines on the port side. These were some giant lathes and presses that could be used to machine Battleship engine parts and they weighed tons. They had not compensated for the weight loss and as soon as the ship started floating He, yes HE Doc Piedmont the only He ship in the Navy, started rolling Port and slipping off the blocks. Quite the list, they used the crew as a counter balance until we could be dry docked again on the blocks. They mustered the relief duty section early so we could have breaks. Took several hours to get corrected.
- thibaultron, mtaylor, Roger Pellett and 3 others
-
4
-
 2
2
-
Tune is Summertime by Louis Armstrong
Summertime
And ship building is easy
Speedwell Frames are jumpin'
And the jig, the jig is high
Oh, your Speedy’s rich
And she's good lookin'
The Winnie is now done little baby
But Don't you cry
One of these mornings
We gonna rise up singing
We gonna spread our wings
Cause Chuck is cuttin Cedar and we can take to the sky
-
Or use this product. Sorry for the upside down picture.

- thibaultron and mtaylor
-
2
-
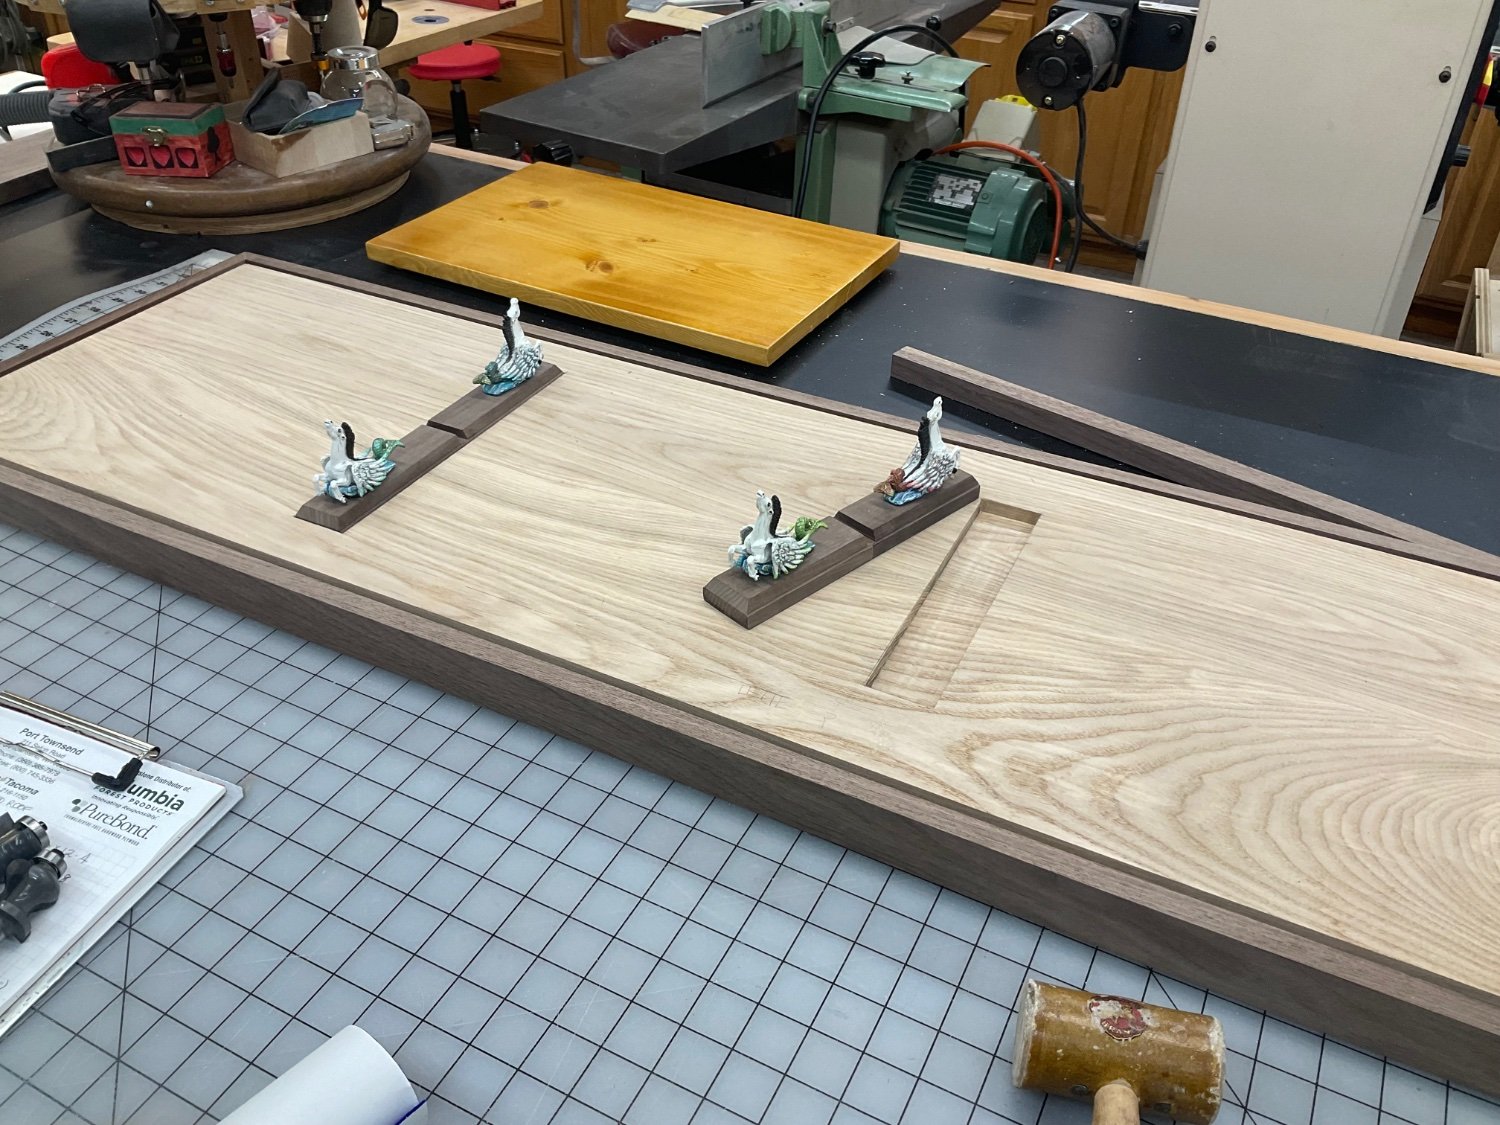
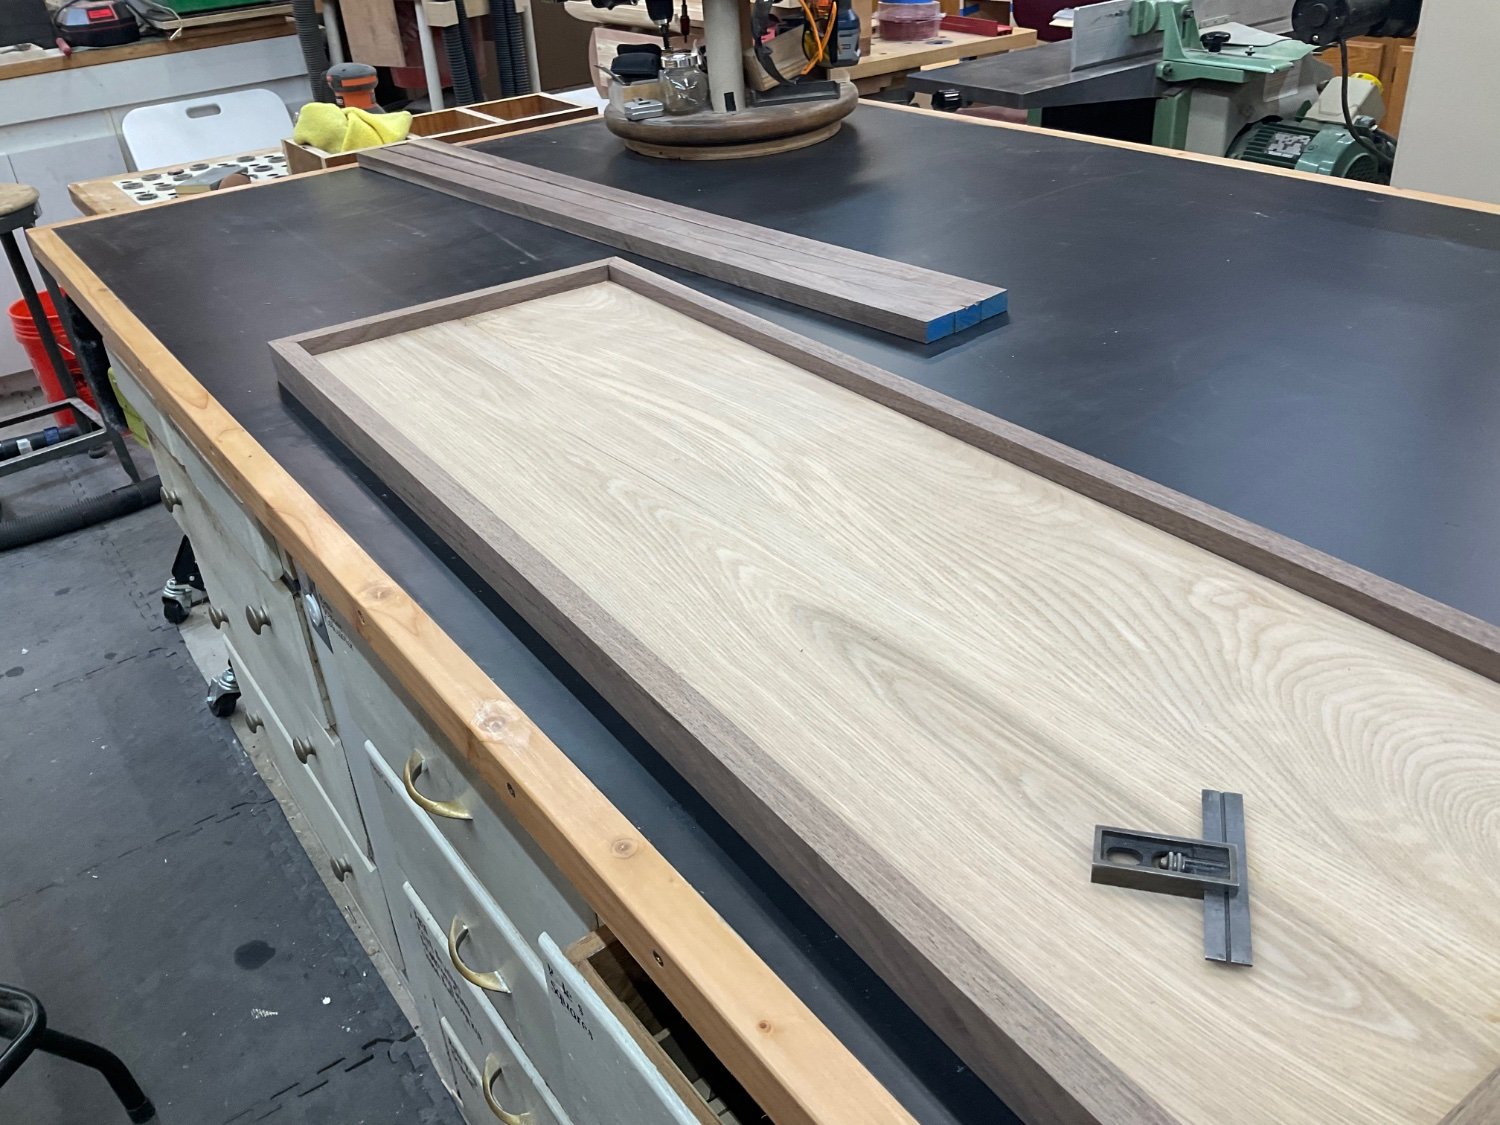
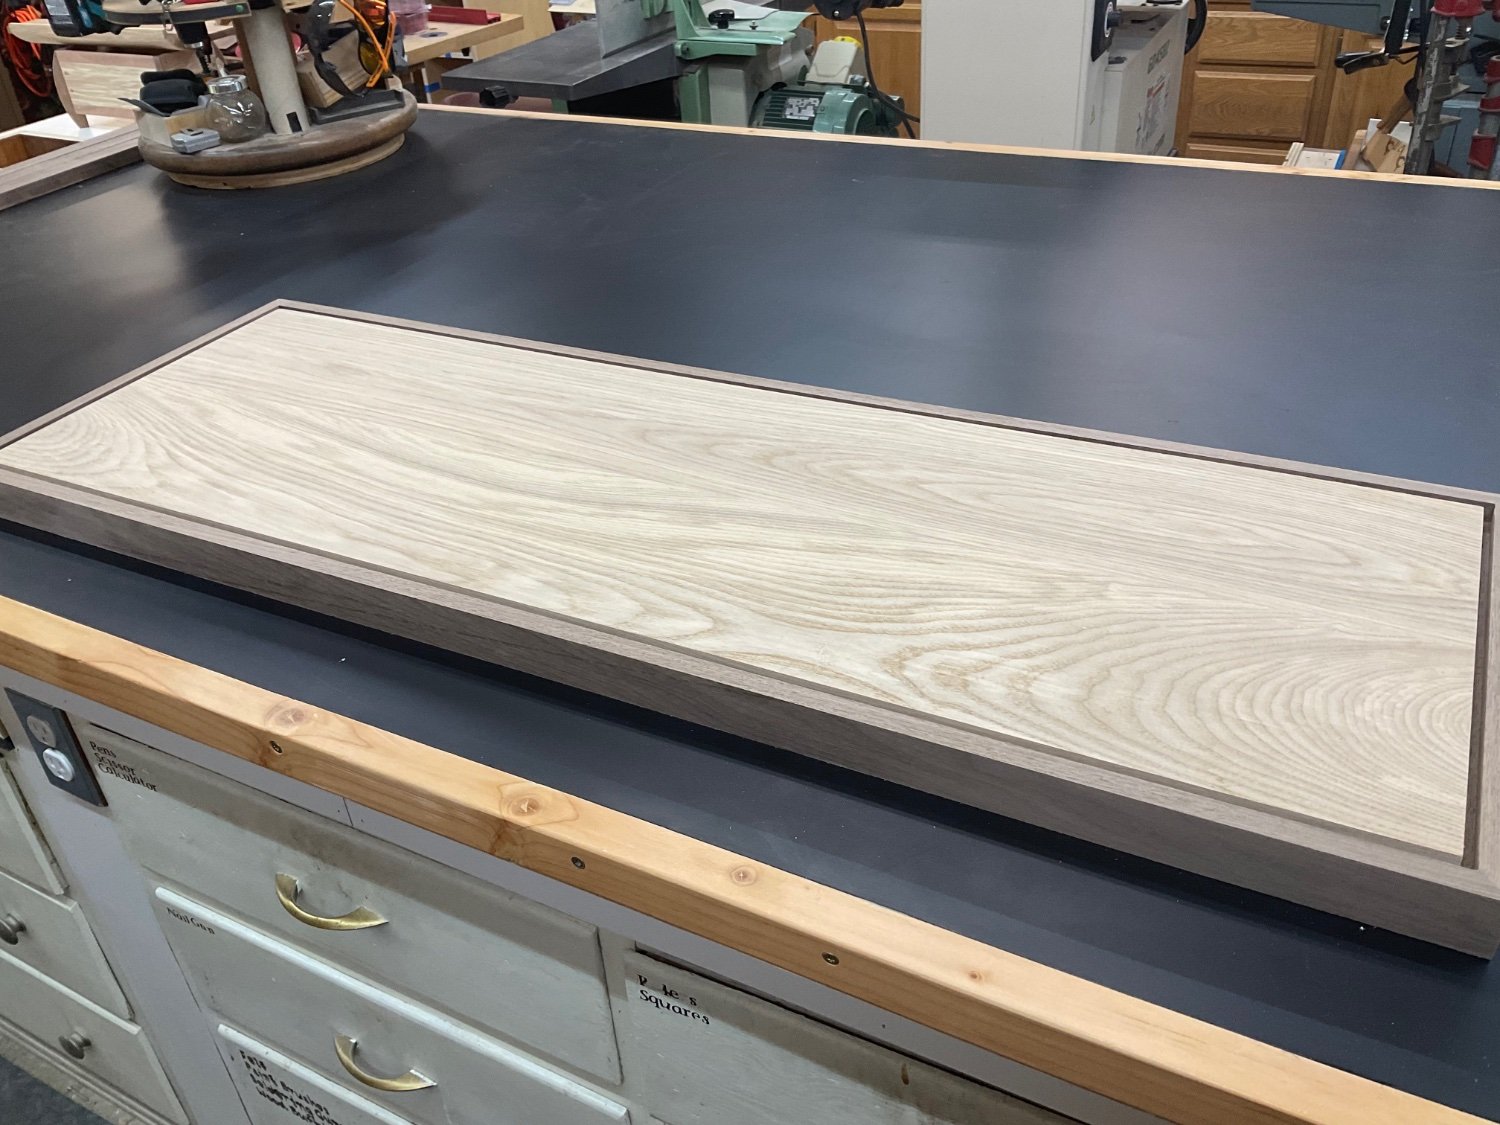
I got a little further on the case. The base is assembled. Ended up being 42 x 14. White ash with black walnut trim. Acrylic will fit down in the 1/4 x 1/2 groove and be pinned in place with maple dowels. The Pegasus stands will be sunk down 3/8 to lock them in place.


- Edwardkenway, Chuck, Ryland Craze and 12 others
-
11
-
4
-
3 hours ago, allanyed said:
Jim
What vessel? The size of the panels, seams, reinforcing pieces, and more are available depending on what vessel.
Allan
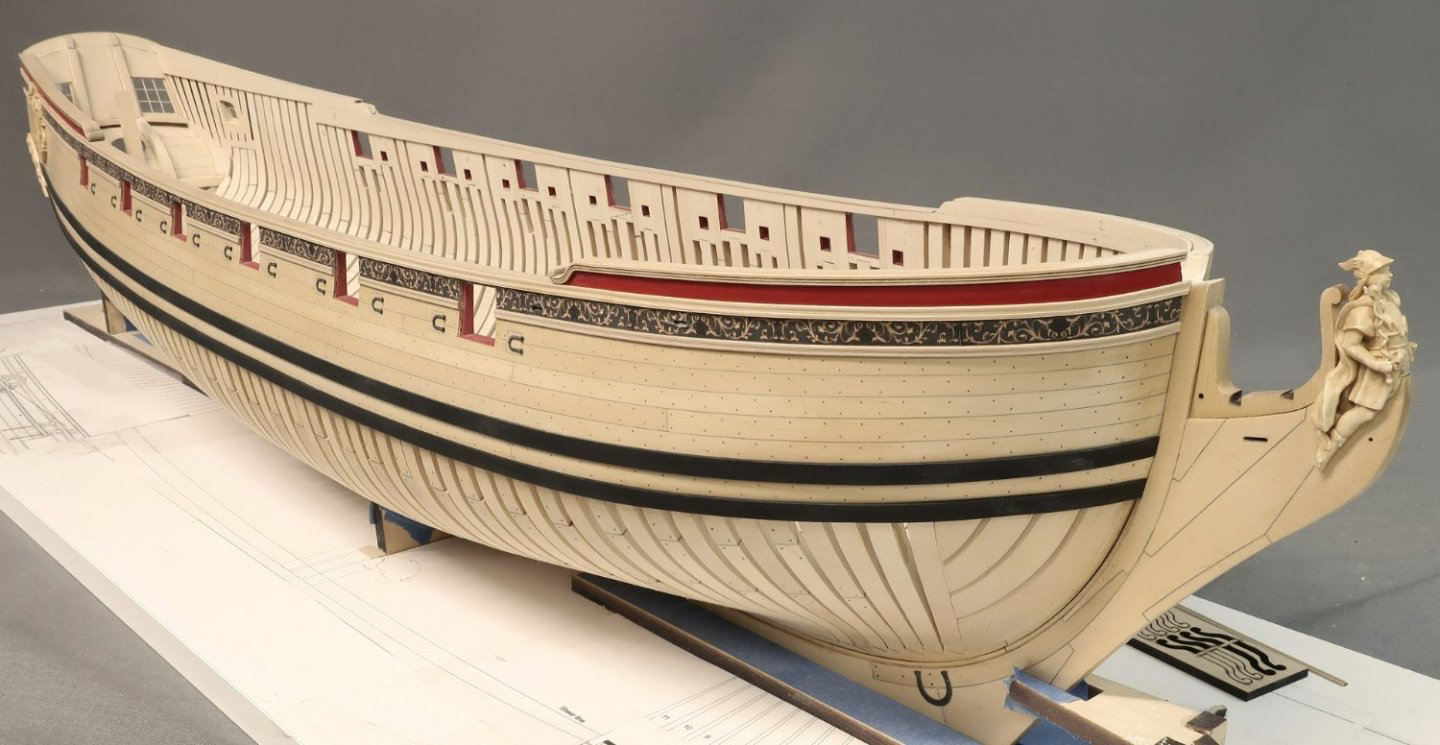
ModelExpo American Privateer.
- thibaultron and mtaylor
-
2


Syren Ship Model Company News, Updates and Info.....(part 2)
in Traders, Dealers, Buying or Selling anything? - Discuss New Products and Ship Model Goodies here as well!!
Posted
When will the eight hear something ?