Schrader
-
Posts
304 -
Joined
-
Last visited
Content Type
Profiles
Forums
Gallery
Events
Posts posted by Schrader
-
-
Steven
your level has served to me as inspiration and motivation to try to take my models to the next level
congratulations!!!!
and now what is next?
GOOD JOB!!!
- mtaylor and Keith Black
-
 2
2
-
-
-
Hello all......
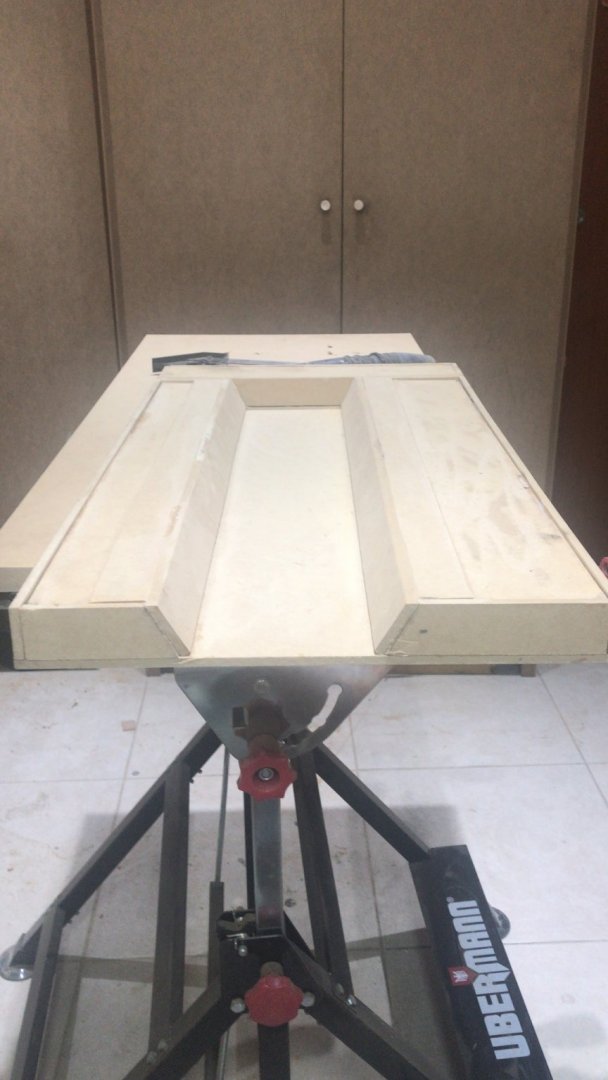
I already brought the diorama Base......
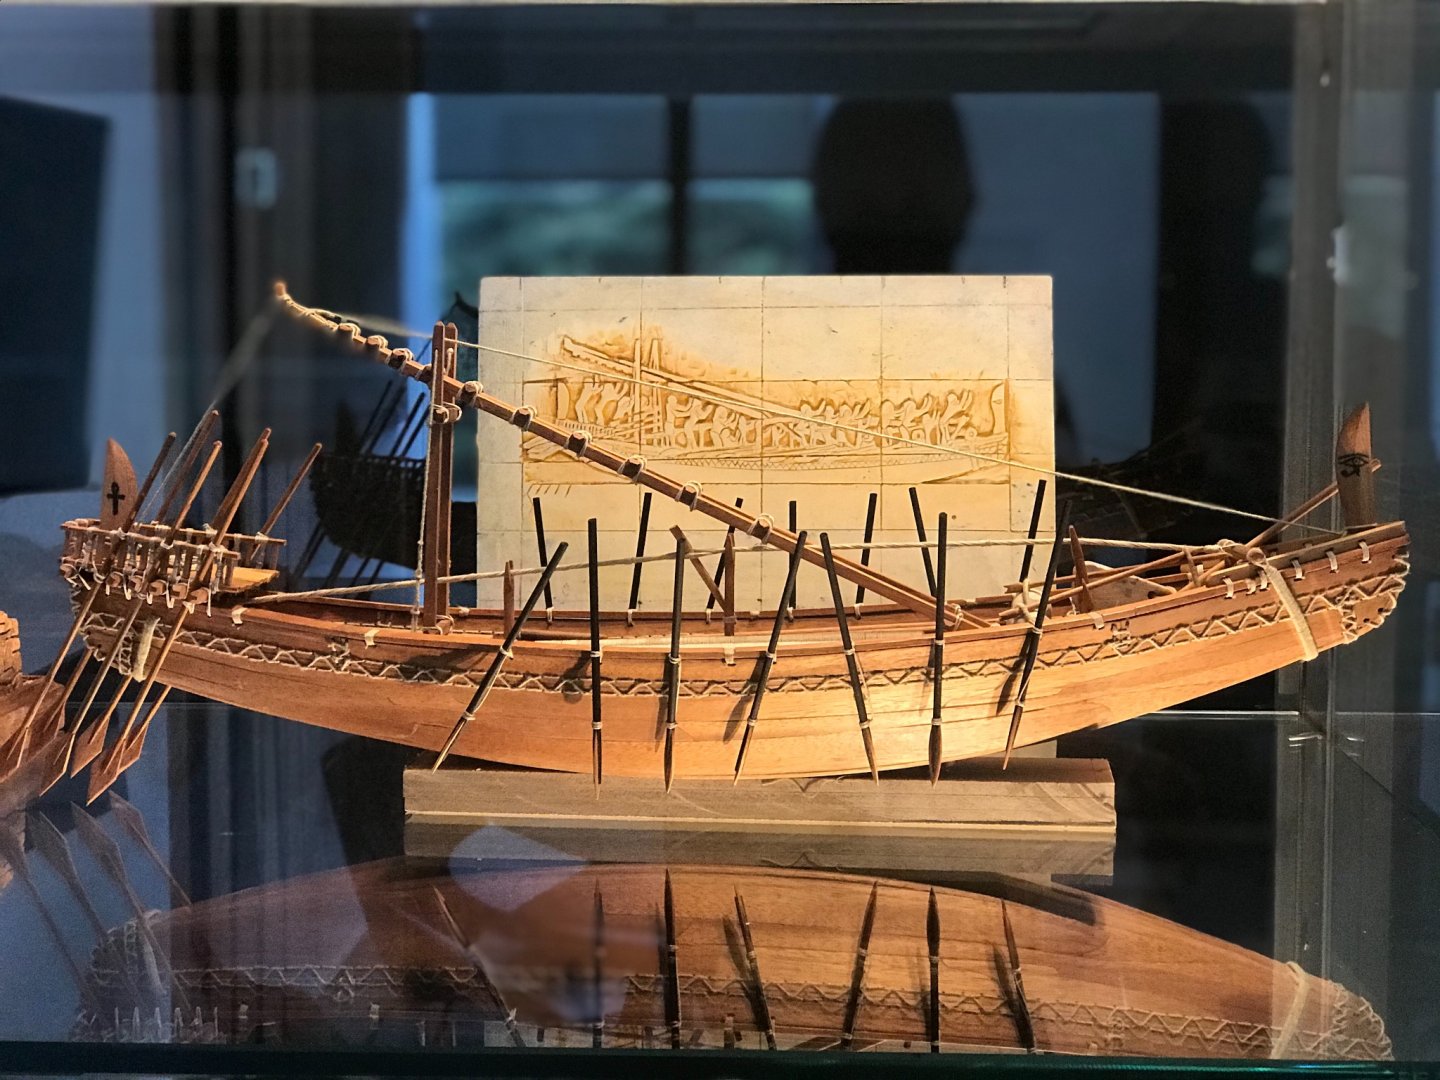
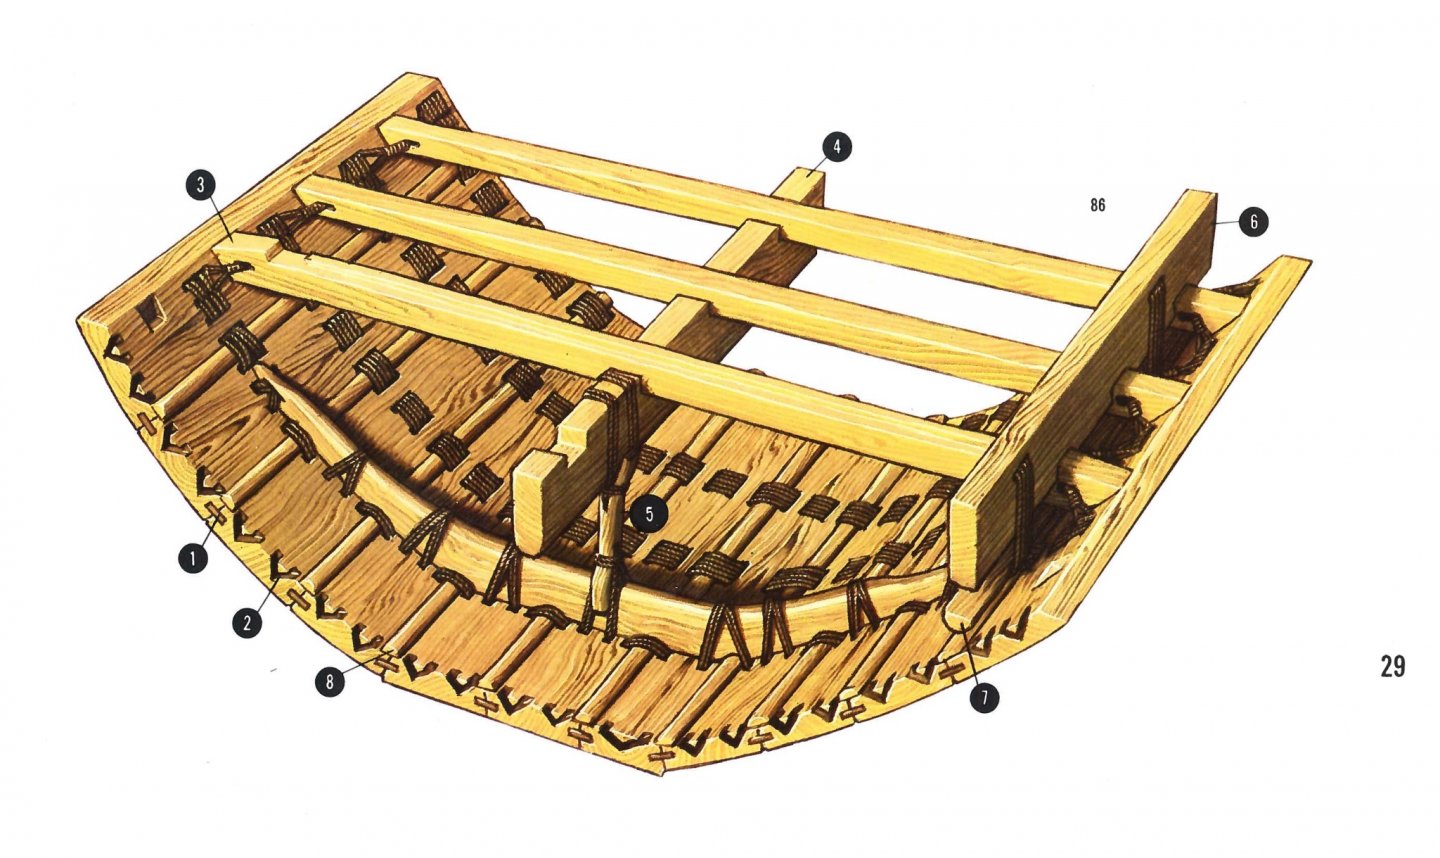
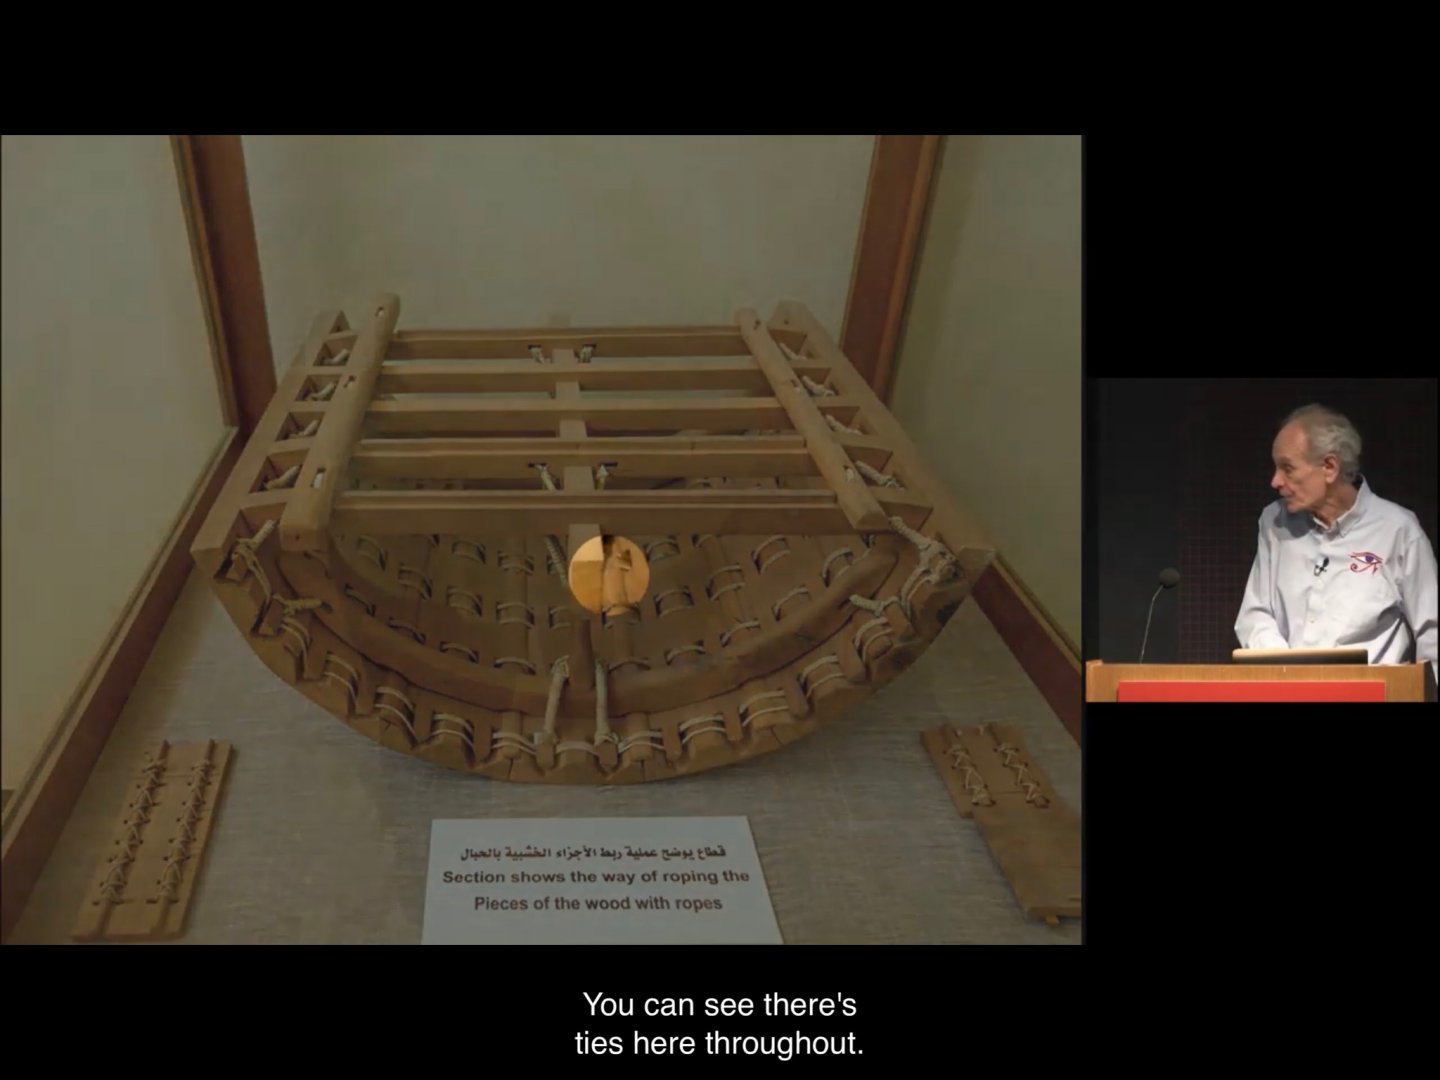
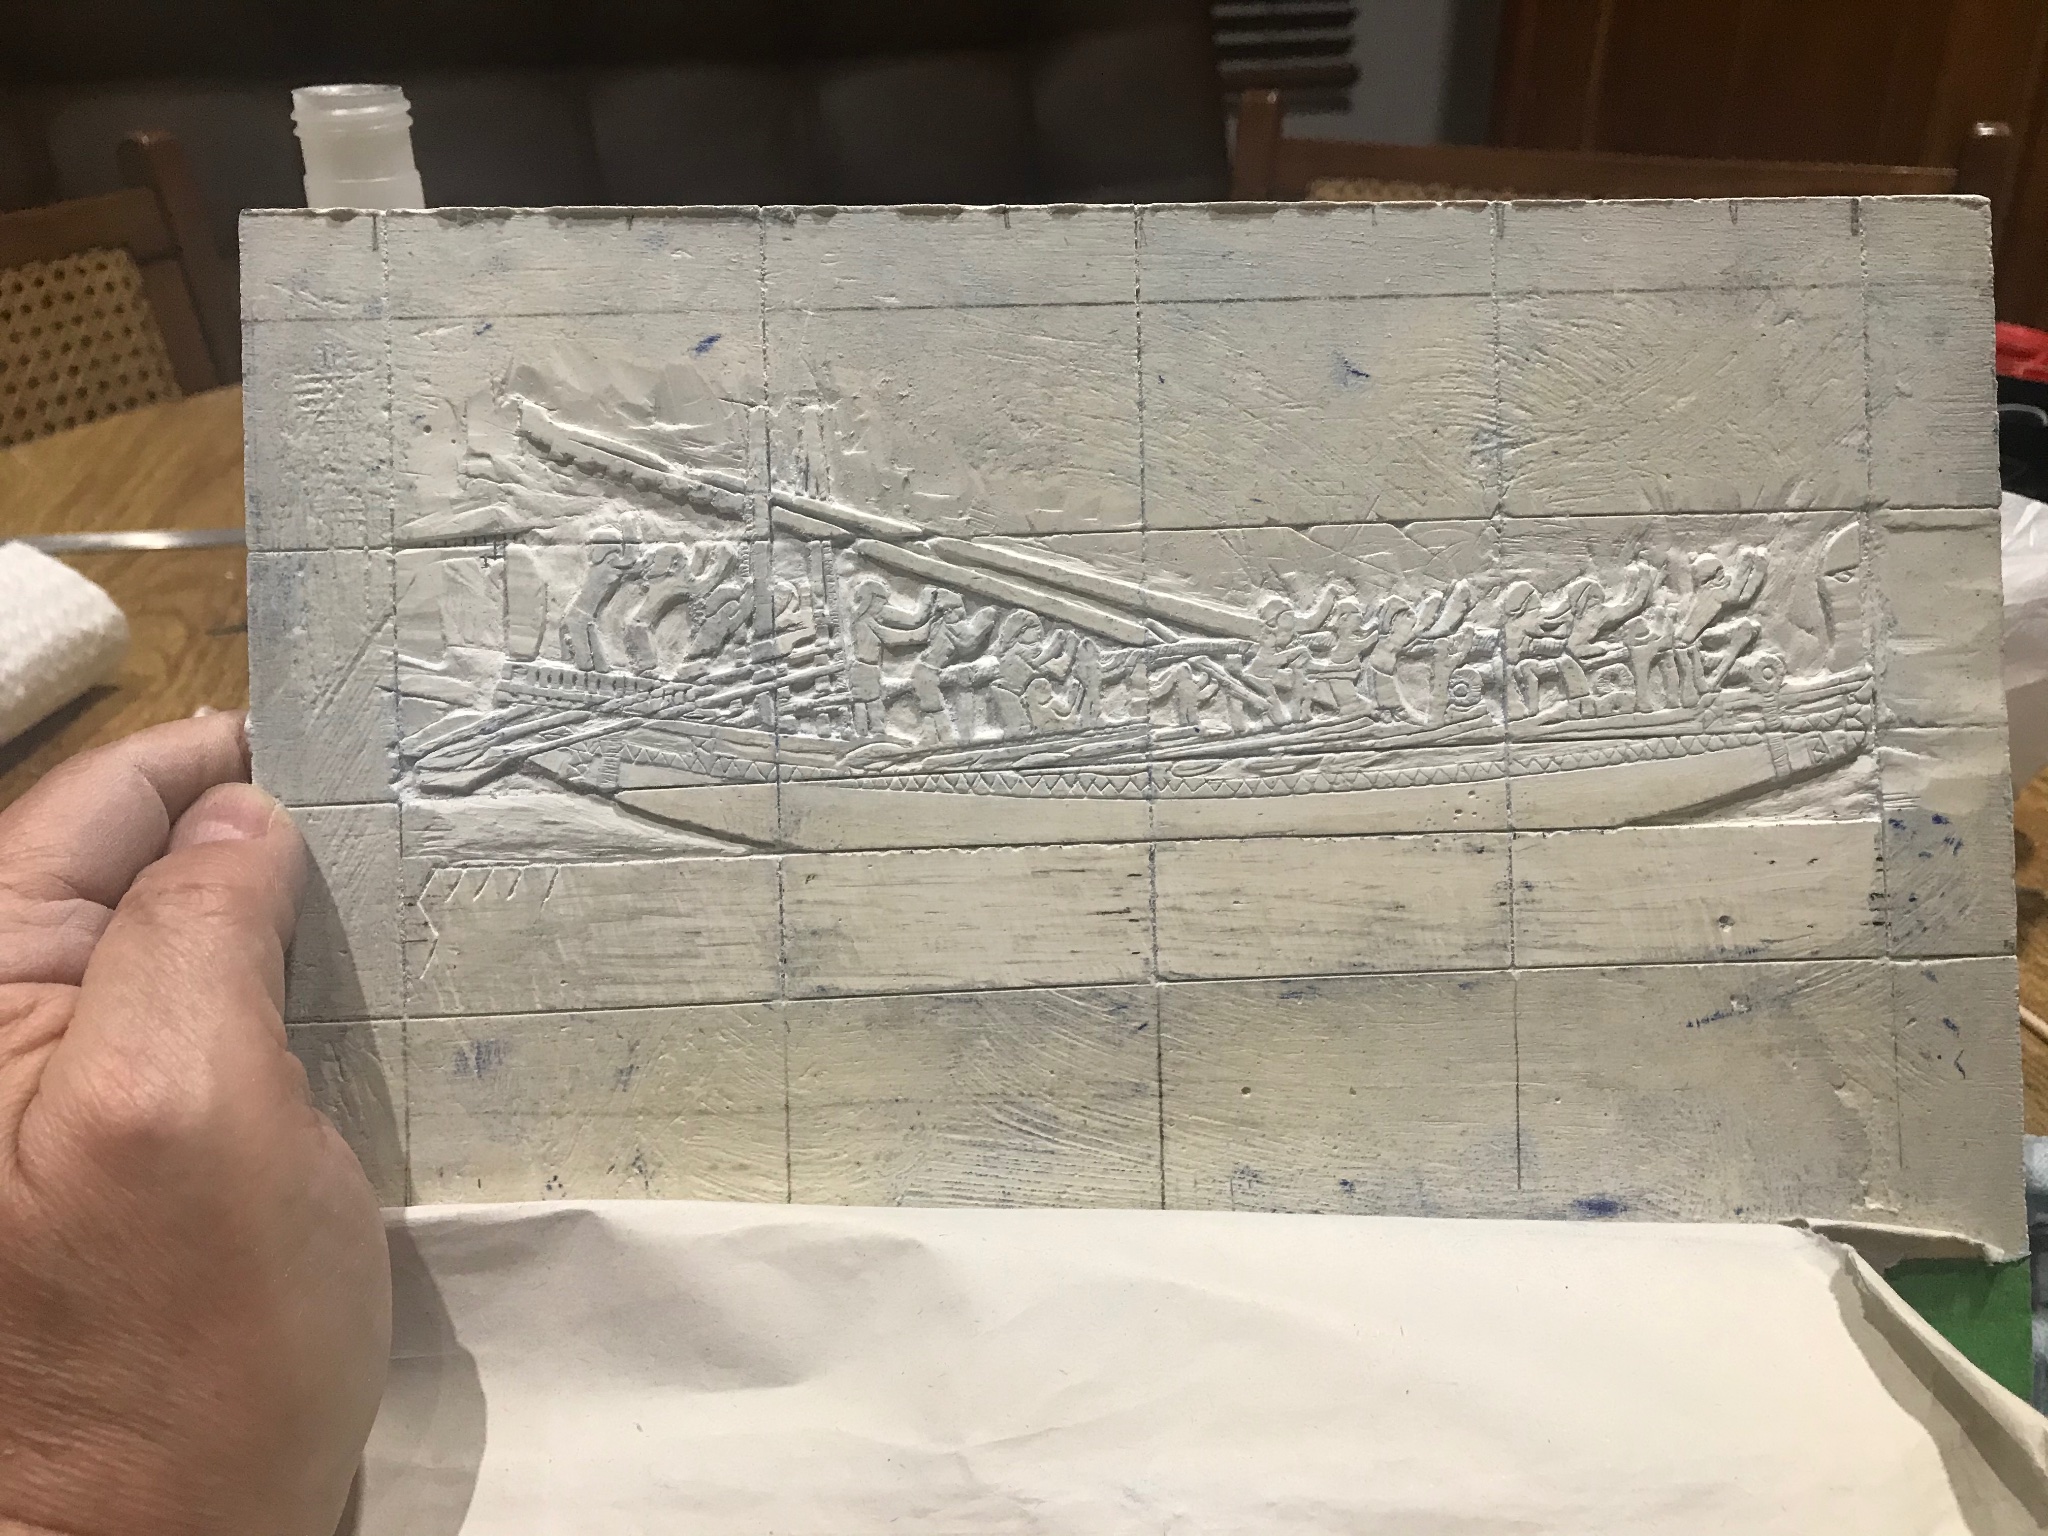
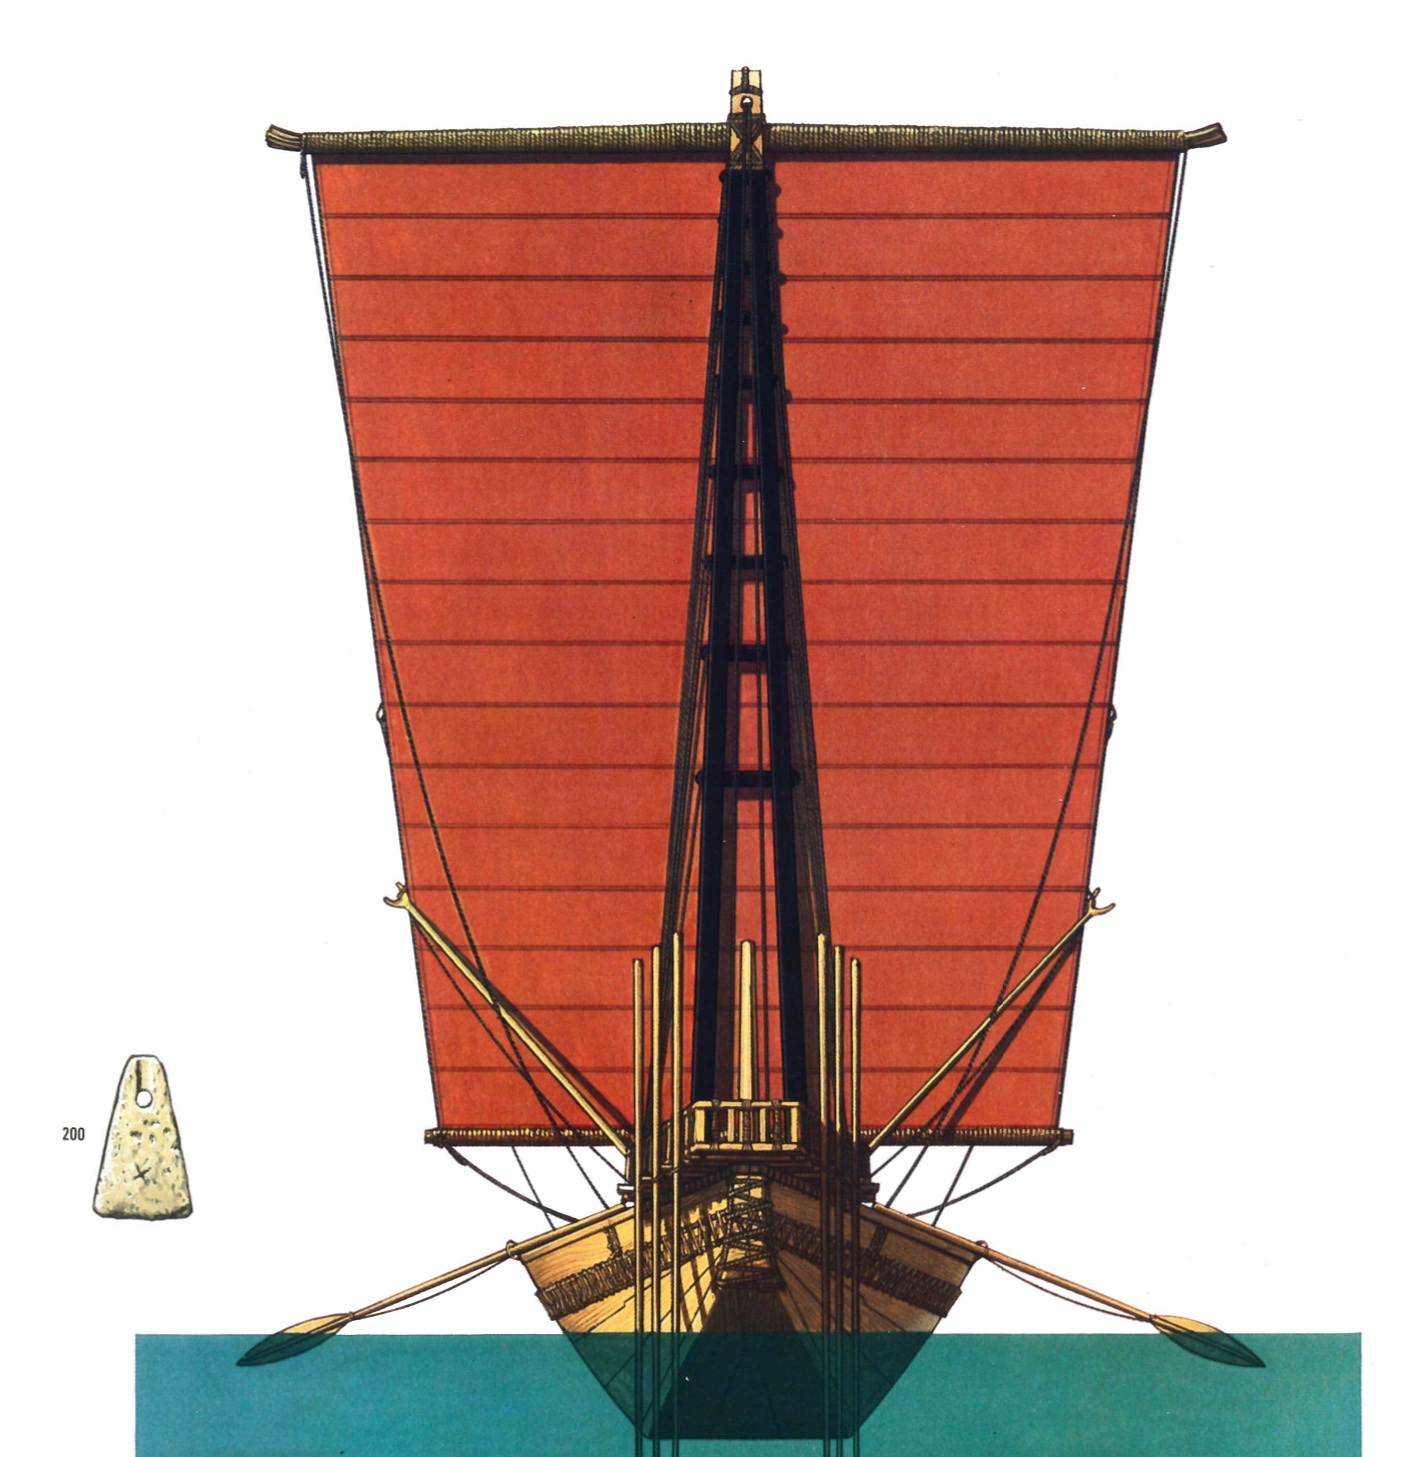
The idea is to build a dry dock “simulation...... and in the back side I’ll build a “wall” simulating the Sahure King tomb (. Let’s remember that the “Byblos ship pictures were found in his tomb).....
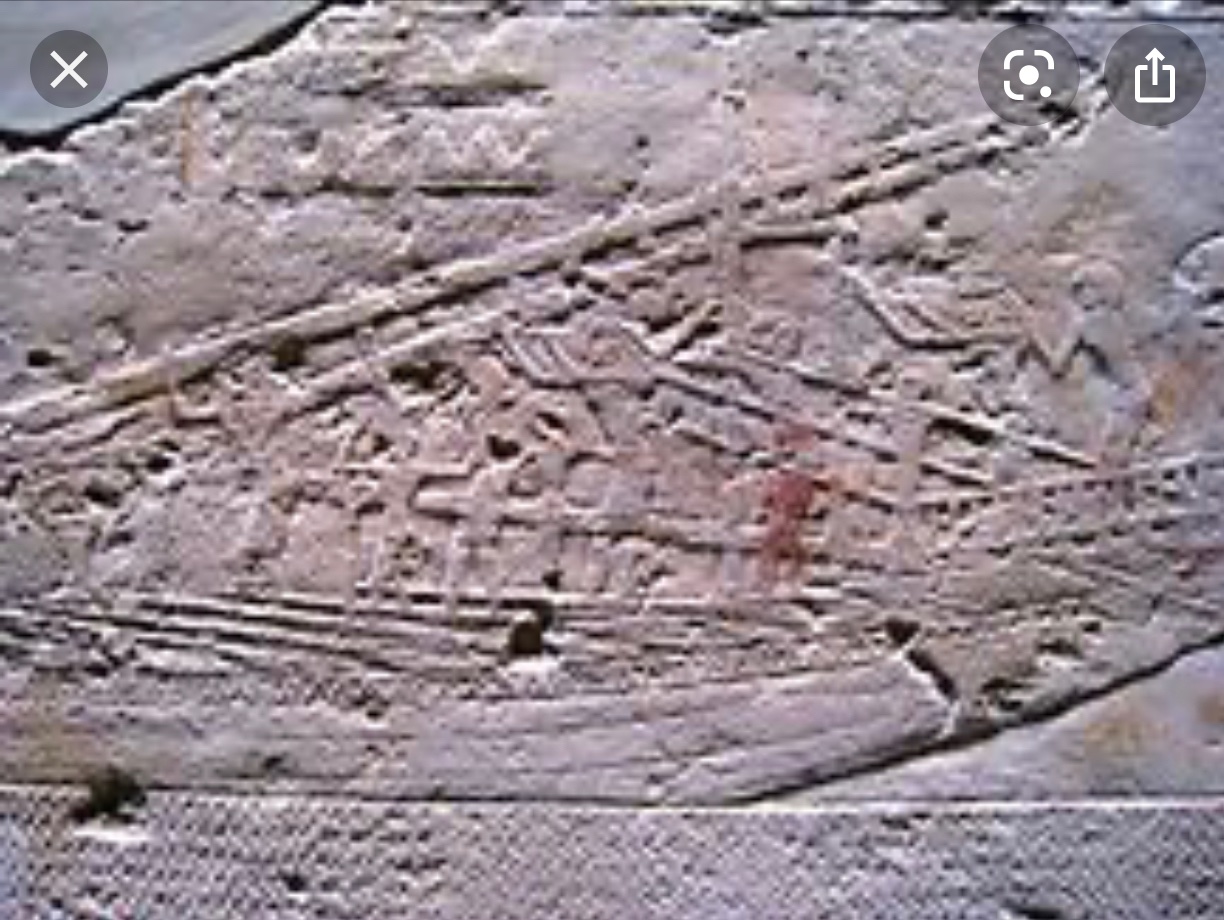
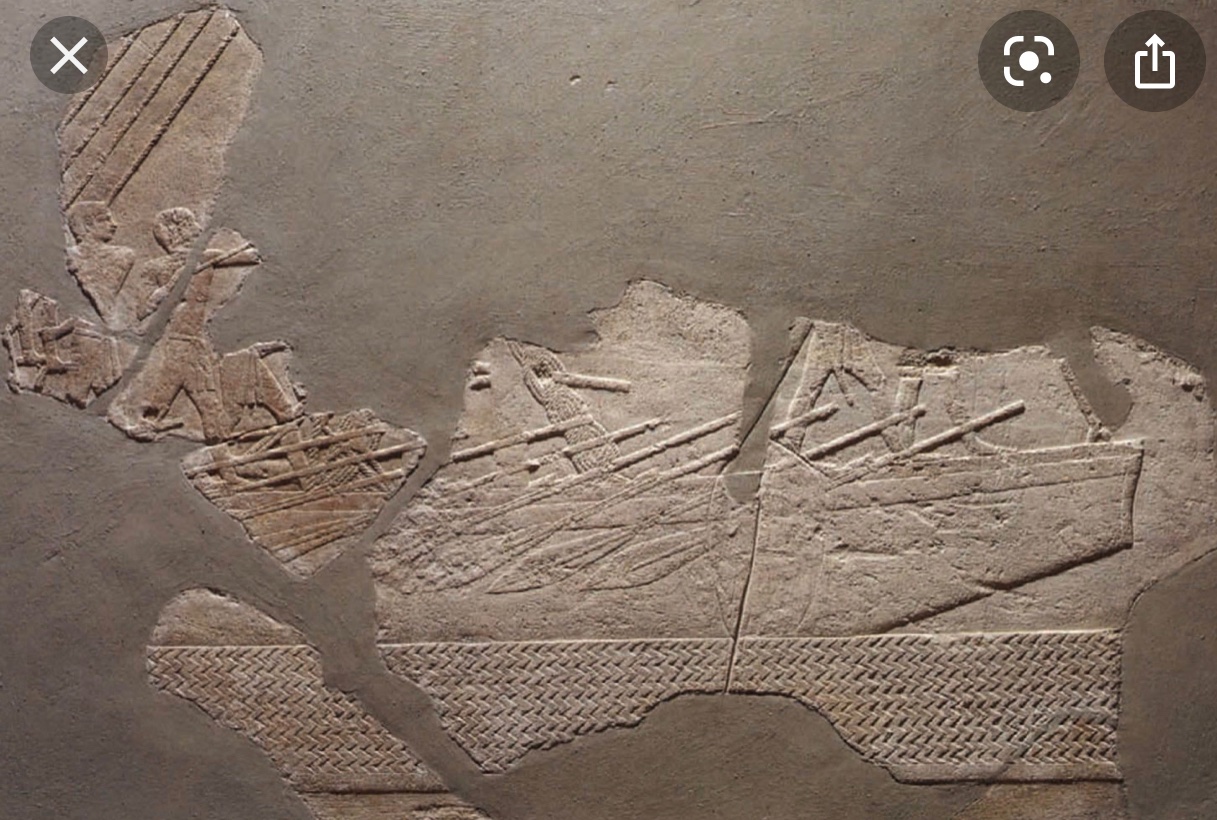
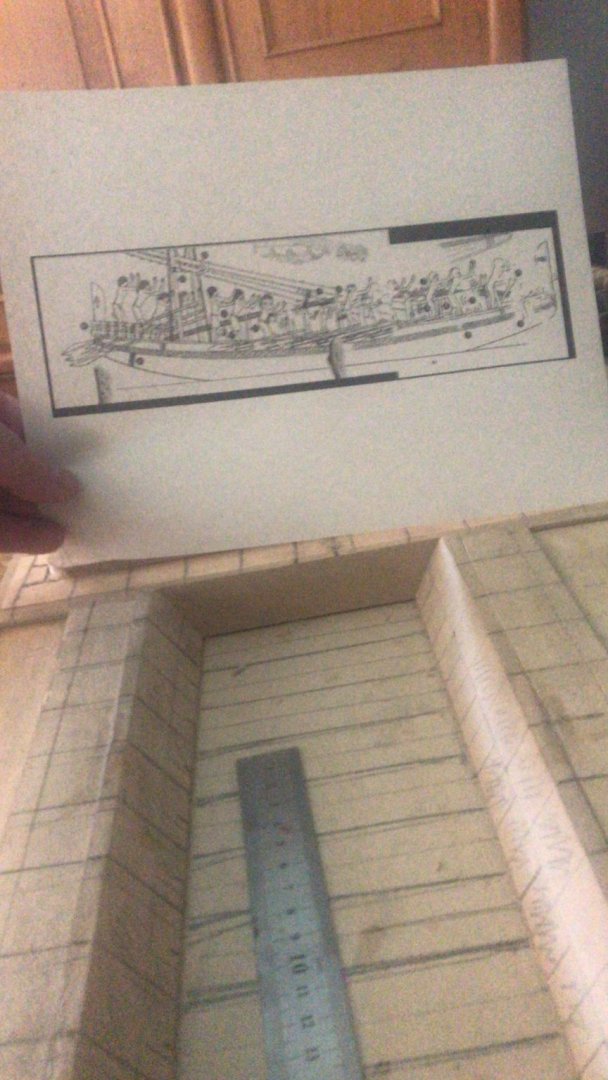
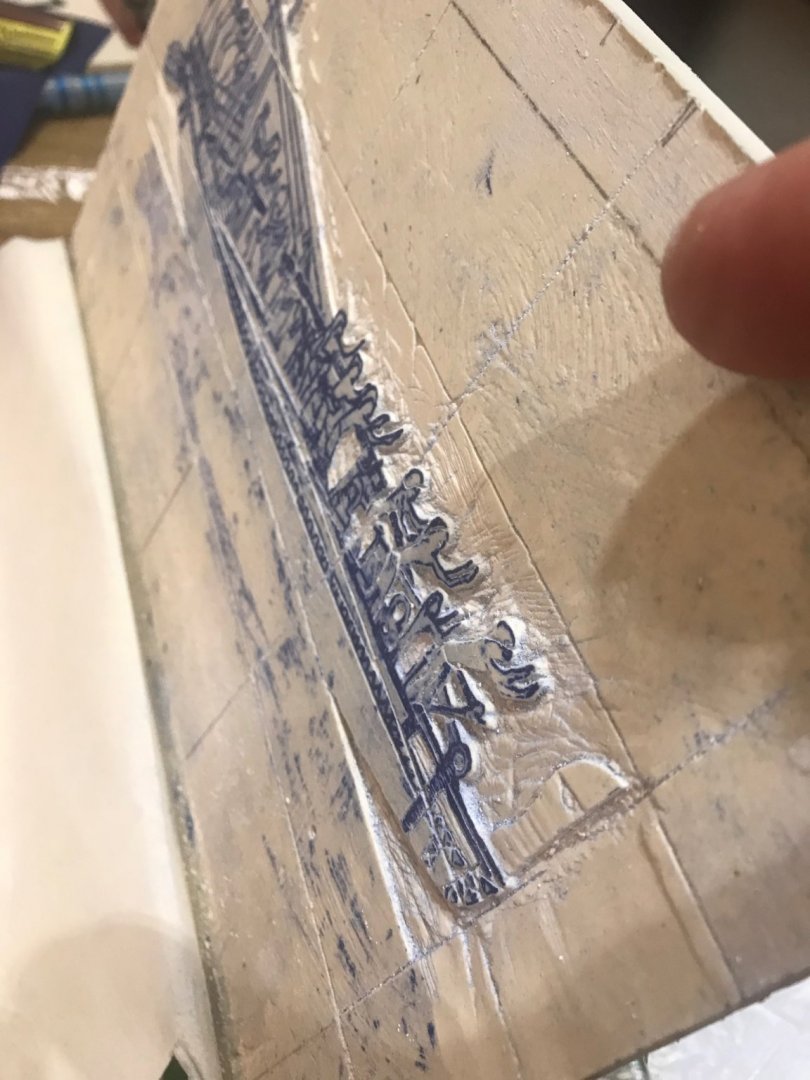
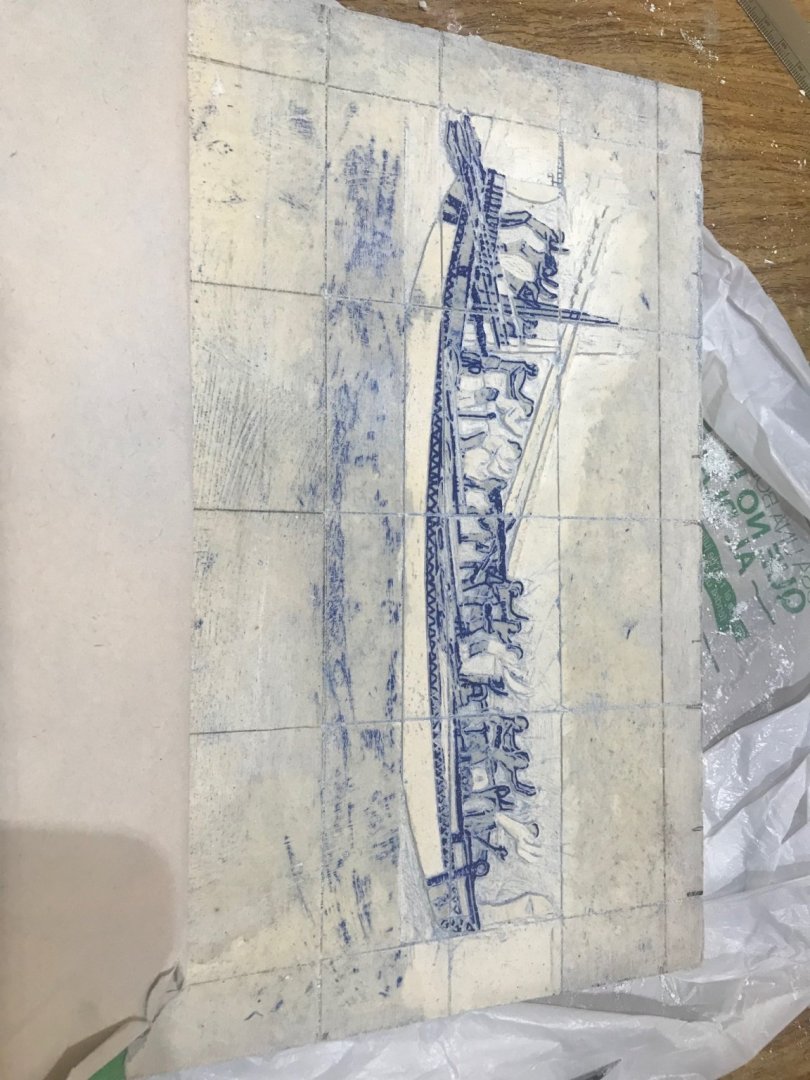
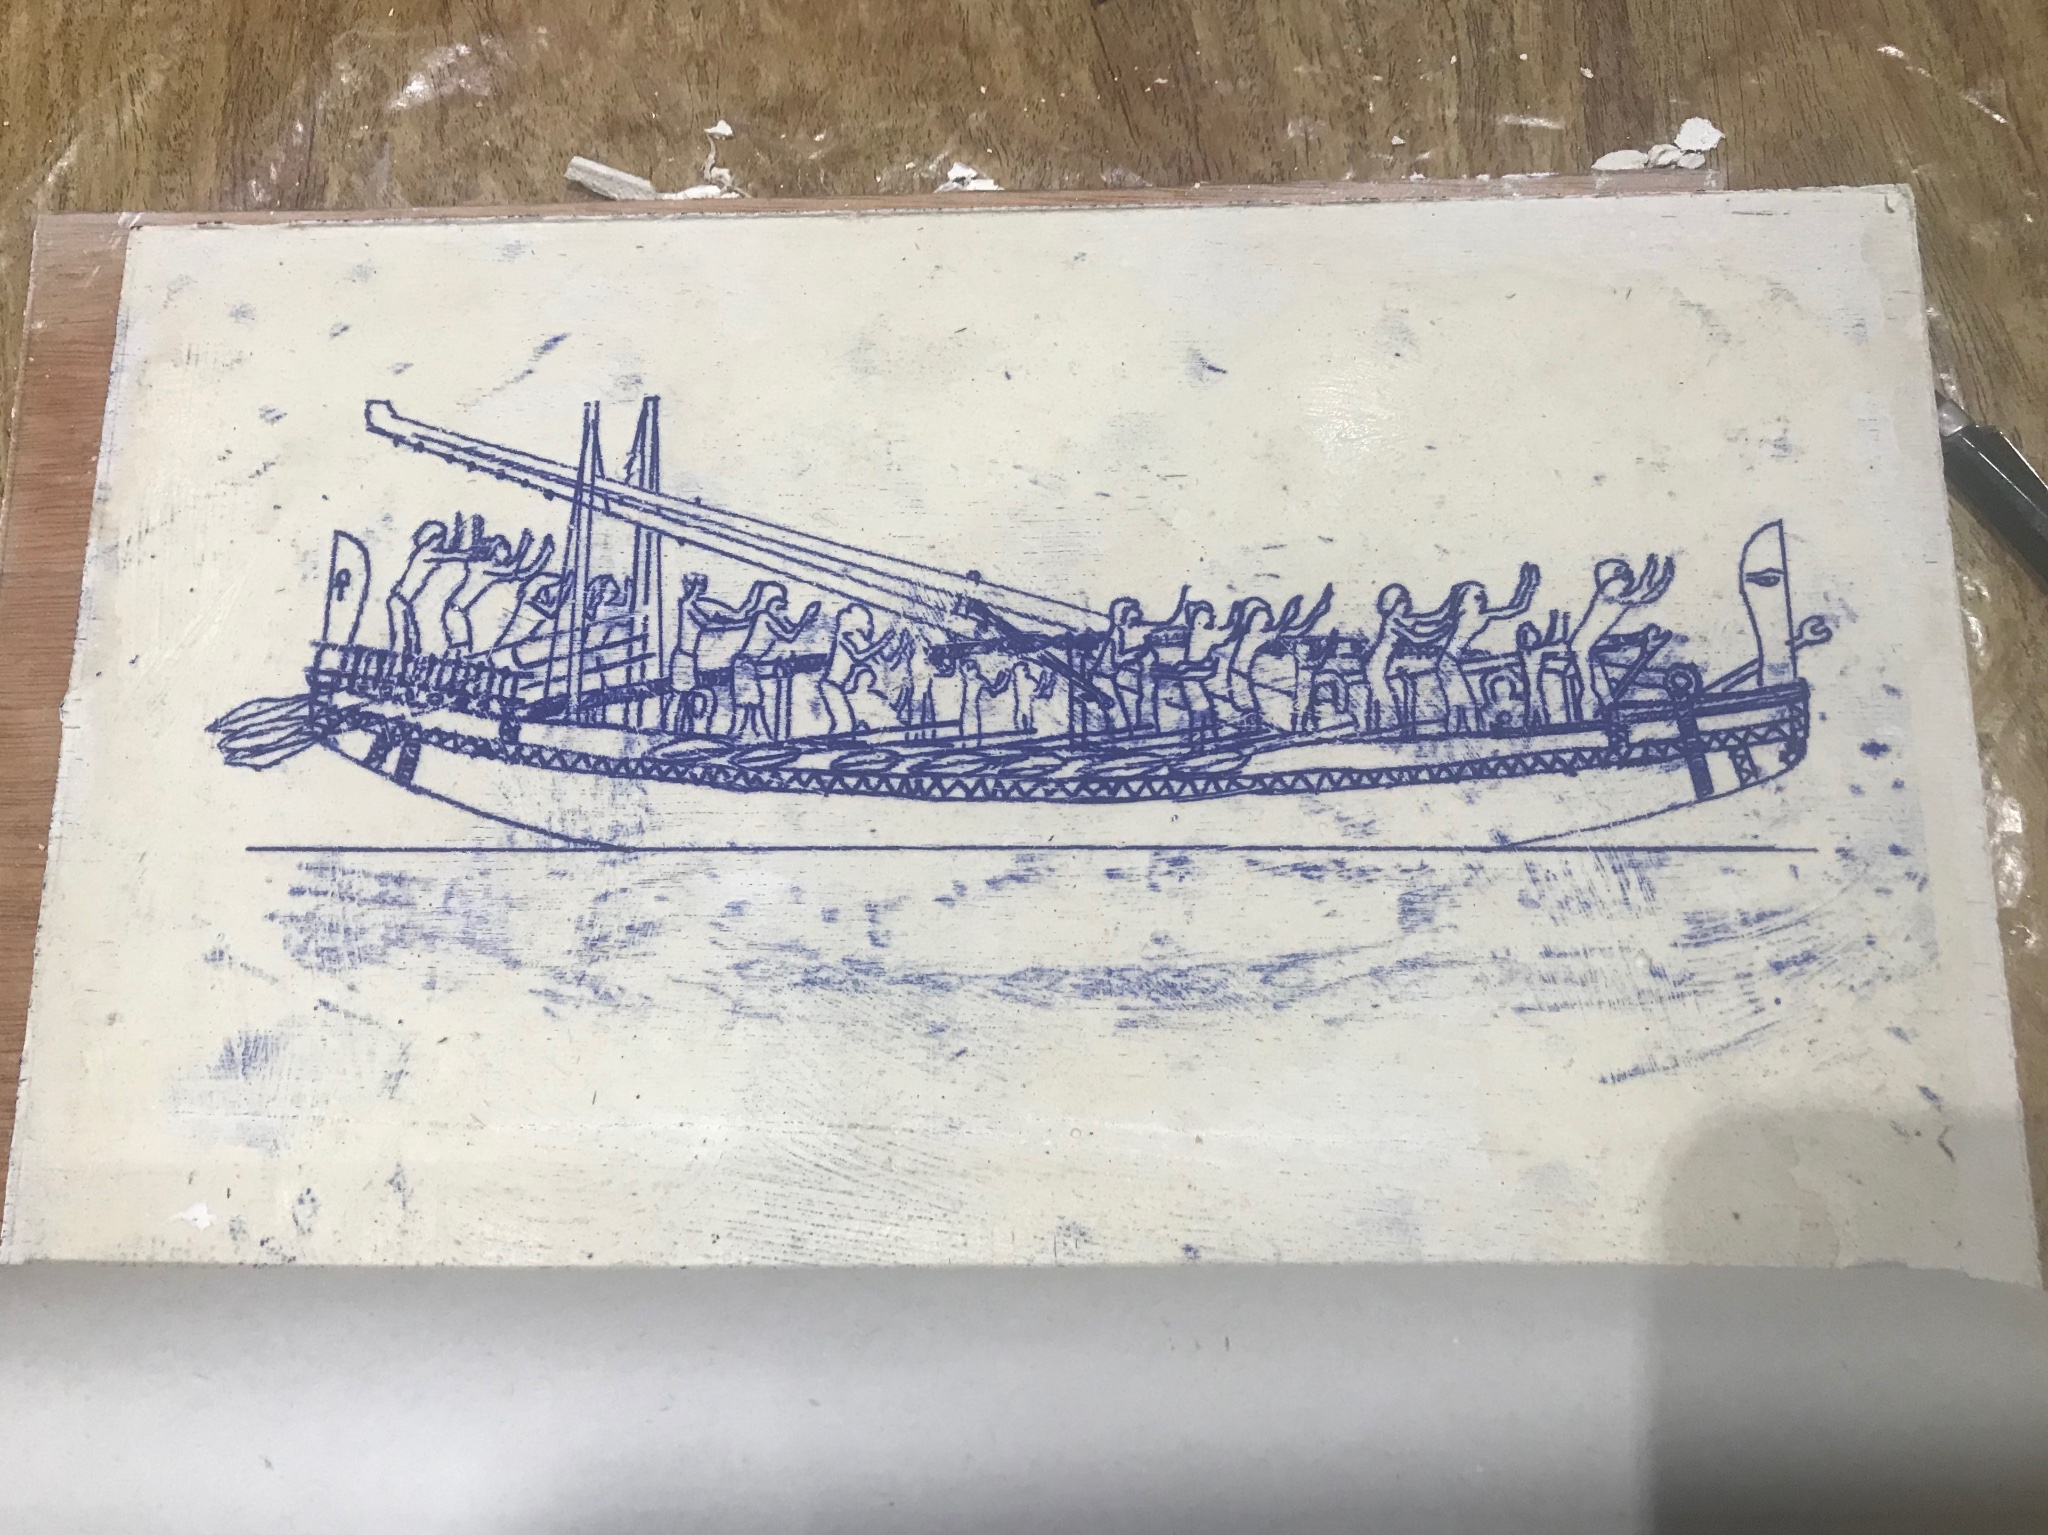
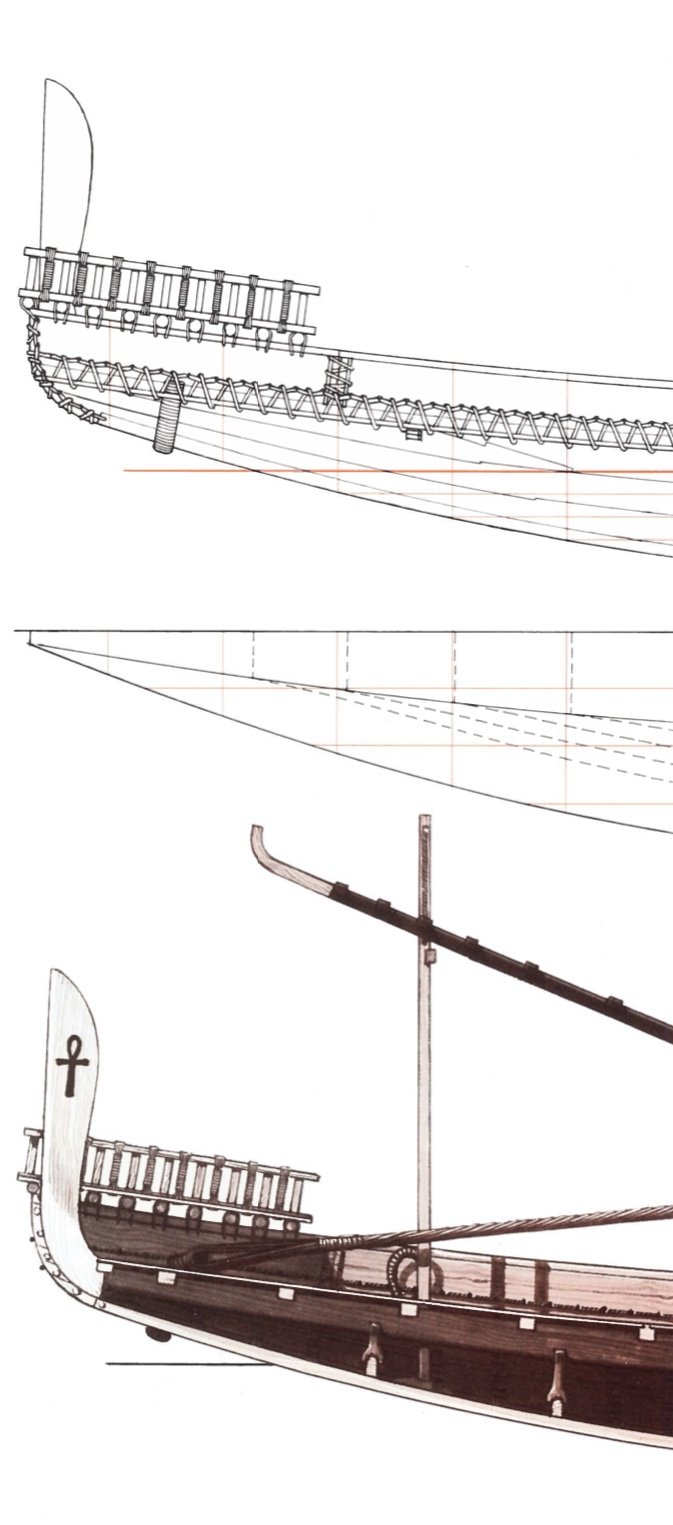
Well...... I went to the “odonthology” method.... and using the PLASTER CASTING material I created the “wall”..... but first I took the drawing from Landstrom book, imported to Autocad and created a full picture with 25 cm long....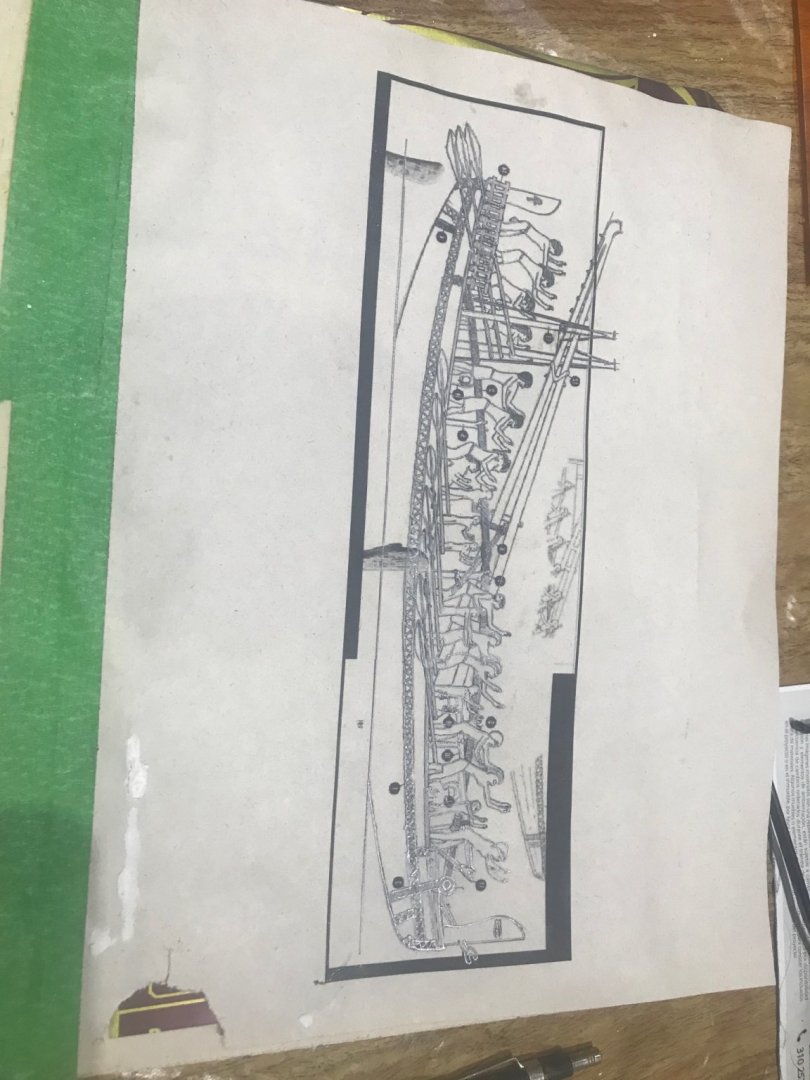
Then I put it over the “wall” and with carbon paper I reproduced the image over it.....

Created the “stones”.....

And started to carving all these “details”.....

It is going to be a long way before it is finished....
-
Thanks a lot to you all. Your comments an your likes always motivate me to start and most important “to finish”. I’ve seen a lot of unfinished projects in different scenarios, which is really sad.
with all this positive comments you all make me blush.
Next I have several alternatives but looking for
1. finally to have “my viking” where with the help of this forum, there are enough research and documentation.
2. a Quanzhou Ship. Which is a first century Chinese Junk. Where there is not that much information (pretty less that the Egyptian one)
BUT FIRST.... finishing the “diorama” where the idea is not to build a very complex one but a real Egyptian surroundings.
again. Thanks a lot!!
- tarbrush, bigpetr, Louie da fly and 2 others
-
5
-
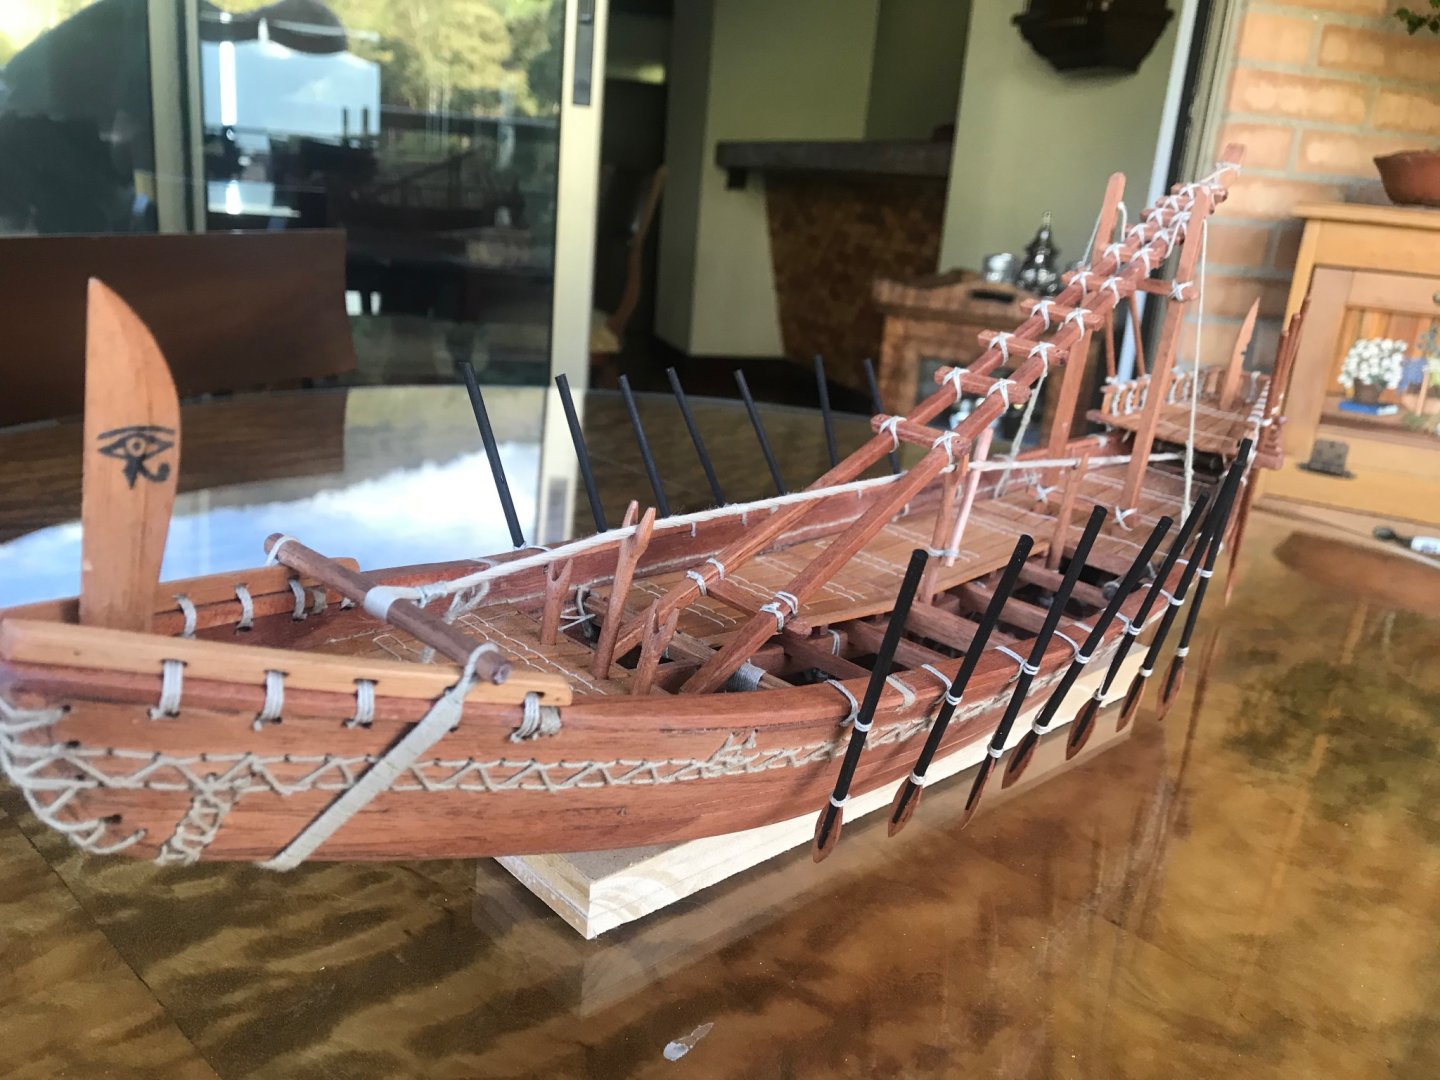
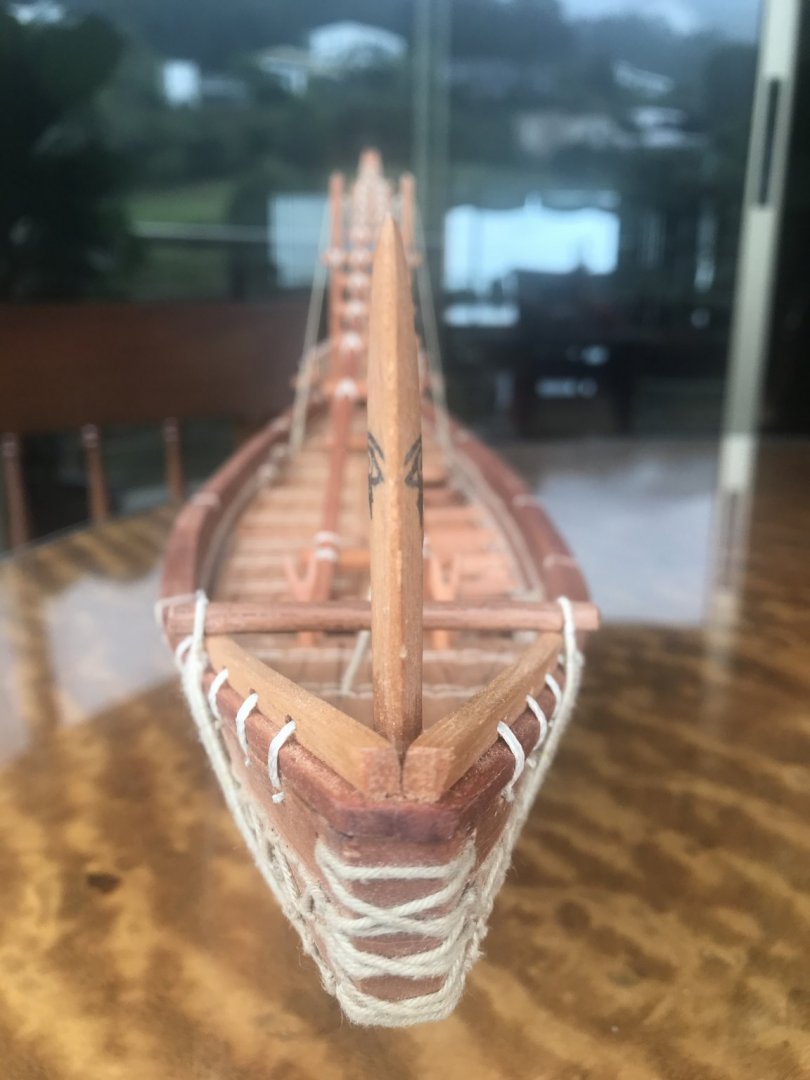
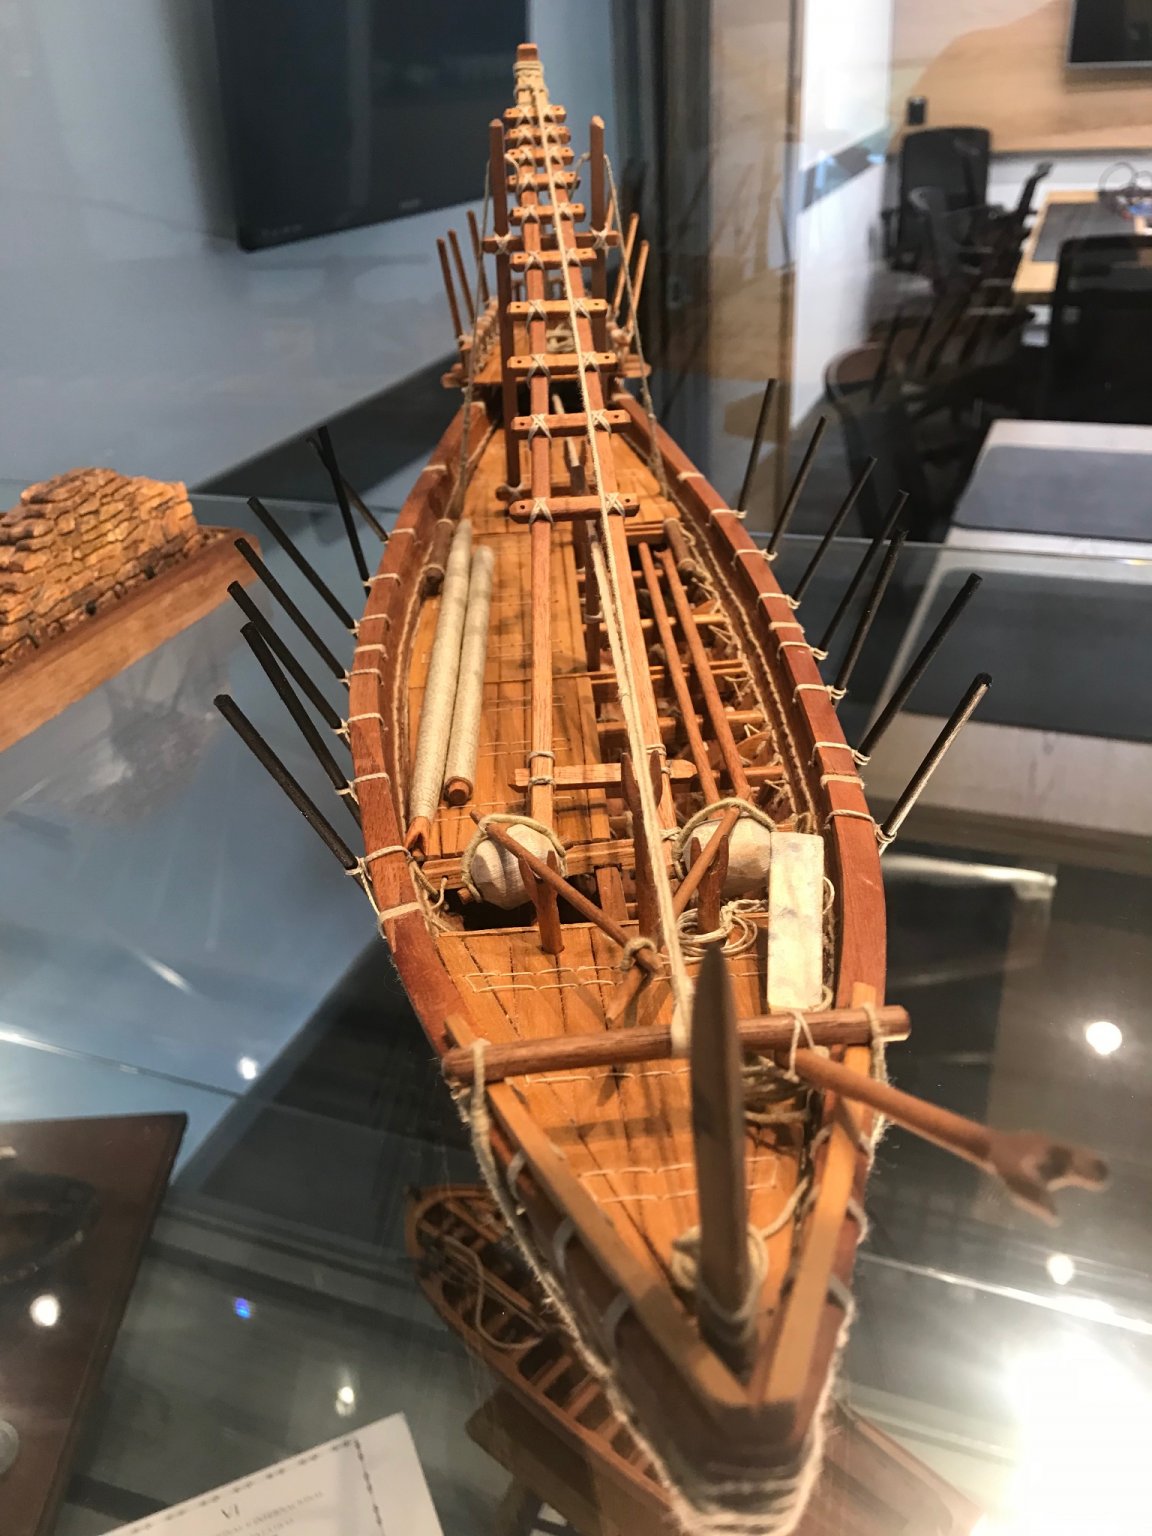
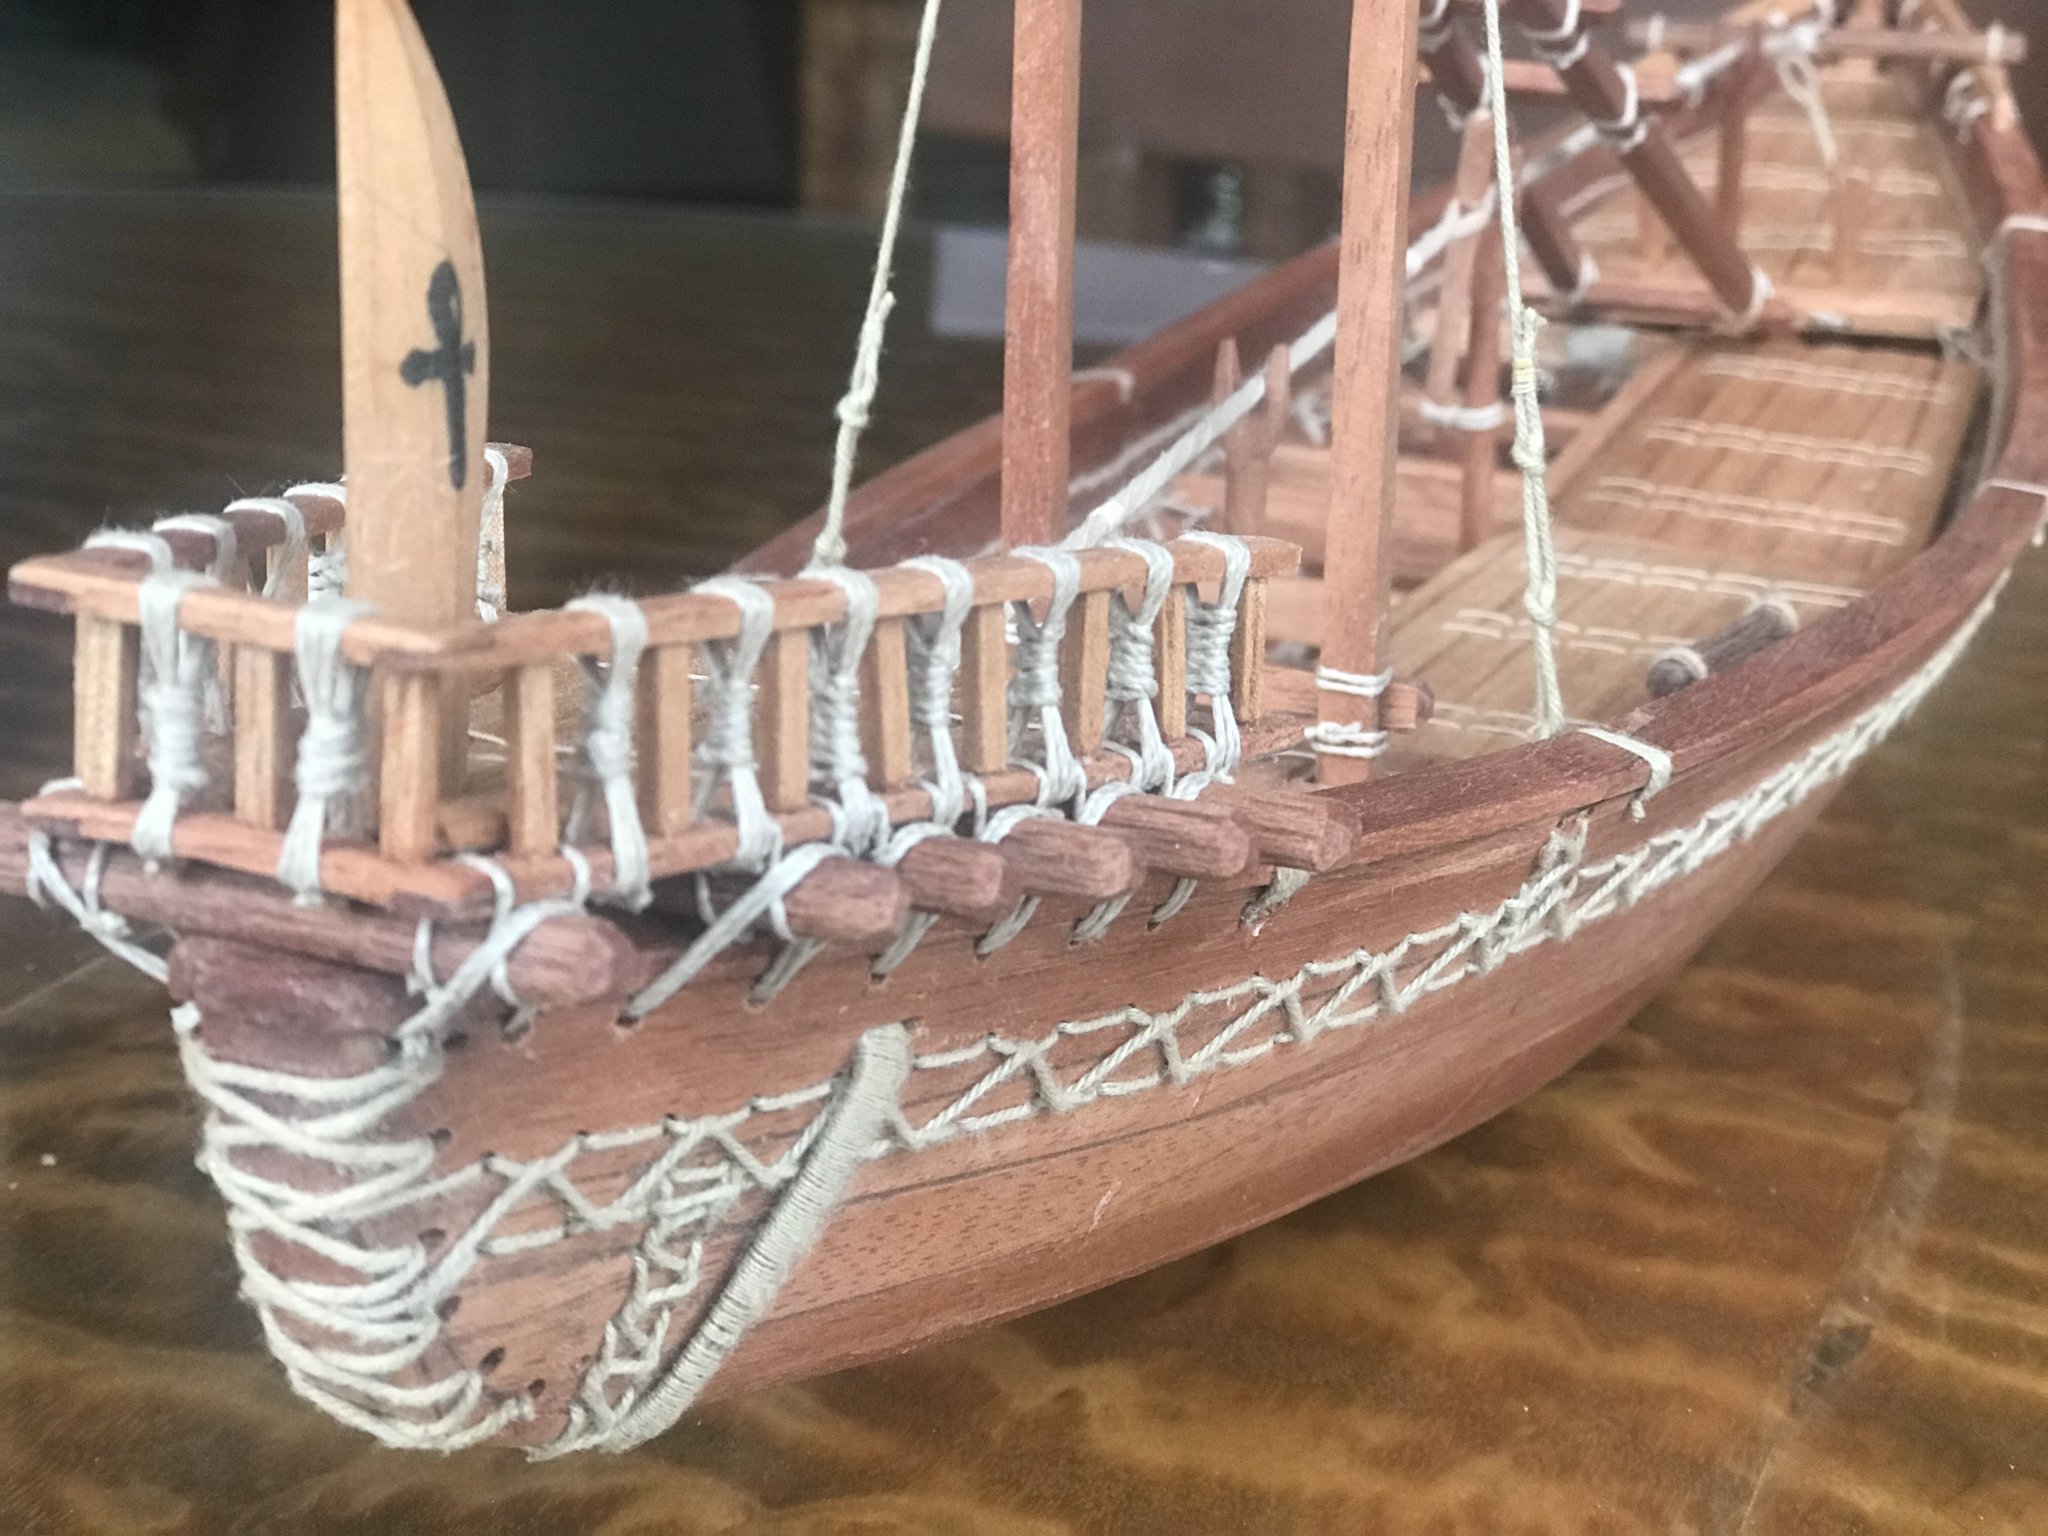
The SHIP IS FINISHED!!!!
The yards are done....:


The diorama is on its way
- Brinkman, tarbrush, shipcarpenter and 13 others
-
16
-
This happens a lot when yo build a “ real” thing. You realize that plans and theories not always can be executed
GOOD WORK LOUIE!!!! 👍
- druxey, Keith Black, Brinkman and 1 other
-
4
-
You are right Louie. After looking the stone composition and definitions it is the same stone
- mtaylor and Louie da fly
-
2
-
-
-
I’m here to see this log. I really want to see how this is going
- thibaultron and mtaylor
-
2
-
I already ”made” a false stop in my showcase......

Still the yards to make...... and the ship is really finished.
I started the diorama design already. This is going to be a new adventure!!!!!
Thanks all for your support!!!- GrandpaPhil, luponero, mtaylor and 3 others
-
6
-
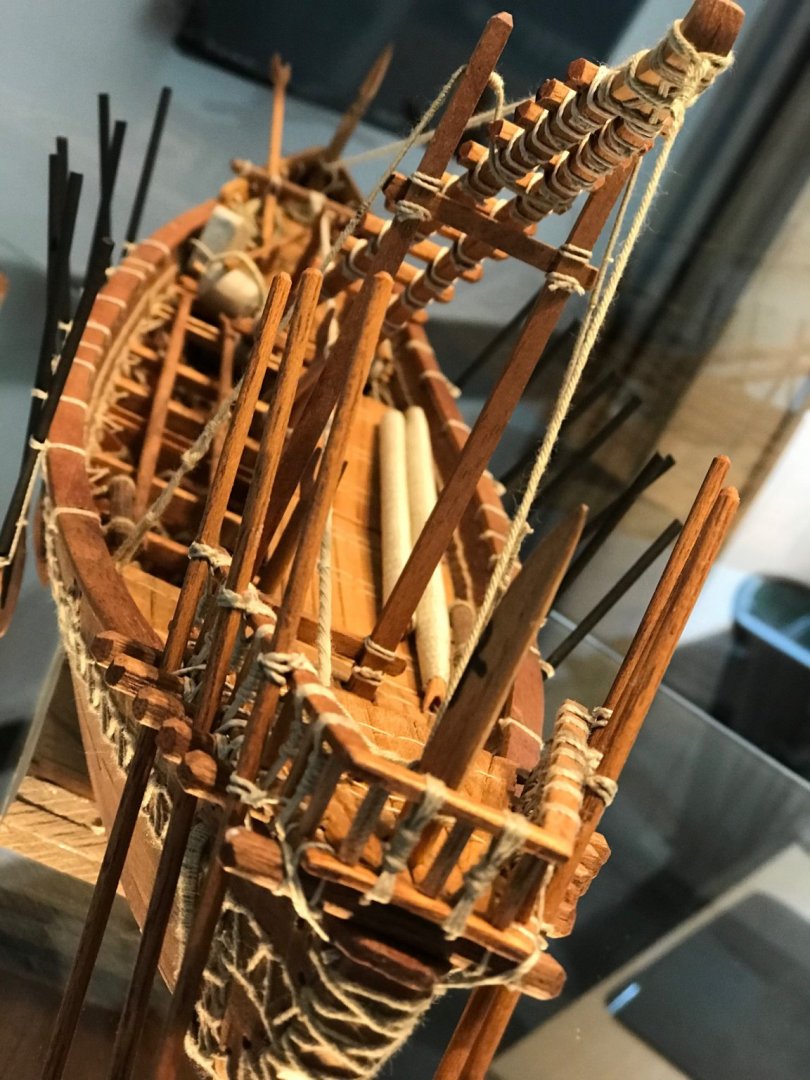
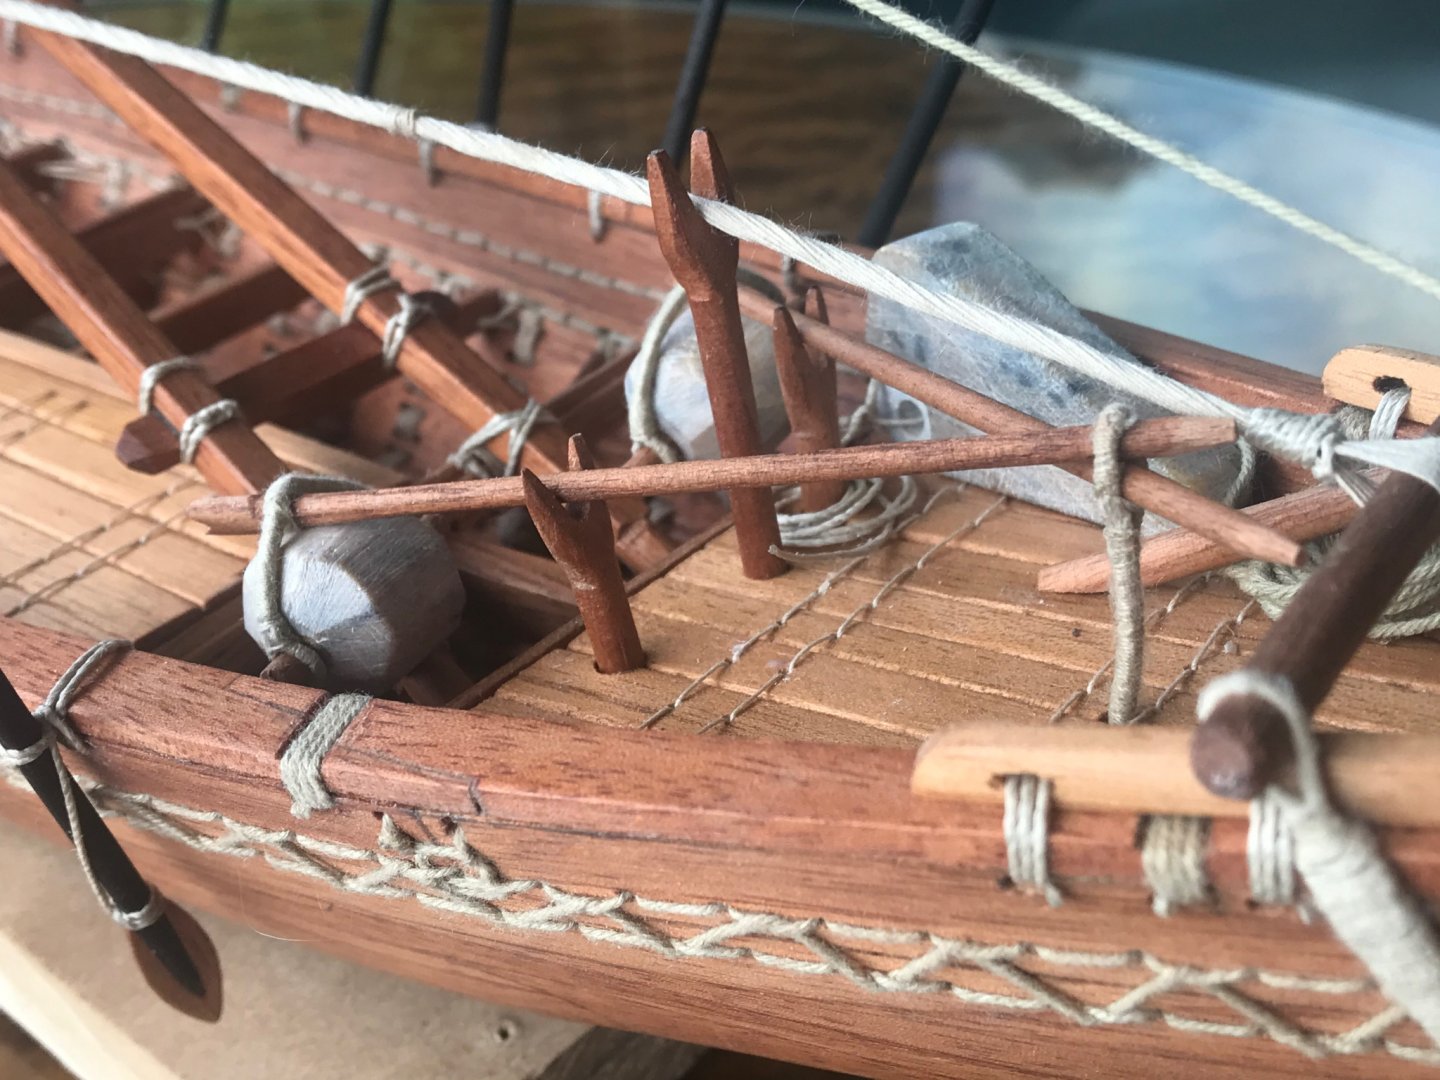
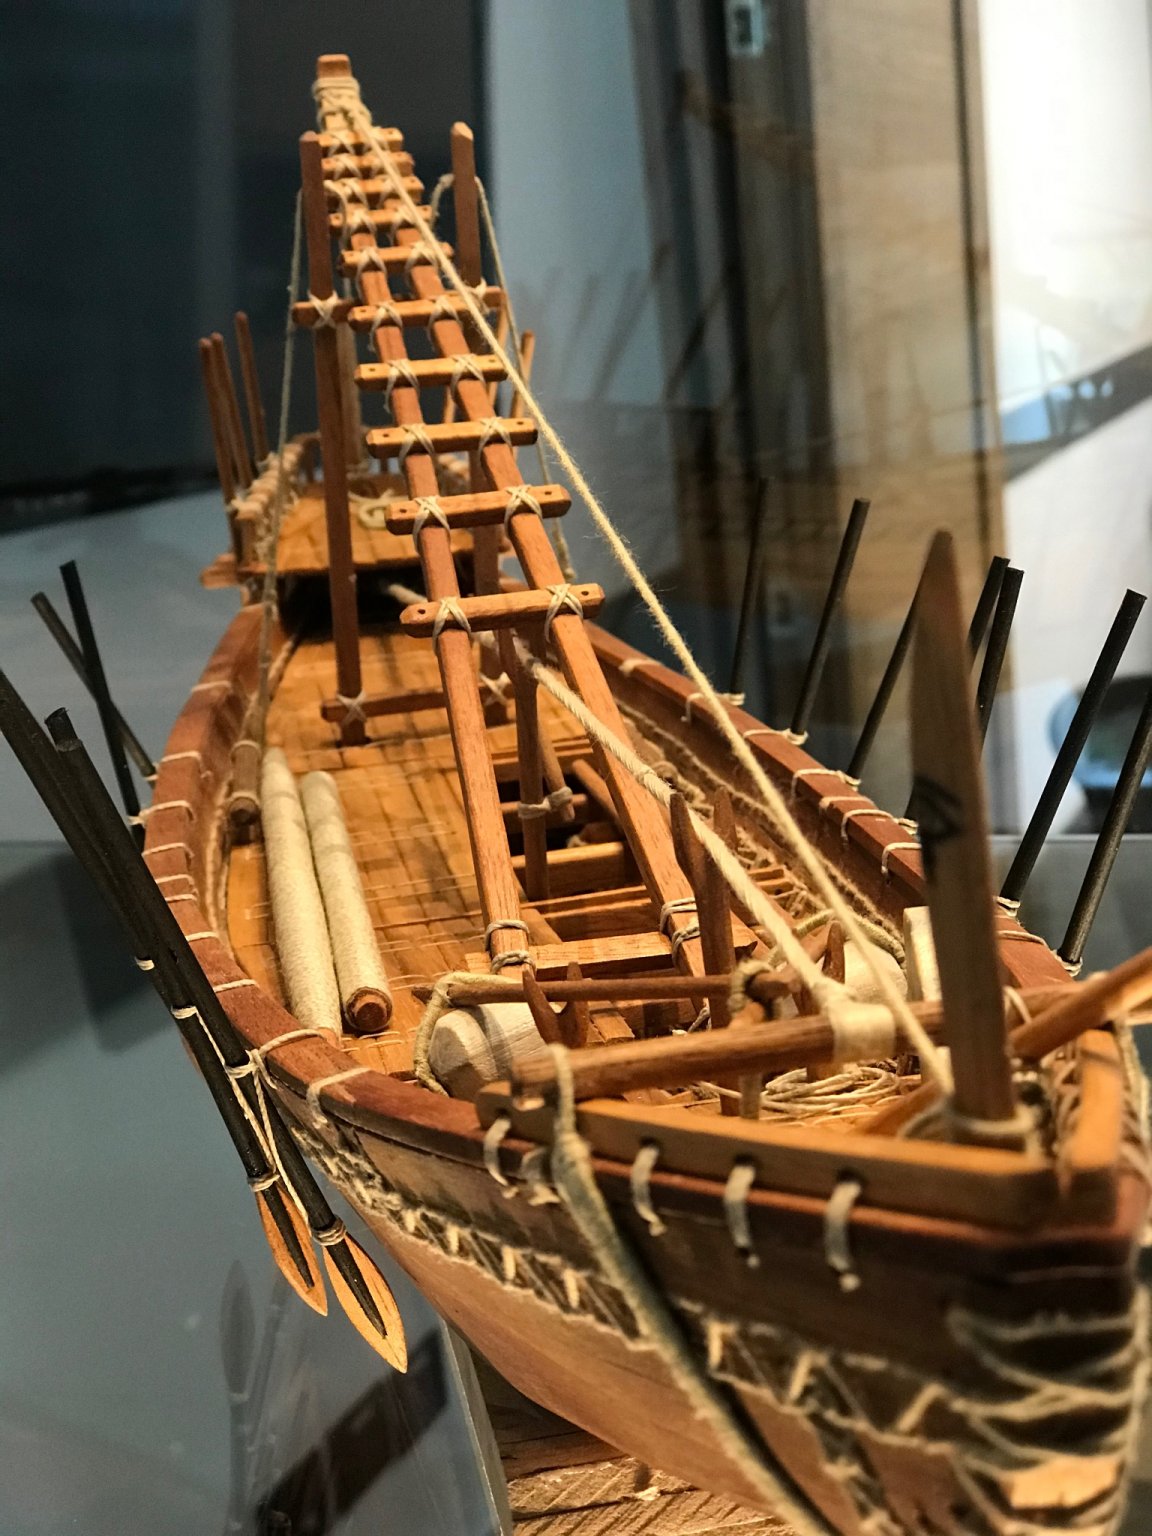
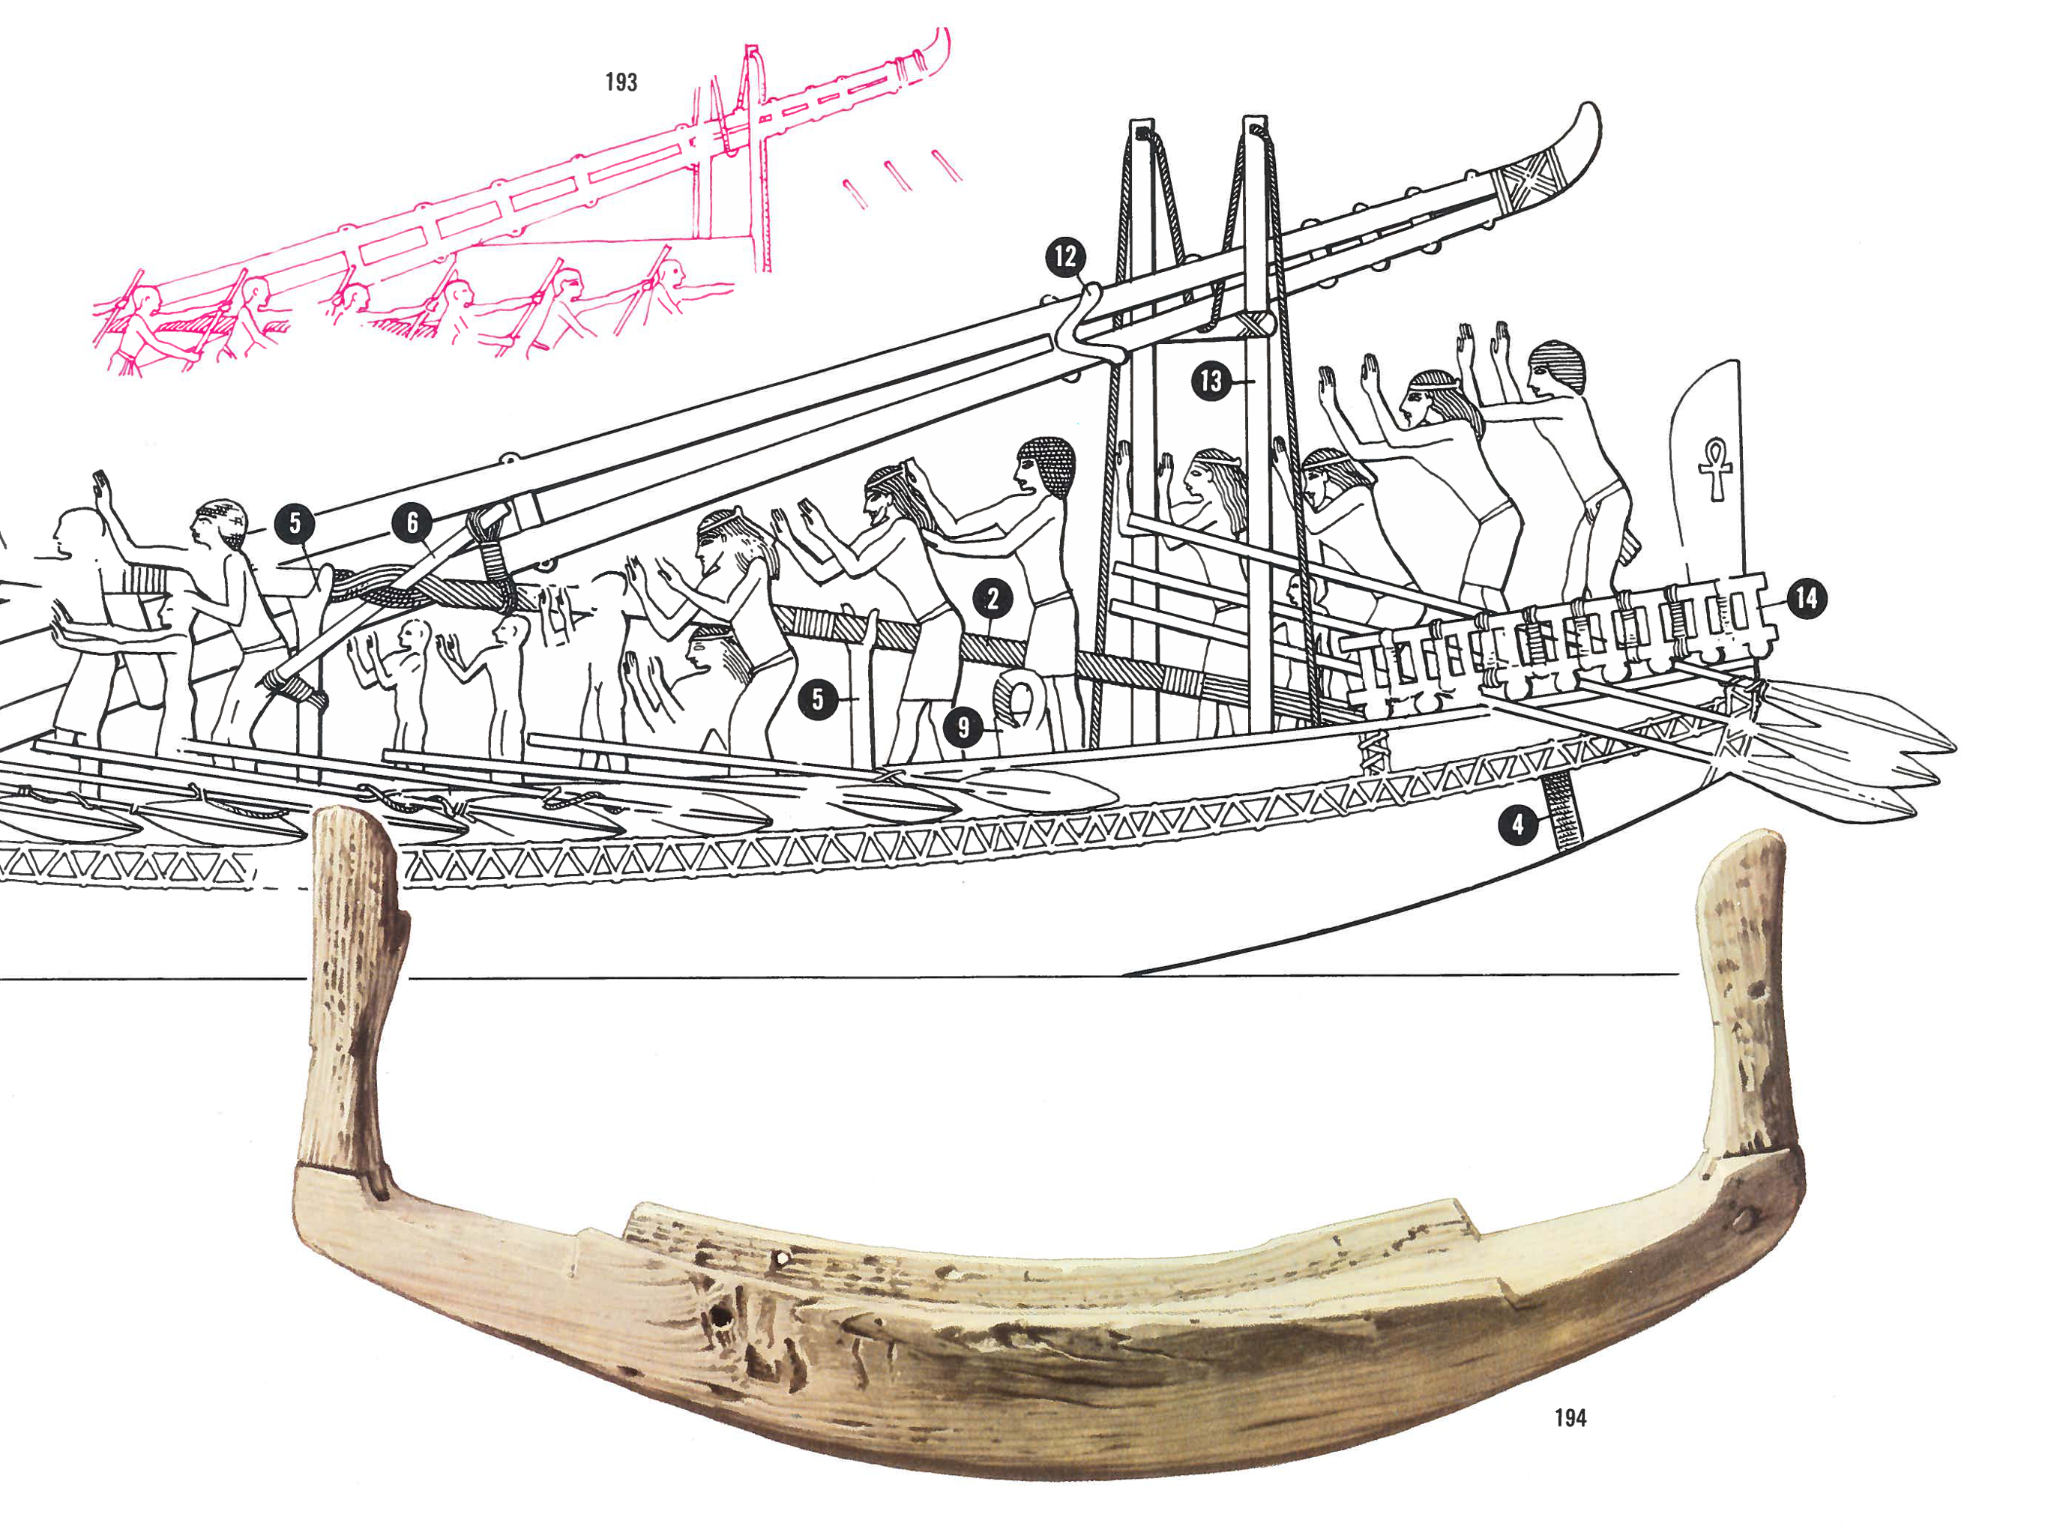
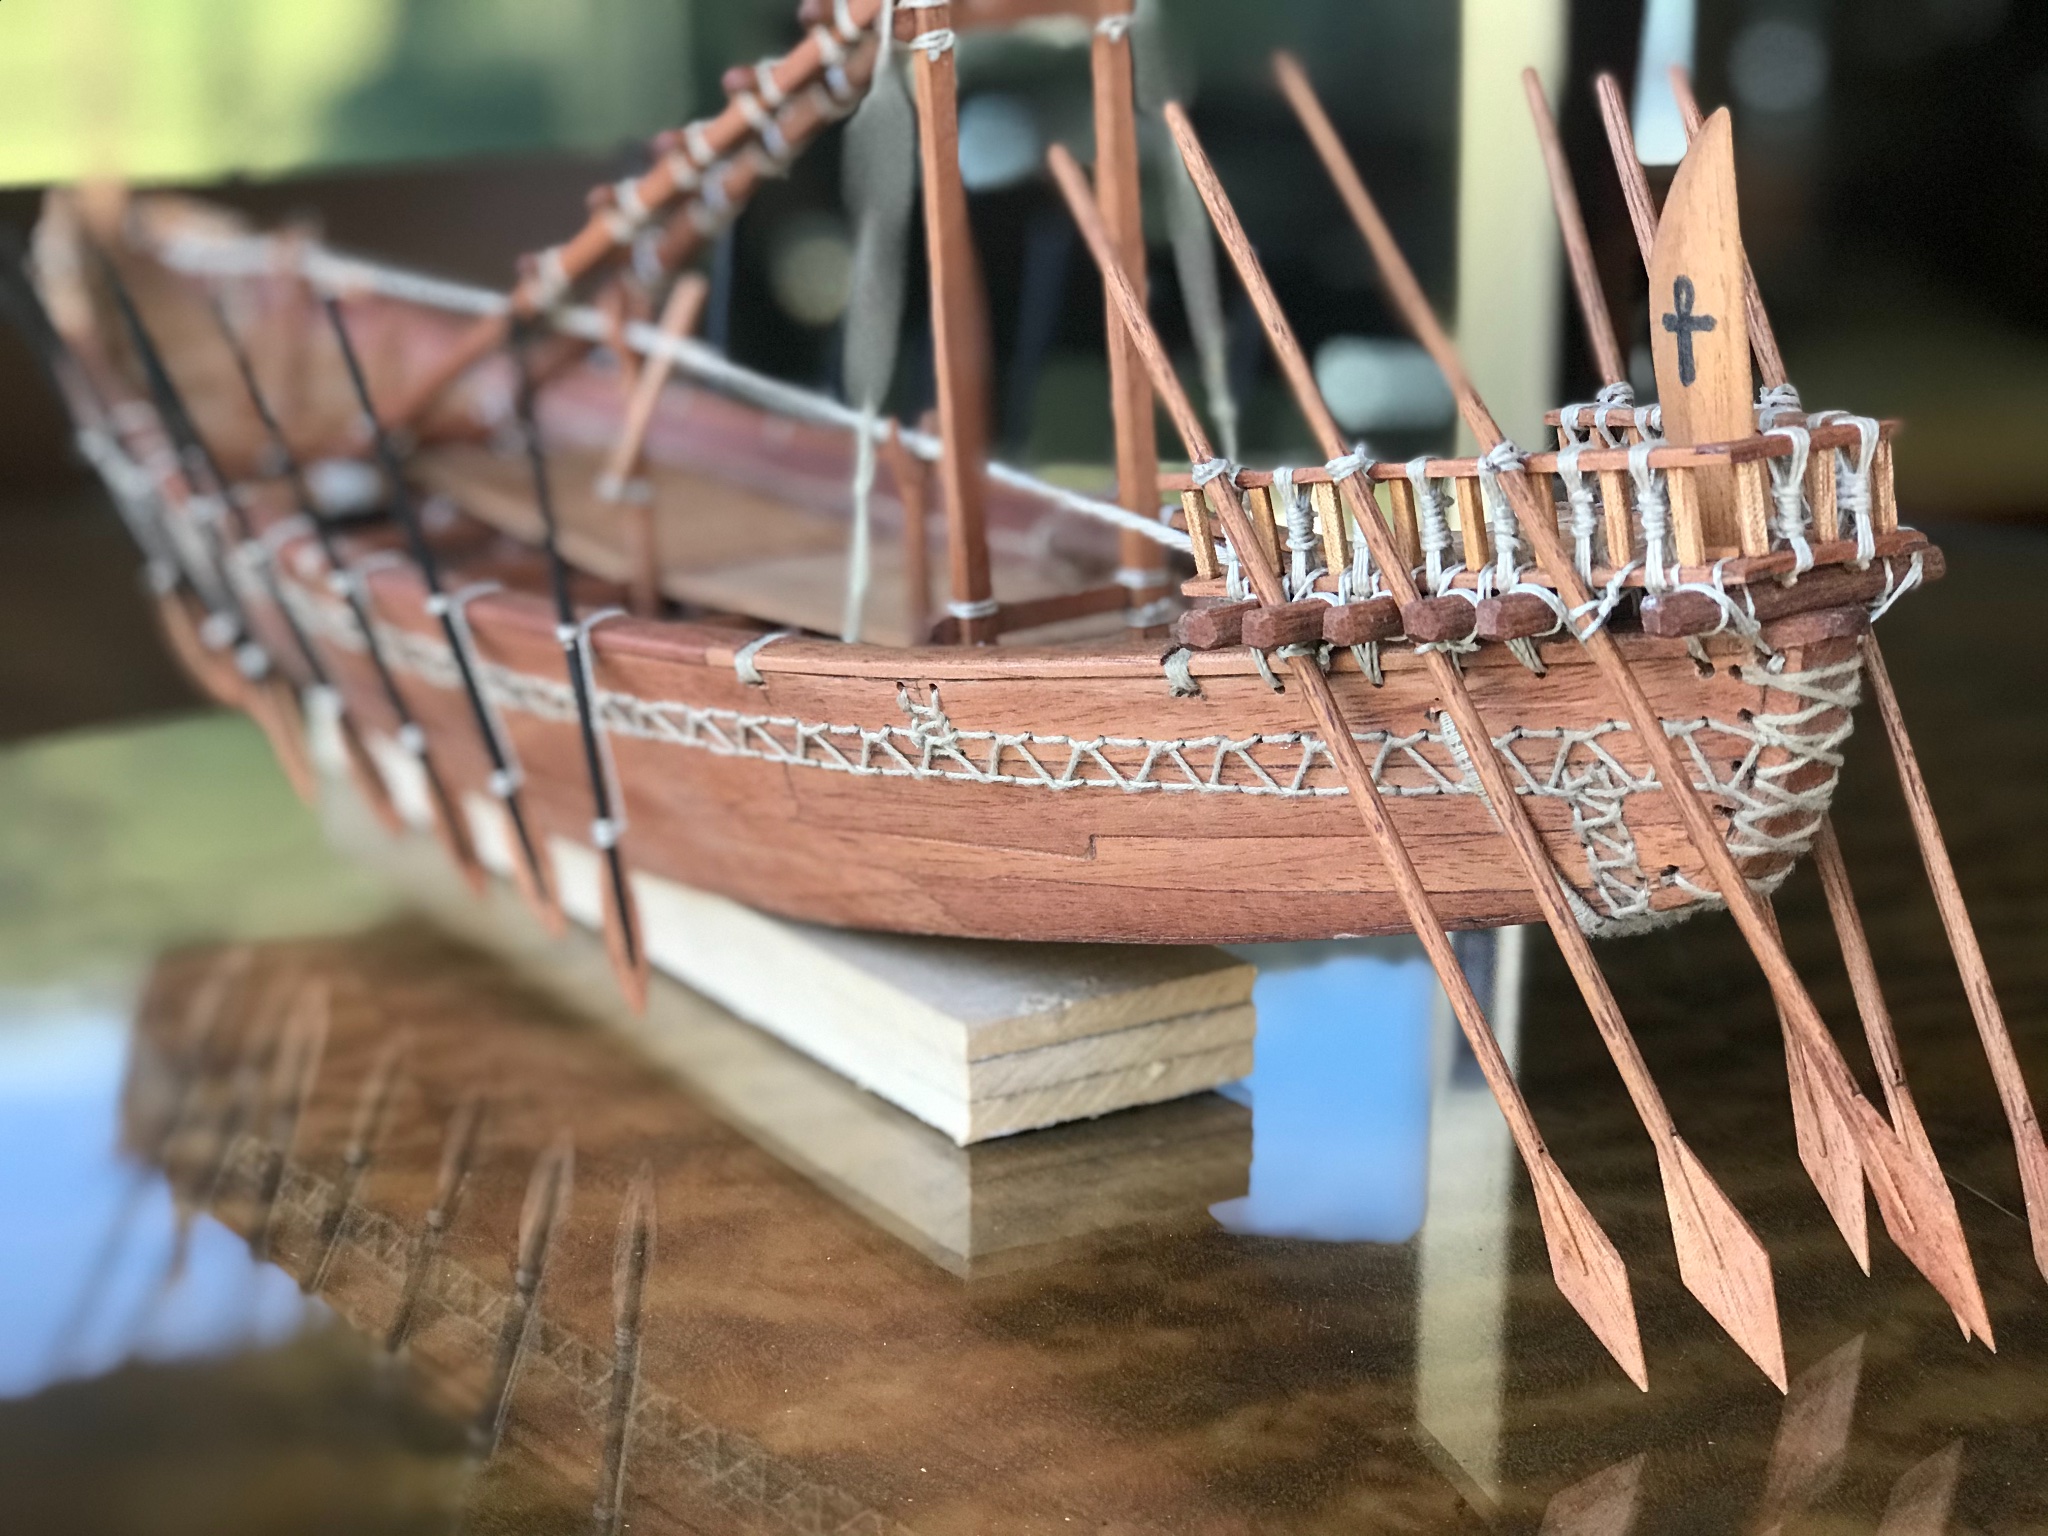
Here some pictures with those fittings already in place....


- luponero, BANYAN, GrandpaPhil and 4 others
-
7
-
Here w go again.....
This time we are going to work in some fittings.....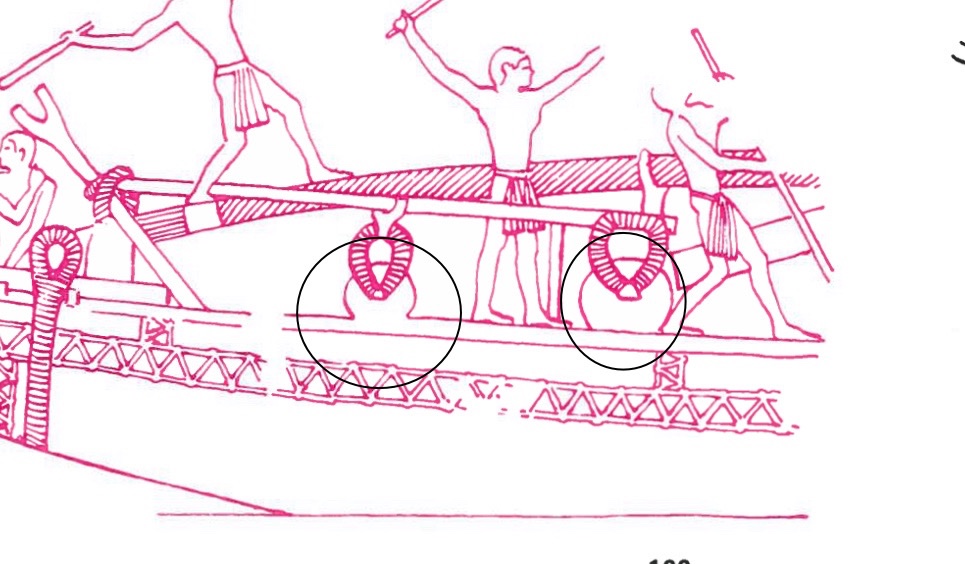
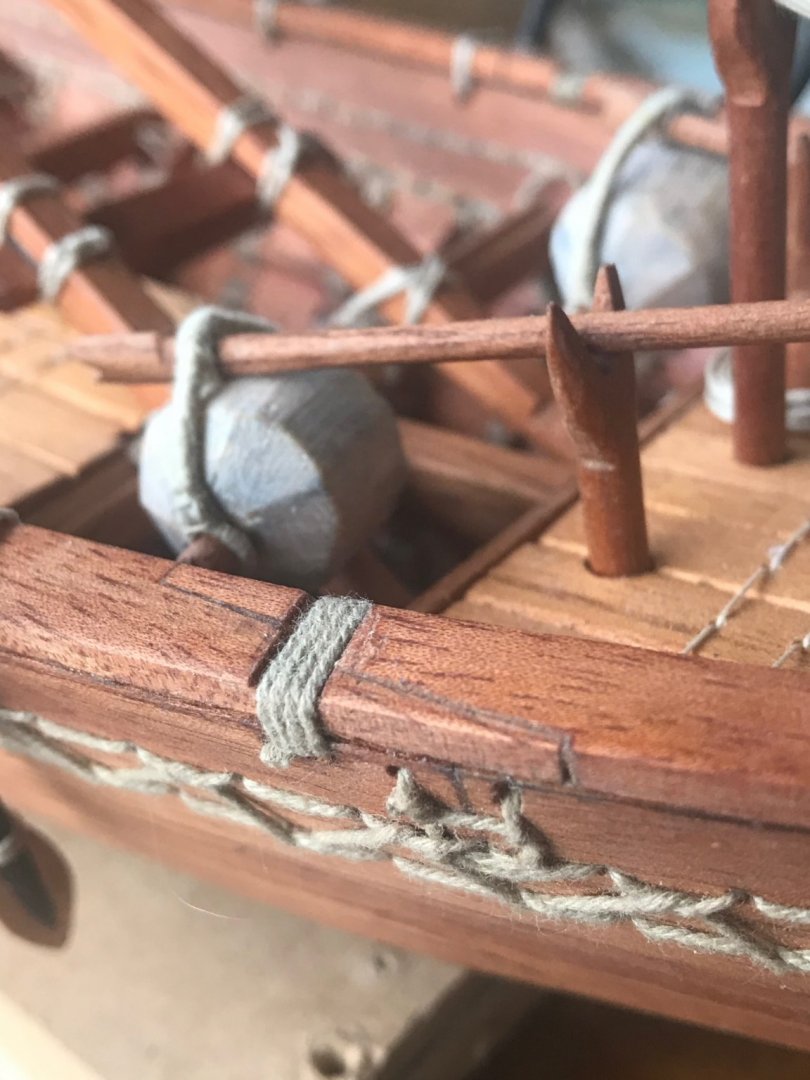
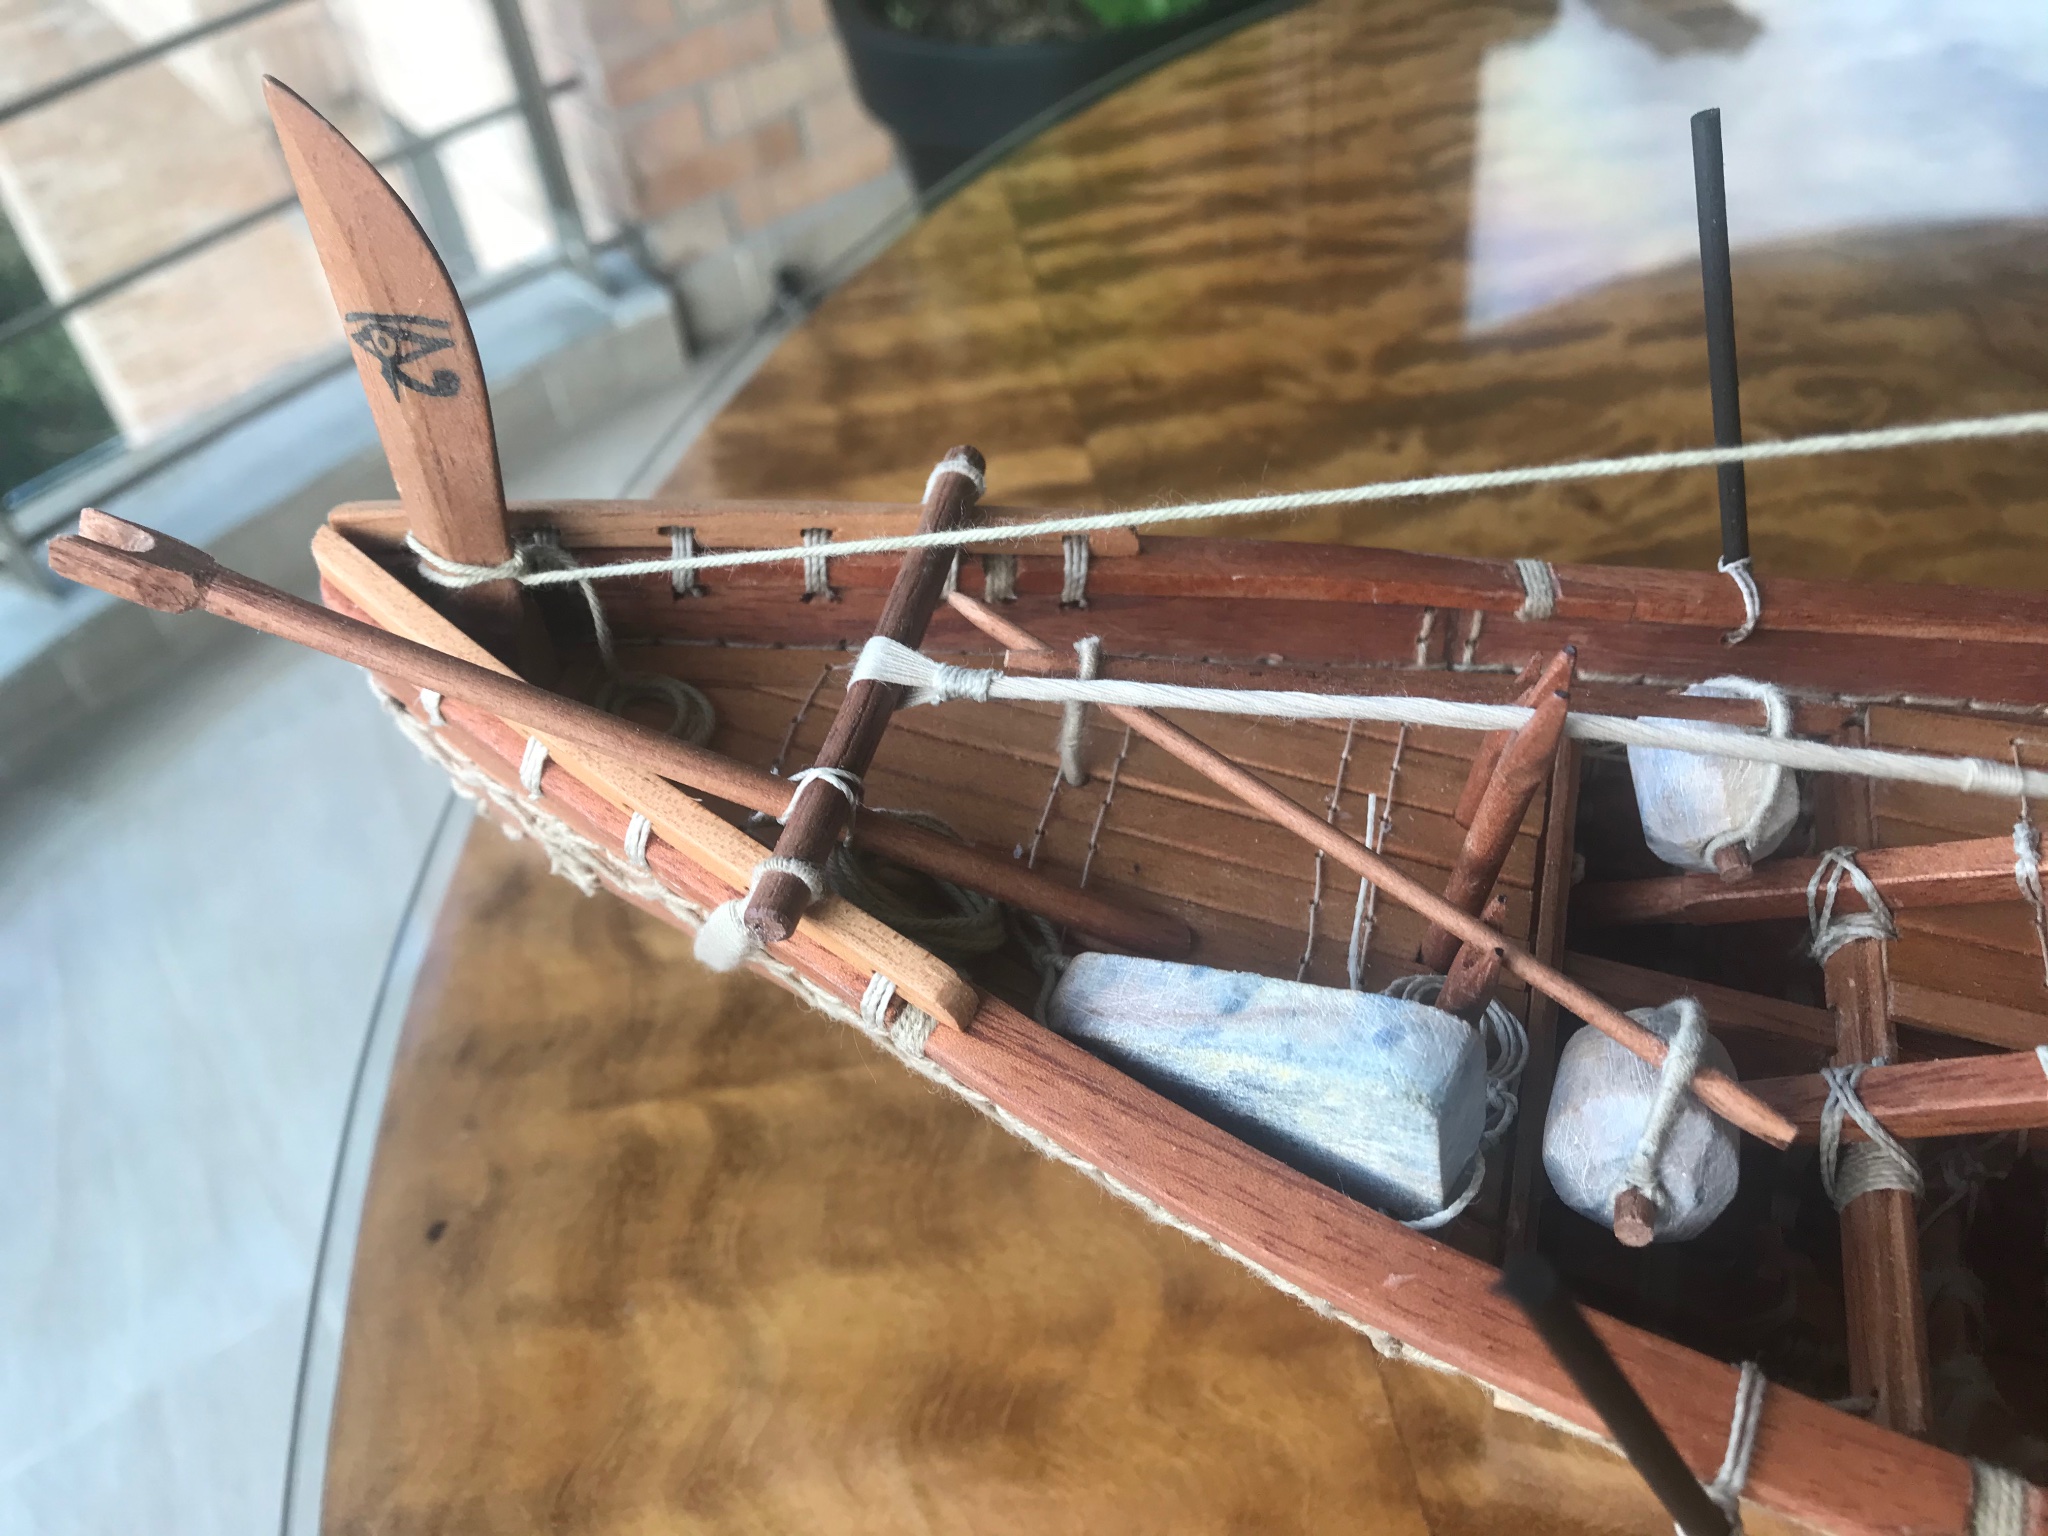
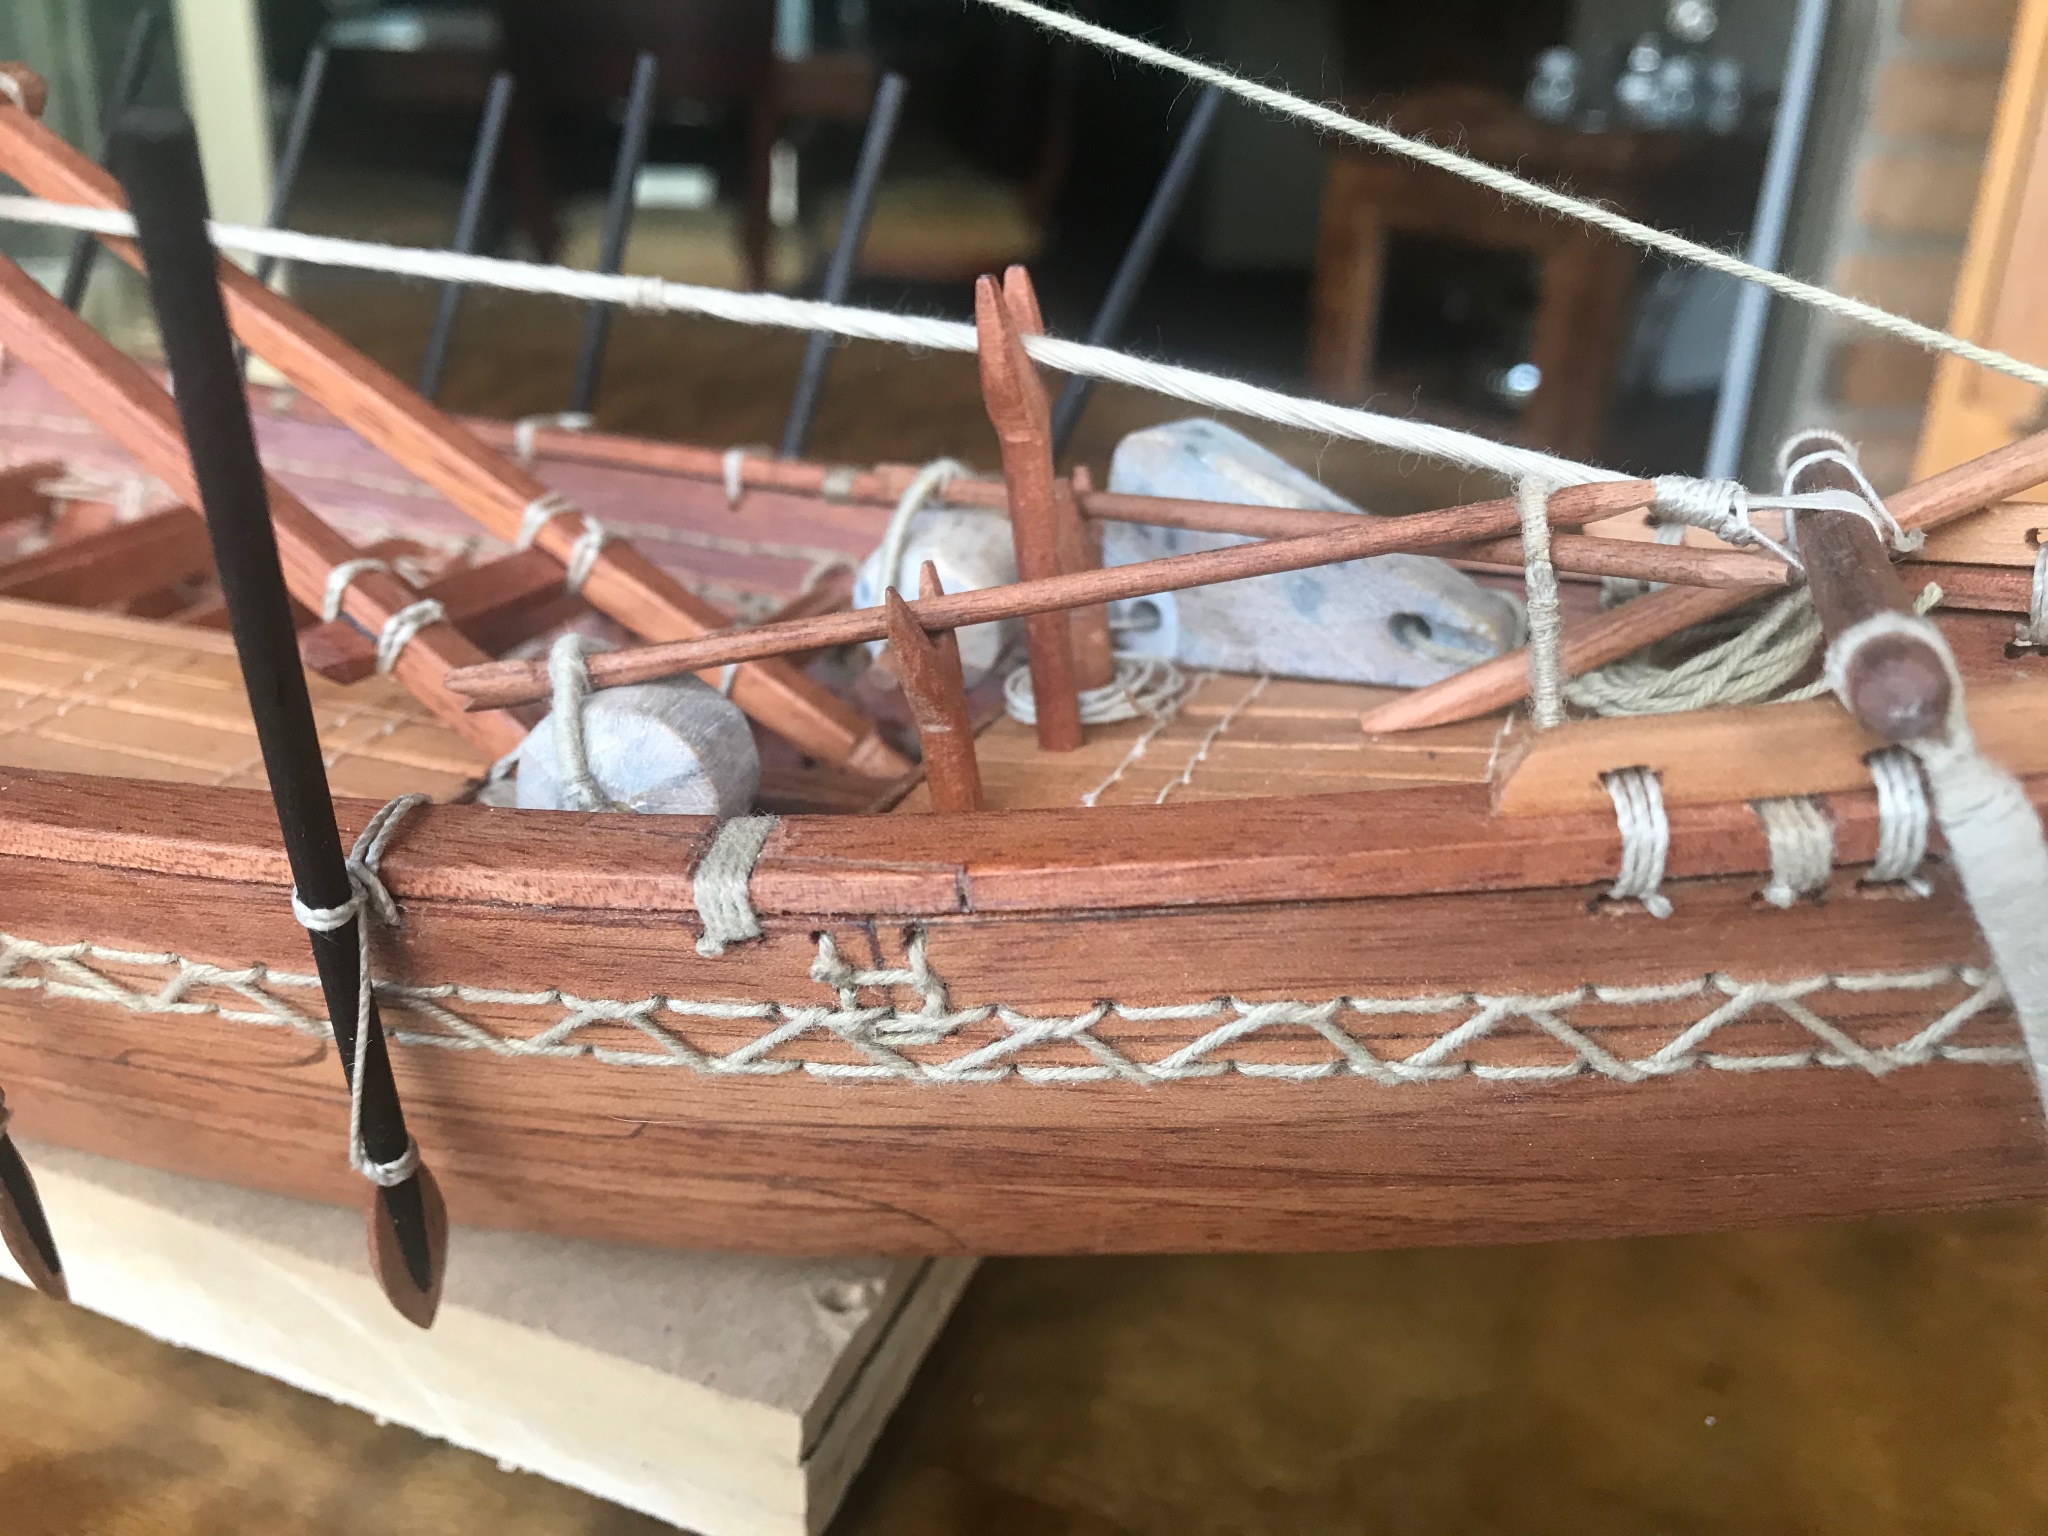
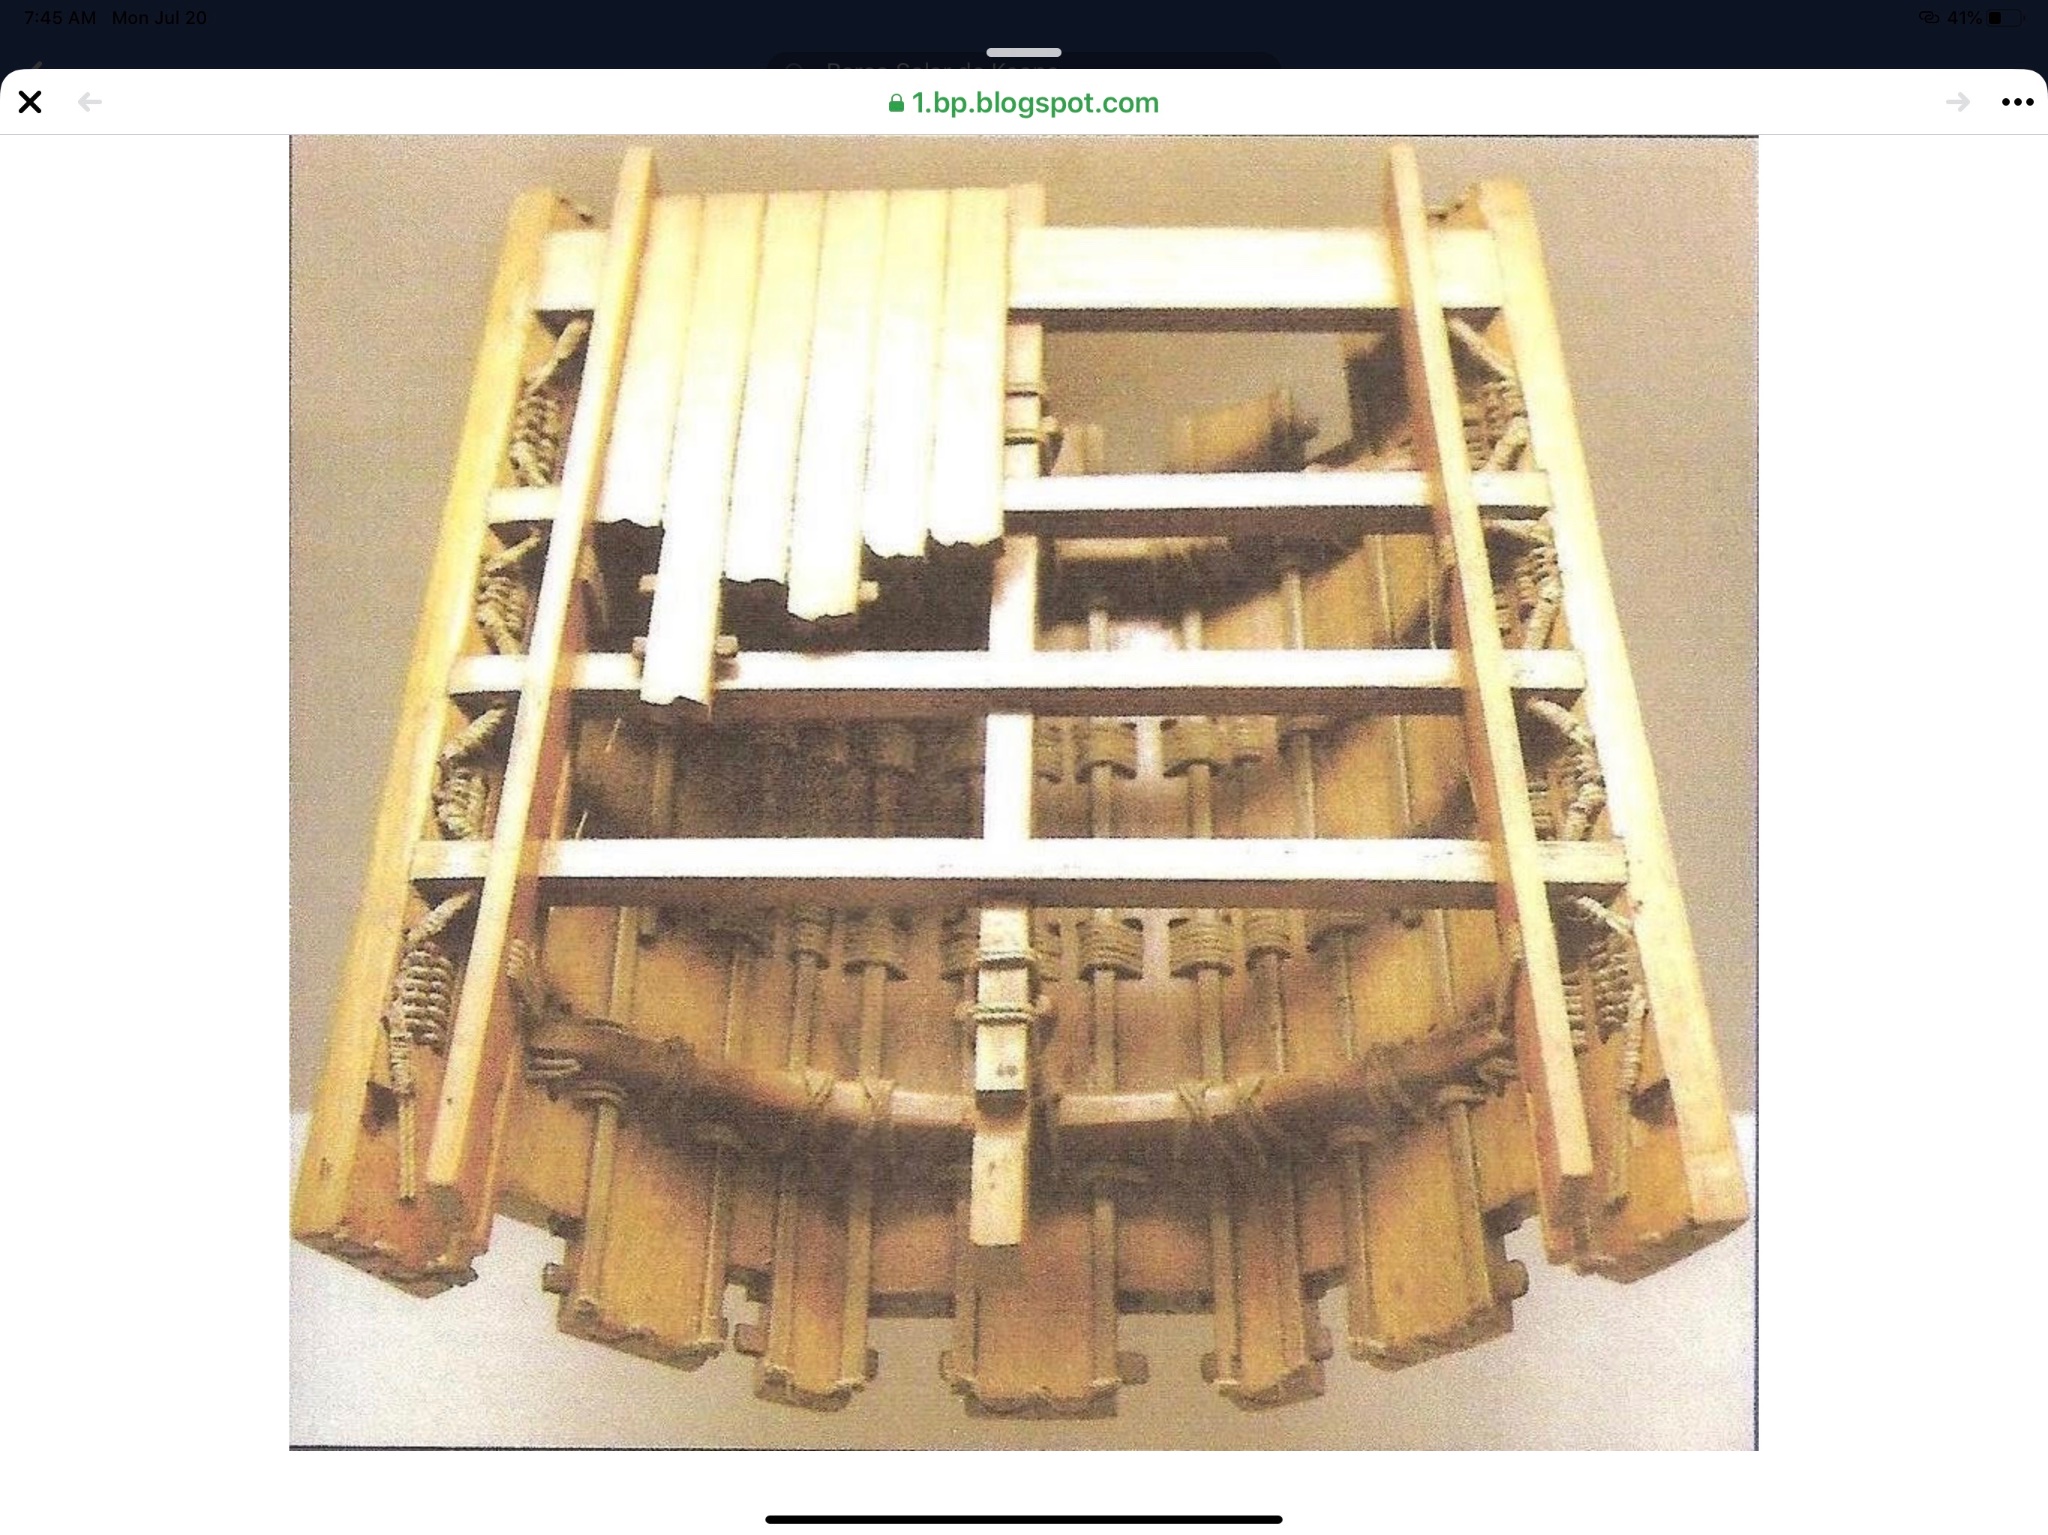
This picture “suppose” to be the mast elevation system. I consisted (according with Landstrom mainly) in two stones that with a levers help.....
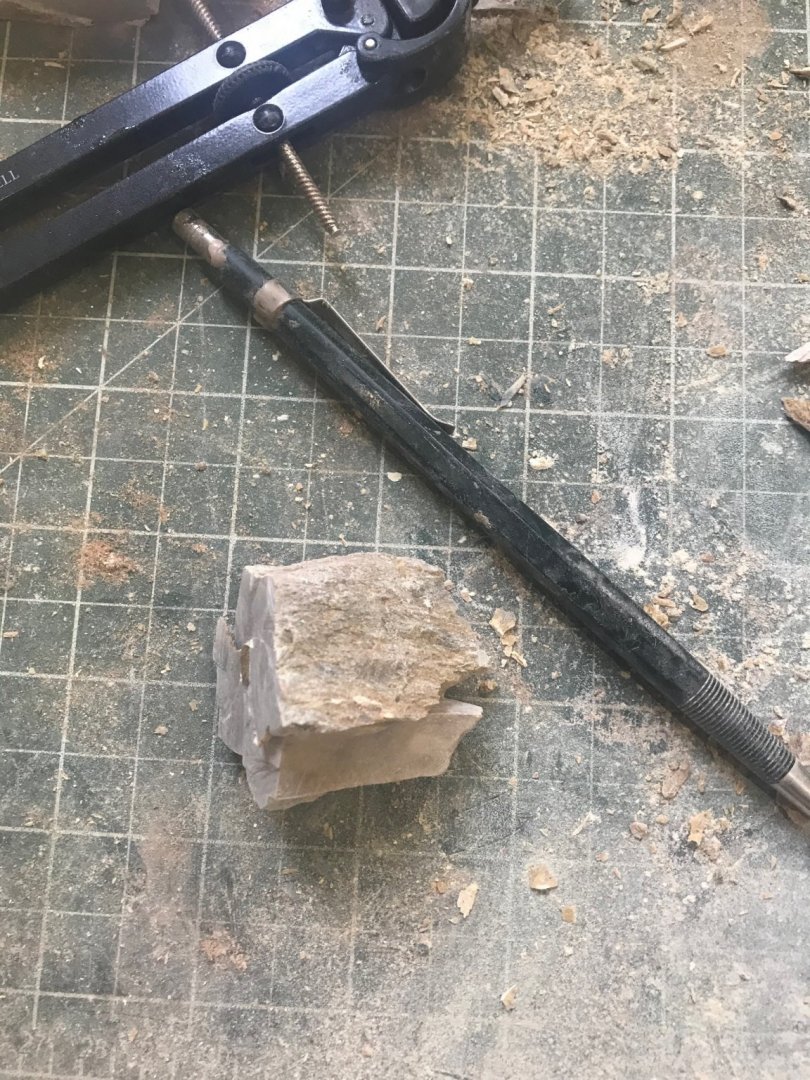
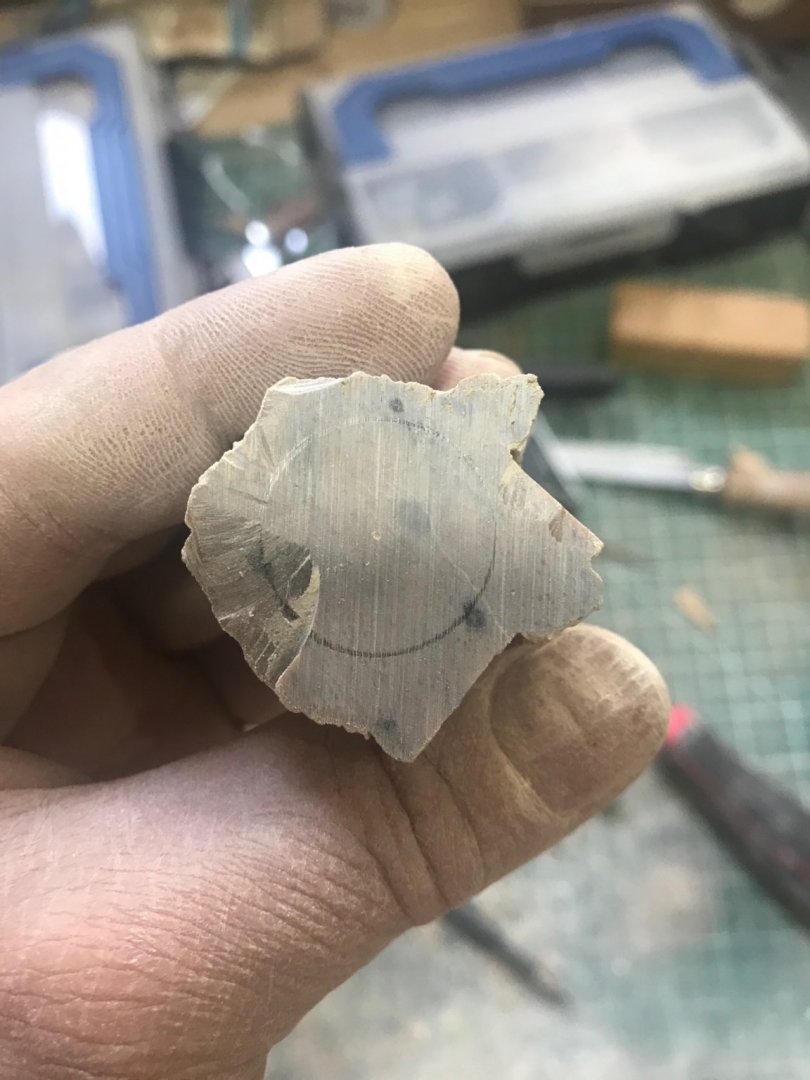
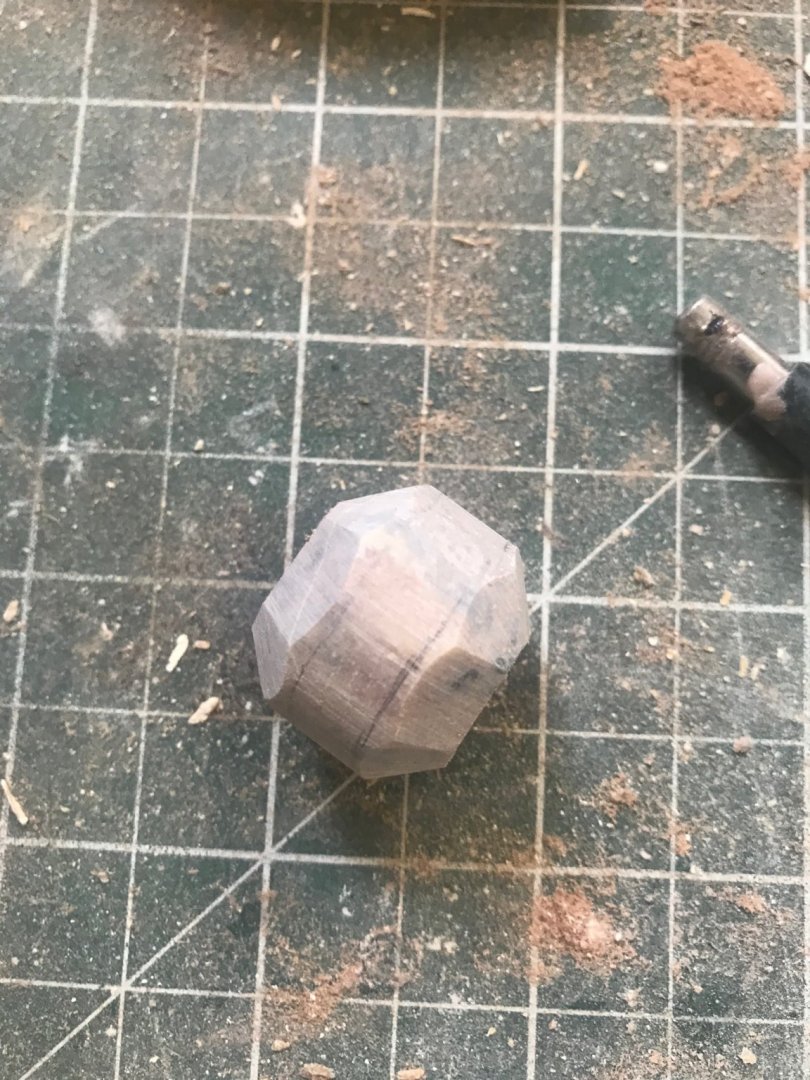
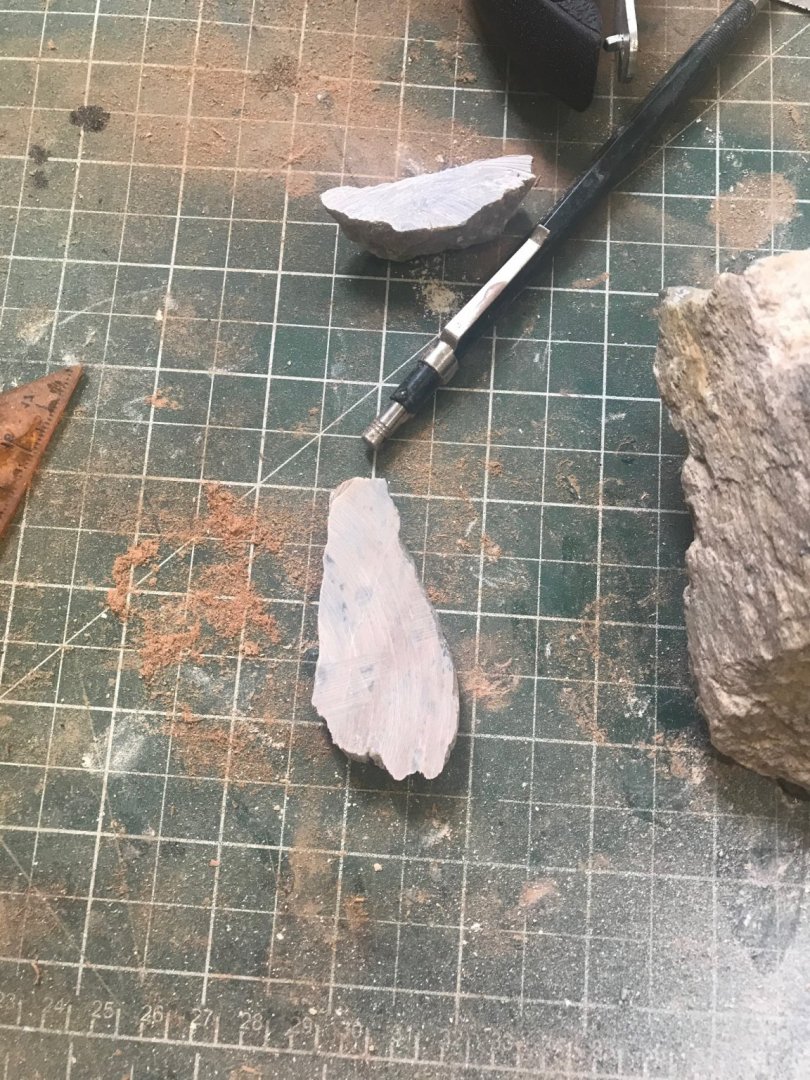
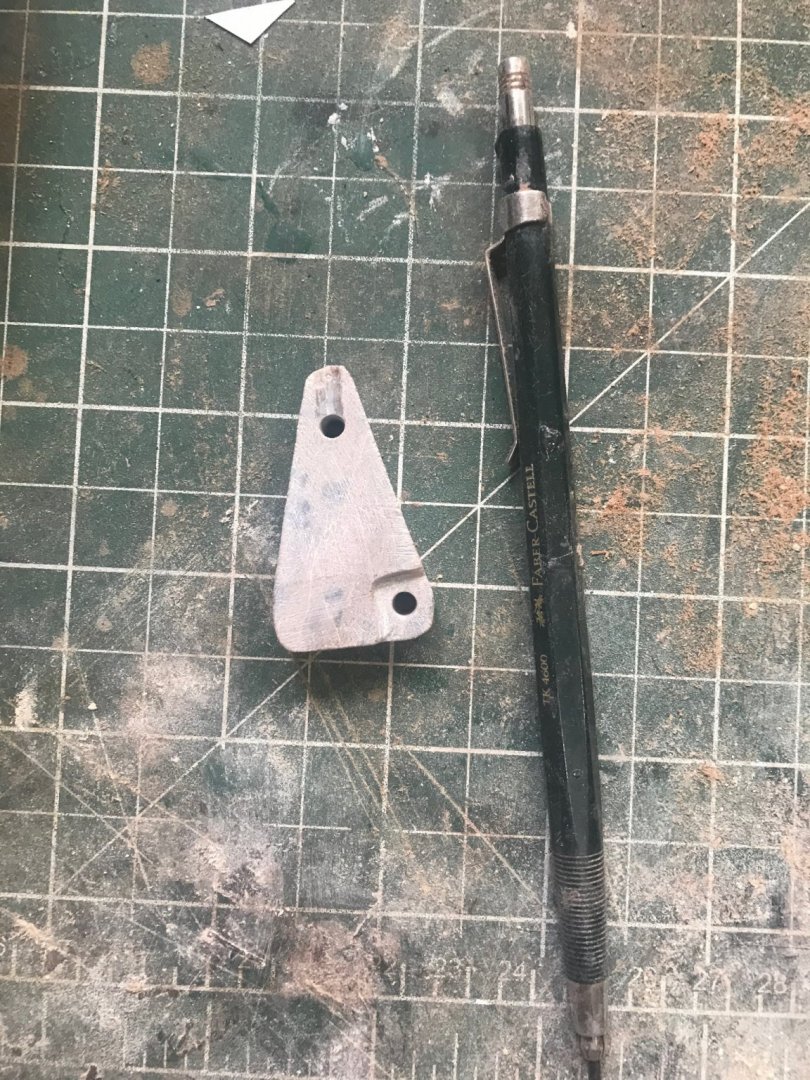
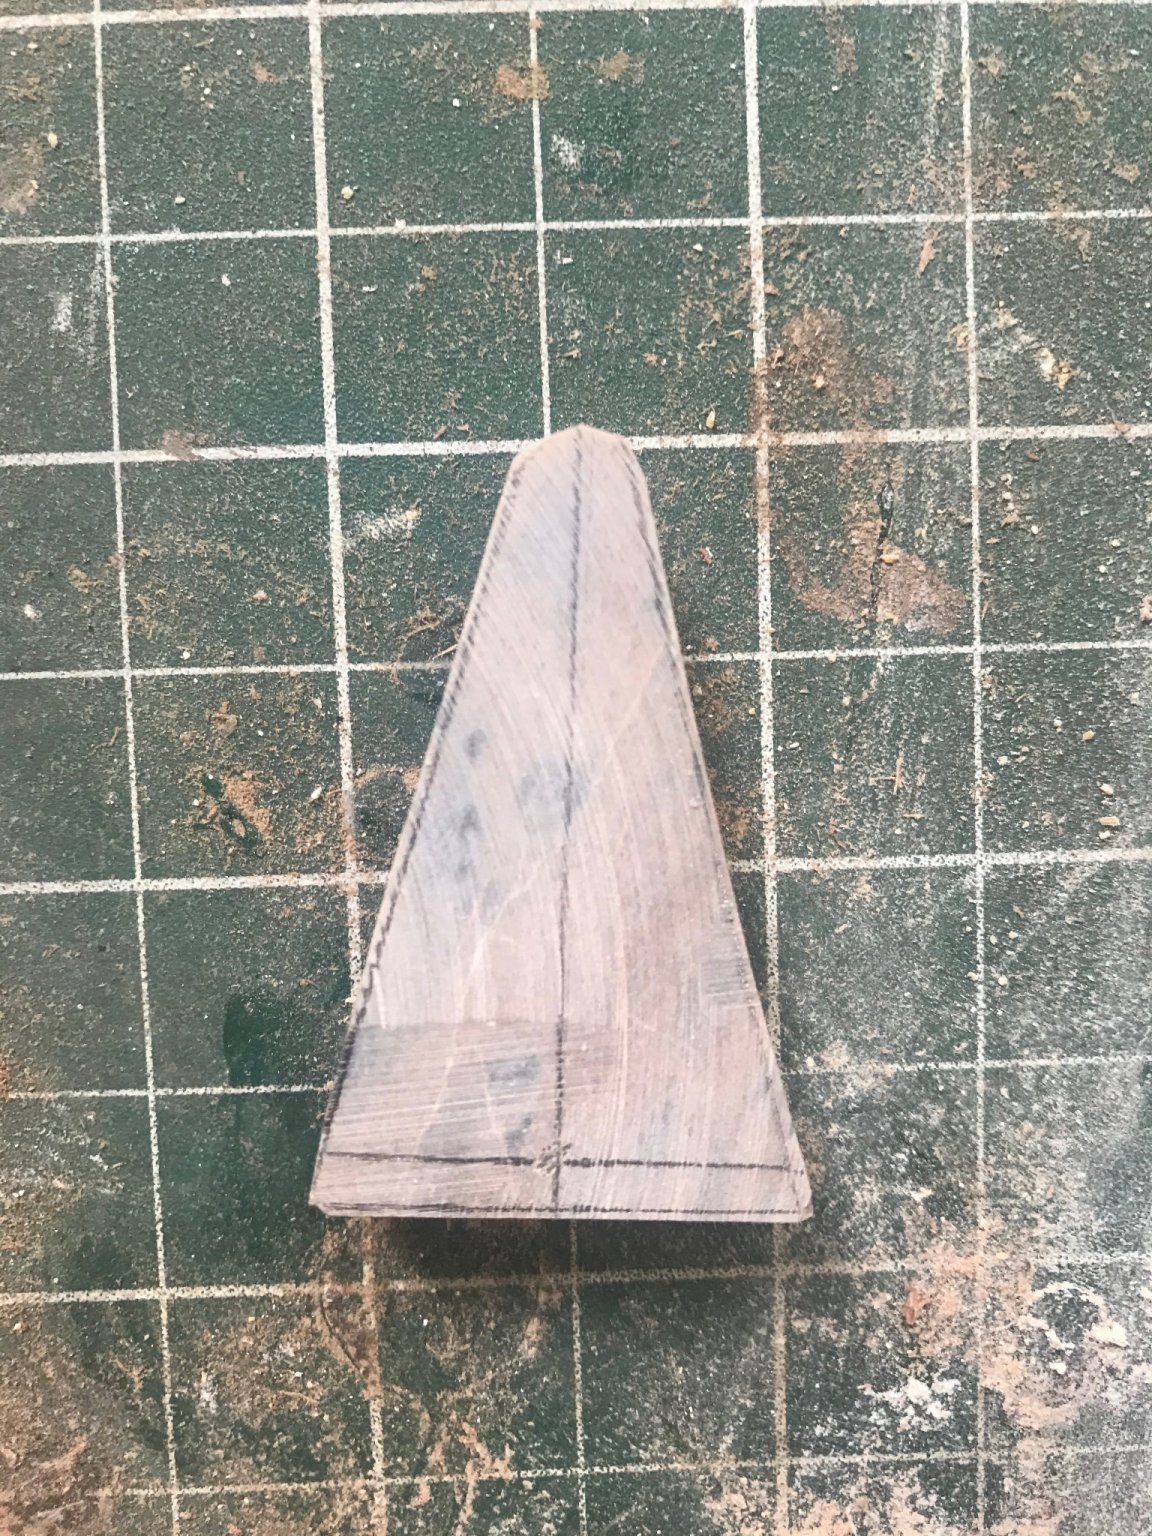
For these stones and for the anchor... I decided to work with a kind of stone named “powder stone” or “talcum stone” (probably you all have different name for it). Is kind of stone really easy to work with. I made the pieces using basically the dame tools I use for wood, finishing them with a wired brush to give some “carving effect “....
Here some pictures about the anchor process.....

-
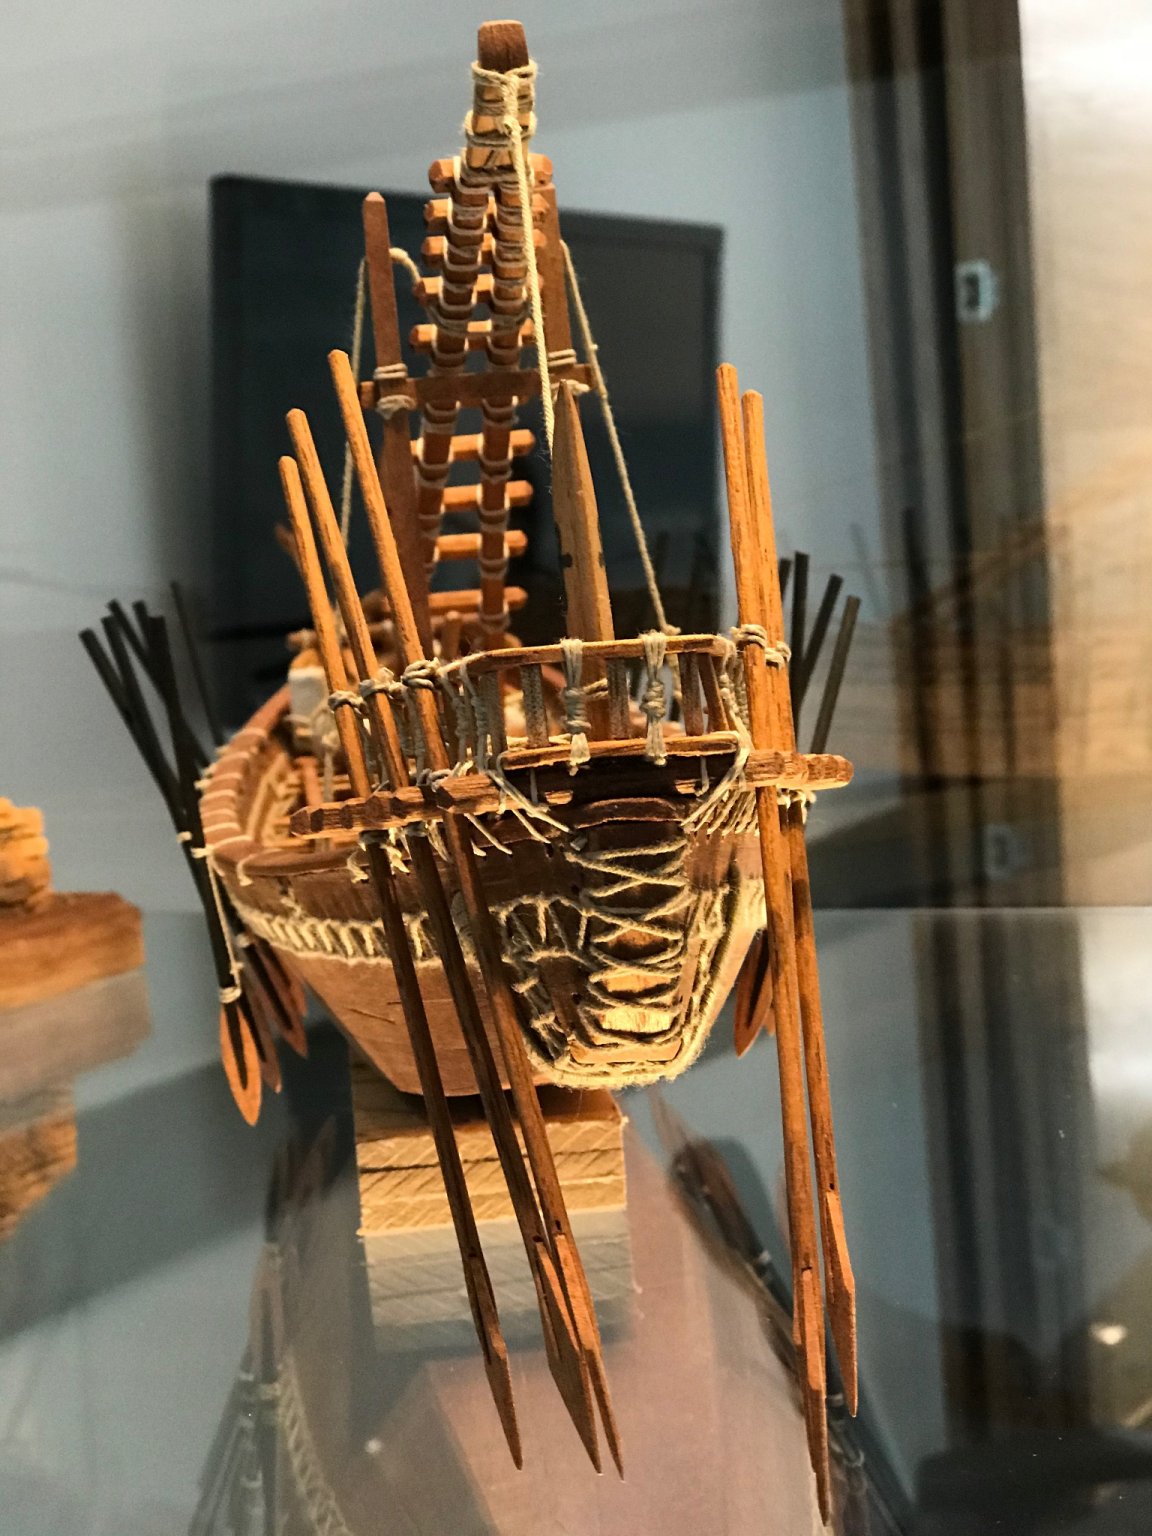
There are two theories
one is the one you just mentioned. This one is with the oars in the position I just used They are tide in two position.
the other one is they steer moving the oars like “rowing” With the angle needed to have the ship in the right direction. They would be tide in just one place (like the oars are)
so???? Pick just one
- liteflight and mtaylor
-
2
-
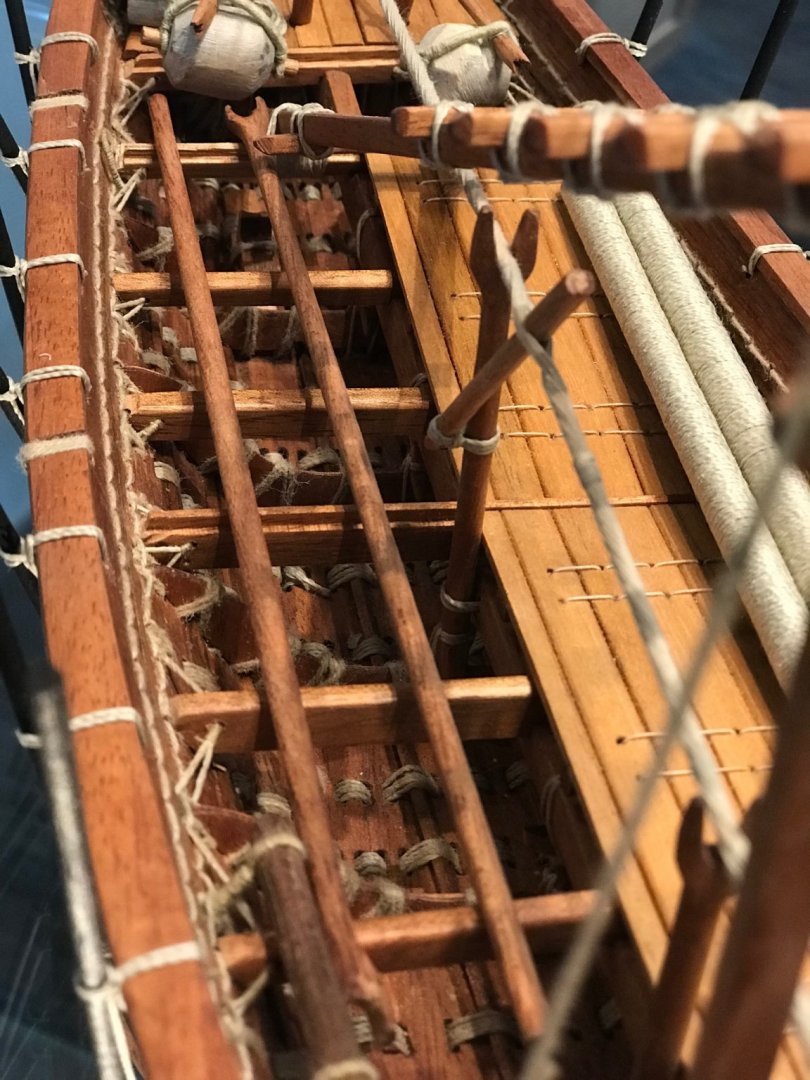
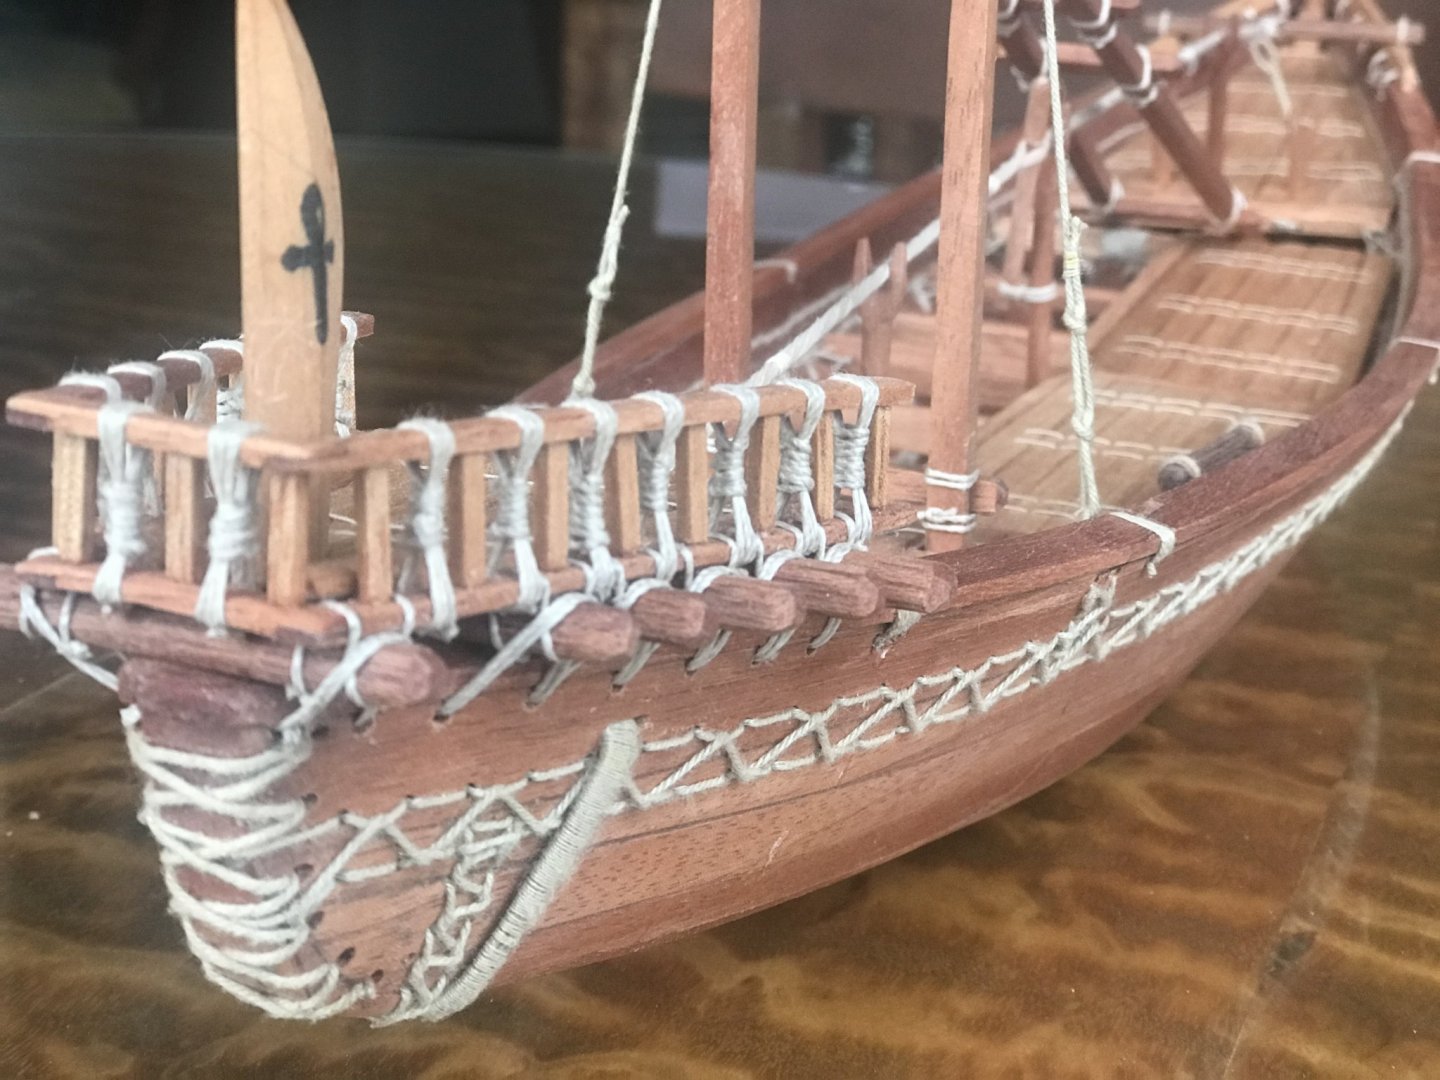
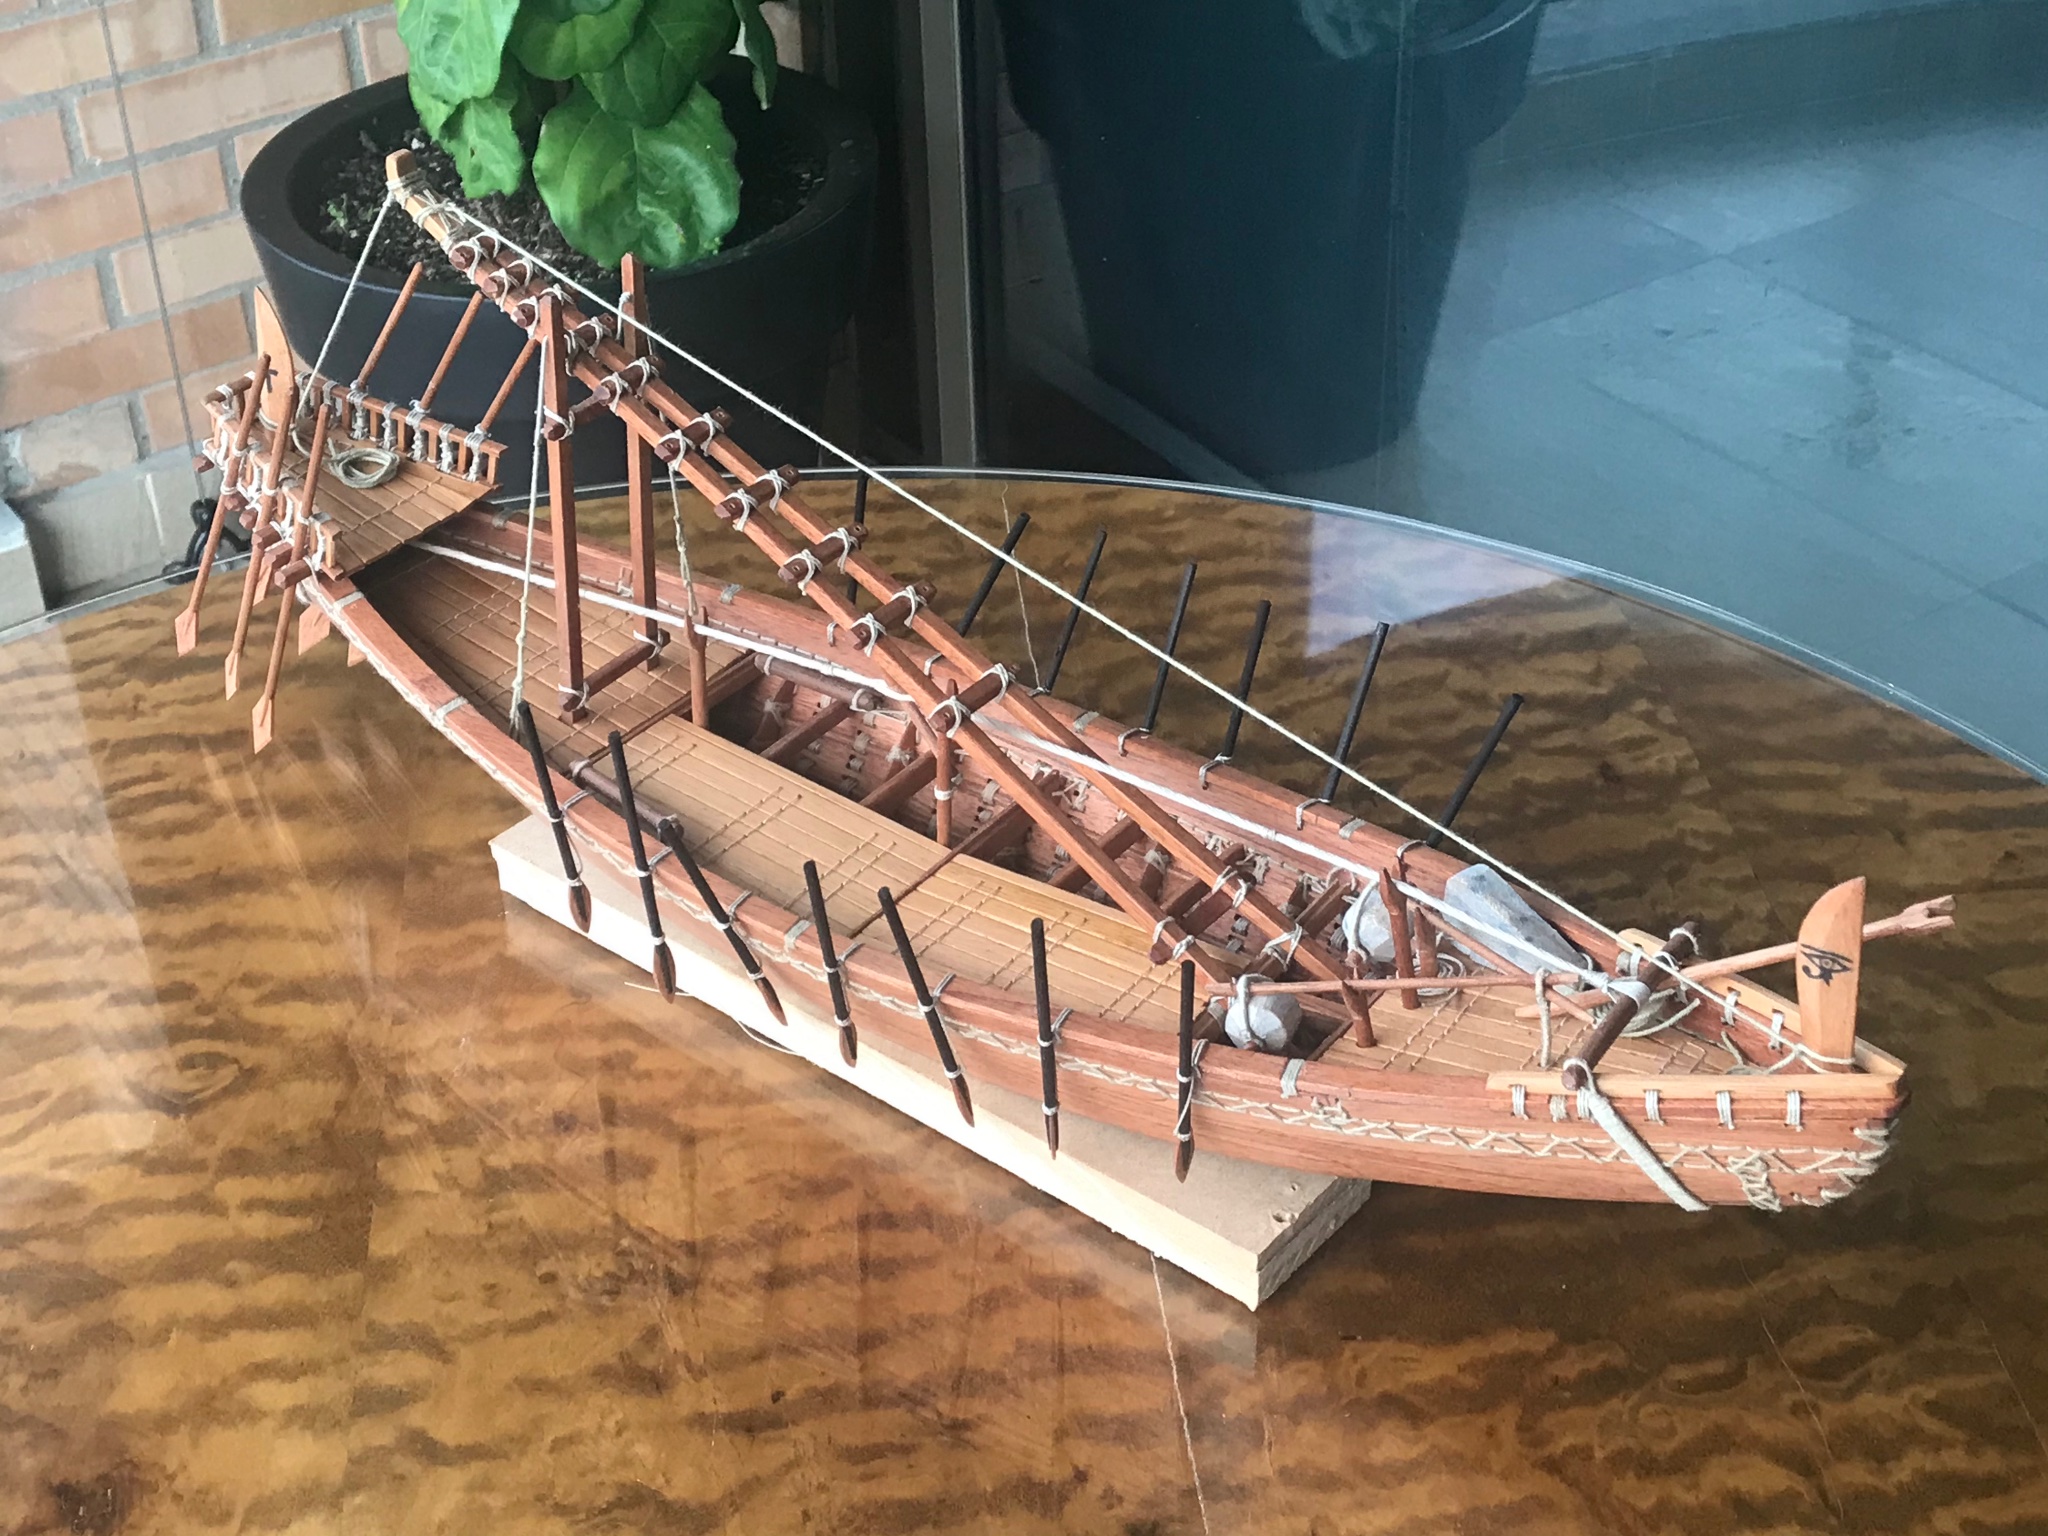
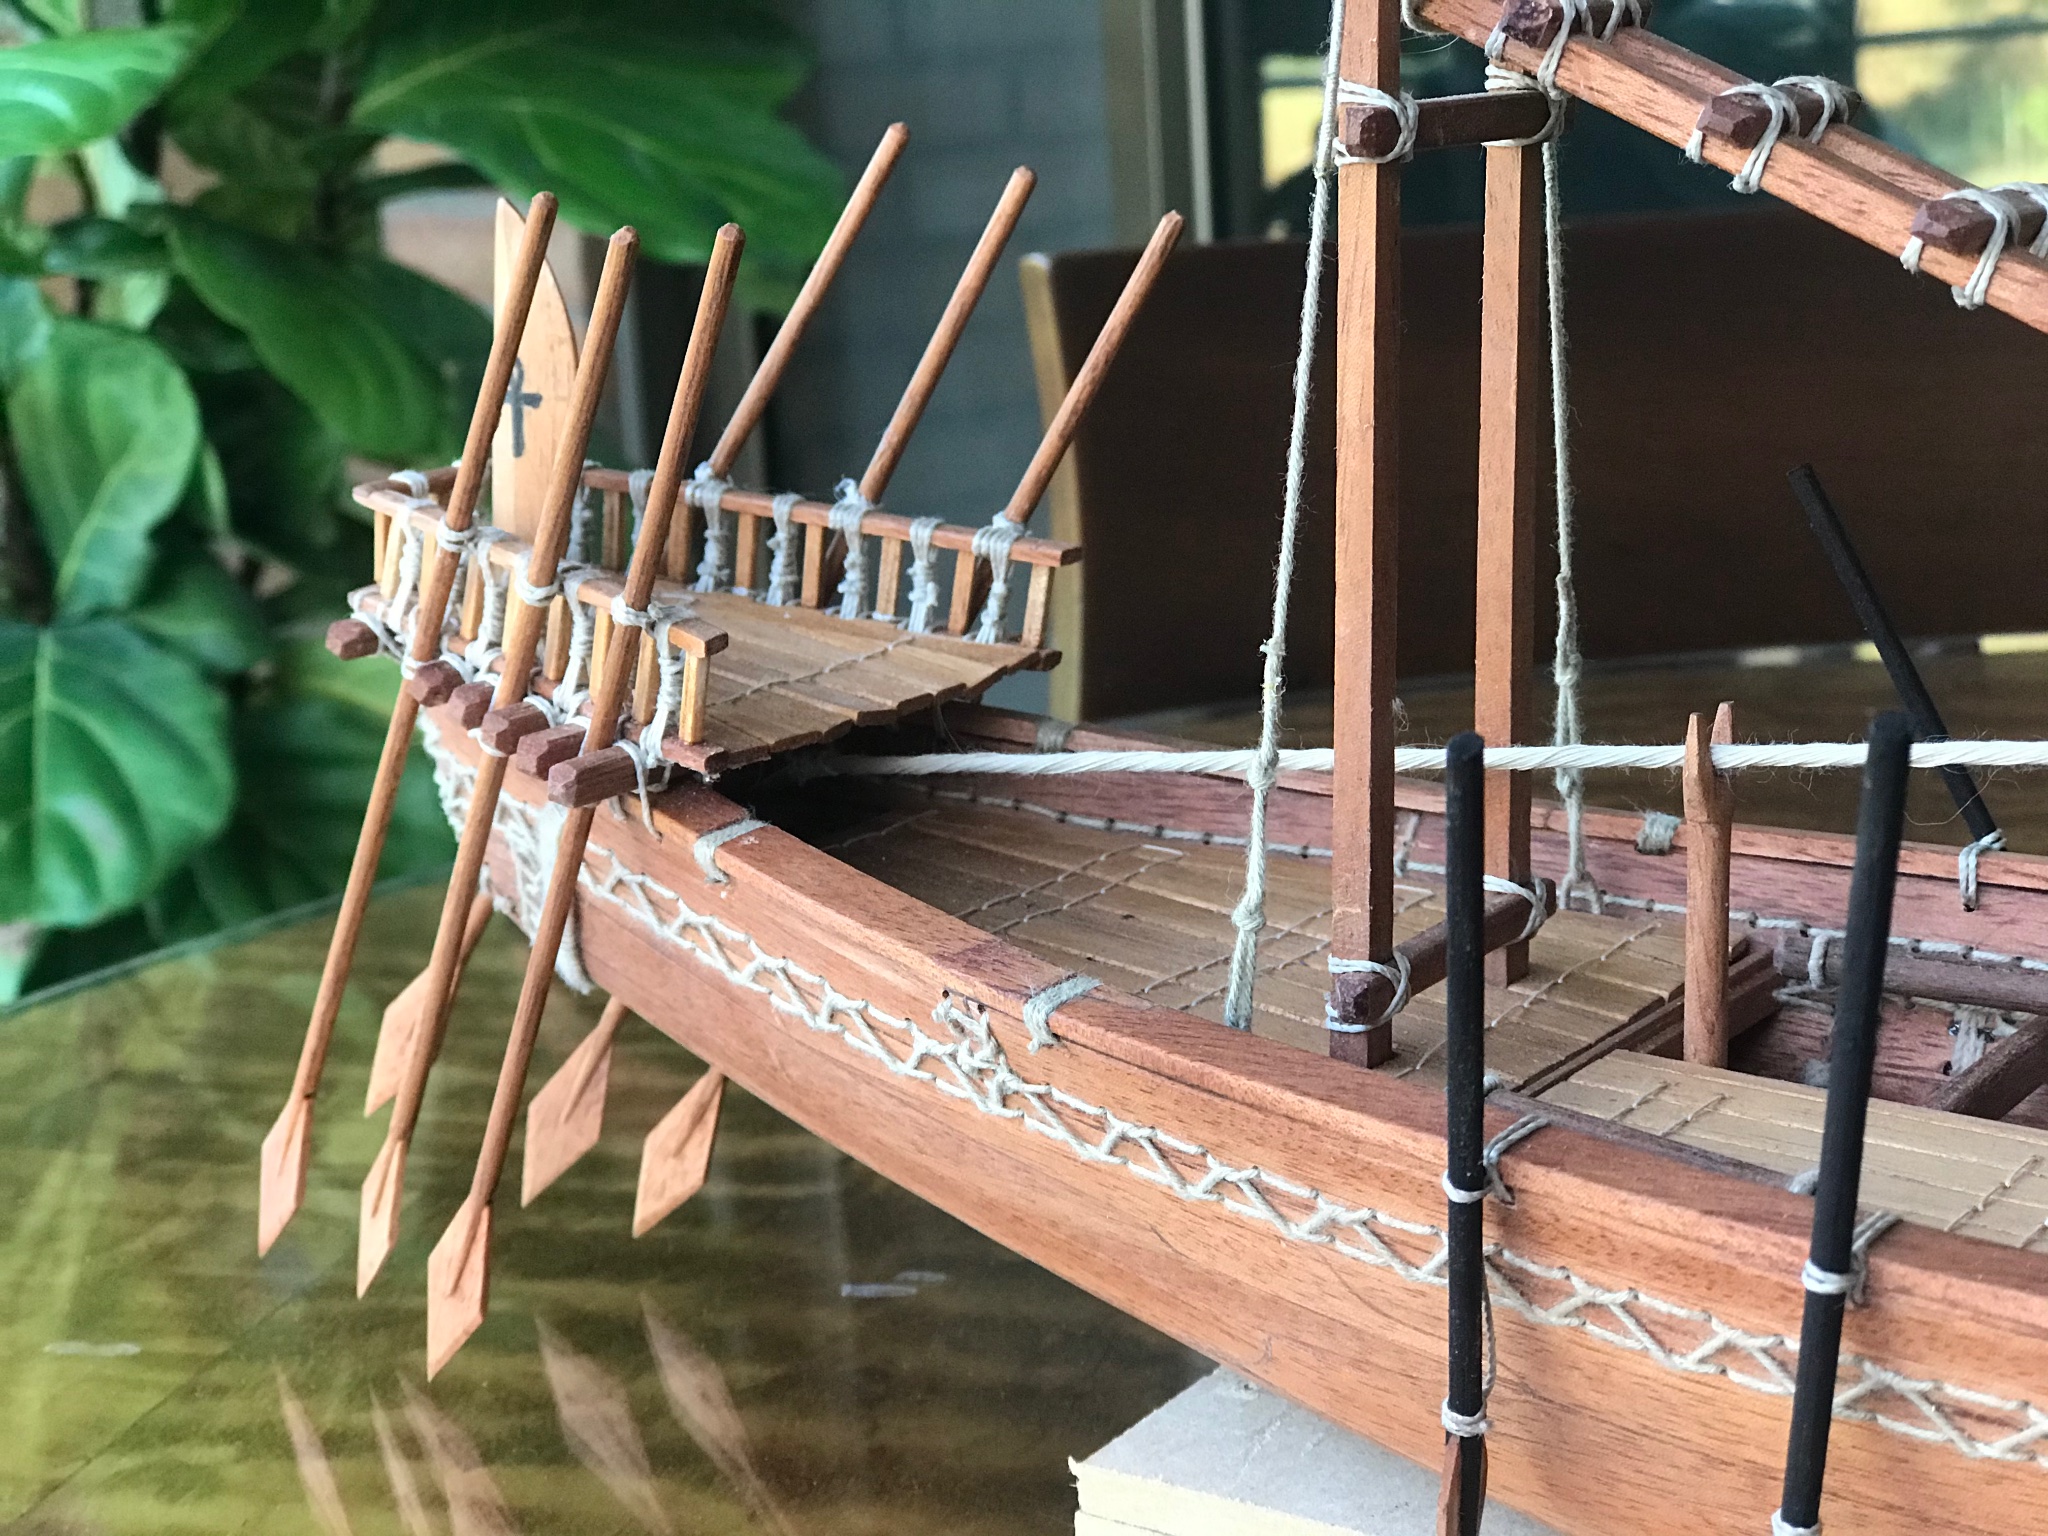
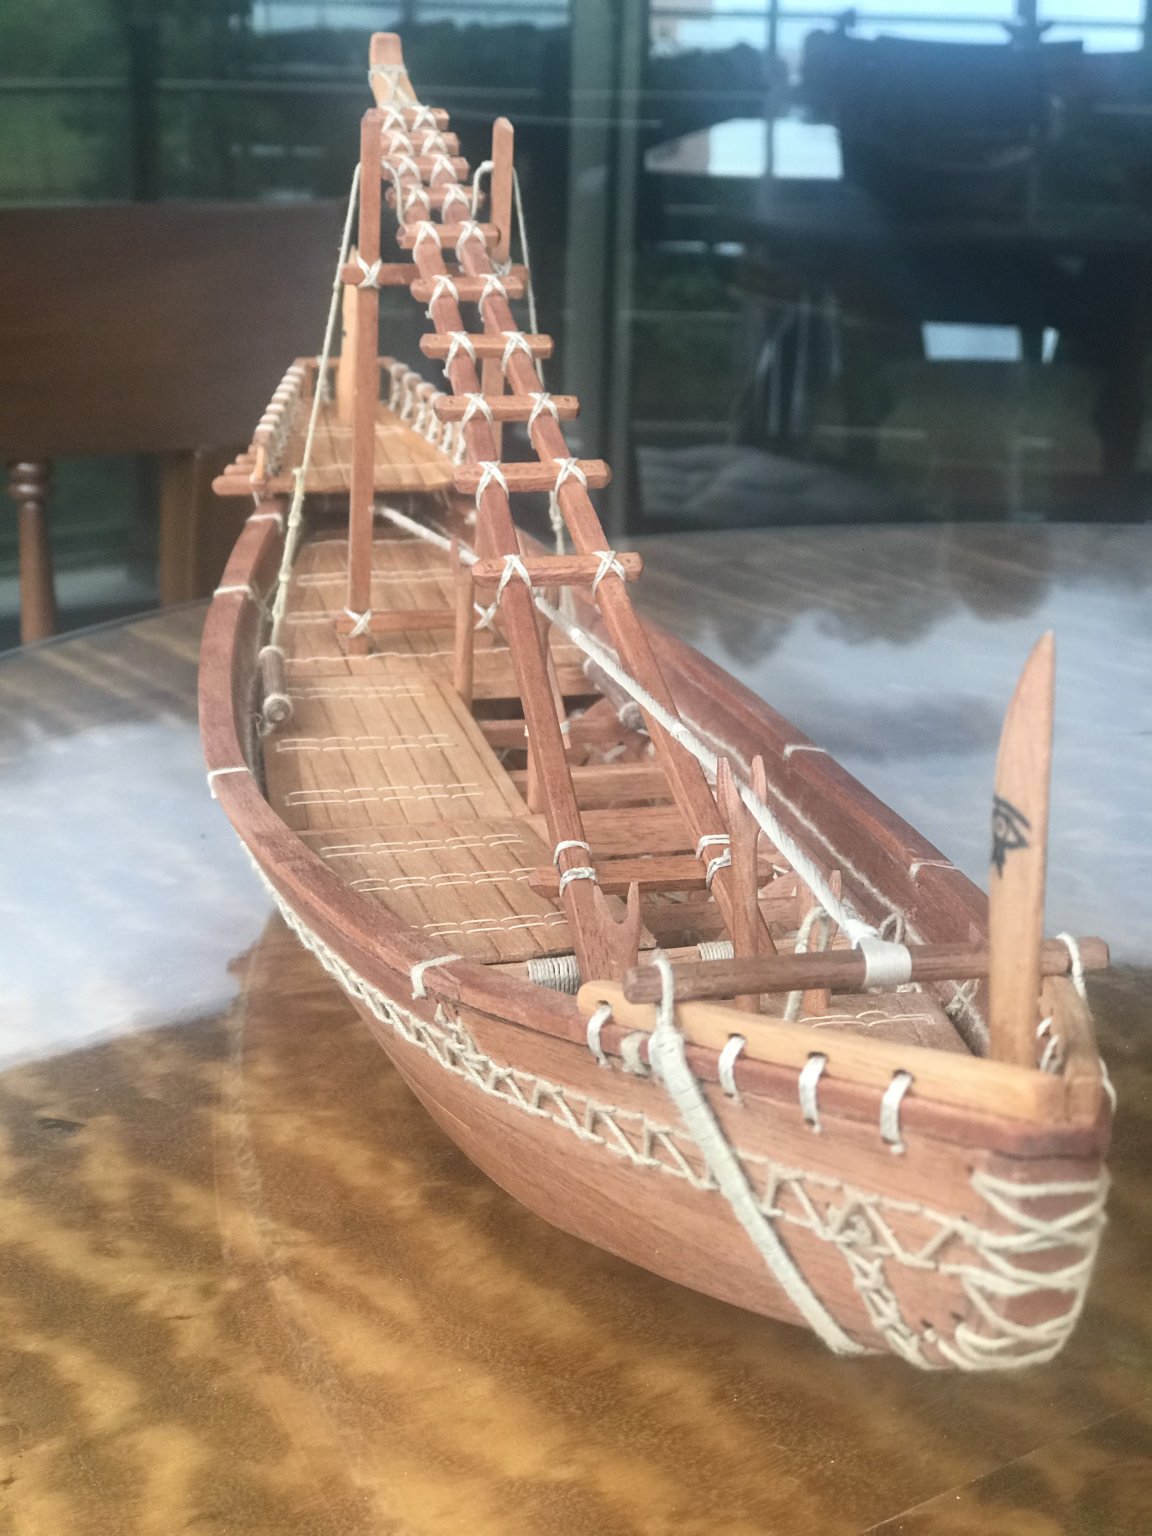
Now the oars for the “really” helmsmen. According with the pictures in documents they were six..... And also There are different versions about it.... some pictures put he oarsmen stand some seated...... I went with the stand version
Also they have some differences in the blade form.....Take a look


Here some pictures....


- bigpetr, GrandpaPhil, Brinkman and 6 others
-
9
-
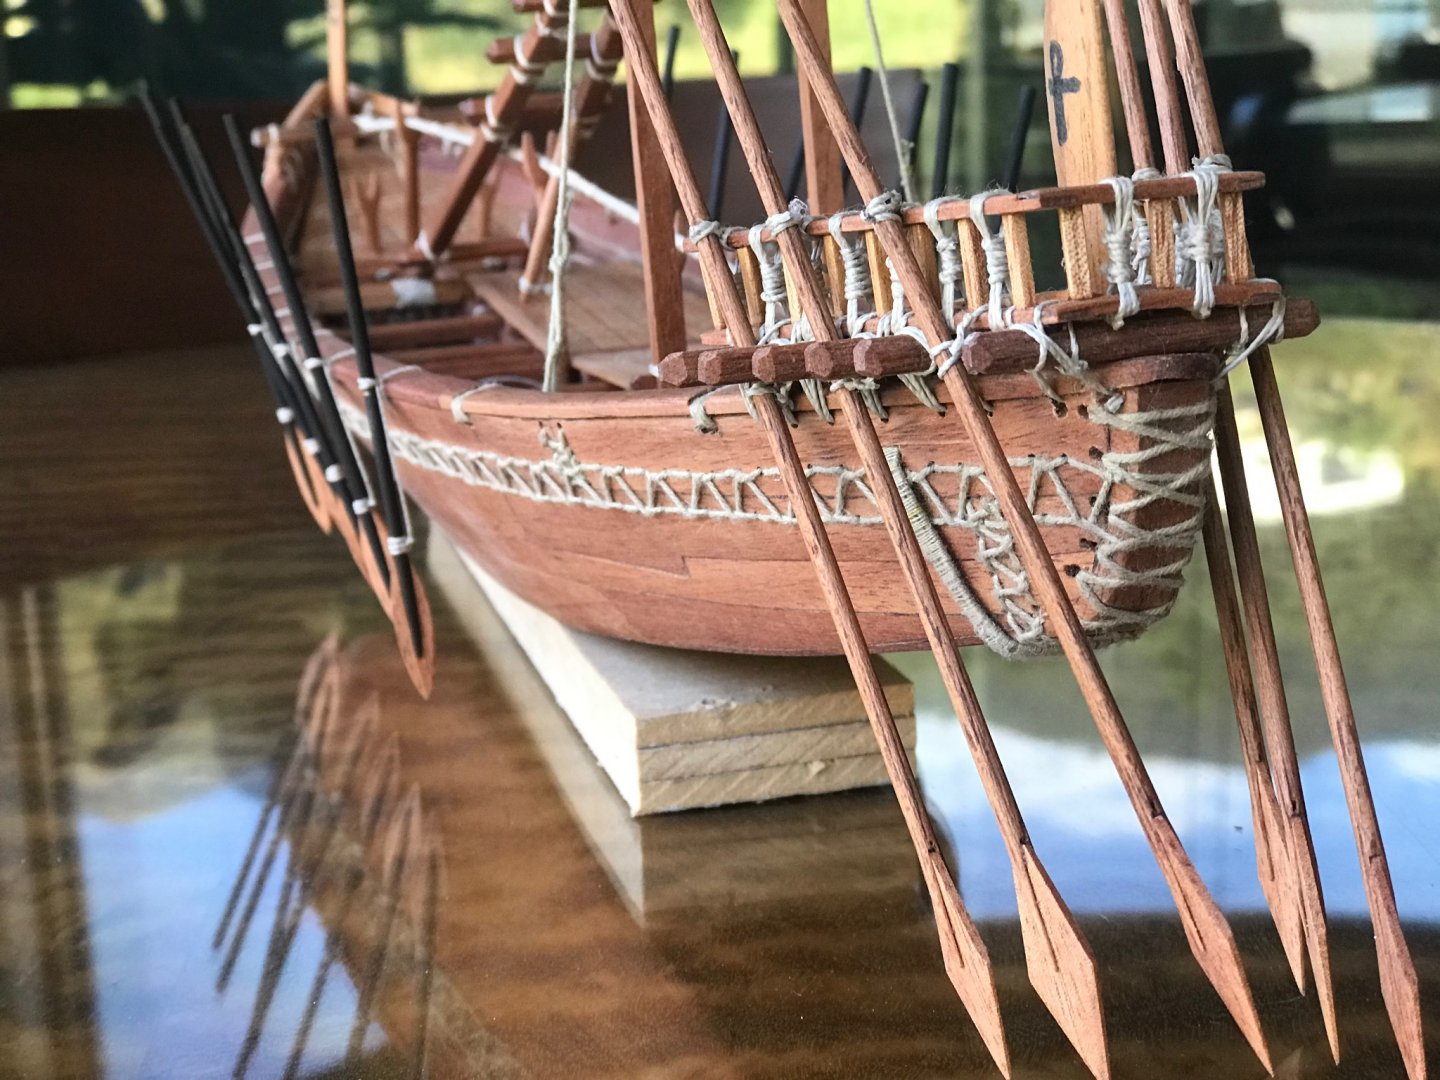
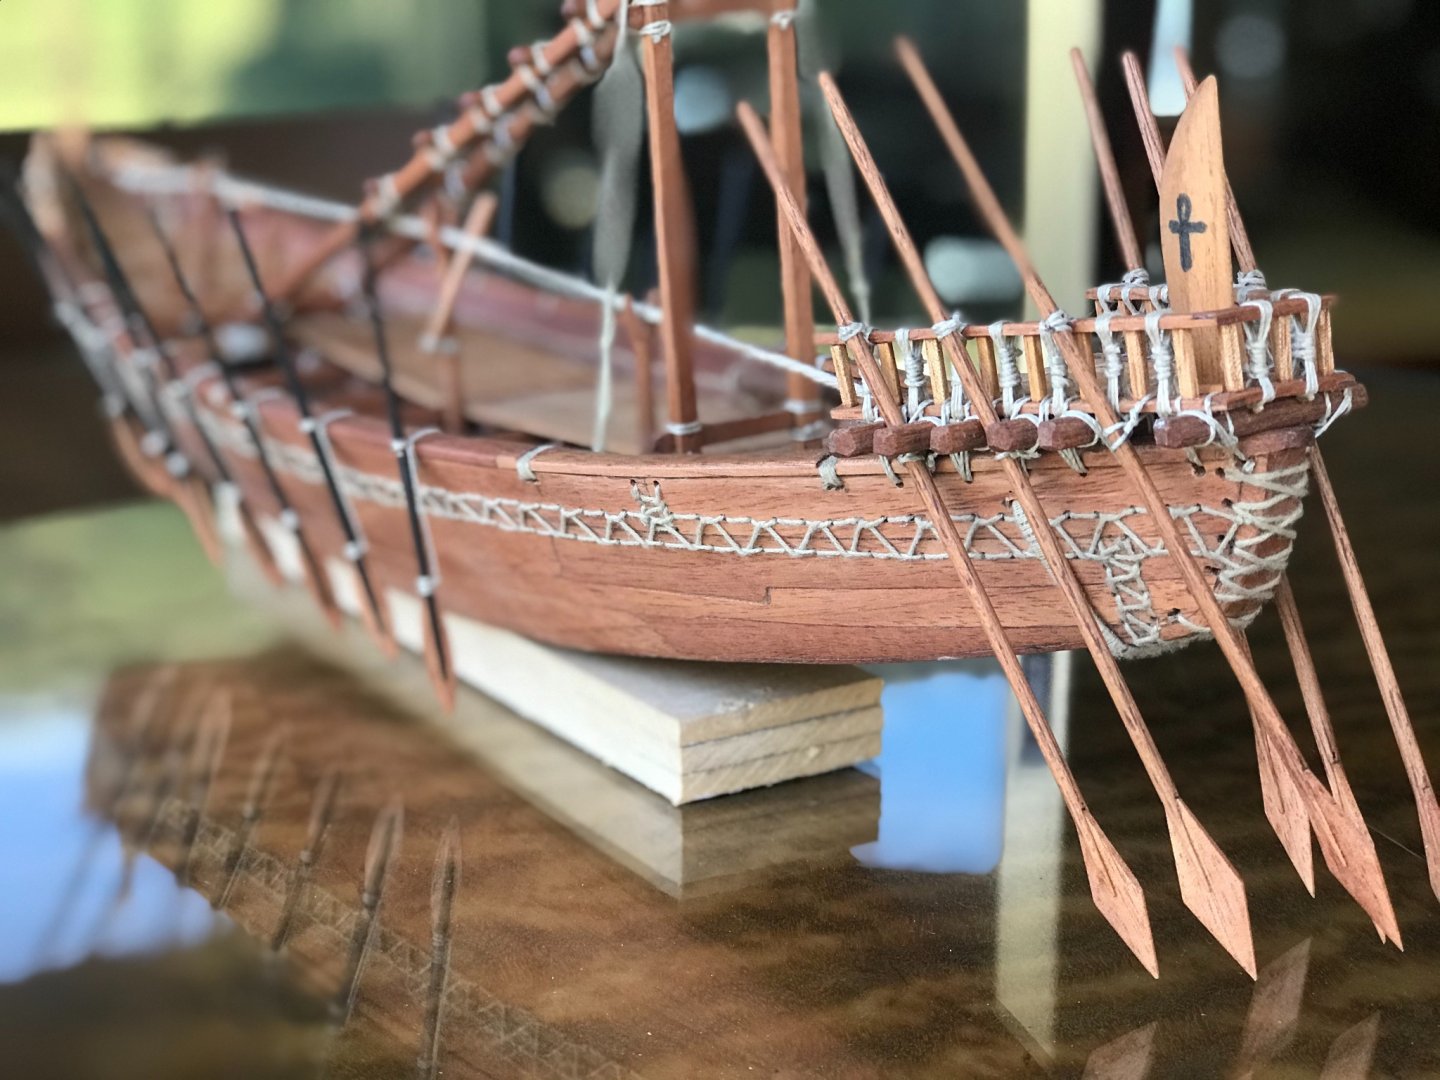
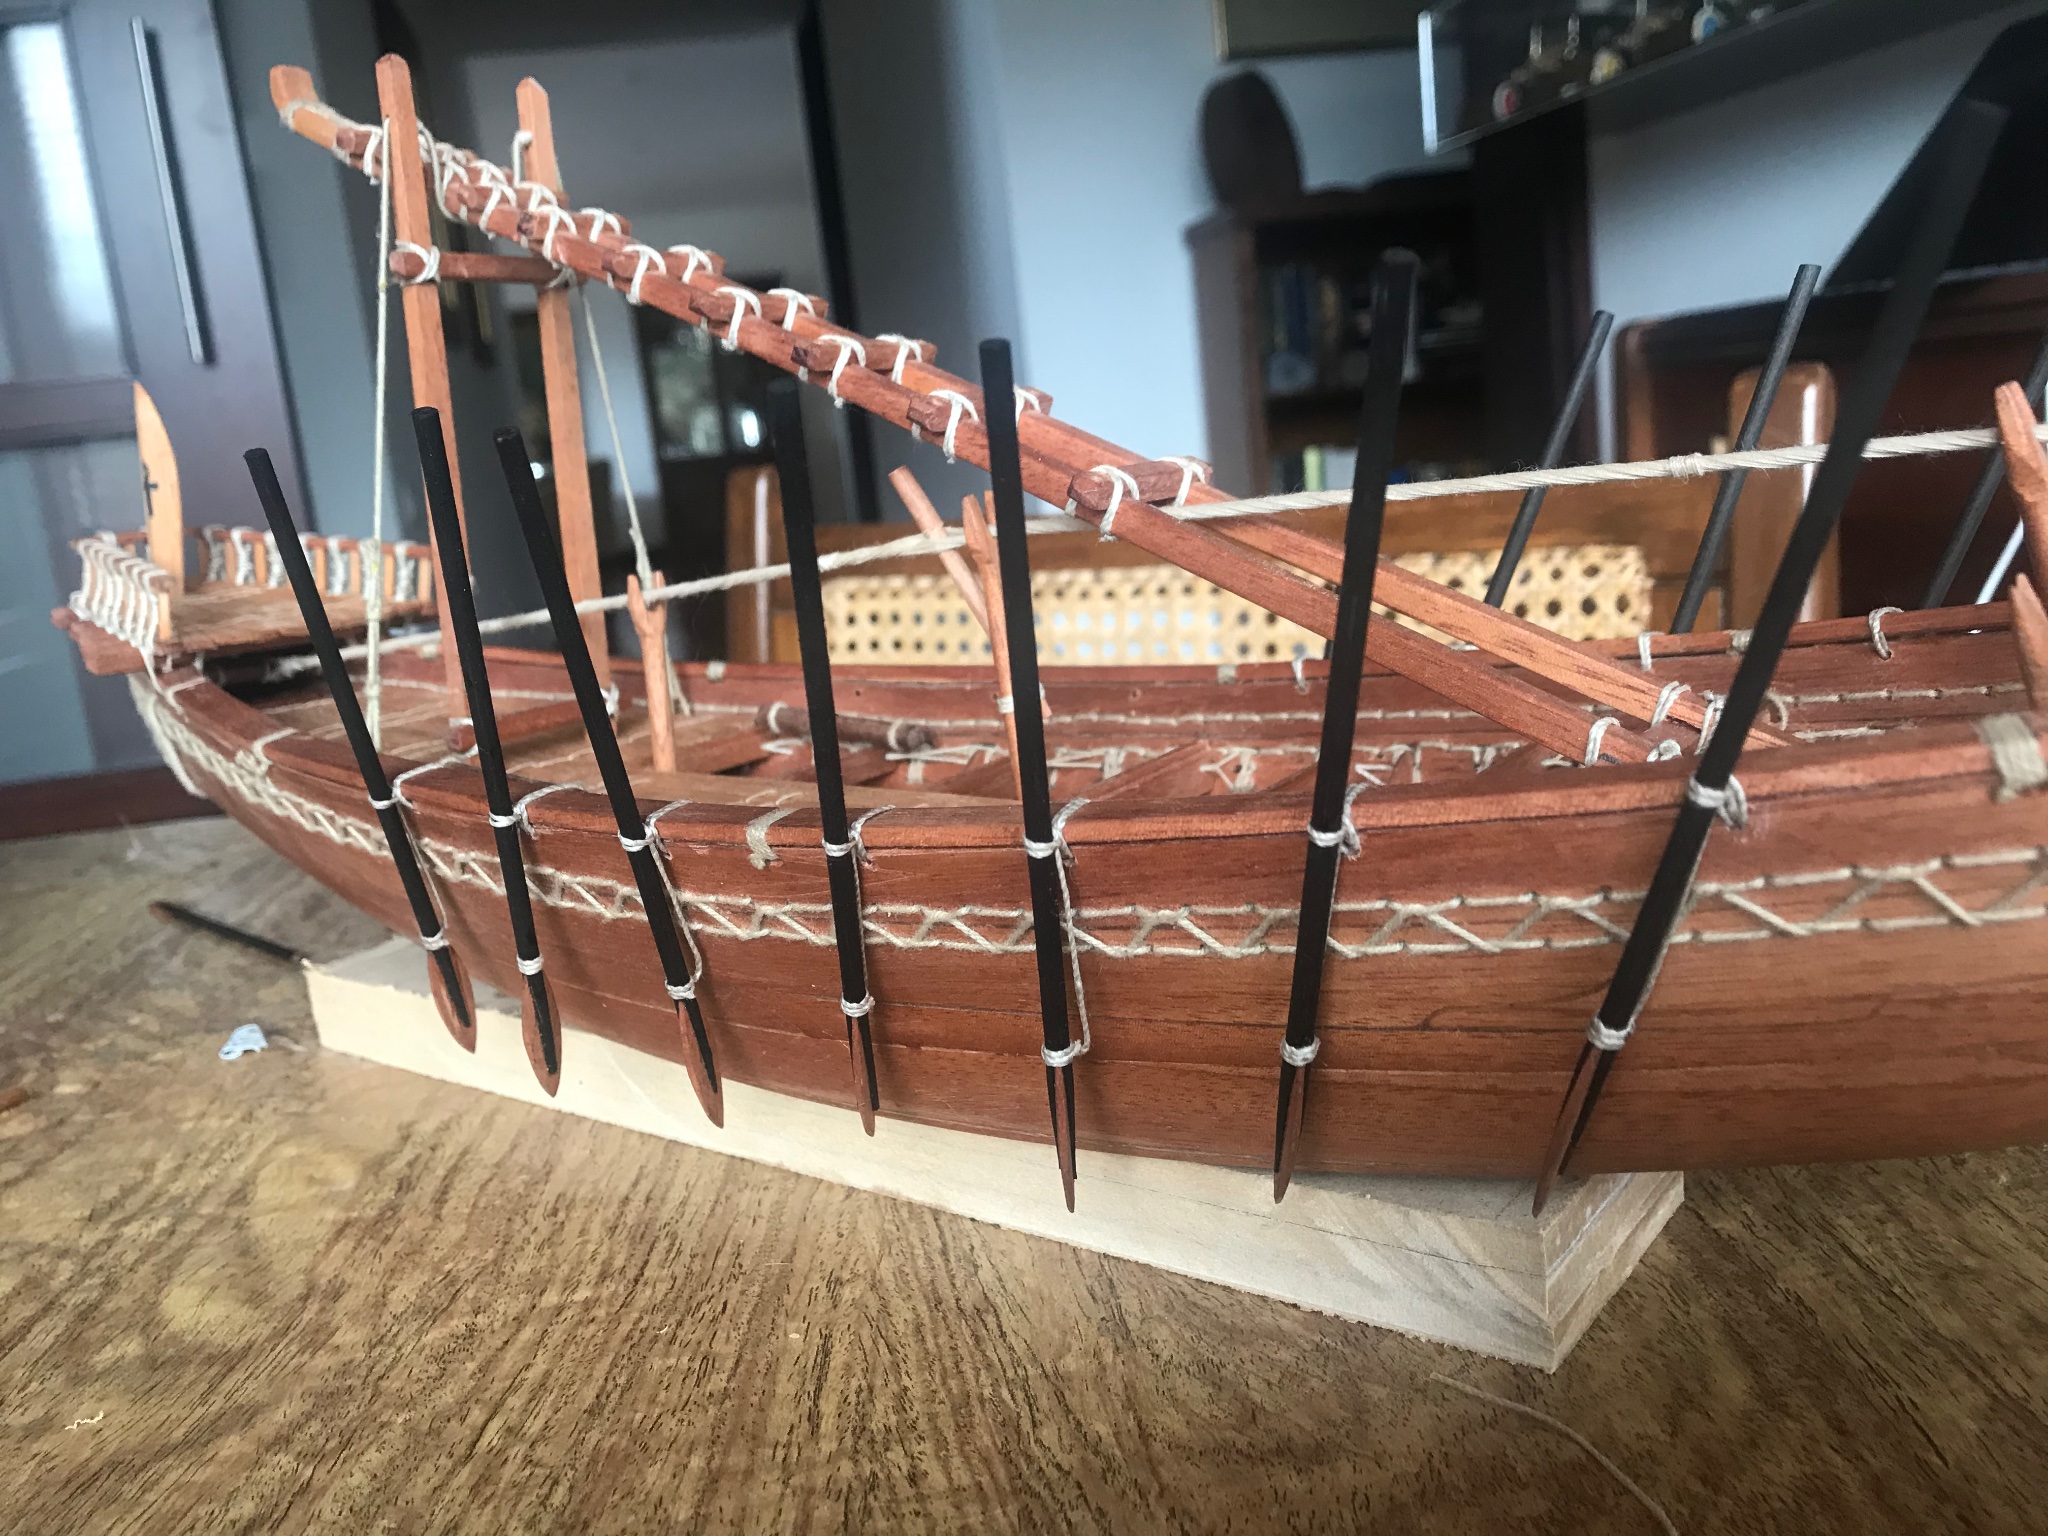
Weekend advances.....
Oars in its place.....
- The oars length were something that I had to deal with. Accordingly with Landstrom, today we don’t know if these oars were really for rowing or for helmsman.
- We don’t know if they were rowing stand or seated.
So... I decided to build them assuming they were for rowing and the oars men were stand....
Also, they had a very special way to fix them to the ship.......guess what!!!!! They also were tied 😄
here some pictures.....

-
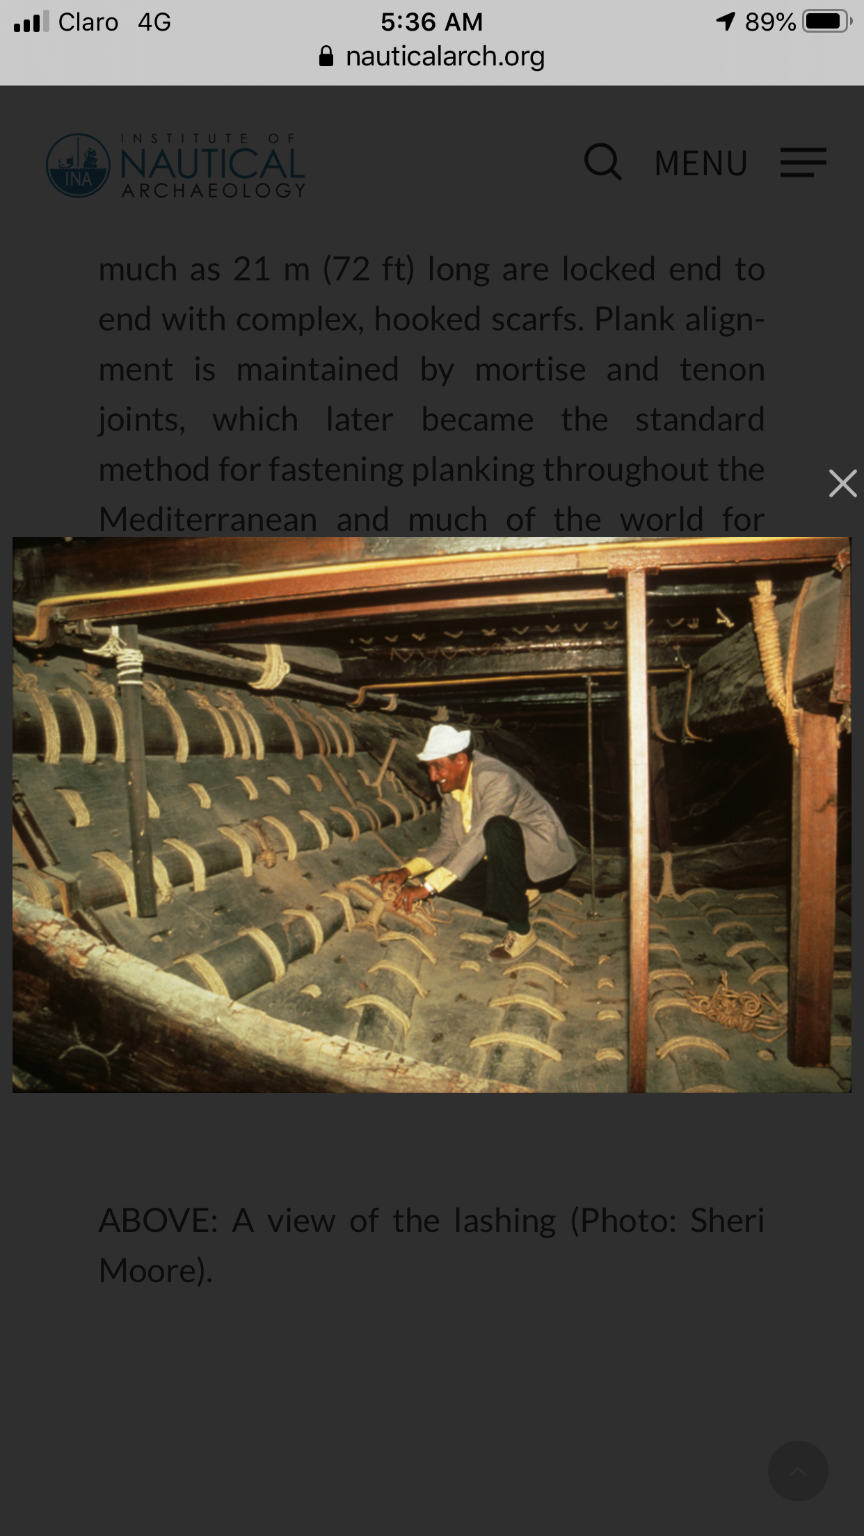
Thanks for following...... This ship belongs to the 5th dynasty...... by then, the wooden ships were just starting, they used tied rushes (according with some documents) because
- This was about the copper age.... they did not have materials strong enough to work with
- They tied their ships - again this is speculation- because this method allowed them to assemble and dissemble the ship, allowing them to transport it in pieces.
-
Just to clarify a little bit more...
-
8 hours ago, Boxbuilds said:
so I may have missed the explanation.....how did the shipbuilders plug the holes? It must have shipped a lot of water?? And the knots...were there descriptions of how lines were attached or were they gleaned from illustrations? Thank you.

the holes were like “V” shape in the interior going just up to the middle of the thickness. They were not seeing from the exterior.
talking about the knots.... I did not find any specific annotations about it
However I realized that using those that helped me with “tension” worked well
thanks for your comments

-
-
-
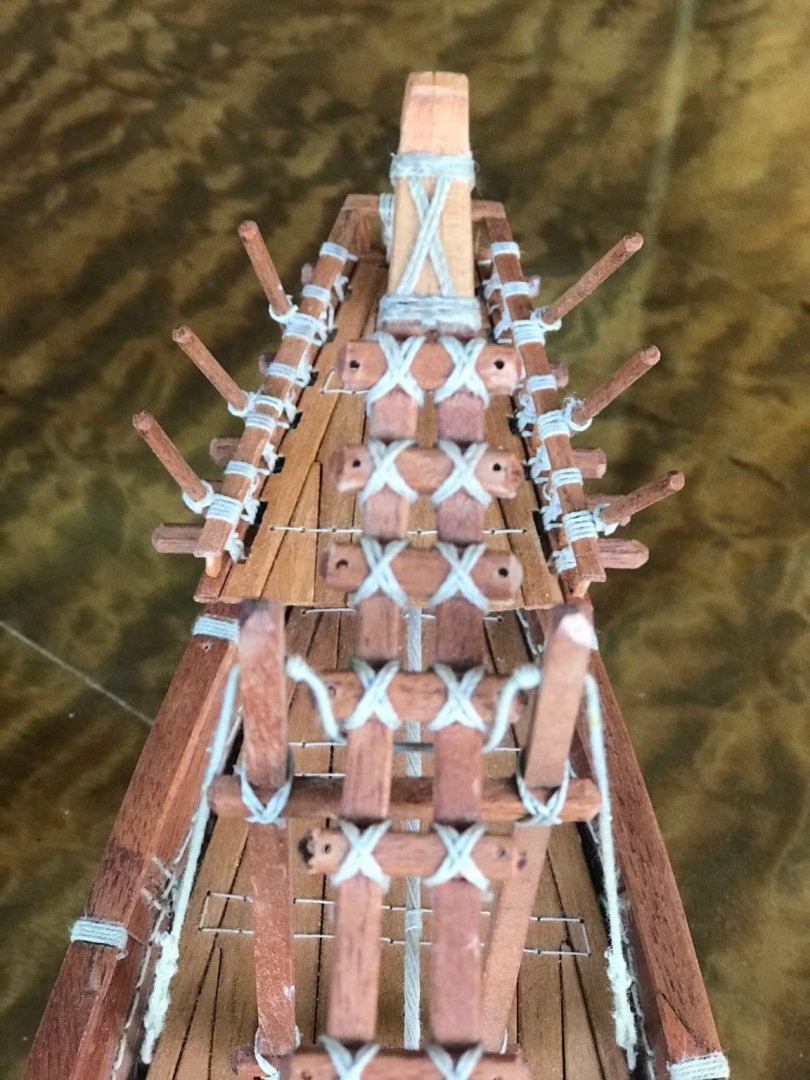
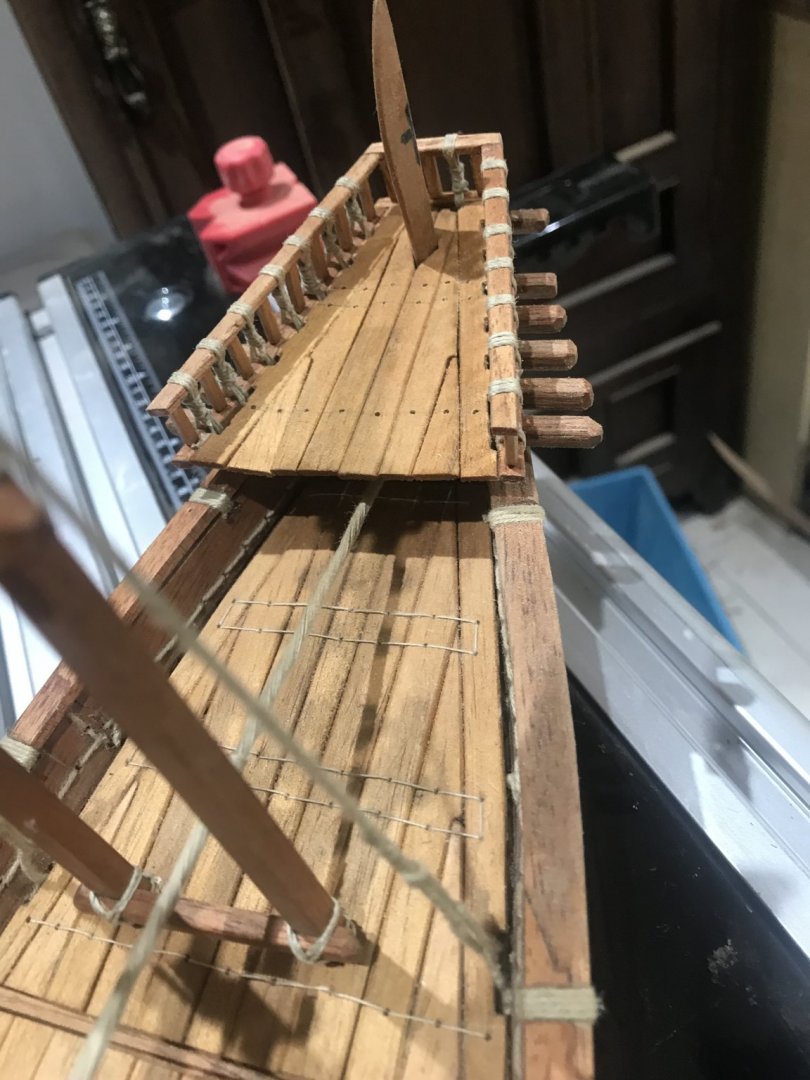
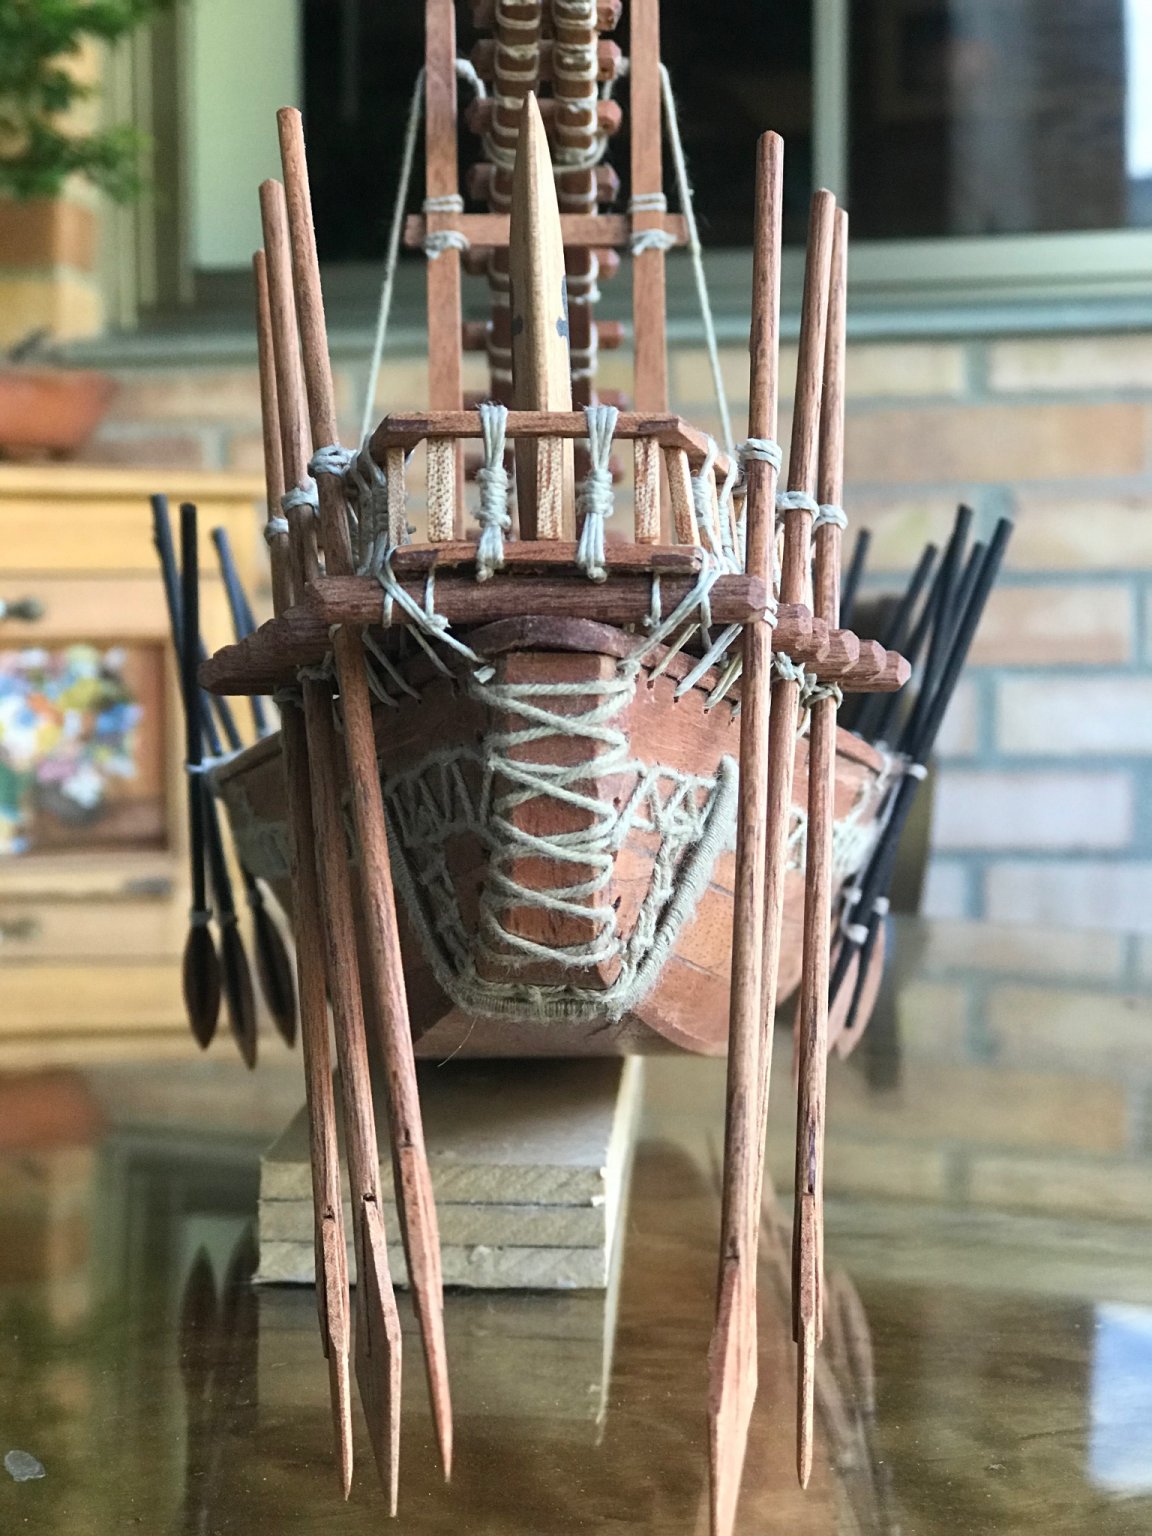
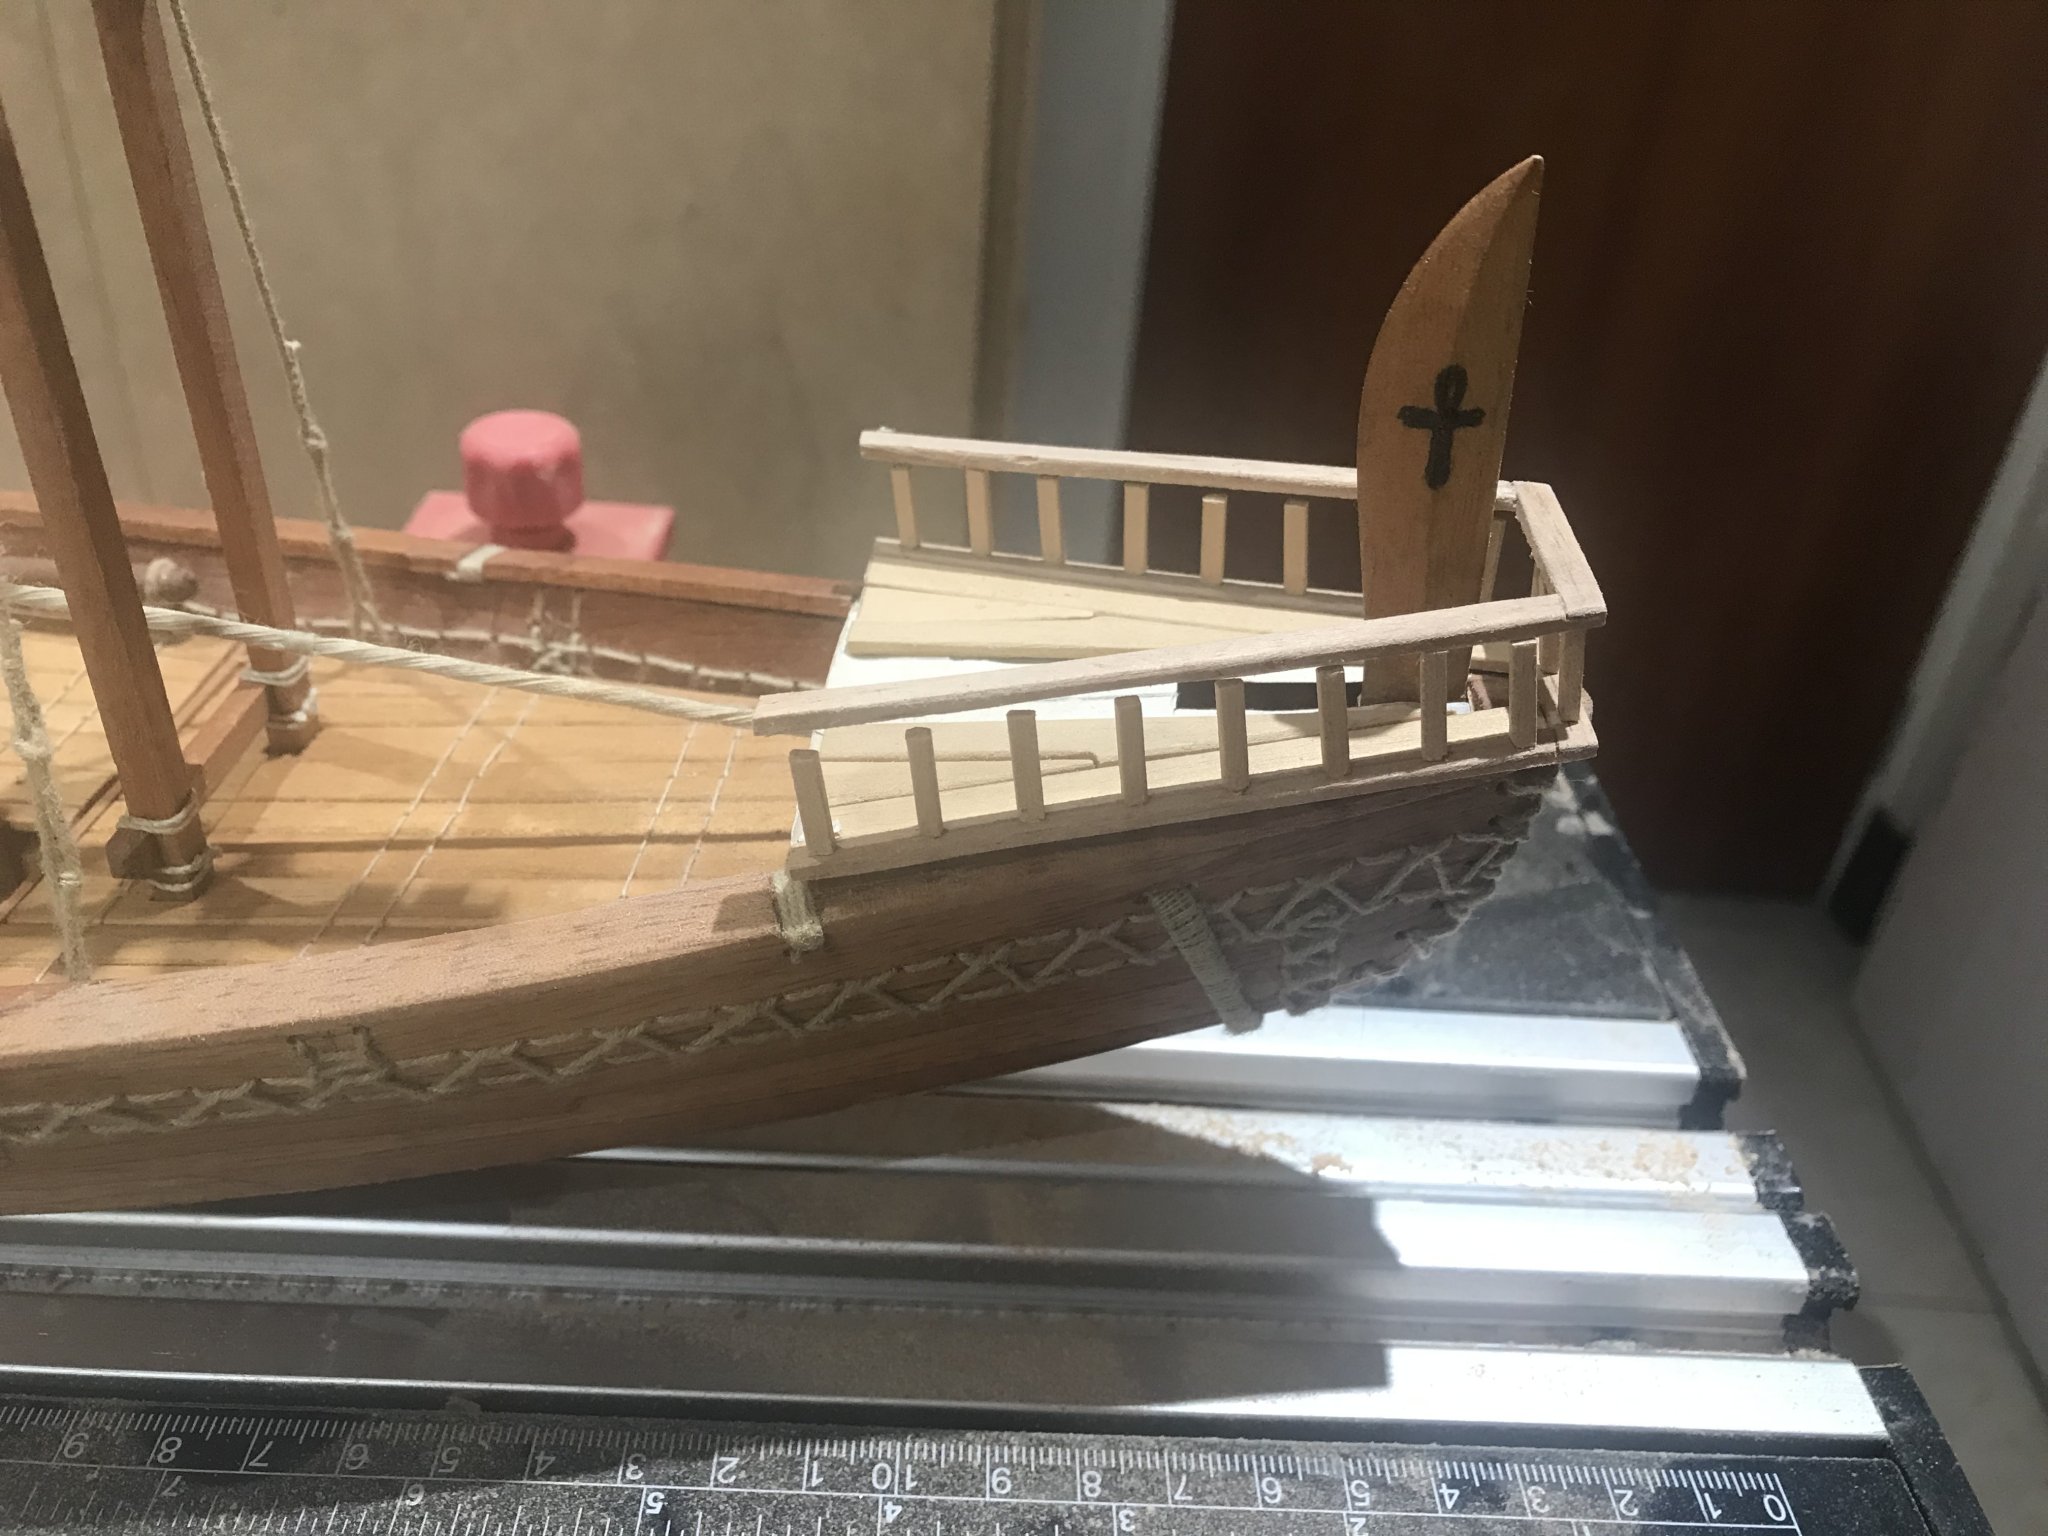
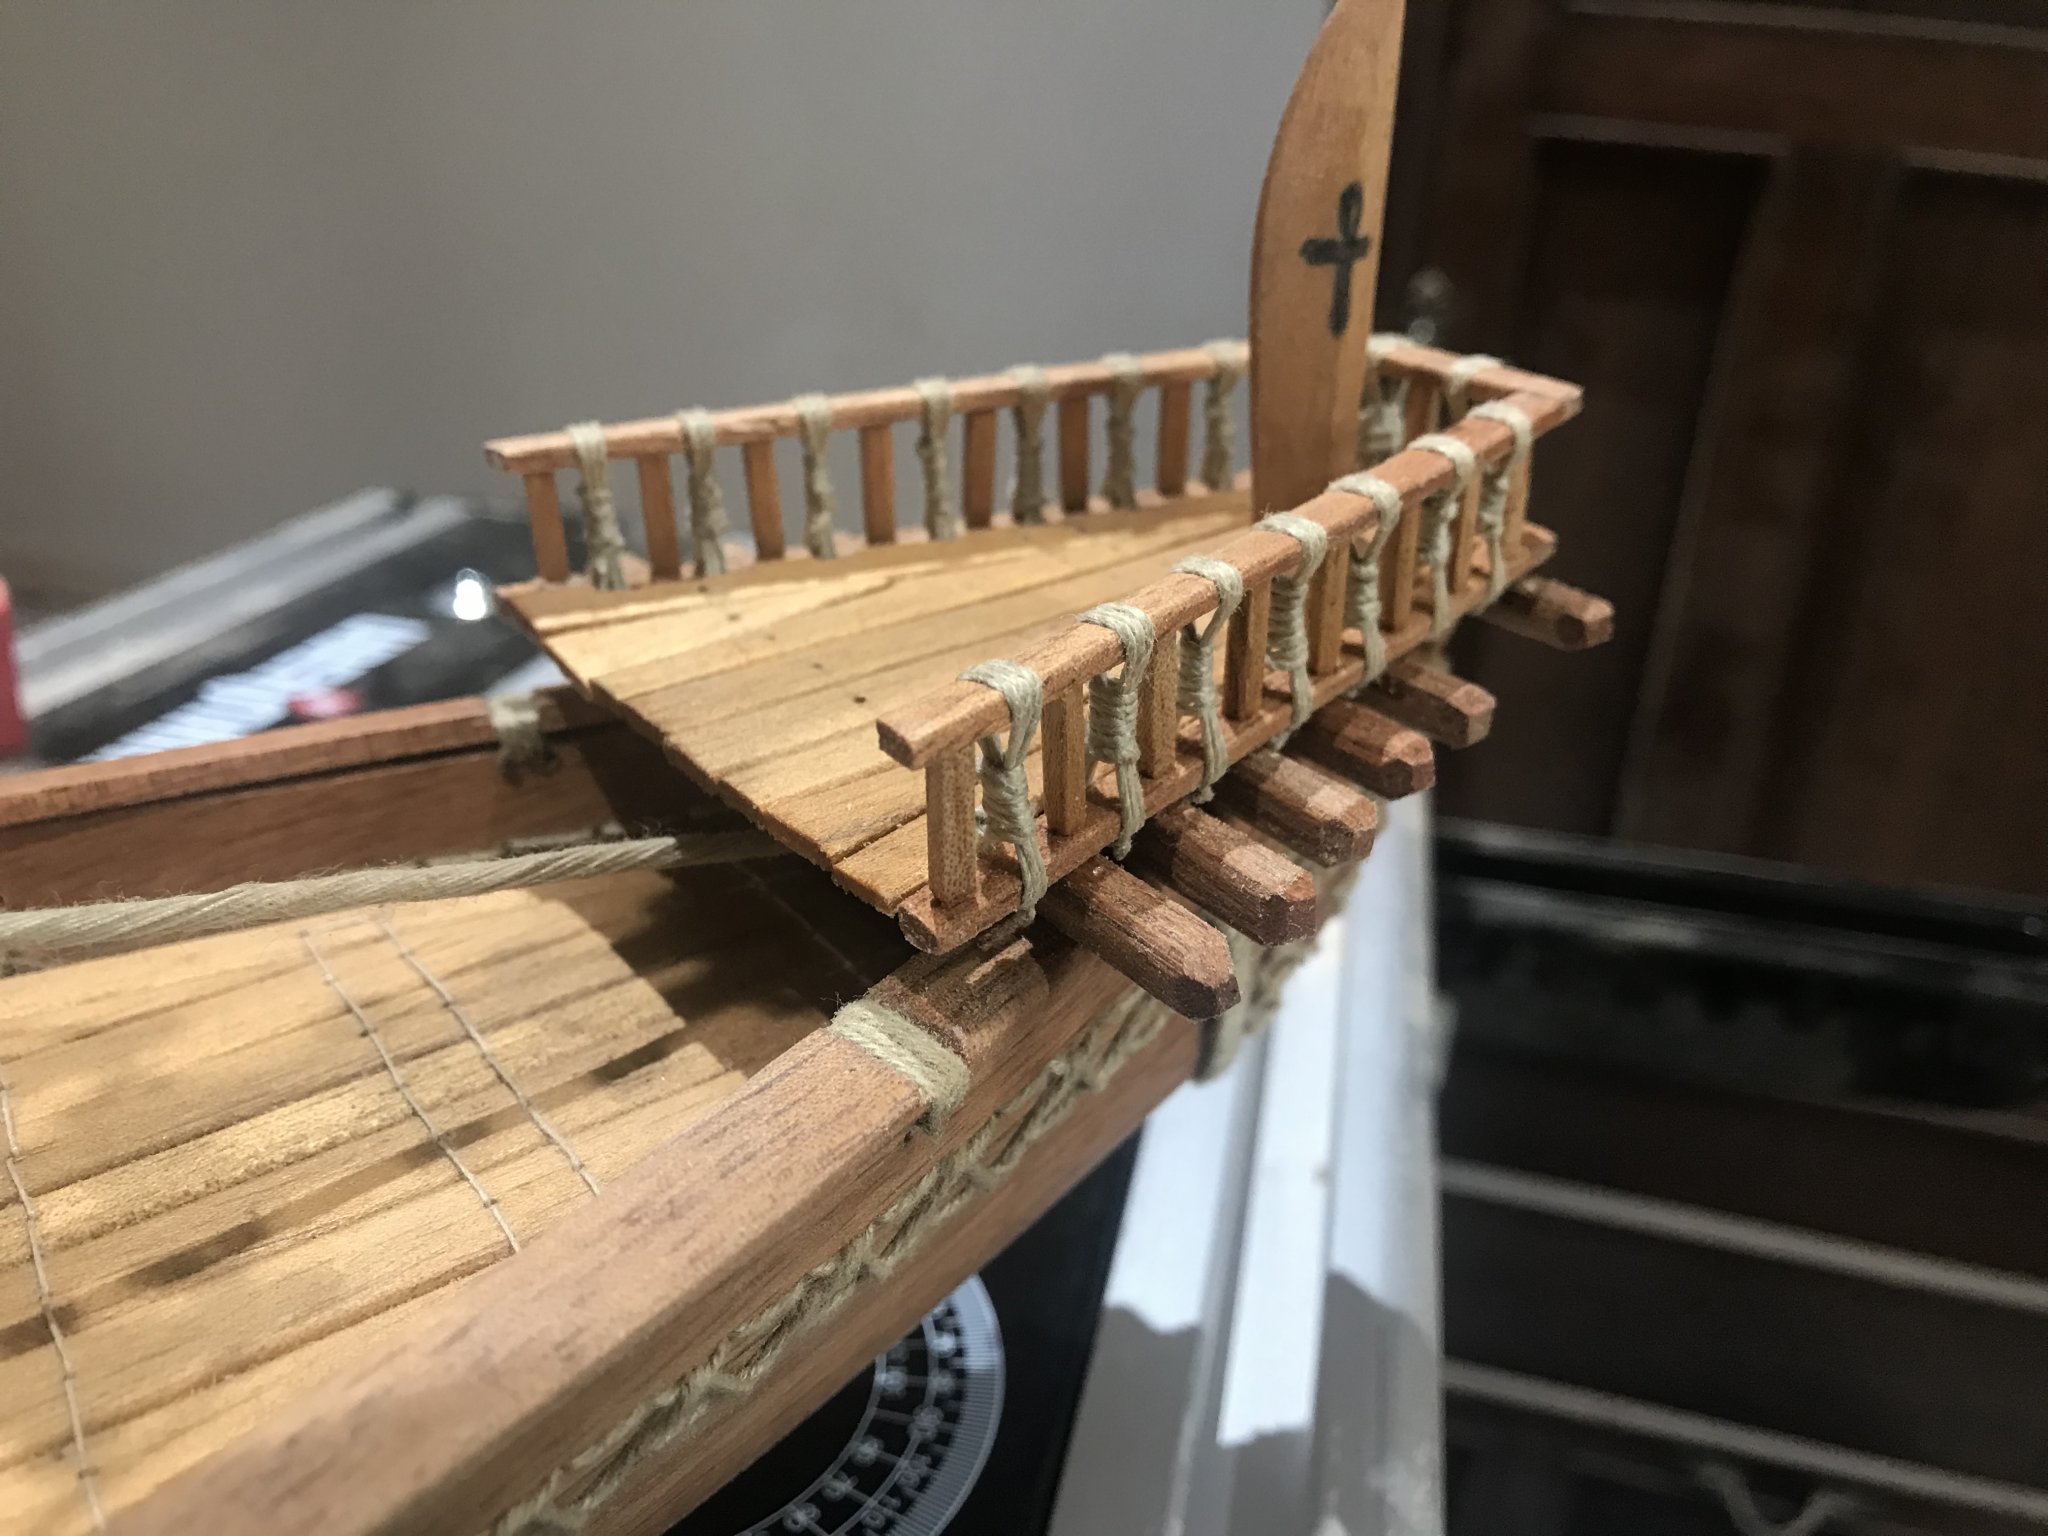
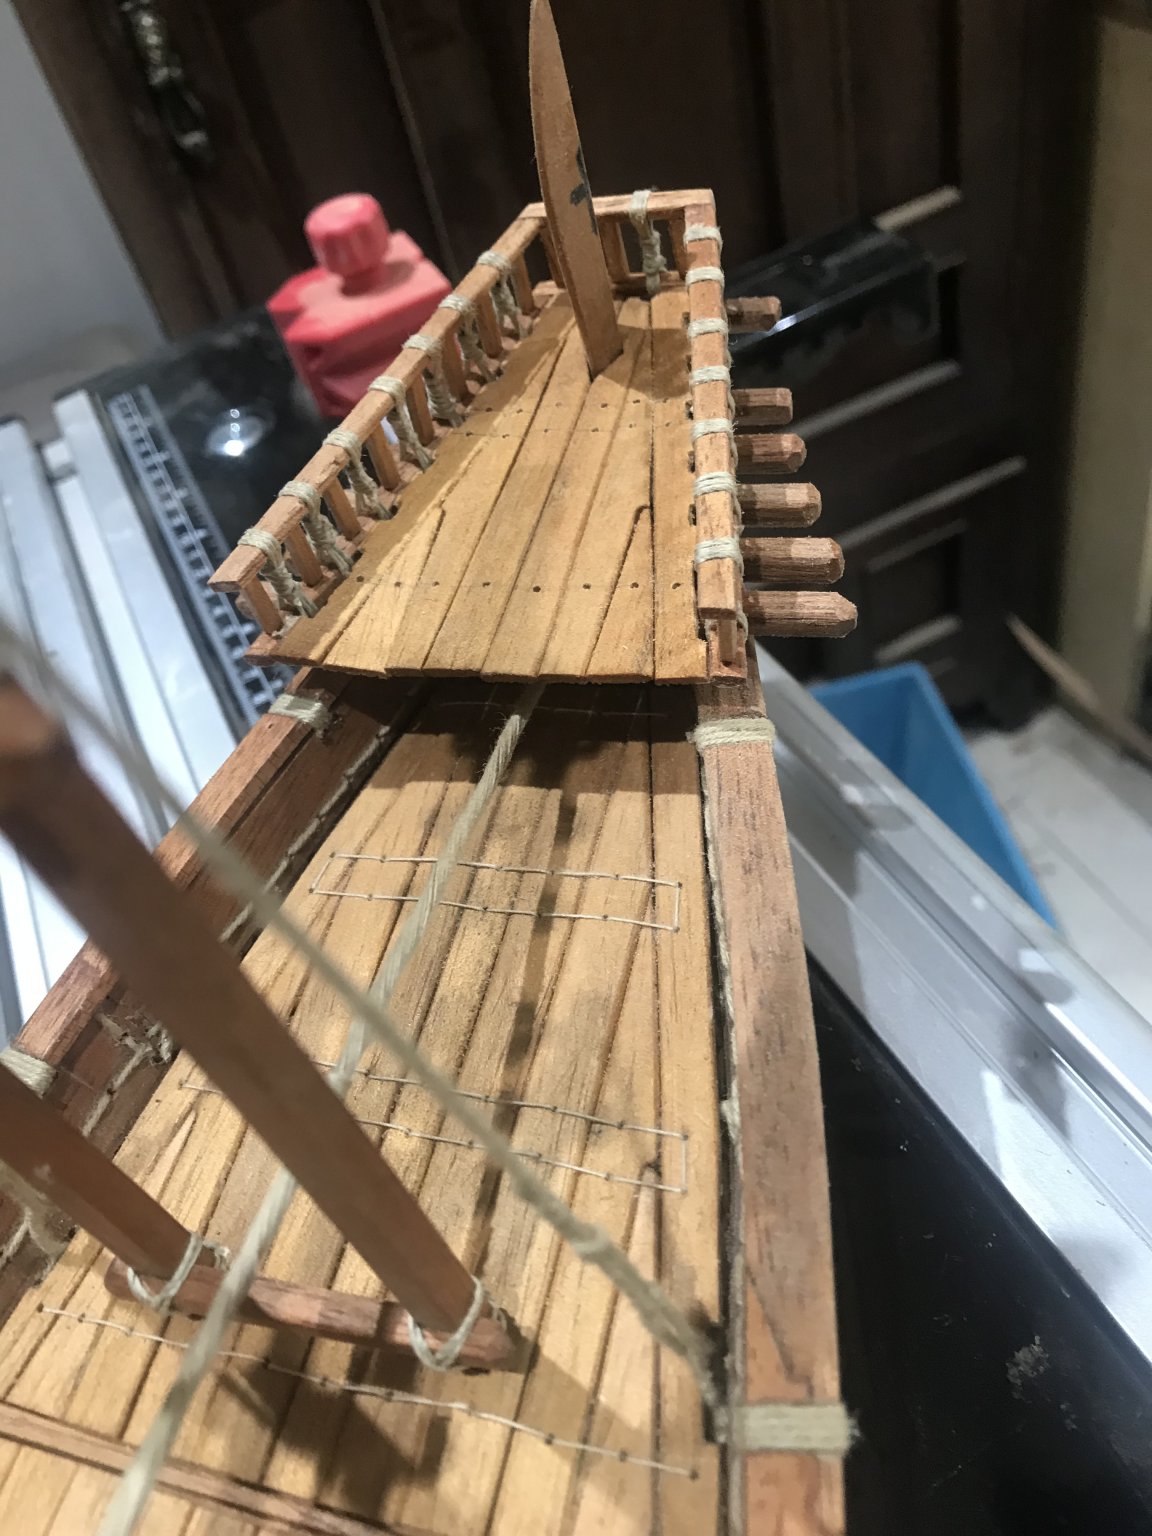
Here we go again.....this weekend I’ve been working in the helsman’s platform.....

As almost everything in this ship this particularly puzzle has been tide....

-
Steven
it looks really good. Well executed and It will looks wonderful any place you decide to show it
I just want to see it person once in my lifetime
congrats
- EJ_L, Louie da fly and mtaylor
-
3


Byblos by Schrader - FINISHED - 1:32 - Egyptian Seagoing Ship
in - Subjects built Up to and including 1500 AD
Posted
I’m so happy!!! I liked