HOLIDAY DONATION DRIVE - SUPPORT MSW - DO YOUR PART TO KEEP THIS GREAT FORUM GOING! (78 donations so far out of 49,000 members - C'mon guys!)
×


JerseyCity Frankie
-
Posts
1,338 -
Joined
-
Last visited
Content Type
Profiles
Forums
Gallery
Events
Everything posted by JerseyCity Frankie
-
schooner sail question
JerseyCity Frankie replied to captainbob's topic in Masting, rigging and sails
The Fisherman sail has to be dropped right down on deck and partially re-rigged every time you go about. The two ends of the two halyards (there are only four lines on this sail, one on each corner) have to be cast off and the hauling part of the rope is now tied to the sail and the part that was attached to the sail now becomes the hauling part- this way you don't have to have dedicated Port and Starboard halyards. The topsail on the Main is tacked with a special line that lifts the tack up high enough to get over the gaff below it when you go about and two tacks, one for each aspect to the wind, Port and Starboard, so one is always under strain and the other lazy. The the Main Topsail stays in place and in fact is even furled aloft, it never comes back to the deck. The fisherman is not often put to use and stays below decks most days. But for racing or longer passages its set. -
The flat spiral coils in question are known as Flemish Coils and they do have a place on sailing vessels. They are used in places where there are a combination of factors: a long line that needs to be stowed yet instantly available if needed and no good place to hang them, they are also best in places where there is a lot of foot traffic as they are the only type of coil that can be trod upon without ruining them. They are in fact deigned to be walked over although it is likely not encouraged. The yacht your building would have had a large crew which would mean every space on deck would see a lot of foot traffic. Also with no bullwarks there aren't too many convenient places to hang a round coil and keep it off the deck so the Flemish Coil is your only answer. Some long lines are flaked down in figure eights as suggested, but they make a larger "footprint" on the deck and when accidentally kicked they lose their shape and their ability to run without fowling becomes suspect. The Flemish Coil does soak up water and hold it against the wooden deck and that is bad for the deck so if the vessel is not underway the coils would be made up and hung off the deck. The Flemish Coil's precise form takes a lot of effort to get right and they do look "fancy" and on a working vessel they are considered "yachty"-a pejorative term- but you will see them at any marina being used as the best way to keep the long ends of docklines from cluttering up the docks making them unsafe to walk upon. Picture the tackle on a cannon: the lines are long and they can't be made to pins on the bullwarks so they are either gasket coiled and hung on the gun itself or they are Flemished on deck. Incidentally the Flemish coil is always laid in a clockwise direction with the bitter end at the center.
-
In general nothing runs on the outboard side of the shrouds, this would be too dangerous for the crew. My guess is your buntlines would pass through the shrouds at a convenient point near the very top of the shrouds, under the top and ideally above the futtock shrouds so the men wouldn't have to tangle with them. Often fairleads were seized to the inboard sides of some of the shrouds and these look like wooden doughnuts with a hole big enough to allow for two or three lines to run through them and these fairleads are often lashed to the shrouds at points directly over the pins the lines are being led to. Its conceivable and likely that there were fairleads near the top of the shrouds too, where necessary, to keep lines running fair.
-
On the Lettie the headsail with the spar attached is known as the Jumbo, and the spar is known as the Jumbo Club. Why its not known as a jib I can't tell you. Clubs on headsails are not uncommon, at least not on schooners, and they help the sail maintain an optimal shape. Tacks are not the line your thinking of Themadchemist. Sheets adjust the headsails, The tack is the forwardmost lowest corner of a fore and aft sail and there is a tack line holding it in place but its never adjusted and is more like a lashing. Incidentally I have sailed on Lettie and in the photo its likely she has JUST come about and the photo was likely taken in the instant before the sheets were adjusted. She wouldn't be sailing around with her hadsails like that, this is a temporary condition.
-
Just to bring the narrative up to date: Lettie G Howard is back from her four month refit in Main and is tied up once again on pier 17 in lower Manhattan-right by the Brooklyn Bridge- with her spars back in place. in Main a new keelson was built, made of purpleheart. This month the South Street Seaport Museum announced a partnership for the vessel with the New York Harbor School and she is expected to be sailing again in the spring. So things are looking up for Lettie. The museum is still of VERY shaky legs though and things could still get dire, but this time last year the damage from the hurricane made it seam like the whole seaport district could have been bulldozed and today there is a plan for Lettie's future and skilled, tenacious people in place who are determined to make things work down there.
-
I will put in a word for basswood. The original poster said his samples were in a sad state but that doesn't mean all basswood is junk. Where I live its available in all sorts of dimensions at craft and art supply stores and I buy square stock and work it down to the spar I want and if you select a straight piece of wood you will get a straight spar. Kit manufacturers are notorious for providing poor wood.
-
BEESWAX FOR SHIP MODEL RIGGING
JerseyCity Frankie replied to vas1949's topic in Masting, rigging and sails
In Ship Modeling From Stem to Stern by Milton Roth on page 239 Roth claims you can dissolve beeswax in turpentine or benzine and run your line through the solution which will allow the "deepest penetration" but I found the wax would NOT dissolve in turps and later I wondered what he was on about. I have never worked with benzine but I tend to think its likely too strong a solvent to monkey with in this way. My experience is that the raw beeswax should be a bit soft and if your ship modeling battle station is cold you should heat the wax a bit by holding it in your hand or putting a hot light on it. -
My recollection of the Heller kit instructions is that they have you tie the Chain Plates with two bits of black rigging thread!
-
I vote a sharpening wheel. Set it up on a little bench. Essential on a whaler but not out of place on other ships I would say. In the same vein an anvil set up on a log with some tongs and hammers would fit onto any ships deck. the easiest solution would be an unbent sail folded and lying on deck waiting stowage or setting, a short length of nearly any sort of white fabric with some turns of line holding it in a sausage shape, as actual unbent sails are configured.
-
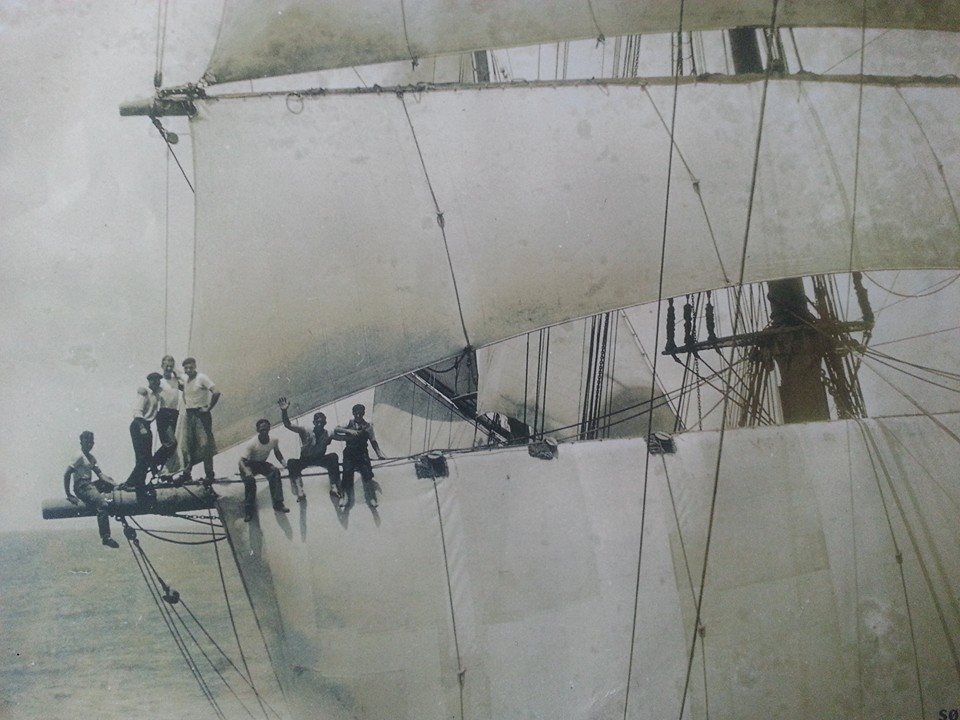
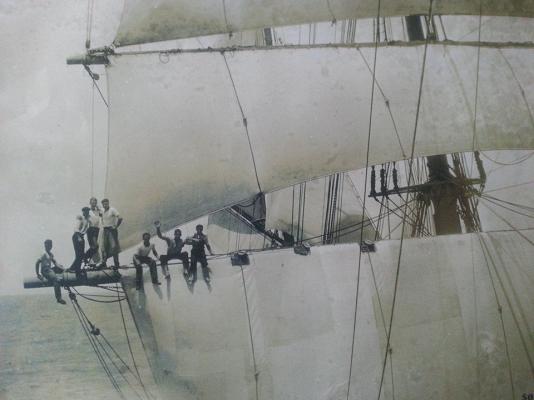
Those look like mats serving as chafe gear top keep the buntline blocks from marring the sails. The sun does appear directly overhead, the shadows cast by the crew are vertical, so vertical seams wouldn't show too clearly I guess.
-
Found this great photo of life aloft on a square rigger, the caption was "The barque "Claudia" of Marstal in the Atlantic, 1931" with no other info. I was struck by how smooth the sailcloth is, I could not make out the seams for the individual cloths on the course and I am not 100% sure I can make them out on the topsail. The course sail does indeed look like it is constructed of very wide individual pieces of sailcloth, not the usual two foot wide ones. I wonder at what point wider sizes of canvas became commercially available. And I wonder if there wasn't some sacrifice in strength when they abandoned the smaller cloth size? Its a great photo though isn't it?
-
Congratulations on your decision to depict your ship with yards braced around. It is so uncommon to see ship models depicted this way, even with all sail set! But this was how they would most often have been rigged while at sea and in my opinion it looks better on a model than yards squared as if for a formal inspection.
-
In my opinion nobody has yet written and illustrated the perfect ship model rigging book. Young Sea Officers Sheet Anchor has so much information but its not written or illustrated with the sort of unambiguous clarity or step by step explanations one could desire. But your cheating yourself if you don't buy this excellent bargain book. Lees Masting and Rigging or English Ships of War is great too but very expensive. It gives you a great deal of comprehensive information but still won't give you the step by step "walk you through the process" that I think is what your looking for. Rigging Period Ship Models would be a good place to start, as has already been mentioned.
-
Sails ARE floppy and droopy if there isn't any wind to fill them. It becomes a question of how you want to depict the model. I like to have sails full of wind on my models but getting the look, stiffening and shaping the sails, adds a lot of time and effort. I think its worth it but there are times when I am trying to get the perfect look to the billowing sails that I could almost wish I had opted for sails in a calm.
-
I am curious about the gluing of the wire project you are working on. I have tried a similar glue-up making shrouds on small models but I was using thread in place of wire. Gluing all the intersections on the jig was tedious. I was using cyano. Donald McNarry describes in one of his books using varnish ( or was it lacquer?) as an adhesive in a similar process. I gathered he just painted it on and when it hardened it glued all the junctures together, a nice trick if it can be reproduced.
-
This looks like a great project to sit on the sidelines and watch develop! Its a nice looking bottle you have there too, where did you get it?
-
I was so tempted to get Niagara last time I saw it was on sale. Shes such a nice looking ship and there is so much available reference material on her. Brigs too appear to be so much more manageable, fitting into a smaller space but still giving you all that sail and rigging area. I'm wondering what my next project will be, I think I will have what I am working on done by midwinter at the latest and I have to think of something to build next. If I go with a kit I am certain it will either be Niagara or Pride of Baltimore.
- 304 replies
-
- 1
-

-
- niagra
- model shipways
- (and 1 more)
-
I remember reading a discussion/argument about Balentiine coils on ship models, it was on a website whos name I can not remember. Everyone agreed Balentines were right and good on a ship but there was a question raised about how far back in time they were in use. Probably a question that could never be answered? I don't remember ever reading the term in any book on rigging, I only learned about Balentines from actual sailing. They certainly make the best use of space on deck in that they concentrate more line in the same space a round coil would take up by using the inner area of the coil. This same density makes them more resistant to accidental jarring, they hold their shape longer and can take a bit more abuse. The nested nature of their interlocking coils makes them more reliable for running without fouling.
-
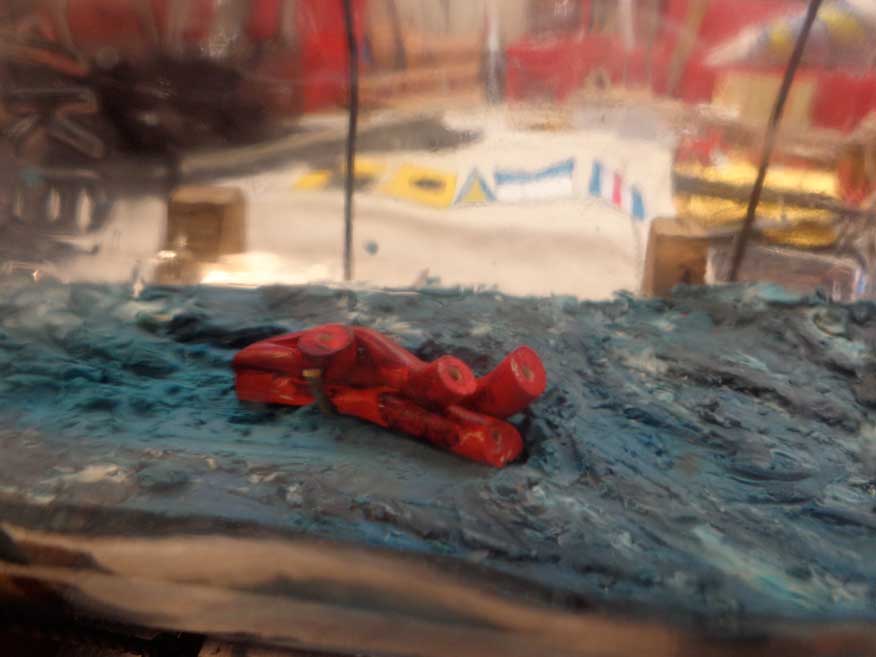
Another step is to remove a little bit of the “water” your ship (or in this case your creature) will displace so that the hull can be bedded in the sea firmly. I make a paper template of the hull or creatures waterline and put it in the bottle over the spot the assemblage is going to sit on and using an improvised tool I scrape out the outline of the ship or creature. I remove the template then excavate some of the clay out. How much clay to remove and how deep you go will be determined by your models draft. This is a slow messy uscientific process. The best tool I found for this bottle for this job was not my fancy articulated arm, it was a bit of stout copper wire wrapped around the end of a dowel. To get the angle I needed on the tool within the bottle, I was able to bend the wire against the inside back of the bottle into positions it could not have held while being inserted through the neck of the bottle. Little tiny bights of clay are removed one greasy little chunk at a time. Finally at the end of the days work I put in a piece of the Kraken to see what it would look like in there. I think I am finally ready to start actually putting things into the bottle.

-
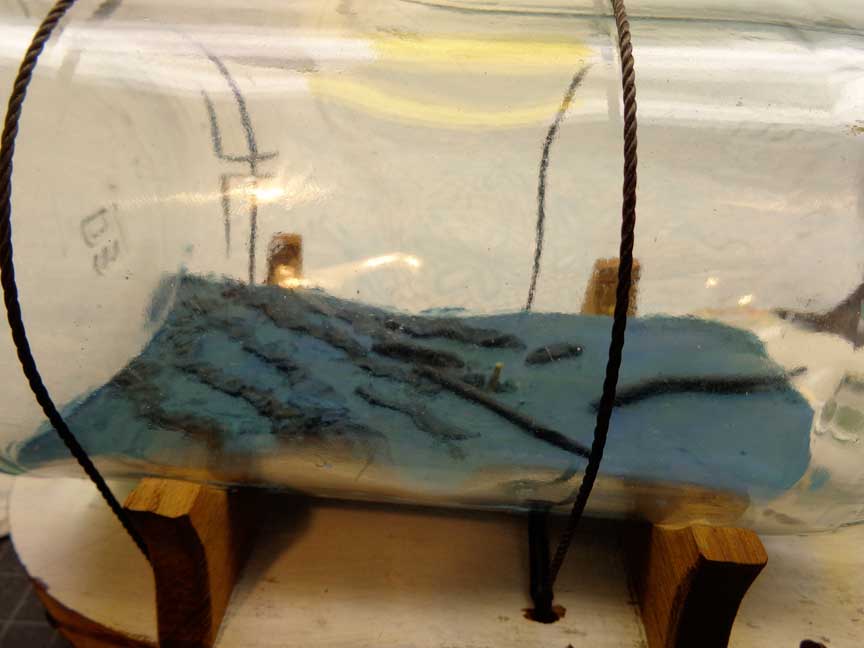
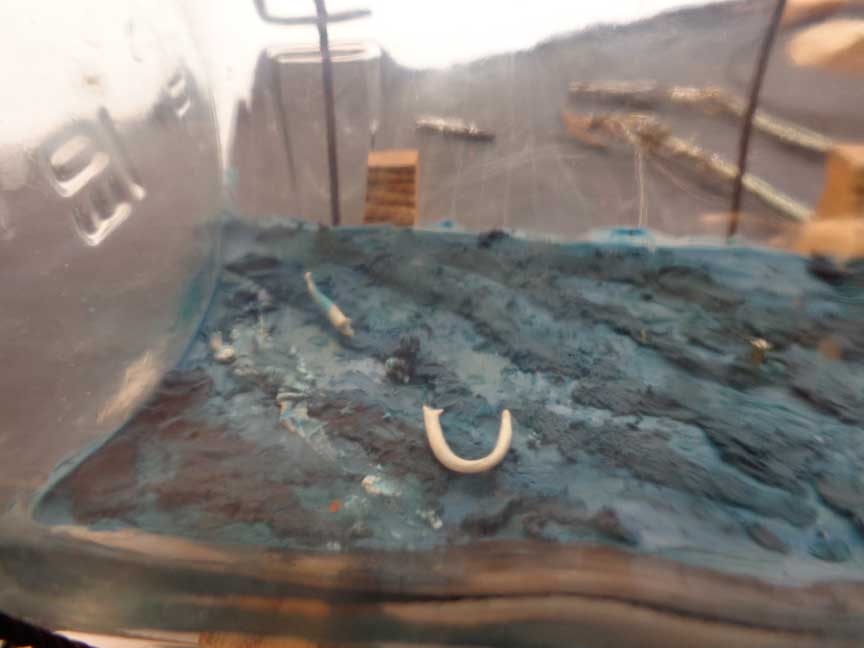
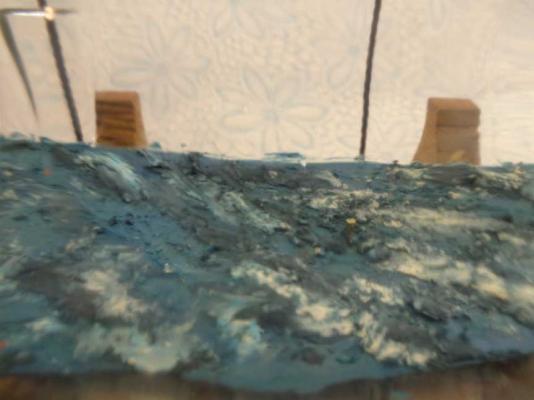
Working on the plasticine “sea” some more. I wanted the surface of the water to appear more realistic so I added waves and whitecaps. Waves were achieved by rolling clay “snakes” and laying them in on the surface of the sea diagonally and then slightly mashing them down. The snakes were of a slightly darker color than the base sea. Note that I have tied the bottle down tight to the base it will sit on. I don't want the bottle rolling around since from this point on it often takes two hands to manipulate things. I made a bunch of shorter and much thinner white clay snakes and laid them in on top of my “waves” and mashed them down. The white clay quickly blends into the sea and looks pretty good for a very small amount of effort. If I were modeling a ship underway and not molested by a monster, I would at this point make the ships bow wave and wake using the same white snake method.


-
The lashing would go between the two eyes only, not taking the long way around the spar but rather the shortest path between the eyes. The lashing would be made of some smaller stuff and several turns would go between each eye. For a nice flourish look up "rose lashing". As to the relationship between the eyes and the deadeye, I can't say with certainty. But I tend to think the disposition won't matter, neither one or the the other types you have drawn look better or worse. What could make a difference is how this bit of rigging fits onto the spar, what other equipment is alongside, where are the stop cleats, that sort of thing.
-
Gaff halyard rigging: one line or two
JerseyCity Frankie replied to isali's topic in Masting, rigging and sails
I'm not familiar with the vessel in question but here are my two cents. The reason for more than one peak halyard would be to make the job of setting the sail easier or faster. On paper, one line can be used to do the job of raising the peak on any fore and aft sail but in practice you have to factor in the impact on the crew. If the sail is large enough your single line has to be made of stouter rope and the physical effort in raising sail becomes problematic. I don't know at what point a double peak halyard would come in but I can tell you from my direct experience on a 102' and a 125' schooner that there was only one line on each peak and a group of four or five people could handle it on the smaller 102' schooner, all hands on the larger. The Throats too. Incidentally you need separate peak and throat lines. It would be possible to rig one line to do all the work but it would rob you of sail handling options. Underway, one person can take all the horsepower out of the sail by simply easing the peak a bit, this makes the peak of the sail droop down enough to ruin the sails aerodynamic effect and doing this can give the helmsman more options for maneuvering in certain situations. Its also useful to be able to change the gaff angle when you are furling the sail, when you lower the gaff to the deck the angle of the gaff as it comes down has a huge effect on how the sail is gathered and folded for stowing. -
Help with question regarding HMS Victory at Trafalgar
JerseyCity Frankie replied to AllanP's topic in Nautical/Naval History
Well I certainly know Victory is square rigged, so that is not the reason I was unable to register. Perhaps its an issue with the type of computer operating system and browser I am using? -
Ratlines....why so important.....
JerseyCity Frankie replied to Script's topic in Masting, rigging and sails
I was VERY SURPRISED to learn recently, here on M.S.W., that there were at one point in the past New York City Pilot Schooners that had no ratlines on their shrouds. Presumably to make them that much faster? I couldn't then and still can't fathom how they would have been able to manage things without them. Sure they could use a boatswains chair for getting aloft and maybe they even had crew aboard who were so extraordinarily fit that they could go aloft arm over arm on the naked shrouds? But I still can't understand what, if anything, was gained by omitting ratlines. A tiny bit less windage? an infinitesimal lowering of the center of gravity? -
Wooden ship kit manufacturers seldom show a painted completed model on the kits box art. I think this practice has instilled the idea in some people’s heads that the finished kit should be left unpainted. I think the kit manufacturers actual intentions though are only to clearly depict the different materials provided in the kit and a painted model would disguise the different species of wood or white metal or brass parts the kit features. This aside, there is a lot to be said for the practice of leaving a model unpainted that has nothing to do with how kits are marketed. Demonstrating to the viewer a models true nature is best done without covering anything with paint. For instance it would make no sense at all to paint a bone model. On the other hand I don’t think any serious plastic kit model builders ever leave any part of a finished plastic kit unpainted, their goal is to produce something that “looks like the real thing”, not to “demonstrate the true nature” of the styrene plastic the kit was made of. So I think the intentions of the builder dictate weather or not to use paint. I will point out though that there were no unpainted ships sailing the world’s oceans. Every exterior surface on a wooden ship was painted tarred oiled or varnished in one way or another in order to protect the ship from the elements and any wooden vessel that didn’t get some sort of surface coating would quickly be reduced to driftwood by the marine environment.