Supplies of the Ship Modeler's Handbook are running out. Get your copy NOW before they are gone! Click on photo to order.
×


hamilton
-
Posts
1,925 -
Joined
-
Last visited
Content Type
Profiles
Forums
Gallery
Events
Everything posted by hamilton
-
 Thanks Grant! But unfortunately, it has not gone so smoothly...The masts are up, the out lines are glued and severed and the bottle will soon be sealed, but the results are not what I had hoped.....it's not a ship-wreck-in-a-bottle, but it definitely leaves quite a bit to be desired, especially next to the many amazing examples on this forum! I'm almost embarrassed to show my results, but I believe the bad should be shown alongside the good, since people can learn as much from a negative example as from a positive one..... I don't have the photos loaded yet, so I'll leave it there for now, and update this "log" later...... hamilton
 -
Hi Brian: I think the ratlines look great - I've always had a hard time getting a nice dip in them to make them look like people have actually climbed them.....yours do this well! hamilton
- 831 replies
-
- 5
-

-
- Armed Virginia Sloop
- Model Shipways
- (and 1 more)
-
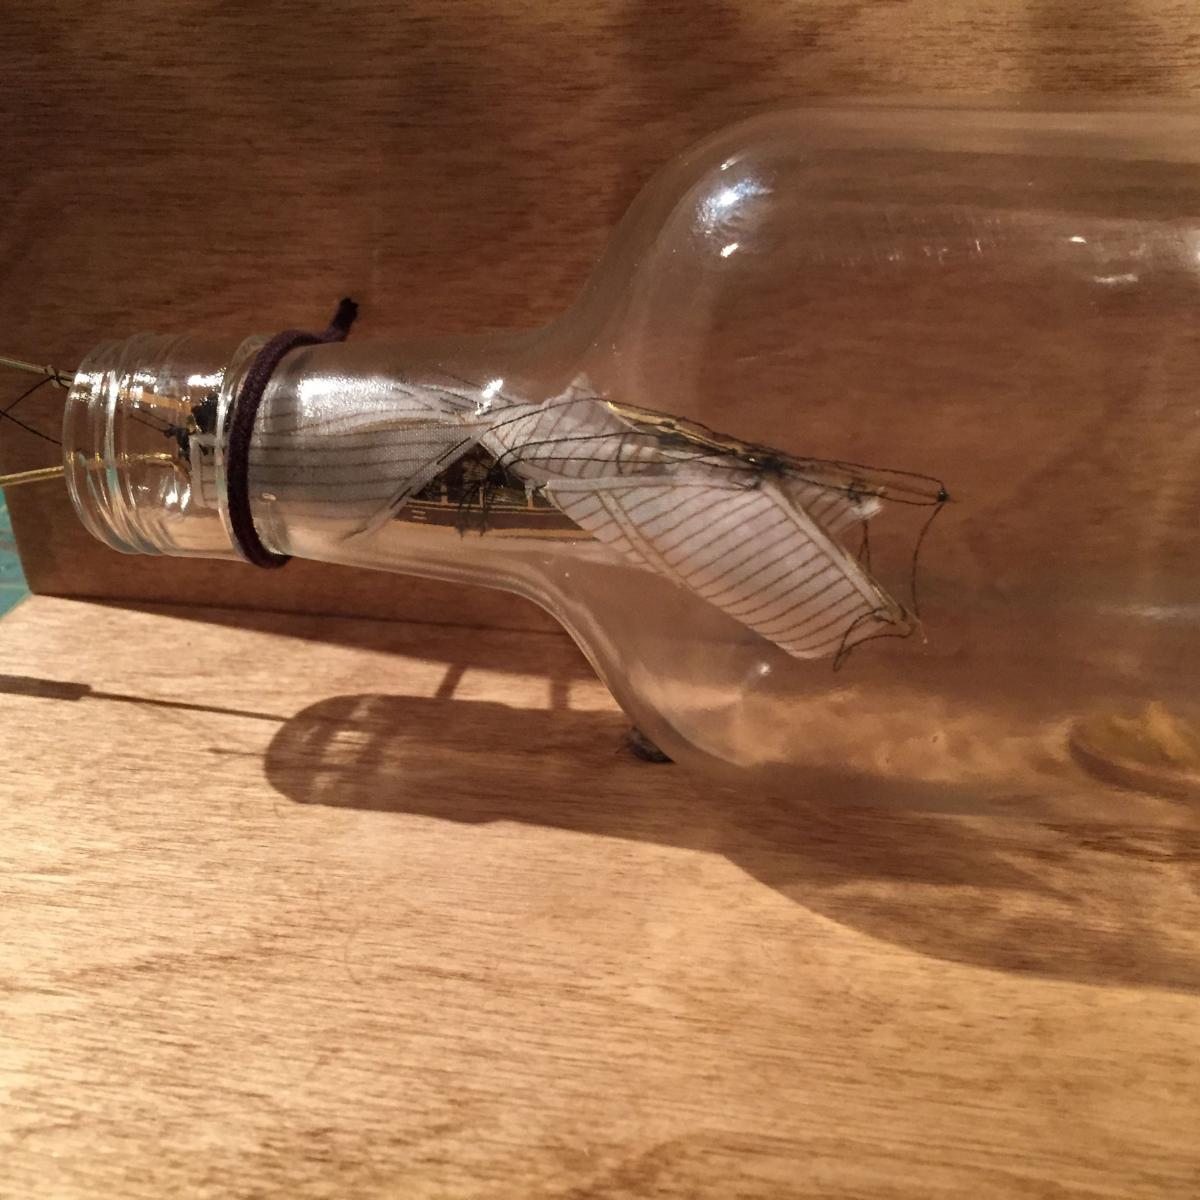
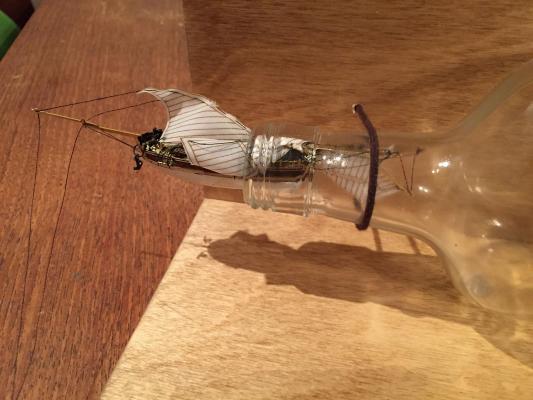
So I've now put Hannah in the bottle.....I'm waiting until after dinner (and possibly a beer) tomorrow before risking the mast raising....As I mentioned before, I made a "V" stand to replace the pins and while this seemed like a good idea (easier to mount?) in practice I kind of wish I'd stayed with the pins....there was a lot of uncertainty as to whether the hull was going to stay on the "V" stand, especially since my pre-emptive attempt to mount the hull last time, which resulted in quite a bit of 5-minute epoxy curing on the stand....But let me begin from the beginning.... I think I mentioned before that when I put the Hannah in the bottle last time, the boom and main gaff came off, and the thread that makes up the fore course yard and topsail yard braces and fixes the fore topsail to the yards also snapped....I repaired these parts of the vessel, using stronger upholstery thread to attach the boom and gaff and reinforcing the rigging where the topsail attaches to the yards. Here's a shot of where I started tonight, followed by a shot of the topsail repositioned on the yards....not the prettiest work I've ever done.... I then did a trial run to see if it would still go in nicely - a tight squeeze, but not too bad..... My source build log talked about attaching the boat hook tool with double sided tape, but there were no photos provided to show how he did it.....here's my inference....also, I don't think you need double-sided tape - I think I could probably have used my Tamiya masking tape and it would have worked fine..... I can hear you thinking how precarious it looks....at it was!! Getting it into the bottle was a struggle. I had to keep my hands incredibly steady and kind of cajole the hull up onto the "v" stand, on which I had applied a liberal amount of 5-minute epoxy using a chamfered piece of scrap wood glued to a bamboo skewer. Then it was a nerve-wracking process of keeping entirely still to prevent the hull from slipping around (which would not have happened with the pin stand) on the stand as the glue set.....even if I could move to see the thing from different angles, the bottle really prevents a clear view of its interior except from the front and the top....I really wanted to get a forward or stern view to make sure all was well. And because I was seated high while doing this, I couldn't crouch down to confirm whether the hull was connecting with the stand at all three lifts I had made....All I could do was concentrate hard on not moving, while angling the tool in such a way as to press the hull down as much as possible while not having it collapse or slide off.....A very tense series of minutes.... In the end, though, it stuck....not only that, but the shifting and balancing had loosened the tape, so I was able to easily extract the positioning tool. Now the Hannah is in the bottle, the outlines are draped out of the mouth, and tomorrow, we'll see what happens when I pull on them.....There's still a 50/50 chance it's not going to work....but I guess that's always the case, so it's hardly worth mentioning....here's where it stands as of now. hamilton

-
Thanks Augie: Thanks for dropping in. Yes - I think it'll just be a matter of shaping the filler blocks to conform to the curve of the cockpit....hard to say how much shaping this will involve until a bit later in the build.... hamilton
-
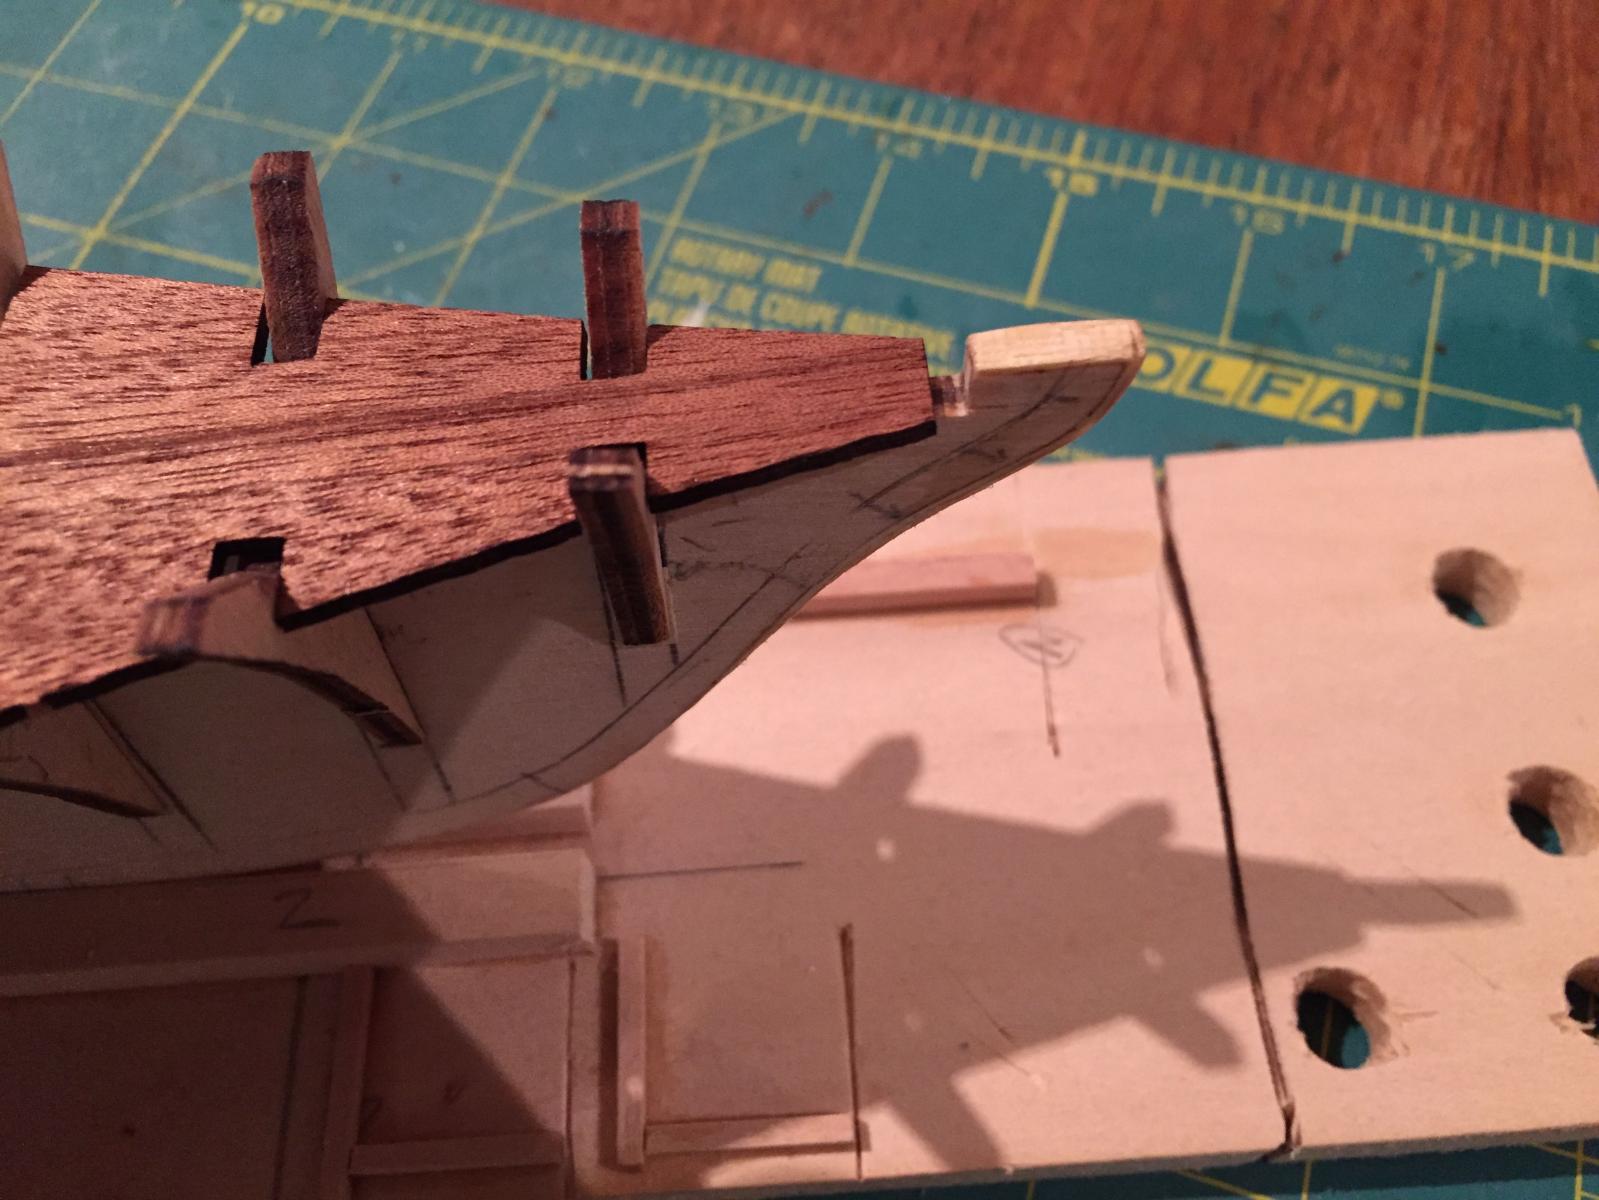
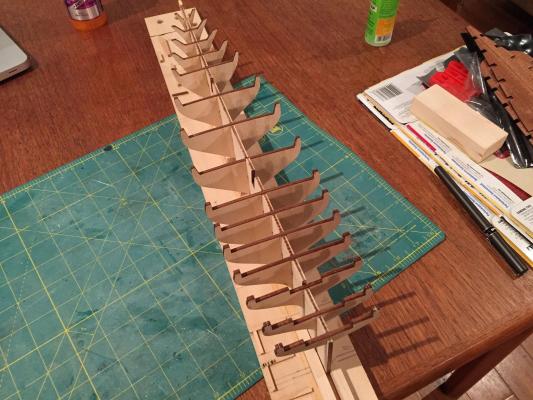
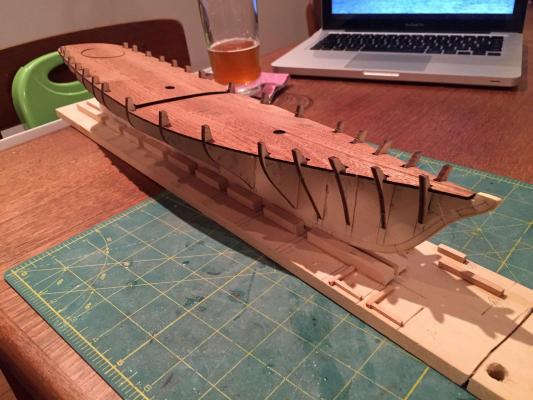
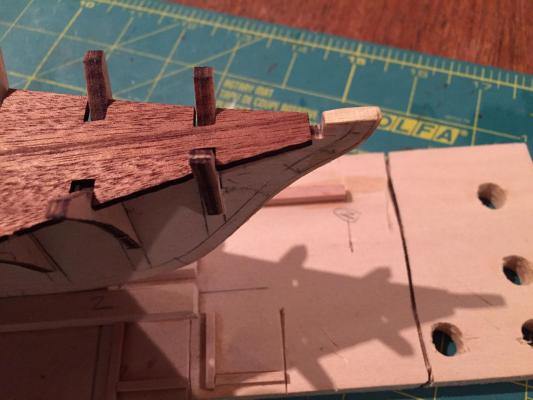
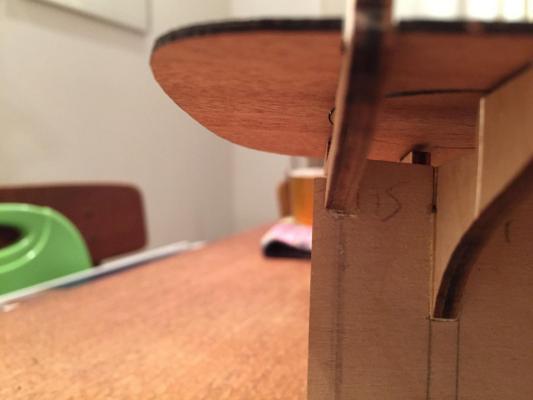
Hello there: The bulkheads are now adjusted to fit snugly on the America's centre keel....it took a bit of time and patience and quite a bit of fiddling to get the positions right, but the essential corrections have been made (though there are more to come before the framework is complete). The trickiest part was fitting the final bulkhead (15). Unlike the others, there is no slot on the keel, just an abutment forward on which the bulkhead sits. I had to very gently deepen the slot on the bulkhead so it fit flush. But I could not shim this part as I did with the other bulkheads, since there is nothing to shim it up against....I added the port and starboard shims on the keel piece and it sits ok, but not as securely as the other bulkheads - this will change later once the stern fillers are attached. Anyway, here are a couple of shots of the bulkheads drift on the keel Of course, once the bulkheads were fit I couldn't help but dry fit the decks..... When I first tried this, I noticed that a few of the deck slots were not deep enough, so I filed them out a bit so the deck slides on nicely. I'll have a bit of clean-up and adjustment to do on these pieces too. At the bow, there is a gap between the end of the deck and the stem - easy enough to fill. I'm a little worried about the stern as well. The issue is whether the stern fillers get in the way of the cockpit. It sees as if the area of the cockpit extends very slightly past the aft end of bulkhead 15 - but the stern fillers lie flat against that bulkhead....I'll have to double check everything and see if I need to adjust the filler pieces so as not to impede the cockpit. It's very hard to get a shot, but here's what I'm talking about - please note that the angle of the photo amplifies the problem - it's not this bad in reality.... Well that's it for now. Next steps are to complete the deck adjustments, mark them up for installing and planking, adding mast mortices, and working out the proper bearding and rabbet lines to set up for planking - once this is done, I'll glue the bulkheads in place along with some support beams and the decks..... hamilton

-
Hi JPett - I was just re-reading your review of the Berlin and wanted to let you know about something (if you haven't already discovered it) that I noticed when I was reviewing my Berlin kit contents. The Italian notes on the plans are translated into English (and French and German) in the instruction booklet, towards the end under the list of tables.....I was a little jarred by the italian on the plans, too, until I found these translations.... hamilton
-
Hi Tom I can't help you get out of work, but I can say that my cannons needed some slight adjustment given the positioning of the bulwarks. I had fit the bulwarks and then realized that the cannons sat too high. My choices were either to scratch build cannons at 1/300 scale (HA!! - I'm a masochist but not that much of a masochist), to peel off the bulwarks and reposition them (I was both too lazy and too afraid of doing this after much wrestling to fit them), or to try bending the barrels of the cannons downwards to accommodate the low gunports (I opted for this, but accidentally snapped one of the gun barrels off....) I think you could correct for my errors by trying the following: 1. Dry fit the bulwarks - the key here is getting the little channel extensions (the 4 tabs sticking out from the deck) to slide into the slots for the bulwarks. With some light bending these could be positioned and then held in place with an elastic band 2. See how the cannons fit and make any necessary adjustments to the bulwark positions. 3. Then fix the bulwarks, being confident that your cannons will go where they're supposed to.... Hope this helps - my work is now getting in the way of my building too - It's almost midnight and I've only just finished work for the day - 15 hours! And it's only the first day of the semester....it's going to be a long one....... hamilton
-
Wow Tom - the hull looks great - I think you could definitely leave it natural and avoid the painting altogether....the lifts show a little bit it seems, but I think that this effect will be diminished once the model is complete and in the bottle - looking good! hamilton
-
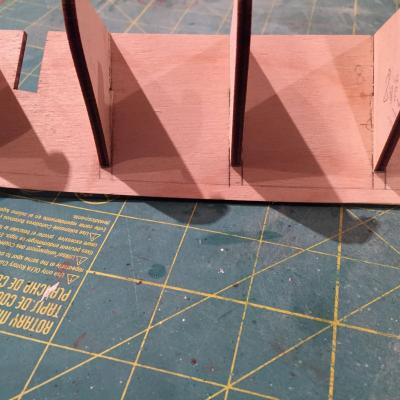
Thanks Augie - we planted some purple garlic too, which is quite spectacular - both varieties smell wonderful and taste fantastic. I believe I said I wouldn't update this until I was finished adjusting the bulkheads, but in continuing this work this evening I noticed something that I wanted to document, and that will cause a bit of work later on......Here are two photos, one of the port side and the other of the starboard side showing bulkheads 6, 7 and 8 dry fit. You'll notice that the bottom of bulkhead 7, which should (at mid-ships) be on the same level as bulkhead 6 and 8 is actually significantly higher up, which will create a very unsightly bump in the planking unless corrected....the difference with bulkhead 6 is 1.5mm and with bulkhead 8, 1mm. 6 seems correct, as does 9, but both 7 and 8 will need shimming on the outside. Oddly, though, the laser cut bulkheads seem to match the plans more or less well, so the area that needs shimming might actually be very small....I'll have to see what's what when it comes to fairing the hull, at which time I'll make necessary adjustments to the edges of all the bulkheads. To compare this situation with another similar one I've faced in the past, check out these bulkheads from the Corel Greyhound....can't remember the numbers but you can see they are significantly out of step and required a HUGE amount of extra wood....to call it shimming does not truly describe the situation at all..... hamilton

-
Hi Tom: No problem, of course - it's nice to follow a log so close on to a model I'm building, and glad to be of assistance. A couple of notes. My quarterdeck needed A LOT of reducing in size. It ended up being quite thin top to bottom, with a slighter angle aft. Looks like you've got more sanding ahead of you there! As for the paint - I think your hull looks good, though it would be nice to see it in daylight. Just my opinion, but I would avoid a gloss finish. Satin would be my choice. I think that the glass will give the hull a glossy shimmer without applying the extra coat of gloss finish....again, just my opinion. I think I mentioned before, I use artist acrylic paints (by Golden) - don't know if they're available in the UK, but something equivalent must be - you should be able to pick something decent up at any artist supply shop. I like them much better than other modelling paints I've tried because they hold the pigment extremely well over time and do not separate. They go on very smooth and require fewer coats to get something that looks clean. The trade off is that they're a little pricey (small bottles ranging from $8-12 CDN - roughly 4-6 pounds) and they do not come in the variety of colours that model paints do.... Anyway, enjoying your build - you'll catch up to me very quickly at this rate! hamilton
-
That boiler/engine looks like a very fun little project - nice work! I'm not eagle-eyed so I didn't notice the repositioning of the whistle.... hamilton
-
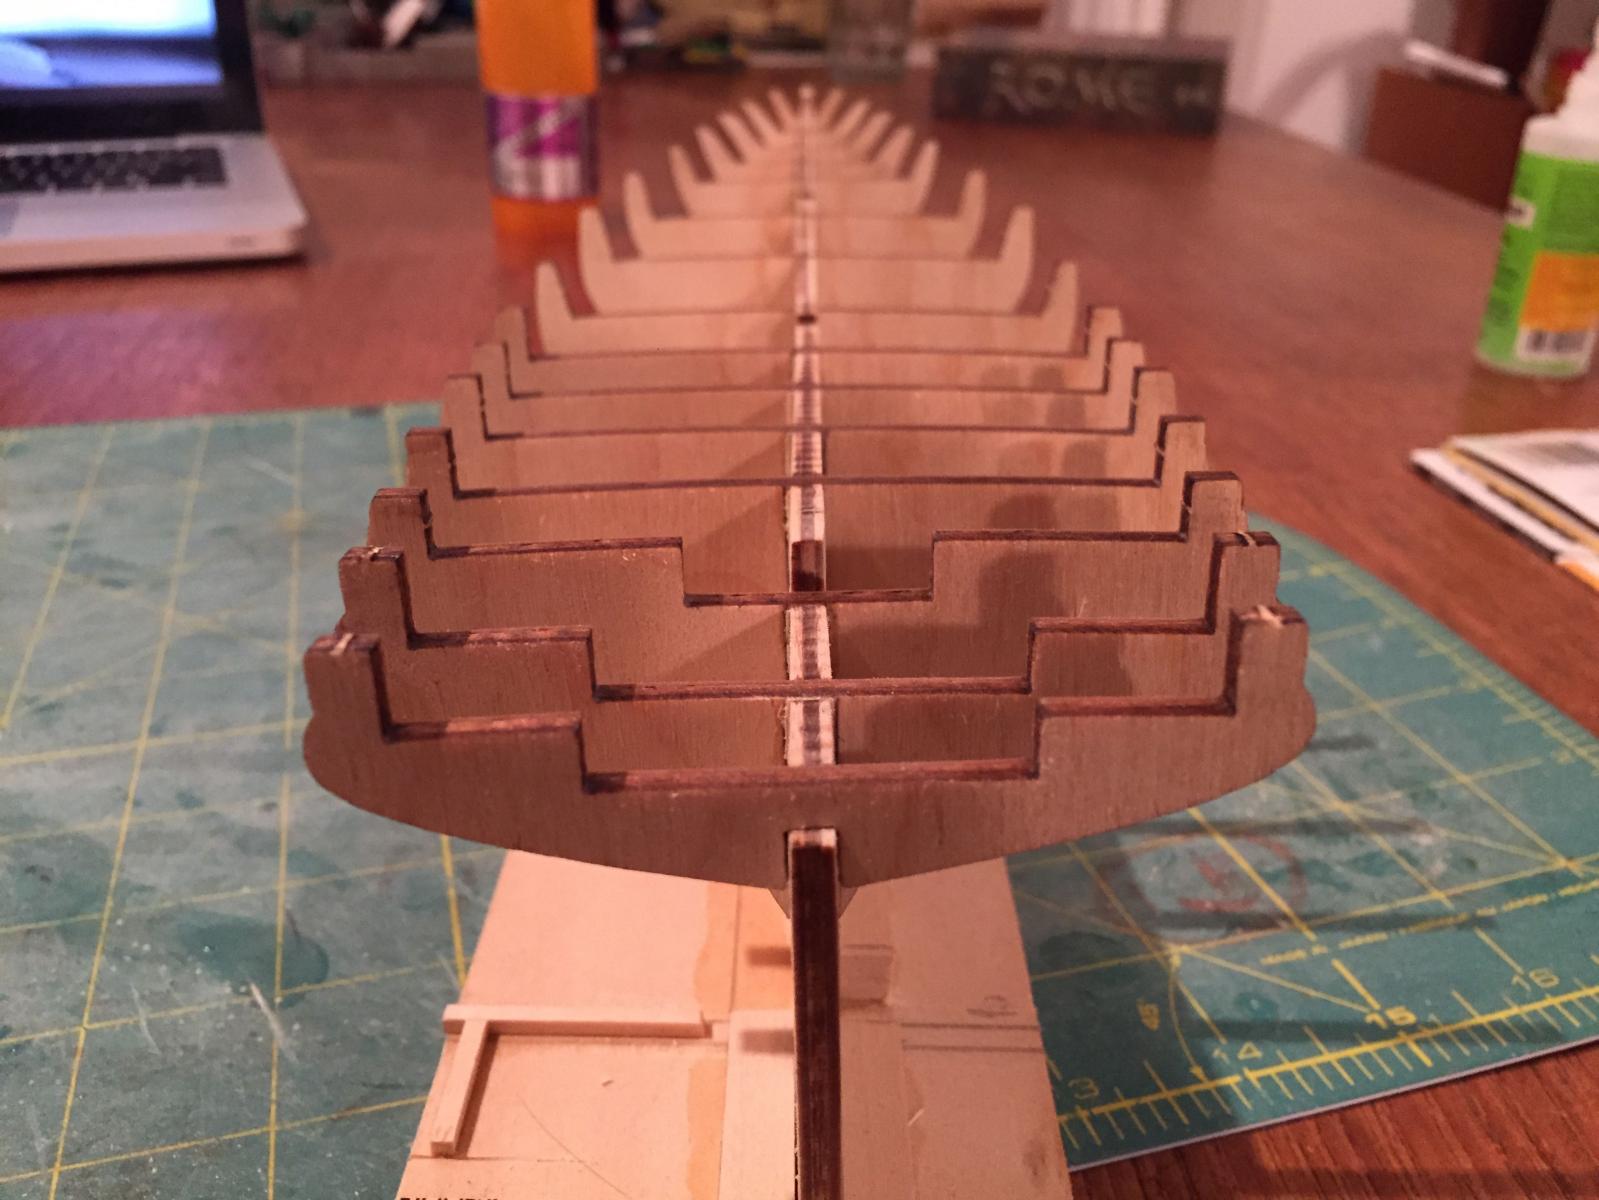
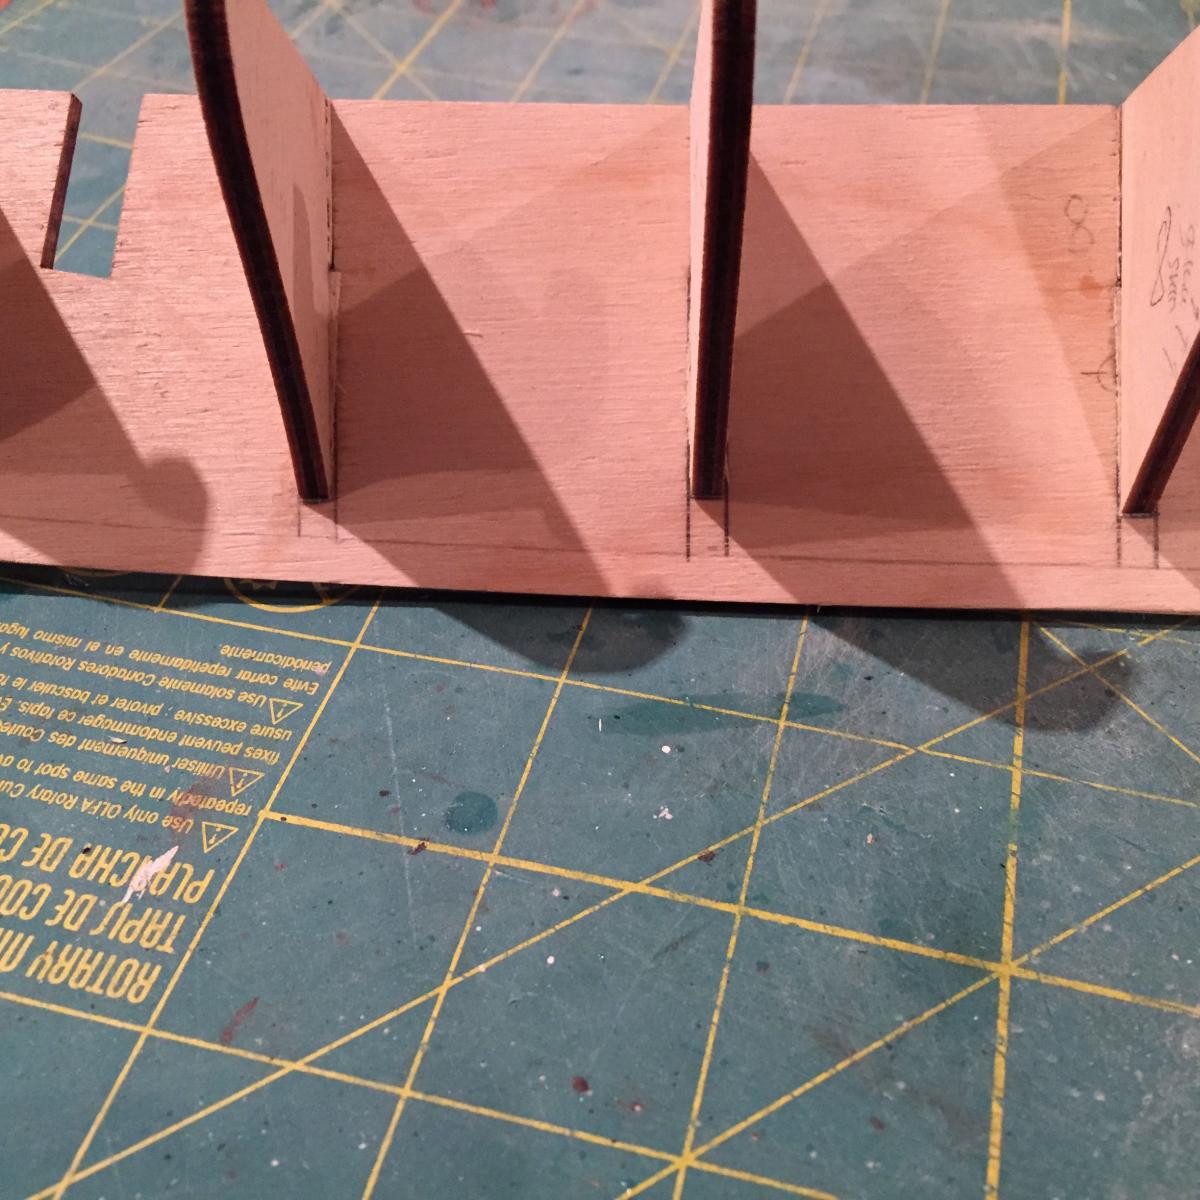
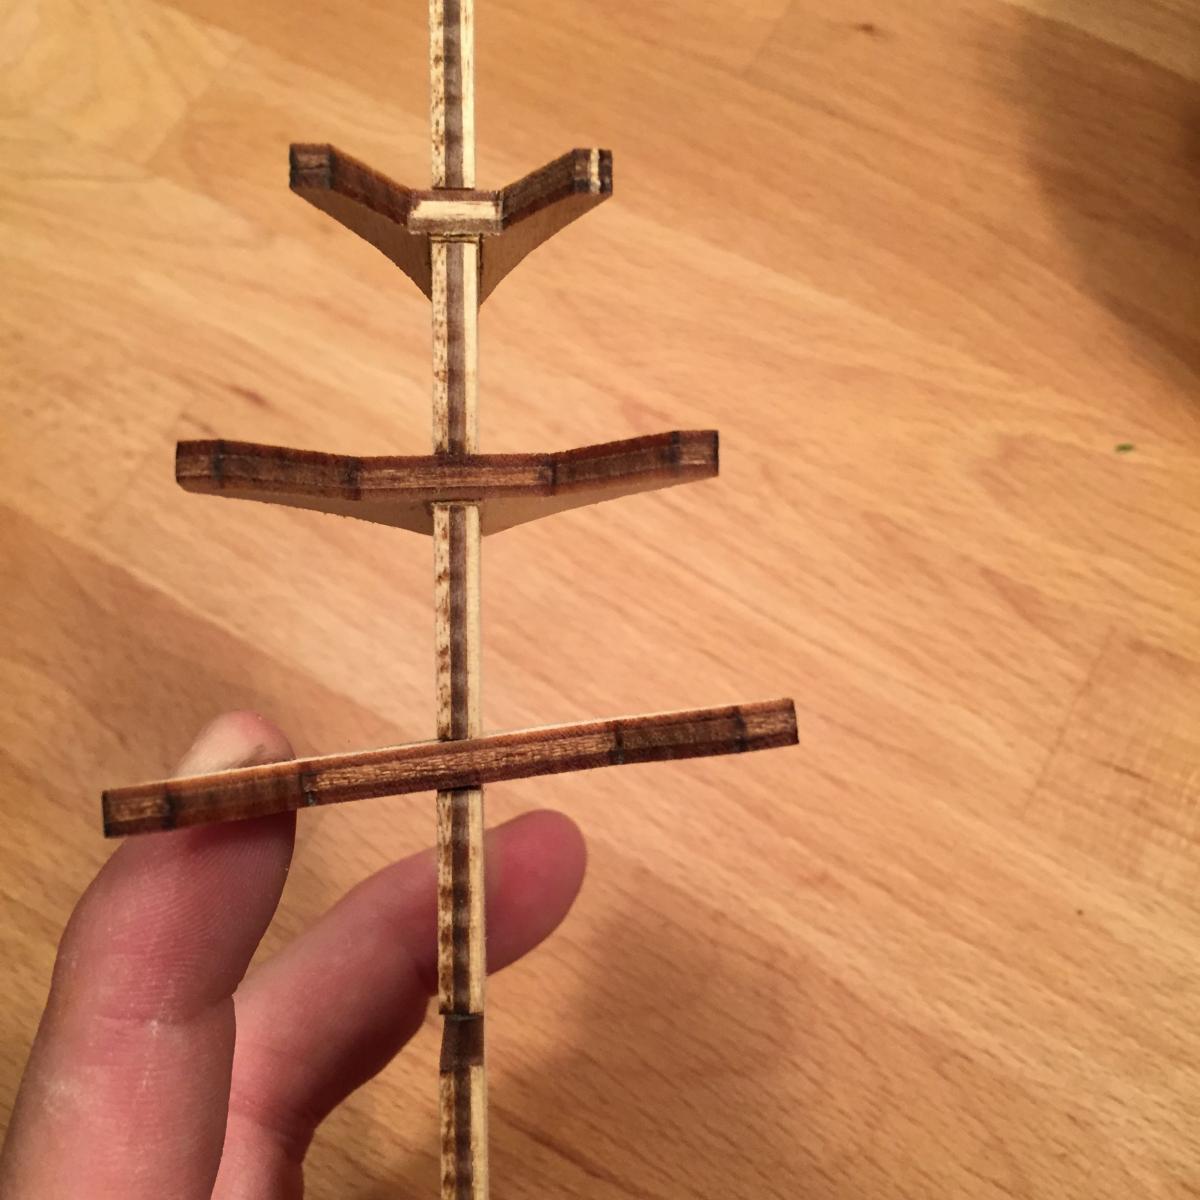
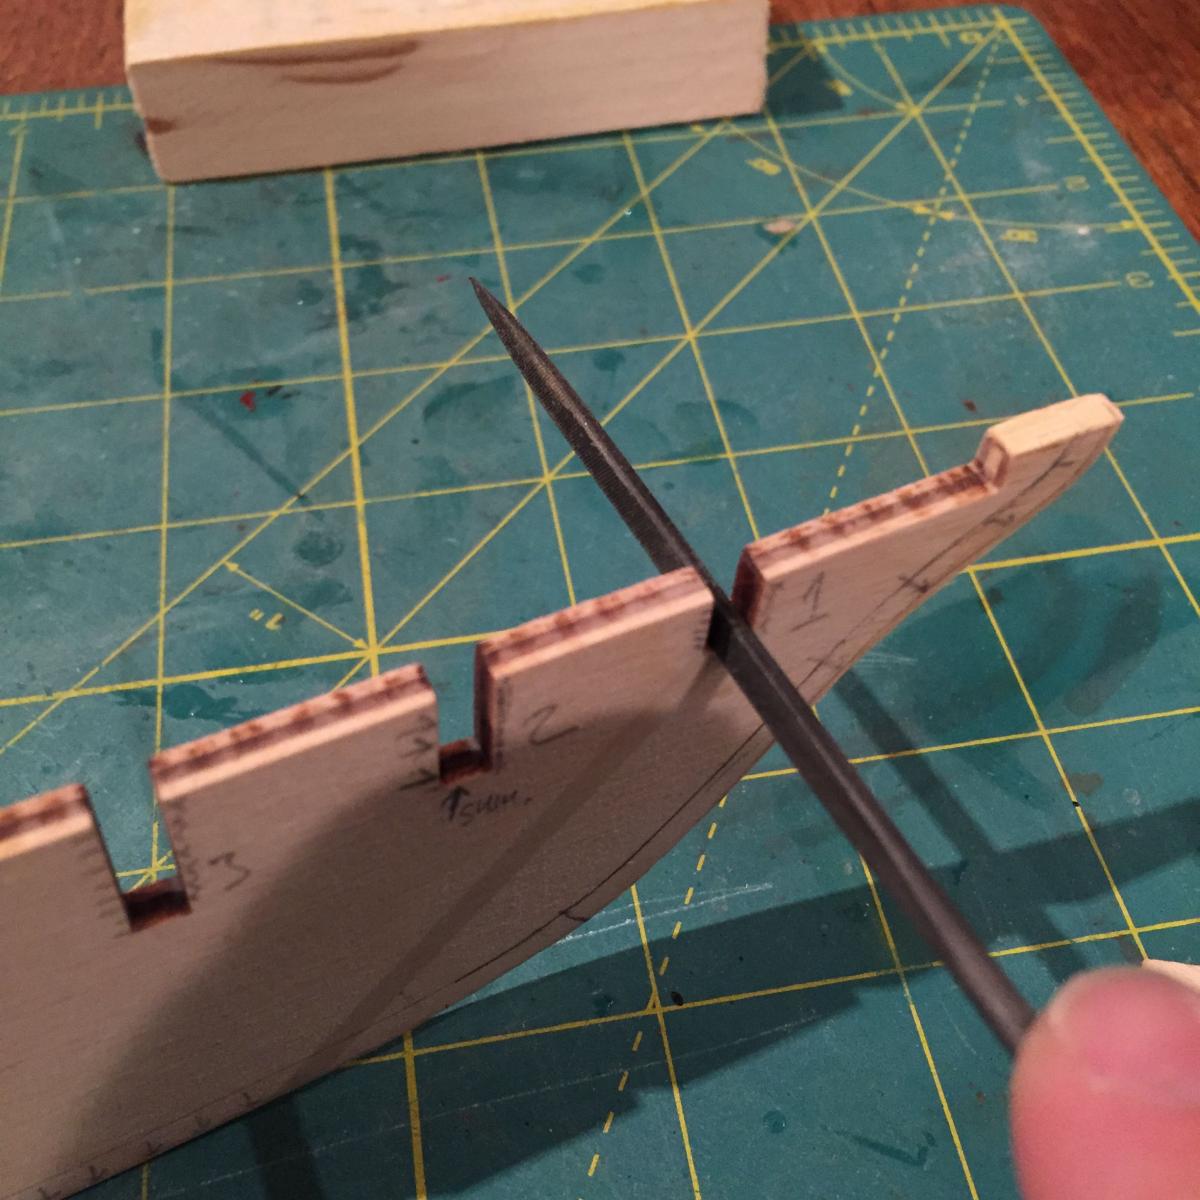
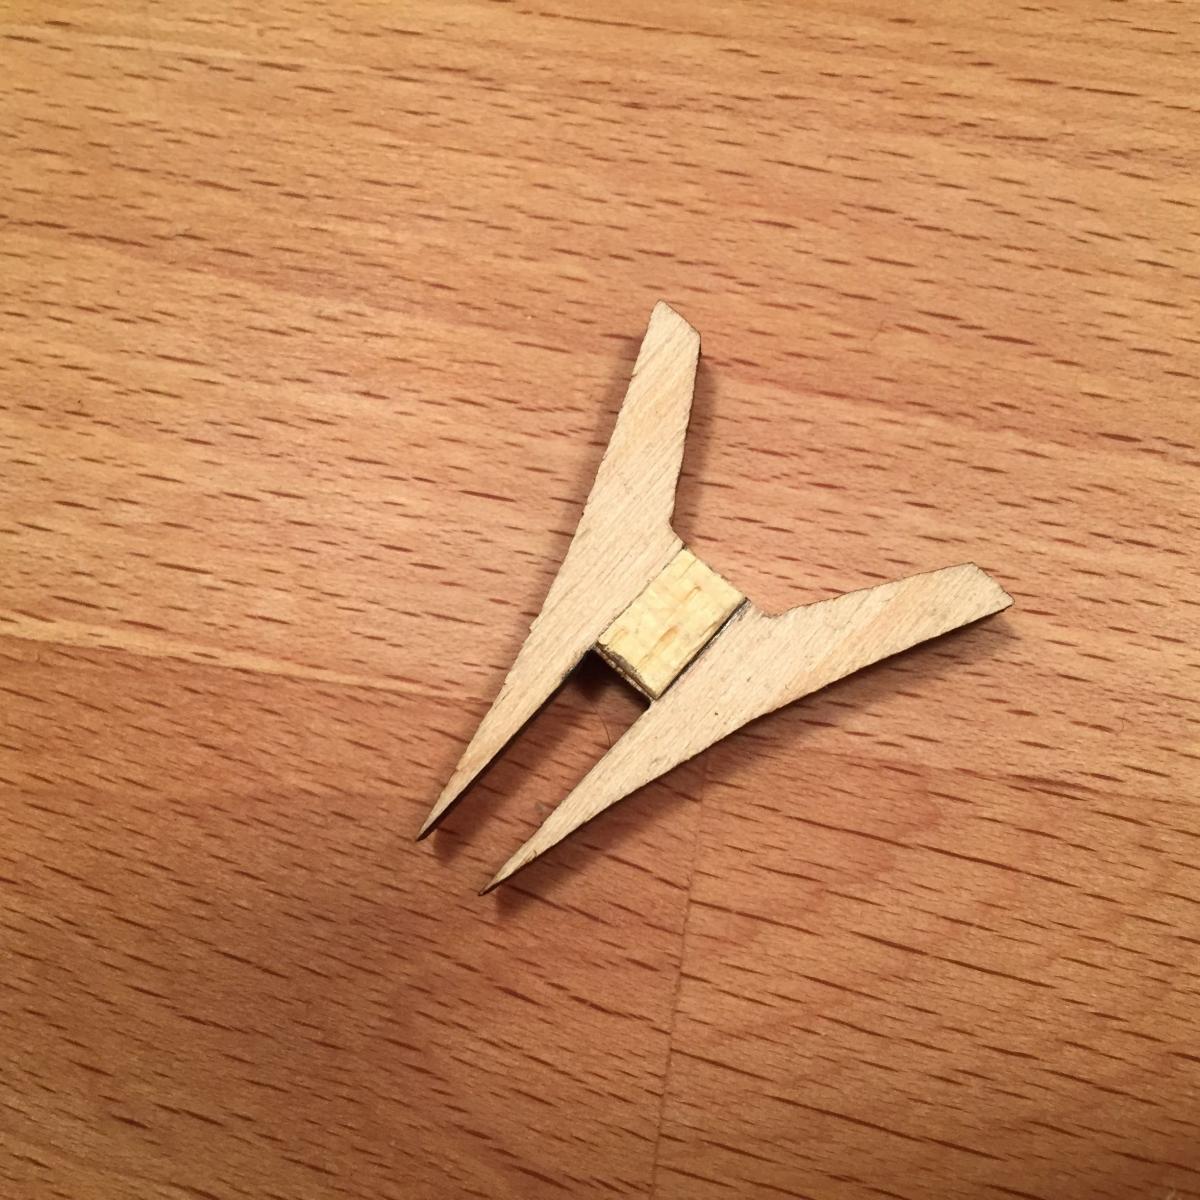
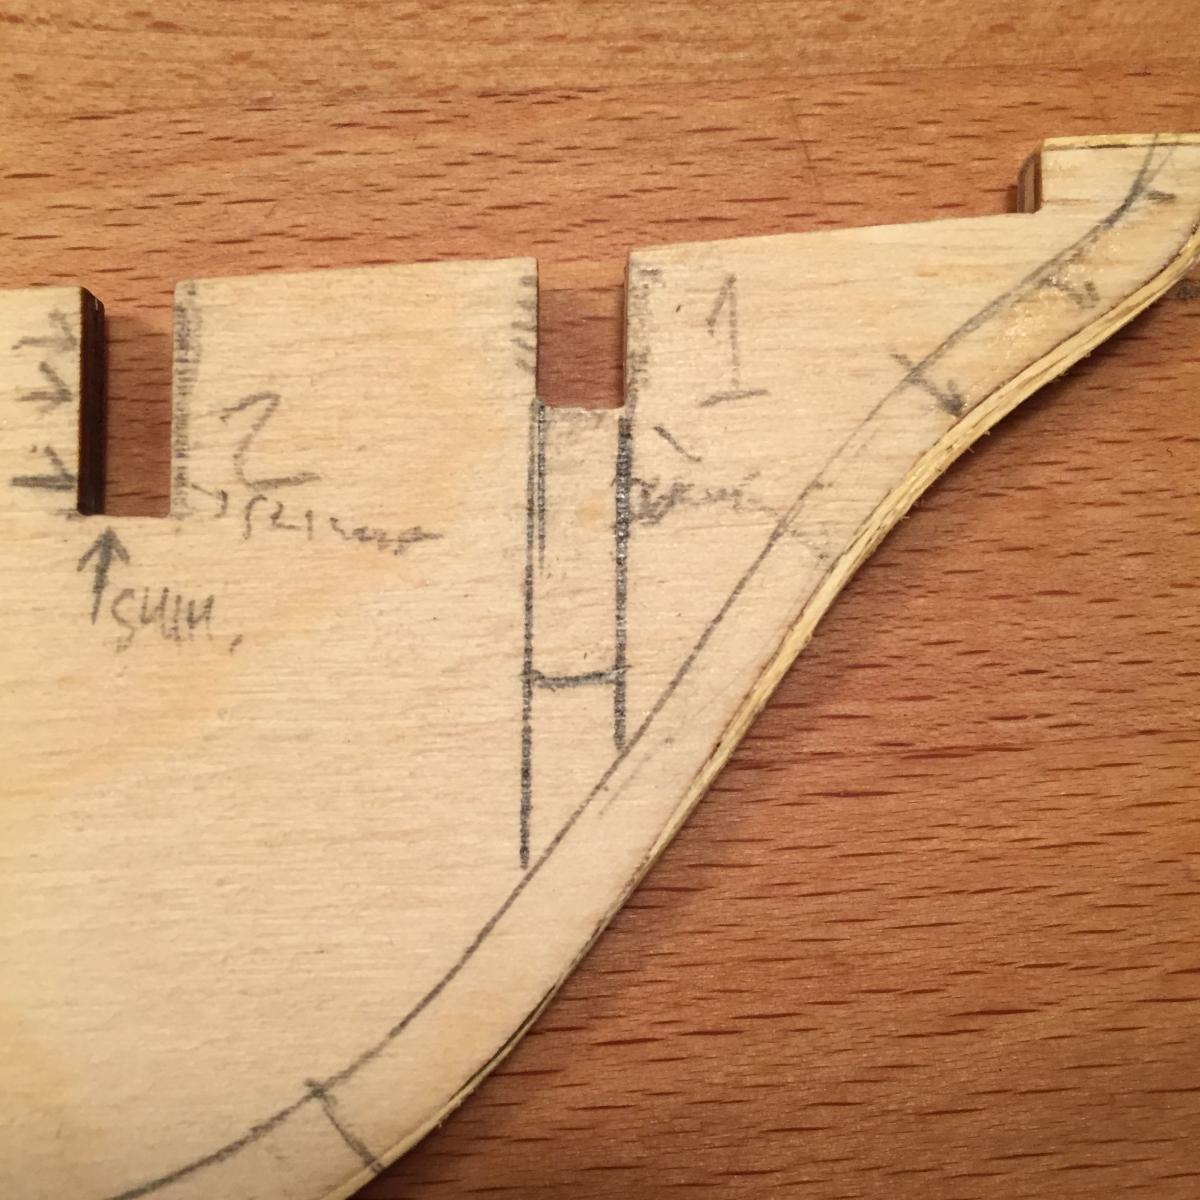
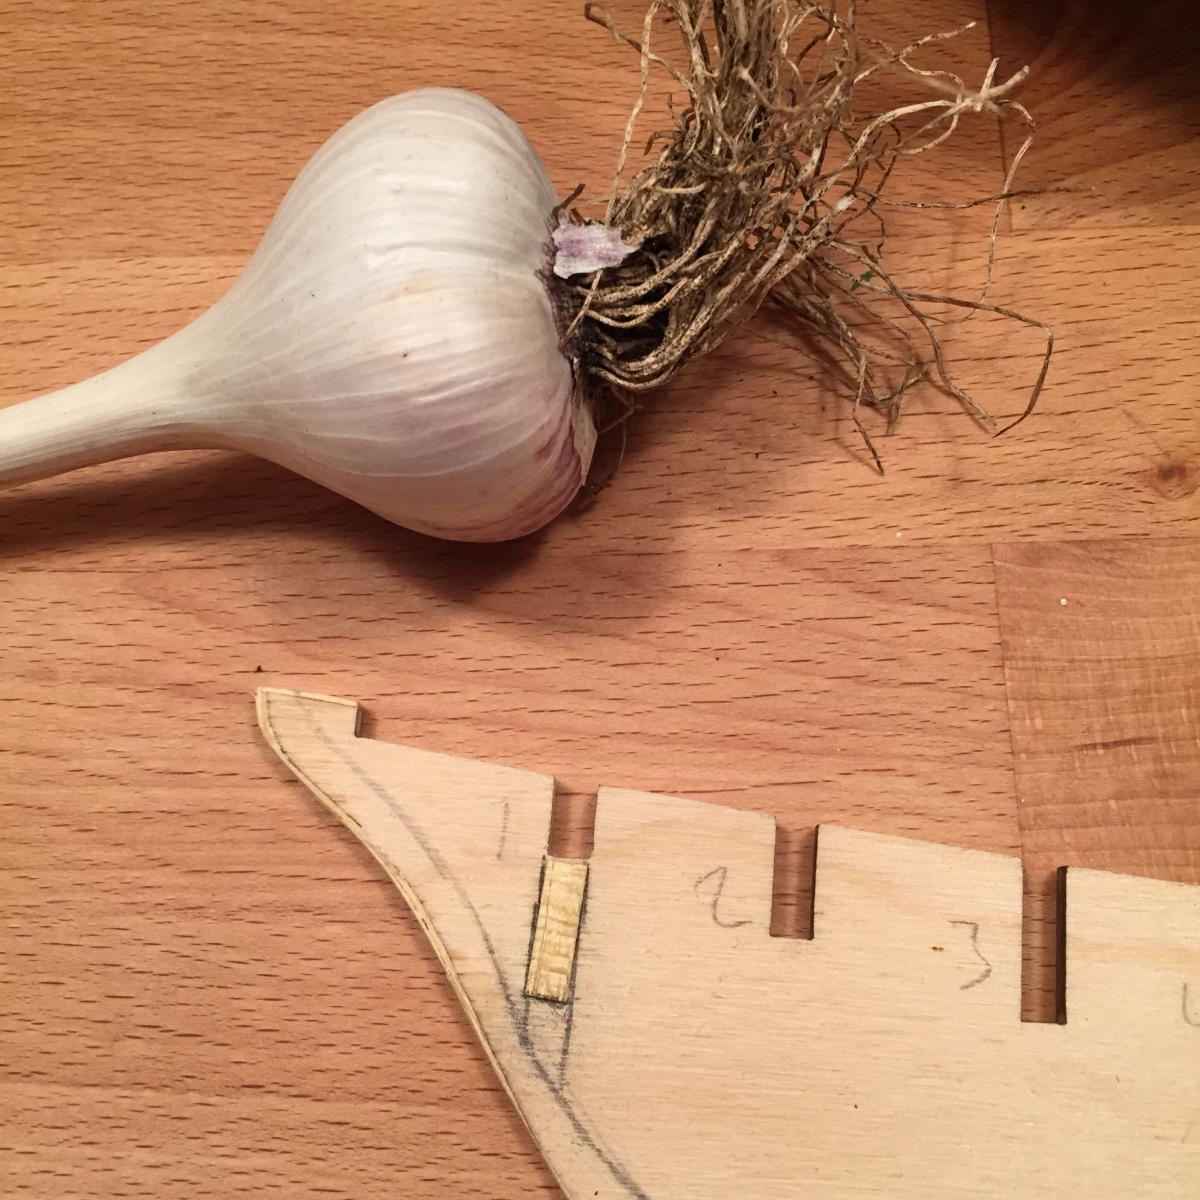
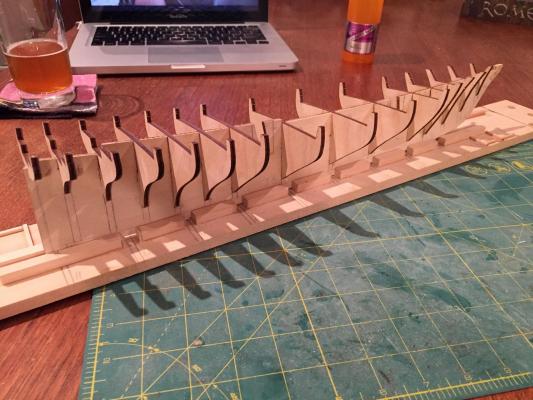
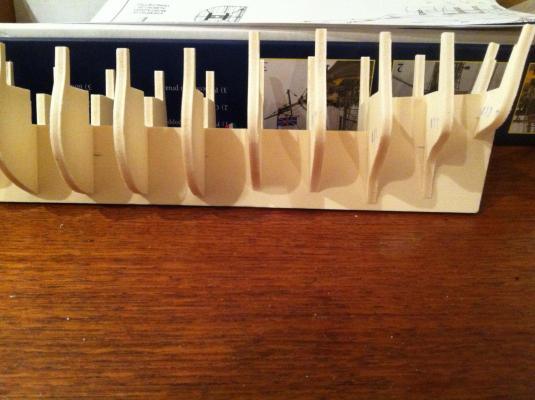
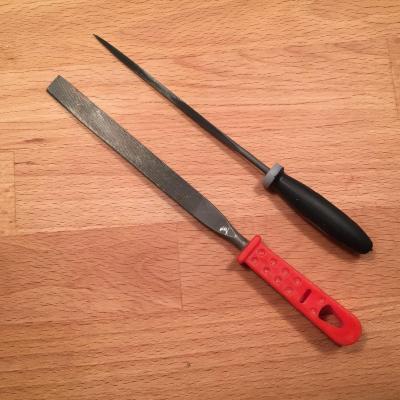
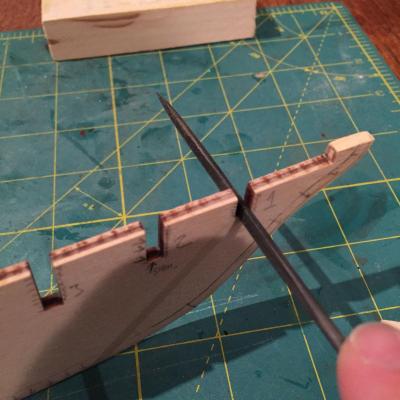
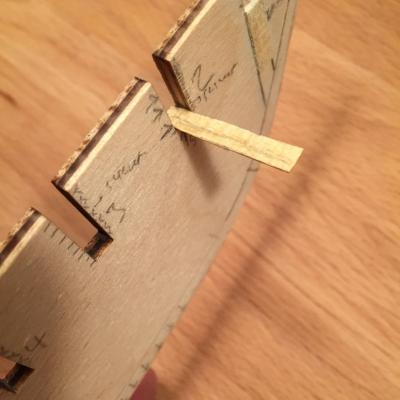
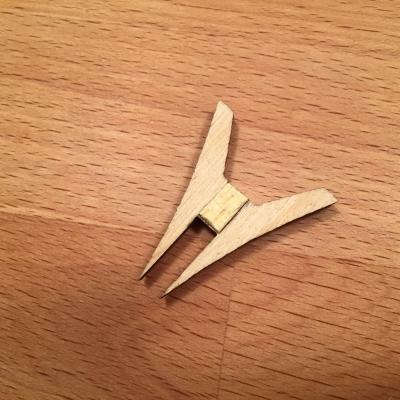
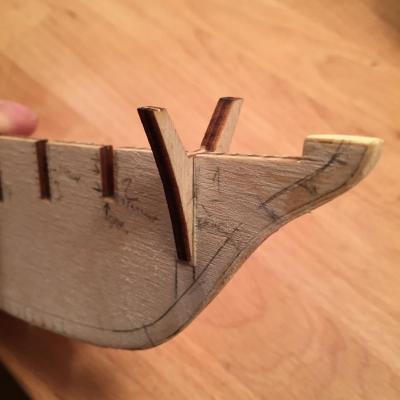
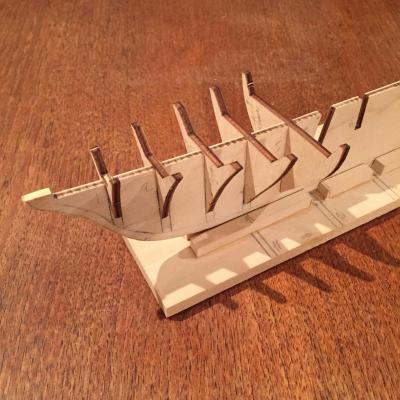
Hello all: Well I guess I'm now officially working on two models at once.....actually, I feel like I'm avoiding the Hannah a little bit....or anyway, I didn't think the last night before the beginning of another school year should be spent redoing her topsail rigging.....maybe once I get back into the rhythm of the semester.... In the meantime, there has been some progress on America. I've adjusted and dry fit the first 5 bulkheads. I think I mentioned earlier that all of them had significant play, so it'll be kind of slow going. Here is a shot that shows how much play - this is bulkhead 3, but it's pretty representative. As you can see from that photo, bulkhead 1 and 2 are already fitted. The process was very straightforward. I first filed off the laser burn on the inside of the bulkhead and keel slots. I then filed out a bit of the forward section of bulkhead slots 1, 2 and 3 (4 and 5 did not require this, though some of the bulkheads further aft will). This widening might seem counterintuitive, but it's not just that there was wiggle in the fit of the bulkheads - in the cases of bulkheads 1, 2 and 3, the position of the keel slots was slightly aft of where it was marked on the plans. For bulkheads 1 and 5 I had to file the bottom of the slot so the top of the bulkhead was flush with the top of the centre keel. I used a small triangular needle file for this (I preferred it over the square one because it was wider and left less chance of unevenness), while for filing out the forward and aft edges of the keel slots I used a larger flat file. Here are implements at rest and at labour For bulkheads 2 and 4 I had to add a thin shim at the bottom of the bulkhead slots on the centre keel so that, again, the tops of the bulkheads would be flush with the top of the keel. I trimmed down some crappy deck planking material leftover (unused) from my Fair Rosamund build for all this kind of work. I used CA to fasten it in place and the after a few minutes of letting it set I snapped off the excess and filed it down. Here it is in process Because the bulkhead slots on the keel had to move forward this meant shimming them aft. I prefer to put the shims on the bulkheads themselves rather than in the slot on the centre keel. To do this, I simply drew lines up to the top of the bulkheads from the slot, marking out the area in which the shim would be placed. Then I used some of that thin leftover material to make the shim. Here's a shot This is bulkhead 1. I test fit it after shimming it and it fit great. But I still needed to put shims in to stabilize it and even it out symmetry wise port and starboard. Here's a shot with bulkhead 1 pushed over towards the port side. The gap is large, though in reality to make it sit symmetrically, gaps half this wide had to be filled on either side - I pushed it over for this shot to give you a sense of what needed to be done. These shims are placed on the centre keel running down below the bulkhead slots. They must only be as long as the bulkhead itself, so my process was first to draw extension lines to the rabbet from the bottom of the bulkhead slot and then to mark to the bottom of the bulkhead "arms" (or legs?) so I would know how much area had to be filled with the shim. I then cut the shims and installed them on both sides. The keel shims for bulkhead 1 needed only a bit of sanding, but those for the other forward bulkheads needed quite a bit to get the bulkheads to sit snugly. Here's a shot of the portside shim for bulkhead one with a bulb of garlic from our garden for scale comparison. And here's bulkhead 1 fit nice and snug on the keel..... Repeat four more times tonight (and ten more times on future nights and this part of the build will be done. Here's where I am now.... Hope you've enjoyed this update....I'll post again once the bulkheads are done and I'm on to the next thing....bye for now hamilton


-
Hi Tom - my keel also sat deep in the hull - I don't think it's a huge issue in terms of construction and I think that given the height of the model and the space inside the bottle, a low set keel will actually help (I think it helped in terms of the relative ease of getting mine into the bottle. I don't think the keel should disappear entirely but it doesn't look like that's the case with yours - how far does the keel protrude at the bottom? Mine is at a minimum of about 1mm I think, though it is well exposed at both stern and stem.... hamilton
-
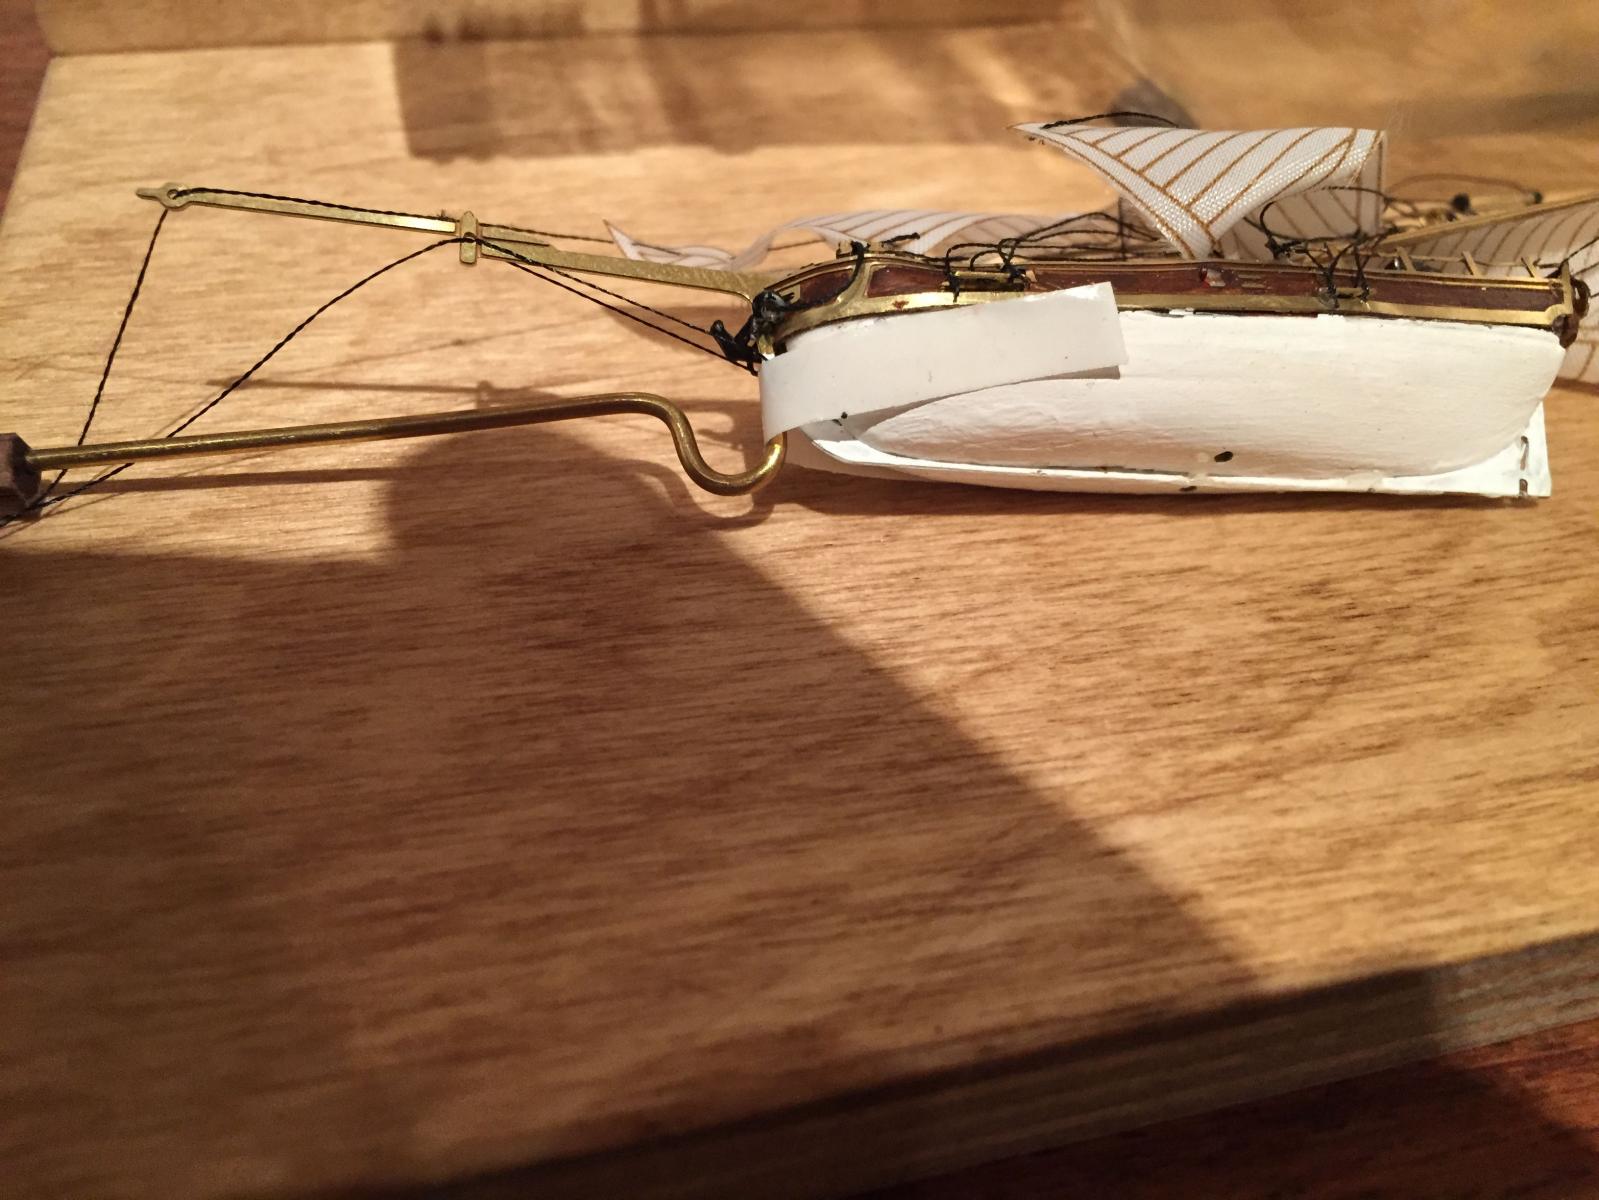
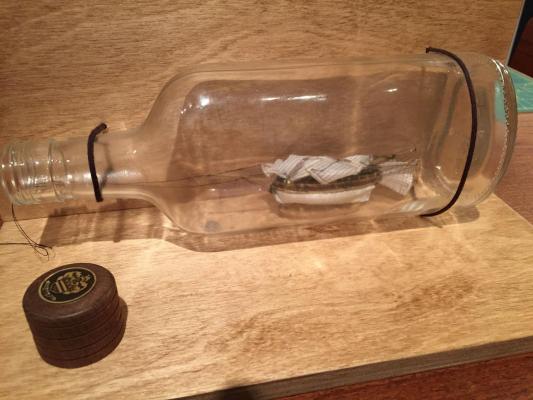
Haha! By "give up" I mean just toss the ship into the bottle in a heap and leave it like that as a "ship-wreck-in-a-bottle" - it's pretty high concept and I don't think many people would get it immediately, but it might be my last option if all else fails.....I won't be trying to mount it again tonight, but am going to stick with redoing the topsail.... You might also have noticed that I decided not to rig the fore course - I felt that too much of the deck work would be masked by this large sail, so I opted to go for a rig as depicted on the bottle with topsail only......anyhow....more later hamilton
-
Hi Tom: Looks about right to me! The sanding will help a lot with the unevenness of the lifts. I spent a lot of time sanding (probably could have spent more). The top side particularly and the bottom both needed quite a bit to smooth out the edges that define the sweep of the deck and the shape of the lower hull. The bow was probably the trickiest area to sand to smoothness while keeping it even. Looks like you'll need some filler in a couple of places, but it's better than mine - I had a small gap (about .5-1mm) that ran around the entire ship due to the misnomered lift..... One issue with leaving it with a natural finish is that the lines between the lifts tend to really show up when the hull is sanded and it looks kind of weird. Maybe this would be ok with the dramatic effect of the sails and the opacity of the bottle, but you'll see once you get it sanded - you can hold off on the decision till then, fortunately - I actually held off until I'd already installed the bulwarks.... Anyway keep it up! hamilton
-
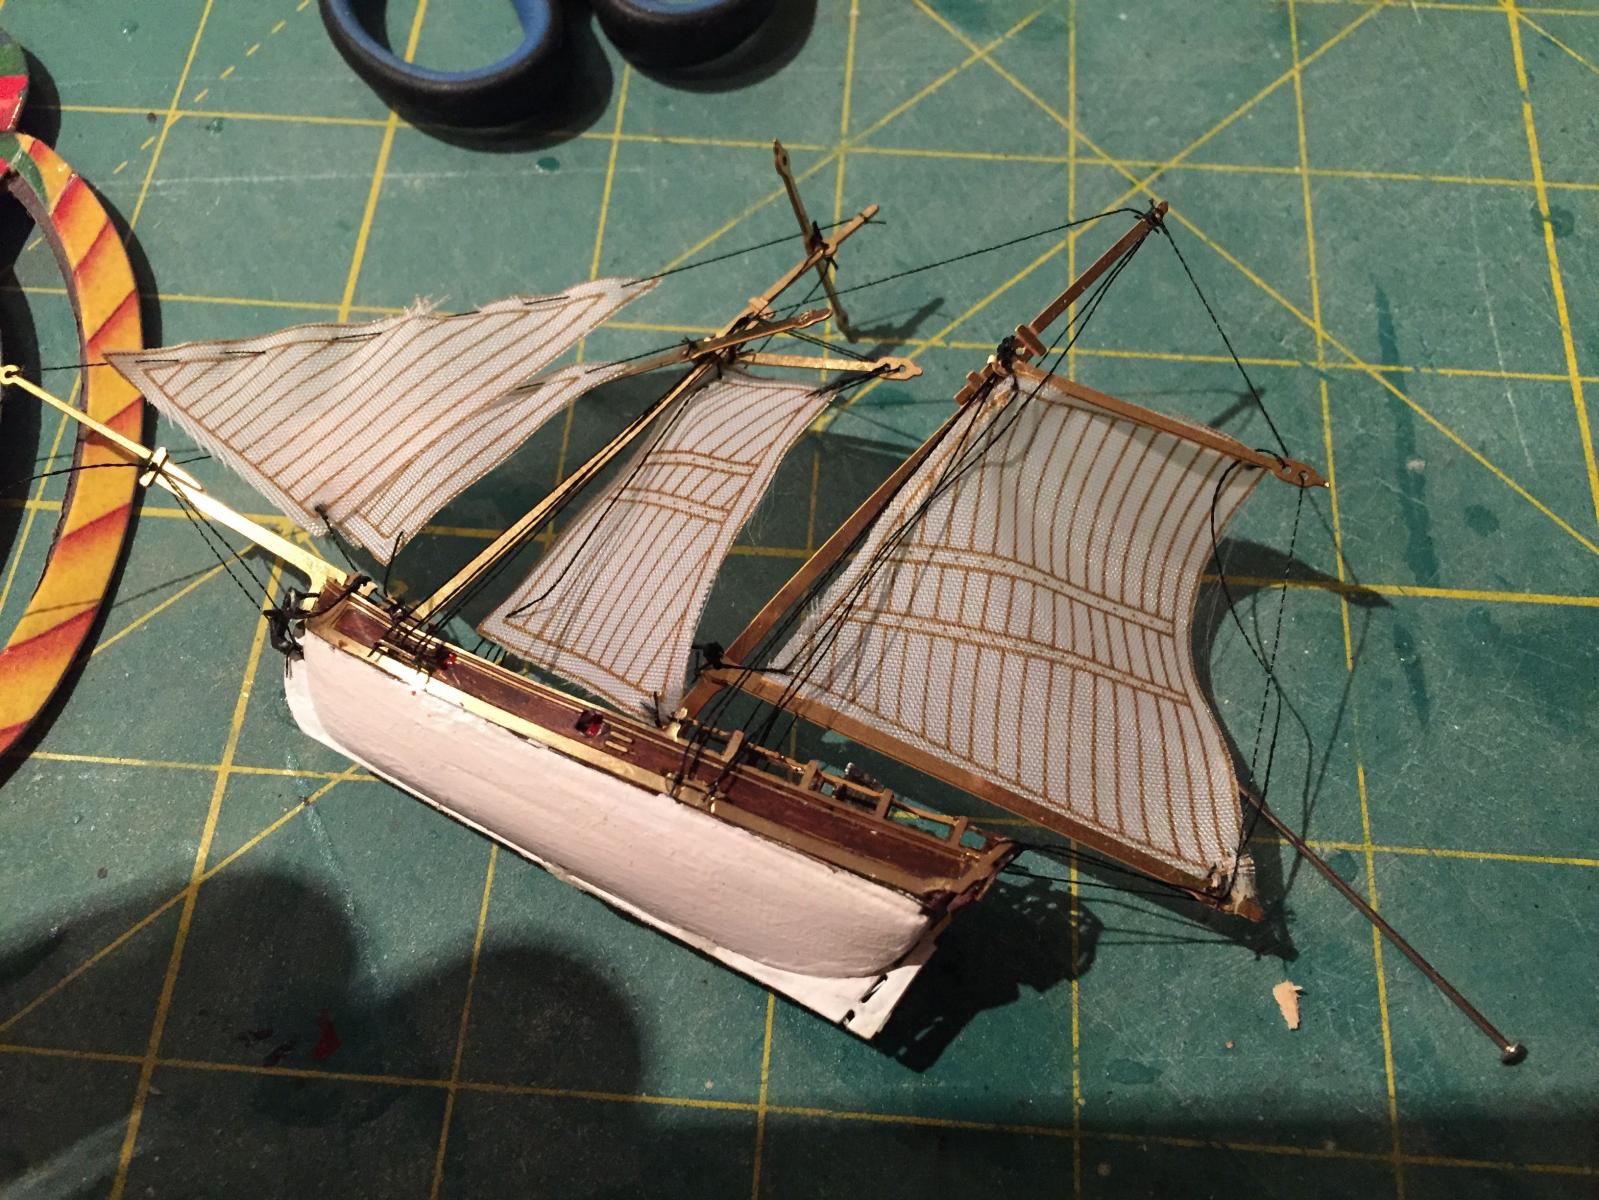
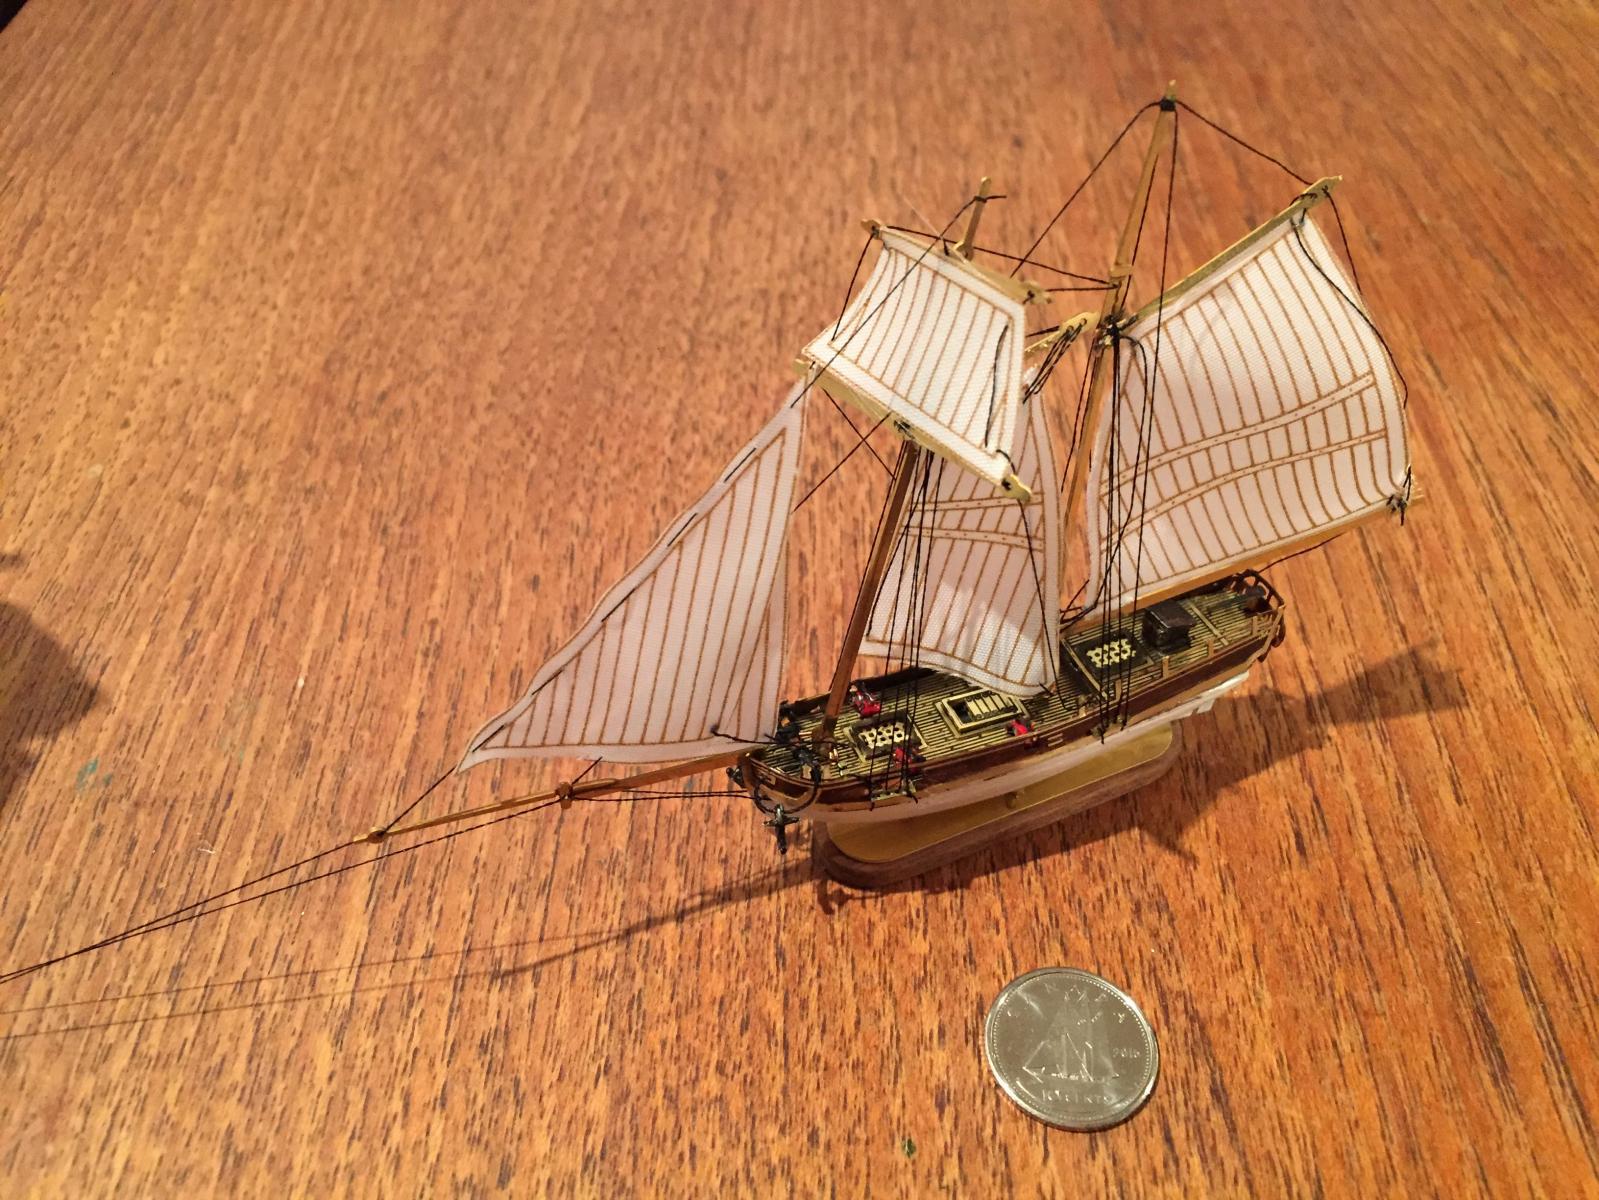
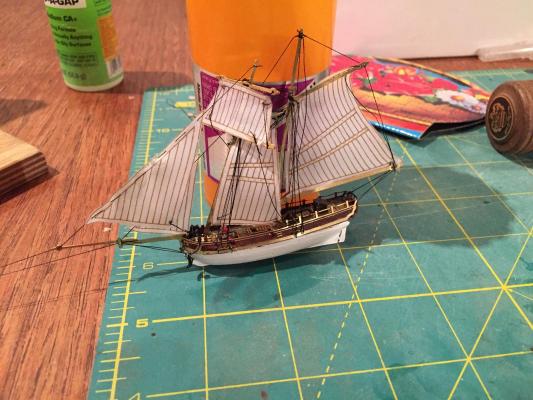
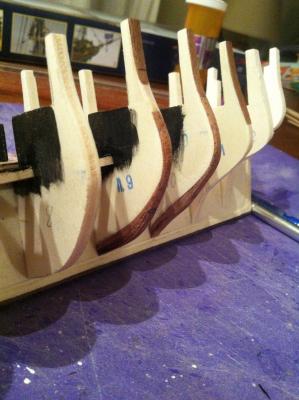
Hi Tom: Yes at least she went in! I've not given up yet, though I still have to re-do the topsail rigging before trying again.... Here's a shot with the sails set - they look pretty overdone (with the dark seams and reef bands) but again, I'm assuming this will help them show a little bit once in the bottle and for better or worse, I'm going to use them.....I'm not sure I could make a set of sails at this scale - the material would need to be very thin to do it justice and very difficult to sew for the average 10-fingered person. Anyway, hope this helps... hamilton

-
Hi there: Glad you decided to start a build log for this kit - there are a couple on here, I think, which will likely provide some help as you go - though since you're aiming for a particular version, the help might be more in particular construction techniques rather than overall aspects of the vessel. Anyway, I've always admired the look of the Mars and hope to build her myself one day.....I'll follow your build with interest (though ten years is a very long time!) On another note, I've visited the Twente region a couple of times - both times staying in Enschede while visiting at the University of Twente. Good times! hamilton
-
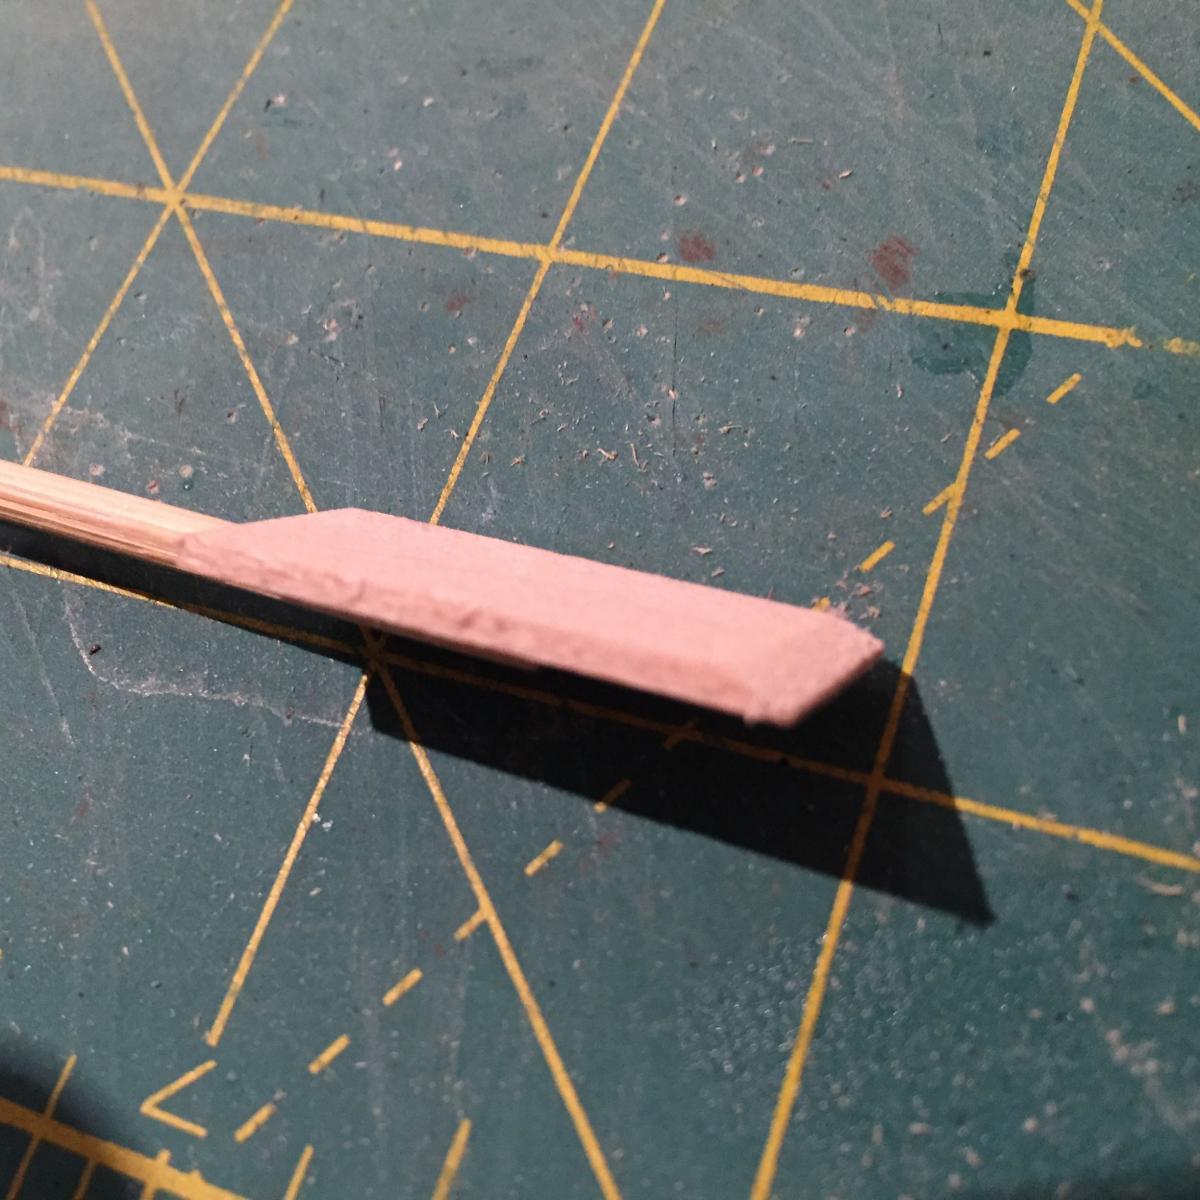
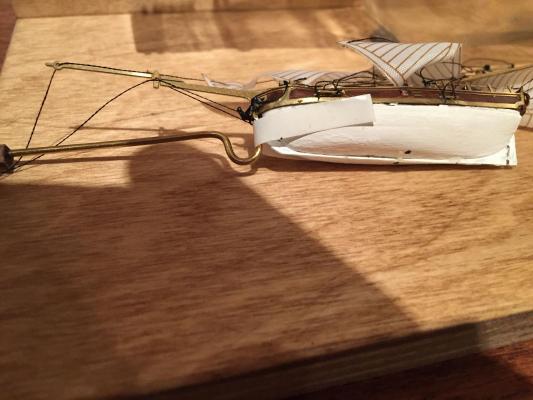
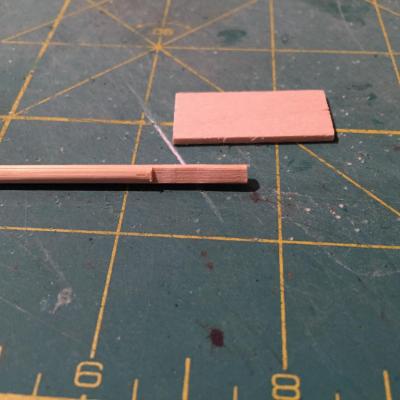
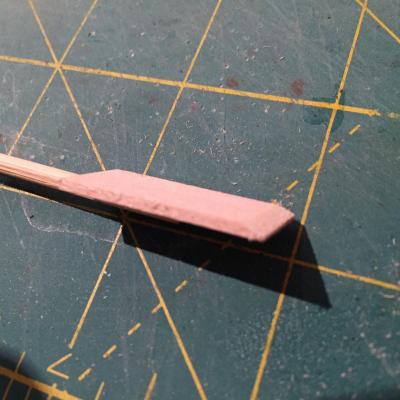
Thanks Danny: And on that note, I'll add an update on the Hannah build....I began this evening with the intention of fixing the Hannah on the stand (already in the bottle). I spent a bit of time considering the approach. I then made an initial attempt to manoeuvre the ship into the bottle. It is a snug fit, but with a little gentle pressure it actually goes in ok. I only moved the hull about half way into the bottle neck before retreating. Satisfied that I could actually get the thing in, I decided to make a little tool to apply the adhesive (I chose 5-minute epoxy again - more on this choice in a minute) to the stand. This turned out to be the only successful part of my evening's work.....Here is the tool - the filed down end of a bamboo skewer onto which I glued a short piece of 10mm x 1.5mm lime. I chamfered the end of the lime strip to ease the application. Here's the tool and here's my test of its reach and action on the stand - exciting stuff here, people! Once satisfied with the tools utility, I mixed up some epoxy dipped the tool in and applied it on the stand....it was a bit messy and the glass distorts the view to the point where I was unsure whether I was getting an even coat on the stand. I took a look down the bottle from the mouth and all seemed well, so I decided to go for it. In the build log I'm using as reference, the modeller mentioned using double-sided tape to attach one of the kit-supplied tools to the hull of the ship and thus be able to manipulate it in the bottle and onto the stand. The kit-supplied instructions mention making a rope sling using another tool supplied with the kit. I have not tried this (I might later) but decided to go with the other modeller's technique. Unfortunately, the only double-sided tape I have is wall mounting tape, which is very thick, though also strong enough to get a good leverage on the hull using the tool attached running alongside the stem. But in order not to have the tape stick in the rigging, I had to run it along the turn of the bilge from the bows to about 1/4 of the way back. What I did not notice until I drew the ship out again in failure was that the tape rose up from the hull enough to make it impossible to sit the forward part of the hull on the stand......mistake number 1. Anyway, blissfully unaware of this, I proceeded. On my first attempt, I accidentally wound one of the out threads around the bottom of the hull forward (it didn't get epoxied, thank god! but it did make it impossible to raise the masts) - mistake number 2. Still not noticing the tape issue, I pulled the hull out of the bottle just enough to untangle the out thread. I then began manoeuvring the hull back into the bottle. Here she is on the way in: At this point I had to drop my camera and focus all my attention on getting her onto the stand.....I actually wish I had kept the posts, which would have helped me to lock the hull onto the stand. The "V" stand I made is adequate, but when slathered in epoxy the hull slid around quite a bit and the tool, despite it's strong hold on the hull, did not allow much in the way of precise control. I did take a moment to pull the out threads and saw the masts come up quite gloriously (it was a momentary elation) before I finally noticed that the forward end of the hull was not sitting on the stand at all, and that it would never adhere to it as long as the tape was keeping the hull from contacting the stand. I drew the ship out planning on repositioning the tape, which is when I noticed: Mistake number 3 - the boom had detached from the main mast Mistake number 4 - the port side boom sheet had snapped Mistake number 5 - the main gaff had also become detached from the main mast Mistake number 6 - the aft port side canon had become unglued. Mistake number 7 - the line that runs through the foremast topsail had snapped on the starboard side Sheesh!! I decided I needed to step away from the modelling table for a bit (and write this post) so I could decompress and build up some positive energy to continue....I think that tonight I will simply do the following: 1. reattach the canon 2. reattach (with stronger thread) the boom and gaff 3. re-tie the port side boom sheet Tomorrow I'll tackle the topsail rigging (again!) and see about getting it into the bottle.... At this point (just to make a long post even longer), I'm a little concerned about the stand....it's epoxied in the bottle, so I imagine it's there for good. But now the lifts on the stand are slathered in epoxy.....I'm considering using slow-acting CA now to set the hull on the stand (despite my earlier misgivings about using it inside the bottle). But I may go with the epoxy again - except holding the thing straight while the epoxy sets will be a test of zen-like patience....on the other hand, will today's epoxy on the stand give me trouble when I go to try to put the boat on the stand at a later time? If anyone has insight here I would greatly appreciate it...... Long and the short - I can see that this is doable (which is important), but the goal line just receded significantly after today's modelling debacles...... And on and on... hamilton

-
Hi Tom: It's funny that you say the more you do the smaller it seems - this is definitely true! Wait till you get into the rigging! I also found the laser cut wood to be unevenly cut. Also - I suspect that a couple of the lifts might be mis-numbered on the plans - I can't remember which, but I would advise you to test their fit against each other before gluing them and making sure that the numbers correspond to the right part. There was one lift that should have been wider than it was given its placement and I think it was actually mis-numbered in the plans....if I hadn't been assembling as I went, I could have fixed this easily, but I ended up using some wood filler during and after the sanding of the hull to correct for this.....maybe your kit is different, though..... hamilton
-
Cutter Cheerful 1806 by rafine - FINISHED
hamilton replied to rafine's topic in - Build logs for subjects built 1801 - 1850
Hi Bob: Just caught up on your Cheerful - she's coming together very nicely. hamilton- 525 replies
-
- 1
-
-
- cheerful
- Syren Ship Model Company
- (and 1 more)
-
So far so good eh? The bottle that came with my Hannah was also a little foggy, though it's now too late for me to do anything about it and viewers will have to pretend that they're peering at the ship through a light mist..... I don't think you'll have any problems with the finishing on this tiny kit - given the scale and detail of those figures! I'll be following along here with interest hamilton
-
The deck and stern are looking great, Brett. And good on you for sticking with the 2mm planking - you're a braver man than I! hamilton
-
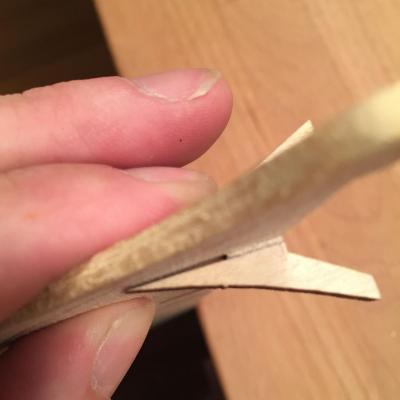
Hi Tom: Well there's not actually that much left to document, and I don't have many photos of the ship in process and none of the various construction stages.....as I say I'll try to get some good photos of the ship going into the bottle and to document that.... The keen-eyed among you will notice that I replaced the brass pins on the stand with some rough-hewn walnut strips shaped for the hull to rest upon. I thought this would make mounting the hull in the bottle a bit easier - someone (either here or in another place) compared putting the hull on the pins to a carnival game.....not really in the mood for that sort of finagling.......I'm going to have a try at getting her into the bottle this evening, so check for an update (good or bad) later. hamilton
-
Hi Brett Yes mine was double planked - making for a much easier build! Though I've seen some very nice planking jobs on the SF II, but it looks like quite a battle....You might try replacing the wood with two thinner layers that add up to 2mm - a 1.5 and a .5 or a 1 and 1.....I'm not sure whether this would cause construction issues down the road (do the bulwarks come as a laser cut piece?) but it would certainly make the planking easier.... hamilton