-
Posts
1,528 -
Joined
-
Last visited
-
 Rik Thistle reacted to a post in a topic:
Log to PDF Tool
-
 Taken Aback reacted to a post in a topic:
As a new member....How to get the best from your MSW experience!!
-
 Saburo reacted to a post in a topic:
HM Sloop Echo 1781 by VTHokiEE - 1:48 - Cross-Section
-
 Saburo reacted to a post in a topic:
HM Sloop Echo 1781 by VTHokiEE - 1:48 - Cross-Section
-
 FrankWouts reacted to a post in a topic:
Duchess of Kingston 1778 by Rustyj - FINISHED - Vanguard Models - 1:64 - Royal Yacht
-
 VTHokiEE reacted to a post in a topic:
Free. HMS Pegasus incomplete. North Essex U.K.
-
 petervisser reacted to a post in a topic:
HM Cutter Alert by VTHokiEE - FINISHED - Vanguard Models - 1:64
-
 VTHokiEE reacted to a post in a topic:
Speedwell Battle Station Kit 1752 by CiscoH - Syren Ship Model Company - 3/8" or 1:32
-
 VTHokiEE reacted to a post in a topic:
Speedwell Battle Station Kit 1752 by CiscoH - Syren Ship Model Company - 3/8" or 1:32
-
 VTHokiEE reacted to a post in a topic:
Syren Ship Model Company News, Updates and Info.....(part 2)
-
 FrankWouts reacted to a post in a topic:
Sloop Speedwell 1752 by Rustyj - Syren Ship Model Company - 1:32 Scale - POF Sloop
-
 FrankWouts reacted to a post in a topic:
HMS Winchelsea - FINISHED - 1764 - by Chuck (1/4" scale)
-
 thibaultron reacted to a post in a topic:
Ring light
-
 Nirvana reacted to a post in a topic:
HM Armed Cutter Sherbourne 1763 - Vanguard Models - 1:64 Wooden Ship Model Kit
-
 VTHokiEE reacted to a post in a topic:
Ropes of Scale developments and updates
-
 VTHokiEE reacted to a post in a topic:
Chris Watton and Vanguard Models news and updates Volume 2
-
 VTHokiEE reacted to a post in a topic:
Gunboat Philadelphia 1776 by tmj
-
 VTHokiEE reacted to a post in a topic:
Gunboat Philadelphia 1776 by tmj
-
 VTHokiEE reacted to a post in a topic:
Chris Watton and Vanguard Models news and updates Volume 2
-

Gunboat Philadelphia 1776 by tmj
VTHokiEE replied to tmj's topic in - Build logs for subjects built 1751 - 1800
Looking forward to your build! Should be a very interesting take - have fun! -
 VTHokiEE reacted to a post in a topic:
Gunboat Philadelphia 1776 by tmj
-

Beginner looking for advice on first kit
VTHokiEE replied to O-Nurse's topic in New member Introductions
I would also consider getting the HM Armed Cutter Sherbourne by Vanguard https://vanguardmodels.co.uk/product/hm-armed-cutter-sherbourne-1763/ The owner of Vanguard (@chris watton) is on the forum if you run into any questions. I built the HM Alert as my first planked wooden ship and the material, instructions, etc were all very high quality. -
Not the original poster but where I build my model (in my garage) was on the edge of my wifi signal and made it somewhat of an unreliable connection (solved it this week for different reasons). I know others build in workshops/basements/etc where the connection simply may be lacking regardless of the connection to the ISP.
-
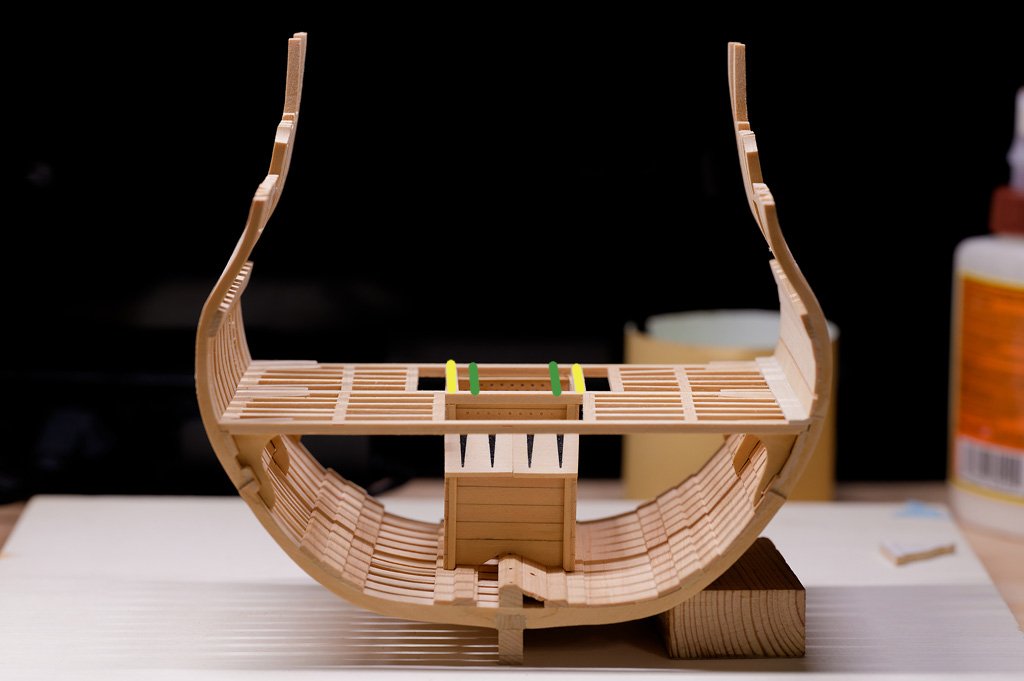
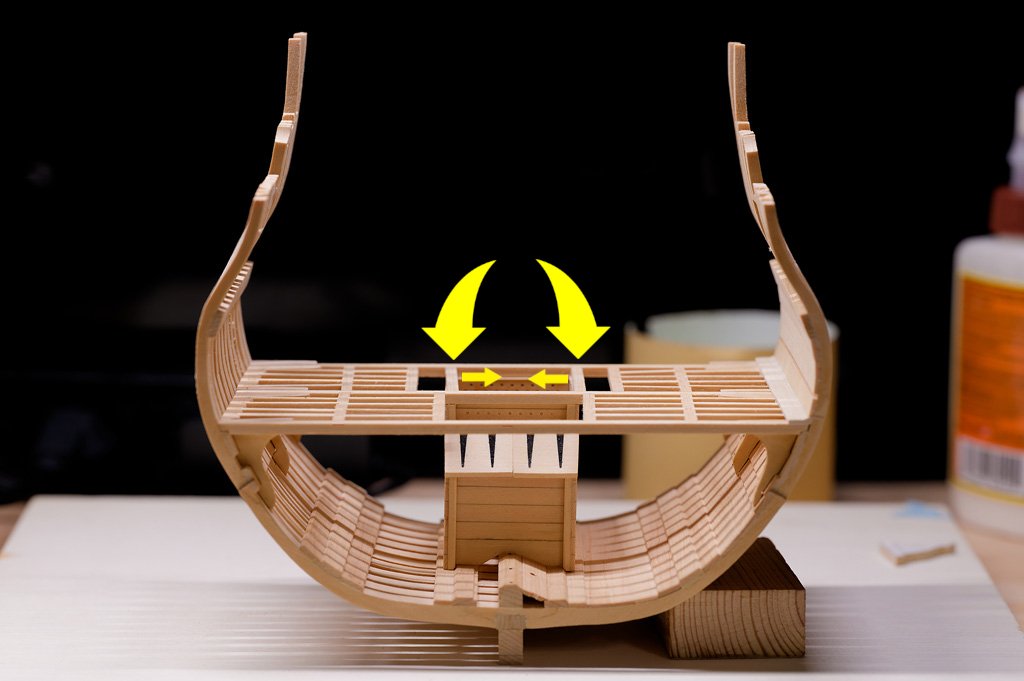
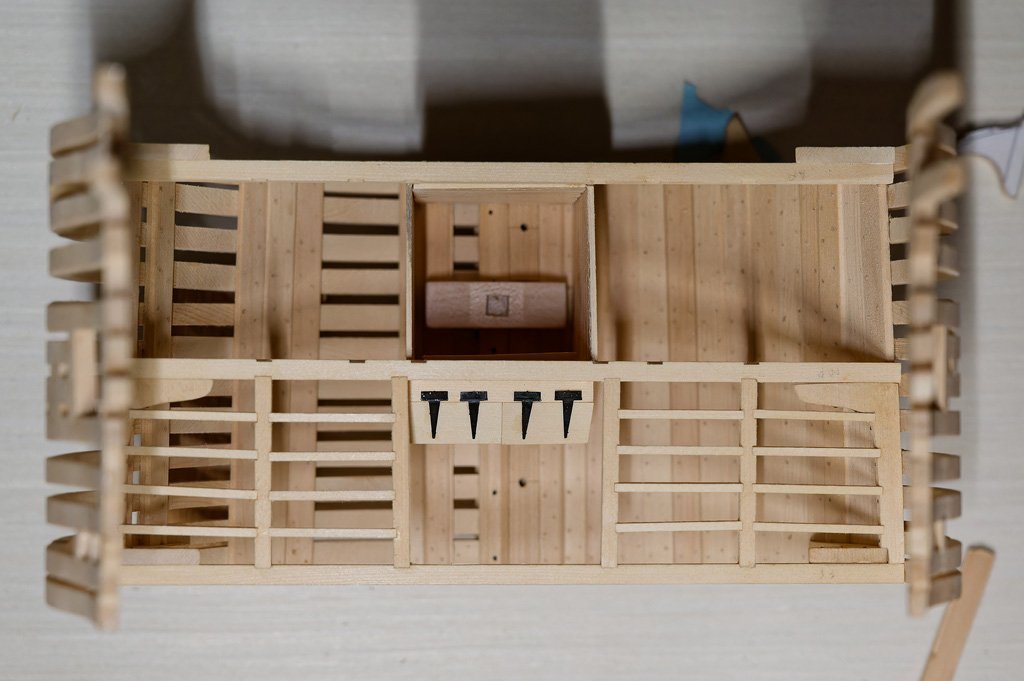
Almost, the side of the cutout nearest closer to the frames can probably stay put, but the interior side needs correction. Something like the below where the current carlings, in yellow, are moved closer to the green line. This is on the tables as I used PVA, but I am a little concerned about accidentally doing damage to the frame joints when I try to soak to joints with IPA (there's probably a more a precise way to do it than what I have done in the past though). I probably should use a little less glue the future I think. I'll see how removing the carlings go and see what my options are - leaving the planked carling off is making a lot of sense though so I don't fight myself again with this and it wouldn't be visible in the end regardless. As I wasn't planning to add the pump on the unplanned side so leaving a visible carling there should be fine. I probably should try to address the large grate size though, I need to re-read the practicum and look through the TFFM Vol 1 to see if I can get a more accurate idea for where the carlings should be placed.
-
Thanks @davec @Old Collingwood @glbarlow I was happily continuing with the build when I unfortunately ran into a snag. There was a comment in @tlevine build log for the cross section "Do not measure off the practicum. Unlike the drawings in TFFM, these drawings are off scale by up to +/- 6%." Unfortunately, I re-read this caution late and now I am faced with an issue to resolve. I used the template provided on page 7 for the lower deck framing and realized that though the scale provided was measuring accurately the template would not fit the deck (it was too small). I made an executive decision to start at the provided centerline, place the carlings as indicated and continue on - this will prove to be an unfortunate mistake. EDIT: The actual mistake was that I placed the template at the edge, by the frame, and measured out from there which allowed for too much space around the centerline. Based on measurements trying to correct this mistake if I actually had measured in from the centerline it would've been fine. I placed the upper deck clamps, planking and spent some considerable time shaping the waterway. I then started to think about the pump tubes and noticed that the carlings are not in the correct places. The most problematic are the interior ones in the aft - they landed right on top of the well and provide no space for the pump tubes to go into the well. This also means that the lower deck hatchway will be too large, but I can live with that mistake - I could also probably live with the error on the planked side in the aft and simply pretend that the carling was in the correct place. However, this error will not look right on the unplanned side and it will imply that the pump go through the well wall. I think the best plan is to use some IPA and remove the most offensive two carlings, use filler (huge crossed fingers here) to hide to wrong scores, then carefully file new scores by hand (start crossing my toes here), and add the carlings back in.
-
I can only give you my experience with the second book. I bought Ship Modeling Simplified: Tips and Techniques for Model construction from Kits by Frank Mastini when I was getting my first kit because it seemed to be highly recommended. The book wasn’t expensive but I didn’t really use it very much and I only read about a 3rd of it. This forum simply provided more knowledge in a more searchable form than I found in the book. The forum has great examples of so many components of construction in build logs and many general questions answered in the other forum areas that I passed the book along to make room for others in my library.
-
I looked at several instructions for Mamoli kits and while they all had the CM descriptor only one (instructions for the Sâo Miguel ART. MV21) had a label for CM and that label was in Polish only (it was removed from the English translation portion of the instructions). It stated: CM – sklejka 1,5 mm which using Google translate, appears to translate as plywood. That translation makes sense for, at least some of, the parts that I saw labeled as CM. Hope that helps.
-
I really should get some weather power - your cannons (as well as everything else) look awesome. I have to stop looking before I convince myself that I need an airbrush as well. You have done a remarkable job with your Winchelsea!
- 840 replies
-
- winchelsea
- Syren Ship Model Company
-
(and 1 more)
Tagged with:
-
The minimum aperture for Nikon macro lenses is typically f/32, but as you focus down to 1:1 the effective aperture is smaller.
-
Very excited to follow your build as I have considered doing the Hayling Hoy as well as a first scratch ship. I think that how close you get to the line probably depends on the part. My experience with the frames on my cross section was that I should have left a a good bit more on the parts than I did to account for fairing (maybe leaving 1-2 mm? outside the line to account for fairing), but this is probably also due to my inexperience building and raising the frames. I imagine (hope?) that as I get more scratch work under my belt I can get closer for the frames at least. Looks great so far!
- 92 replies
-
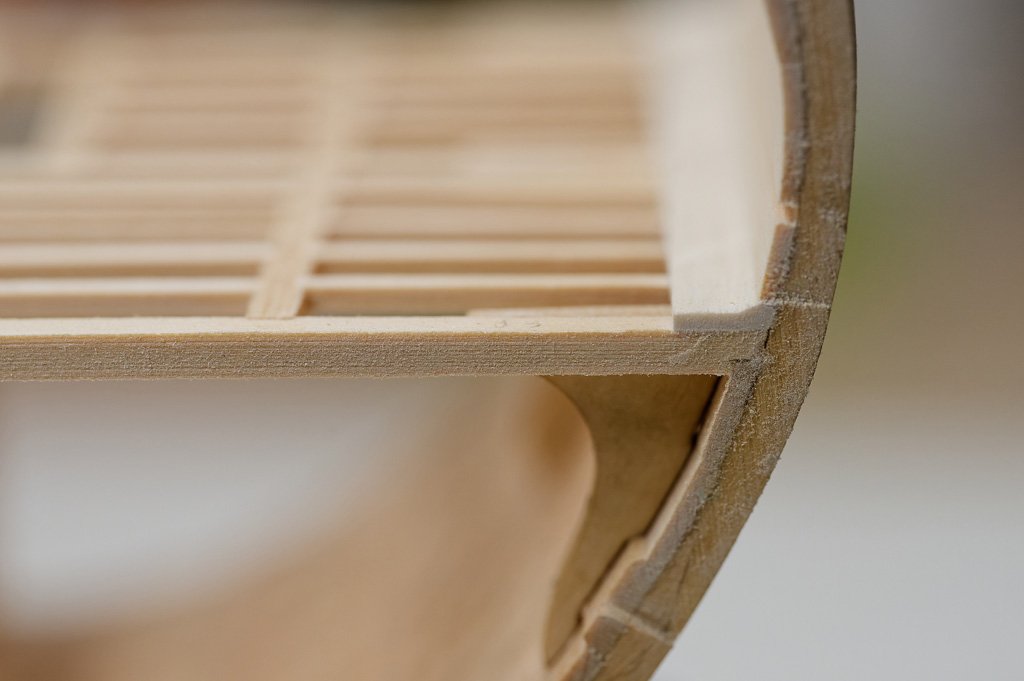
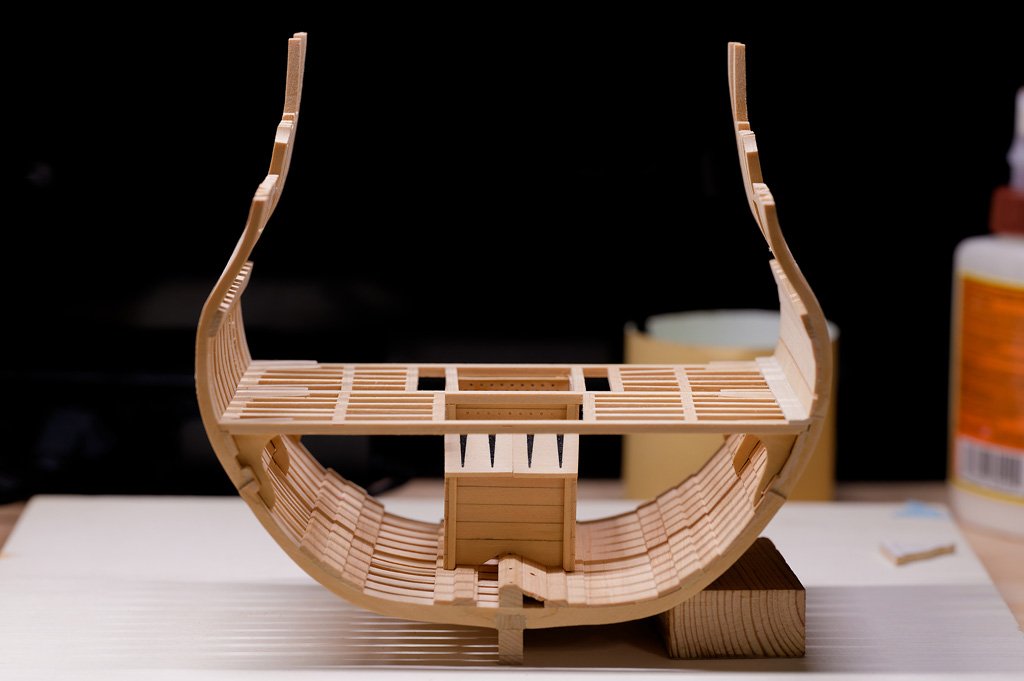
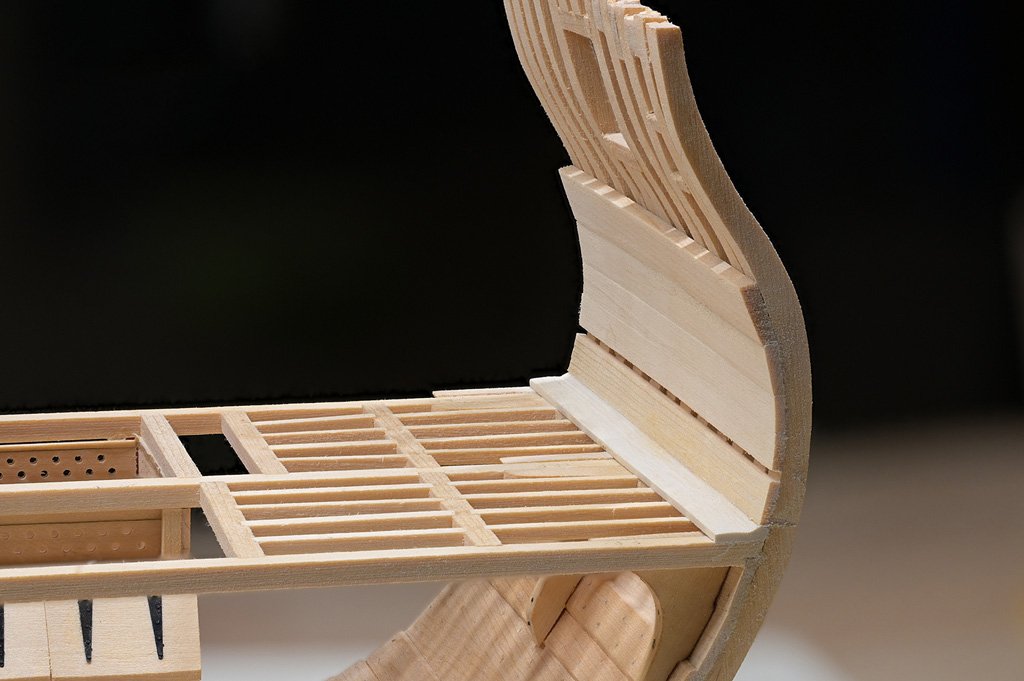
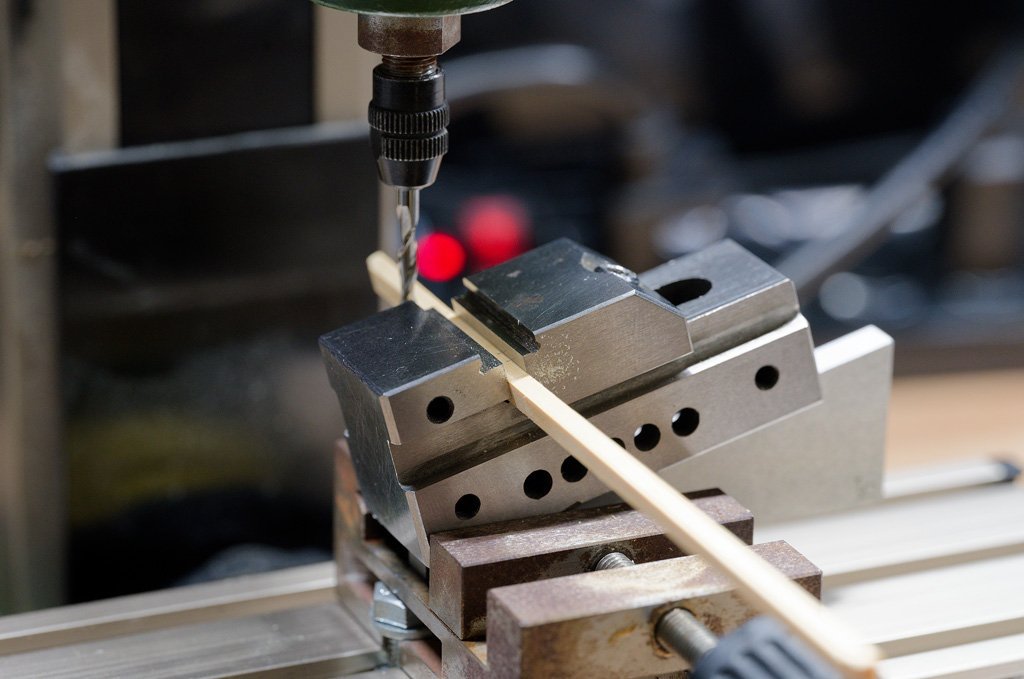
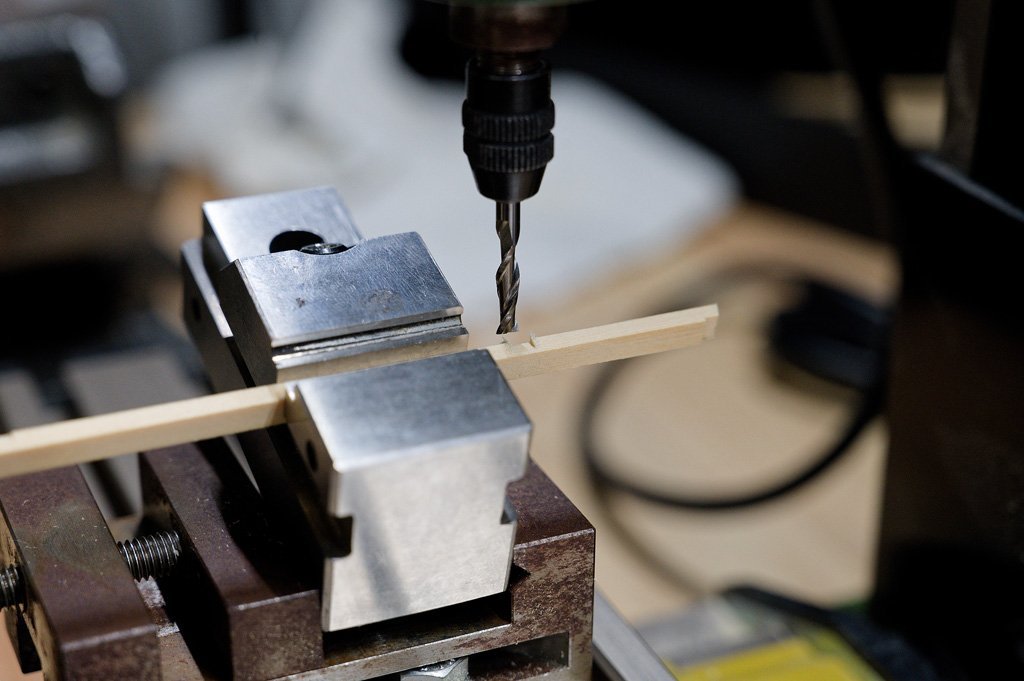
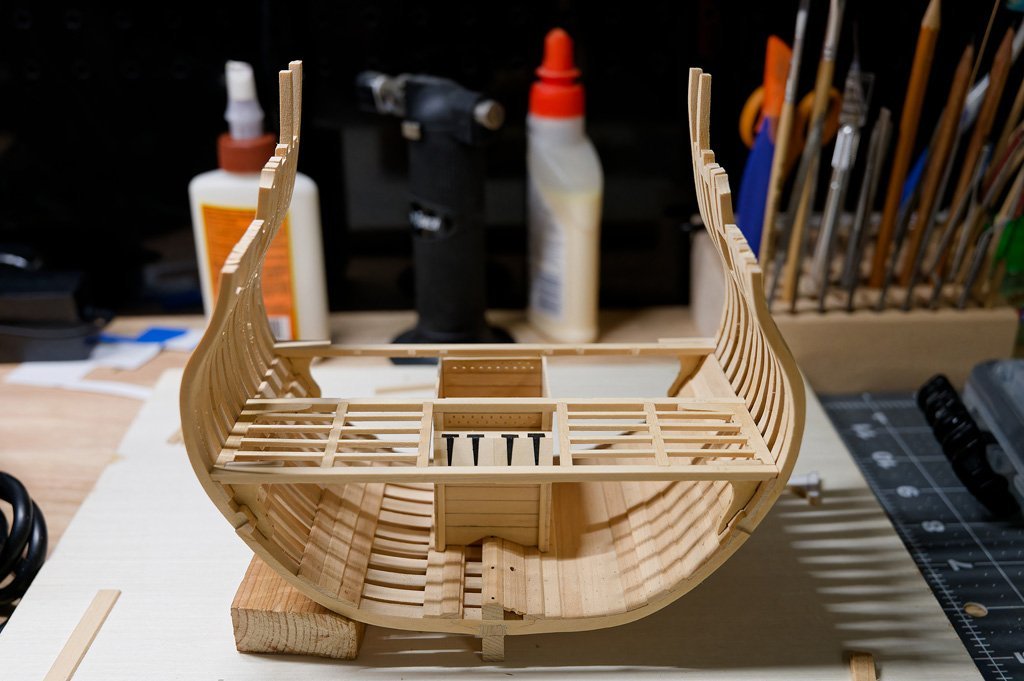
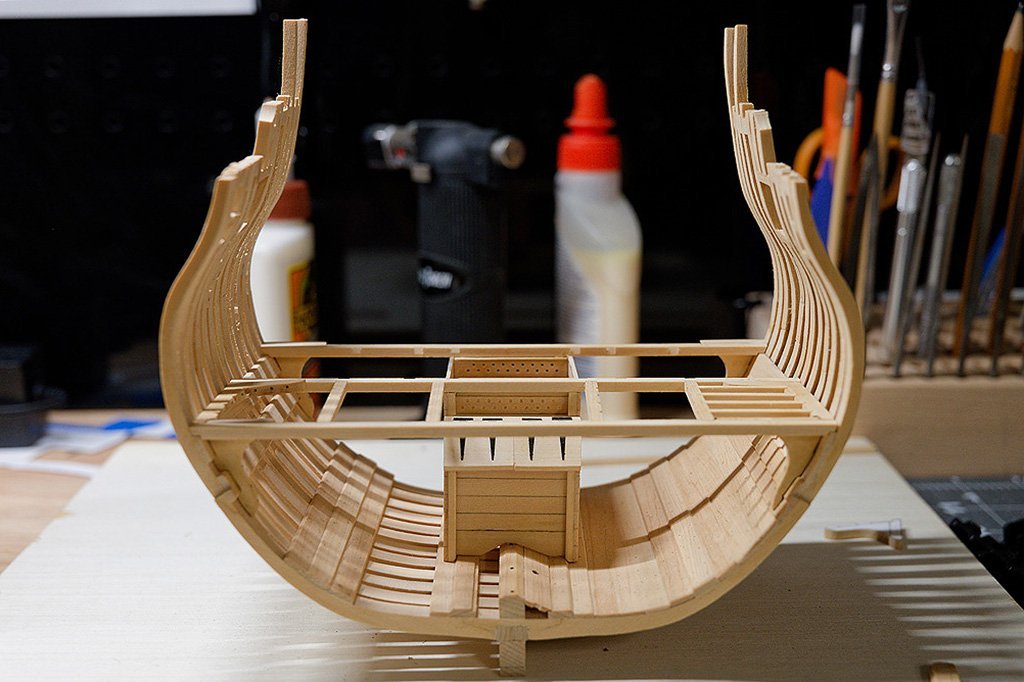
@glbarlow Thanks a lot - there have certainly been a lot of challenges to overcome, not certain that I've quite "mastered" any yet though :-). I've been continuing work on the lower deck framing and while not perfect I'm happy with how the cross section is shaping up. I struggled for a little bit trying to determine how to score the mortises (joints?) for the ledges and carlings until I recalled my mantra for this build - go re-read TTFM book 1 and of course there was a nice tip for how to easily make pseudo joints which I attempted to follow. The picture thats follow show how I set the angle for the score on beam and then the finished cut. I did my best to get the matching score aligned, but they are slightly off - though it isn't very noticeable until you really start staring at the deck and I think it will be even less noticeable when the upper deck is added (though I will have to be more exact there). I have to add the center hanging knees and lodging knees before finishing out the deck framing, but here is where I currently stand.
About us
Modelshipworld - Advancing Ship Modeling through Research
SSL Secured
Your security is important for us so this Website is SSL-Secured
NRG Mailing Address
Nautical Research Guild
237 South Lincoln Street
Westmont IL, 60559-1917
Model Ship World ® and the MSW logo are Registered Trademarks, and belong to the Nautical Research Guild (United States Patent and Trademark Office: No. 6,929,264 & No. 6,929,274, registered Dec. 20, 2022)
Helpful Links
About the NRG
If you enjoy building ship models that are historically accurate as well as beautiful, then The Nautical Research Guild (NRG) is just right for you.
The Guild is a non-profit educational organization whose mission is to “Advance Ship Modeling Through Research”. We provide support to our members in their efforts to raise the quality of their model ships.
The Nautical Research Guild has published our world-renowned quarterly magazine, The Nautical Research Journal, since 1955. The pages of the Journal are full of articles by accomplished ship modelers who show you how they create those exquisite details on their models, and by maritime historians who show you the correct details to build. The Journal is available in both print and digital editions. Go to the NRG web site (www.thenrg.org) to download a complimentary digital copy of the Journal. The NRG also publishes plan sets, books and compilations of back issues of the Journal and the former Ships in Scale and Model Ship Builder magazines.


.thumb.jpeg.fc5d633a7b34428fcf19419a73d56d55.jpeg)


.thumb.jpg.62d1d69fed1f32364417cb1f9cdeb009.jpg)

