HOLIDAY DONATION DRIVE - SUPPORT MSW - DO YOUR PART TO KEEP THIS GREAT FORUM GOING! (Only 13 donations so far - C'mon guys!)
×


CiscoH
-
Posts
379 -
Joined
-
Last visited
Content Type
Profiles
Forums
Gallery
Events
Everything posted by CiscoH
-
 Mike- the Conference was in April in New London, CT. About 6 hrs from here.
- 23 replies
-
- 2
-

-
- Speedwell
- battle station
- (and 1 more)
-
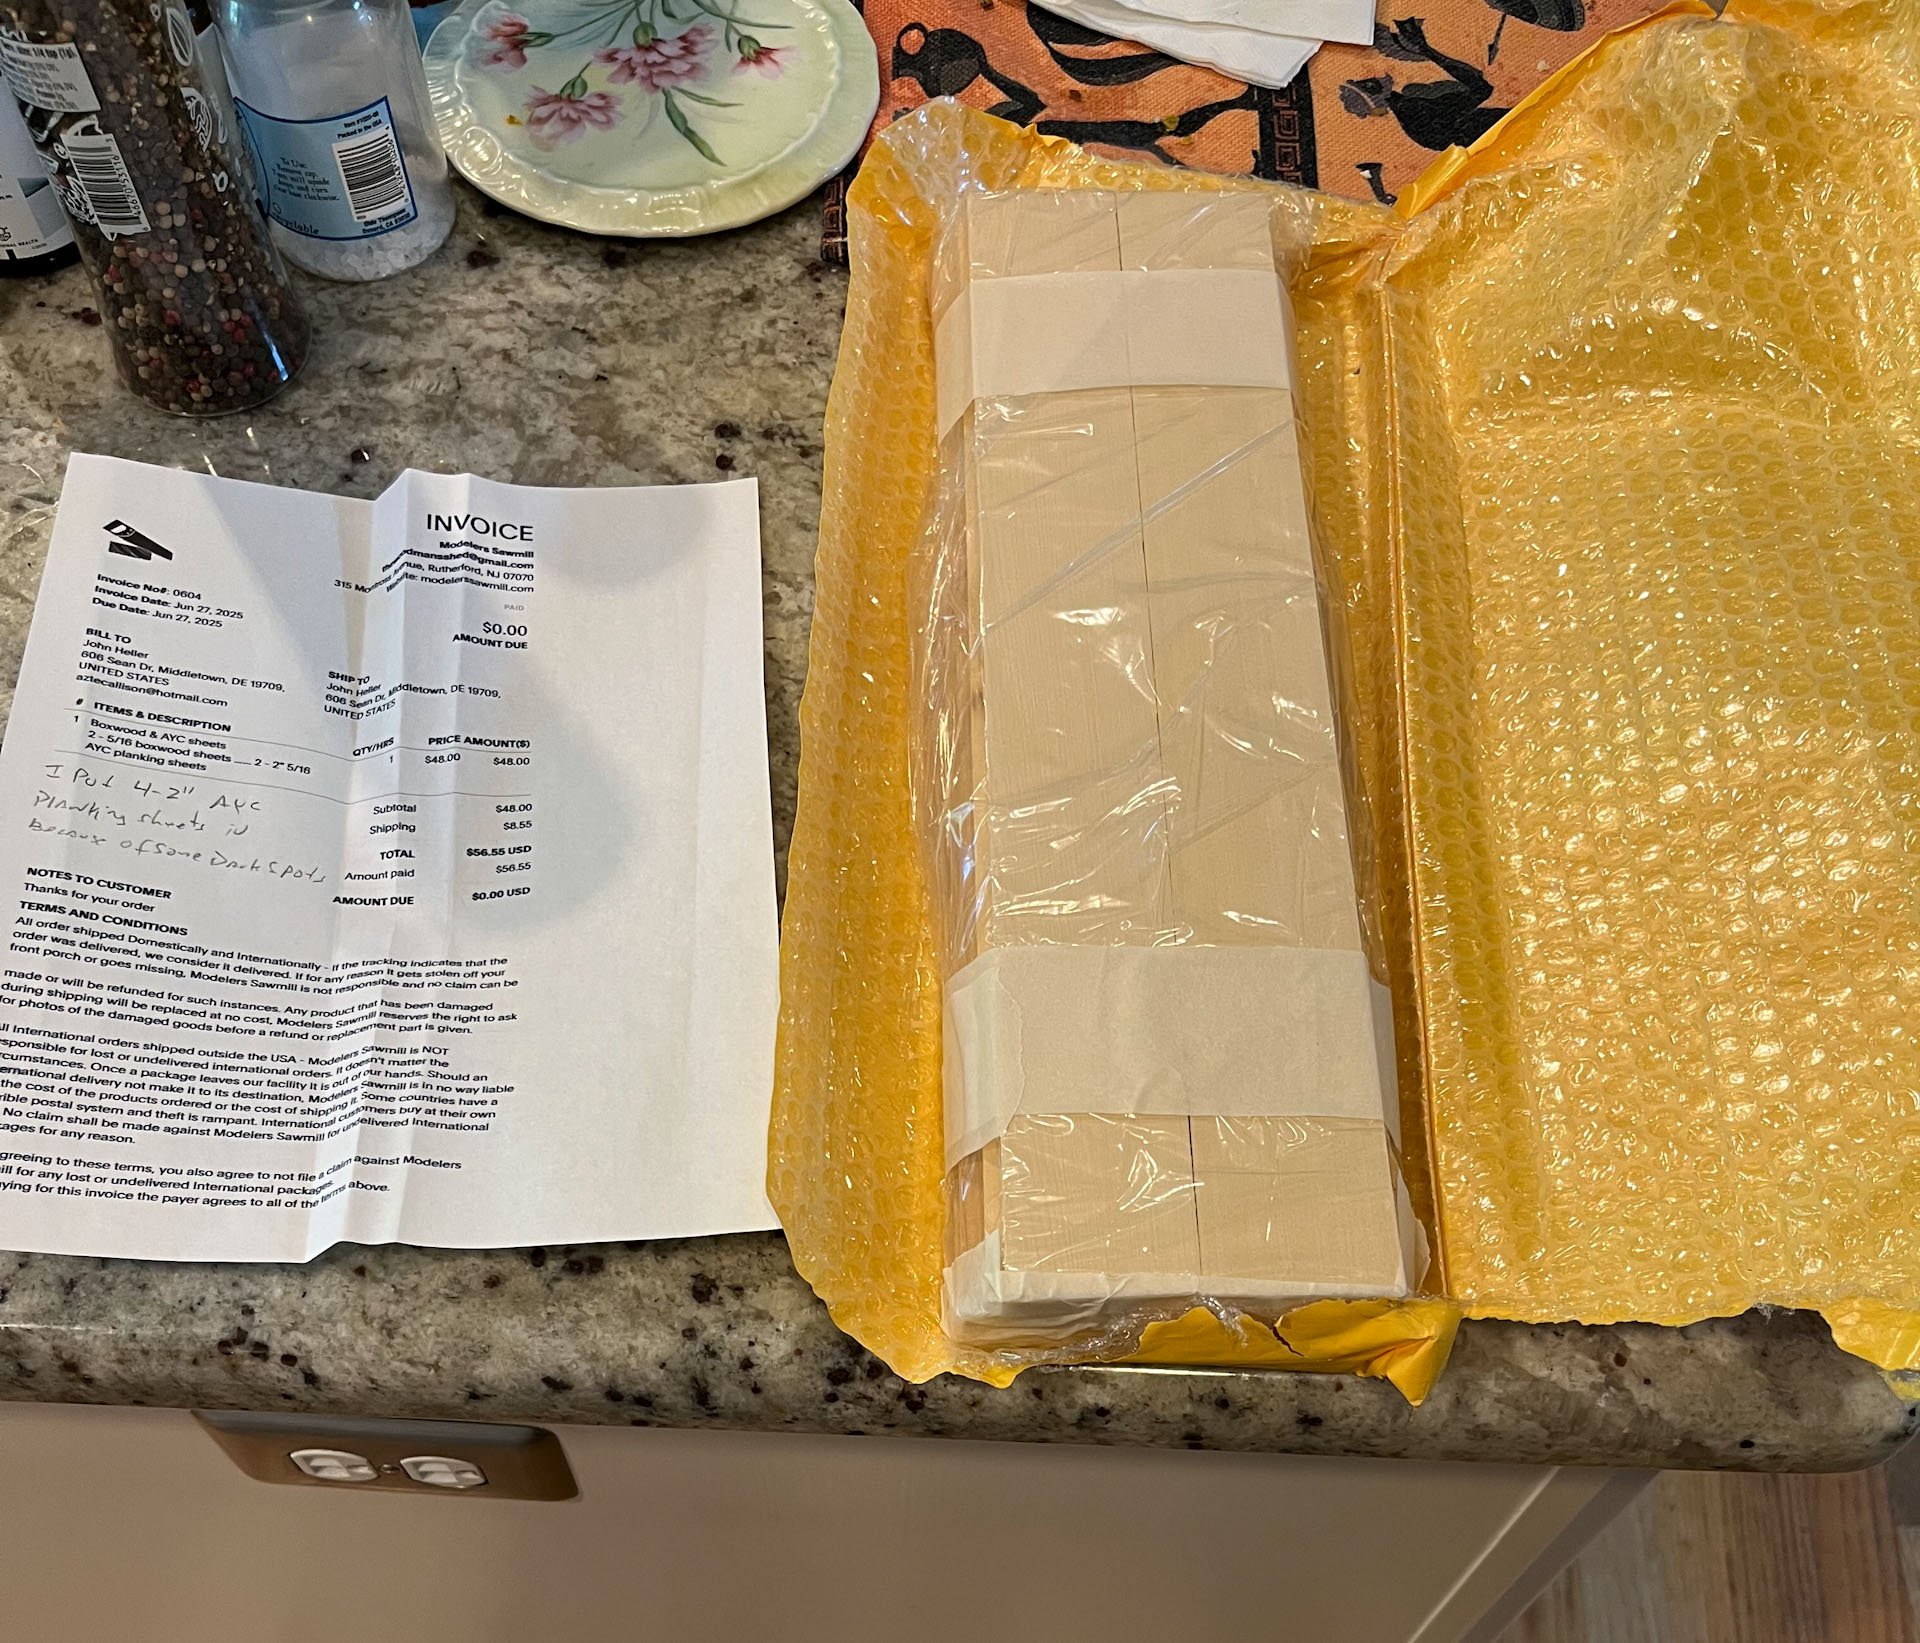
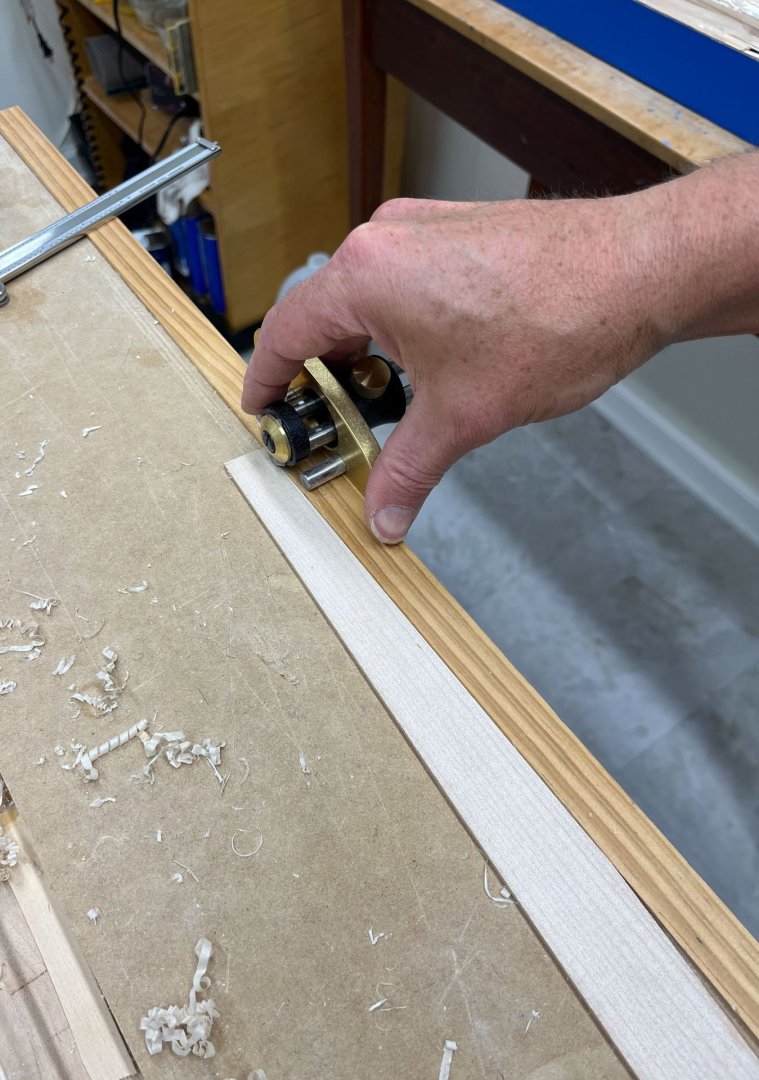
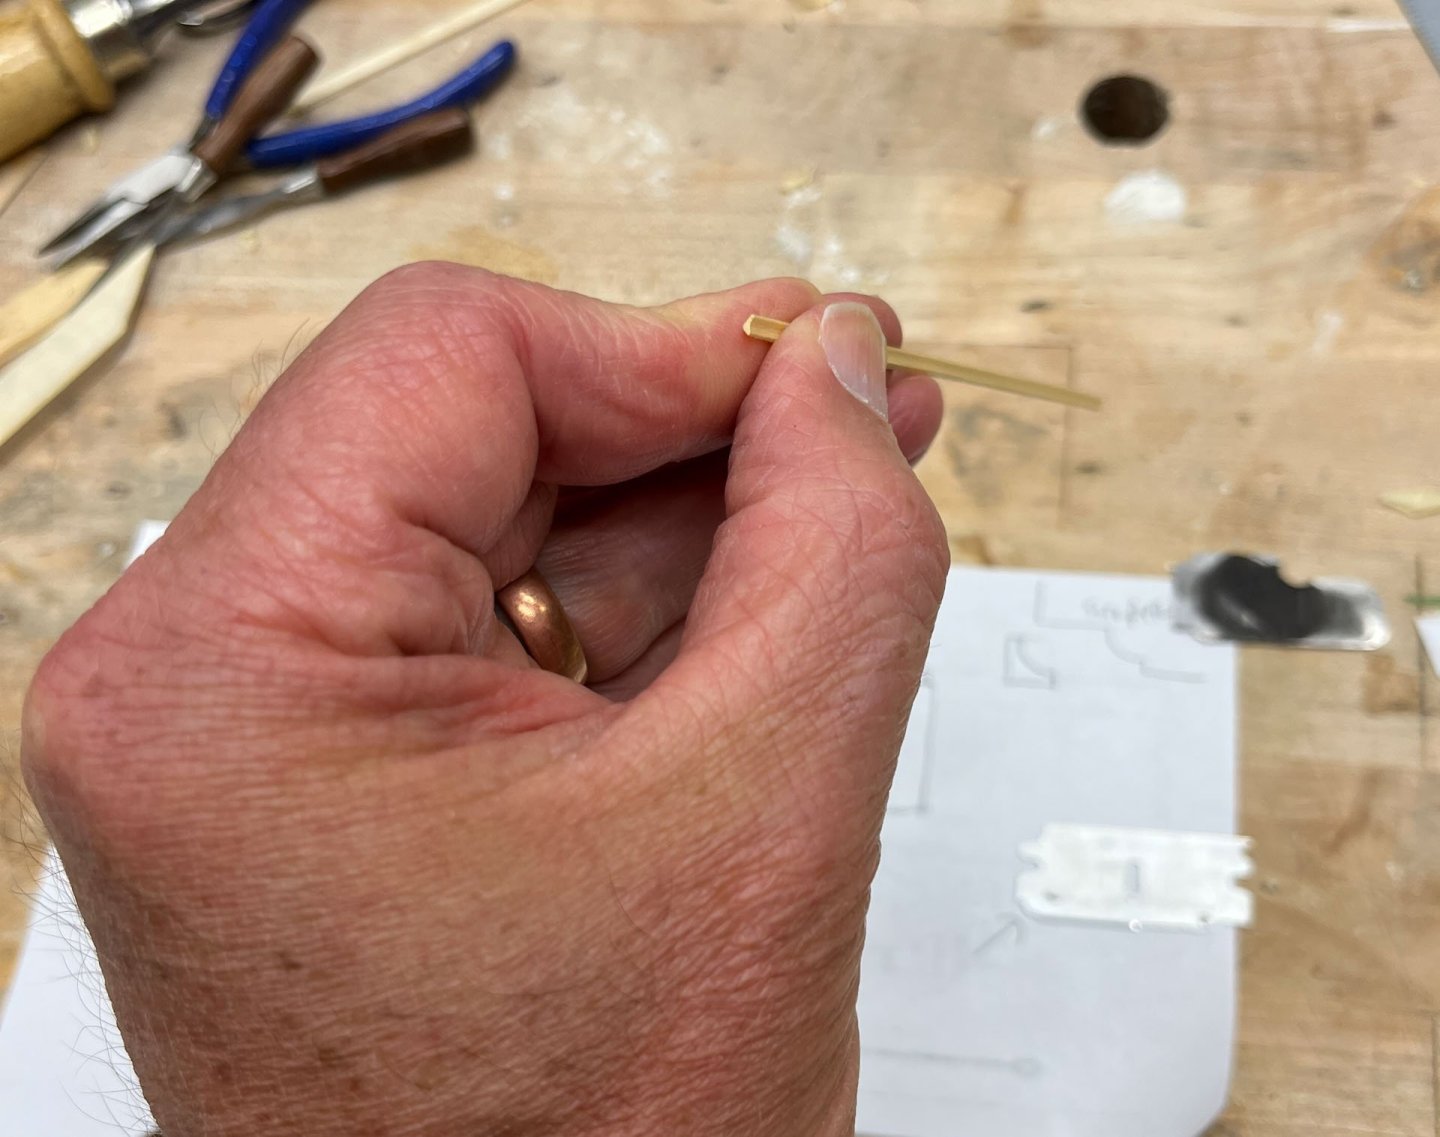
Well Howdy MSW. Its hot and humid here in Middletown Delaware on Sunday afternoon. Most of this post is fixing my last post, oh well. I was not fully satisfied with my previous attempts at making moldings. The process was fine and good practice, but the wood I used (I think maple?) had a mottled pattern. It looked ... ok. After staring at it for a while I decided to hold off on making the upper molding until inspiration struck. In every misfortune lurks opportunity; this was the perfect excuse to order some wood. I'd heard good things about Modelers Sawmill in New Jersey so I gave it a try and ordered 2 billets of AYC and 2 of Boxwood (which I have never used before). Joe, the owner, was excellent and provided good communication and suggestions. The order took a few days to show up, was nicely wrapped on the outside, celophaned on the inside (to limit moisture exchange -> which leads to warping). An excellent experience - highly recommended. Joe even included 2 extra billets of AYC because of some discoloured areas. I normally assume 25% wastage from imperfections so this was above and beyond. Now that I had the wood I had to do it justice. I cut a strip from the boxwood and used the same scraper as before to remake the lower molding. Once it was scraped I trimmed it down to size. It was definitely better. Below the old molding is on the left. You can see the mottling/spots it has. The boxwood on the right is much cleaner. The old lower molding popped off distressingly easily. I changed from white glue to yellow in hopes the boxwood version would stick better. Next I made the scraper for the upper molding. My interpretation of the Battle Station plans indicated a double bead, the upper one bigger than the lower, with a small fillet at the bottom. This scraper took a lot more time to construct versus the lower molding; every time I had it almost right I tended to over-file. Here is the final result - the profile I used is on the bottom left side. The profile is cut pretty deep into the hacksaw because i had to redo it so many times. Then the same process as before. Scrape the boxwood, plane it down to the correct thickness, and yellow glue it in place. The upper molding sticks up a bit so next I added a strip (the cap rail?) to bring it flush. Now that I have my finished height I can make the inner molding next. And thats where we are. While waiting for my wood to arrive I had started on the cannon carriage but it can wait for my next post. I like Boxwood. Its hard, a bit stringy, and on the billets you can see the grain pattern but its not obvious once cut into strips. It will be my molding material of choice in the future on any AYC projects. Happy 4th of July weekend for those of you that celebrate thanks for reading Cisco


- 23 replies
-
- 16
-
-
- Speedwell
- battle station
- (and 1 more)
-
Beautiful Frank! Those 45 degree miters are challenging to get right. Even a little off and its glaringly obvious; I can't see any bad joints there atall.
-
the interior looks like a real, full-sized ship! astounding attention to detail Matthias
-
looking good Skibee. Getting the planking to fit around that very sharp curve under the transom strained my abilities to say the least. like you I used layer #1 as practice for the second.
-
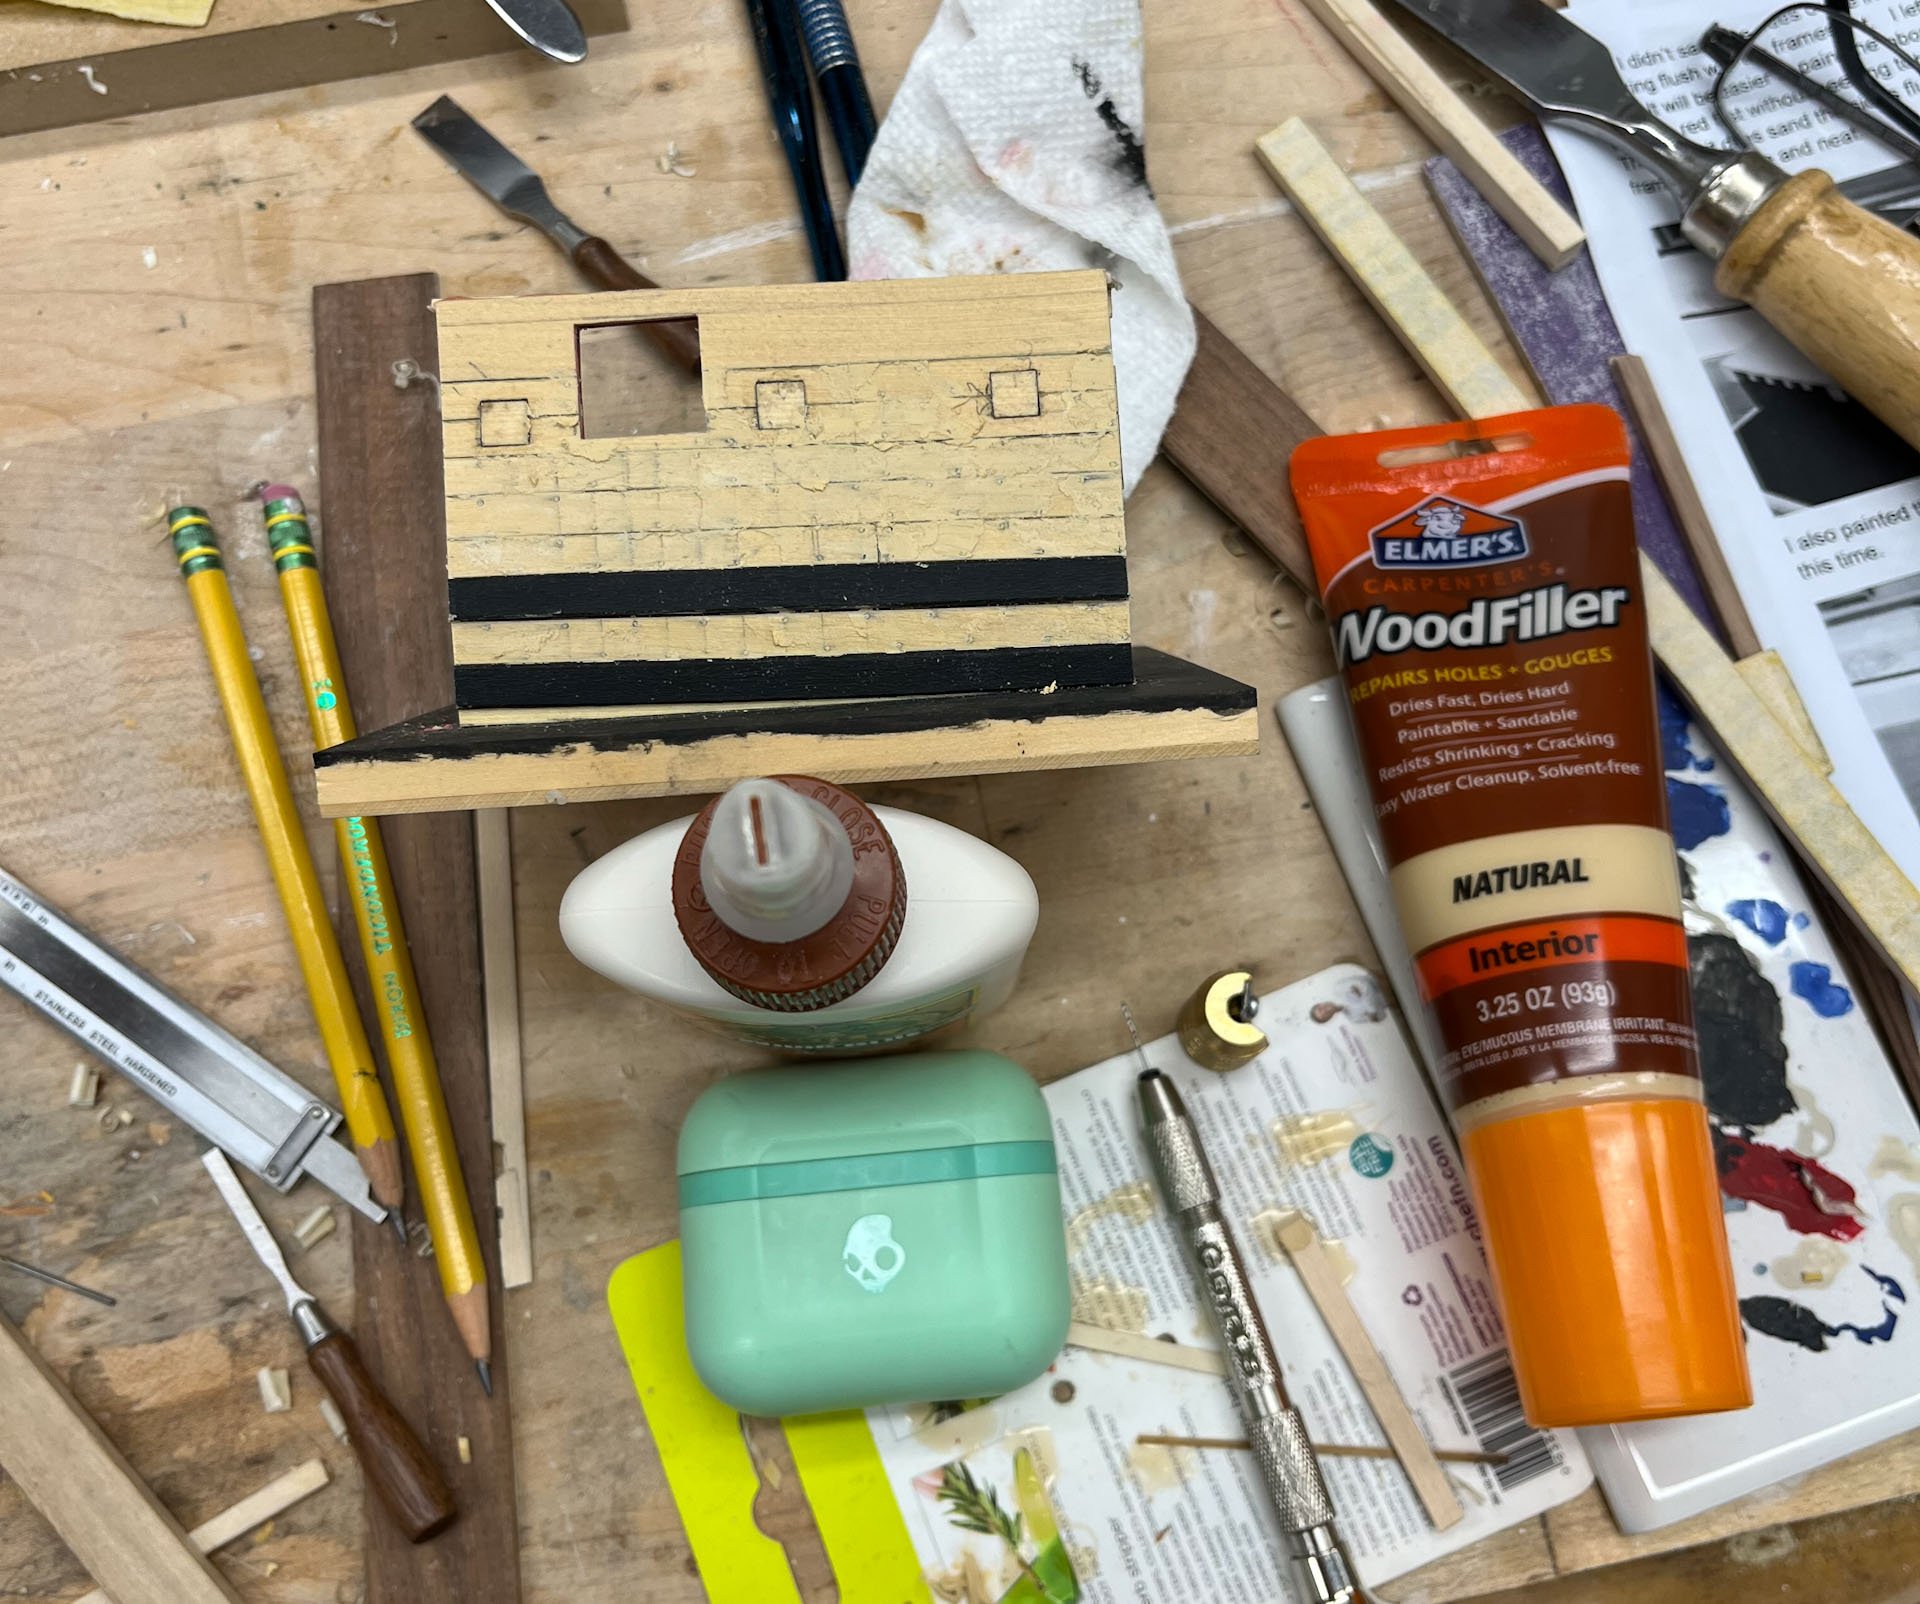
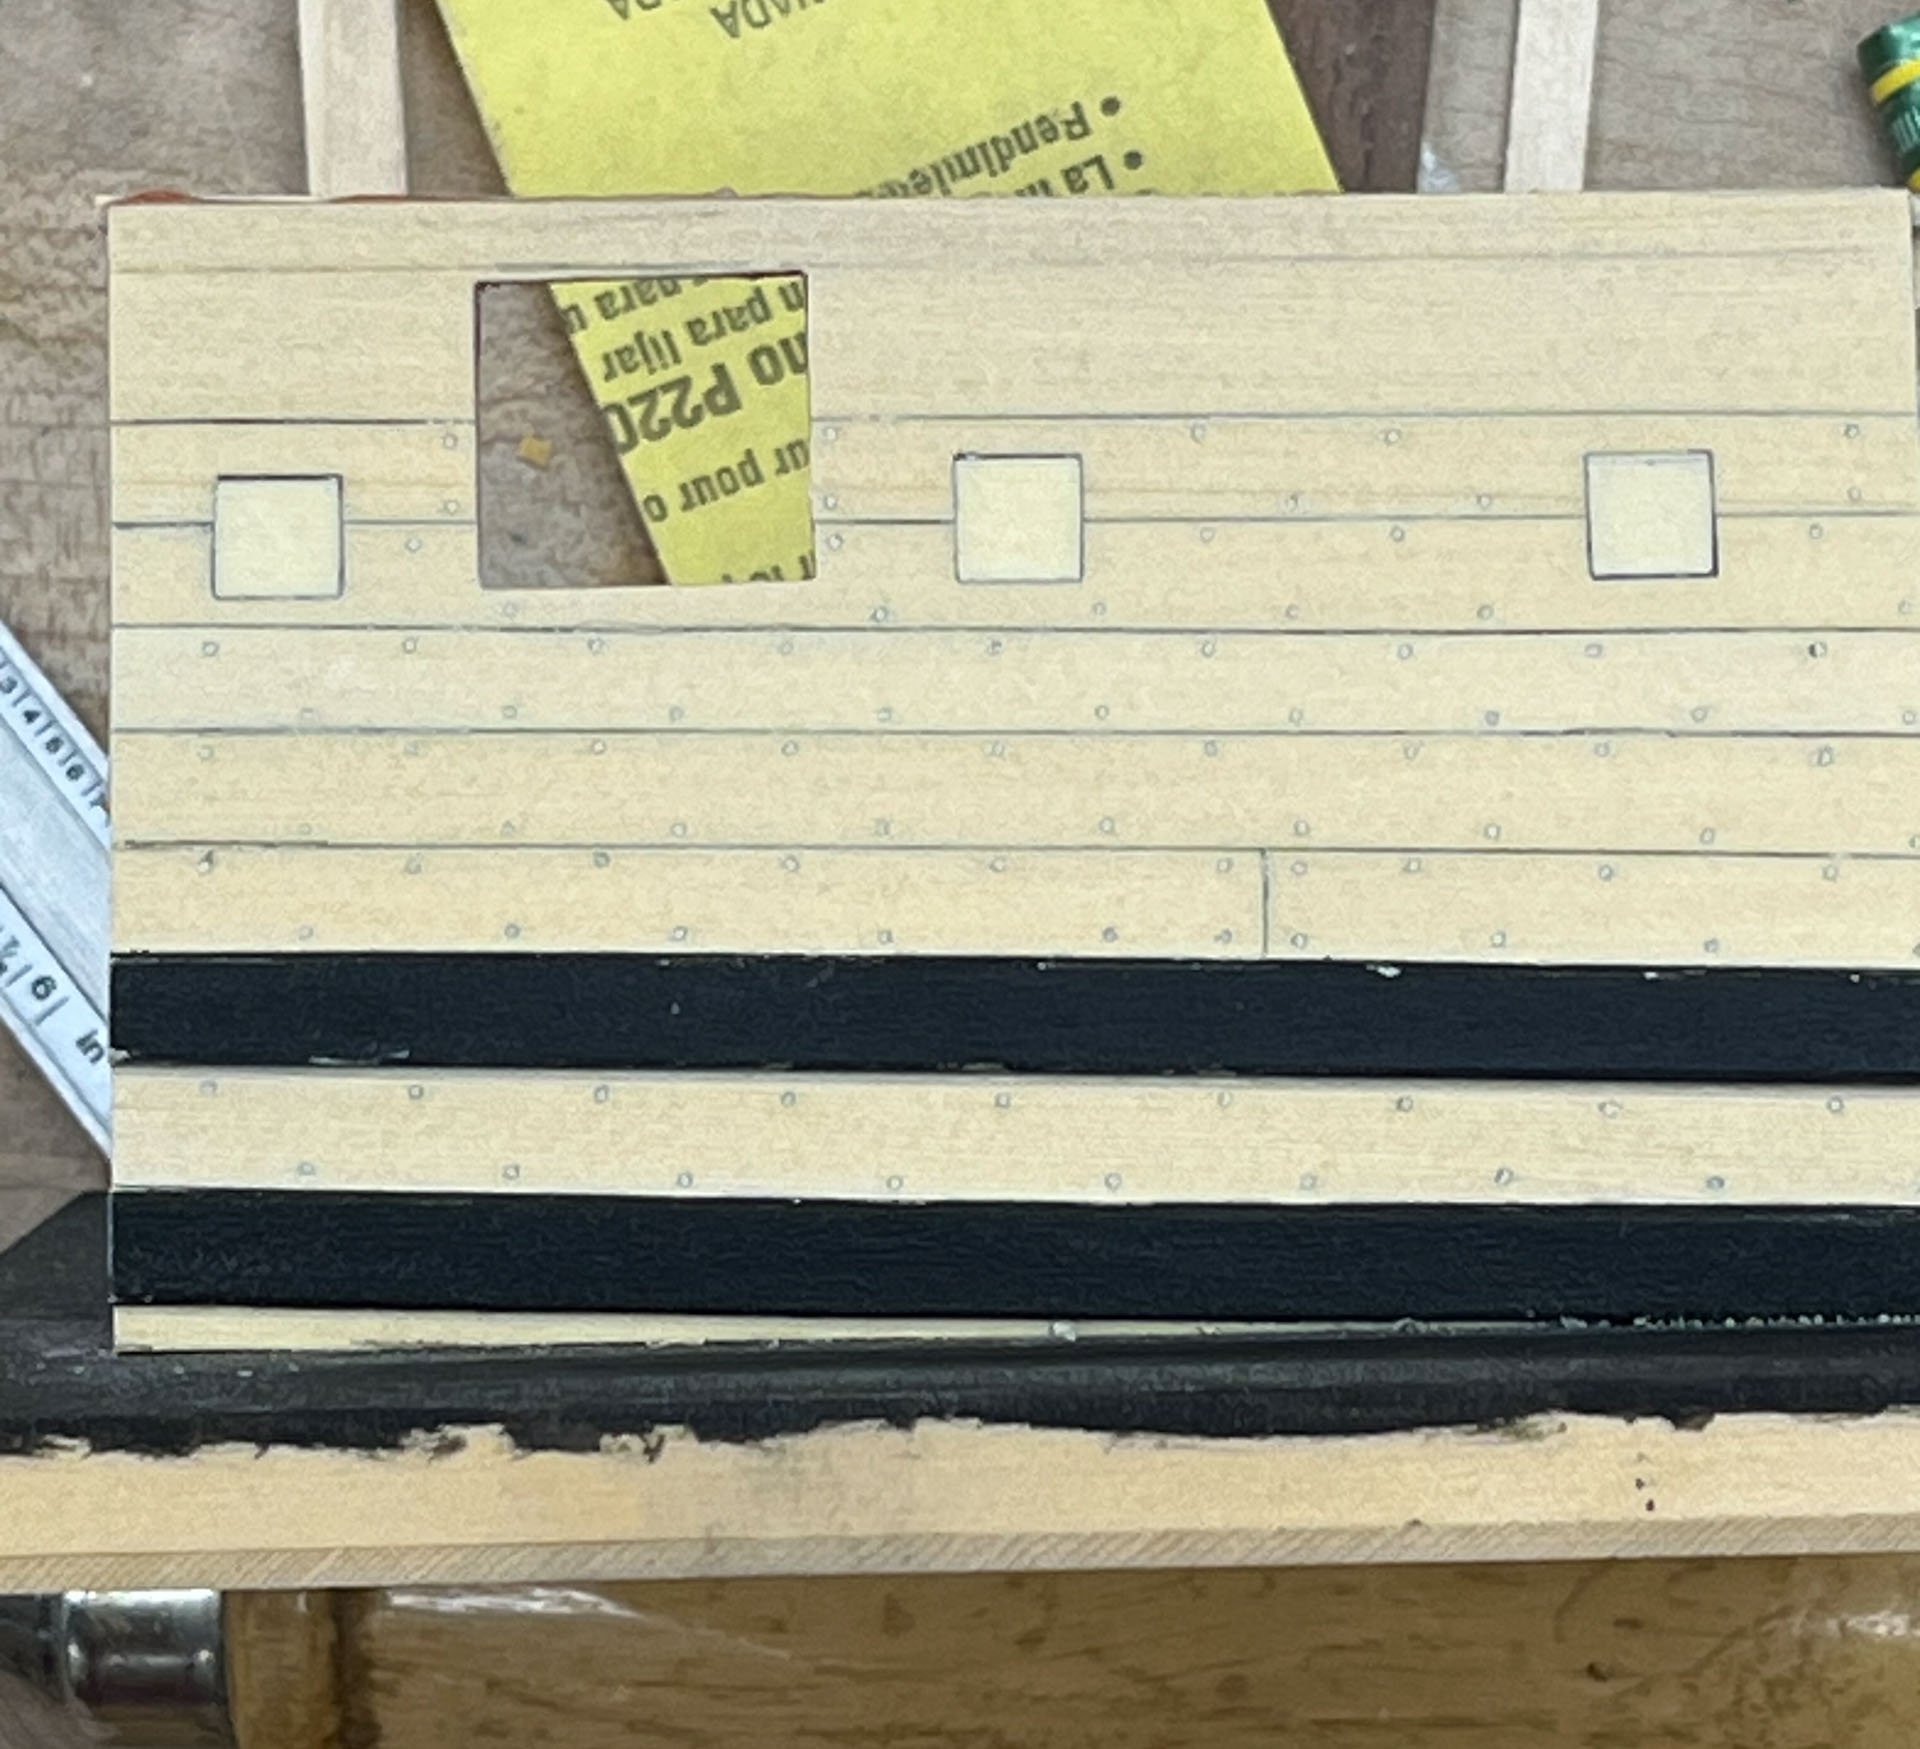
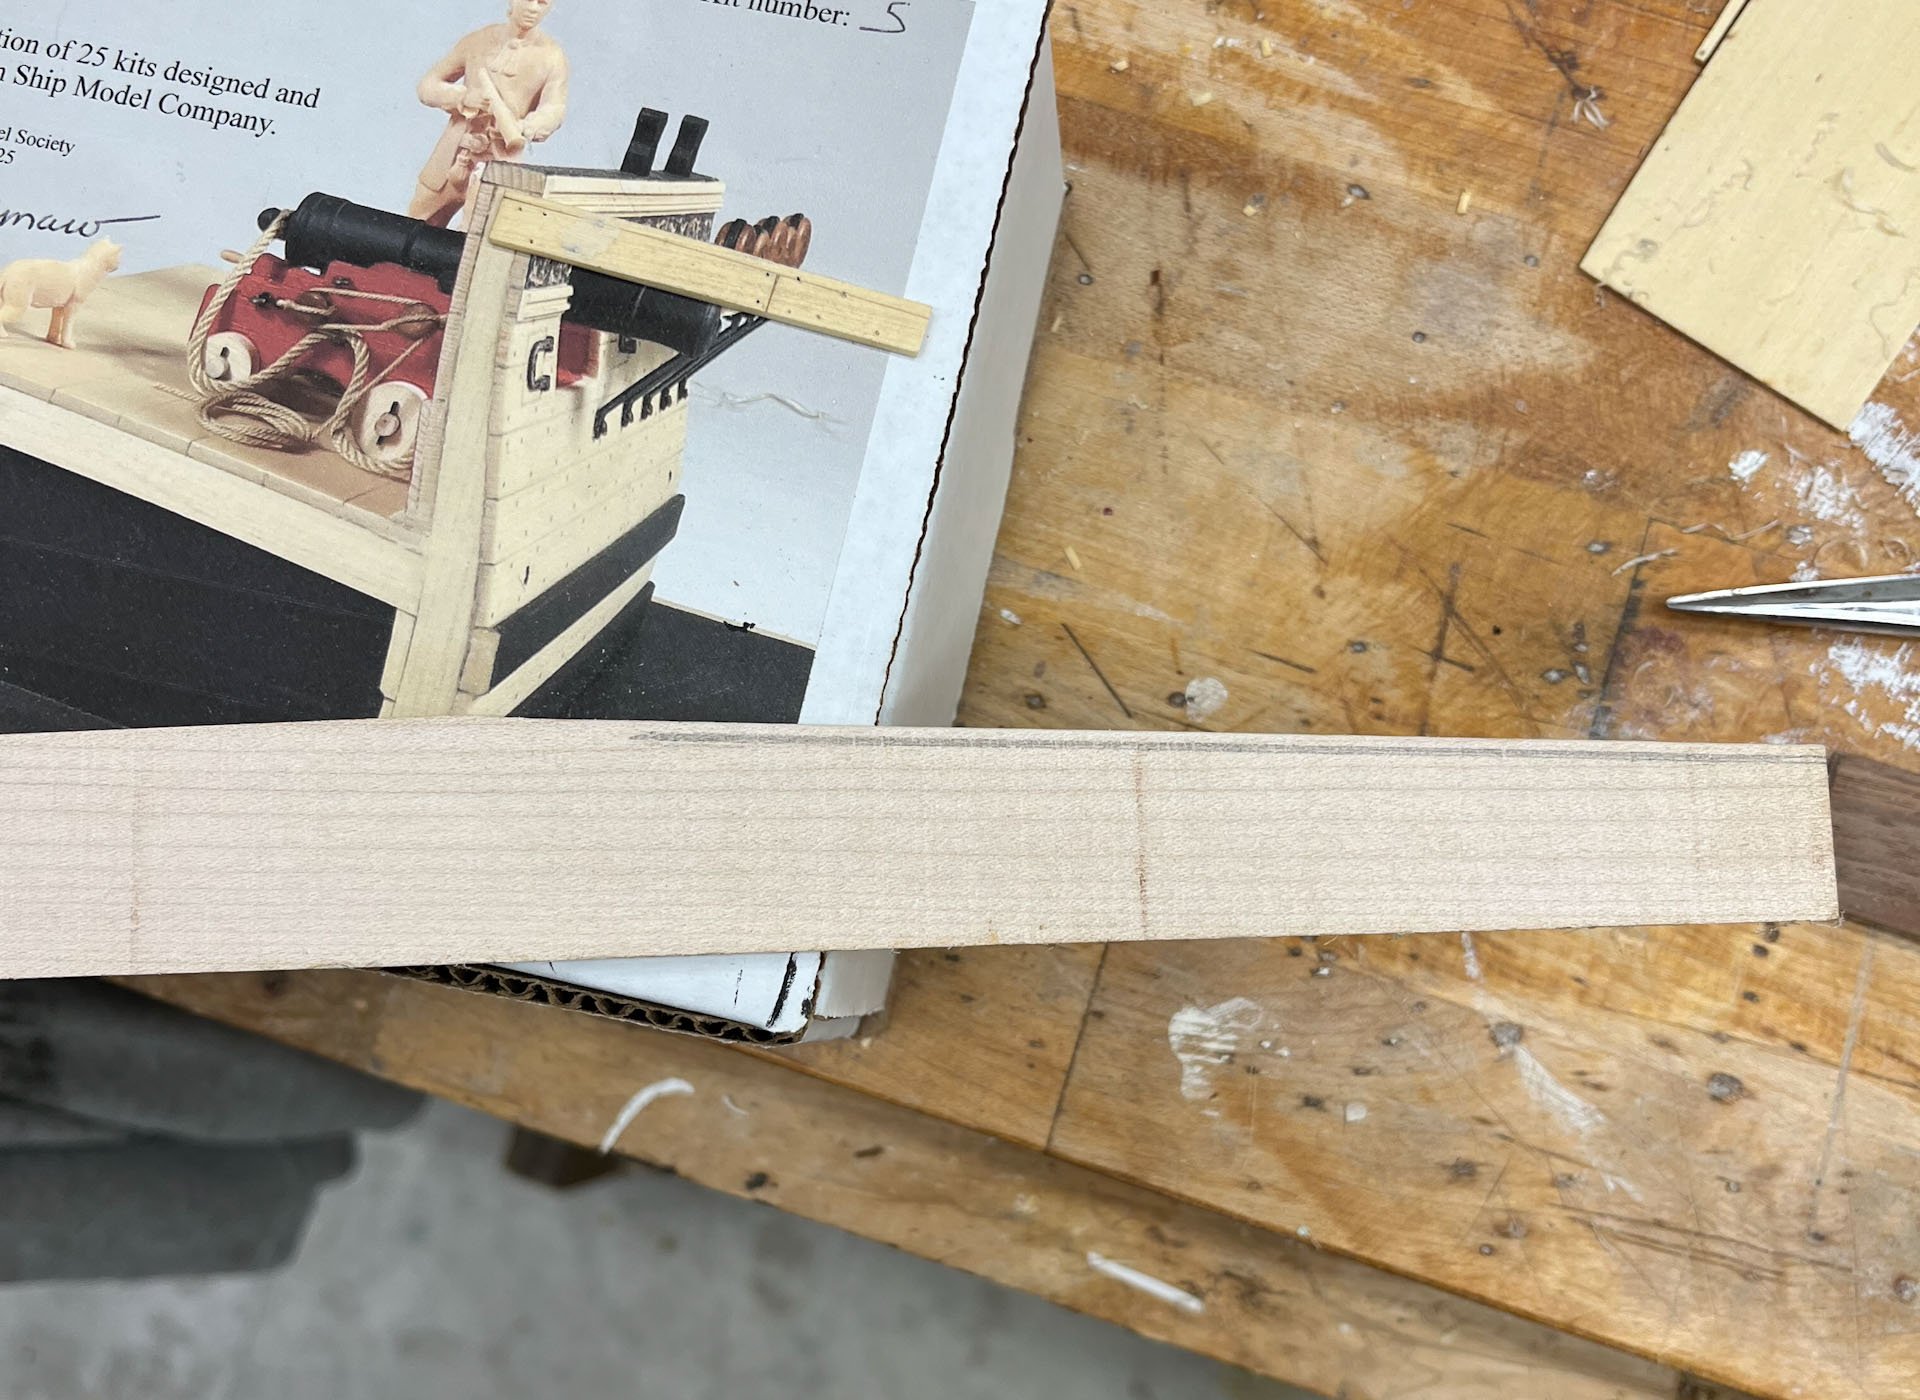
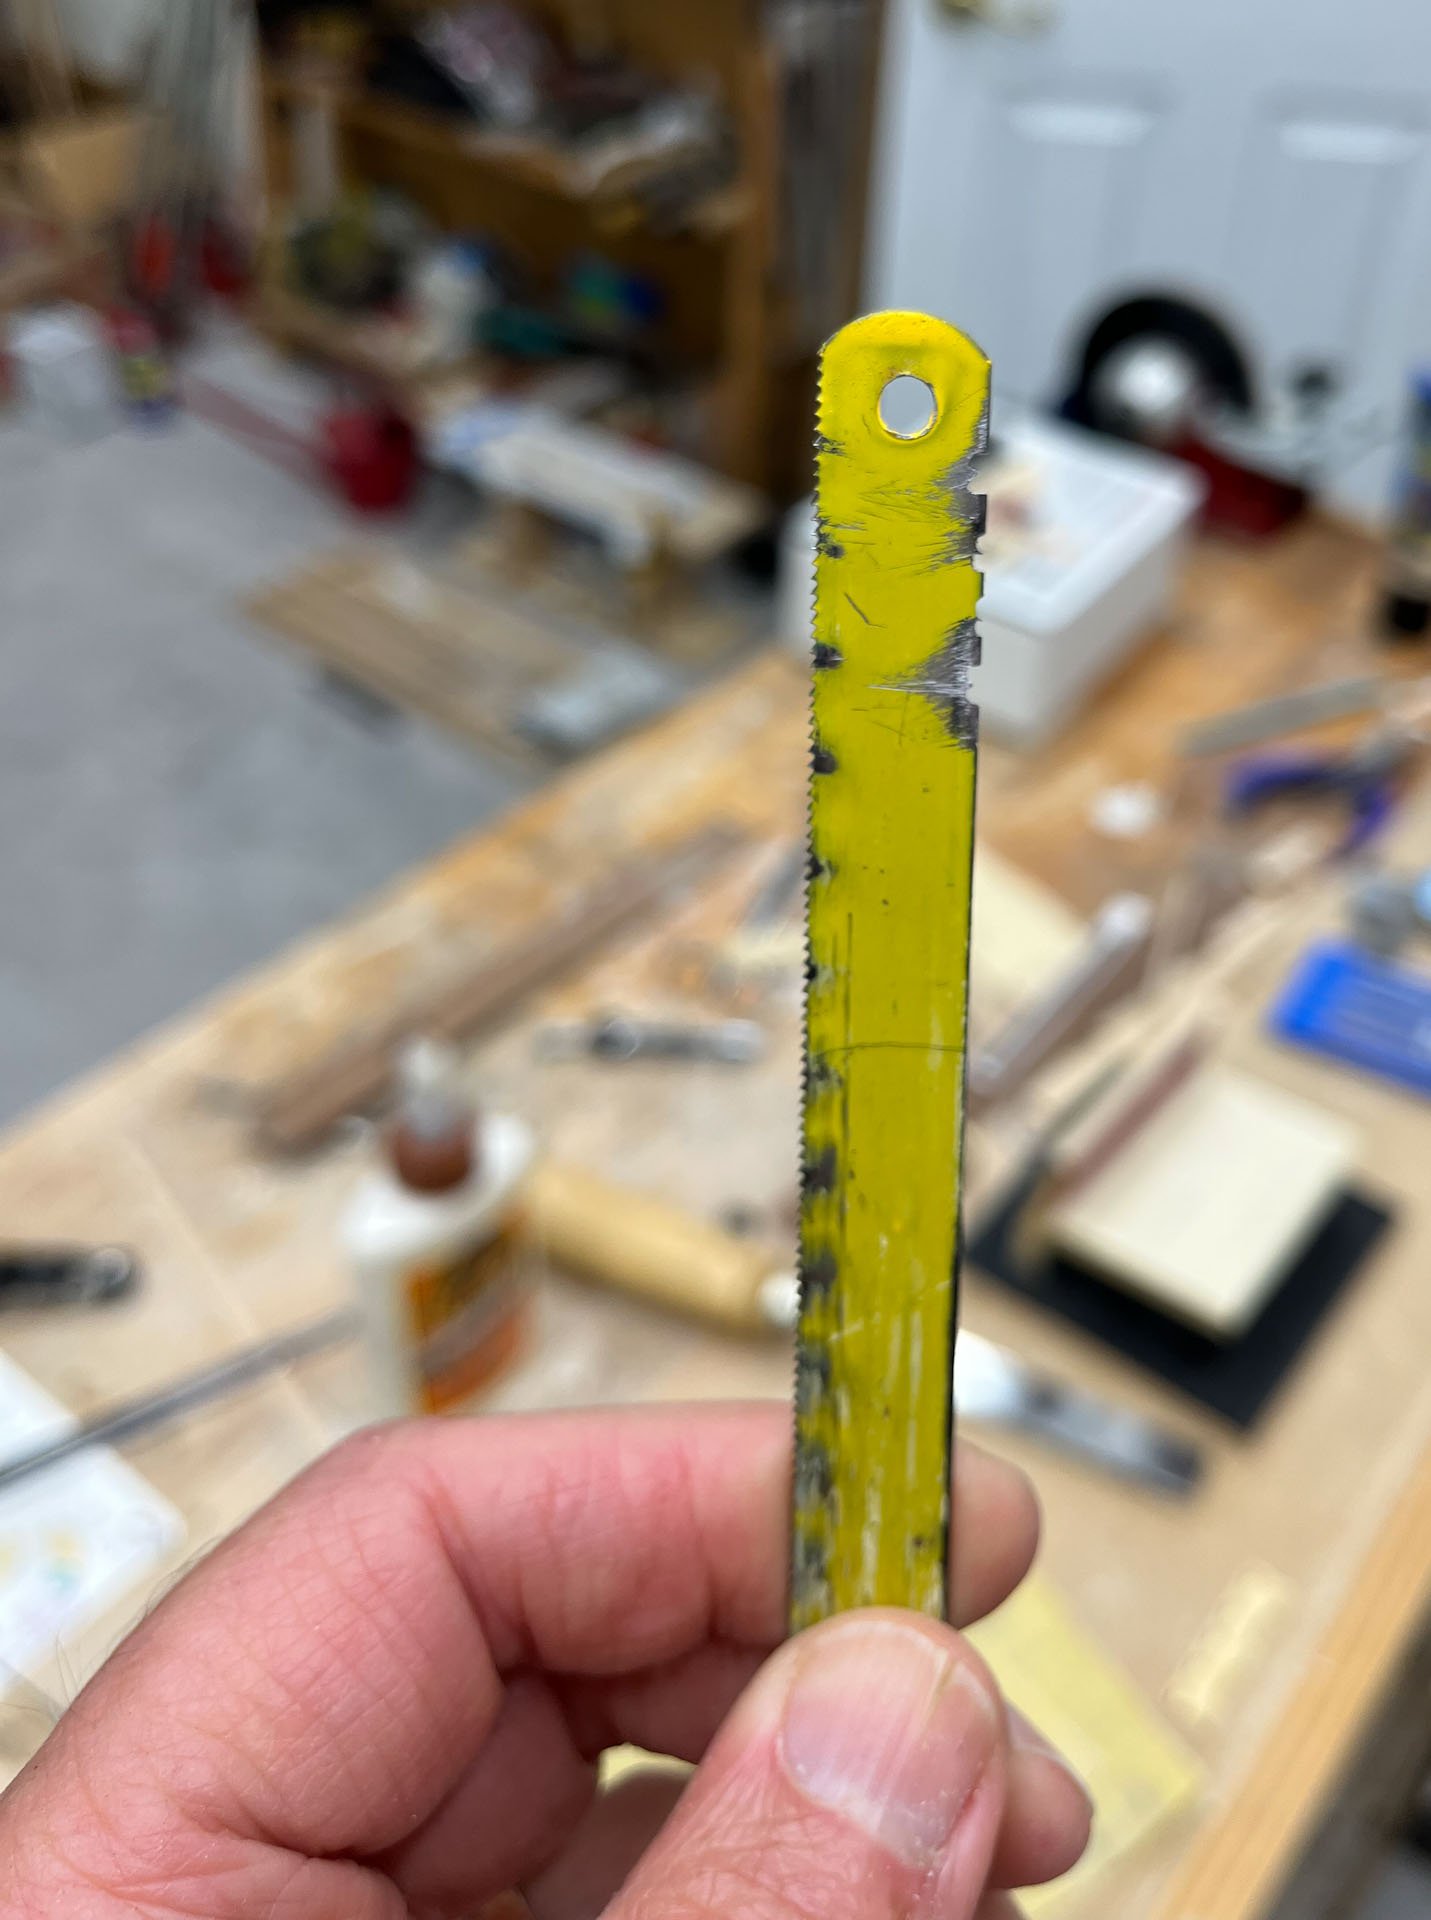
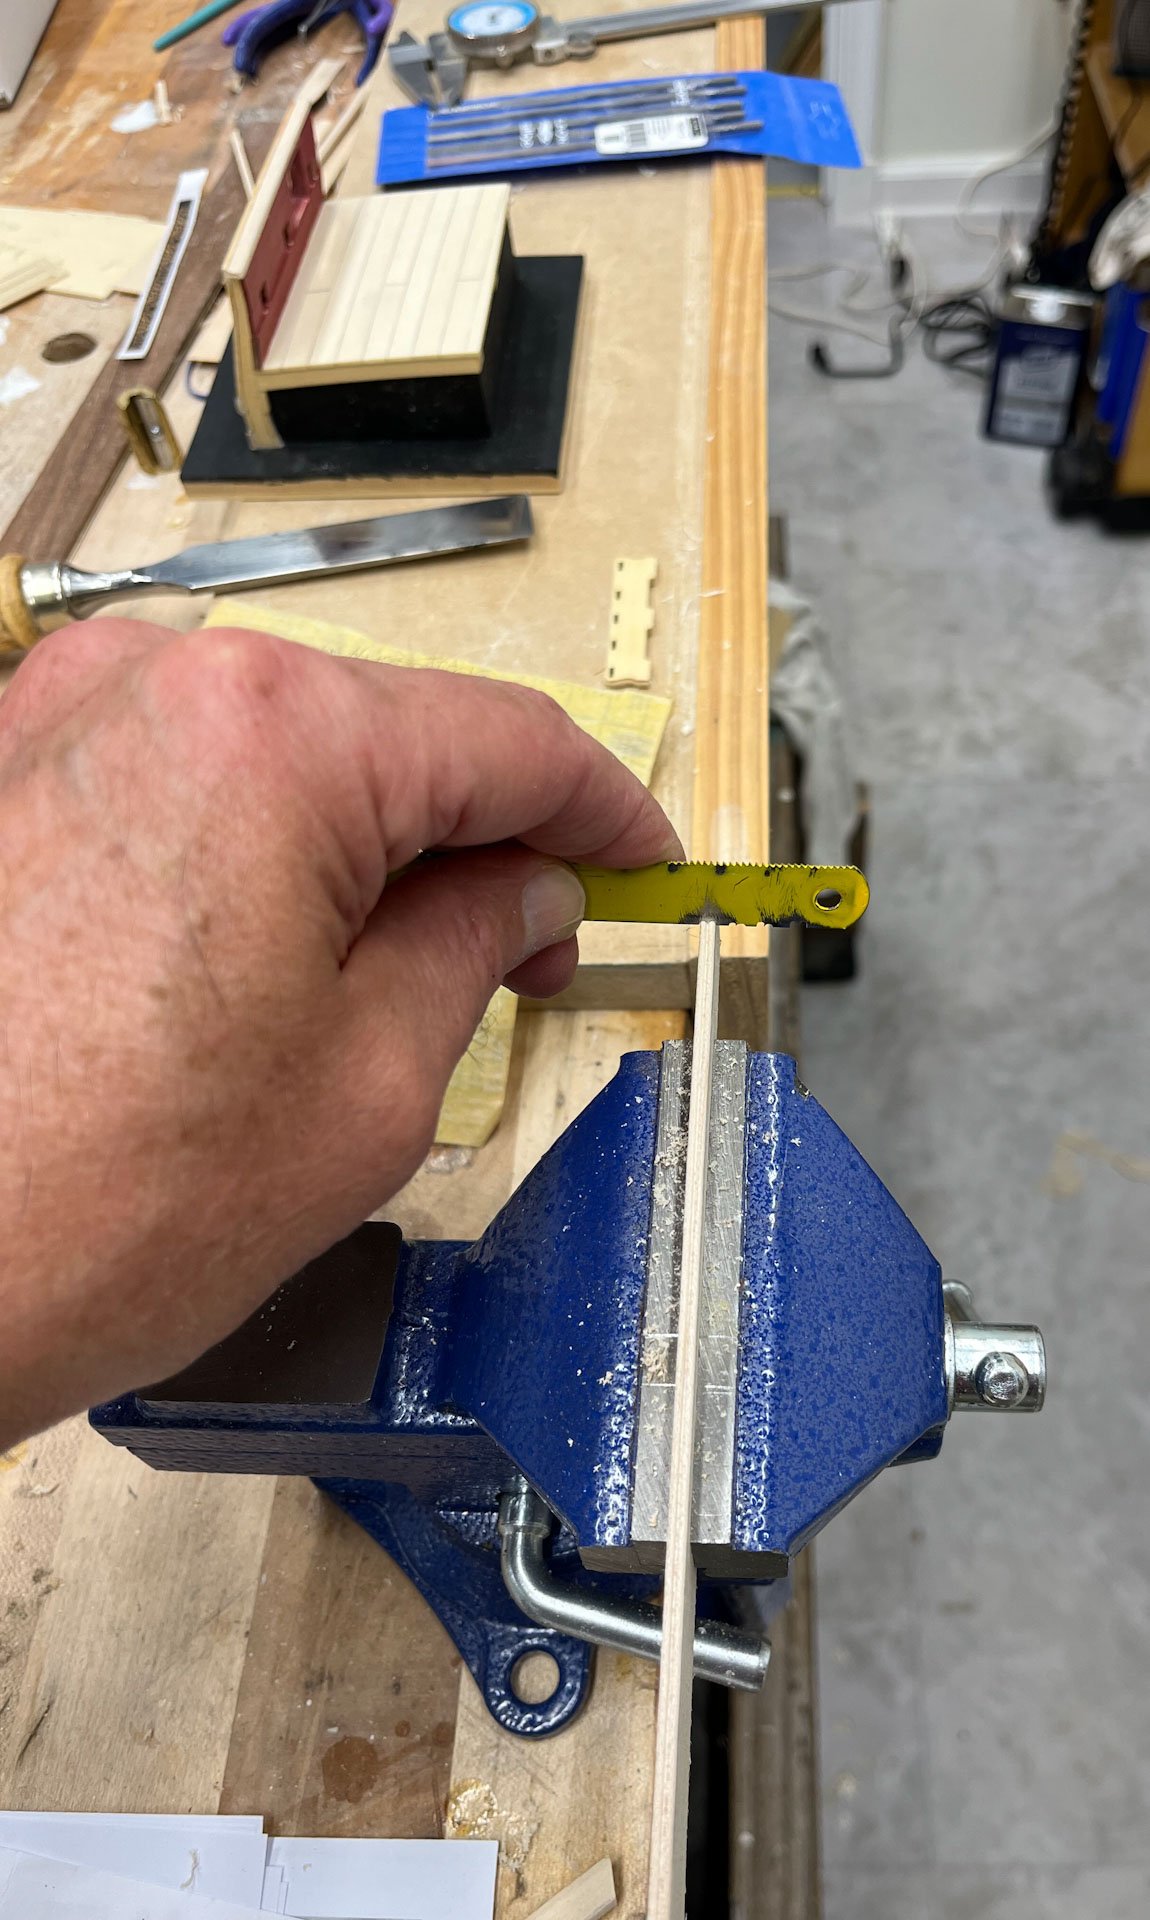
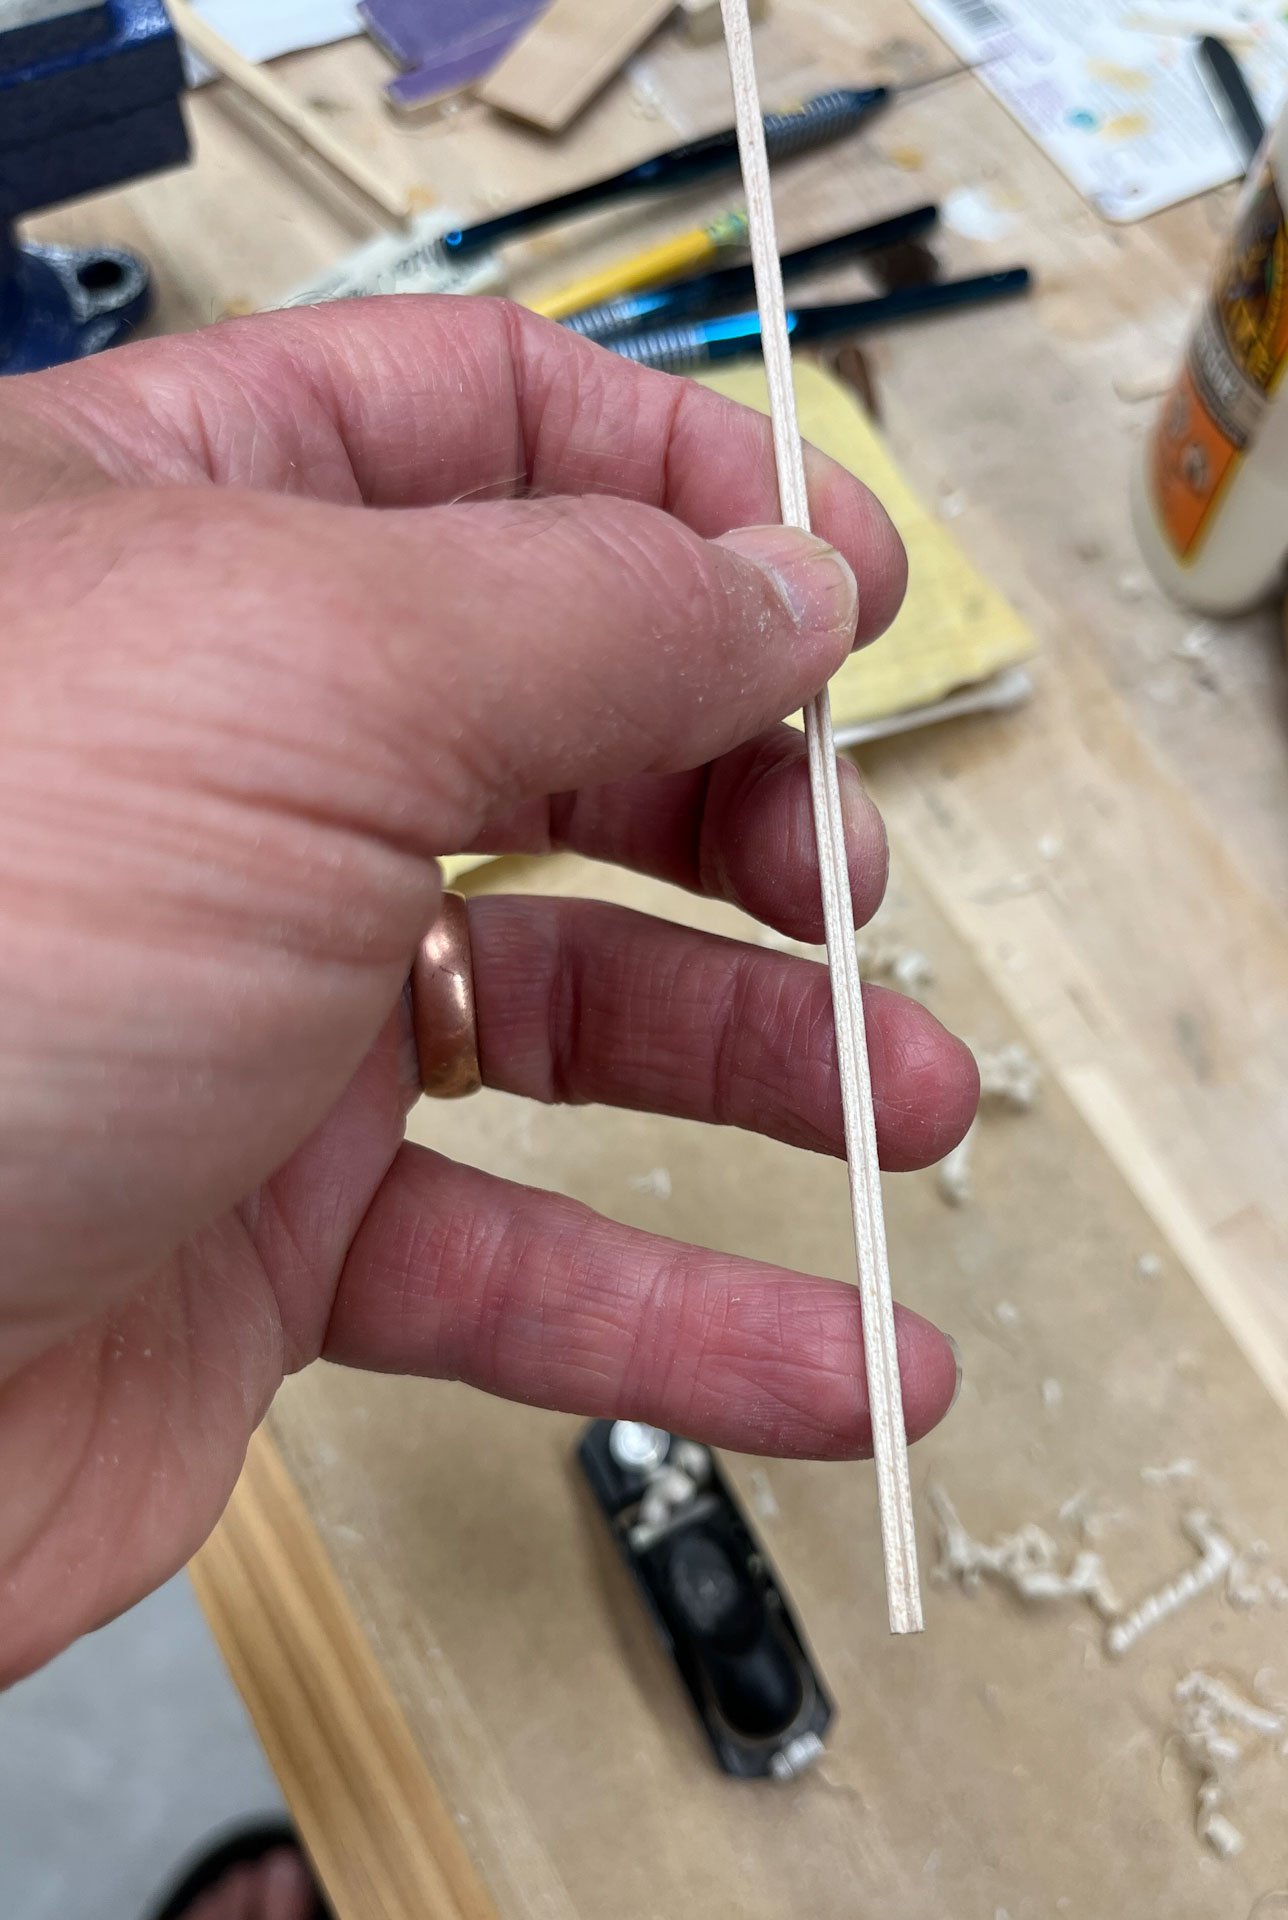
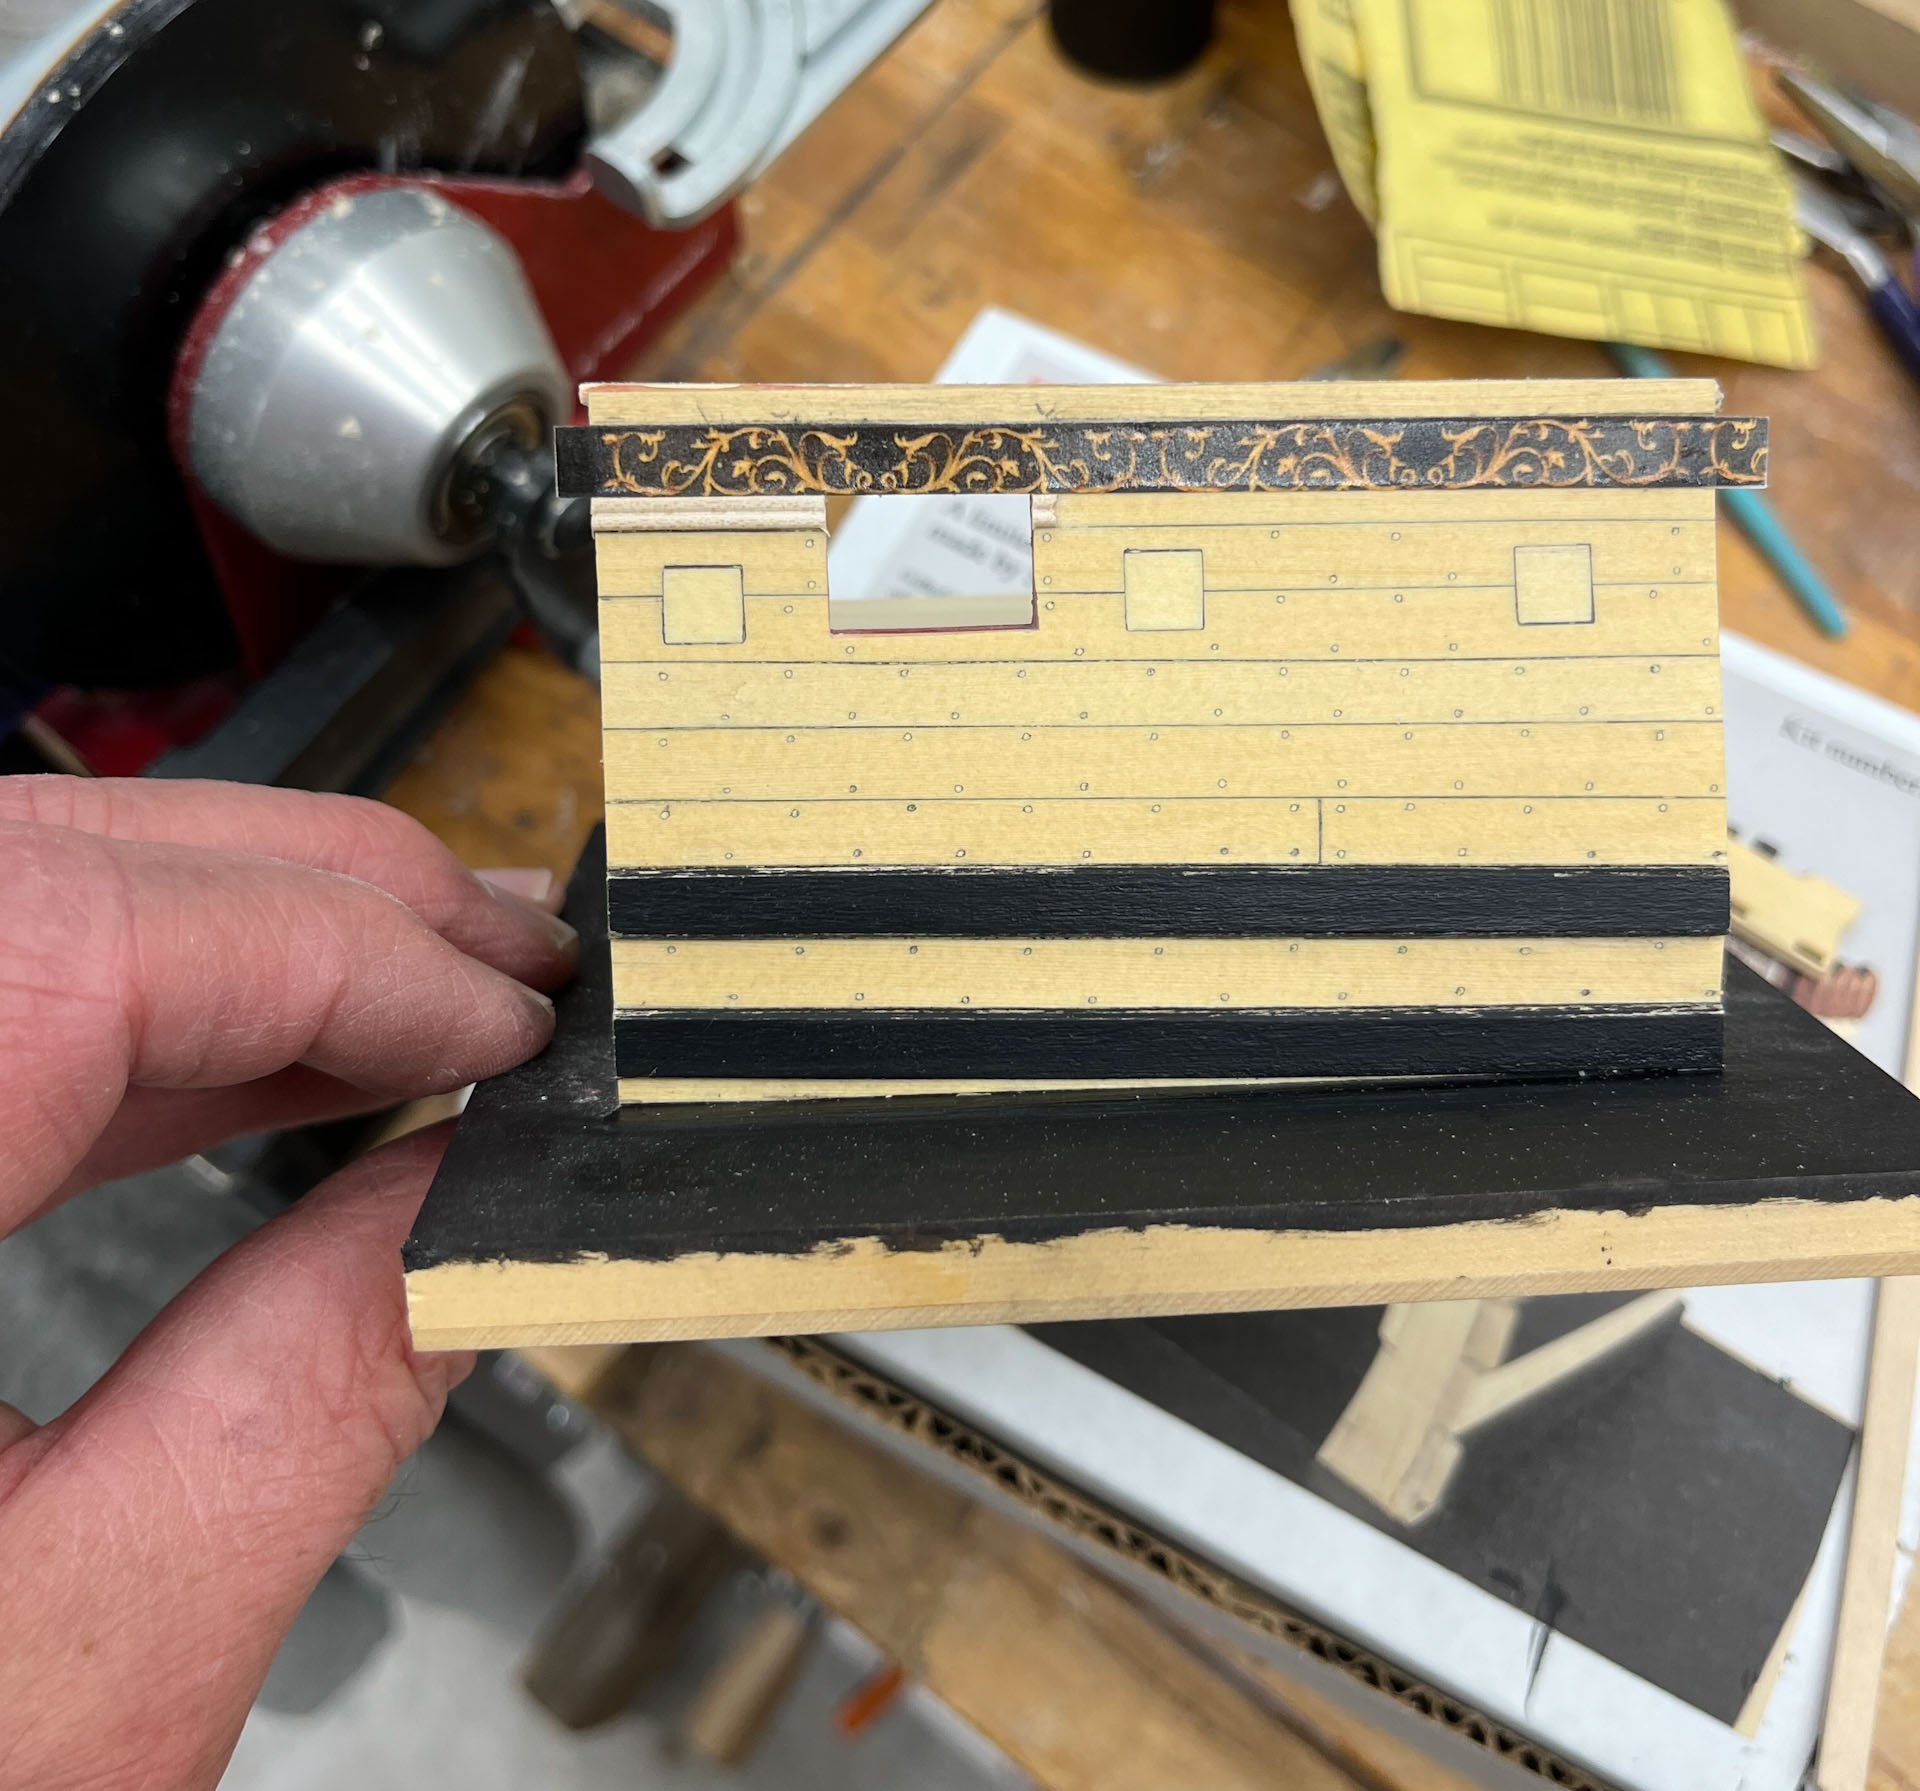
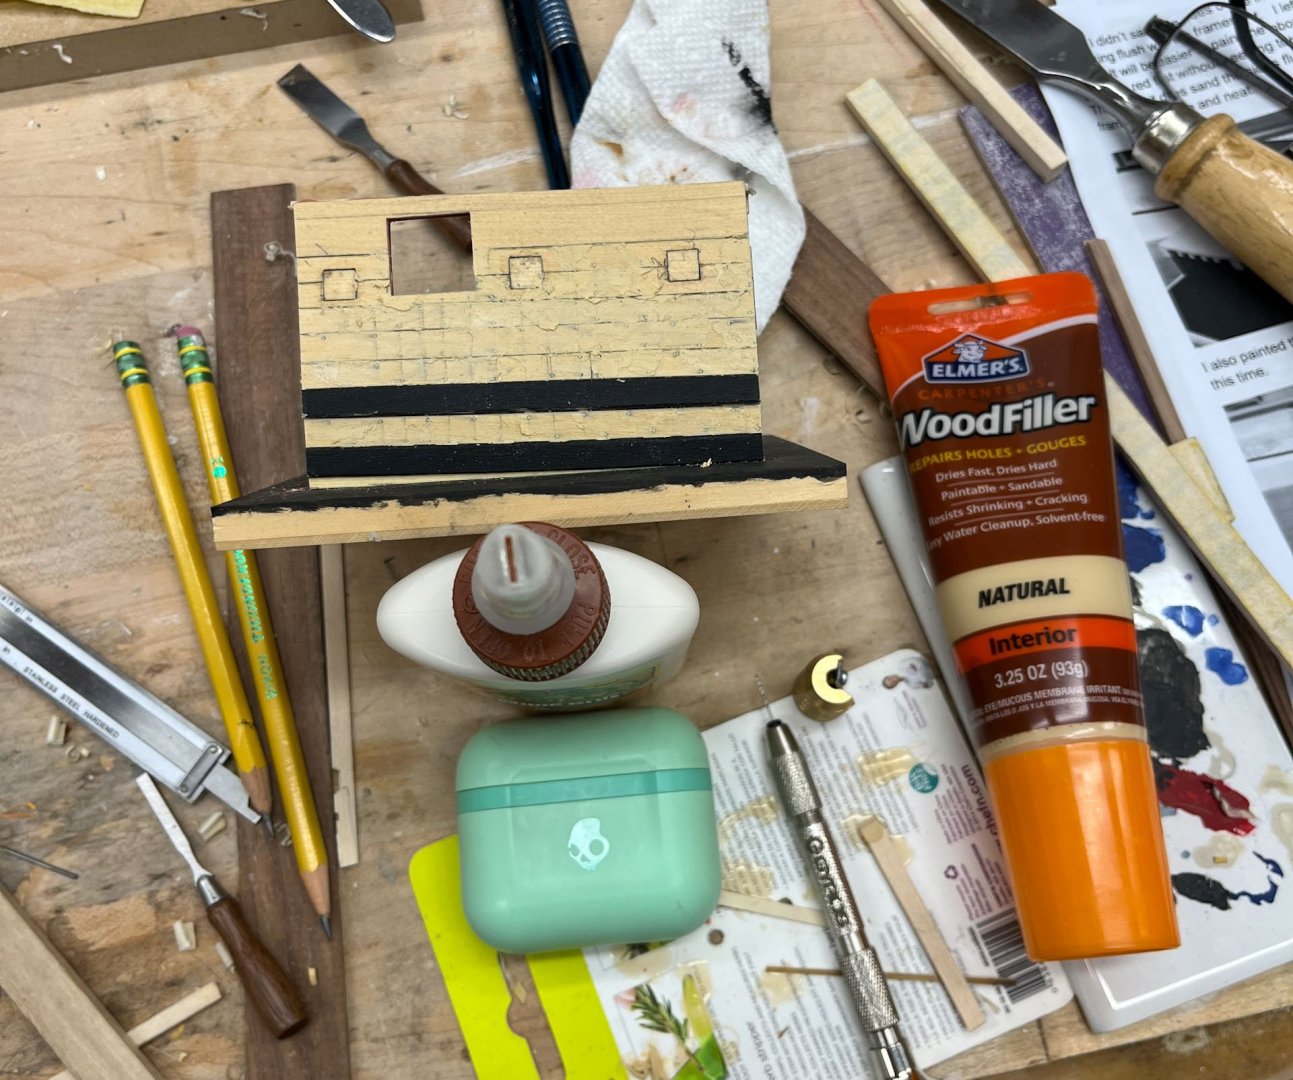
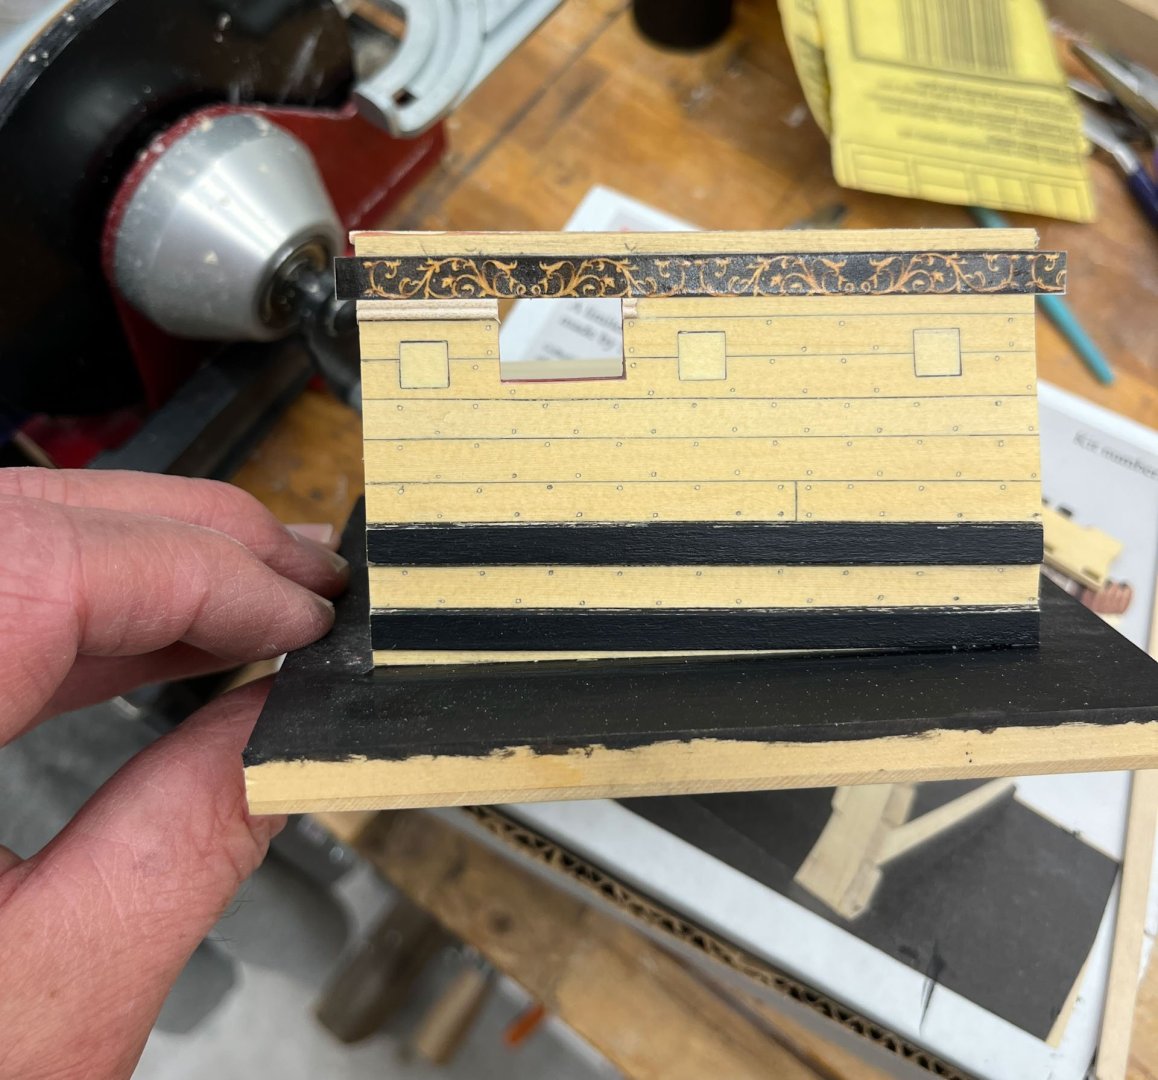
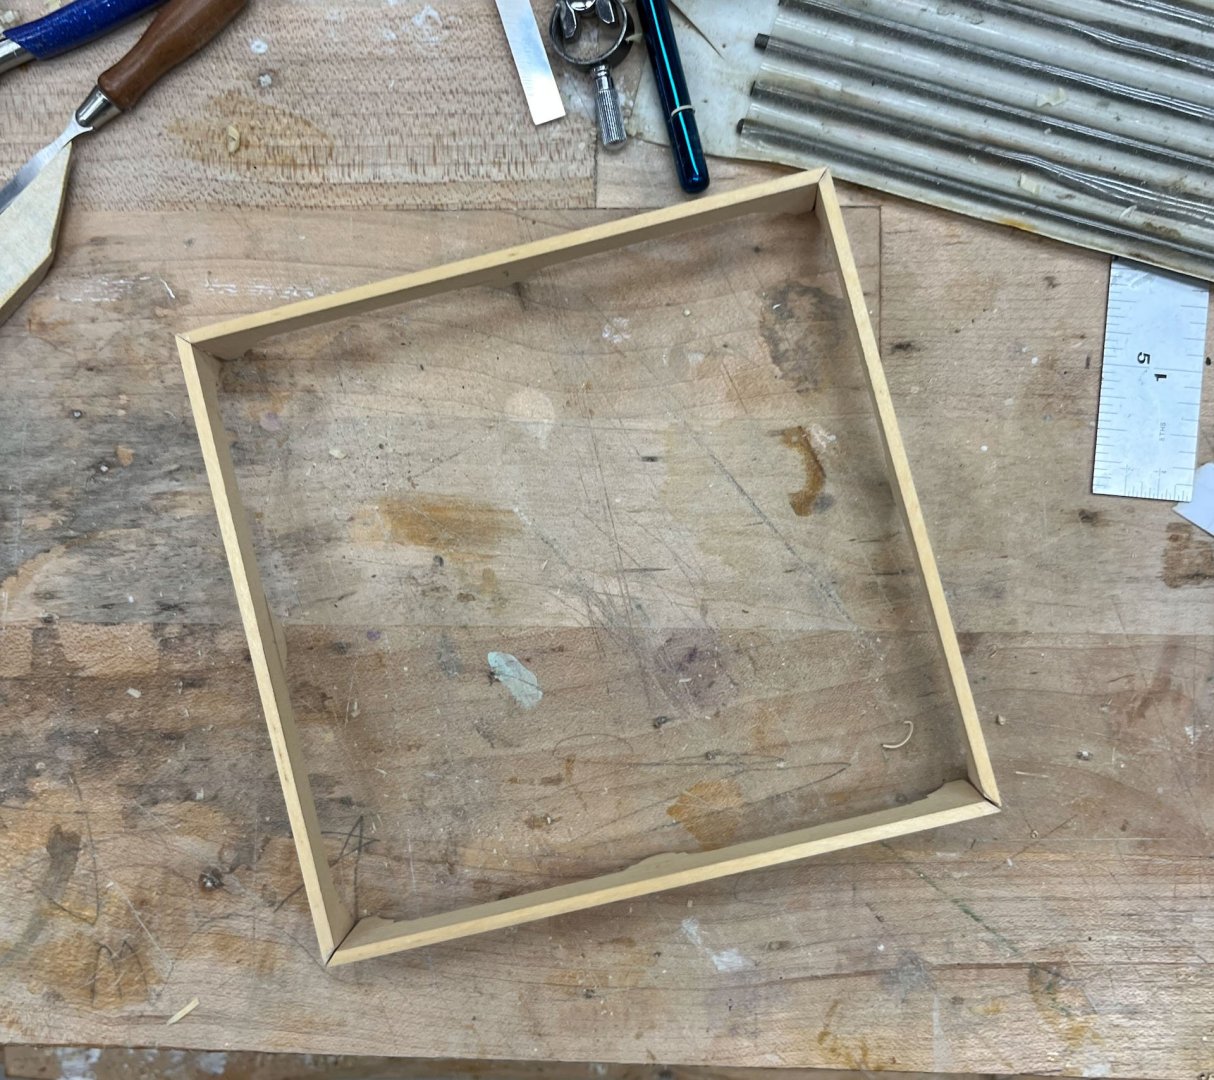
Good Saturday afternoon MSW. Got a lot of pictures for you today. First up is finishing the treenailing. I got my Elmers natural wood filler in the mail and used a scrap of wood to press it into the holes I had drilled last post. Doesn't look great while drying. the I scraped and sanded and much better I dinged up the wales some but will touchup paint them at the end. Next up was the moldings. This took me a while. The kit includes a plastic material that has been laser-cut with all 3 moldings but I wanted to create my own. After lots of searching (both in Chuck's Speedwell instructions and David's and Greg's original Speedwell books) I was unable to find the exact profile in cross-section. So I winged it; the pictures looked like a simple double bead. The plan shows the lower molding to be 1/8" ish wide and maybe a little thinner than the channel. Worried that the channel I make might not be the same thickness as the channel shown in the plans I built mine early. Pretty simple- a sandwich of 2 thin laser cut pieces top and bottom, the middle is a thicker piece. Sand off the char and round the middle piece. I made pegs to align the parts and used white glue sparingly placed so it didn't squeeze-out. The channel turned out to be a bout 1/8" thick so good, on to the molding. AVC is soft for scraping as I've said in the past so I cut an 1/8" thick strip of what I think is maple. Then I cut the edge to follow the diagonally running grain. Next I made my scraper, going with a hacksaw blade this time. It took a couple tries. After clamping the hacksaw blade in a metal vise I used a cut-off disk in my dremel at low speed to make the initial grooves and refined with some small cheap files (not my nice Vallorbe's). The pattern I used is the lowest. And here I'm scraping the wood by running the blade gently tilted in both directions (it had a definite direction it scraped easier). then cut off the molded section with my Veritas String cutter. I cut it a little thick and refined with my veritas miniplane and then some sandpaper sticks until the molding was thin enough. To glue it in place I used white glue sparingly to minimize squeezeout. The tiny piece of molding on the other side of the cannon port was then shaped to fit the channel and then glued in place. And finally the painted frieze. The kit includes 3 strips and thats a good thing because I messed up all 3. The first two by not cutting evenly and tearing the edges. The third I sprayed on too much Krylon digital photo and paper protectant (Chuck had recommended this in his 18th century whaleboat kit that ModelShipways sells and it worked well for me). But it was too easy to "spray 1 more time" and ridges of solidified spray formed along the edges of the strip. Below you can barely see the ridges but they were there and bugging me. The directions recommend using a glue stick - the one I could find was blue that is supposed to turn clear when it dries, but my son (who is 10 years old) remarked while walking by that the blue doesn't truly go away. This seems to be his area of expertise so i practiced using one of my failed strips of frieze and some scrap wood with a very thin coat of white glue and it worked great. After taking this picture I scraped the painted frieze off and printed a bunch more (6 just in case) and sprayed them with ONE coat of Krylon and resisted with all my might spraying more. They look fine so I'll pick one and glue it on. And thats where we are as of 2:42pm today. thanks for reading Cisco


- 23 replies
-
- 15
-
-
- Speedwell
- battle station
- (and 1 more)
-
I agree the lowered topmasts look most interesting and least obscuring. Gets my vote, if you were looking for opinions
- 332 replies
-
- 2
-
-

-
- Harpy
- Vanguard Models
- (and 1 more)
-
I found the stern window assembly to be the most challenging part of the build (so far anyway). mine never looked exactly right. once the fashion pieces are added everything flows a bit better. yours is looking great
-
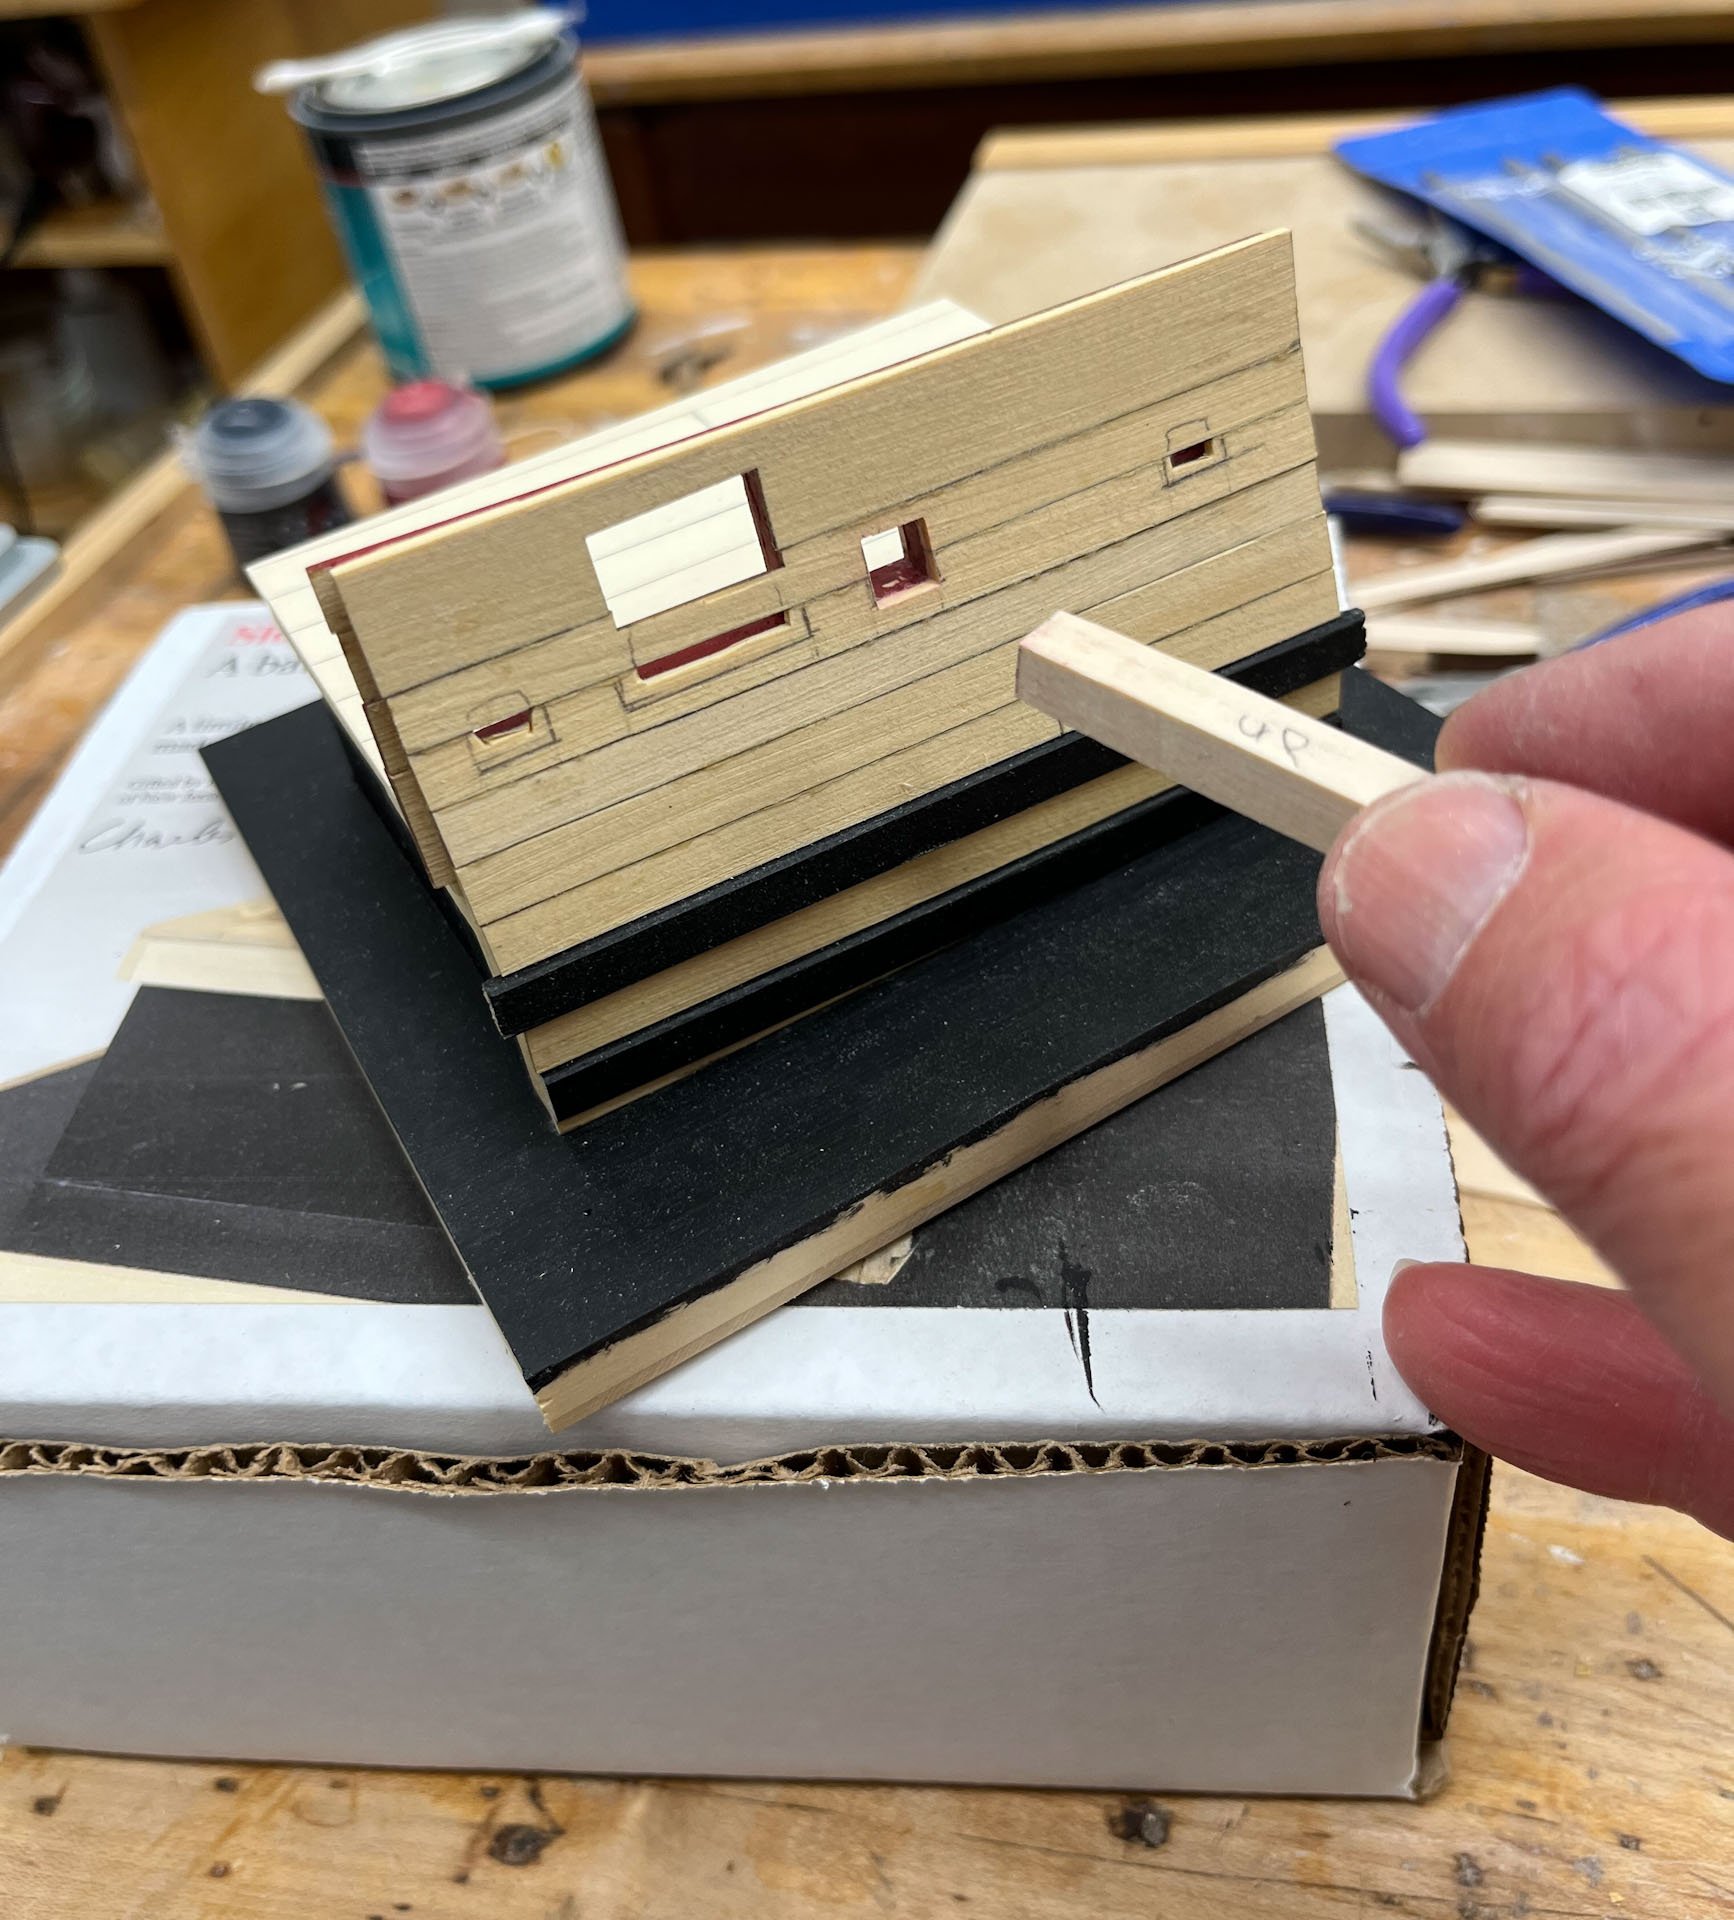
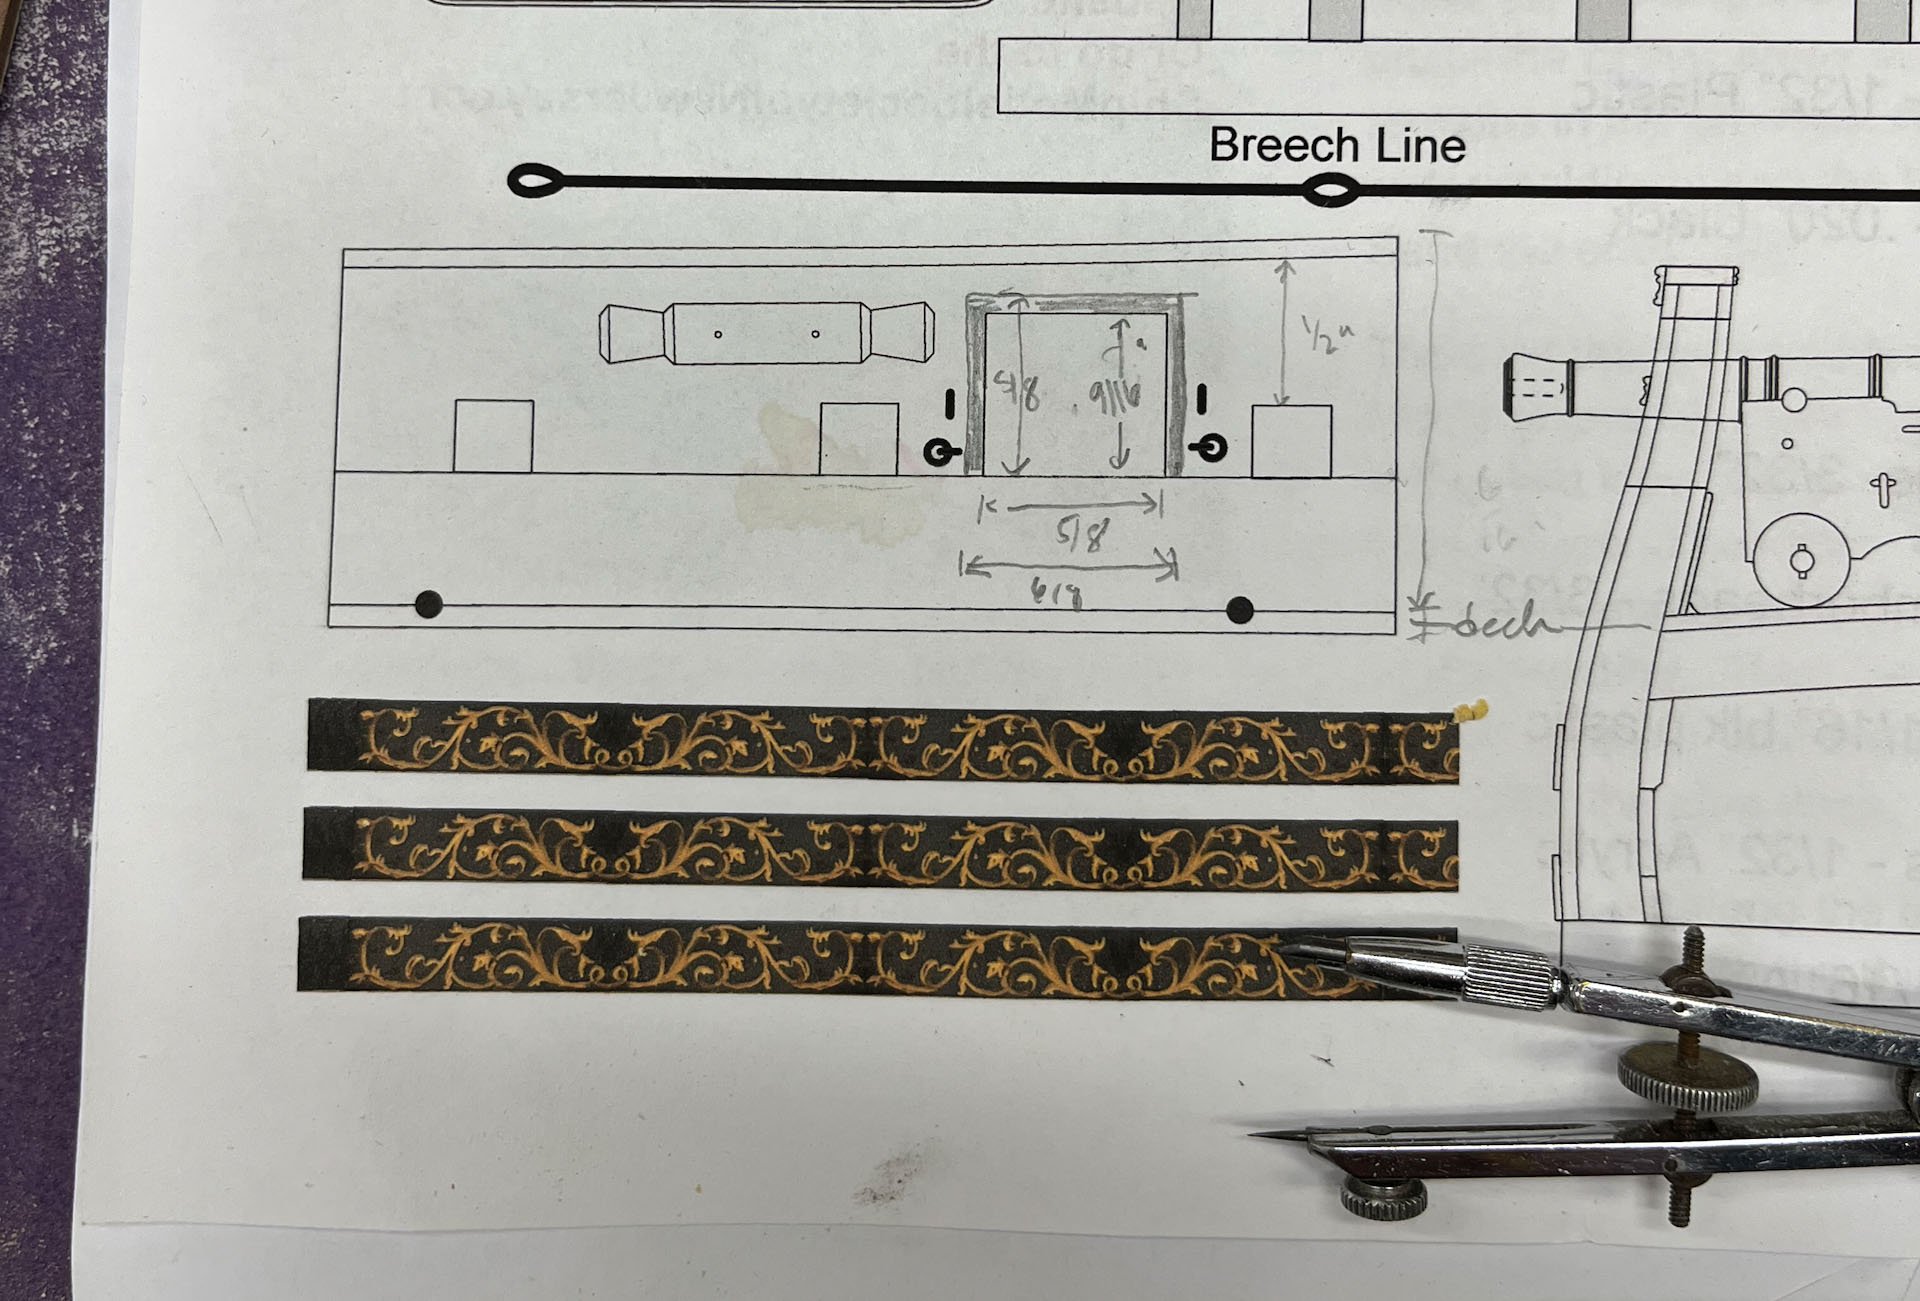
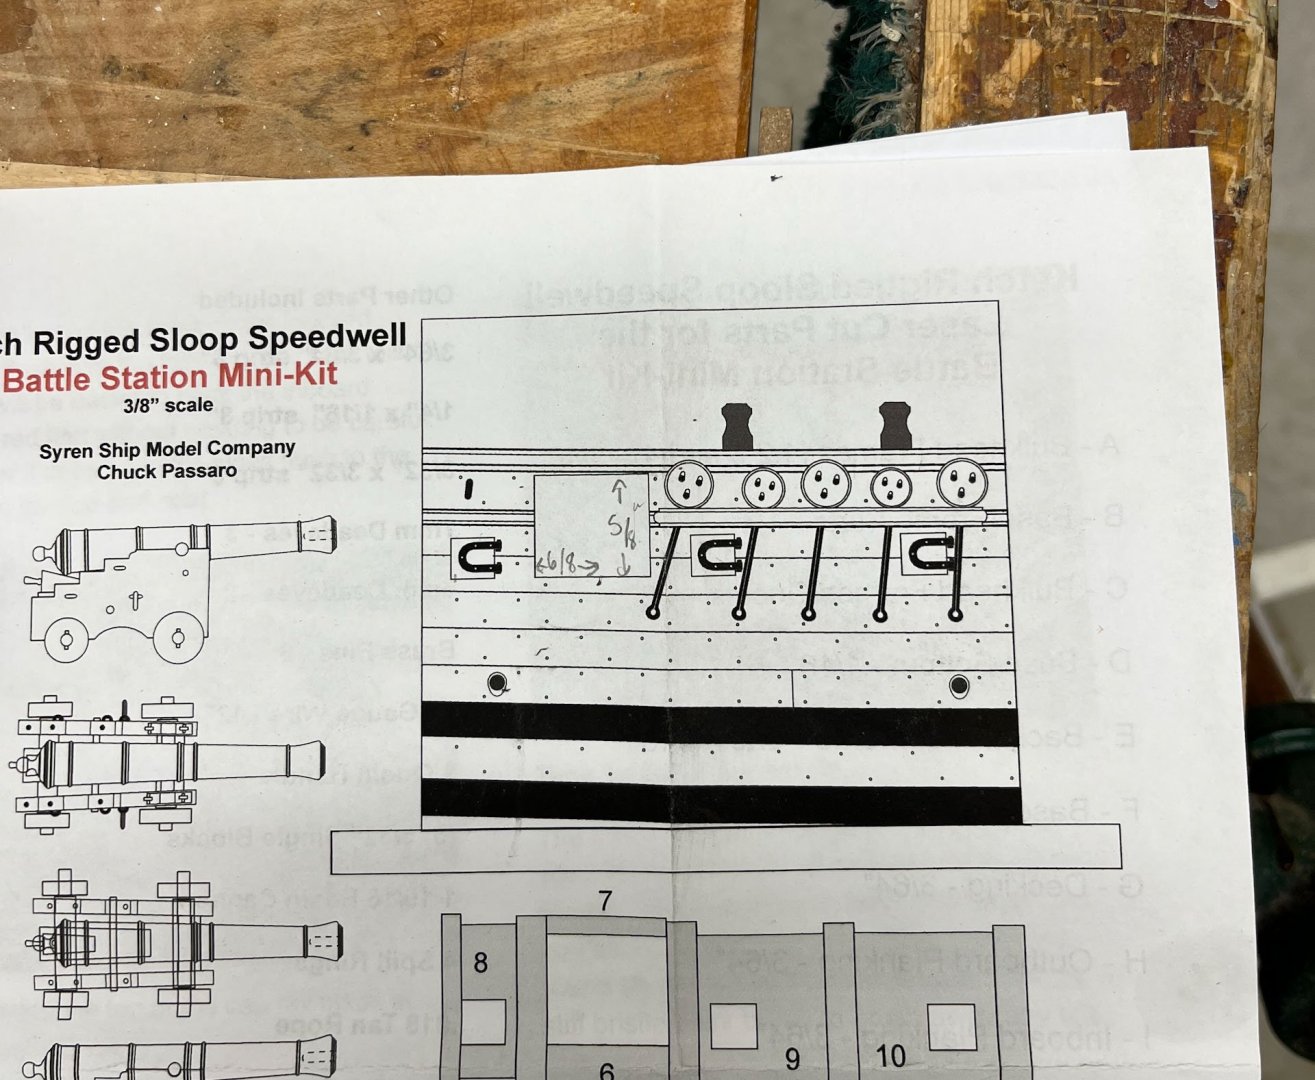
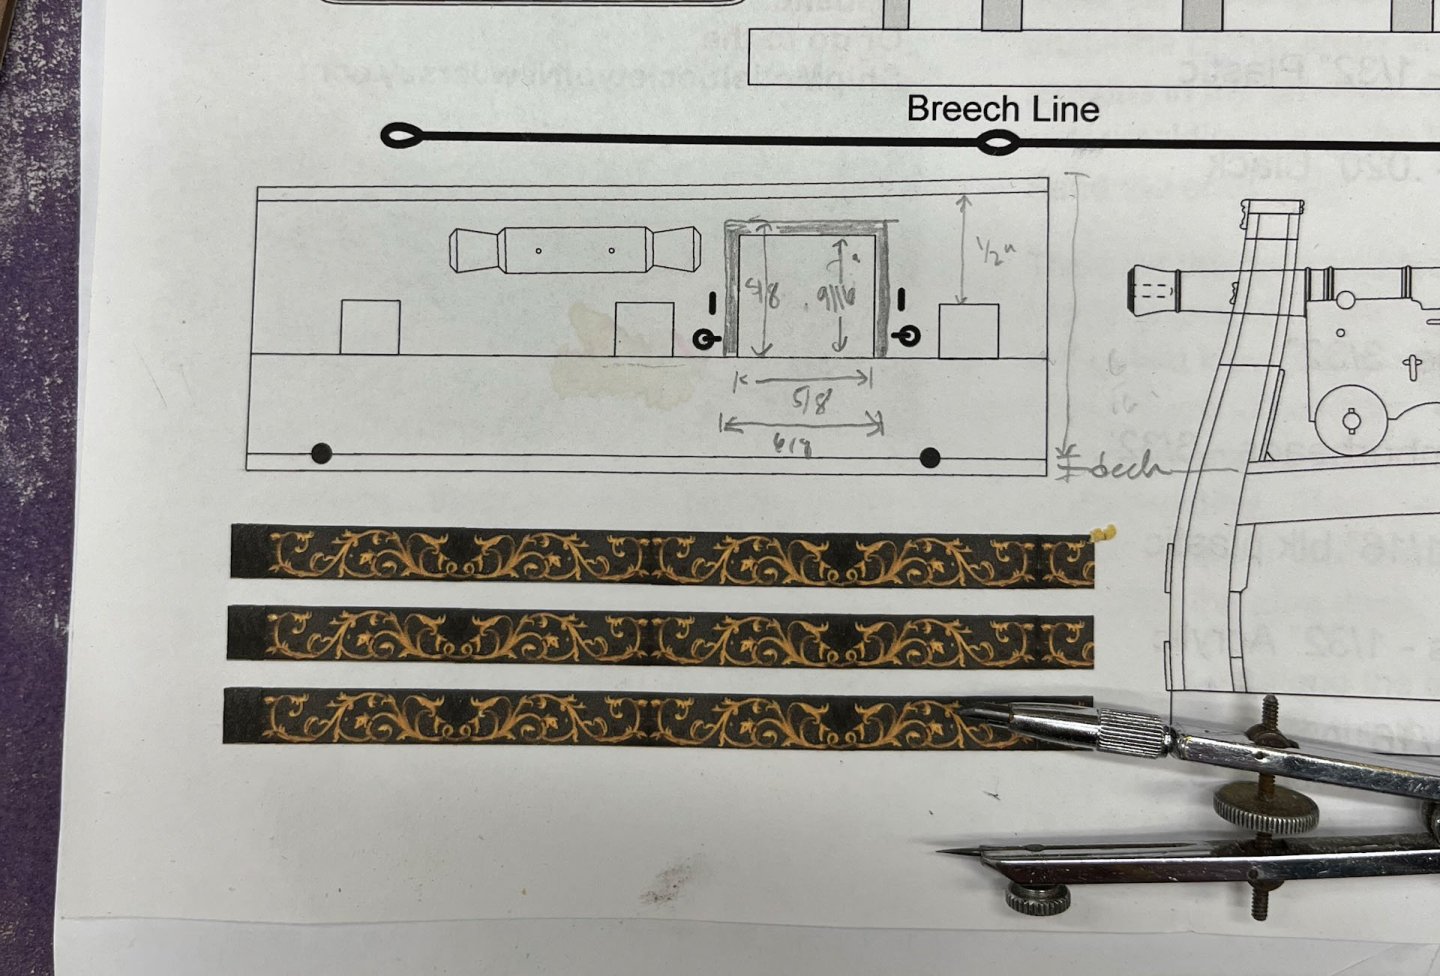
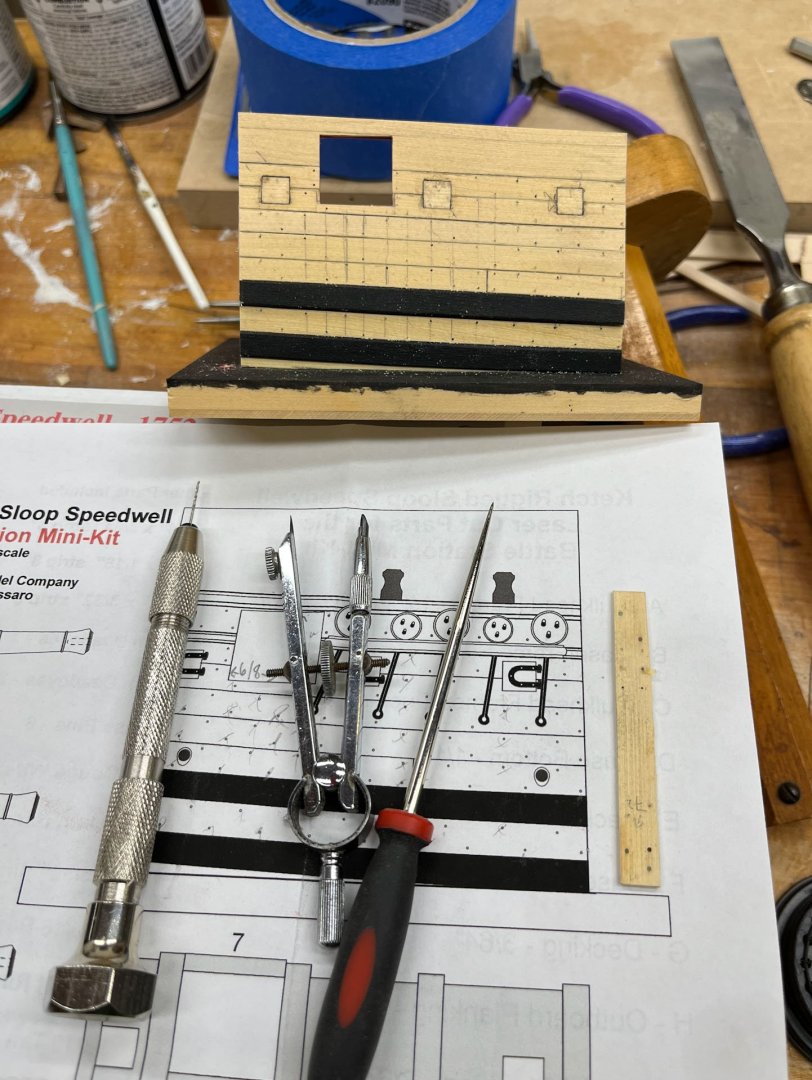
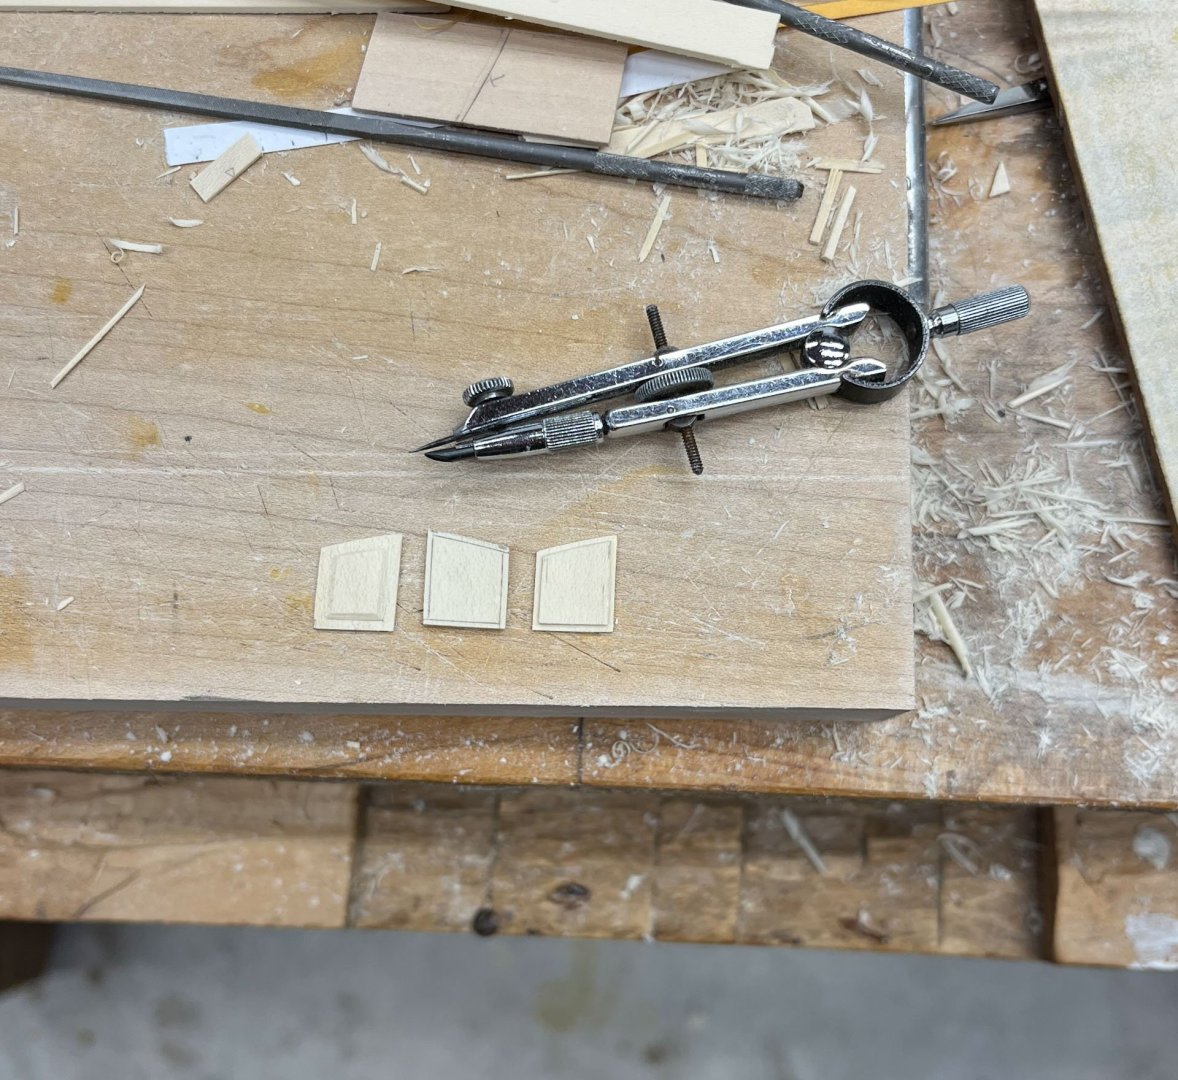
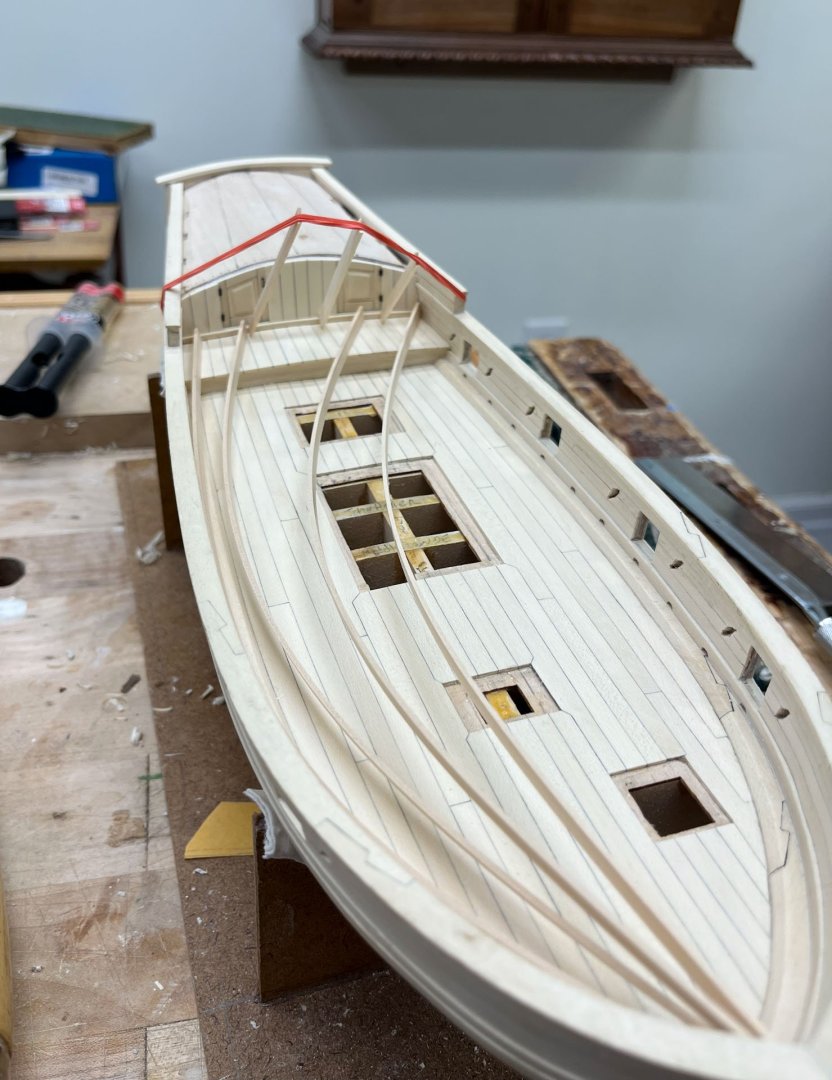
Howdy MSW. Tonight's update, I got a goodly amount done last 2 weeks. First up, I planked the front. The kit includes a laser printed piece of AYC that could have been glued in place with some bending and minimal frustration but wheres the fun in that I like complicated. I wanted this planking to be AYC so I cut my strips from the original printed piece and turned them over so the printed side was in. The run of the grain wasn't perfectly even with the edges so I had to trim some and would have run out of material before I got to the top except I substituted some basswood strip for the wales which were painted black. The planking is subtly curved which I also tried to preserve in my replacements. Next up was forming the oar and cannon ports. I took a 1/4" (I think) square strip of basswood (make sure to measure yours if you do this, mine was extra strip from my AVS and while it looked square one side was 1/16"or so thicker than the other). After squaring I trimmed the end so I could fit it into the hole and sneak up on the correct opening size. It helped marking which side was up. The oar ports were straightforward. Then I got to the cannon port and got confused. Somewhere I had messed up. On the plans Chuck provides there are two "to scale" pictures of the bulwarks; one of the inside and one of the outside. On the Exterior picture the cannon port measured 5/8" high and 6/8" wide. There is a molding that fits tightly between the top of the cannon port and the bottom of the cap rail. Ok fine. On the picture of the inside planking the opening is smaller, 9/16" high and 5/8" wide. I didn't realize this size difference at first and was going nutts figuring out how the distance from the top of the cannon port to the cap rail was somehow different front to back. After some staring and measuring I eventually figured the inner picture is probably the rough opening in the prefab piece (which i don't have anymore as I cut it apart into planks). Once that was sorted out and the openings finished I added the oar ports. These were cut from a strip of AYC and sanded down very carefully until they fit and the edge reveals seemed even. Here they are glued in place. The strip I cut them from is infront. Next up was trenailing, trunelling, whatever. I didn't attempt this on my AVS (the thought of ruining the planking after all the work that went into it was too much and I chickened out). But here is the perfect place to practice. I tried a bunch of different techniques on one of my rapidly diminishing stock of AVS spare planks. The 10 lb black fishing line in drilled holes looked not right to me for this scale so no go. Eventually I settled on Chuck's "drill a hole with a 72 bit, twirl a #2 pencil in the hole, and fill with a neutral coloured wood filler." I first used some wood putty, which it turns out stays flexible (and therefore doesn't dry), and I suspect is solvent based so will probably stain the wood. So now Elmers wood Filler is in the mail; for some reason neither the local Home Depot or Lowes carry it. I had a lot of complicated methods in mind to mark out my trenails; tape strips, rulers, math. Turned out it was easiest to use my compass held against the bulwark sides to trace vertical lines. I poked an initial hole with my awl and drilled it out with the 72 bit. KISS is still a good rule to live by. And finally. My inner bulwark planking ended up lower than the exterior so it needed to be extended a little. Here I added a small strip of wood which should also give the cap rail a more secure glue surface. OK thats enough for one night. Thanks for reading, g'night. Cisco

- 23 replies
-
- 17
-
-
- Speedwell
- battle station
- (and 1 more)
-
Could you post a description of how you made it? And seeing your first 3 stands that didn't work out would be very instructive all well. Absolutely beautiful!
-
i personally would leave it be and make sure i remembered to properly position the second layer of planking, as i think you said your plan was. good progress
-
the deck, bulwark, and waterway planking will hide all the sins of the thinned bulkheads. I have a version of that drafting kit you show; my mom got it for me at an auction years ago and I had no idea what it was originally for. I use the small compass (the one with a pencil) all the time marking out plank widths.
-
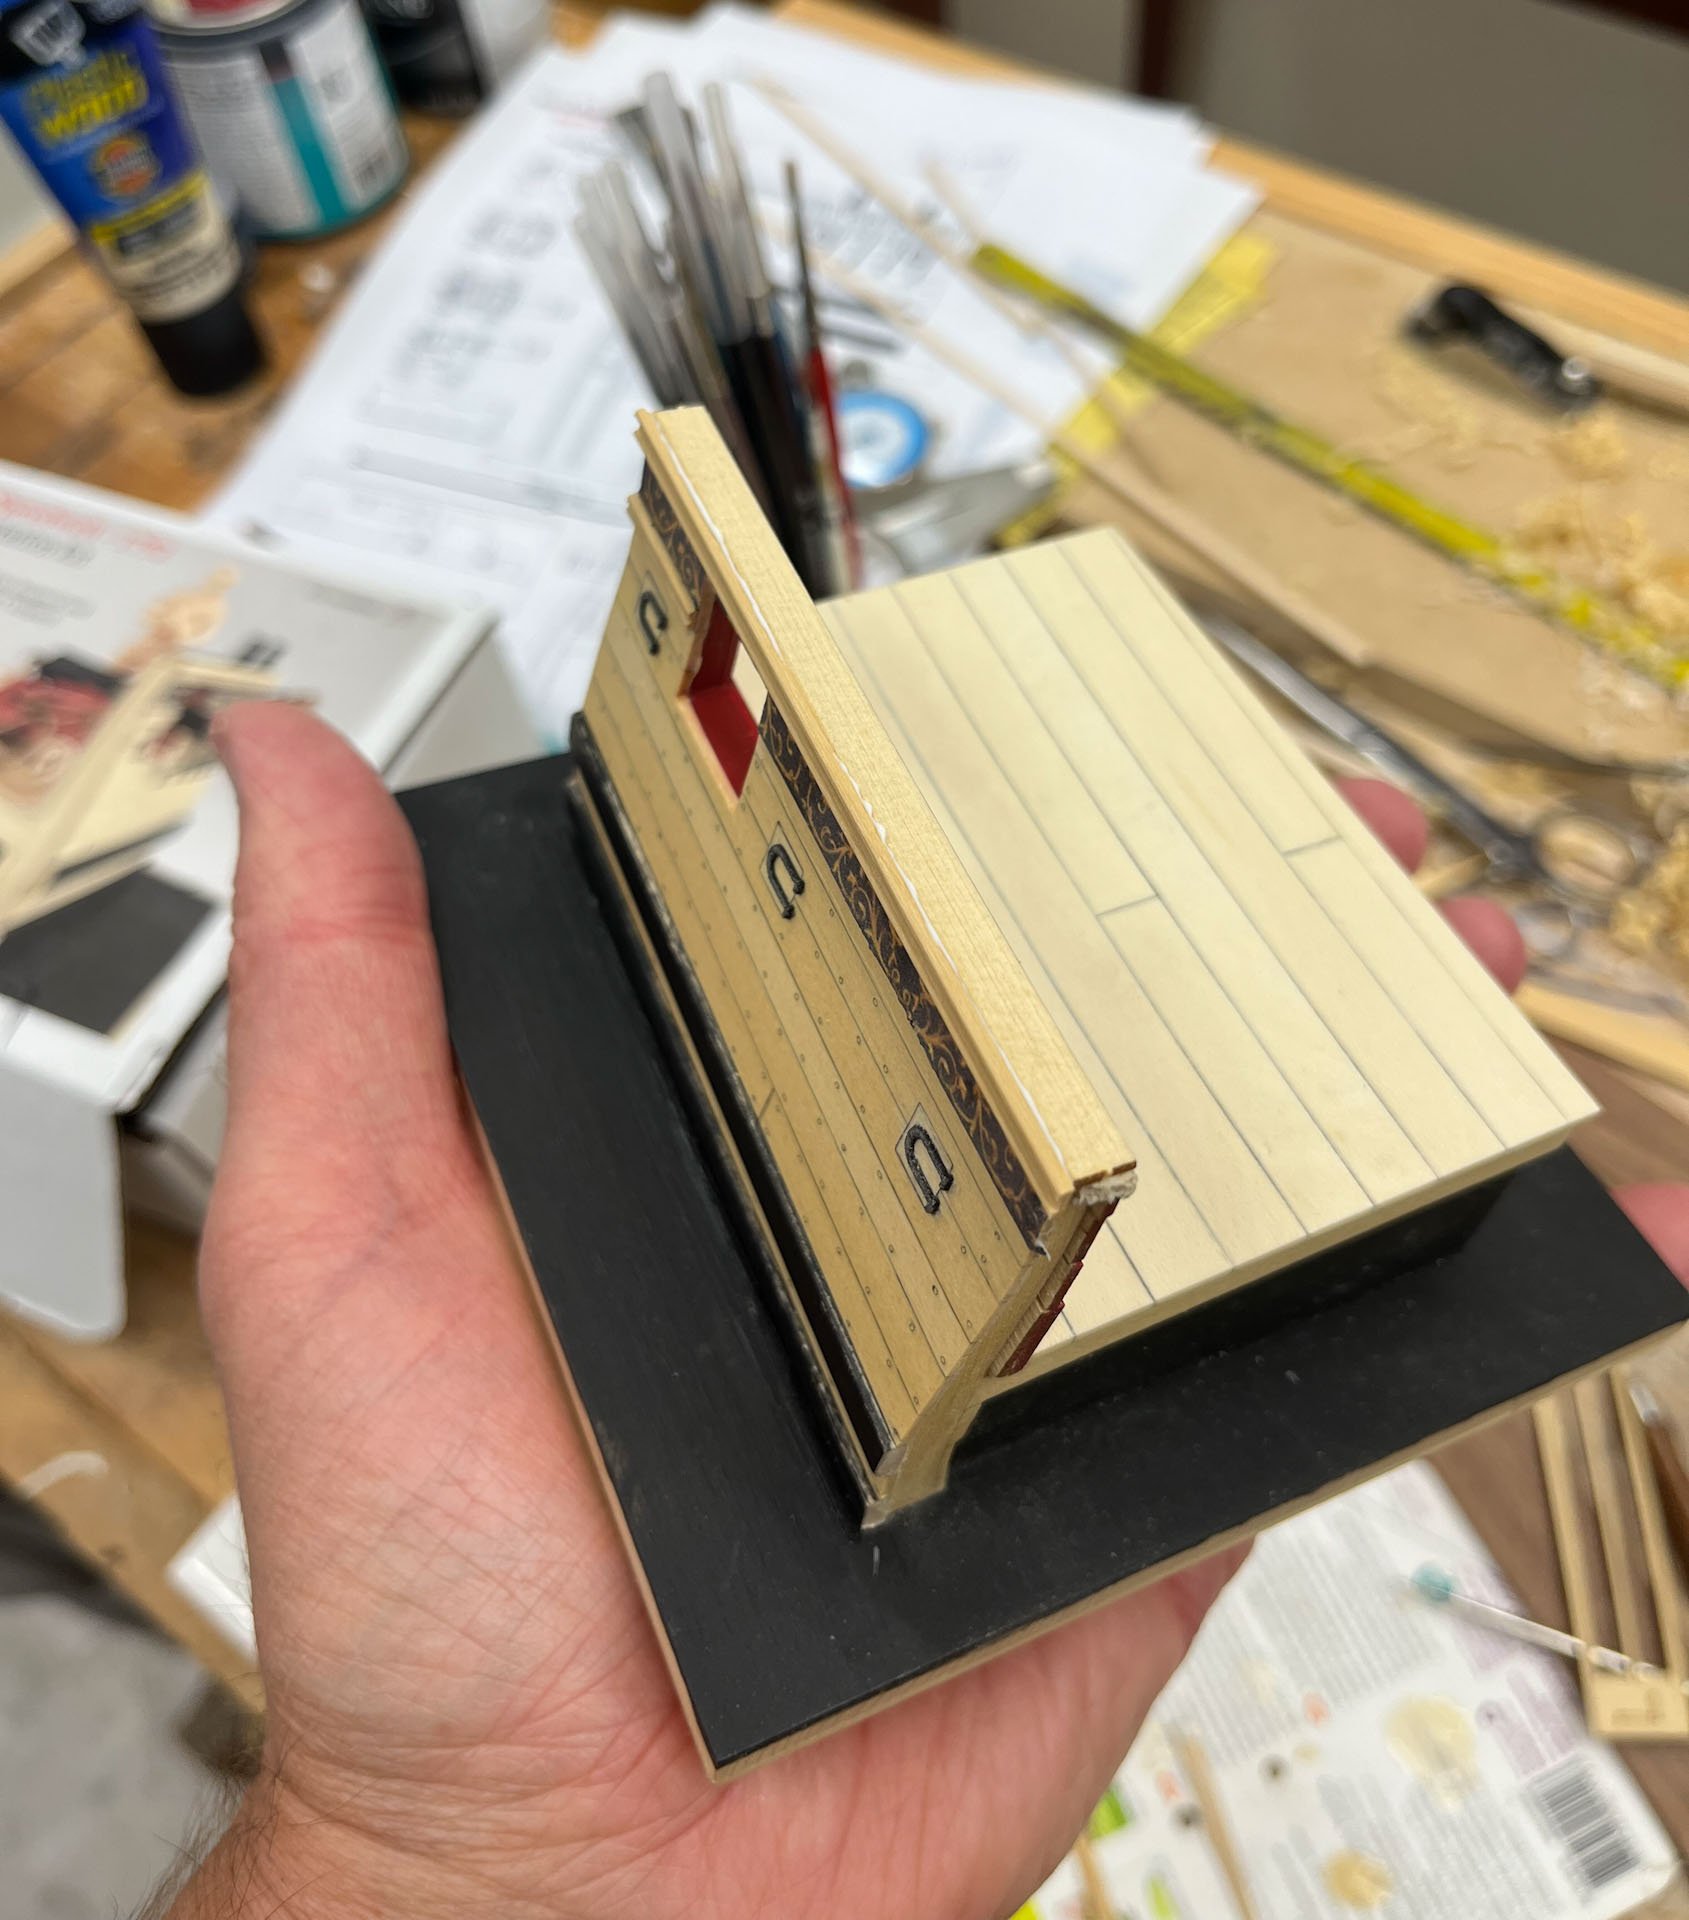
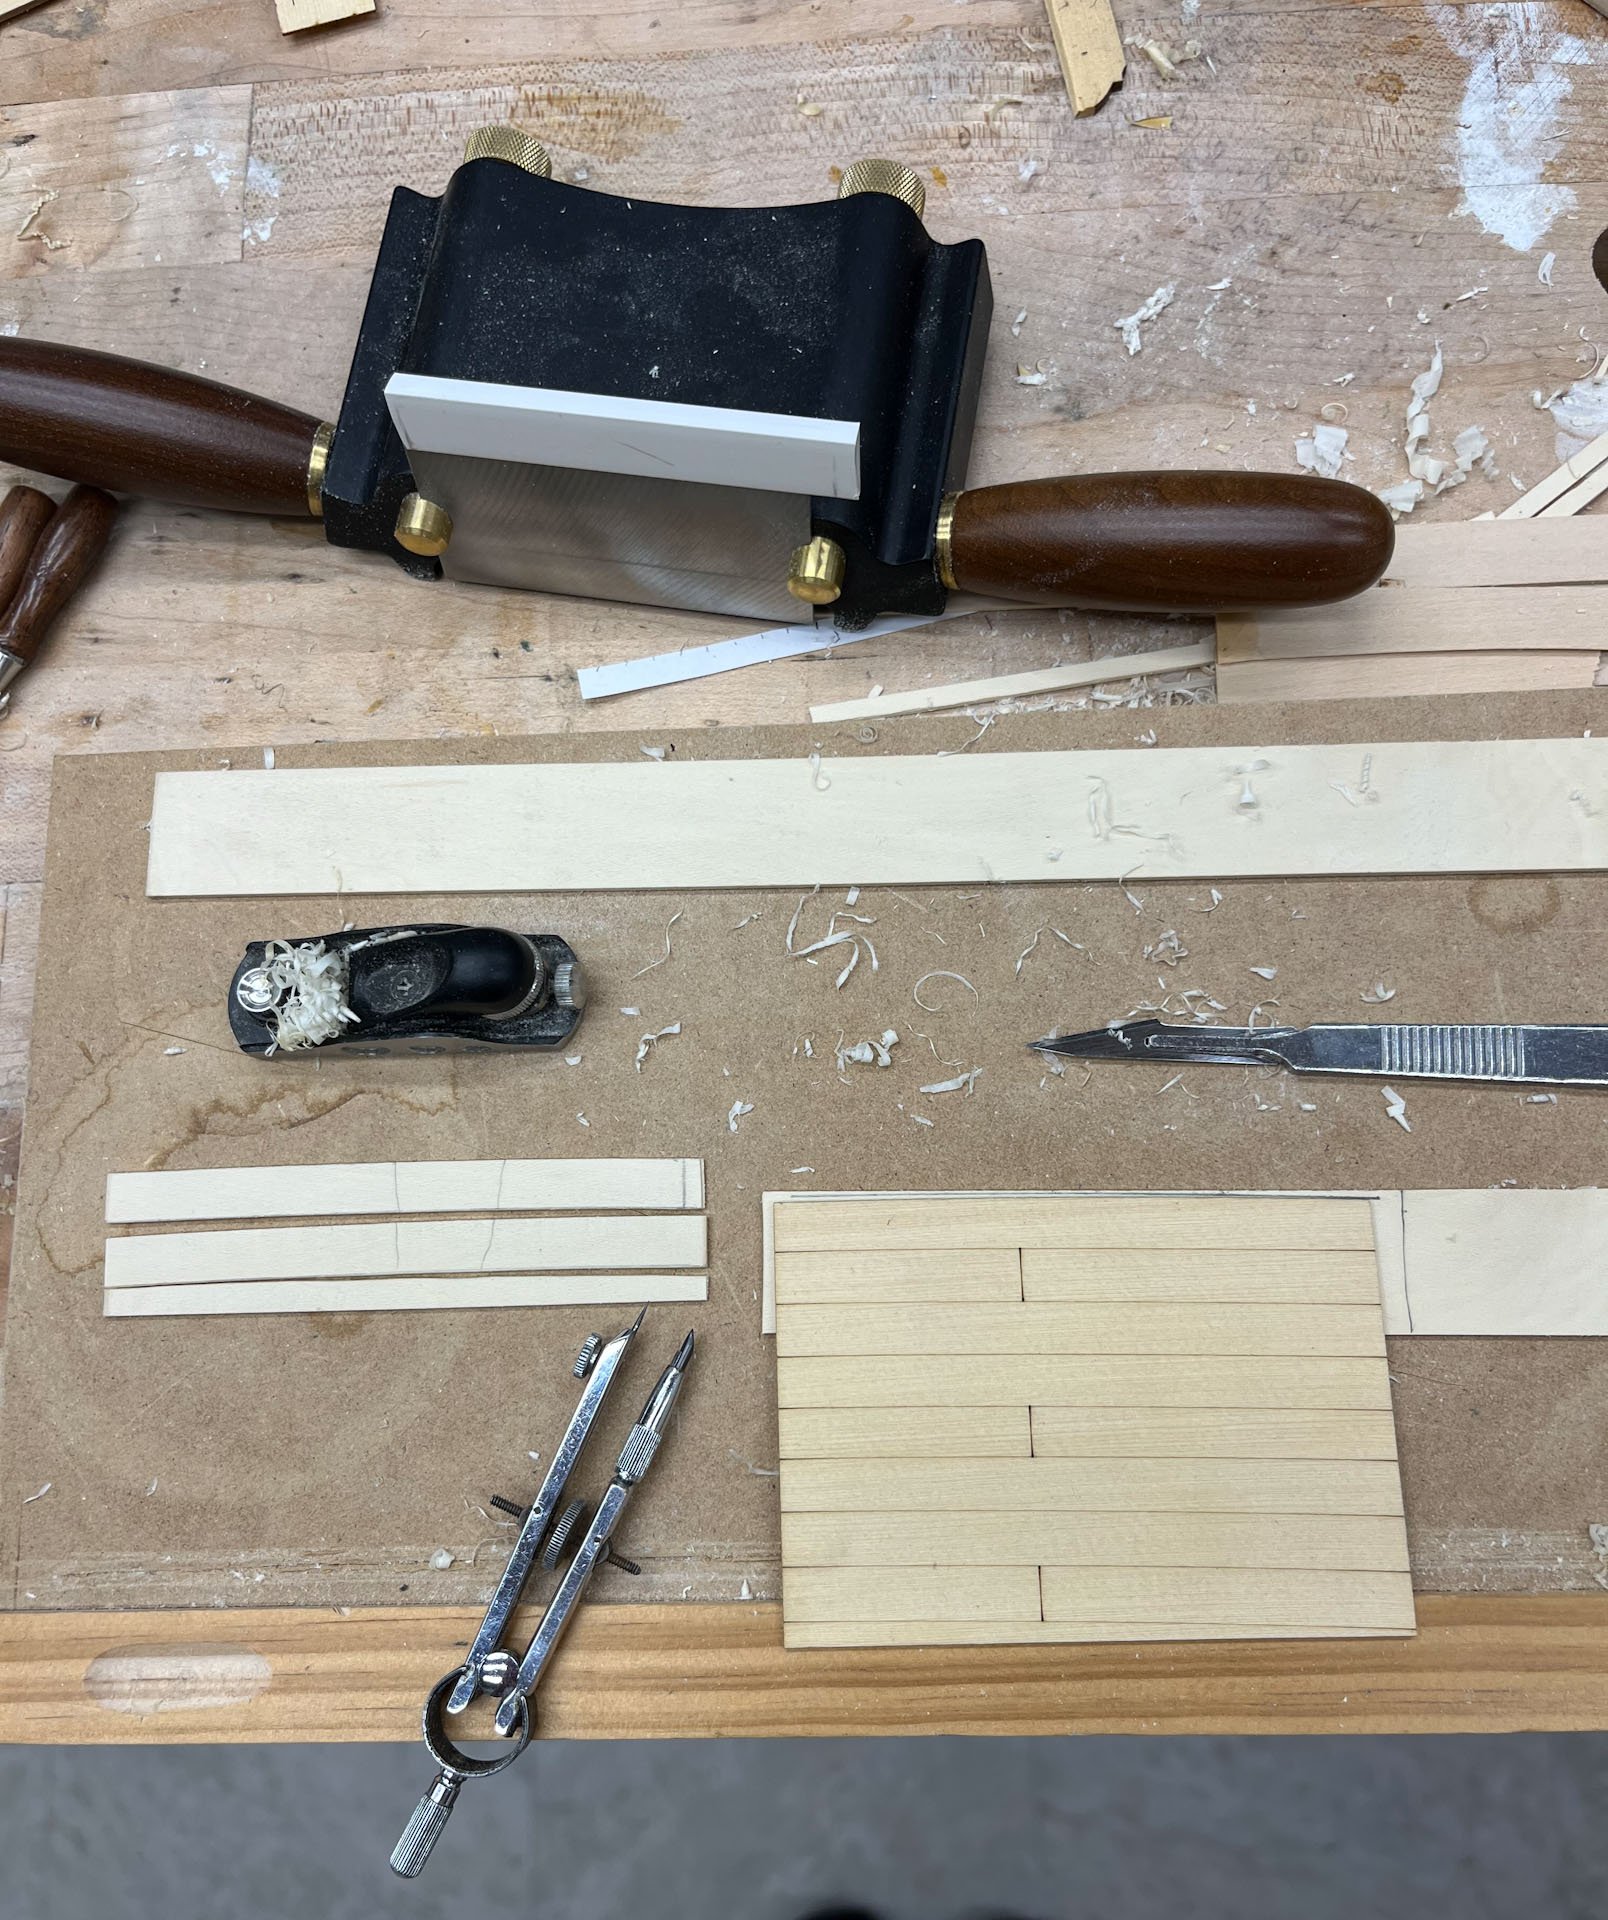
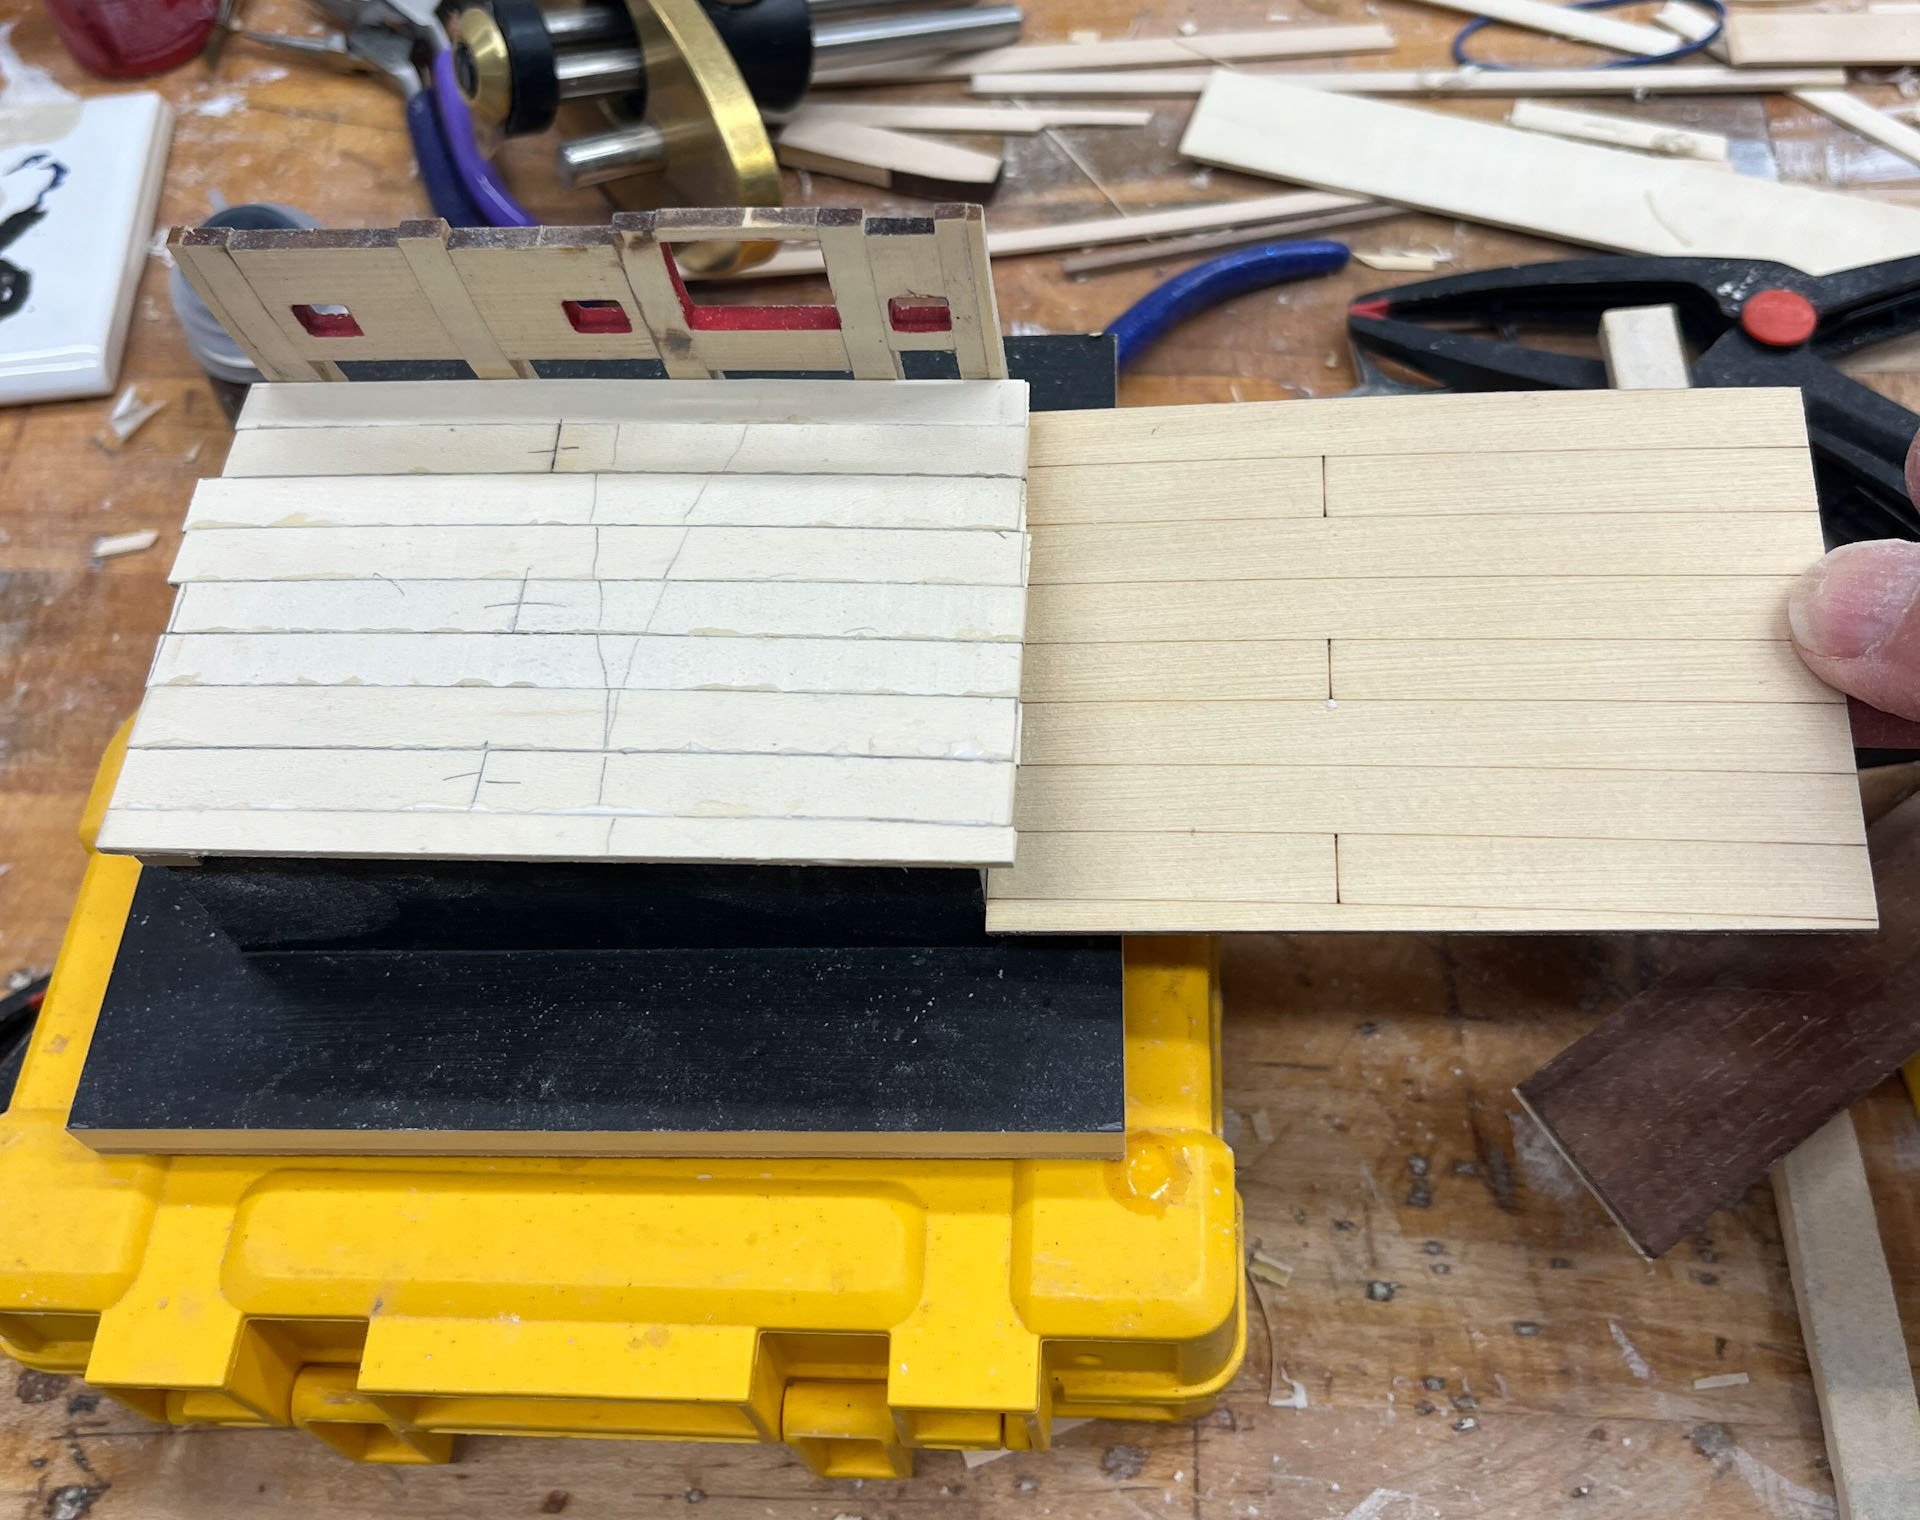
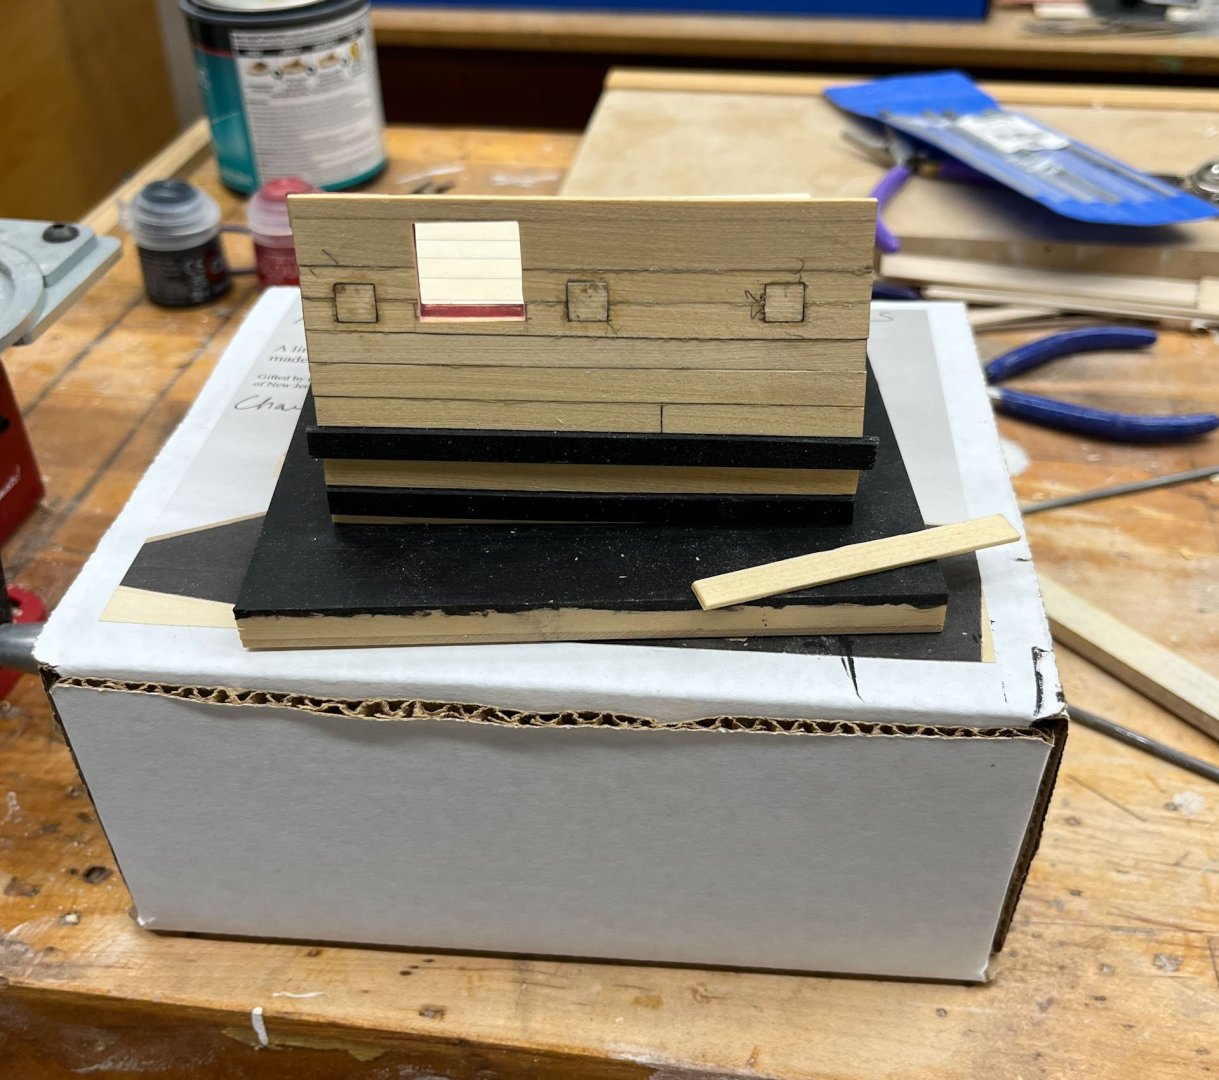
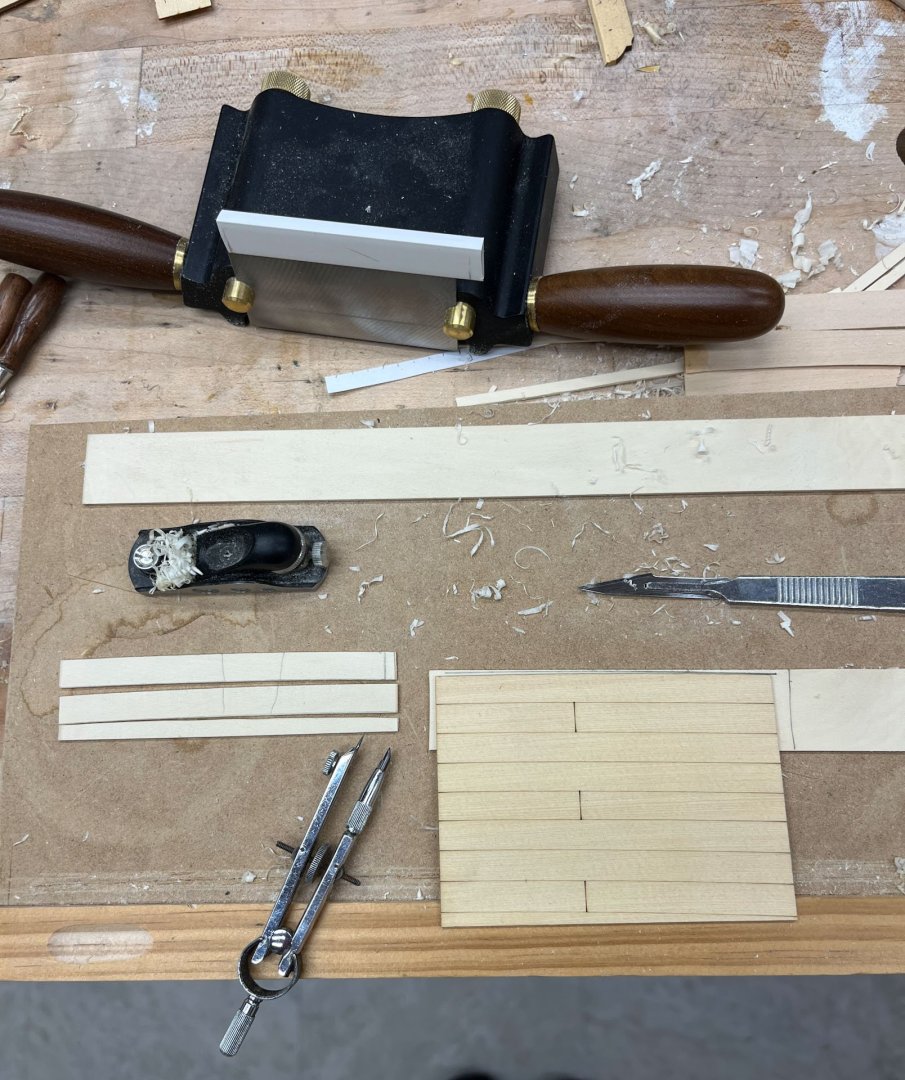
Good Sunday evening MSW. I got a little done this week. I decided there was no way I wouldn't break the stand if I glued it on now so decided to add it later. I touched up the faux beam ends with black paint and moved onto the decking. The kit comes with printed decking and exterior planking but that would be easy. I did my usual plank preparation of cutting strips from my shrinking billet of holly and smoothed the rough side with my Veritas string thicknesser. The decking is curved so the easiest way to replicate it was tracing the edge of the pre-printed decking onto my holly strip, smoothing to the traced line, and using my trusty compass to mark the width. I cut the concave side with a scalpel, then smoothed with sanding sticks. I like to mark my planks with a pencil triangle to keep track of order. And when I inevitably drop one (or all of them) I can instantly recreate their order. For anyone following this procedure be aware that the planks are not all exactly the same width - some of the middle ones are narrower than the others. Not by much but if you want your decking to exactly match the printed version some fudging will be required. I sanded each board as I went to match the curves as closely as possible, and used #2 pencil for caulking. I also edge glued each board with yellow glue which has some gap-filling abilities. Here is the deck after glue only. I tried to match the spacing and width of the printed version as closely as possible. I know it looks rough. After scraping the glue beads off I trimmed the edges back to almost flush (the Veritas mini plane is such an essential tool), sanded with sticks using 180, then 220 grit, then applied 2 coats of water based polyurethane. Now it looks like below, which I'm happy with. Also in the above pic I have added the interior planking. The kit provides a single piece of AYC which could be glued in place; I choose to cut it into separate planks. The bottom one I glued to the laser-cut spirkiting, making it thicker. (Its a different colour in the above pic b/c its been polyurethaned while the planks above it haven't yet.) On the top 3 planks I sanded the edges so they have a subtle bevel; I think the directions say to paint the inboard all red and I was worried the planking seams wouldn't show. And at present its all drying. Next up is enlarging the inner planking holes so they match the gunport and sweep port holes, then planking the outside. thanks for reading Cisco


- 23 replies
-
- 14
-
-
- Speedwell
- battle station
- (and 1 more)
-
looks like real hinges to me. i am disliking more and more shaping finiky brass that wont blacken. wood that is even and stays painted - great idea
-
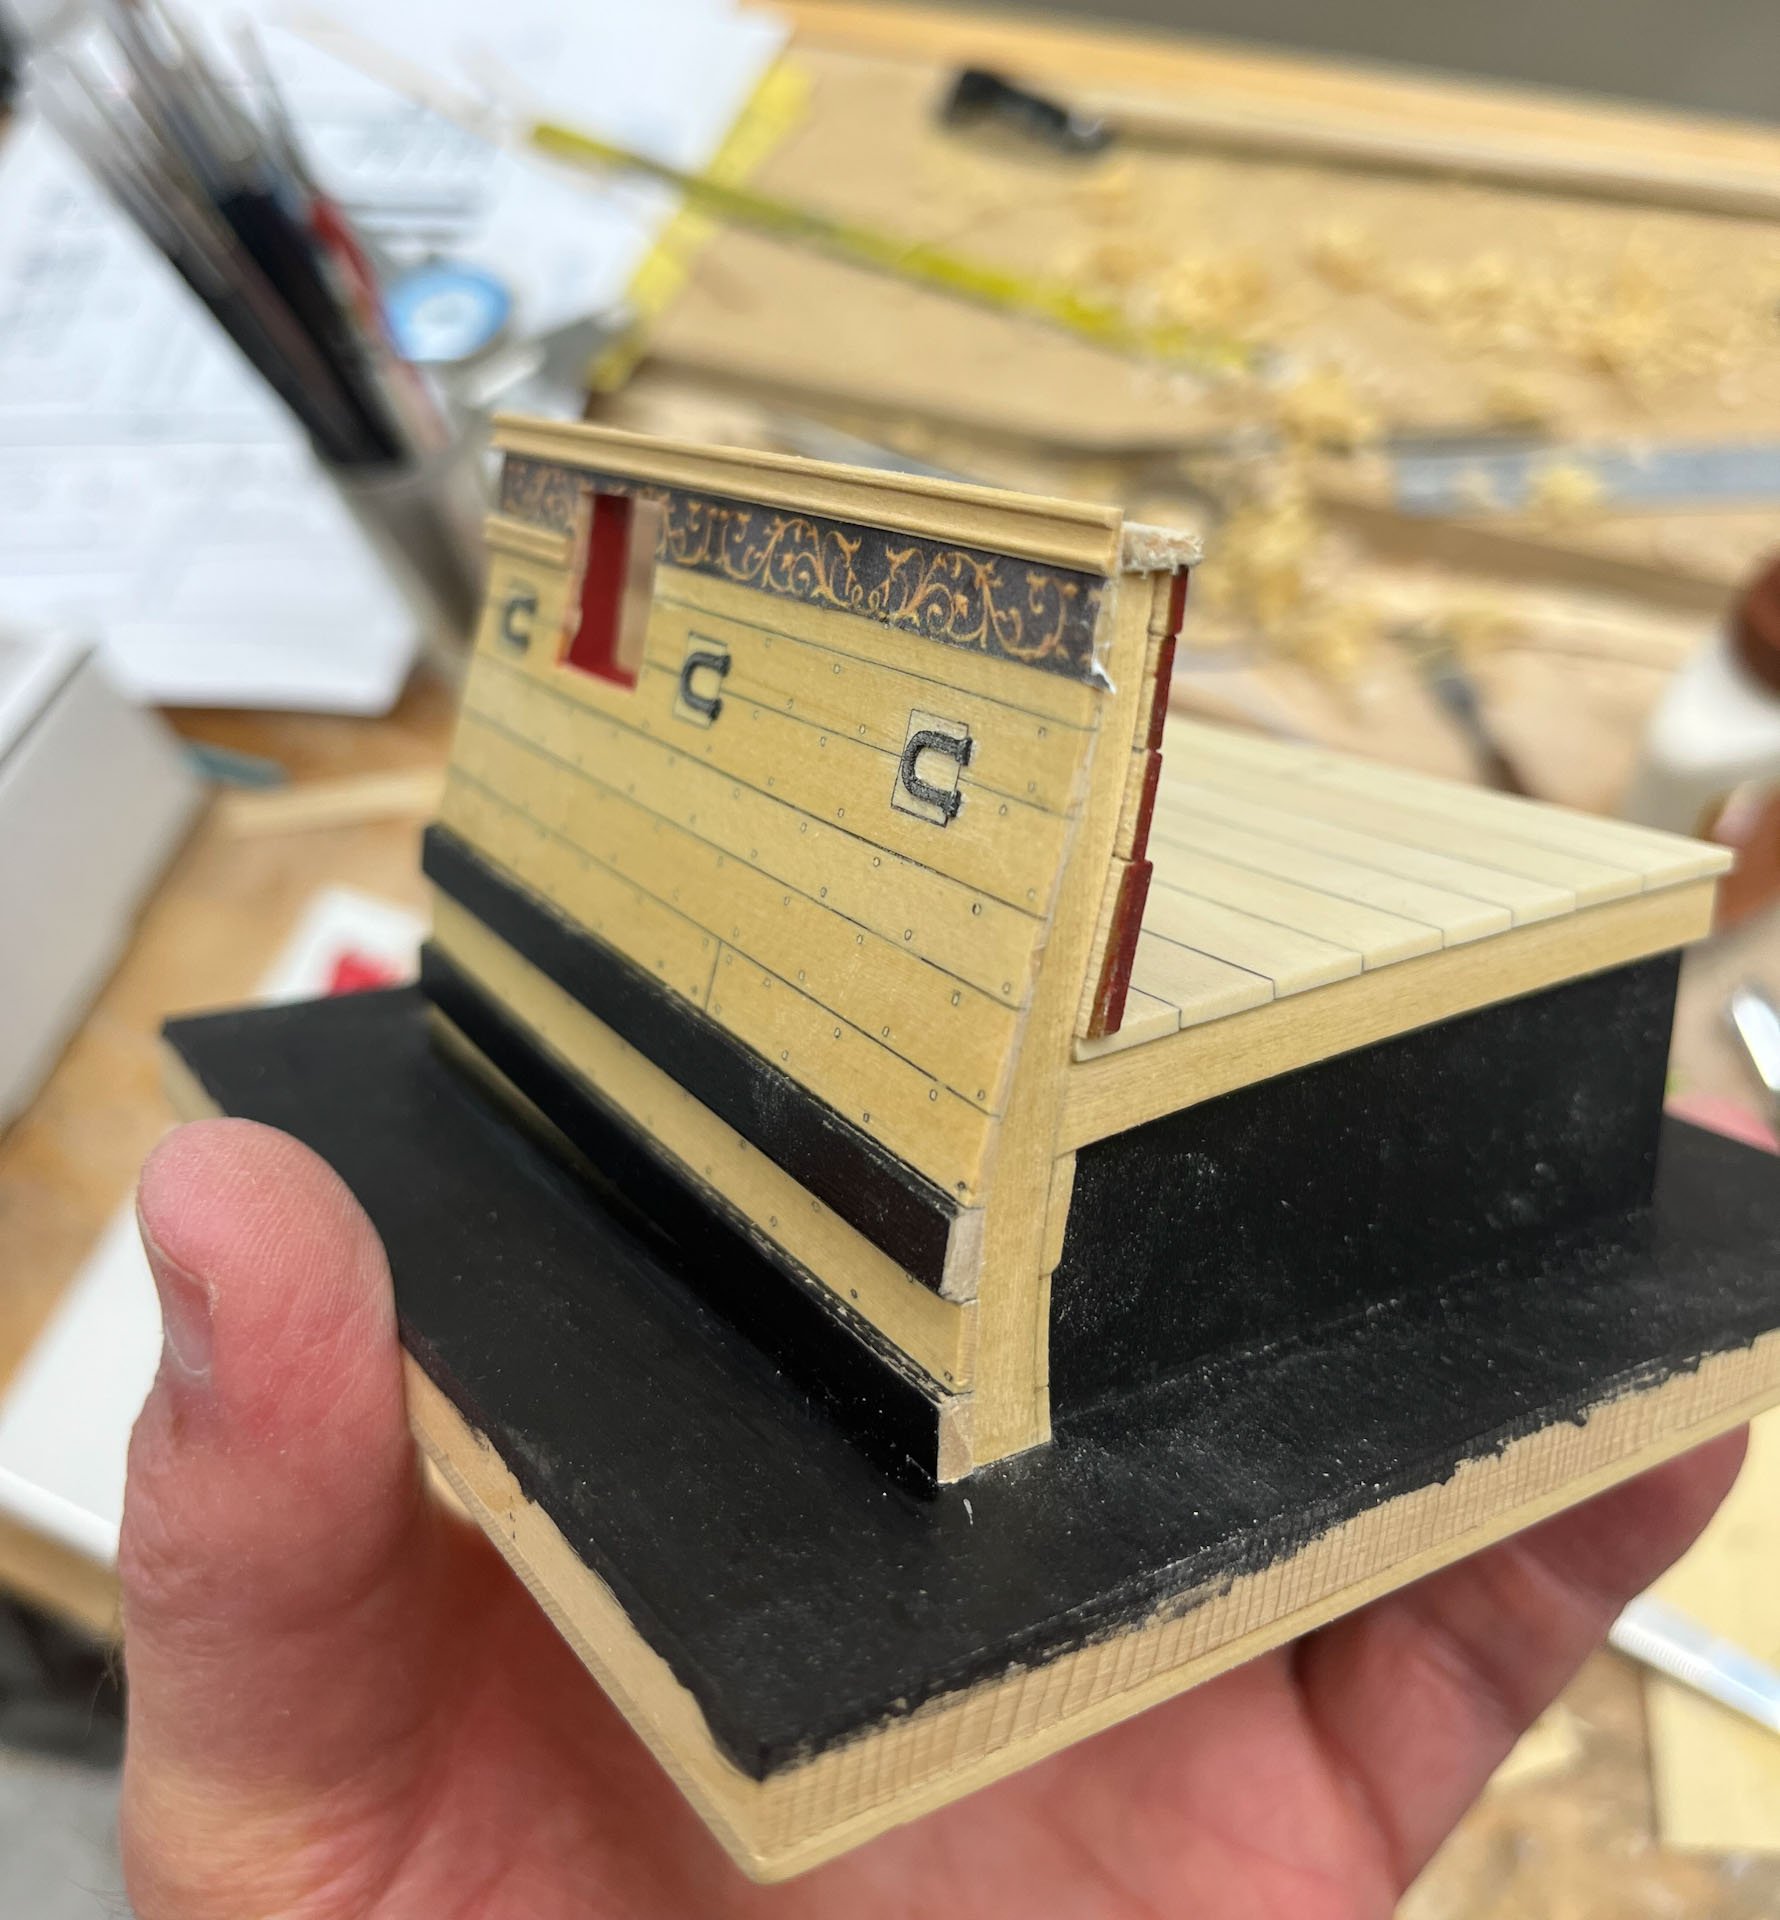
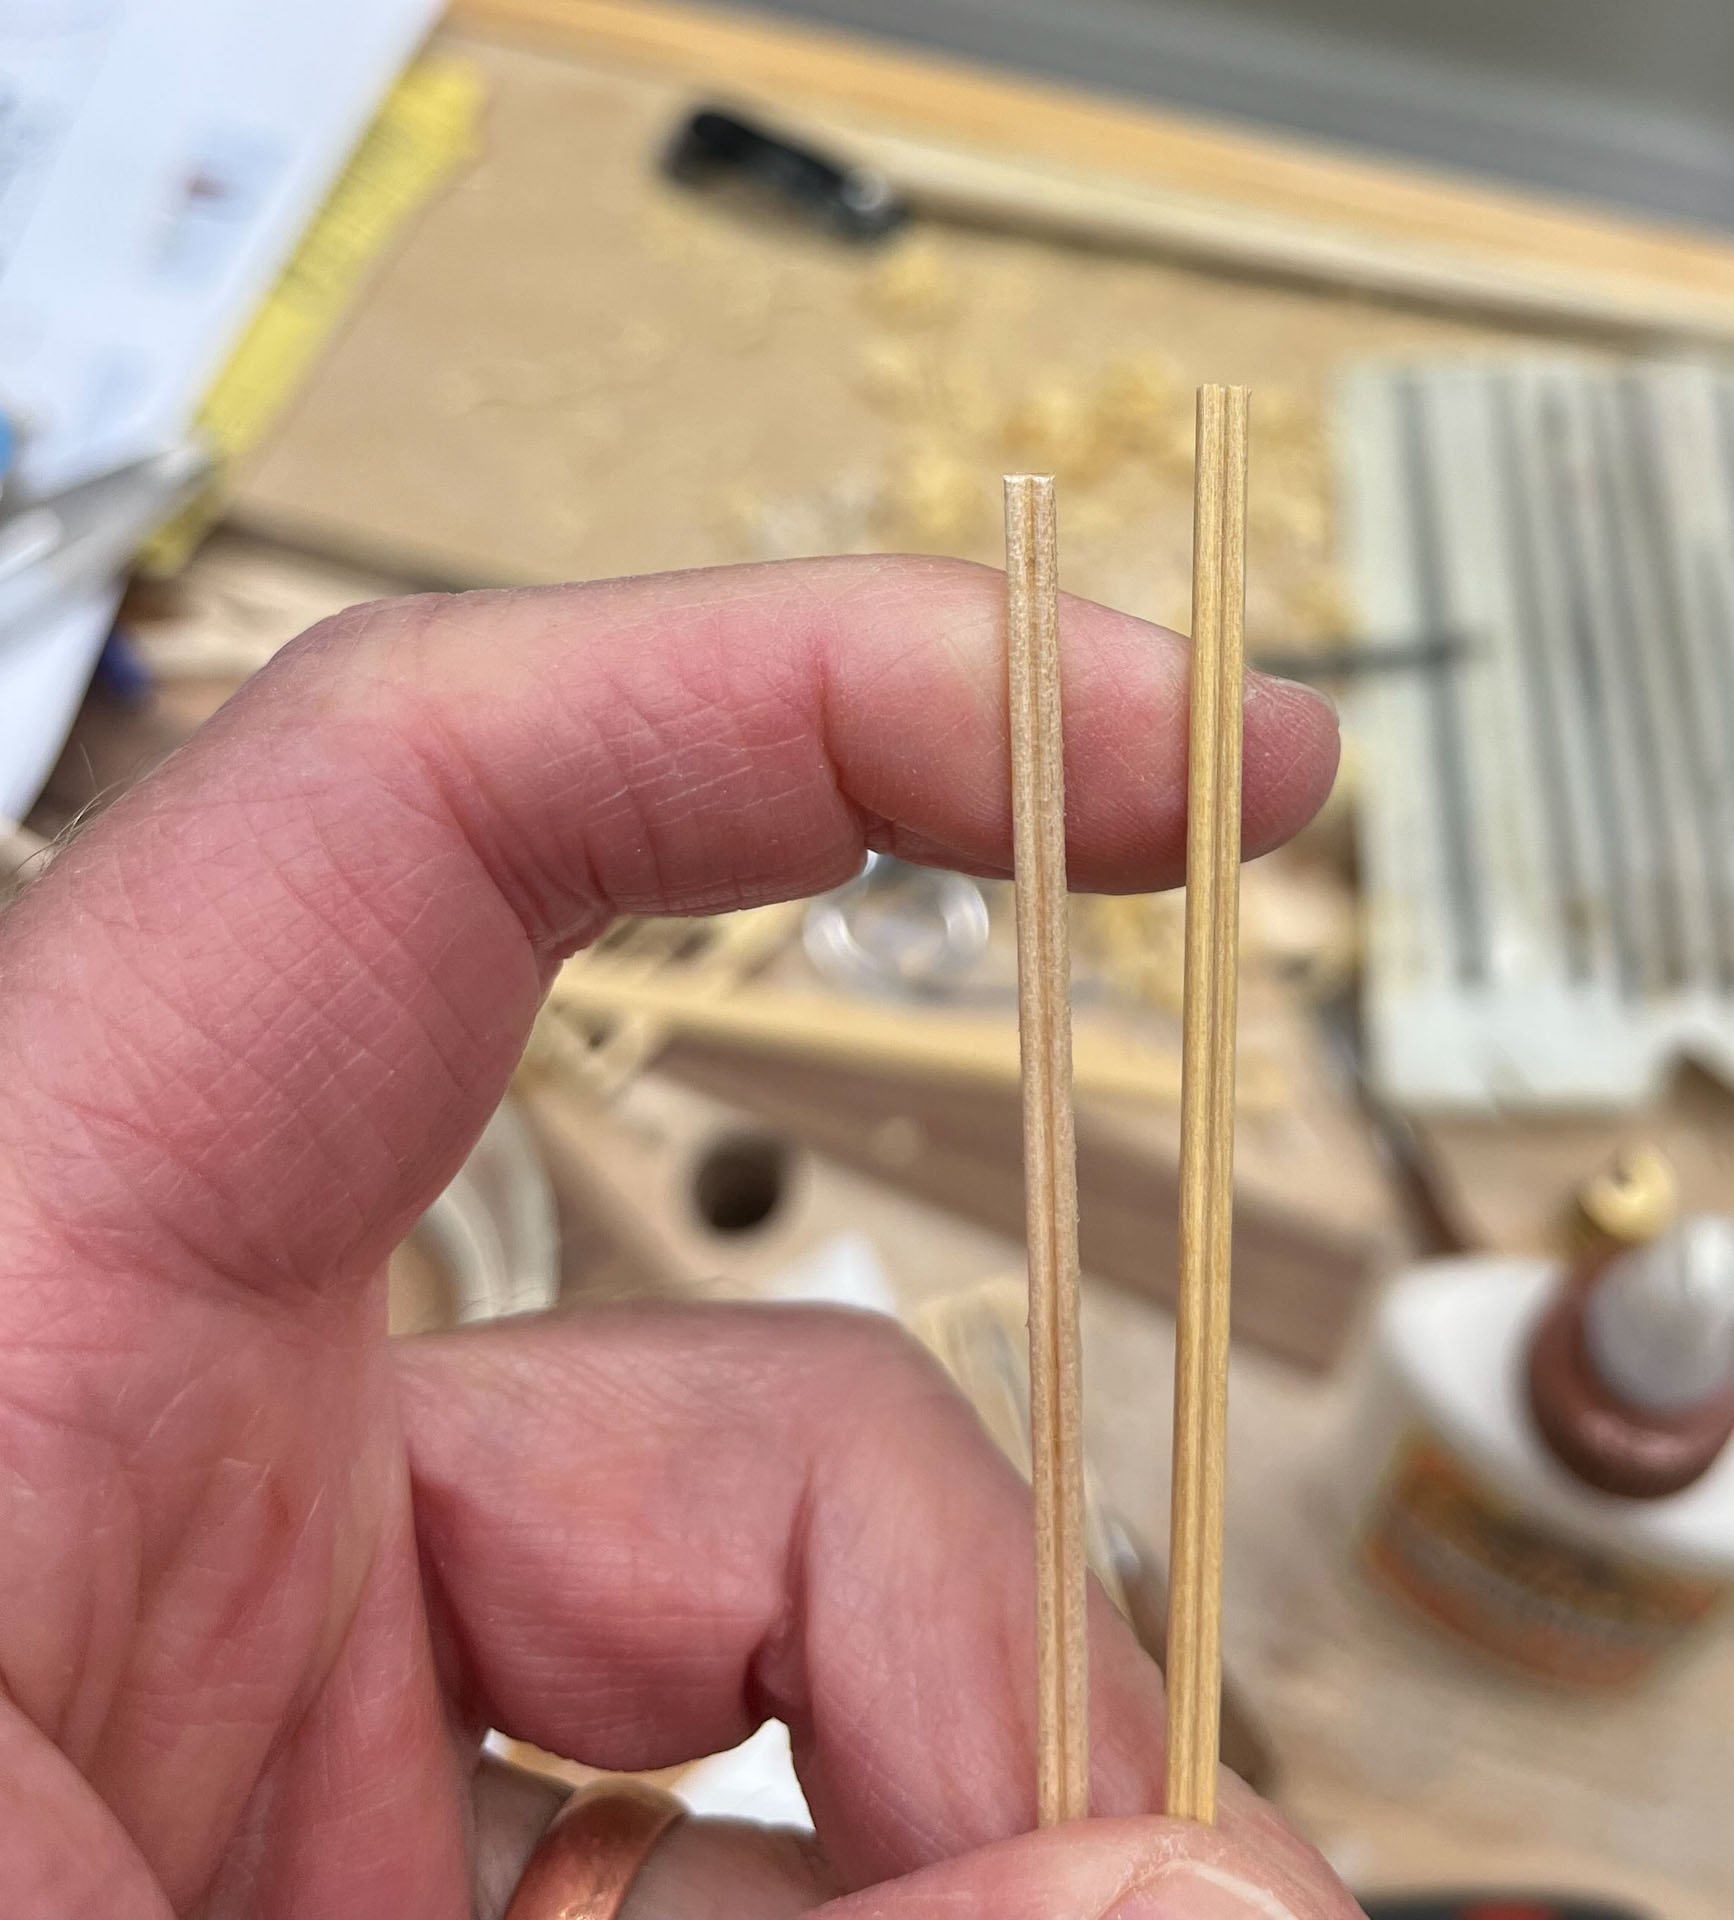
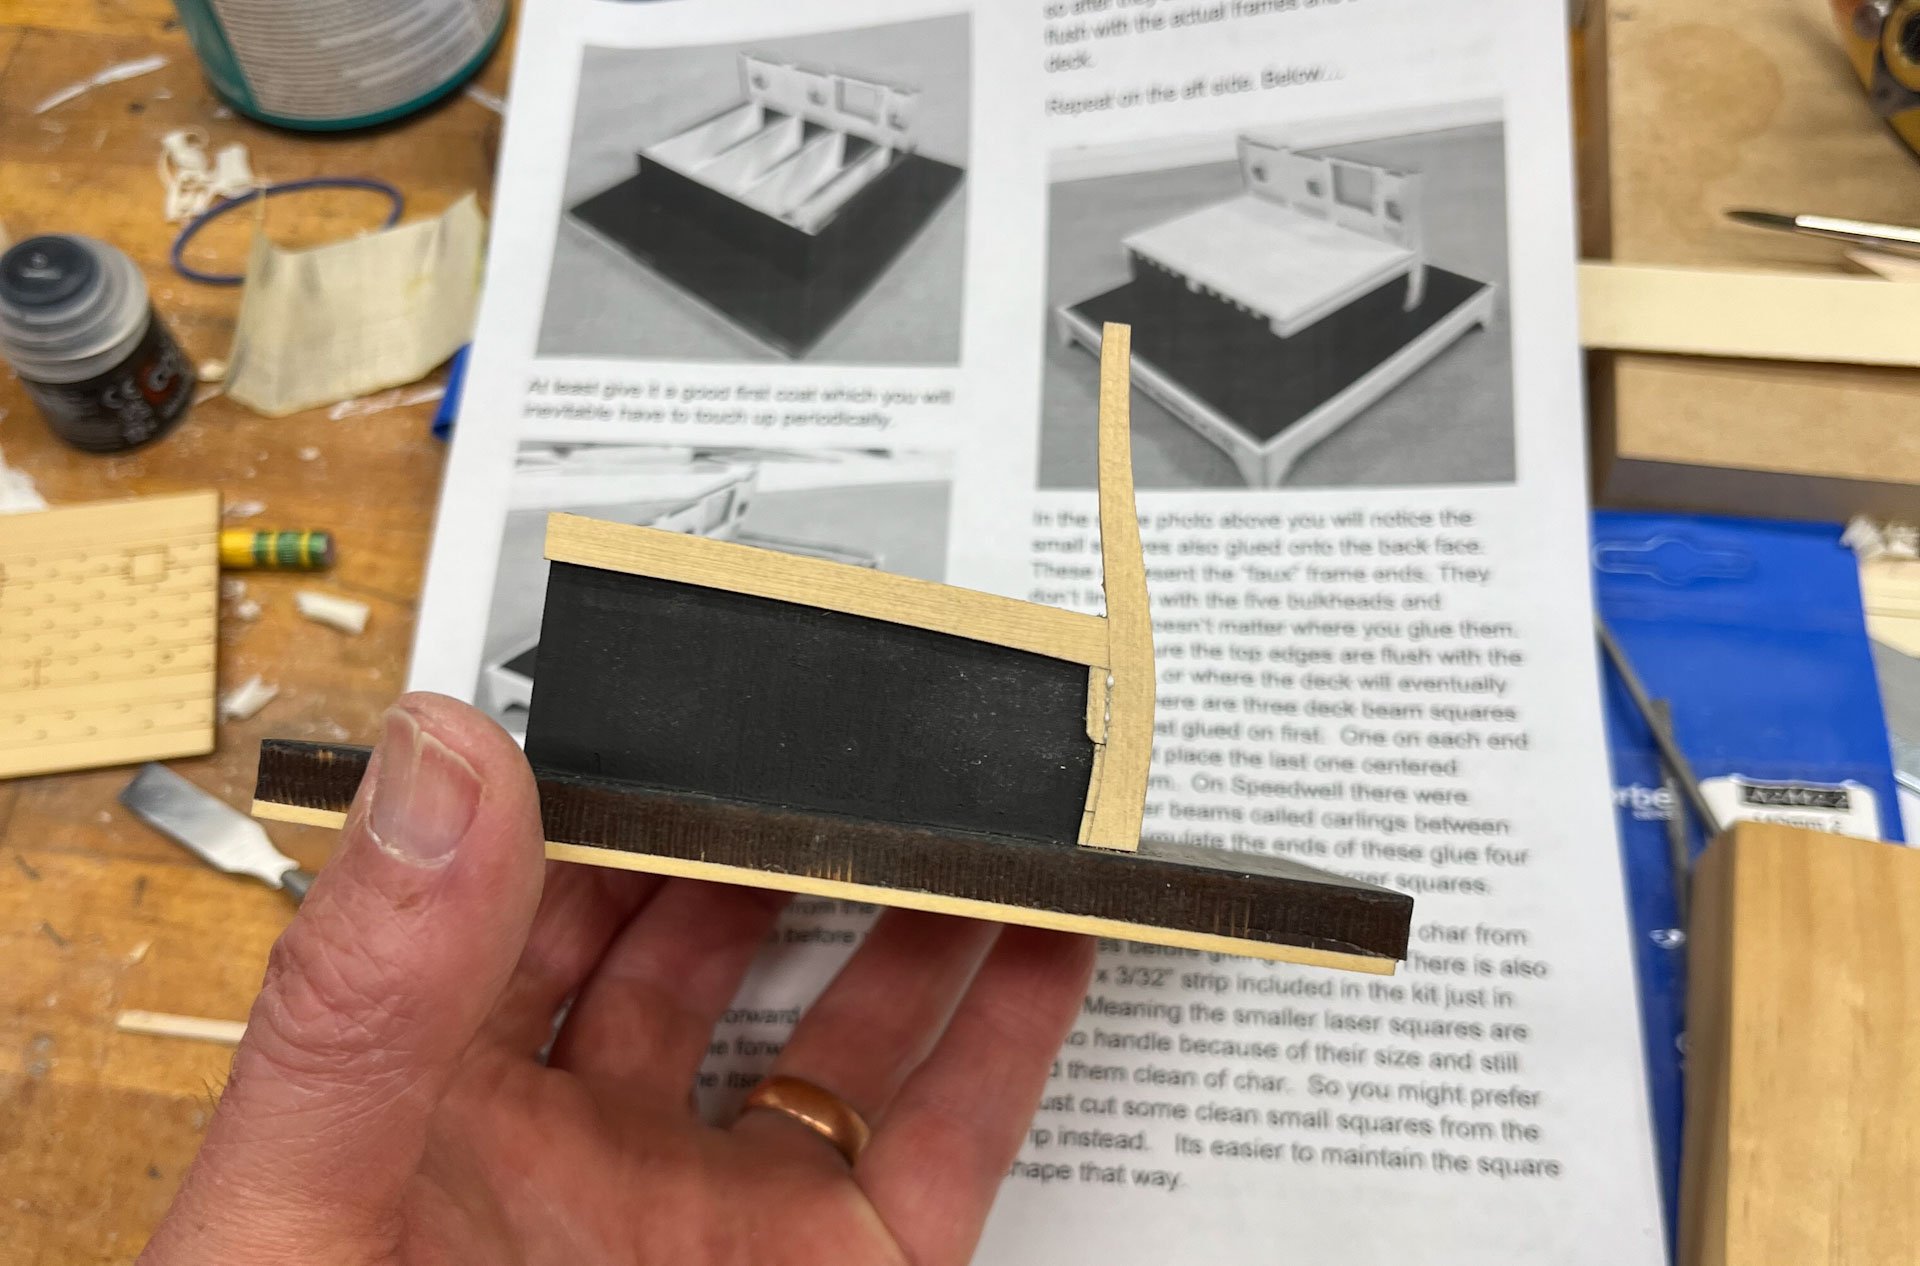
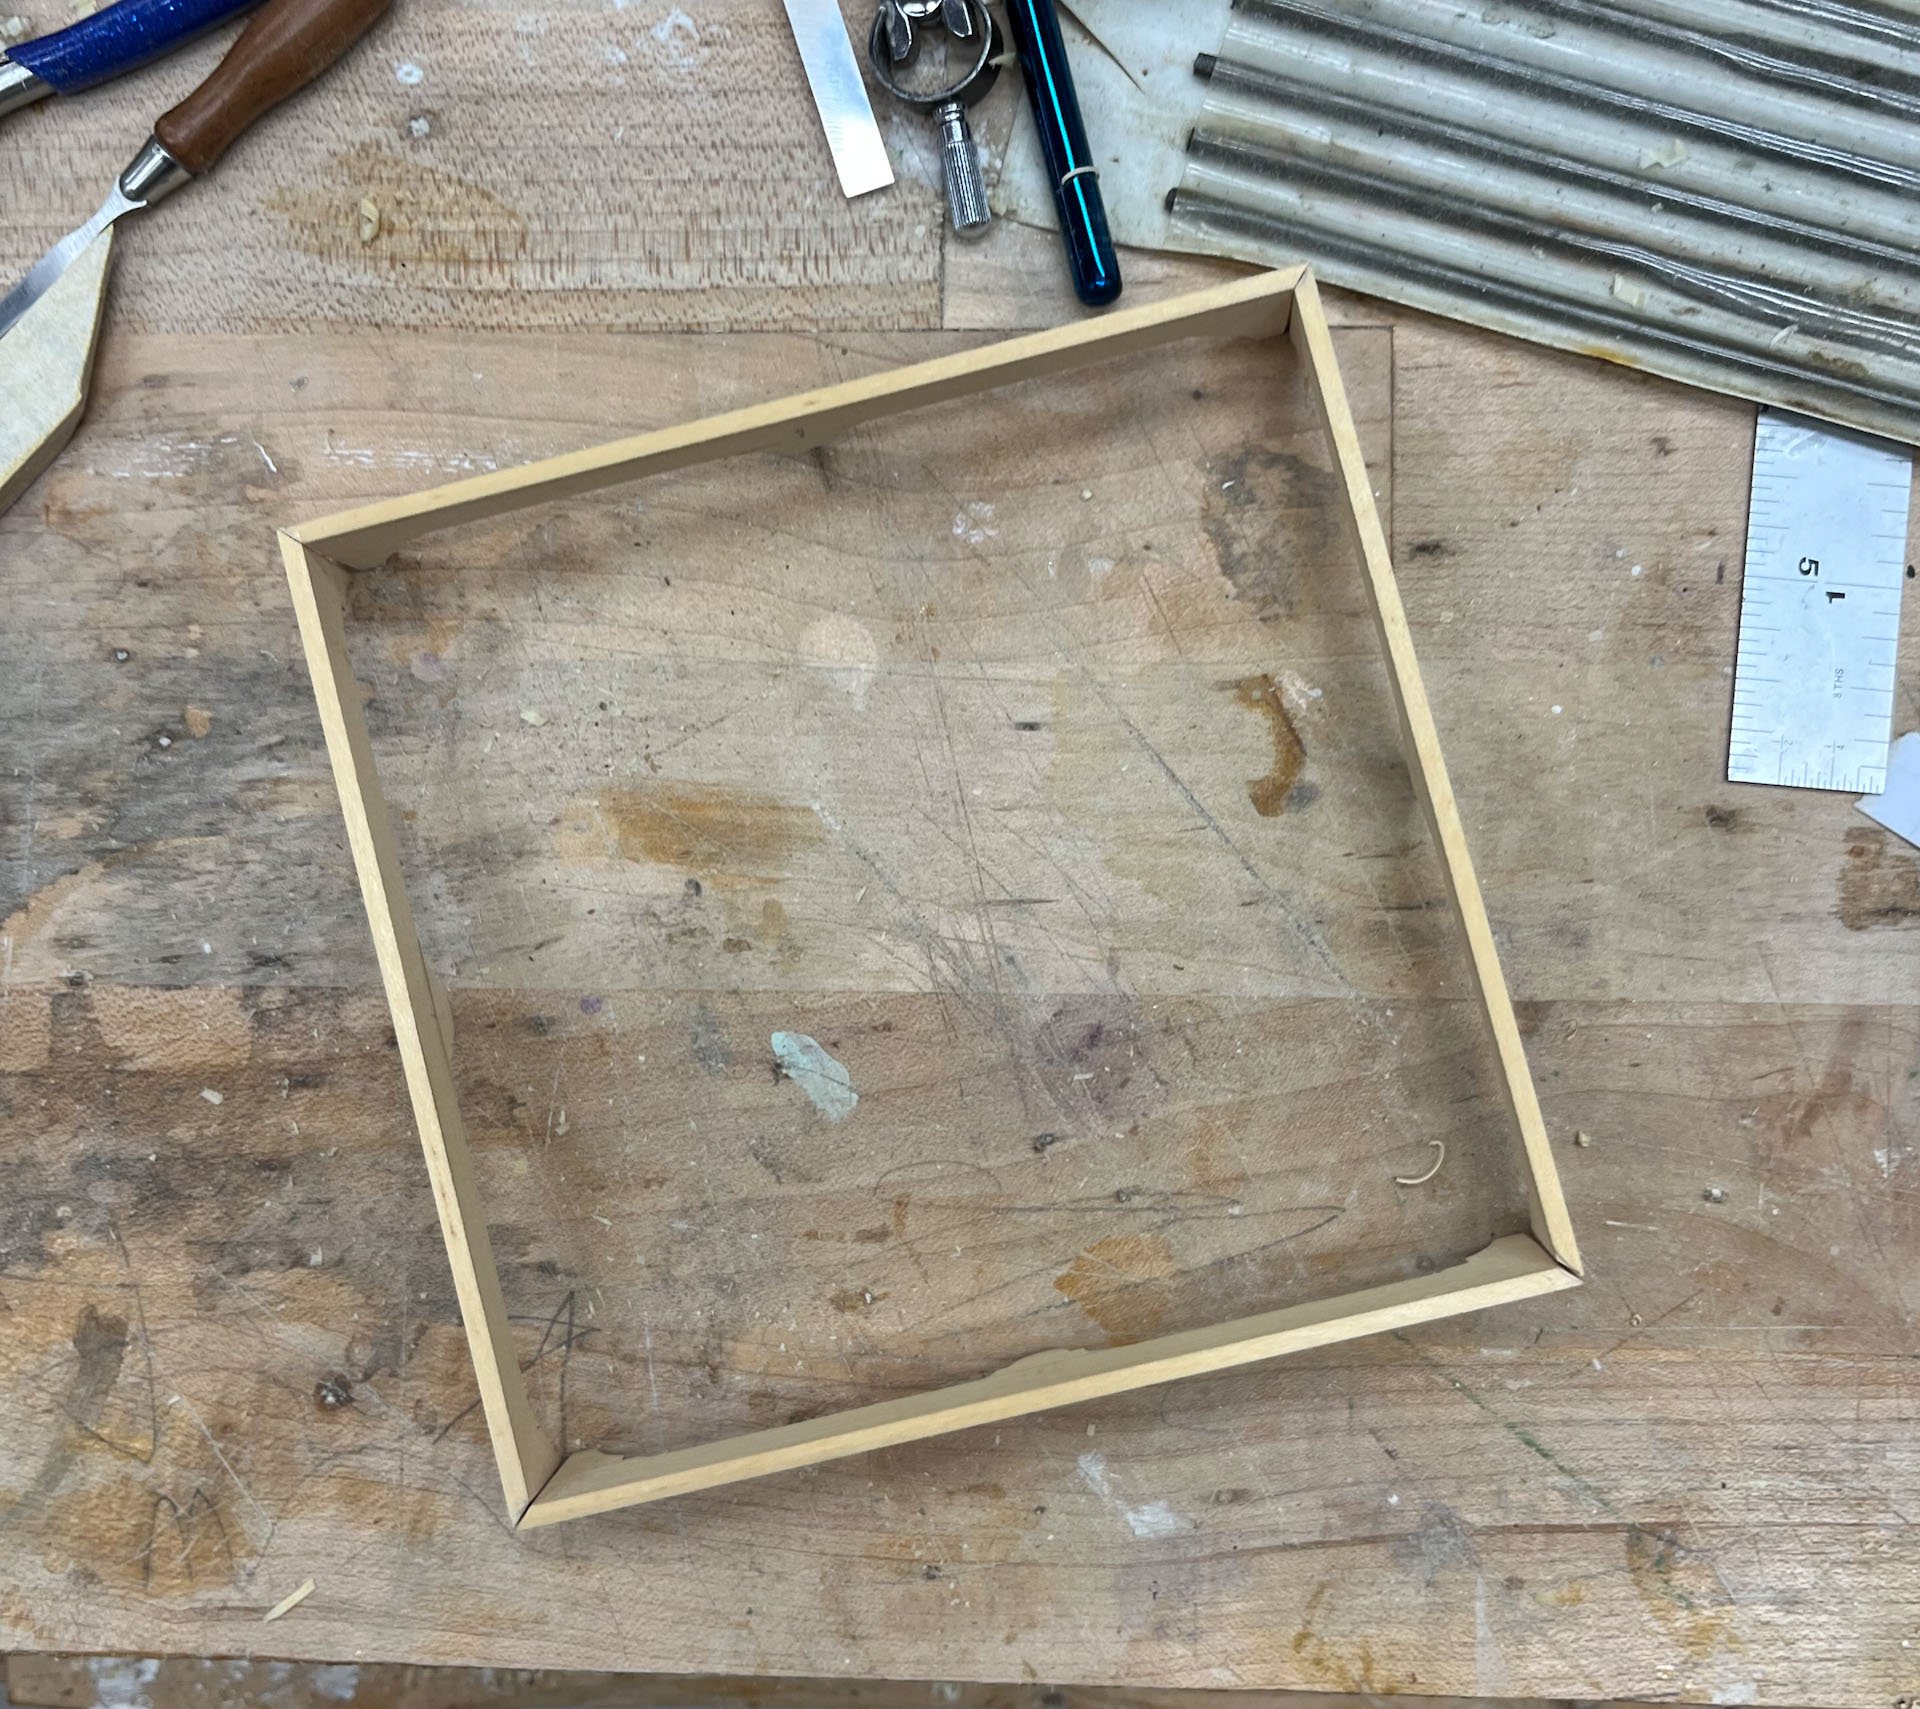
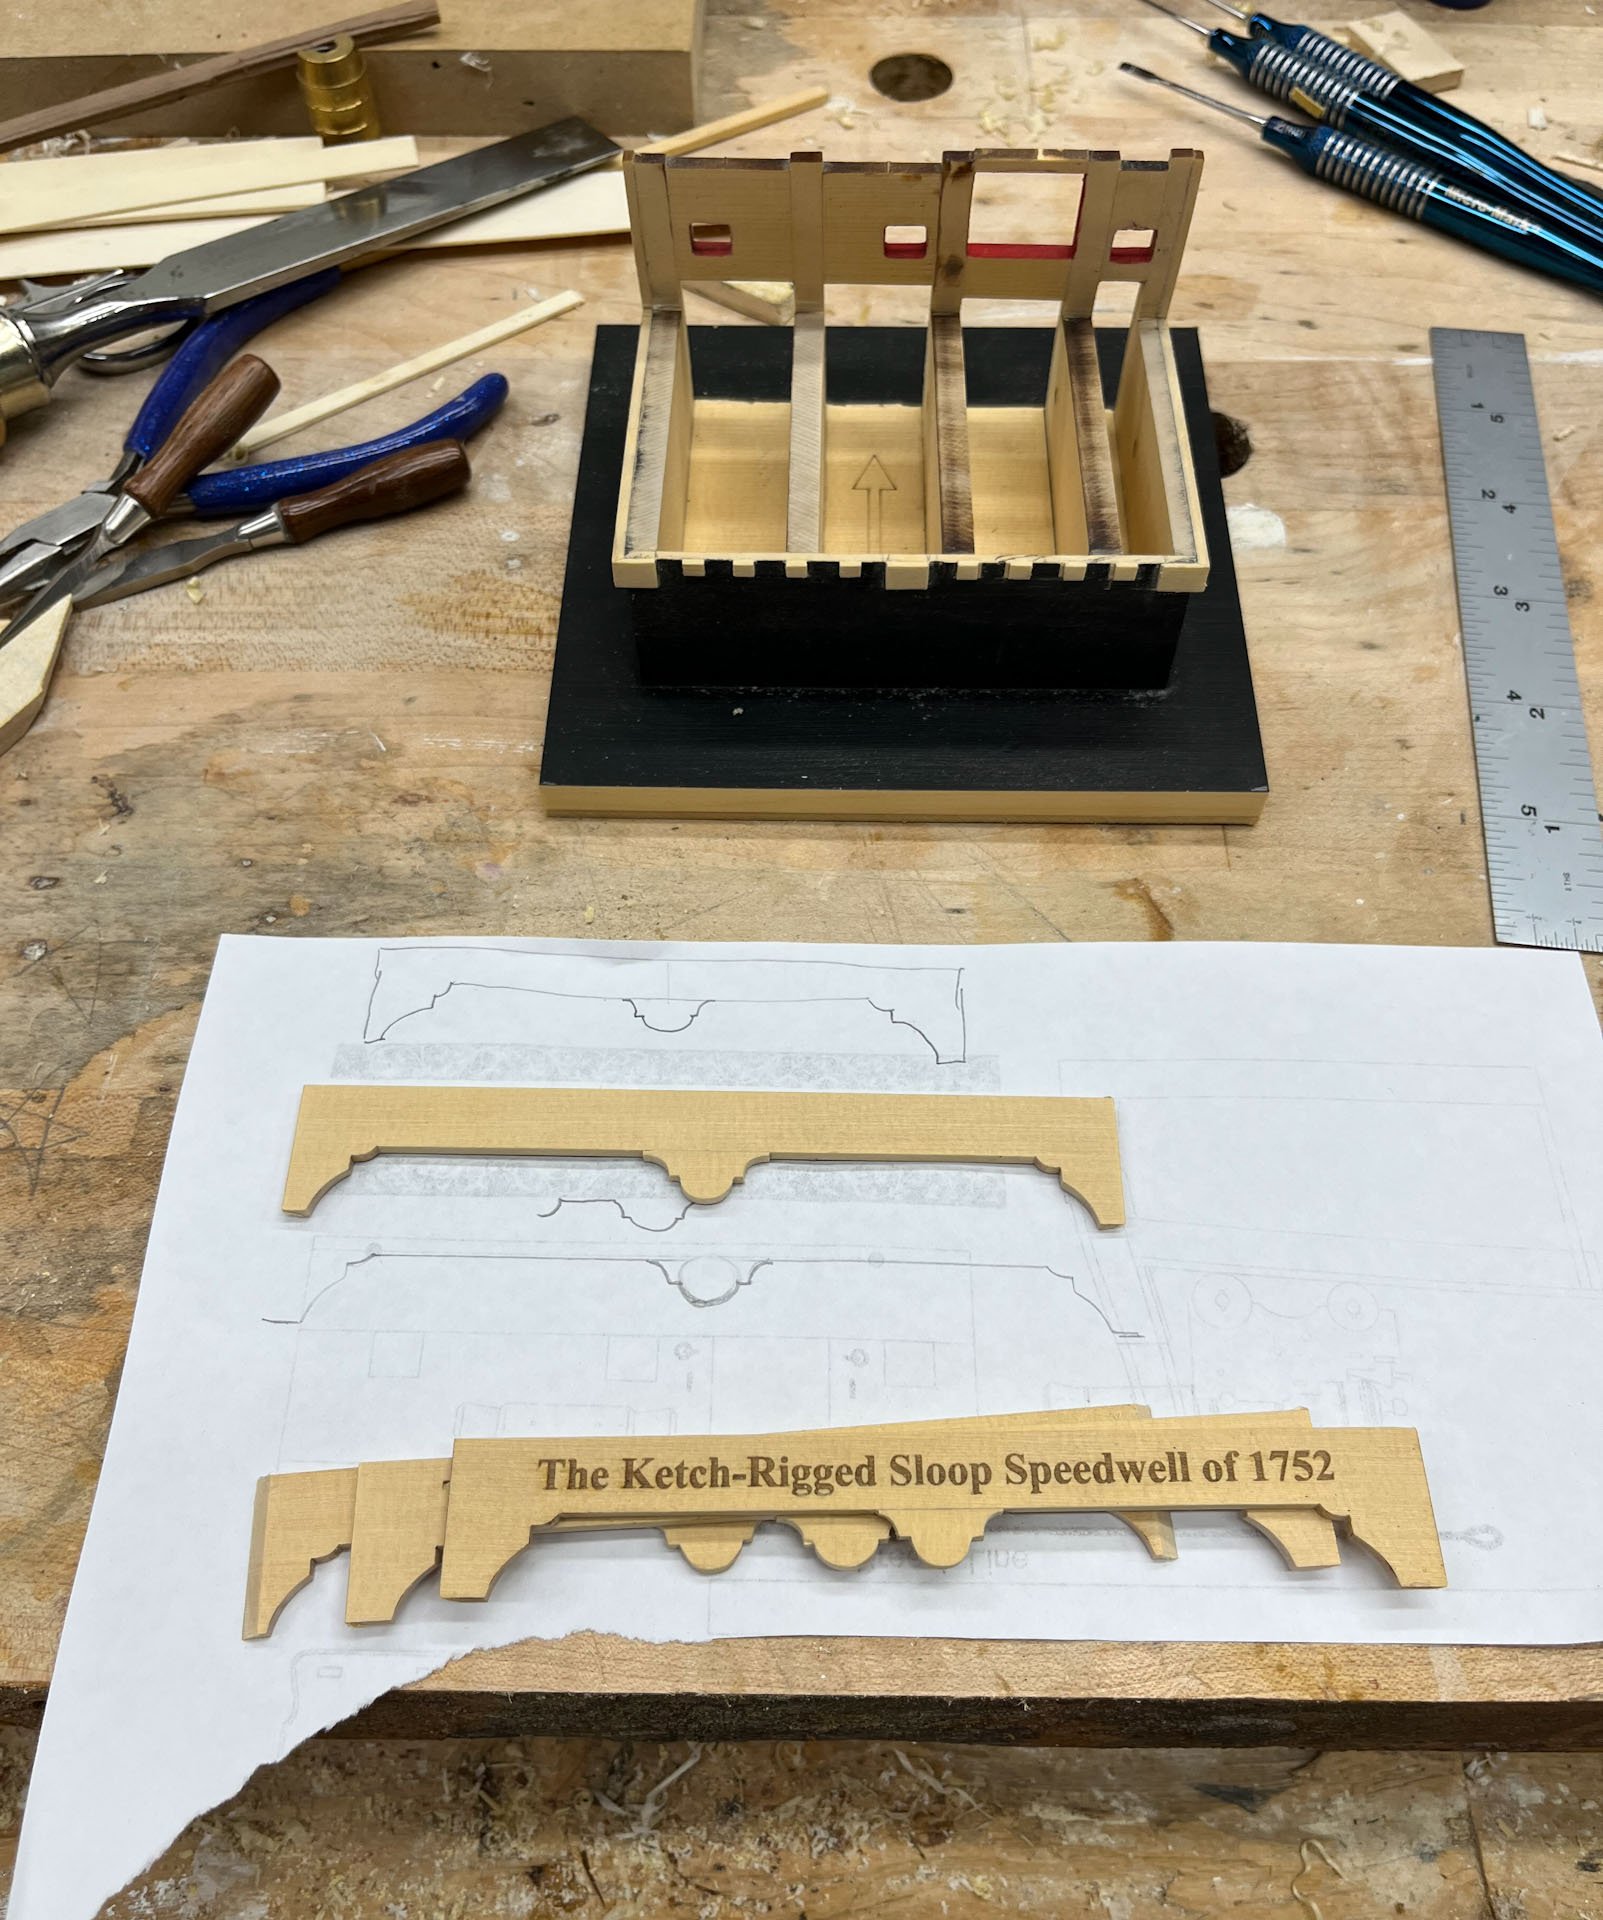
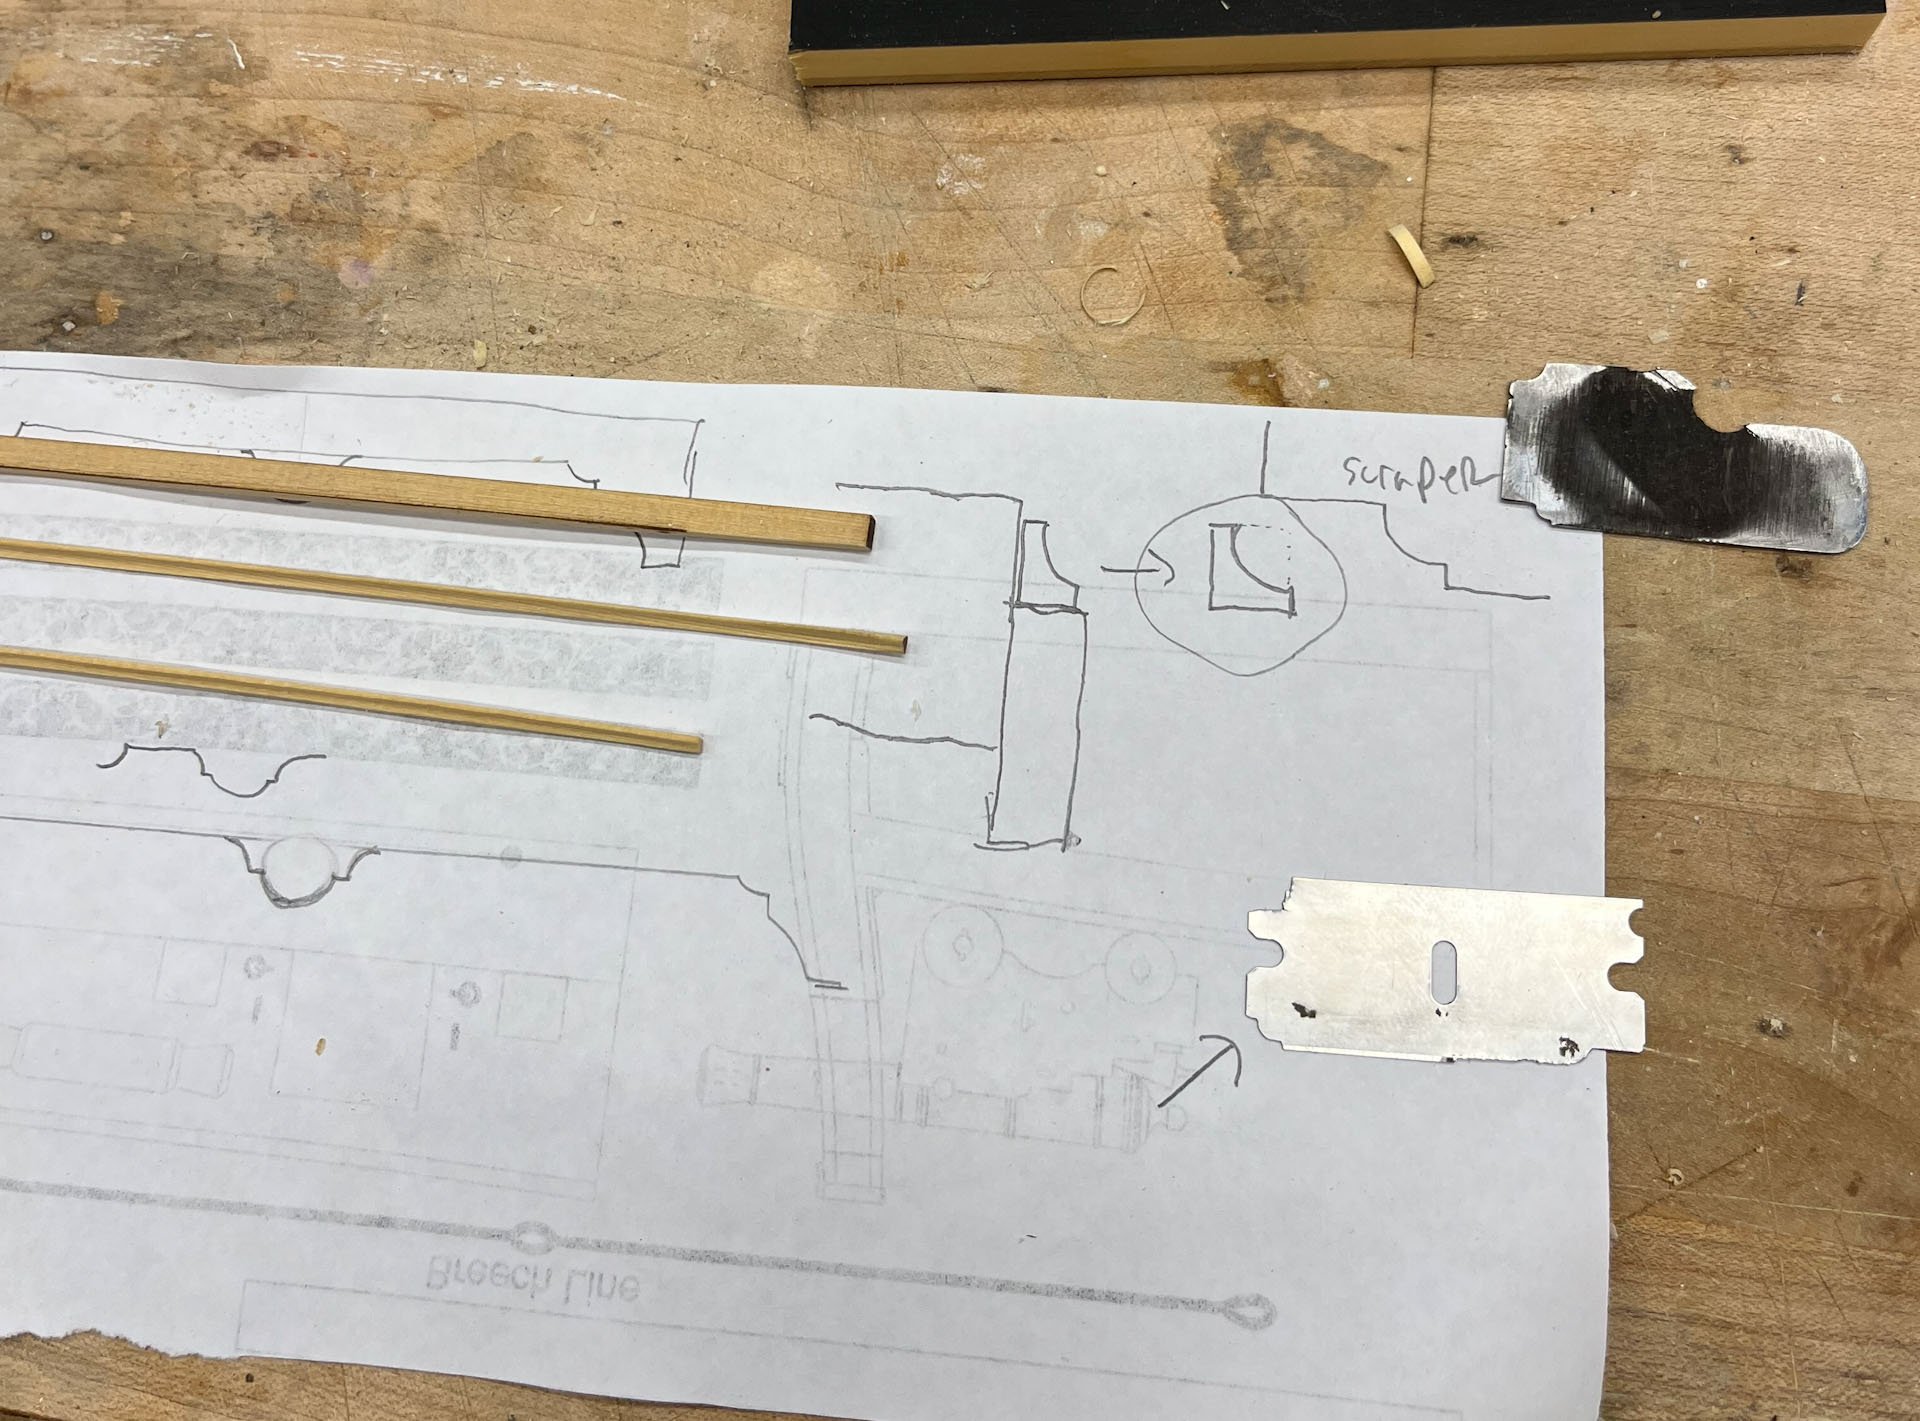
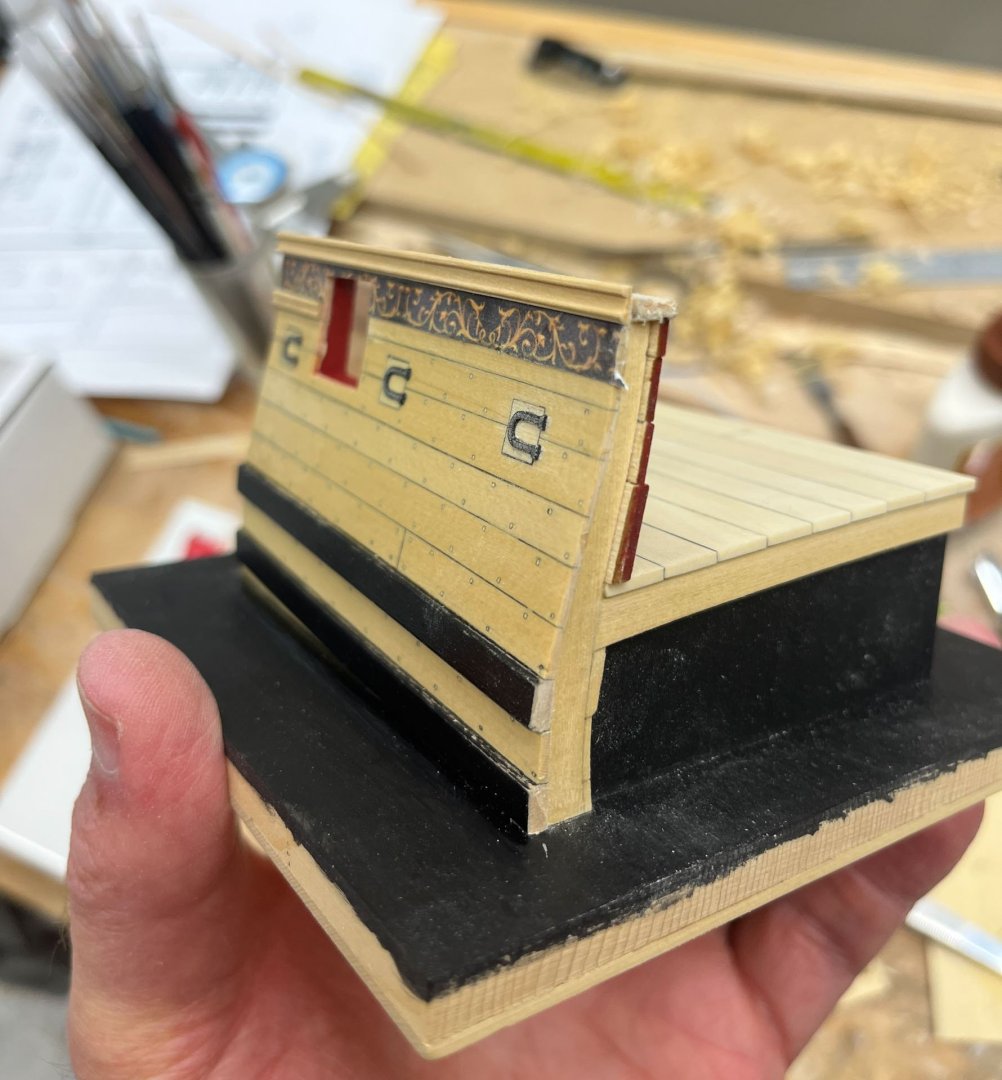
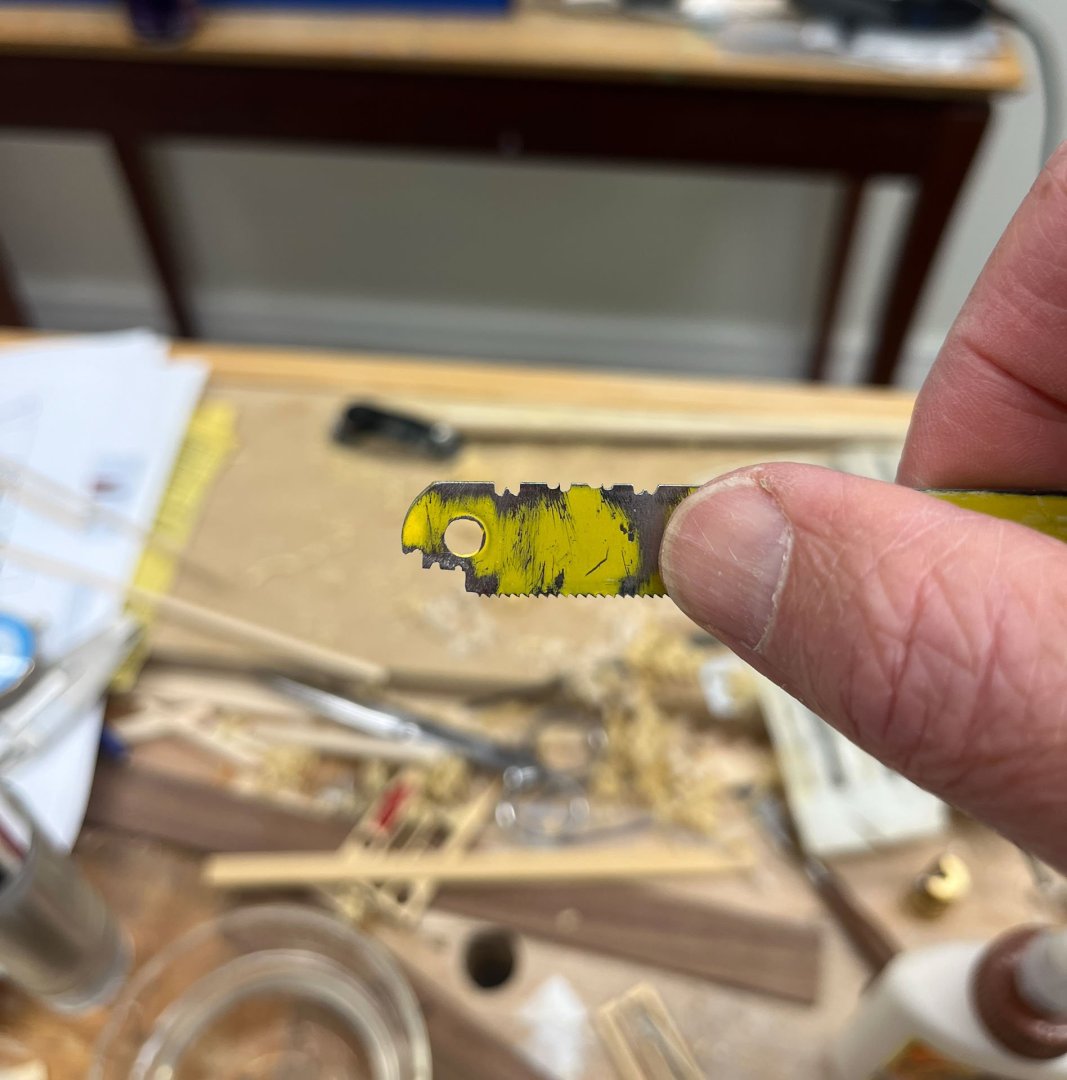
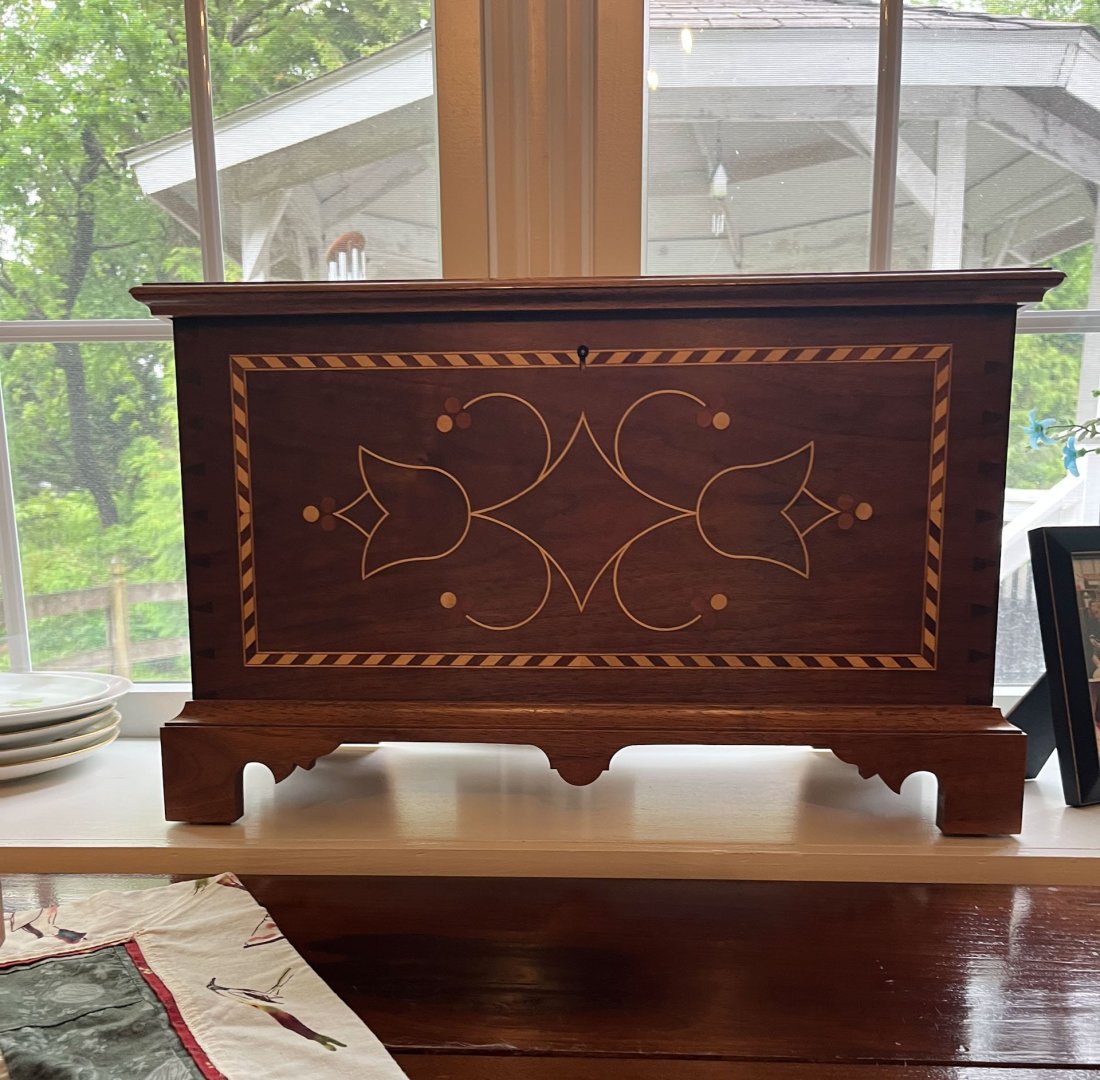
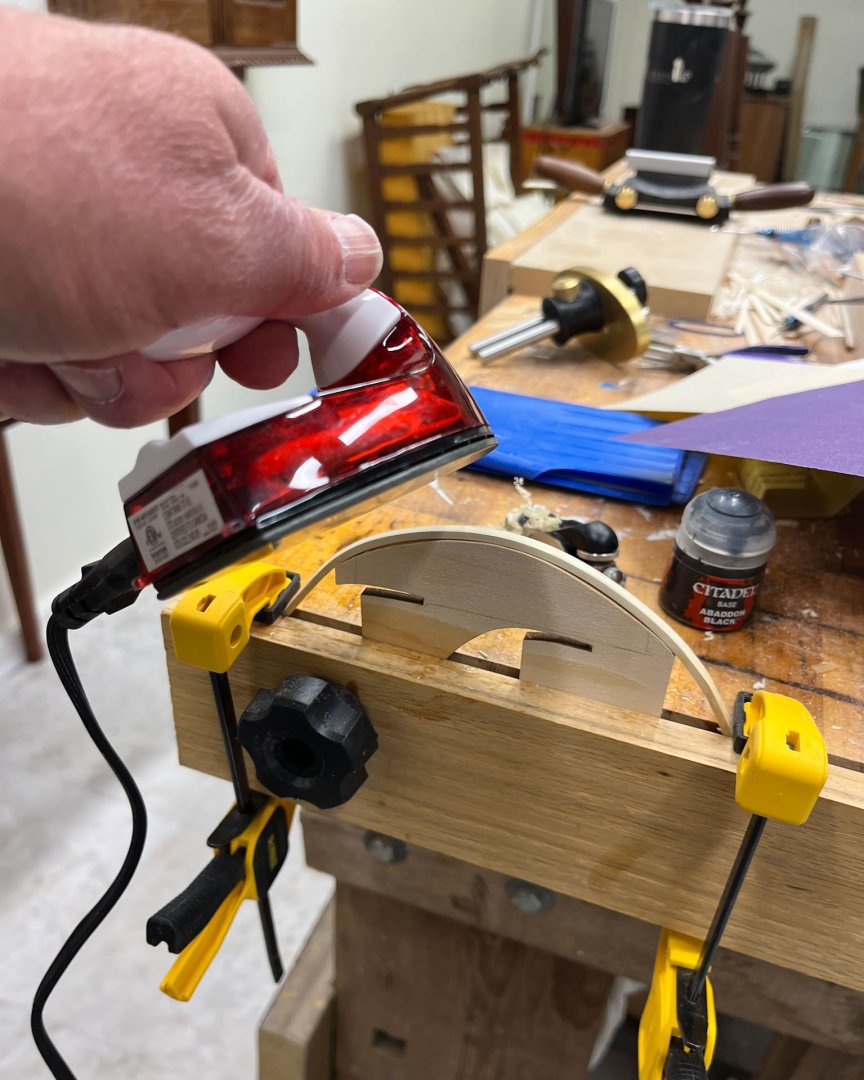
Good Wednesday evening MSW. Progress on the Battle Station, finally. As is typical I am making the kit much harder than it has to be. After adding all the blocking I shaved them down to pretty close with chisels, then sanded them flush. Two coats of water based polyurethane and 2, possibly 3, coats of black paint (Abbadon Black because I have 4 bottles). Then I added the veneer end frames and deck beams. I had a gap between the deck frame and the beam end it rests on so I chiseled out the beam and glued a slightly larger one in place; looks fine now. Then I glued the end carlings and beam ends in place. I made my own out of frame pieces; the kit supplied ones were fine but challenging to hold and sand (they are 1/8" square so jumped out of my fingers like fish). I made mine a little oversize and trimmed them to fit once glued in place. I will have to touch up the black paint later on. Next up was the frame the Station sits on, elegant feet on each corner with butt joints. The edges are a relatively long horizontal run, compared to their height, and I thought some drops would help break up the space. I have a Keepsake Box, below, which provided some inspiration. I liked the cove molding along the top of the base frame too. But I wasn't sure about replicating it at such a small scale. Here's my initial try at a drop, which I thought looked acceptable. Then I simply traced the original pattern onto some scrap AYC frame material and tried to make the other 3 similar. Butt joints are simple, easy, look good, and idiot proof. So I went with miters instead. I had to shorten the Battle Station frame about 1/8" to make the frames fit (mitering has the effect of shortening the side frames). I did the actual miters on my Ultimation sander. And here is a shot of the inner Battle Station sanded even with the faux deck framing and the frame pieces. I forgot I painted the ports with Mephiston Red earlier. And finally the cove molding. This was a challenge. I figured a scraper was the way to go and I tried making one from a razor blade, shaping it with files. It turned out to be way to bendy and flimsy but was good practice (lower right in below picture). Then I made the profile in my usual scraping tool, a piece of old sawblade (upper right). It has a wide flat area that registers on the wood top and worked pretty well. I used again some scrap framing from the sprue that held the base pieces. It was extra challenging as these pieces were 1/8" square if that and holding it all steady took some effort. I found it helped to waste away most of the "point" with my veritas miniplane before scraping. Here's a side profile of the molding. The ends don't scrape well so the middle 3/4 of the strip are deeper but you get the idea. AYC is a soft wood (harder woods are definitely easier to scrape) but I think its working out ok. And the cove will match the frame. I hope. And thats where we are. Next is gluing the base to the frame and starting planking. thanks for reading Cisco


- 23 replies
-
- 15
-
-
- Speedwell
- battle station
- (and 1 more)
-
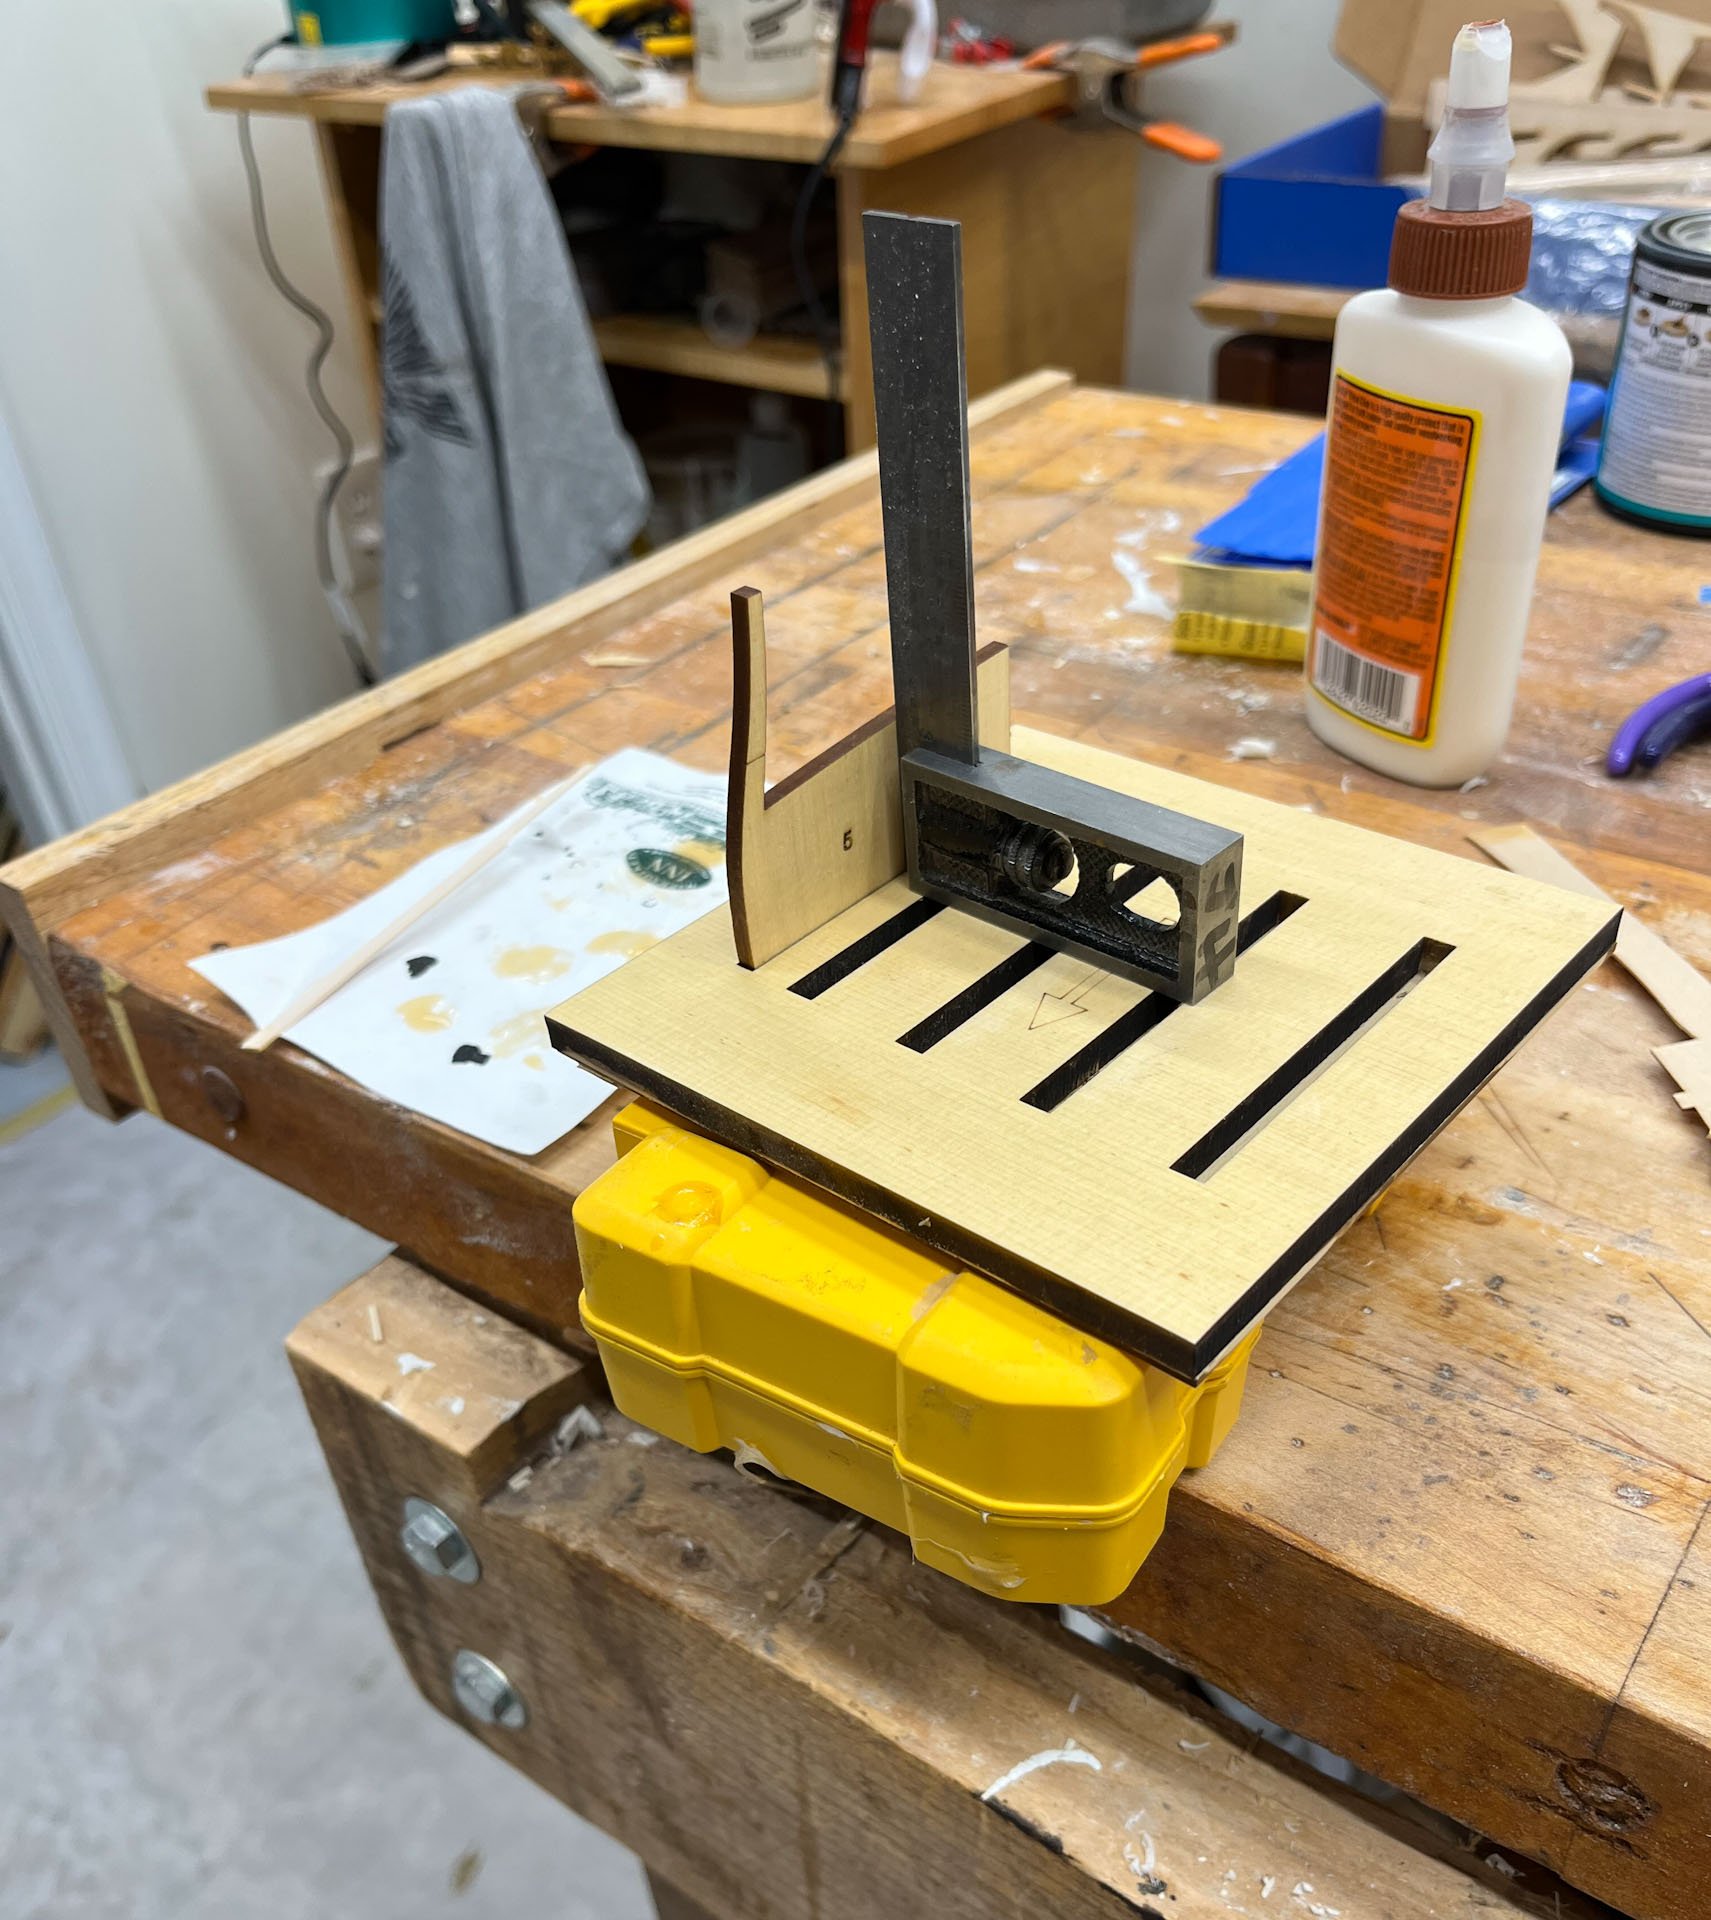
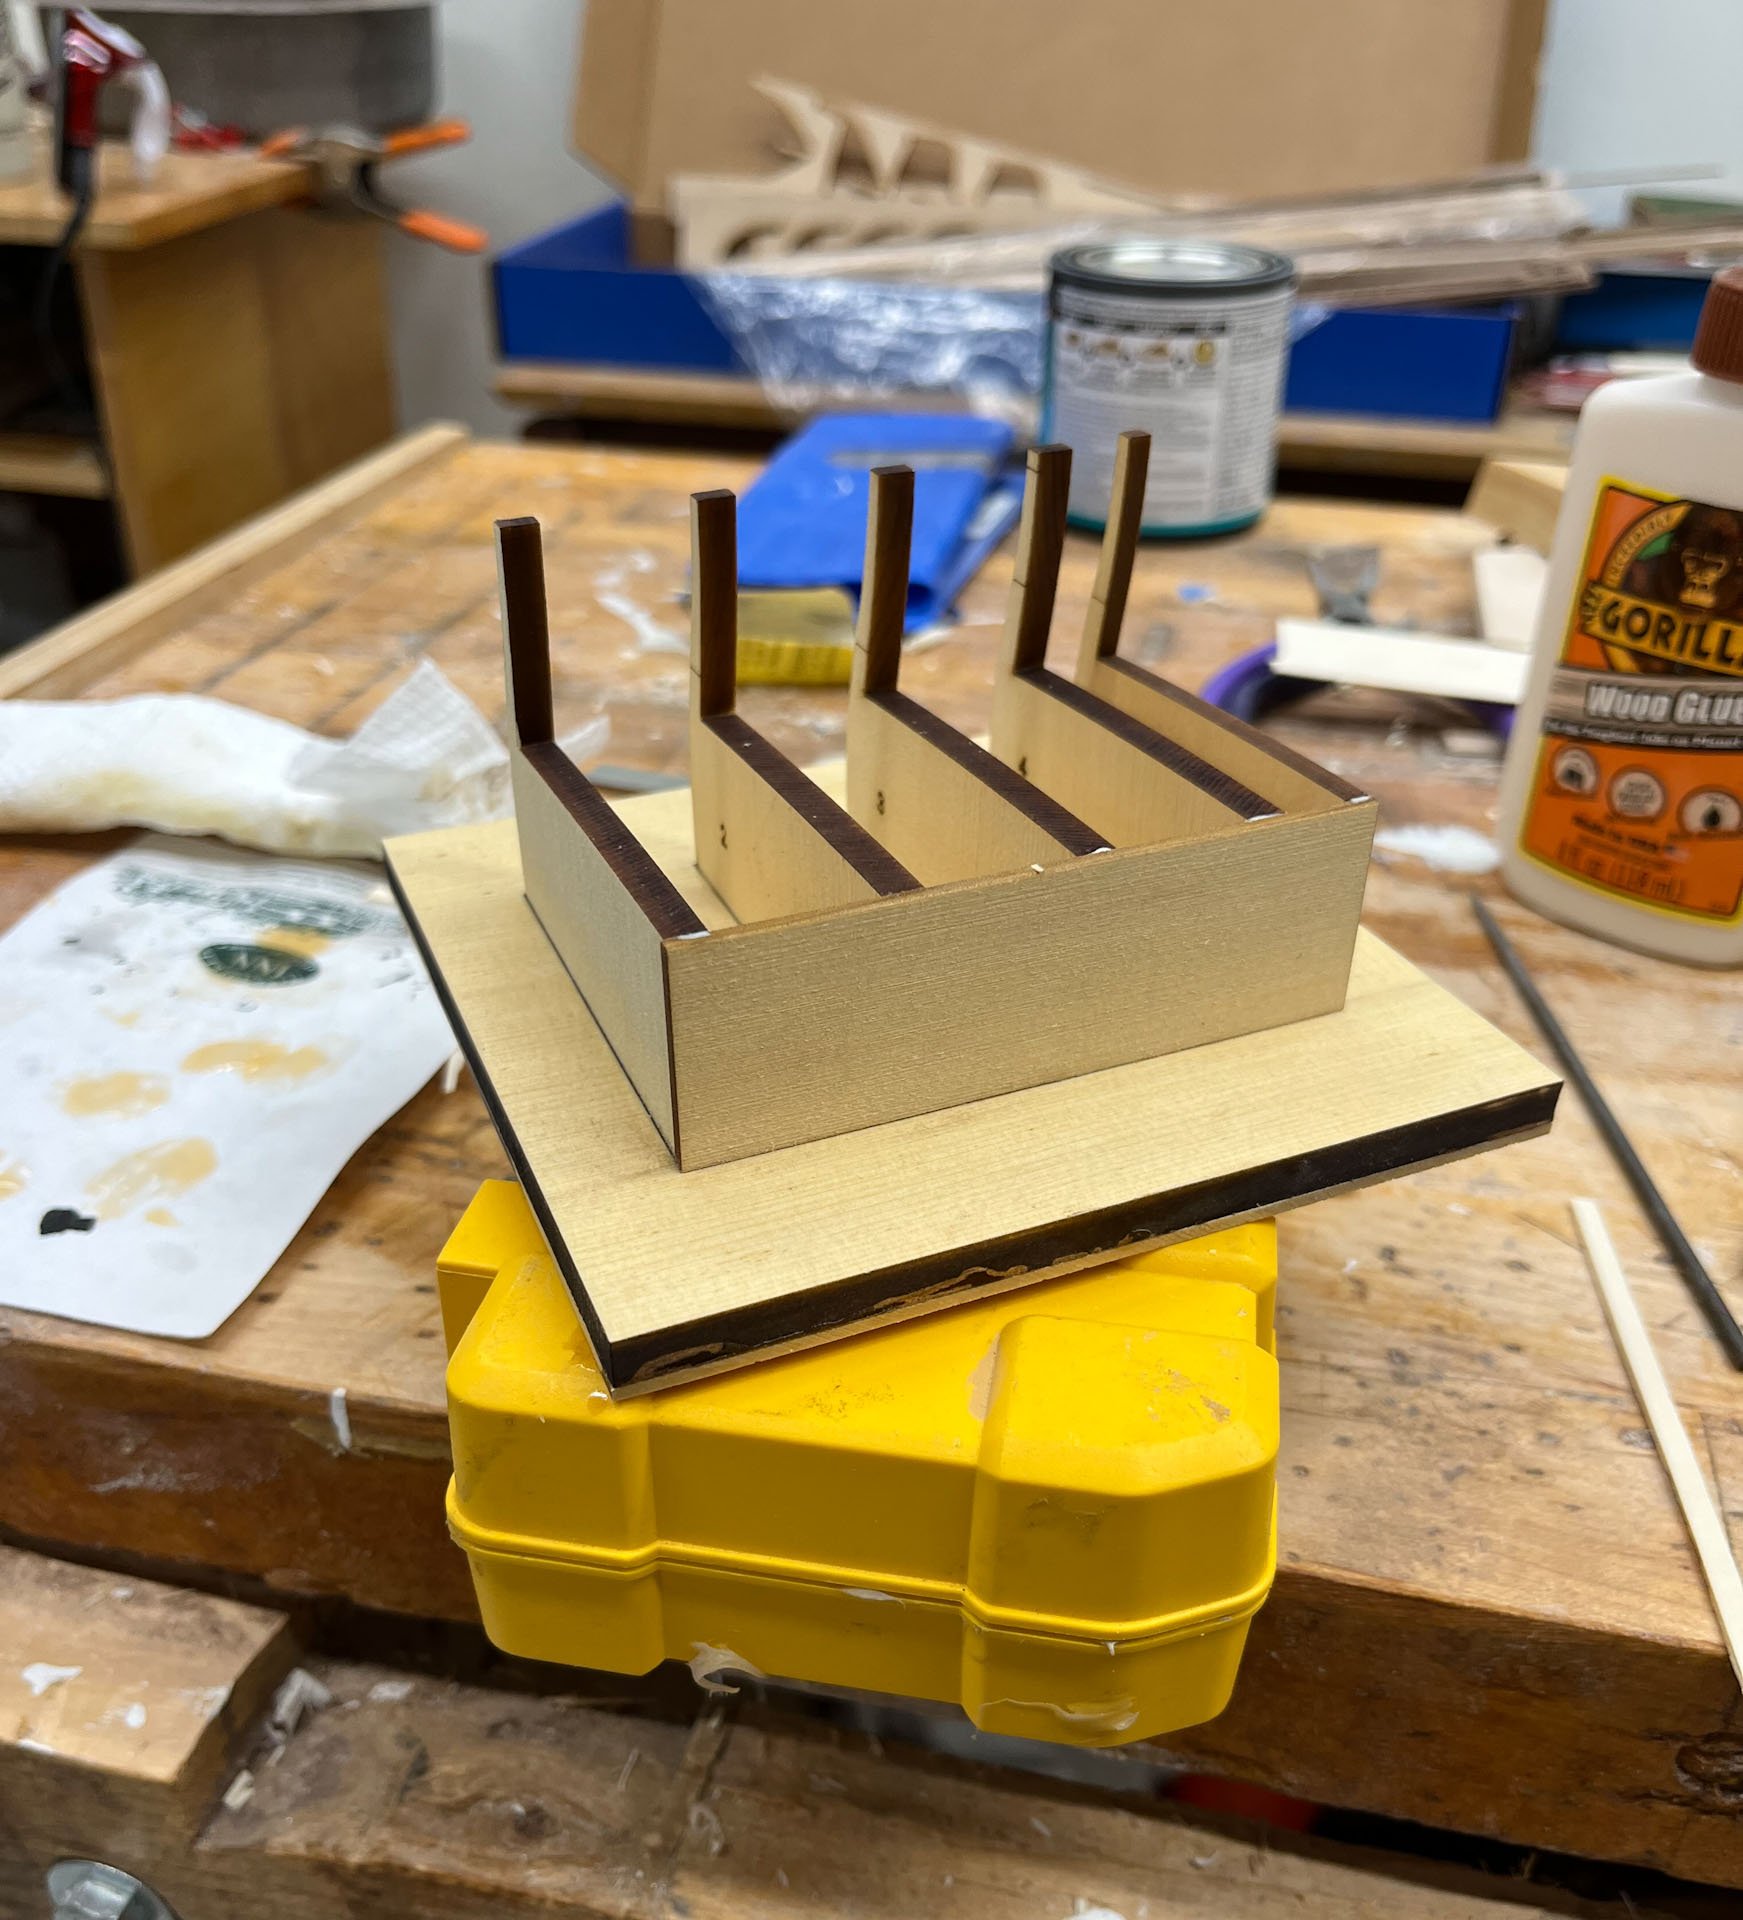
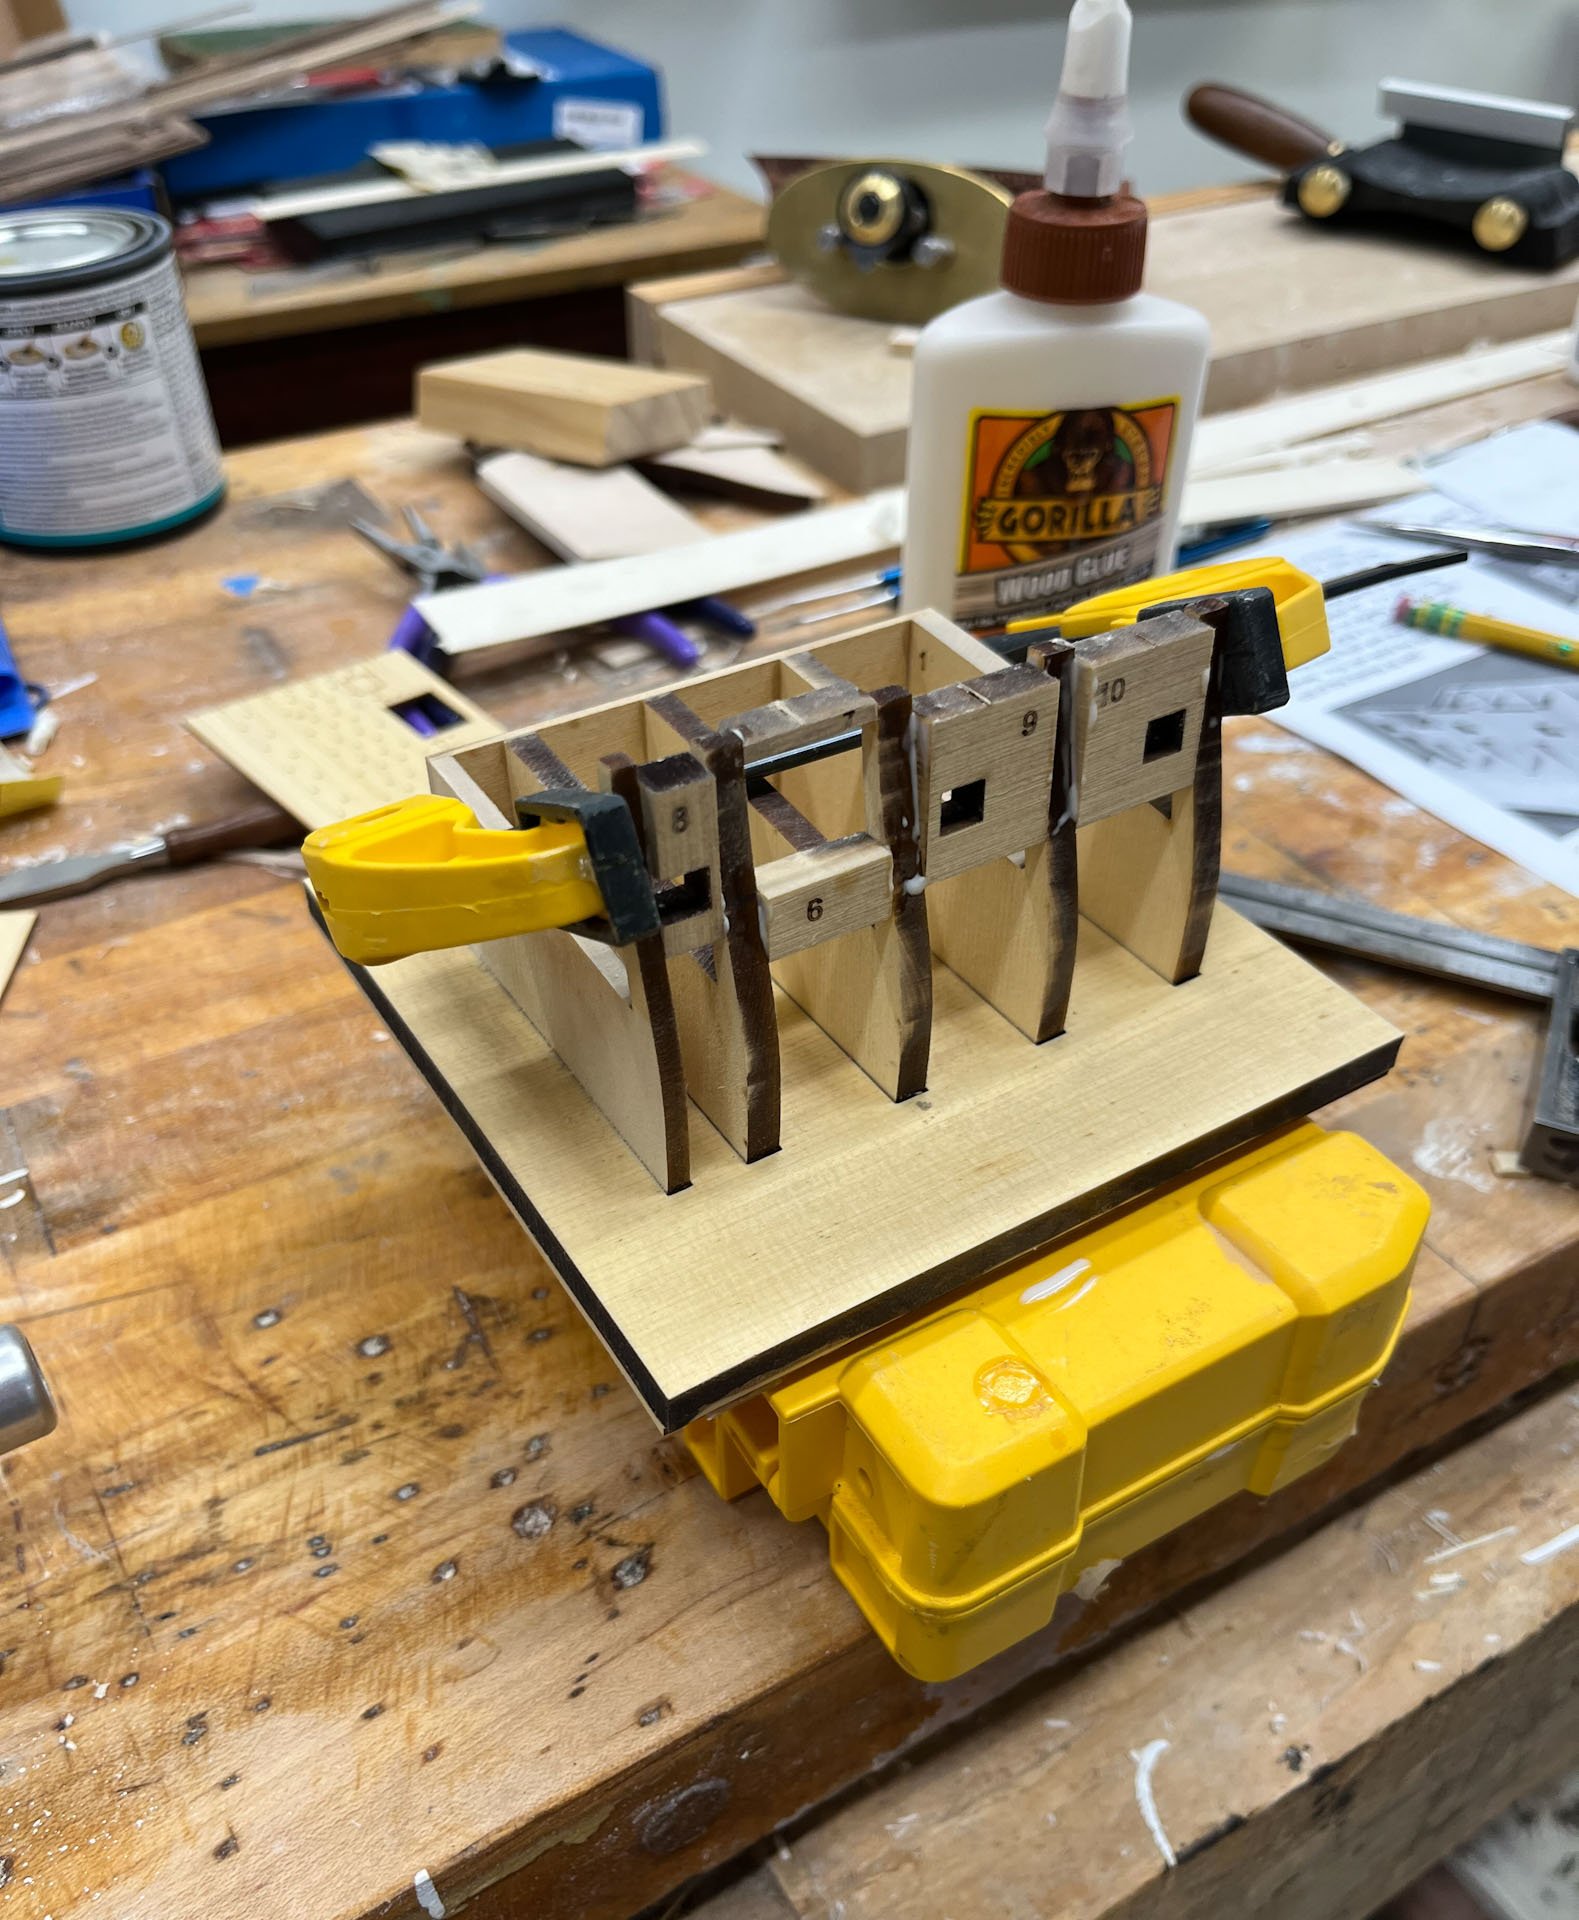
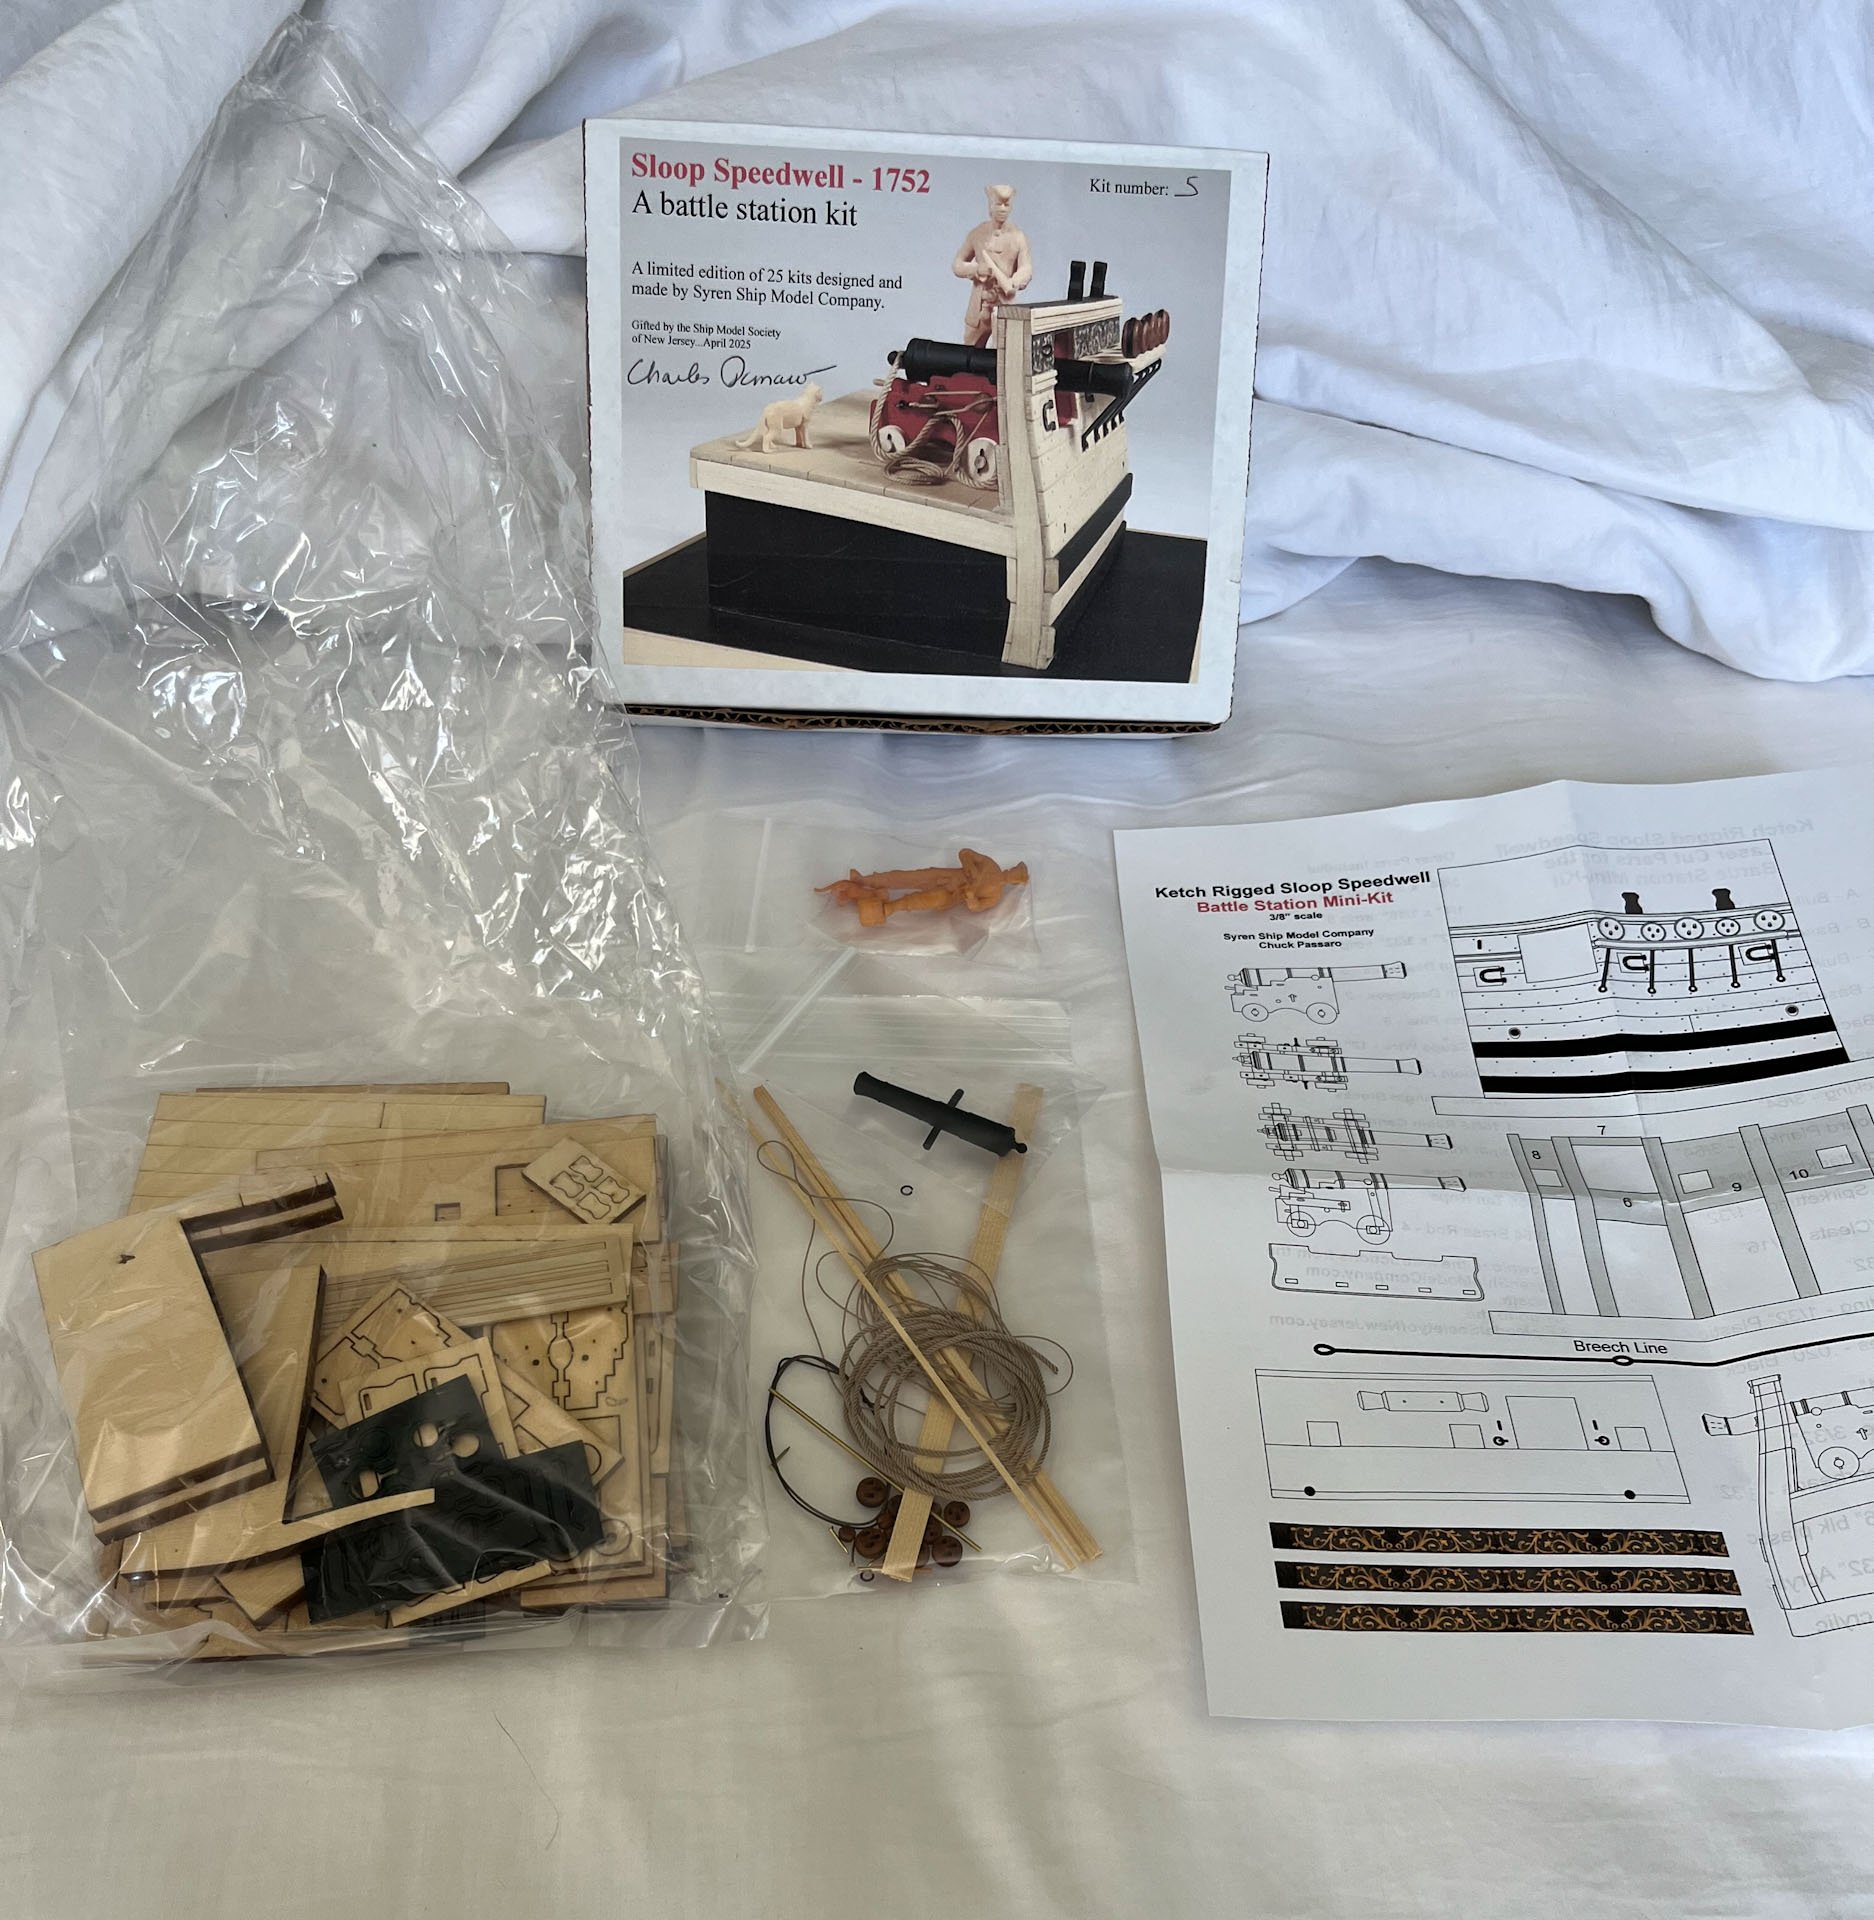
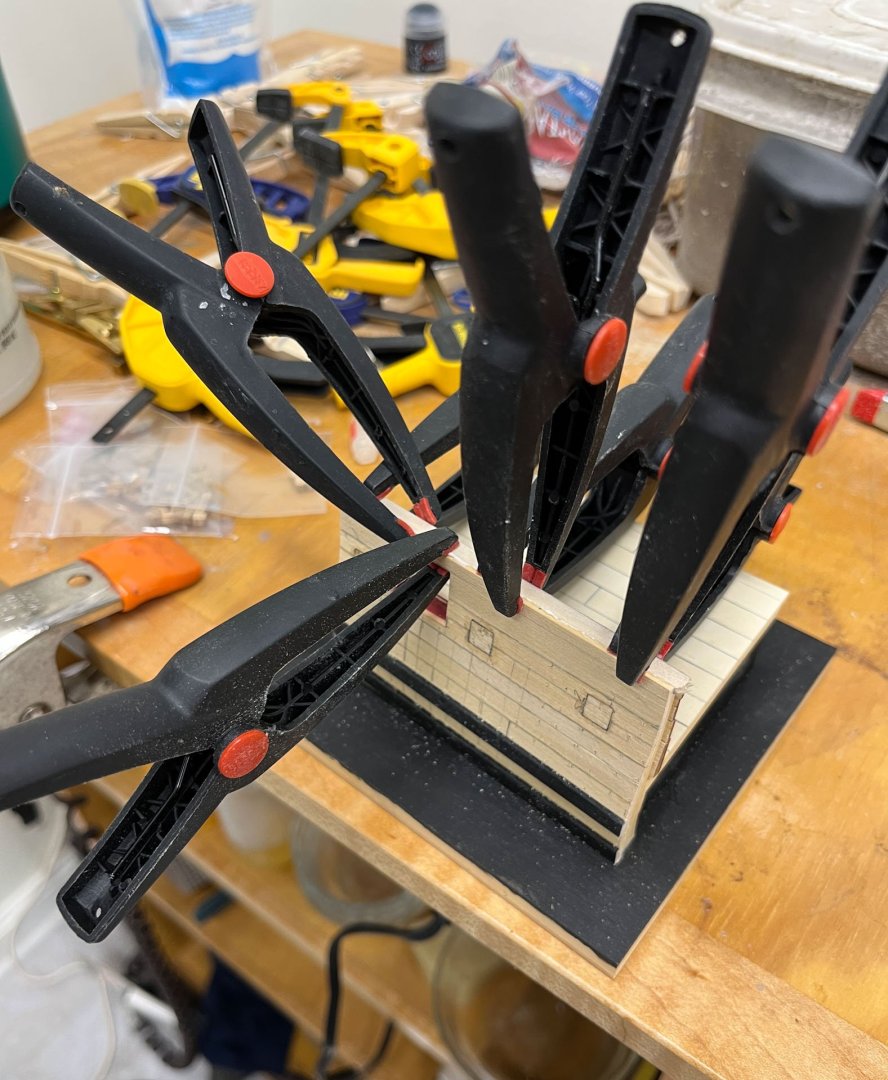
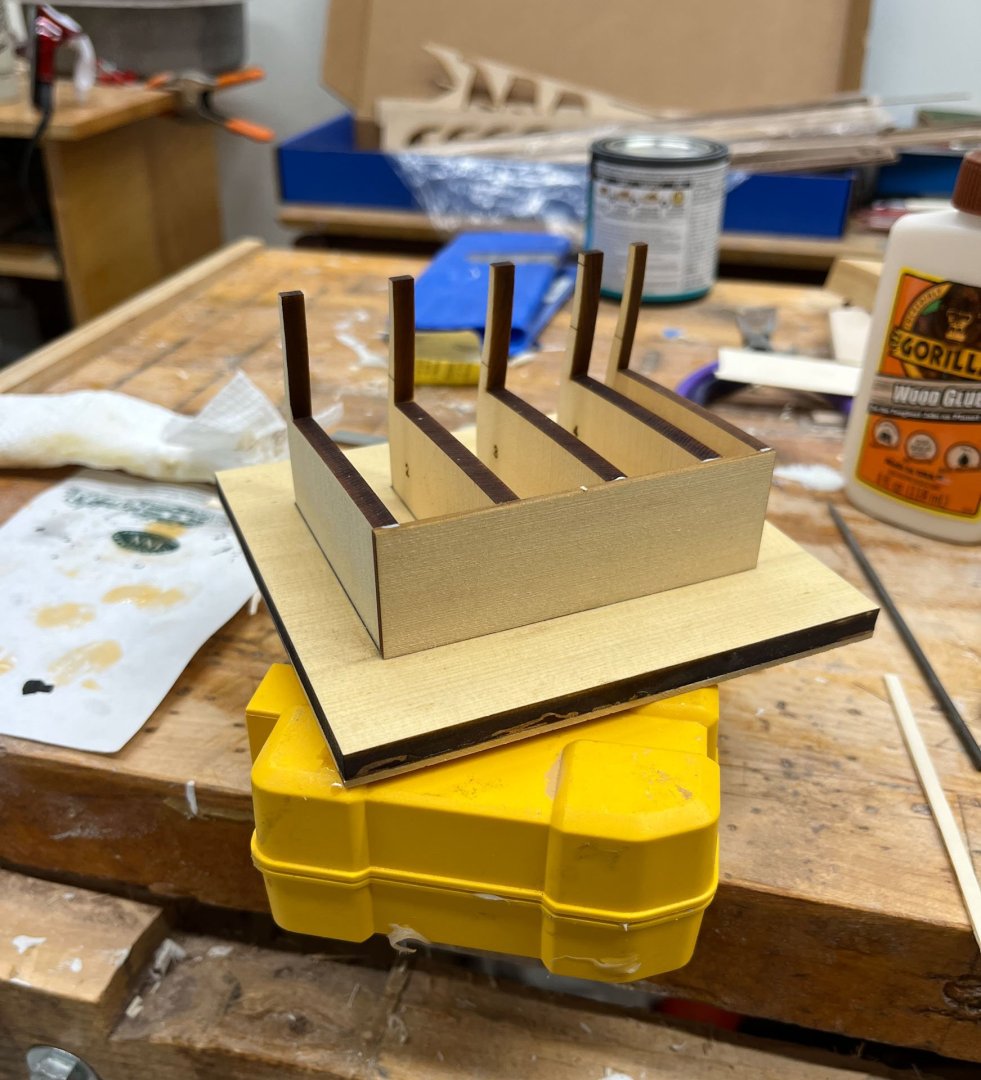
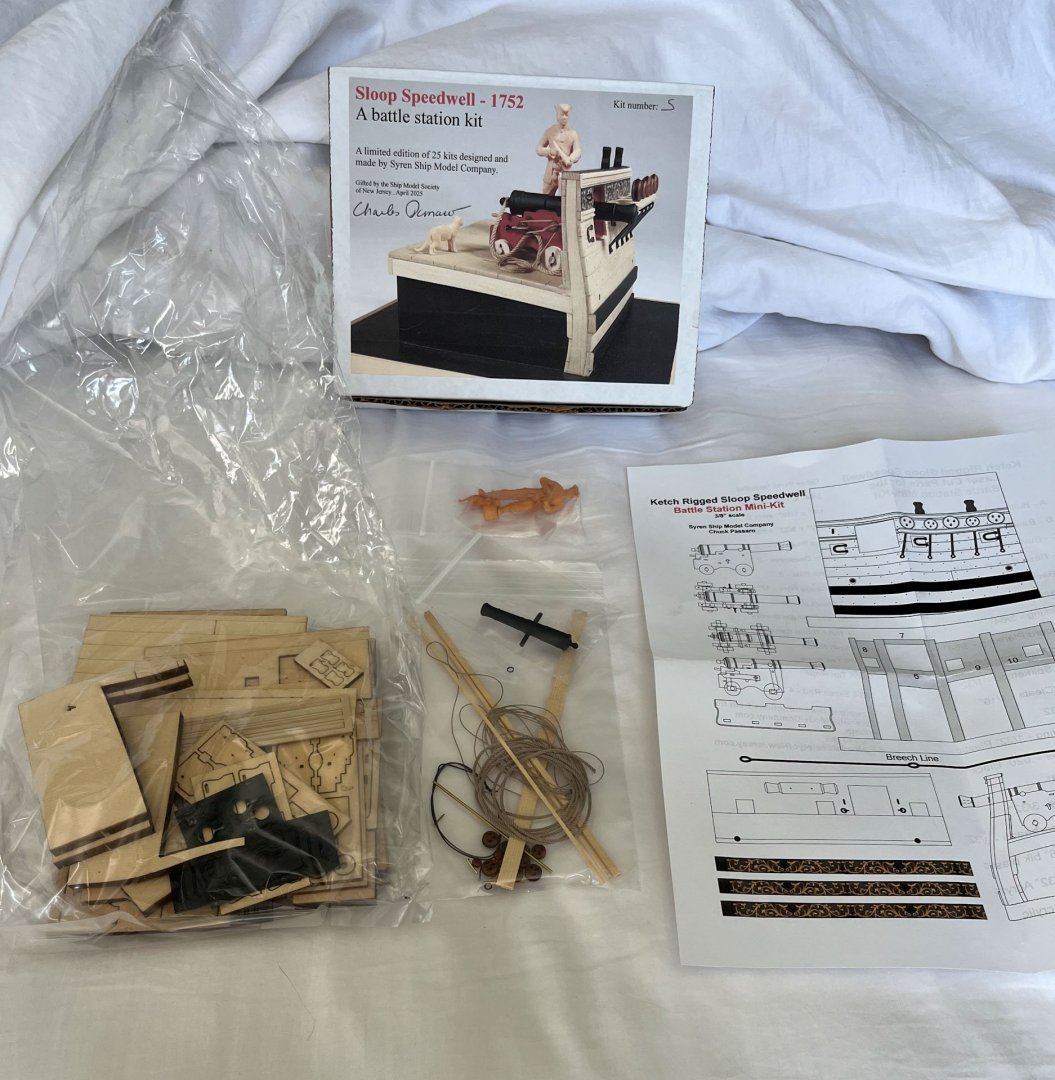
Good evening MSW I won one of Chuck's Battle Station kits at the Joint Clubs Conference so I'm taking a short break from my Armed Virginia Sloop. I justify taking on a second project with the excuse that this kit will be a great way to practice rigging a cannon, which I have never done. The kit includes Syren rope and blocks, and at the Conference Chuck gave a presentation on how exactly he likes to seize his rope. With this knowledge still fresh in my mind I felt I better use it before it was forgotten. So here I go Here's the kit unwrapped on my bed; there's a lot of parts in the little box. Directions are downloaded from Syren's website. I read through the directions, unpacked all the parts, and re-read the directions. The wood is all AYC I think, which I haven't worked with before, my previous experience is with basswood (blah) and holly. AYC seems to be a good compromise wood; midway between basswood and holly in hardness, very minimal grain pattern, and it looks great under polyurethane. I glued the two base panels together at right angles, creating a 2-ply plywood of sorts. The thicker piece had warped a little but I left them clamped under a block of wood overnight and it came out flat. Then I used water-based polyurethane (because thats what I have for my AVS) on both sides of the panel. I plan to paint the top black somewhere down the road and the urethane provides a good base. Next was gluing in the frames. Mine fit fine without any sanding and I checked each piece for square as I went. The slots are deep and the frames didn't require much adjustment and stayed put, and each frame is labeled. Frame 5 (pictured below) is narrower and will only fit in 1 slot so its harder to screw up placement. After gluing in the 5 frames I waited an hour then sanded the backside of the frames flat and added the back panel Once it dried I sanded it flush with the frame edges. And finally I added the blocking. The Ultimation Hand Sander I got 2 Conferences ago worked great for removing small amounts of wood without rounding the edges. I glued the blocking in place and clamped (gently) across the top. And thats where I am tonight. thanks for reading Cisco


- 23 replies
-
- 24
-
-
- Speedwell
- battle station
- (and 1 more)
-
Mine wasnt perfectly regular either, although I was following Lauk Street's directions which may differ from the kit directions. None of my ship's dimensions match right vs left, anywhere, sometimes by a couple mms, so during final deck planking I had to make some planks a little wider or narrower each side to make up this difference. It is not noticeable so you have a lot of leeway. I'm sure my hull's outside planking dimensions were also different R vs L side. It all works out in the end
-
great series of explanations
-
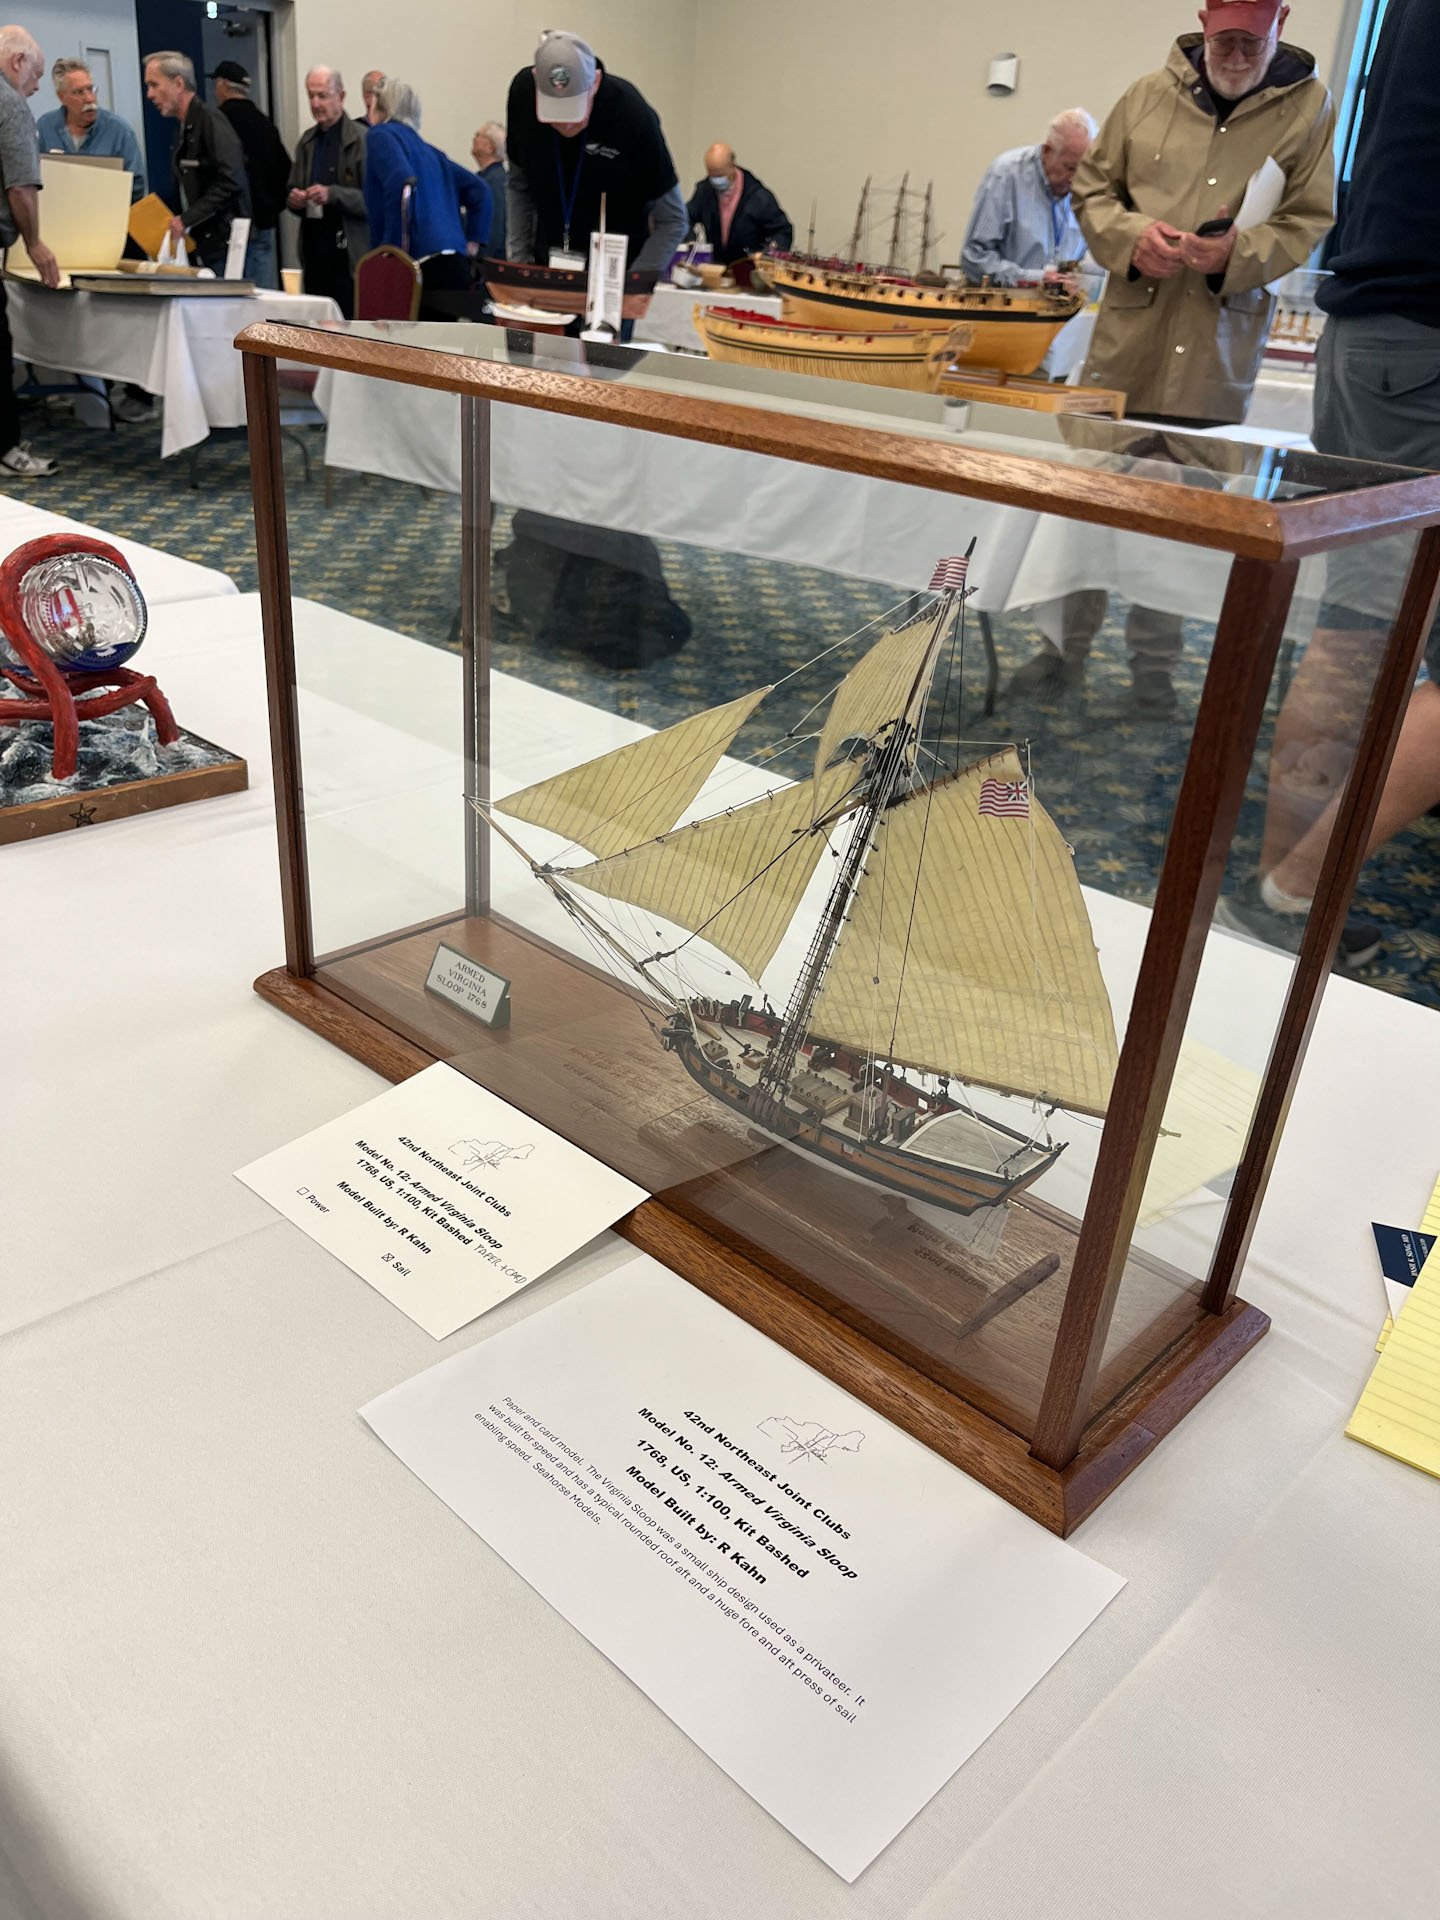
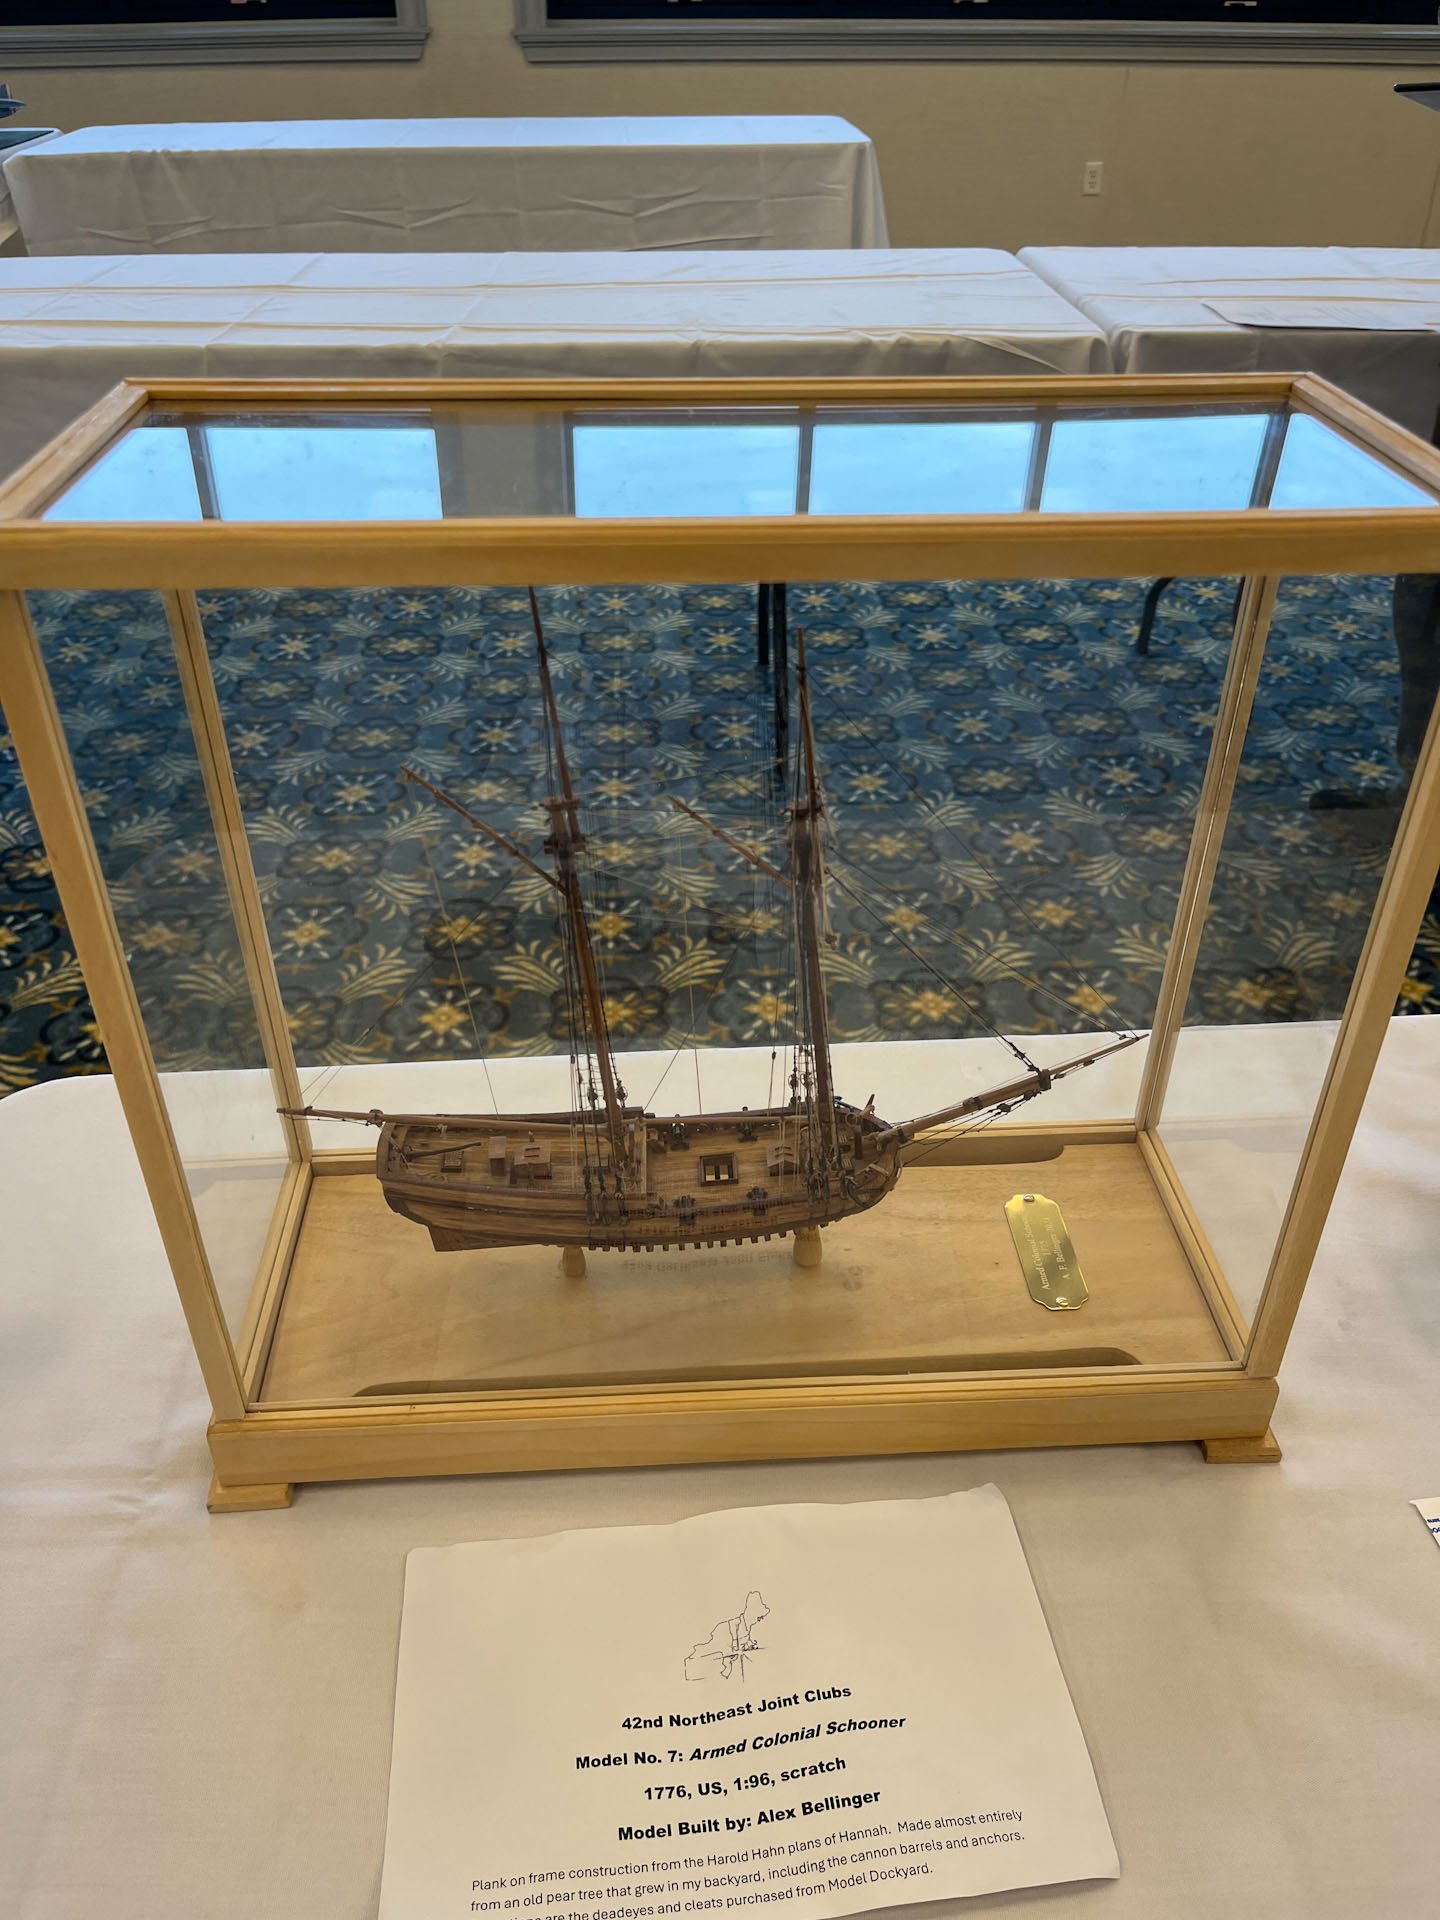
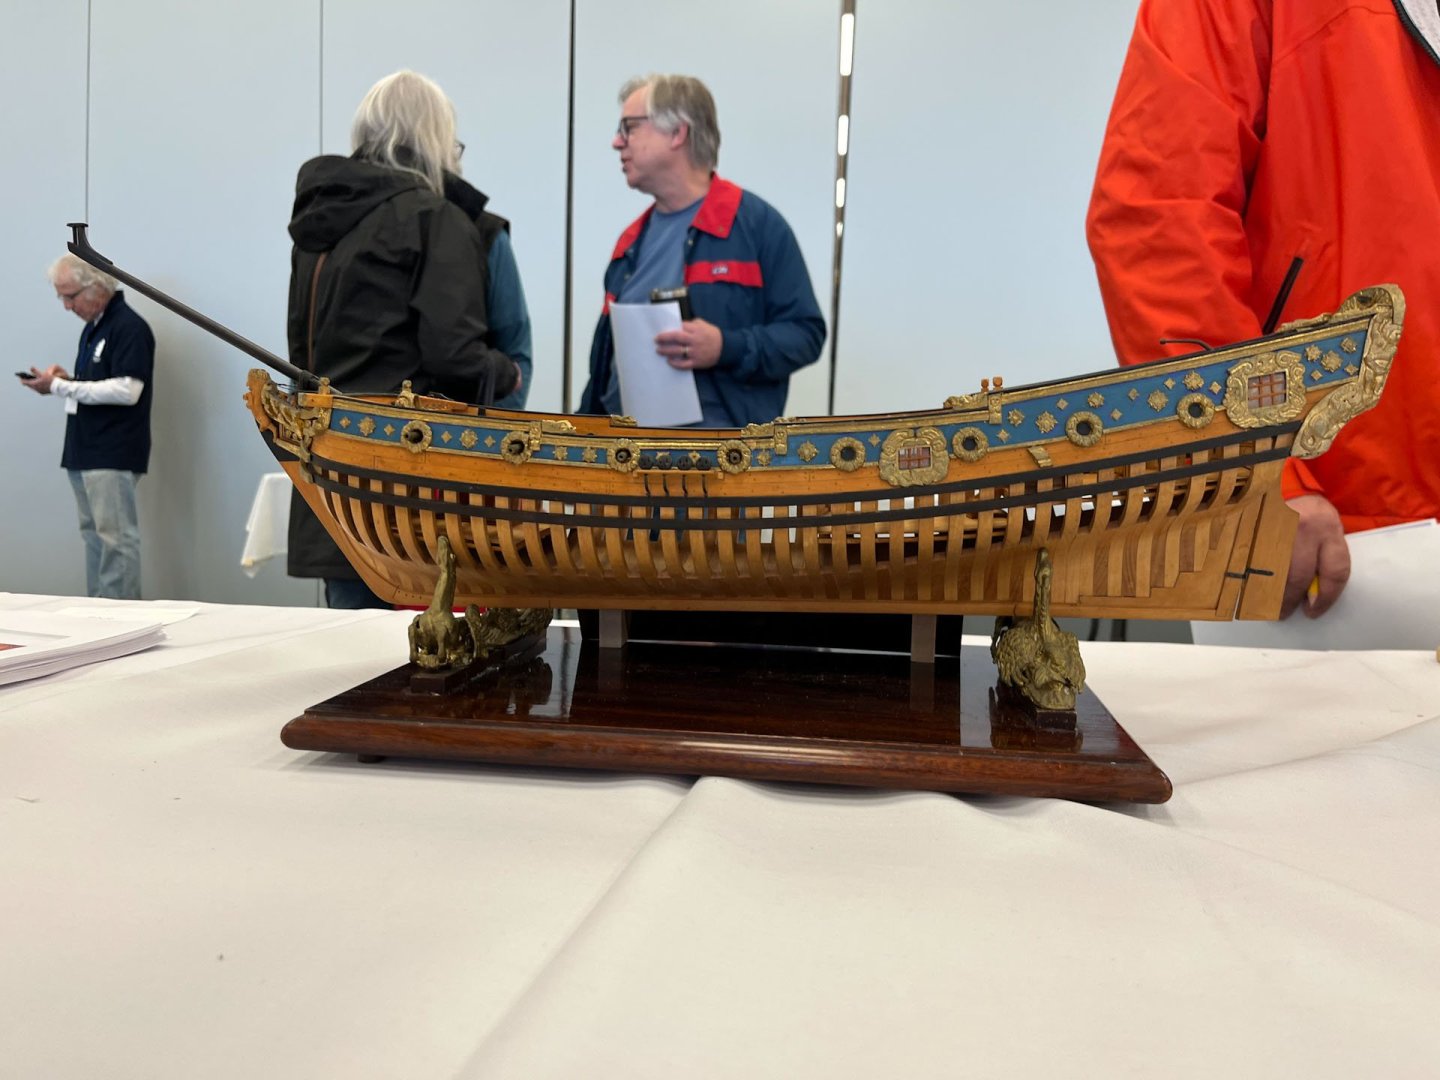
Thank you very much Tim! I appreciate the kind words. It may be longer than a year though... Some Conference pics. It was raining hard when we got there and I managed to step into the river flowing through the parking lot so wet feet for a while. Heres a pic of this case which I really liked; and I notice I accidentally caught Dave and Greg talking in the background. They gave the lecture after lunch about their current project, a 1:48 behemoth frigate? thats so big there are concerns it may not fit through Greg's doorways when he's done rigging her. Along with some other attendees I worked on them both to restart the Admiralty Workshops and its sounding hopeful. If either of them are reading this I still vote for a short cross- section of a ship. They did Echo years ago which I have downloaded but maybe a different ship, same idea. There were 30 minute mini-talk/demos running all morning; every one I attended was worthwhile. I will always be a more traditional-minded builder but it was interesting learning about printers. Maybe when I am deciding on which cannons to use. Dan Pariser's talk on building an Admiralty style hull was fascinating and in my opinion his was the best model there. Here's a side-on pic. If i remember correctly shes a sister ship to Fubbs, but named after another of the king's mistresses, of which he apparently had a veritable fleet of. I found another mini AVS in 1:100 scale which was very well done. I liked the case too. Most cases are made in dark wood, not sure why unless its tradition. Heres a great 1:96 admiralty style ship in a light coloured case which I also liked a lot. Notice the large cutout venting in the case bottom. And finally the raffle. I have never bought tickets for a raffle before. But. The prizes were a tablesaw, which I was sorta interested in (although I hear Byrnes is making saws again), and several of Chuck's new limited edition Speedwell Battle Station kits, which is what I really wanted. One of my tickets was the first called so I got my Chuck kit, the next guy got the saw, and then I got called again so my modeling buddy Jason got a kit too. Heres the kit unpacked. An amazing amount of stuff in it, all Syren quality wood, rope, blocks, and a flawless cannon. And a sailor and his cat. It seems to me this would be a high demand kit - high quality but small so not the commitment of the other bigger kits he carries. And it has well thought out directions, especially for rigging the cannon, which is essential in my book. And after this triumph we drove back to Delaware and I got to loathe 95S and the George Washington bridge all over again. Have a great weekend folks Cisco


-
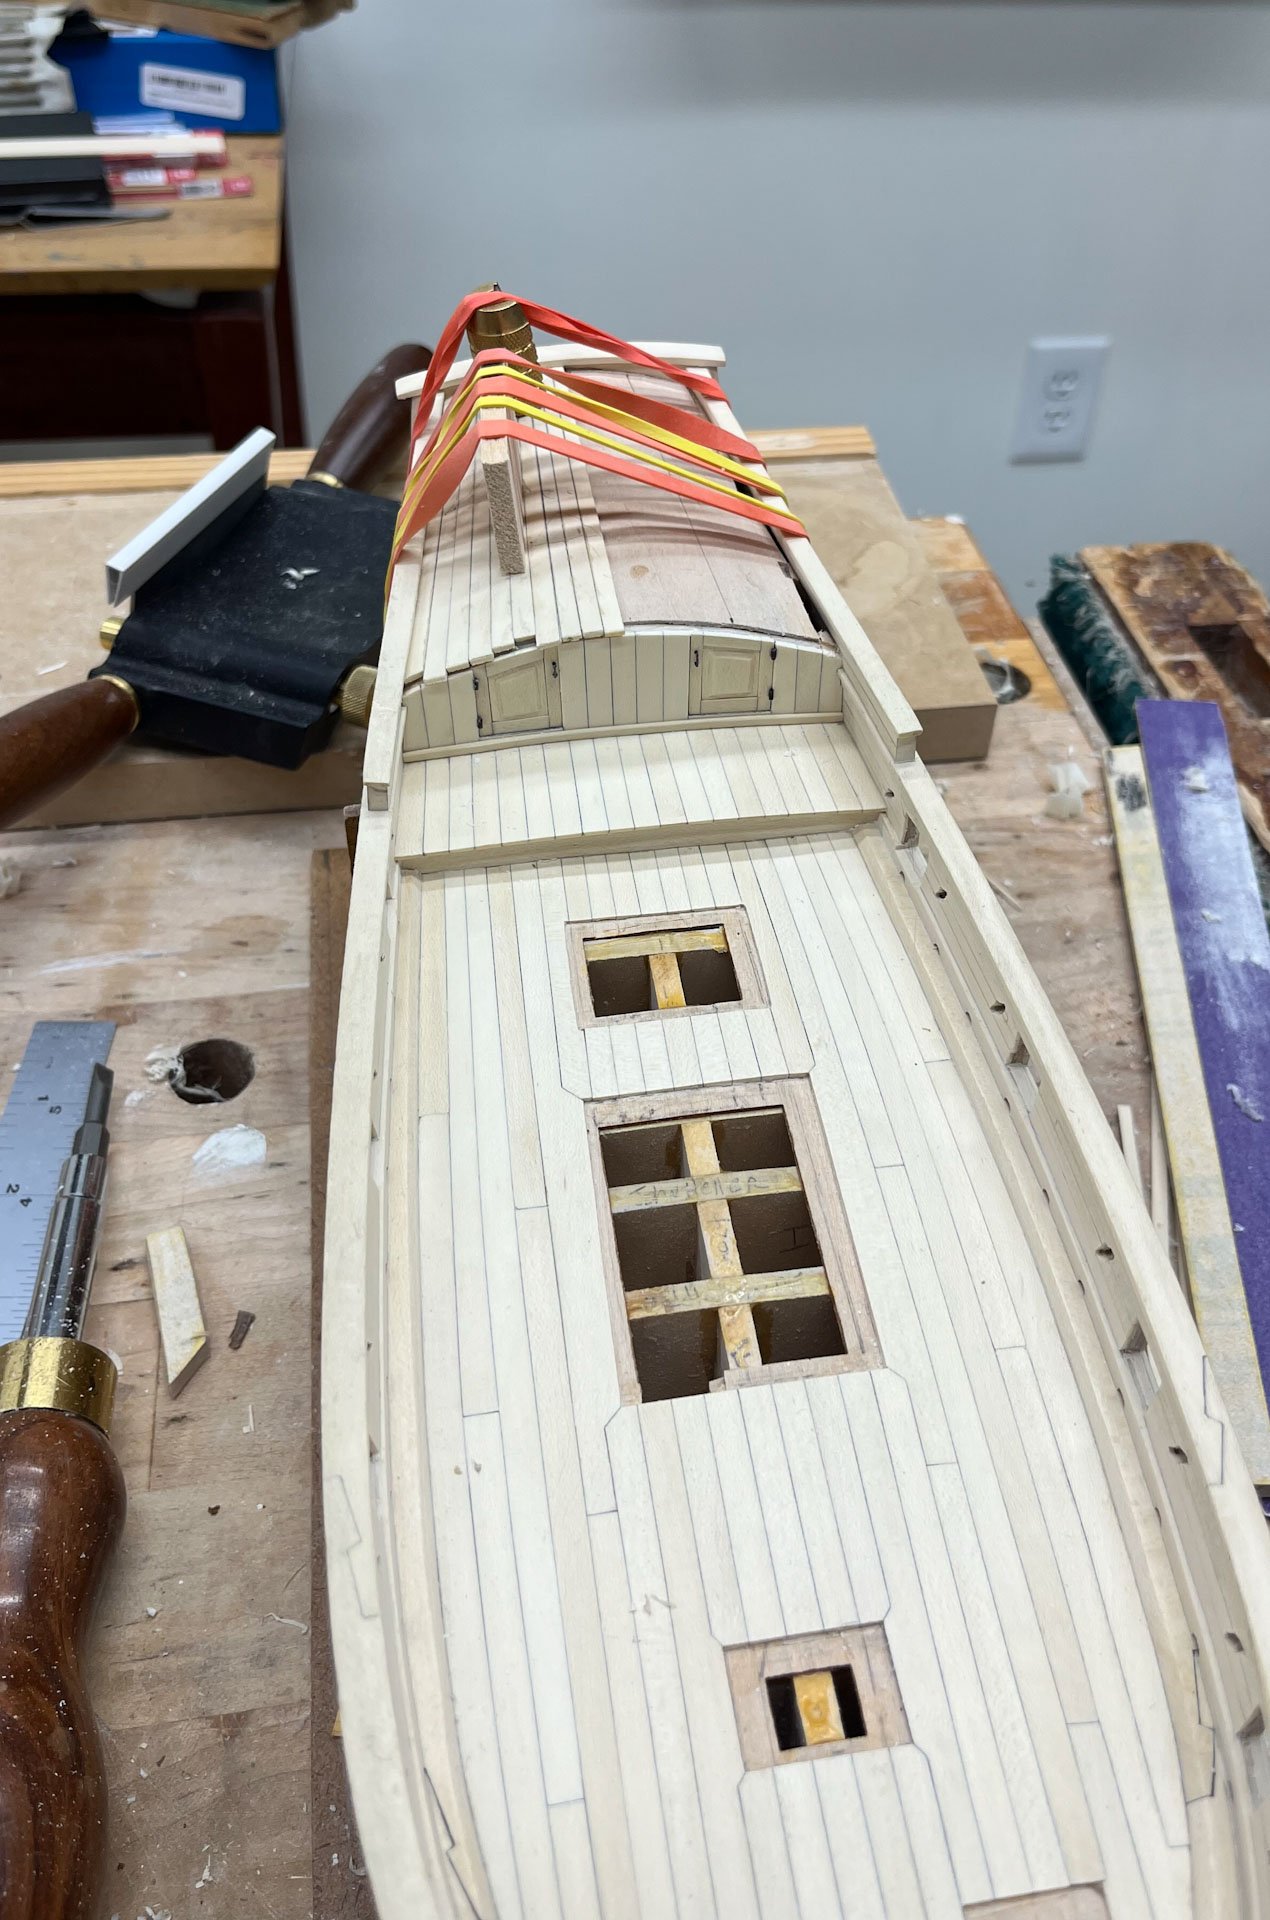
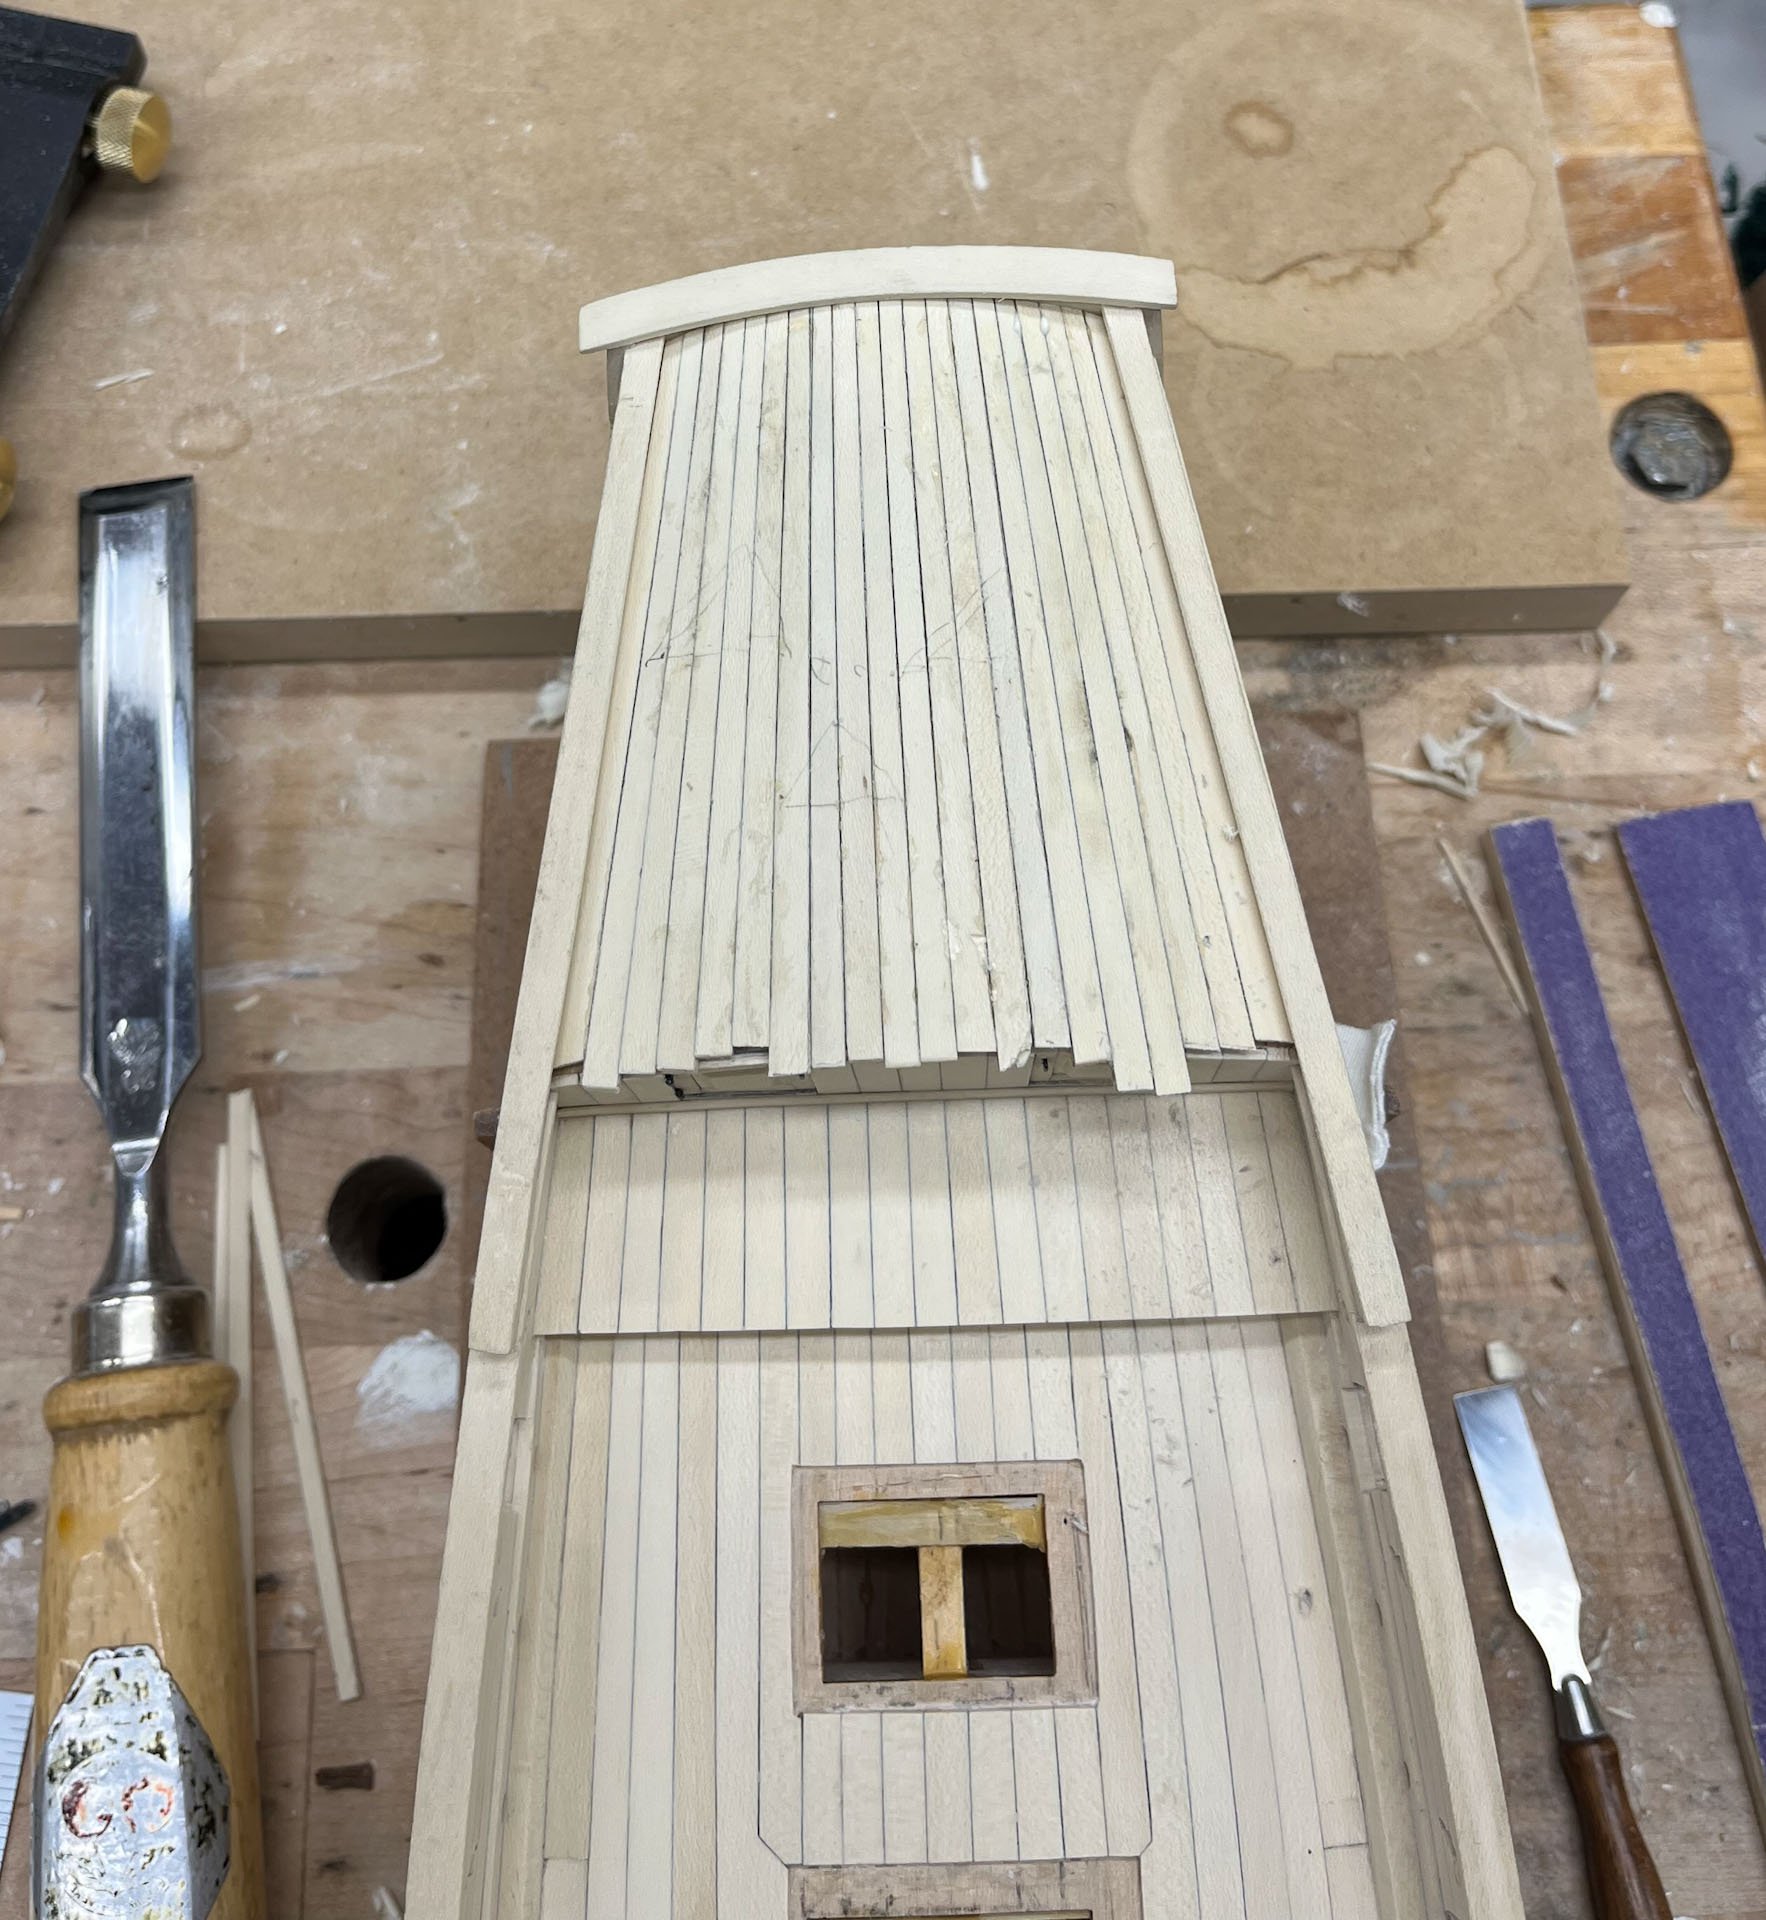
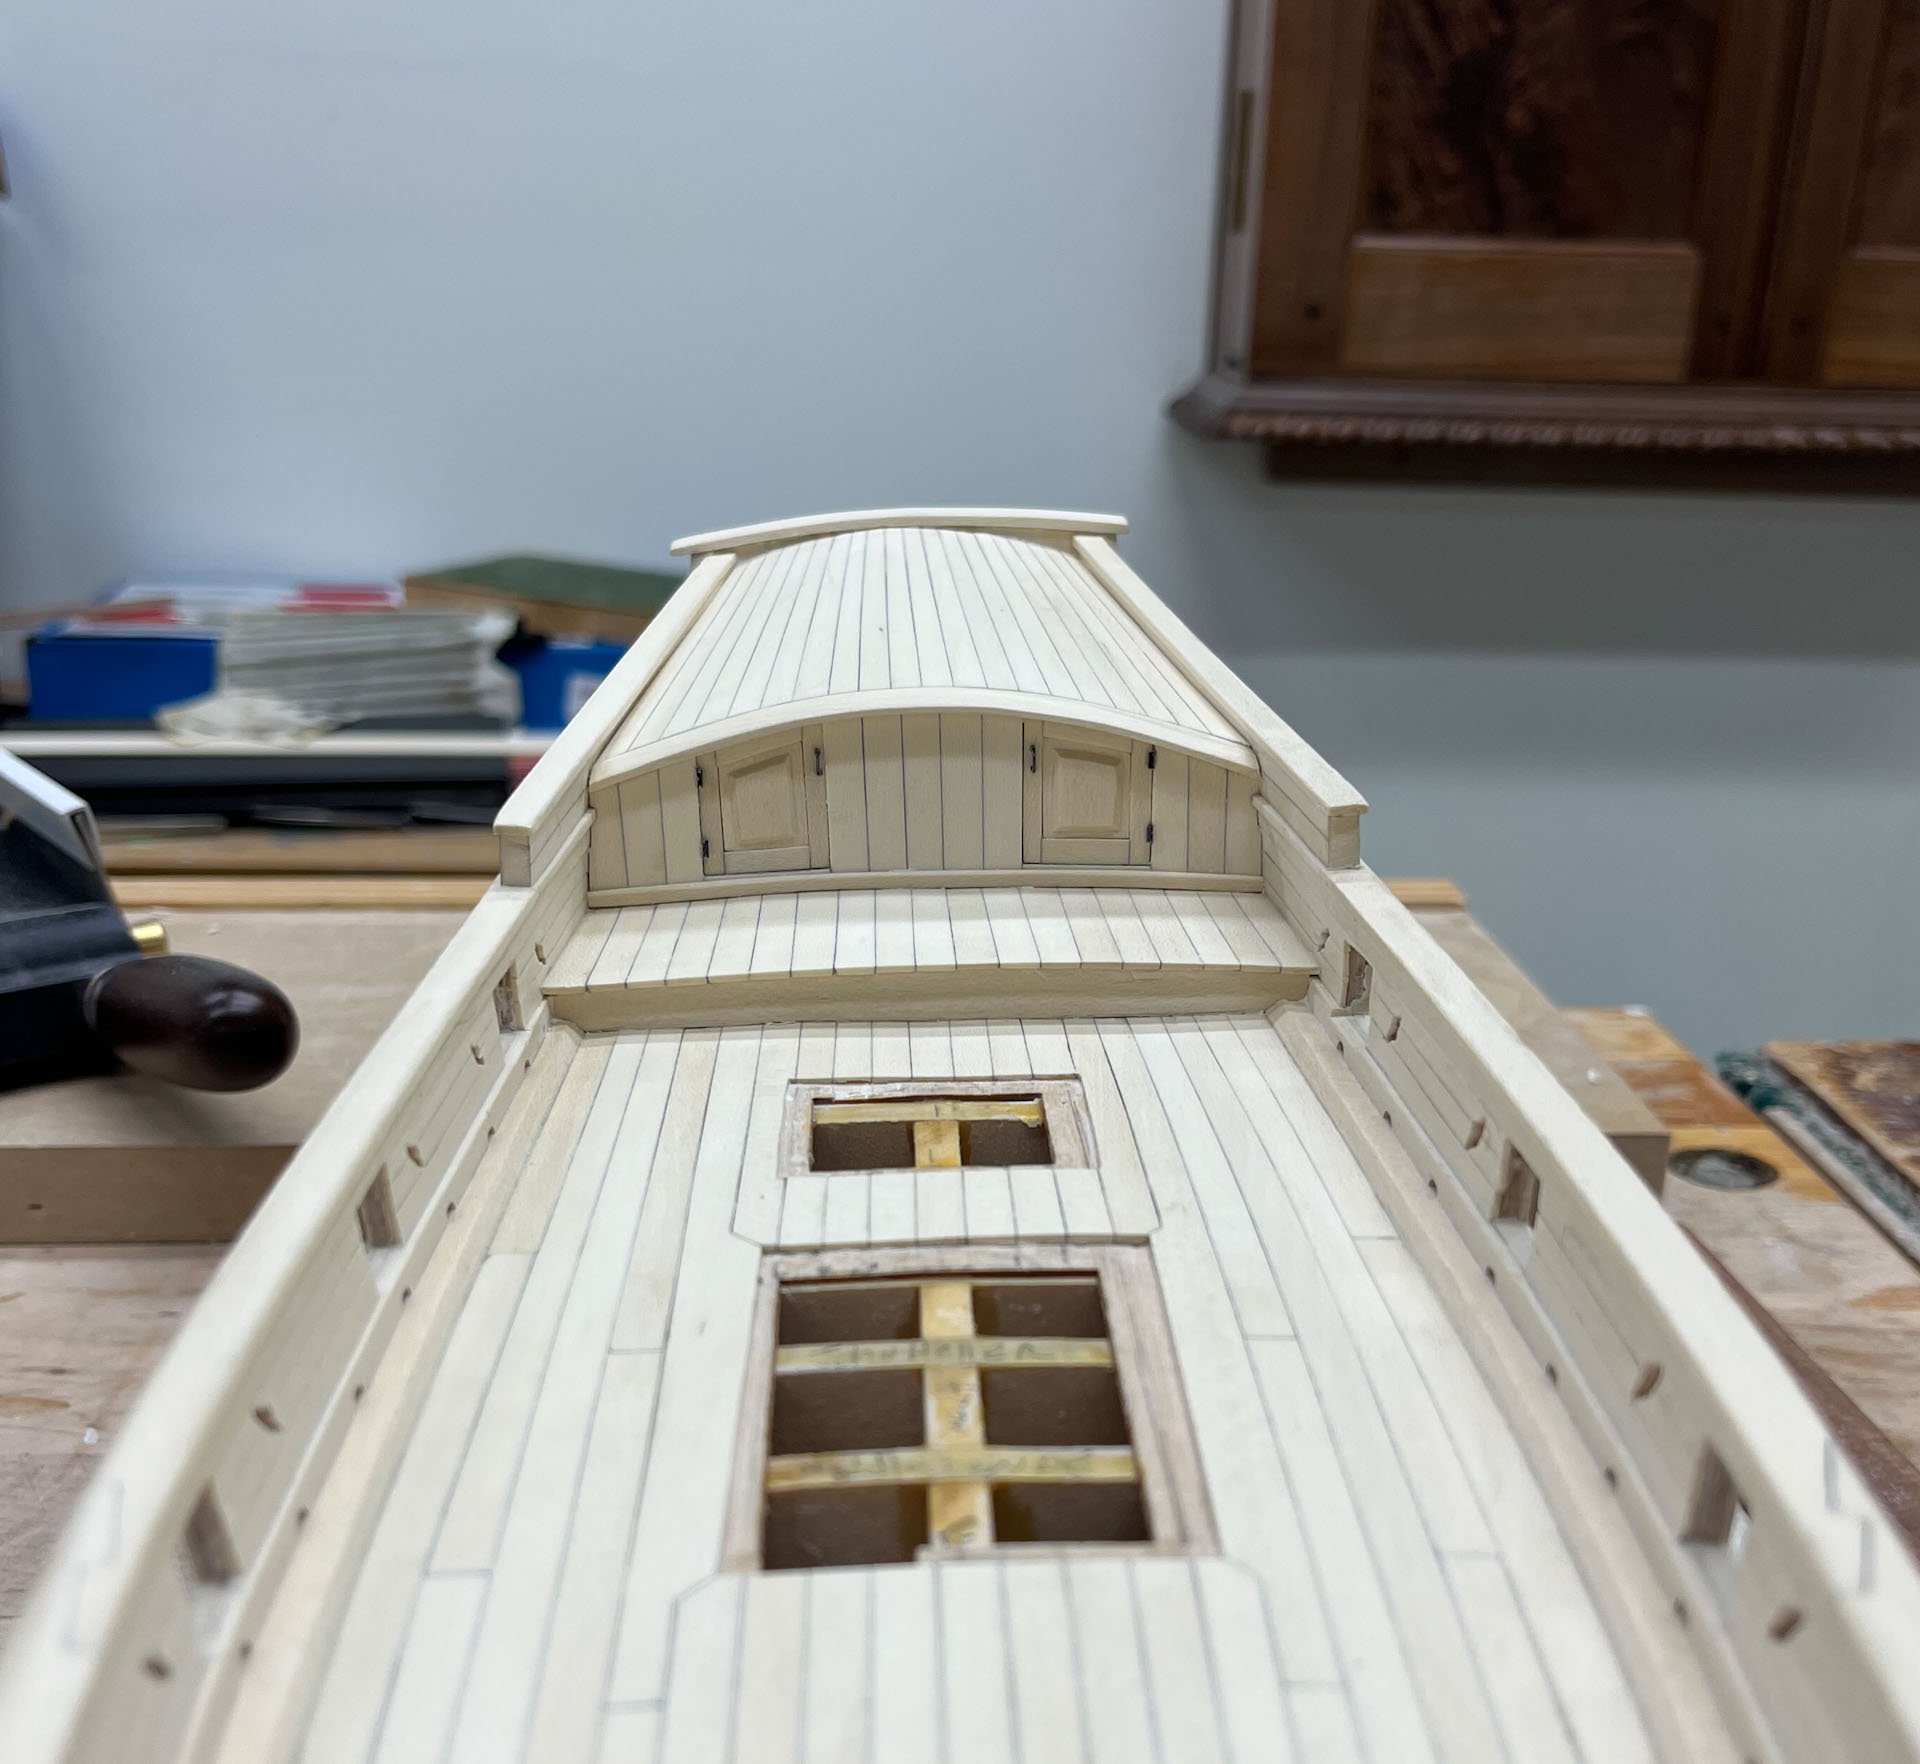
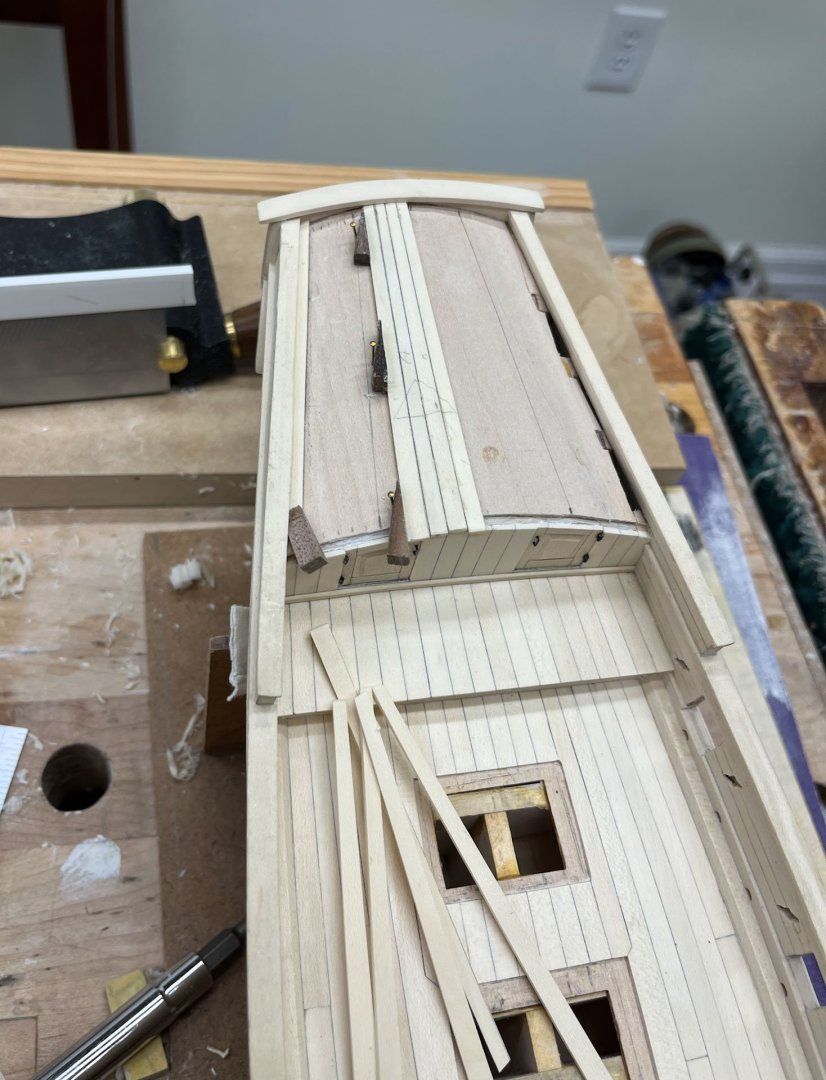
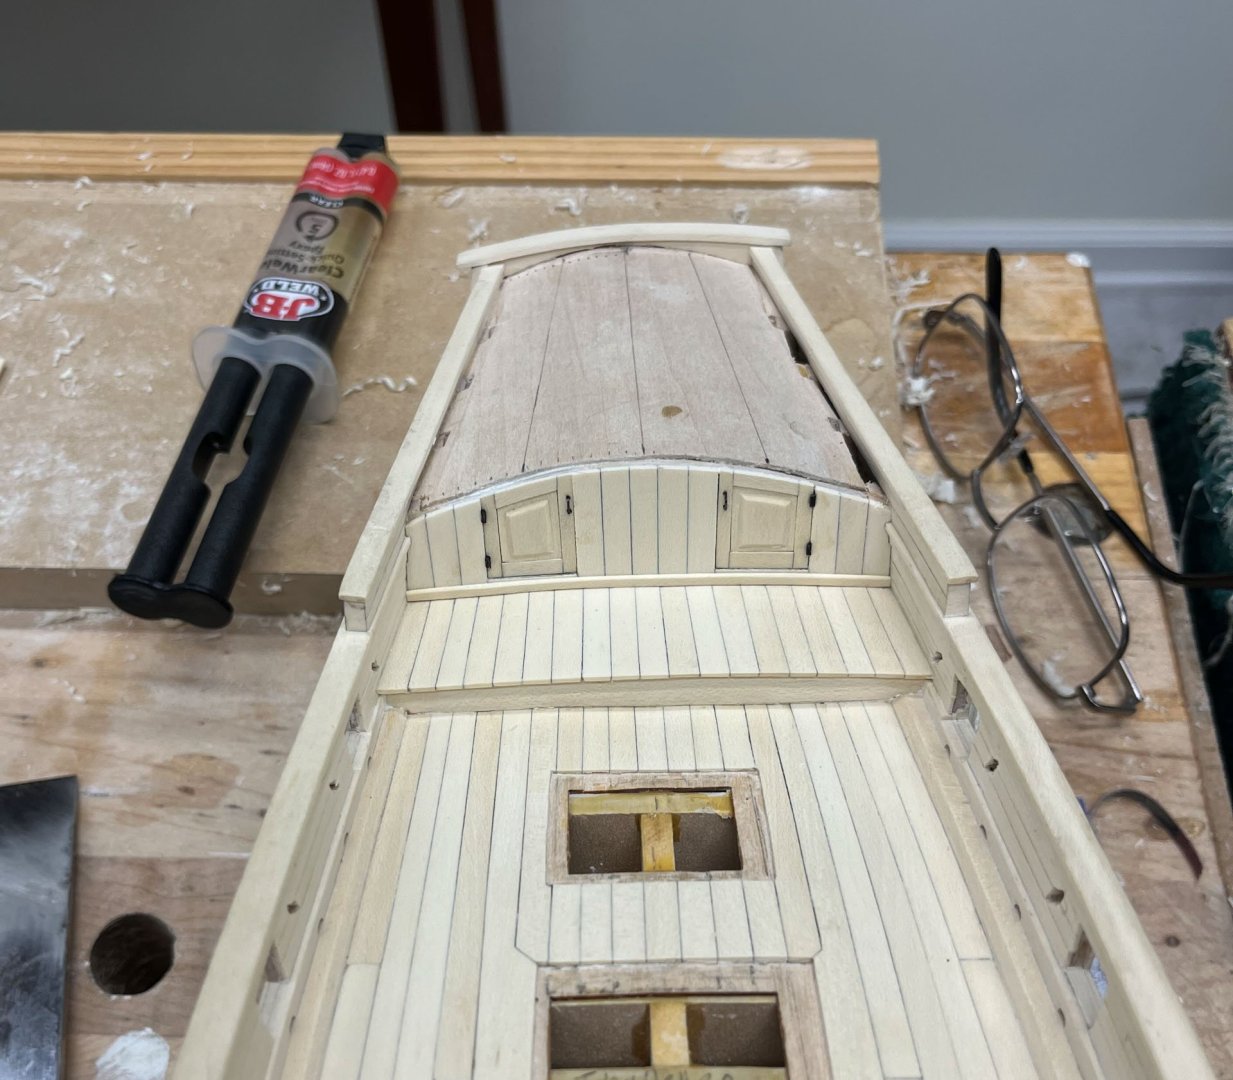
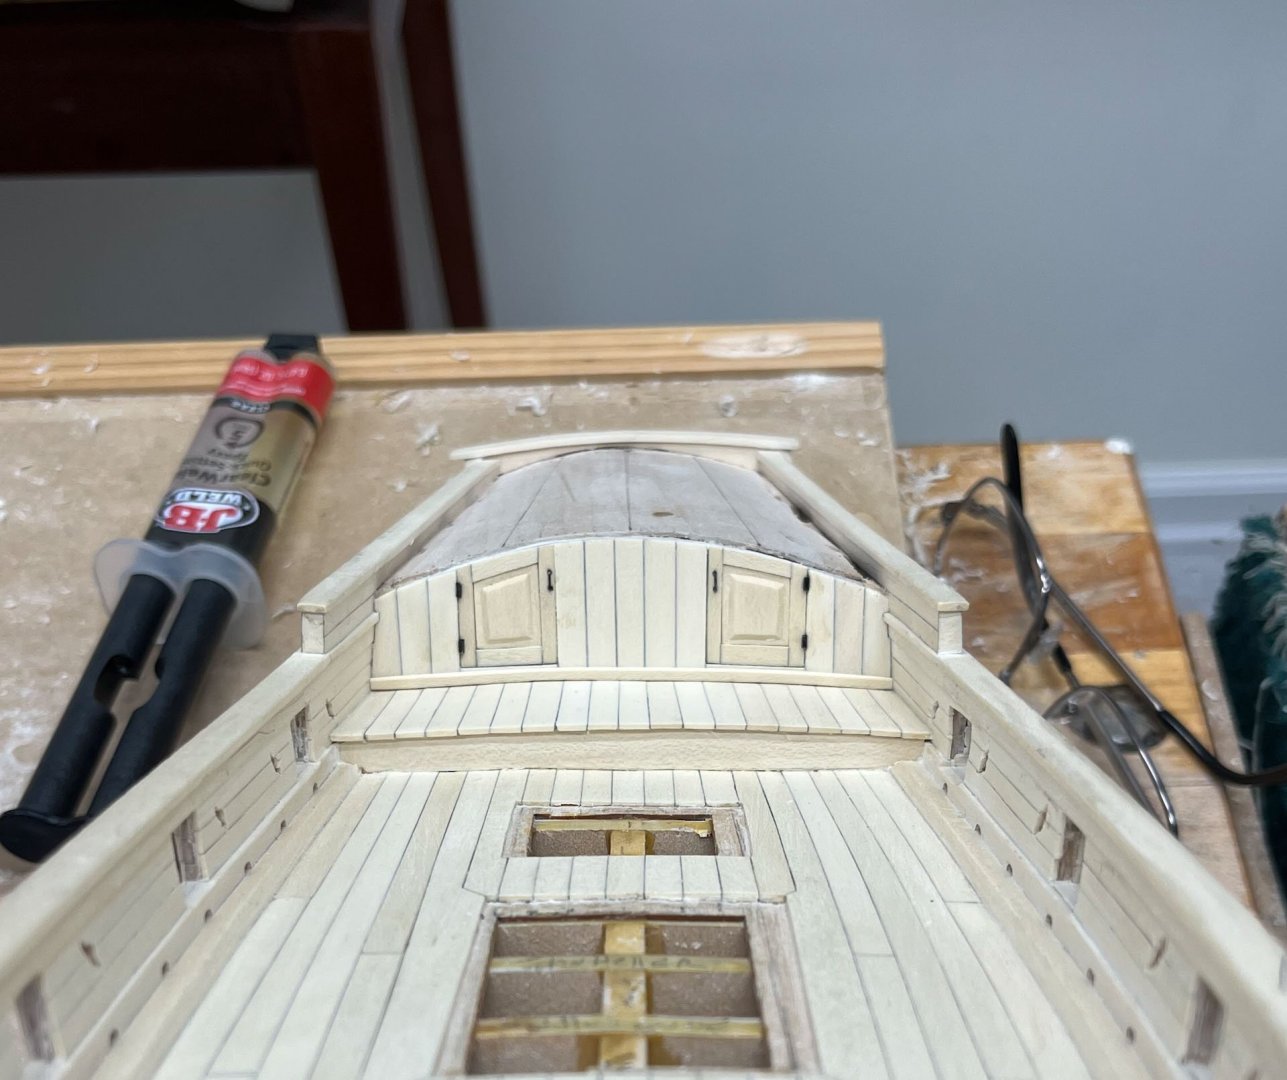
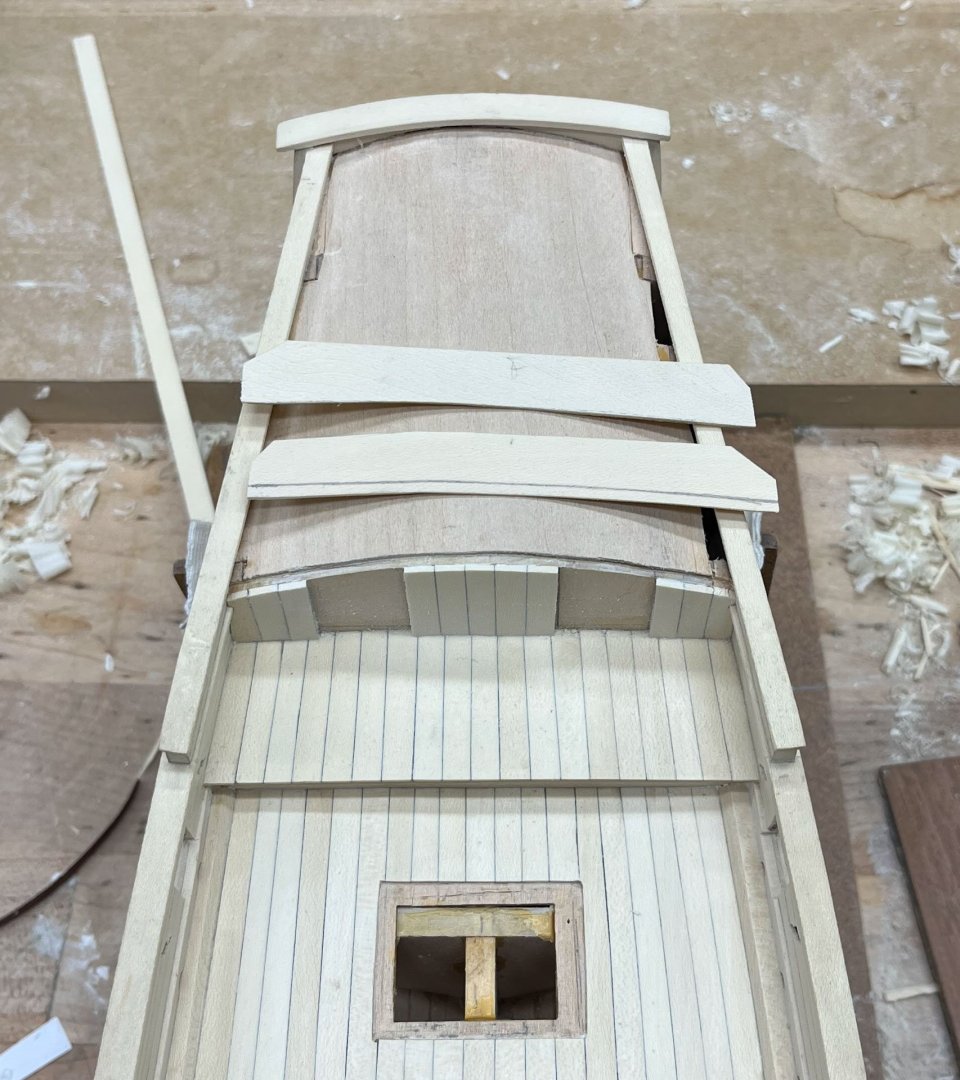
Page 8! At my rate of building speed thats remarkable. Slow and steady. First up progress on the AVS. My shipmodel friend Jason and I drove the 4 hours to Connecticut on Friday night for the 42nd Annual Joint Clubs show. Nothing in the world compares to the joy of 95N narrowing down into the George Washington bridge. We almost ran out of things to talk about. Anyway I wanted to display her at the Conference if I could get the main cabin planking finished so I had a Deadline. After dividing the front of the cabin into aprox 1/8" wide divisions I got 20? I think planks. After gluing the the most starboard and then the central planks into position I made another 9 planks and glued them in 3 at a time. The top of the cabin curves upwards so if you put too much pressure on the planks they would suddenly flip outwards. Inventive clamping became necessary. Once starboard was done I did the same for port. The penciled on triangles helped keep track of the planks order. Its not as apparent as I had hoped but the planks narrow as they get towards the center. Looks a little rough in this picture and it was 2 days to go. I scraped and sanded (180, then 220) the planks down close to level. Next up was cutting the planks flush and inserting a curved molding over the cabin doors. I traced the rounded profile I wanted and assumed there would be some springback so made my jig a little more curved. Holly , even thick stuff, bends well with some heat and a touch of water. I was thinking about complicated laminations but turned out to not be necessary. I trimmed it to fit, had to bend it again a little more in 1 location and unbend it in another. The molding fit into a rabbit that was irregular and wasn't a good "bed" so I used epoxy instead of yellow glue. Its easy to get epoxy everywhere you don't want it so (like dripping over/into the doors) but I got lucky in this go around. Final sanding was in the hotel the morning of the Conference and then she was good to go. I think up next is making more deck fixtures and cleats and bollards. Also some pumps so my AVS doesn't sink. And on the horizon is Cannons! I took some pics at the Conference which I will post next. thanks for reading Cisco


-
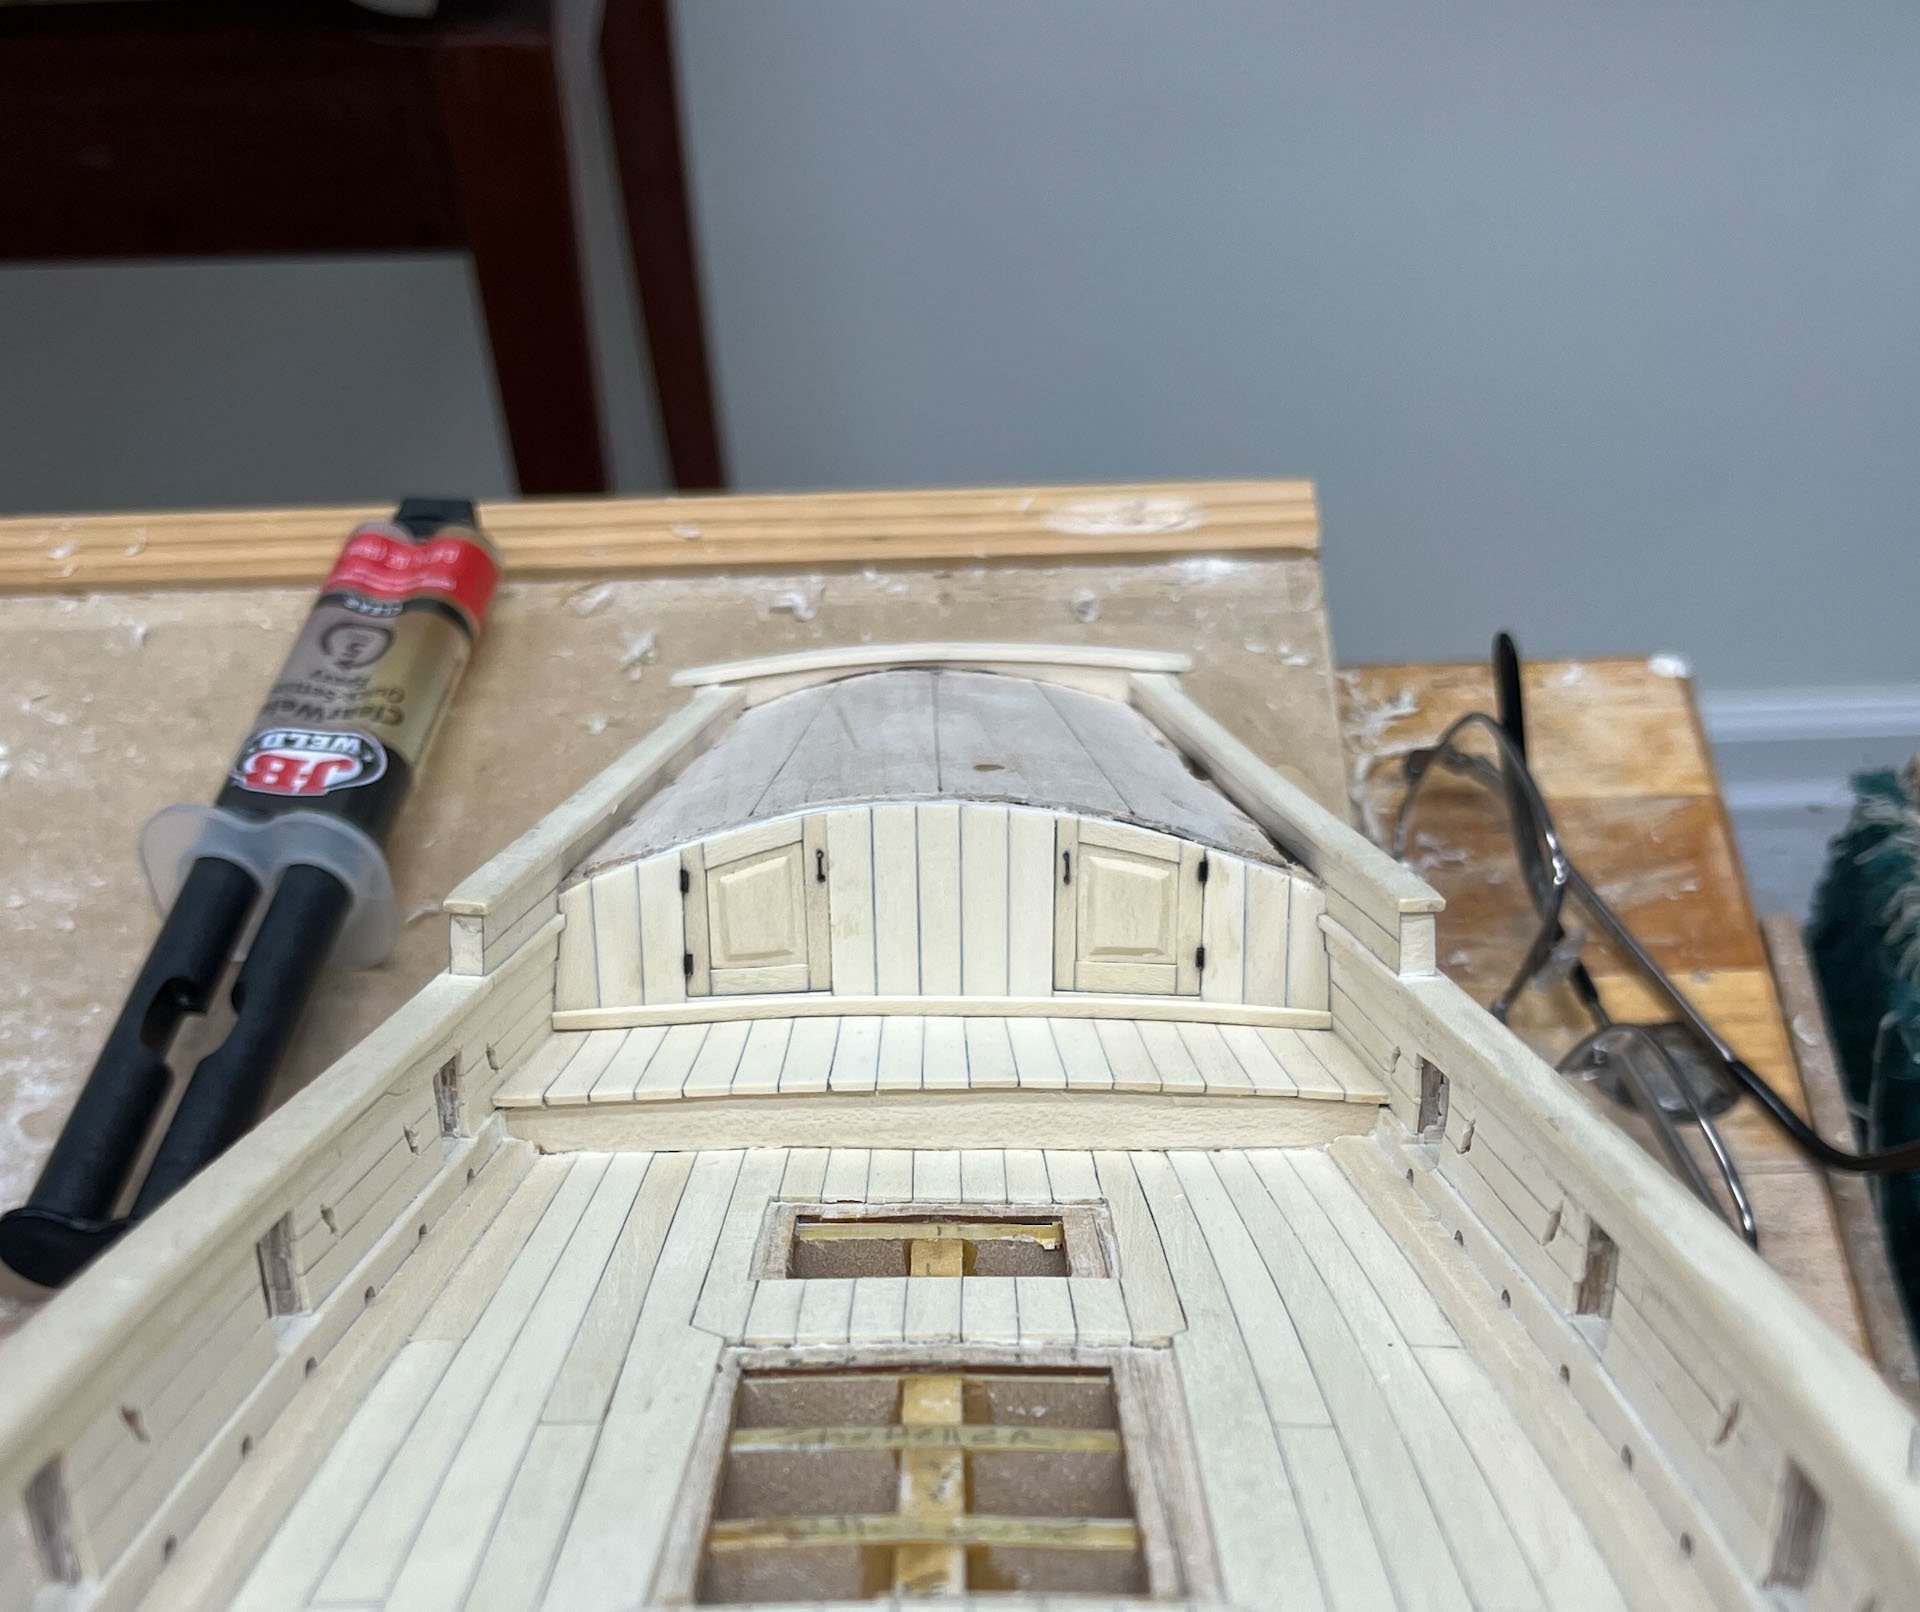
I removed all the rubber bands and go-sticks and got a better photo this morning. The raised panels have a bit of a rustic look but I'll take it and moving on to the roof decking. Happy Sunday all Cisco
-
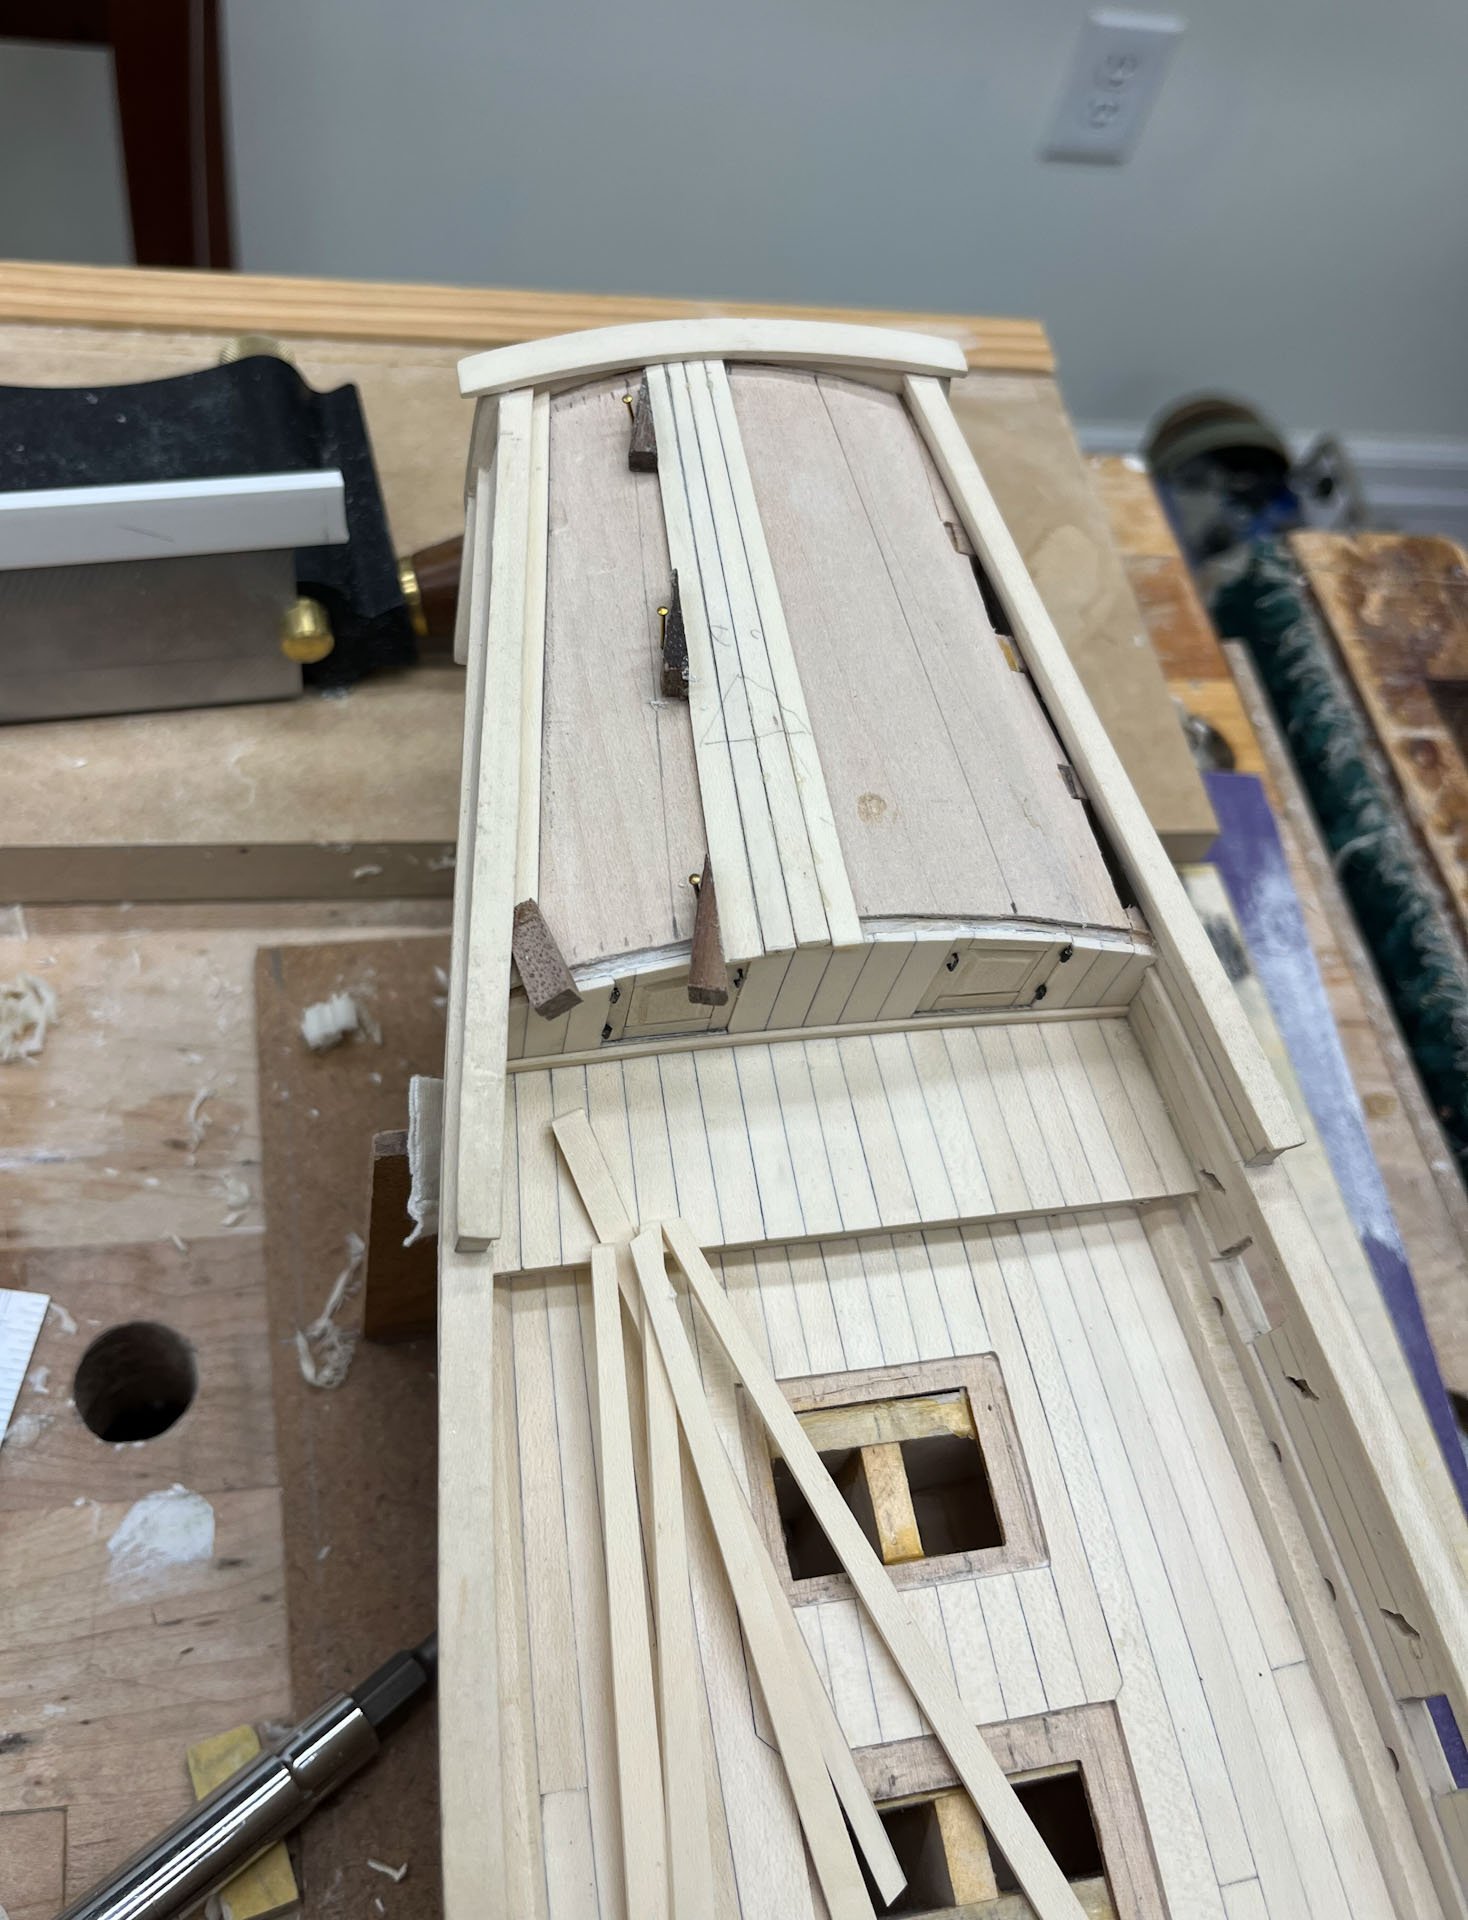
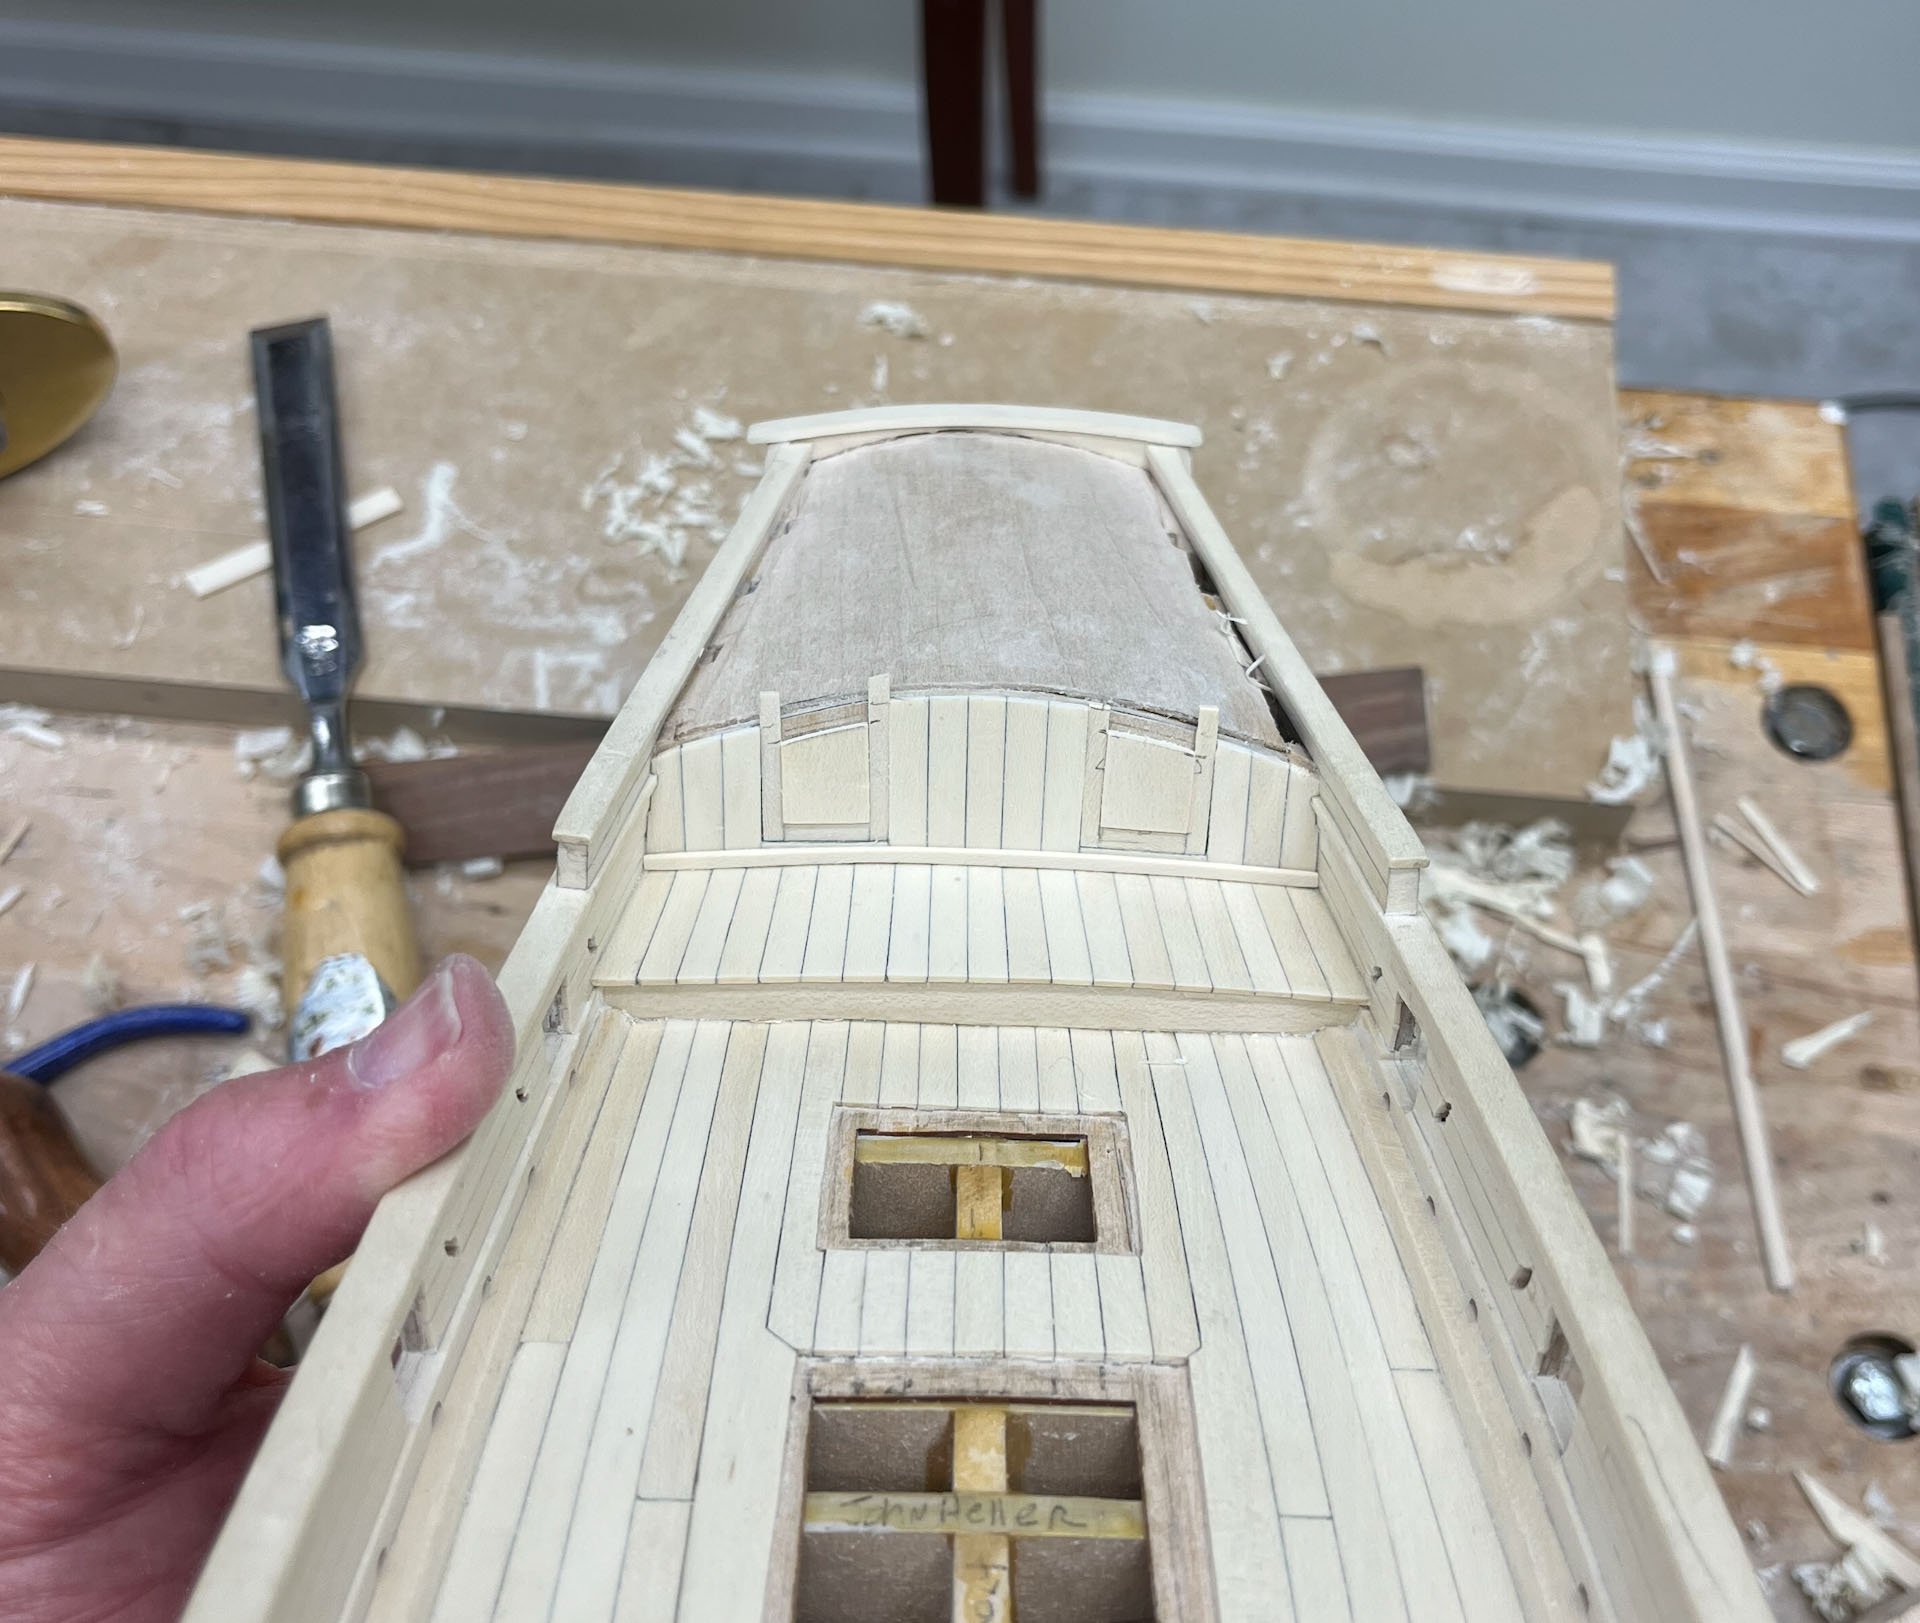
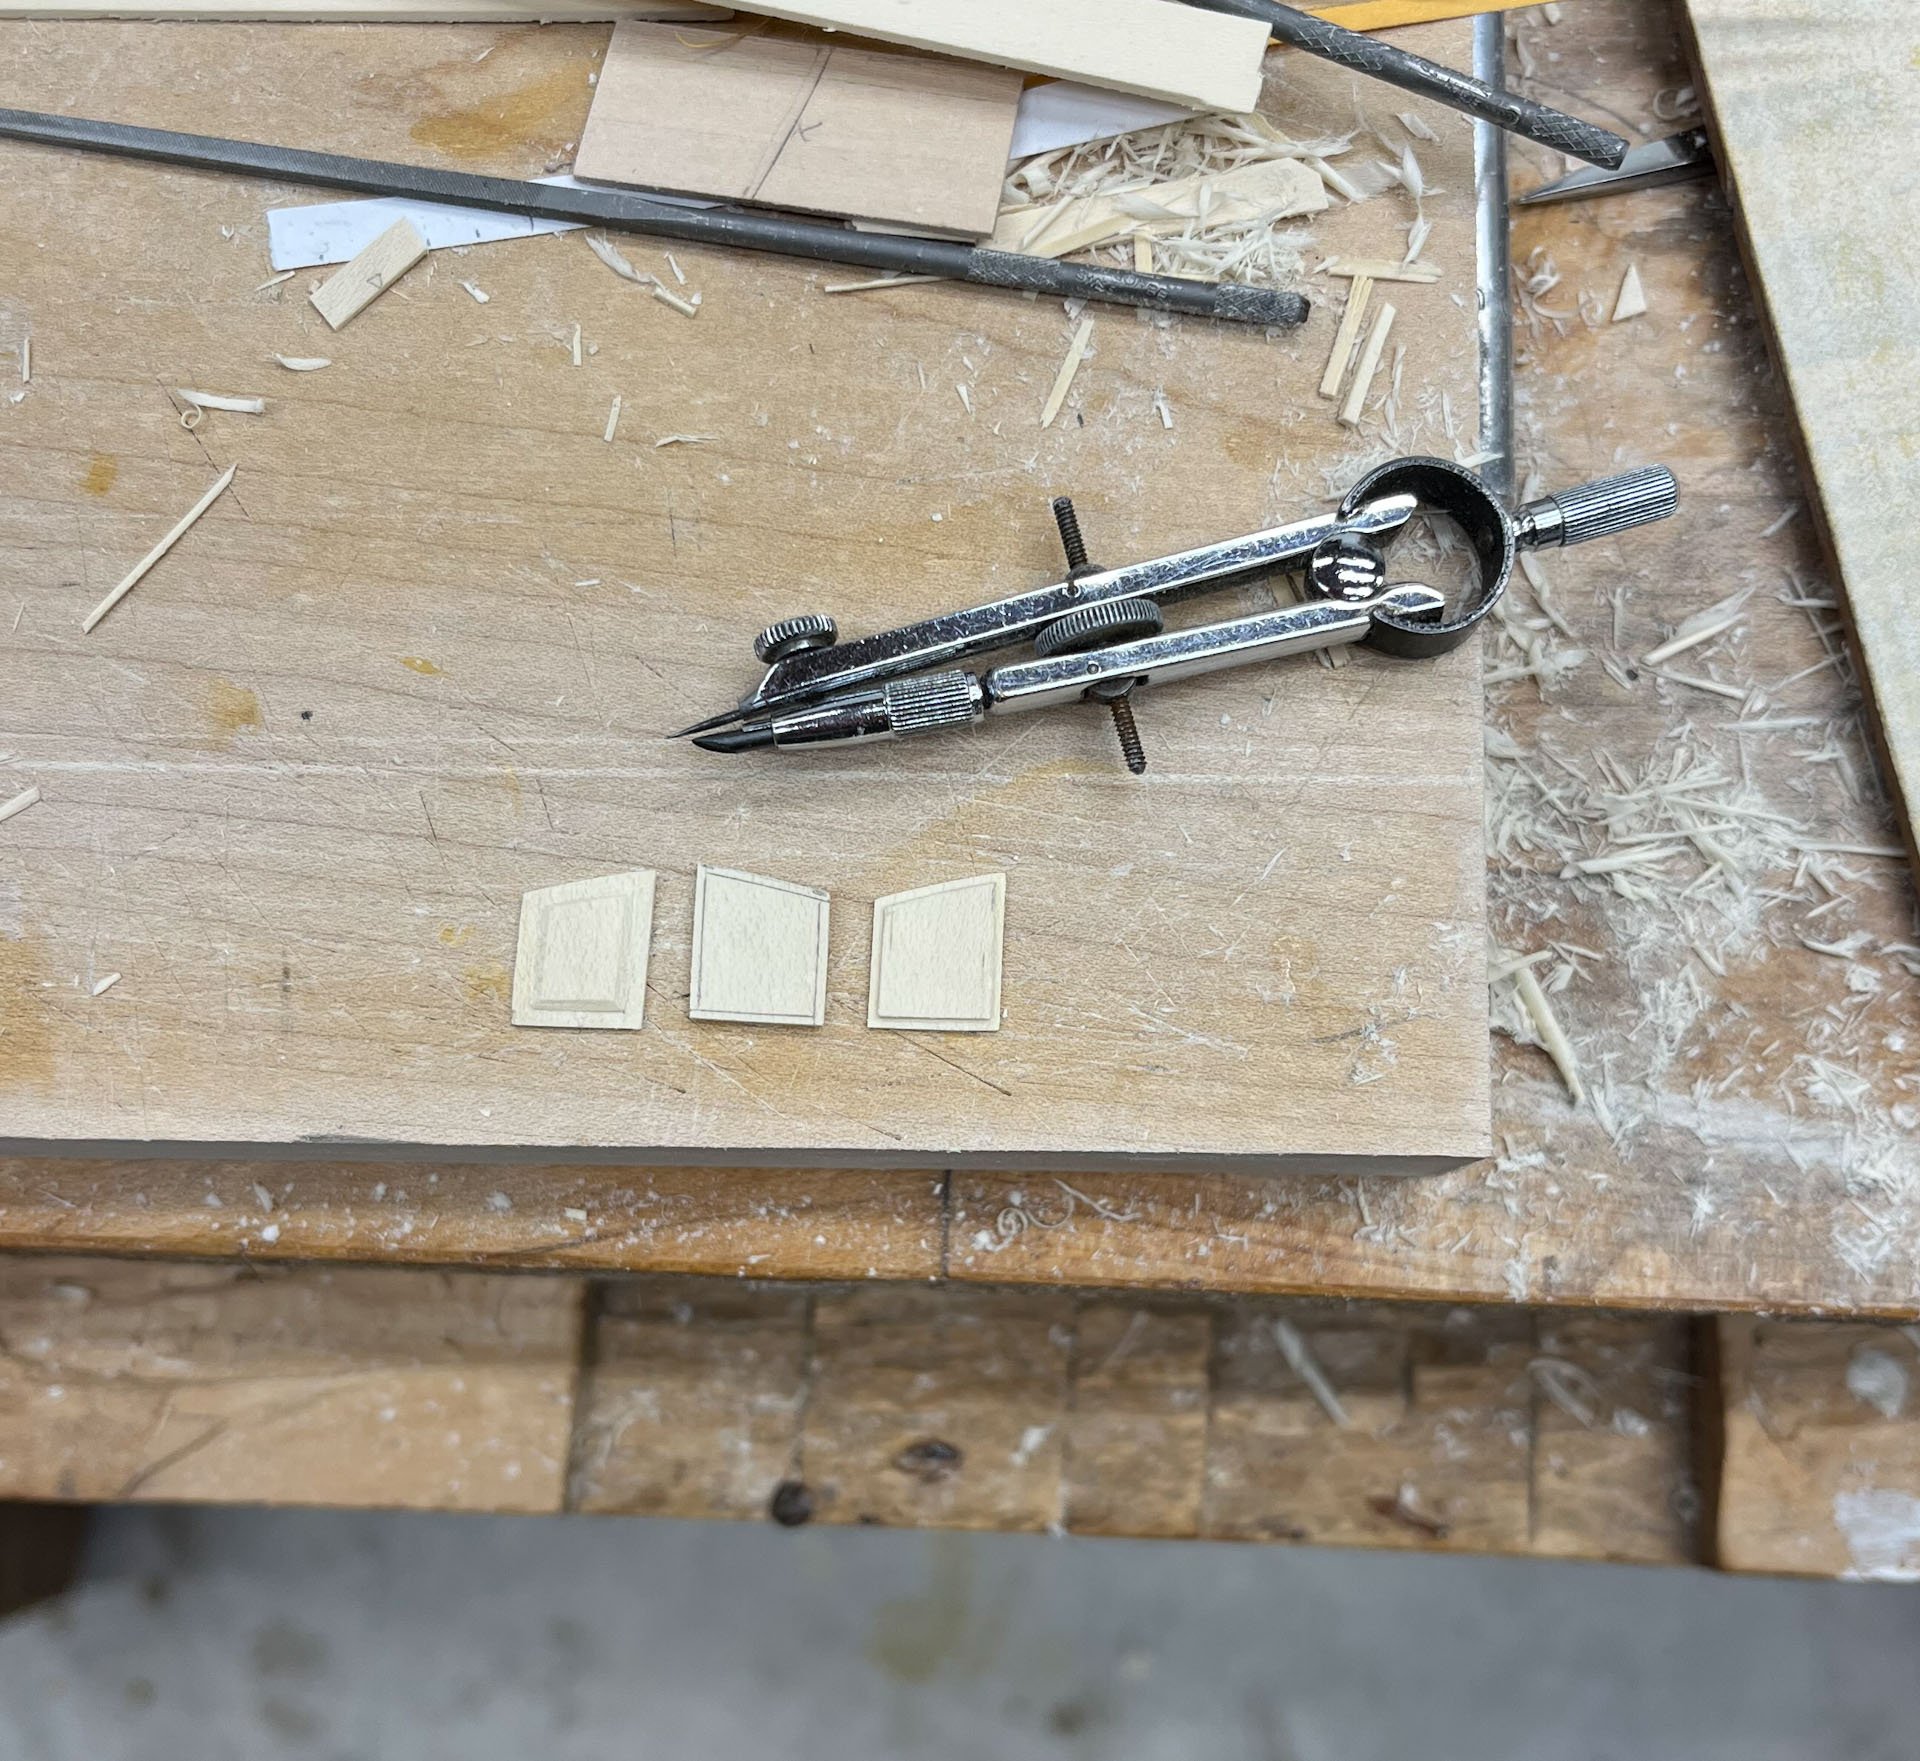
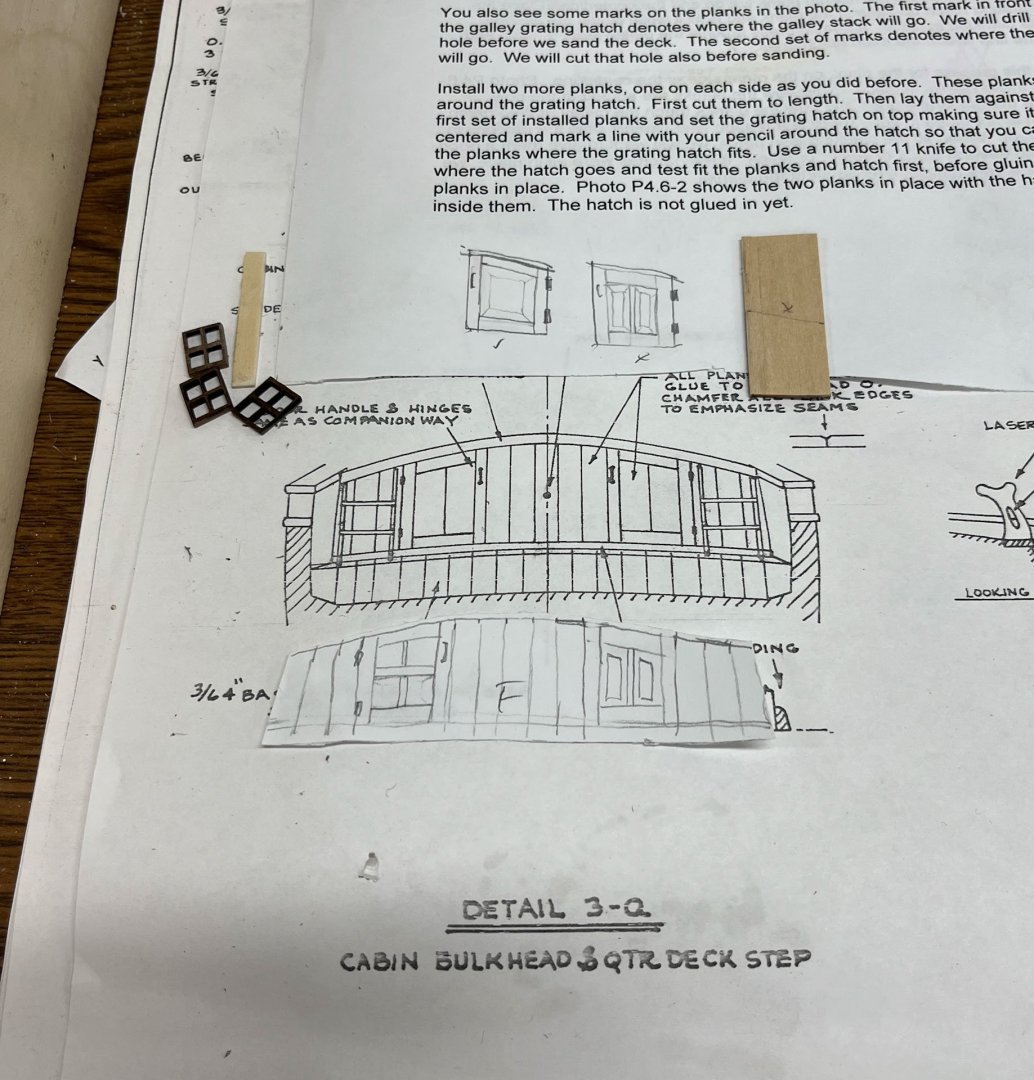
Well its been over a month. Vacation and work took their toll. I'm trying to bring my AVS up to the Joint Clubs conference as an "in progress" so now its crunch time. While anything beyond deck furniture won't happen in time; I don't want any basswood showing. Next up is planking the cabin entryway. Below is the kit door picture. I tossed around how I could make the doors more aggravating to build- maybe a window in the top of each one? maybe double raised panels? After looking at my drawings I eventually decided a single raised panel looked better than any of my other wacky ideas. The door frames were simple butt joints, highlighted with pencil. If I had more time the half-lap joints I used for the companionway coaming would have been sturdier to work with. But they turned out ok and were very solid once glued onto the basswood underlayment. For anyone who noticed I deliberately made the door frames inset so they would stand out. In reality this would have made the doors only open 90 degrees and been a pain to traverse but in this built artistic license overcomes functionality. Next I test-fitted my raised panels. The panels were challenging due to the flat reveal around the raised portion. It took a few tries. I scribed around the edges for a rabbit (shown below), then scribed further back for the borders of the raised portion of the panel. Tricky work although you are essentially cutting to a line. I don't know how I functioned before discovering my fine drafting compass. After planking the sides and middle of the cabin entryway I made the small base trim piece. Its fragile; I first made a "pretty close" version out of basswood (top piece), then a second try with holly. Once I got the bottom scribed as closely as possible I used the above compass to trace the width I wanted and cut it out. Then I attempted not to throw the base molding out (it looked exactly like cutoff scrap). Then I glued the top part of the door frame in, final fit my raised panels and glued them in. I forgot to say I pre-finished the door frames and panels, and pre-drilled for the handle and hinges before the frames were glued on; much easier to do that stuff on the bench. The handle and hinges were added with a touch of epoxy, then I used the below scheme of go-sticks and rubber bands to keep the basemolding in place while its glue dried. Sorry I now realize that pic is a little out of focus. Well thats progress as of now. This week I will be making the narrow planking to cover the roof of the cabin. And if all goes well I'll bring her to the conference for laudits and critique. thanks for reading Cisco

-
Simply Beautiful lines Siggi.
-
nice smooth curve of your bulwarks. looks very good. be aware that black Sharpies fade to a dull grey in about a year. i stopped using them as interplank tarring; paint, coloured paper, or pencil are usually coulourfast
-
Great discussion Mike. i like your last picture - it made me wonder which hand you took it with
- 968 replies
-
- 2
-

-
- hahn
- oliver cromwell
- (and 1 more)