

.jpeg.7d7eba14c97a2e1d9f79cd2c97f6424a.jpeg)
EricWilliamMarshall
-
Posts
986 -
Joined
-
Last visited
Content Type
Profiles
Forums
Gallery
Events
Posts posted by EricWilliamMarshall
-
-
How did you cut the rabbit? I looks very nice.
-
-
If Nirvana is correct, then you should have a rigging plan included. Also note that the current version of the kit is in the same scale and the instructions can be downloaded from https://modelexpo-online.com/Model-Shipways-RATTLESNAKE-US-PRIVATEER-164-SCALE_p_1016.html . If you are missing that plan, same company does sell the plans separately as well. The instructions state that they use the same scale plans as drawn in 1963. There a fair number of build logs here of the Rattlesnake (in the same scale) here, so you may wish to check out a build log or two (take a look at https://modelshipworld.com/applications/core/interface/file/attachment.php?id=563017 for a list of links). Good luck and welcome!
- mtaylor and Duanelaker
-
 2
2
-
-
-
19 minutes ago, ccoyle said:
now you are asking questions that are above my pay grade!
Hahaha!!
-
Stumped me as well. Supports for glass shelves? Neck bolts for Frankenstein’s monster? Etc.
- Keith Black, mtaylor and KeithAug
-
3
-
I’ve fixed rudder. I’m prepping the cloth for this model’s set of sails/experiments. I’m also now thinking about string. The kit contains two tiny amounts in two sizes in white only with instructions to dye white to a darker color as needed.
")
Of course, I’m unsure how much to dye, since I haven’t figured what goes where and in what amounts. So I’m thinking making rope, although I’ve never done that.
Since the photo on the cover of the box is my current go-to reference - I noticed that some is the rope is wrapped with smaller string (making it served rope). I’m curious about that as well. Where that is used, how to do it well (and labor intensive is it if folks feel the need for serving machines!)
- Edwardkenway and thibaultron
-
2
-
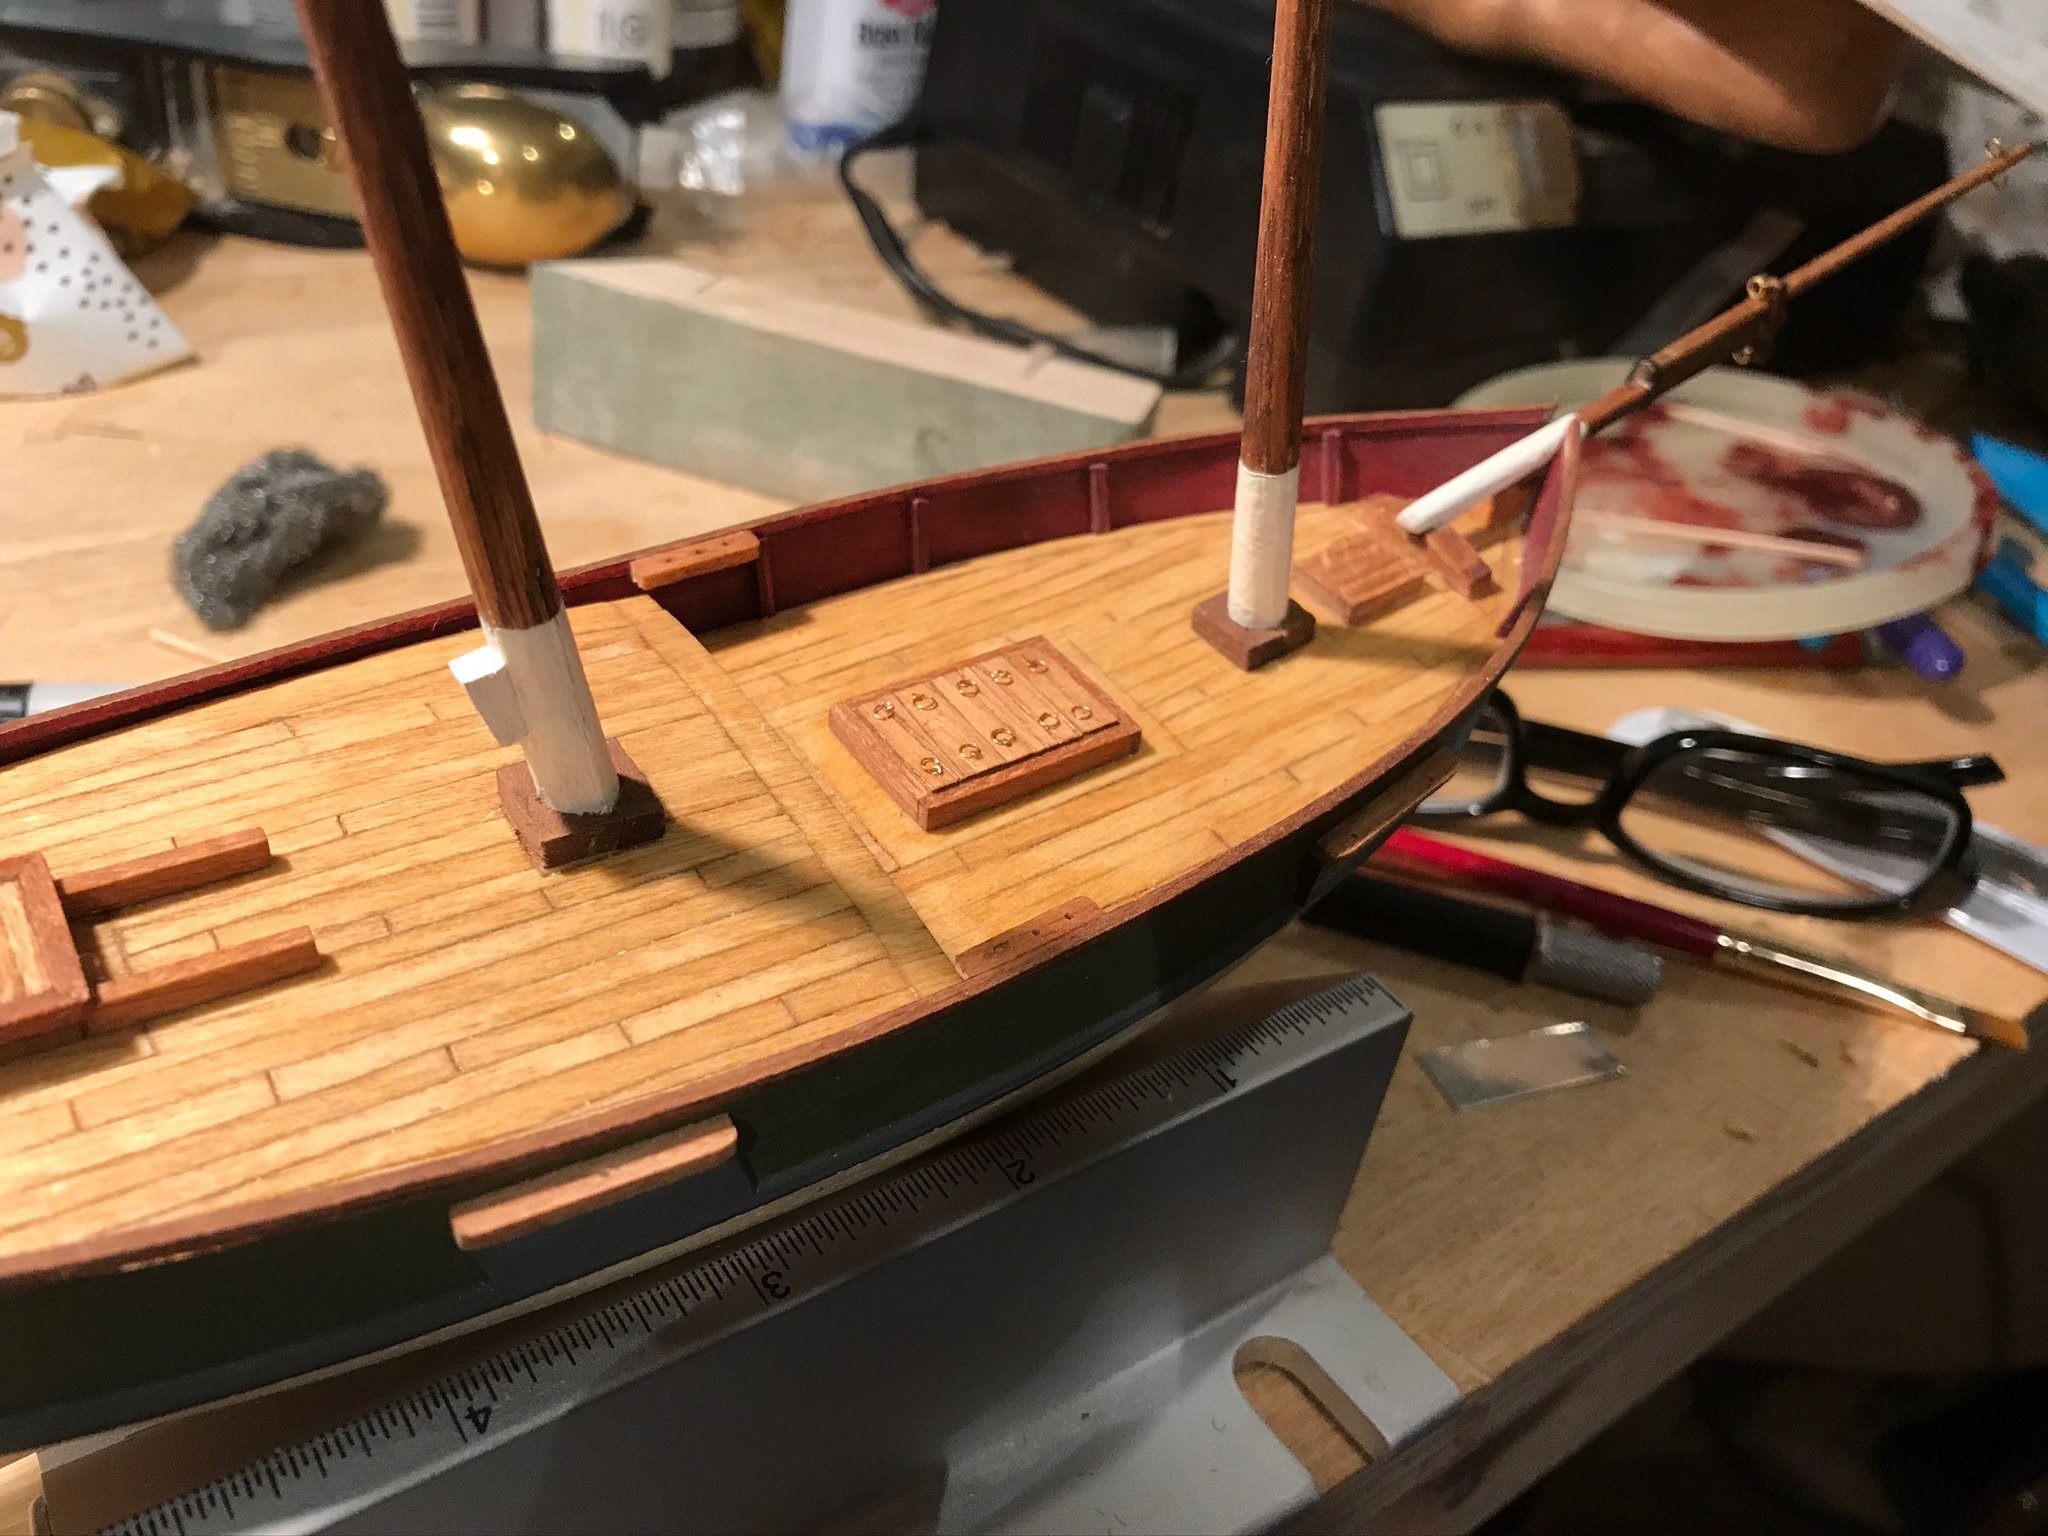
I have jiggered the mast and added boots. I think I have recovered from the earlier issues.

- thibaultron, coxswain, Edwardkenway and 4 others
-
7
-
23 hours ago, BobG said:
What cleaning method has worked well for you, Eric?
Nothing perfect yet. The current approach is a bit of ammonia and fine steel wool for prep. I also let the solution be in contact with the brass longer than suggested and I let everything alone for a day or two before handling. Something in that list makes the brass a little more resistant to touching, but I'm not sure what. <shrug> I'm still searching. Let me know if you figure it out.
-
-
1 hour ago, Jack12477 said:
Mother Nature did it for me !

Secrets of the Masters revealed!!! Hahaha! Thanks, it still looks great!
- Jack12477, Canute, Old Collingwood and 3 others
-
6
-
Question: On the Mardar and Panzer at the end of the second set, both have the look of wind-swept dust. How did you achieve that effect? Great collection/beautiful work! Thanks for sharing!
- mtaylor, popeye the sailor and Canute
-
3
-
-
On 10/29/2019 at 10:10 AM, tlevine said:
Your best tool will be patience. Your second best tool will be solvent for your glue!
That’s great!! If MSW had t-shirts, that should be the tag line!
-
As a new builder myself, I would add the following: Take a look at instructions and practicums of the kit you are thinking of building. The better the instructions, the less mistakes and second-guessing. Having said that, you will make mistake no matter what and that is part of the adventure. None of mine have been show-stoppers (yet), but it can be tough on the soul some times.
Take a look at the Model Expo site; the Shipways models have the instructions available for free download. Some of the manuals are practically books themselves! Even if you don’t want to build any of those models, just skimming will give you a sense of order of operations and the difference between scales, etc. I would suggest creating a build log as well, so questions can reach experts with full context, leading to better answers. Good luck and I look forward seeing what you create!!
-
2 hours ago, Gaetan Bordeleau said:
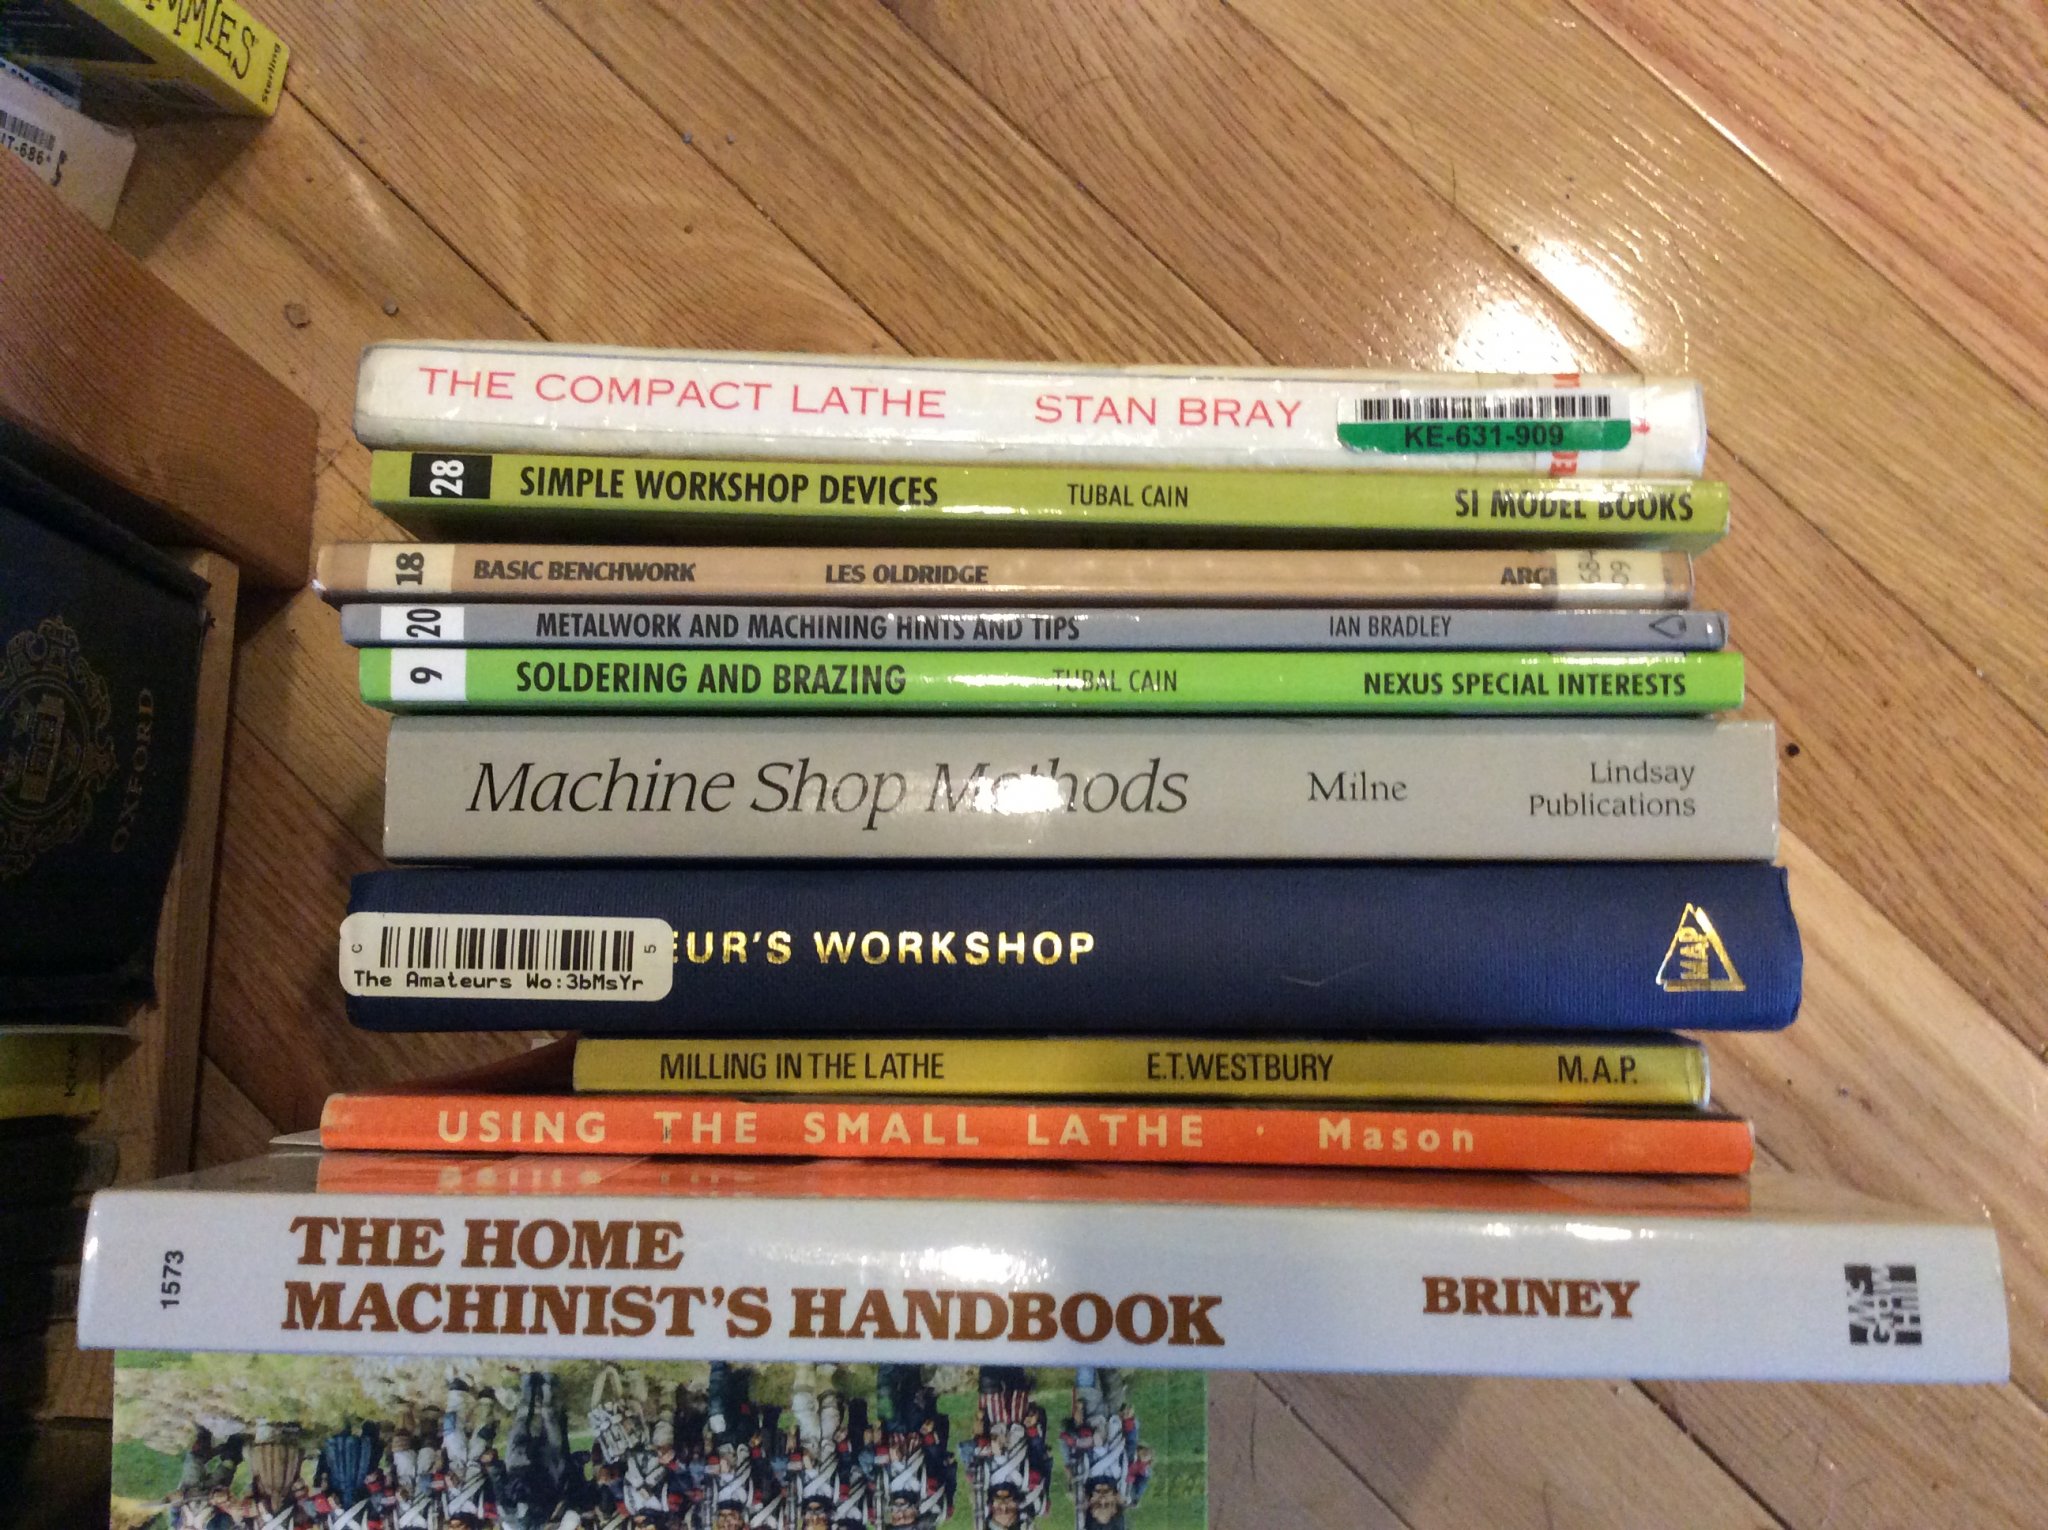
I showed few examples of the books I did read to learn machining and at the same time building tools.
Yup, you were kind enough to answer my question about your library! I found a large number of those book are quite affordable used! Not all of them have arrived yet.

- FriedClams, mtaylor, JpR62 and 1 other
-
4
-
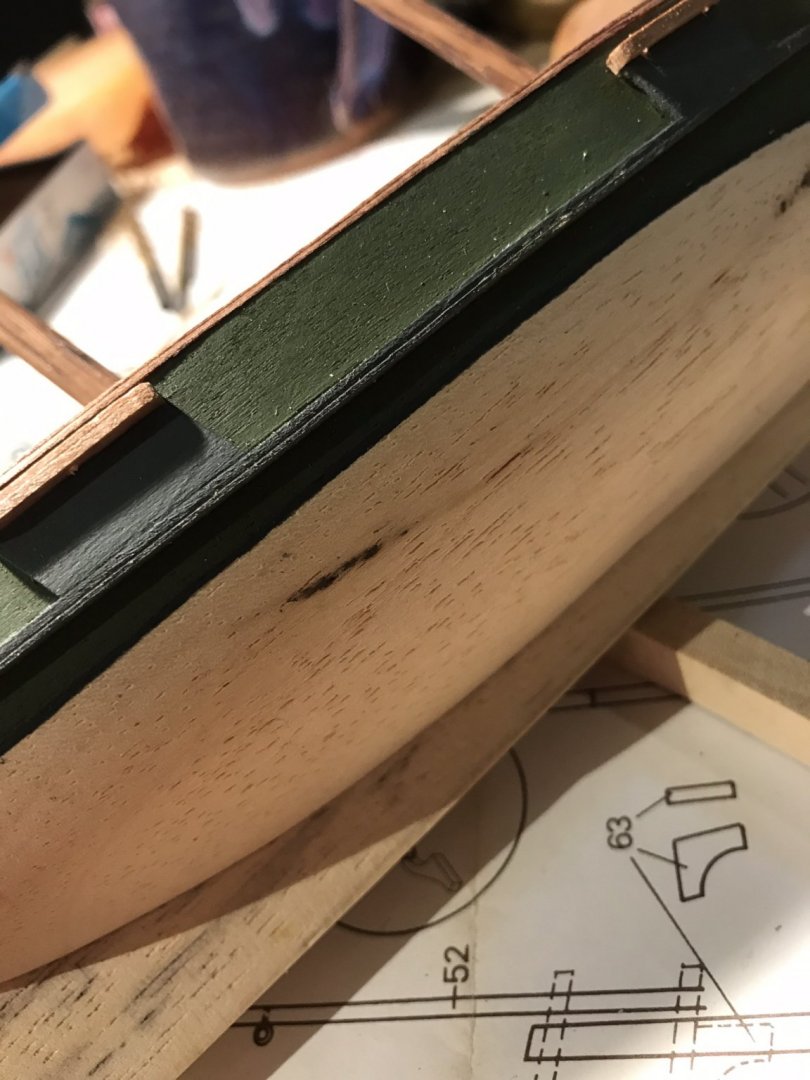
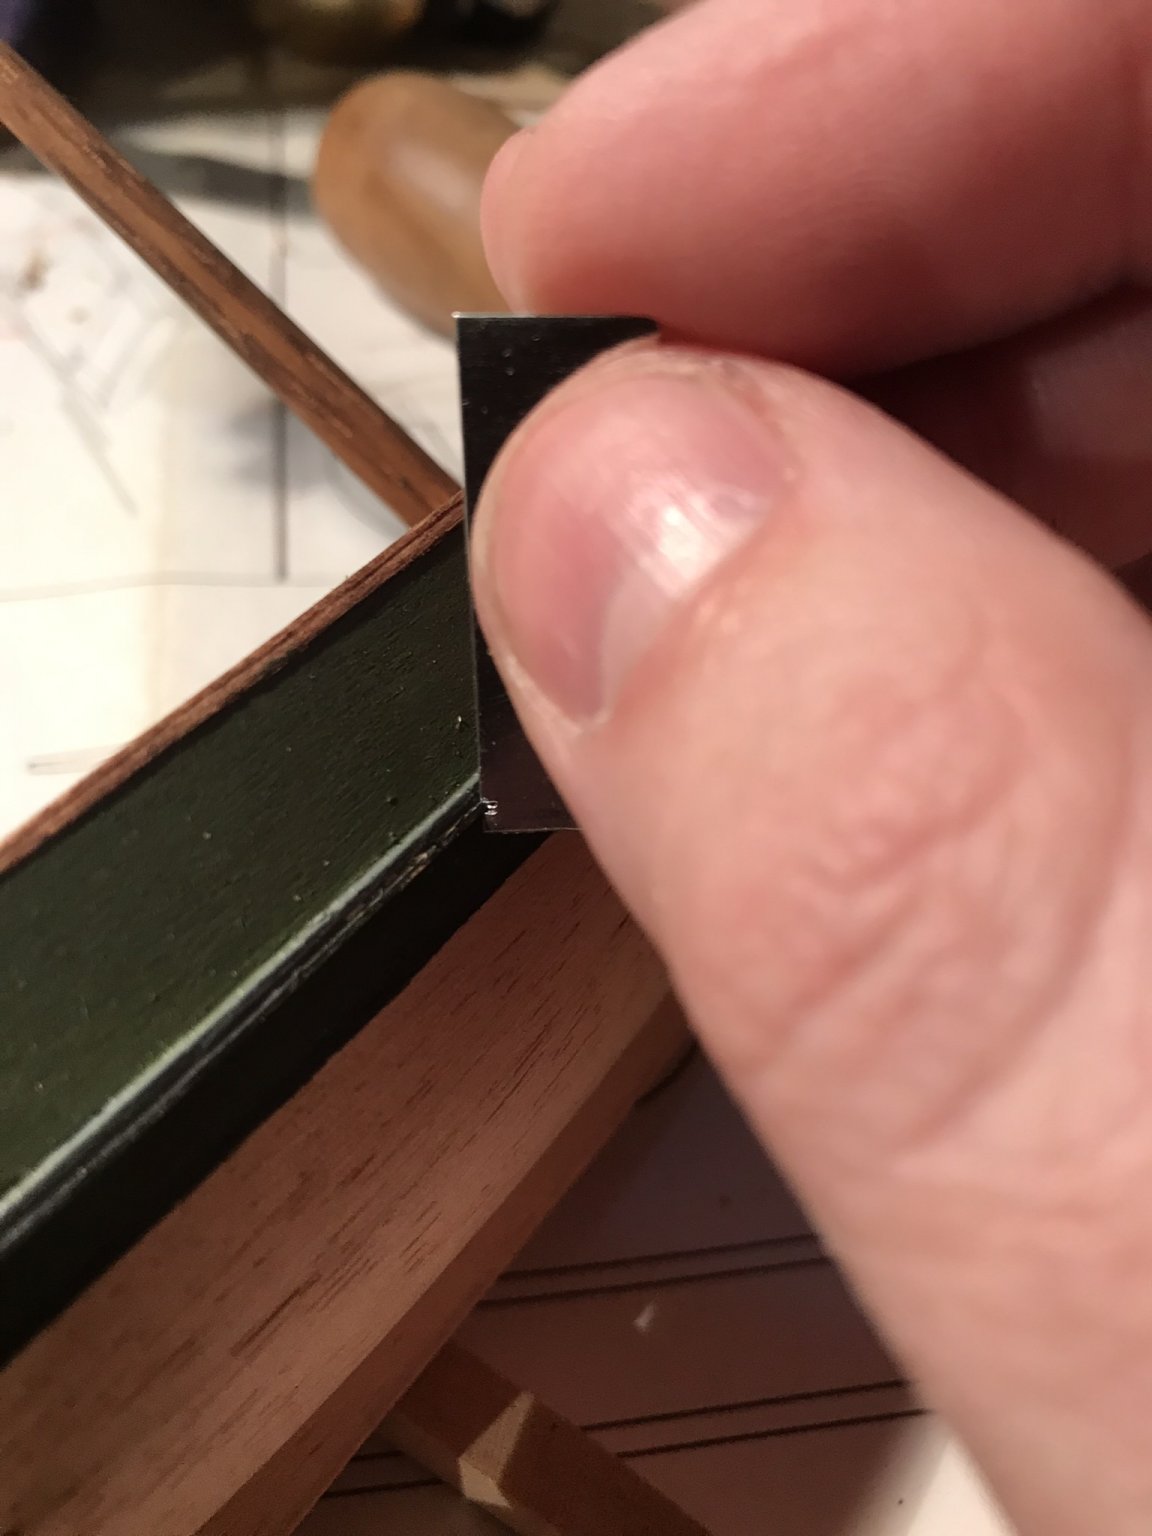
Then I dragged the profile over the area I want to cut. I then added paint to cover the revealed wood. Ideally I would have done this earlier before assembly. So it goes.

- coxswain, GrandpaPhil, Edwardkenway and 3 others
-
6
-
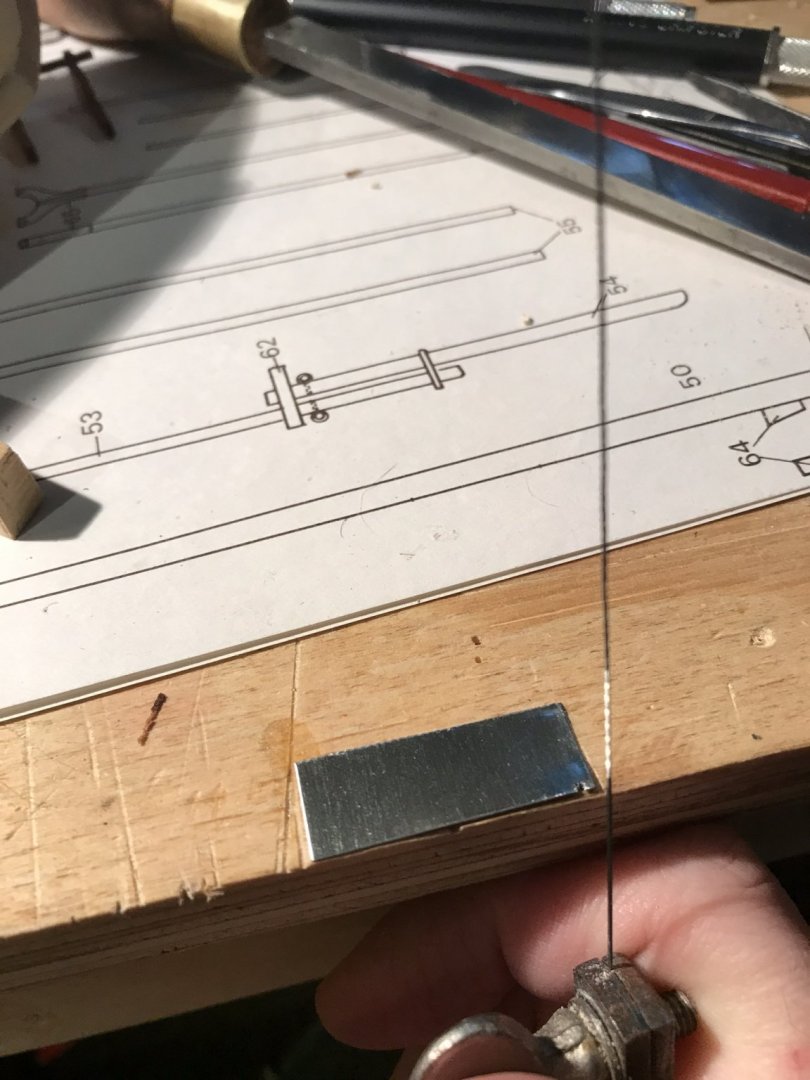
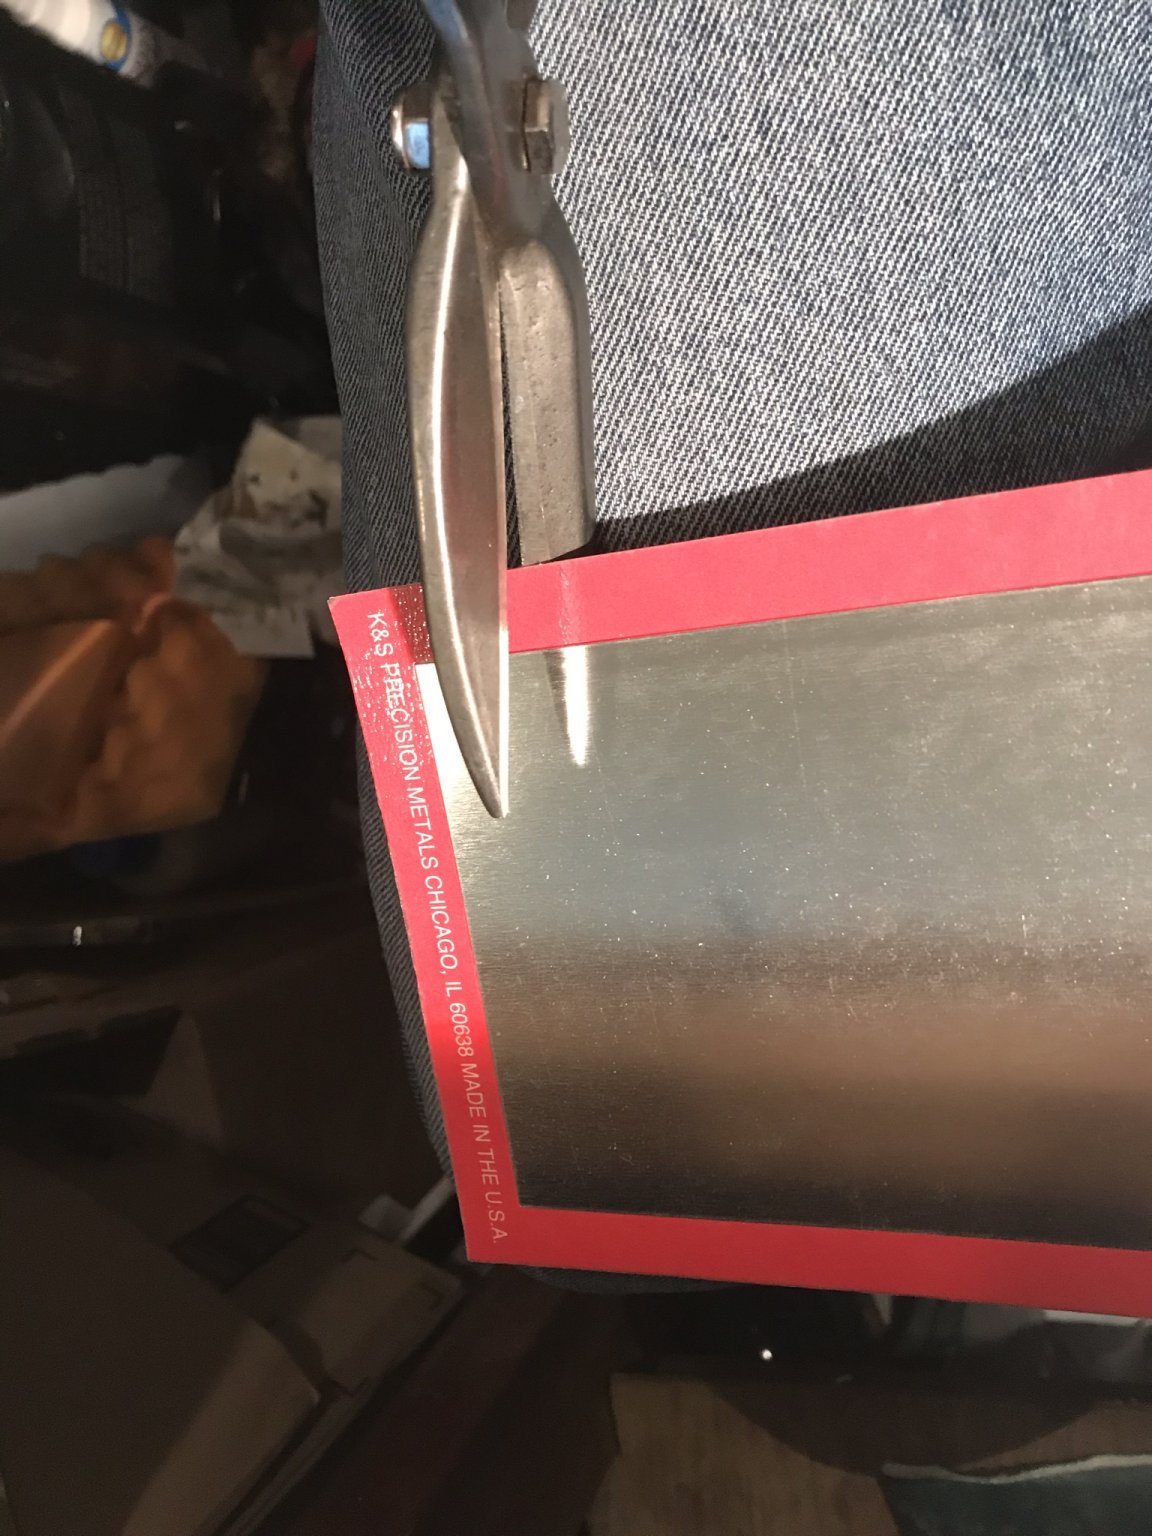
Chuck and Bill were discussing creating profile cutter or scrapers from scrap brass sheet a few weeks back at at one of Chuck’s workshop for the SMSNJ. (Thanks Chuck!!) And I thought it wouldn’t hurt to apply the idea to my little adventure. I cut a bit of tin with snips and then used a jeweler’s saw to cut a small negative profile.

-
-
-
-
Deck or mast collars seem to the name of the “interface where the mast goes through the deck” and the mast boots “help prevent water leakage where the mast goes through the deck”.
Quoted from https://www.rigrite.com/Spars/SparParts/Deck_collars.php
-
31 minutes ago, Gaetan Bordeleau said:
would have loved to build furniture for the king.
Me too! When I was young, I worked in NYC repairing 18th-century furniture, some of which was once owned by nobility. Unfortunately, the economics of that industry is exactly the same as the one you lament (to some degree here). On the plus side, I have a stupid amount of strange hand tools to bring to bear on ship modeling! Were/are you a furniture maker as well? (Yet another hobby requiring eight-foot wall-space lengths per project!)
- druxey, mtaylor and Captain Poison
-
3


Opium Smuggler 1806 by EricWilliamMarshall - FINISHED - Authentic Models - Scale 1:75 - Schooner
in - Kit build logs for subjects built from 1801 - 1850
Posted
Wow, what a great prep for one of your retirement hobbies!") I’ll say again, which is what everyone else says, beautiful beautiful work. If I do a Bluenose build, it will be cause of you.
I’ll say again, which is what everyone else says, beautiful beautiful work. If I do a Bluenose build, it will be cause of you.