realworkingsailor
-
Posts
3,271 -
Joined
-
Last visited
Content Type
Profiles
Forums
Gallery
Events
Everything posted by realworkingsailor
-
 Have you tried Detail Associates? They do a lot of model train detail parts, but also carry an assortment of brass rod and strip stock. They don’t have a website, but you can find their products on many model railway retailers sites like Walthers https://www.walthers.com/catalogsearch/result/?q=Brass+strip (who also may carry some residual K&S strips in stock) Andy
 -
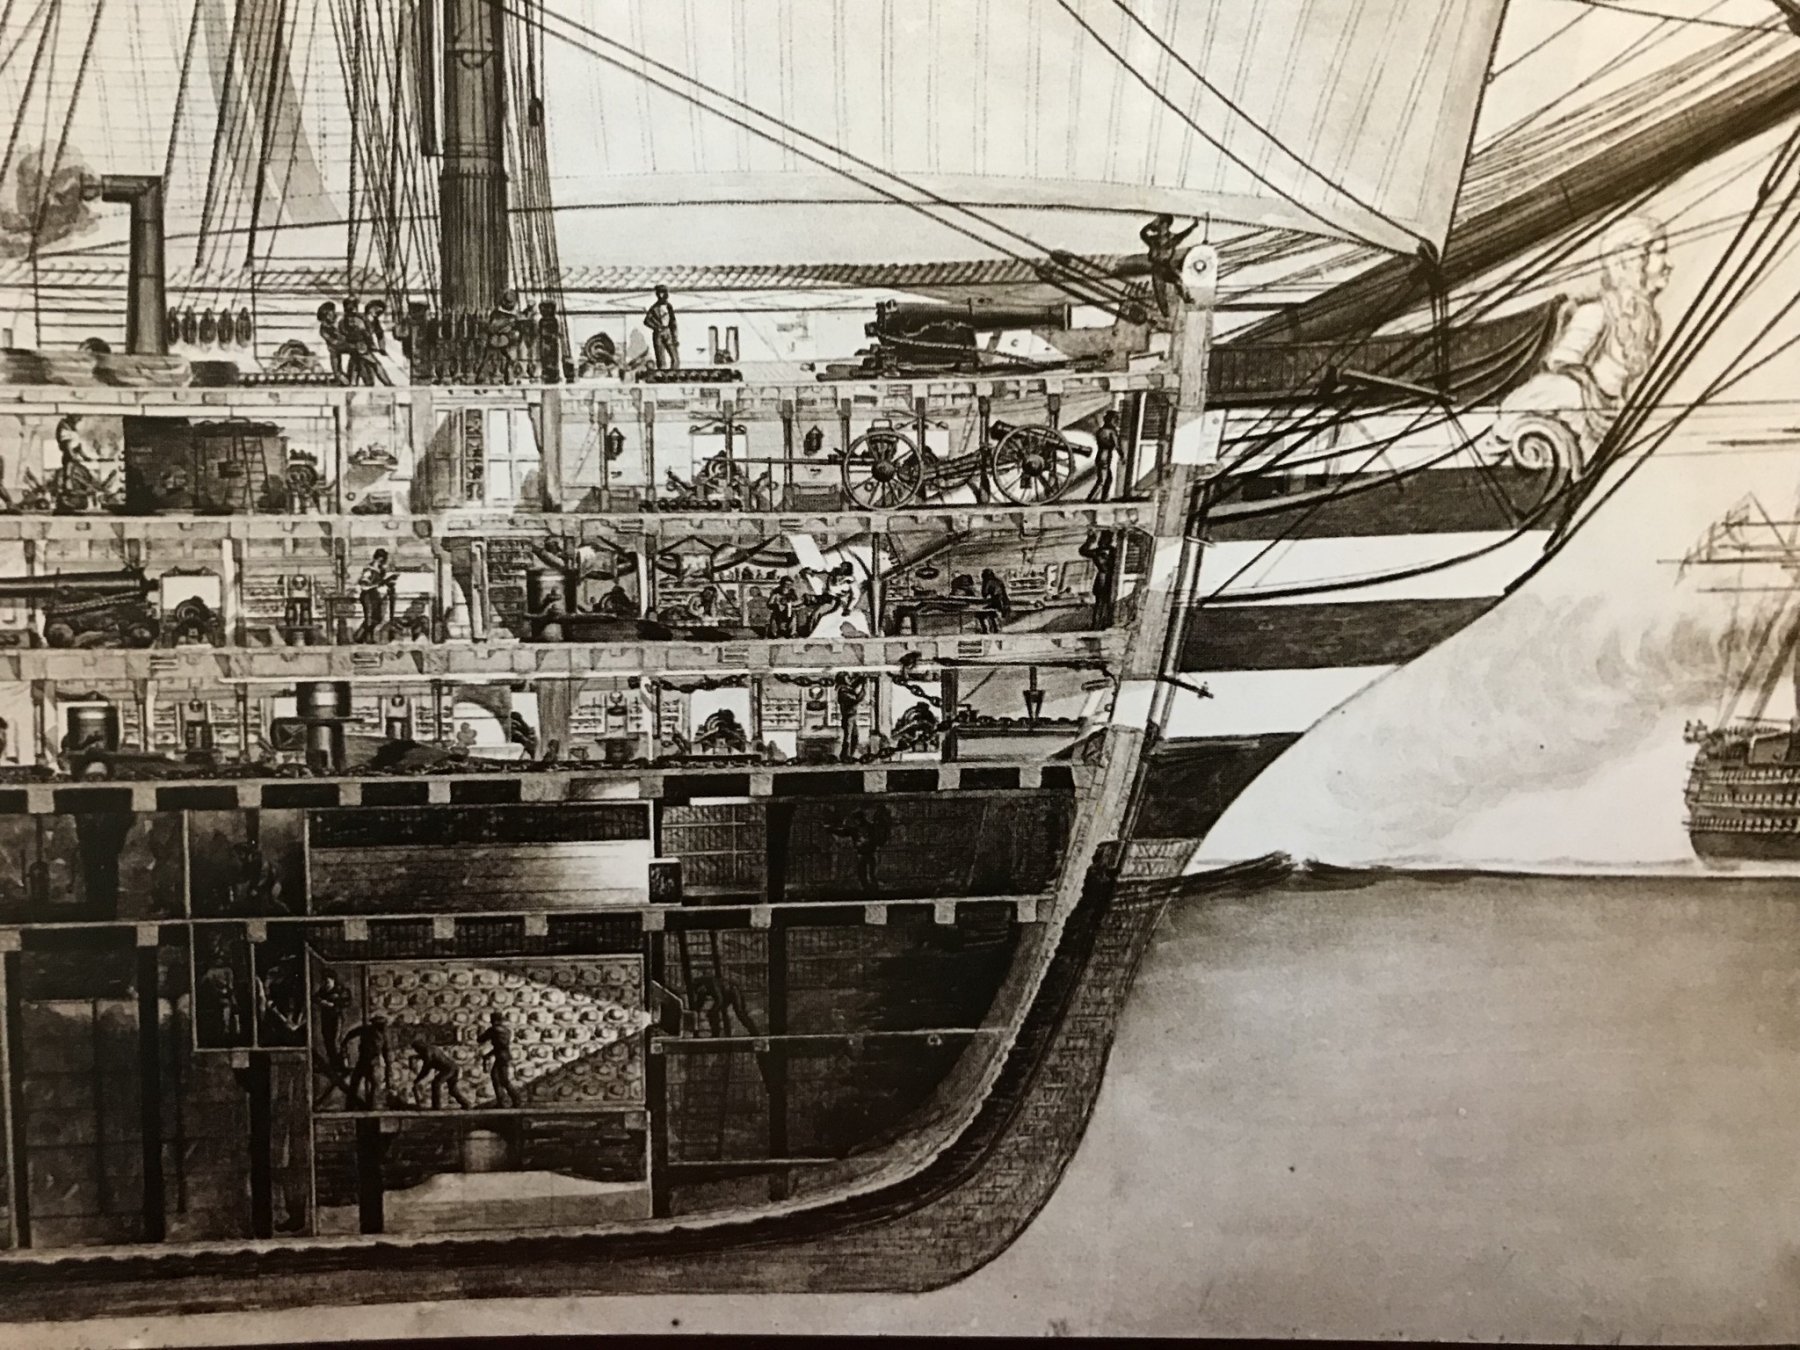
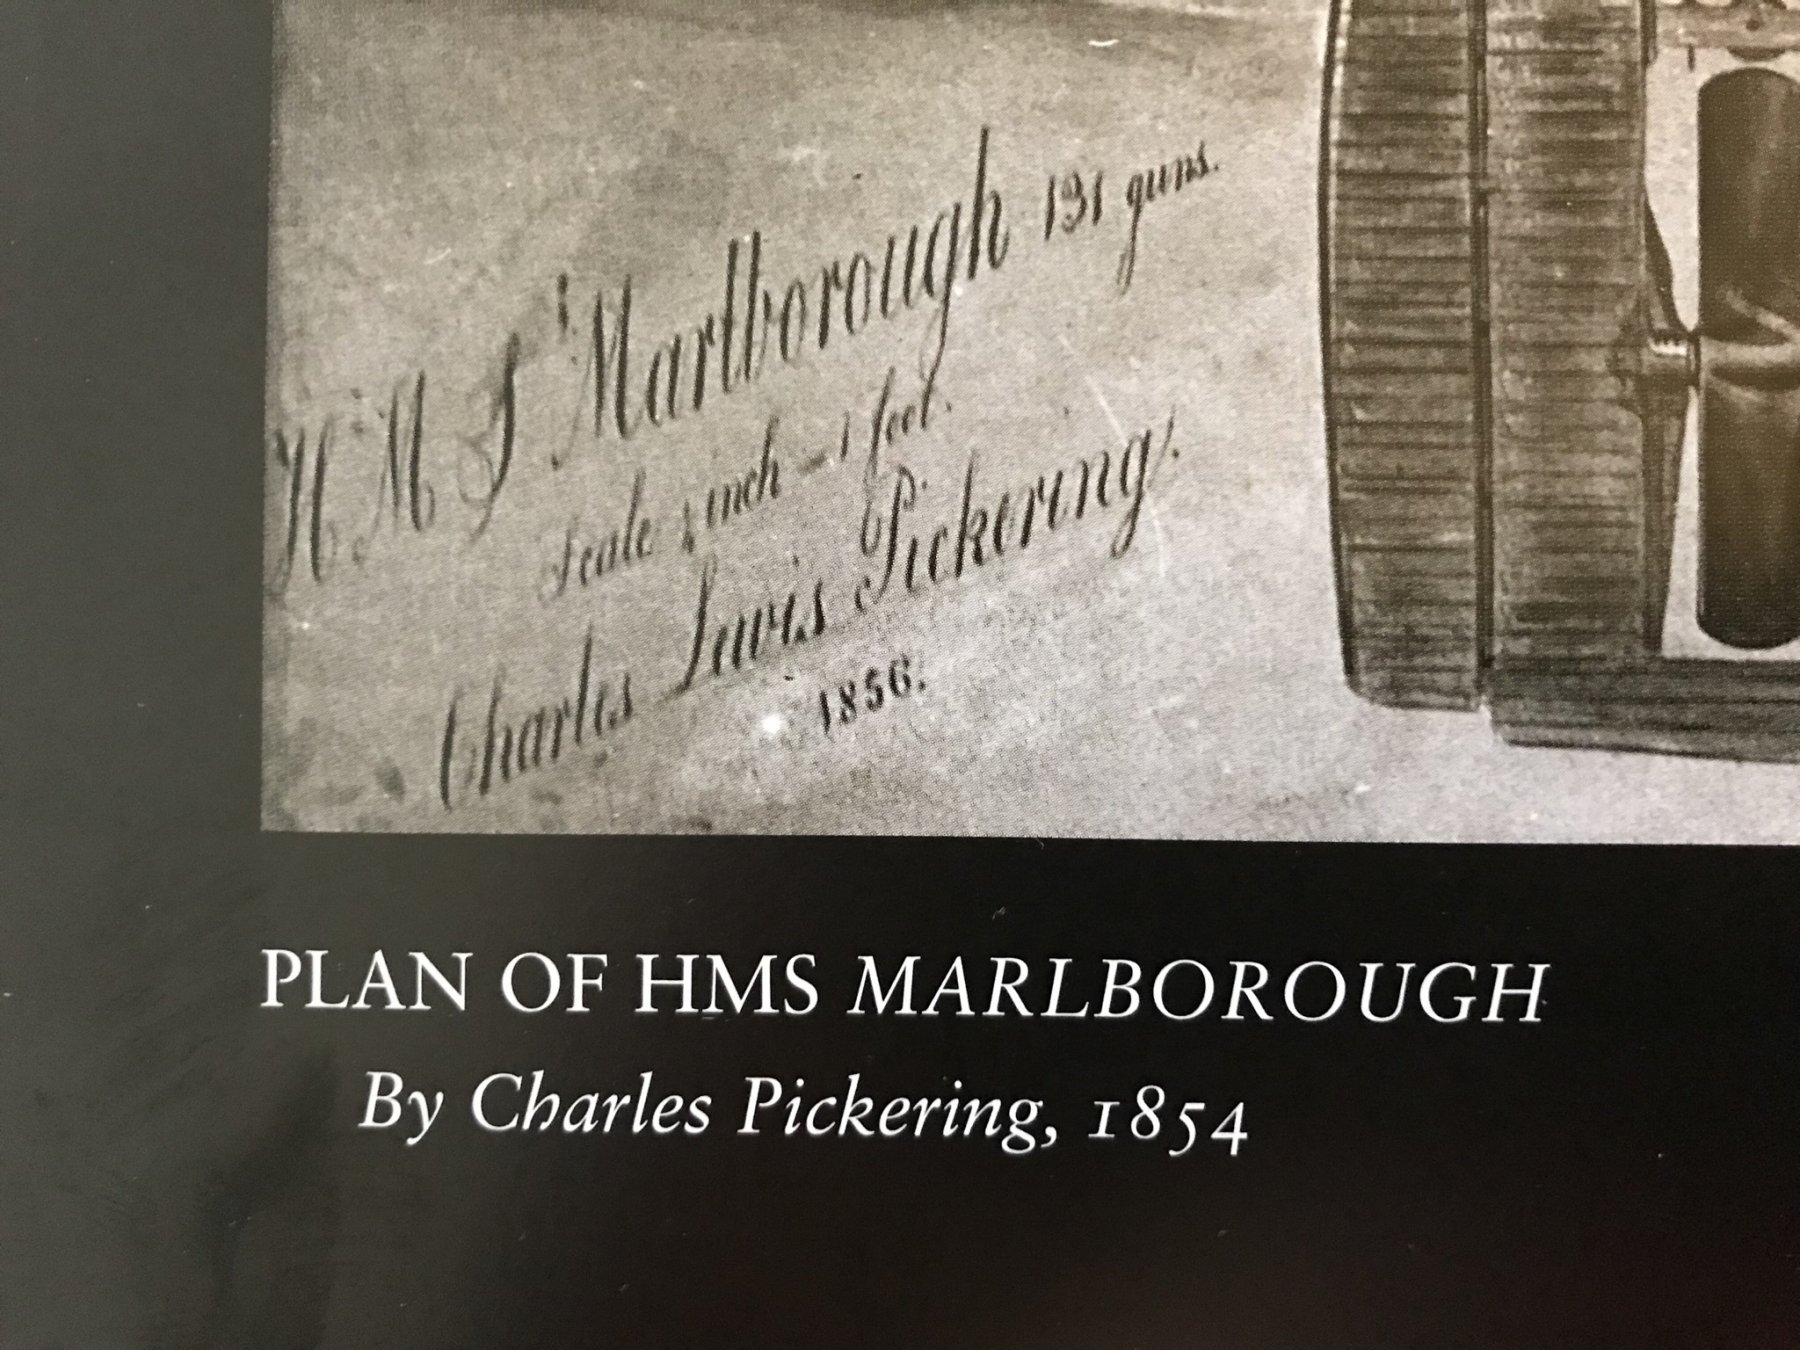
Maybe this might help. In the book “Fighting Ships 1850-1950” by Sam Willis there’s an excellent broadside cutaway illustration of the Marlborough. (Those are just a couple of quick cellphone camera snaps, it’s a coffee table book that’s, well, literally a coffee table)


-
I’ve been wondering if they’re not modified gun ports for a slide-carriage gun. I had a look at Wikipedia and it claims that later in its career, the ship was fitted with one 7” 110lb Armstrong breech loader. Perhaps it was mounted forward and required wider ports in order to allow it to be traversed, from a central position, either port or starboard. Andy
-
Northwest Short Line Chopper?
realworkingsailor replied to asimon's topic in Modeling tools and Workshop Equipment
I would suggest opting for the slightly more expensive Chopper II. Instead of the MDF base, if uses a replaceable cutting mat in a much sturdier cast metal base. Andy -
See, I knew that you knew what you were doing, it was all just a test to see who was paying attention in class 😁 Andy
-
Hi Mike, Very nice metal work on the lantern, although I hope the lenses aren’t glued in yet.... Andy
-
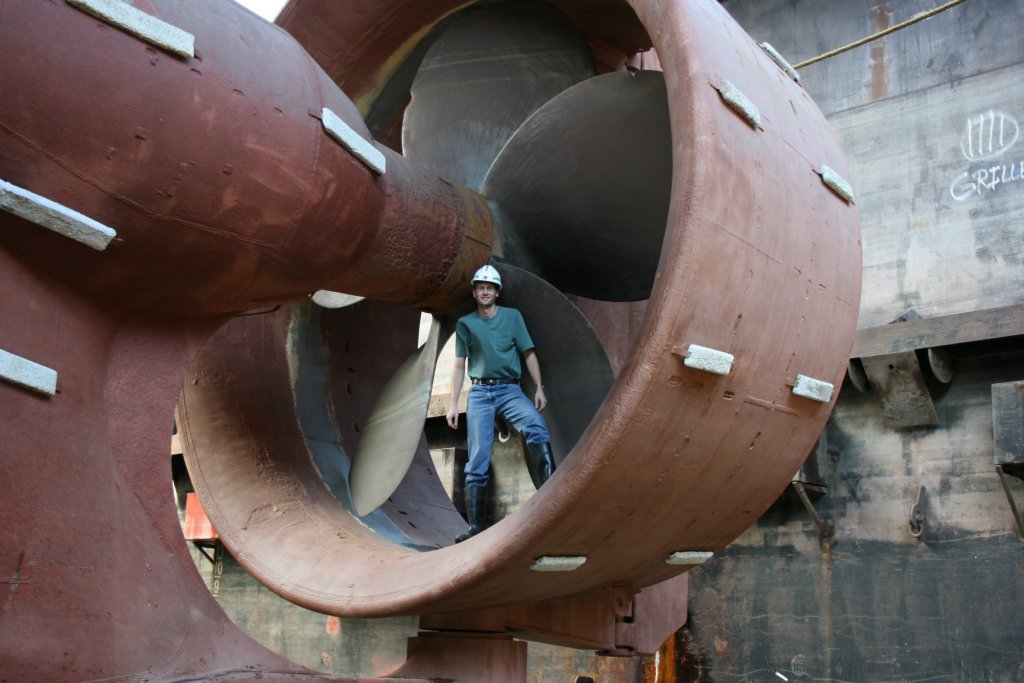
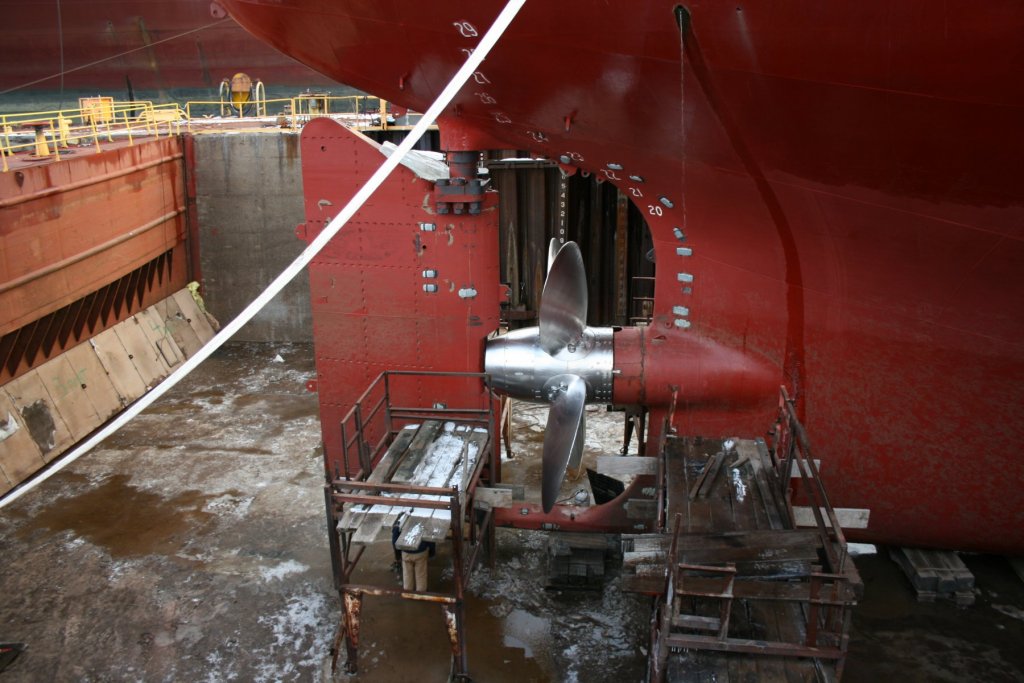
Hi Sjors! Nice looking boat you're building! I noticed you referenced me the other day, asking about the colours of the propellors and I was thinking of the best way to respond.... then I remembered my profile picture, and figured that it would make a good example for you. The famous picture of me standing in the Kort nozzle. That prop is a typical manganese-bronze alloy prop after a few years work. Then I also remembered that I had another dry dock picture of another ship with a prop of a different metal alloy. I can't remember offhand what the metal was (not stainless steel though), but it's also been through five or six years of work since its last polishing. Hope this helps! Andy
-
I received for Christmas (and just finished reading), “Erebus” by Michael Palin (yes THAT Michael Palin!). A fascinating account of the history of that enigmatic ship. While the author is not the first person you would think of when it comes to naval historians, he nonetheless manages to weave a brilliant nautical narrative. He covers, in some detail, as much of the human stories surrounding the various voyages of the Erebus, culled from various journals and letters written by the various participants. Starting with some details of her initial construction and her early deployment in the Mediterranean, to her conversion for polar service, and her two polar operations. The first being the successful voyage to the Antarctic, led by Sir James Clark Ross, and her final fateful journey. A recommended read for anyone interested in polar exploration, Sir John Franklin, and maritime history. Andy
-
For something that has the serious potential to come out (looking) like a total rat’s nest, I am utterly amazed at how neat and tidy your work is. Andy
- 3,618 replies
-
- 2
-

-
- young america
- clipper
- (and 1 more)
-
If you’re talking about the little brass pin nails, these: https://www.micromark.com/Spike-Insertion-Plier are far more accurate and versatile for driving them in (and pulling them back out too). They were originally designed specifically for spiking model railway track, I have a set, and use them extensively for shipbuilding. I’ve had no trouble with nailing plywood, mdf and other woods. Andy
-
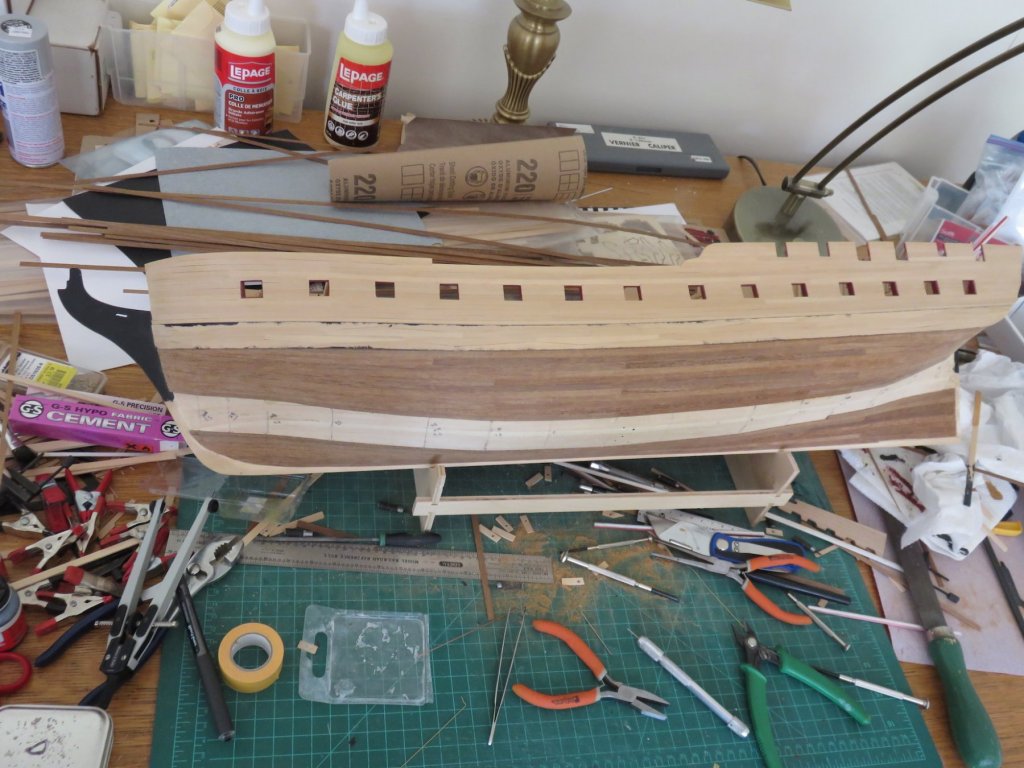
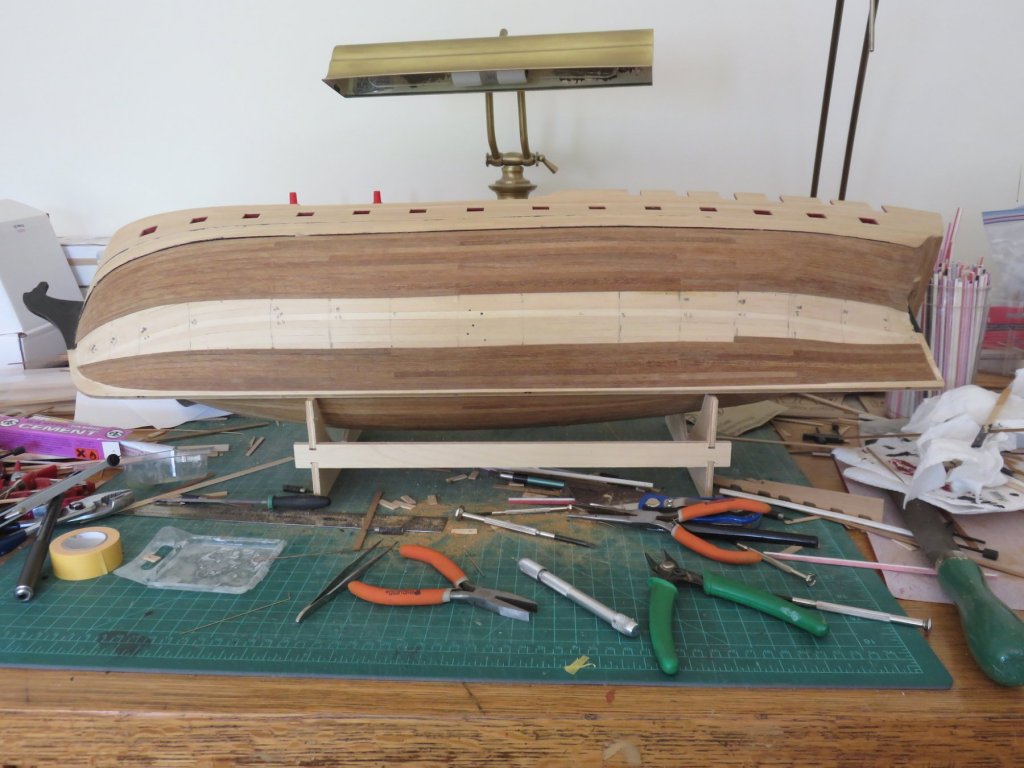
With all the sudden and unexpected interest, I'll throw you good folks a bit of a bone (not one of Freyja's chew bones though). I'm out of the shipyard for the near future, but I'll share a few pics of how far I managed to get with the planking. Not really too many more strakes left to go, I can't remember if it's eight or nine by my last count. The wales are done, but not fully painted, just the top and bottom edges. And popeye, it's not so much the pitter patter of little feet.... more like the thundering footfalls of a herd of galumphing baby elephants! Andy

-
Hey everyone, Thanks for the positive comments. My current distraction is a little more demanding of my attention (and rightly so). Her name is Freyja, she’s four months old, and she doesn’t really allow me to turn my back for a second. Andy

-
Hi! I had been picking away at it a little bit over the winter, so there has been some progress. I tended to stall every time Jason (Beef Wellington) posted an update on his build. And also a few other distractions keep getting in the way. I may get back to it when the distractions abate, and the weather turns cooler. Andy
-
I wouldn't be surprised if it was black. I'm not sure when coal-tar epoxy paint came into general use, but I recall slathering it around the ballast tank of my first ship twenty years ago. More modern ships use more of an off-white colour in the ballast tanks to improve lighting (better passive reflection from portable light sources), and defect detection. Bunker tanks are generally uncoated. Andy
- 83 replies
-
- 8
-
-
- marcle models
- card
- (and 1 more)
-
If I may offer a suggestion, it may be an idea to combine this great list, with the current list of banned manufacturers (no links for those ones, obviously), along with the reasons why those manufacturers have been banned (I want to call it Chuck's manifesto, but he's dead right, and we should all follow his sage advice!). And perhaps also, it should be considered that every so many weeks, any extraneous conversation is deleted from this particular thread (ie when a suggestion for an addition, or perhaps a deletion, has been verified and added). These lists should be pinned and available for immediate reference by anyone. Having to wade through pages of conversations (forwards of backwards) dulls the message. Not saying there shouldn't be discussion, but there should be a separate arena for it. Andy
-
For most of us ratlines are a mind numbing chore..... with the level of detail you put in to yours, if you don't mind me asking, how do you avoid ending up in the corner curled up in the foetal position ranting gibberish? All kidding aside, congrats on page 100 and well done! Andy
- 3,618 replies
-
- 8
-
-
- young america
- clipper
- (and 1 more)
-
Good news that things will/may work out, but I still think it was a sneaky way to go about it.
- 346 replies
-
- 5
-
-
- terror
- polar exploration
- (and 2 more)
-
I can't wait to see how far this collaboration may go. I hope some day for a full ship, as opposed to just a cross section. I am one of those lacking in finer power tools (don't think my chainsaw is too useful for finescale modelling). Obviously, I recognize all things must start somewhere, and I hope this works out well for everyone.
-
Thanks for all the nice comments, likes and well wishes. Mark, unfortunately the whole office and operational organization has changed, so the job I was doing doesn't exist any more. At this point I'm looking at a whole new career, and that's not the easiest thing to figure out. It was so much easier during that better part of a decade of time that high school and university/college provided.... the pressure was.... different....
- 382 replies
-
- 4
-
-
- stadacona
- sylvan scale models
- (and 1 more)
-
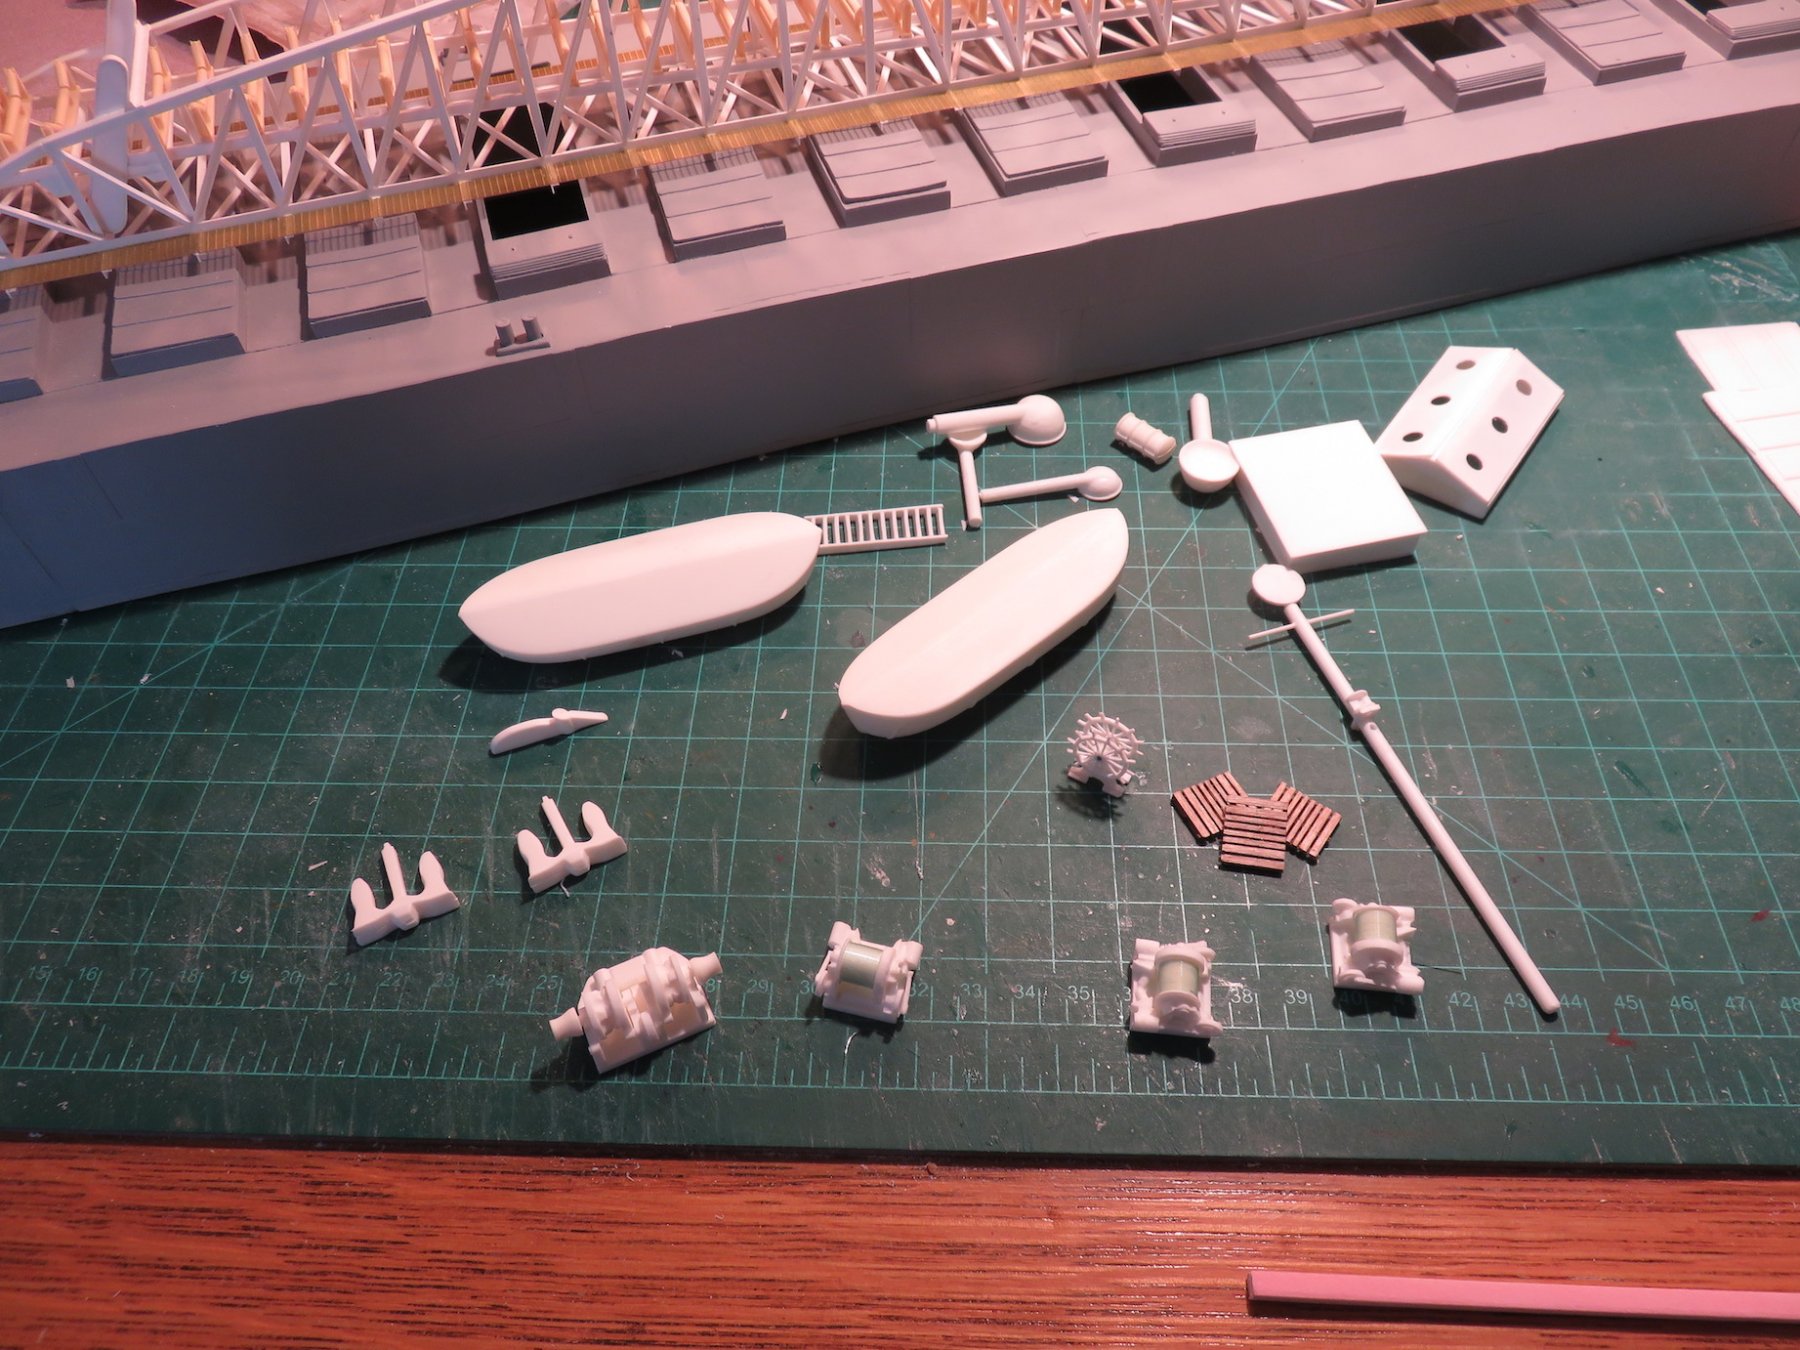
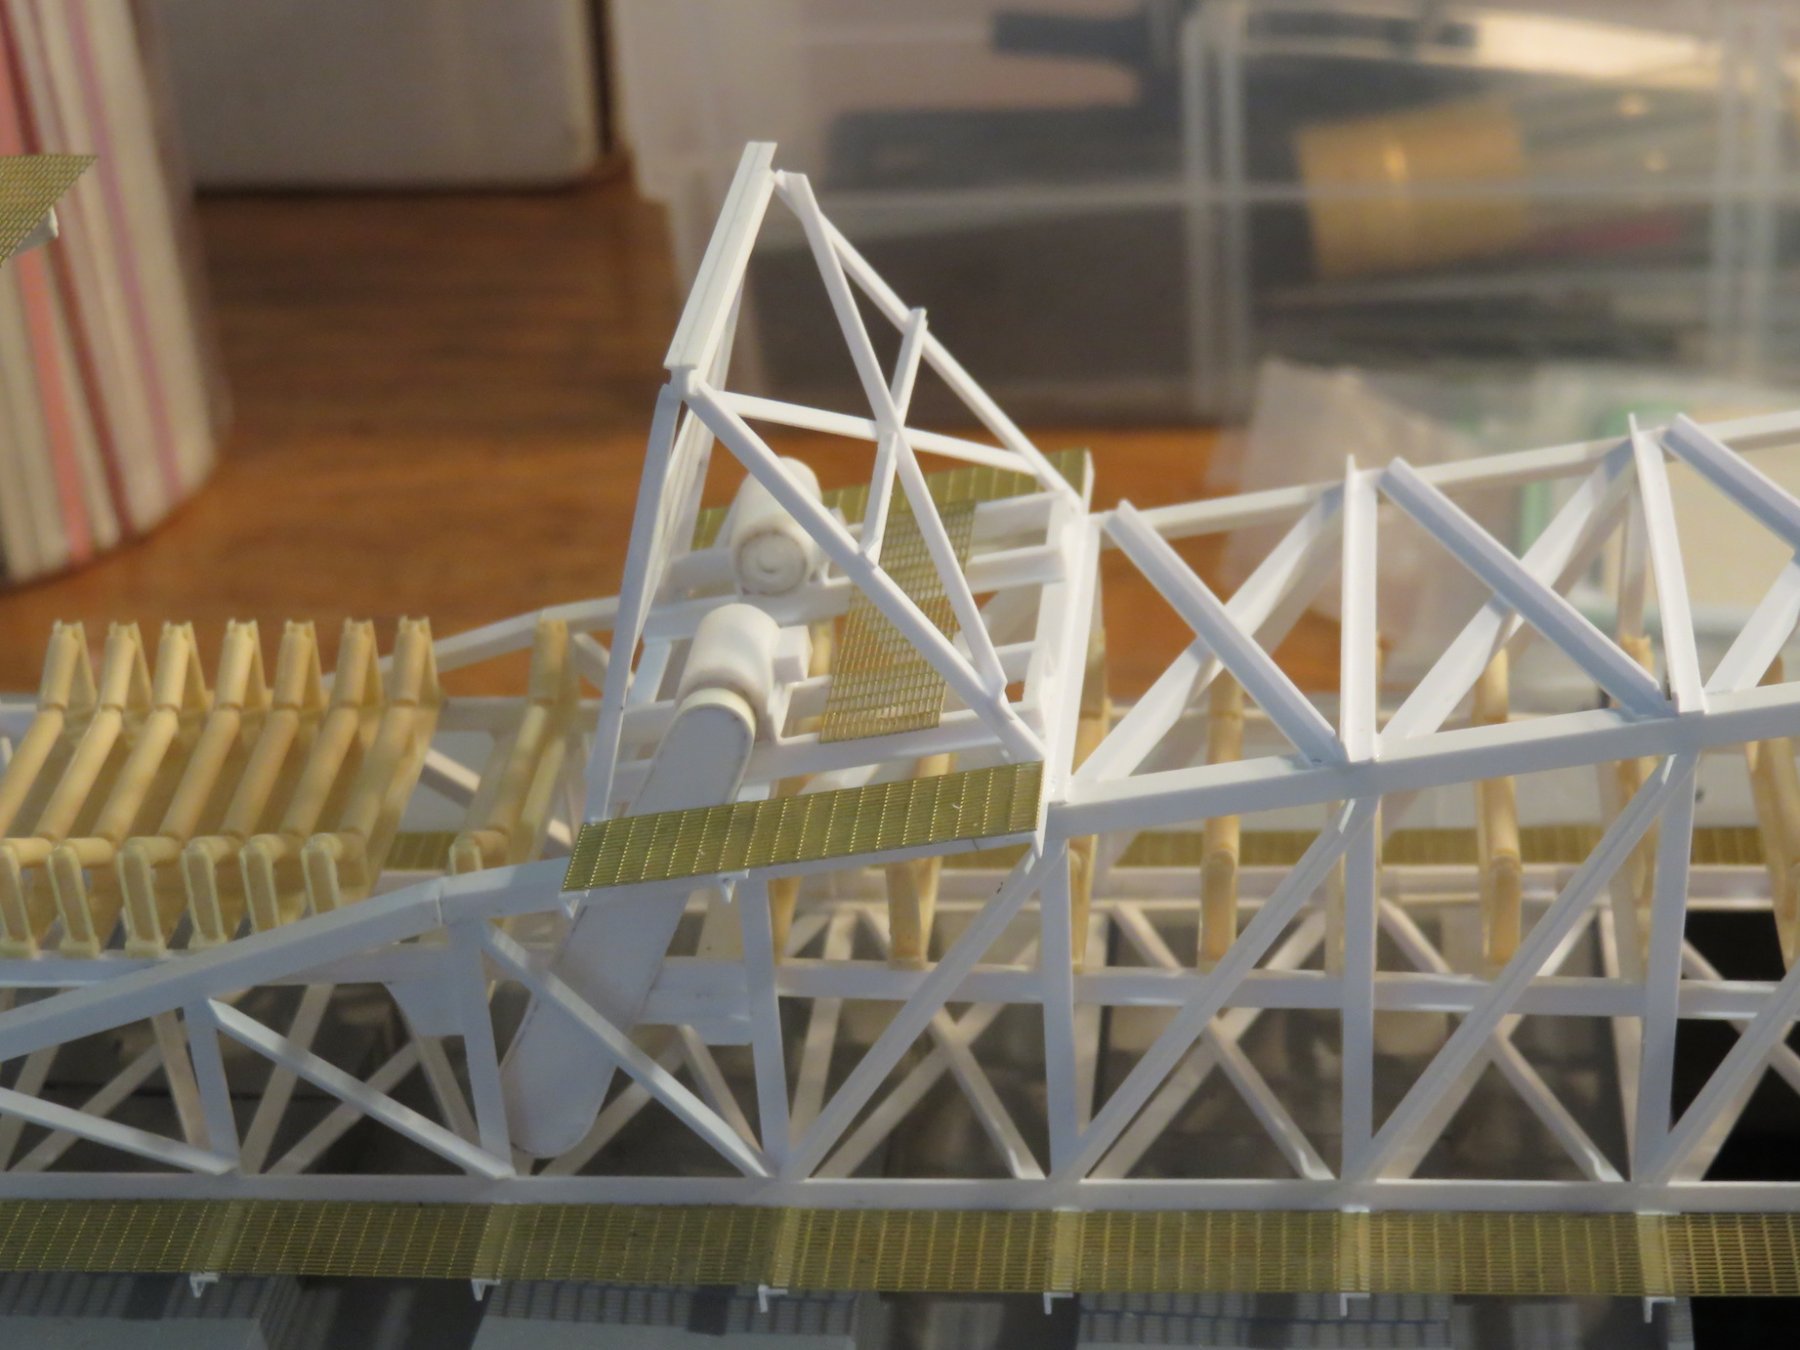
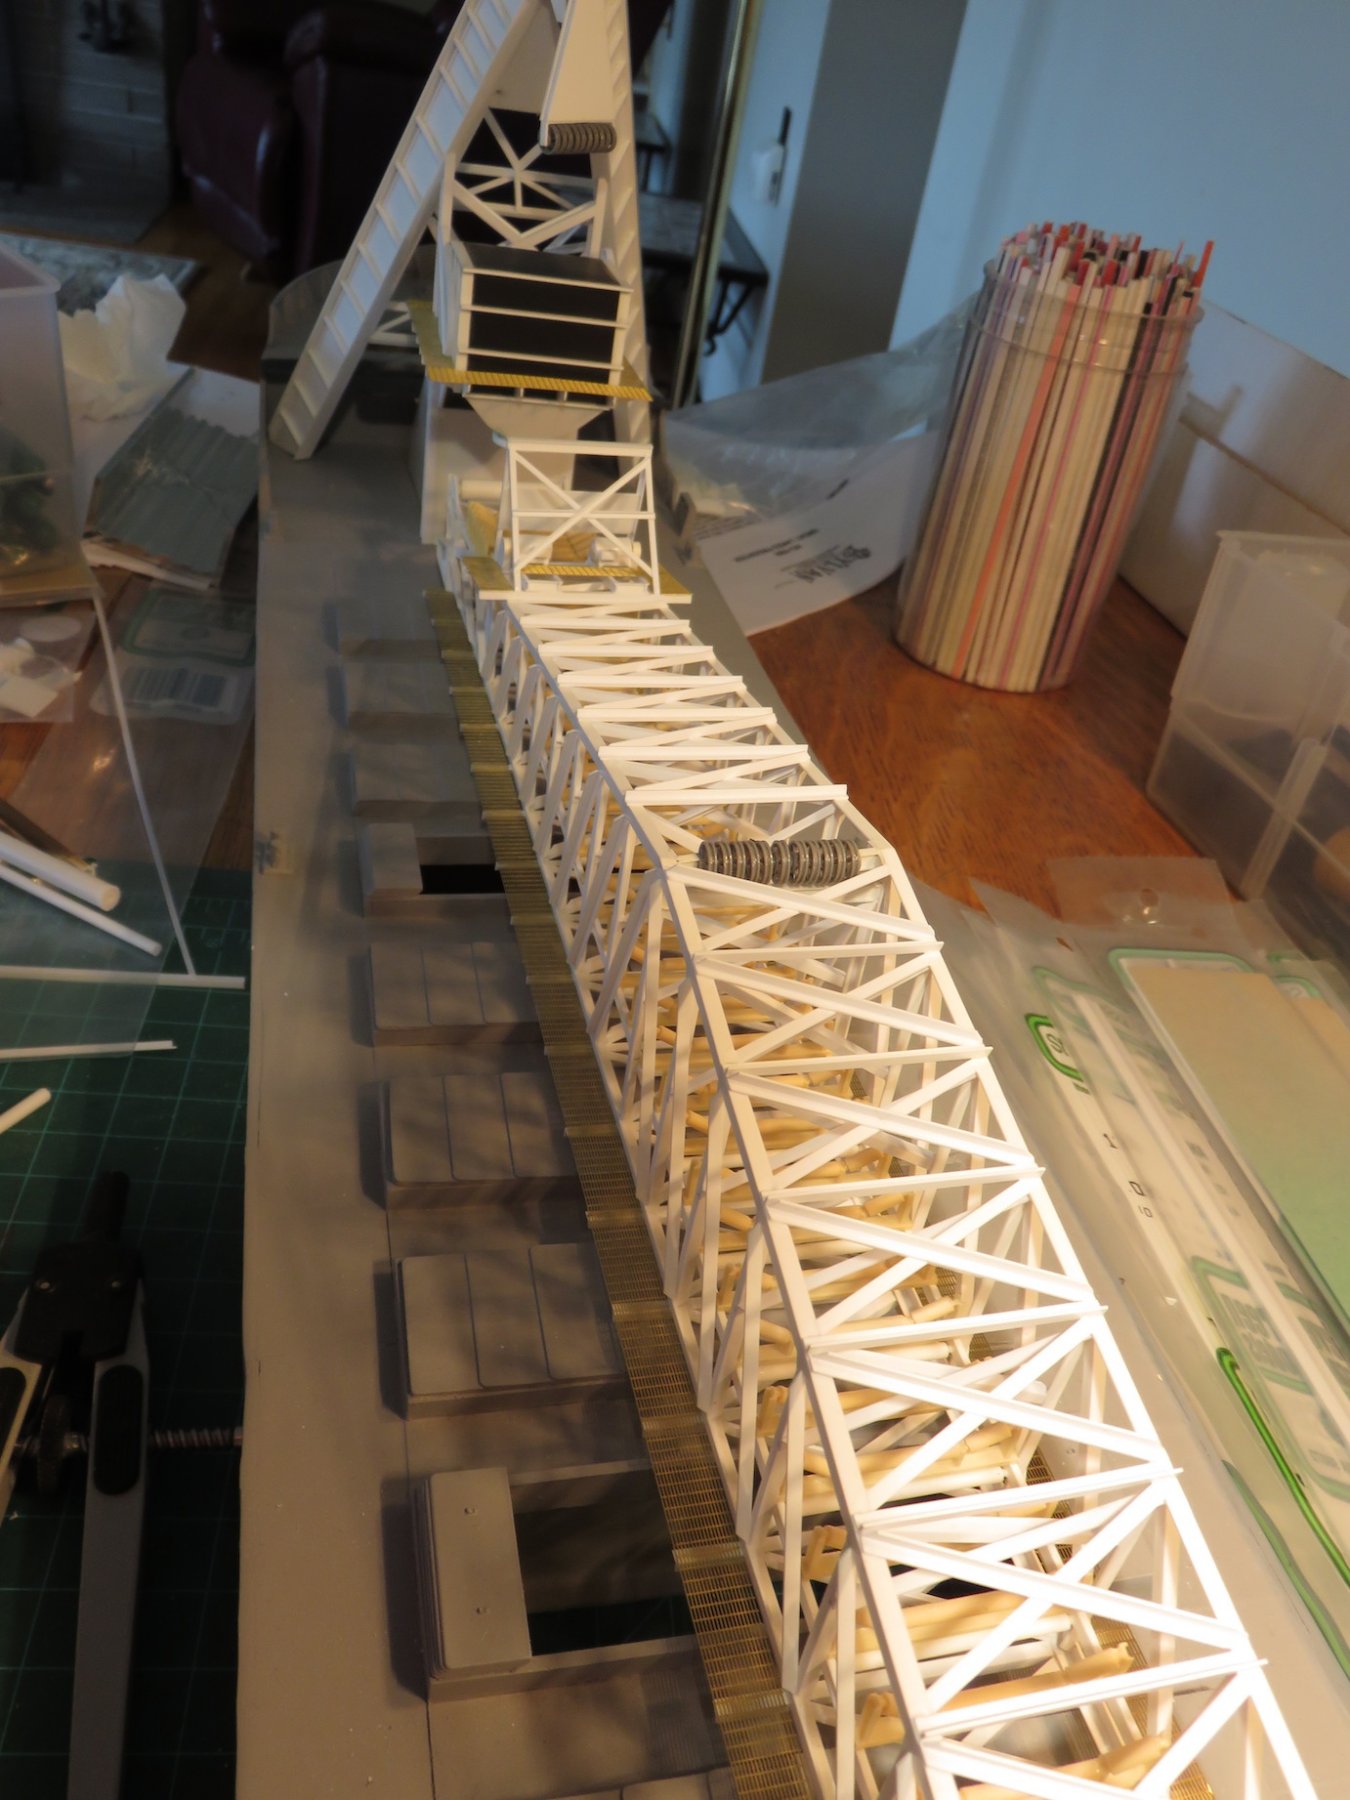
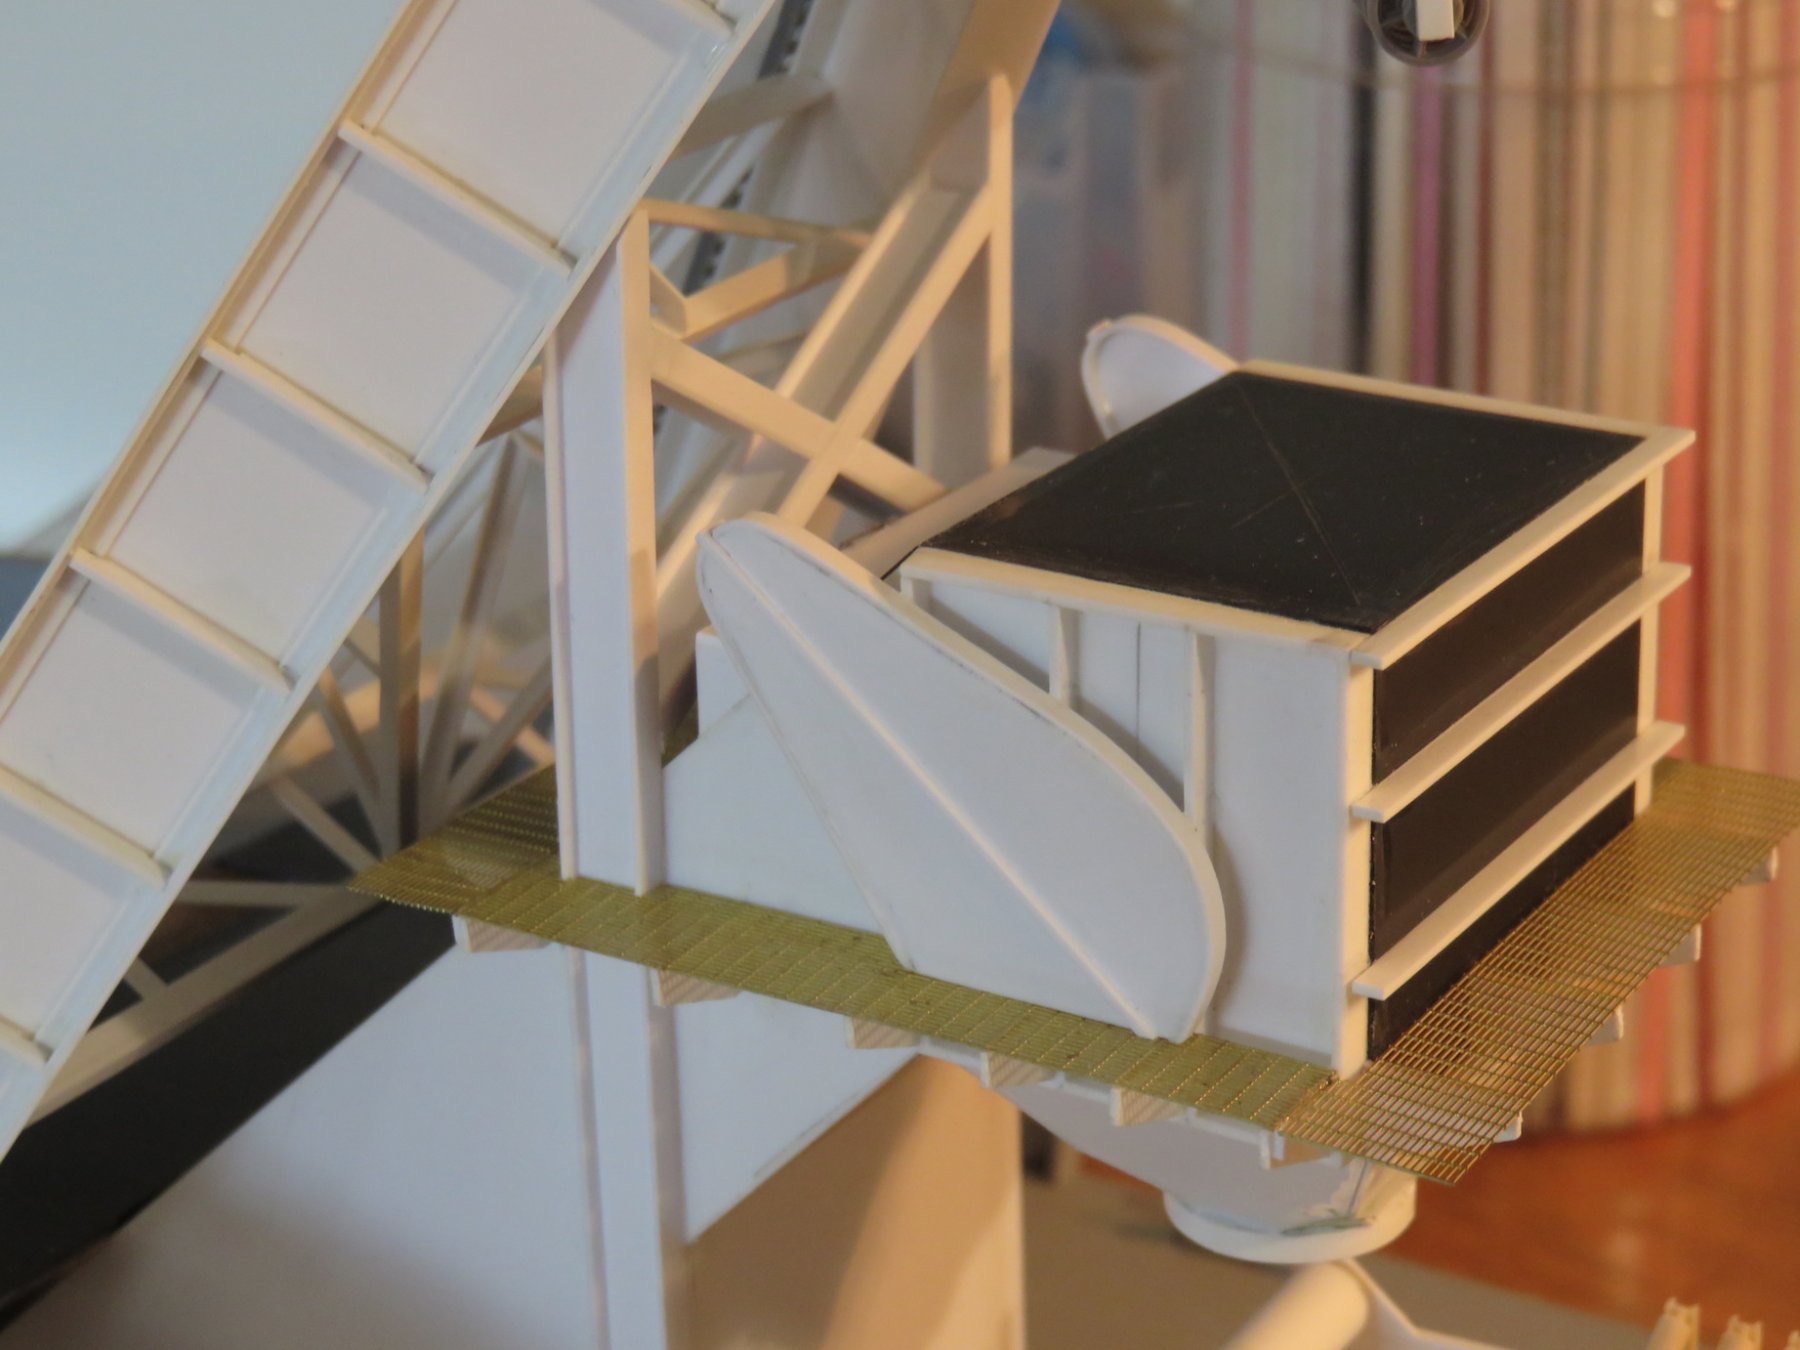
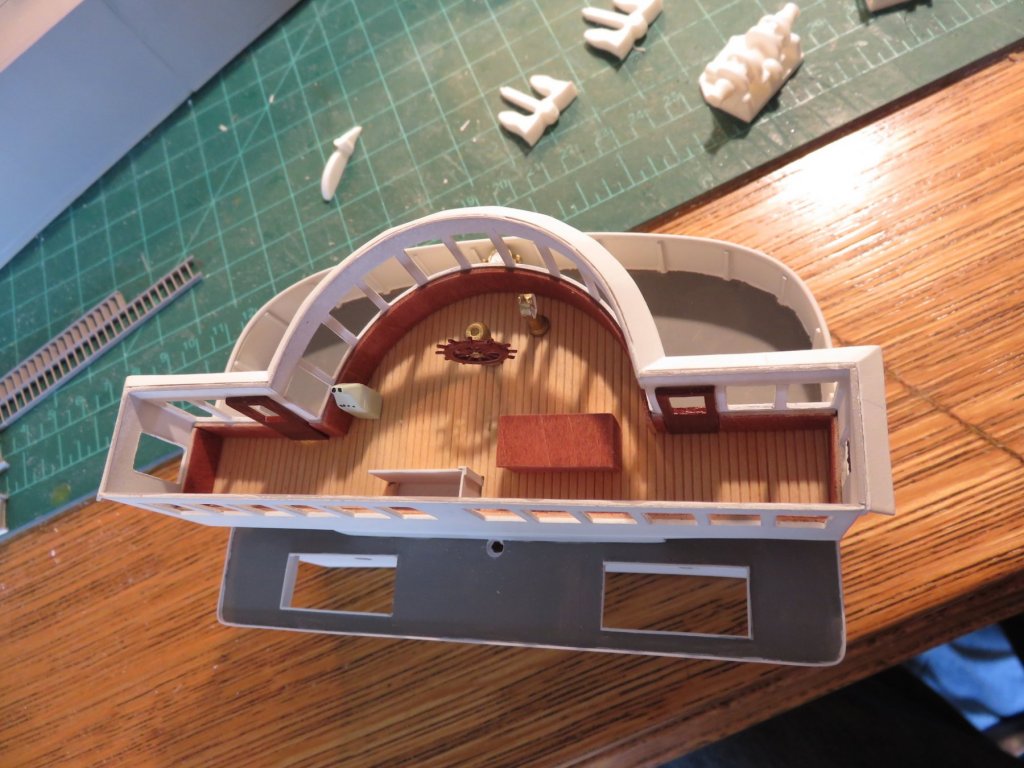
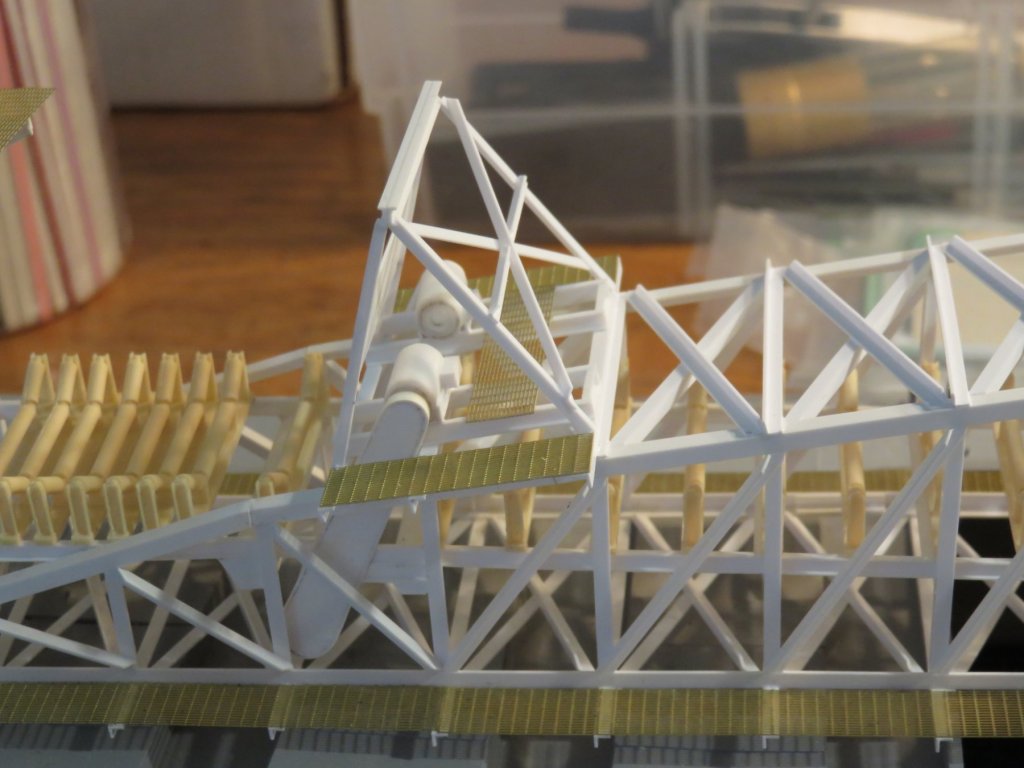
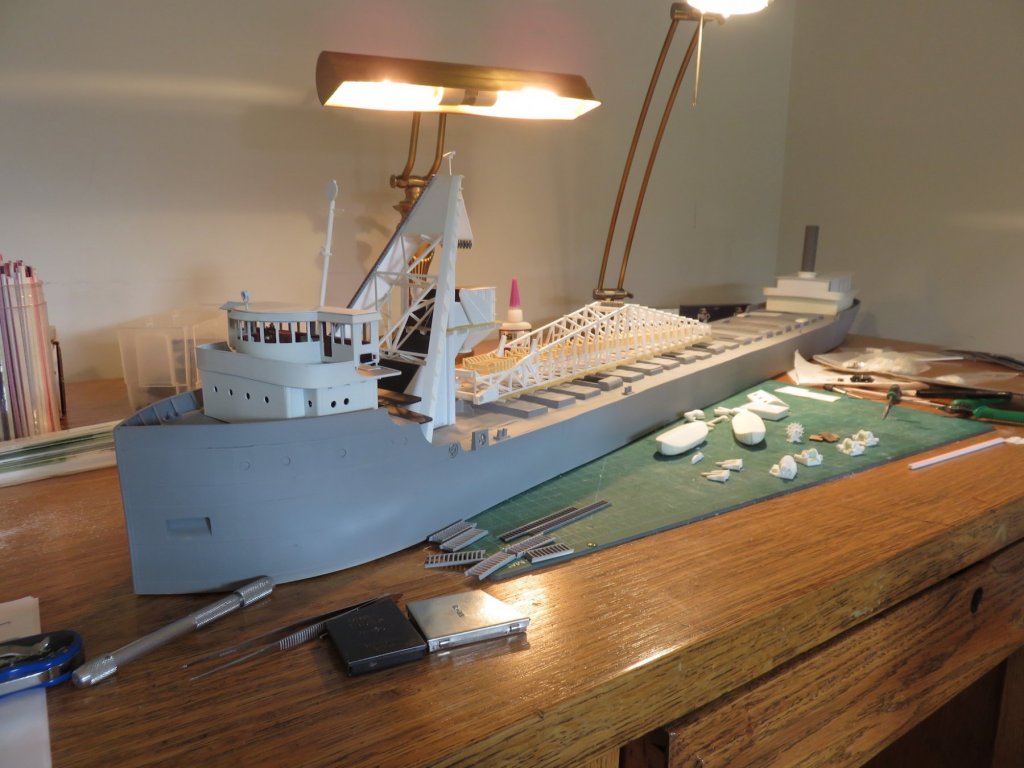
Well, it's been a while since I've been here.... Things have been rather "interesting" the last few months, and not so much in a good way.... I'm no longer working on board any ships, as I my medical fitness certificate was revoked on account of my eyesight, more specifically, my uncorrected visual acuity (how well I see without my glasses). I did investigate treatment options, but the only one available to me is more drastic than I am willing to undergo at this point in time (no, not laser surgery, I almost had my head wrapped around that procedure....). I'm sure there are some of you who know what it feels like to have a career pulled out from under your feet rather unexpectedly, especially after having dedicated nearly 20 years of time and effort. Trying to figure out what to do now, and where in the world I am supposed to fit, is proving to be difficult. In August, I relocated out of my apartment to a piece of family property north of the City. So there was another bit of an upheaval to contend with, but the move was one I was considering for some time before the rug got pulled. Anyway, I'm trying to stay positive, and busy (80 forested acres does help with the latter). After getting settled, I decided that a change of pace was in order and I've been picking away at this build again for a couple of weeks now. I've painted and assembled the large components of the forward house, as well as assembled, painted and installed some of the bridge equipment. The wooden deck is simply scribed basswood sheet cut to fit. Using individual planks did not seem like a good way to maintain my sanity. There are a couple more things I may add including the window glazing, as well as some further detail to the chart table. Good thing I built it so the interior can be accessed. I've also started working on some of the other resin bits and pieces that came with the kit, such as the mooring winches and windlass, the auxiliary wheel and so on. The reels on the winches are just blank, but I've wrapped some light fishing line to simulate the runs of cable. And yes, those are scale pallets (there's no real secret to making them, they're from Osborn Model Kits). I've also been picking away at more of the unloading boom structure.... lots of bits of angle bar needed to be added. on the whole, it has become quite a solid structure (after you take in to account the natural flexibility of the styrene!). I've also added the drive motor platform, and scratch built a couple of reasonable facsimiles of the electric motors. I had ordered some cast detail parts, but it seems that the company who made them had long gone out of that particular business, drat. Still not sure what purpose the small A-frame structure served, I have some suspicions, but seeing is it is something that has completely disappeared from self unloaders built barely a decade after my prototype, it is just not seen today. I did manage to get some high resolution images of the ship from a friend of mine, that revealed a whole wealth of detail, and unfortunately revealed a few areas in which I have erred. But rather than tear the whole thing down and start over, I've decided to forge on with what I have. I'm not after making a 100%, down-to-the-last-rivet accurate model of the ship, I'm looking to build something that embraces the character of the vessel, and is recognizable for what it is. I other words, I'm keeping things as I have built them, and nuts to the rest! So... thats about it for now.


- 382 replies
-
- 14
-
-
- stadacona
- sylvan scale models
- (and 1 more)
-
At what scale are you planning to build? Check out Deans Marine https://www.deansmarine.co.uk/ Andy
-
There are many possibilities as to what type of steam engine you are looking for... having a manufacturer's name helps enormously. Unless your movie has a clear close up of the engine builder's plate, you're probably out of luck... Your first black and white photograph appears to be a fairly typical triple expansion engine (high pressure cylinder, exhausting to a medium pressure cylinder, exhausting to a low pressure cylinder). The other engine looks to be a four cylinder compound engine, with two high pressure cylinders exhausting into two low pressure cylinders, but not a quadruple expansion engine. Andy
-
Using highly toxic substances.
realworkingsailor replied to bluenose2's topic in Metal Work, Soldering and Metal Fittings
Hi Mark, if anything, my original topic should be pruned a little bit. There was considerable discussion on the perils of wood dust, and although equally valid, my intent was to focus on the actual chemicals, glues and paints etc. Perhaps after pruning, my thread could be pinned as requested, in the appropriate forum, with the added caveat that the topic is to be restricted to posting verifiable factual information (ie MSDSs). I feel the last bit is important because of the amount of hysteria and miss-information, and obsolete information, surrounding certain substances (and I have seen some of it sneek into discussions on MSW). Andy -
Using highly toxic substances.
realworkingsailor replied to bluenose2's topic in Metal Work, Soldering and Metal Fittings
https://modelshipworld.com/index.php?/topic/4150-the-hazardous-chemicals-we-use/#comment-117810 Started this a long time ago. Andy -
What you produced at 1:64 scale was amazing, can't wait to see what spectacular results you will be capable of at a larger scale. Best of luck with the new build. Andy
- 156 replies
-
- 1
-
-
- pinnace
- model shipways
- (and 1 more)