realworkingsailor
-
Posts
3,271 -
Joined
-
Last visited
Content Type
Profiles
Forums
Gallery
Events
Everything posted by realworkingsailor
-
 Hi Denis! Thanks for your generous compliments. The BCW Sparrows Point Kits are modern kits (laser cut components, PE parts, etc). The major assembly is pretty straight forward, and should be reasonably simple for anyone with a modicum of experience. As for trucks, research, especially if photographs are available, is your best friend (along with the Walthers website). Make sure you have a Kadee coupler height gauge too! If you want a suggestion for your diorama, look into getting a couple pieces of styrofoam insulation board (the dense pink of blue stuff, not the pressed white pellet stuff). You can layer and carve it to quickly make 3D scenery (ditches, embankments, hills). Your trains can be shown living IN the scenery rather than simply plonked on top of it. Kalmbach publishing has many inexpensive books on scenery techniques to help get you going. Good luck! Andy
 -
That chonky queen post is basically junk, there’s no saving that bad casting. I used Squadron white putty. It bonds reasonably well enough to wood and very well with plastic and resin. It sands easily, but I recommend having good ventilation and/or a respirator when applying, and be sparing too. Andy
-
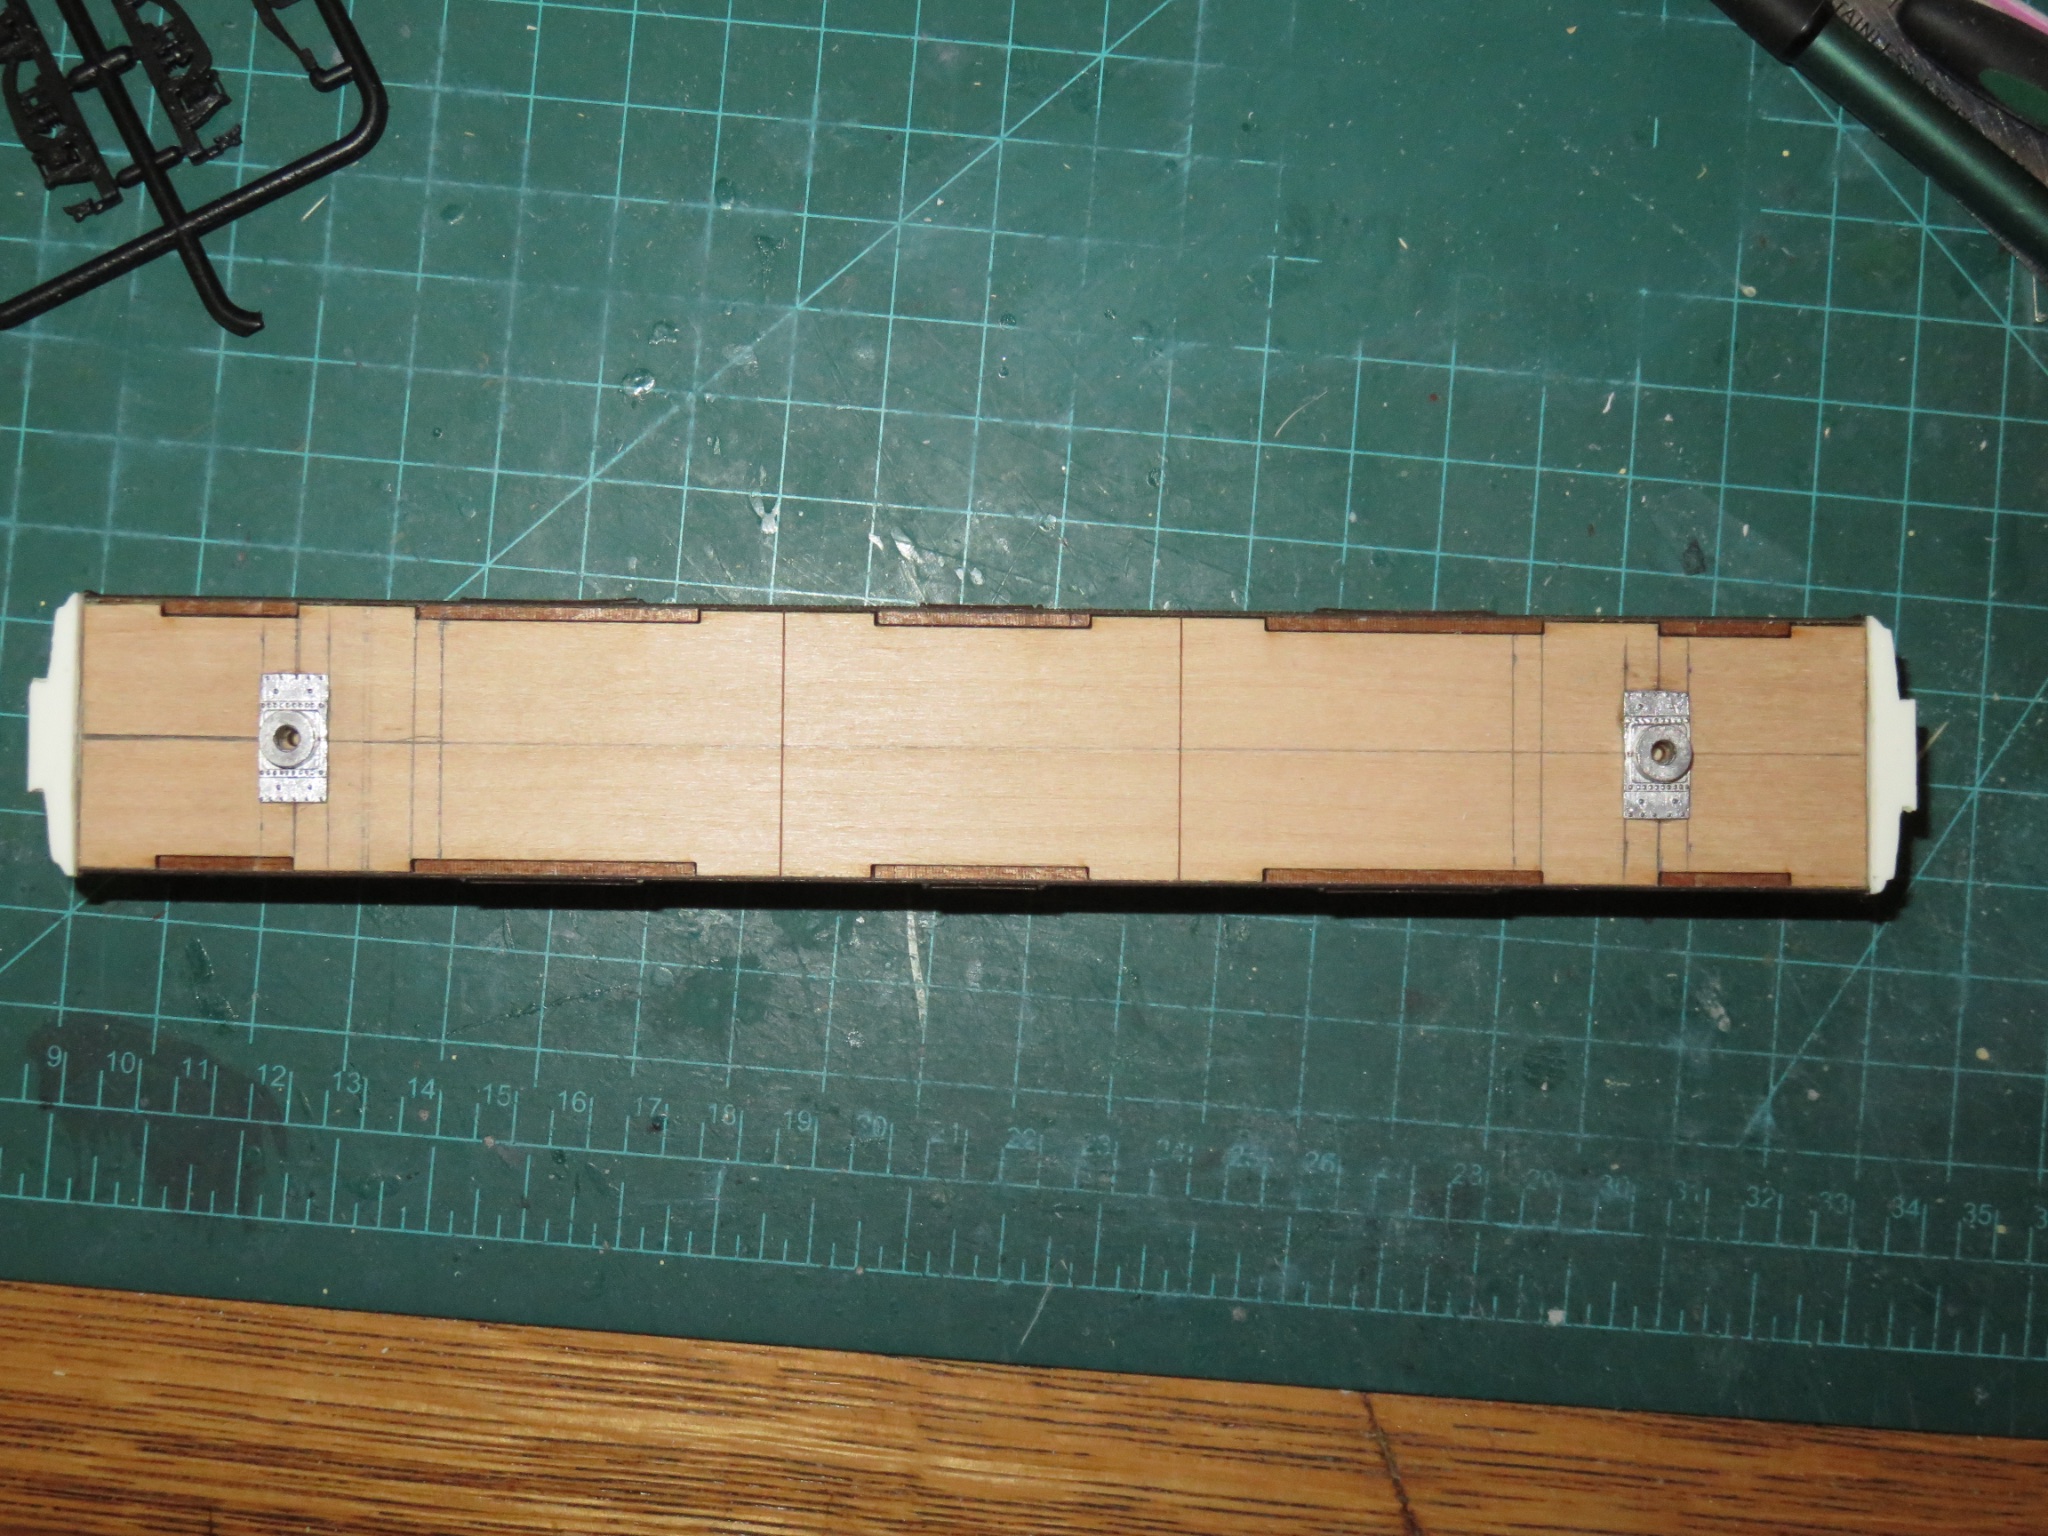
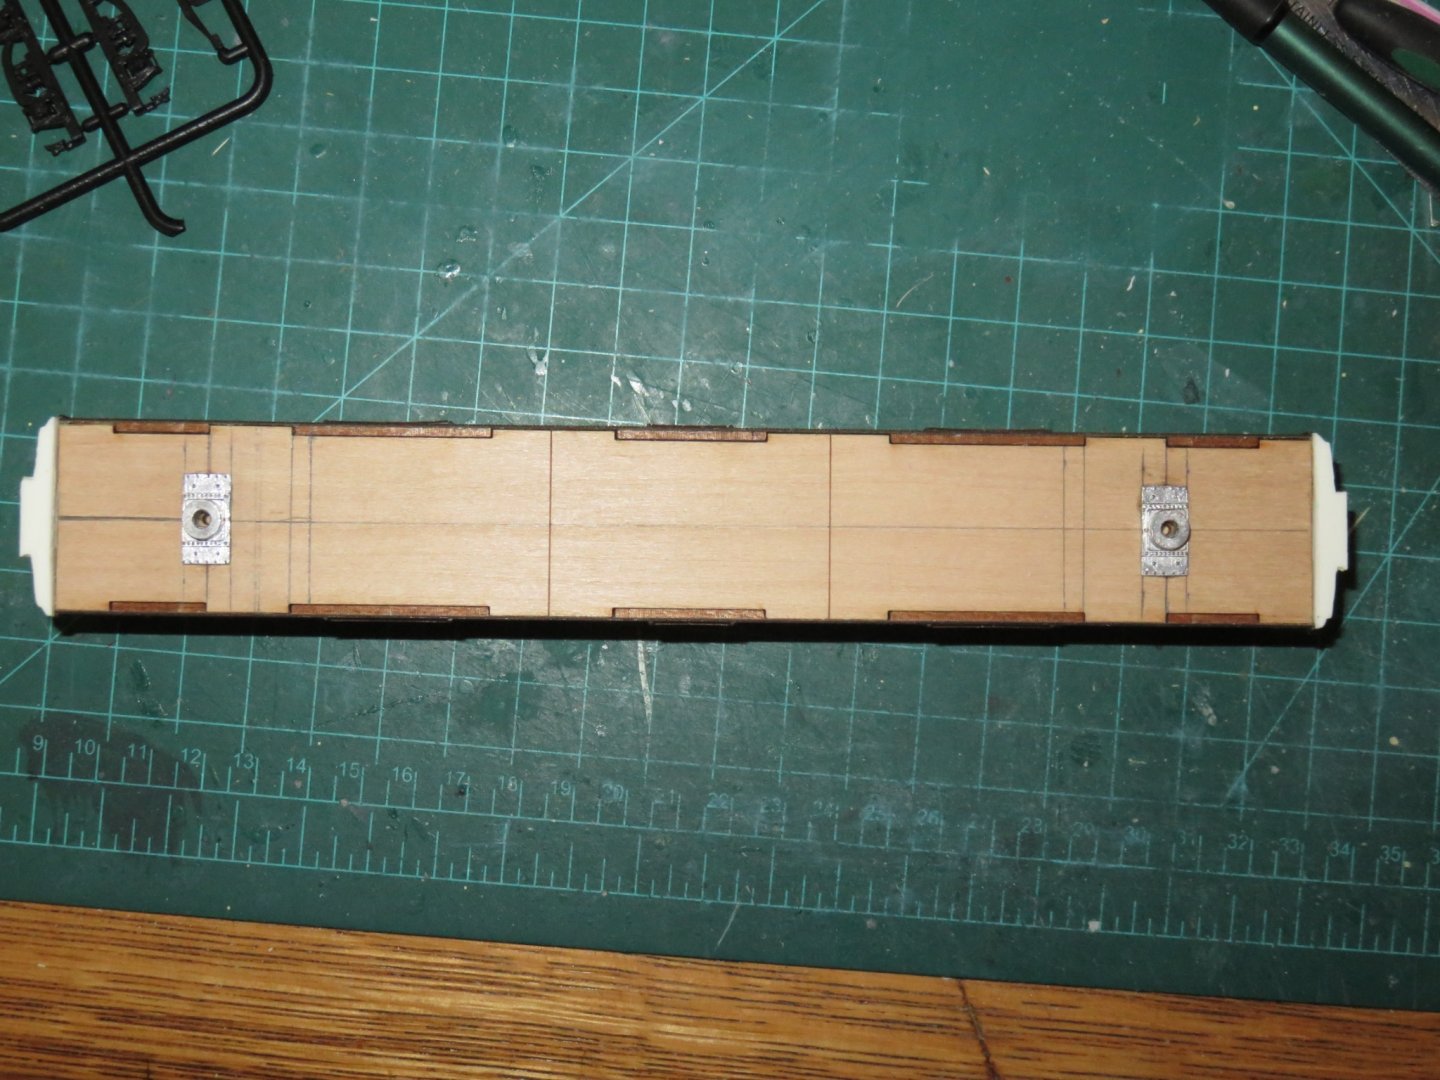
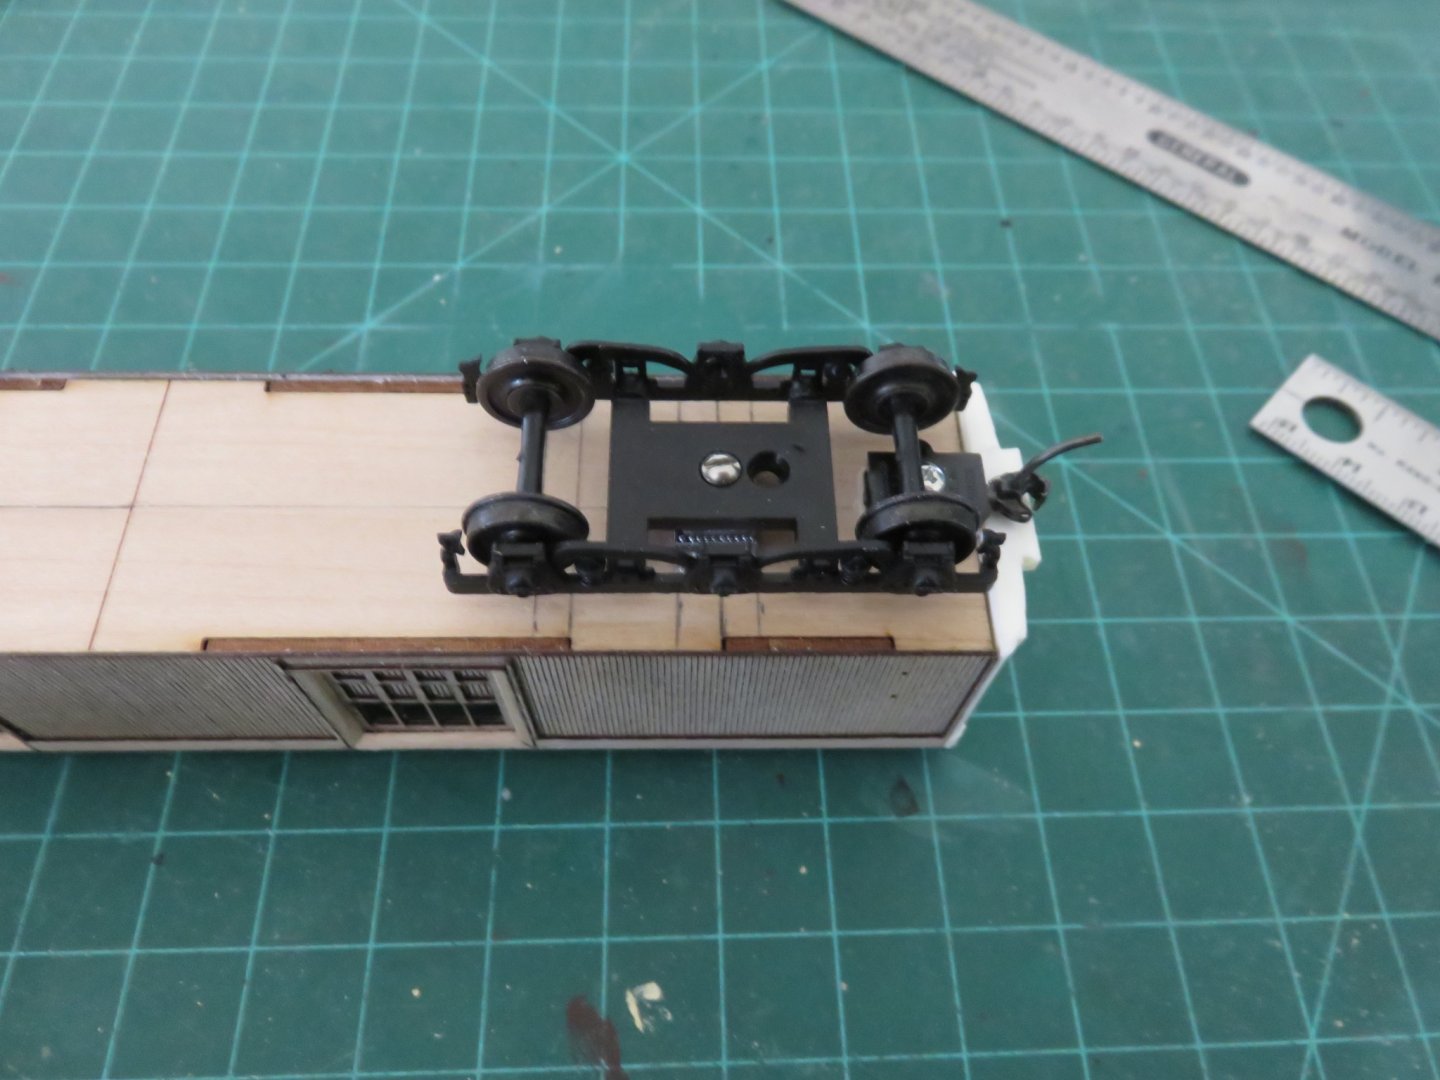
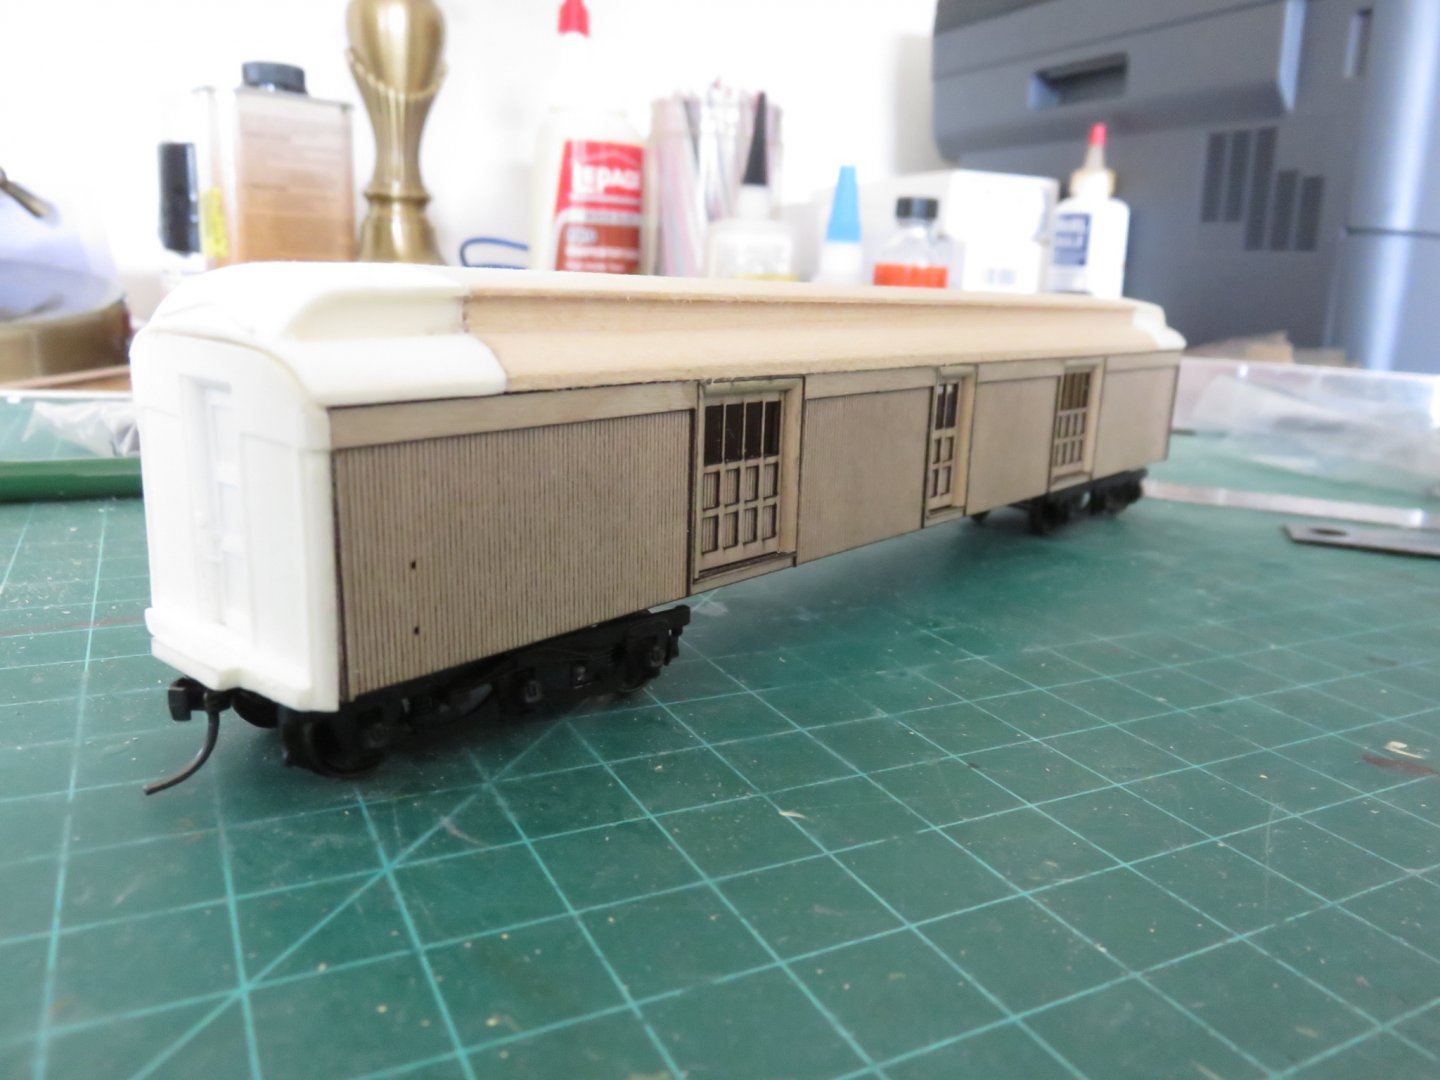
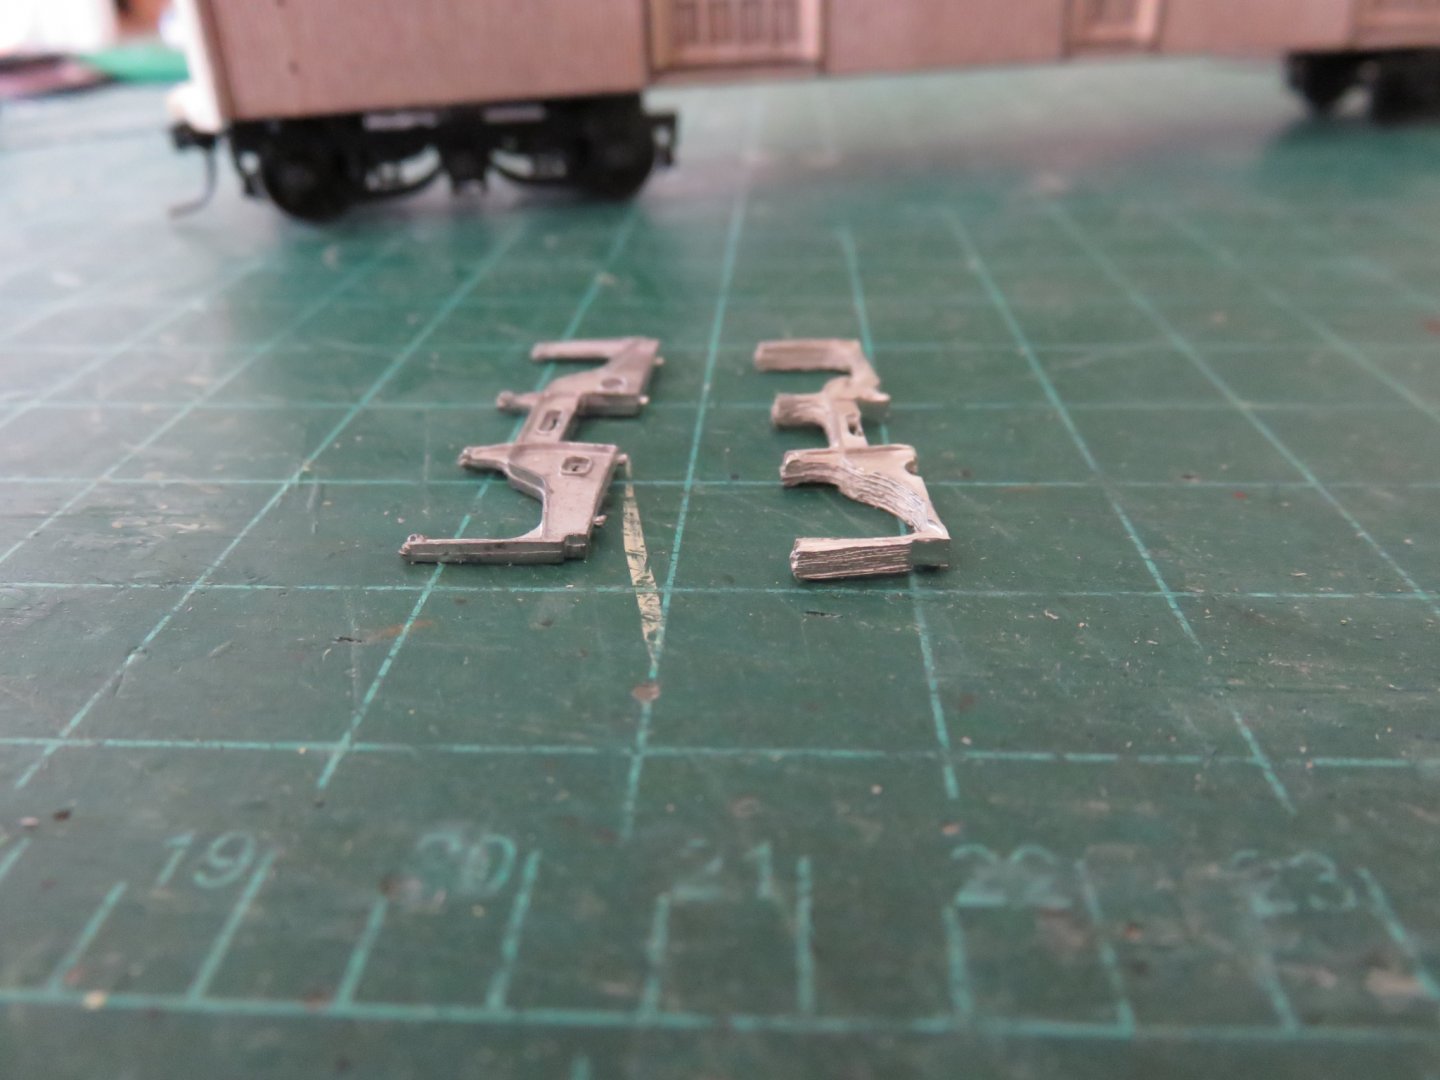
Thanks again, everyone for your kind comments and likes! Work has continued on the car mostly as planned. The truck bolsters are white metal castings that required only minor clean up before glueing to the car floor. Before that step, it is helpful to mark a few reference lines to help with locating other components later on. While the two transverse lines close to the centre of the car are laser etched as part of the kit, the remaining lines I had to add. The obvious longitudinal centre line, as well as lines to help locate the truck bolsters. The other two transverse lines mark the line of the truss rod anchor points. I've had to deviate slightly from the kin instructions, as there is the potential to foul the swing of the trucks, so I marked a line slightly closer to the centre of the car. I've partially assembled the Branchline trucks. There's no point yet adding the remaining detail parts or the middle wheel set until the car is ready for final assembly. Couplers have also been added, and tested for height with a Kadee coupler gauge. For display purposes, a medium shank coupler is just fine (the same goes for the other baggage cars I've built), but for smooth operation, at least one will have to be replaced with a long shank coupler to allow enough clearance between cars. Next up was fitting the roof. This step requires a lot of car and attention in order to get as close and as clean a fit as possible. In my case, for some reason the kit supplied wooden roof section was an end cut, it looked almost like it had been cut by a chain saw. Since I didn't have any replacement pieces on hand, it was time for a little improvisation. After sanding off as much of the rough cut end as I felt comfortable, I was able to shim it back to the correct length with a piece of styrene sheet. Following this, the resin end cap was glued on. A little more sanding and some filler, and the joint looks good. I ran into another difficulty too (I think QC was asleep when they packed this particular kit): Skipping ahead a little bit, I was preparing the centre queen post casting as described in the instructions (the height needs to be shortened slightly and a notch filled in the outer post) and noticed something off. On the photo above, the piece on the left is what the casting should look like (before flash removal). The piece on the right was the one I was working on, and it must have been a bad casting, as it is considerably "chunkier" than the other casting. Part of the parts order I made with LaBelle was for a bunch of these queen post castings, so hopefully a replacement will be on the way soon. In the mean time, it's time for some grab irons and end details (yay!). Andy

- 154 replies
-
- 12
-

-
The kit notwithstanding, there’s something about wooden passenger car construction that showcases true artistry and craftsmanship. I’ve seen old black and white photographs taken inside the Osgood-Bradley car shops in the waning days of wooden car construction. Not only was the joinery as intricate and precise as you could ever imagine, but the smell of wood chips and sawdust was palpable. I guess the closest anyone can get to that kind of atmosphere is a visit inside a high end wooden furniture shop. Andy
- 154 replies
-
- 10
-
-
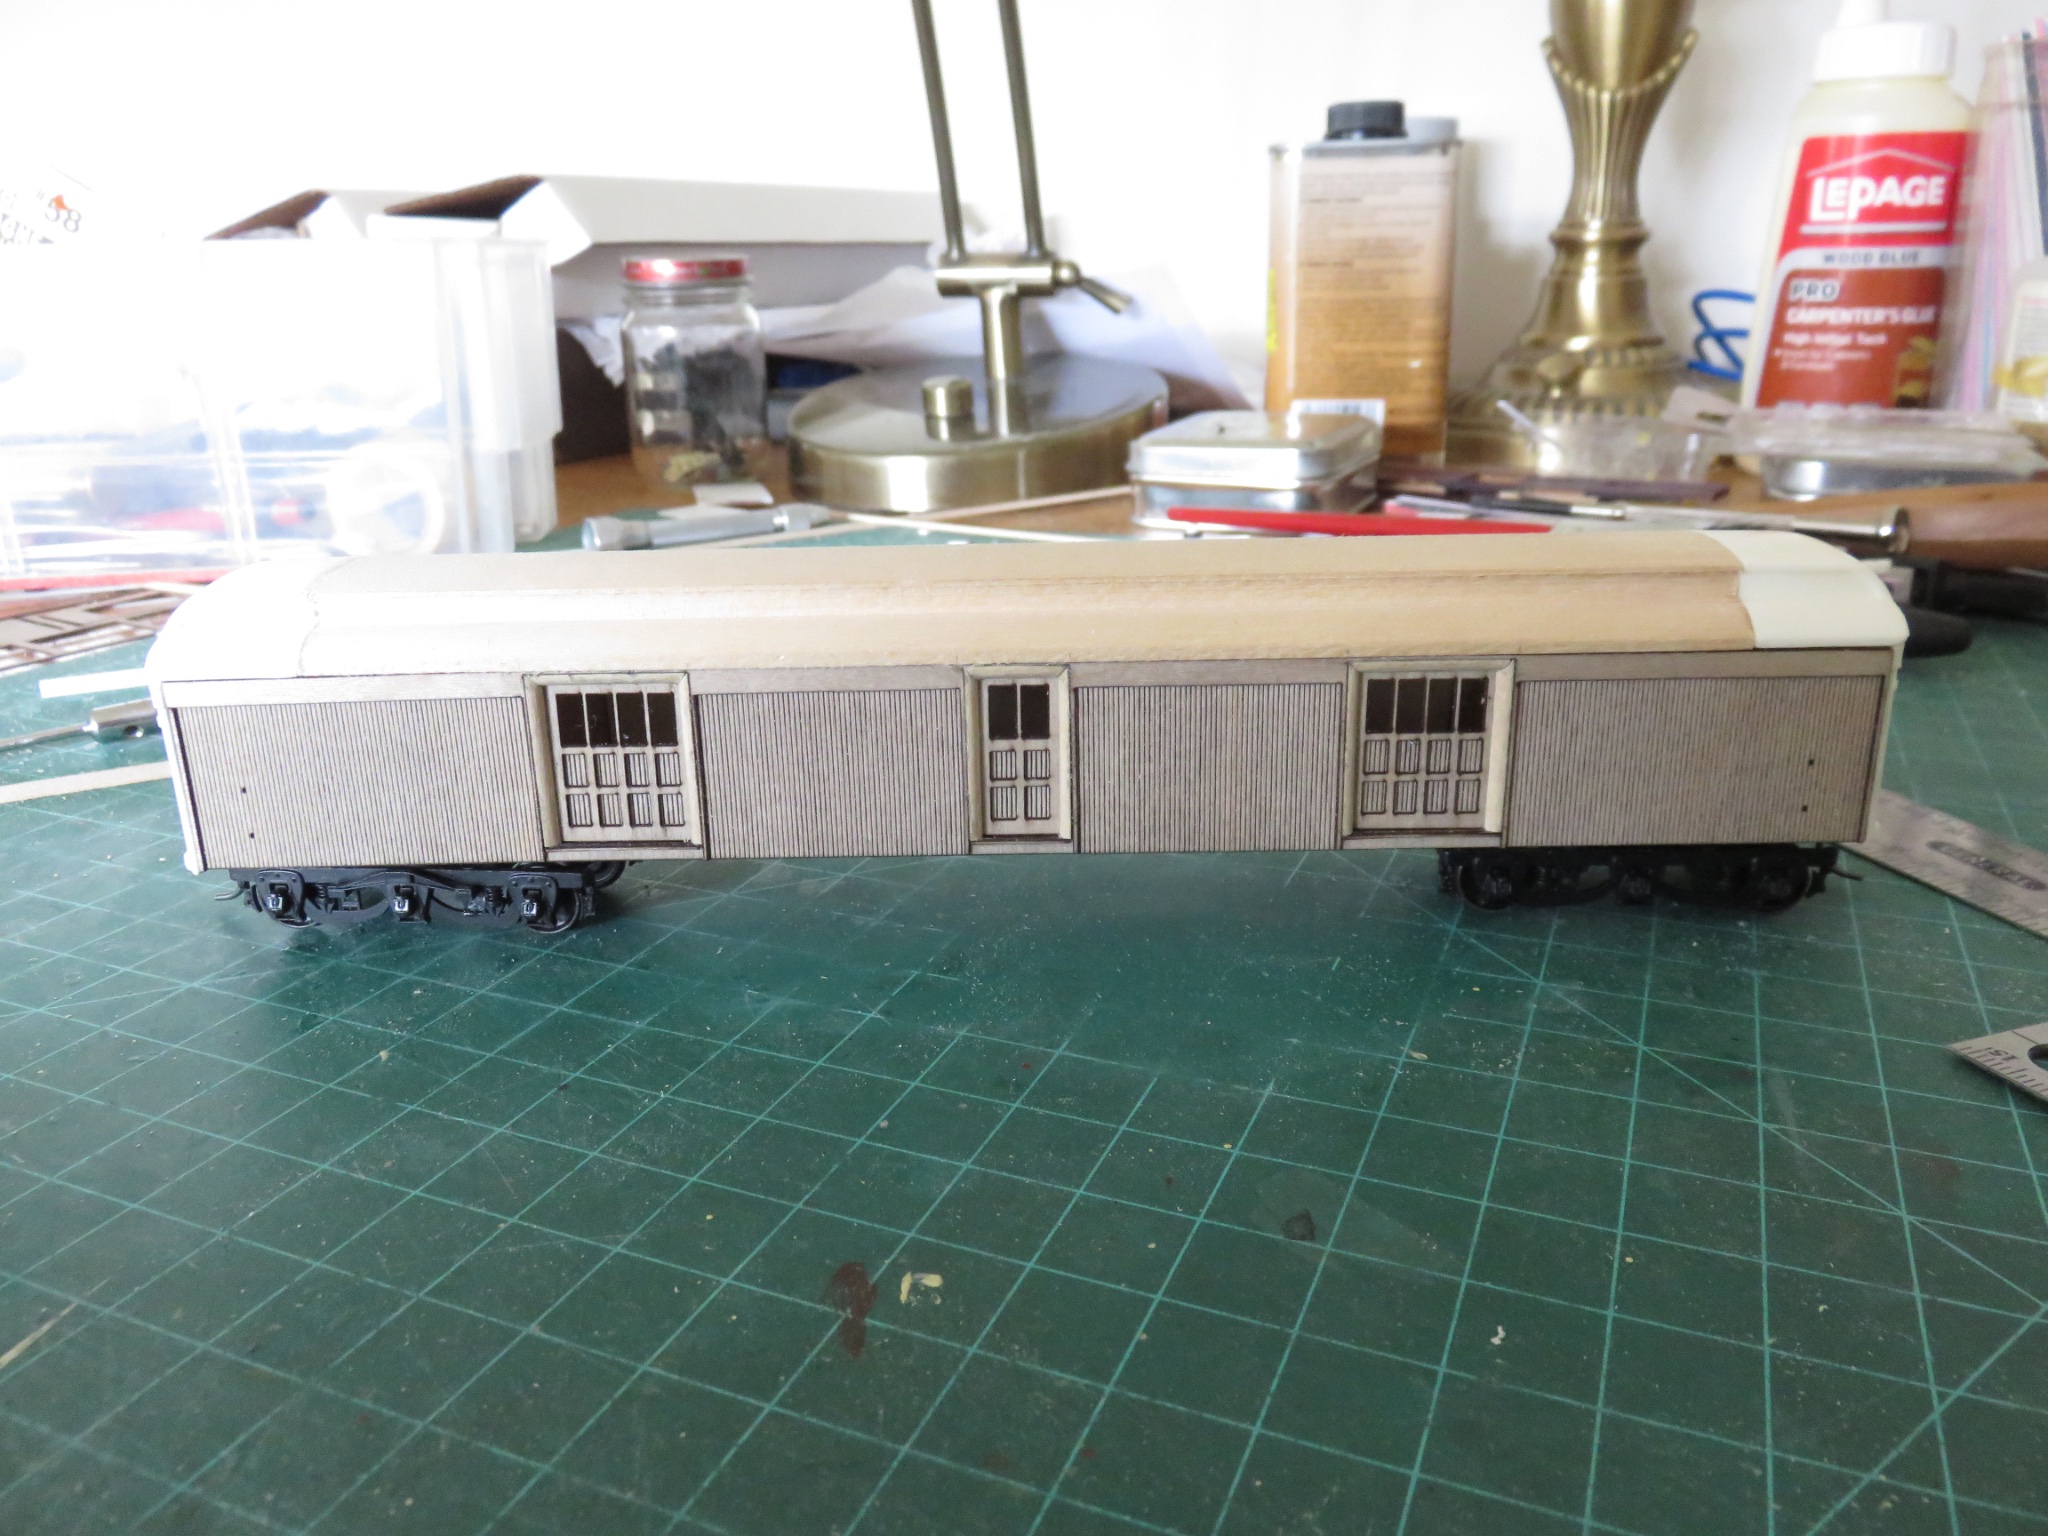
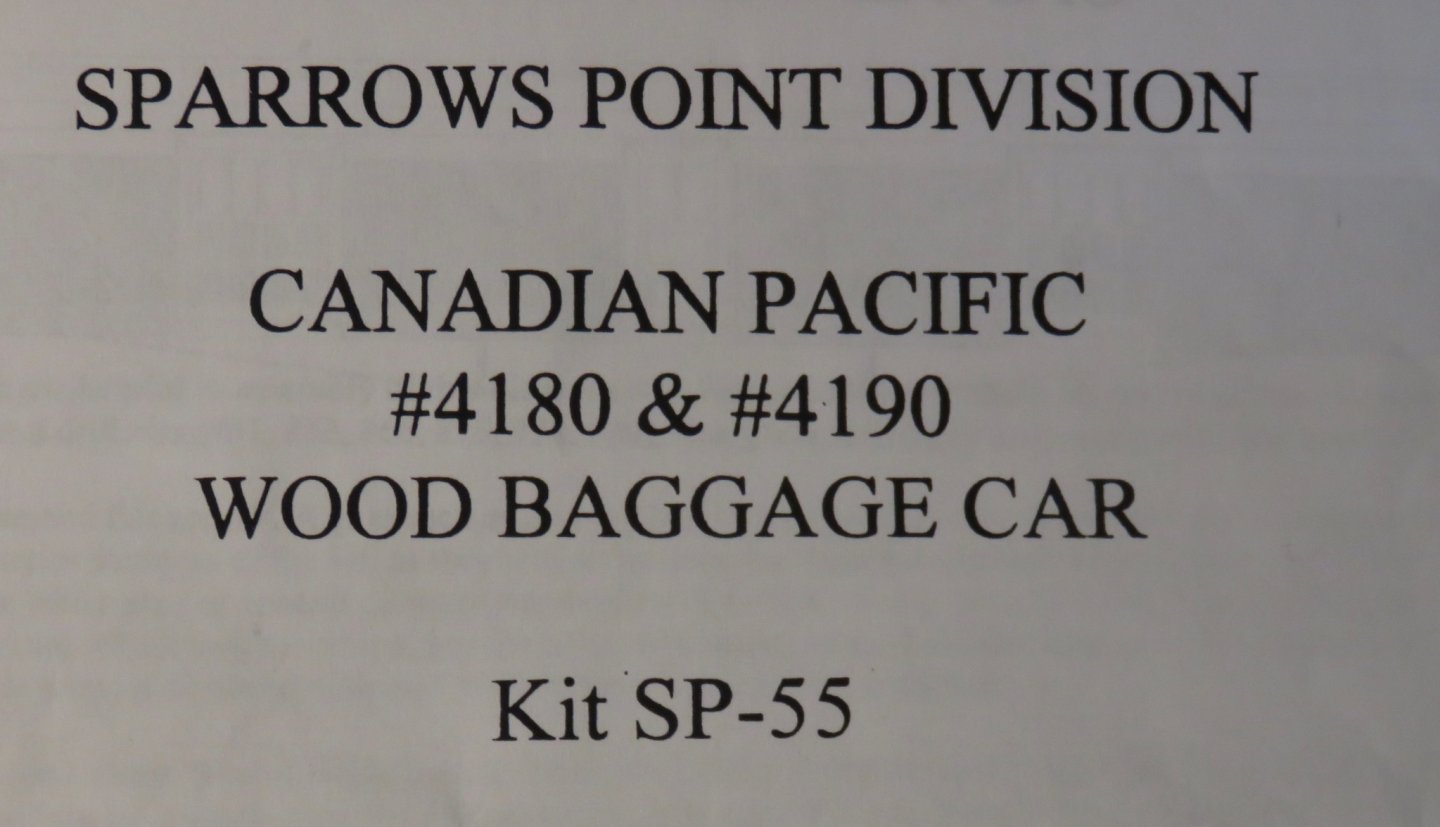
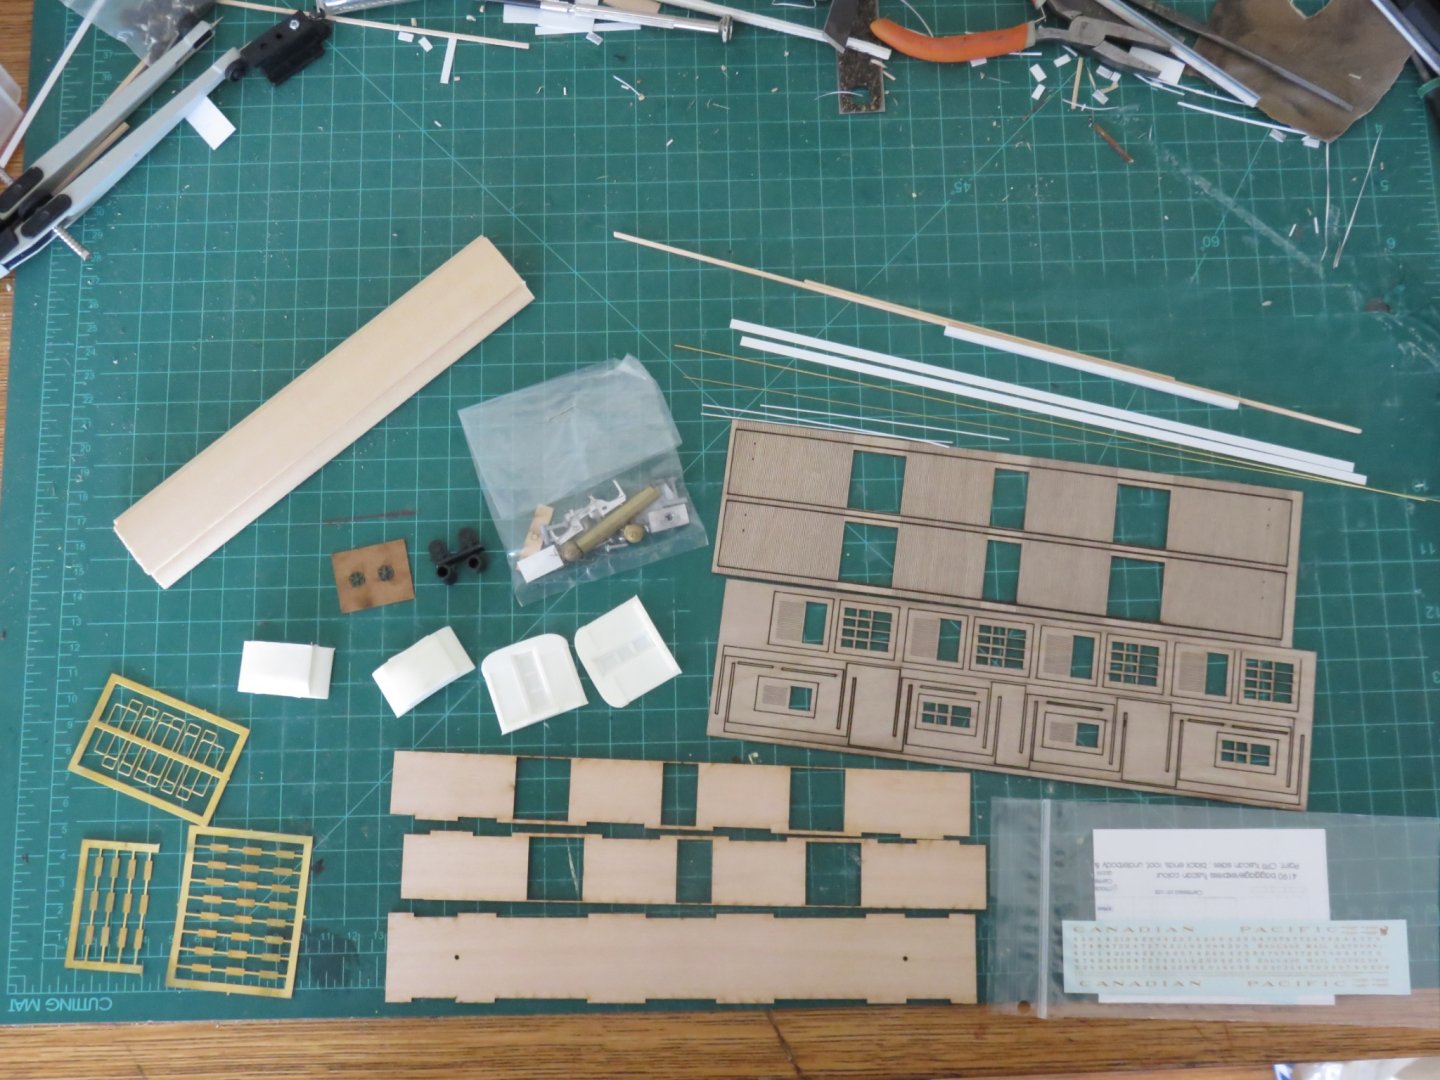
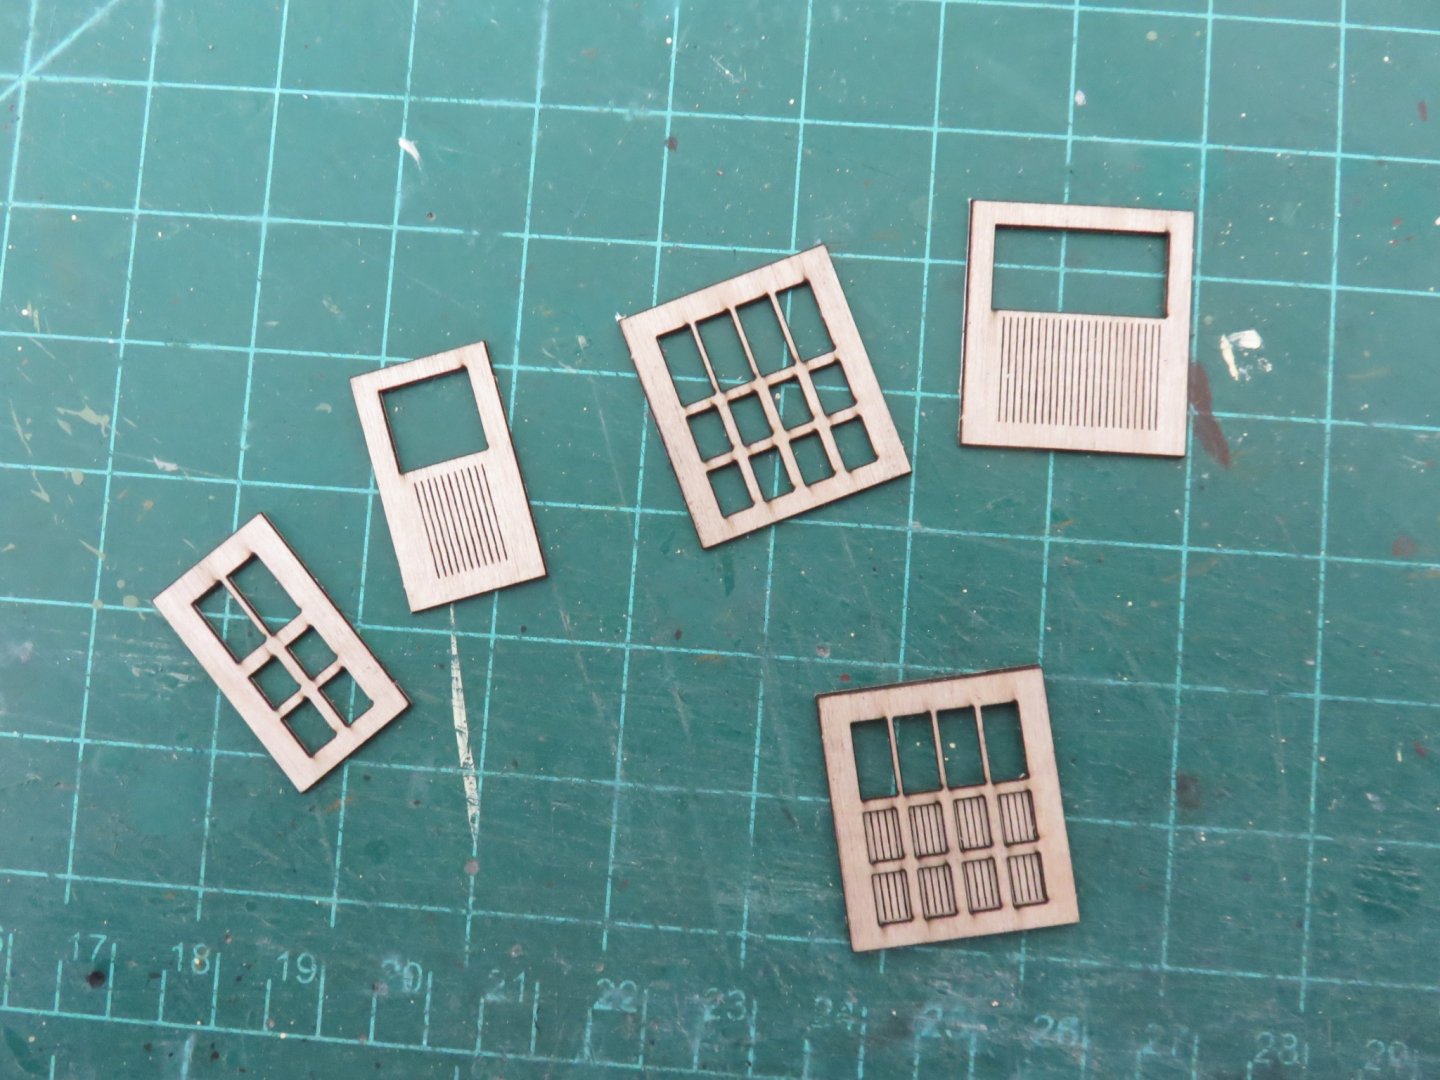
Well, parts have been ordered... we'll see how long or if ever (my credit card has yet to be billed.. so... ). In the interim, a little diversion.... another BCW Sparrows point kit: This kit is based on a small number of baggage cars built by CPR and American Car and Foundry in 1905 and 1913 Most of the cars went to the CPR and a few went to the CPR/NYC joint subsidiary Toronto Hamilton and Buffalo railway. Midway through their careers, they were returned to the CPR, where the last was retired in 1958. Originally they were designed for baggage, mail and express, and thus were built with a third door in the centre of the car that was equipped with a mail catcher and features a small slot to drop off envelopes. There is a great photo of #4190 near the end of its career in the book "From Wood to Steel: Classic Canadian Railway Passenger Cars from 1860 to 1920" By Richard McQuade. A quick look at the contents of the kit: The car sides, floor and trim is all laser cut. The thin scribed sides as well as trim and doors is all thin peel-and-stick backed ply, the floor and sub-sides is laser cut basswood. The car ends as well as the roof end caps are cast resin, and the central roof section is a router carved clerestory section I suspect originates from Northeastern Scale Lumber. The clerestory vents and stirrup steps are PE. The main detailing parts are a mix of laser board, plastic and white metal castings. In this kit, I may have "borrowed" the pintsch gas tank for another project, luckily I had a suitable brass replacement detail part. A selection of brass wire and styrene and wood strips as well as decals by Black Cat Publishing rounds out the contents of the box. Like most, if not all, craftsman style kits, trucks and couplers are not included. For this car, I have a nice set of Branchline Trains six wheeled trucks that will do nicely, as well as my usual go-to Kadee #58 couplers. Assembling the car begins with the car sides: A sharp Exacto knife is all that's required to slice the tiny tabs to release the part. Before removing the peel-and-stick backing, it's always recommended to verify the alignment of the side and sub-side. The peel-and-stick material is very adhesive and you only get one shot to get things right! The two sides are now assembled. Some minor sanding was required, as there are some small discrepancies in the sizing that need to be addressed (again, highlighting the need to verify everything before removing the backing!). This instructions then move on to assembling the car, but I prefer to do a detour and trim the doors first, as it is easier to get things lined up properly with the car sides on a flat surface. The door trim consists of 1/16" quarter round basswood strip. It lands square on the door sill and is mitred around the top. I find that using my Exacto knife in my mitre box produces consistent results. Care has to be taken as there is only slightly more material available in the kit than is needed, be sure to cut the pieces slightly long and file to fit. A little PVA secures the strip to the door opening. Next up the doors are assembled: Similar to the sides, the doors consist of two layers of peel-and-stick backed ply. You only need to remove the backing from the outer trim layer. Just like the sides, check the alignment before removing the backing! In the above photo, the doors are only dry fit, yet. Once the doors are completed for both sides of the car, assembly can begin. In the photos above, you can see the interlocking tabbed construction joint of the car floor and sides, this greatly eases construction by keeping the sides correctly lined up. As well, the adhesive backing does provide a little bit of hold while the glue sets up. A few small sections of square styrene stock helps to secure the joints at a right angle (they're CA'ed into place before gluing the carsides on. The prototype car does not appear to have been ever fitted with a steel centre sill. Other SP car kits included a length of wood to simulate this feature which also had the added benefit of preventing any longitudinal warping of the car kit when painting. In this spirit, I've added a strip of wood down the centre of the inside of the car to hopefully provide the same anti-warping benefit. Once the sides are in place, then ends are now added: Using the roof end caps as a guide, some height adjustment is necessary prior to gluing. The interior side of the end casting has a slight raised section corresponding to the door on the outside. Some careful trimming of the lower part of this raised section is needed to allow the end to sit at the right height. Caution is emphasized as it is very easy to sand/carve your way through the door (and leave an unsightly hole). This is as far as I have gotten on this kit so far. Next up assembling the trucks followed by attaching the bolsters and couplers. Andy


- 154 replies
-
- 11
-
-
Especially those wooden “survivor” cars. The ones built in the decades immediately before and after the turn of the century, just before the widespread introduction of steel heavyweight construction, that were modified at least once or twice in the teens or twenties, and somehow seeing almost sixty years in revenue service. http://dardpi.ca/wiki/images/R-105.jpg Andy
-
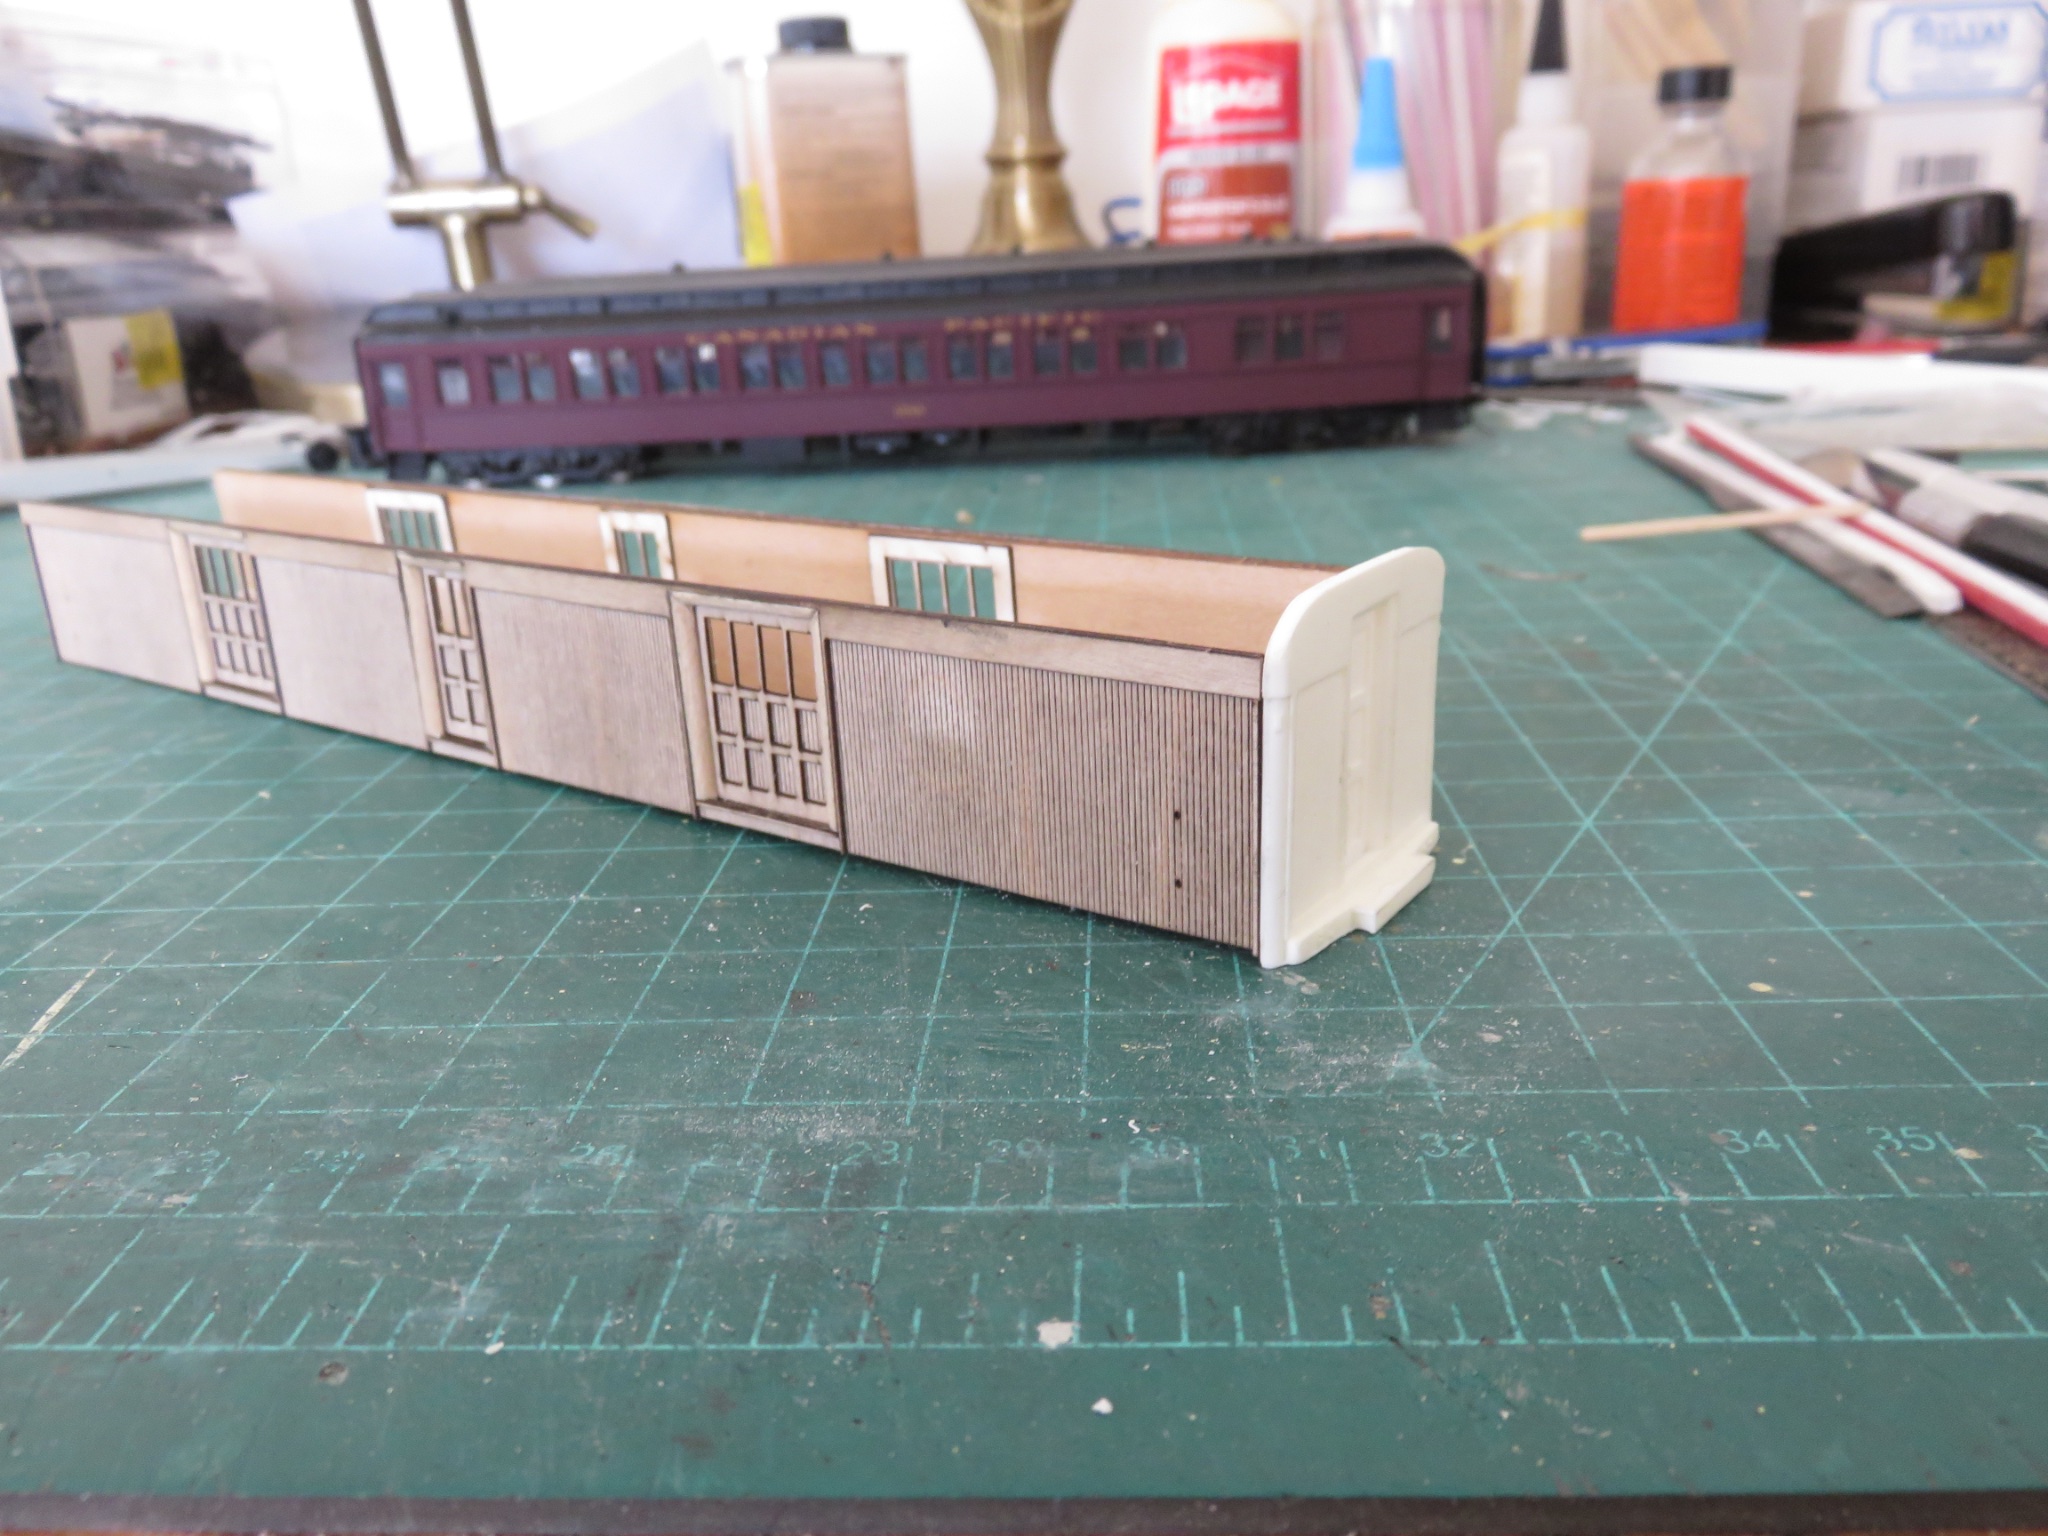
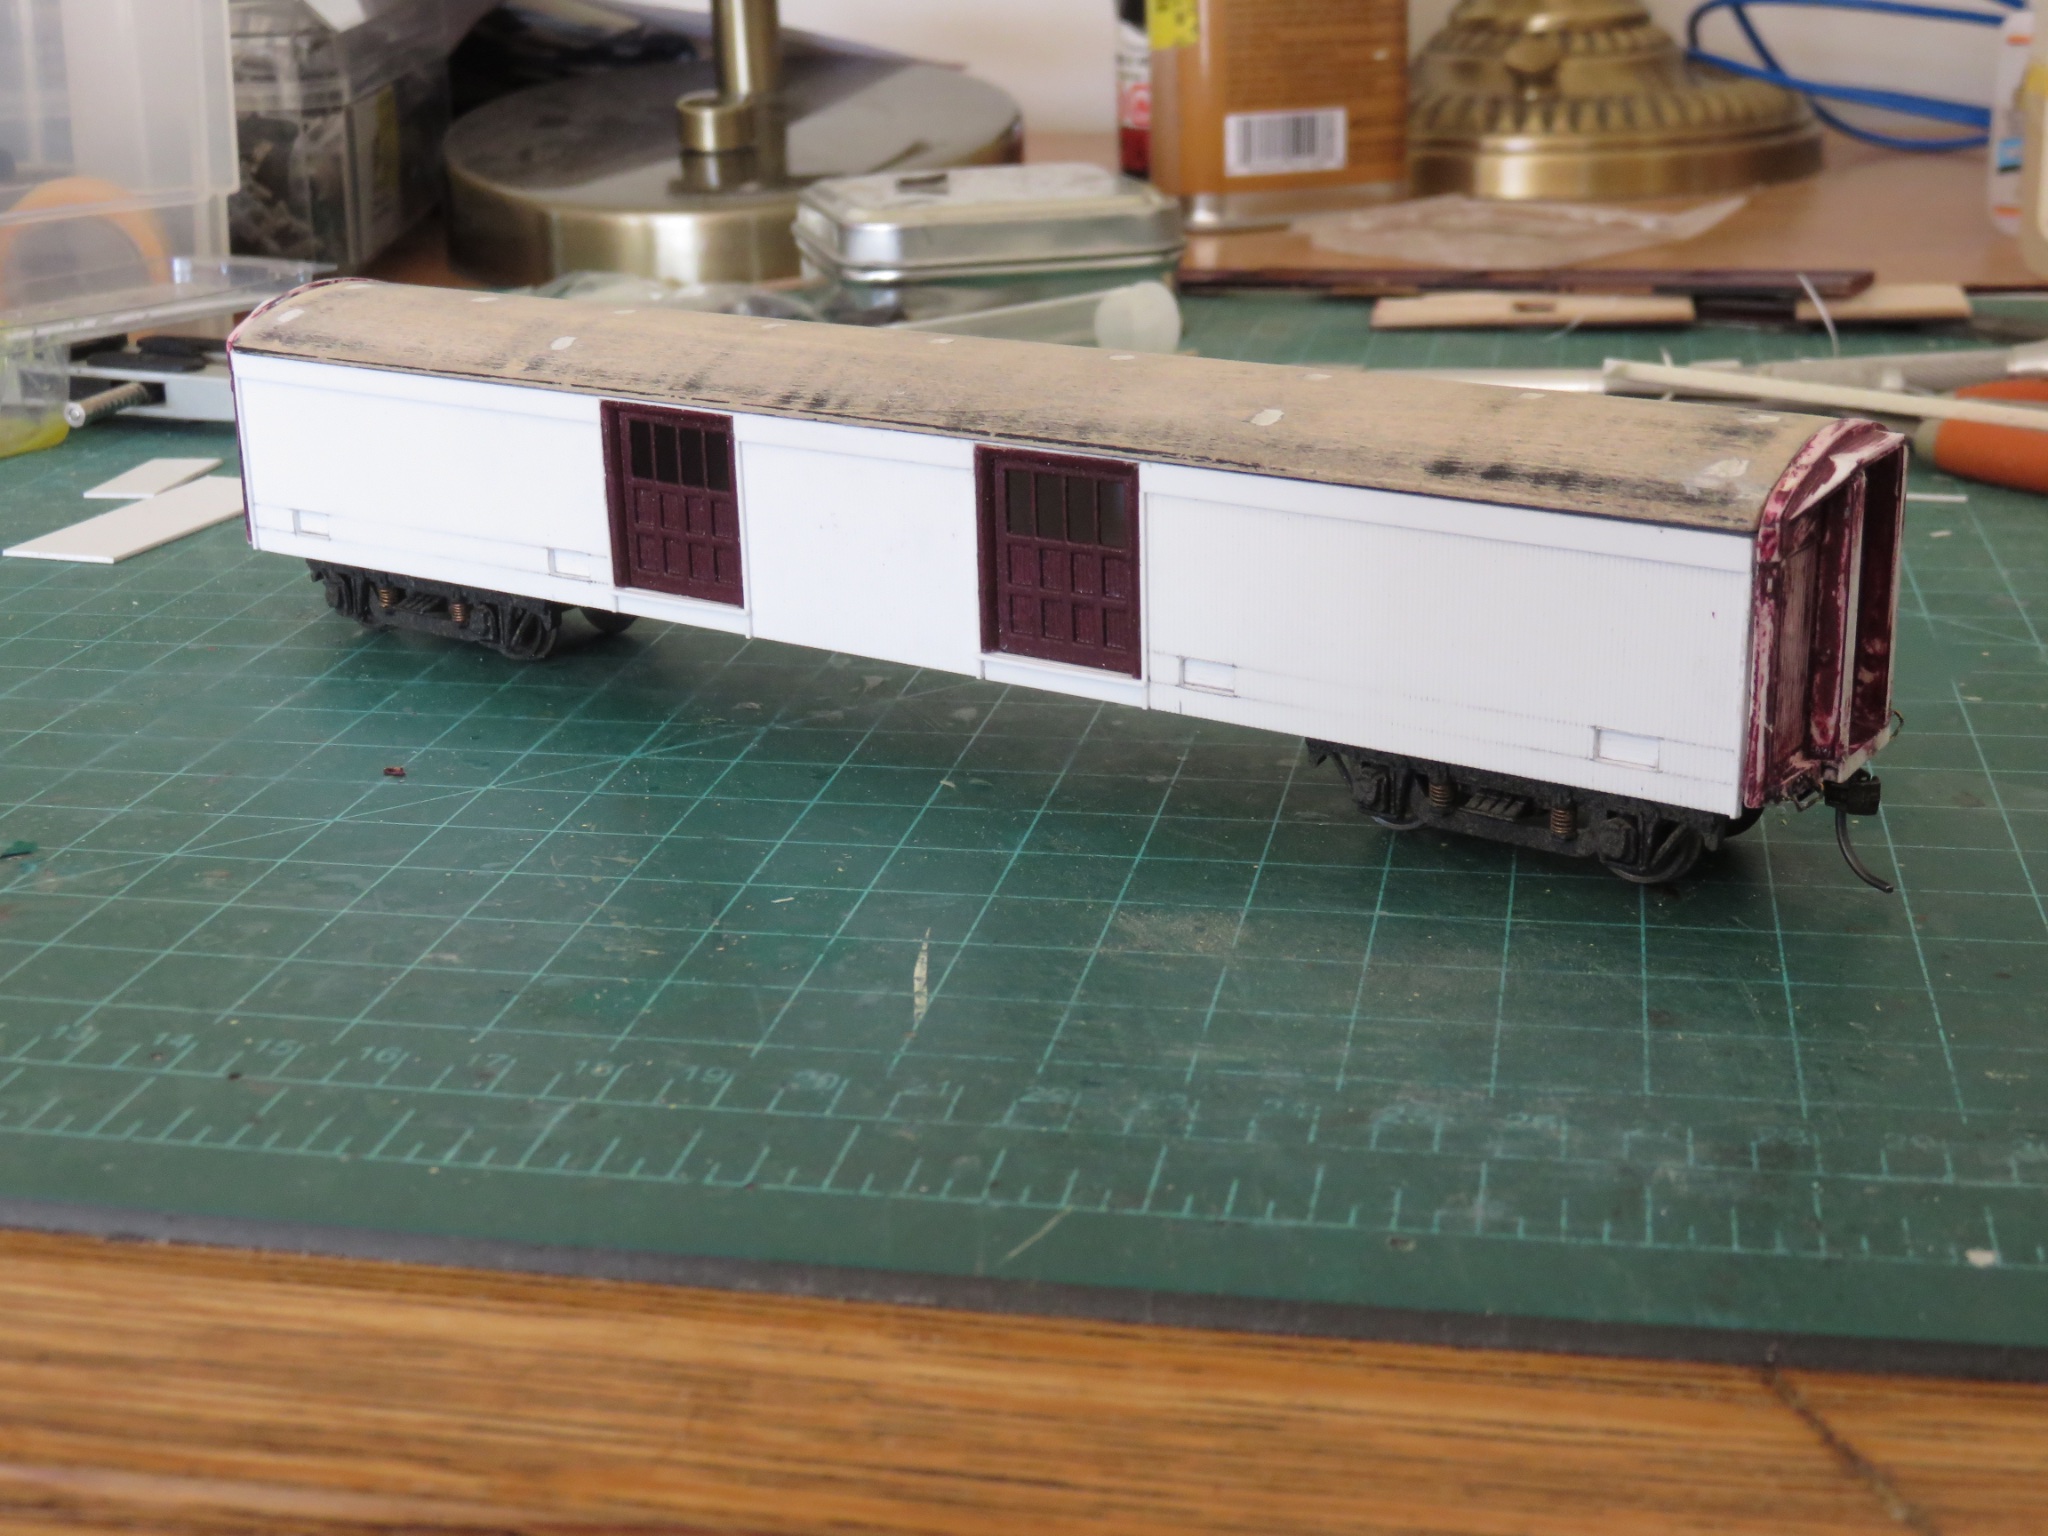
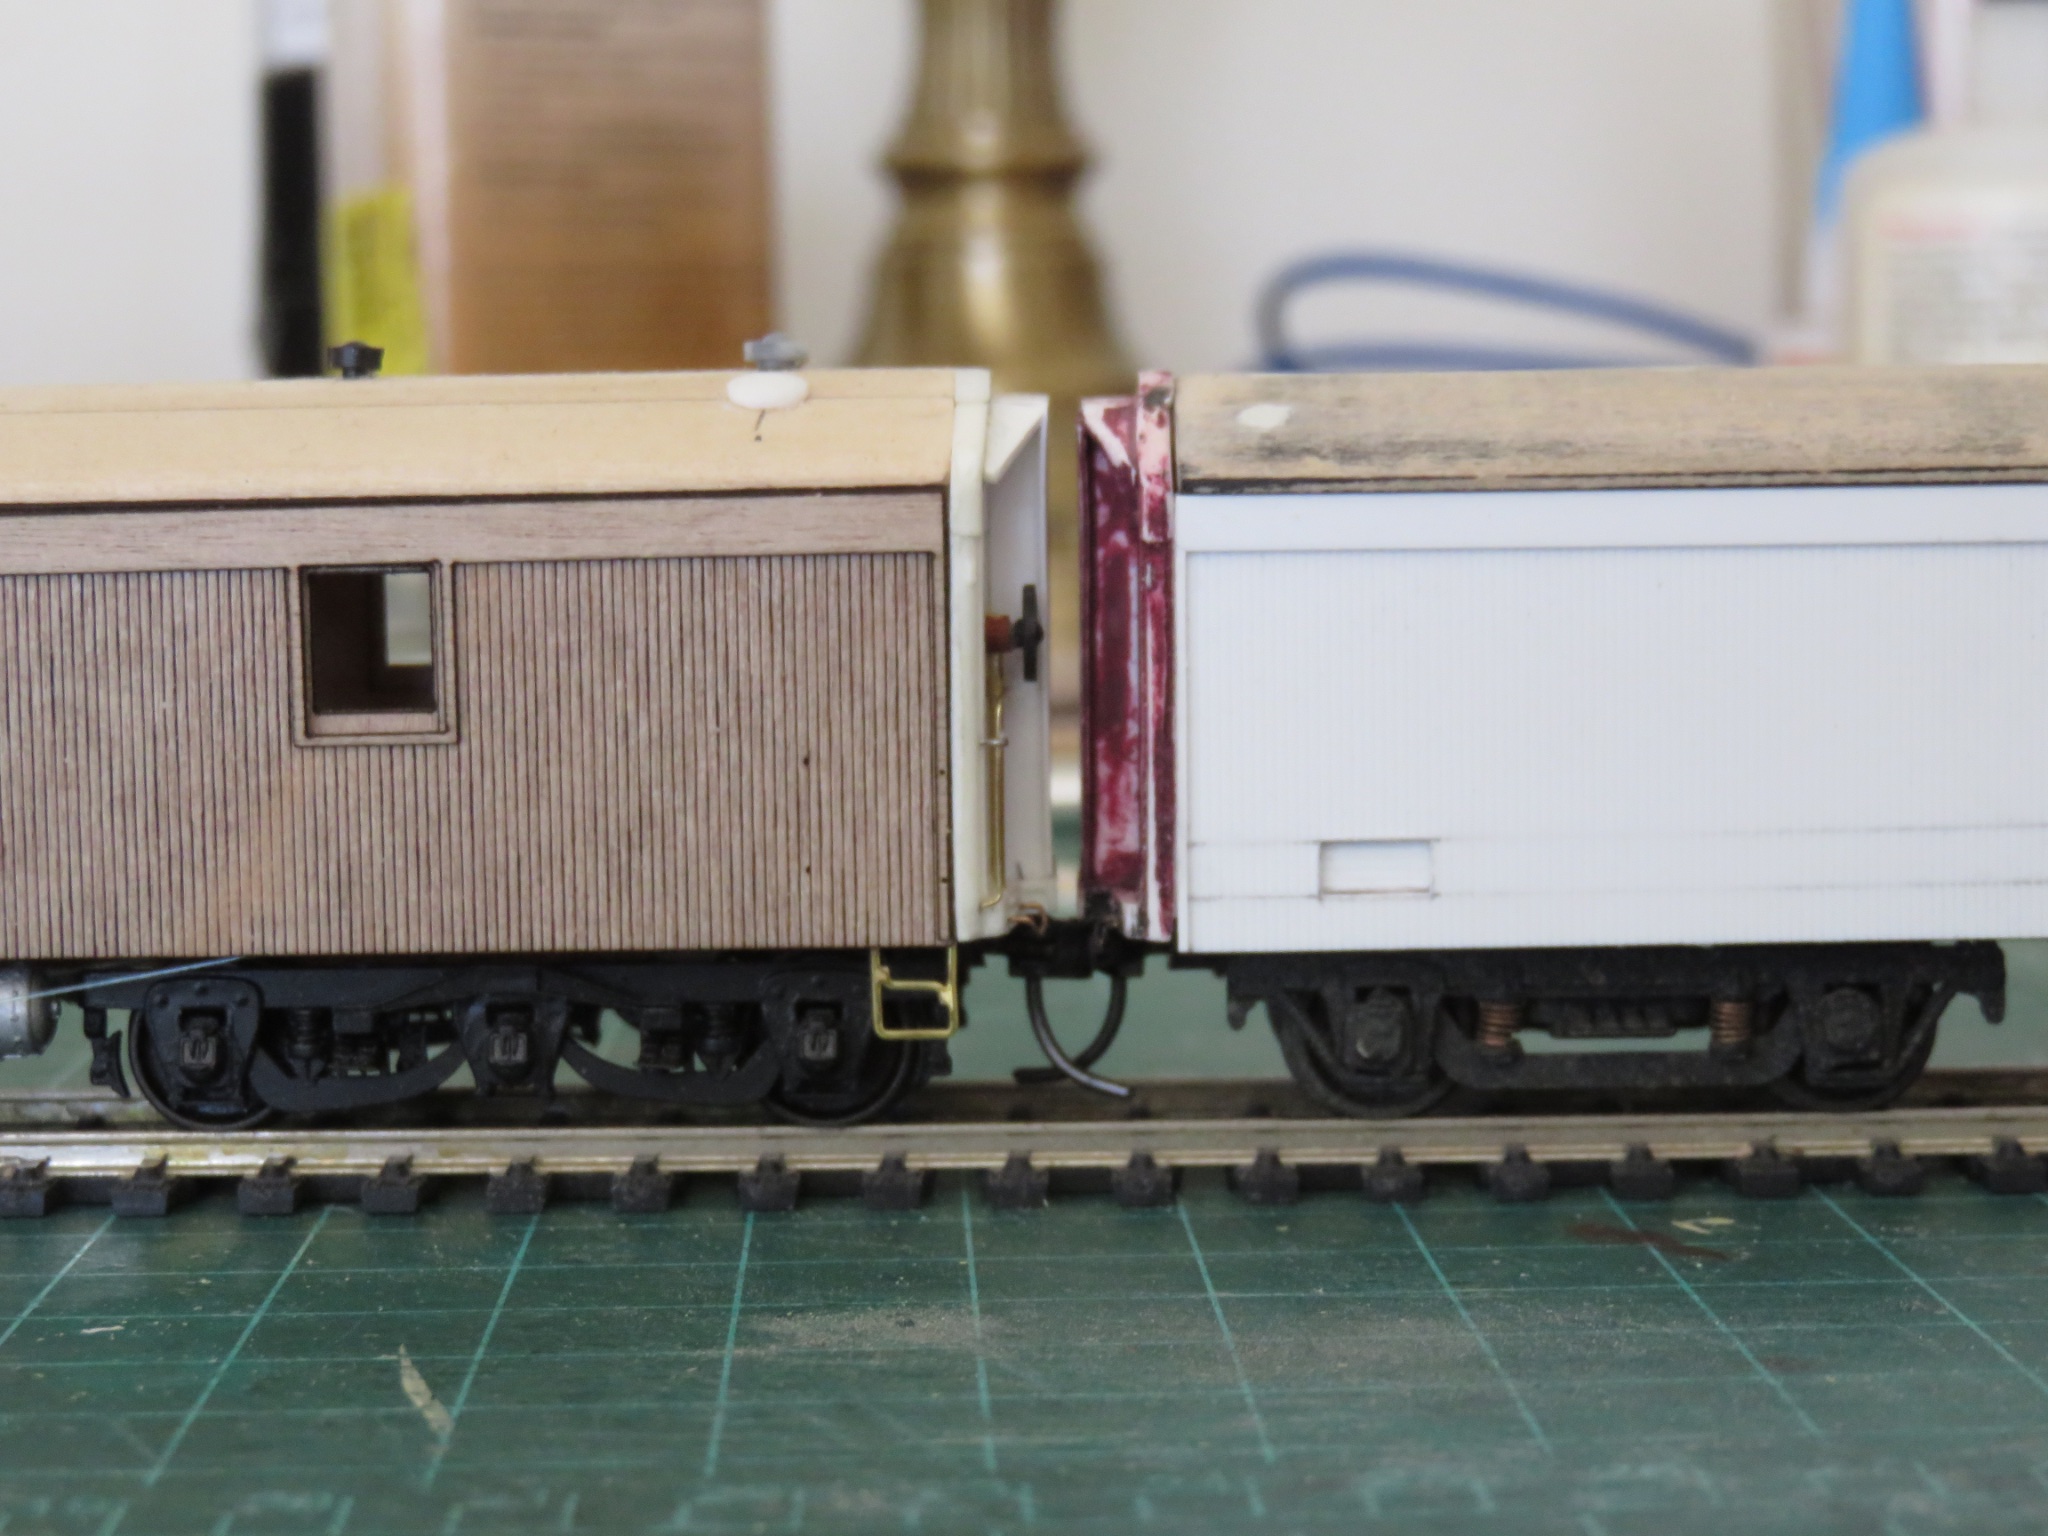
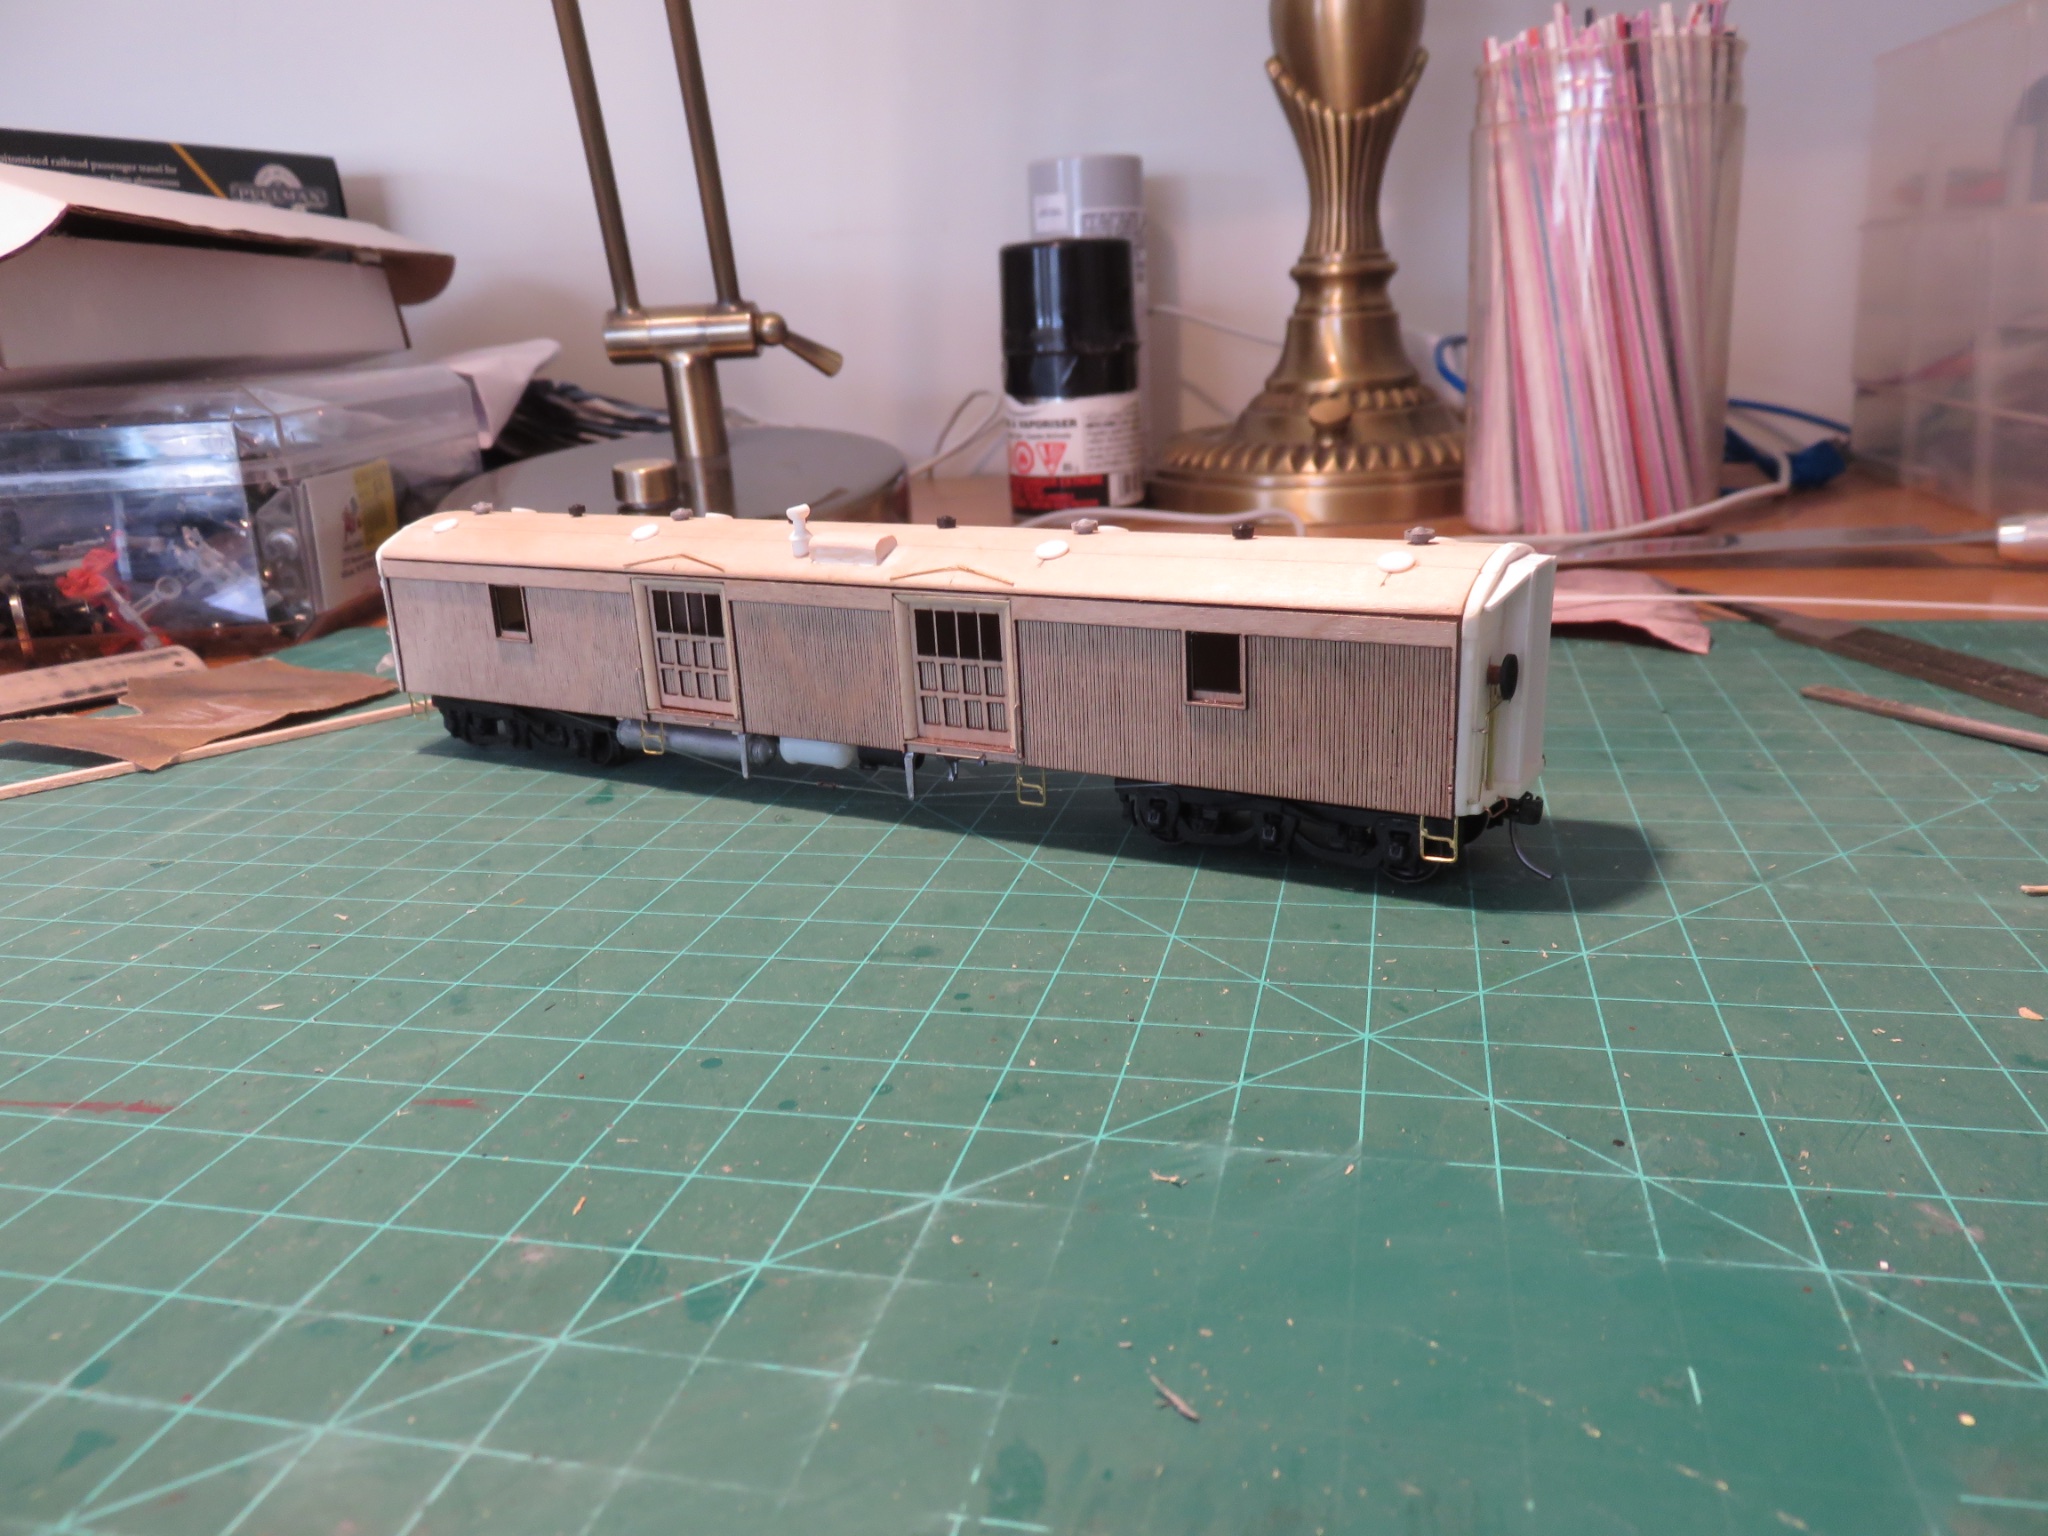
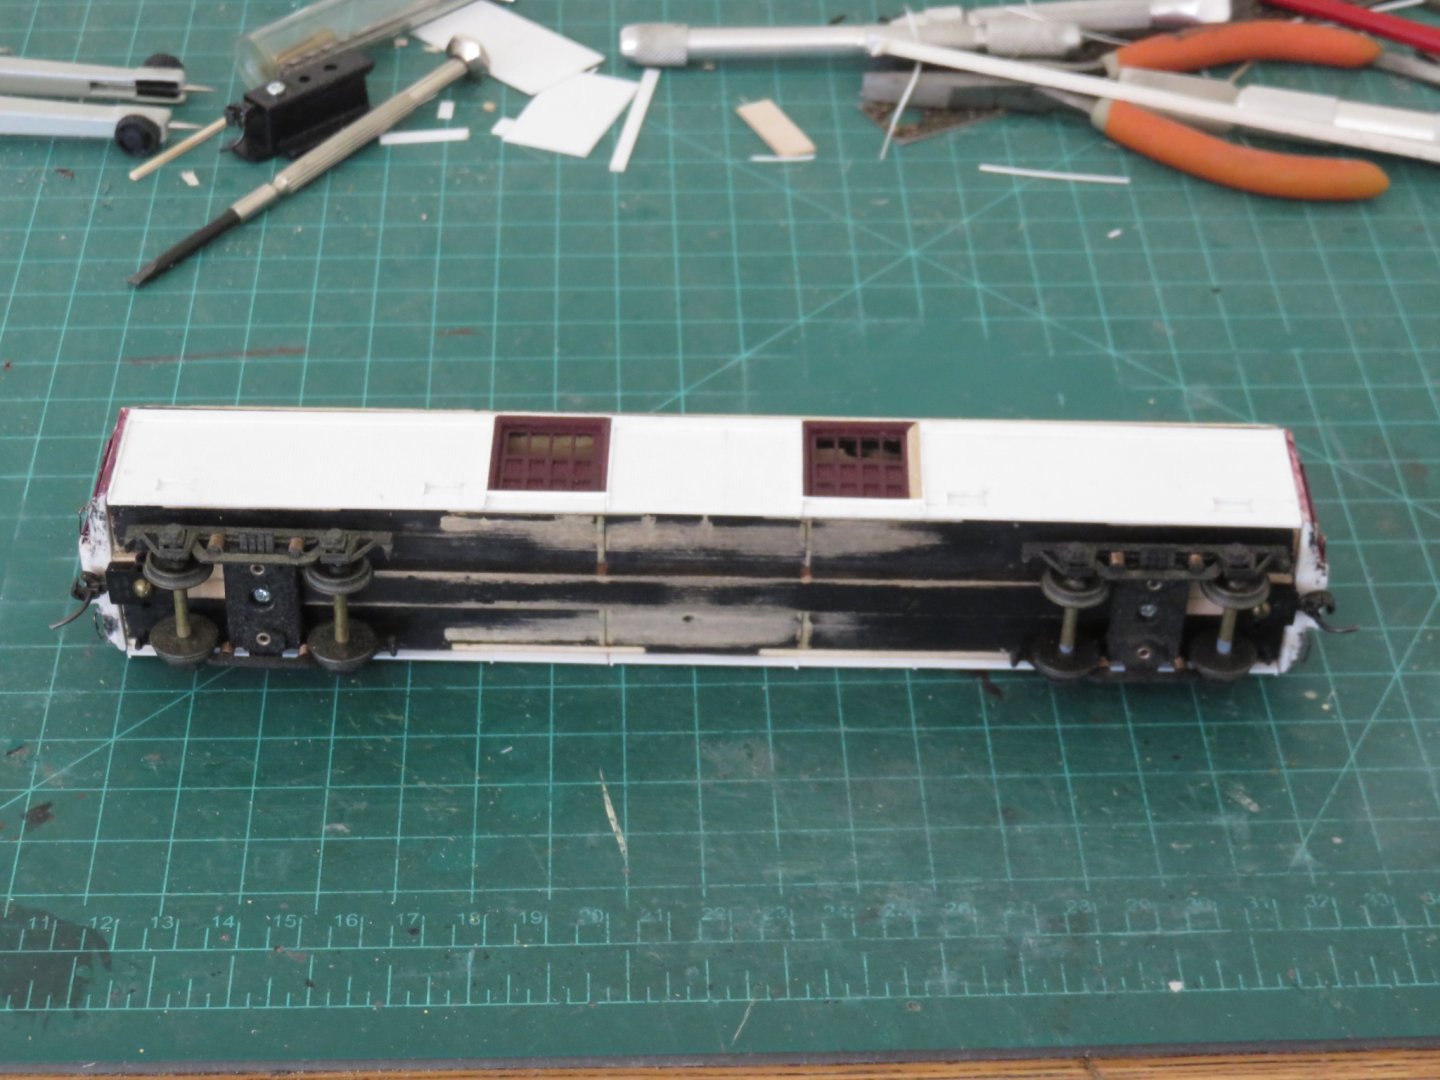
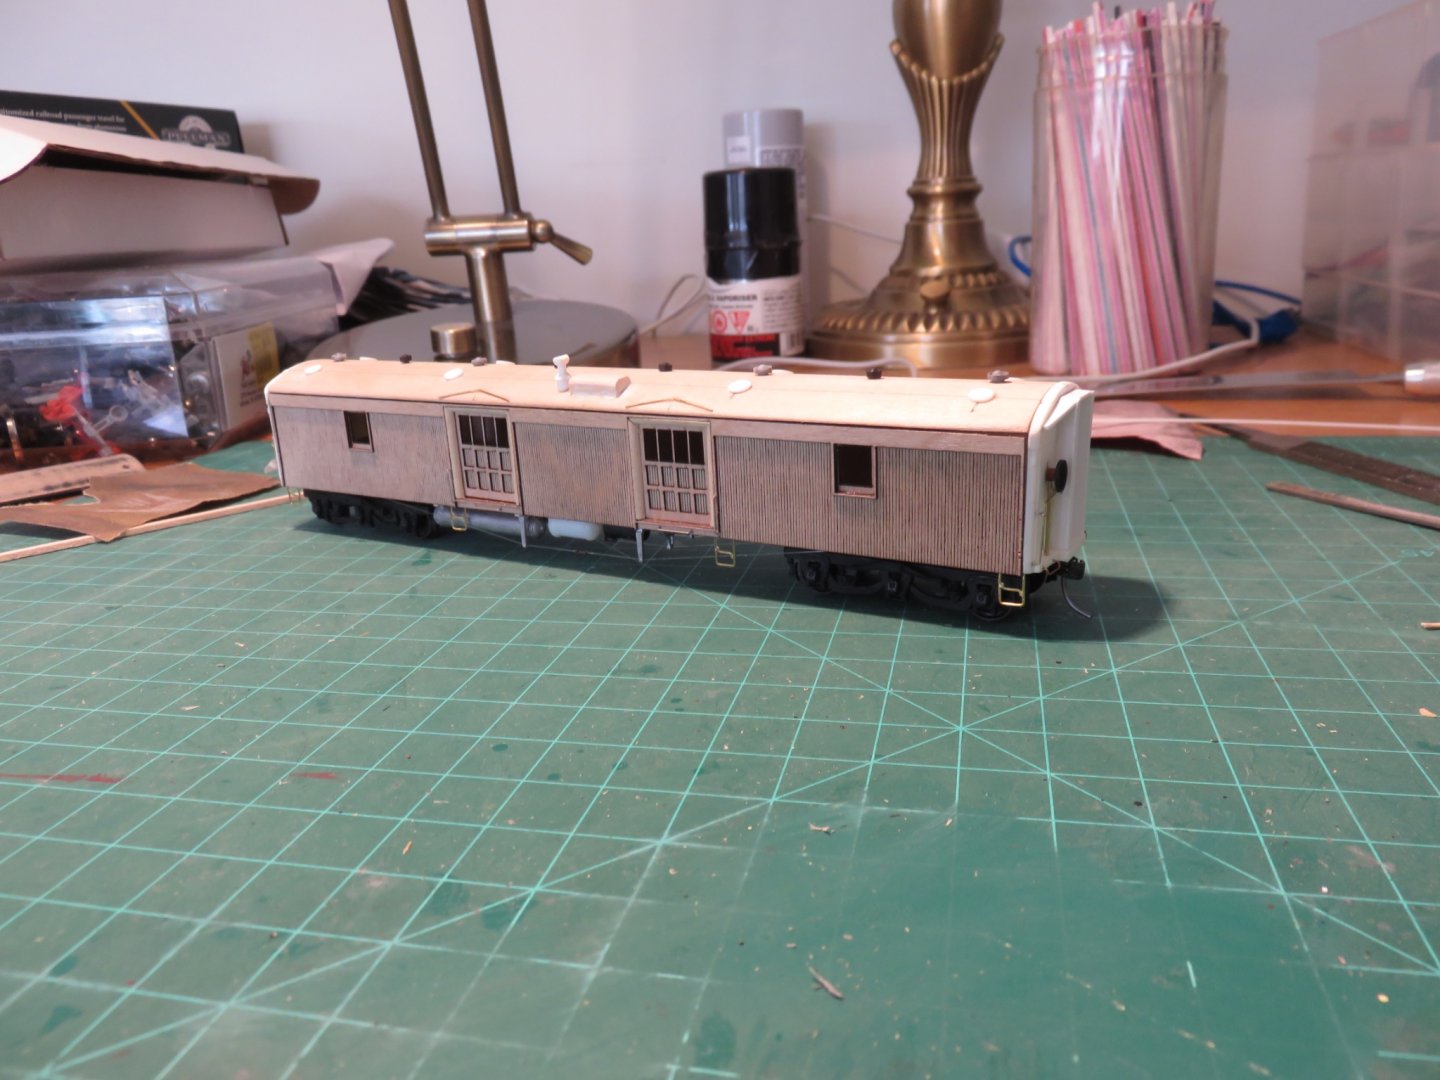
Thanks everyone for the comments and likes! A small, yet large update. I completed the second car side. Not much to it, really, just a repeat of the first. I may have mentioned in the past, how most craftsman type railway kits like to leave off adding the trucks and couplers until the last or second last step in the instructions. Considering that this process can require a certain amount of "heavy" construction, theres always a risk of damaging fine details, scratching paintwork, or for the particularly less delicate among us, leaving a passable looking model resembling something the dog (or cat) chewed on. My preference is to get this stage taken care of as soon as it is practical to do so, basically as soon as the car floor is completed. In the case of this kit, in order to get the couplers located correctly, both height and depth wise, some wooden shims where needed, and a little bit of shaping and filing, followed be drilling out the hols for the coupler mounting screws. Again, as this is intended to be a working model, a certain degree of robustness and a necessity to plan ahead to make any future maintenance or replacement as easy and as least invasive as possible. So yes, the screws are glaringly over sized, but I maintain that, as a model railroader, if you spend that time staring at the underbodies of your rolling stock, you've got bigger issues to contend with. I recommend doing a google search for a therapist in your area and booking an appointment ASAP. Anyway, after the above rough work was completed, it was time to mount the sides and ends (and test fit the roof). The car ends are from the original kit, with some modifications I had made way back when I first attempted this build. I had to clean up some of the old paint, so the ends were given a quick dunk in Testor's ELO. Not the best chemical to remove acrylic paint, but with careful scrubbing using a toothbrush, the worst of the old paint was removed. The assembled car as it sits now. The light splotches on the roof is filler from where I had drilled holes for the roof vents on the earlier attempt. I was deeply dissatisfied with how they turned out (one of the reasons I abandoned that attempt). For my second try, I figured out a better way to simulate the capped vents, so a little bit of filler and hopefully the roof remains decently salvageable. A quick shot of the underside showing the Central Valley trucks and Kadee #58 semi-scale couplers Finally a quick look at the prototypically close coupling I've managed to achieve. When the time comes to begin running these cars, at least one will have to be fitted with a long shank coupler in order to increase the separation. Otherwise, on tight model curves, the whole thing risks derailing. For now, it is time to begin the detail work. Andy


- 154 replies
-
- 13
-
-
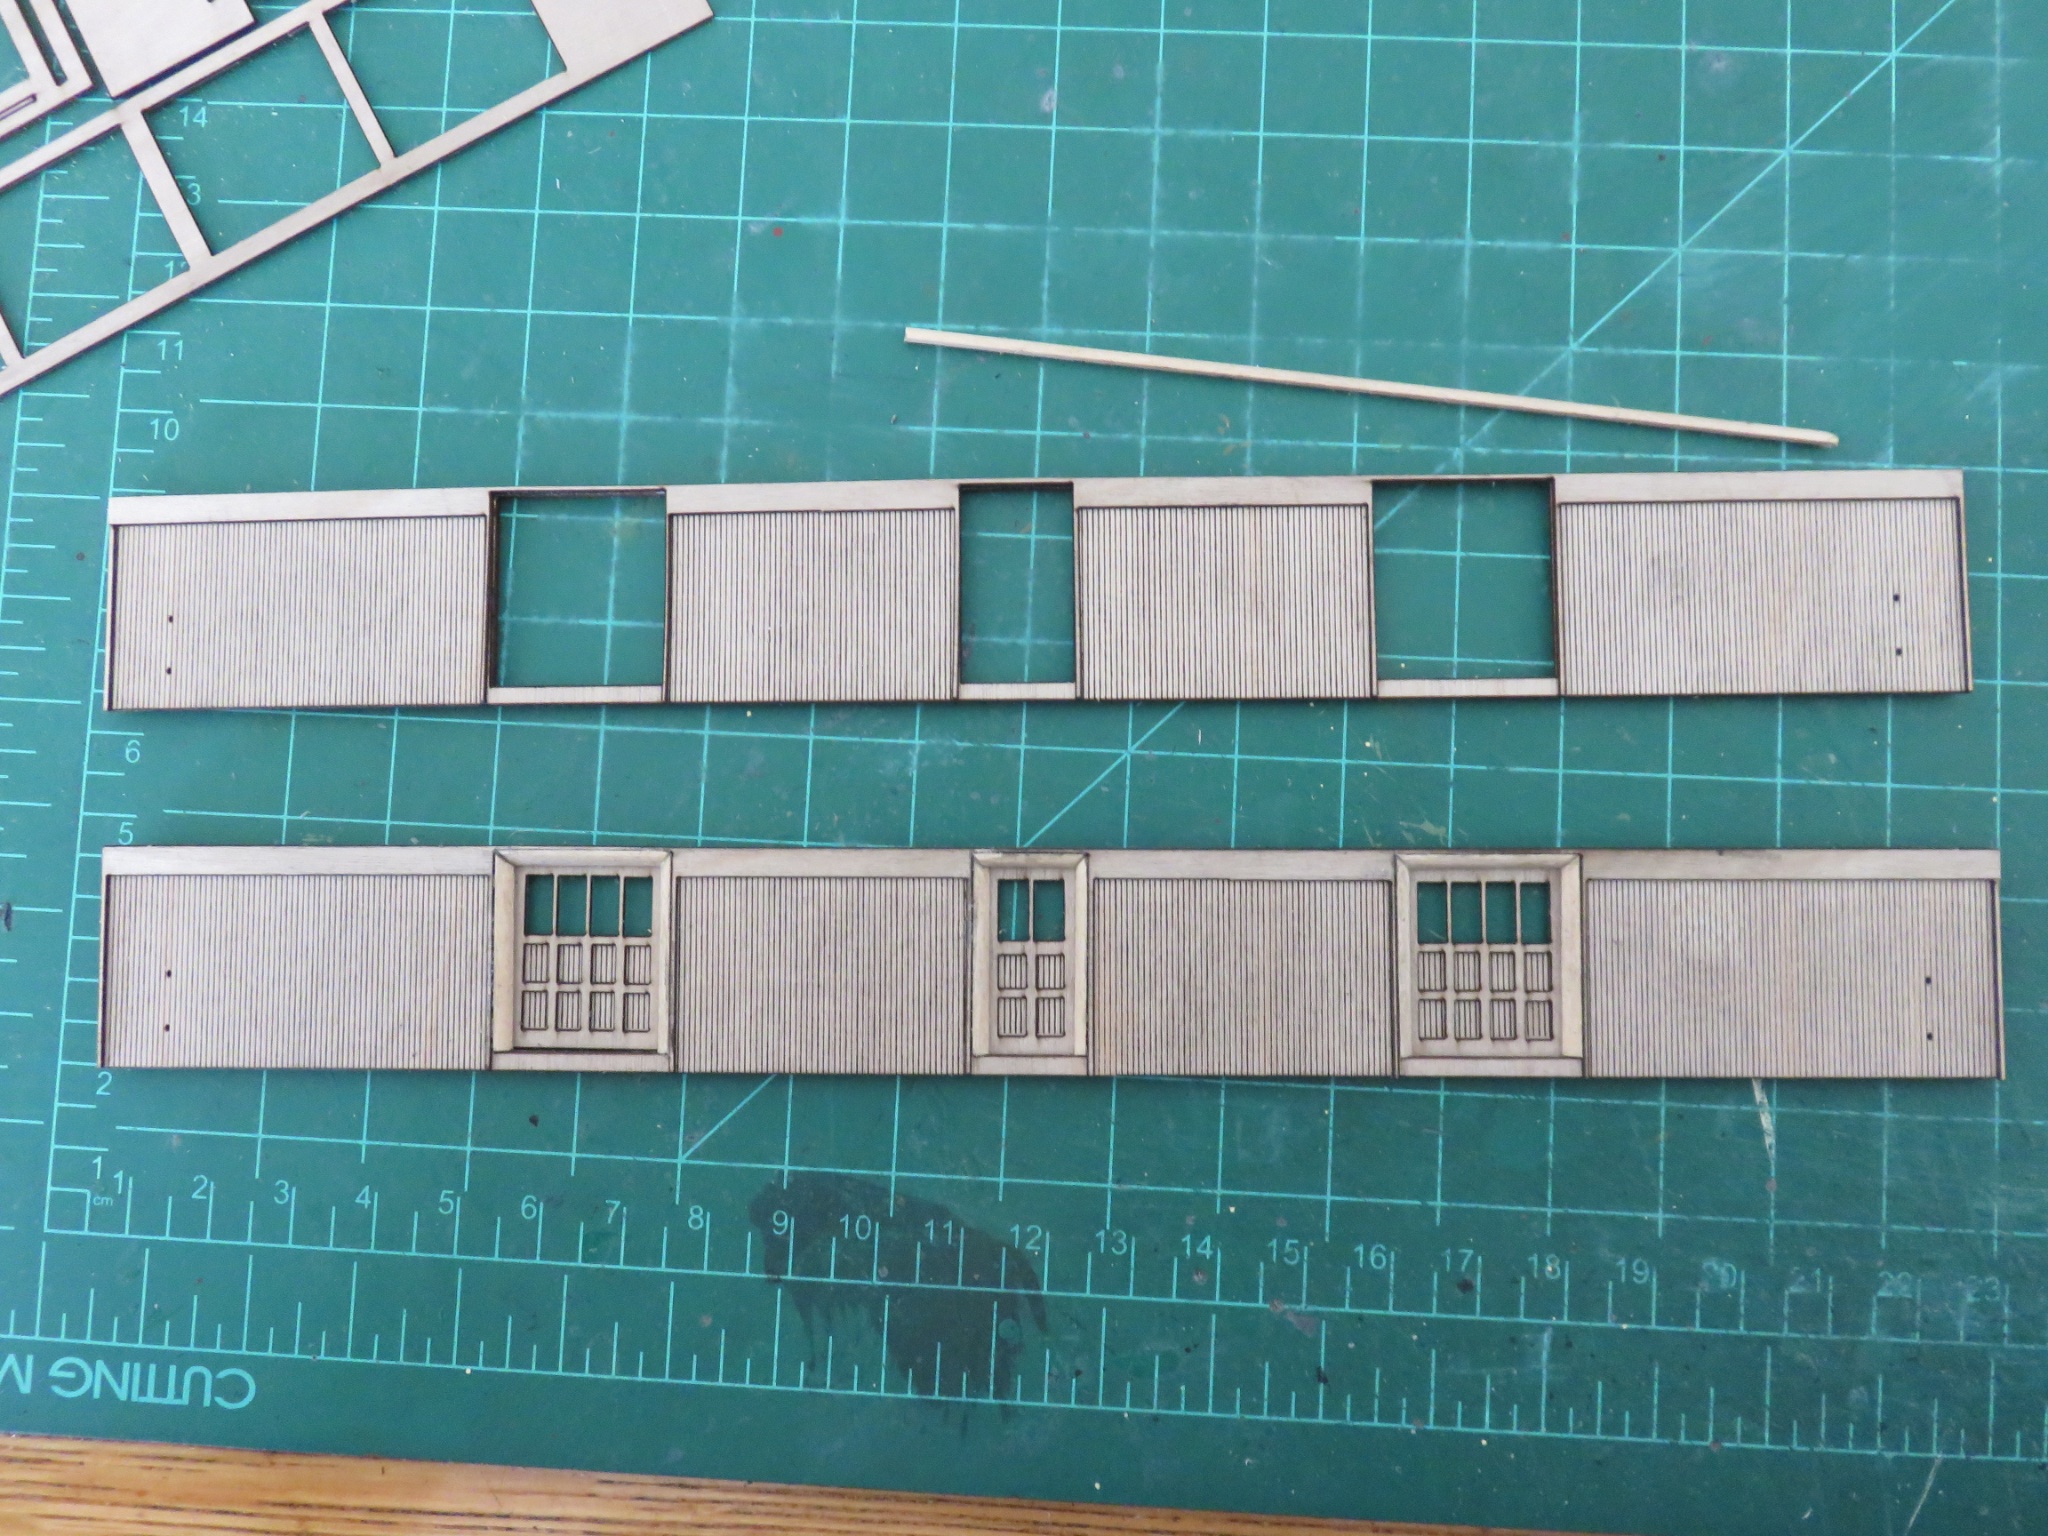
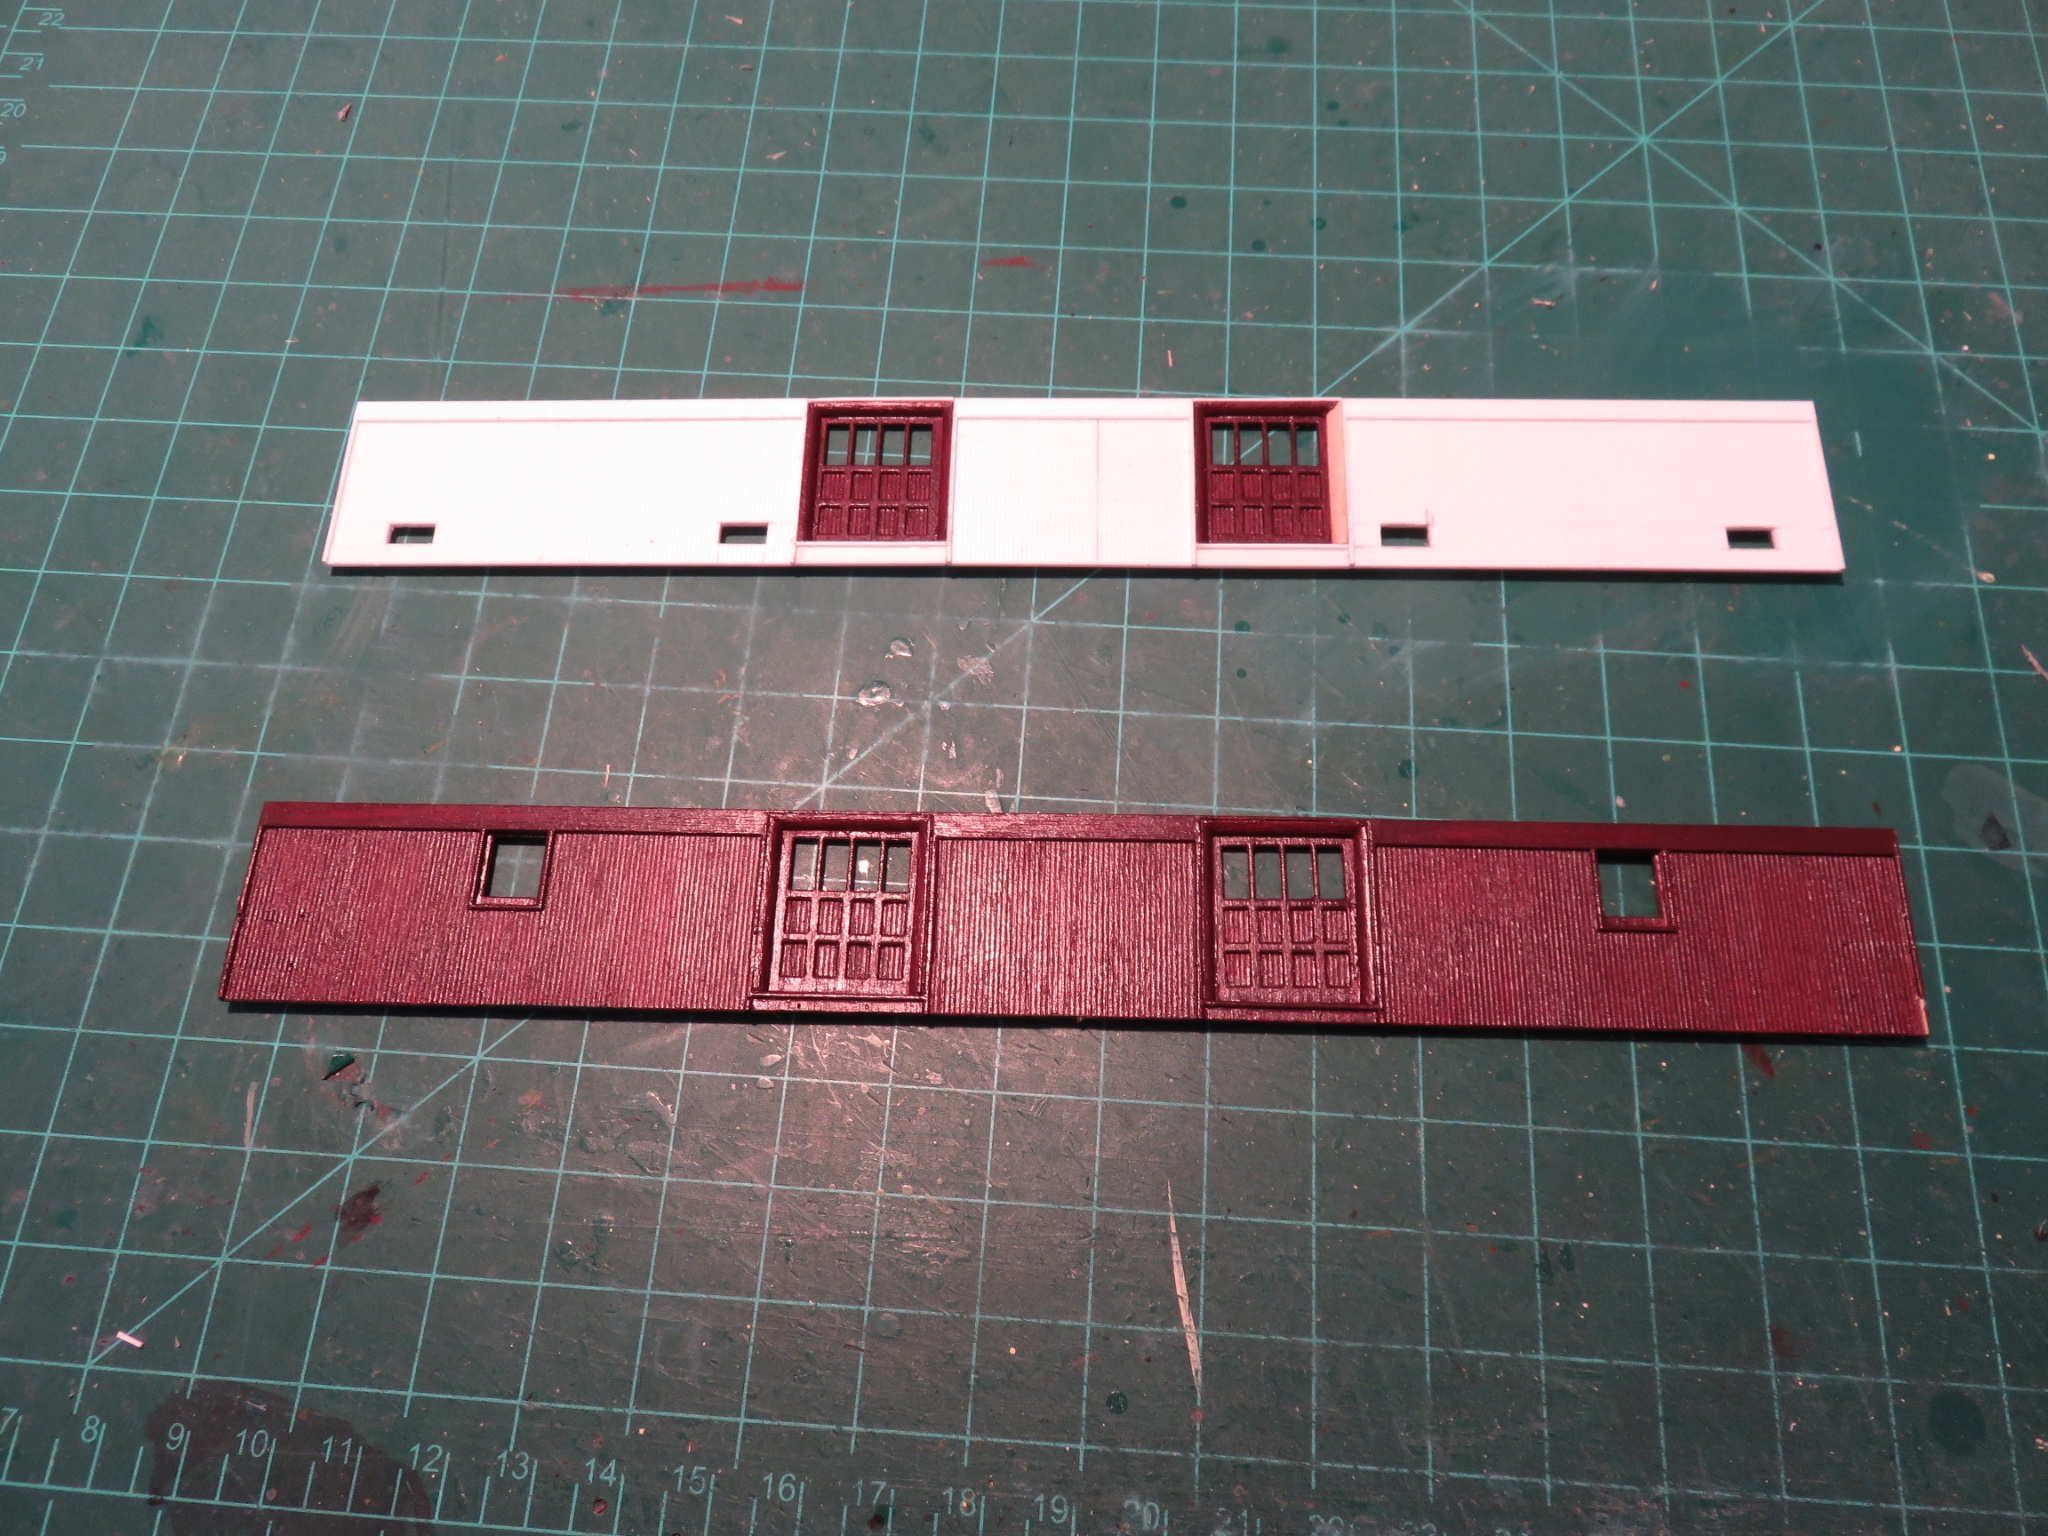
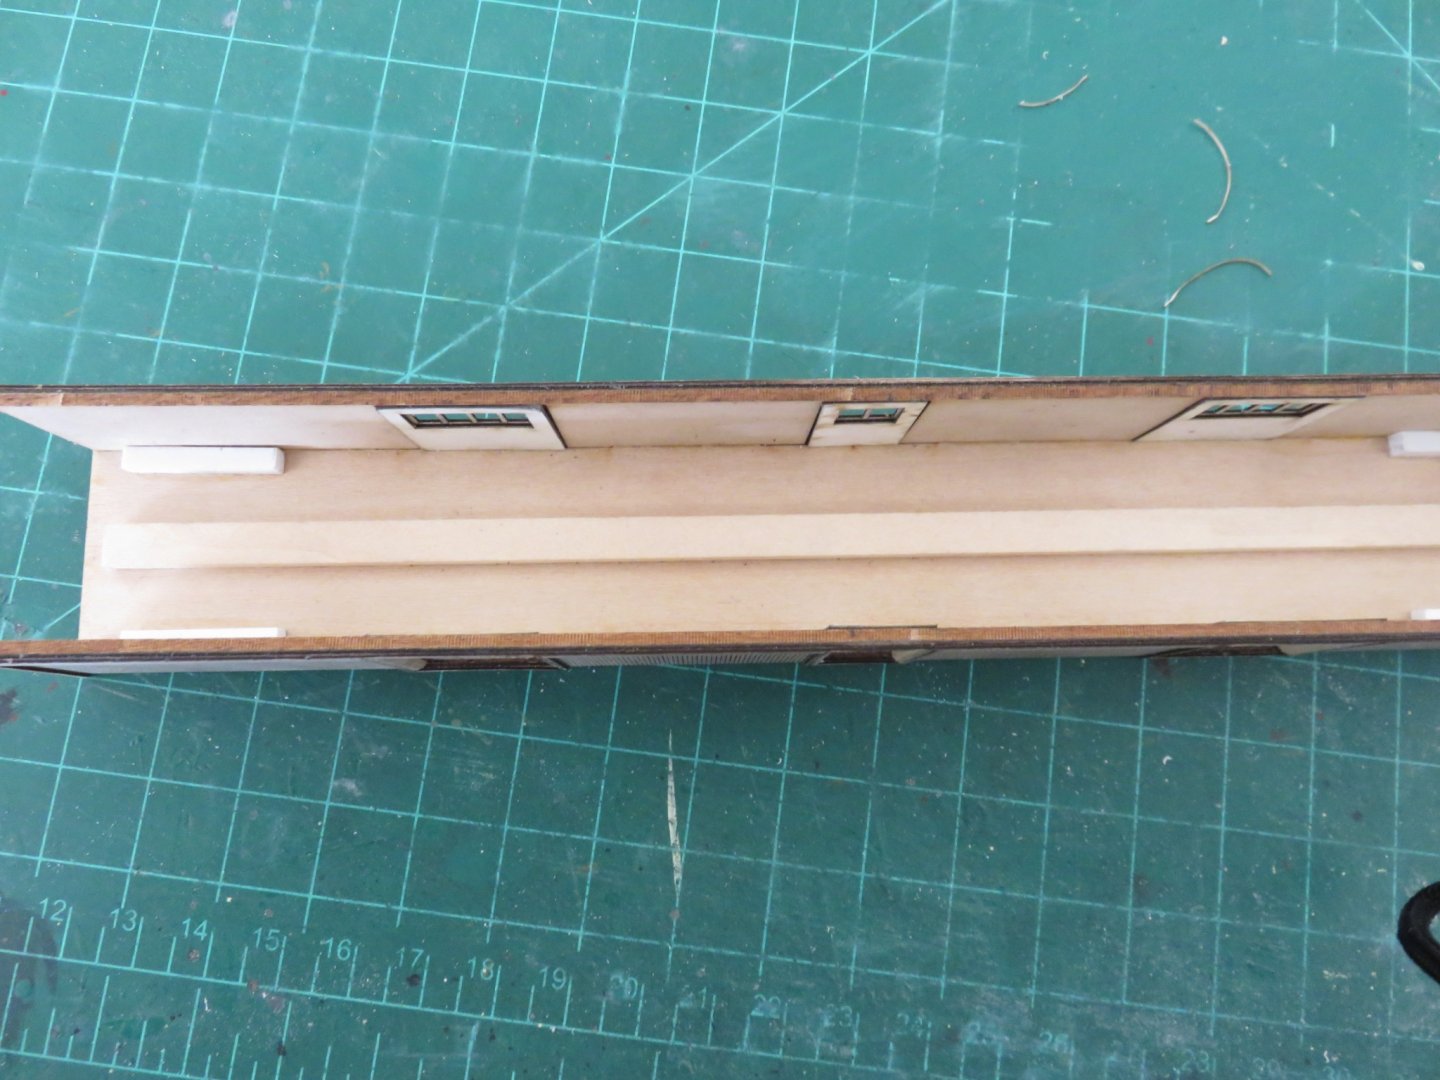
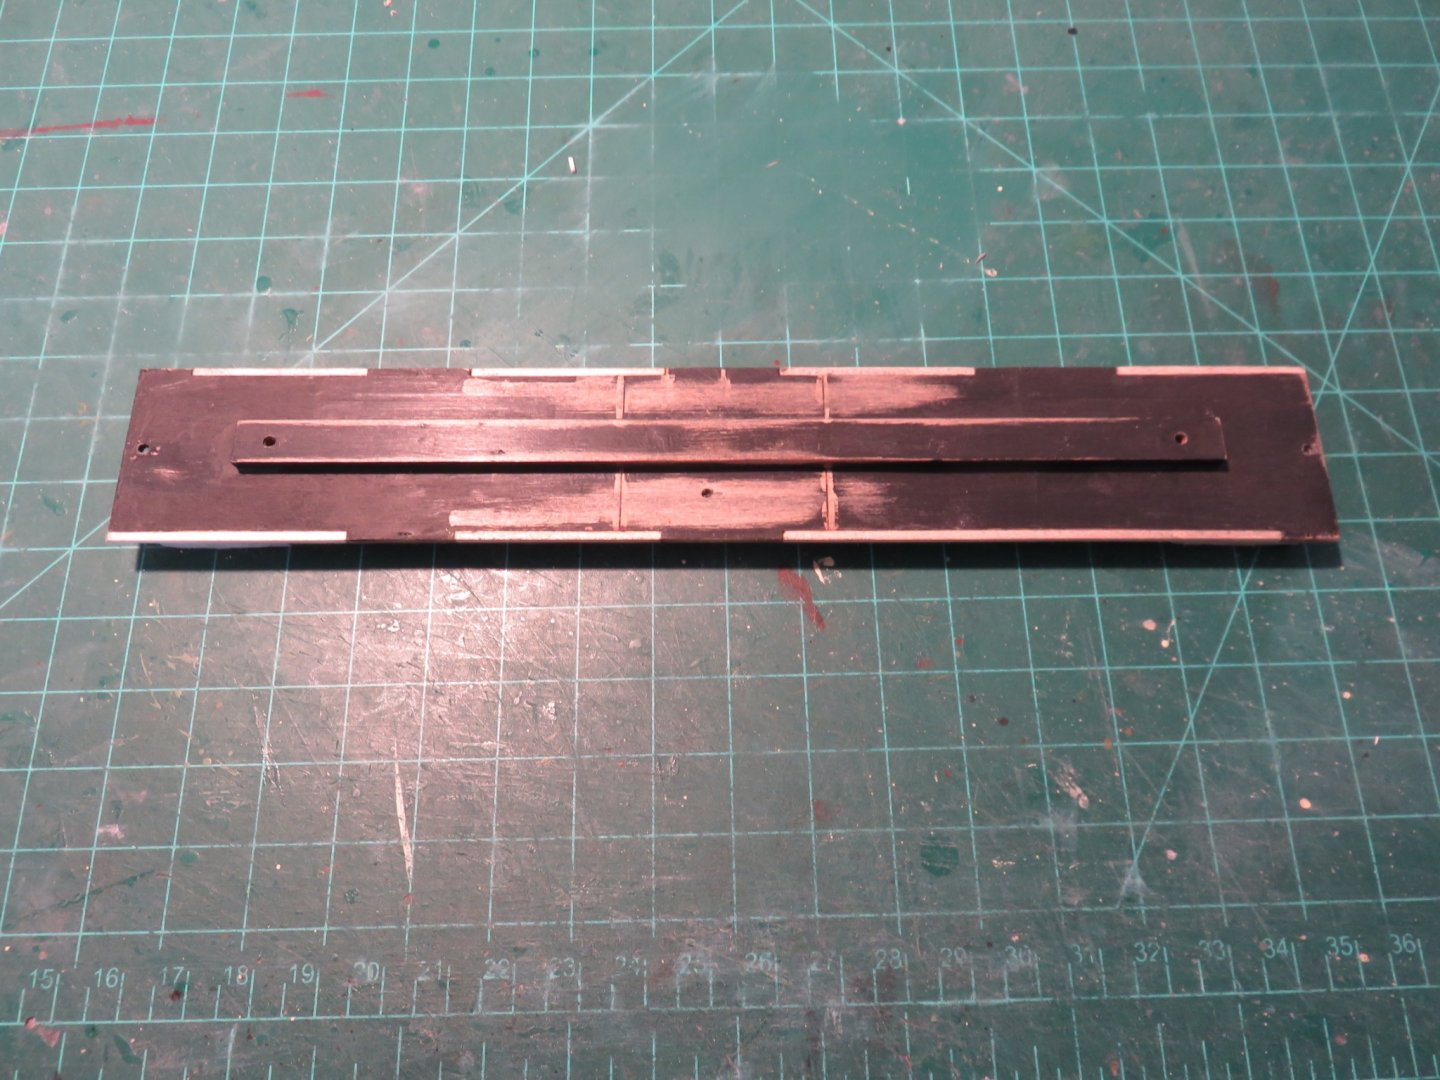
A small update, and as always, thanks for all the kind comments and likes. I now have two sides made, one of which is all but completed just the fine details to be added after the car is assembled. To make things easier, and since I'm going to model the car with the cowl vents removed, the lower louvres will be modelled "closed". This made it simple by taking a small piece of scribed siding and applying it from behind and turned 90 degrees: As stated above, construction on the second car side is will under way: Fortunately both sides have ended up equal in length to each other as well as the original kit sides (hooray!). The second side will next receive its louvres. Both sides will then be built up in thickness for strength. I've even managed to prep the car floor: Strip wood has been added to fill the original construction tabs, and repair a little damage that was incurred while disassembling the model. Any old glue remaining from the detail parts and previous assembly has been mostly sanded off (a little touchup here and there). I am now looking at ordering some replacement detail parts like the queen post assemblies and the pintsch gas tanks (all of which I think I absconded with for other projects....). Andy


- 154 replies
-
- 12
-
-
I’m not worried about trucks.... yet. For this car I have a set of Central Valley trucks, they still turn up from time to time in the local hobby shops. Other alternatives are available such as Walthers, and even Precision Scale. These are the cast parts I’m interested in. Andy
-
I’ve noticed he’s sold his white metal parts line to Labelle woodworking. Their kits look intriguing as well, if a bit generic. Actually, given that Labelle has a web store, it makes it easier to scoop up the BCW parts, so in that respect I don’t think it’s a bad thing. Hopefully Labelle keeps them in production. Andy
-
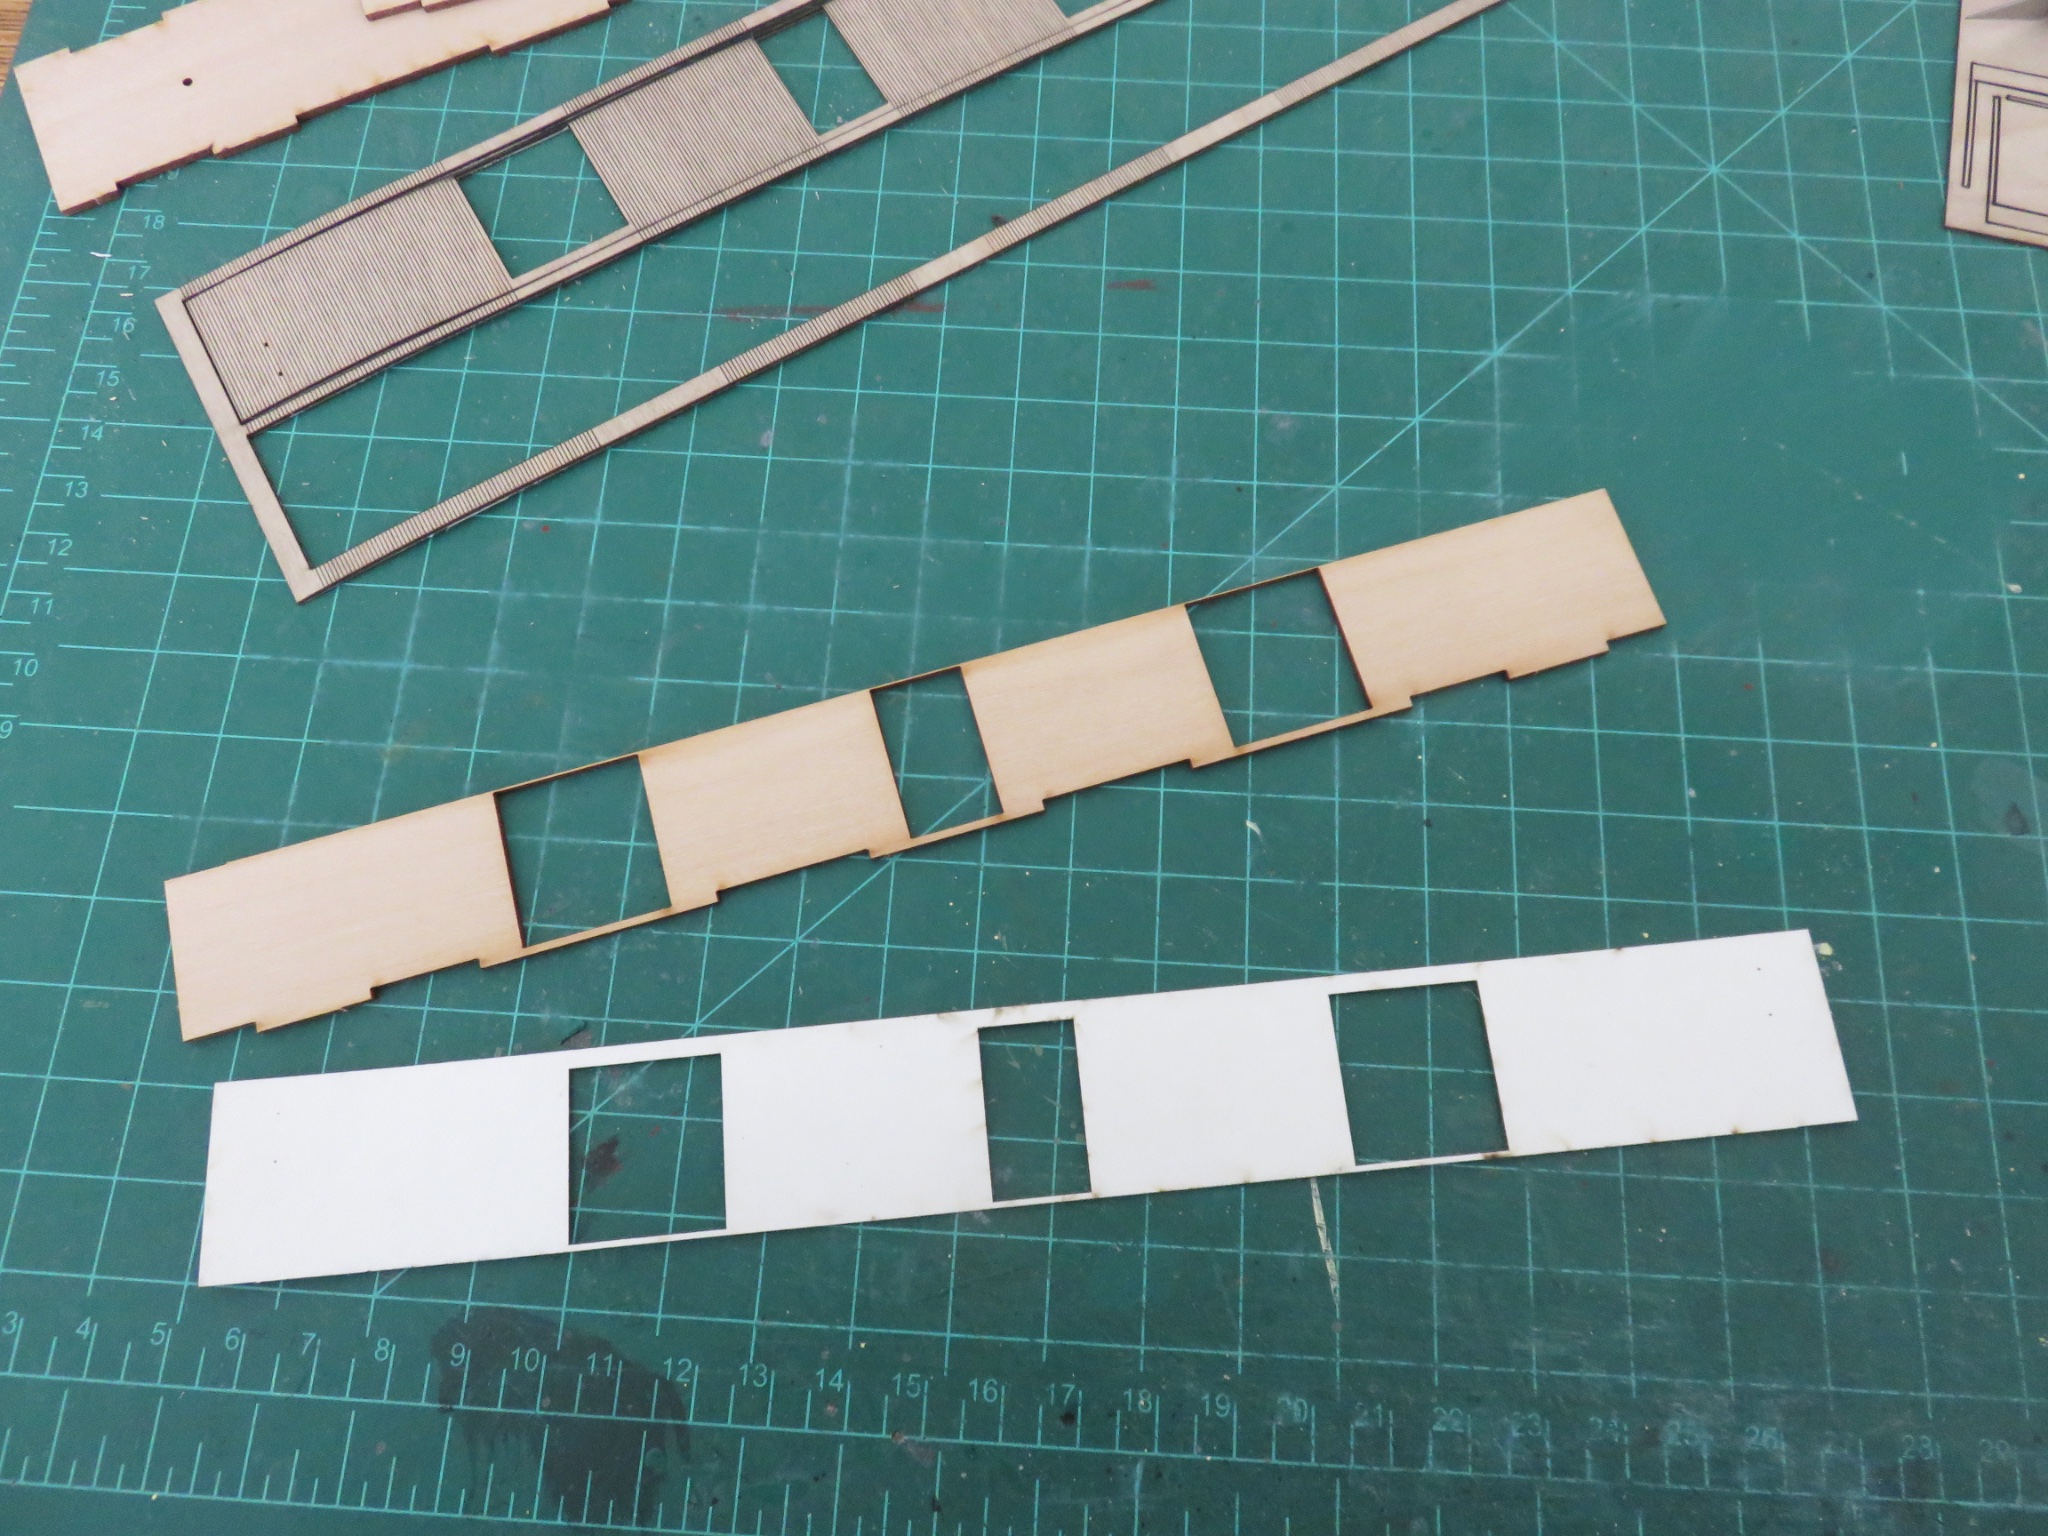
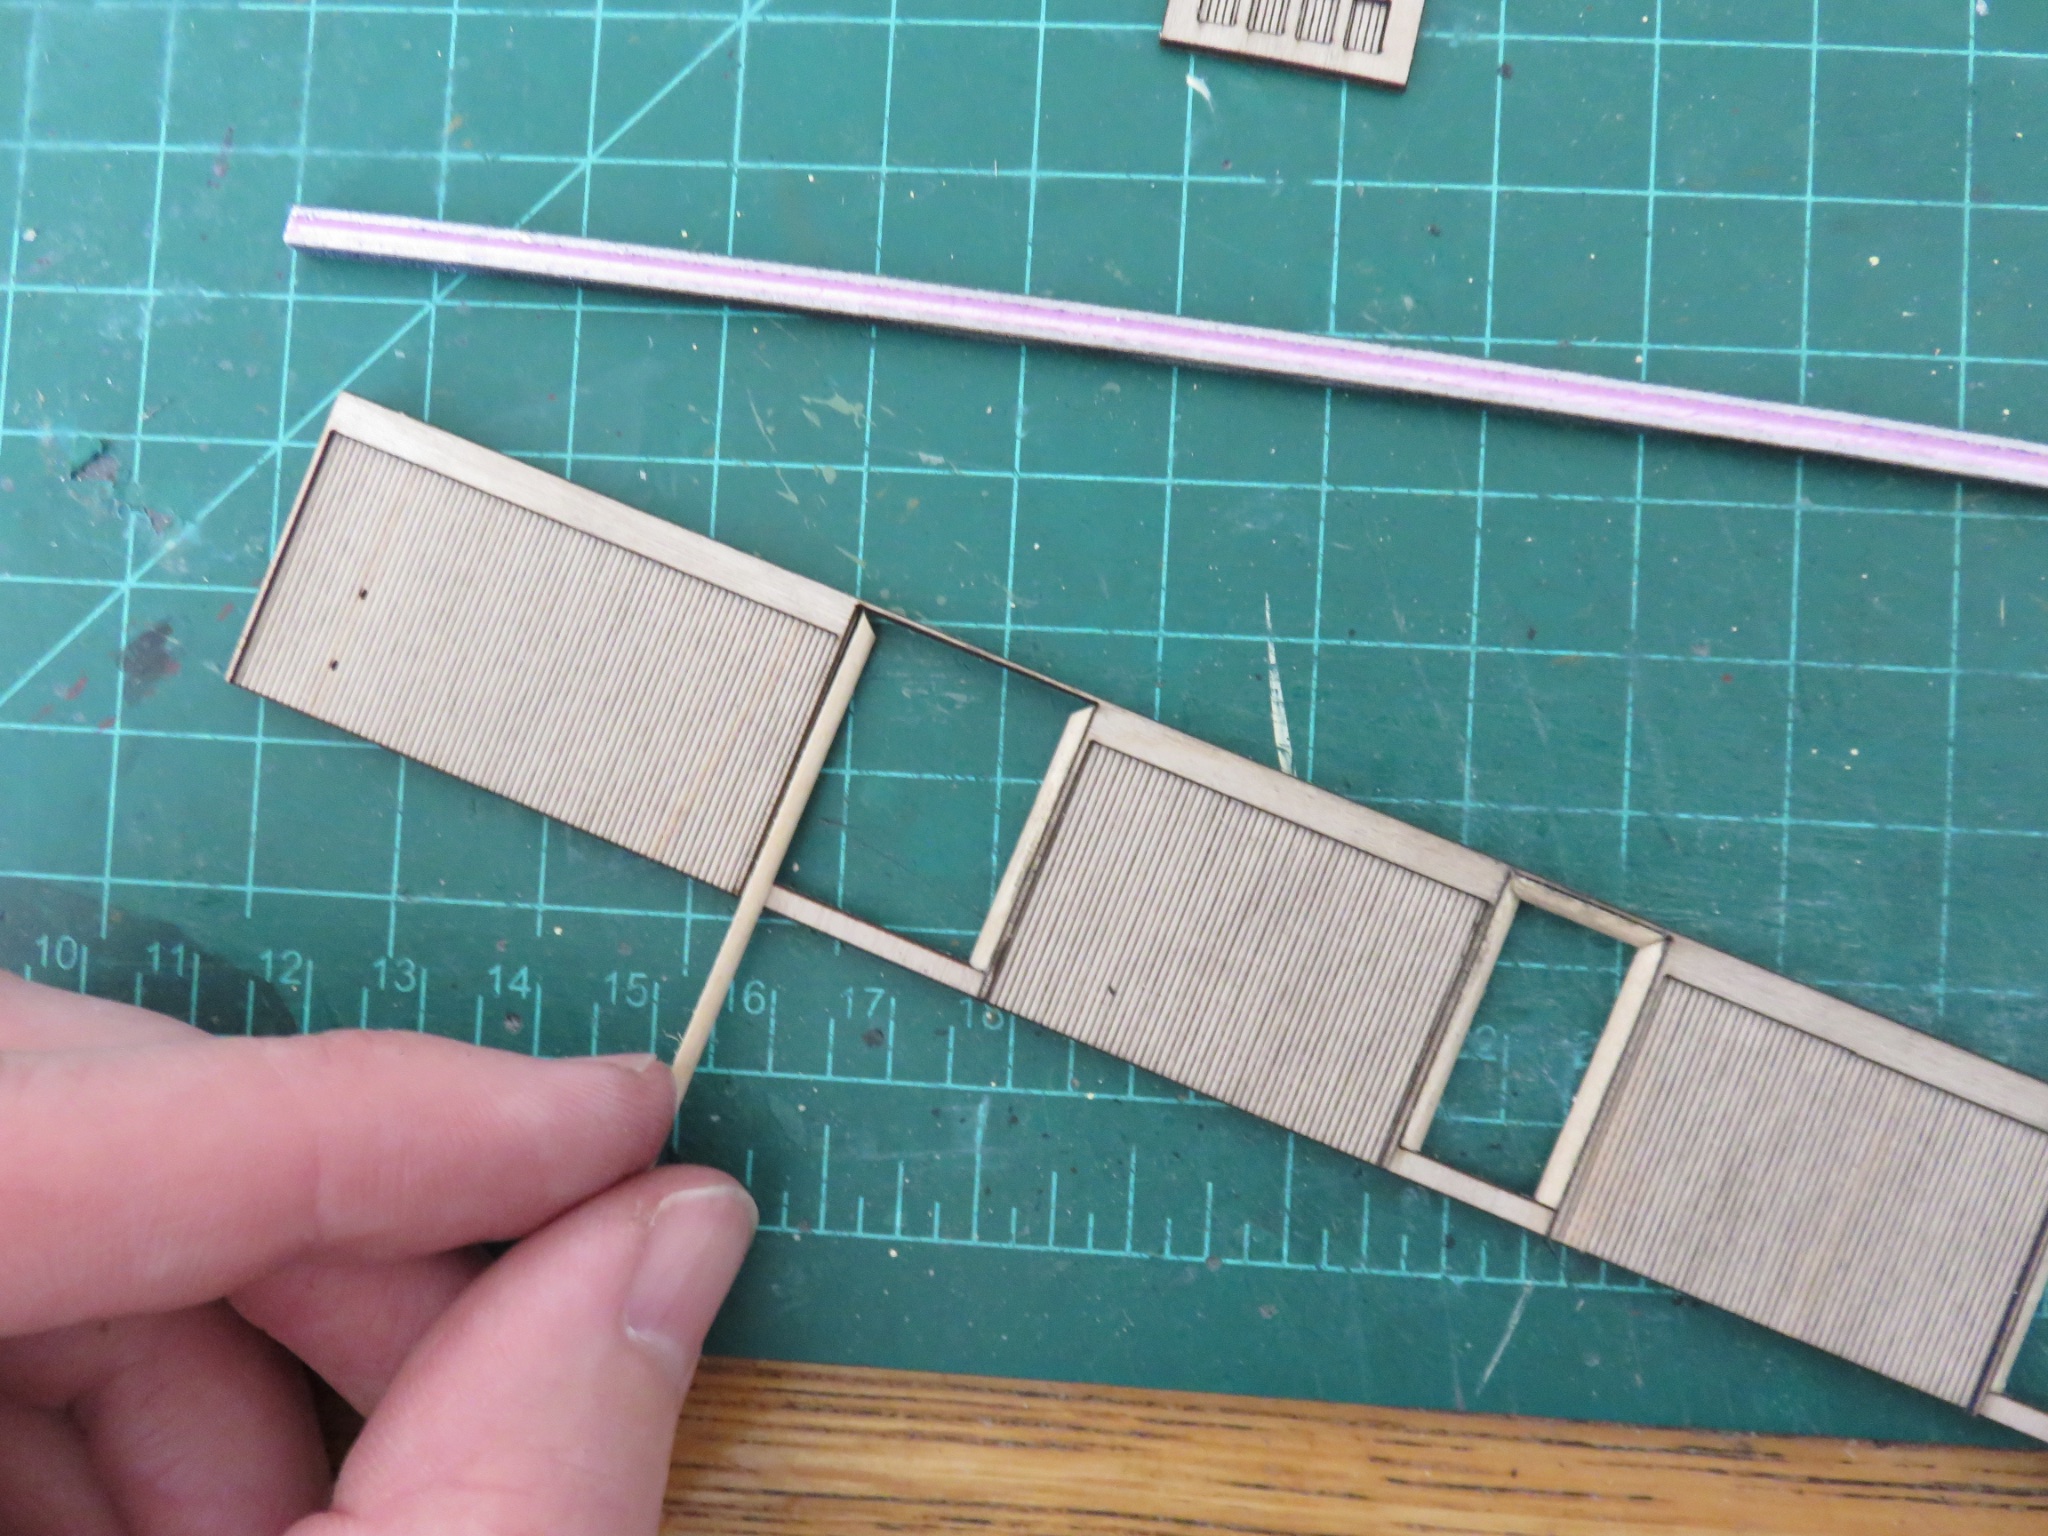
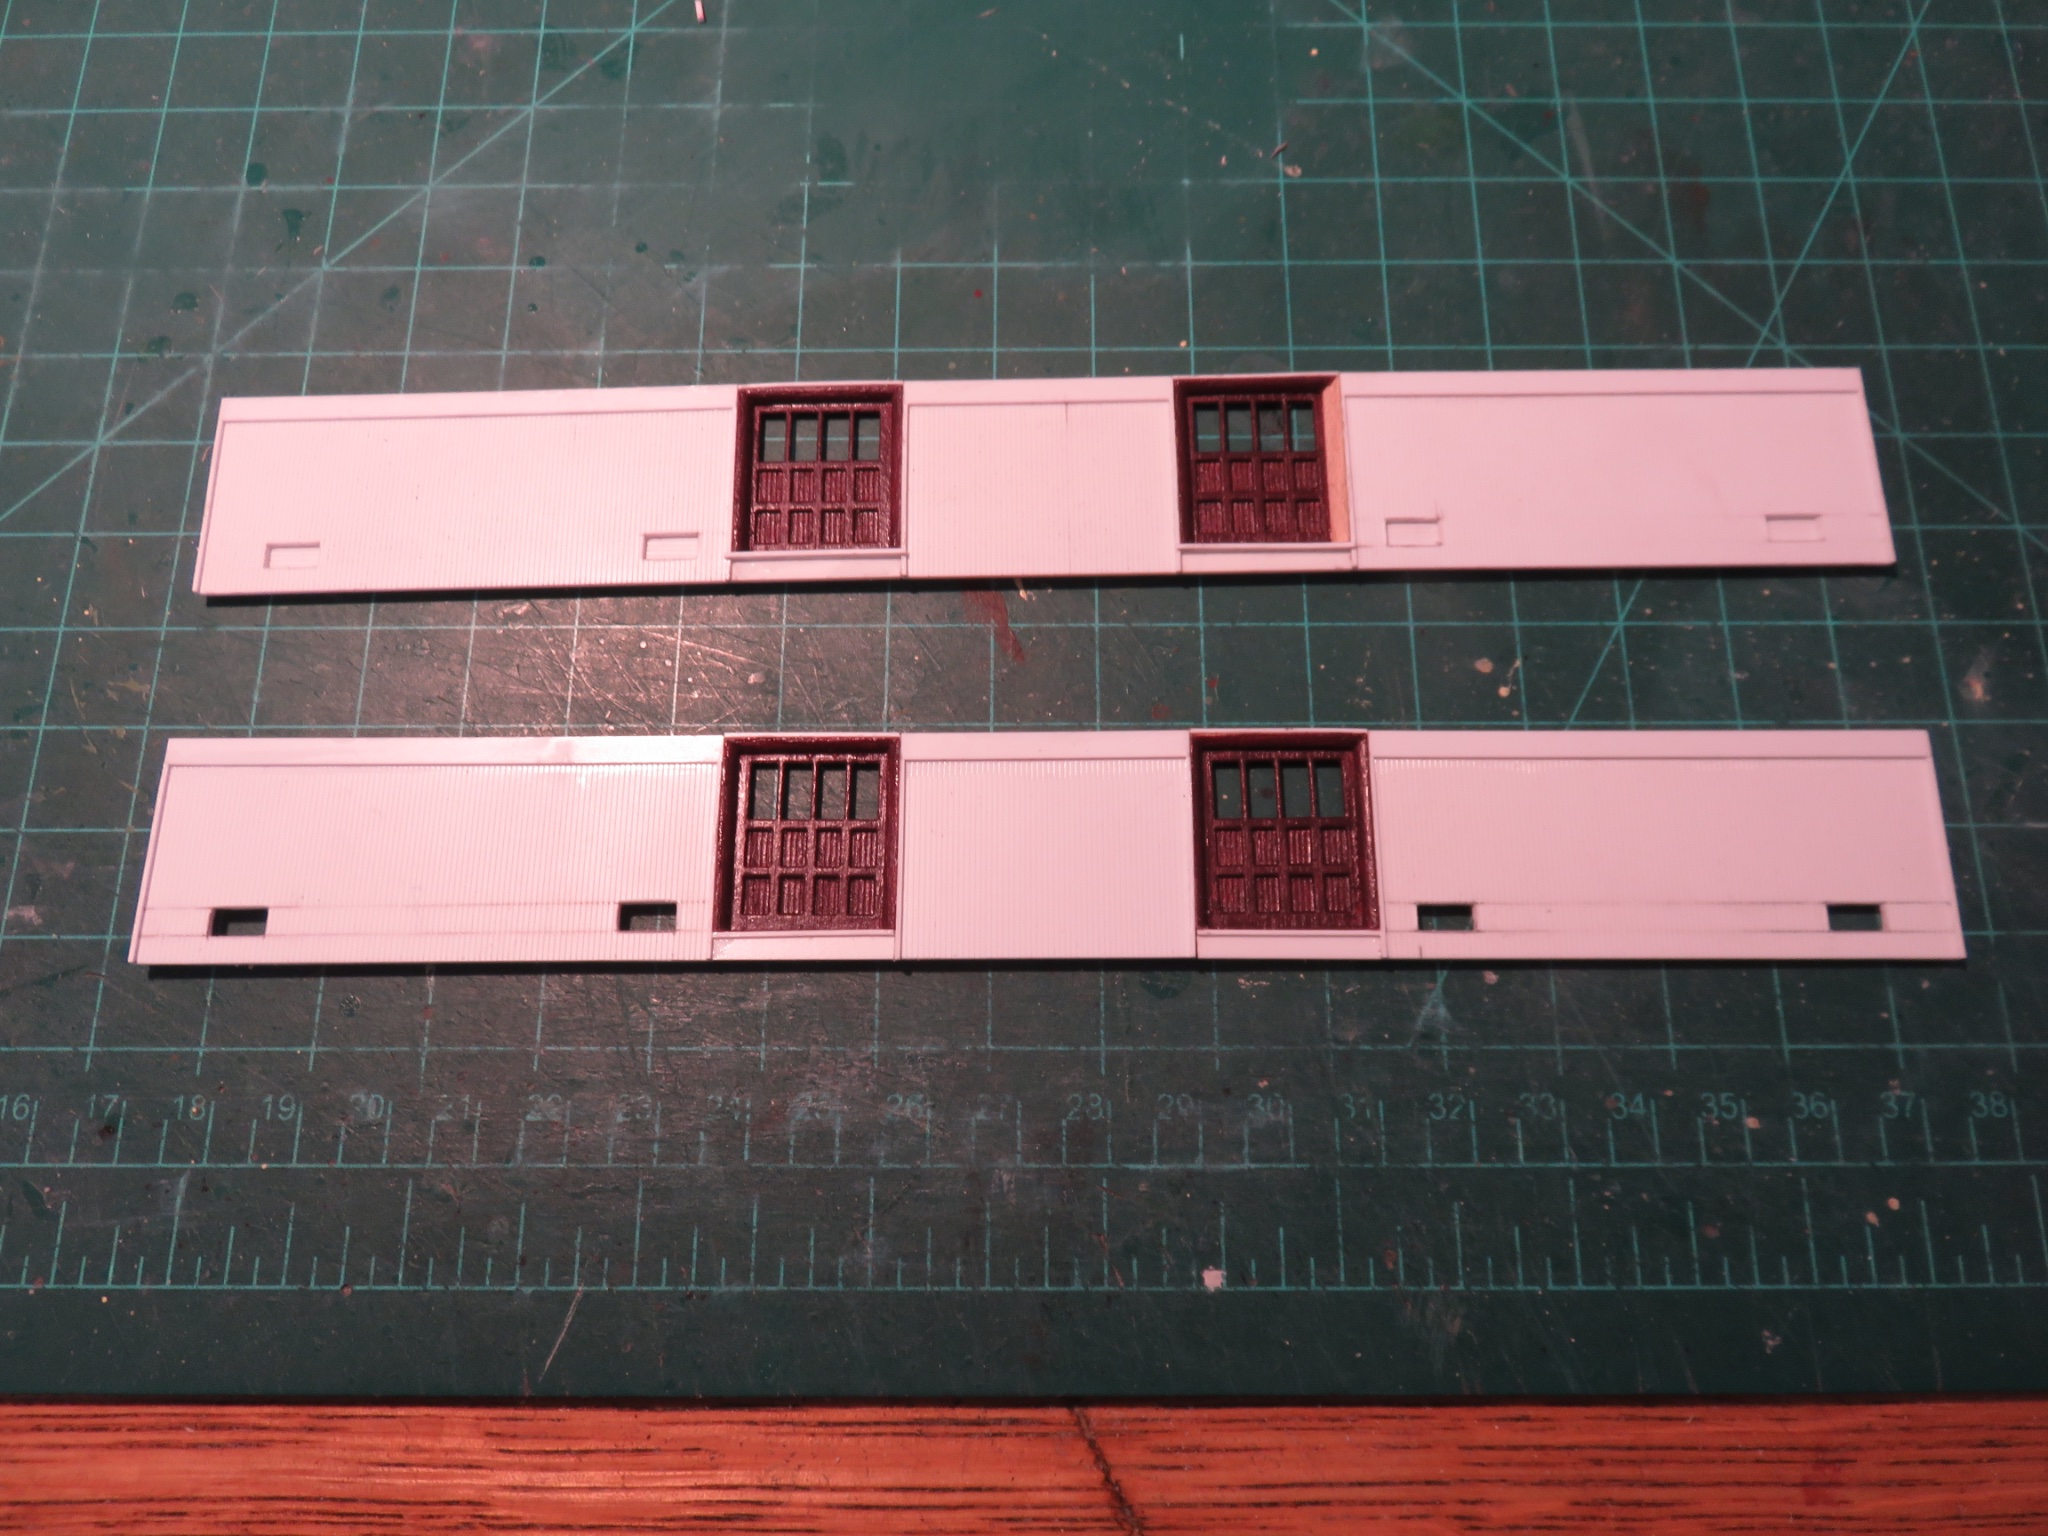
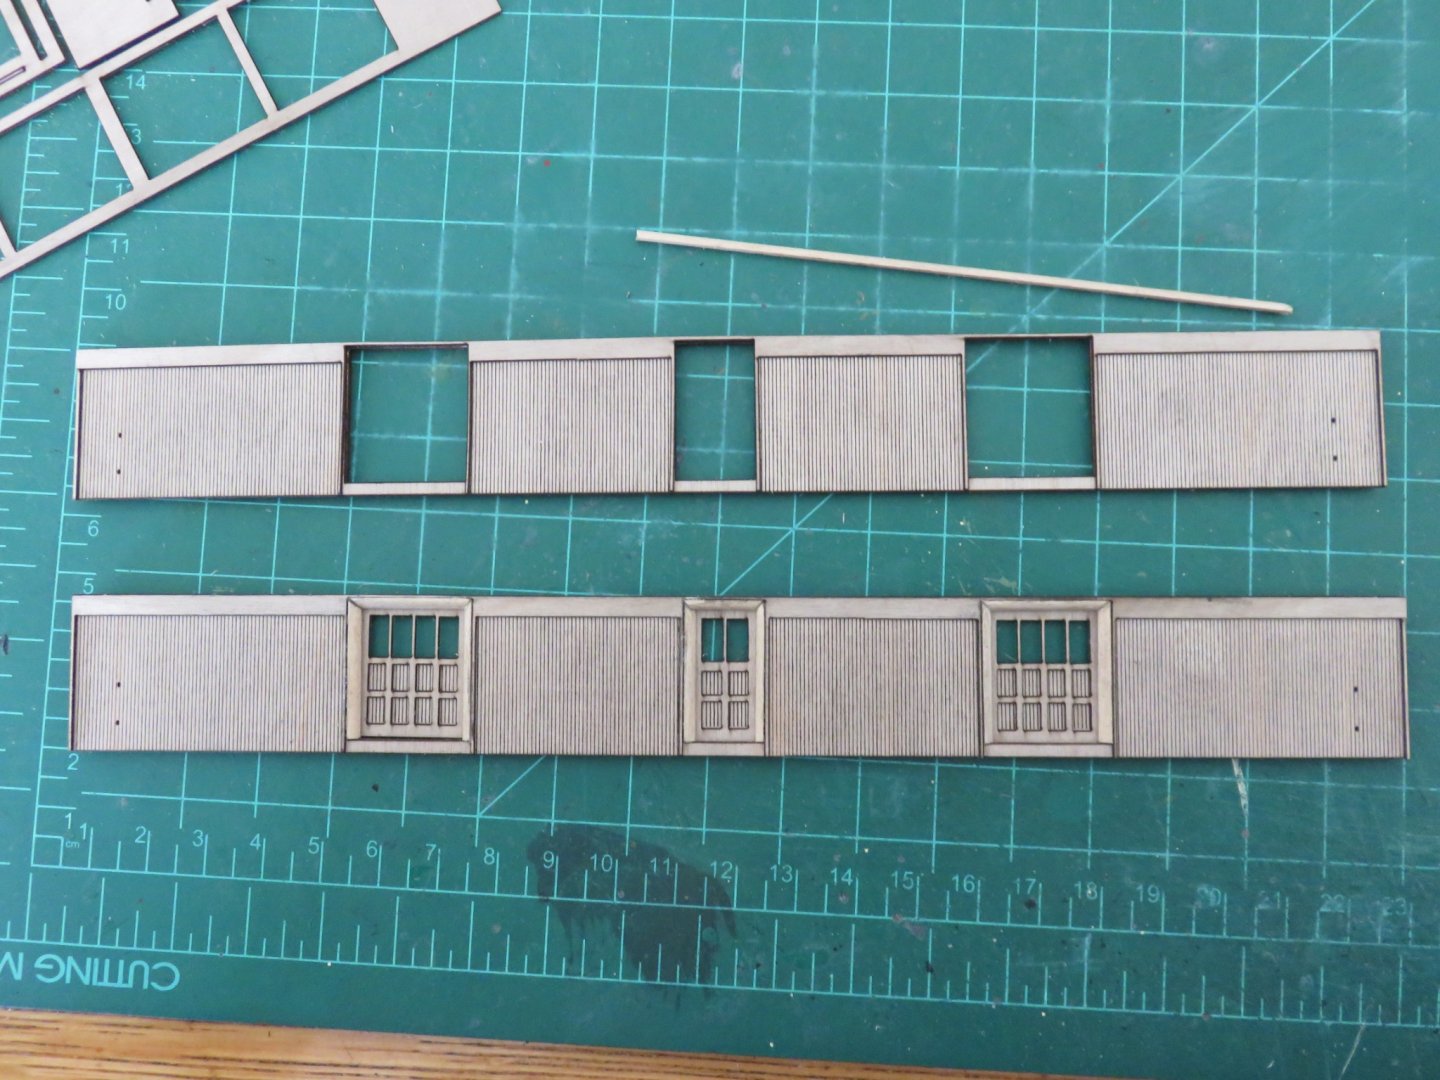
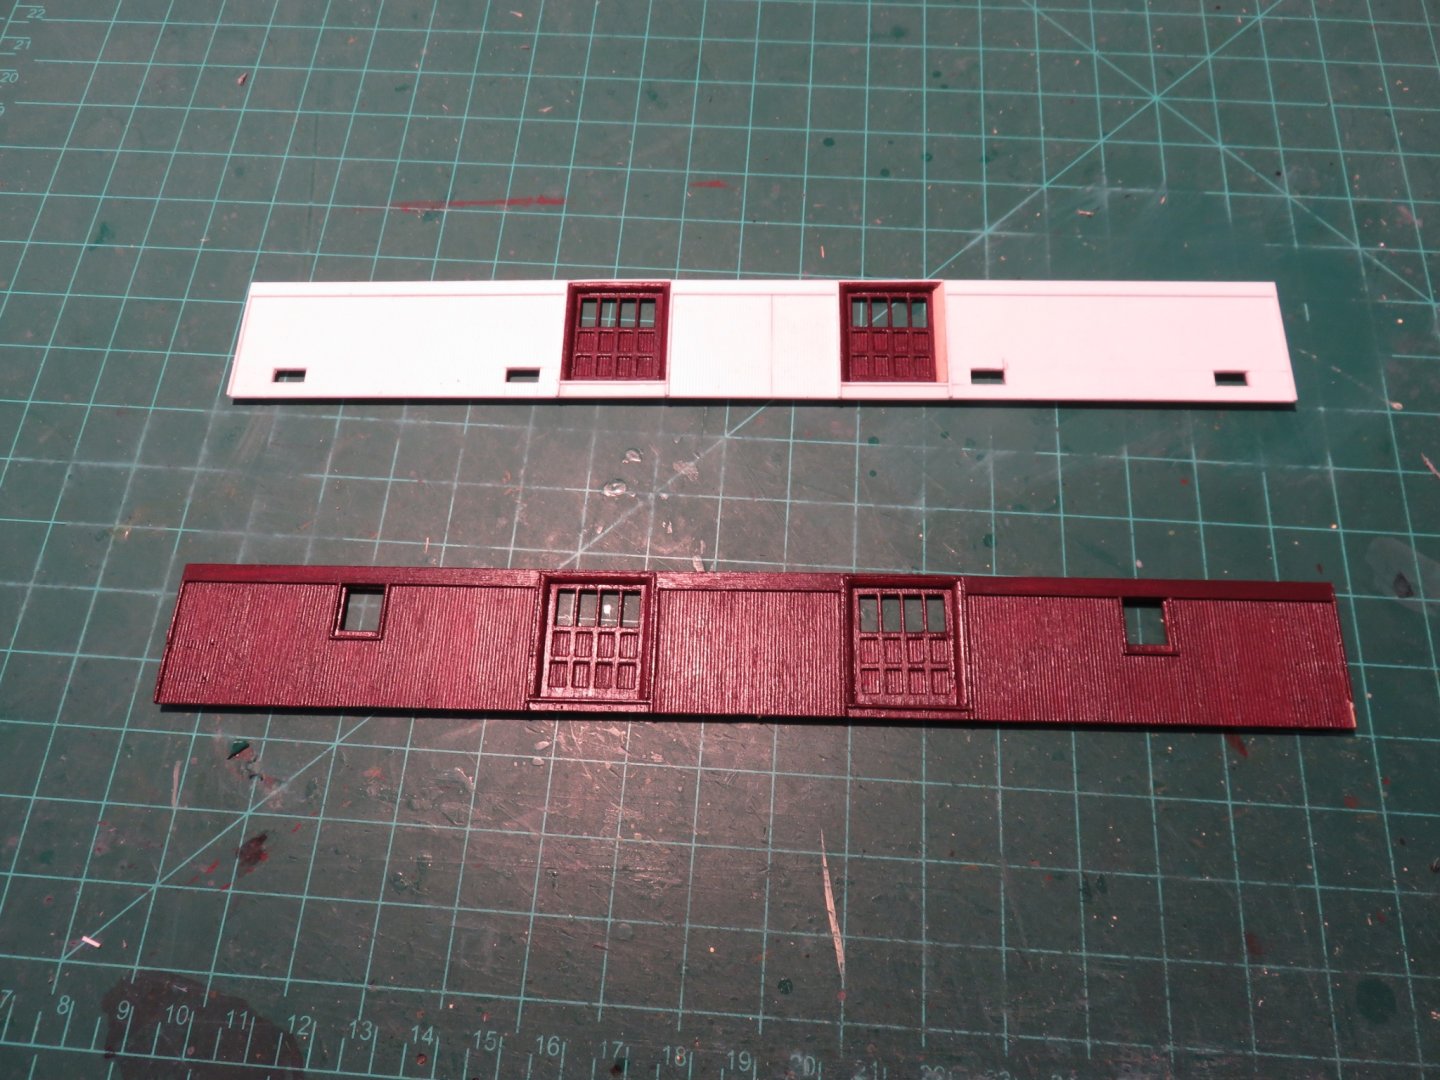
So it has been a while since I've been up to much model building, but I should first mention that I have completed the coach (actually back in November). I will share photos of the completed car when/if I ever get around to building a bit of a suitably scenicked display. I've just nicely started up another passenger car project, so if nobody minds, I'll just keep this thread going... keep everything neat and tidy in one place. Just before I embarked on my coach build, I'd been on a bit of a kit building kick. I did post picks of a combine kit I'd built at the beginning of this log. This was a Sparrows Point kit from Bethlehem Car Works. They have also produced a kit of a CPR 60 foot wooden baggage car (both of which, I see as I write this, have been discontinued...hmm...). Anyway, some time ago I had acquired two of these kits. At the time, I had initially planned to build one of them "out of the box", and the other one as an Express Fruit car. The CPR maintained a small fleet of these cars for seasonal use in the shipping of domestically grown fruit, such as apples, or produce that needed a stable temperature instead of refrigeration. On CPR western lines, these cars were constructed identically to a standard baggage car, with the exception of a series of cowl vents that would be mounted on the roof, an example of which can be seen here. Due to clearance issues, these cars were not permitted to run on CPR lines east of Winnipeg with the cowl vents mounted. In order to meet the needs on eastern lines, the CPR built a modified version with a low rounded roof. All versions of these cars could be seen in typical baggage/express service during the "off season". For this use, the cowl vents would be removed and stored, and the roof openings capped. The eastern cars came in two versions. The first version lacked the windows seen on the "stock" baggage car, but had four louvred vents located low on the car side and radon 2 axle trucks, as shown here. The second version was fitted with small windows, like the typical baggage car but lacked the louvred openings, and rolled on 3 axle trucks as seen here. The subject of my next project is one of these eastern fruit express cars, as fitted for baggage service. Technically this is my third attempt to build one of these cars. I had initially attempted to build one of the second version cars many years ago, but I became dissatisfied with my results and basically binned the project (of course I never throw anything away... you never know). Earlier last year I decided to revisit this project with the second baggage car kit and had a much better result, as you can see here: Only a few grab irons and a splash of paint needed to finish this one off! Now to revisit my first attempt. I had hoped to save as much as I could from my first attempt, and I was largely successful. I was mainly concerned about the doors, floor and ends, as for this version, I would be building the first version of the car, as described above. This involves replacing the sides of the car with scratch built versions of my own and hoping that everything will fit back together. So far so good. You can see the difference between the standard baggage car side and the express fruit car side with the missing windows and the openings for the louvered vents. I've successfully saved two doors so far, I had to remake one piece of 1/4 round trim, but that was an easy fix. The ends have already been modified in my first attempt at the car, and aside from a little clean up, and detail work, they're still ok to use. The car floor will need to be modified slightly, as the original used a tabbed construction, which is now no longer useful and which also suffered a tiny bit of damage during disassembly (easy fix, no big deal). Here I go again. Andy
- 154 replies
-
- 12
-
-
Where can I get TINY letters for my ship?
realworkingsailor replied to Brenticus's topic in Plastic model kits
It should work. After applying the transfers to the decal paper, it’s a good idea to give them a quick overcoat with a sealant such as testors dullcote. Without the sealant, the transfers will be more prone to damage due to handling. Andy -
You may wish to try rubber cement. First paint the wood with whatever weathering effects you want to show underneath (faded older paint, weathered board, dry rot etc.). Wherever you wish to show chipped paint, brush on a dab of rubber cement. Apply your top coat when the rubber cement has properly set. Finally, when the paint is dry, rub off the cement with your finger. You can finish the area off with a distressing tool (like a paint brush, but with metal bristles). Hairspray or chipping fluid won’t work as they are likely to be absorbed by the wood, where rubber cement will just clump on the surface. Thr best advice is also to experiment on some scrap pieces until you get the results you desire. Andy
-
Rigging Question - HMS Ontario
realworkingsailor replied to David Lester's topic in Masting, rigging and sails
Check who the actual seller is. I’d bet it’s a third party scammer. From the same family of clowns who scoop up concert tickets and resell them at 1000% markups. Andy -
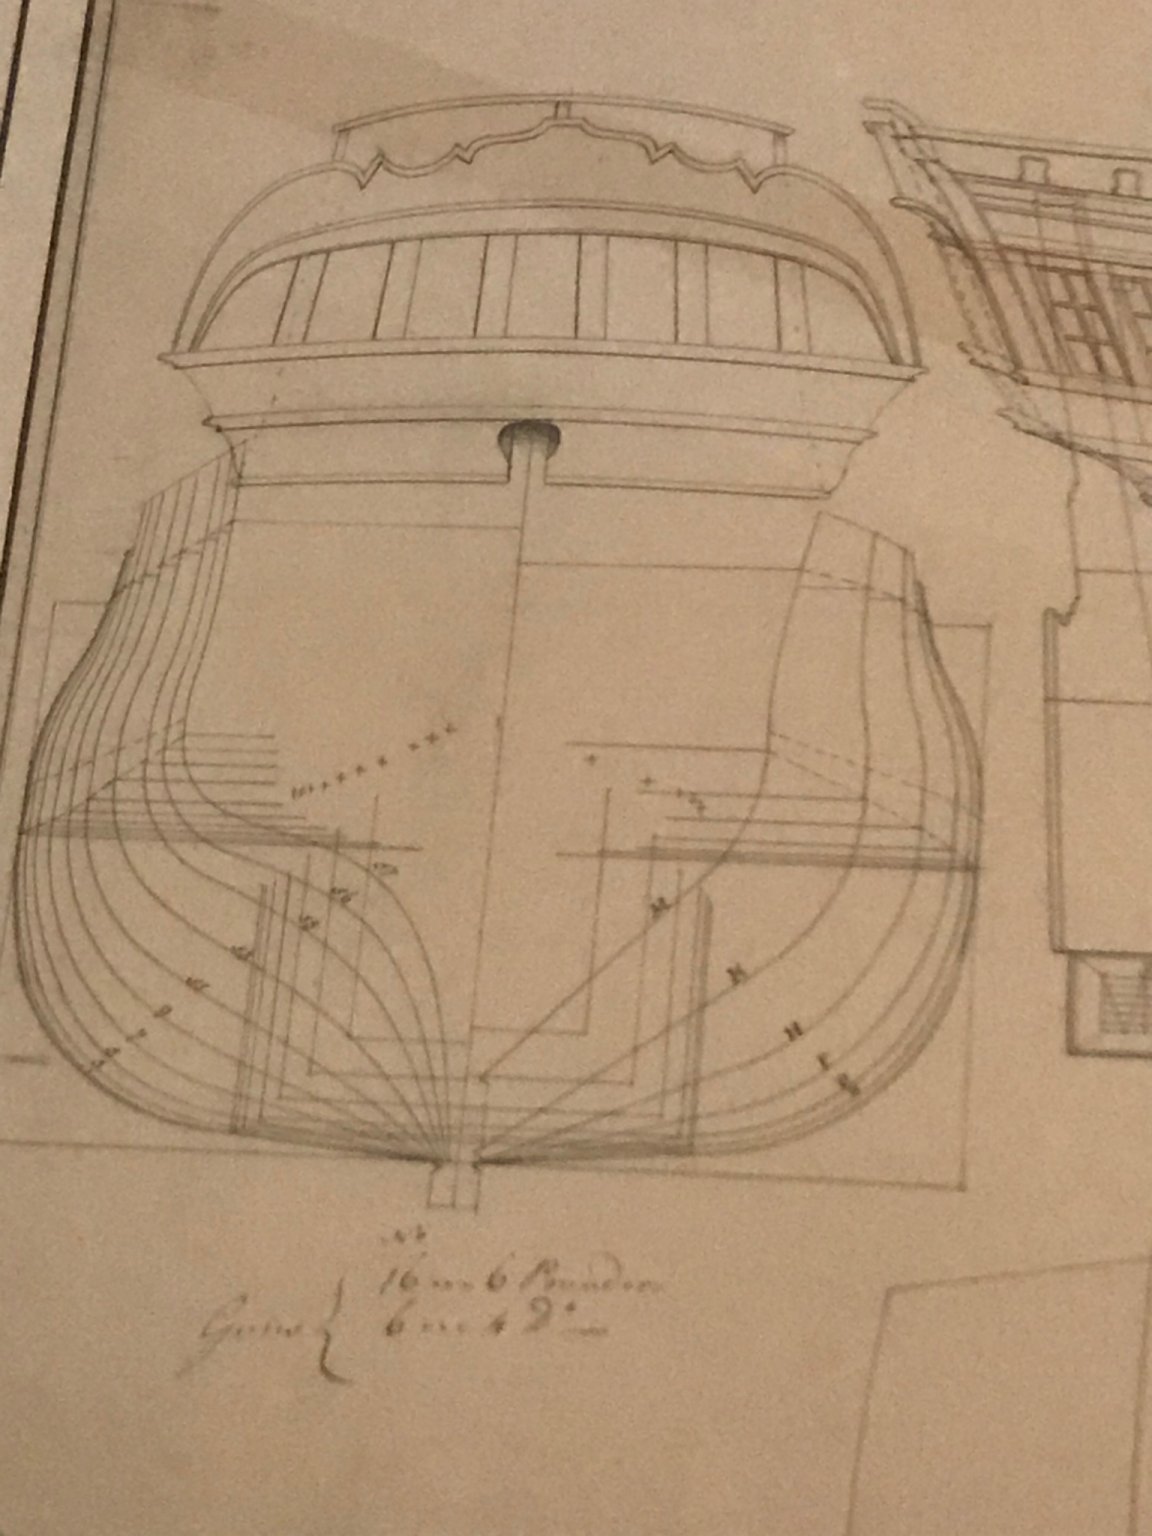
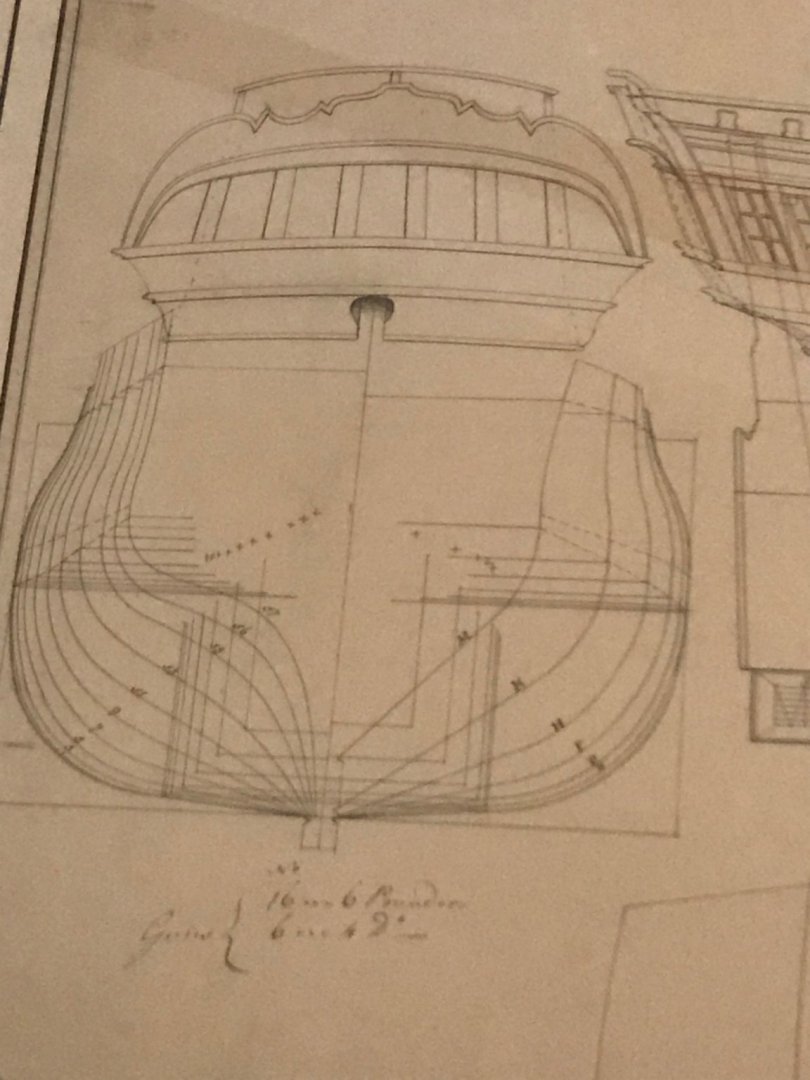
How does the kit bow compare to the actual draft? (I have a framed copy, the photo was taken at a slightly oblique angle to avoid reflection in the glass) It’s a shame that the kit is such an obvious struggle (or at least requiring of extraordinary measures for just the basic construction). Maris Stella seems to have decent offerings, but I wonder if it is due to a lack of experience with designing/manufacturing/building period ship kits. I have a few other thoughts regarding the accuracy of the kit too (like the capstan shown in the “prototype” renderings. Ontario didn’t have one, let alone one sitting right at the forward bulkhead of the great cabin). Andy
-
While the Niagara is considered to be a “snow-brig”, this refers more to the fact that she sets both a square main course and a trysail at the same time as a snow would. Traditionally brigs set either one sail or the other (if equipped with a crossjack), depending on the point of sail, until the early 19th century. Looking at photos of the replica Niagara, the remains of the snow mast (If any) is almost fully integrated into the main mast. By contrast in a true snow, the snow mast is set at some distance aft of the main mast. If you look at the video footage of the wreck of HMS Ontario (1780), at the 1:17 mark, it very clearly shows the relative positions of the two masts. Andy
-
That’s definitely a challenge to overcome! Is it possible to make some sort of actual outer stern frame that would run from the aft bulkhead to the transom? Something similar to what Chuck has done on his Confederacy and Winchelsea models. Andy
-
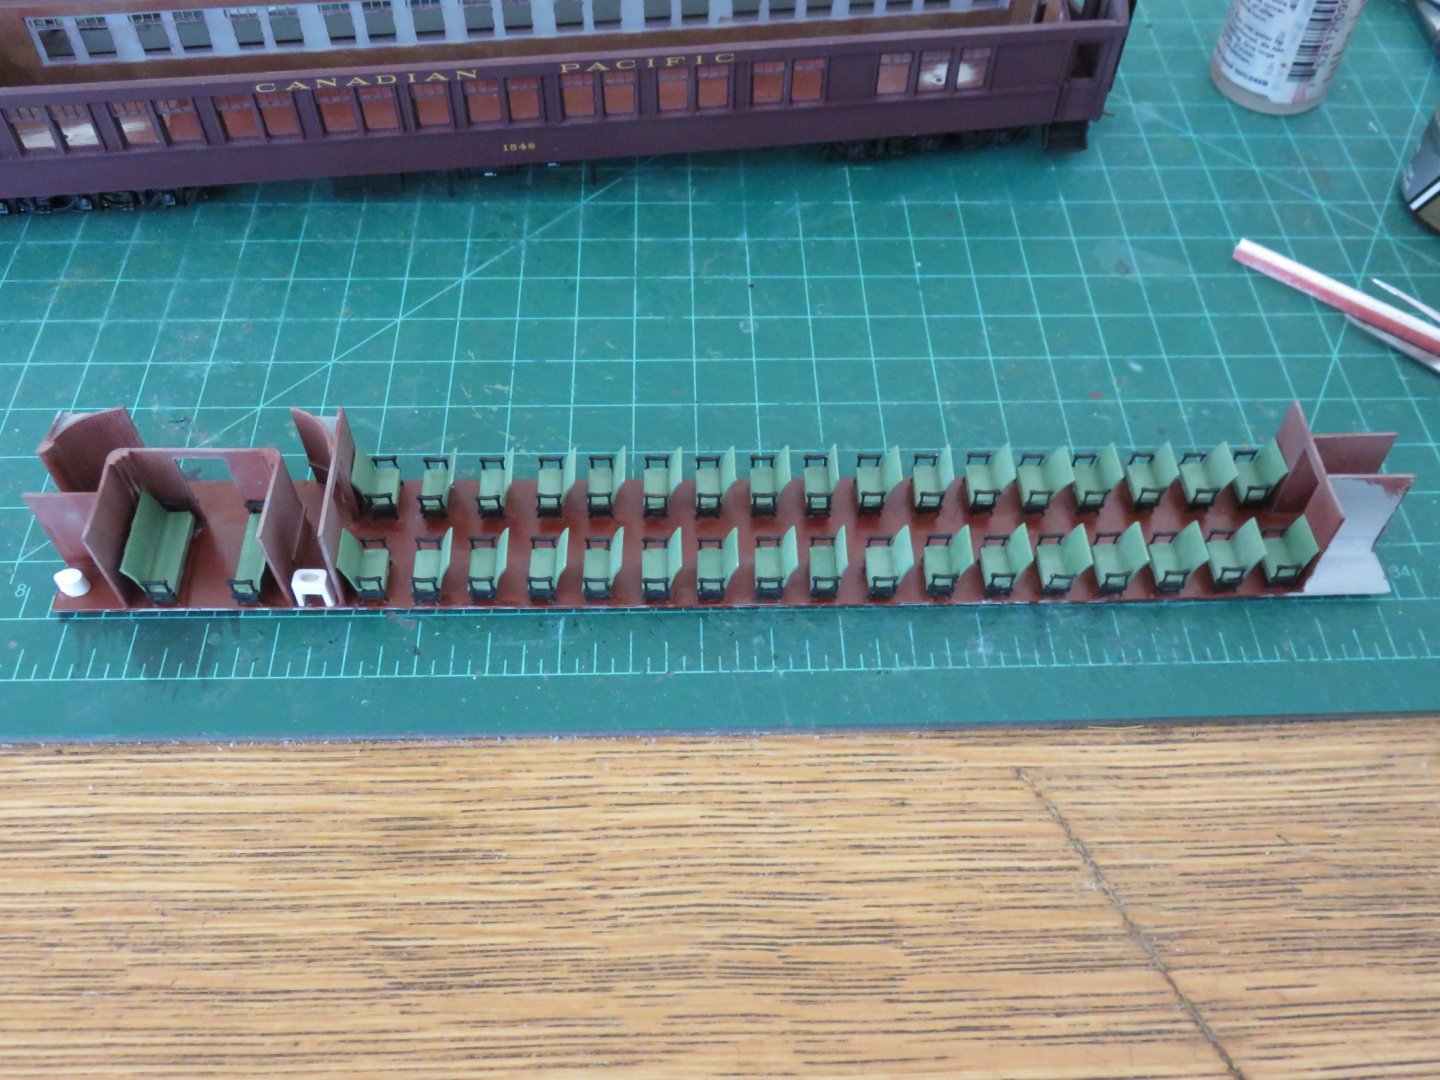
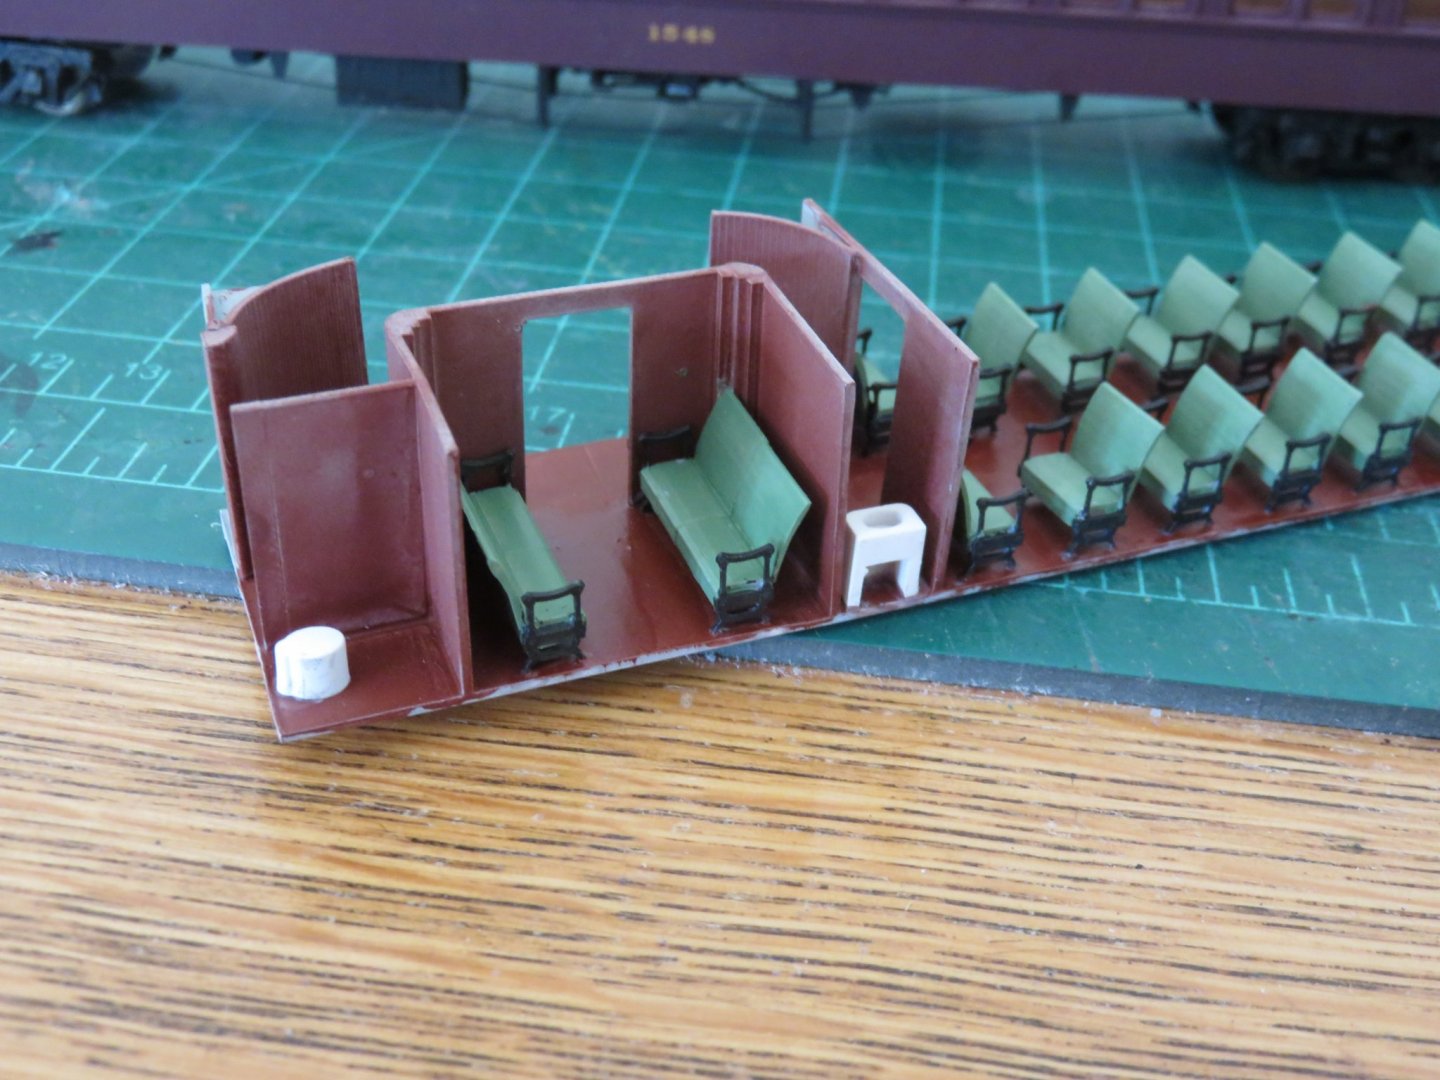
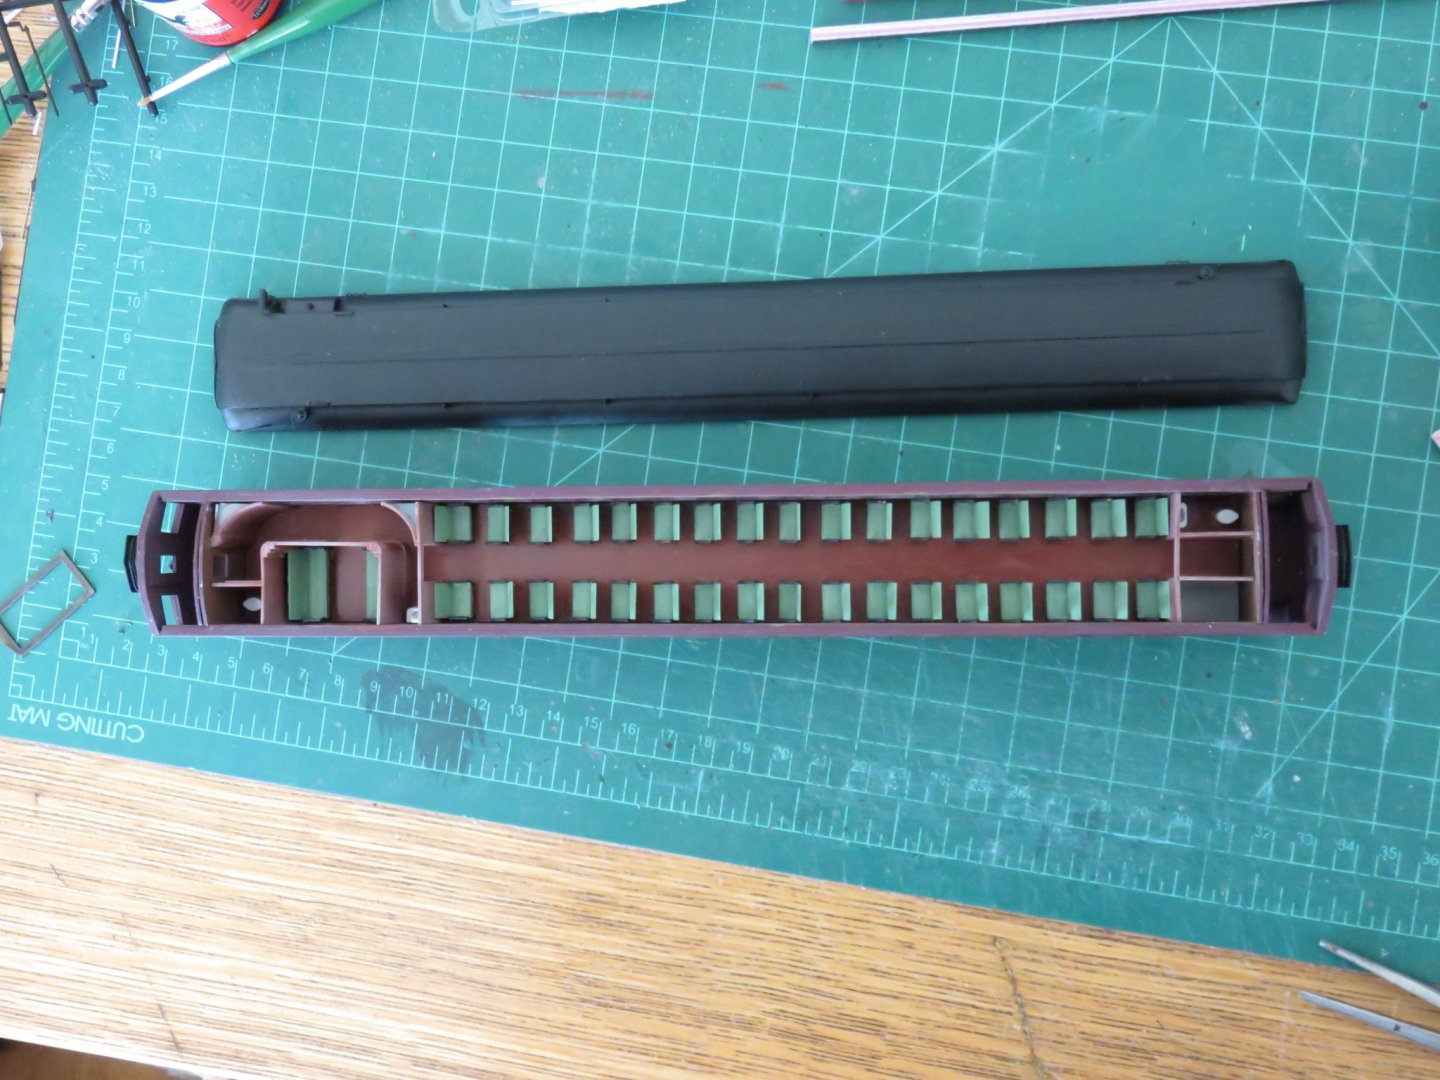
Wow... summer is... well.... over... I have been picking away at my build over the last few months. Progress has been slow, too much nice outdoor weather to be stuck inside, but on the odd rainy day there has been some advancement. The interior is now largely finished, or at least done to a point where I no longer feel the need to dive any deeper down this particular rabbit hole! The remainder of the seats went together smoothly, but painting has been a tedious process. I ended up painting the seats a neutral light green, I felt contrasted nicely with the brown "wooden" interior. I painted the armrests black to provide a bit of contrasting detail. Most of this will be hard to see when the roof is on, so I'm not overly concerned how accurate the colour scheme is, just that someone looking in can see something. Here's the completed interior. There are some sections still showing grey primer, these areas definitely will not be seen. The women's lavatory. The men's lavatory and smoking room. The washbasin was located in the passageway (to the right of the smoking room in the above photo). If you look back at one of my early posts, you'll see it marked "toilet" on the plans. The sofas in the the smoking room were made by combining two seats together. The facilities for the lavatory were culled from a Walthers heavyweight car that I had kicking around (I've beat up a few, here and there, for various kit bashing projects in the past). All that really remains is some small touchups and s coating of Dulcote to seal everything. Finally an overhead view of the interior in place in the coach. Next on the agenda is the window glazing, and then final assembly. The end is drawing near! Andy

- 154 replies
-
- 18
-
-
Looks pretty good. I wonder if using thin card stock to simulate caulking between the planks would have alleviated some of the error? Andy
-
From my understanding, a snow would set both the trysail and main course sails under most points of sail, whereas a brig (of this period) would set the only the trysail when sailing closer to the wind and set the crossjack (If fitted) when running with the wind. (Strictly speaking of these two sails and not the remainder). The book “Legend of the Lake” by Arthur Britton Smith, includes some drawings by John McKay that may help with your rigging questions. It’s also worth checking out some of the video footage of the wreck: https://www.shipwreckworld.com/articles/shipwreck-explorers-discover-1780-british-warship-in-lake-ontario She’s remarkably intact, although the zebra mussels hide a lot of the details, the major features are easily picked out. Andy
-
This is definitely a kit on my wish list. I’ve been wanting to make a model of the Ontario for a long time. For rigging, I’d be inclined to look to the TFFM series of books (specifically volume 4). Although the Ontario looks like a brig, she is, in fact, a snow. She has (had) and extra mast stepped immediately behind the main mast, as well she would have been rigged with a proper main course sail (as opposed to a cross jack sail). Looking forward to following your build! Andy
-
Looks like you've really stepped in it this time! I'm sure you'll manage just fine, and have a good time with it too! Andy
- 322 replies
-
- 3
-
-
- enterprise
- caf
- (and 1 more)
-
Hi Sjors! Glad to see you’re back. Good luck with the new build, you look like you’re off to a great start! Andy
- 164 replies
-
- 3
-
-
- vanguard models
- flirt
- (and 1 more)
-
build logs order
realworkingsailor replied to Papa's topic in Using the MSW forum - **NO MODELING CONTENT IN THIS SUB-FORUM**
Just an observation: Sometimes I find that happens usually in photo heavy threads. When I click on the link to get to the last unread post, it does take me there, initially, but the photos can be slower to load. As a result, the bottom of the page gets pushed down as the photos load (in previously read posts) and expand the thread, leaving me somewhere floating in the middle. I’ve long chalked that up as being the nature of the beast. Andy -
Thanks Kevin! (And all the “likes” too!) Yes the wait was definitely worth it! Andy