realworkingsailor
-
Posts
3,271 -
Joined
-
Last visited
Content Type
Profiles
Forums
Gallery
Events
Everything posted by realworkingsailor
-
 Prototypically, the bowl of the compass should be filled with mineral spirits to dampen the movement of the card. May be worth trying, you could probably get a similar effect with rubbing alcohol. No air bubbles allowed! Andy
 -
Very nice compass! The purpose of the iron spheres is to help mitigate the effects of an iron hull on the magnetic compass. There should also be a vertical iron rod (the flinders bar) to offset that component of the magnetic field. I hate to break it to you, but since your hull is wood, I doubt that your compass would have been fitted with those extras, they would do more harm than good. Andy
-
Very well done. Very impressive. And congratulations on completion. Andy
- 366 replies
-
- 4
-

-
- pegasus
- victory models
- (and 2 more)
-
Hi Ed, Have you considered Sheet styrene? Not the stuff the hobby suppliers sell, but the large size stuff for industrial/commercial use. It still comes in "standard" hobby thicknesses (0.020" or 0.030") for example, but for a reasonable price you get a good sized sheet. Have a look: http://www.usplastic.com/catalog/item.aspx?itemid=22883 Andy
- 3,618 replies
-
- 7
-
-
- young america
- clipper
- (and 1 more)
-
Hey buddy! Great to see you back again with another project! I was beginning to wonder where you wandered off to! Andy
- 322 replies
-
- 4
-
-
- sergal
- sovereign of the seas
- (and 5 more)
-
Thanks everyone! Not sure how much further I may get... the first rumblings of the start of the sailing season can be heard, and the Seaway is set to open on the 20th of the month... we shall see.... Andy
-
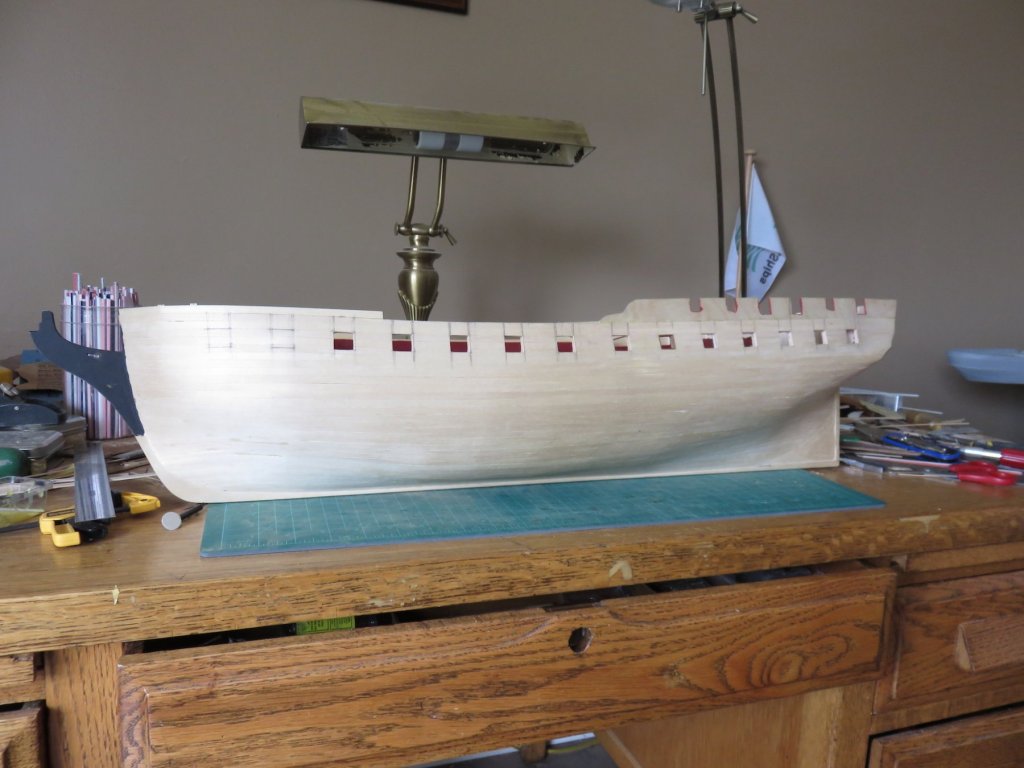
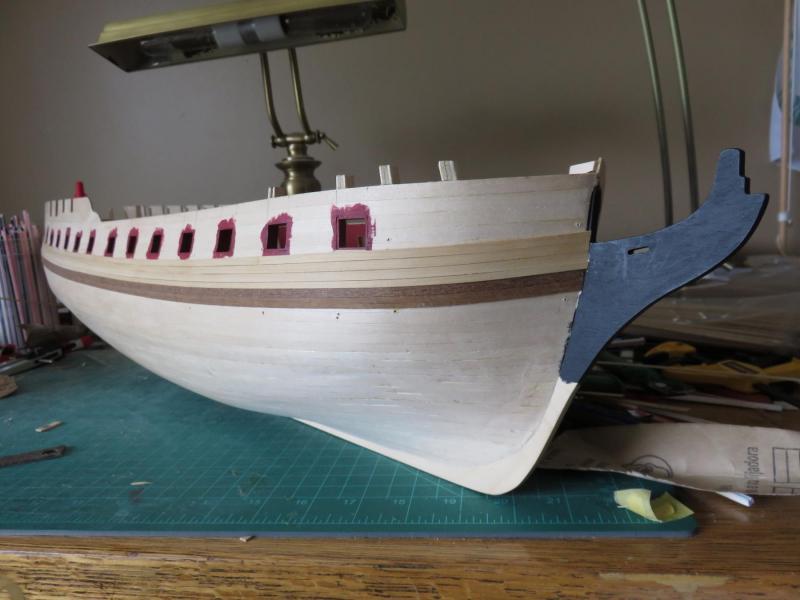
the SPLINTERS.......... Yet another small update. Planking on the starboard side is almost finished, no more walnut for a while. Just a few remaining strakes on the upper works, but I will leave that for now,I don't want the unguarded tops of the planks to get mashed when I'm working on the port side. I've only given this side of the hull a rudimentary sanding as yet. Still a lot of cleaning up to do, as well as evening up the ends of the planks. Anyway, I'm still happy with the way things worked out, not entirely happy with the kit, but that's another matter. Hmm.... port side looks rather naked... Andy
-
Sorry you had to restart your log from scratch, but it was nice to review all those forgotten details you have hidden inside your ship. Andy
- 366 replies
-
- 5
-
-
- pegasus
- victory models
- (and 2 more)
-
Thanks everyone for the comments and the "likes". I always appreciate the positive feedback from everyone here. Andy
-
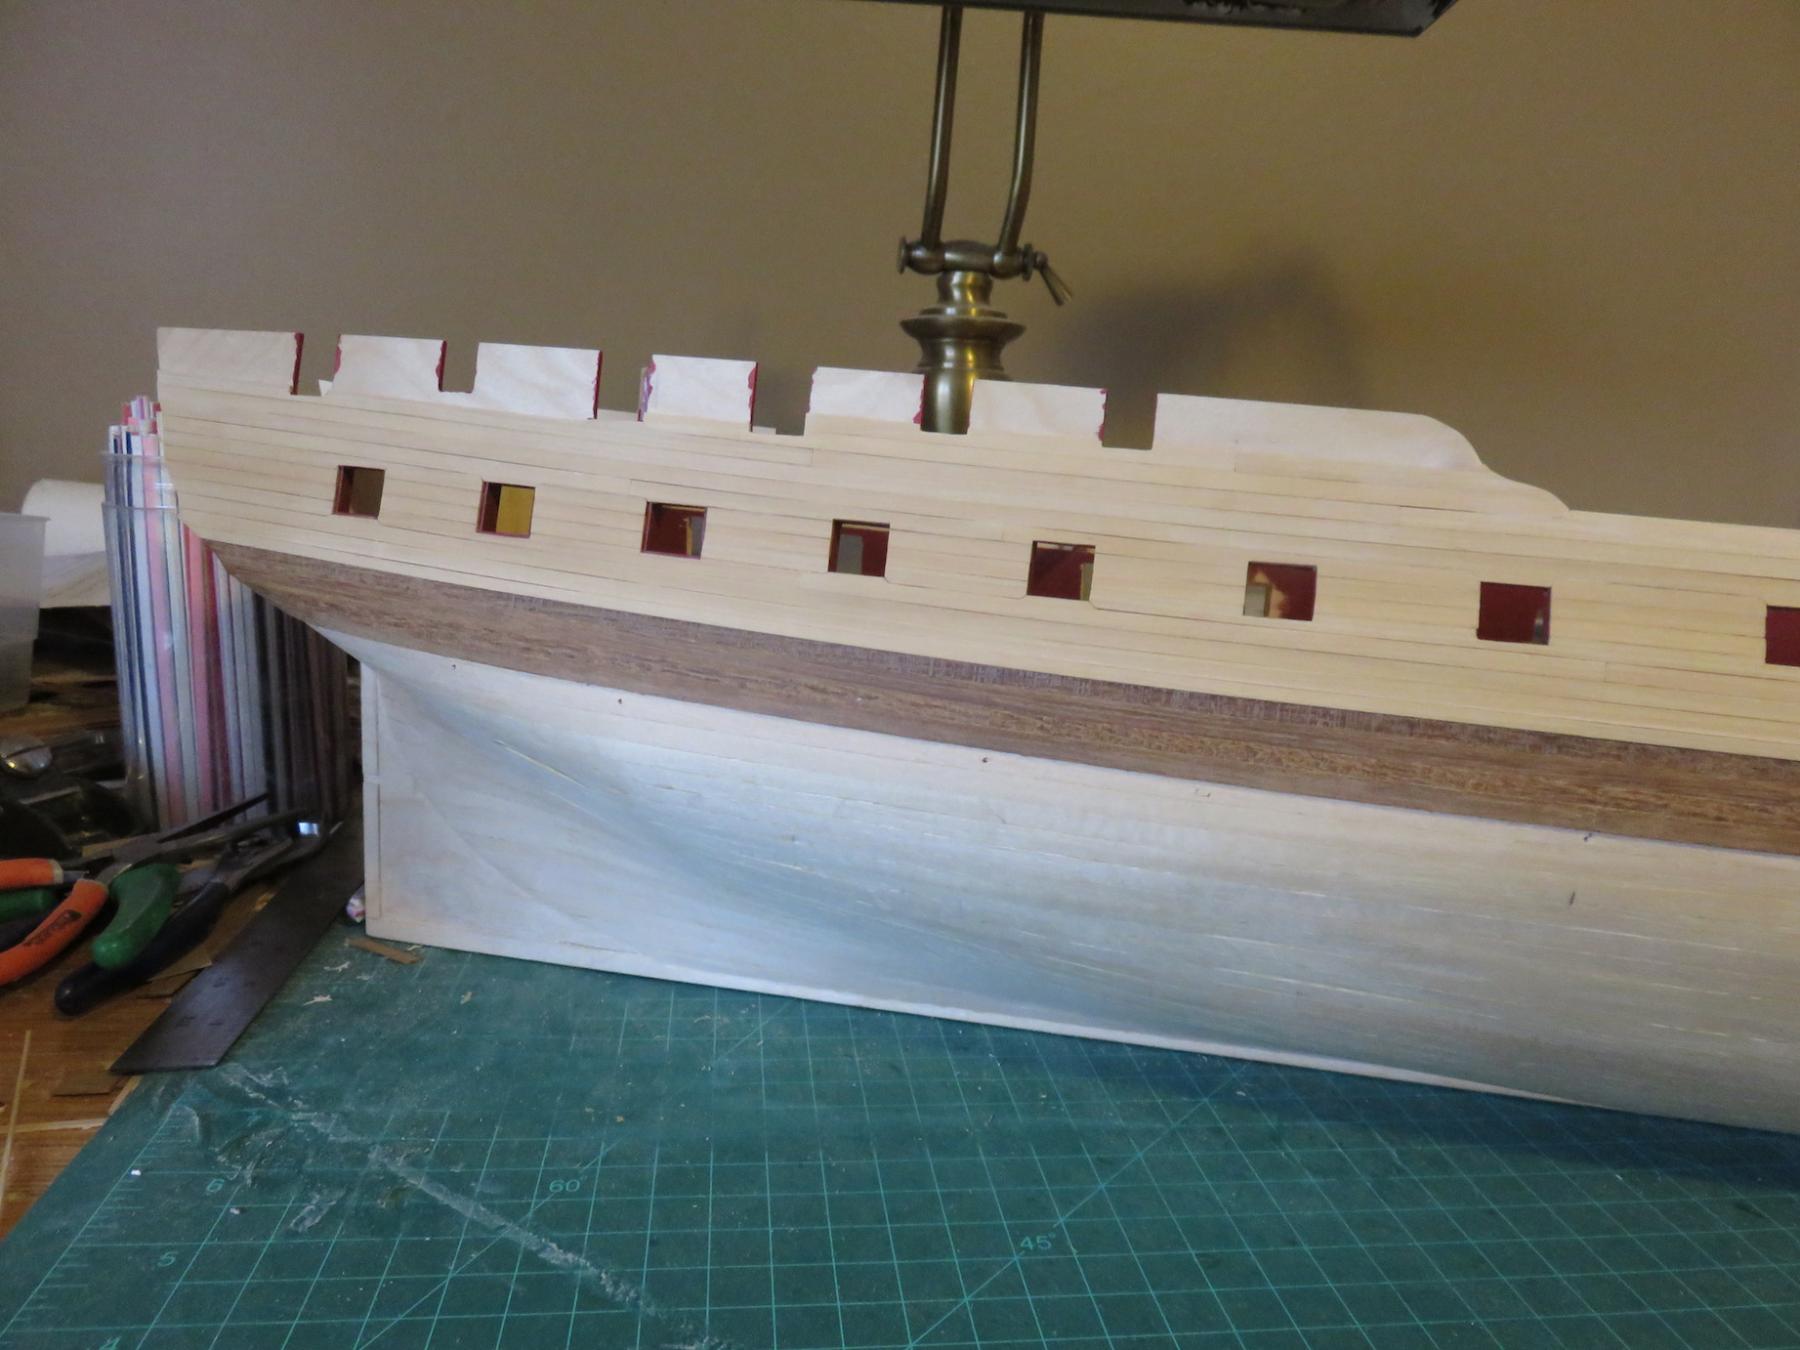
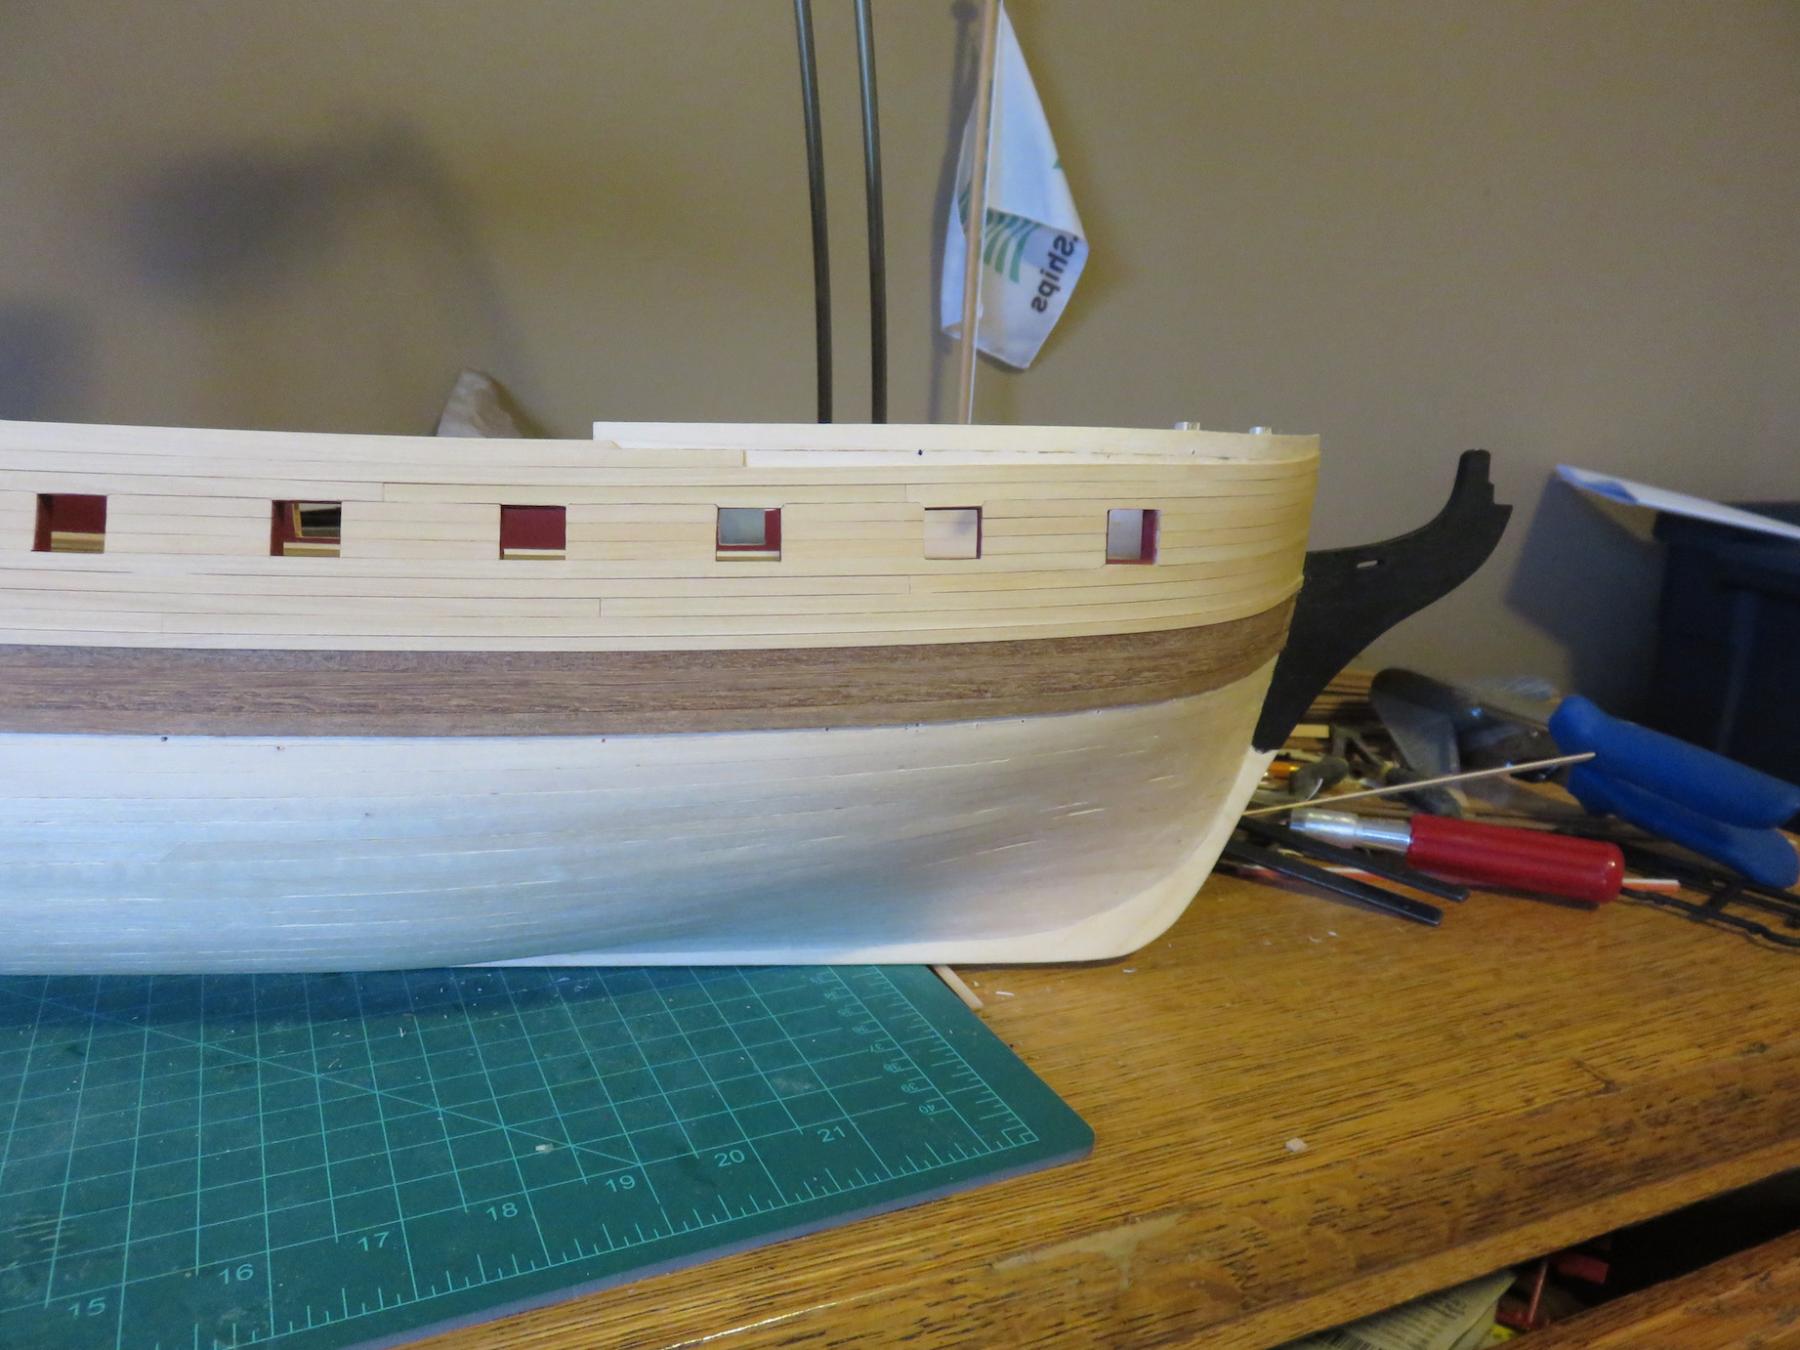
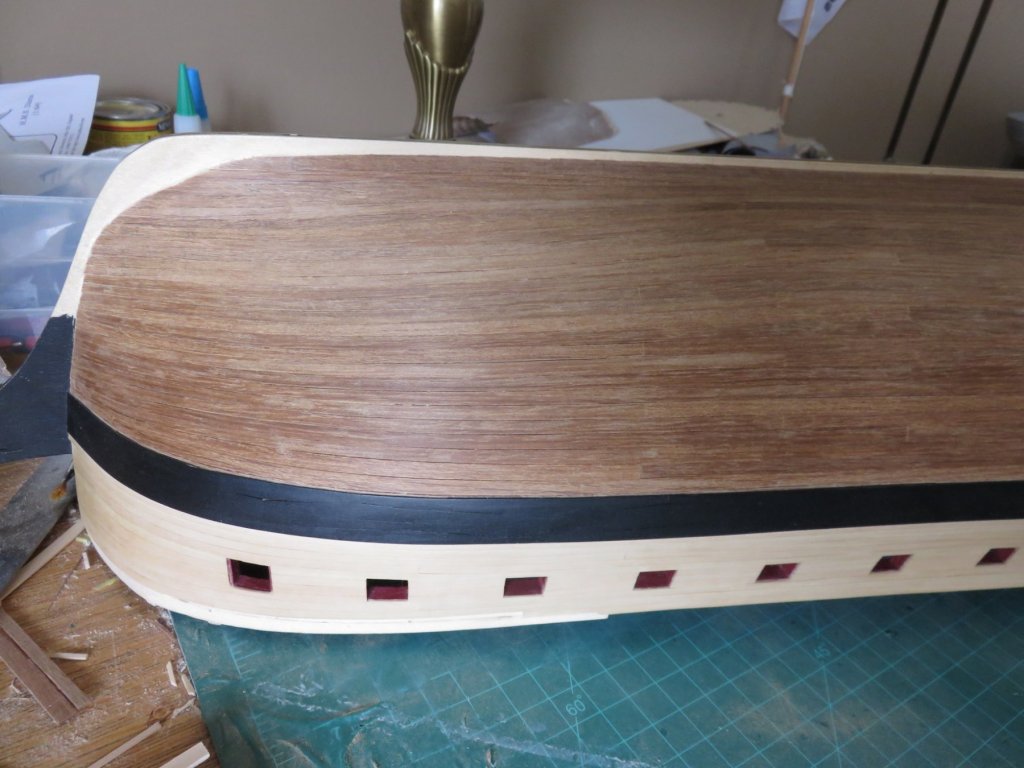
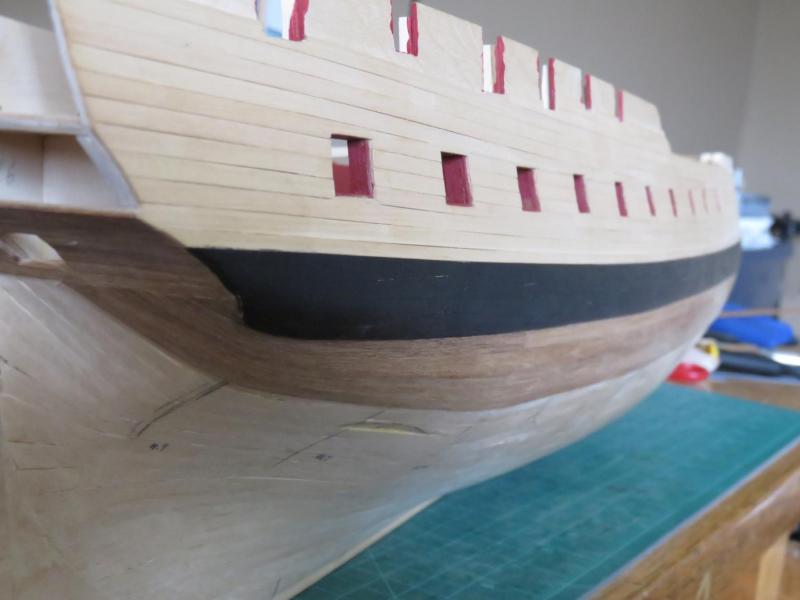
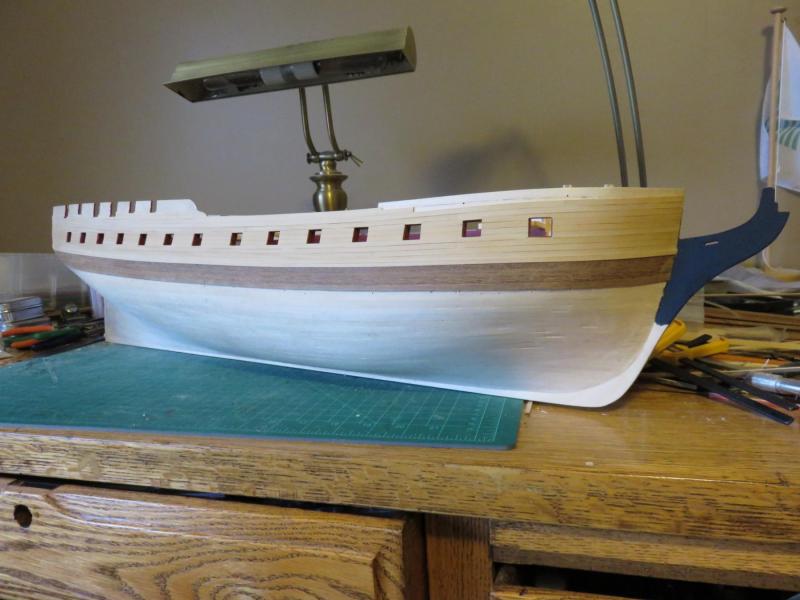
Update time! Hooray! Planking continues slowly and steadily on the starboard side. The second layer of the wale has been added, my first attempt at top and butt (anchor stock). You can just see the shape of the planks through the black paint. I used castello boxwood for the second layer, which was a pleasure to work with. Having the black strake 0.5mm proud of the surrounding planking gave a nice line for the first strake to butt up against. Below the wales, I've carried on using the kit supplied walnut planking. It is incredibly splintery, Caldercraft must supply some other variety of walnut from that supplied by Amati (go figure). It works after a fashion, and doesn't look too bad. Most of it will be coppered anyway, and I find the the colour contrast to the castello appealing. Also, because the kit supplied planks are also about 1m long, cutting them down to more manageable lengths has made things a lot easier when it comes to bending and tapering, it also makes it easier to get a nice fit and finish where the planks meet the stem and stern counter. Anyway, that's about it for now Andy

-
Planking Clamp Use
realworkingsailor replied to Worldway's topic in Modeling tools and Workshop Equipment
Another great way to ruin them is to over torque the thumb screw. I had a couple of clamps that I over torqued and the screw broke free of the knurled bit. I had to break the thing to get it to detach. Andy -
Planking Clamp Use
realworkingsailor replied to Worldway's topic in Modeling tools and Workshop Equipment
I have a set of those as well. They work... kind of. As mentioned they are soft metal, and the clamp part deforms and breaks easily. I substituted mine with cut off bits of limewood and that seems to work just as well. Also, you may wish to put some heat shrink tubing on the "knurled screw" it will save your fingers! Andy -
The stove looks nice... the finger.... not so much! Ow! Andy
- 504 replies
-
- 6
-
-
- washington
- galley
- (and 1 more)
-
Thanks Ham! Yeah, an unfortunate side effect of a seafaring career... life goes on hold. The only upside is that the Seaway will be closed by year end, so I'll only be away for a month or so. Mmmm... bacon! Andy
-
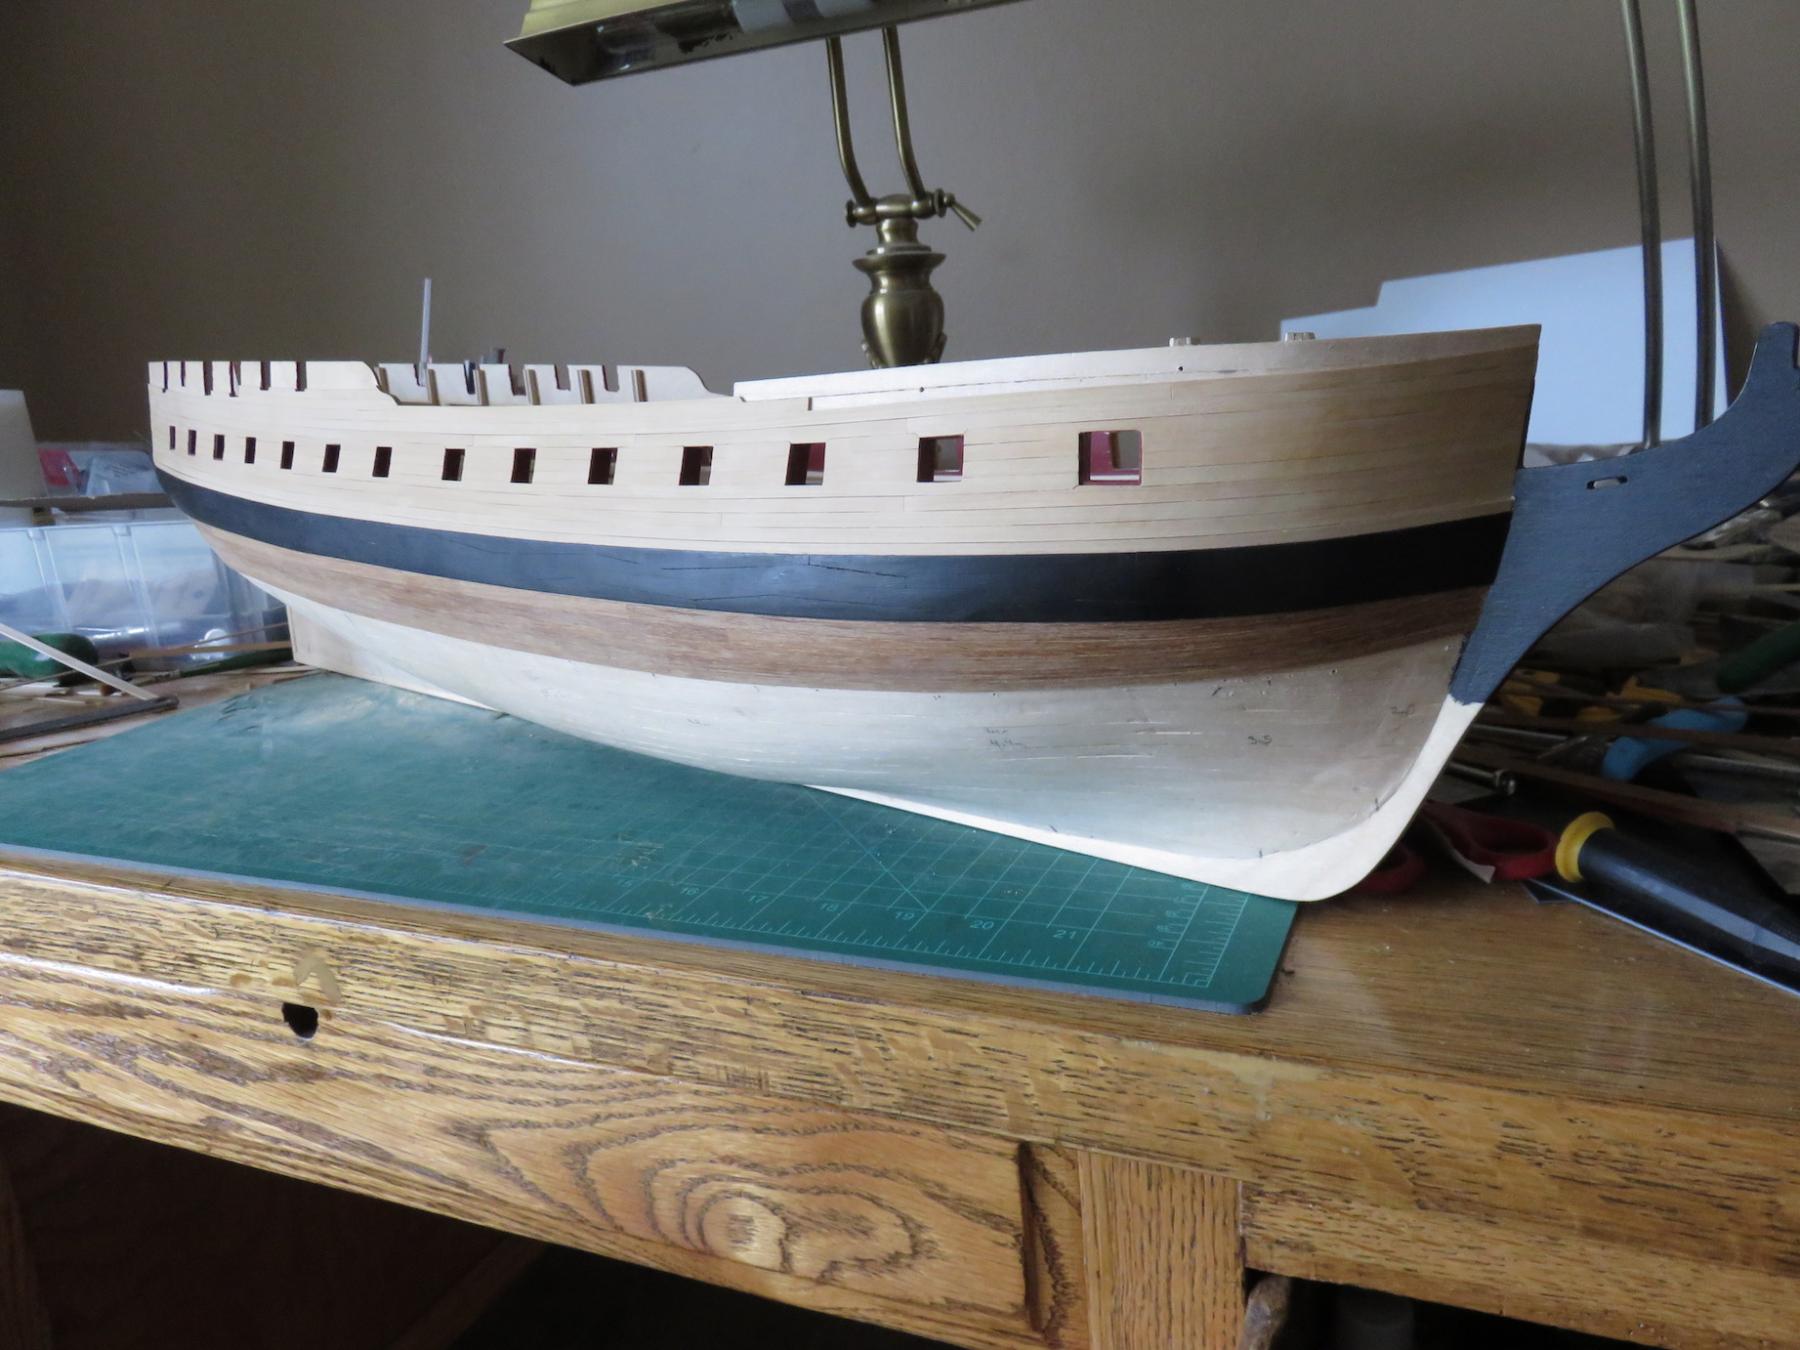
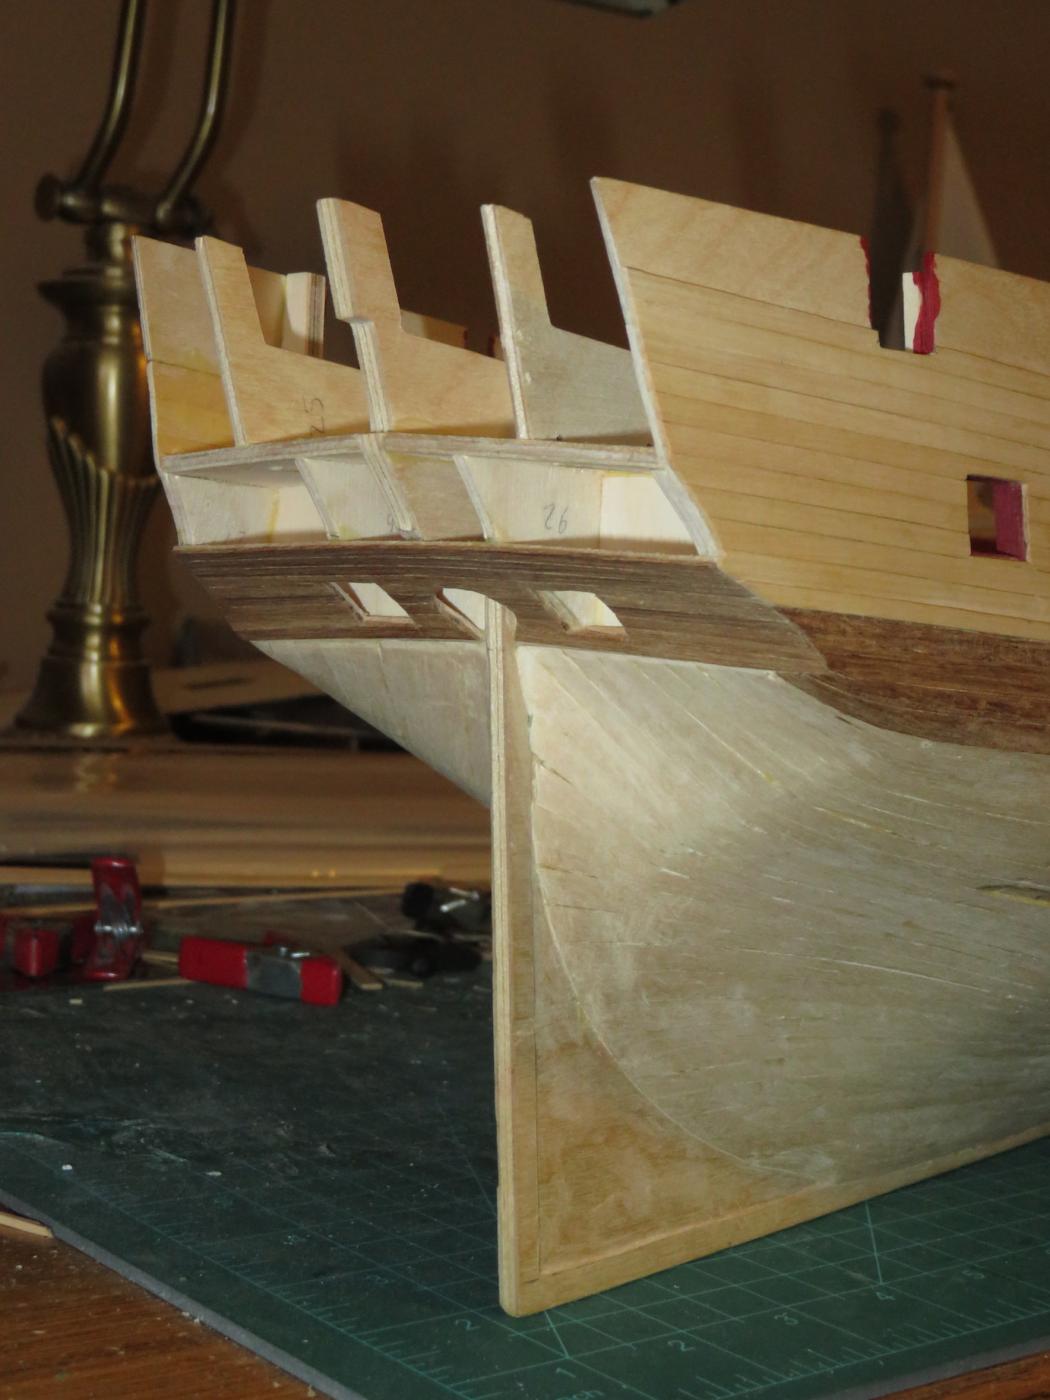
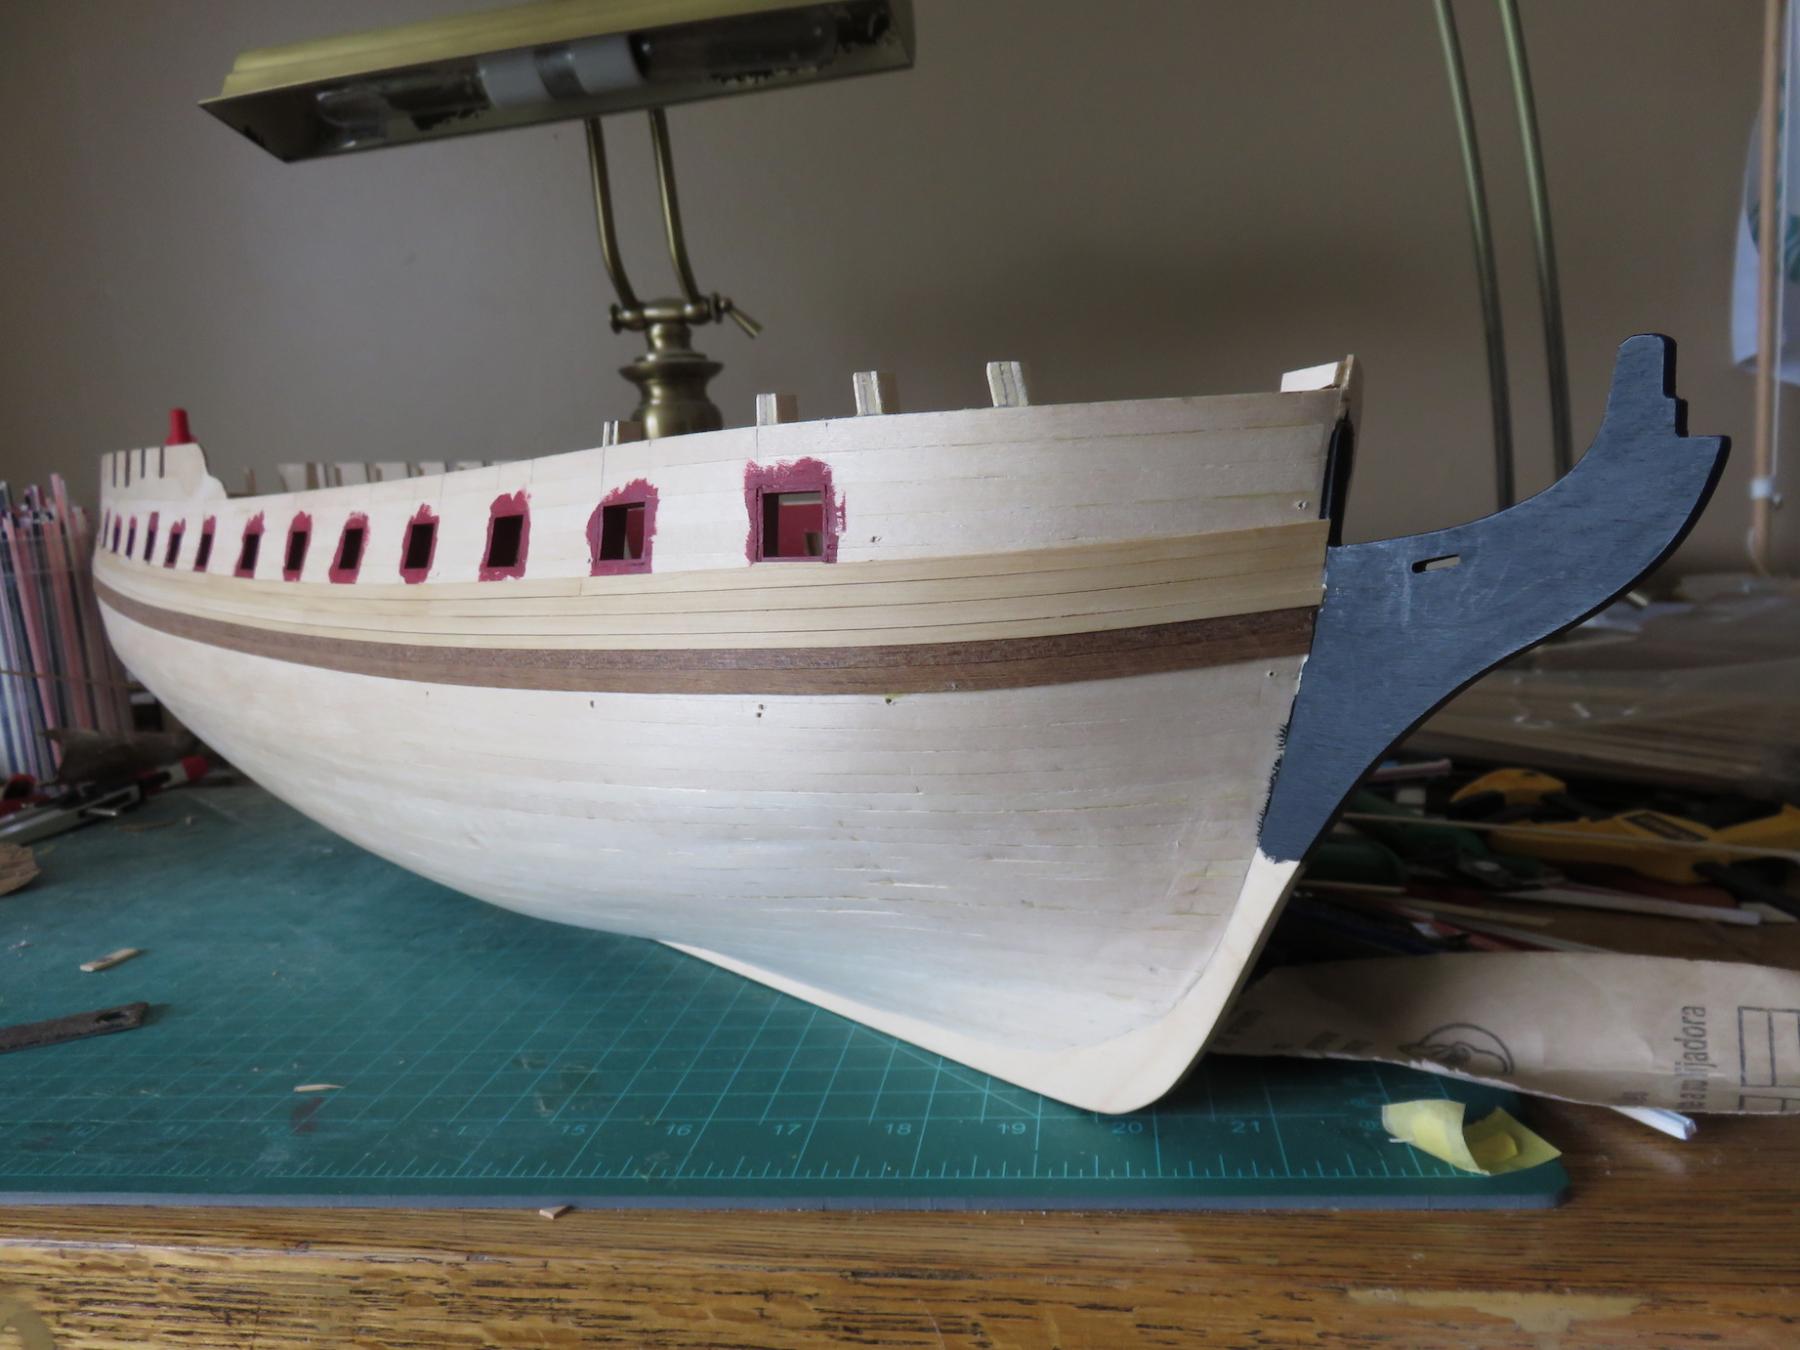
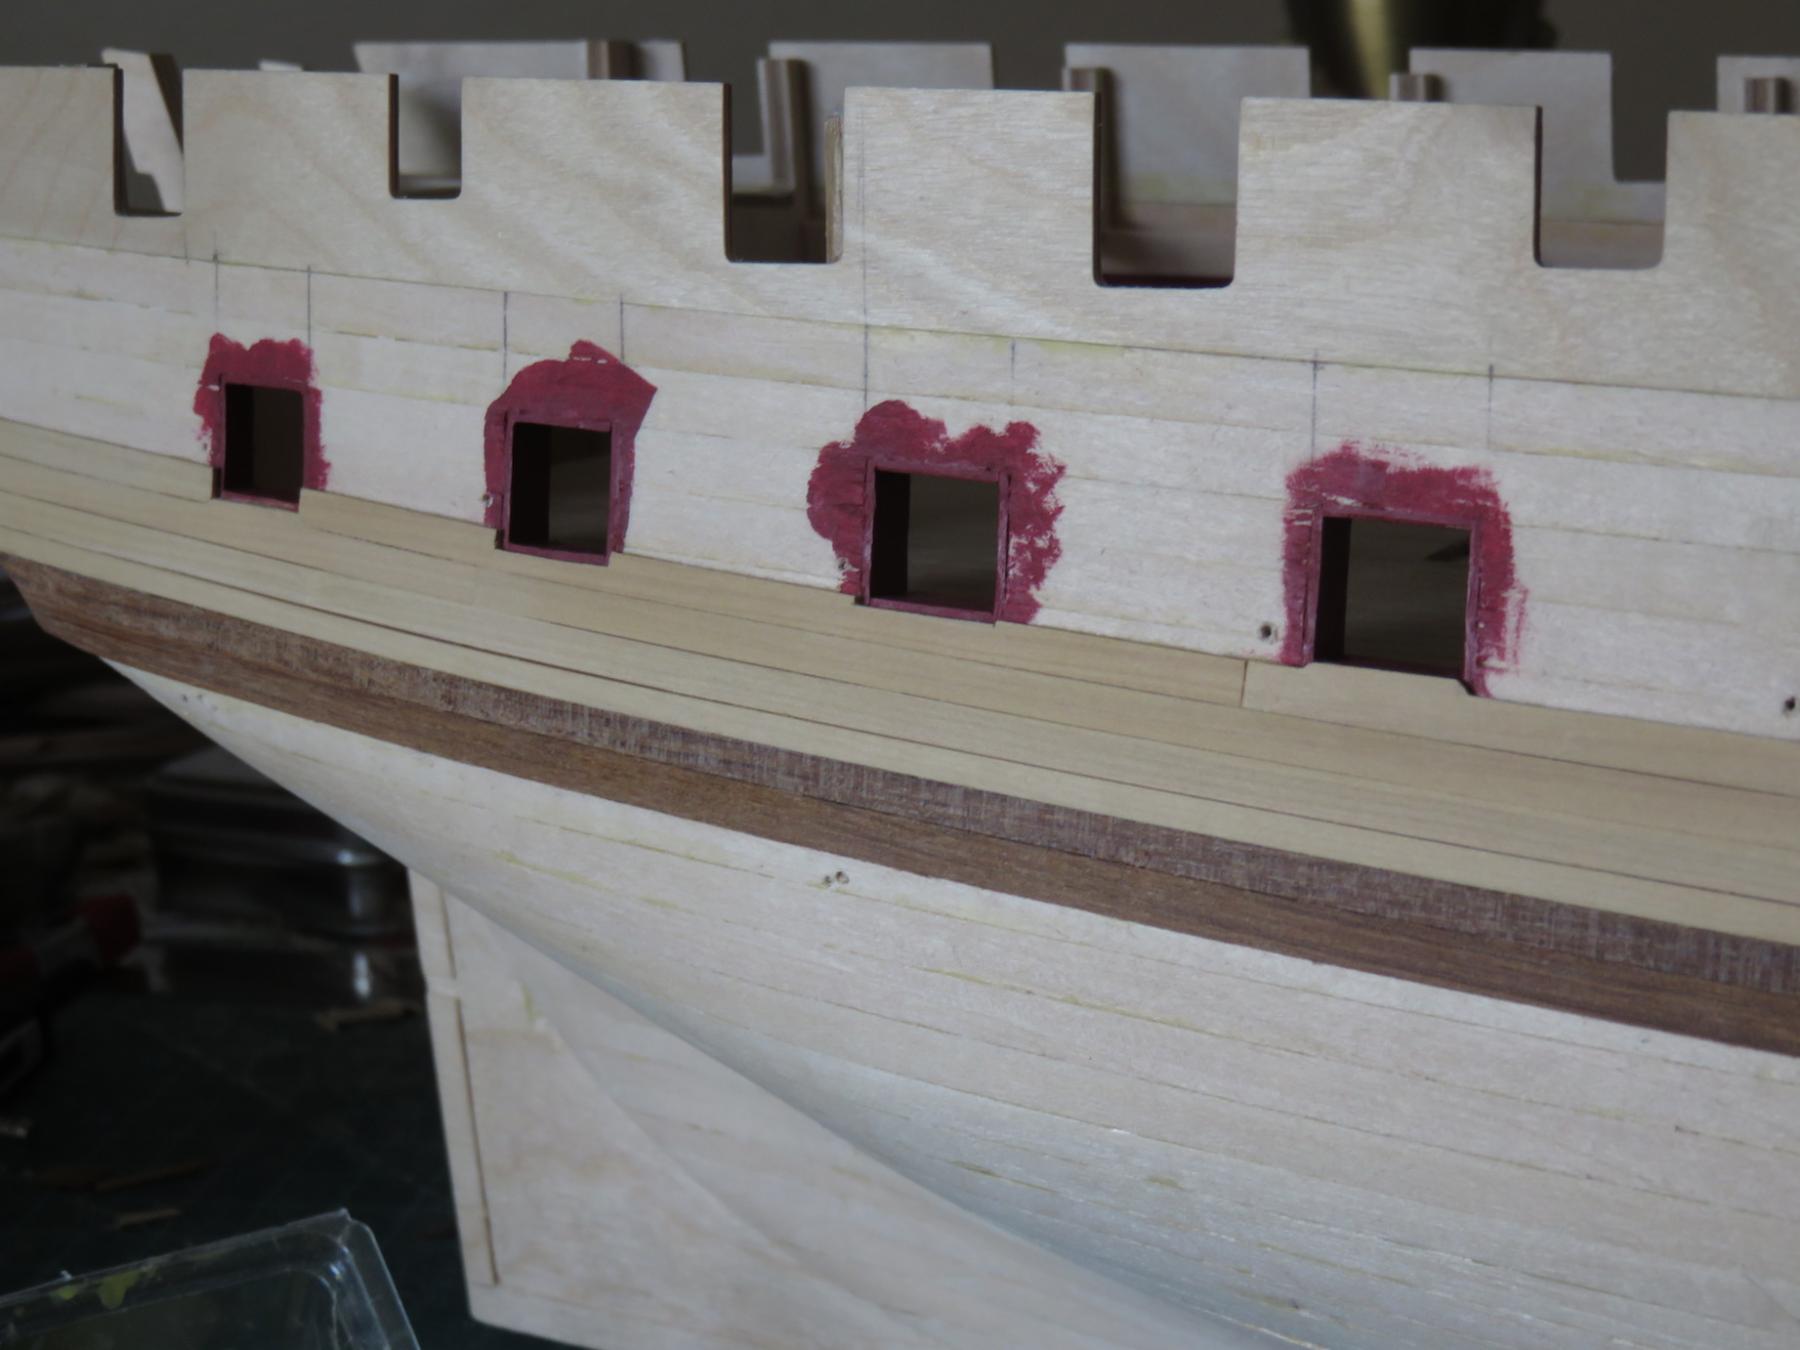
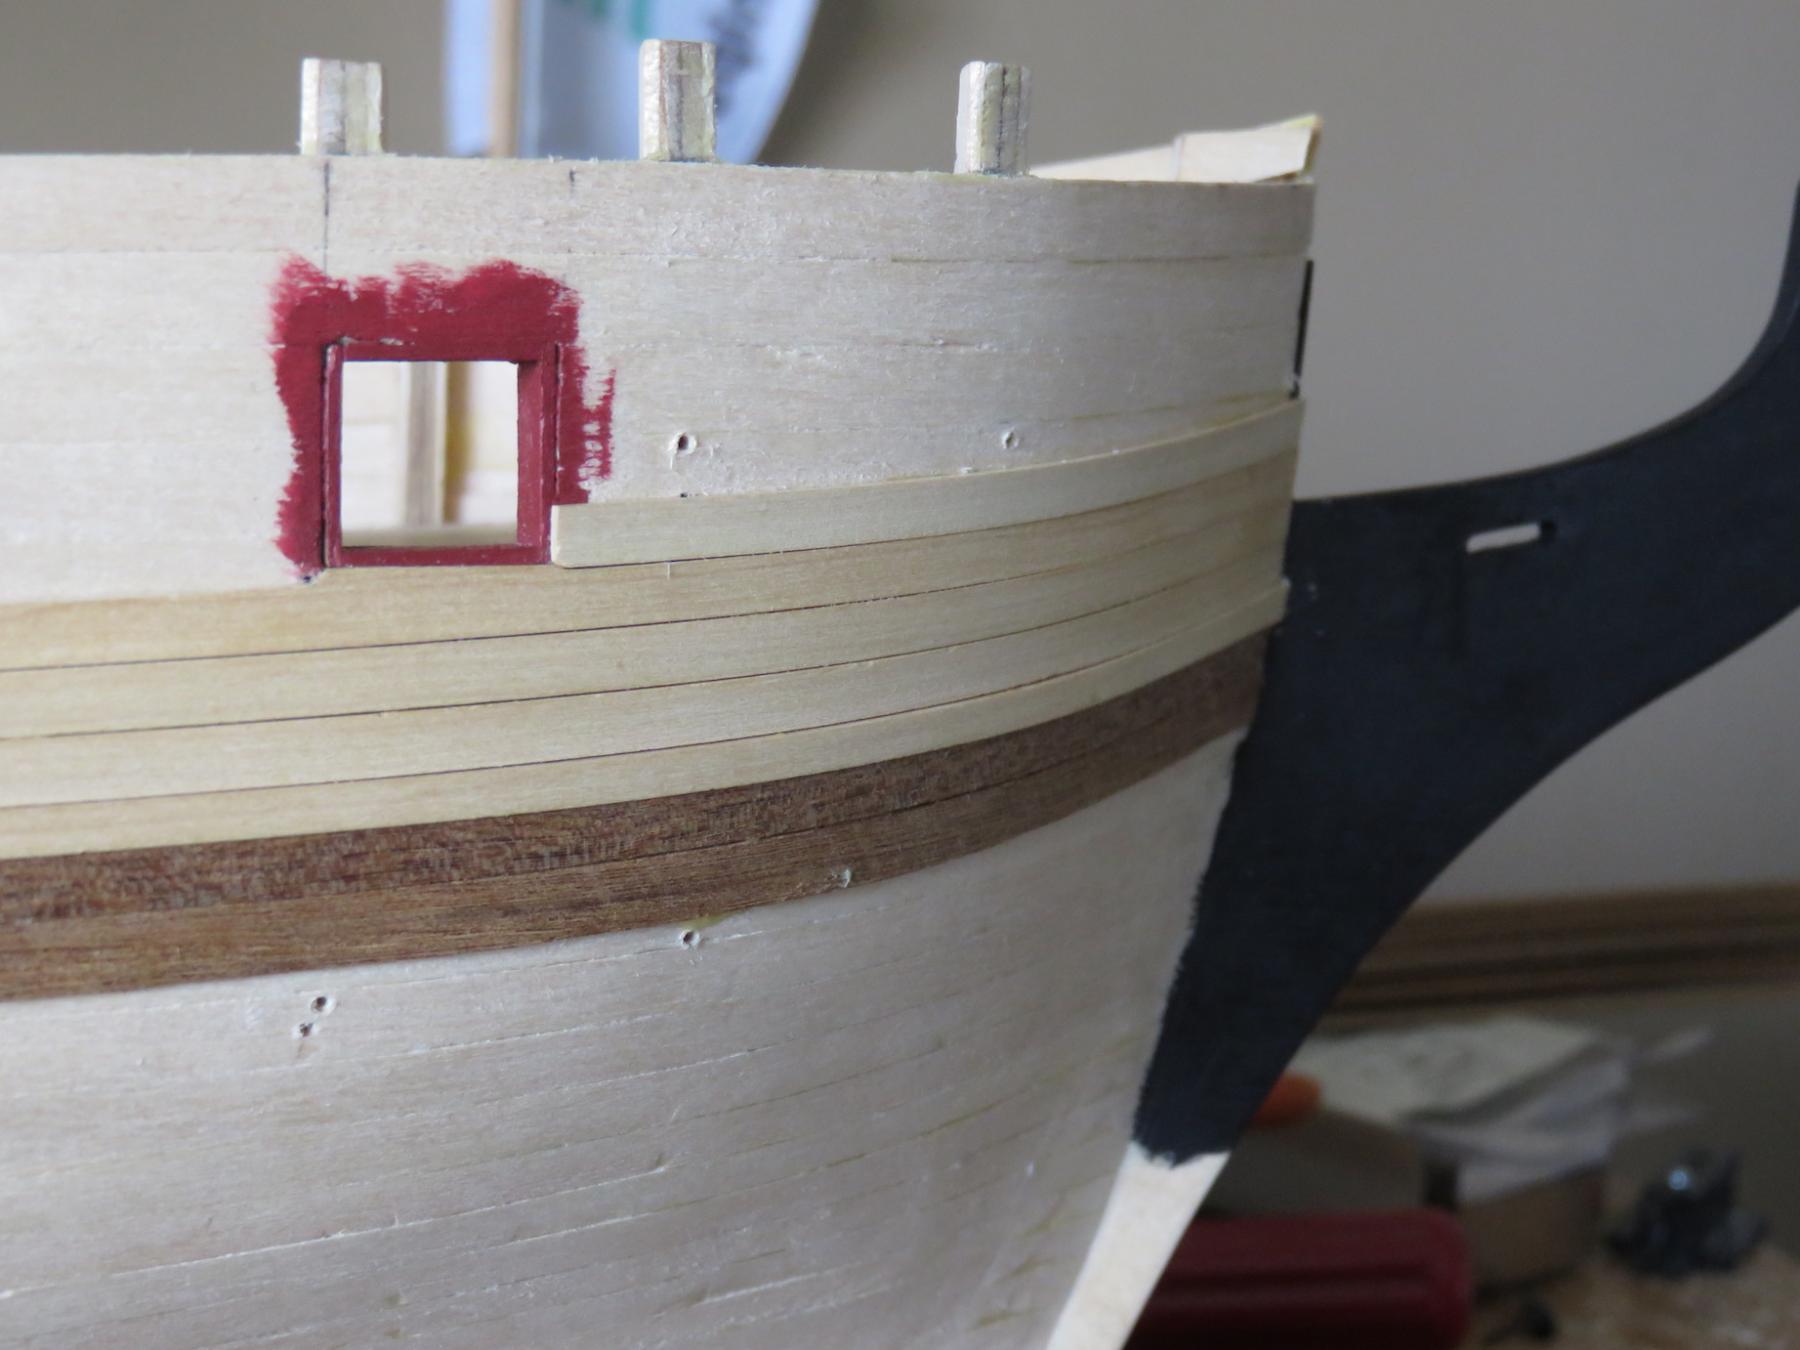
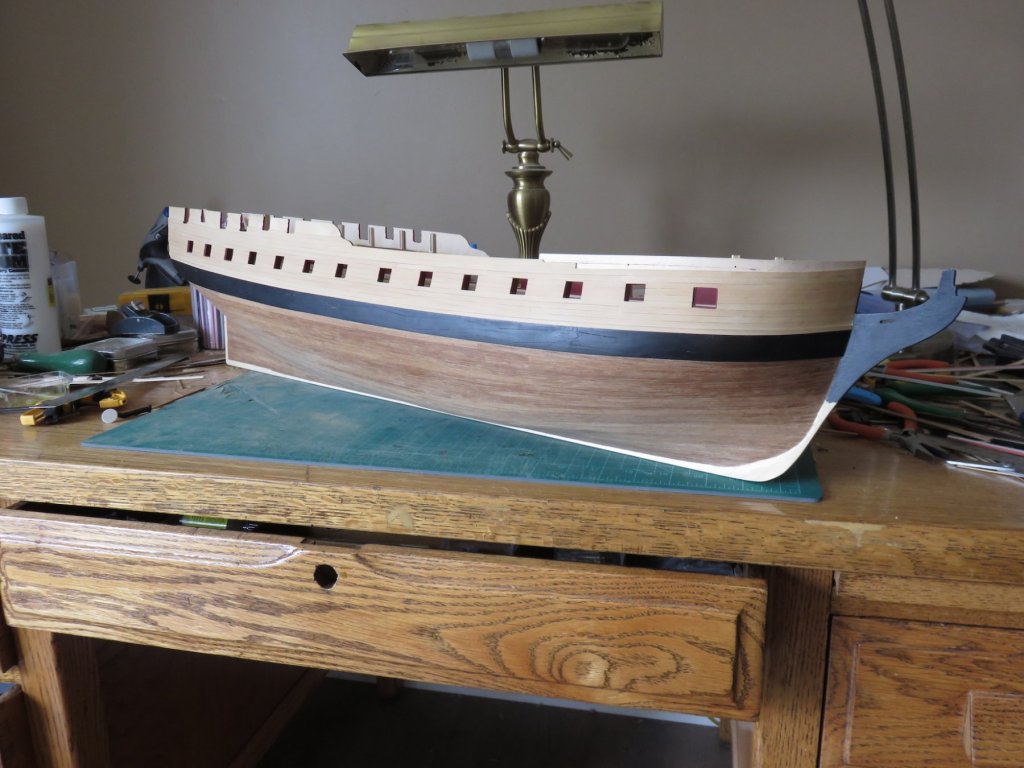
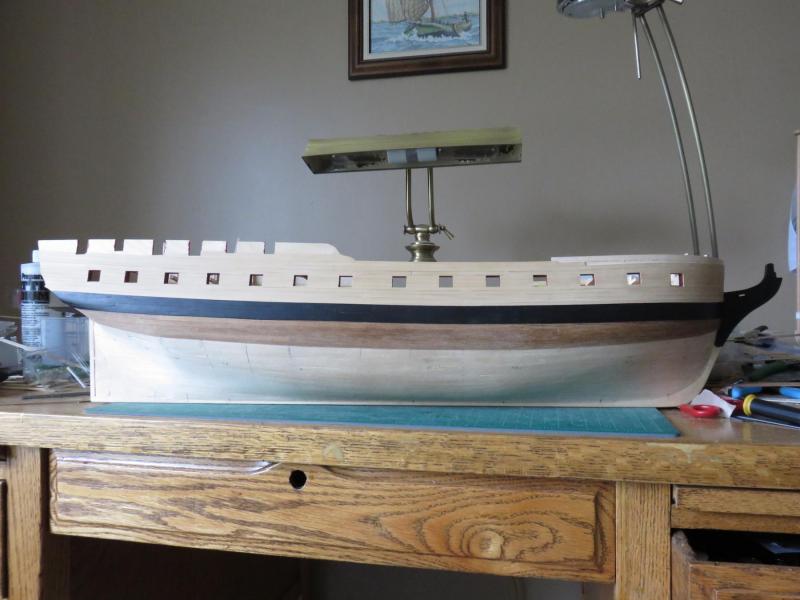
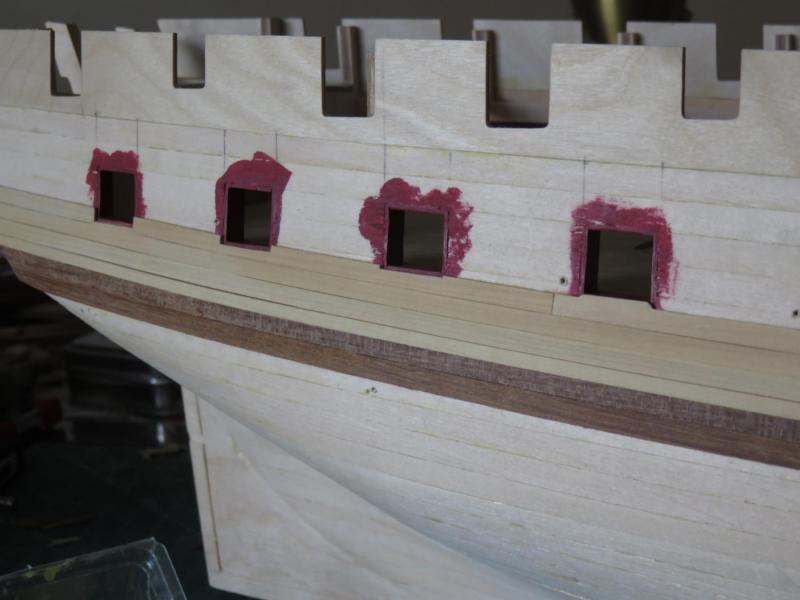
This will probably be my last update for a while. I've been called back to work next week, so hobby time is on hold yet again. Planking has been progressing slowly on the starboard side. It's not perfect by any stretch of the imagination, but I'm still satisfied with the way things have been going, nothing has been sanded yet, so a lot of the apparent unevenness will be remedied later on. I've left the plank at the waist extra wide for the moment. When I get the Quarter Deck/Fo'c'sle/Gangaways installed, I will sand it down to it's proper width. I've been using PVA to glue on the second planking, so that has contributed greatly to the speed (or lack thereof) of construction. I've used modified Micro-Mark planking clamps to secure the planks while the glue dries. The modification of these clamps came about partly by accident and partly by design. When I was doing the first planking, much to my dismay (at the time) the little pieces of soft metal that are used to secure the planks started to fracture, I found that by using drilled out bits of limewood (the first planking material), I could still use the clamps and without marring the wood. Also I found the thumbscrew parts hard on the fingers, so I covered that part with heat shrink tubing for a much more comfortable grip. When I was looking at the CC plans and compared them to the AOTS drawings, I noticed that the aft hanses where too far forward over the 8th gun port. So I scribed the hanses back about 8 or 9 mm with a set of dividers. I only cut back the lower protruding spur, the rest of the bulwark is unmodified. This will eventually allow more space for the ladder and fenders, and show improve the overall appearance of these features. The "sub-wales" and everything below will be done using the kit supplied walnut (most of it will be coppered anyway). Annoyingly splintery and far from first rate quality, but it does have a really nice colour. It's doesn't show in any of the photos, but when given a quick wipe with a damp rag, it turns a nice golden brown hue... I'll have to figure out a good stain/varnish to highlight that in the future. Anyway, that's about it for now. Andy


-
Time for a small update. Second planking is progressing nicely, albeit slowly on the starboard side. The castello boxwood is really nice (and easy to work with), and so far it looks like only a minimum of fine sanding will be needed to finish the surface (yay!). The walnut below the black strake will be part of the sub-wale, which is only half finished at the moment. Anyway, not much more to report at the moment. Andy
-
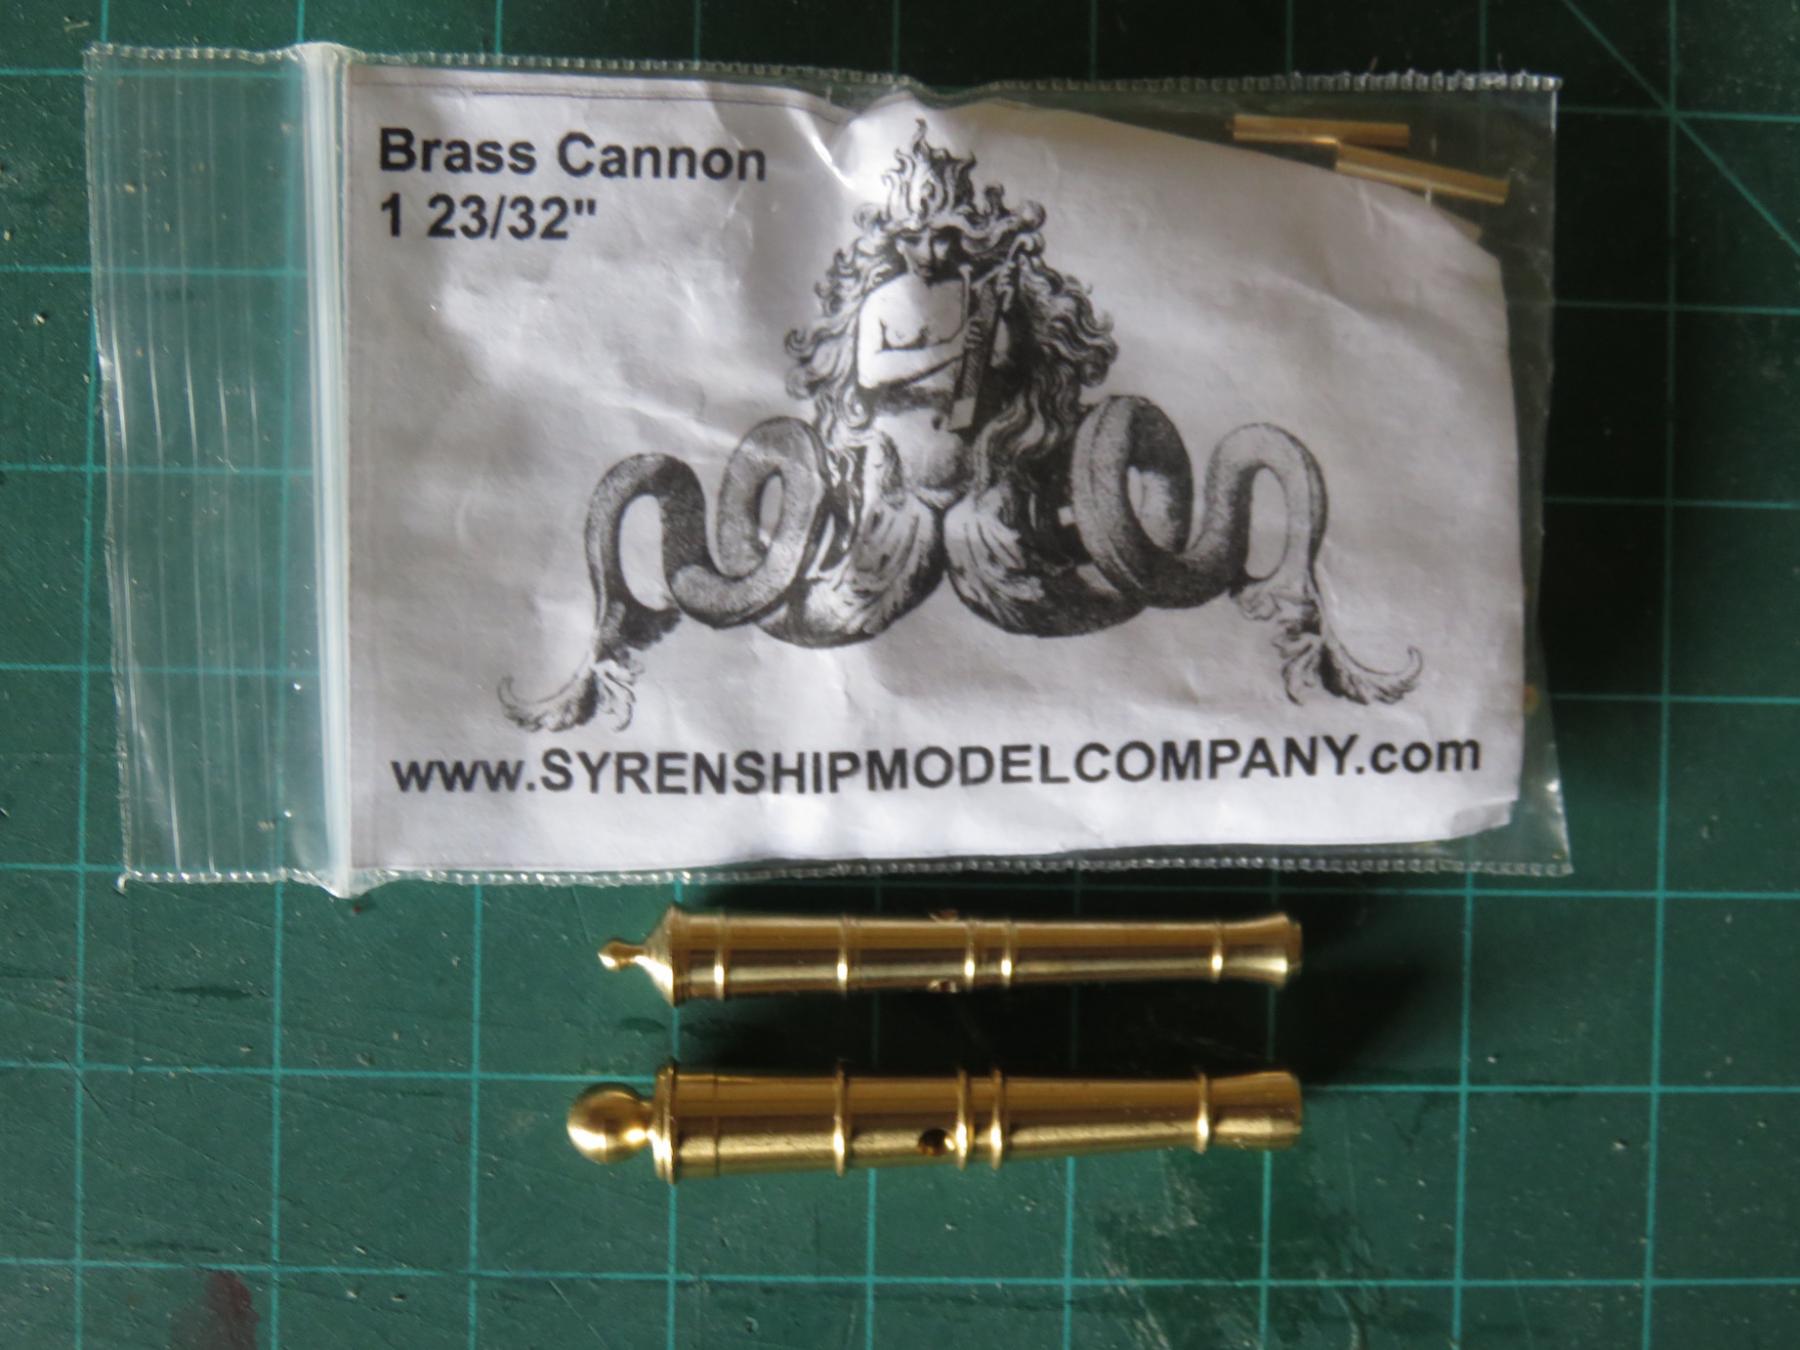
Hi Jason, Those are beautifully blackened! Thanks for posting the pics! I didn't consider the RB models barrels, I do agree it is a heftier looking gun, but I think I will stick with Chuck's guns, since I already have most of them in hand. I feel that I can remedy any short comings with the muzzle bore. Regardless, I think both offerings look miles better than the CC supplied versions. Andy
-
Hey everyone, thanks for all the compliments and the "likes" Spyglass, she's not much more difficult than Pegasus, although the kit is a bit less advanced so it requires a bit more fudging to get everything lined up properly. I really think CC could easily update the kit a bit to bring it up to the same standards as some of their later releases. And if you thought the Amati parts were splintery..... Jan, I will get back to my laker model one day. The biggest issue I'm facing is a lack of painting facilities. I was hoping that by last winter, the spray booth at the model railway club I belong to would have been operational.... not so much....and still waiting..... so in the mean time, I'm happy to work on this one. Don, welcome aboard! I hope I can live up to your expectations. Christian, I'm actually glad of Jason's lead. I had the same idea when I bought the kit, and he did such a good job on his build. Not only that, I now also have an idea of how many packages of copper sheeting I need to buy! So once again, thanks everyone for all the positive comments. Time to get back to the shipyard! Andy
-
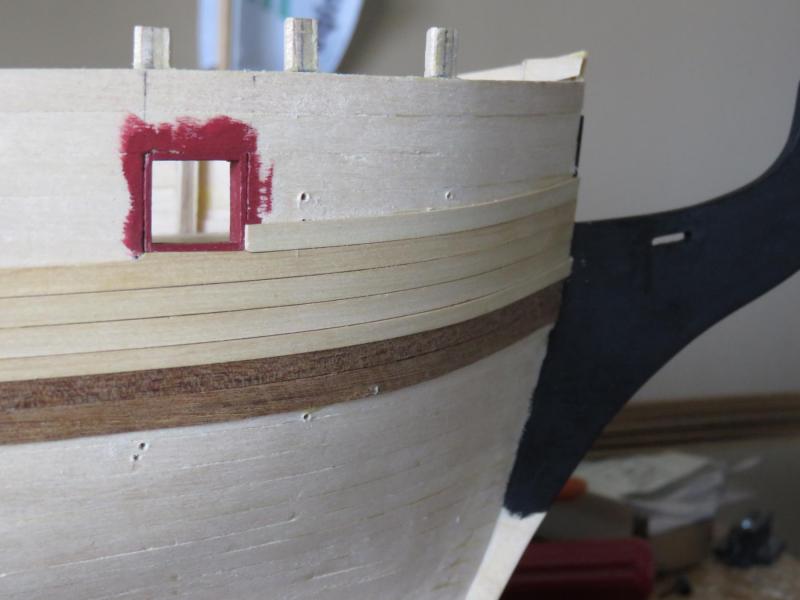
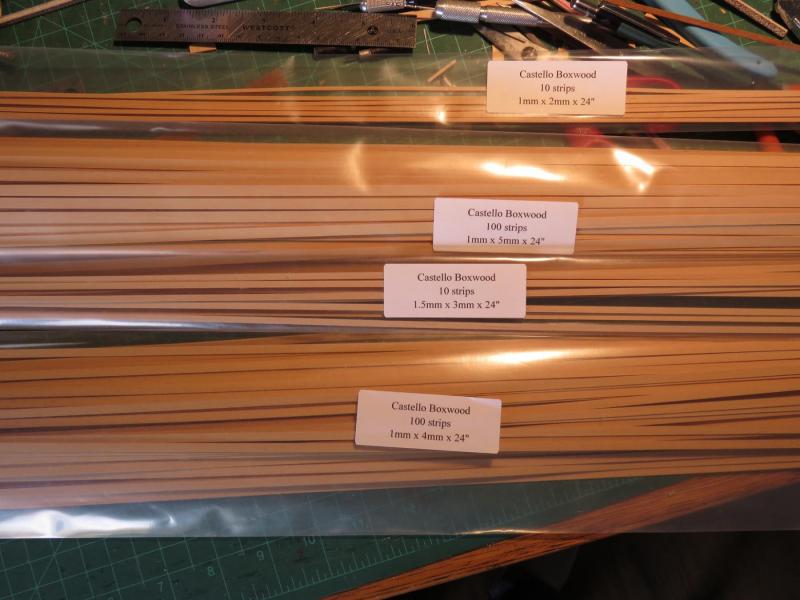
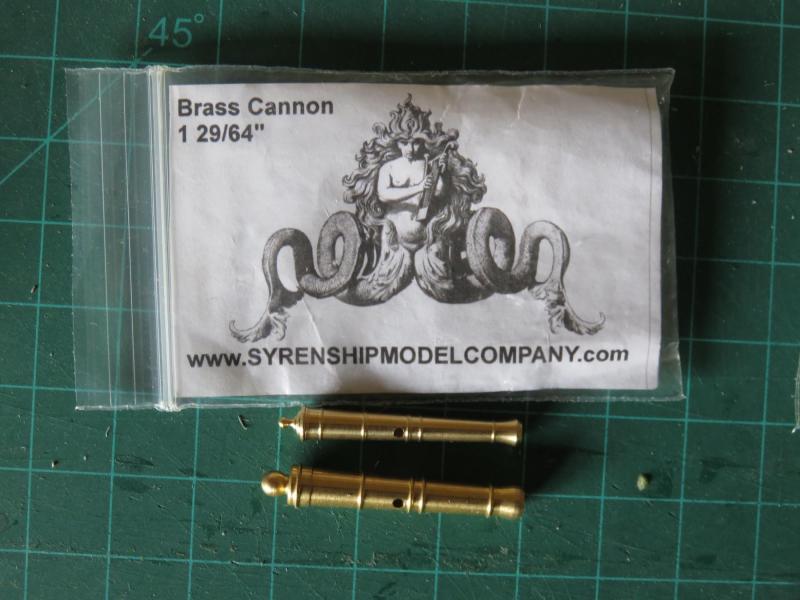
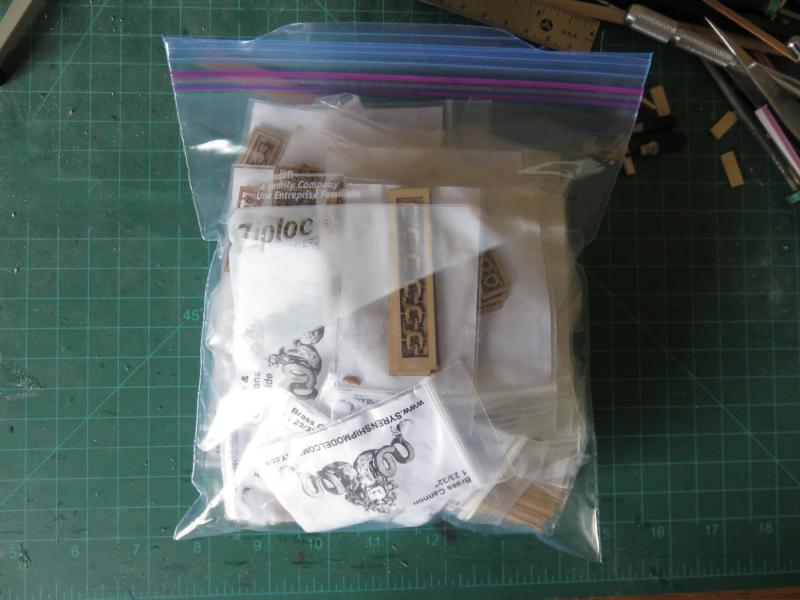
So it has been some time.... to say the least...... I've got some time on my hands again, and things are starting to move once more in the old shipyard. Things have been pretty quiet since the spring...between work and the awesome summer weather (which means spending absolutely as much time as possible up at the lake), it has not been conducive to hiding inside making saw dust. I was busy earlier in the spring purchasing some "upgrades" to the basic Caldercraft Kit. Not finished shopping by a long shot, but at the end of the day, the cost of all this will basically be equal or better than the cost of an entirely new kit ( )... but it will be worth it. So far, I've bought new second planking from Crown Timberyard. Some nice castello boxwood, which I plan to use for the wales and upper works. Below the wales, I will stick to the splintery walnut from the kit. It's actually not all bad once it's cleaned up, but most of it will be hidden by the copper plating anyway, so it's only the top smudge that will be visible. All the blocks will be replaced by those supplied by Syren, far nicer in appearance. Although rigging is a long way off yet, I've already received a good supply to start. There are a few other fittings, such as cleats and gratings that I will also replace, and already have the replacements in hand. The other big thing I'm going to change are the guns. As you can see from the photos below, the Caldercraft cannons are, to my eye, a tad on the chunky side. The muzzle looks wonky and the button on the cascabel is way oversized. The guns Chuck supplies are far nicer and much finer looking. I will also replace the cast white-metal carronades, but that's for another time. Other items on my shopping list: -Replace kit supplied copper with Amati copper sheeting -Try to source better looking PE parts for the chain plates (Would like something along the lines as the PE supplied with the USF Confederacy) -All kit supplied rigging line to be replaced with Syren rigging line -Stern windows and other PE fittings to be specially examined and dealt with as required (I am considering buying the PE set for the Agamemnon, more so if it comes with PE chain plates and not the formed wire nonsense of the Diana kit). I'm on the fence about the gun carriages. I may yet replace them, but we'll see how things go..... So now for the update part..... in order to break up some of the tedium of cutting and lining gunports, I decided to start some of the second planking on the starboard side (since the ports have been all cut and lined on that side anyway). I'd already planking the lower counter back in the spring, so it was a matter of measuring off where the wale is supposed to be and getting going with the planking. I've started off with the black strake, just above the wales. The instructions call for these thicker strakes to be created by doubling the layers of planking. Fairly common for these types of kits, but given my experience with the Pegasus, it can be tricky to get the second layer to lie properly, and when working with CA, do-overs are not easy. To make things easier for myself, I've laid down the black strake in one 1.5mm layer, rather than a 1mm with a 0.5mm layer on top (as described in the instructions). When the rest of the 1mm thick planking is installed, this will leave a proud edge for the second layer of the wales to butt neatly against. I will attempt to do the second layer of the wales in anchor stock pattern, so having a hard edge will go a long way to keeping things neatly in line. Anyway, it will all make sense later on..... maybe.... Hrm.... now that I look at it, I may slap some black paint on the stem before I get further along with the second planking.... Andy

-
Hi Jason, Would scavenging the windows off an HMS Agamemnon PE set provide a better fit? (And at the very least some other PE bits and pieces that might prove useful). Looks like you can get the PE sets from Cornwall Model Boats. Andy
-
Out of curiosity, since I'm planning the same upgrade to the copper plates on my own build, how many sets of the Amati plates have you used, or plan to use? Andy
-
Kinda makes you start to appreciate why real shipyards have all gone to robotic cutting and welding! Andy
- 56 replies
-
- 6
-
-
- sd-14 cargo ship
- card
- (and 1 more)
-
Comparing Amati Swan Class Victory Models
realworkingsailor replied to dchrismiller's topic in Wood ship model kits
Hi Chris, The two are basically the same model, but the Pegasus was issued at a later date with a few upgrades (copper sheeting, laser cut gun carriages) There is an upgrade kit for the Fly also available to bring it to the same level as the Pegasus, but overall either one makes a nice ship. The instructions are fairly reasonable and the plans are well drawn, the bonus being that if you want, you can use the Fully Framed Model (TFFM) series of books and downscale from 1:48 to 1:64 for some of the simplified details, as well as the rigging. Andy- 12 replies
-
- 7
-
-
- Amati
- Amati Victory
- (and 6 more)
-
Count me in! I've wanted to see one of these built for some time. Maybe I'll grab one as well, should the opportunity arise. Andy
- 56 replies
-
- 5
-
-
- sd-14 cargo ship
- card
- (and 1 more)
-
If it is a royal barge, why not the period correct Royal Standard? Andy
- 269 replies
-
- 3
-
-
- Queen Anne Barge
- Syren Ship Model Company
- (and 1 more)