mikegr
-
Posts
830 -
Joined
-
Last visited
Content Type
Profiles
Forums
Gallery
Events
Everything posted by mikegr
-
The new world order is oil 100$ per barrel and dollar high so we have to adjust to the new standards. Yen is also quite low who ever can order from Japan can score good deals.
-
Cap San Diego by mikegr - 1/160
mikegr replied to mikegr's topic in - Build logs for subjects built 1901 - Present Day
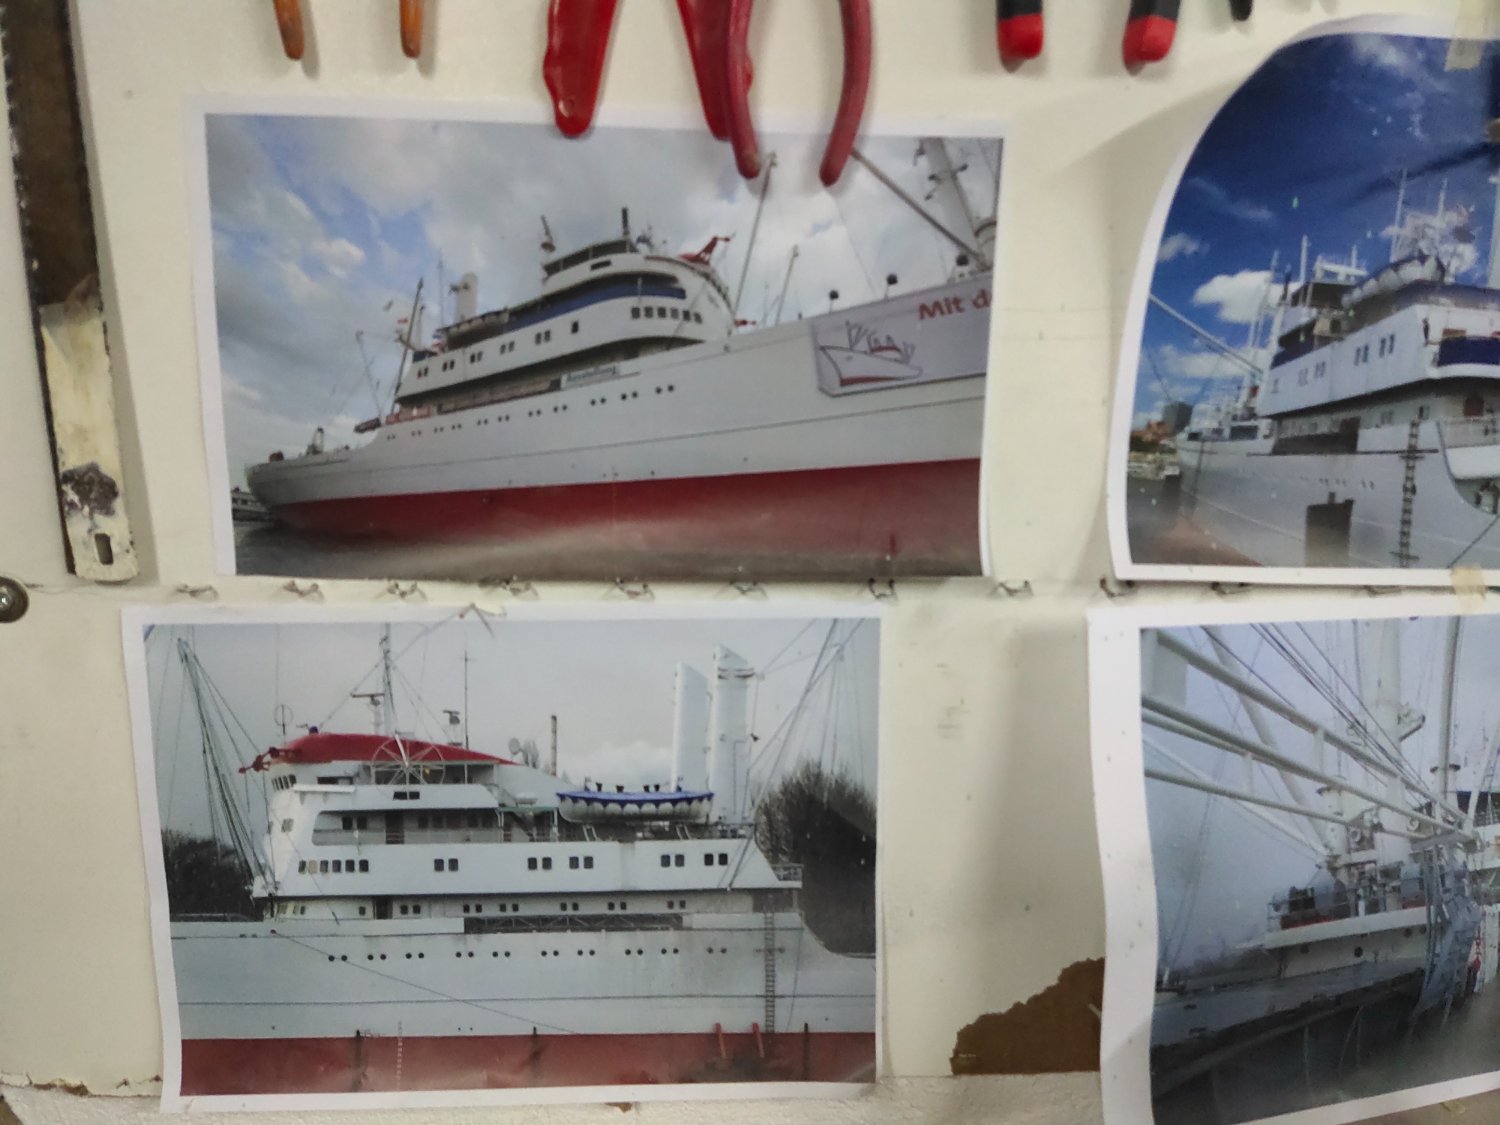
Rear section done. I started working on the main deck. There's a gap where bulwarks meet the deck as shown on pics.That means less work for me. There is some detail paint job to be done but can be done later. I wanted to update here. Time is running out. Tomorrow early morning I will travel to my other place in a nearby island for some self isolation as covid got me and its wise to avoid contacts for a while. Hopefully I will continue next week -
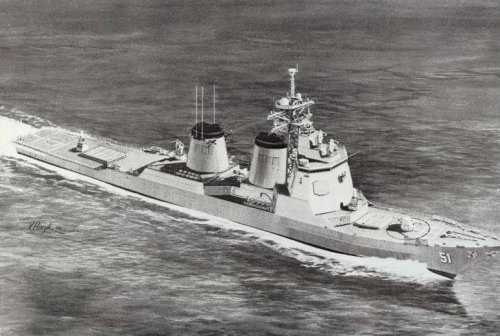
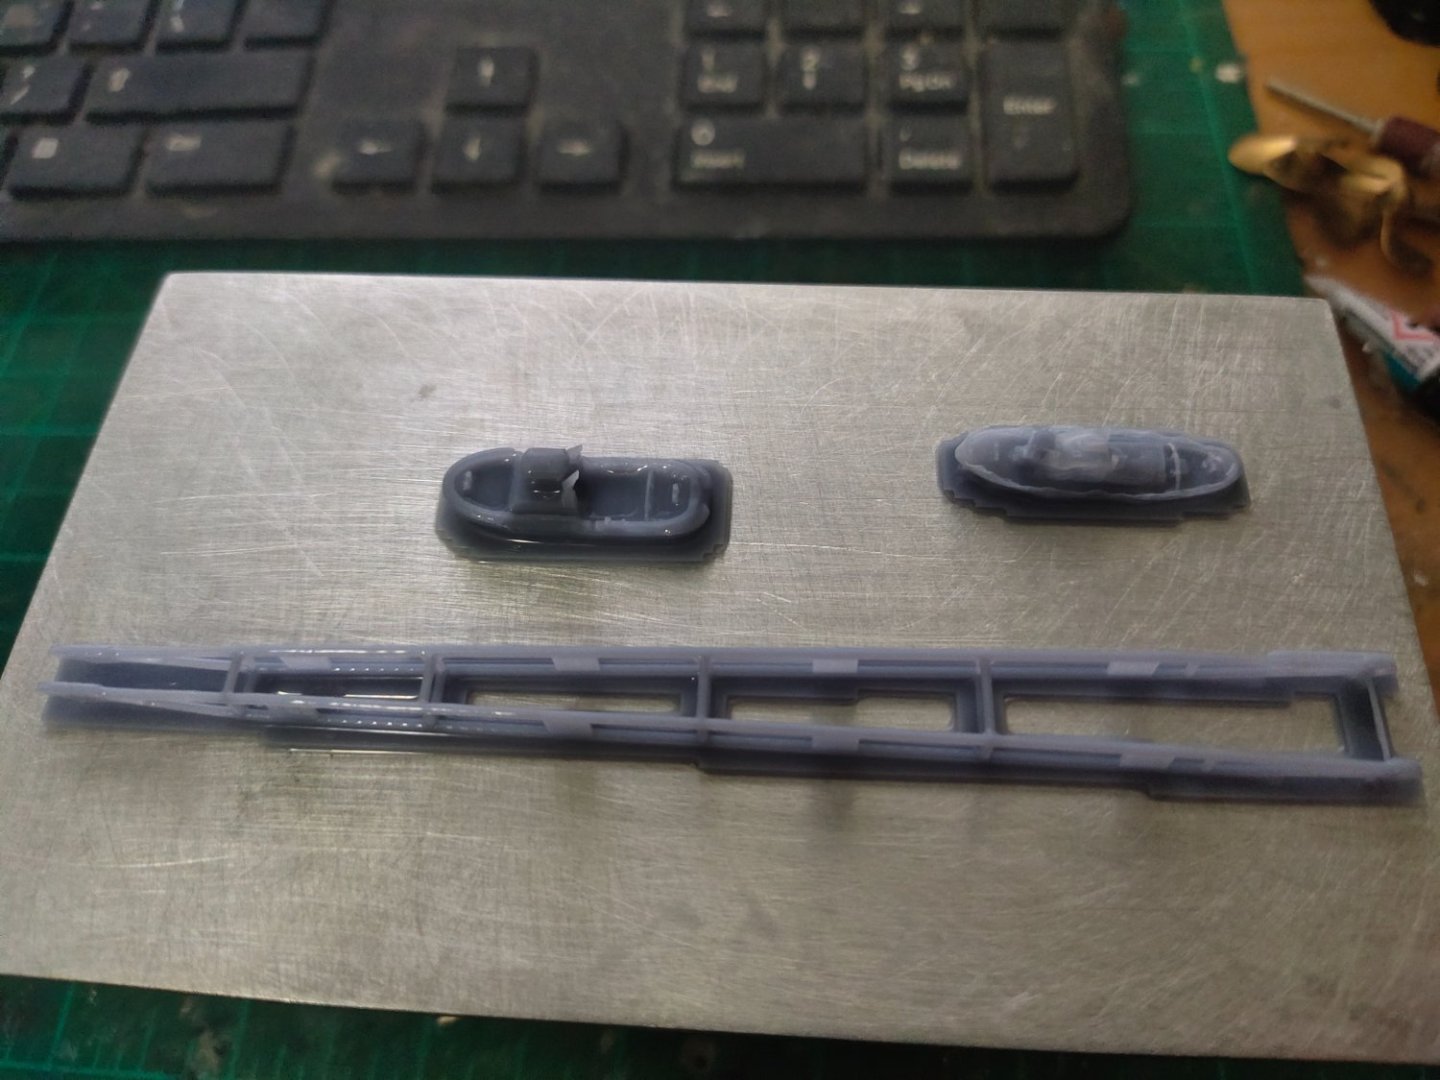
According to "Warships of the US Navy" published in 1983, one of the problems was the welding quality. 33% of Ohio had to be rewelded from the start. At the time the book was published Navy was seriously considering to terminate the program and look for alternative, like a lengthened 688 version. In this book also there is a report for the upcoming DDG 51. The plans were looked like this Thanks the members for the comments so far and their opinions. I printed the last ship, its a tug boat. I actually printed two designs, the one proved too fragile, the other looked ok, most probably can be used in 1/700 scale with some enlargement. I considering also a crane although in this scale it could bring my printer to its limits with its delicate construction. It took 4 prints to get the tugboat but didnt took long 1-1,30 hour each try
-
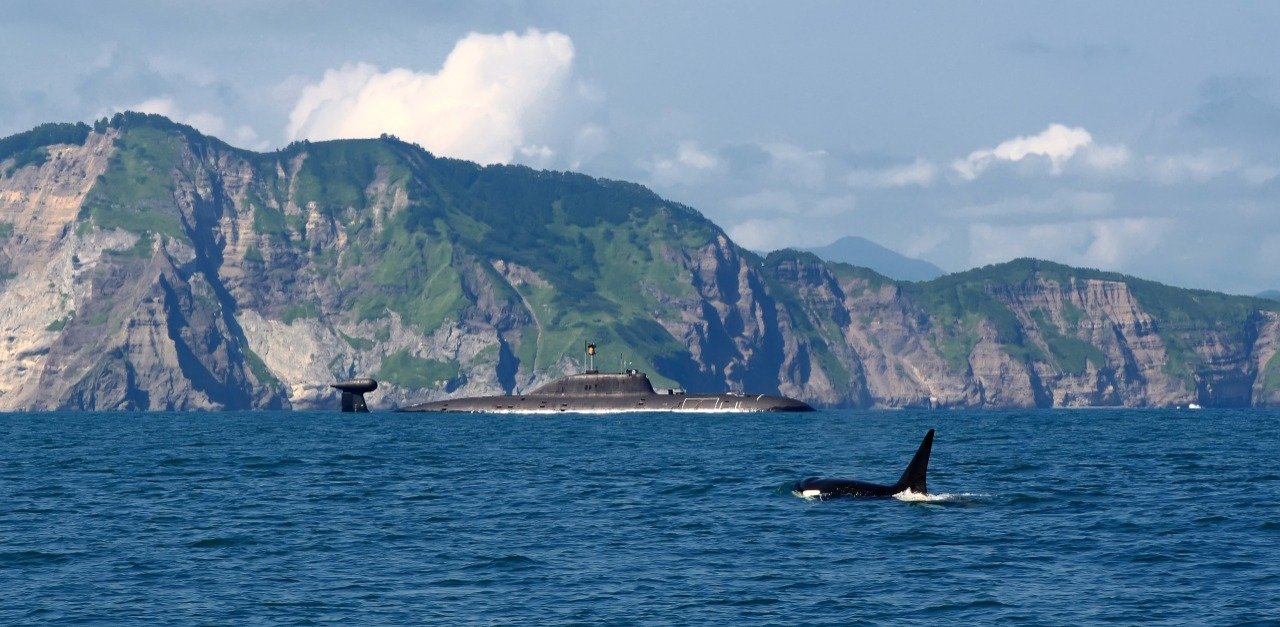
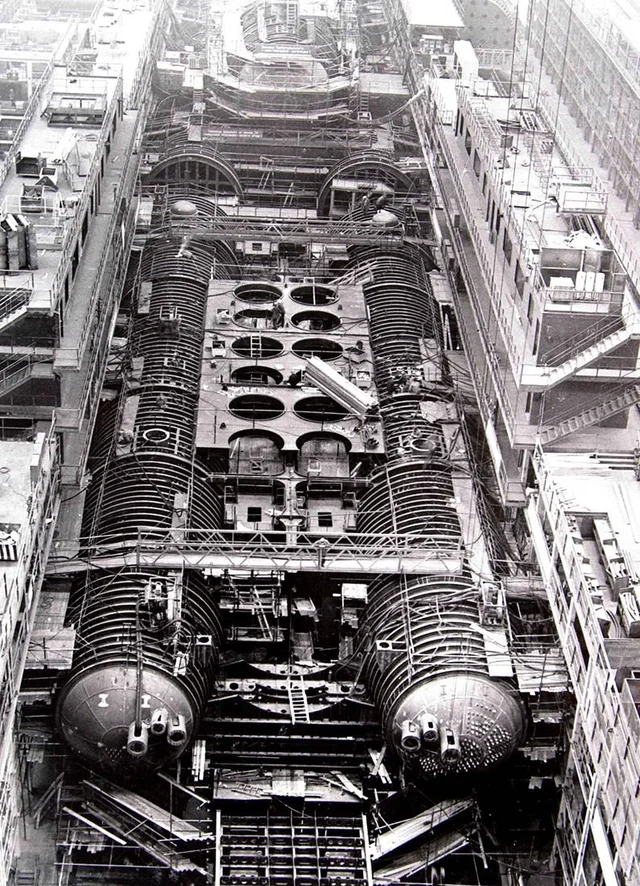
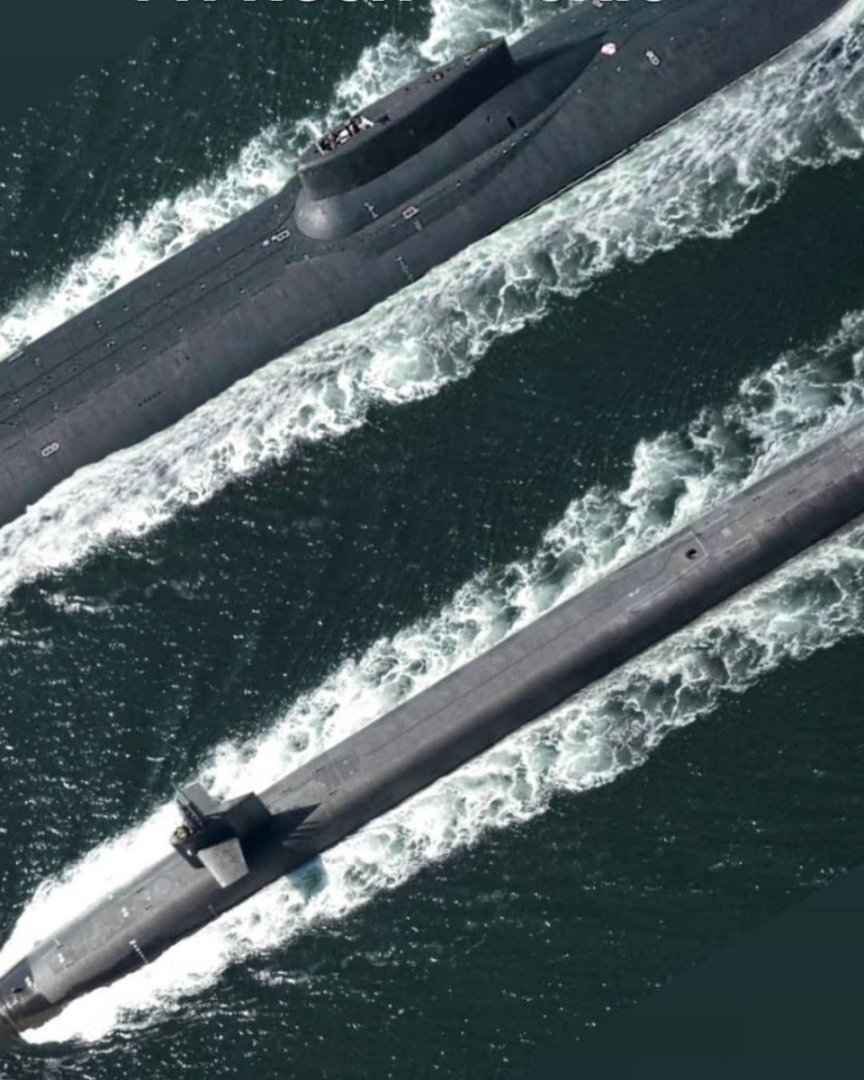
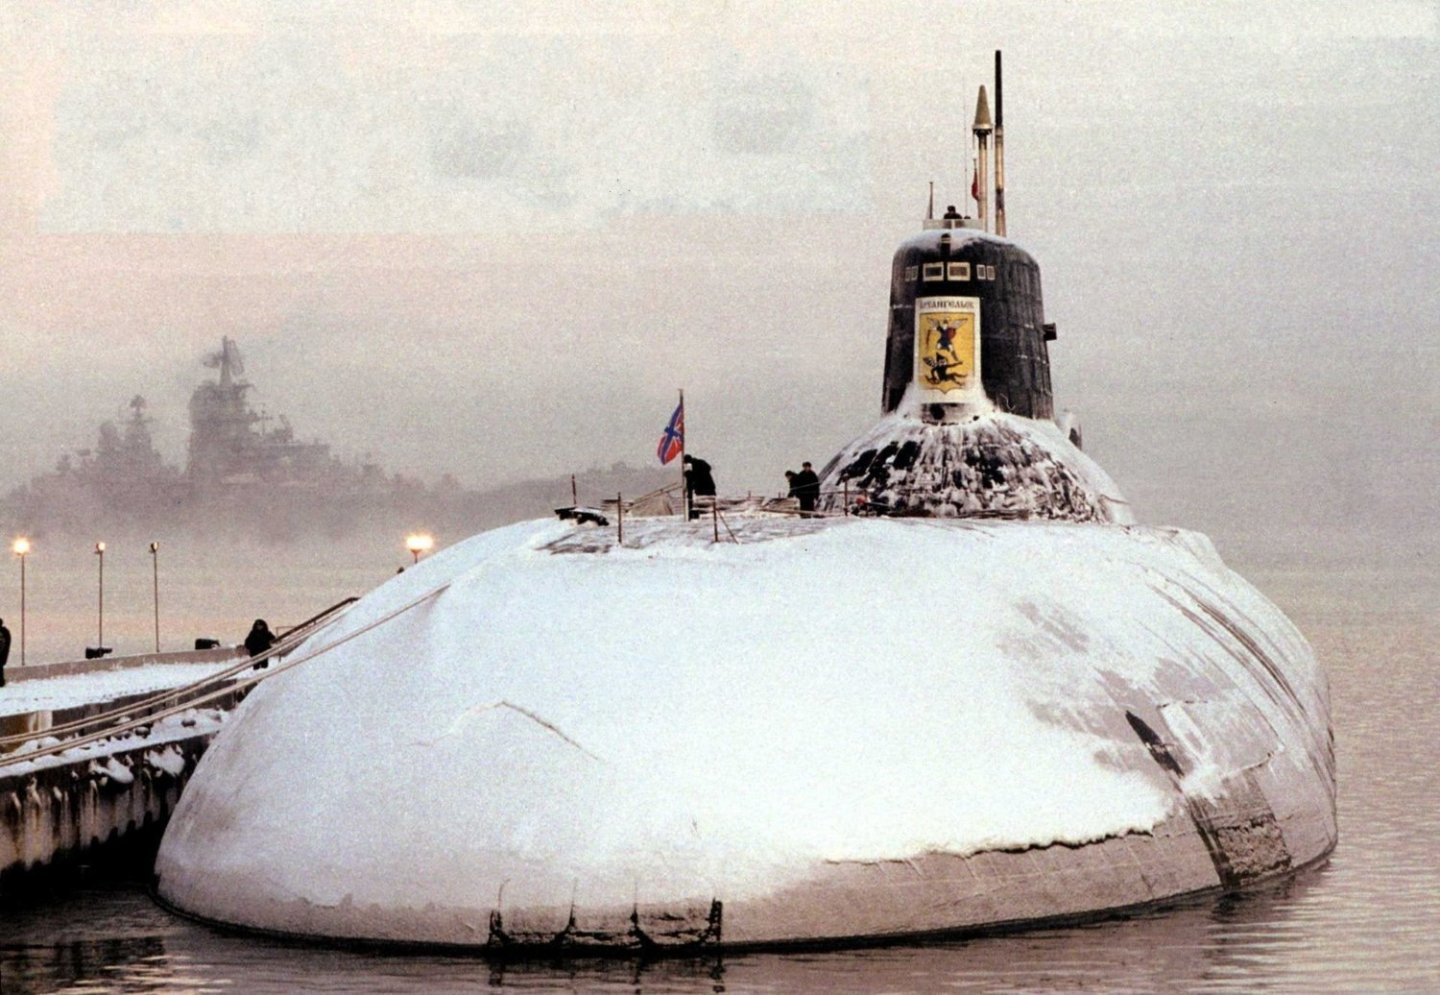
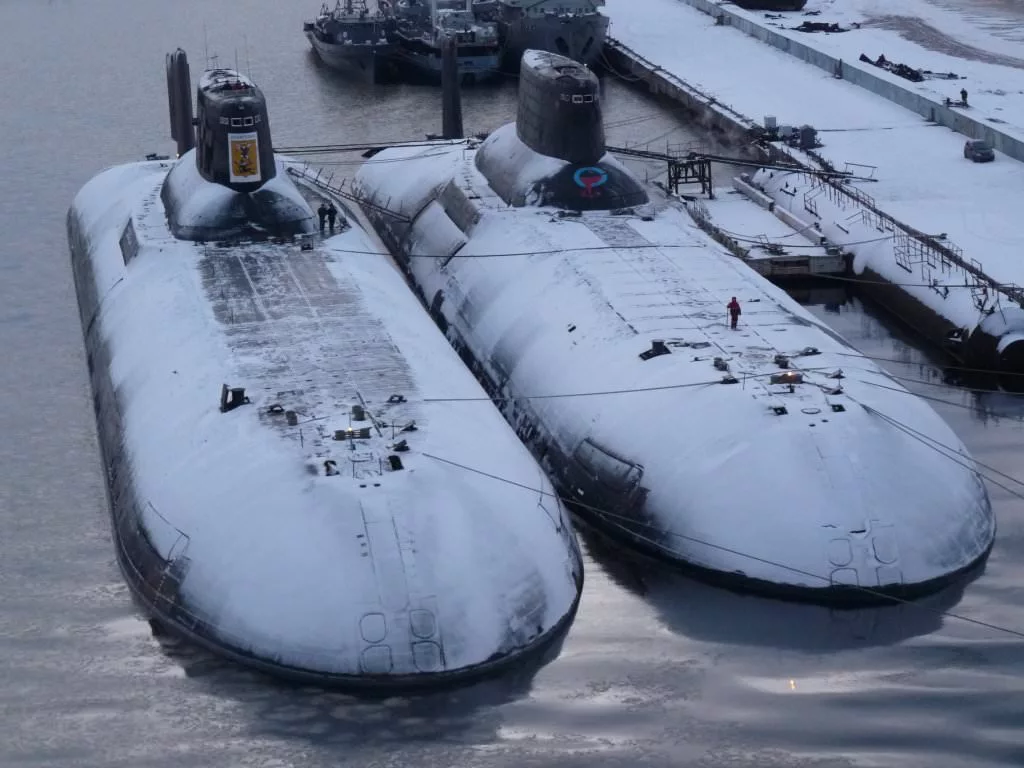
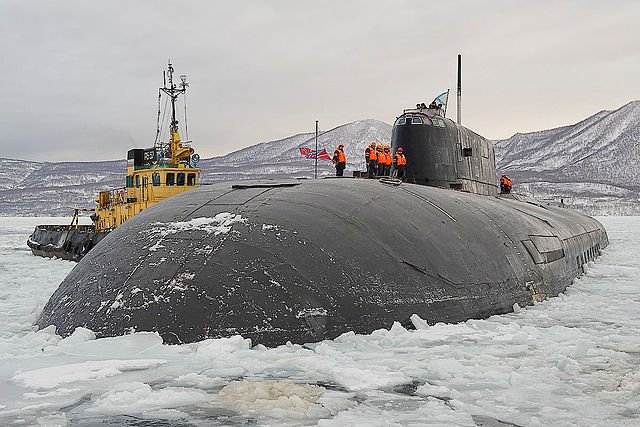
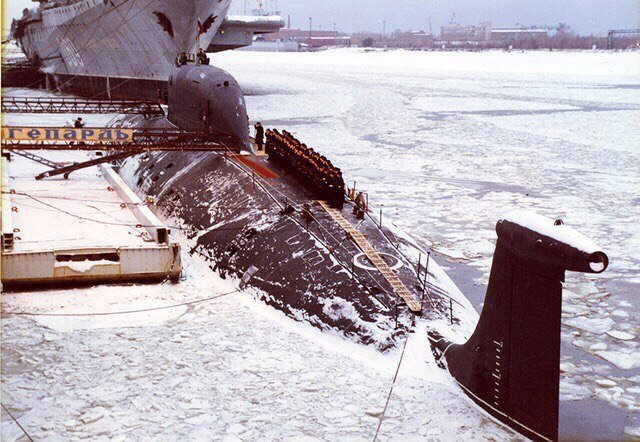
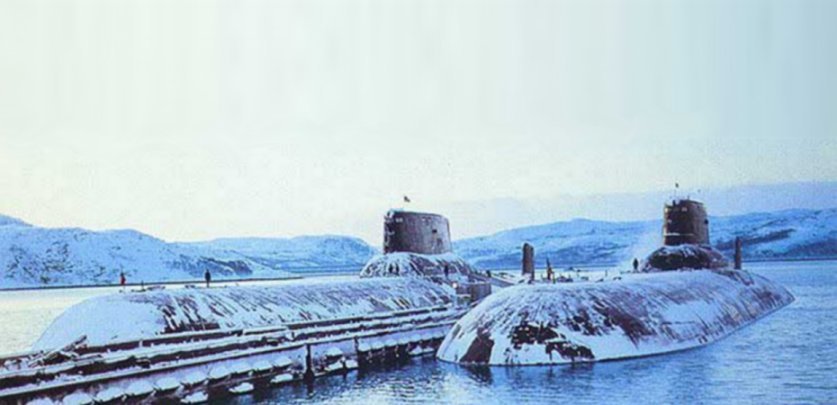
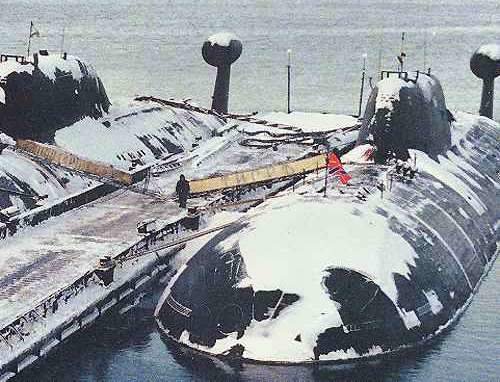
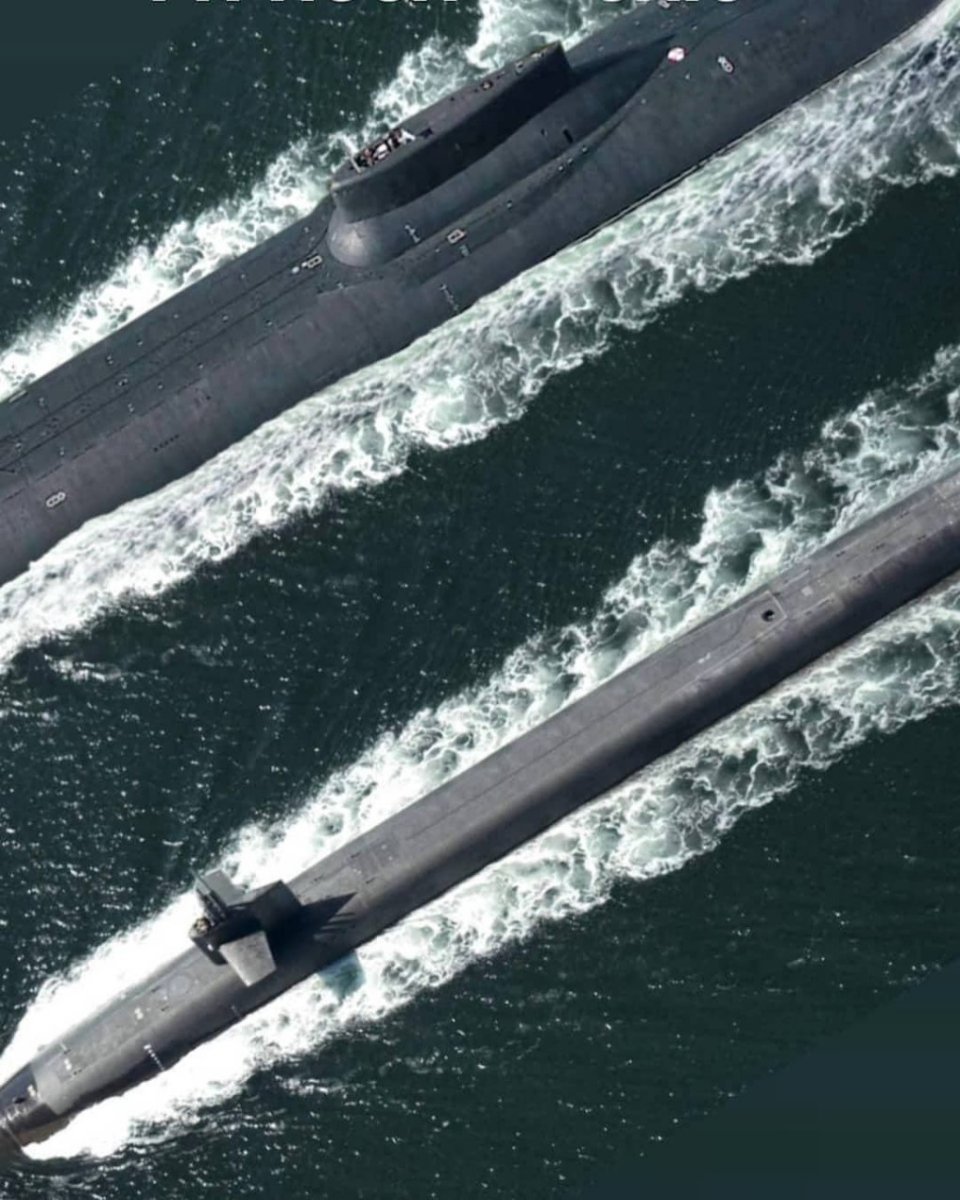
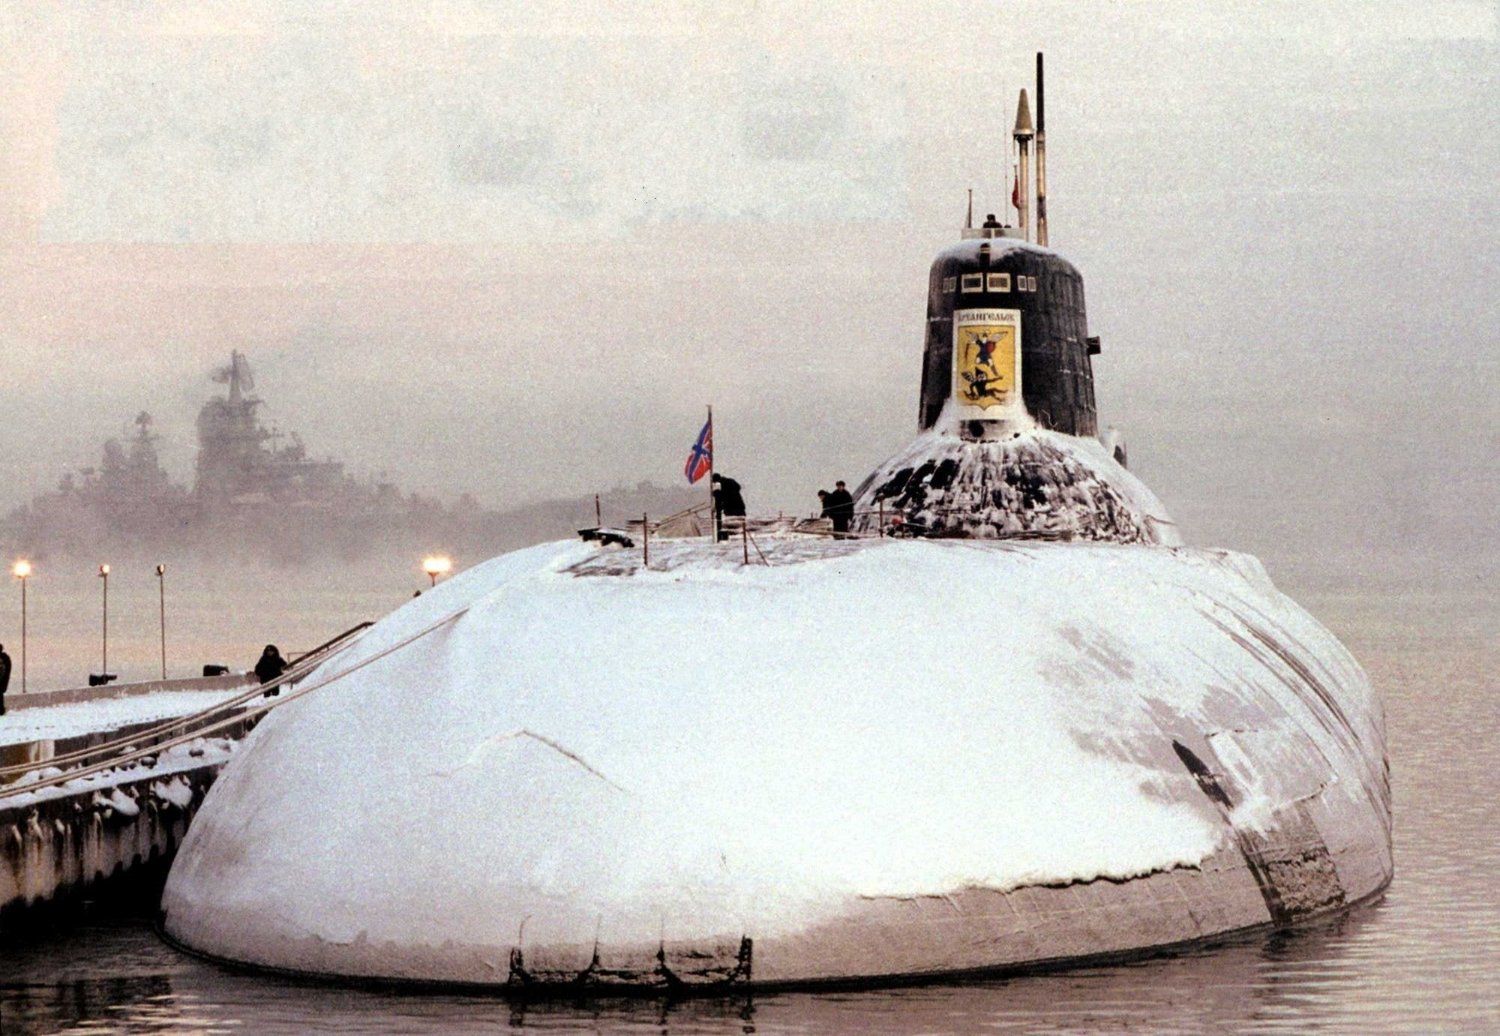
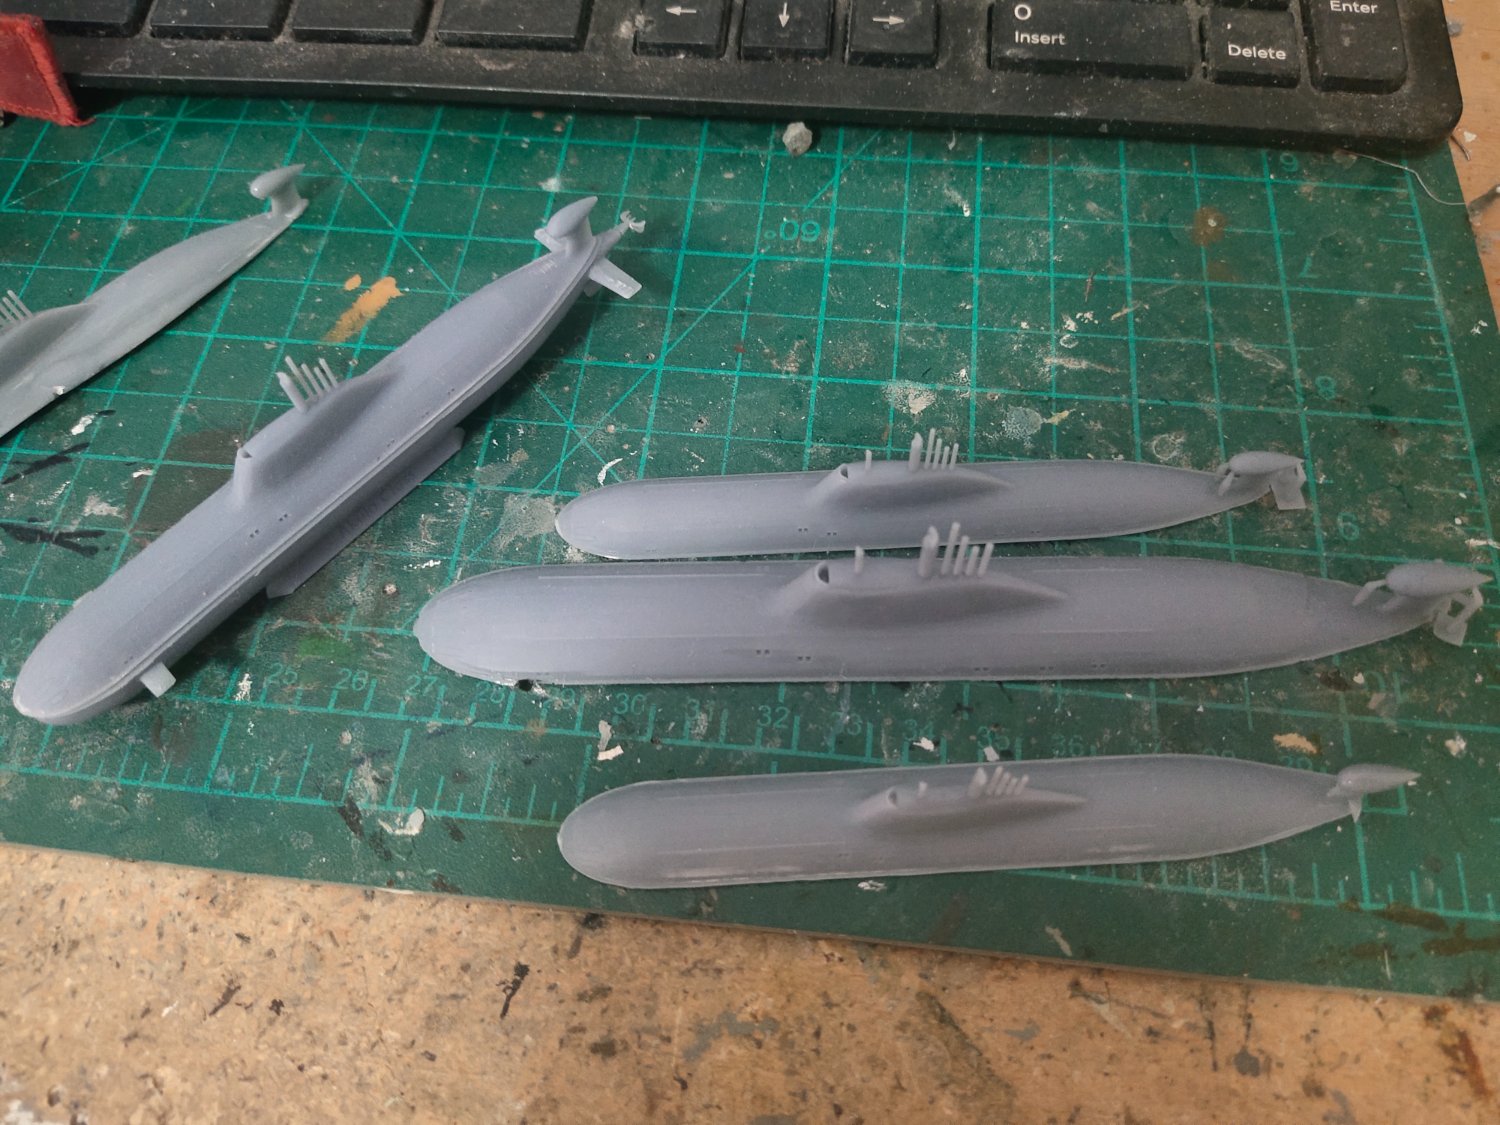
A few last nice pics i found online two hunters met on cold waters A nice idea for a next diorama So, I printed the other model for display a Typhoon class submarine. The size of this giant is impressive. It was printed in 2 pieces thanks to the smaller scale, in 1/700 i would need to divide it in 3. Here is a comparison to the Akula in both 1/950 and 1/700 scale This model has a 2mm margin as it will sink to the resin a bit while other's dont. So i need to modify them accordingly as well as other modifications. The missile silos doors have extremely wide gaps, these should be filled and covered by snow anyway. The Typhoons although were very impressive they were never the most modern submarines of their time. Their most distinctive feauture was their two hull construction side by side giving them that huge space and increased survivability in a torpedo hit. A side by side comparison to an Ohio Class is revealing The Typhoons were among the most comfort subs ever sailed even having a swimming pool and sauna. In comparison Ohios are quite crampy. But they still can carry up to 24 ICBMs instead for 20 in Typhoons. Ohios were quite problematic and expensive to be built but they have a great life expectancy, estimated to serve the fleet beyond 2030.
.thumb.jpeg.8db7465094aef63d6b30933df4507d88.jpeg)
-
Britannic is just a few miles away from my second house in Kea. The depth is 125 meters. There is also another wreck in 70 meters a French liner converted to military transport the SS Burdigala. Every year Britannic was inspected by a group of Belgian divers. One of them died cause of wrong gas mixture used during dive.
-
That depends on the scenery. I'm more worried about the ground effect, rocks etc
-
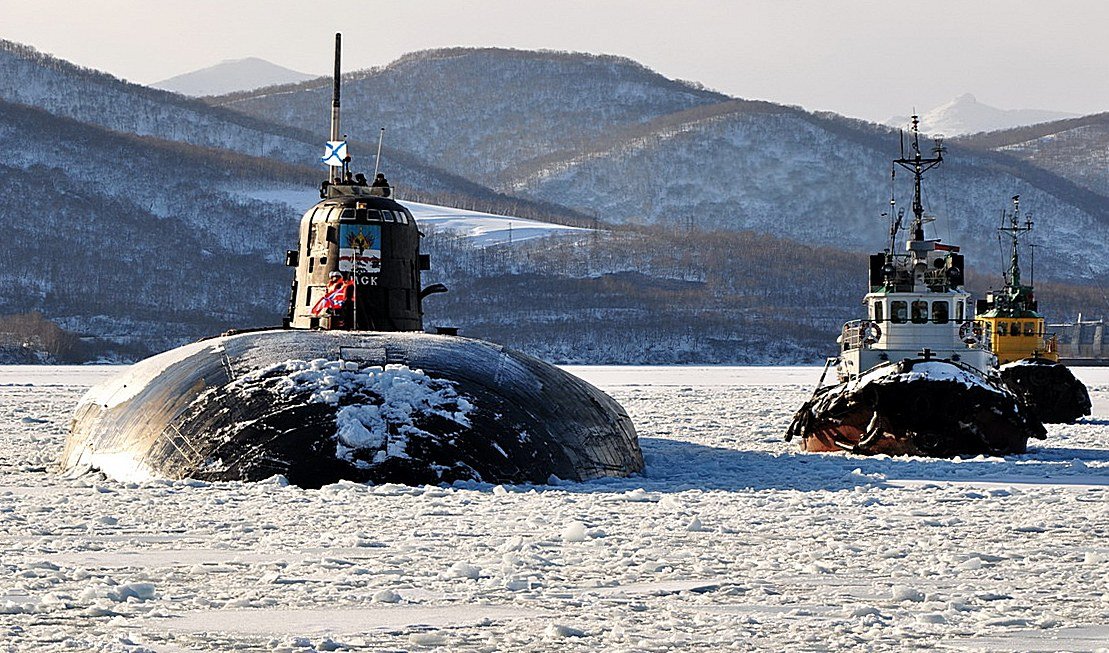
Looking at the pictures i noticed that there are many building options available. No ice on subs, full ice on sea Lots of ice on sea, no ice on subs moderate amount on ice/snow on both objects
-
Cap San Diego by mikegr - 1/160
mikegr replied to mikegr's topic in - Build logs for subjects built 1901 - Present Day
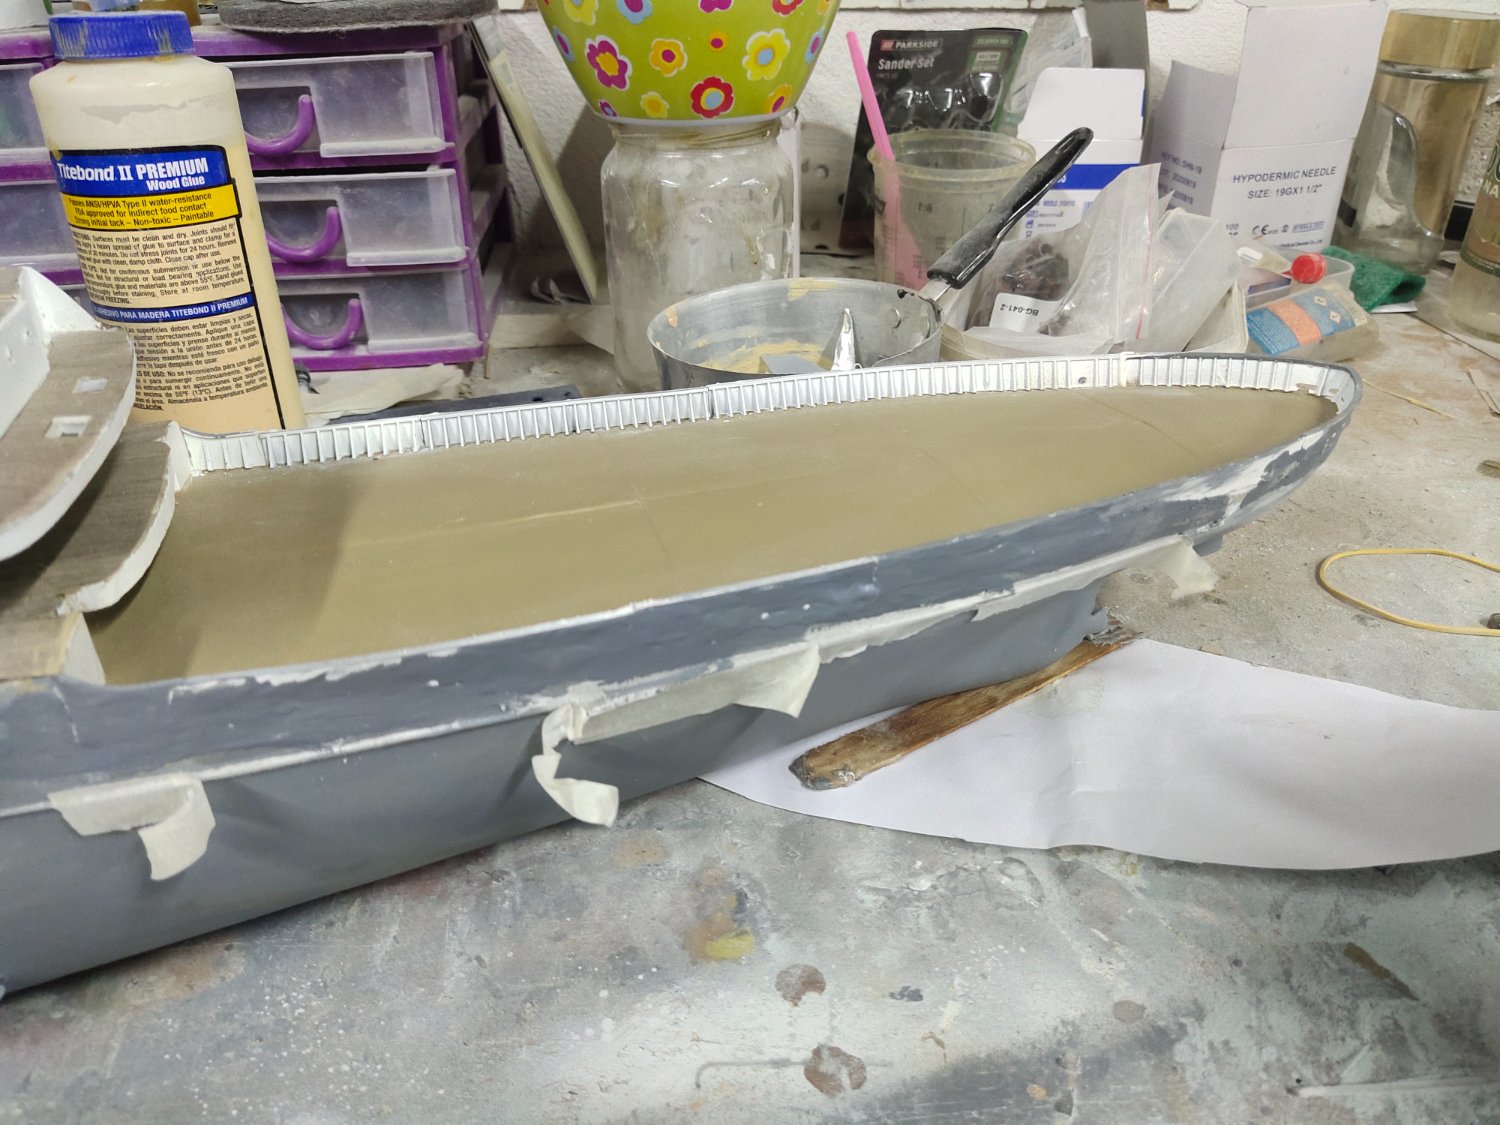
Back to hand work. I used some wood putty to fill some gaps around the joining area of bulwark and deck. I sanded and used glaze putty for a smoother finish. A couple evenings of work is required but big deal. Been here done that. After this, i will use airbrush to repair paintwork.
-
Thanks Alan. By the time you get your resin printer there will be a lot of material that will take your 1/700 and 1/350 to another level. Your filament printer also has paid off very well on your giga project.
-
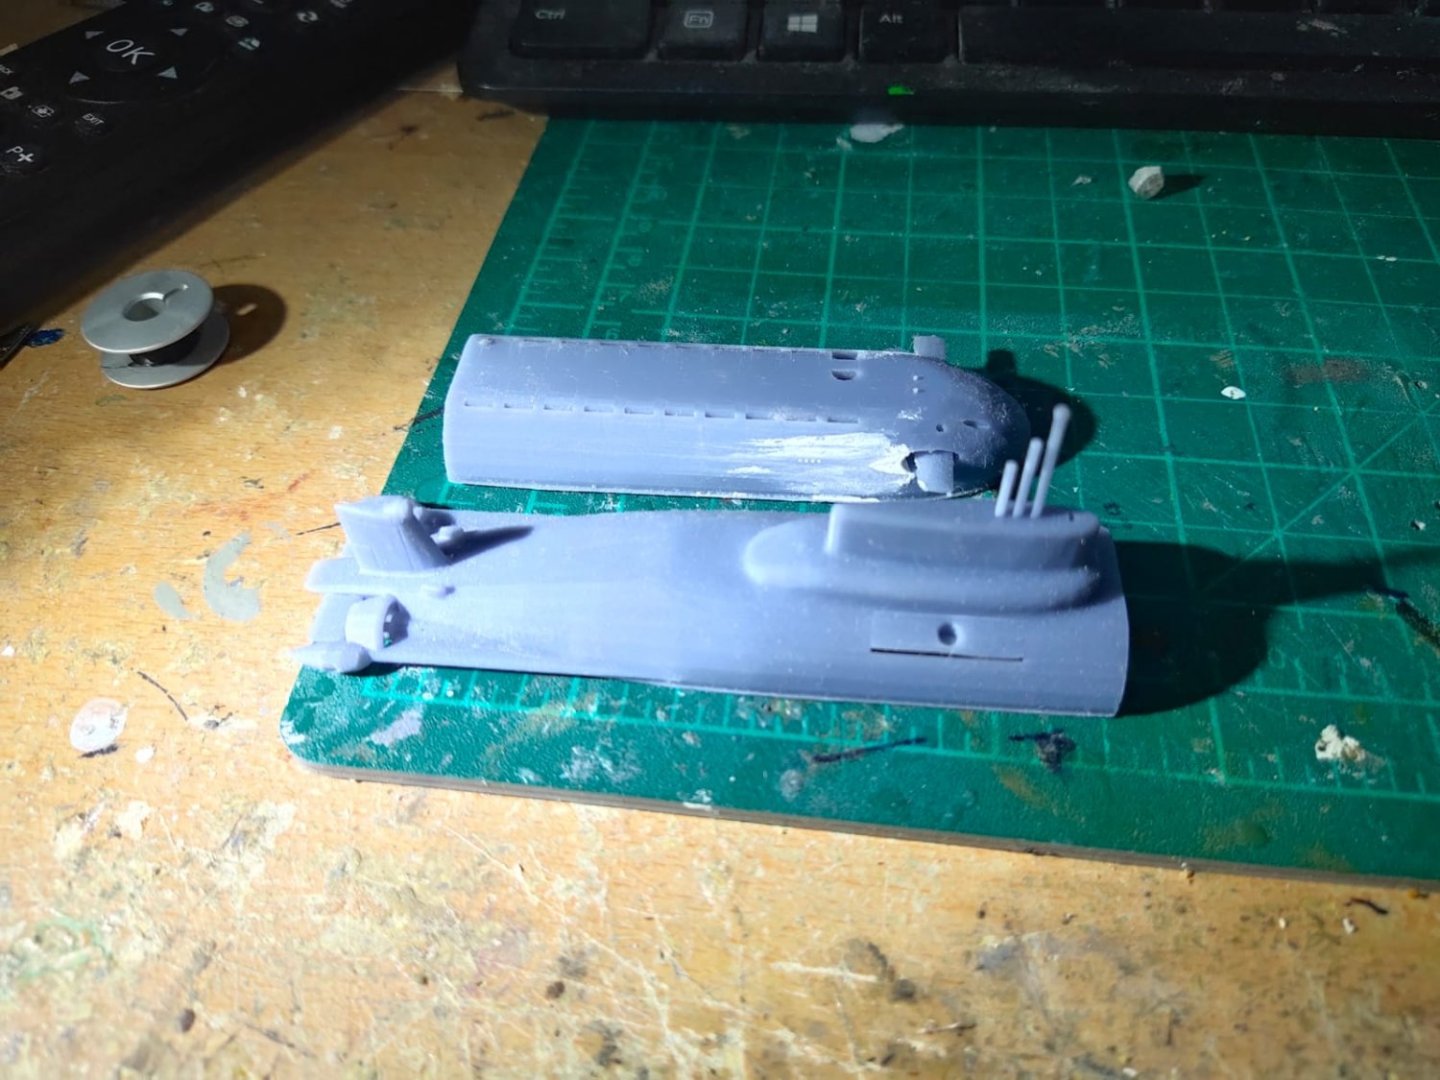
Why in 1/950? I will explain. During my first research for 3d printable models and parts I came up with some submarines. Among many I download and printed a freeware file of Akula Class sub. It was the first ship to be printed so some experimentanion would be needed. After testing several pieces were complete in good detail in 1/700 scale. Or I thought so. While testing and calculating scales my mind was at Alfa Class a sub significantly smaller than Akulas. After doing some maths It was obvious that I was left with a bunch of Akulas in 1/950 scale. You can see the difference of the size in 1/700 and 1/950 in the photo Not sure what to do with them I decide to built a diorama using at least two of them and maybe another class. The scenery would be icy. It will be my first diorama including sea and terain scape. A combo of 3d print and hand work.

-
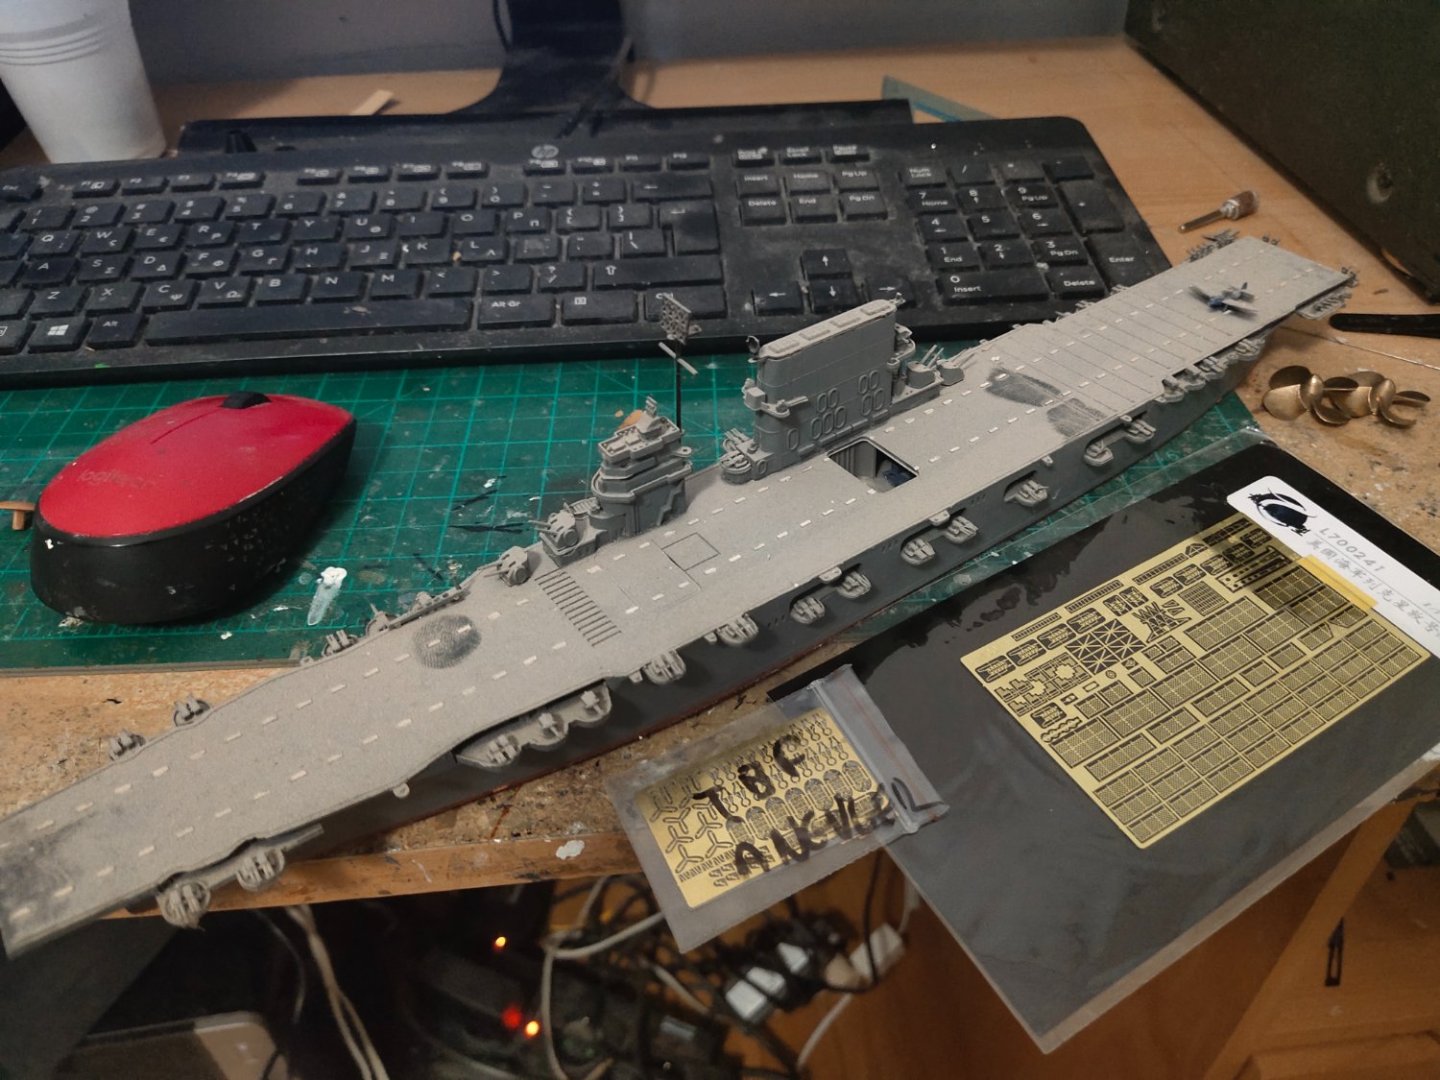
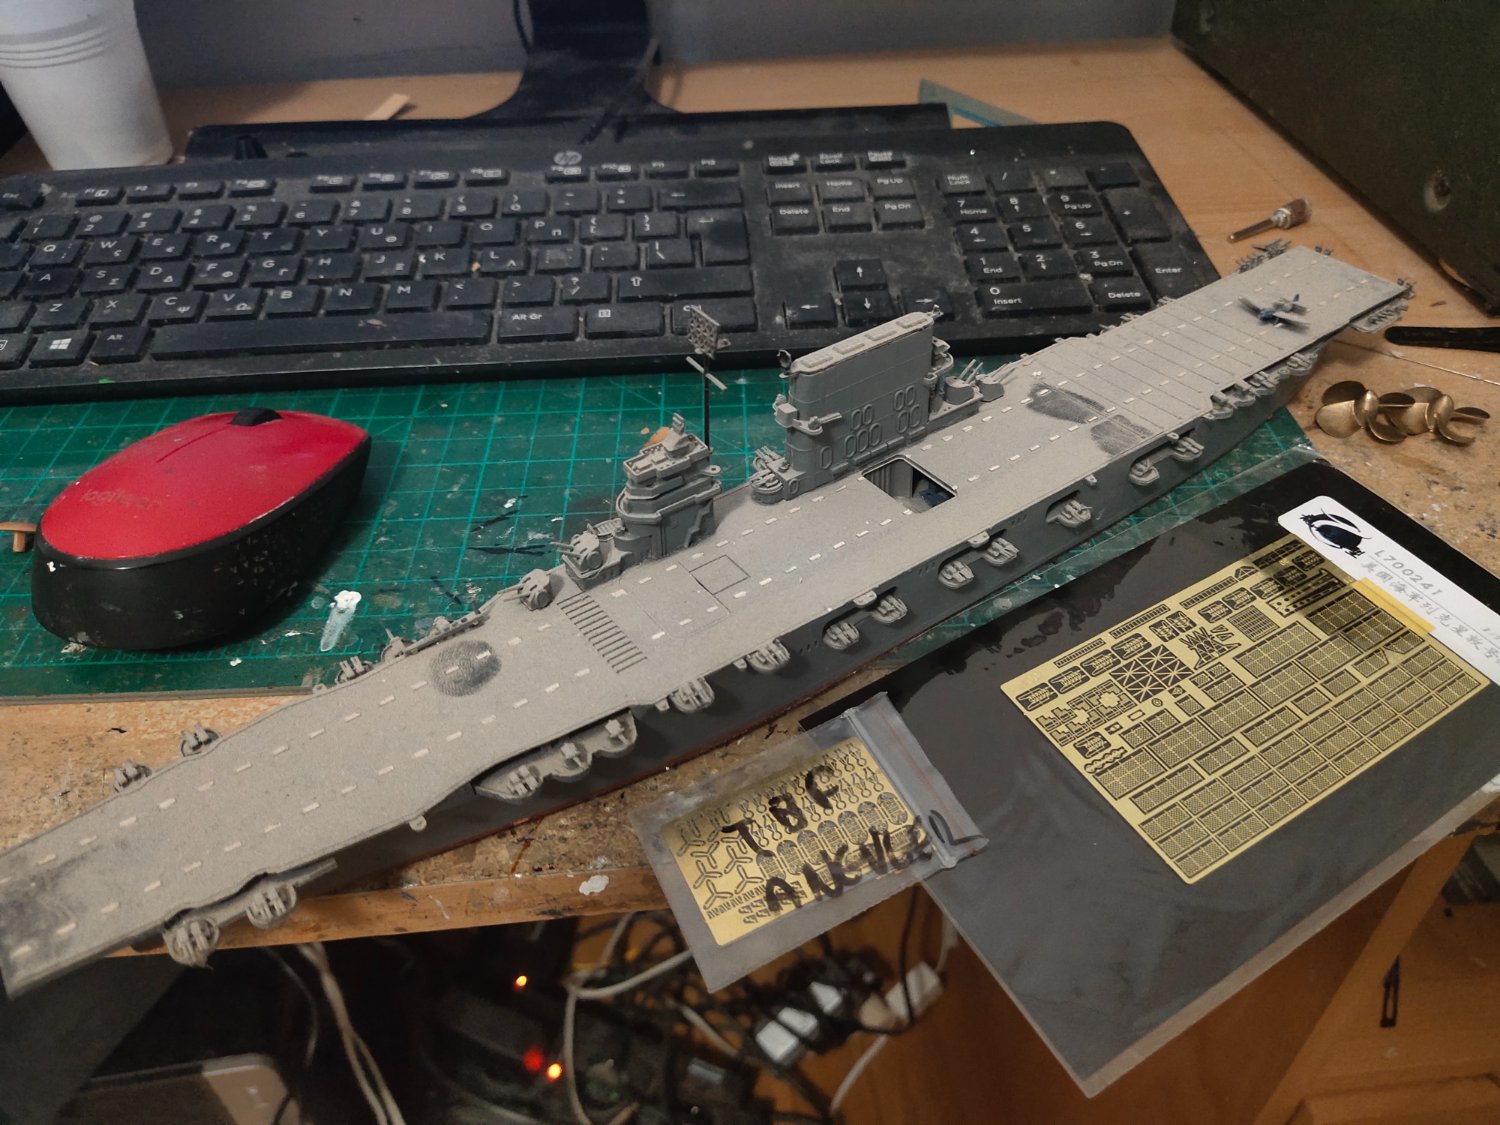
I made a plexi case not perfect but good enought to keep the dust away. A label also was 3d printed. Not sure what the Japanese letters means, just found the printable file for these online. Next project USS Saratonga with PE set, the longest 1/700 model according to a 2015 Fine Scale Modeller Magazine. This is going to take a while as I'm going to take a break and start another project to post in this section.
-
Greek bireme 460 BC
mikegr replied to Rebelnfl's topic in Building, Framing, Planking and plating a ships hull and deck
Maybe this helps -
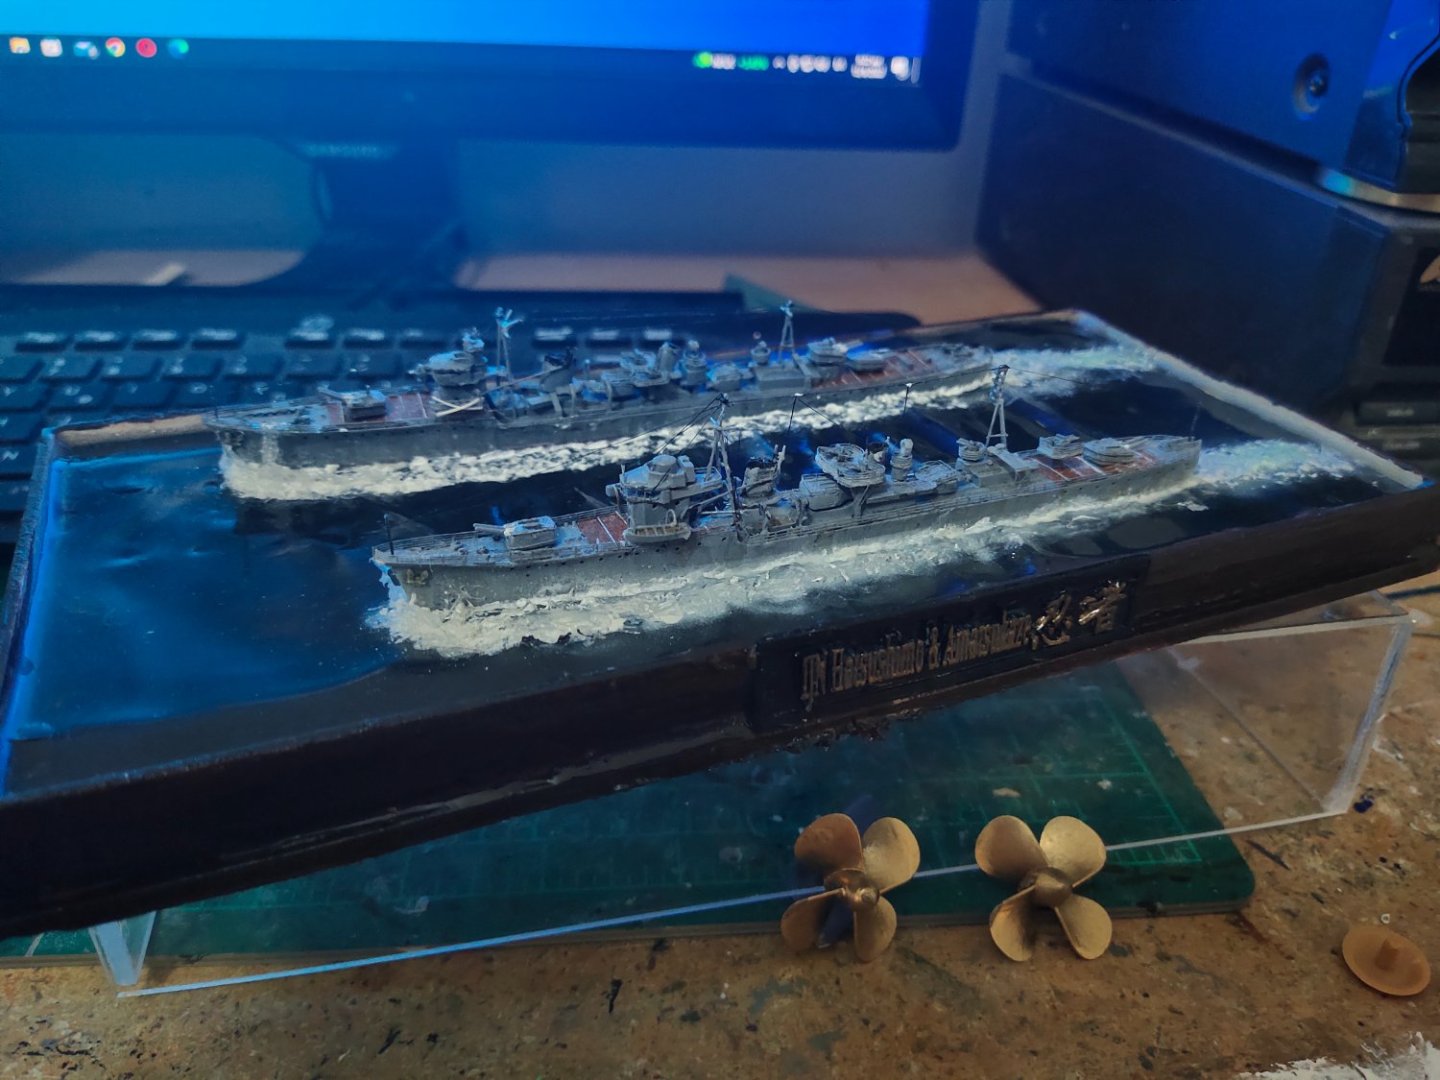
I finish detailing. Hatshusimo "slowed down" a bit. Did some work on paintwork on rear wakes but not successful as this should be done earlier. I added some sylicon bits to give a crystal clear effect on waves then brushed them with alkyd varnish. I Painted the base, some resin could not removed totally in the easy way. I will varnish the base too before make the cover box

-
Cap San Diego by mikegr - 1/160
mikegr replied to mikegr's topic in - Build logs for subjects built 1901 - Present Day
The person who designed my projects owns this site https://www.endtas.com/contact-us/?fbclid=IwAR0qADs71nvIKaXuem1vhqV3mTyS79q0LMuxZ4ioCTCVhByd356Qyr2yL2M It has a lot of free stuff to download. I have printed a couple of submarines model with great success. Those that are not free are still very reasonably priced. You can also donate as little as 2$. Its definately worth to visit it. -
Cap San Diego by mikegr - 1/160
mikegr replied to mikegr's topic in - Build logs for subjects built 1901 - Present Day
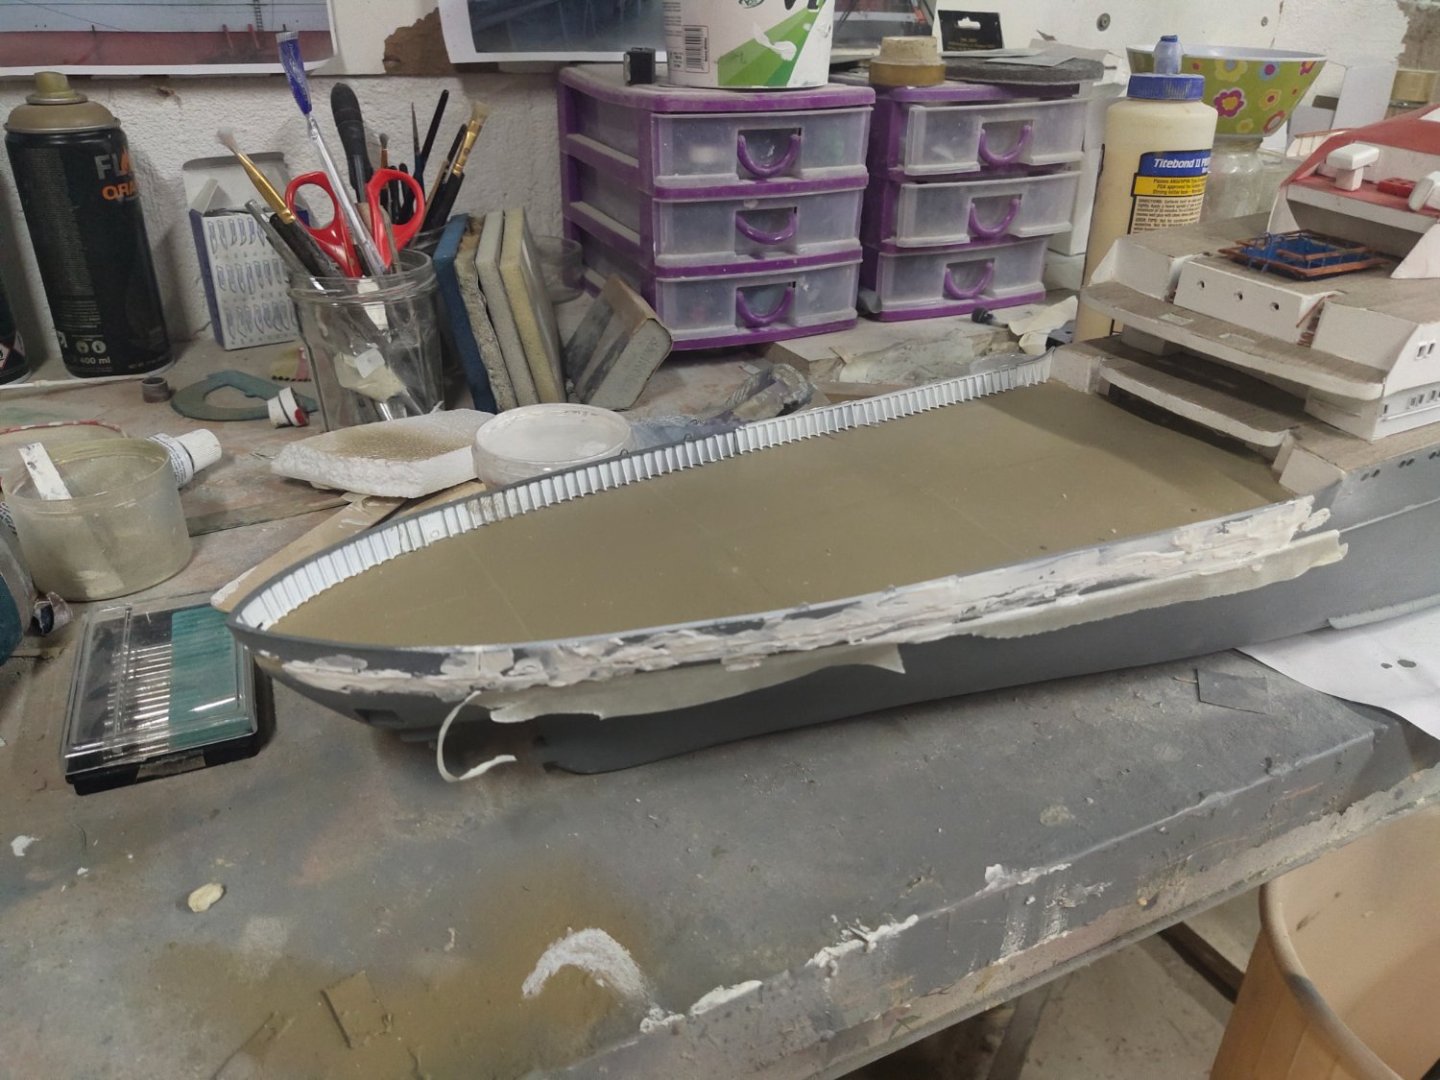
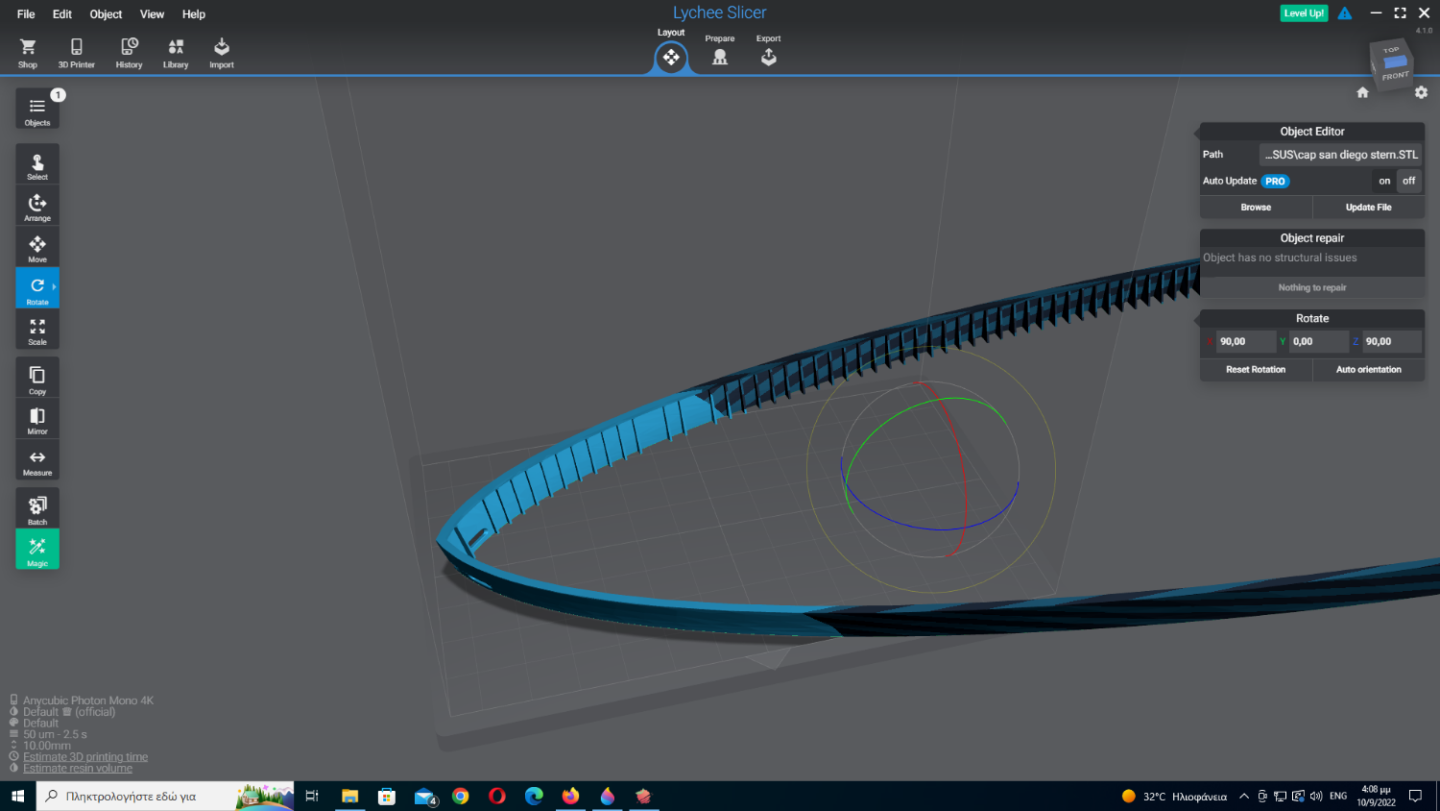
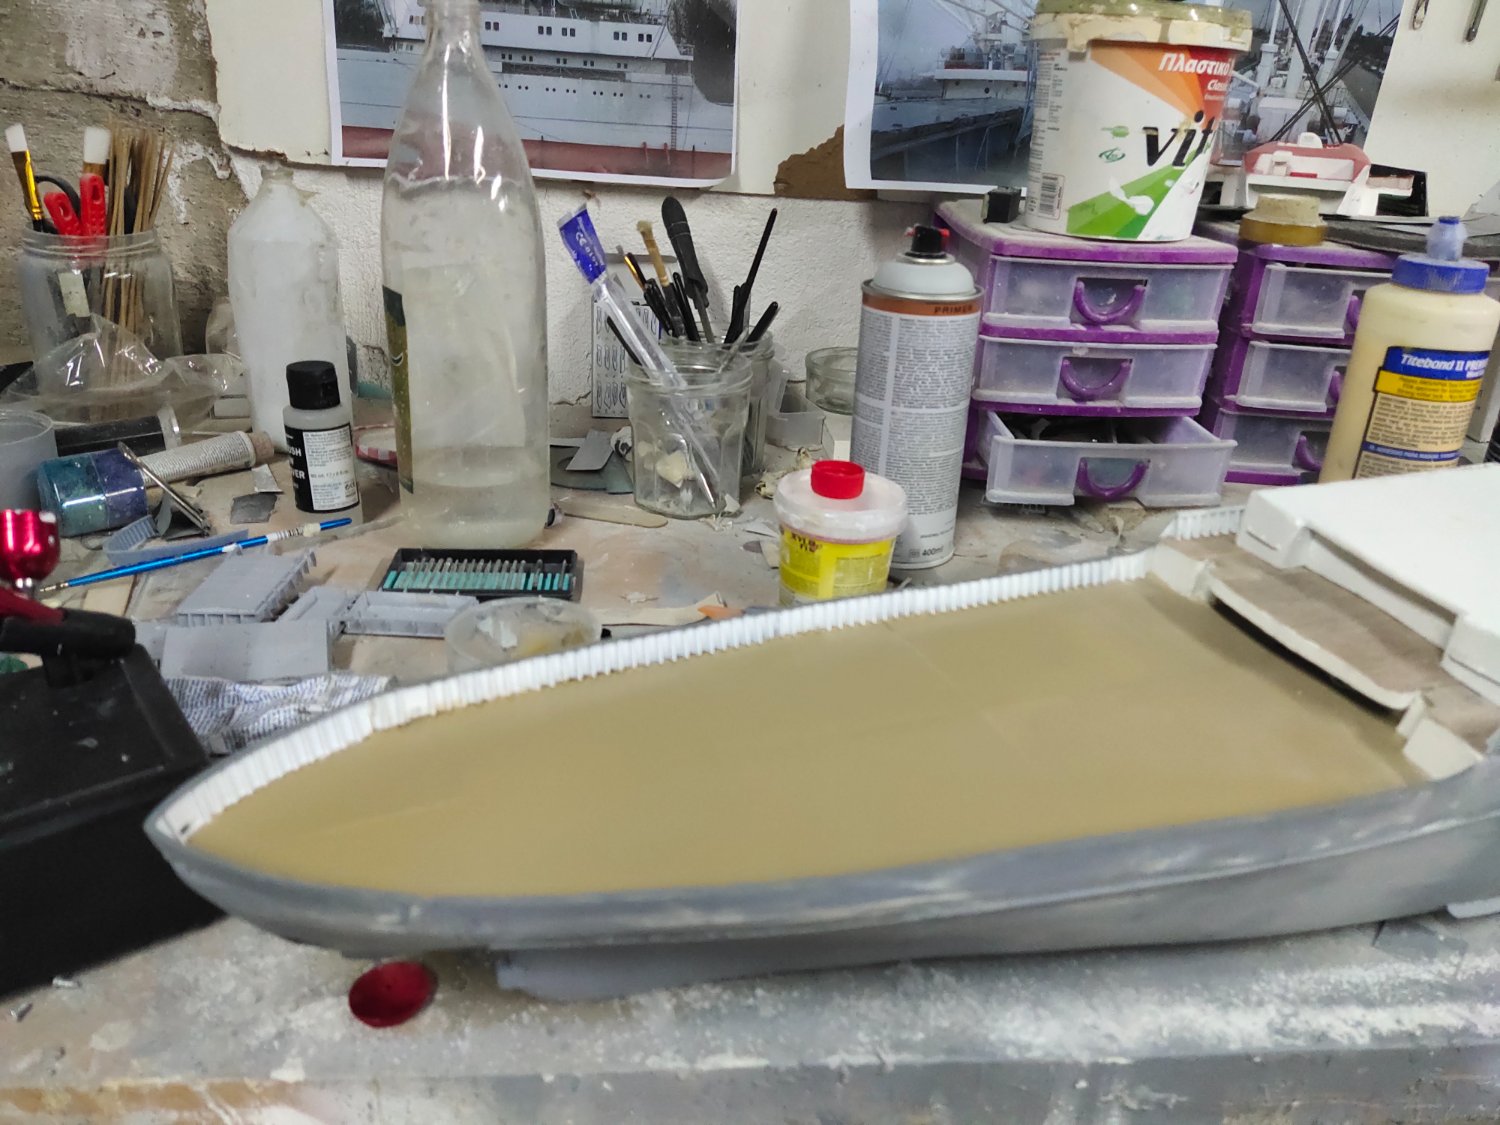
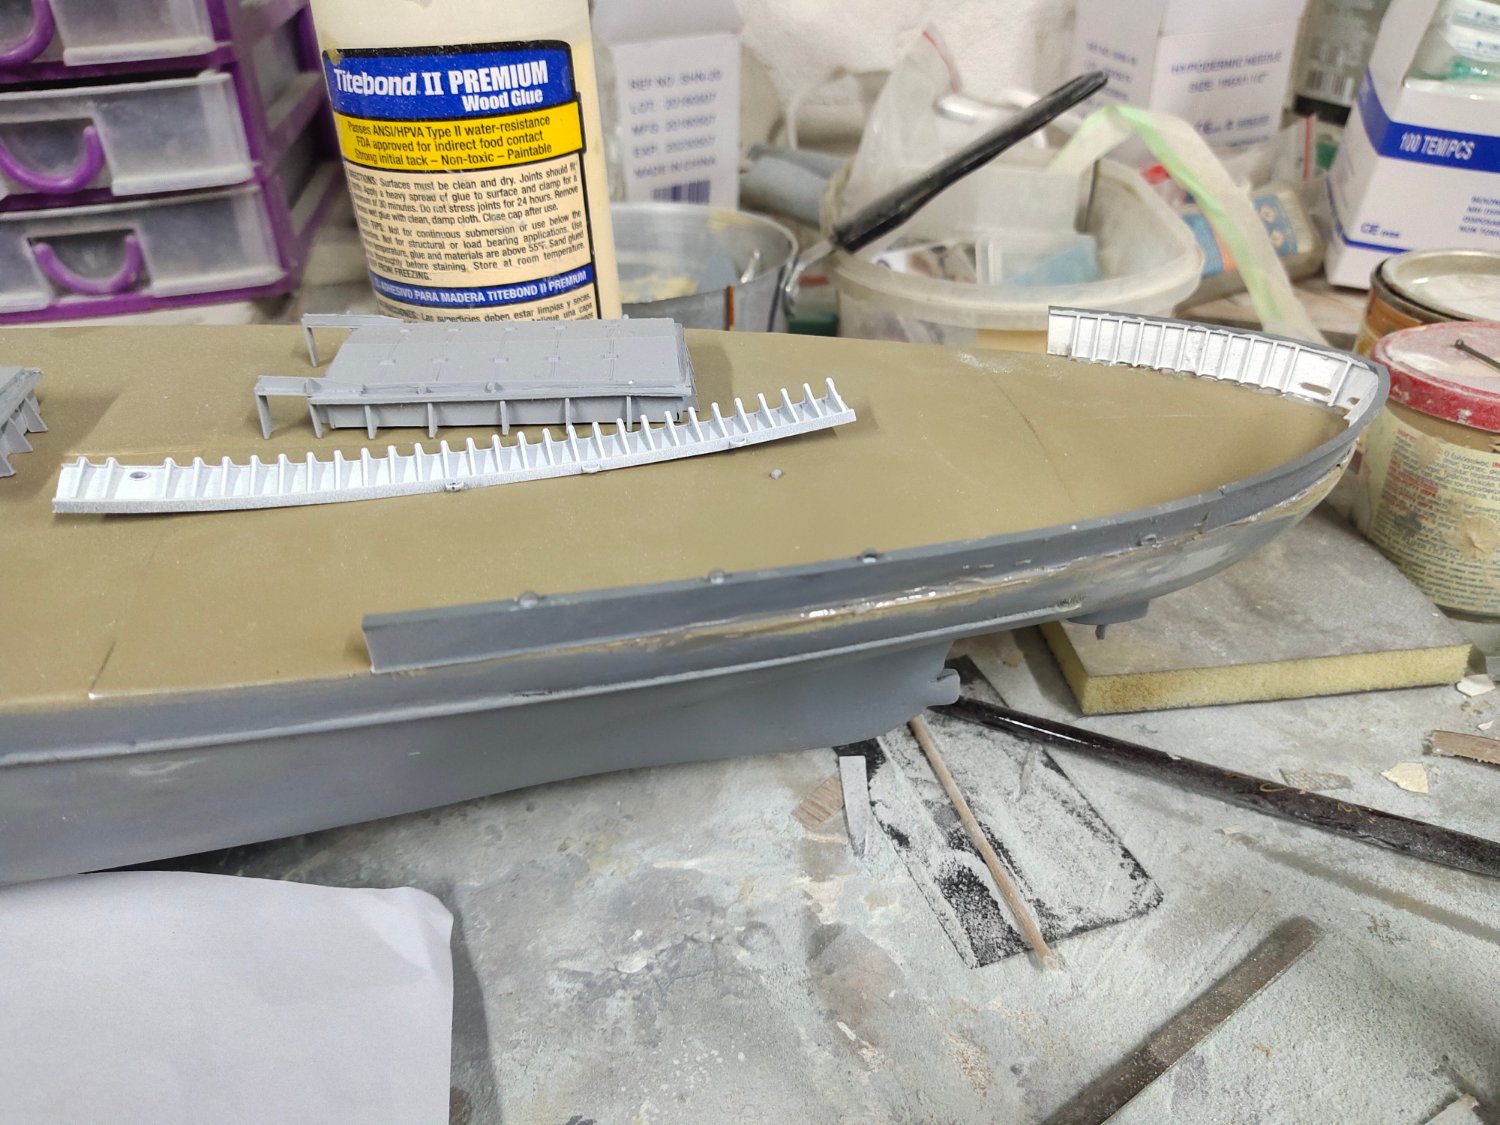
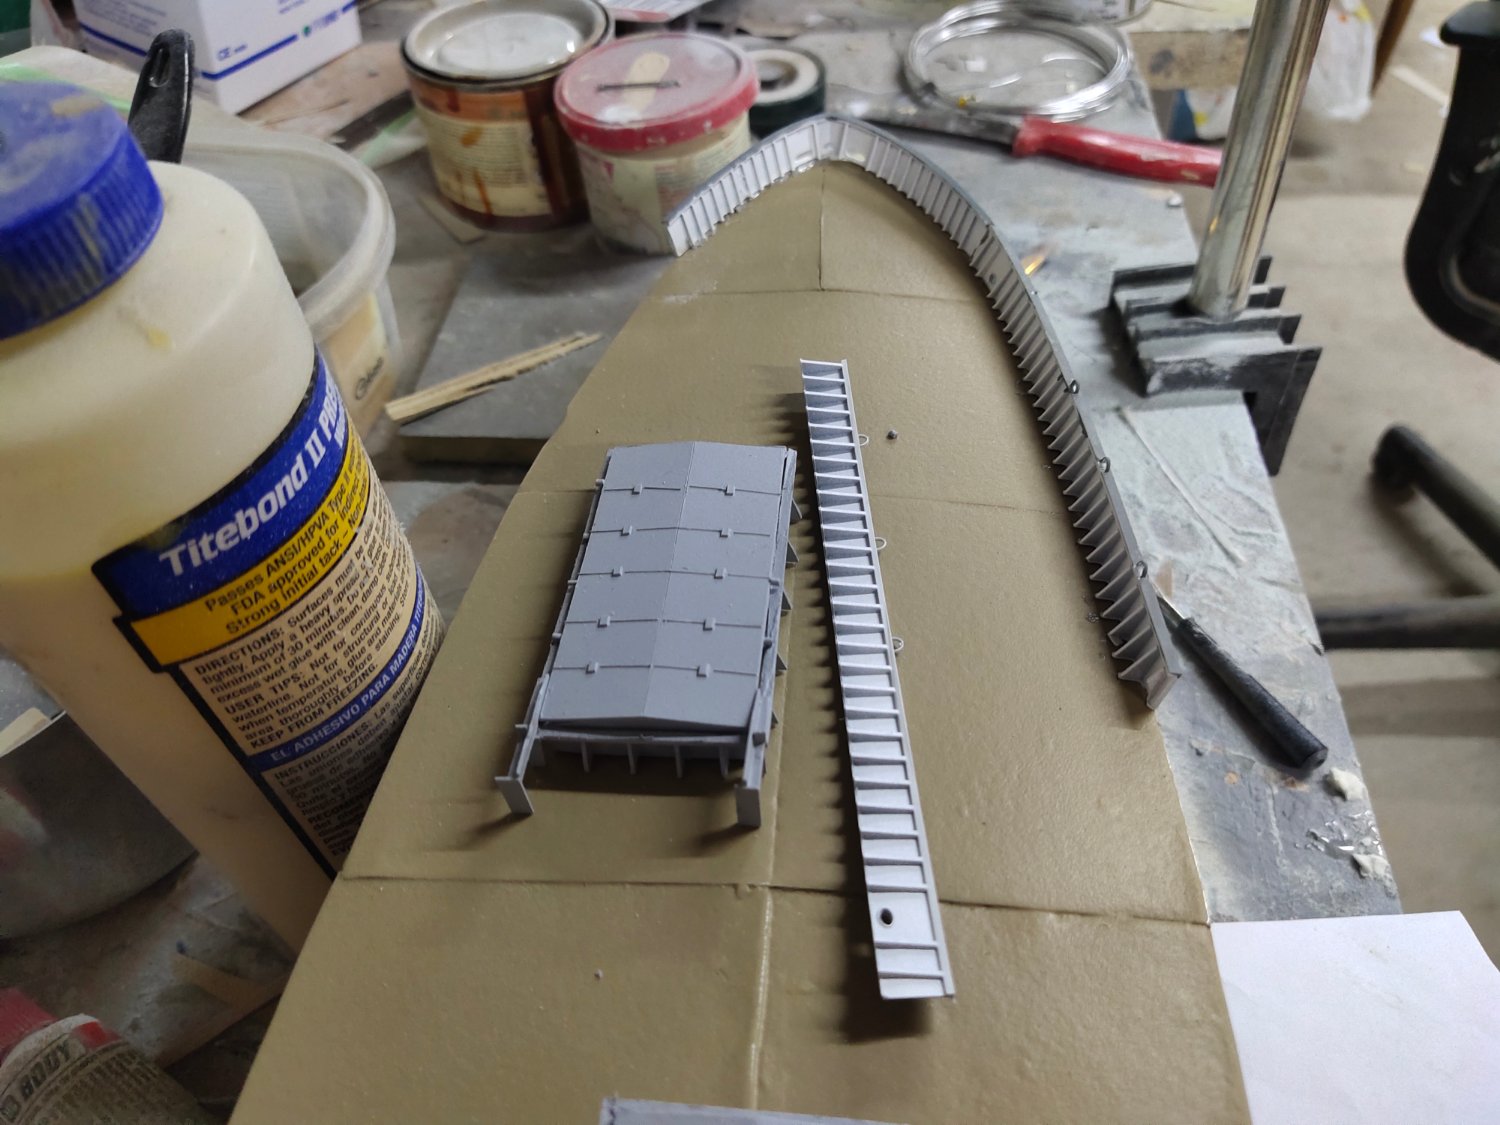
Progress must go on somehow. I found someone on FB who could design bulwarks ready to print for me. I will talk about it later The bow desing came pretty close to model dimensions. With a heat gun i soften the resin pieces and added to the deck with epoxy putty/glue. Due to the size i had to cut the rear section in pieces. If you are interested in a resin printer i suggest to go for at least medium size. The 6" diagonal plate can be filled easily.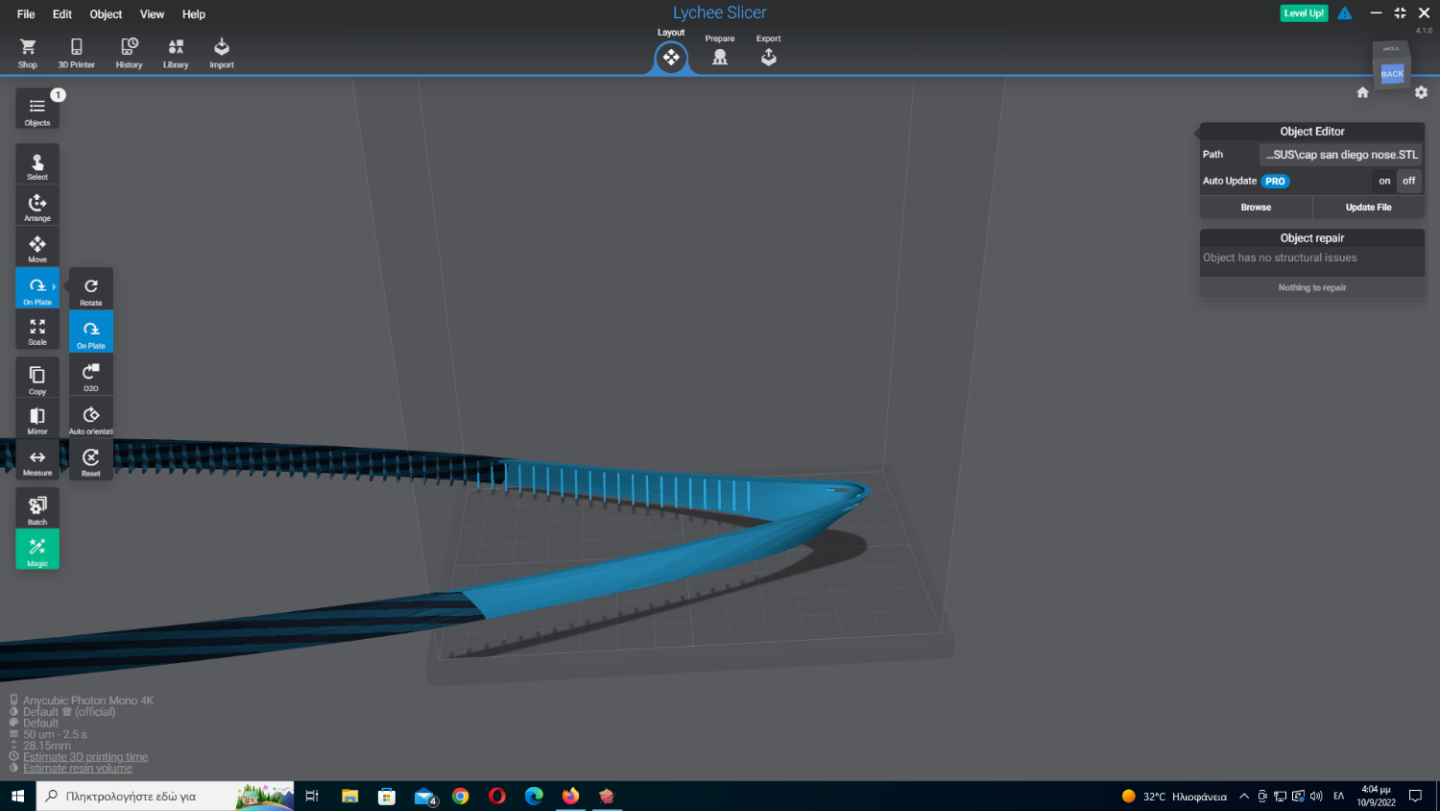


-
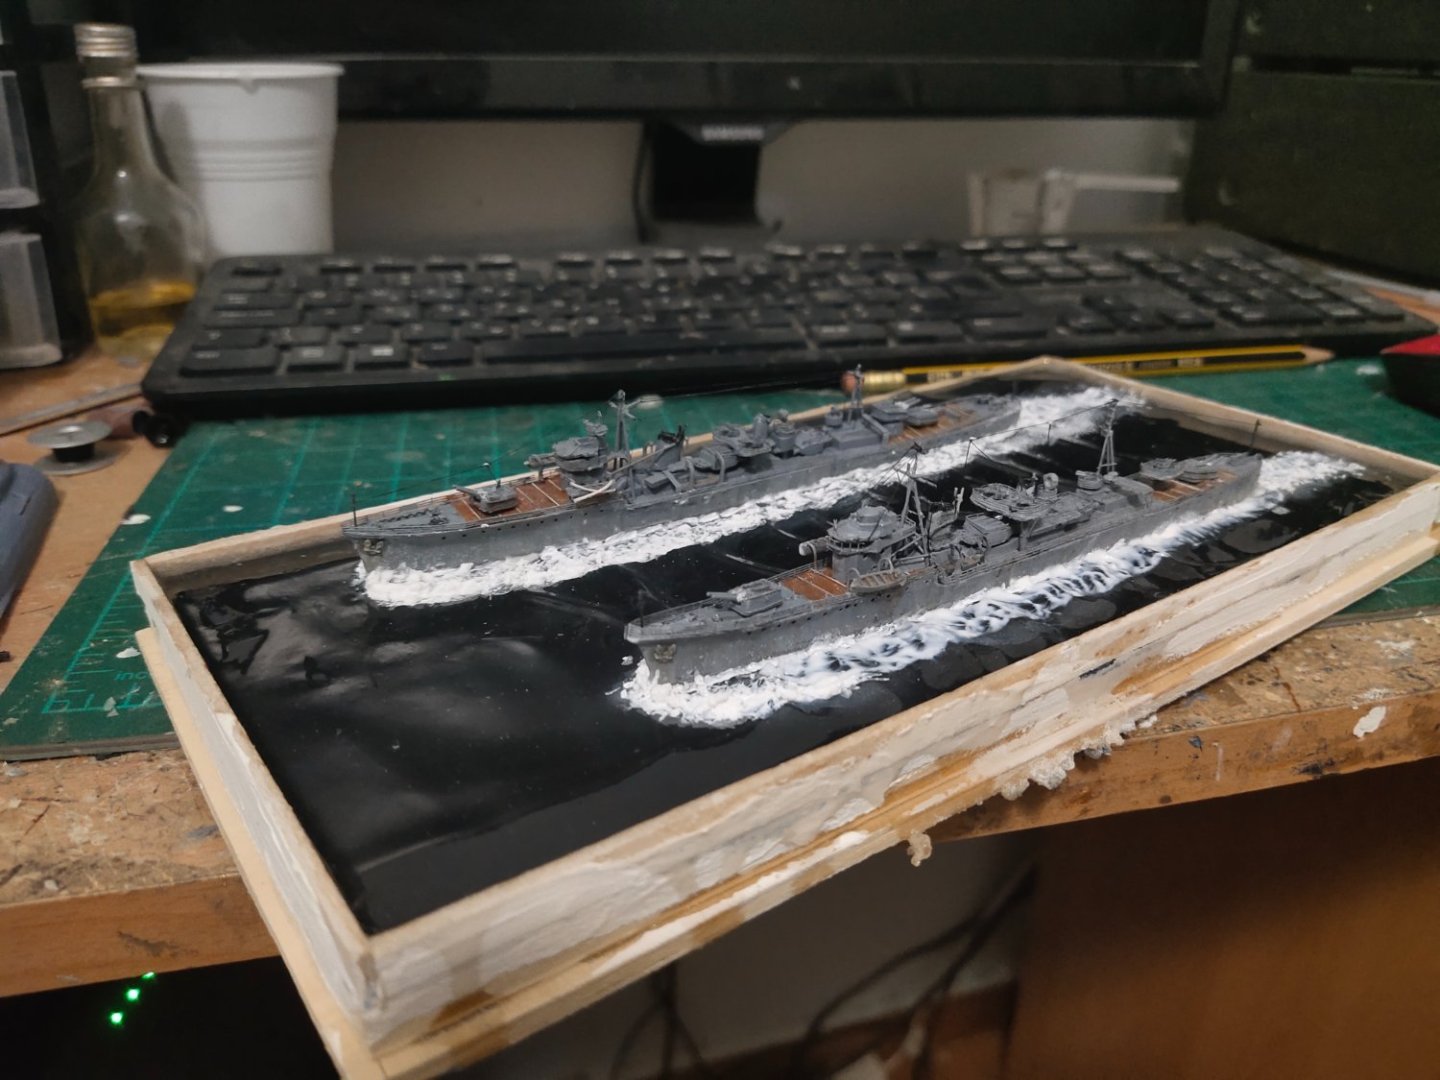
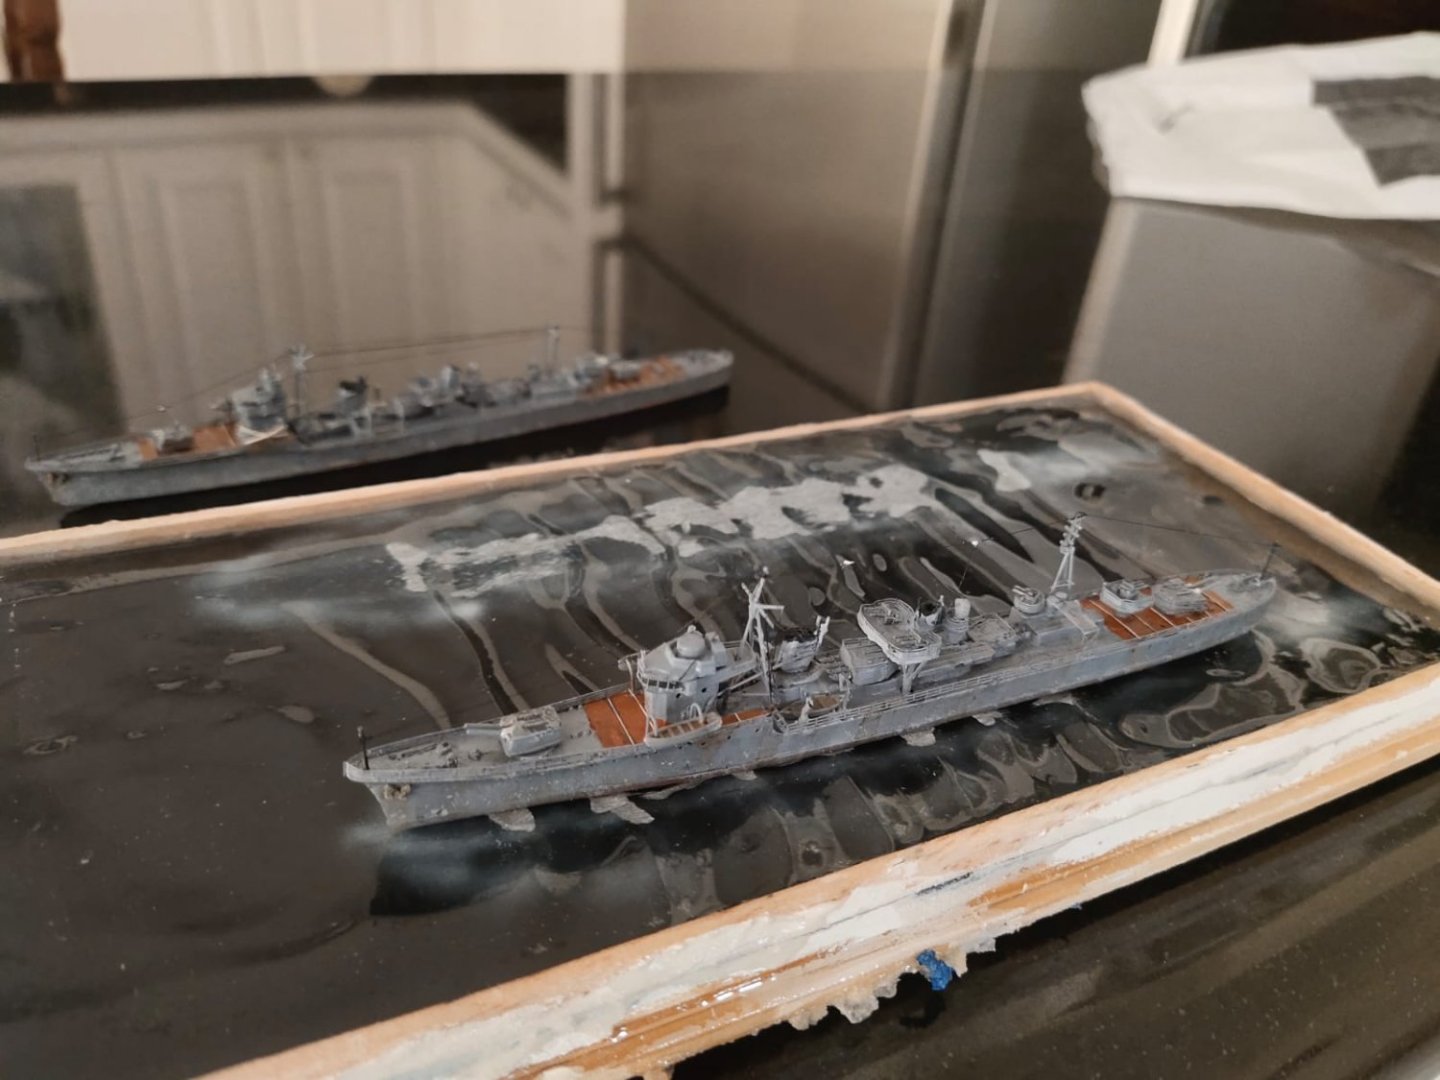
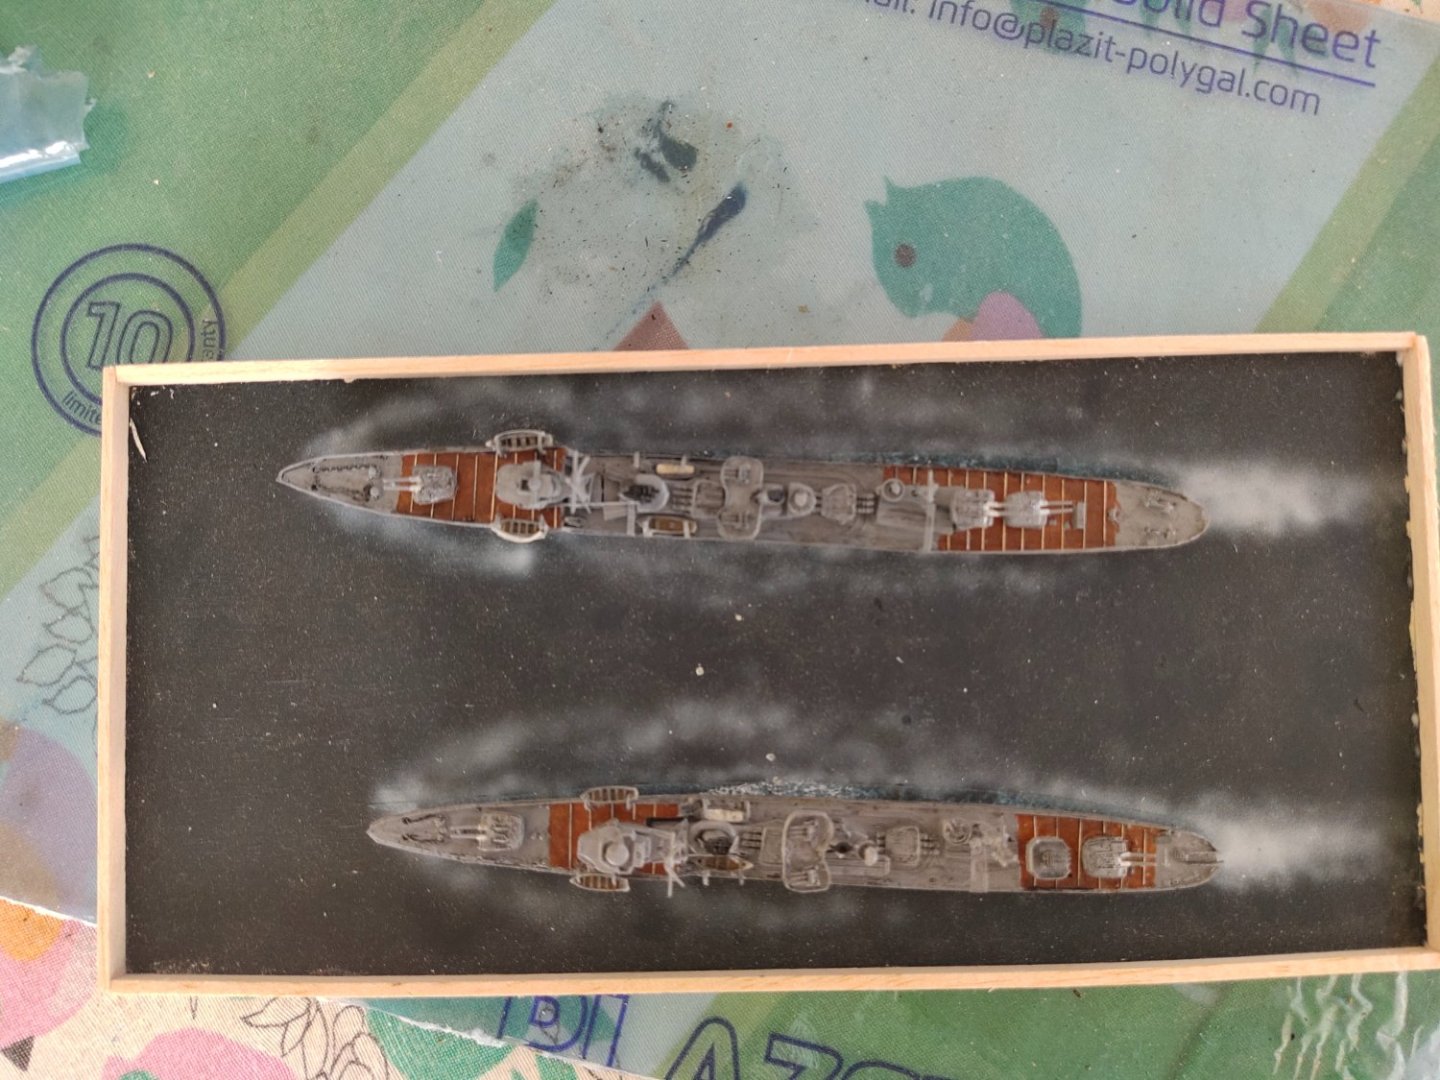
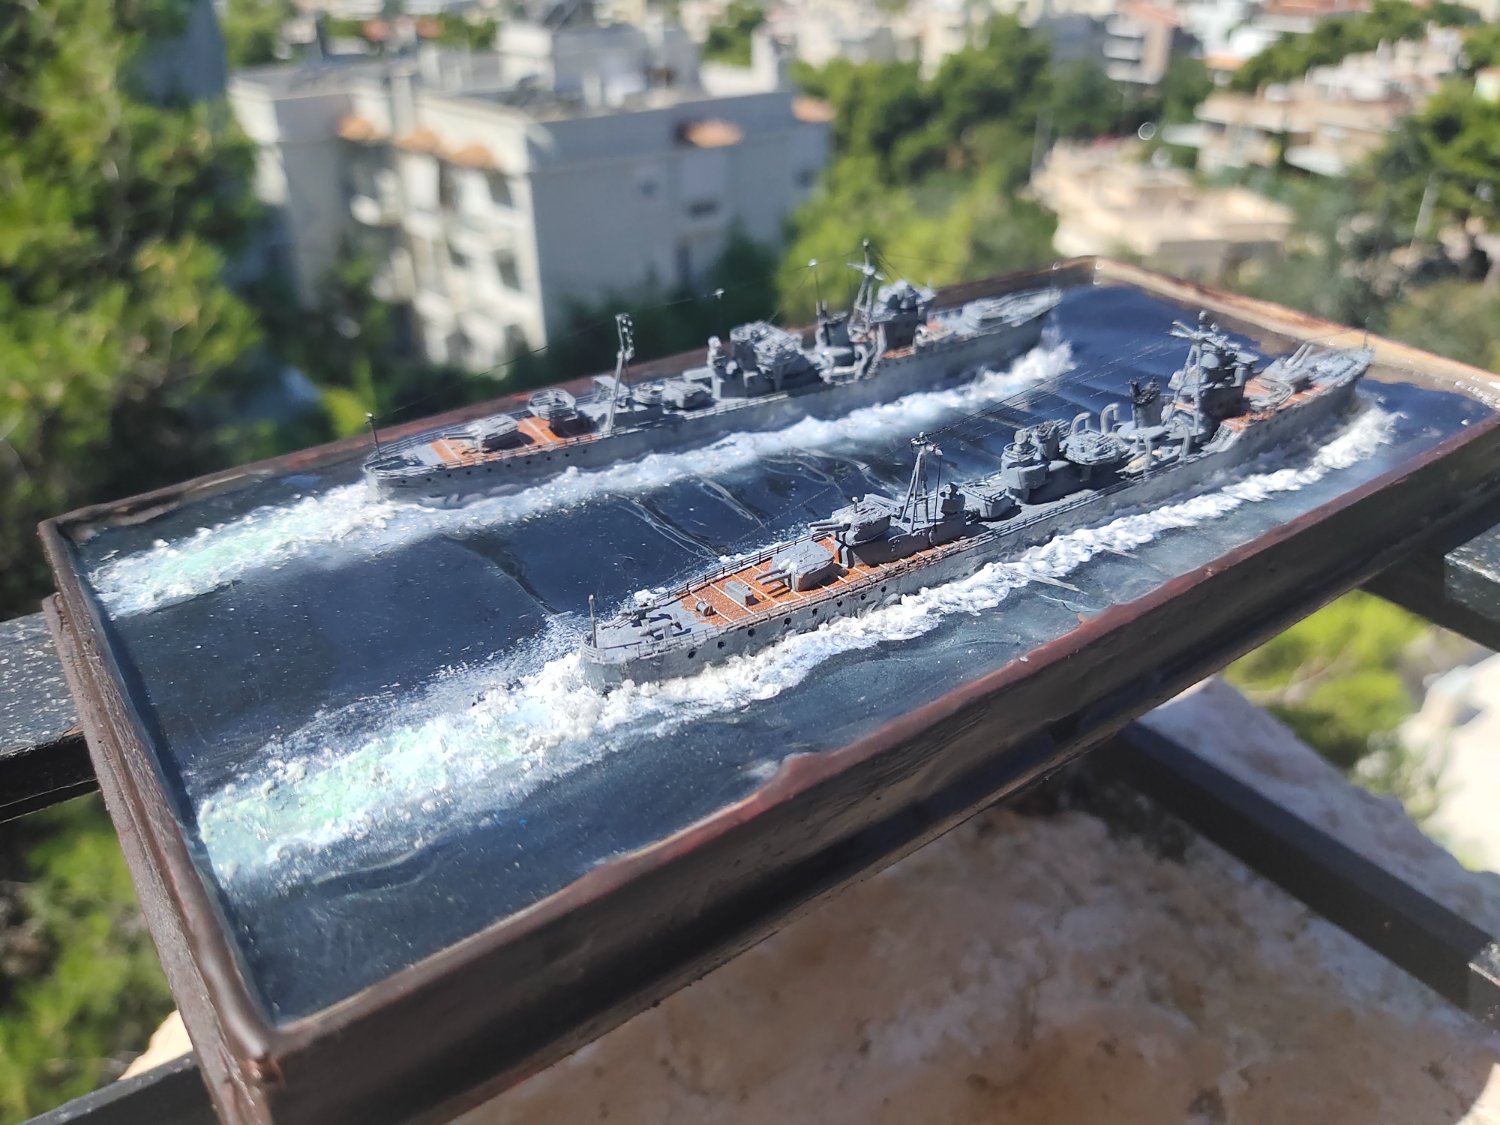
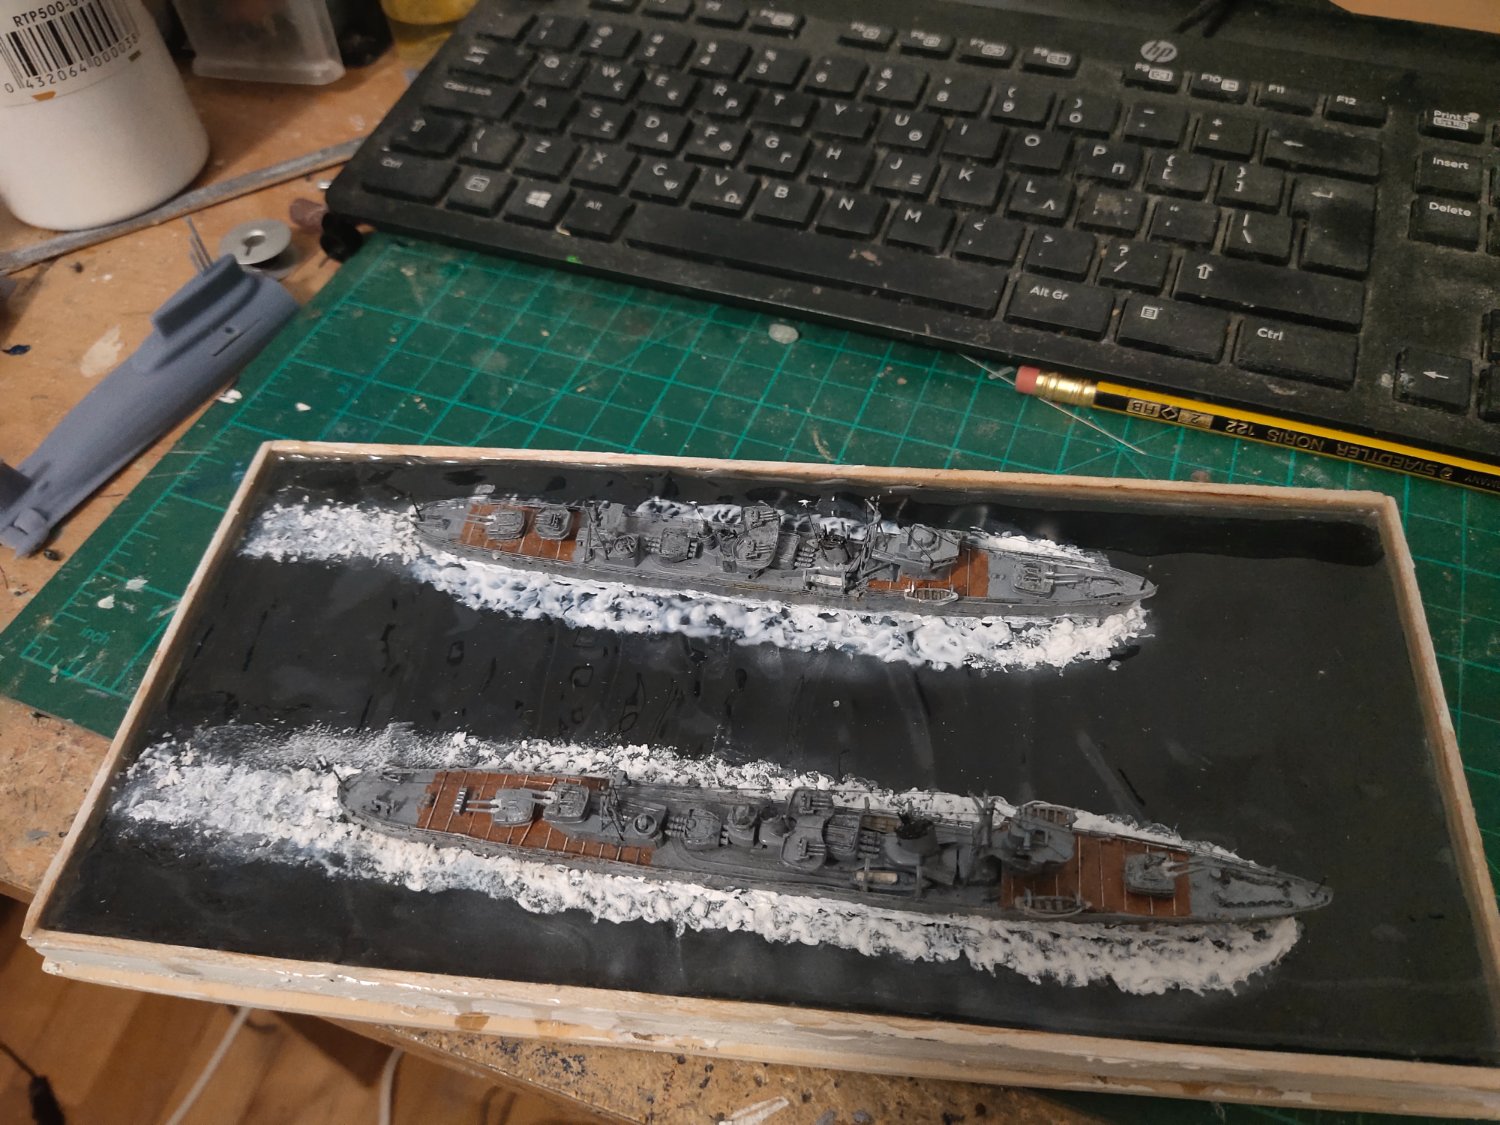
Two different approaches. For the bottom one I used home made snow effect for the waves. On the upper one same for the rear wakes only. For the sides I used gel medium. Tomorrow it will be transparent. I will attempt to paint it with 0000 brush and airbrush. cotton + PVA was not preffered this time something more fluffy was desired therefore I used snow foam. Also I have noticed that cotton balls are not pure white and dont know how to paint them. So when this is finish there will be two different results in the same base. The big success in this attempt was the wavy sea. But for the wakes I need to improve my airbrush skills I'm very clumsy on this, having destroyed 2 and just got a 3rd one.

- 360 replies
-
- 10
-

-

-
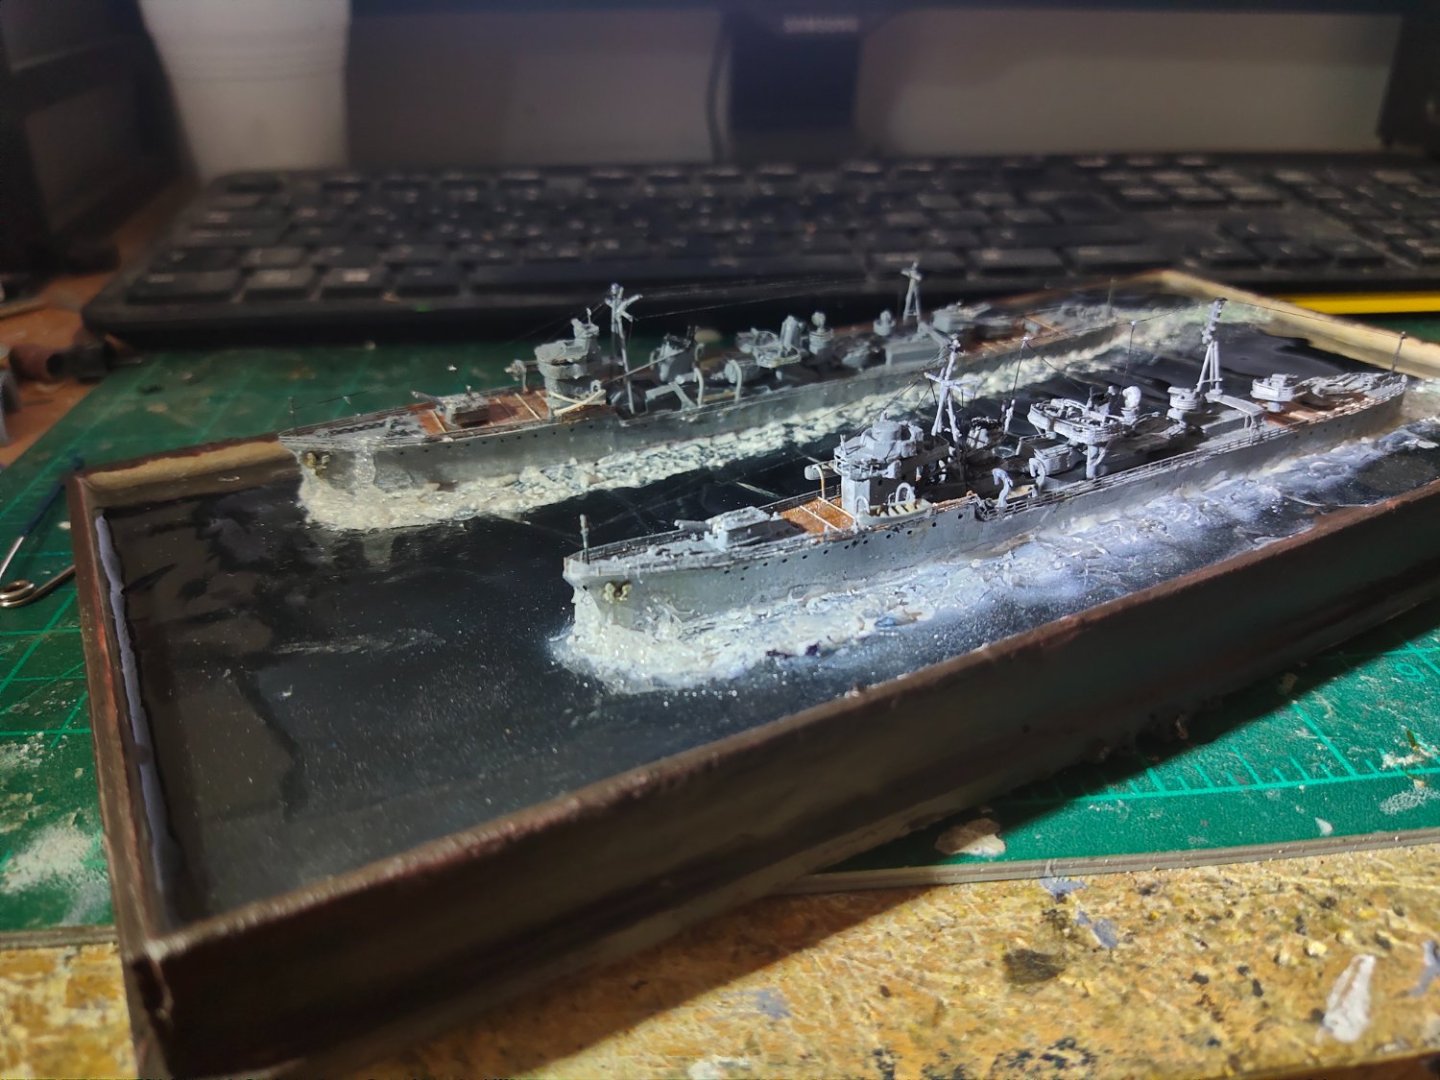
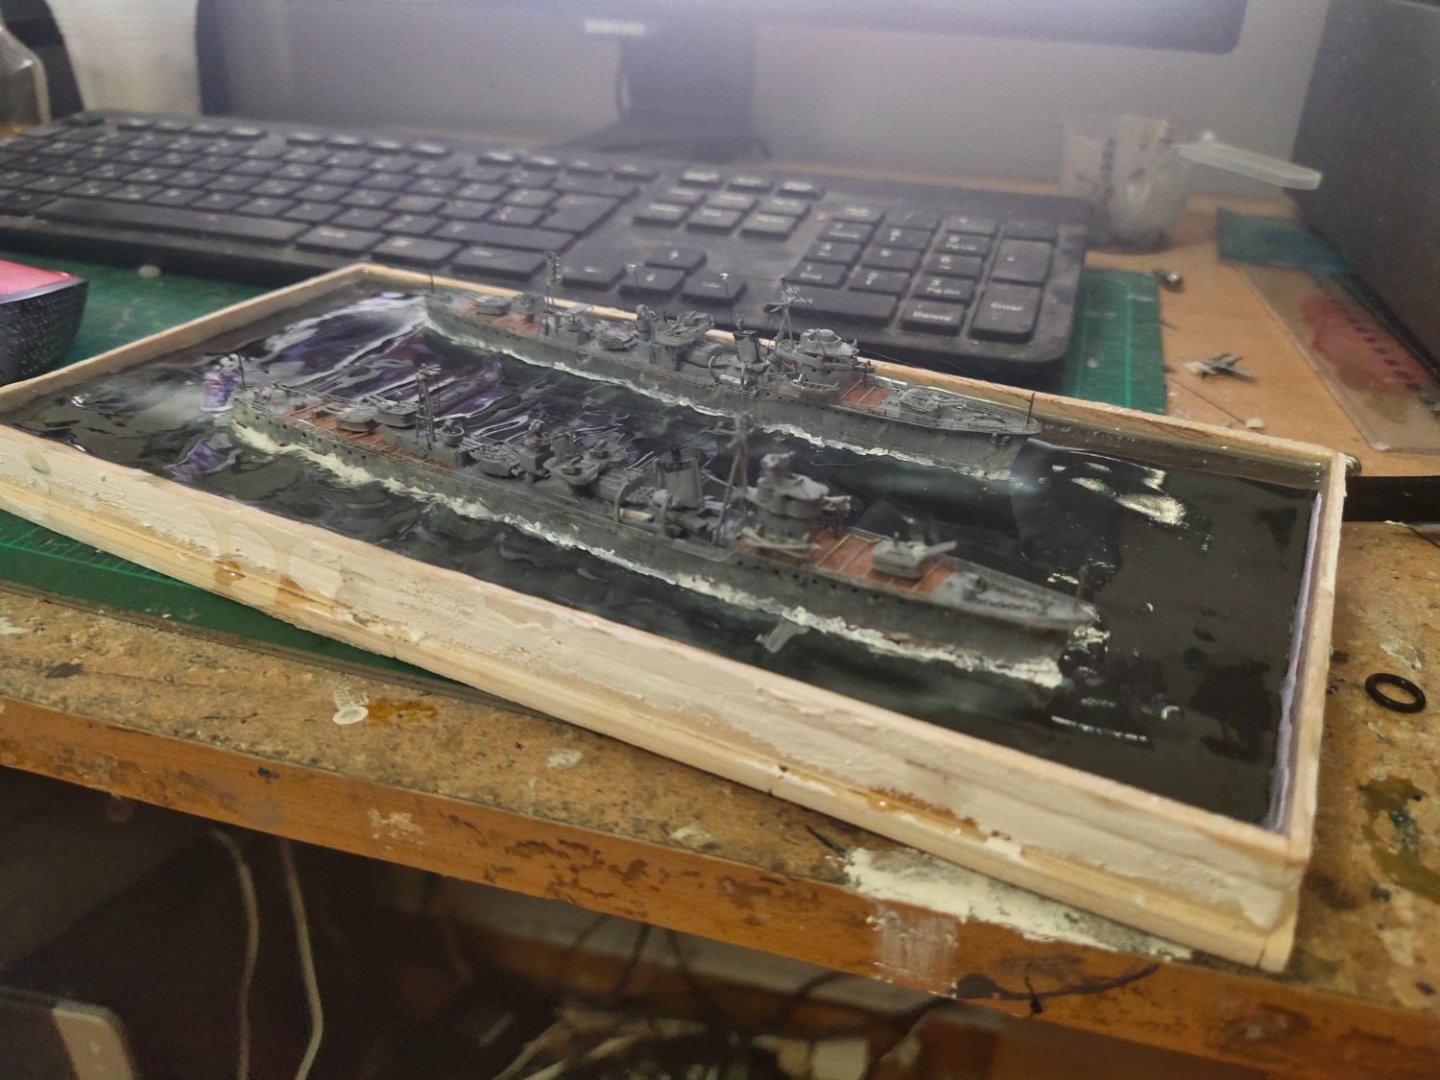
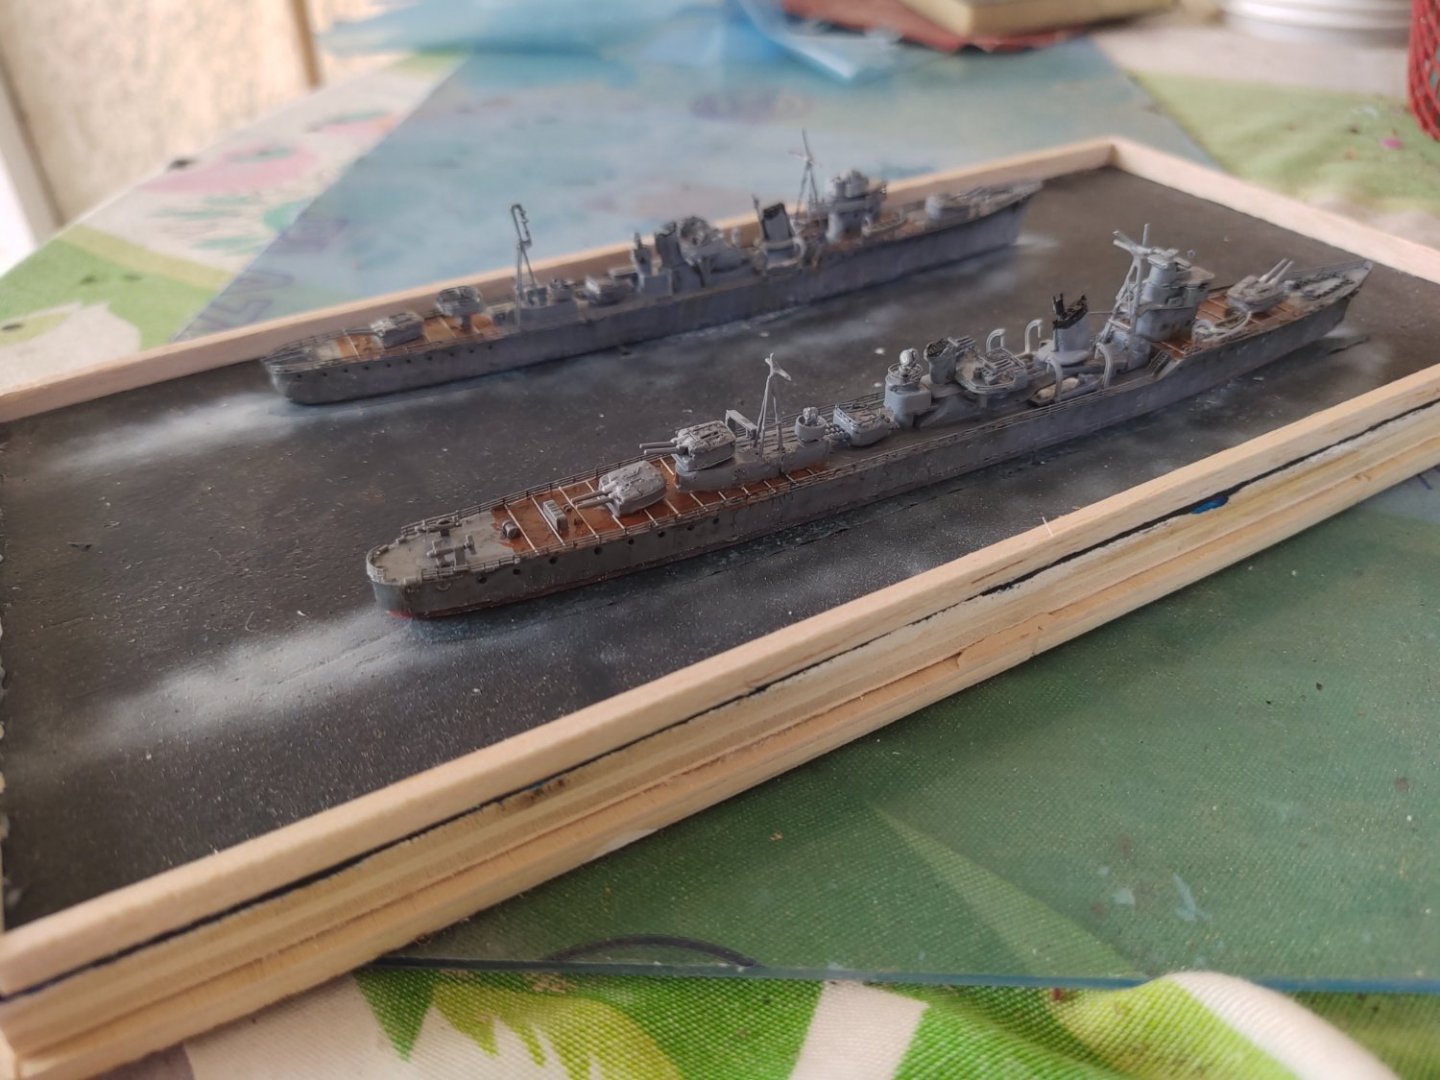
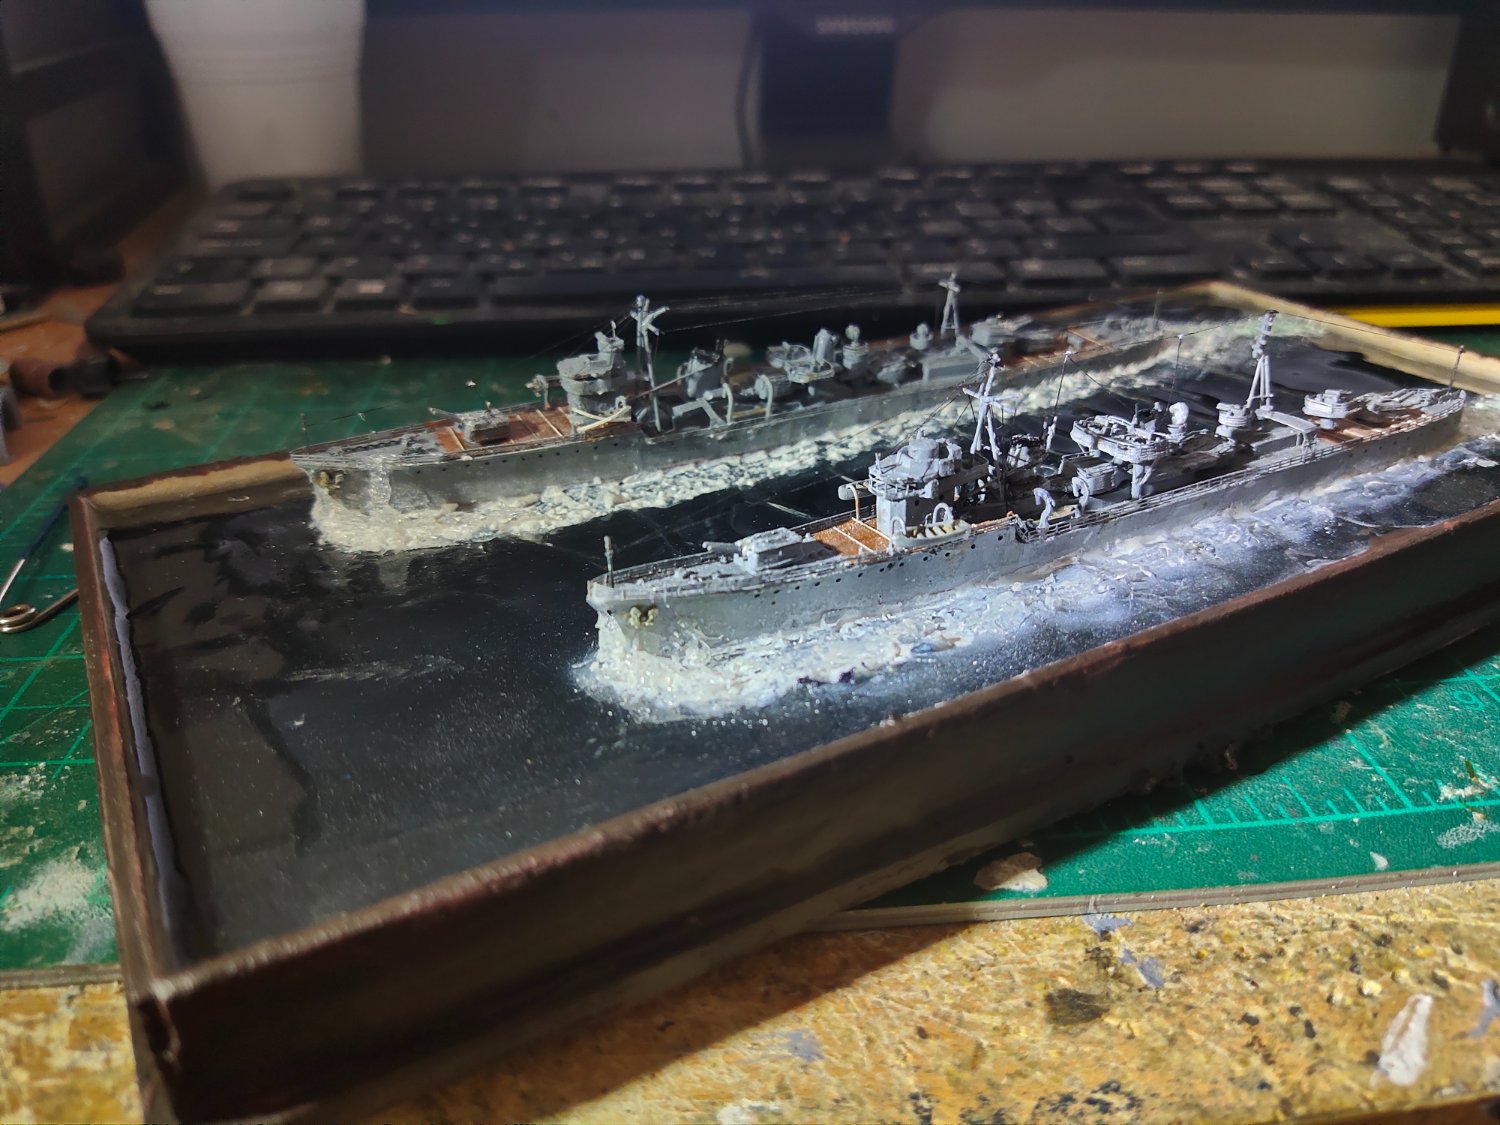
Sculpting the resin wasn't the best experience. Lots of dust and a constant fear that dremel tool might slip and damame the surface. Which happened in a few cases. But I think this will be covered by the wakes I guess. Ships were put in place gap filled with acrylic putty and small gaps with thick paint. At the lower ship on the right side you can see a few thin scratches caused from my very thin tip of the tool. They look like splashes. Maybe set up a small experimental resin base in the future and see if I can draw some wave lines on it


-
Thanx. I am giving a great effort on seascape so I can cover the imperfections than can't be corrected on these old models. So I can't get a satisfying result . Also I try every time to use a different approach. Next built will be entirely different with other materials
-
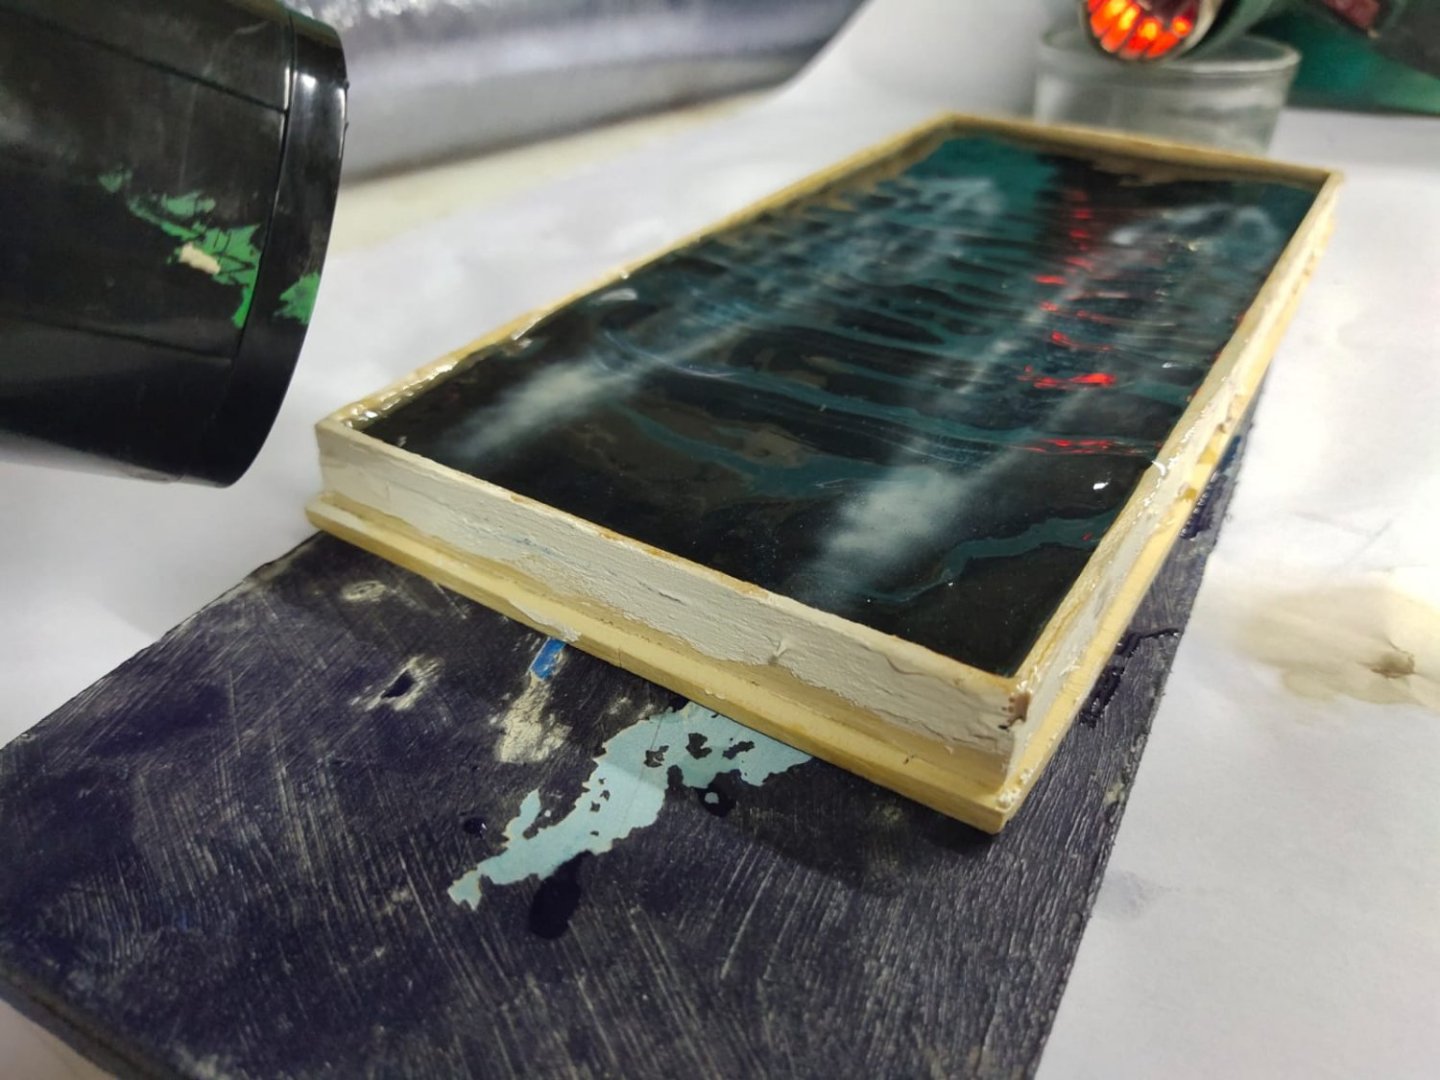
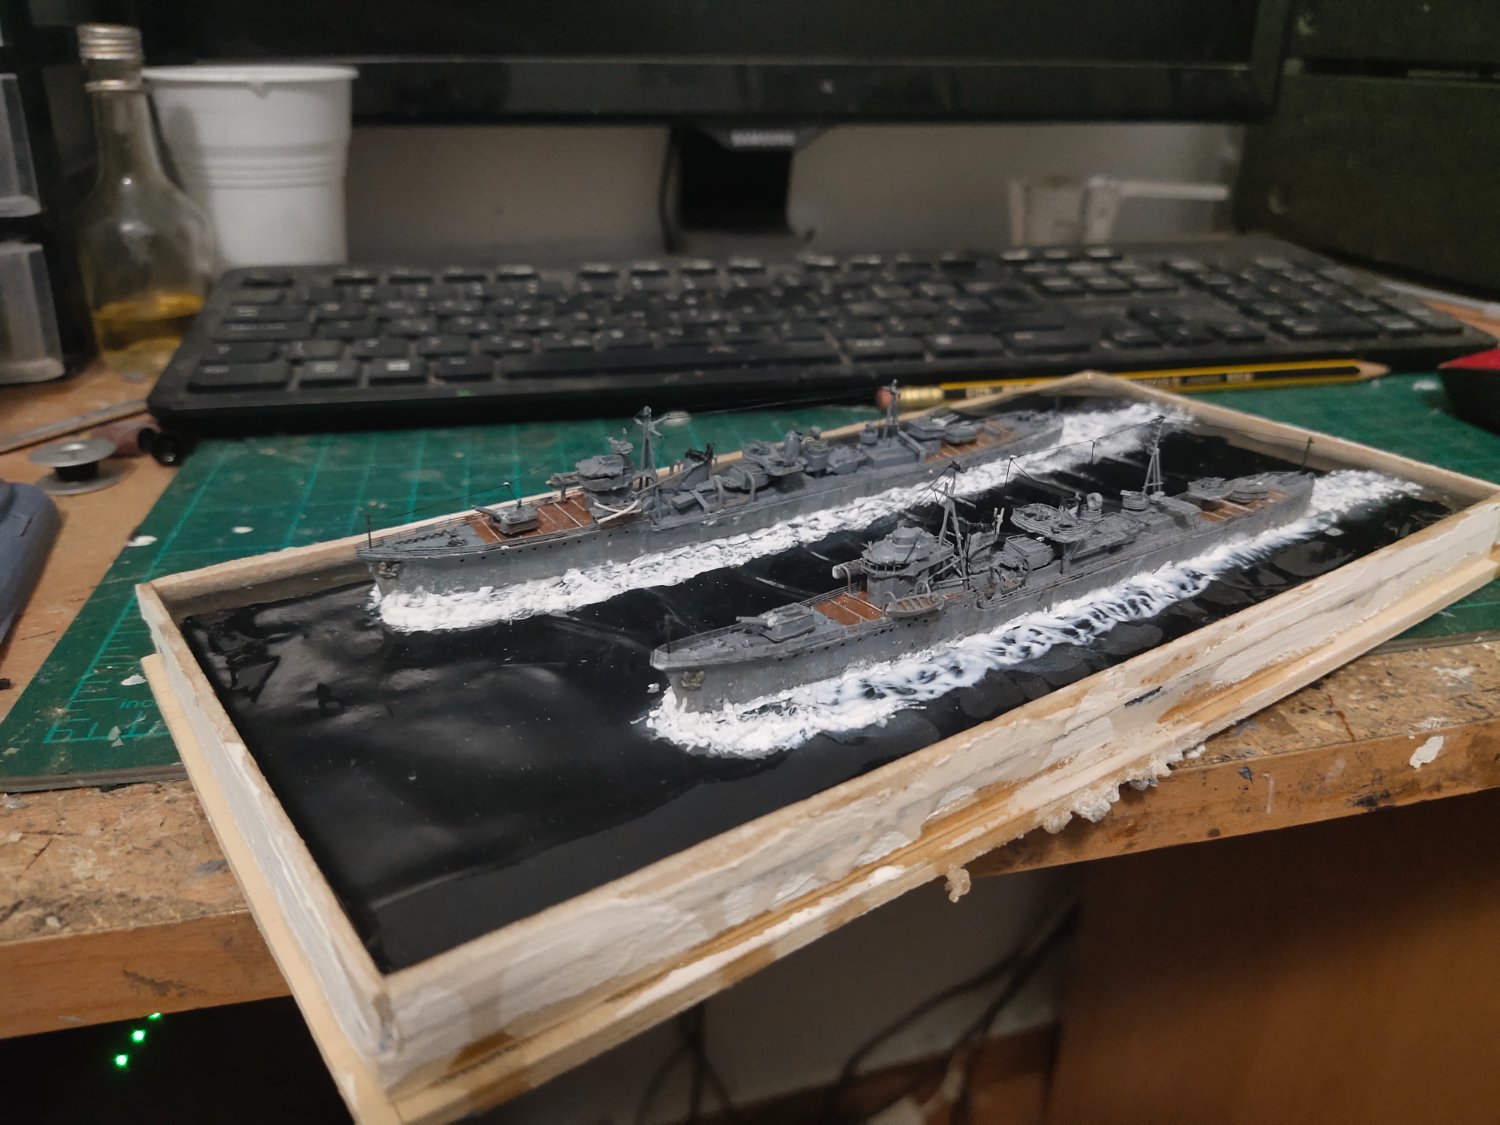
Time for the seabase First i used some wood putty to make sure that there will be no resin leak. My first wavy resin sea failed lets see now. This time i am using a fast drying resin, curing time aprox 40 min. First i measured the volume, and filled 80% full about 80 ml. ,waited about 10-15 minutes. Then took a hair dryer while having a heat gun on my other hand. The dryer gave the desired wave shape while the heat gun provided extra heat for rapid drying. At first resin was too liquid some spilling was inevitable. Later it dried and caused a sticky base. But far less than previous time. Heatgun was reduced to lower scale as on full scale smoked the resin a bit giving me a bath of cold sweat. But seemed that no damage has been done. I continued working with both hands and as the mixture got thicker i reduced the blowing distance Not that at the moment that this photo was taken the black hairdryer on the left died from overheating. Its just present for demonstrating purpose. Fortunately started working again. After almost an hour resin got thick but i still applied heat for another 30 minutes. This time with hairdryer only and with short brakes. I took it upstairs let it rest overnight and next day i inspected it The wavy effect has been achieved and the uneven sea level is also welcomed. Some dust spots appeared remind me another rule. Everything around must be very clear during process as well as tools, cups, mixing spoons etc. Now the other challenge is to level the surface so ships can sit properly. You see putting the models while curing the resin would have disastrous effects caused of the excess blowing and heating. The dremel tool seems to sand resin well, did some work, will do the rest tomorrow
.thumb.jpeg.d4638f44aff5d36a6891af716f7d46fa.jpeg)
-
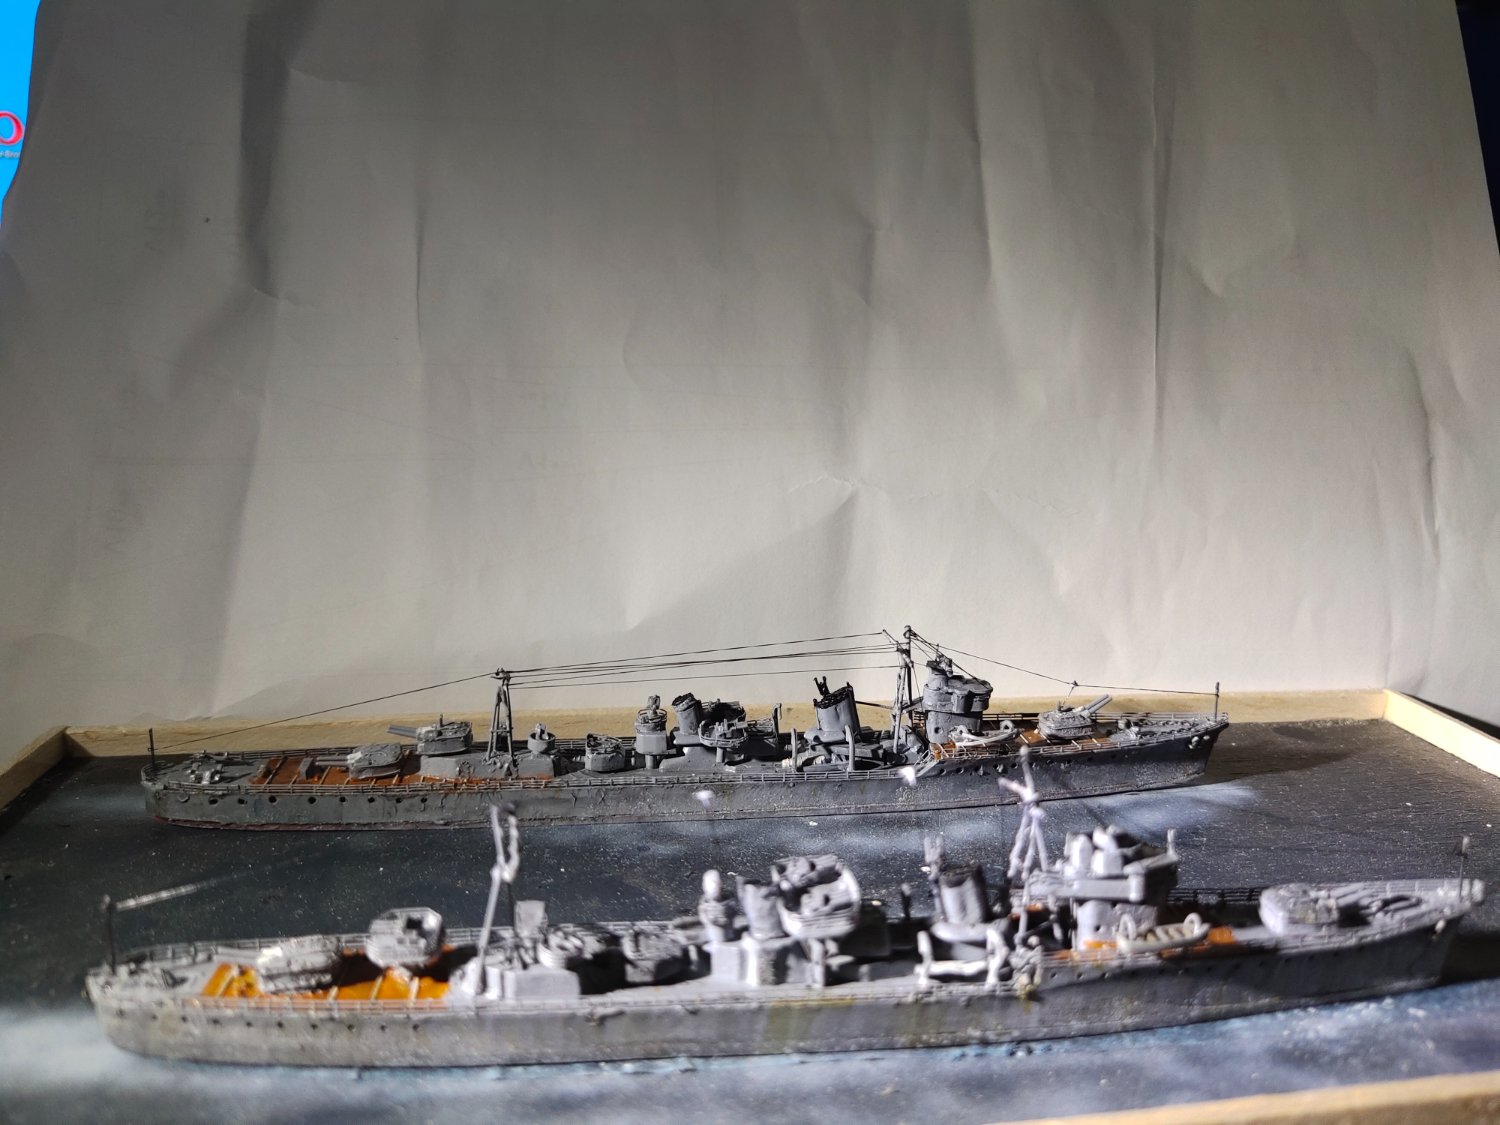
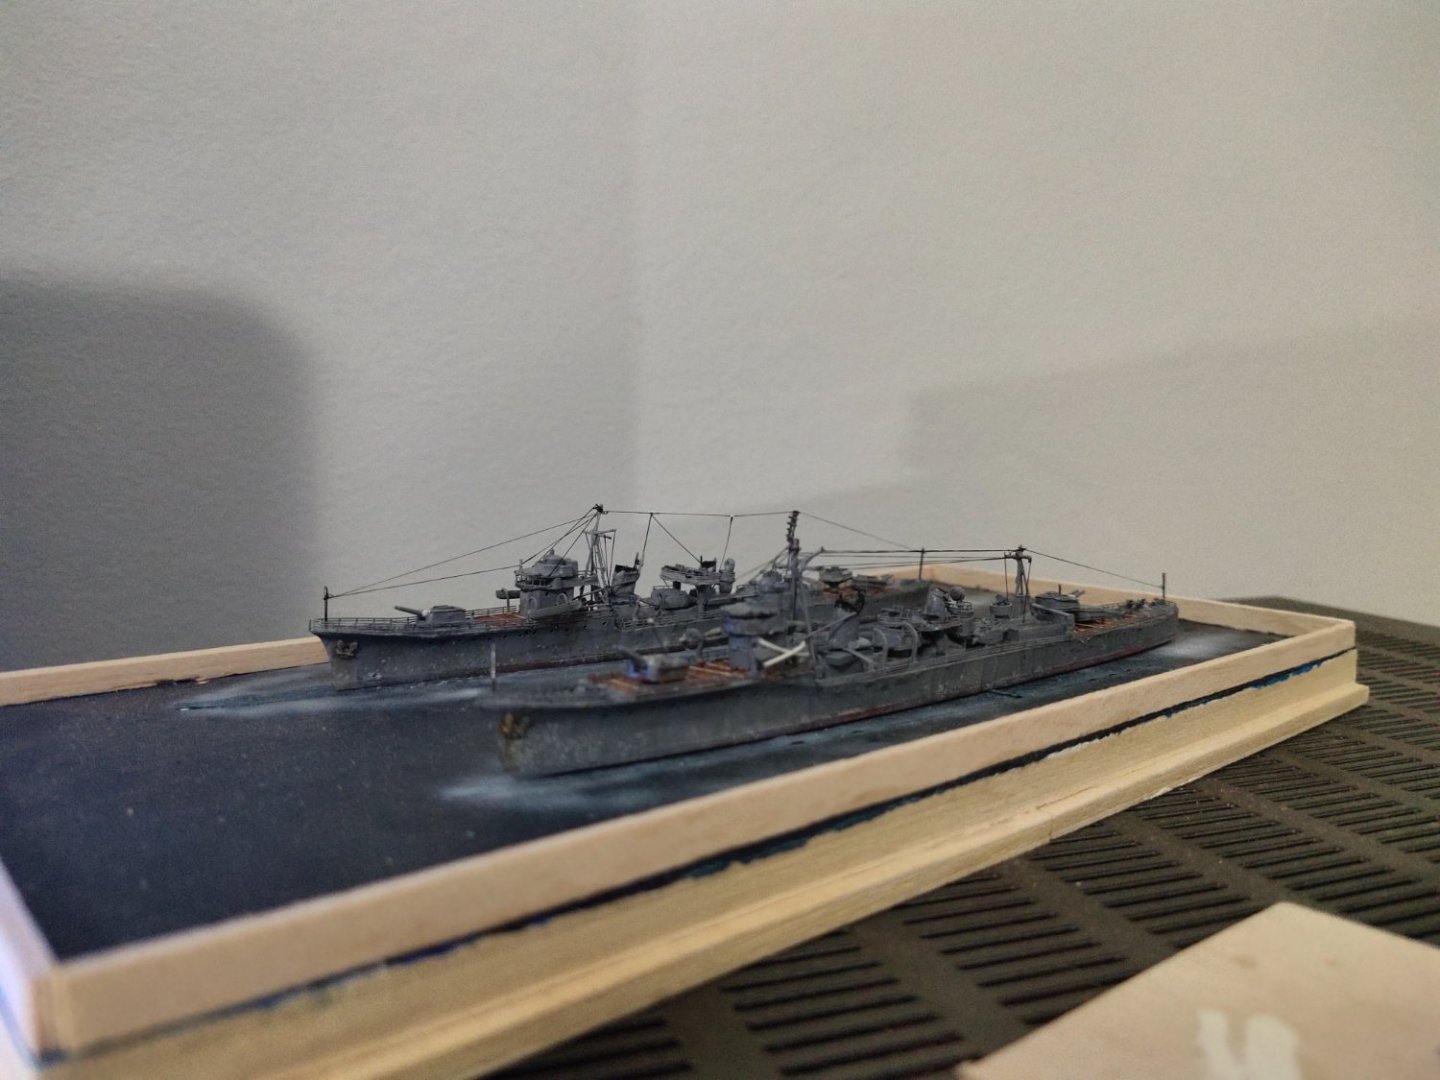
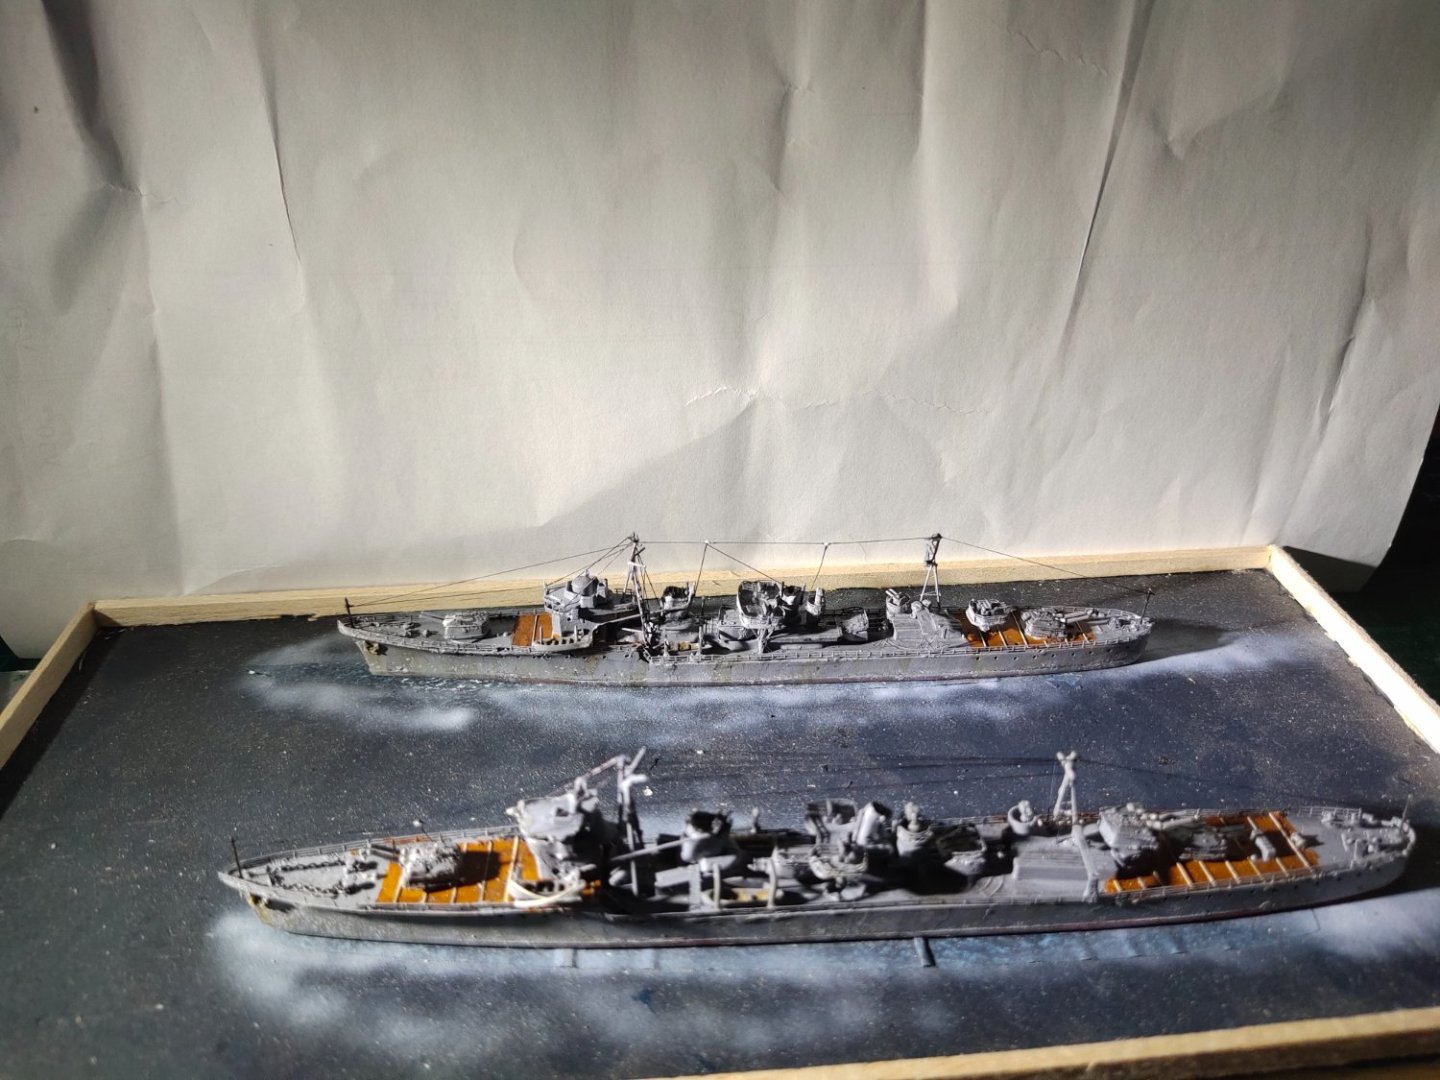
Rigging job is done. In IJN ships actually is never done but cause of the scale and the size of the models I stick with the basic work. Took a pic with white background so it can be more visible. Taking good pics is another art. I even used the beauty mode, lol

-
the printing lines on the lifeboats is a great success
- 460 replies
-
- 6
-
-
- Finished
- Flower-class
- (and 1 more)
-
if you shop overseas you can try Amati's website as well as Polish RB Models through Polish websites at good selection and prices
- 460 replies
-
- 3
-
-
- Finished
- Flower-class
- (and 1 more)
-
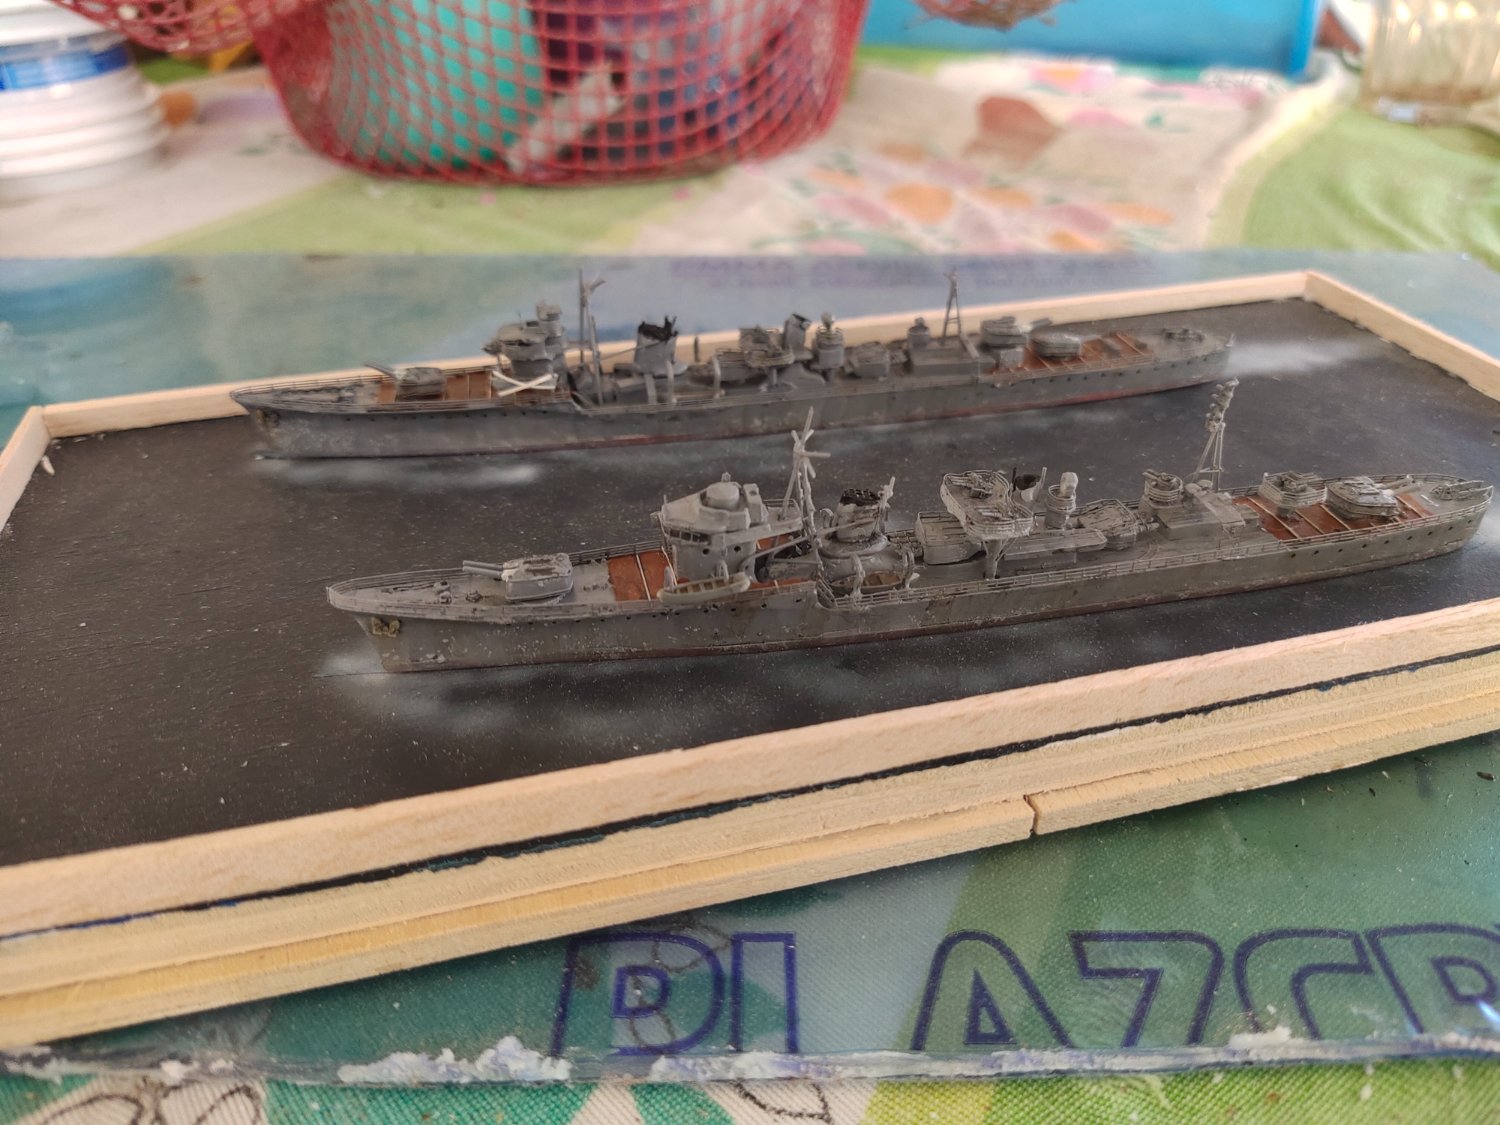
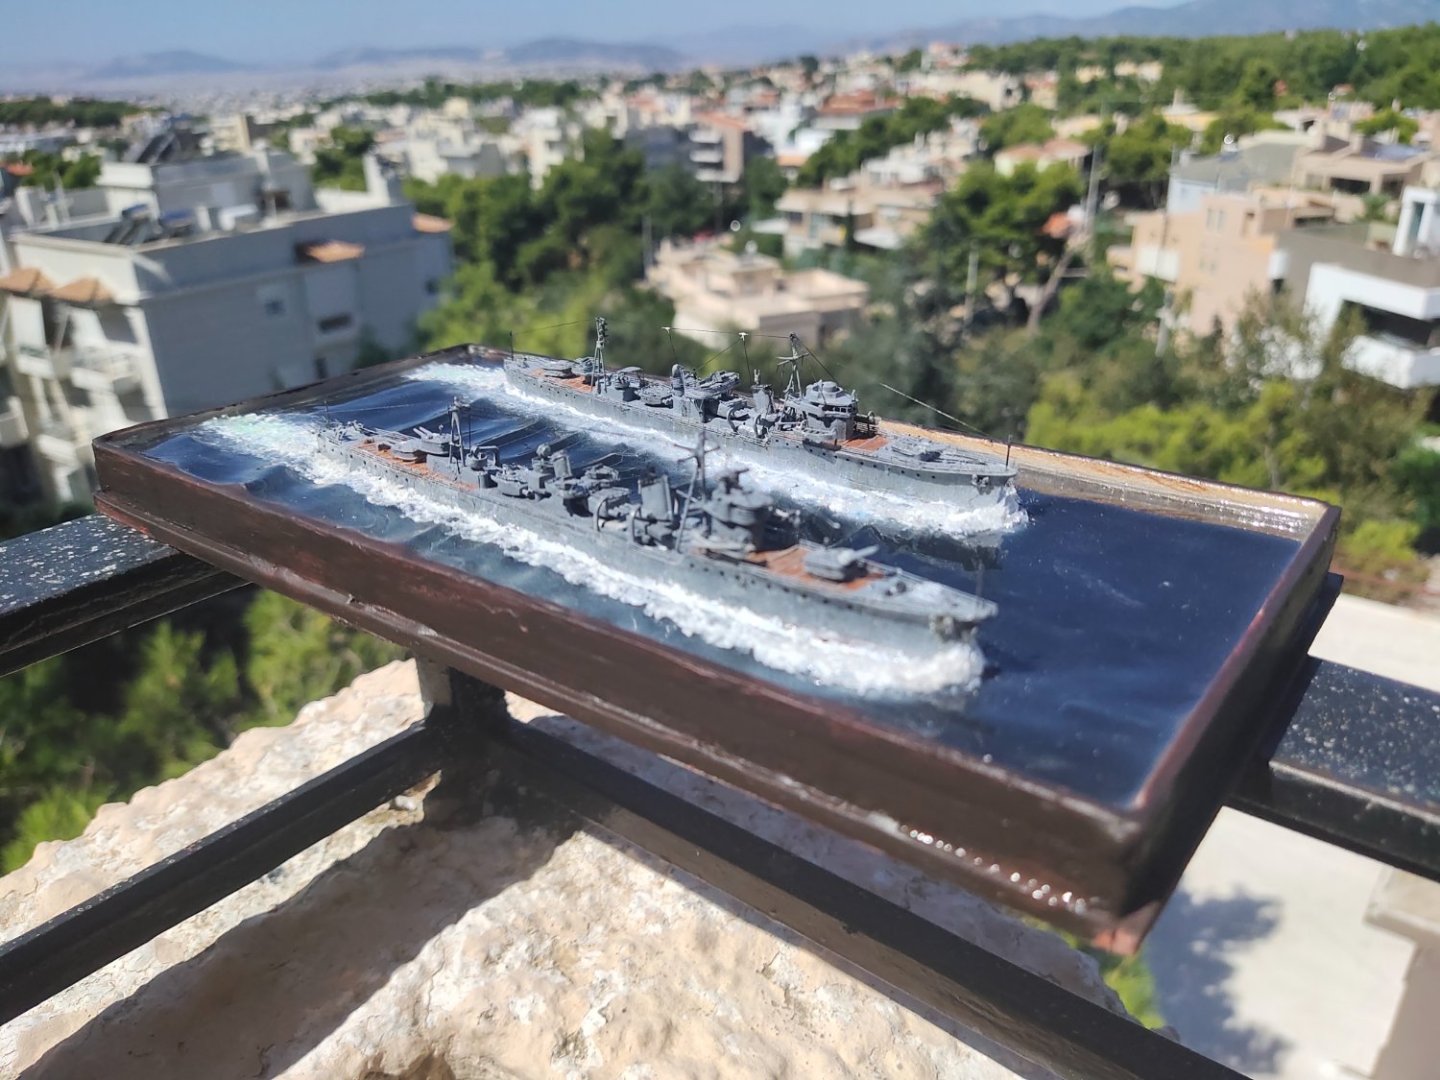
Both models are done. Weathering was light to moderate. Some black wash, light rust and some chipping. Ready for another painful season of rigging.


.jpeg.de6b68861ae61809b7b87d15ec4c15ef.jpeg)


.jpeg.4d6930a2fdb0cc2962200021b0c529db.jpeg)