Mirabell61
-
Posts
7,422 -
Joined
-
Last visited
Content Type
Profiles
Forums
Gallery
Events
Everything posted by Mirabell61
-
 Thank you very much Hartmut, I`ll be happy if it is of helps to you with your next rigging project, especially if ist going to be a squarerigger Nils
 -
Lawrence, Patrick,Bob, David and Ian and all the "likes" Thank you so much for your Kind comments and appreciations...... Lawrence, I`m quite pleased so far theat the planed and intended Details worked out alright Patrick, your encouraging comments are much appreciated, thanks so much Bob, a masterbuilders appreciation......, thanks so much Bob David, Thank you David, I`m glad that you like it Ian, yes I was looking for a suitable Little Fitting with a circumferential groove to pick up the appropriate pendant line. I find These rollers look just right Nils
-
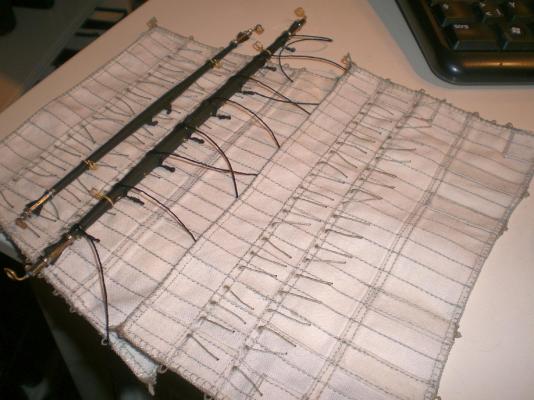
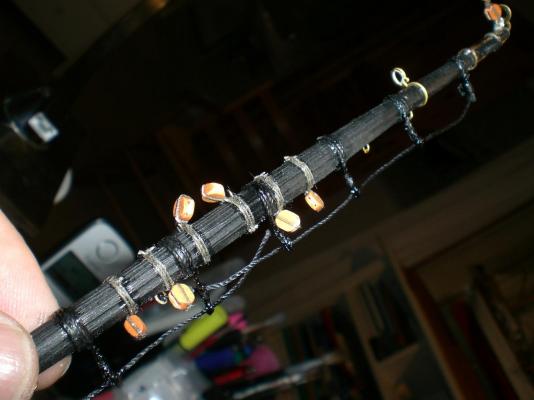
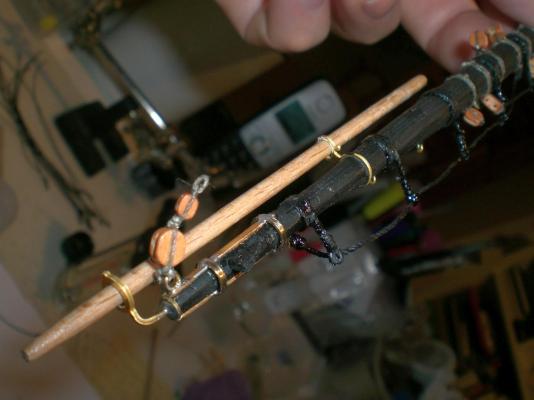
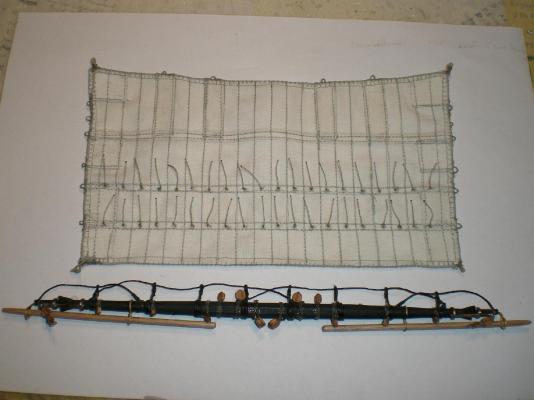
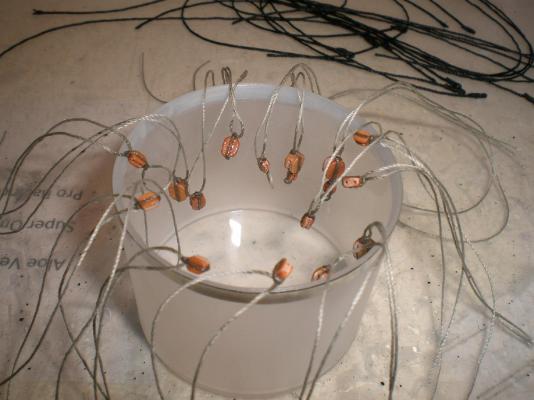
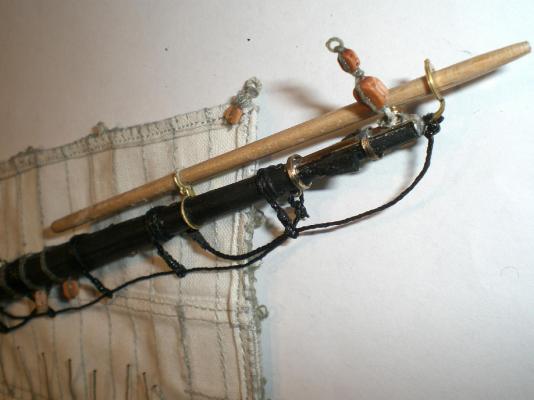
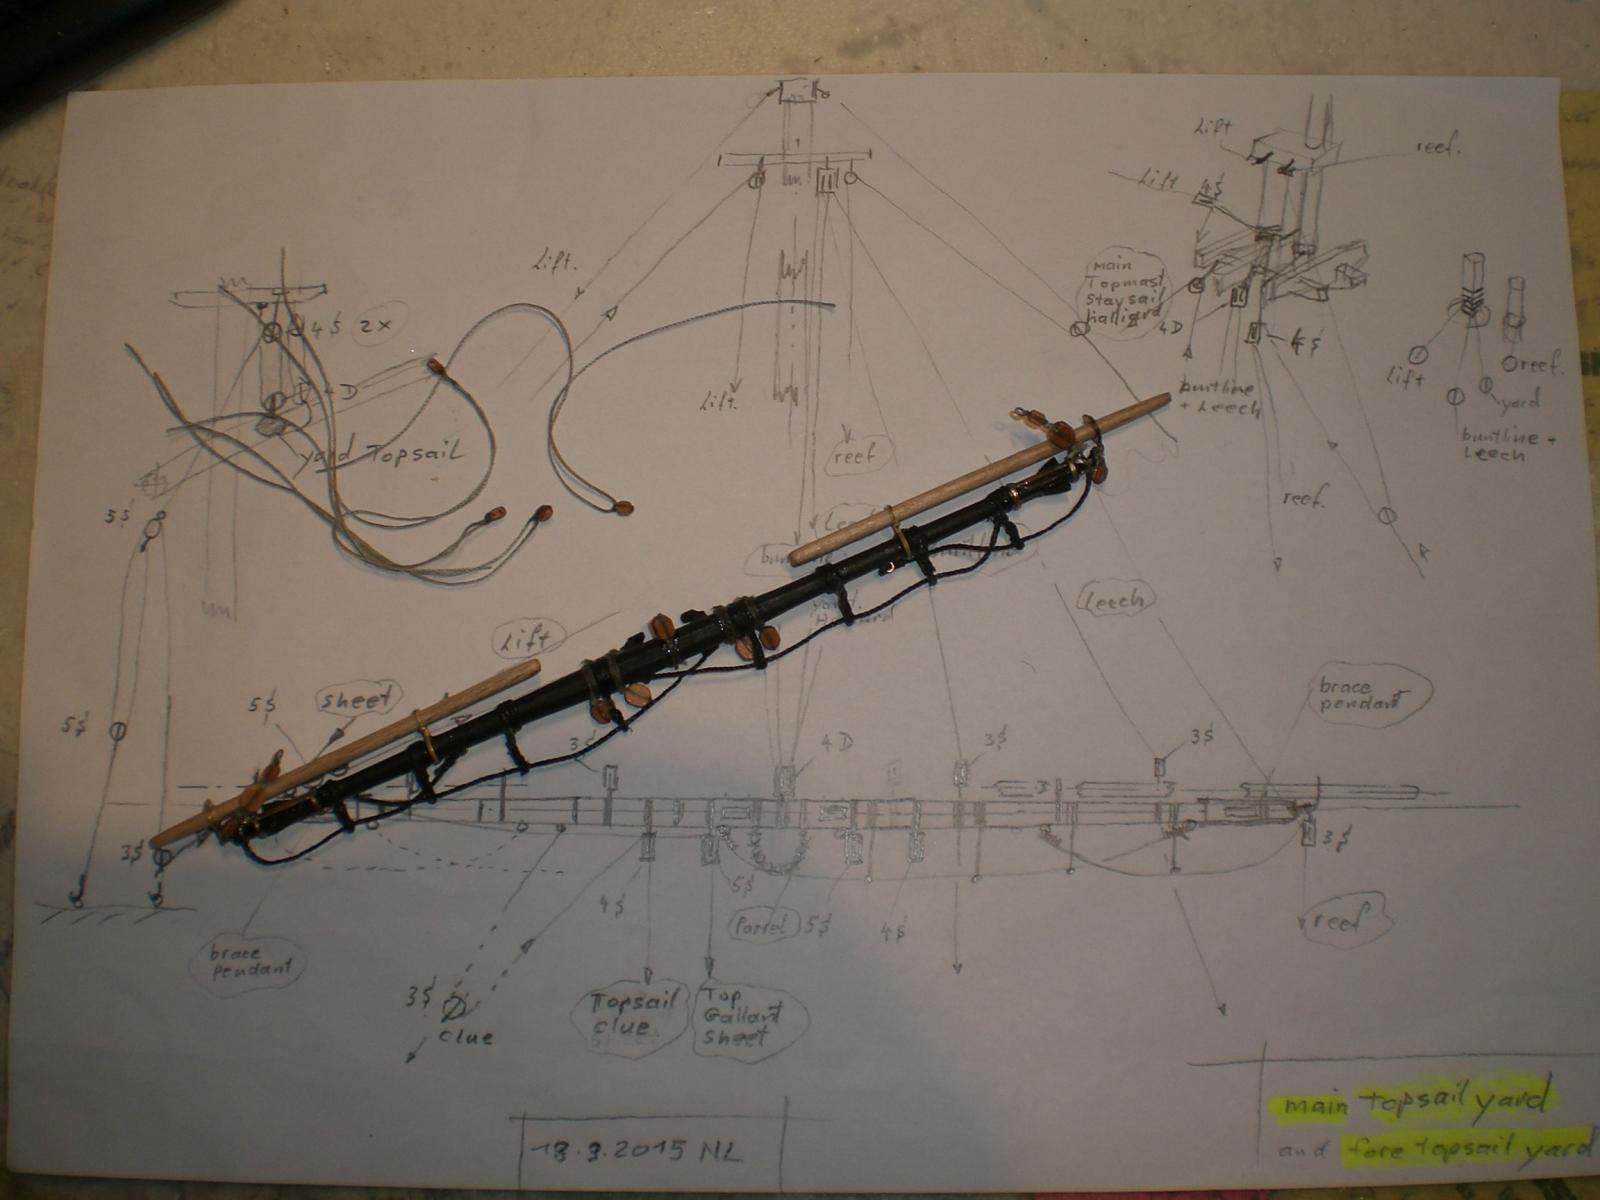
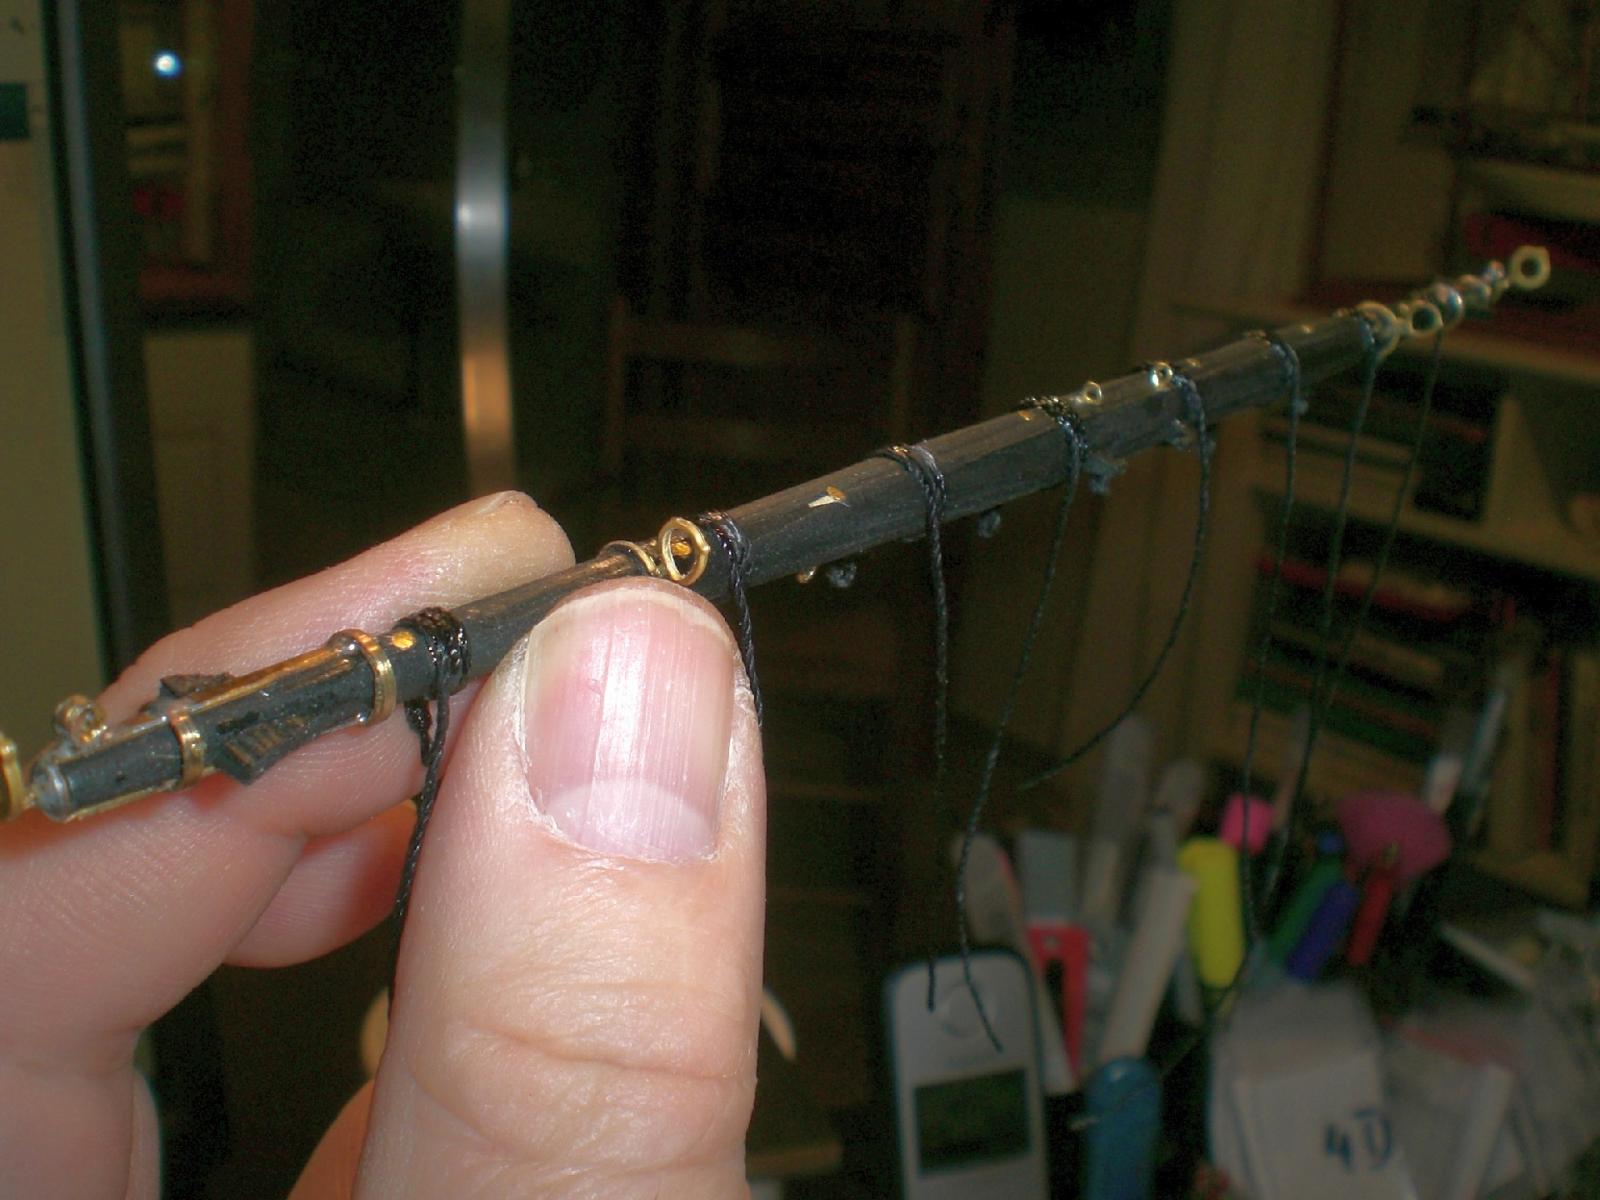
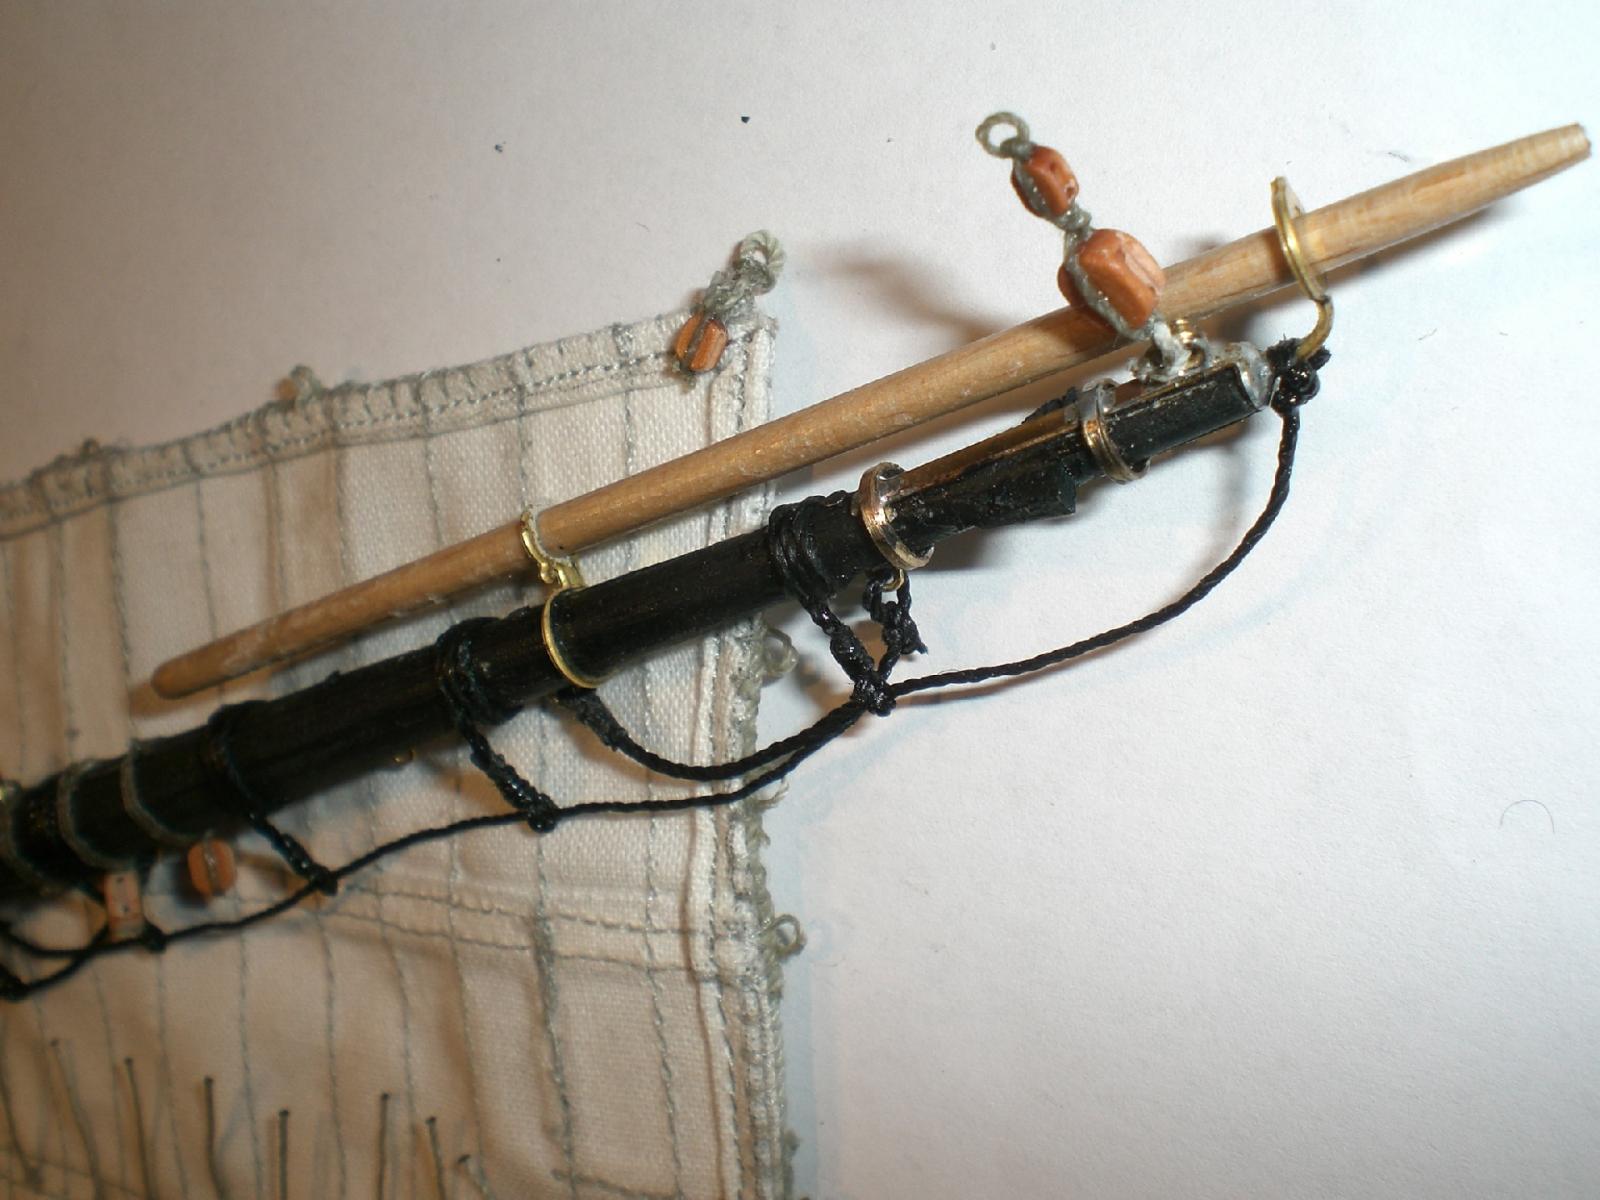
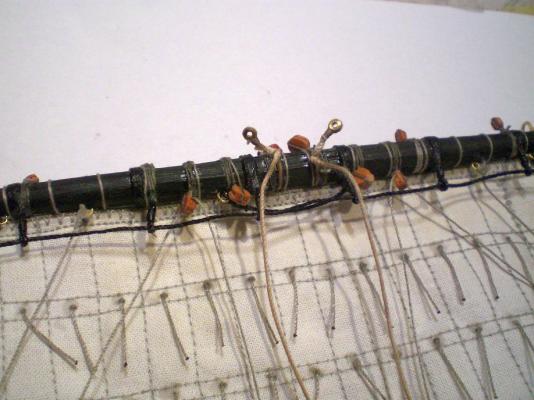
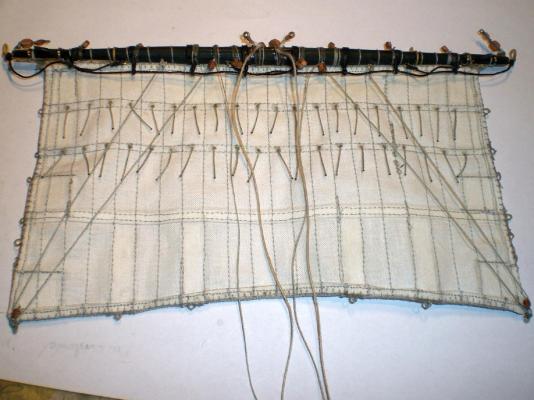
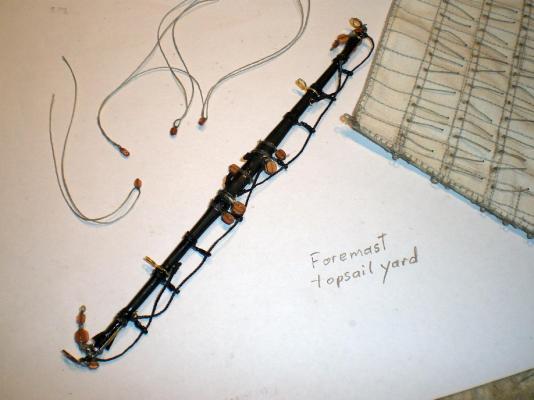
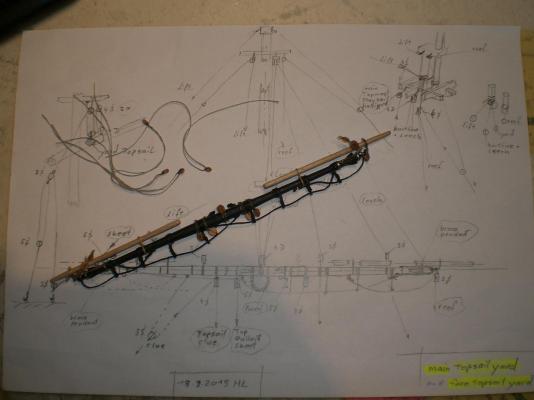
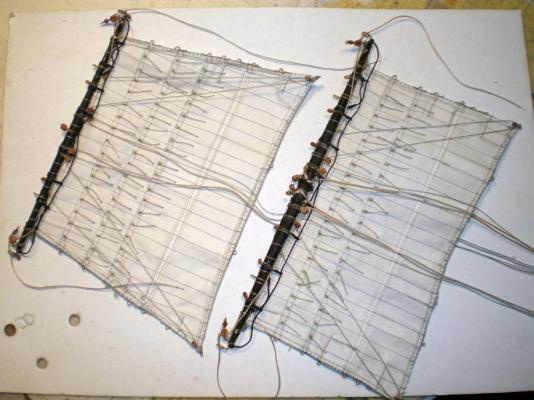
Update here a little update on the foremast topsail and the lower squaresail. My technique for rigging is to pre-rigg the two yards, hang the yards with the attached sail into the slings and then sort out the lines, rigg and belay them to the appropriate terminals. Buntlines, reef lines, leech lines come on a bit later. all the bow lines will go on last, when the braces are set Nils I use mini rollers (diam. 2,5 mm) from RB Models webshop as thimles here thimbles attached for the truss tackles foresail attached to lower yard self explaining..... the scetches for the mainmast yard rigging come very handy again here these two pre-rigged foremast sails are ready for hanging into the slings

-
Cutty Sark by NenadM
Mirabell61 replied to NenadM's topic in - Build logs for subjects built 1851 - 1900
I know Nenad, the correct eyesight is very important. I remember during my early job employments a had to read many commercial fils and specificationn, this ending sometimes in headaches in the afternoon hours. First time I became glasses for compensating (I did`nt recognise I needed them before) was with 32 years, and since then I ca`nt do without. Nils- 4,152 replies
-
- 3
-

-
- cutty sark
- tehnodidakta
- (and 1 more)
-
Cutty Sark by NenadM
Mirabell61 replied to NenadM's topic in - Build logs for subjects built 1851 - 1900
nice nameplates Nenad, I can imagine its not easy to keep a steady hand when applying the golden paint per brush Nils- 4,152 replies
-
- 1
-
-
- cutty sark
- tehnodidakta
- (and 1 more)
-
Gary, an amazing model, neat, clean precise, very well done. I love the color composition you have chosen on all. The dull brick red (not too dominant) goes excellently tother with the light natural wooden deck Nils
-
Thanks Popeye, BTW, why the yellow funnel ? the original funnel is black, which I`m not very fond of, so I Chose Yellow, being next to blue, one of the national swedish Colors, also the bowpost Flyer is not the swedish flag but the town ensign of Gotenburg. The wheelhouse of my model (Bridge) is representing the 1914 version Cheers Nils
-
Carlos, after looking at that picture of the "Bohuslän" I was thinking of adding "eyebrows" over the windows and some of these wooden bumper-lugs hanging outside, when I open the glass case for ammendments next time.... Nils
-
Hartmut, lucky you, to have such a talented sailmaker, regards to your wife she does a great Job on laying out and sewing the sails Nils
-
HMS Alert 1777 by Jaekon Lee - 1/64
Mirabell61 replied to Jaekon Lee's topic in - Build logs for subjects built 1751 - 1800
Wunderbar ! Nils -
This is specialy to thank all fellow builders that expressed their "likes" without comments recently by activating the appropriate button Nils
-
excellent Build Kees, I see, you have amoungst other skills developed yourself to a master of modeling in styrene. I have seen this material once in the shop of a professional modelbuilder for shipyard models Very good work Nils
- 205 replies
-
- 1
-
-
- kw49 antje
- trawler
- (and 1 more)
-
Michael, thank you so much, your Kind comment is gladly appreciated.. The rigging is the first thing to attract ones eye later on, so I`d better put some concentration on it. Also it takes longer than I thought. Trust I would`nt have the Patience to do a rigging for a heavy frigate like "Agamemnon" or "Victory". When all is complete at least I can say that I`ve once tried an 18th century rigging. I admire all those members, for example with their 1:48 scale square riggers where even most the Standing rigging ropes are precisely served...... Nils
-
Hi Popeye, the attaching of the ships Name worked very well, Looks good Nils
- 956 replies
-
- 2
-
-
- andrea gail
- trawler
- (and 1 more)
-
Looks very good Mr. Pucko, Looks like you have overcome the mismatching parts and you are haveing fun again in Fitting out the interior and ist furniture Nils
- 113 replies
-
- 1
-
-
- bohuslän
- nordic class boats
- (and 1 more)
-
HMS Alert 1777 by Jaekon Lee - 1/64
Mirabell61 replied to Jaekon Lee's topic in - Build logs for subjects built 1751 - 1800
That is a beautiful looking model Lee, and as you already mentioned a unique, well done scratch vessel, I like very much Nils -
wonderful stuff Nils
-
Thanks Bob, I told him of your appraisal, and he`ll get an extra jug of Jamaica rum after work today Nils
-
nice clean and accurate work Maury, Nils
-
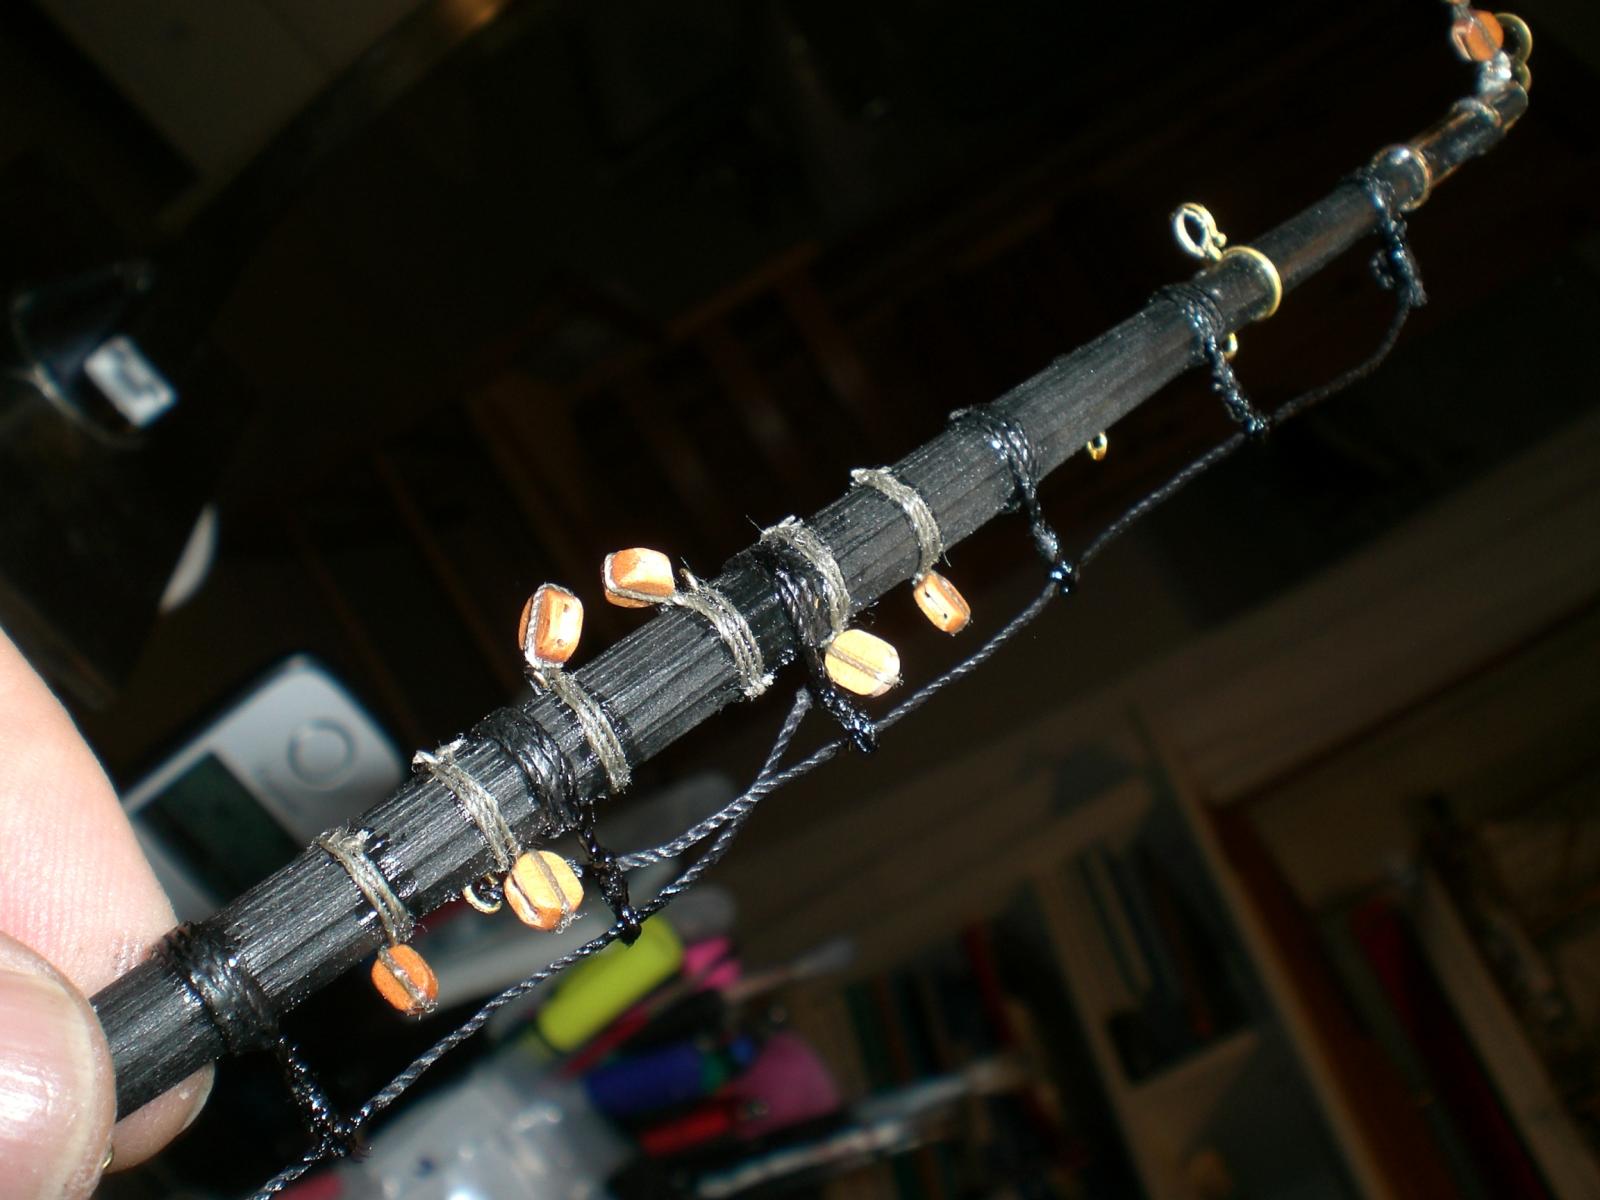
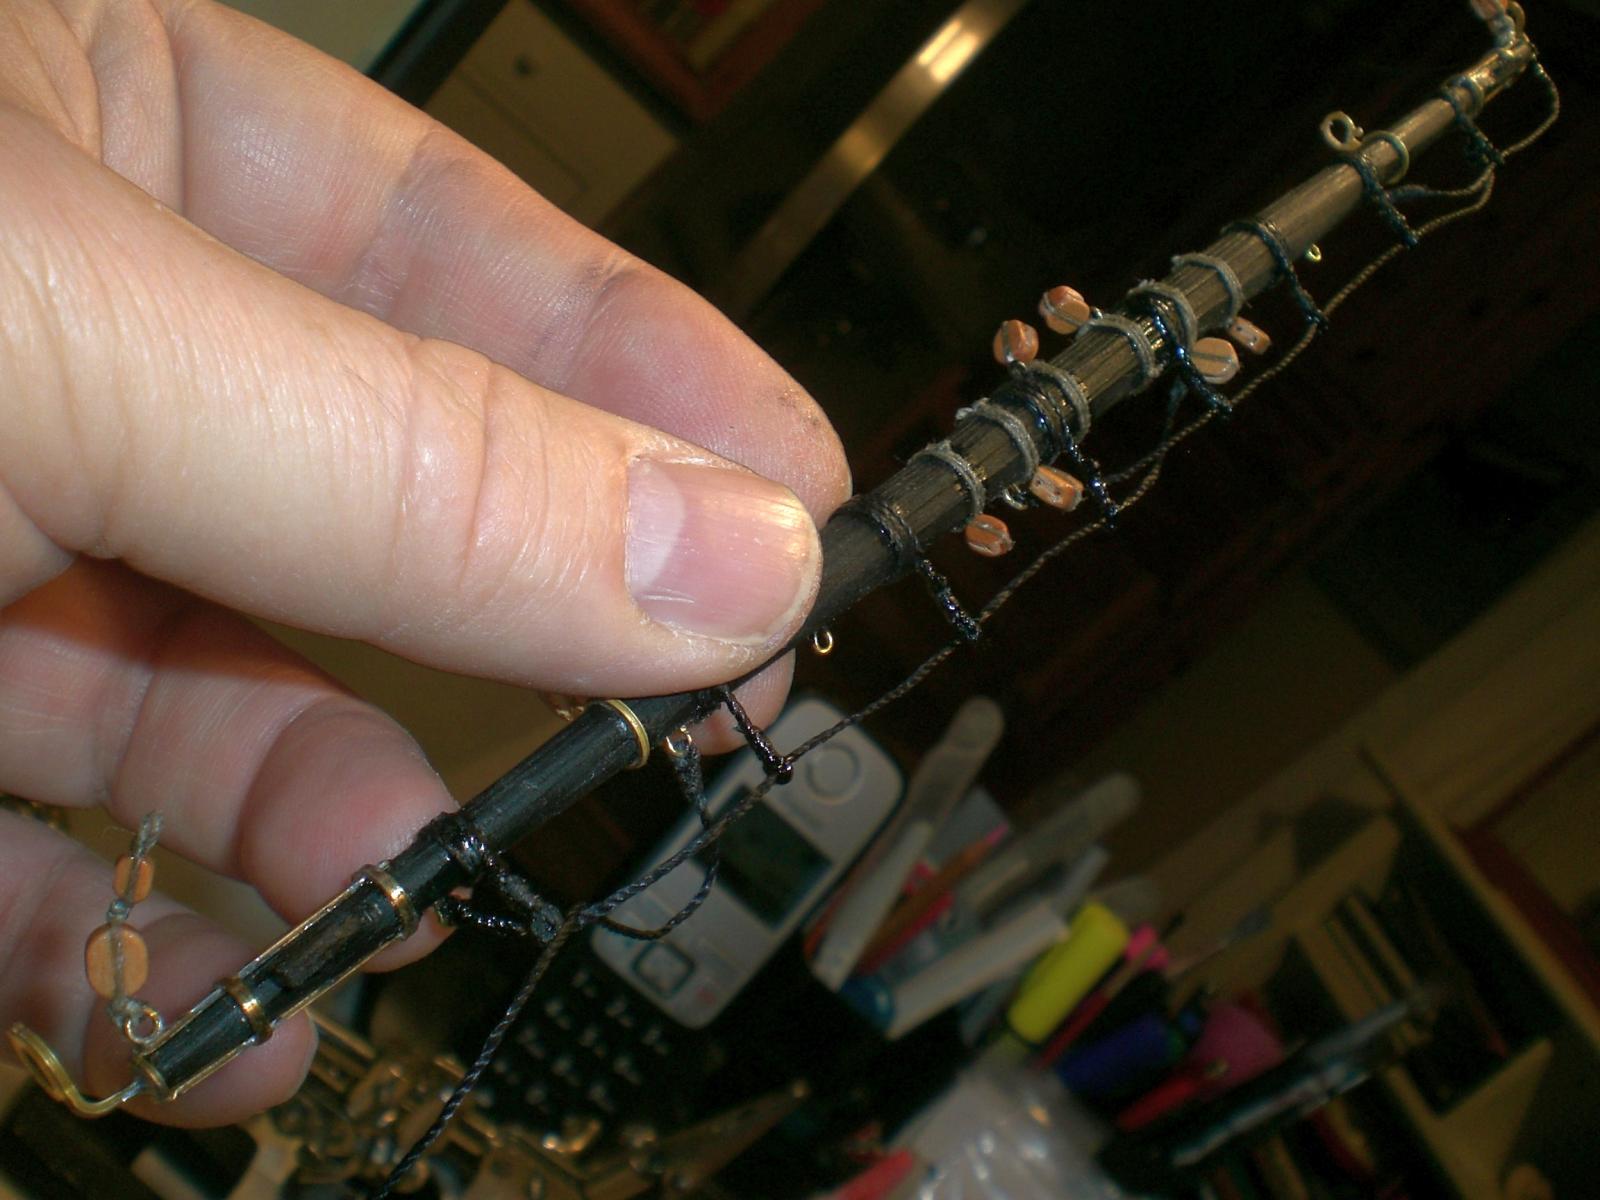
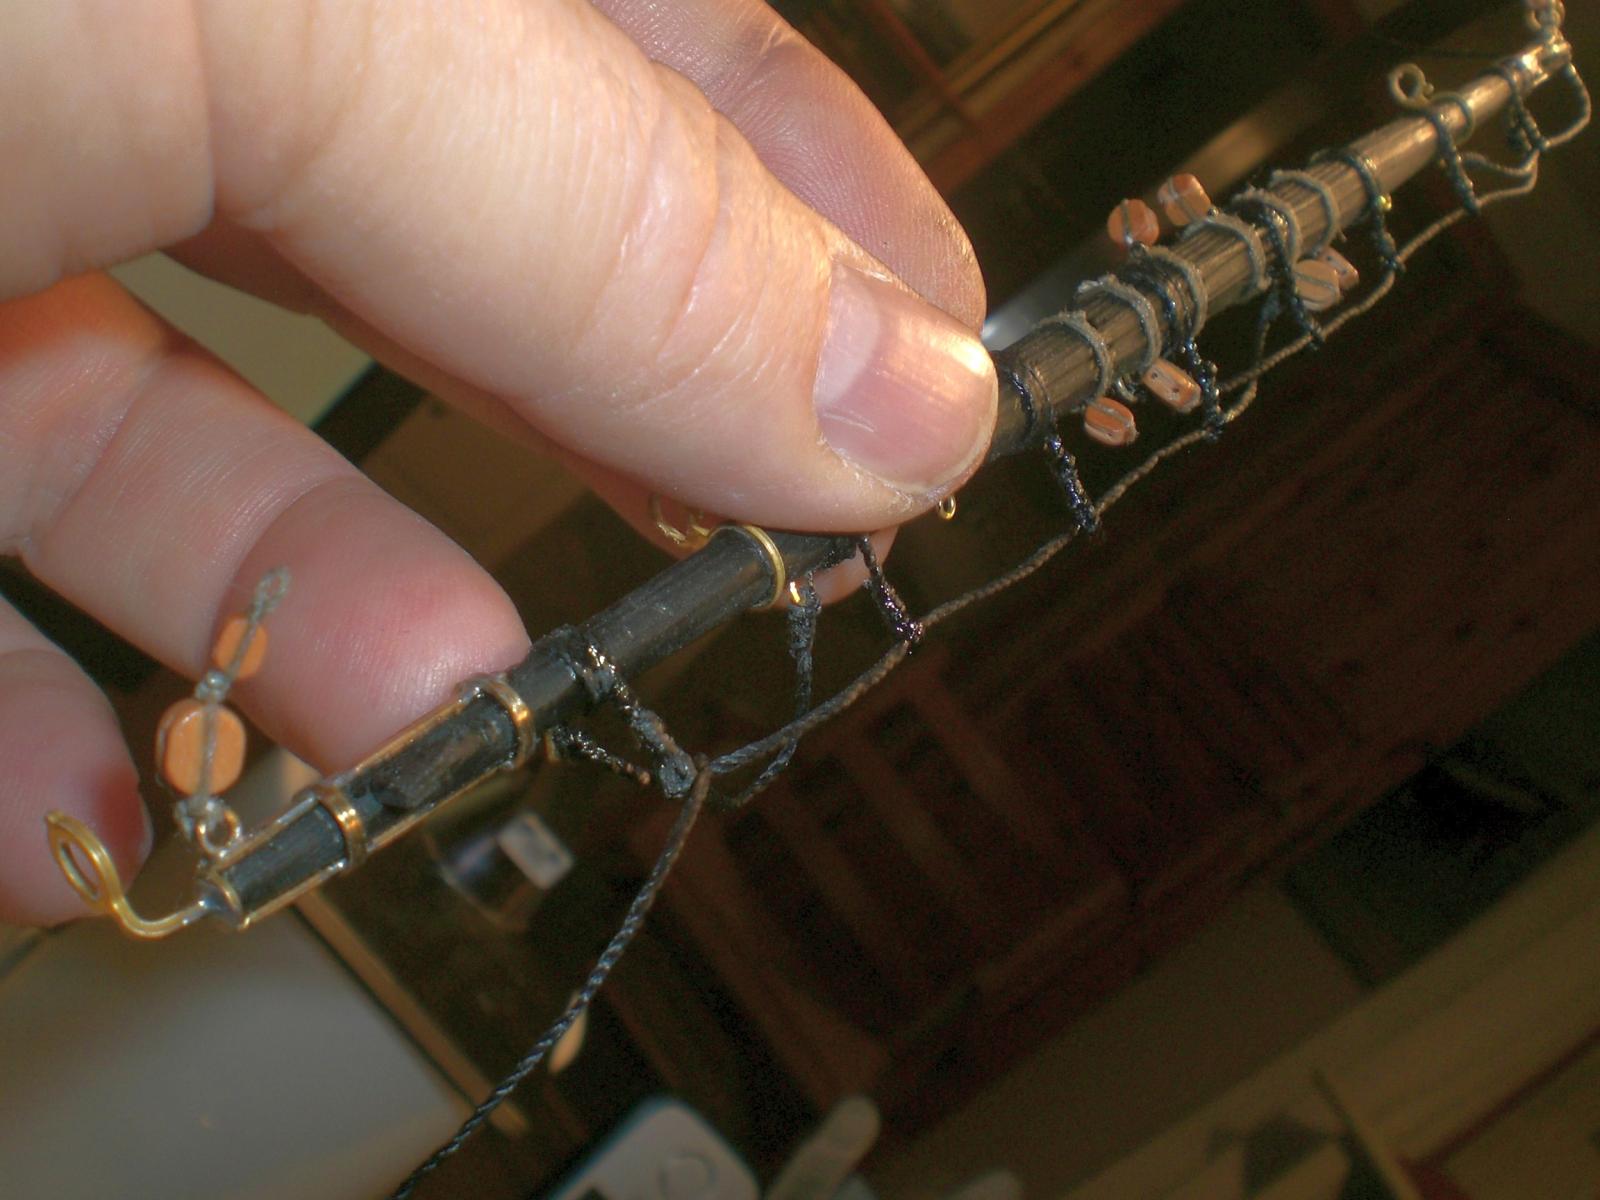
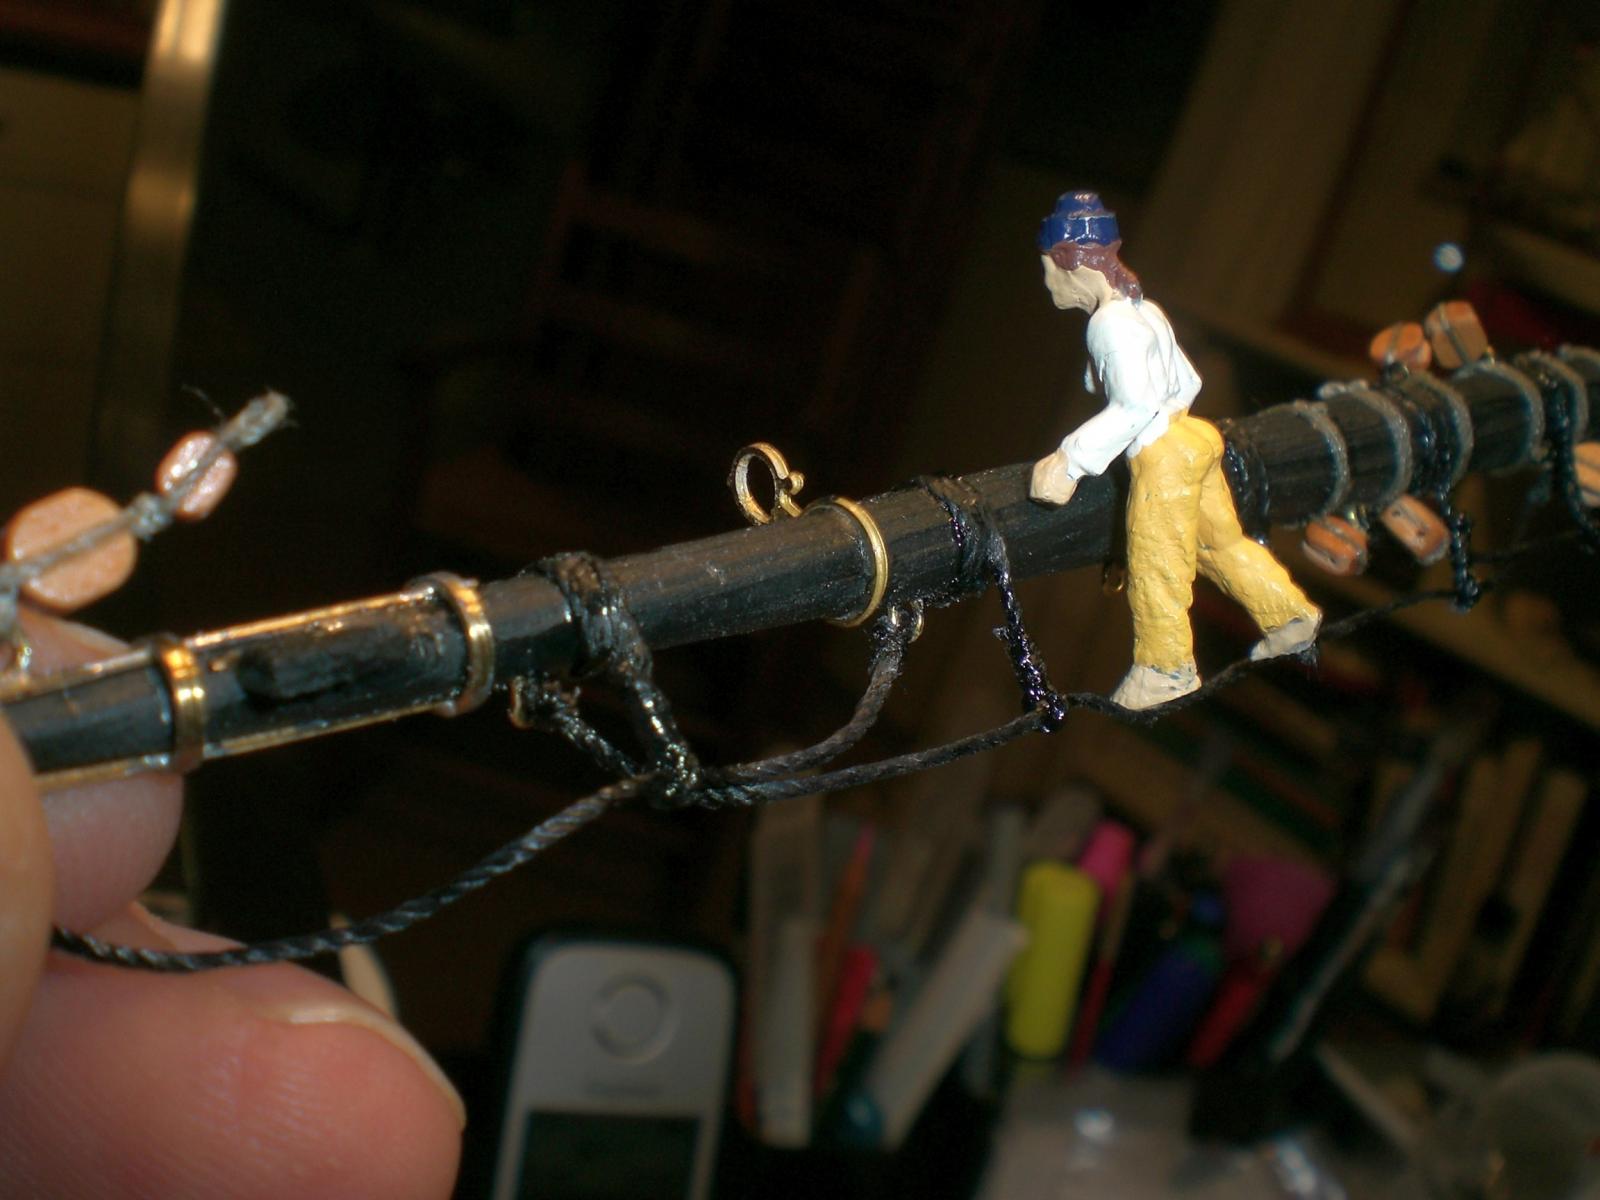
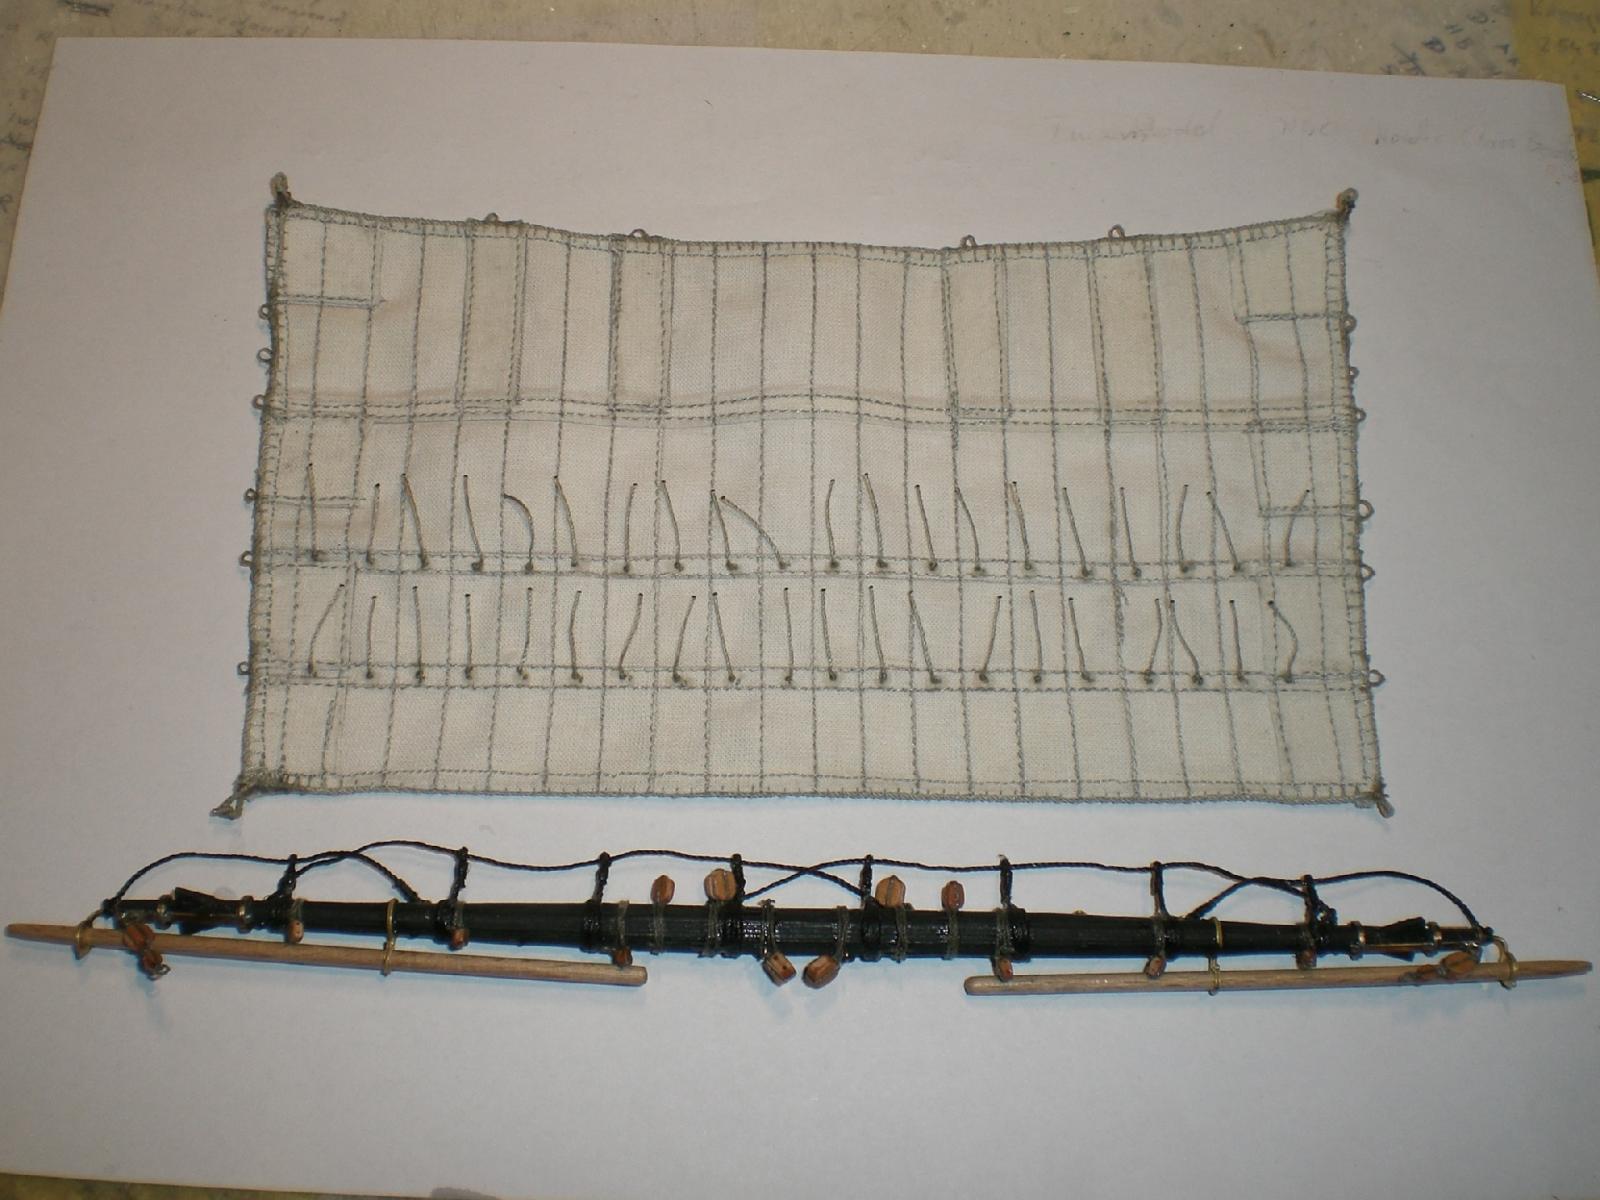
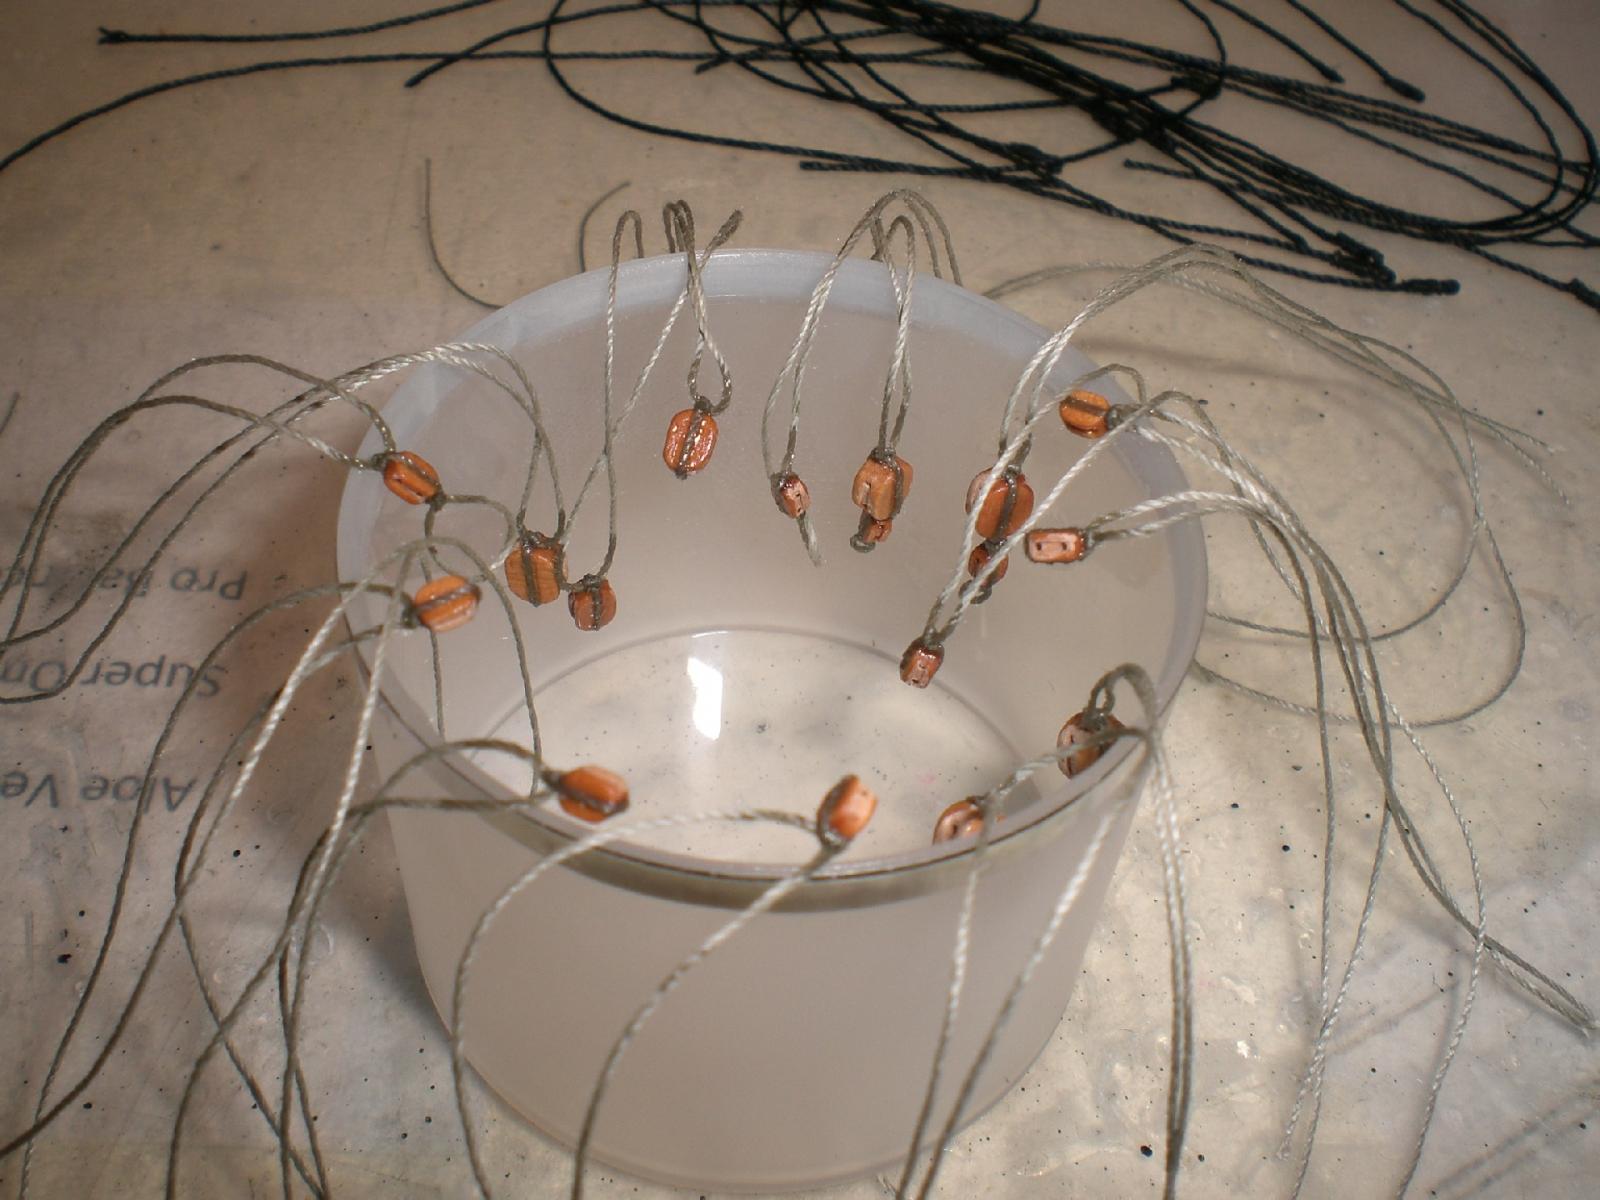
Build log part 79 fitting out the foremast lower yard........ Nils stropping size 3, 4, 5 mm single sheave blocks foremast top- and lower sail stirrups on, no footropes yet footropes on and some blocks dry fitting the studding sail booms adding the "Flemish Horses" (end-footropes) clue blocks to the sail lower corners, and combi-blocks for lifts and sheet to the yard ends stand test on the footropes truss tackles and sling still to be attached at yard center, then all ready for attaching the sail to the yard and preinstalling the individual operation lines