
Gaffrig
-
Posts
129 -
Joined
-
Last visited
Content Type
Profiles
Forums
Gallery
Events
Posts posted by Gaffrig
-
-
Hello!
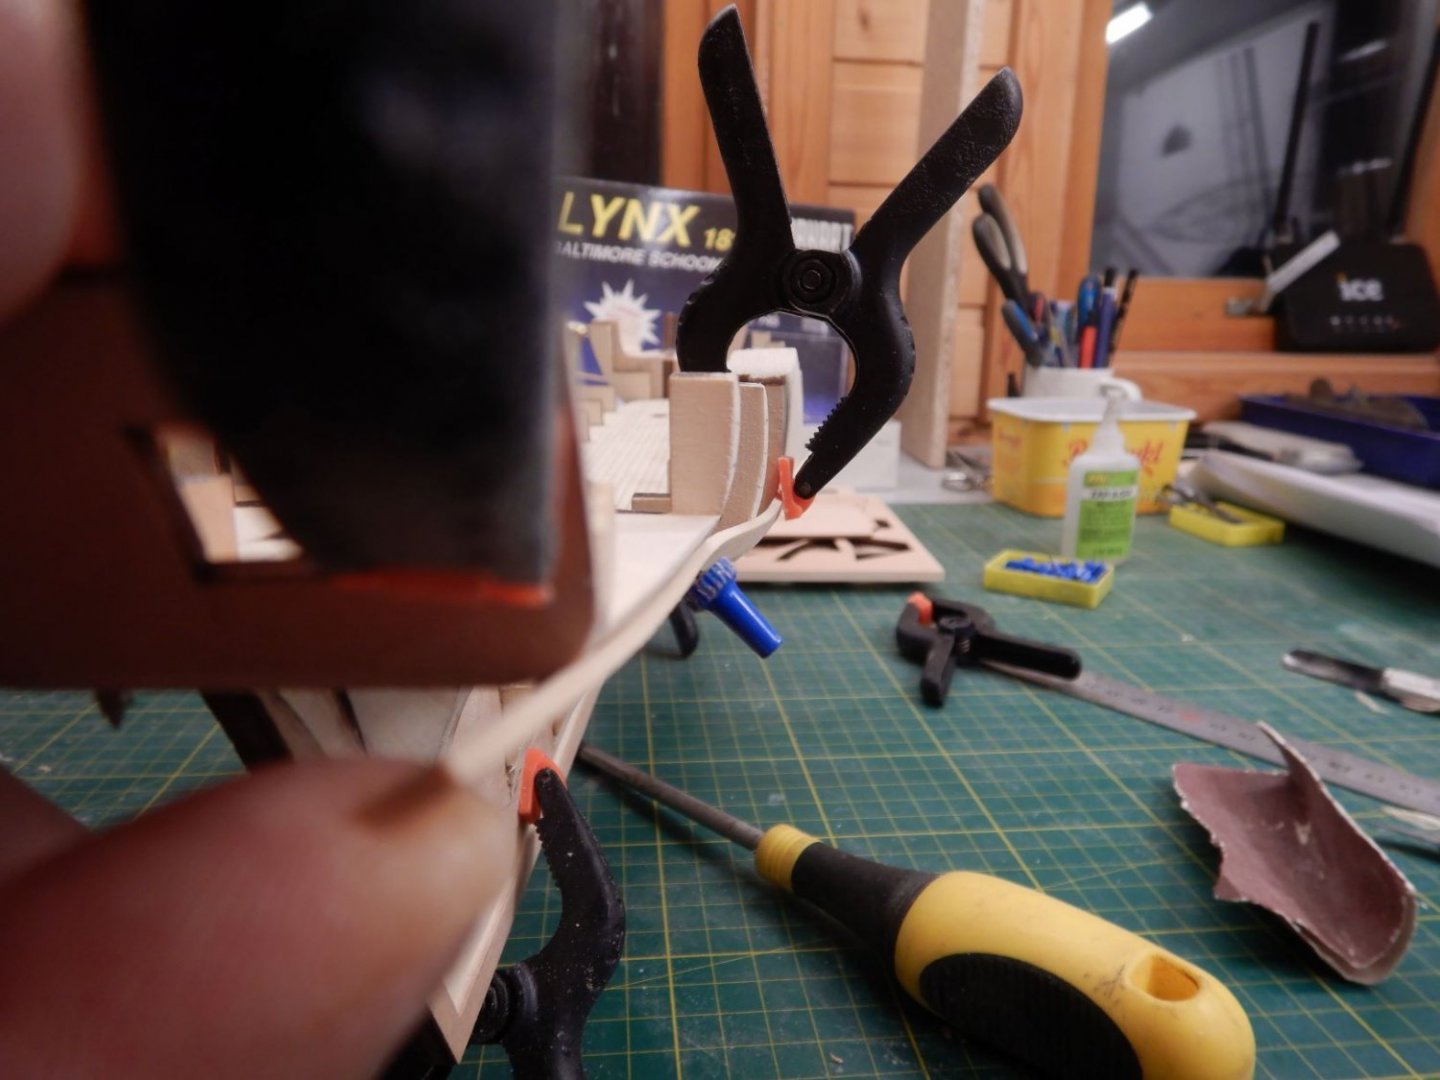
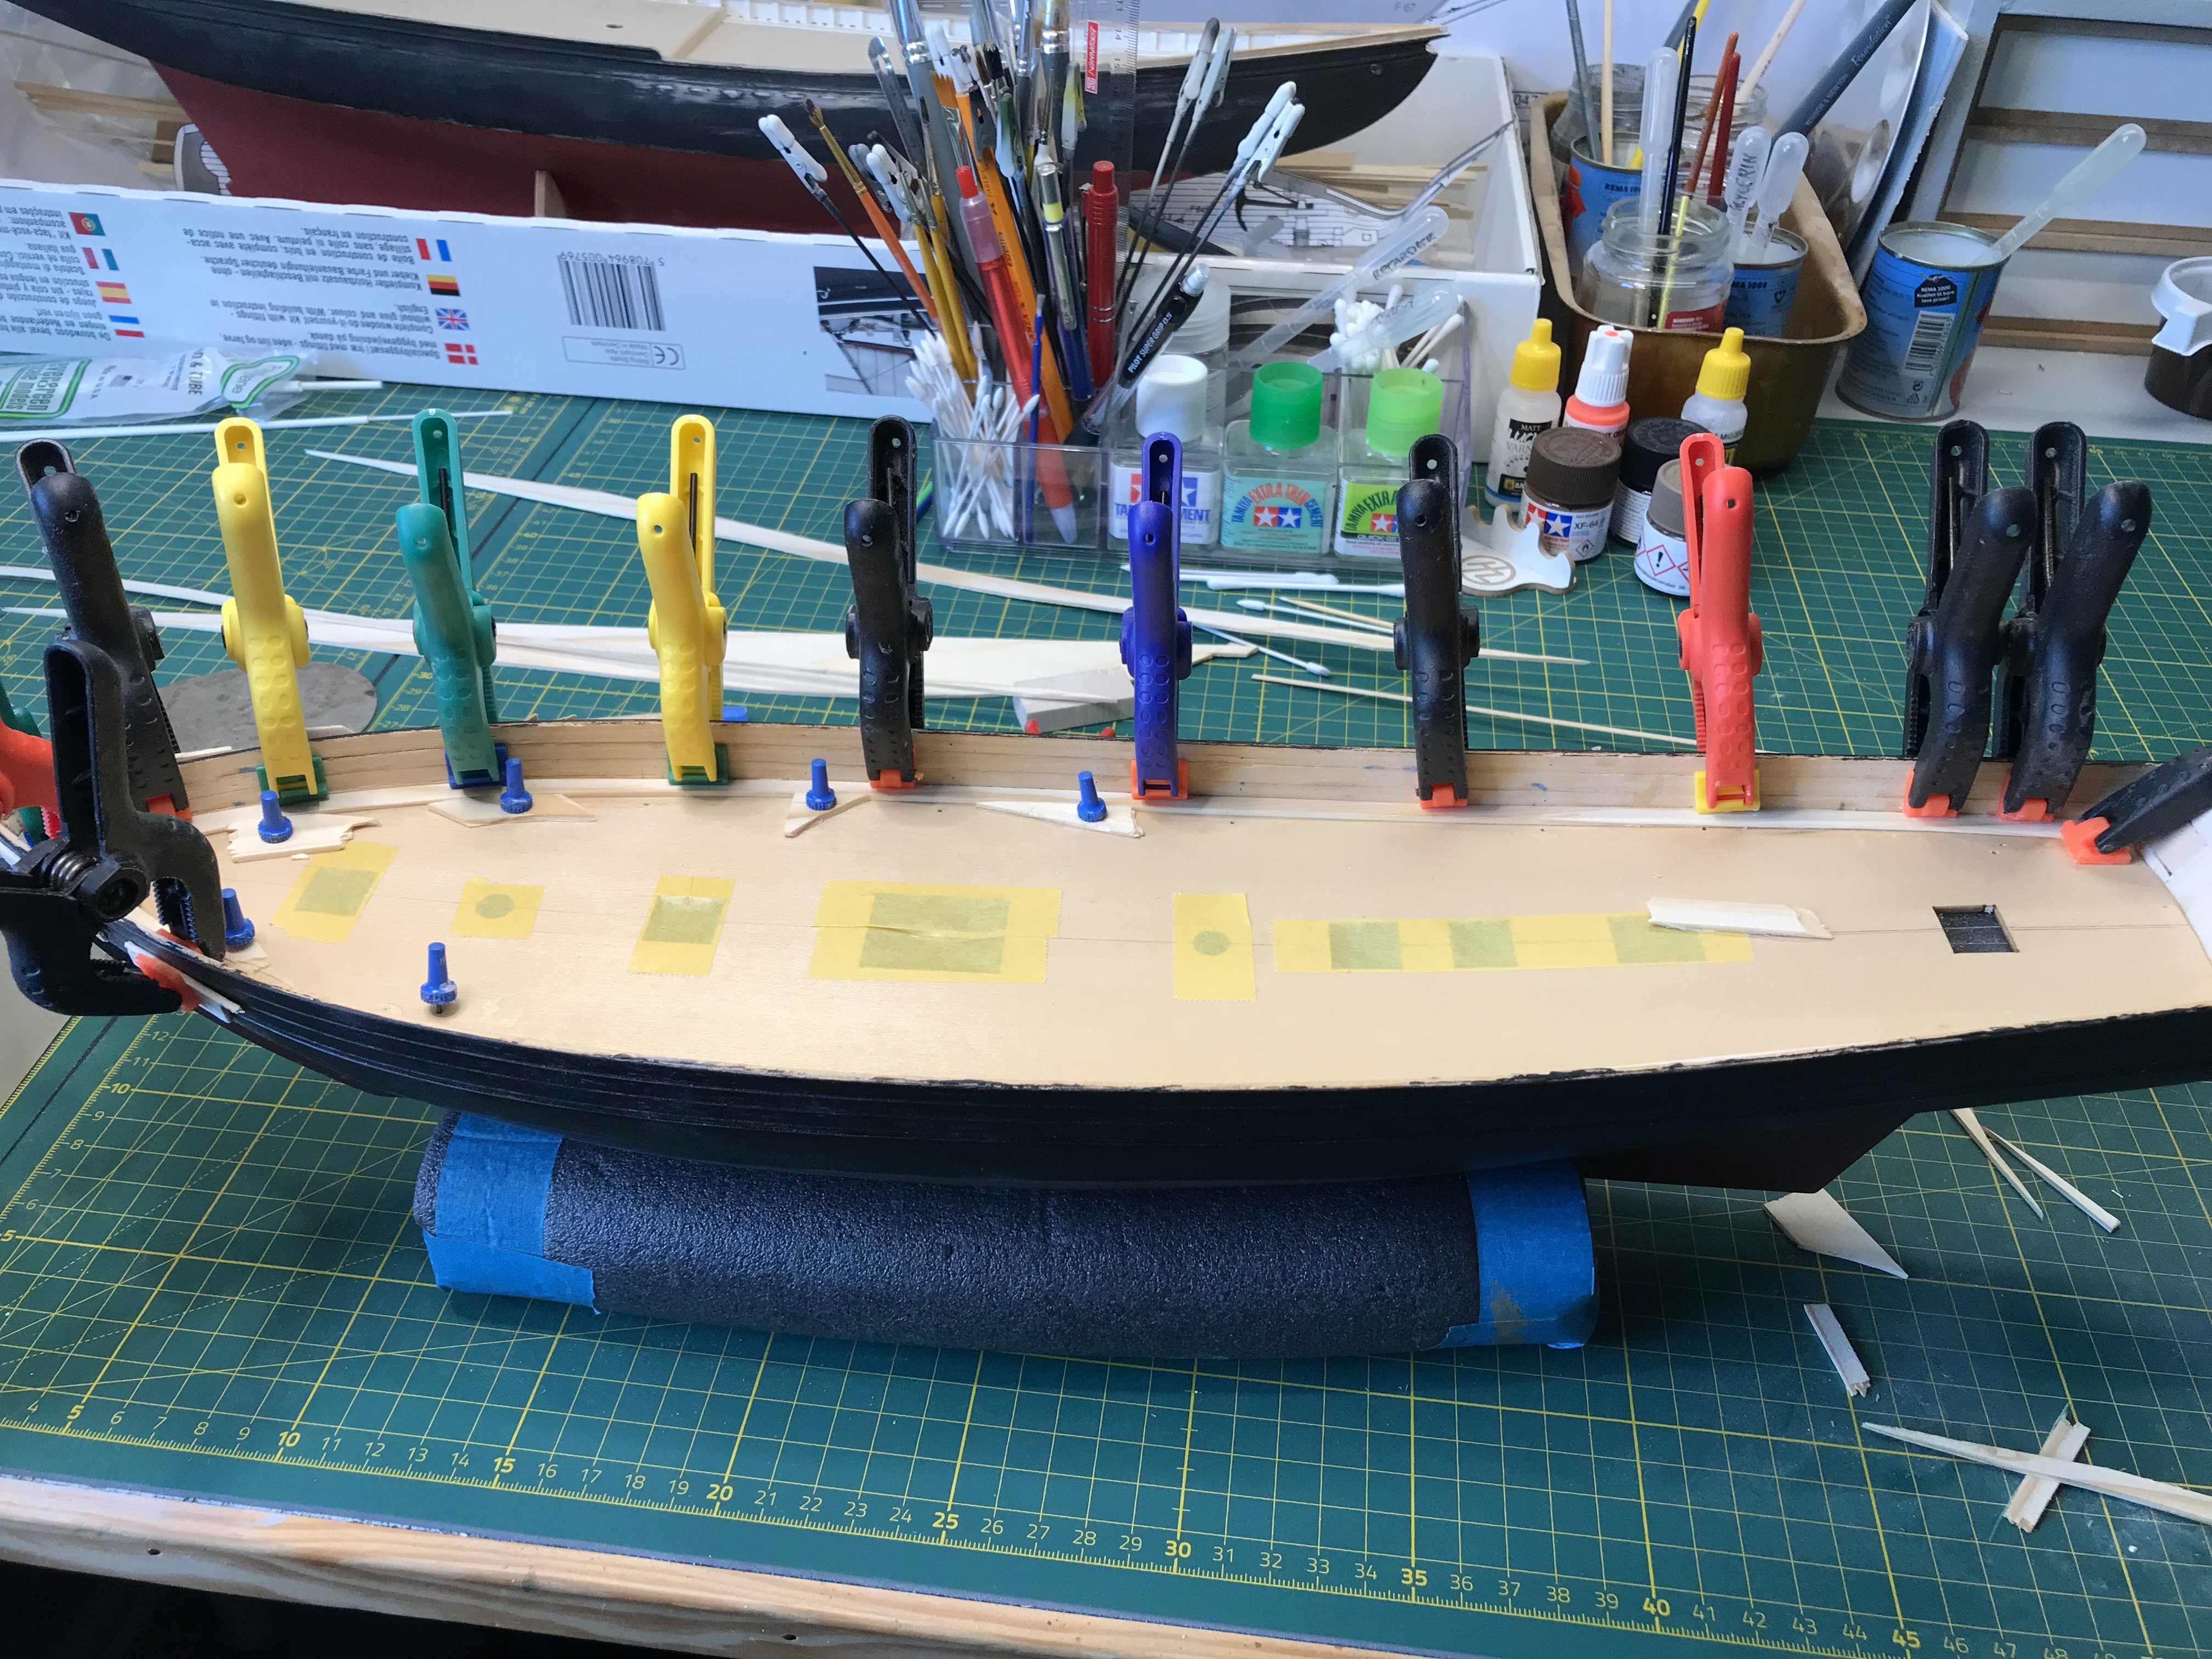
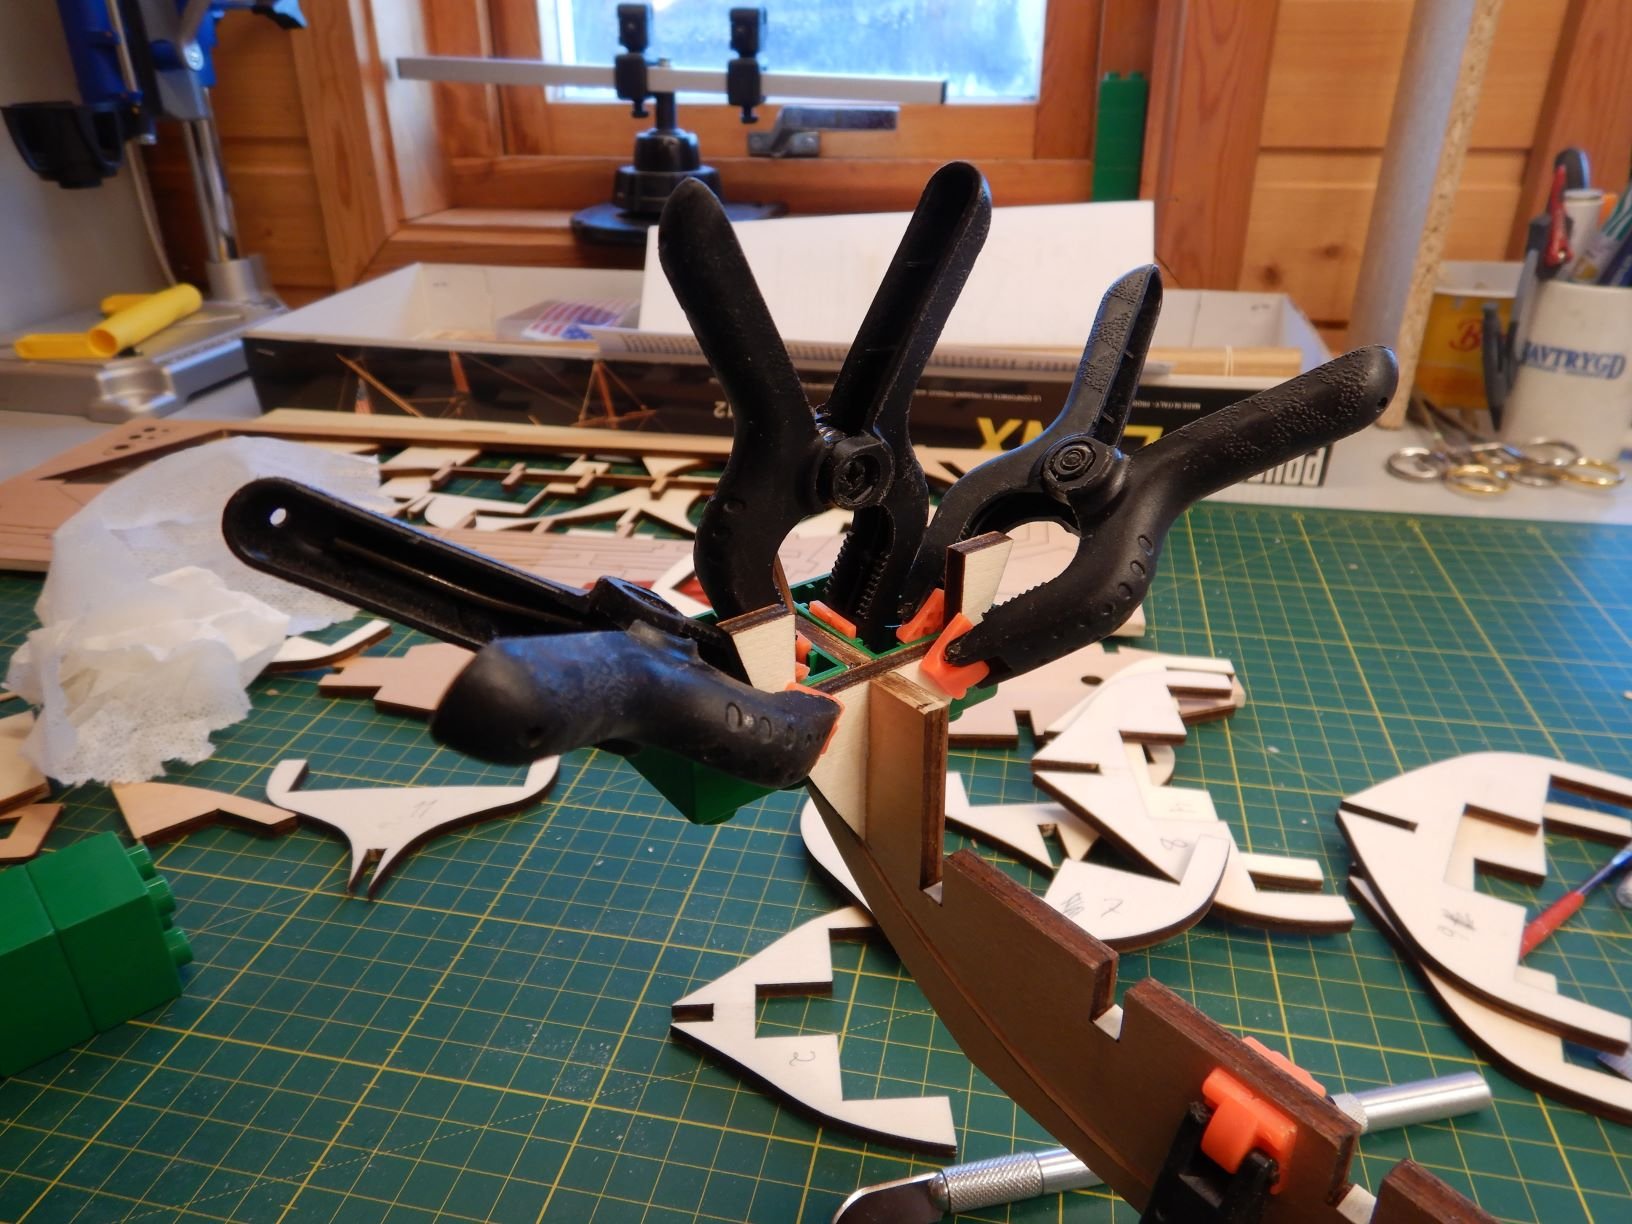
Work continues on Lynx.
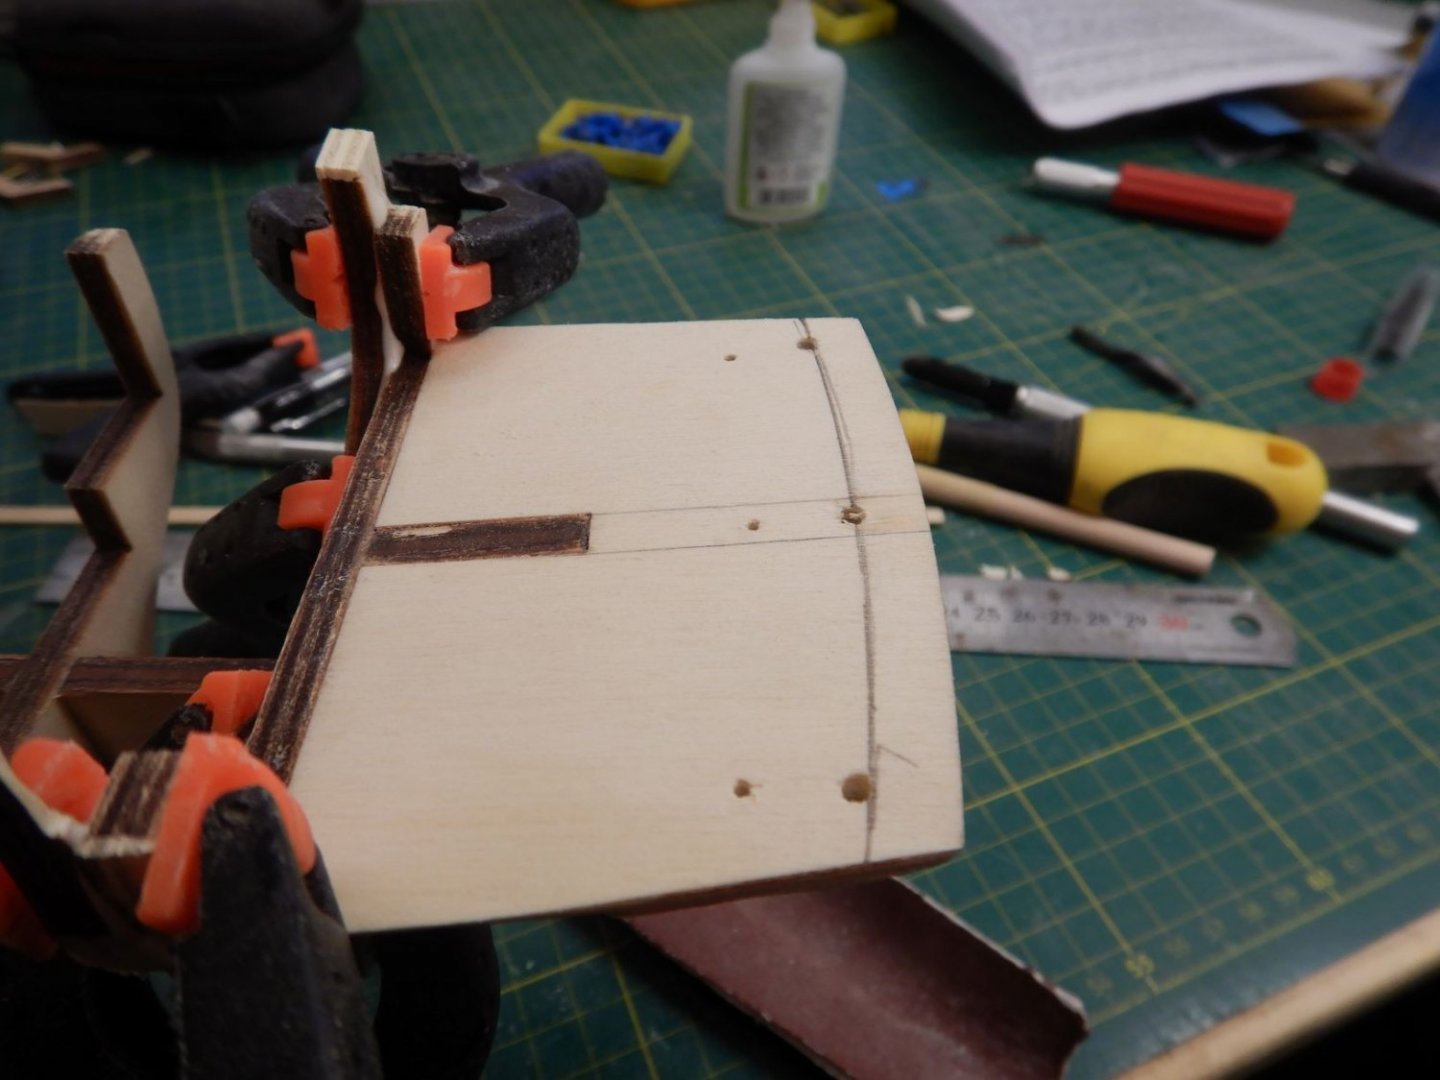
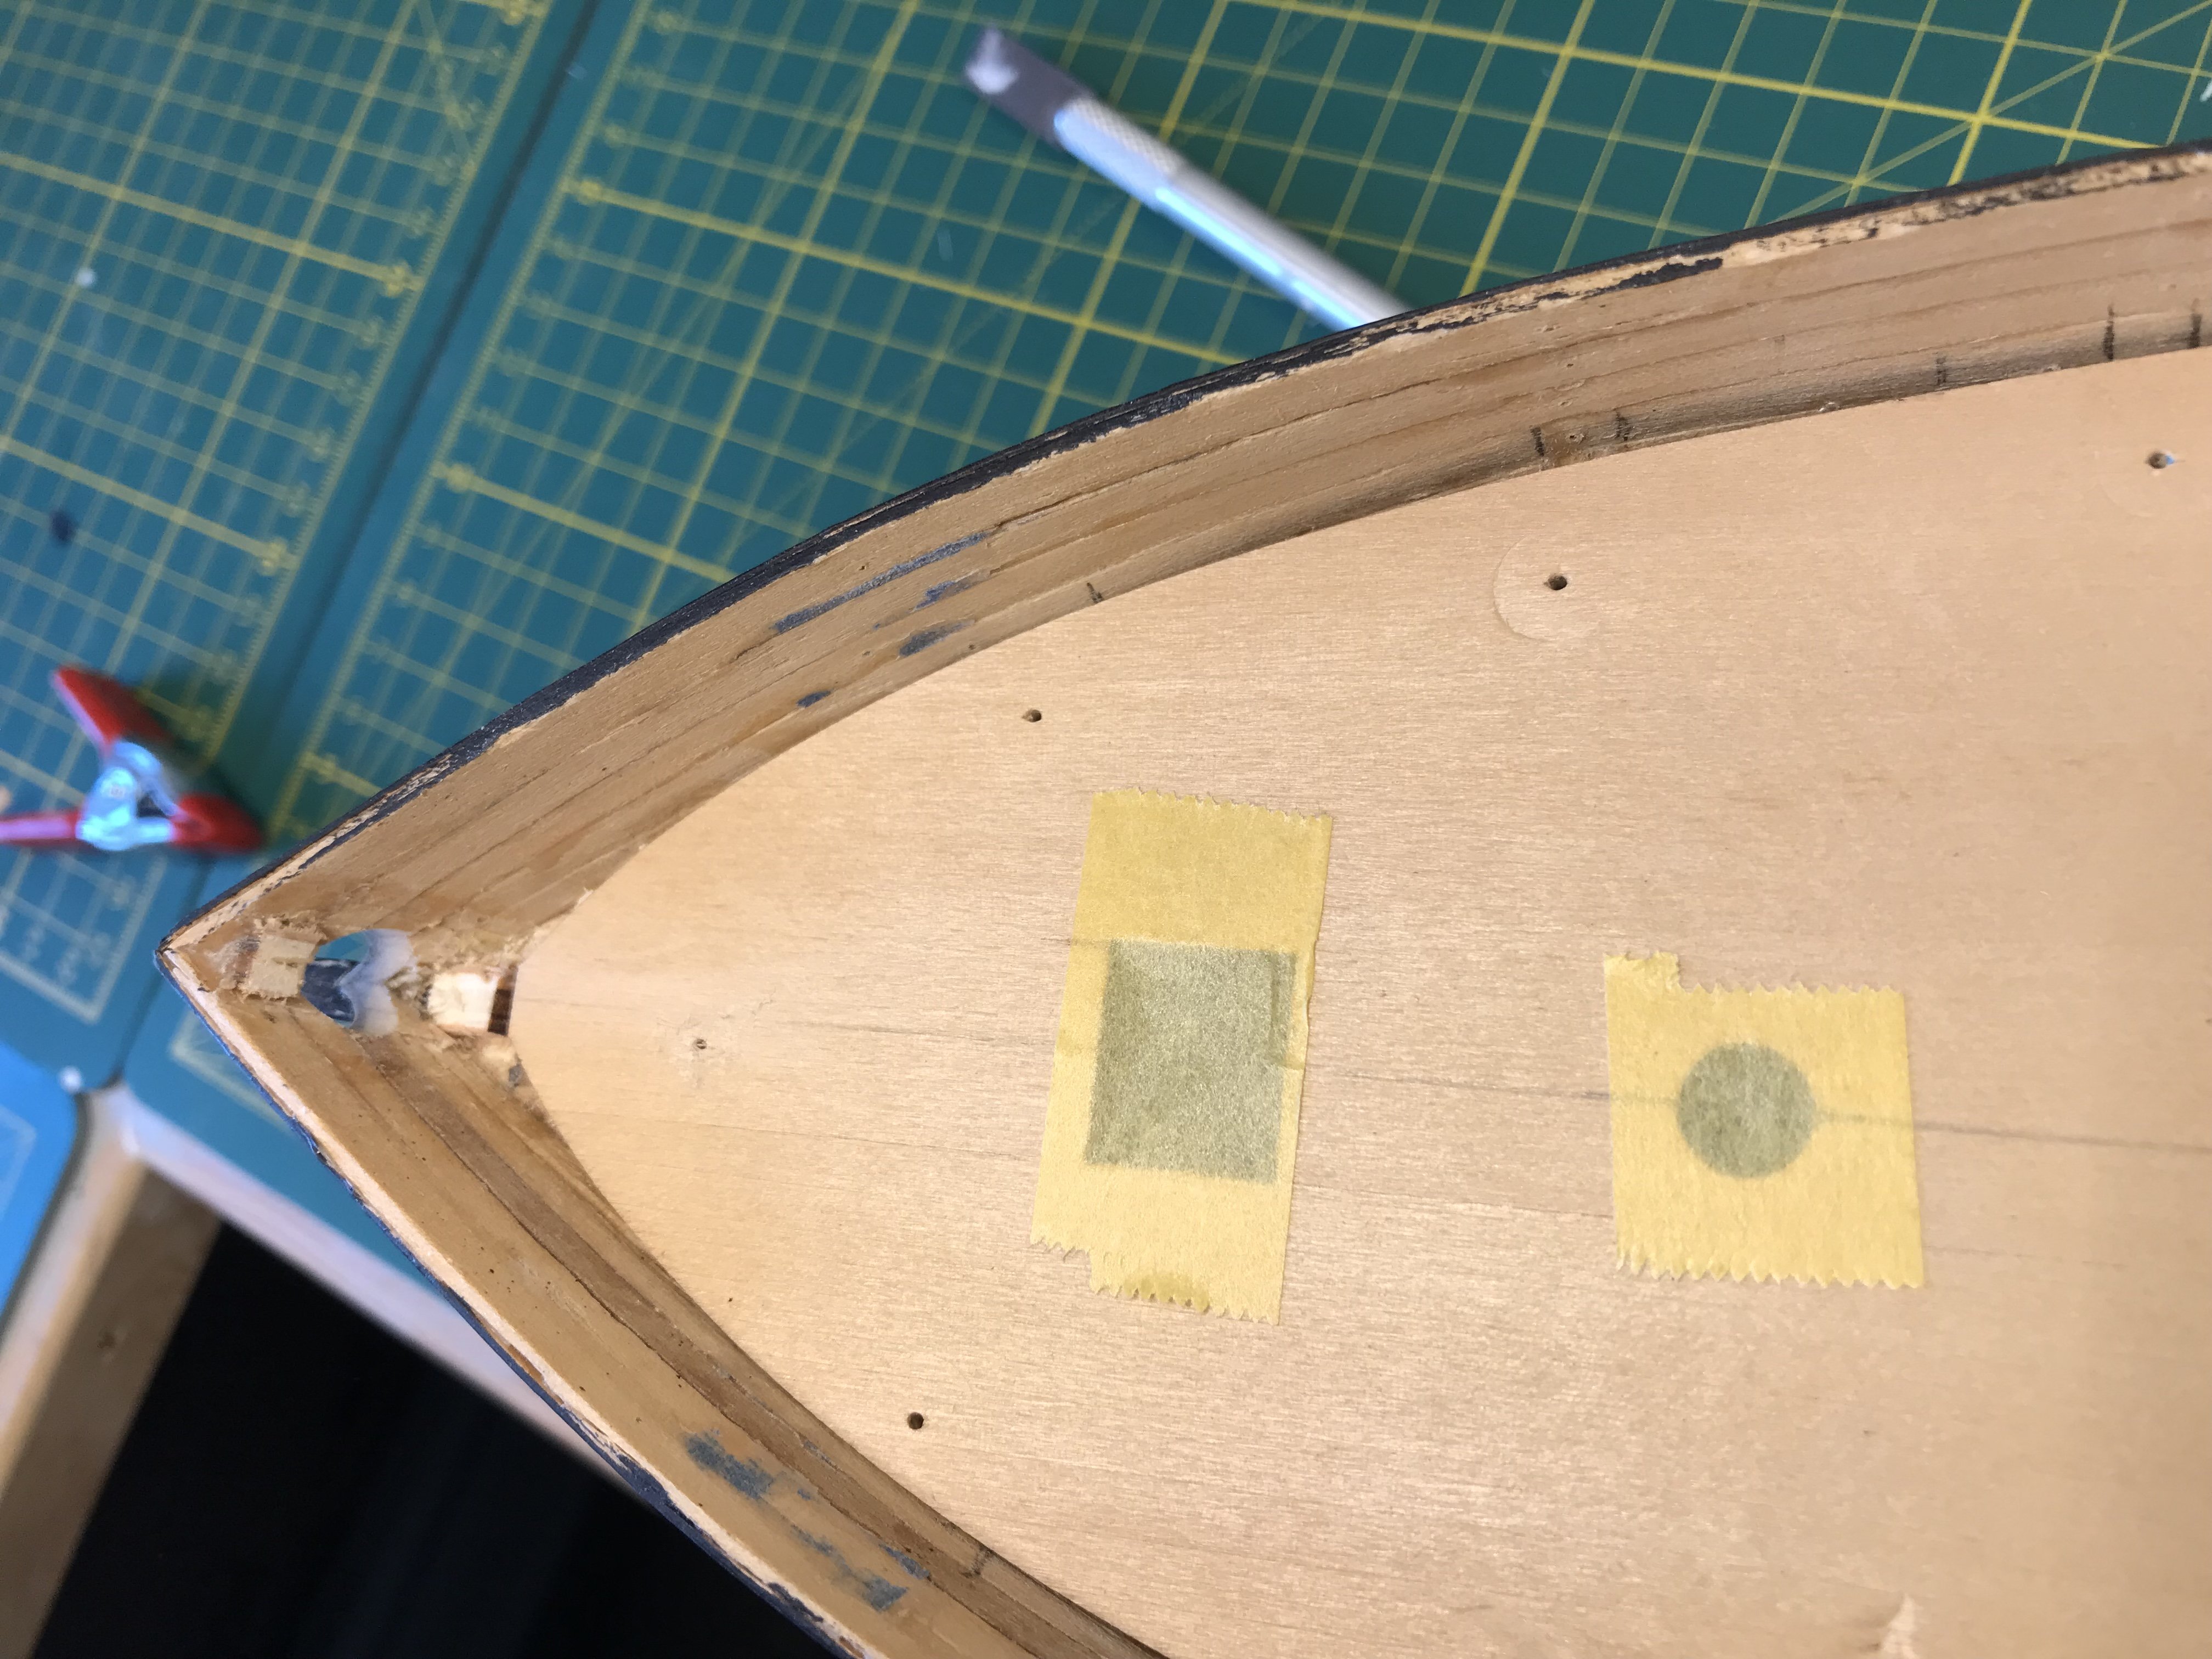
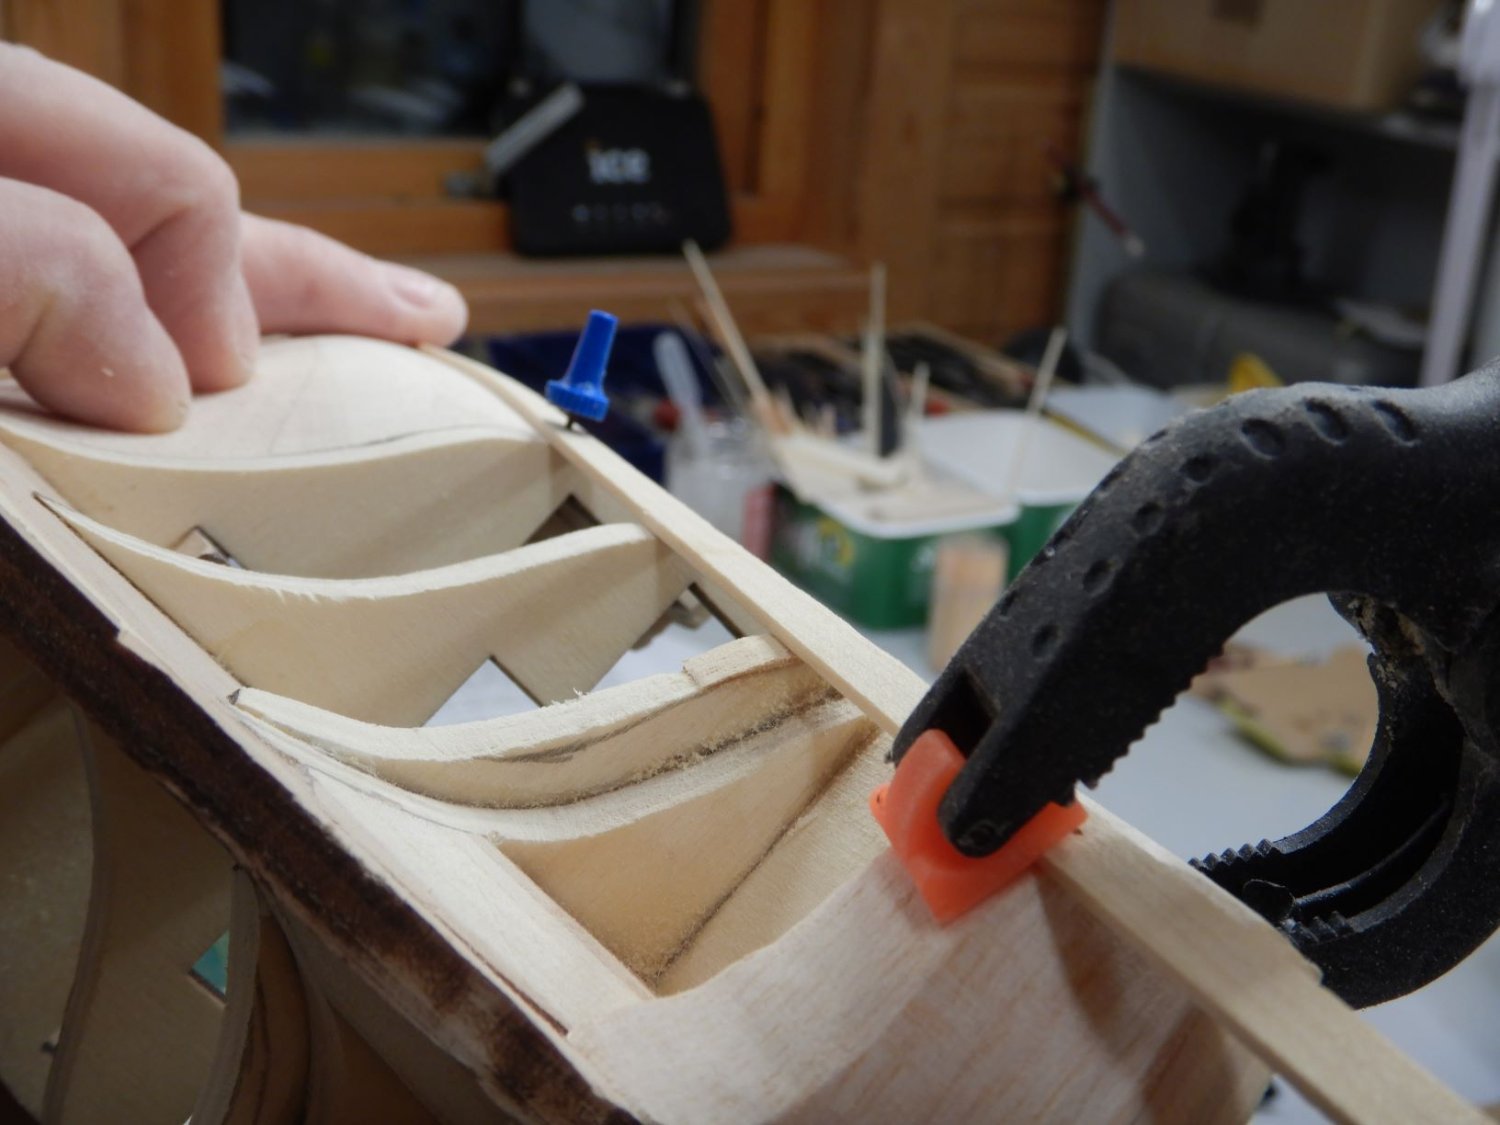
Got the plywood subdeck glued inplace, dowels to keep mastholes aligned.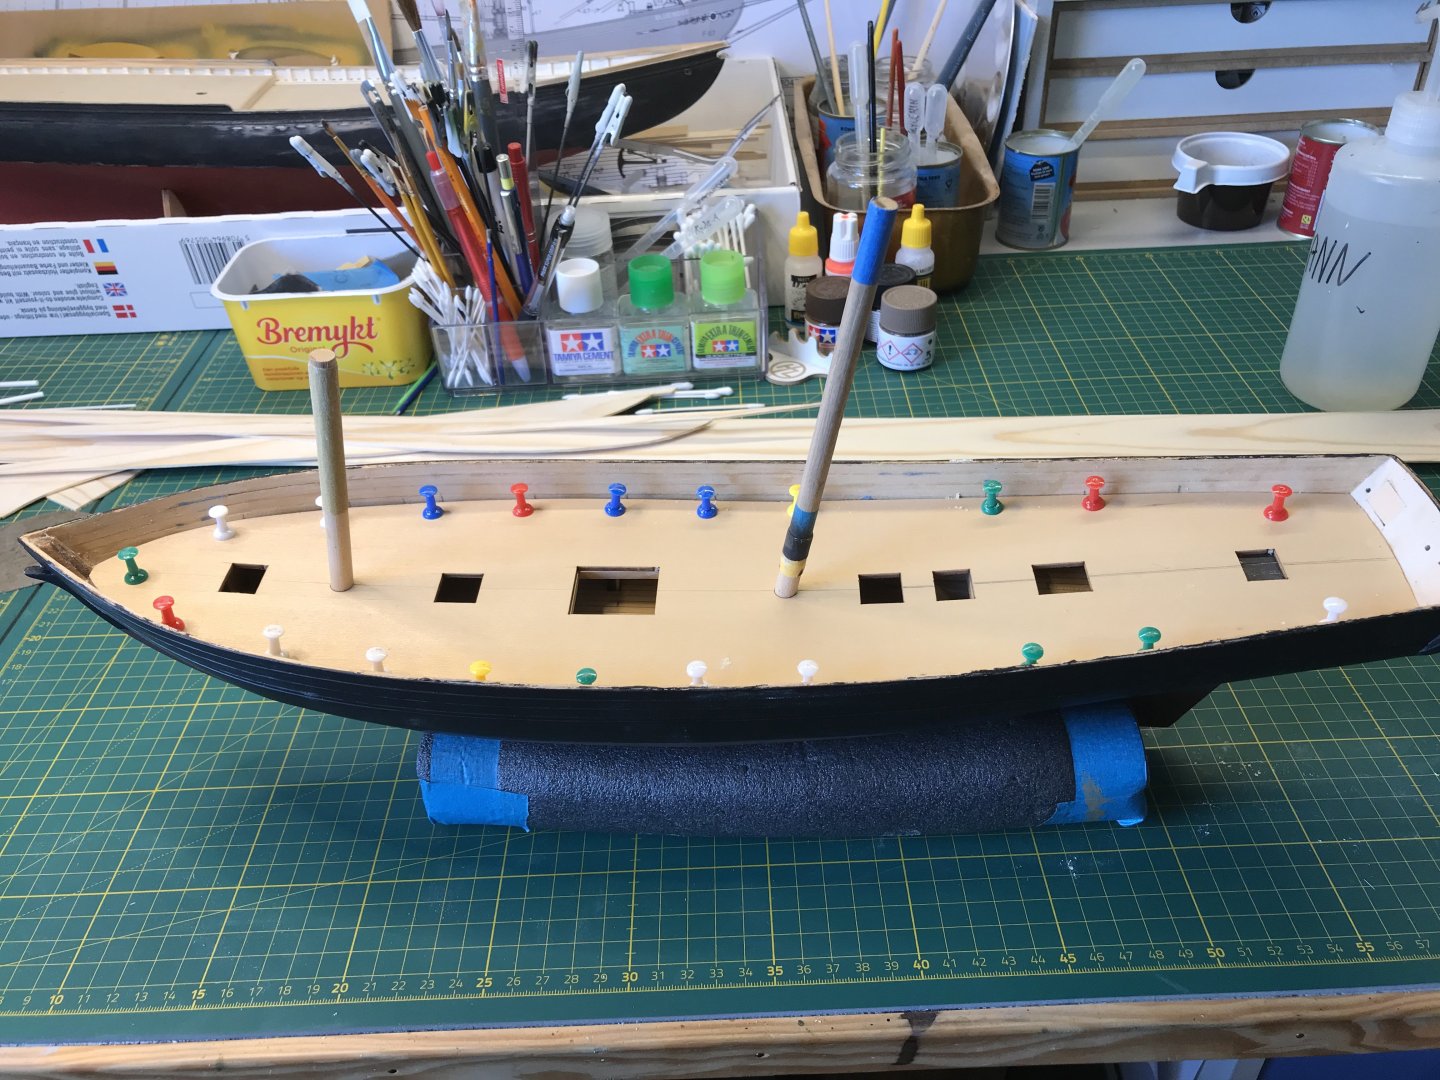
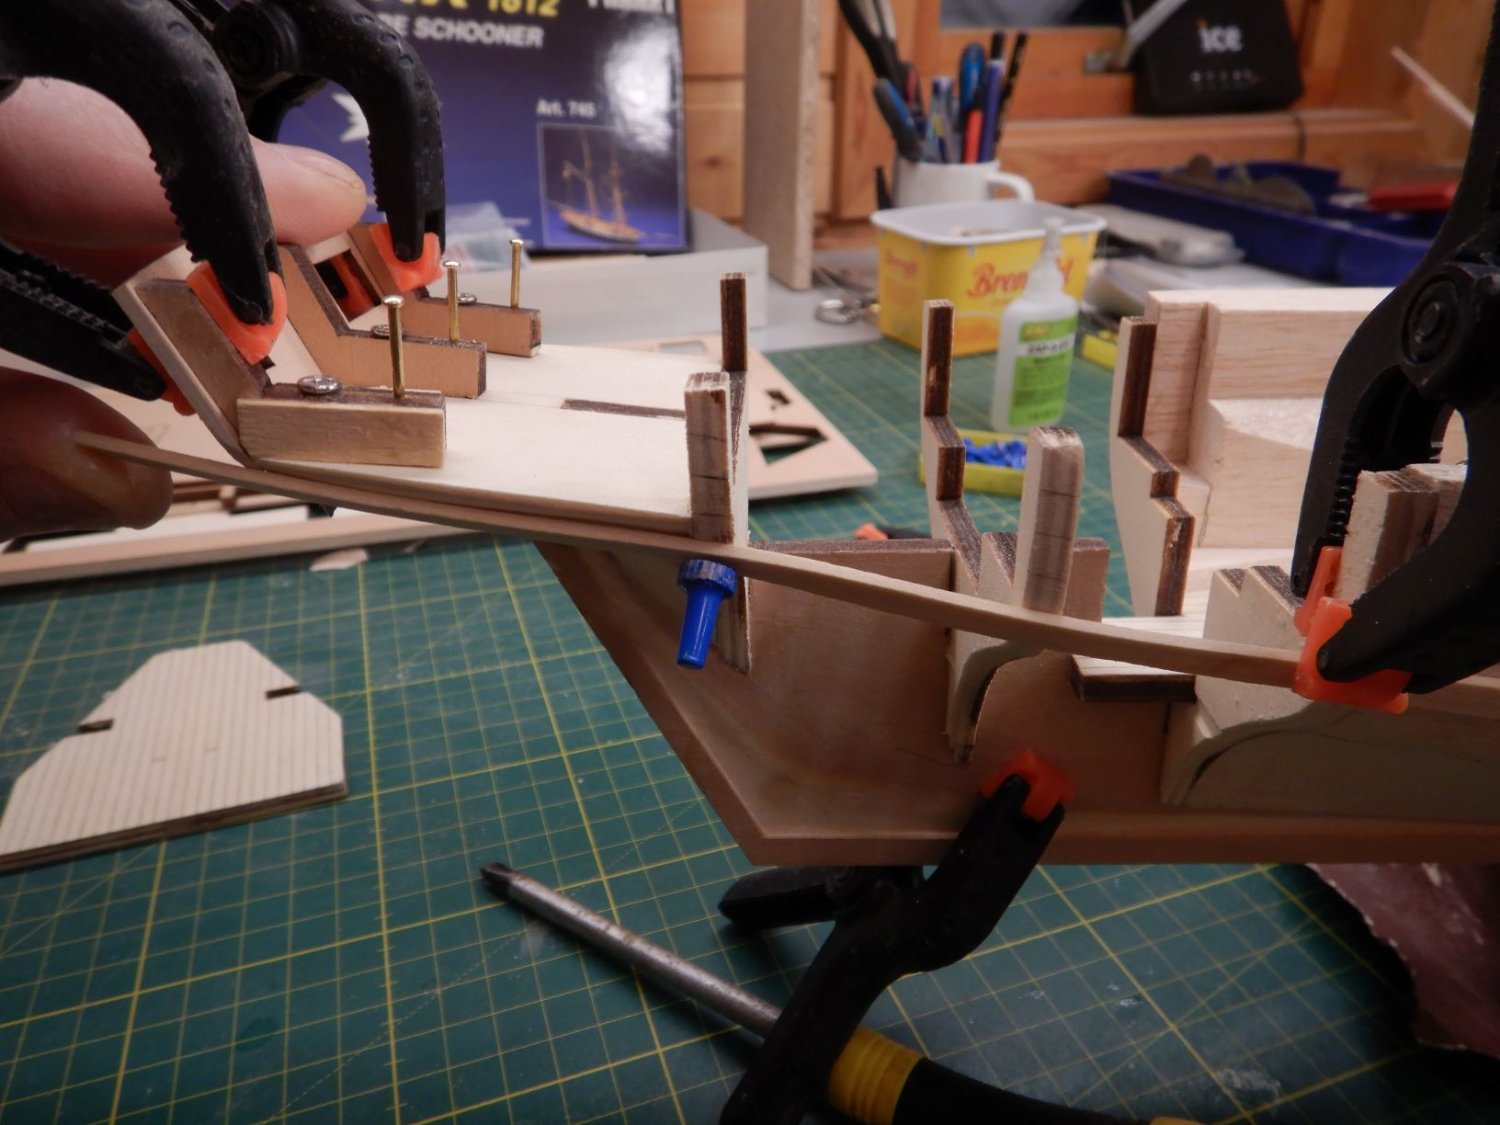
There is no mention of the waterways in either plans or instructions, but i decided to make these as I think it looks better.

Drilled the hole for the bowsprit, to remove the inner stem so the waterways could fit up in the bow.
First waterway glued inplace.

Need more clamps to glue the other side!
Gaffrig.
- chris watton and Javelin
-
 2
2
-
Hello all!
The slowest buildlog continues!
Since the last update I’ve been playing with plastic models for awhile.
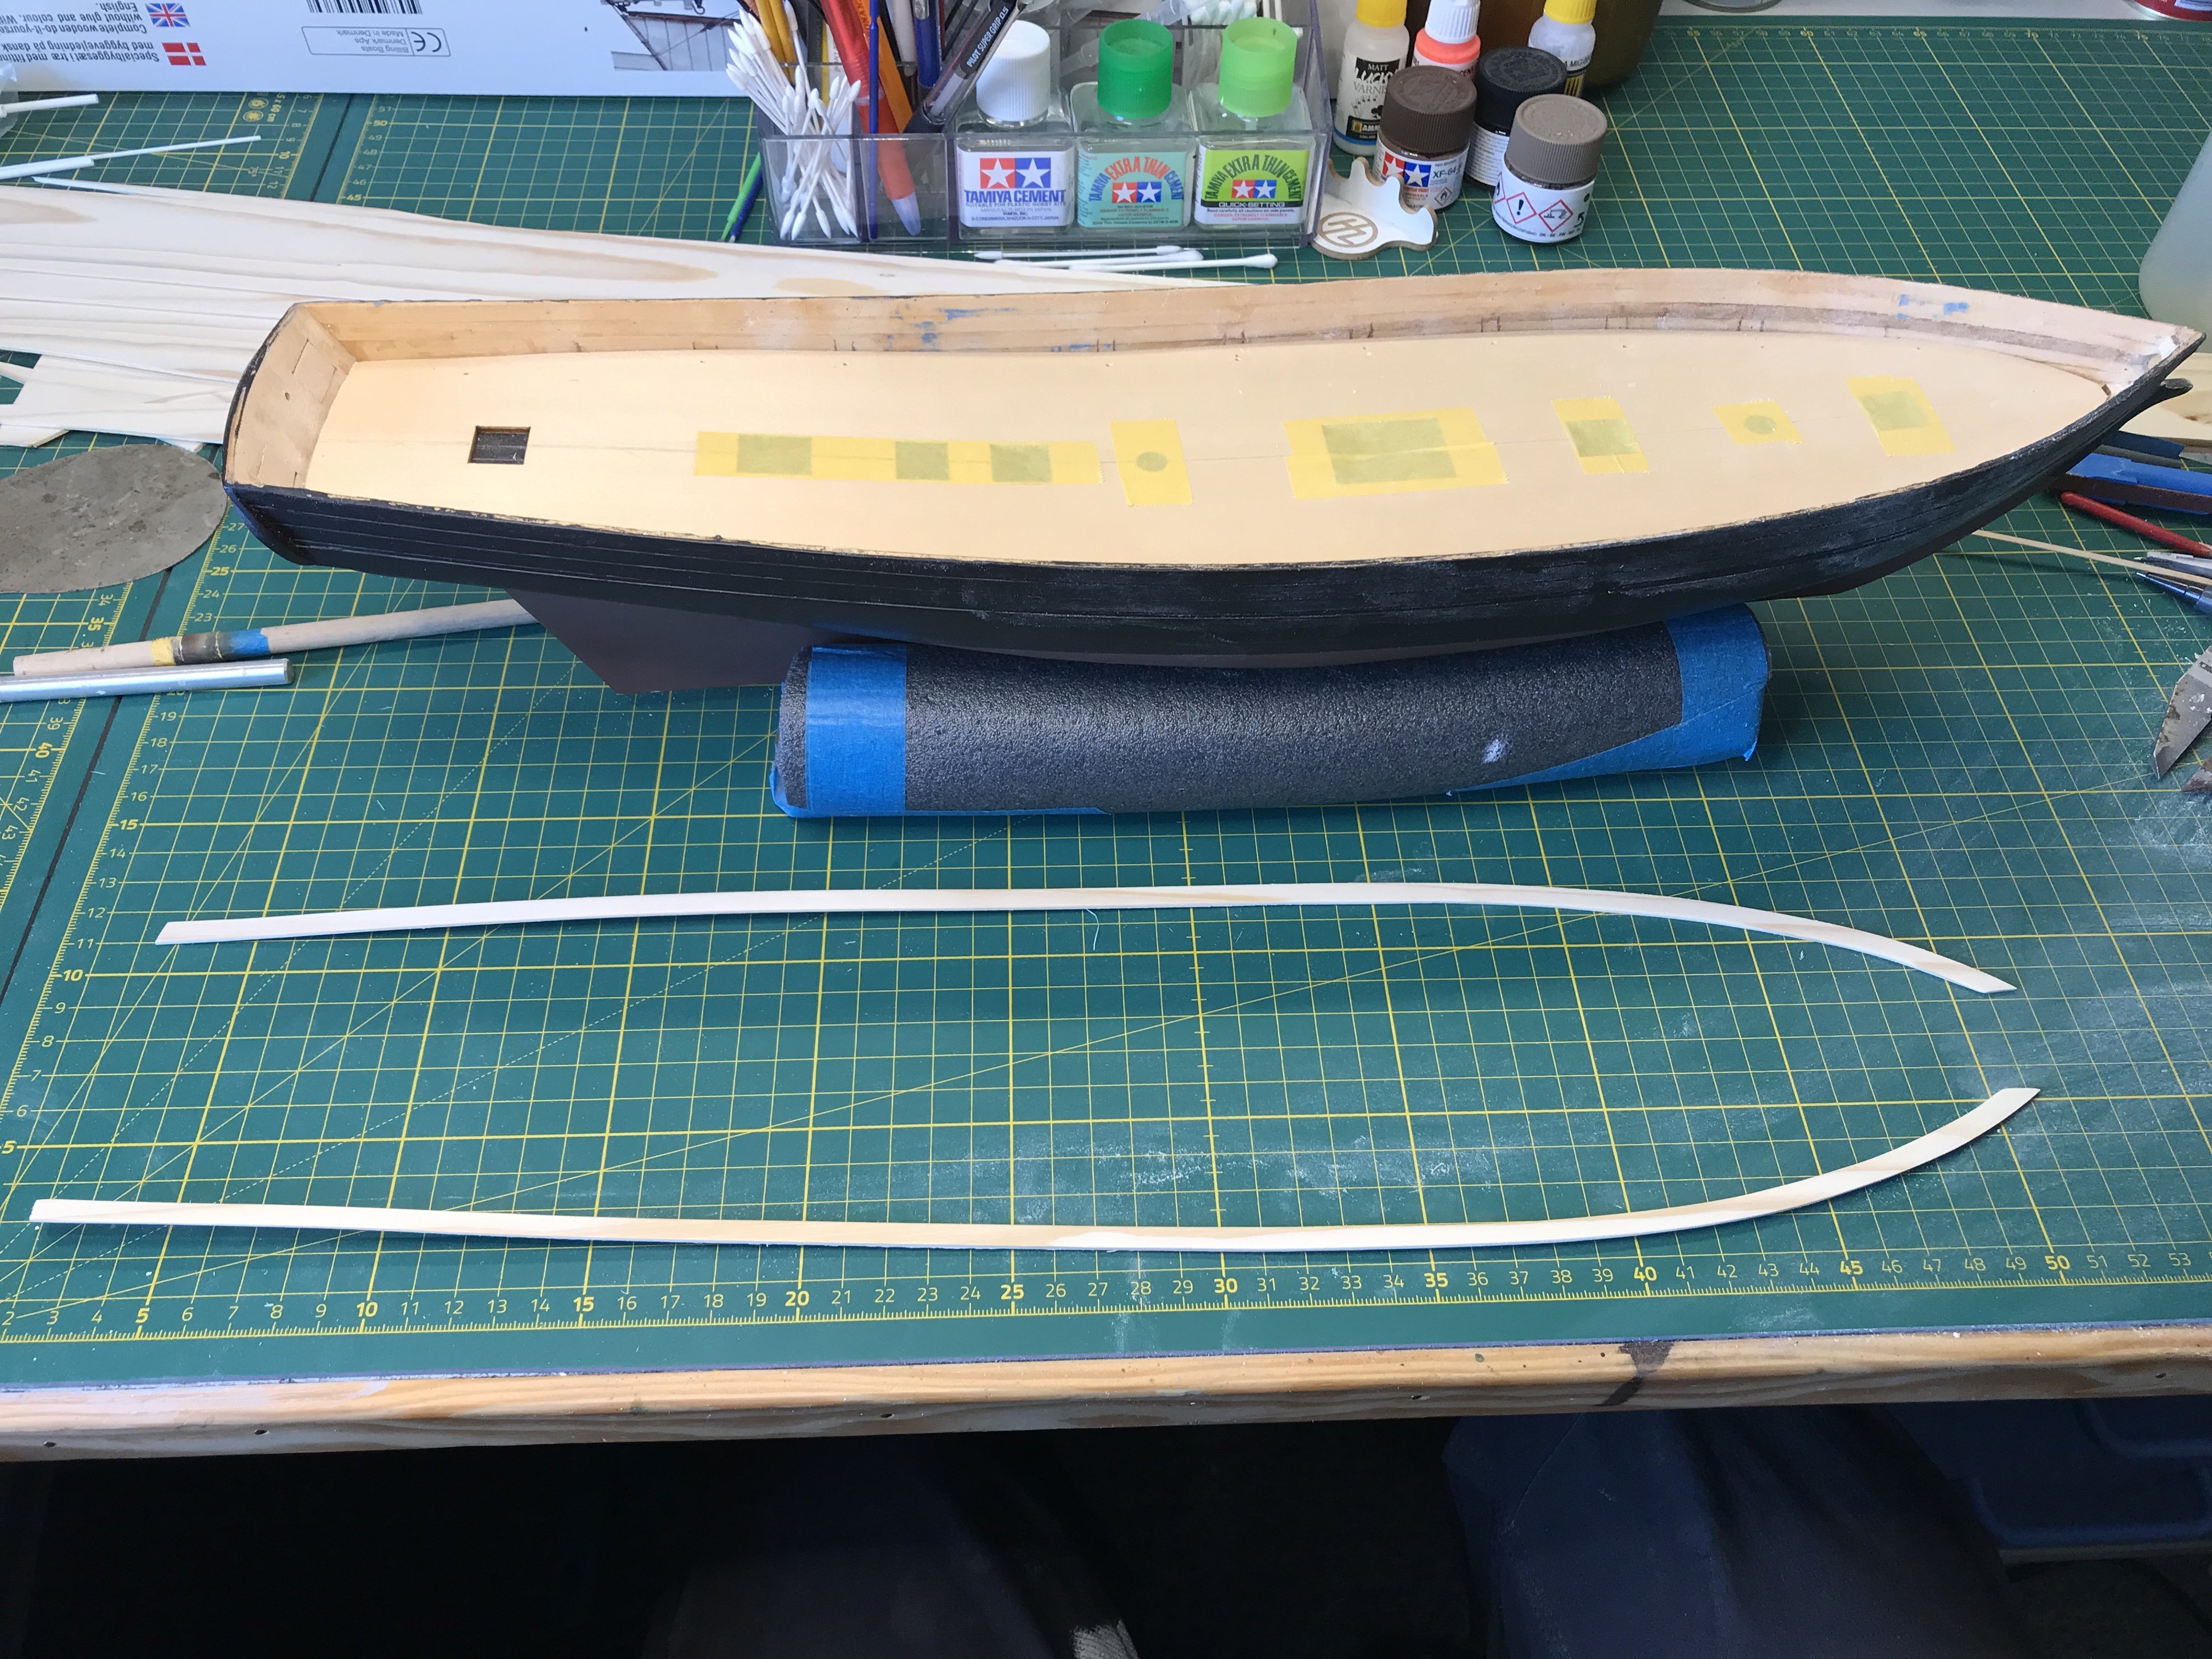
But now I’m back at the Lynx.Hull has been through several rounds of sanding and filling.
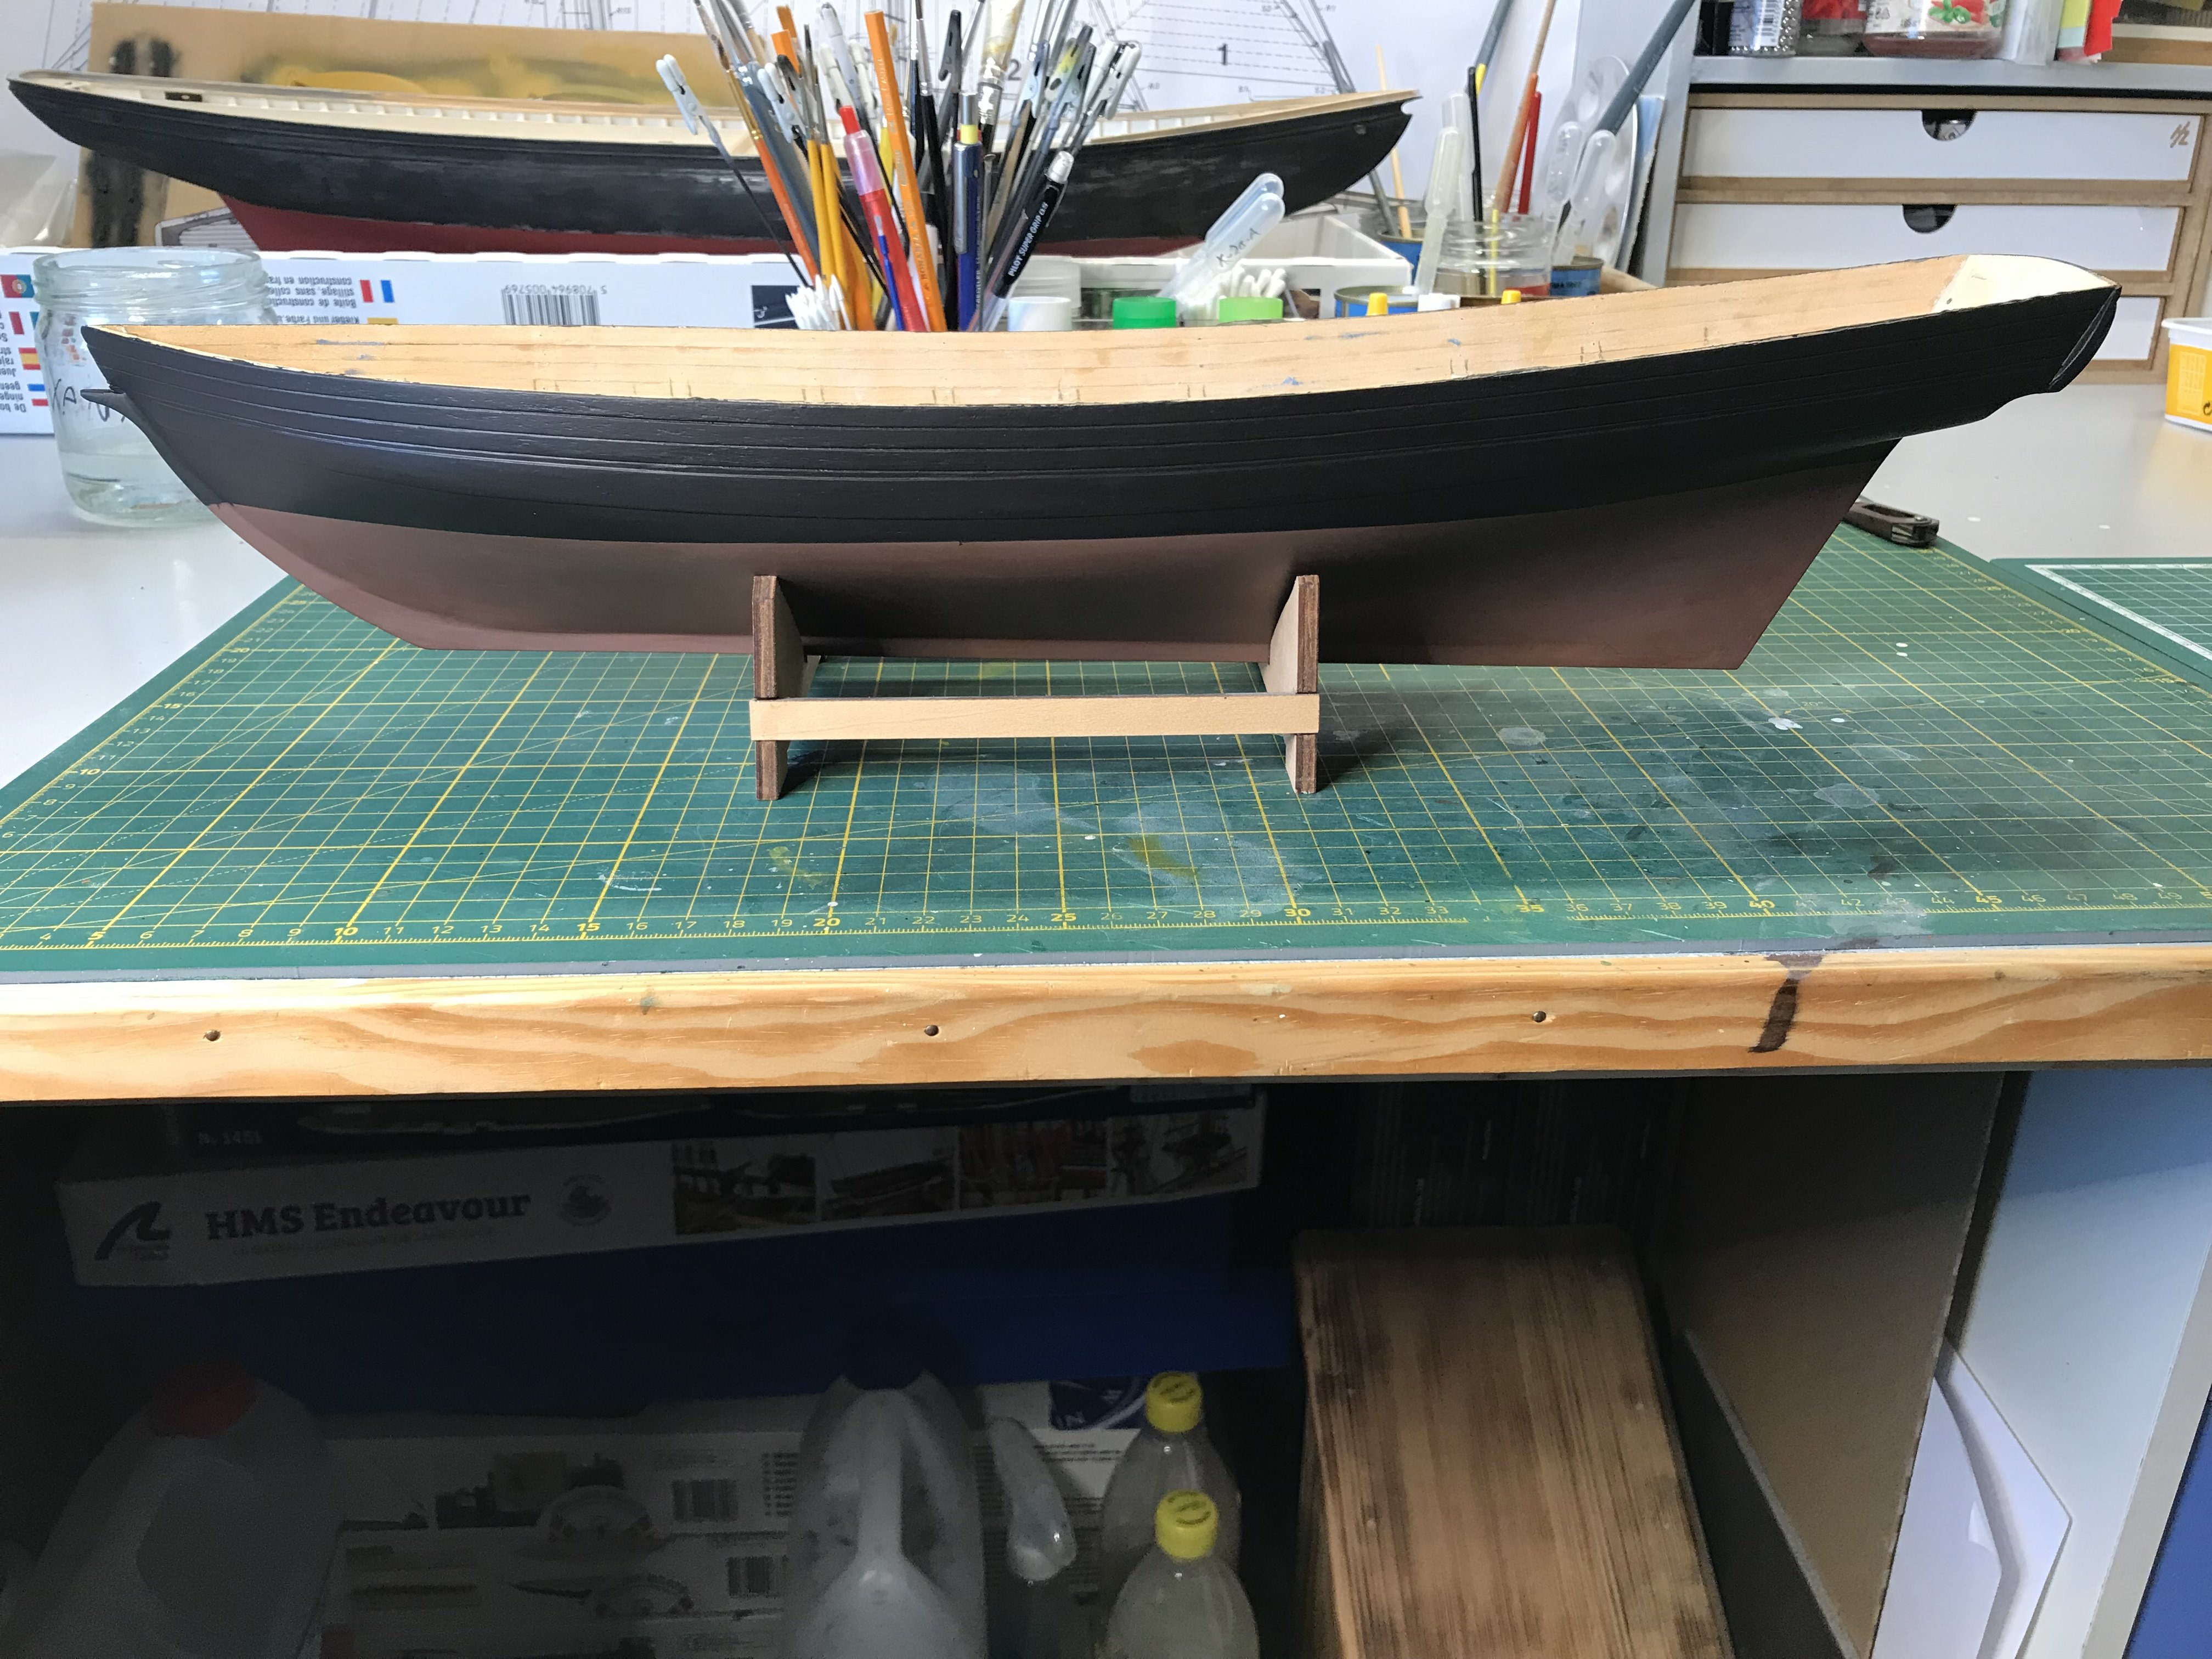
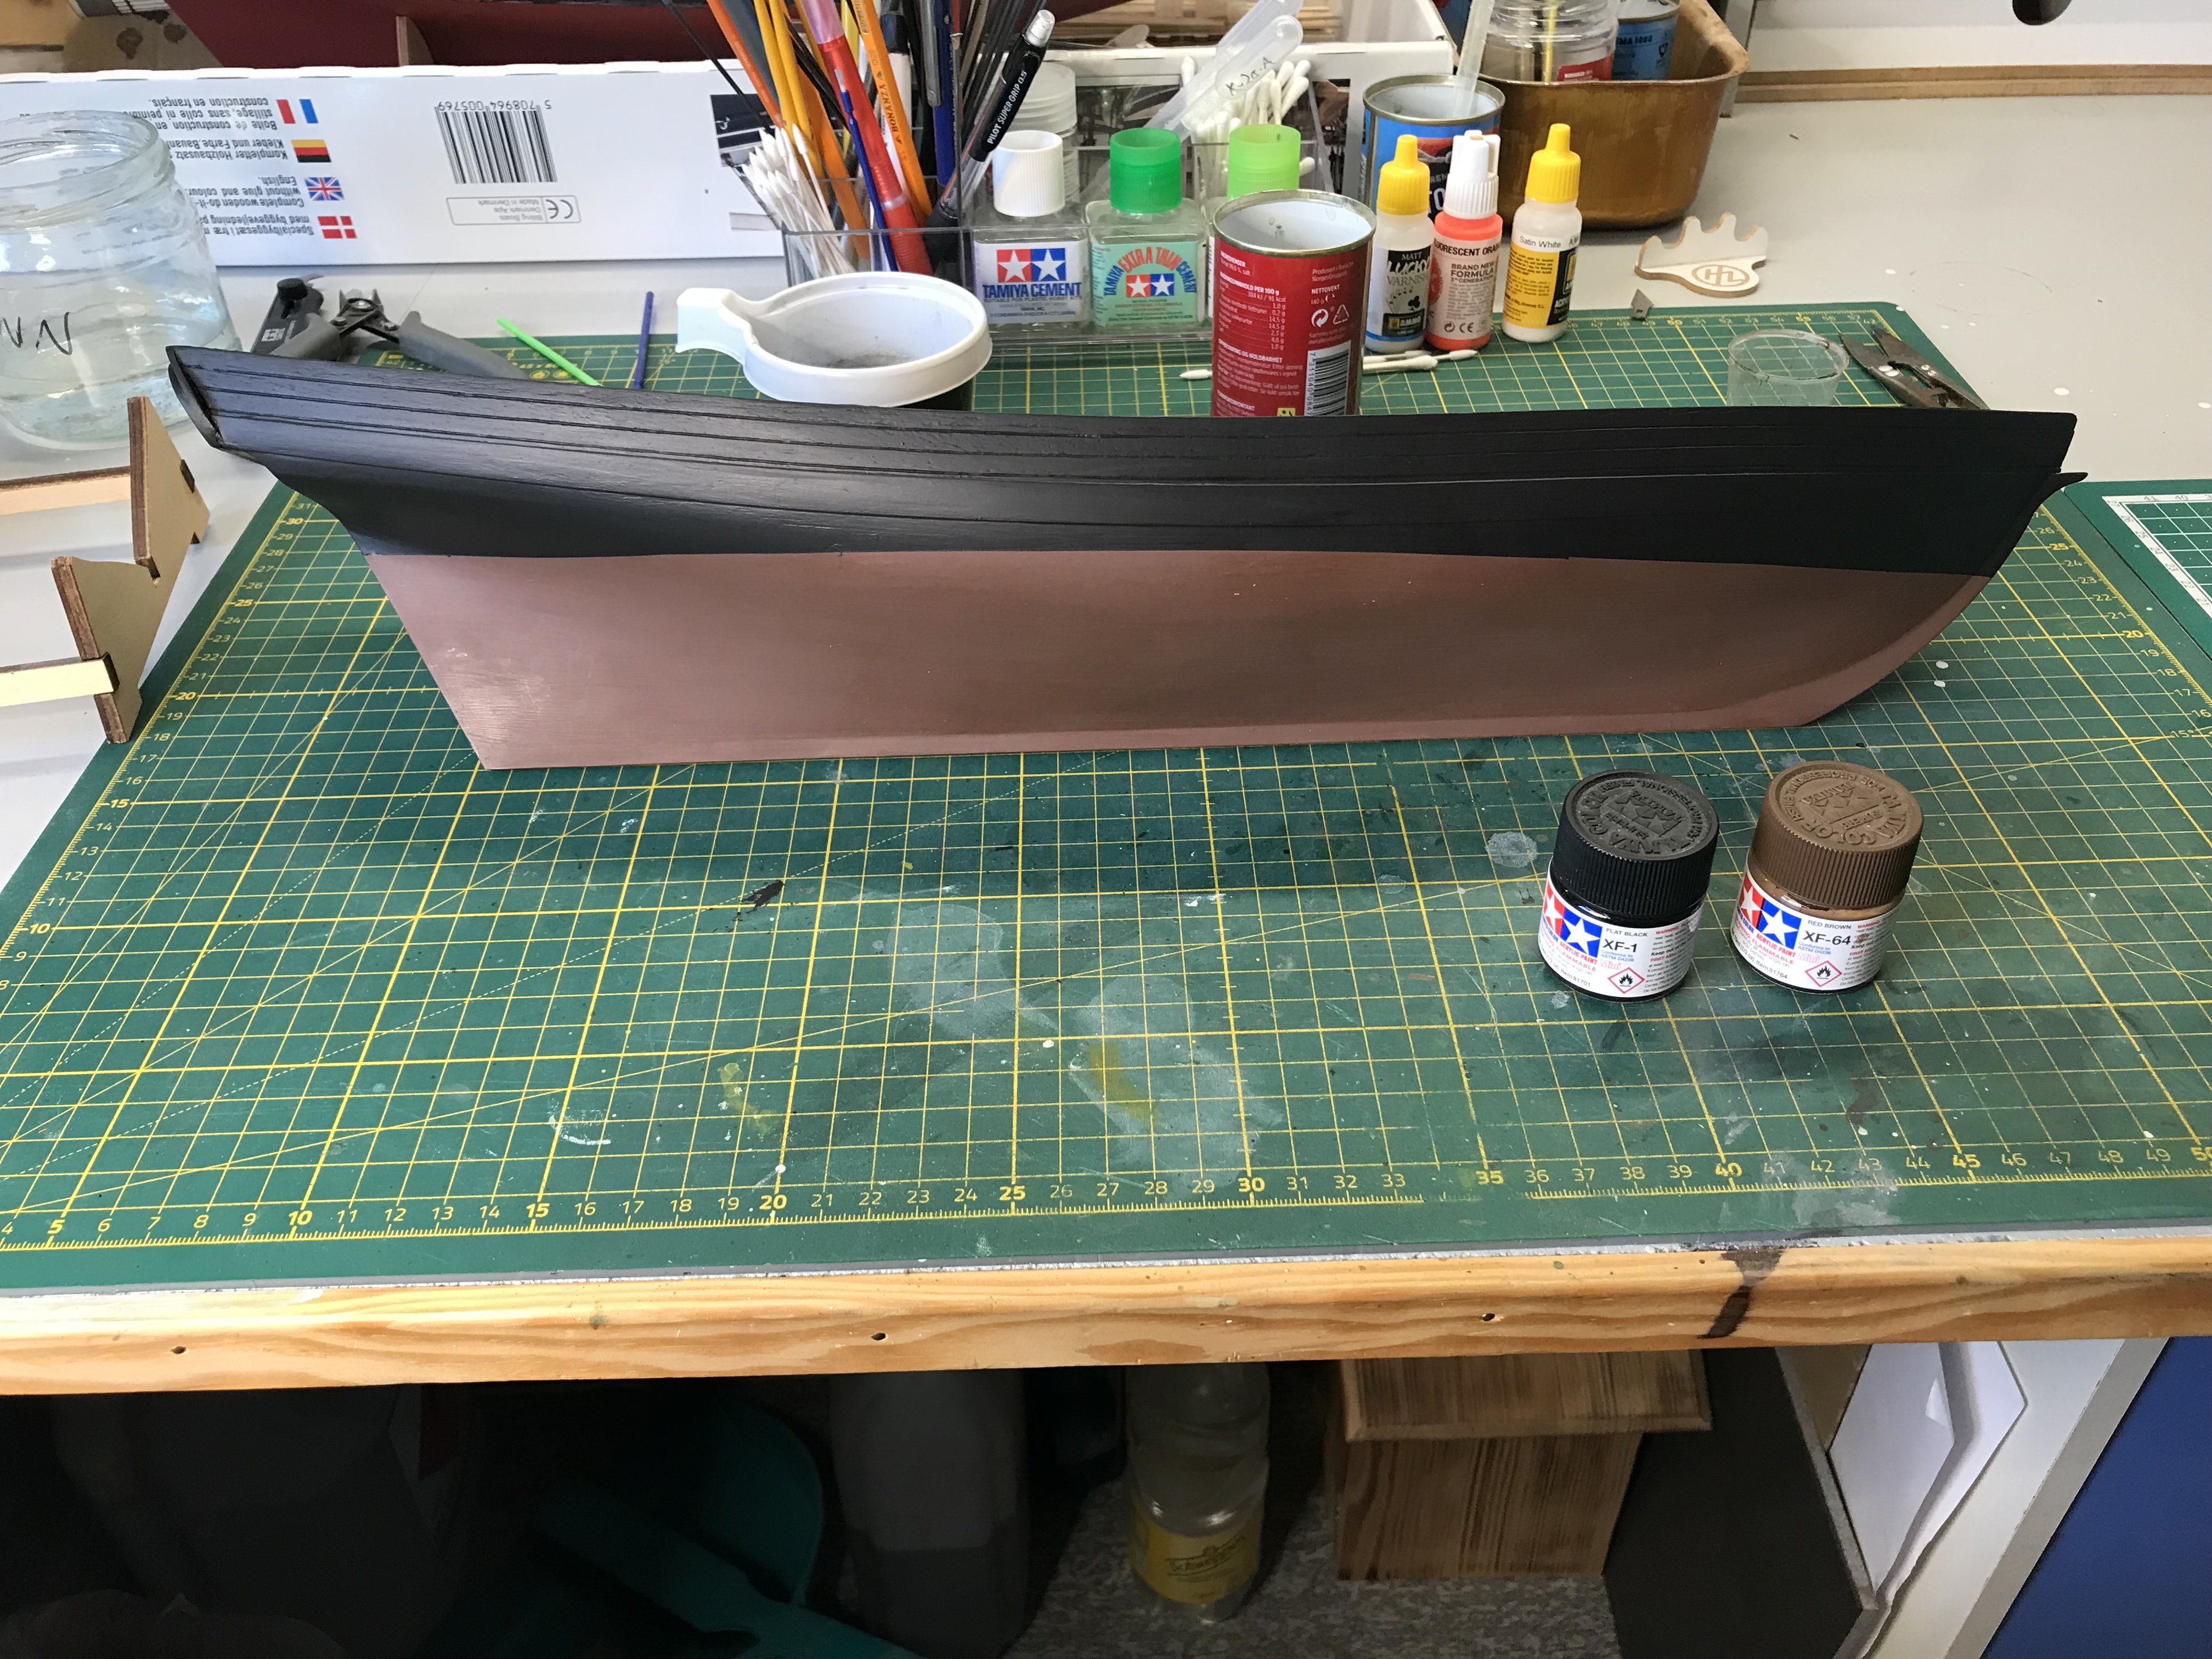
A wale (whale?) has been added and the hull primed.


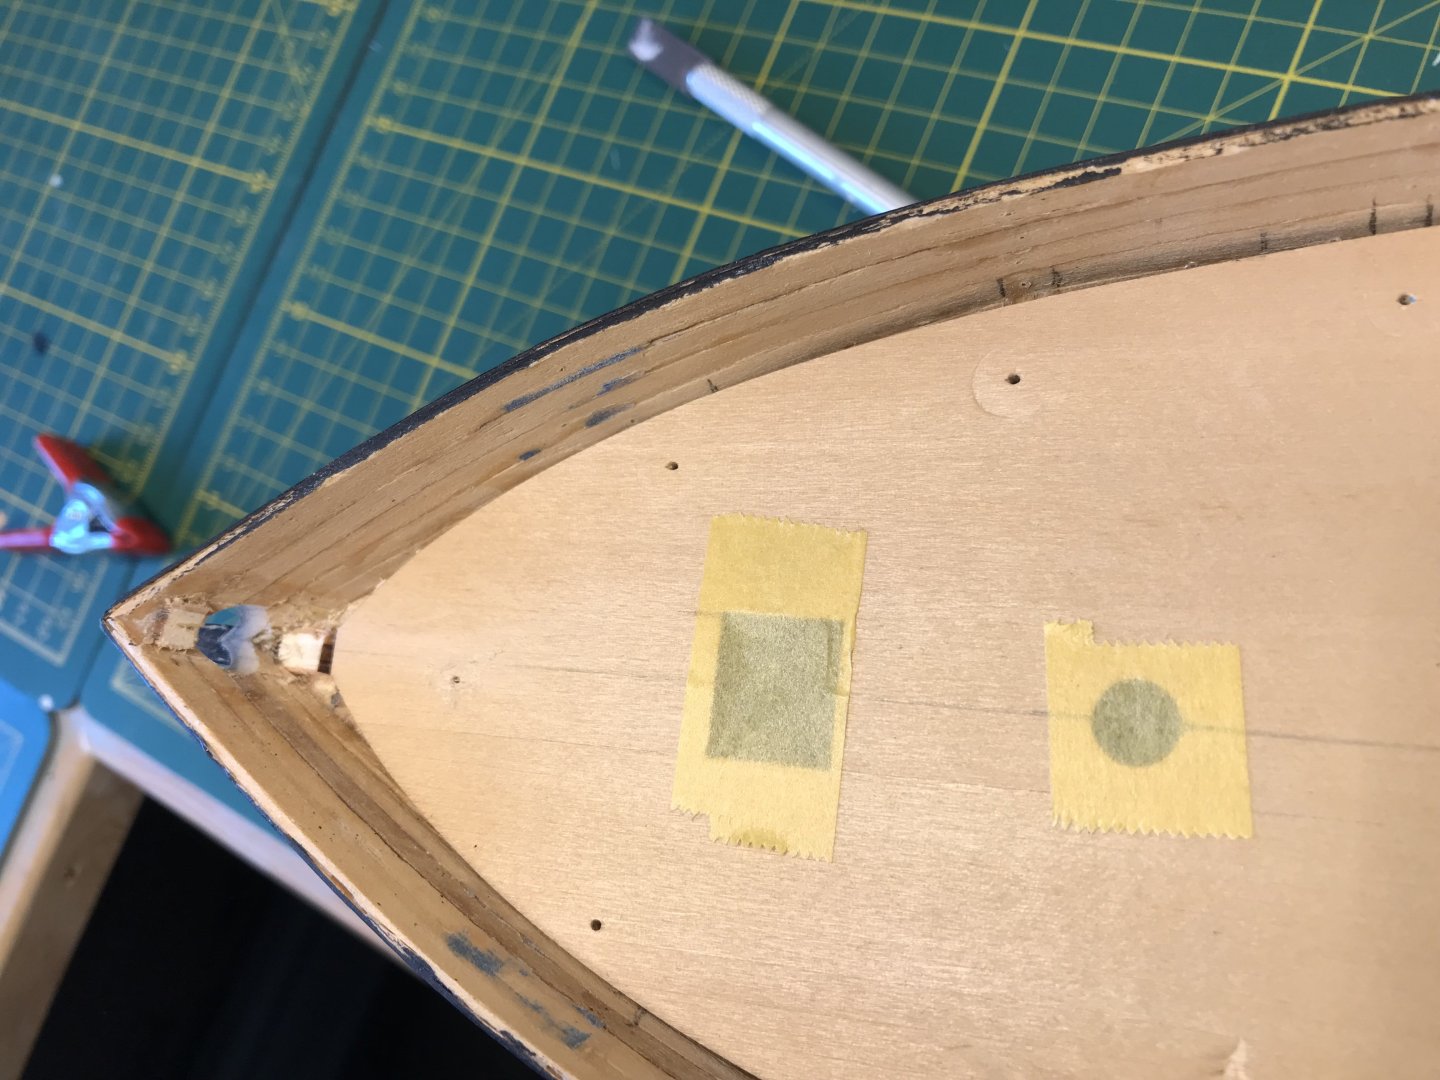
The waterline has been marked and the bottom painted. I used tamiya xf-64 redbrown for this.

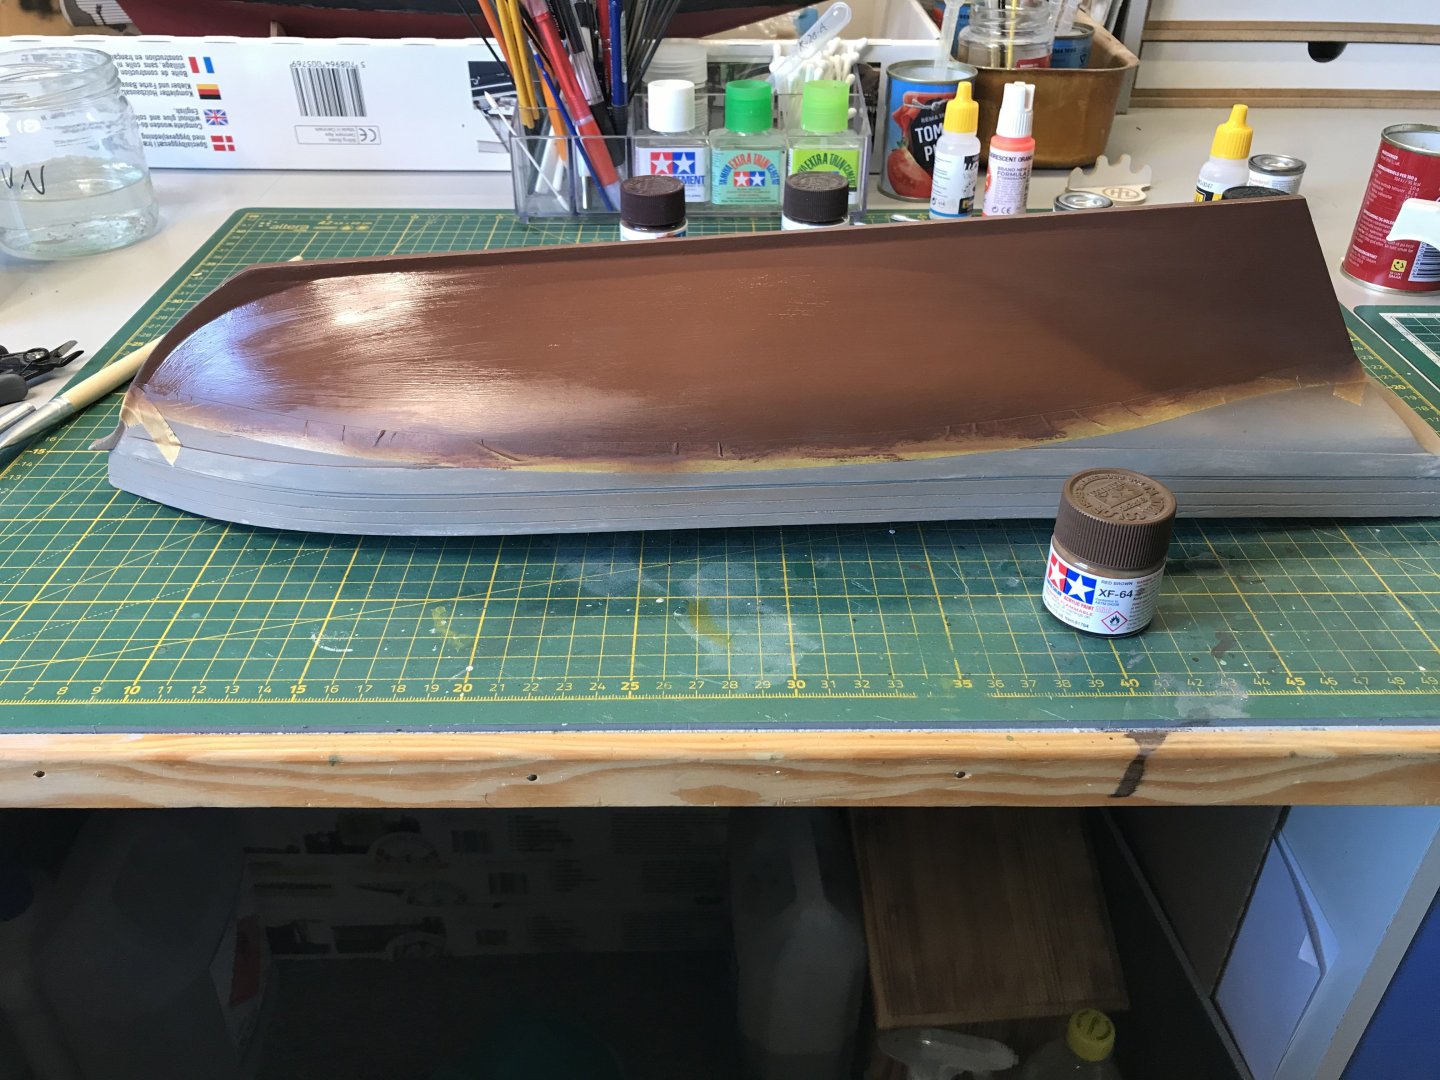
I then painted the topsides black with tamiya xf-1.


The waterline needs a couple of touch-ups where paint has creeped under the tape in some spots.
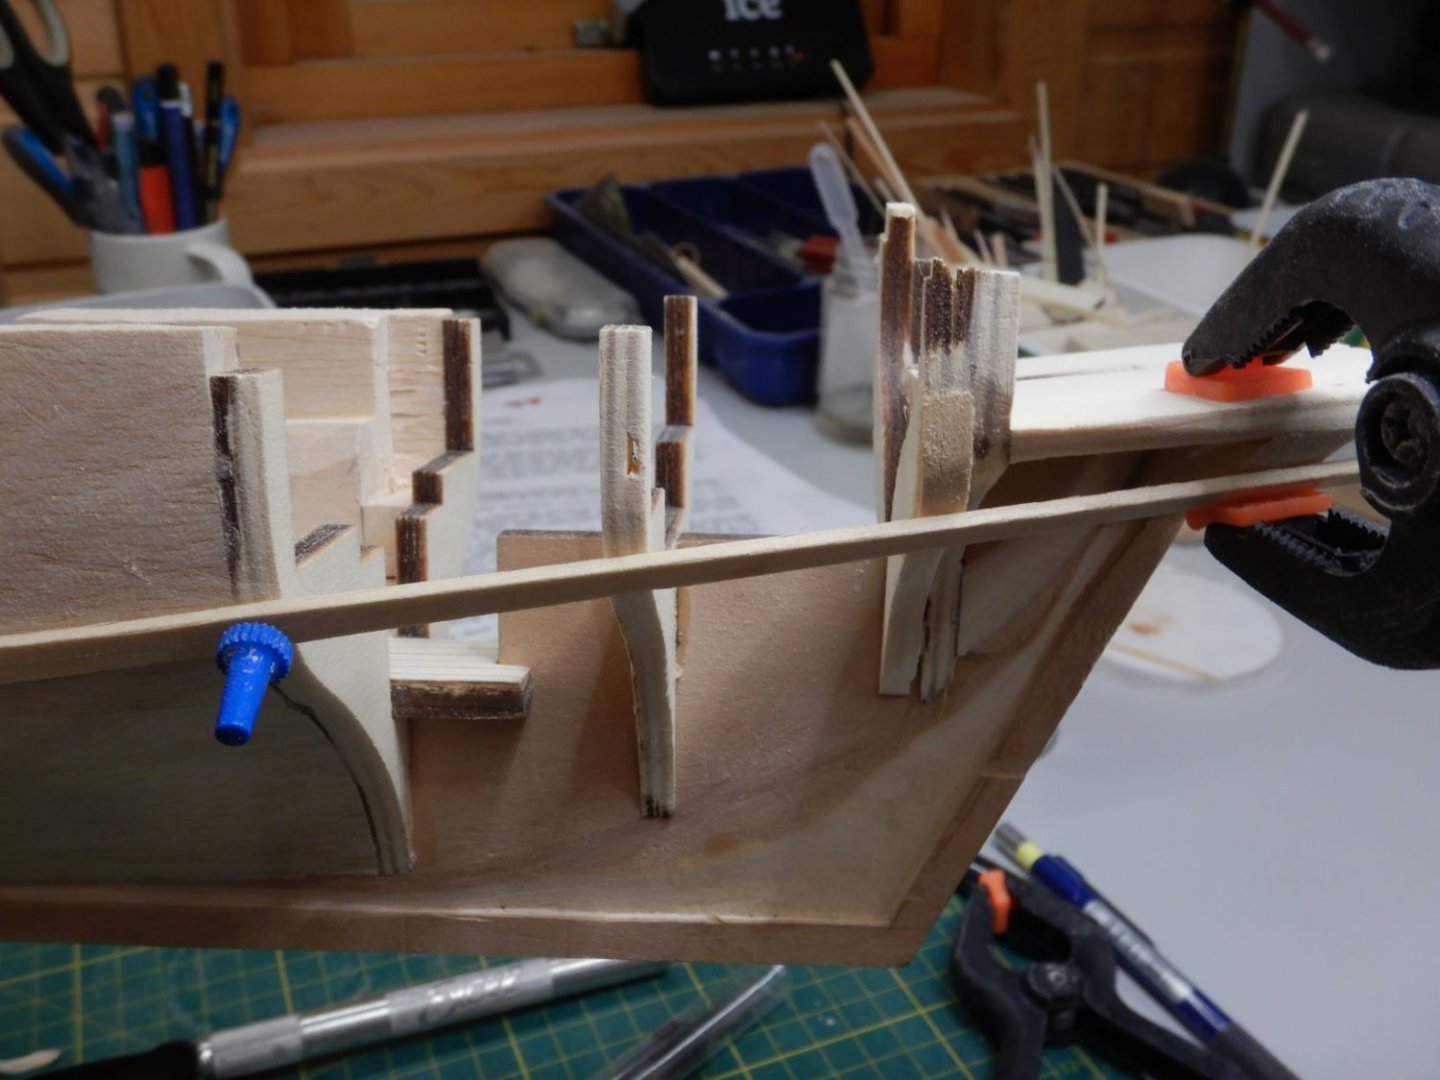
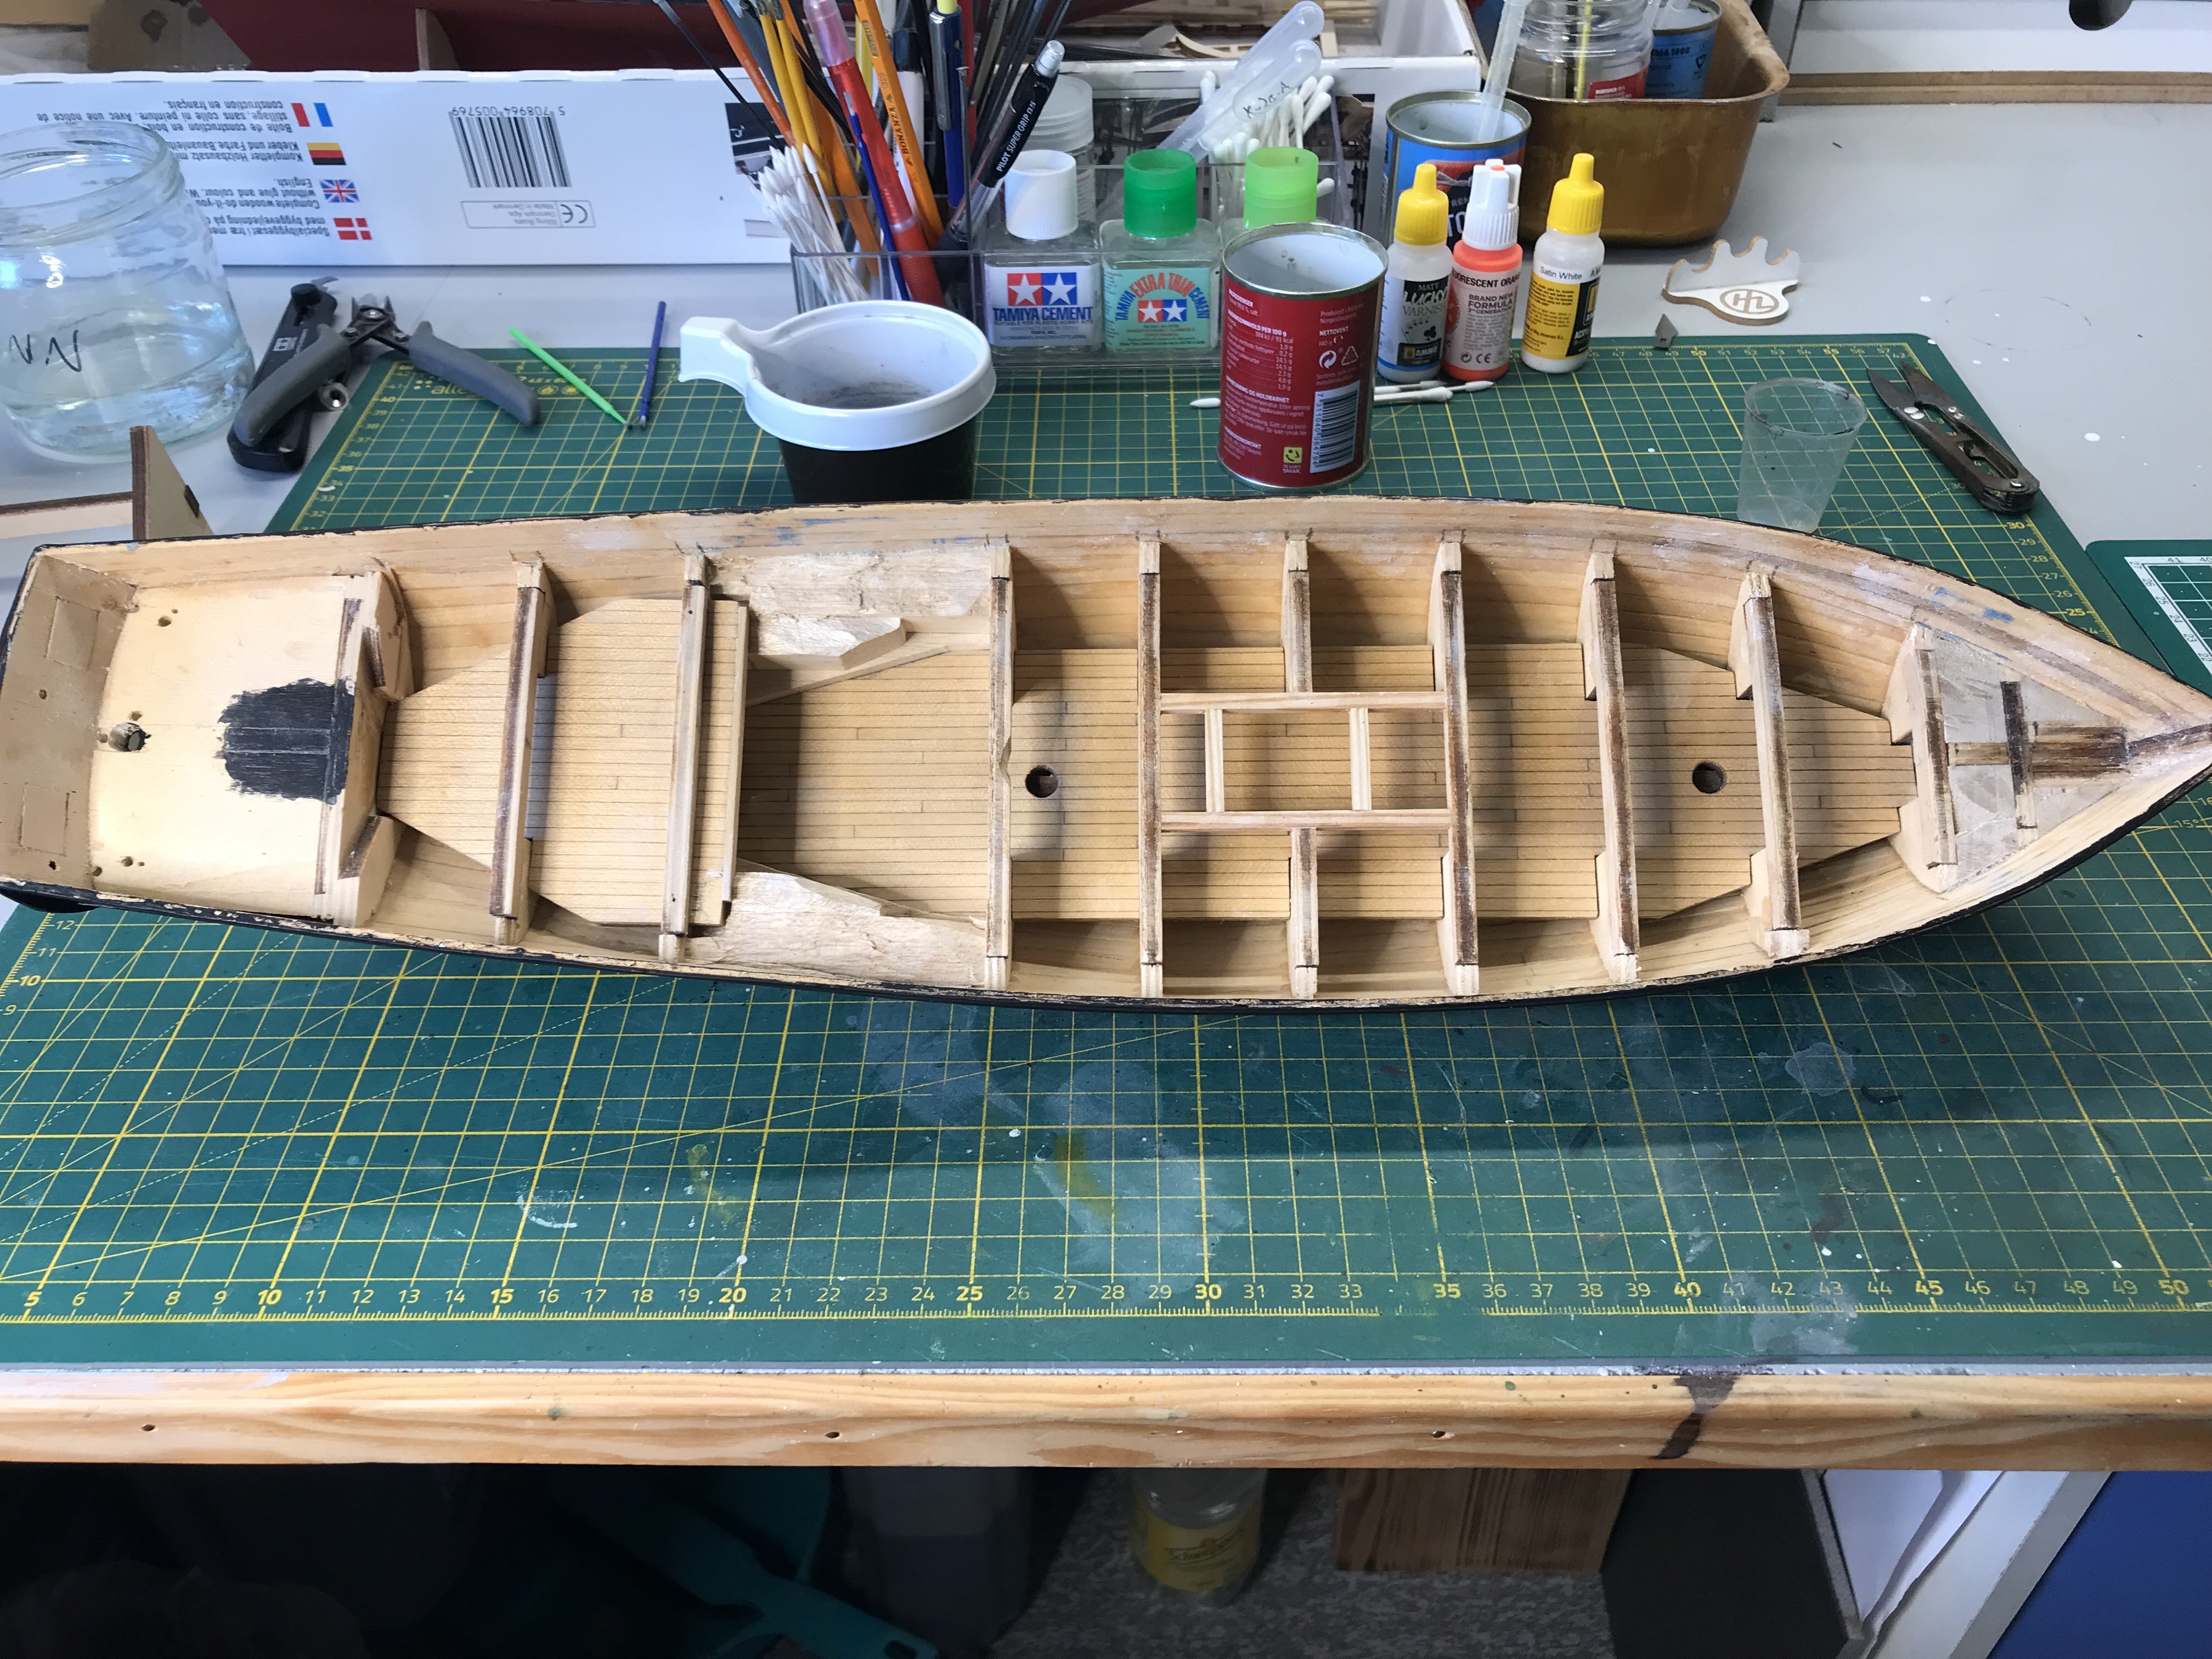
In preparations for the deck, I realised that one of the deckbeams crossed right over the main hatch, so I cut the deckbeam and built a framework for the main hatch. One of the deckbeams also interferes with the mainmast, so this needed a little trimming.

So this is how she sits today, slowly progressing and not not forgotten!Gaffrig.
- ccoyle and chris watton
-
2
-
Here’s a link to the norwegian wikipedia site.
https://wiki.cdd.no/index.php/Motorfabriken_Dan
and here from putting the engine back in the vessel after restoration.https://frammuseum.no/nb/blog/2017/07/09/originalmotoren-tilbake-pa-gjoa/
Hope this helps a little!
Gaffrig.
- Canute, thibaultron, mtaylor and 2 others
-
5
-
Thank you!
I try my best, and hopefully it will be good enough in the end!
Gaffrig.
-
Hello everyone!
This must be MSW's slowest updating buildlog?! Updates roughly once a year...
I have found out that when you buy an old house that needs a lot of work, it really cuts into your modeling time..
Anyway, the most important room in the house is finished, (We all know what room that is, don't we?) and work on the Lynx is progressing slowly but surely.
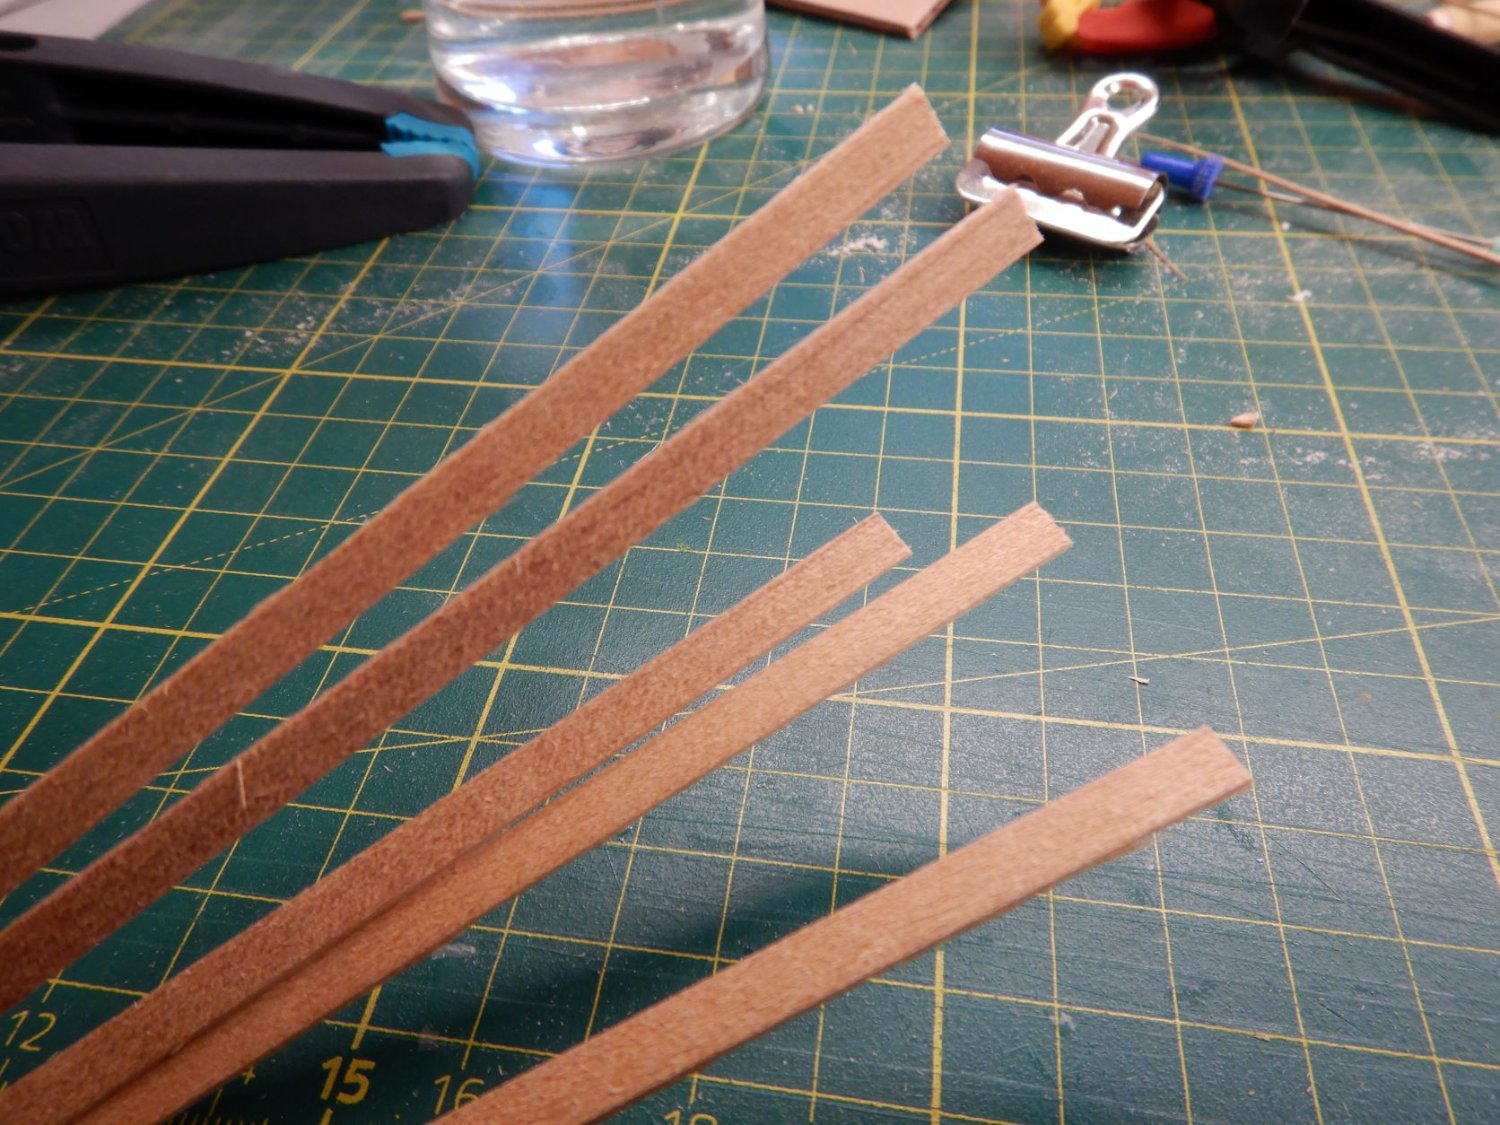
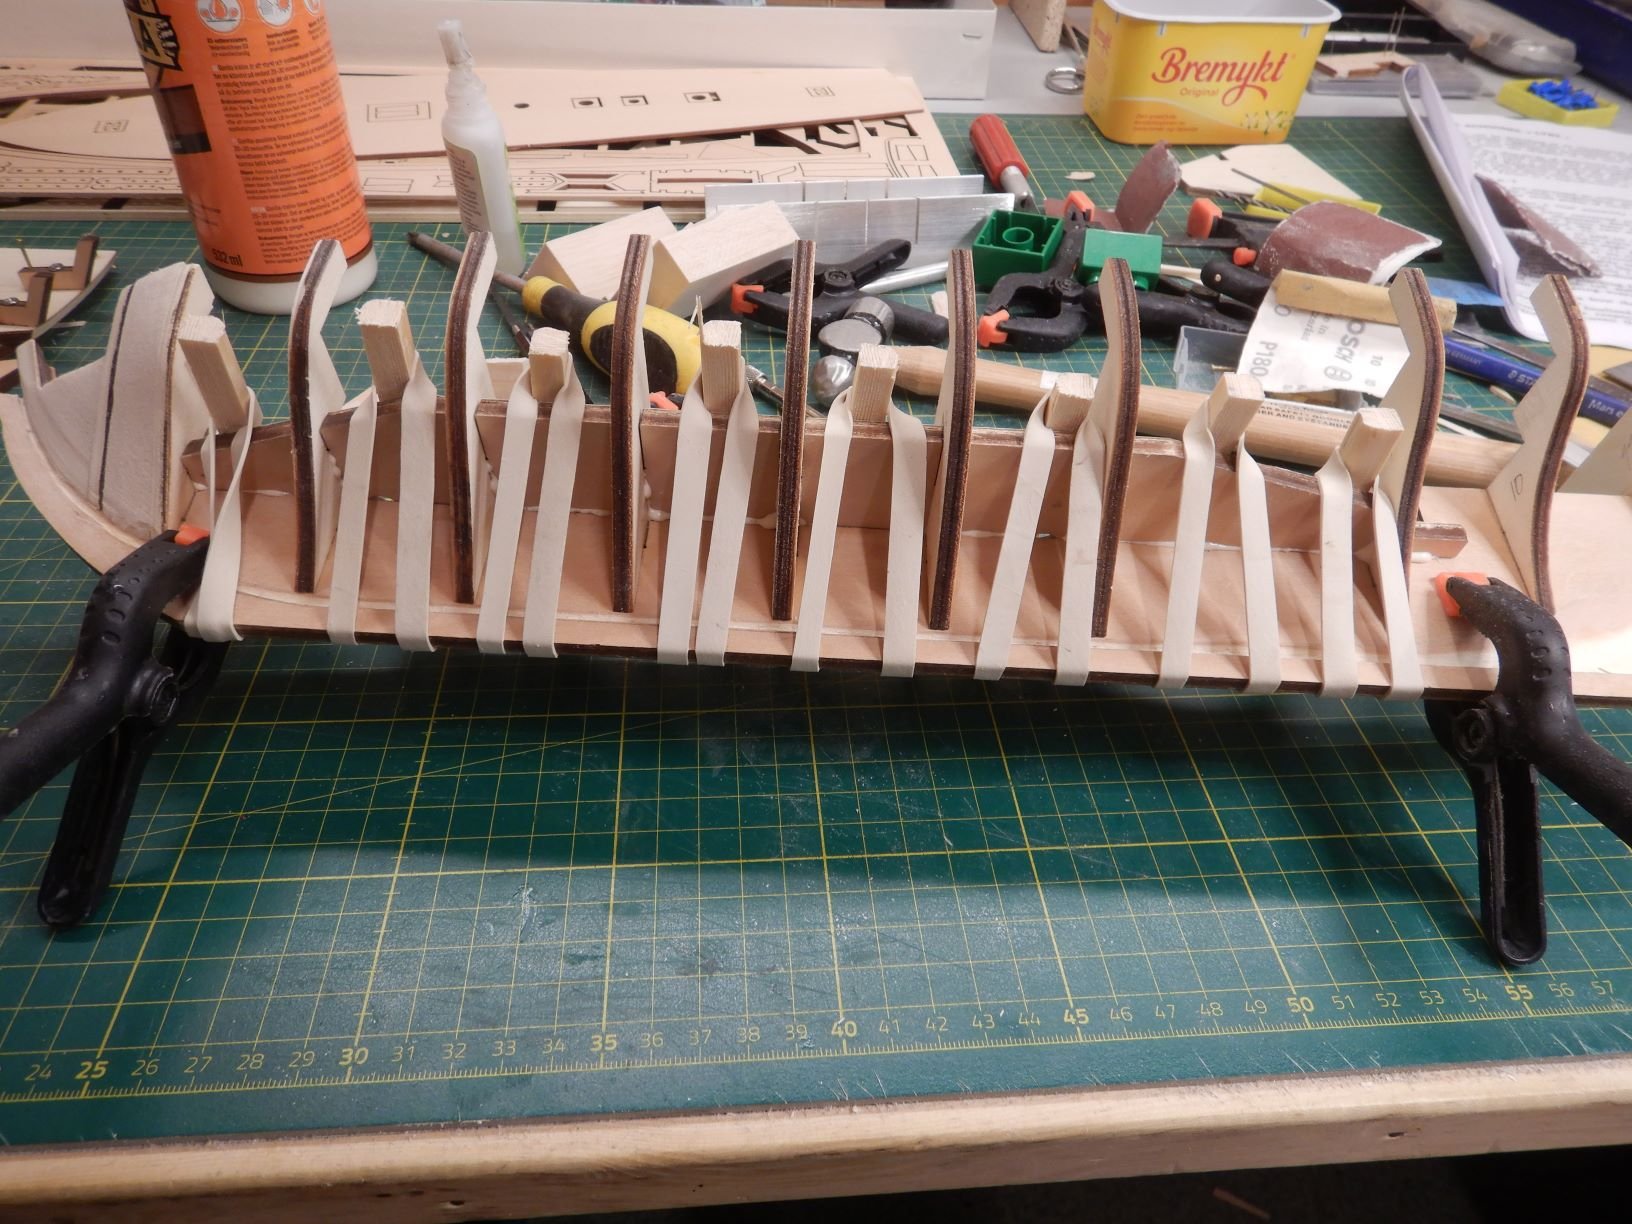
I have been working on the second planking, using the 1x5mm walnut supplied with the kit. They were a little rough looking but after some sanding they turned out ok.

I started at the top of the bulwarks and worked my way down.
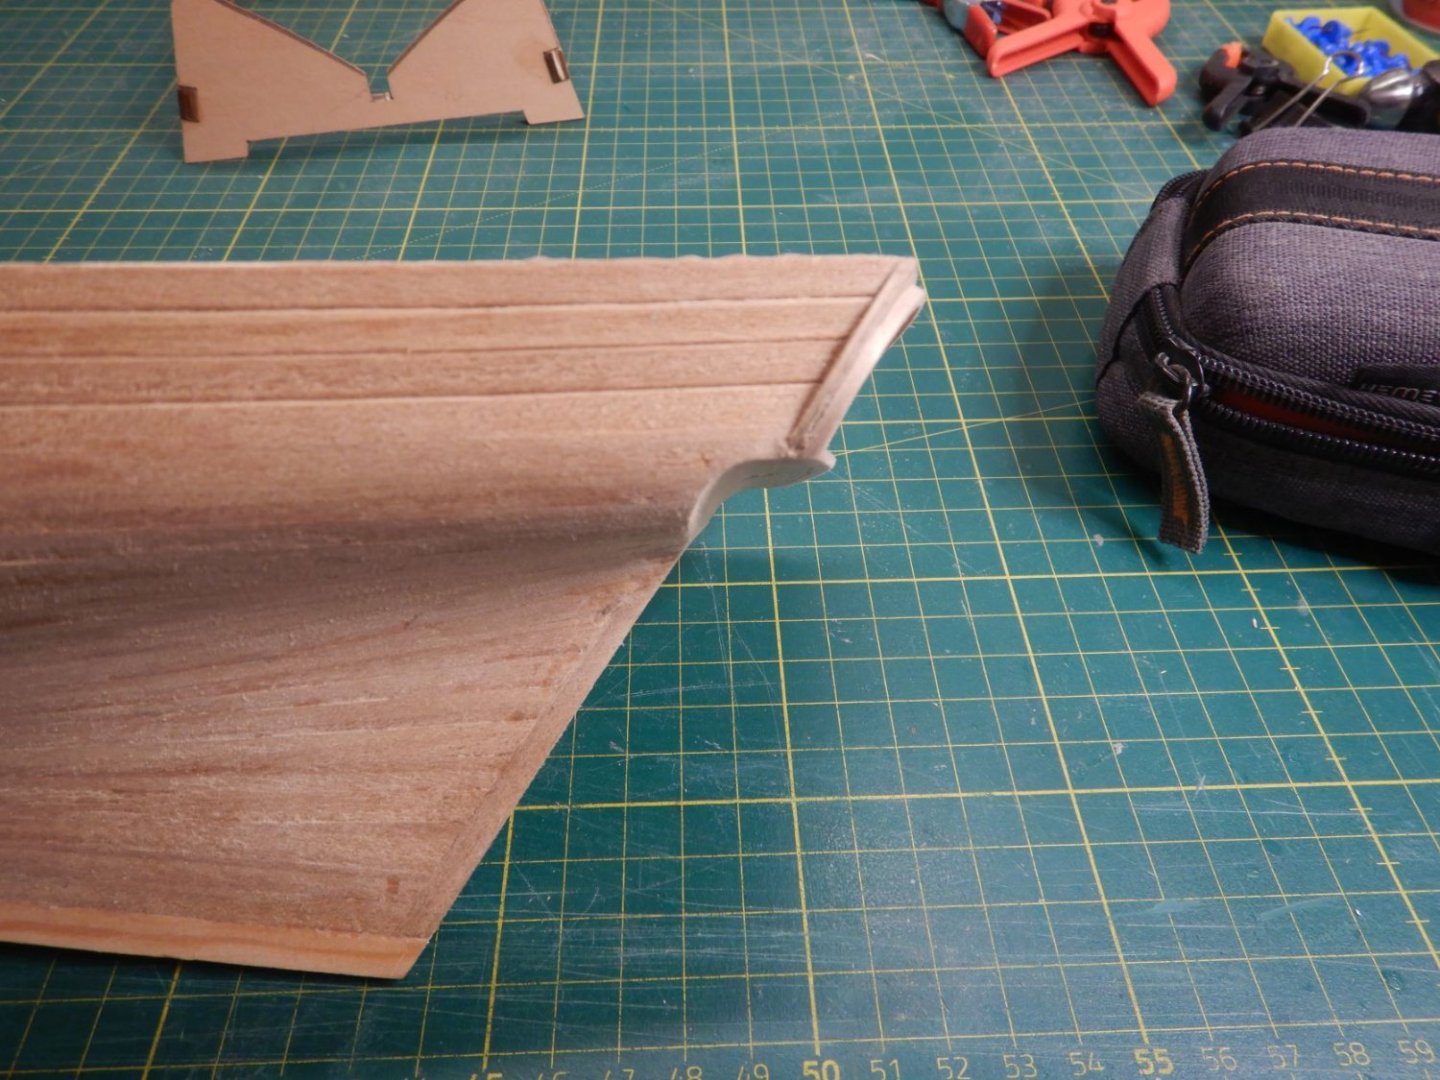
I thought it would look good to round the edges of the first three planks, but if it doesn't I can always fill and sand it smooth.
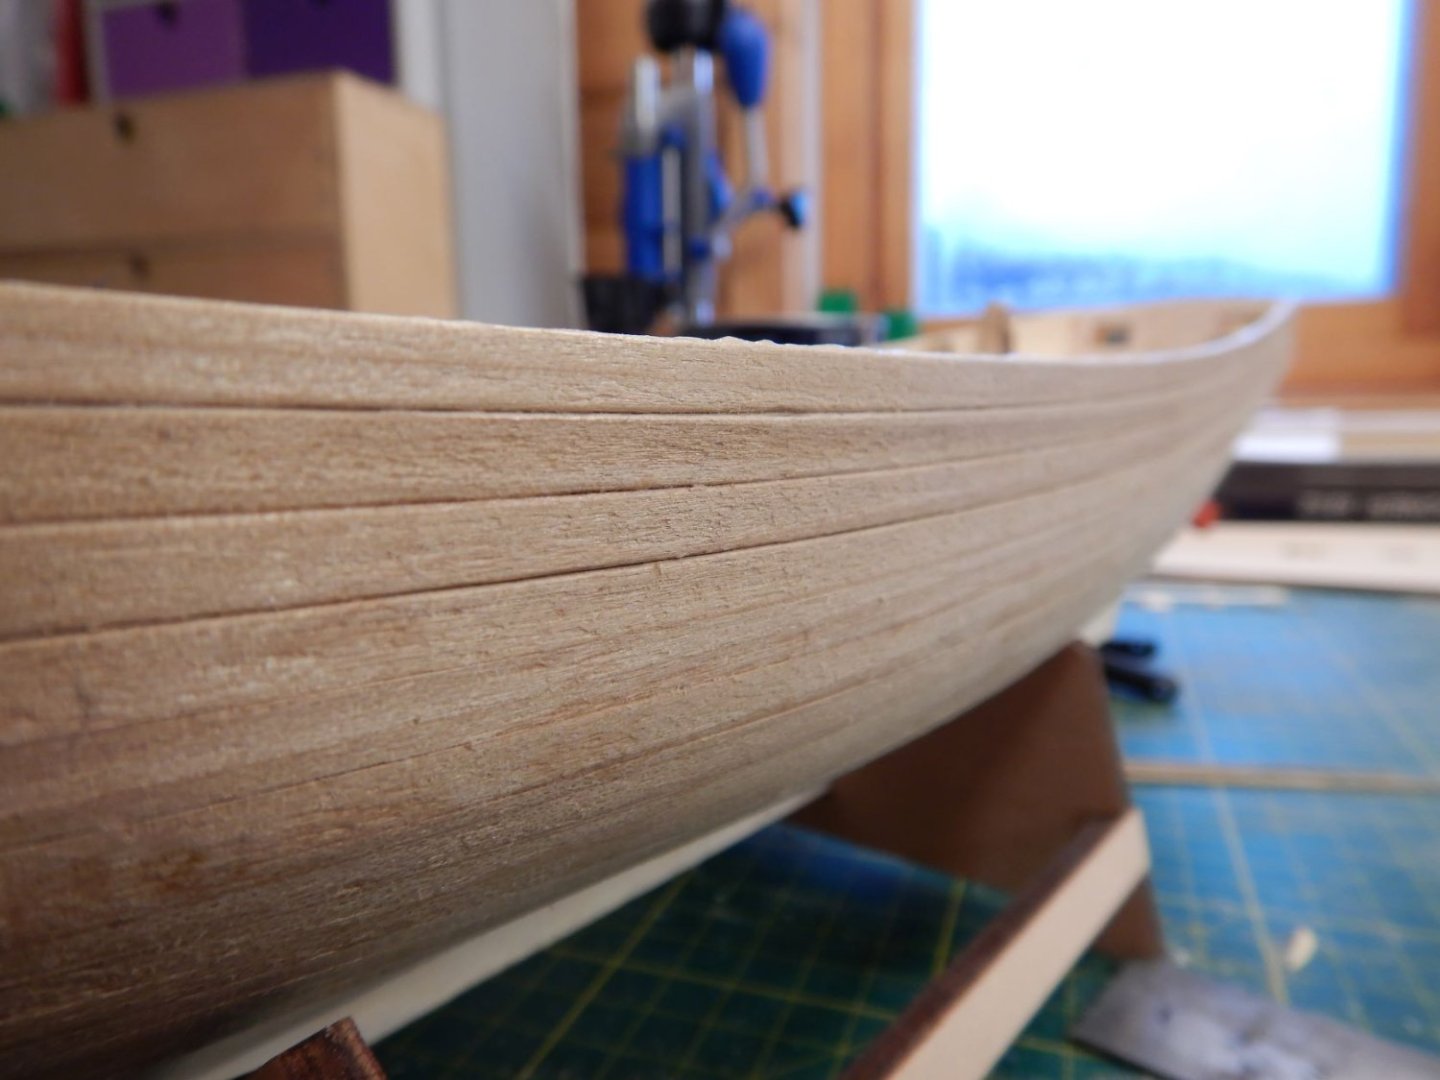
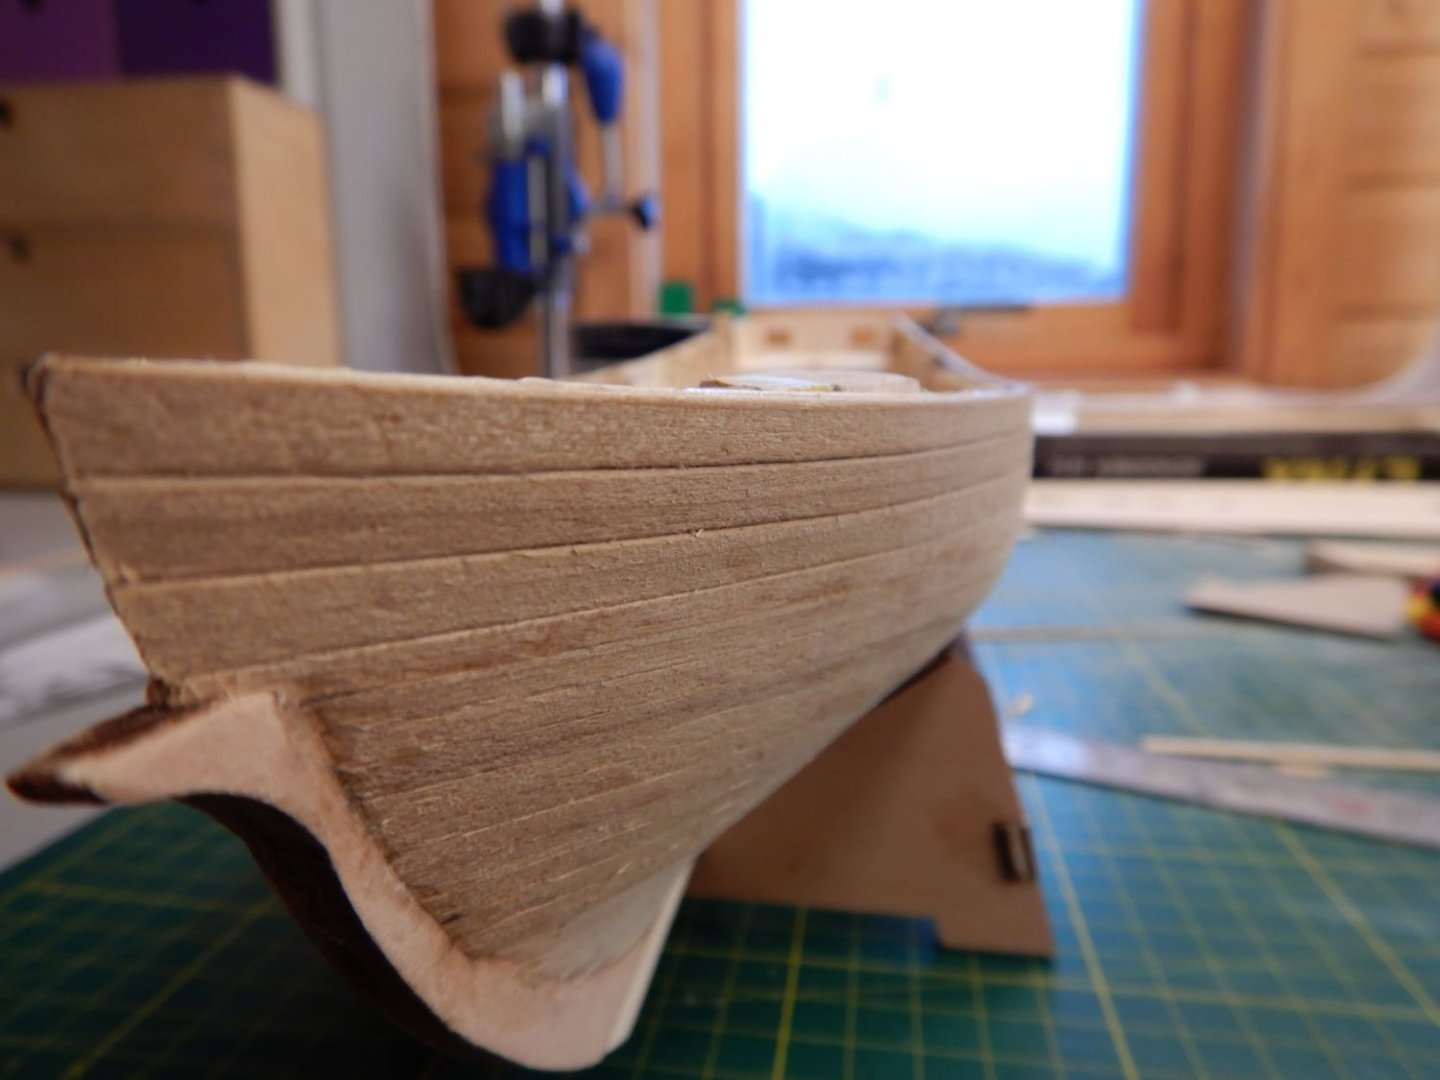


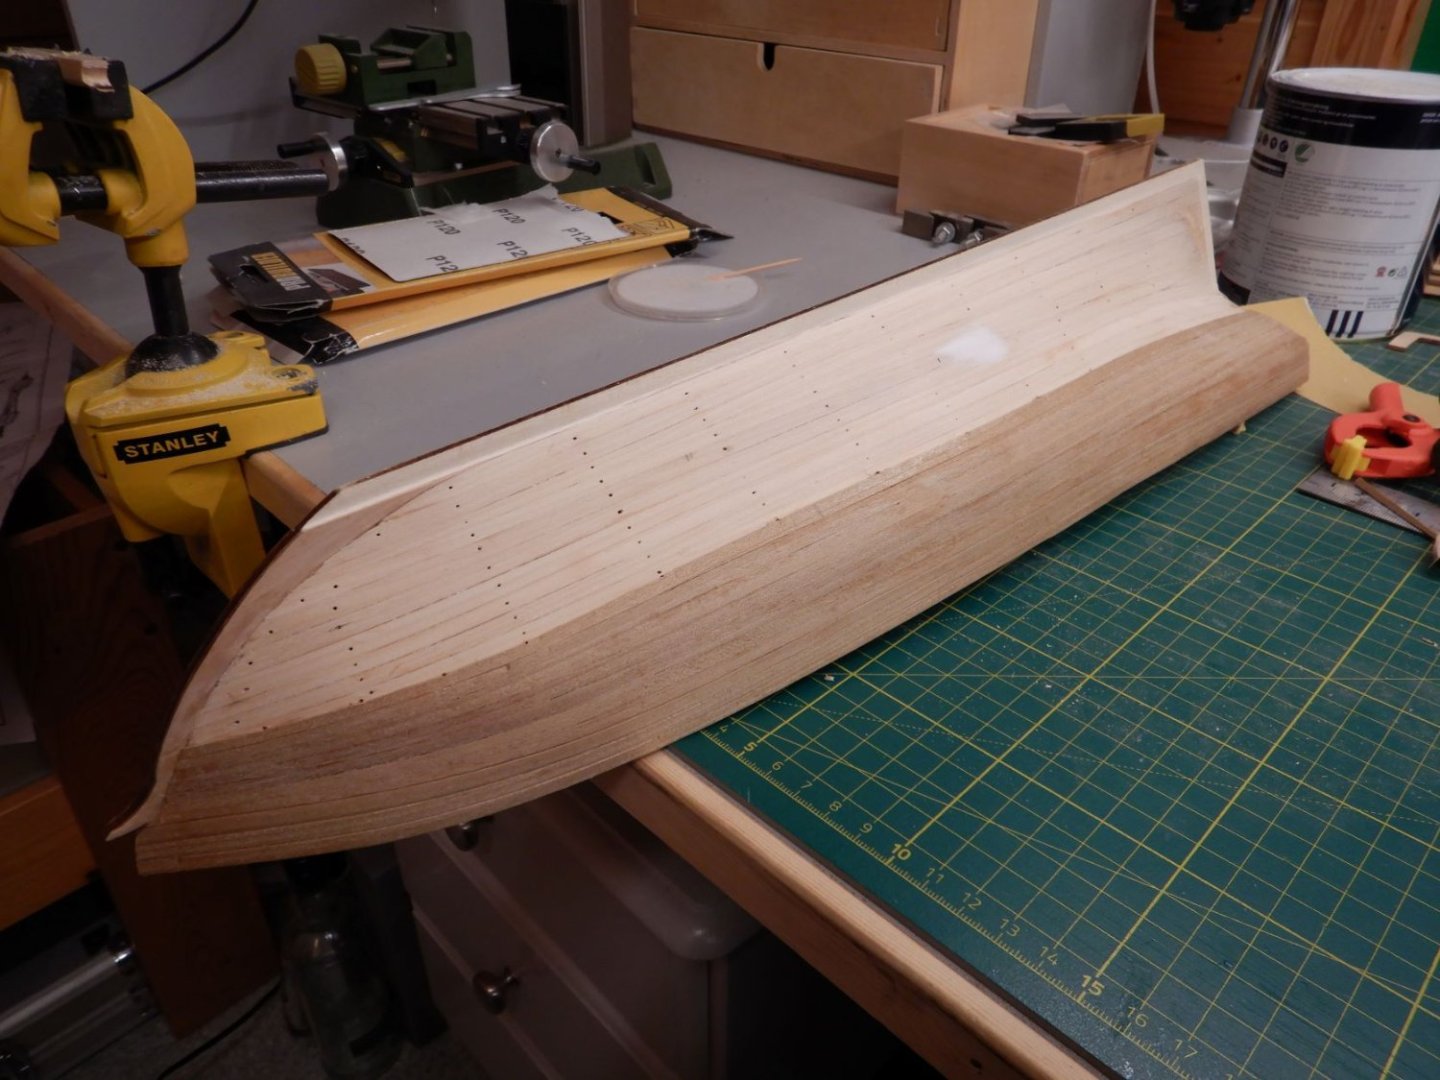


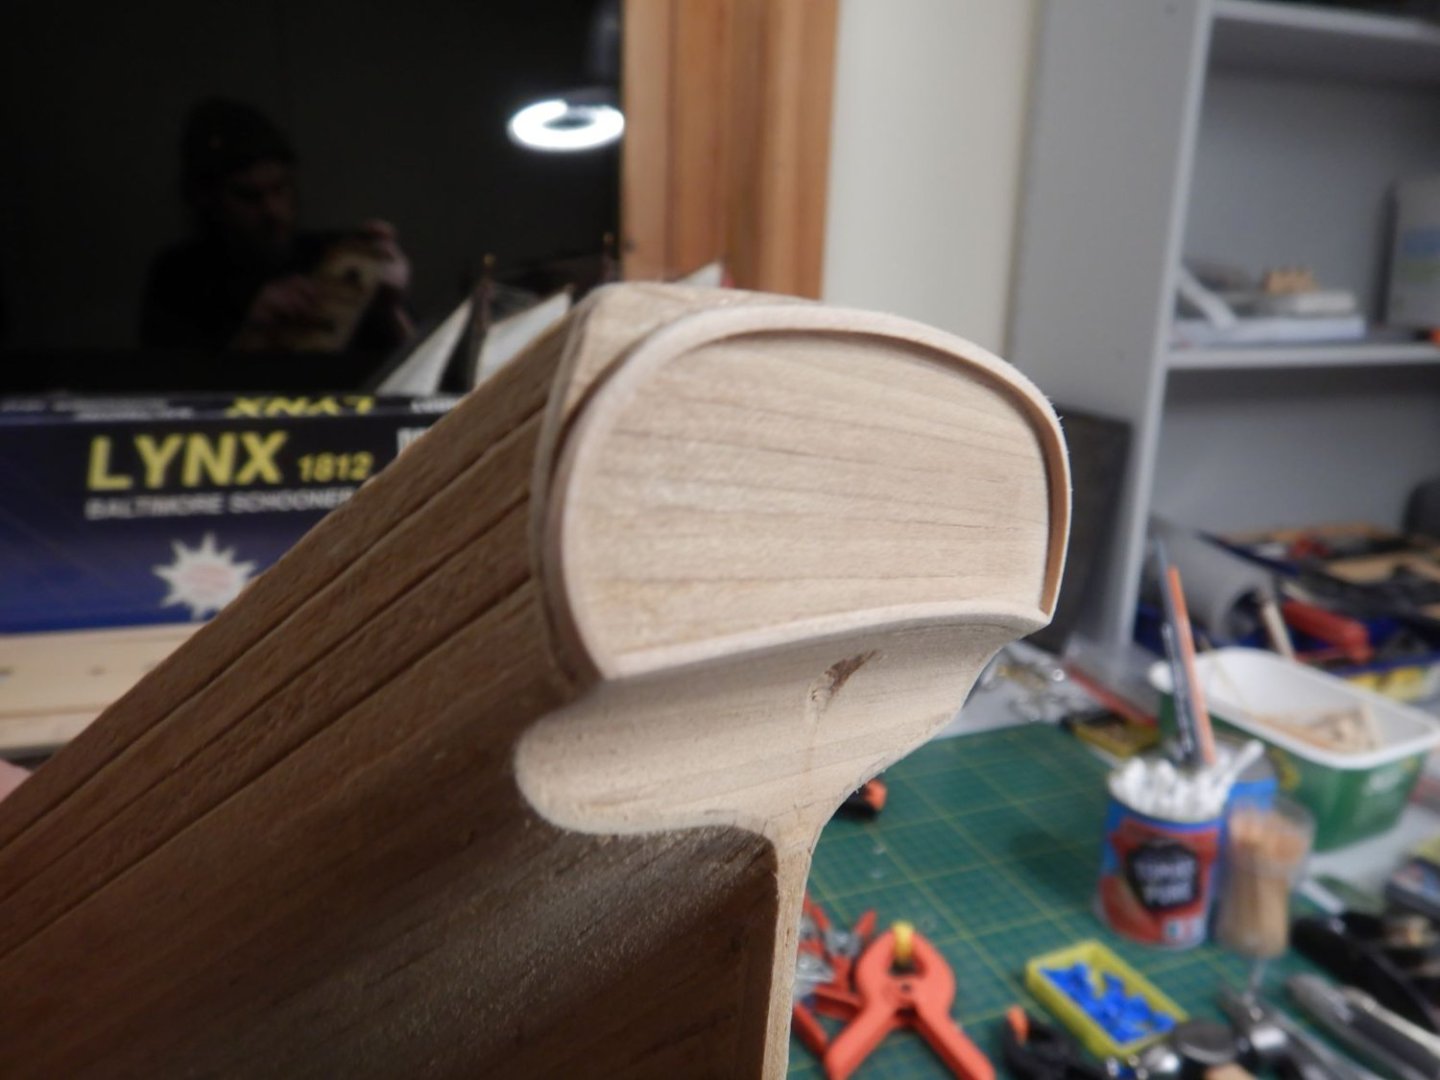
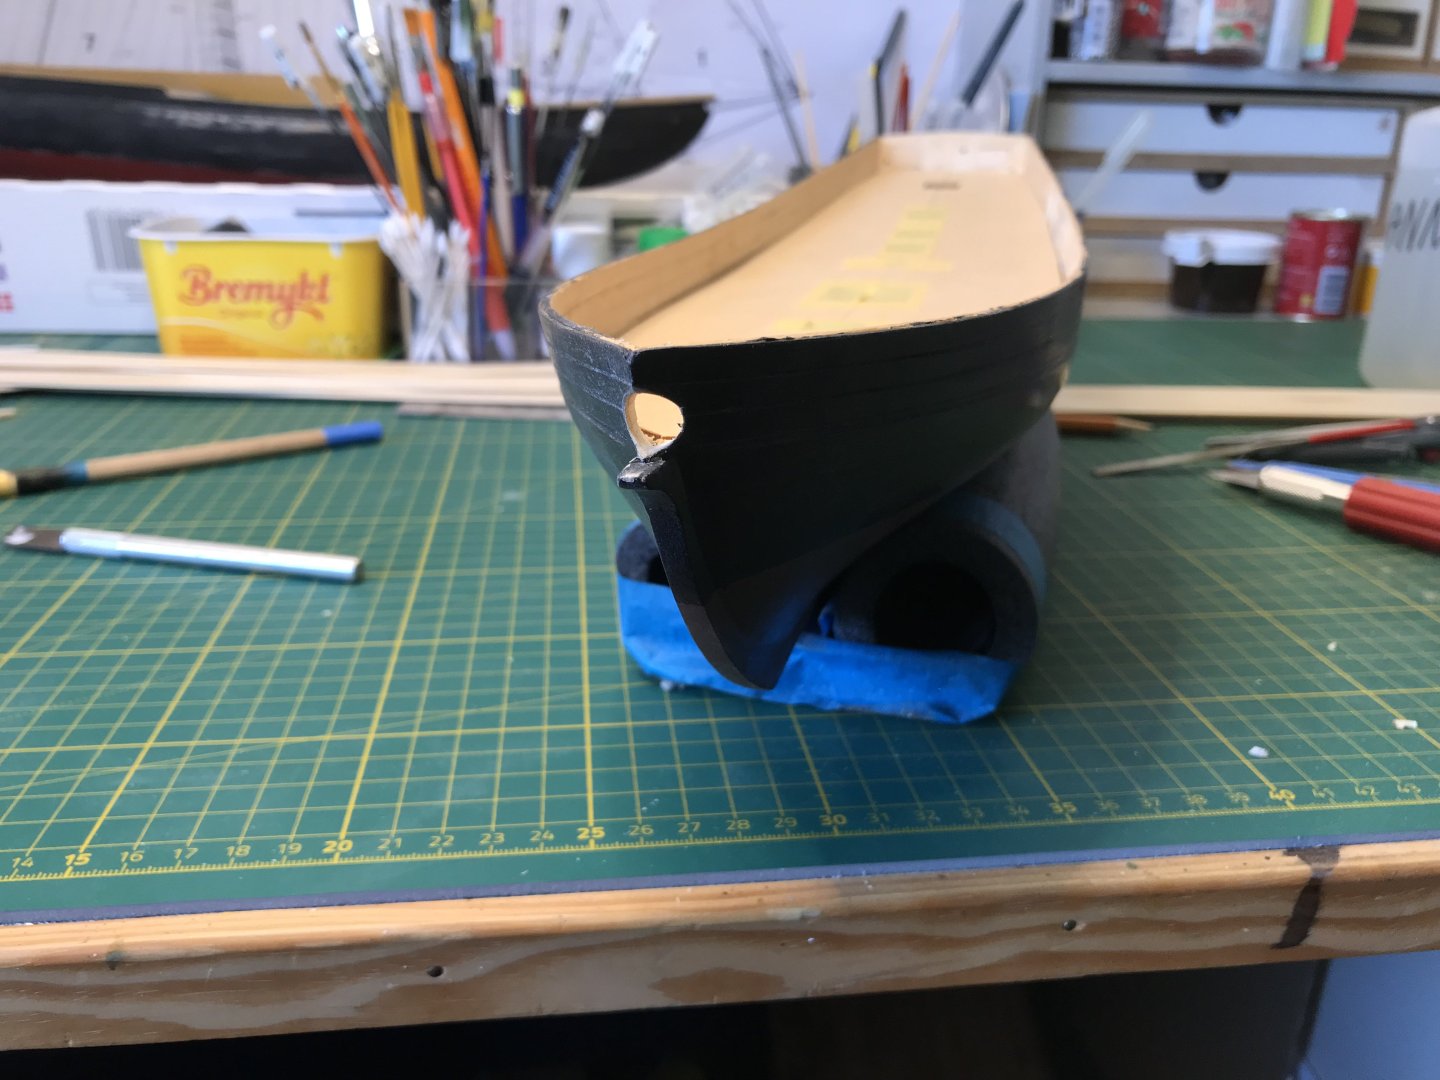
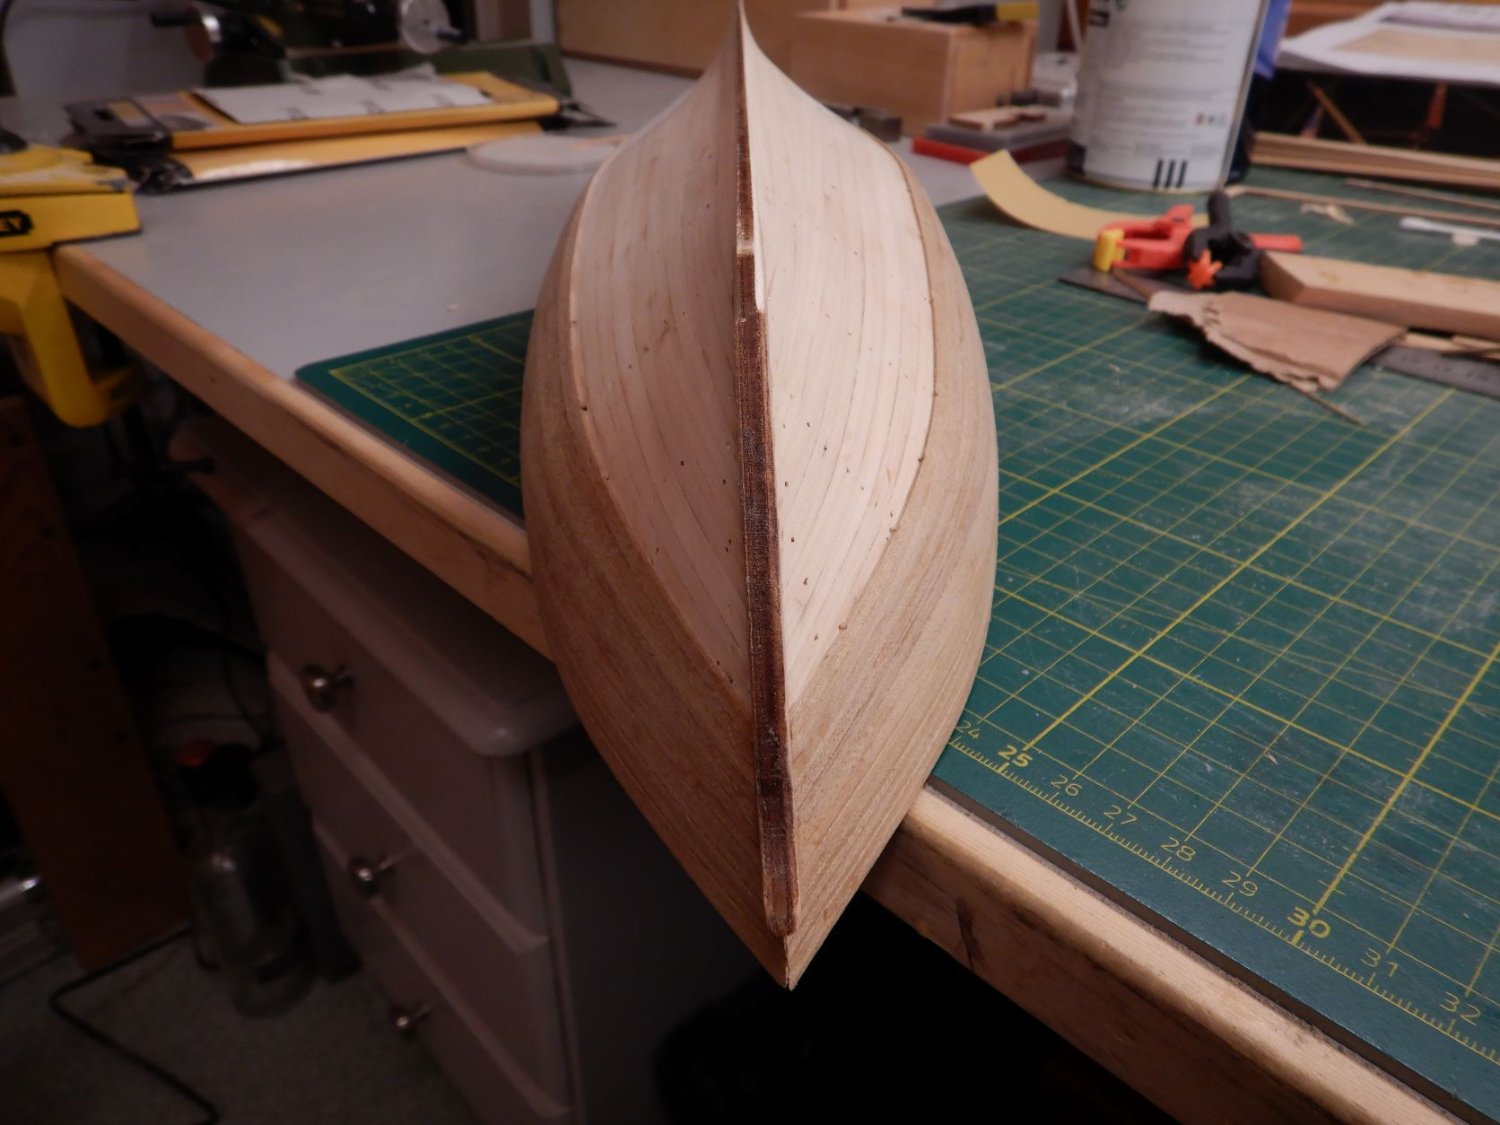
The stern turned out the way I had hoped, looking in my eyes more correct.
In the last pictures here the hull has only got a rough sanding, so that is the next project, to fine sand and fill, and sand... And then some paint.
Hopefully it will turn into a shipmodel in a year or two at the speed I'm going!
All the best,
Gaffrig
- ibozev, Prowler901, ccoyle and 1 other
-
4
-
Hello all!
Wow, I knew it had been a while since I updated this build log, but one year?!
Well, life has gotten in the way quite a bit this past year, but I have been building a little now and then.
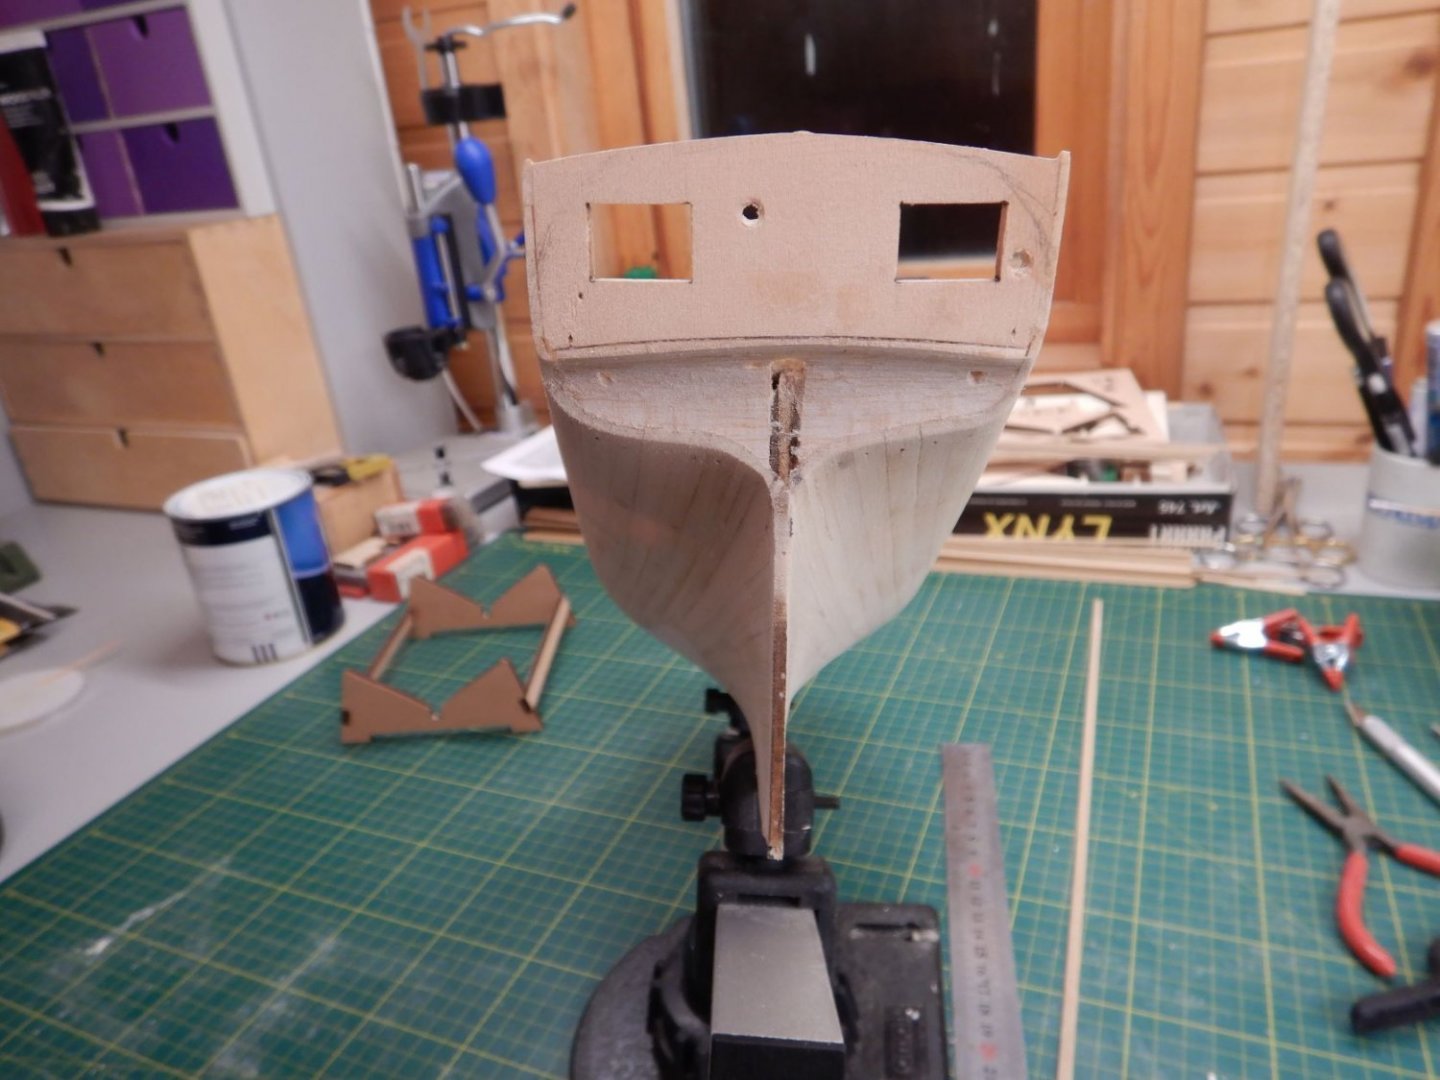
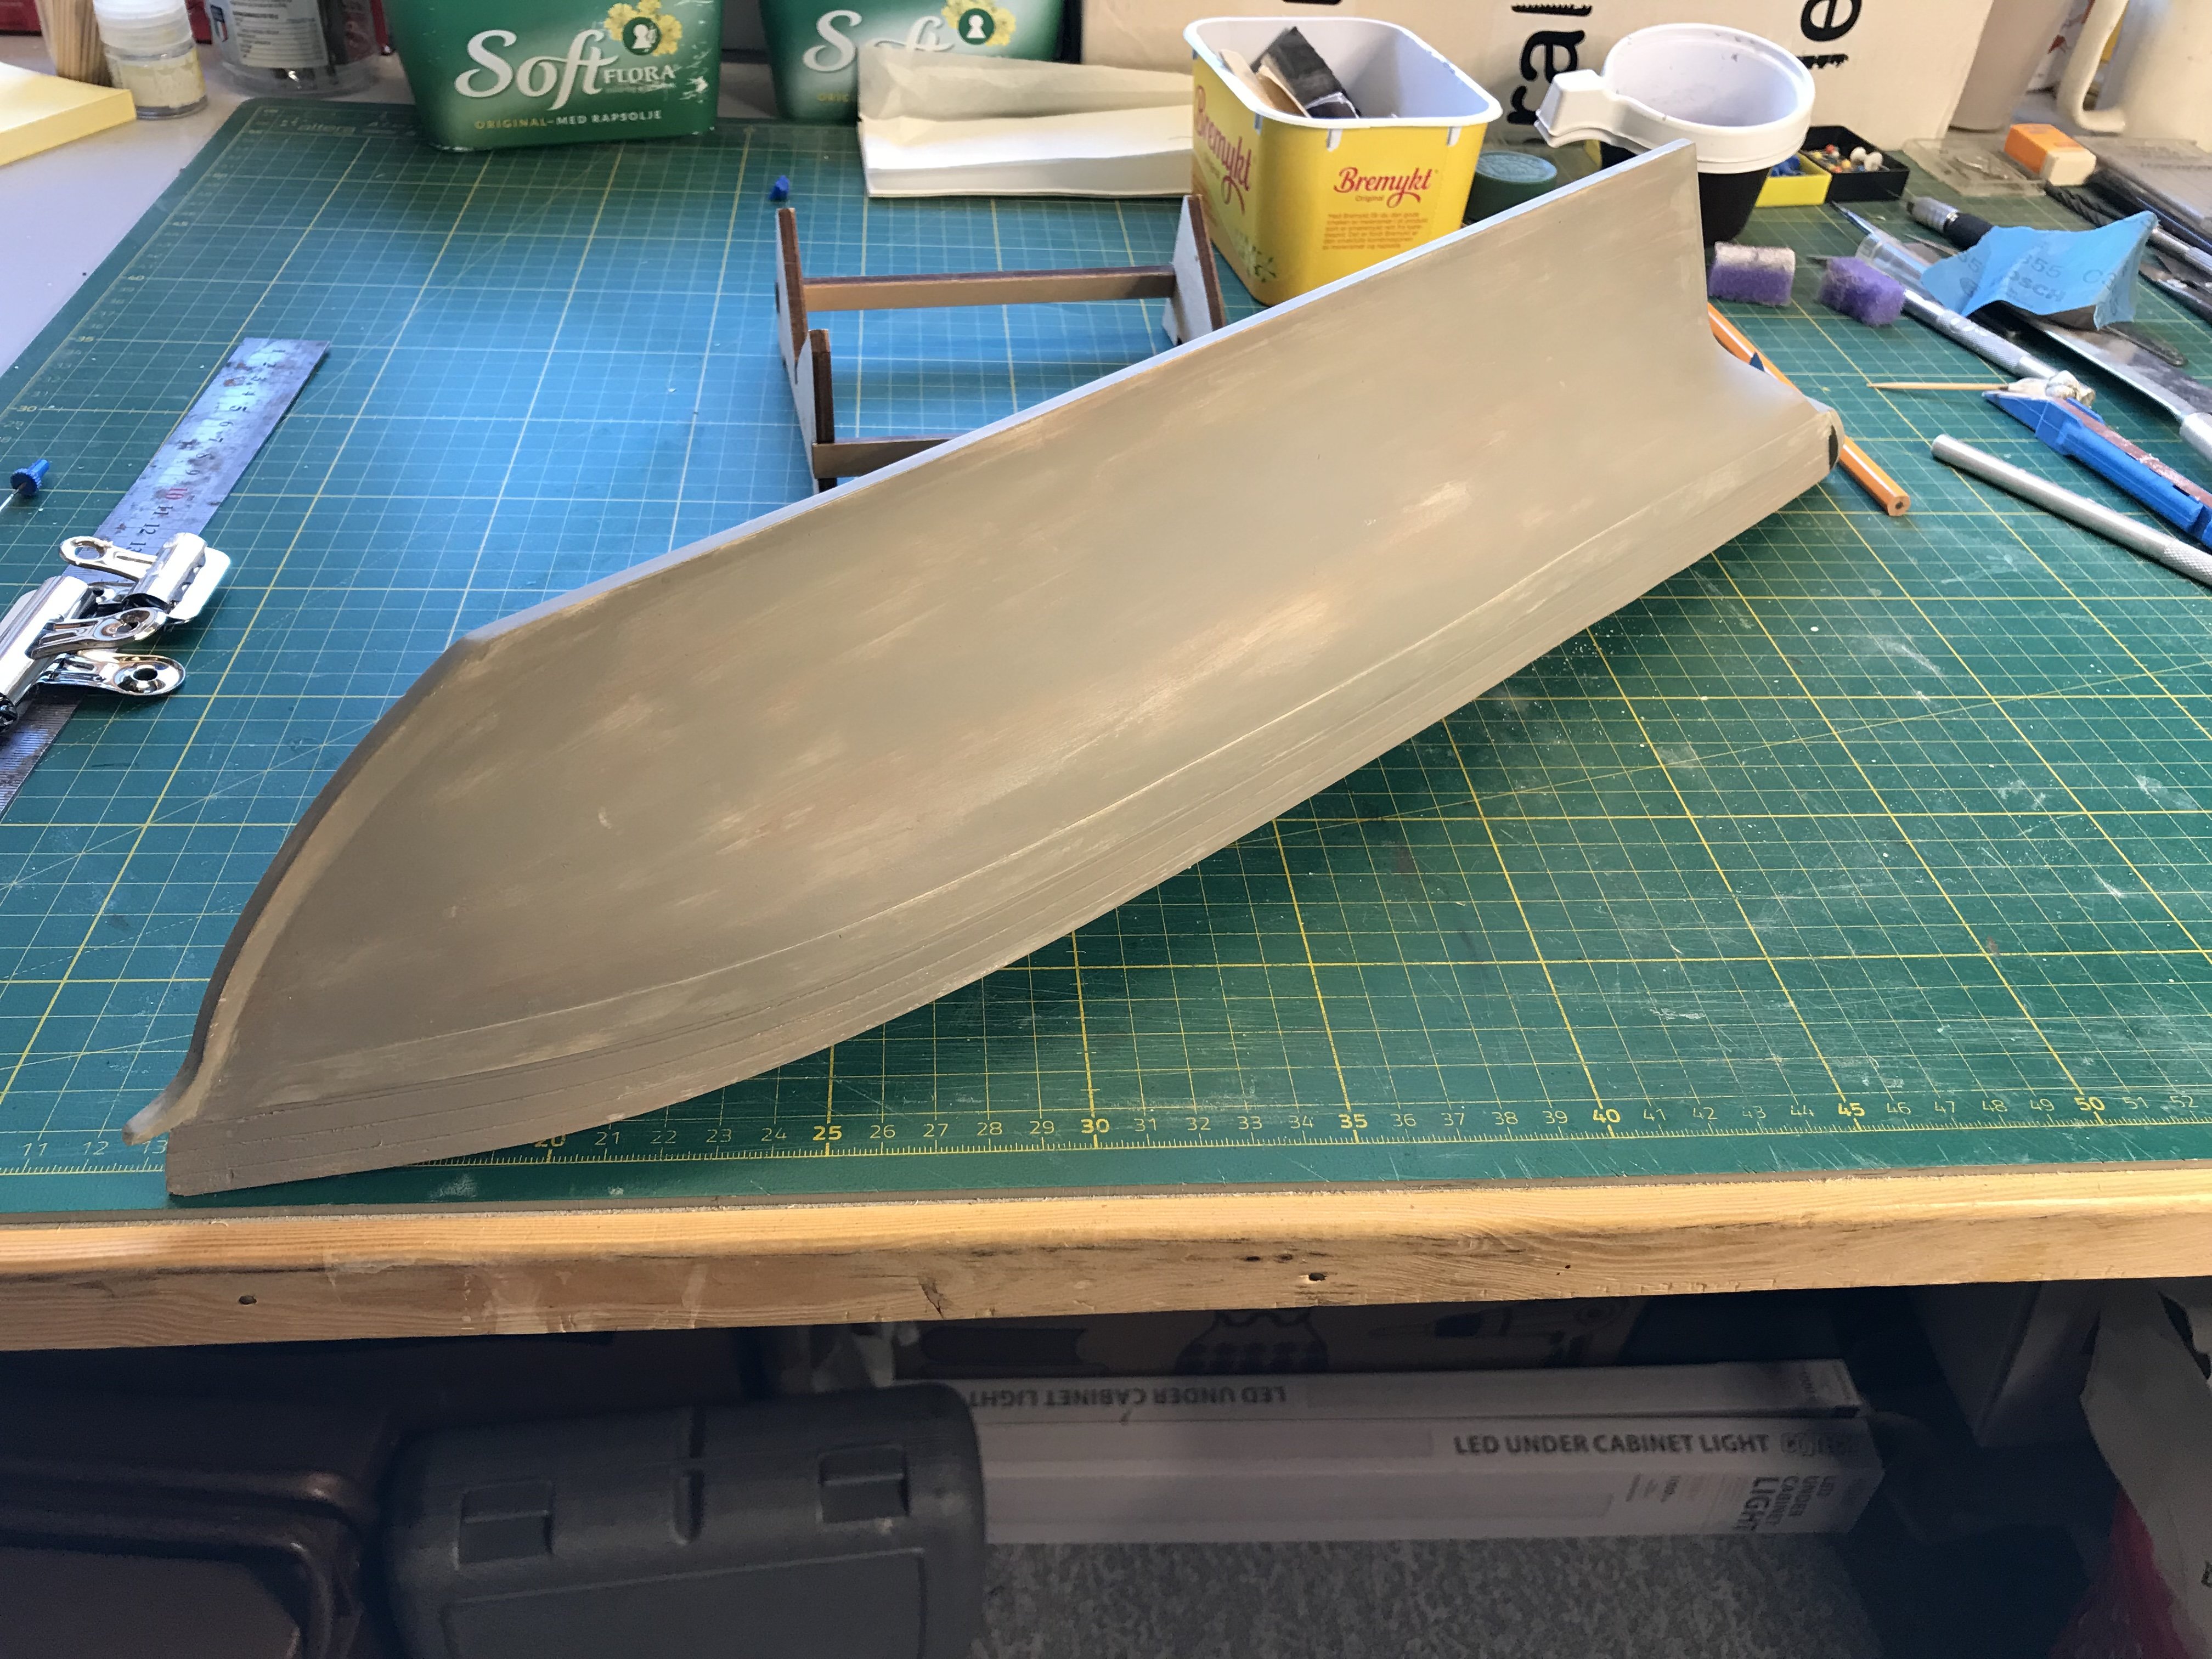
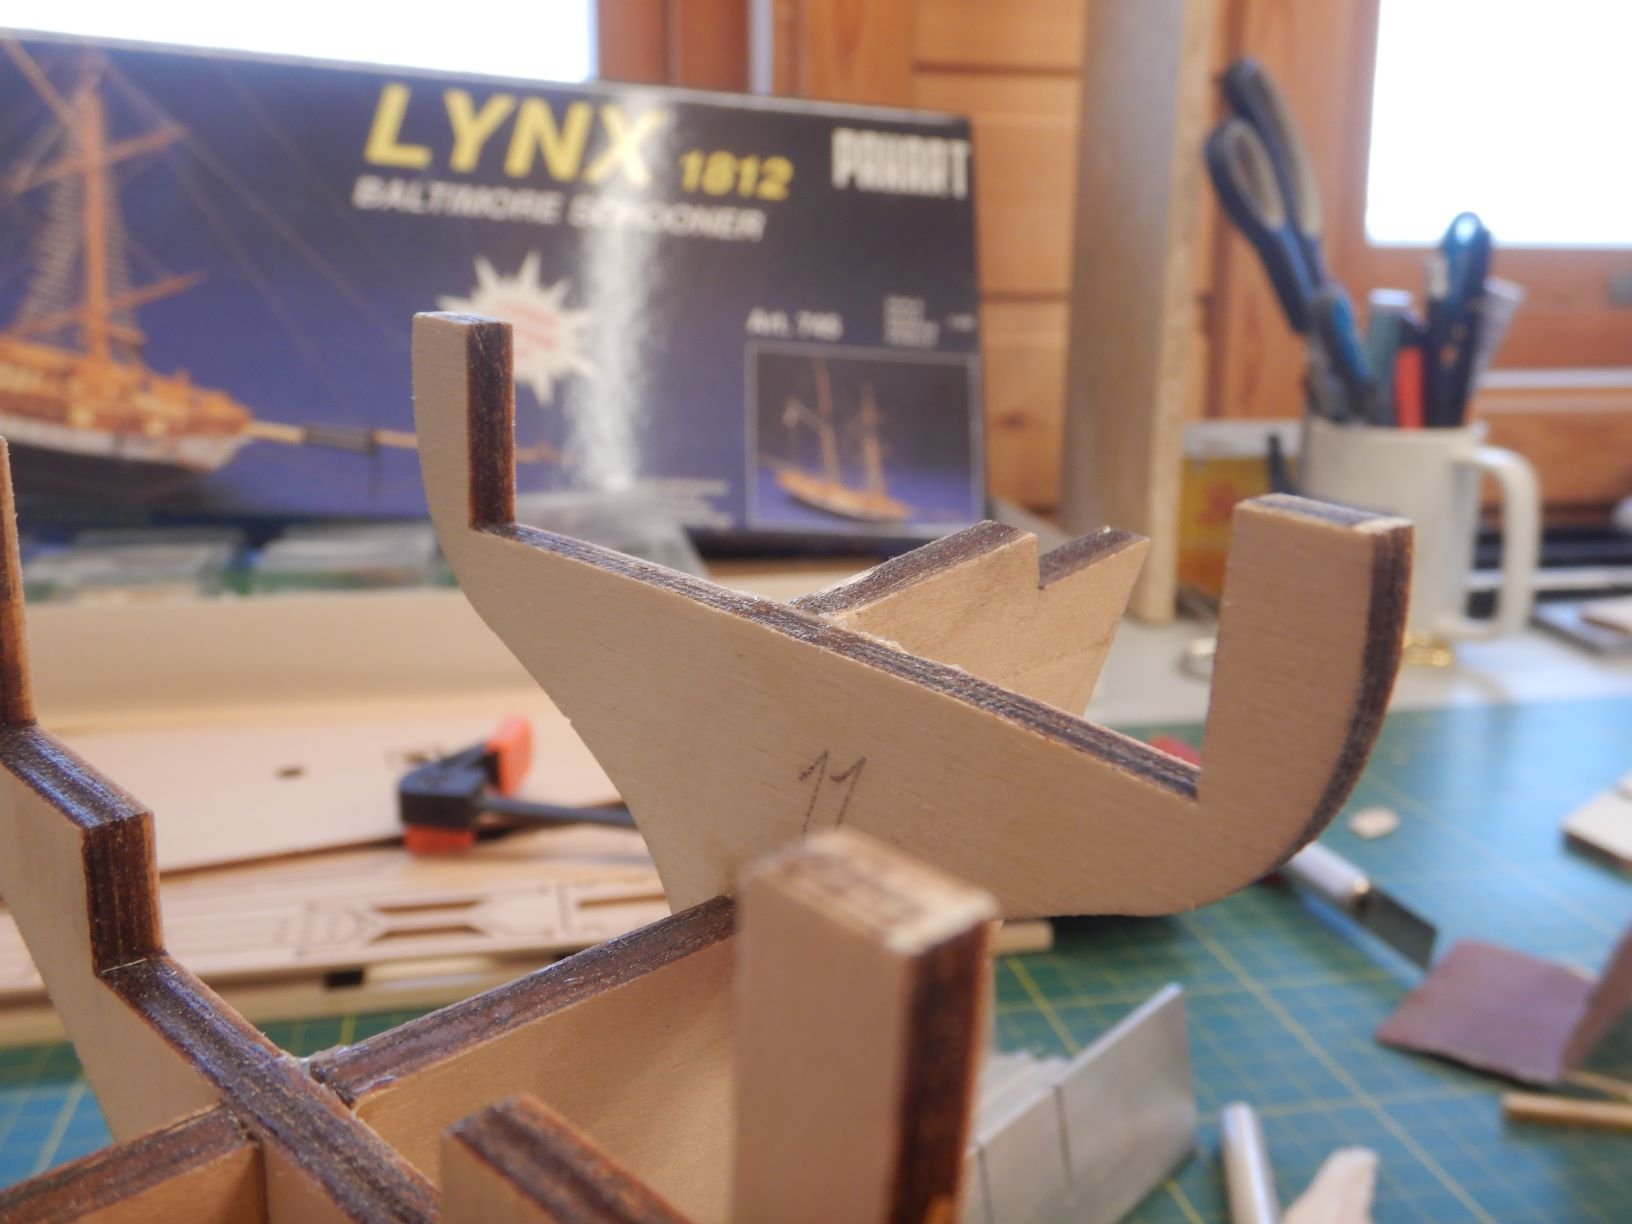
When beveling the bulkheads I got a problem with the last couple of bulkheads not lining up right to get a nice run of the planking.

So I had to make a decision on how to fix this. Looking at the picture on the box, there is a little "dent" at this spot, but not nearly as much as this.
Maybe this got worse because I moved the aftmost bulkhead up to get it level with the deck? (see previous post)
Picture on box..

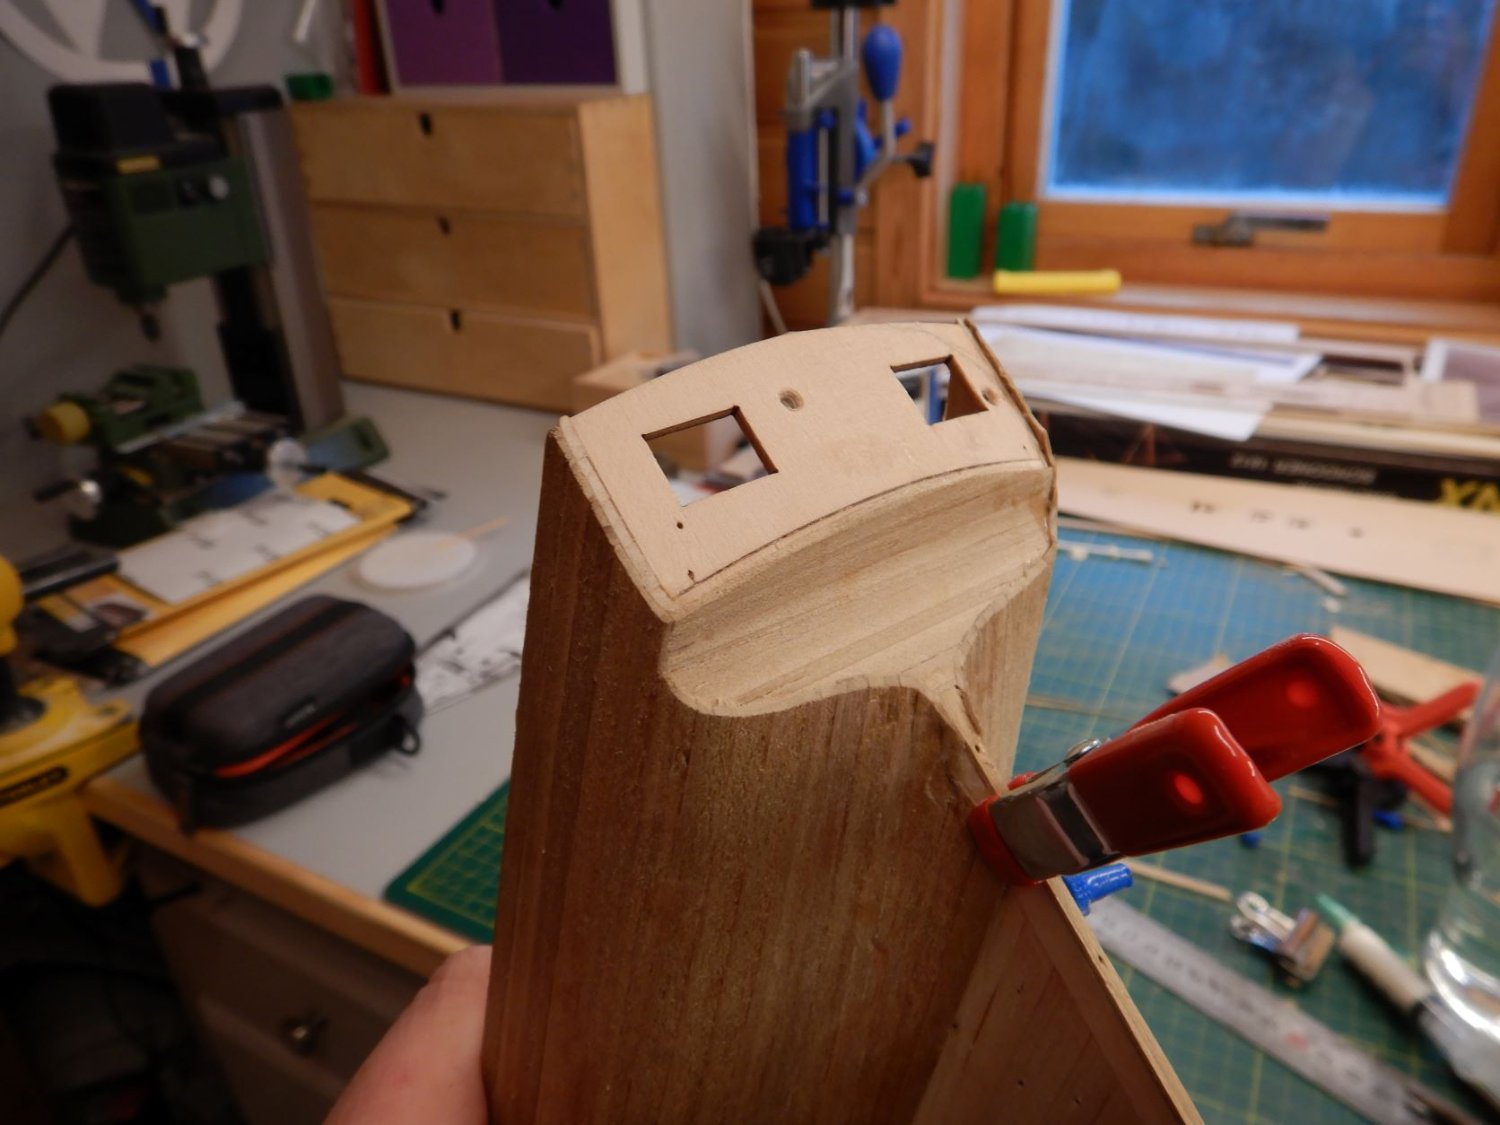
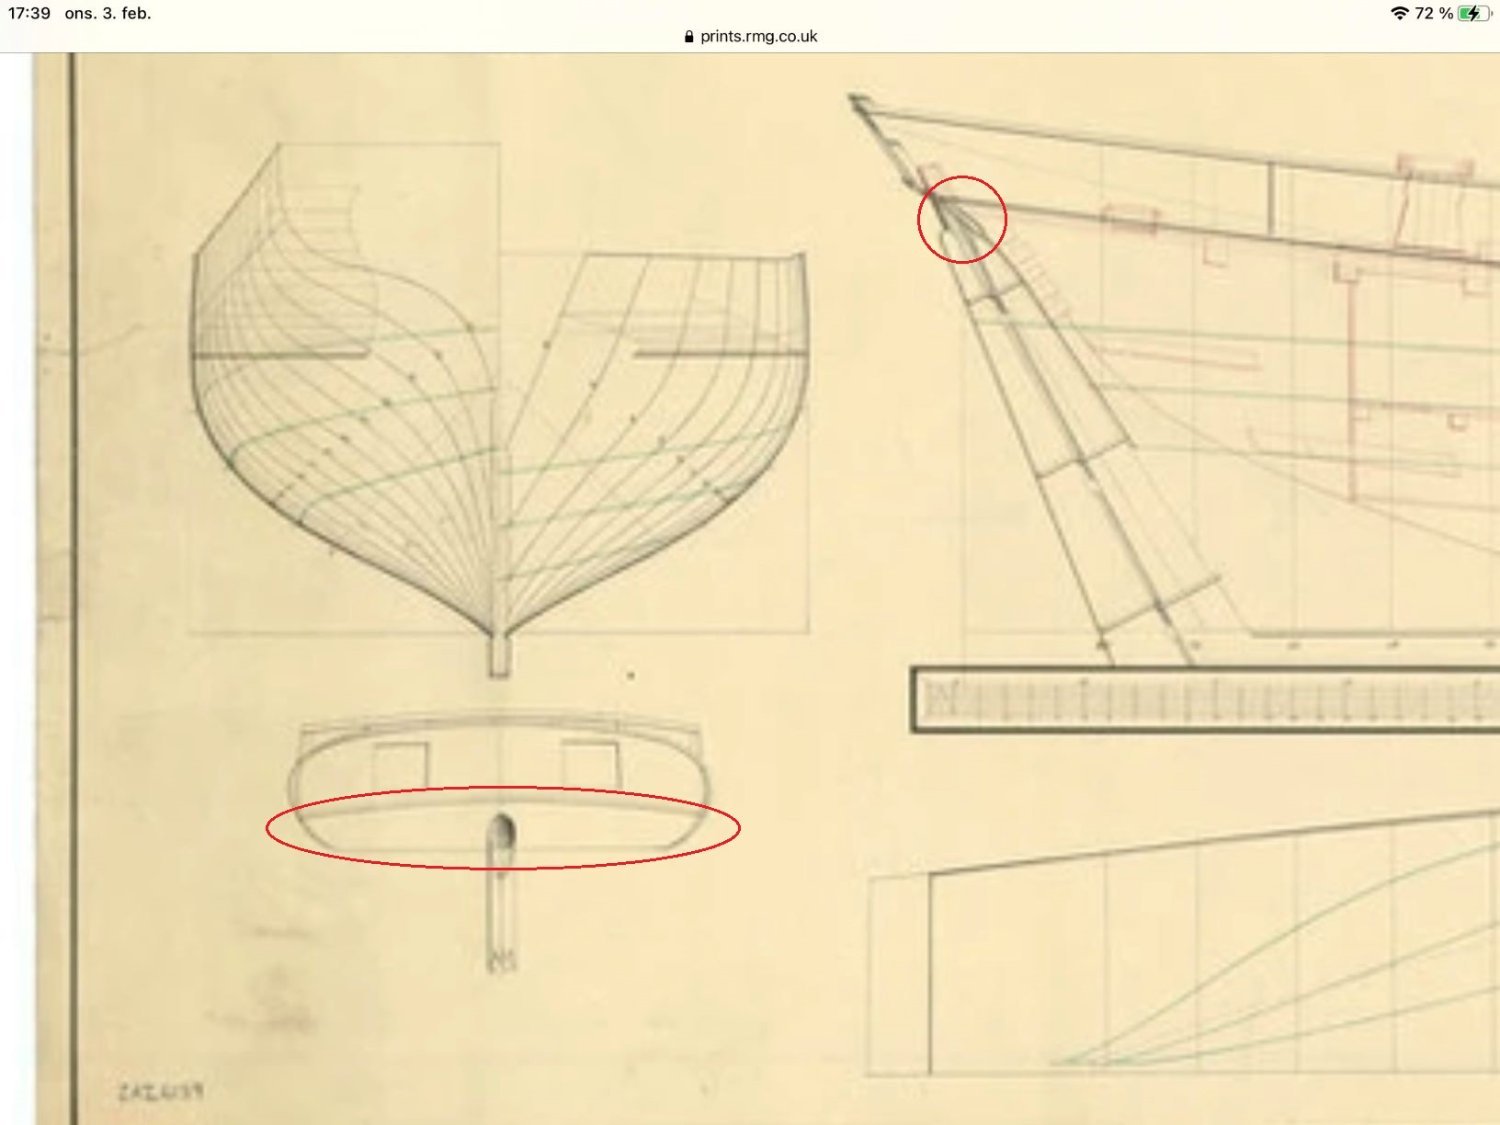
So I did a little research and found the musquidobit lines plan at NMM, and there it looks to be a small transom below the transom with the gunports.
Marked in red in picture.
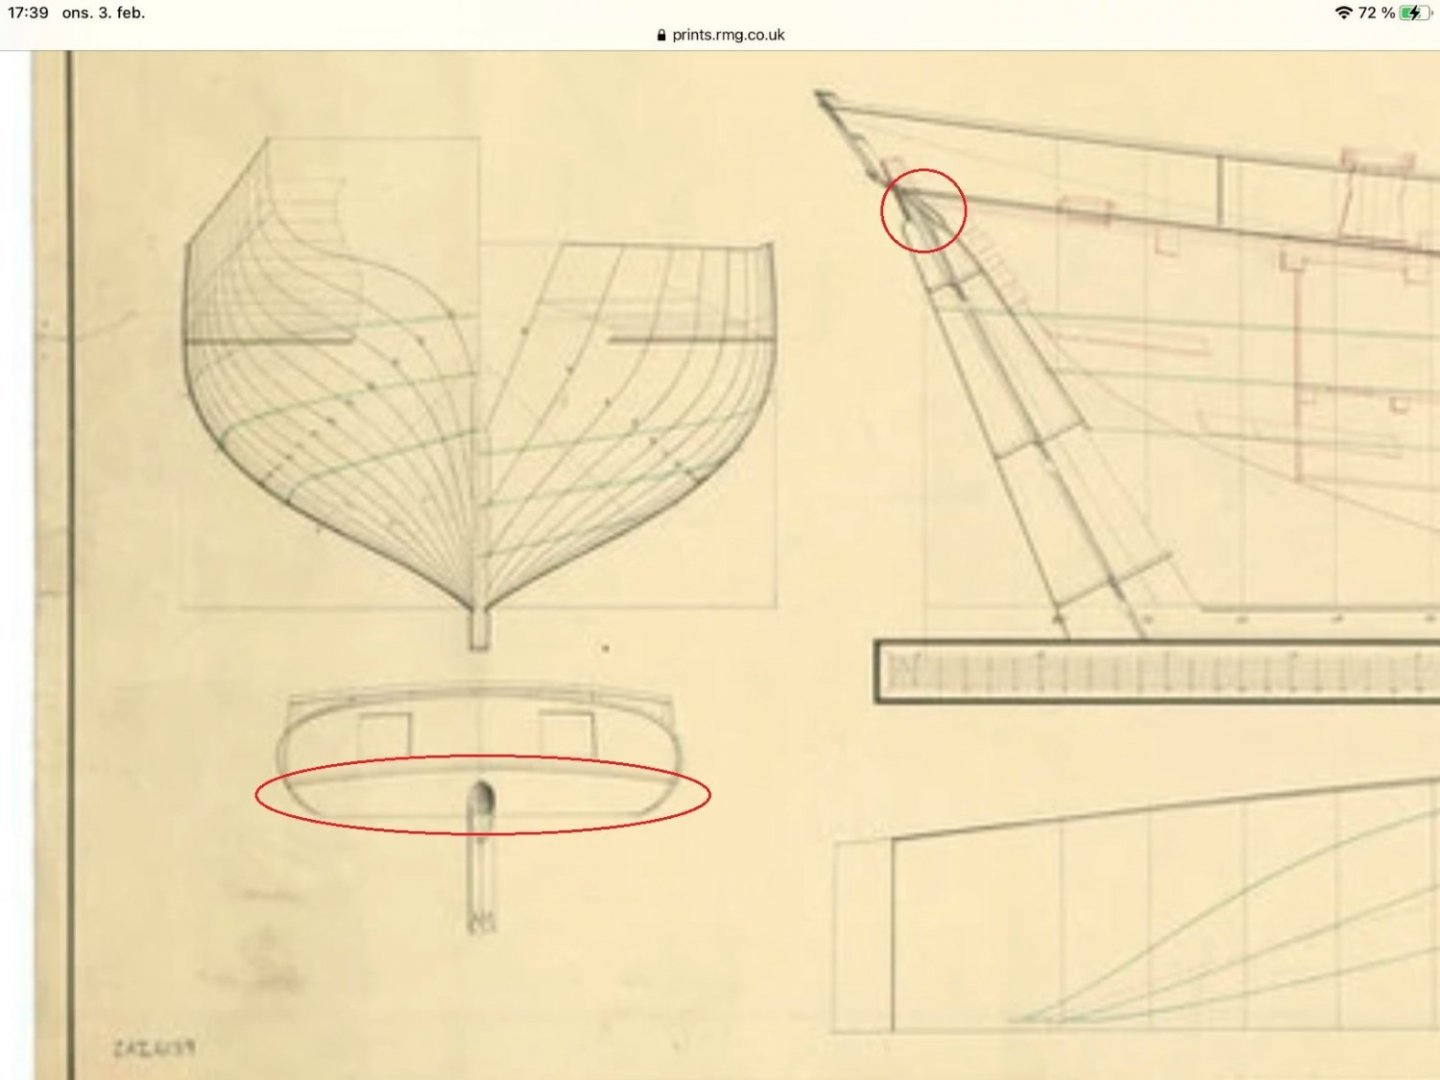
The plans in the kit makes no mention of this..
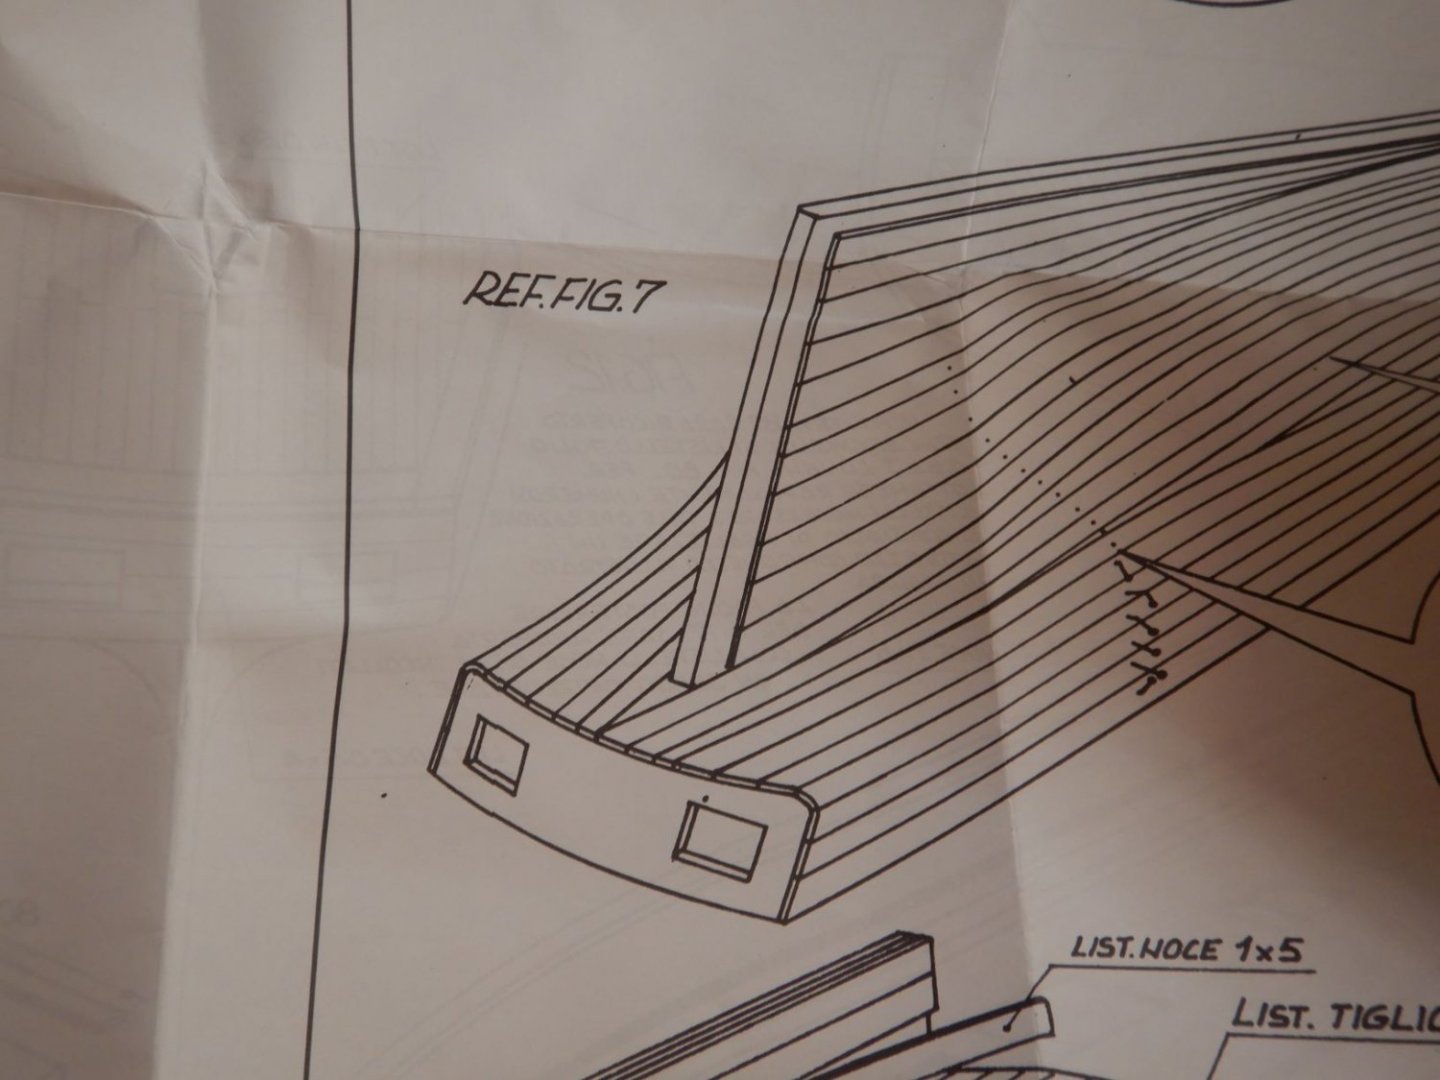
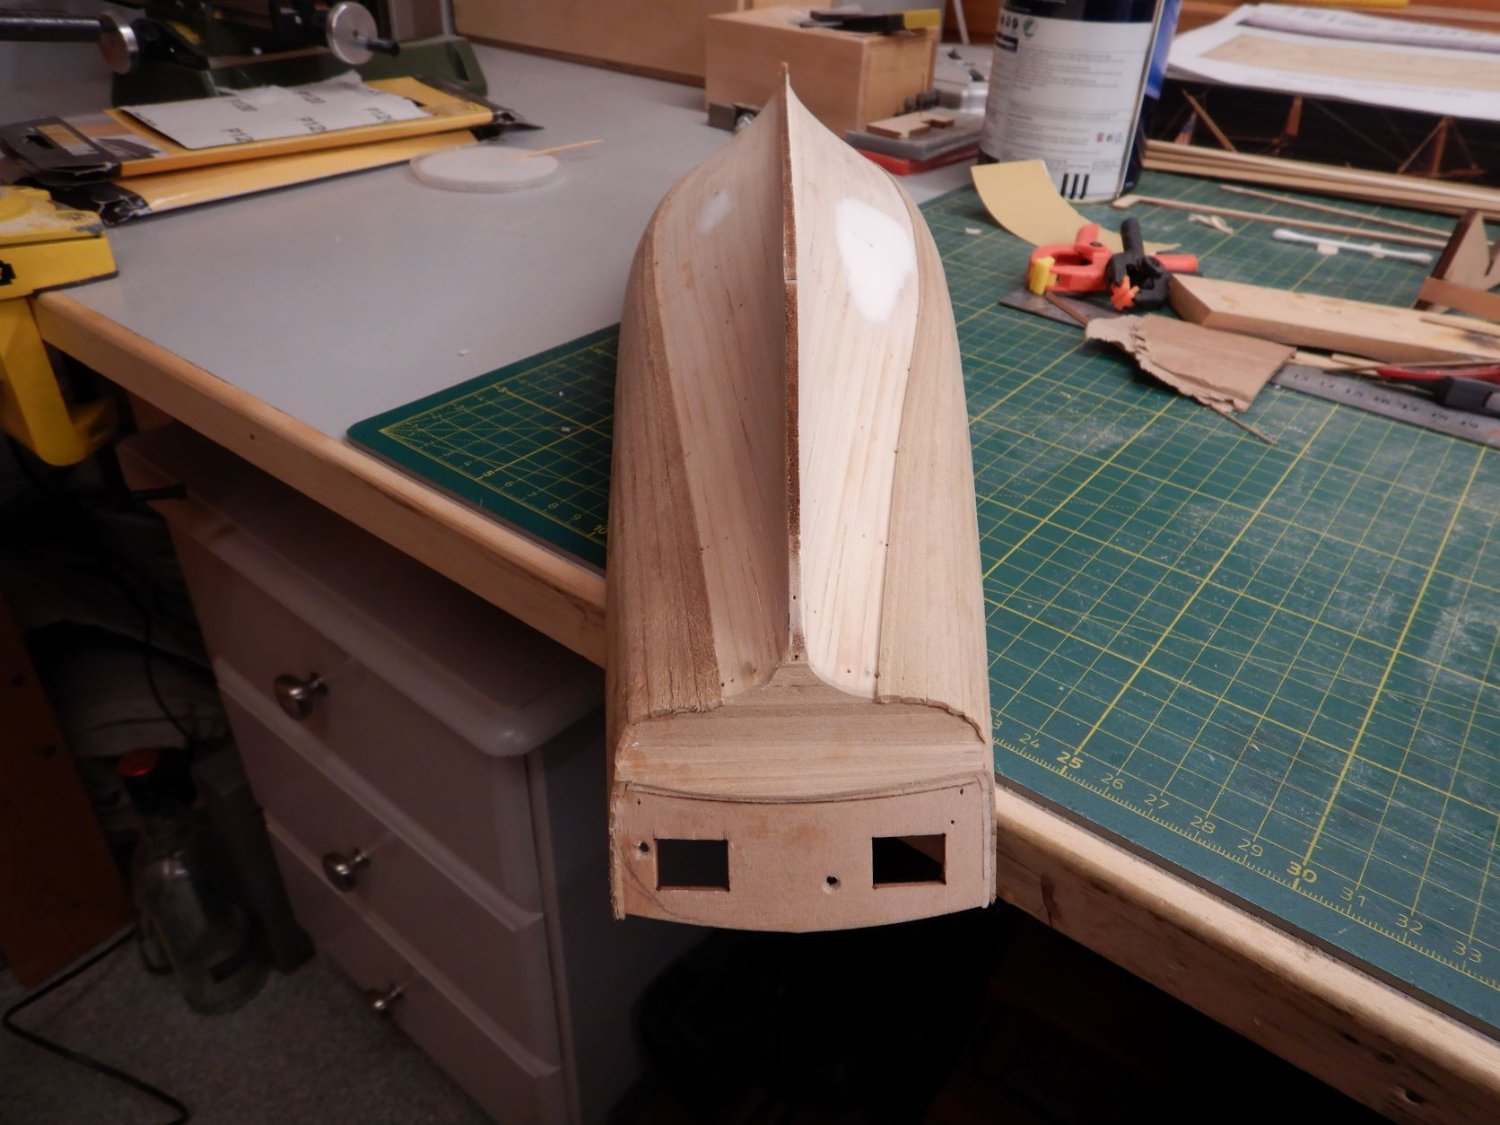
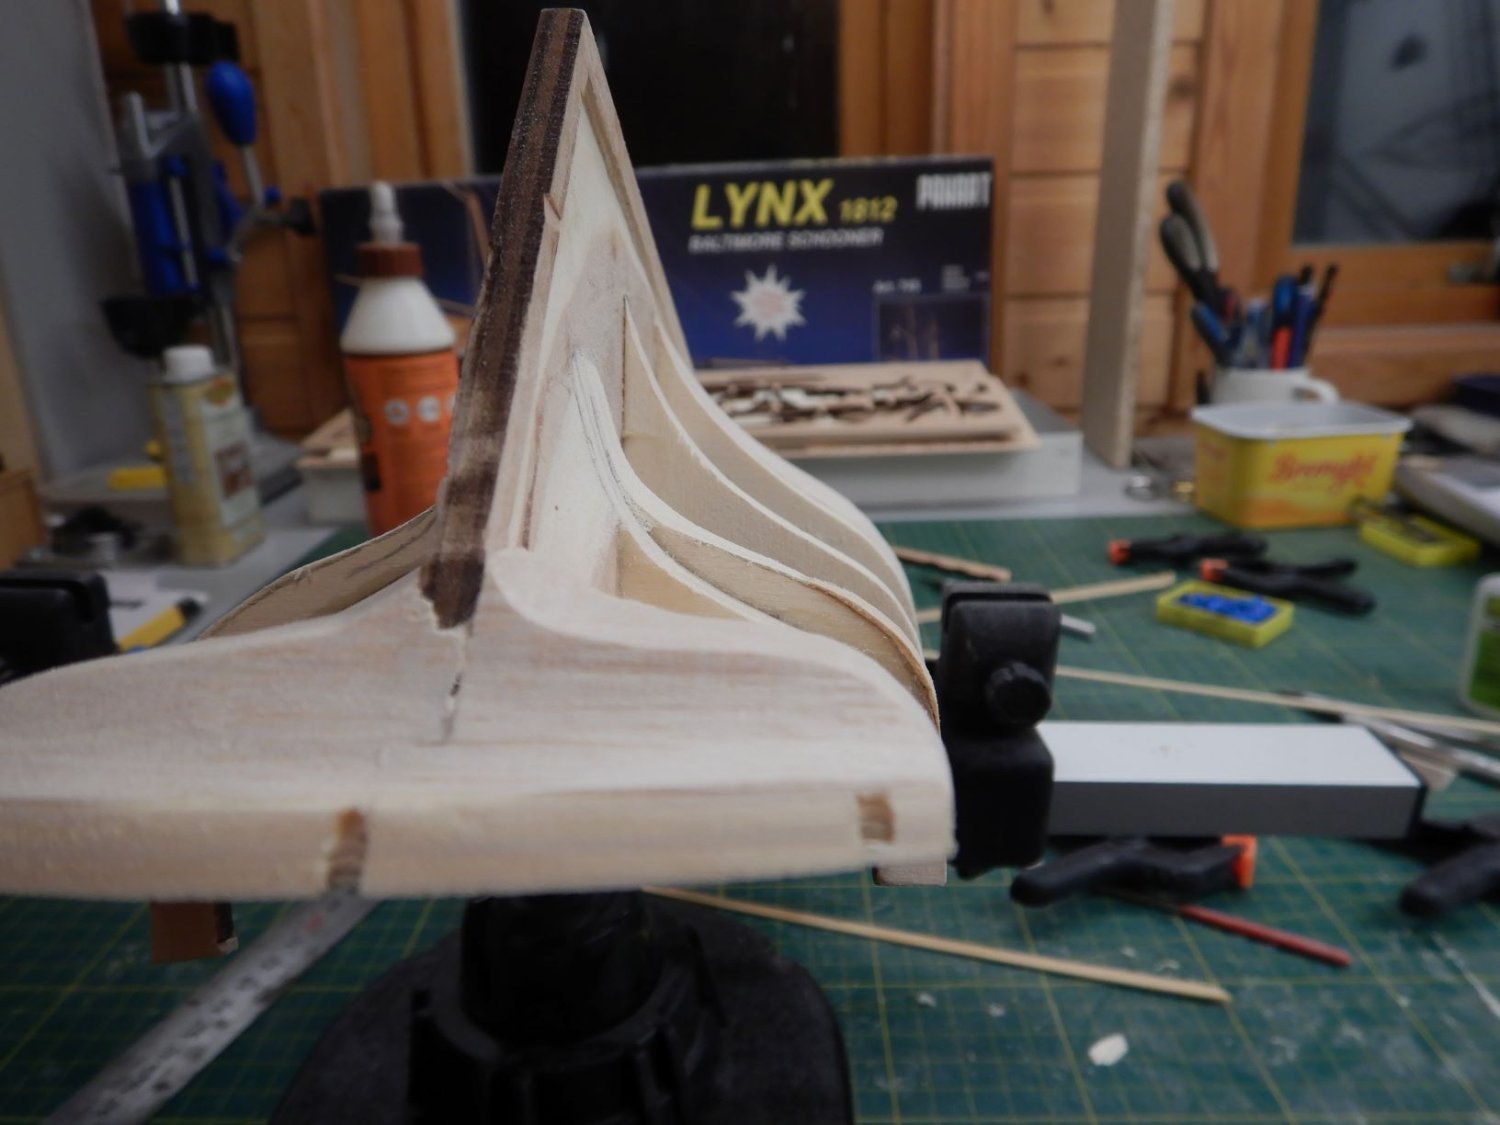
So I decided to wander off on my own and make a transom here. I then worsened the problem with the dent in the planking, but since this had to be fixed anyway I could do this by adding to the last bulkhead.
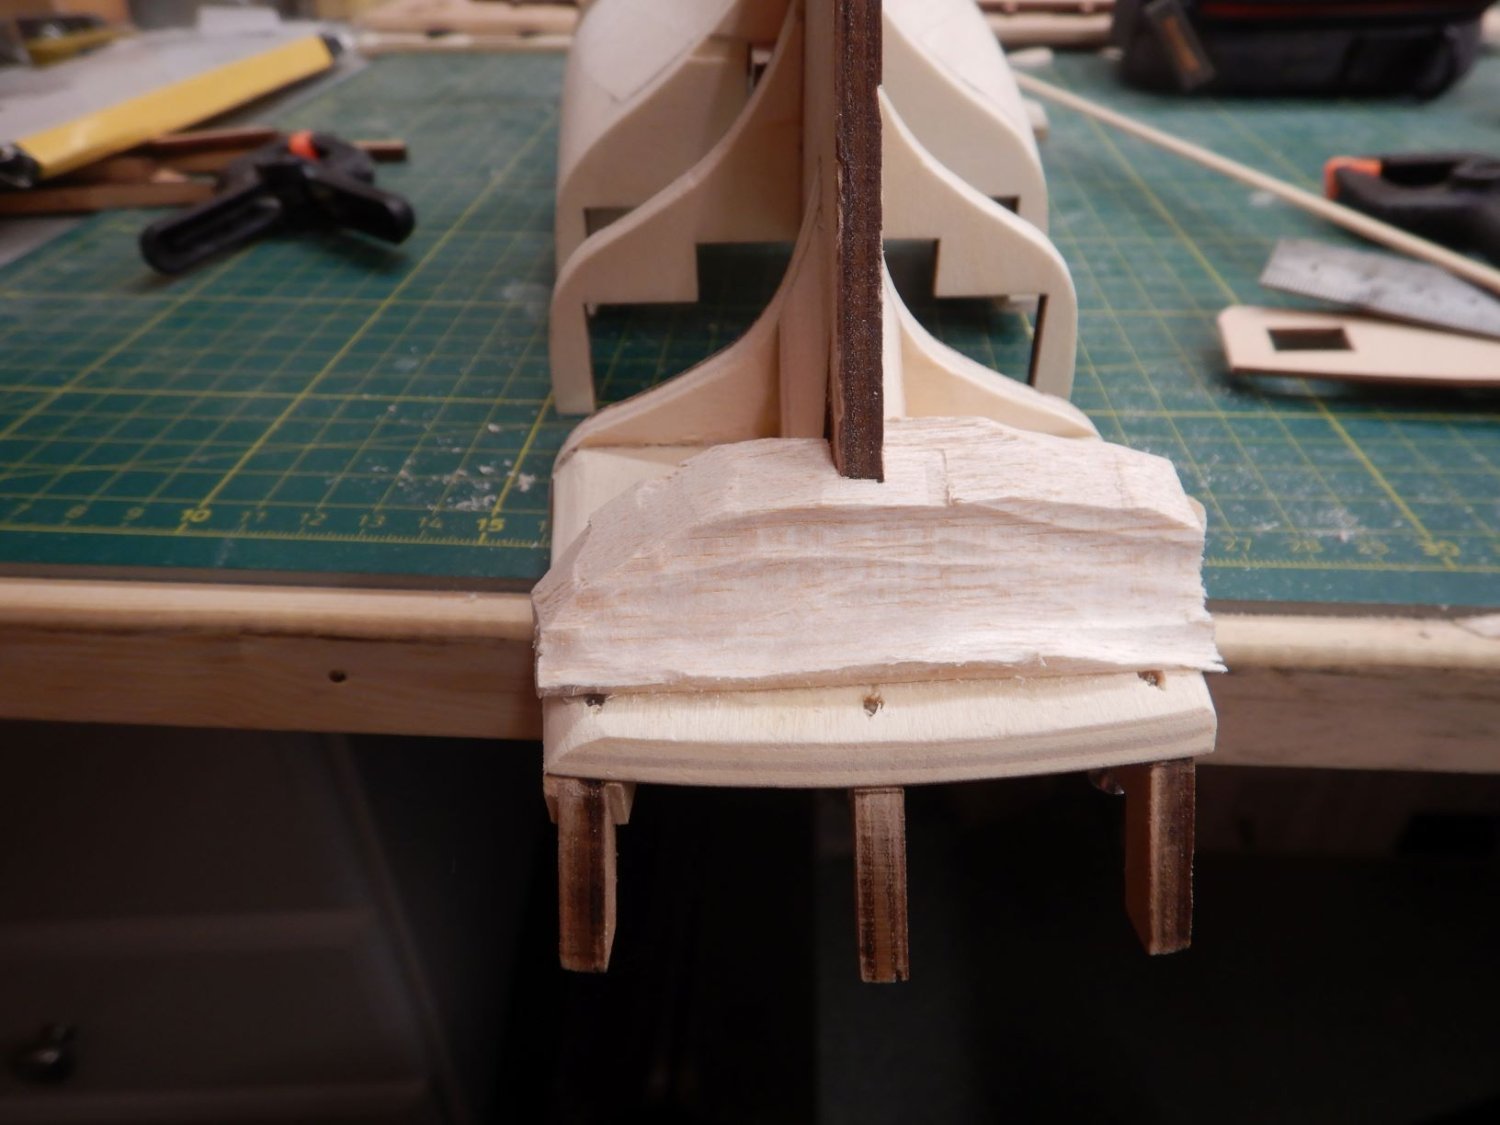
Glued on some balsa wood and started to chip away, having no idea really if this would work out or not!
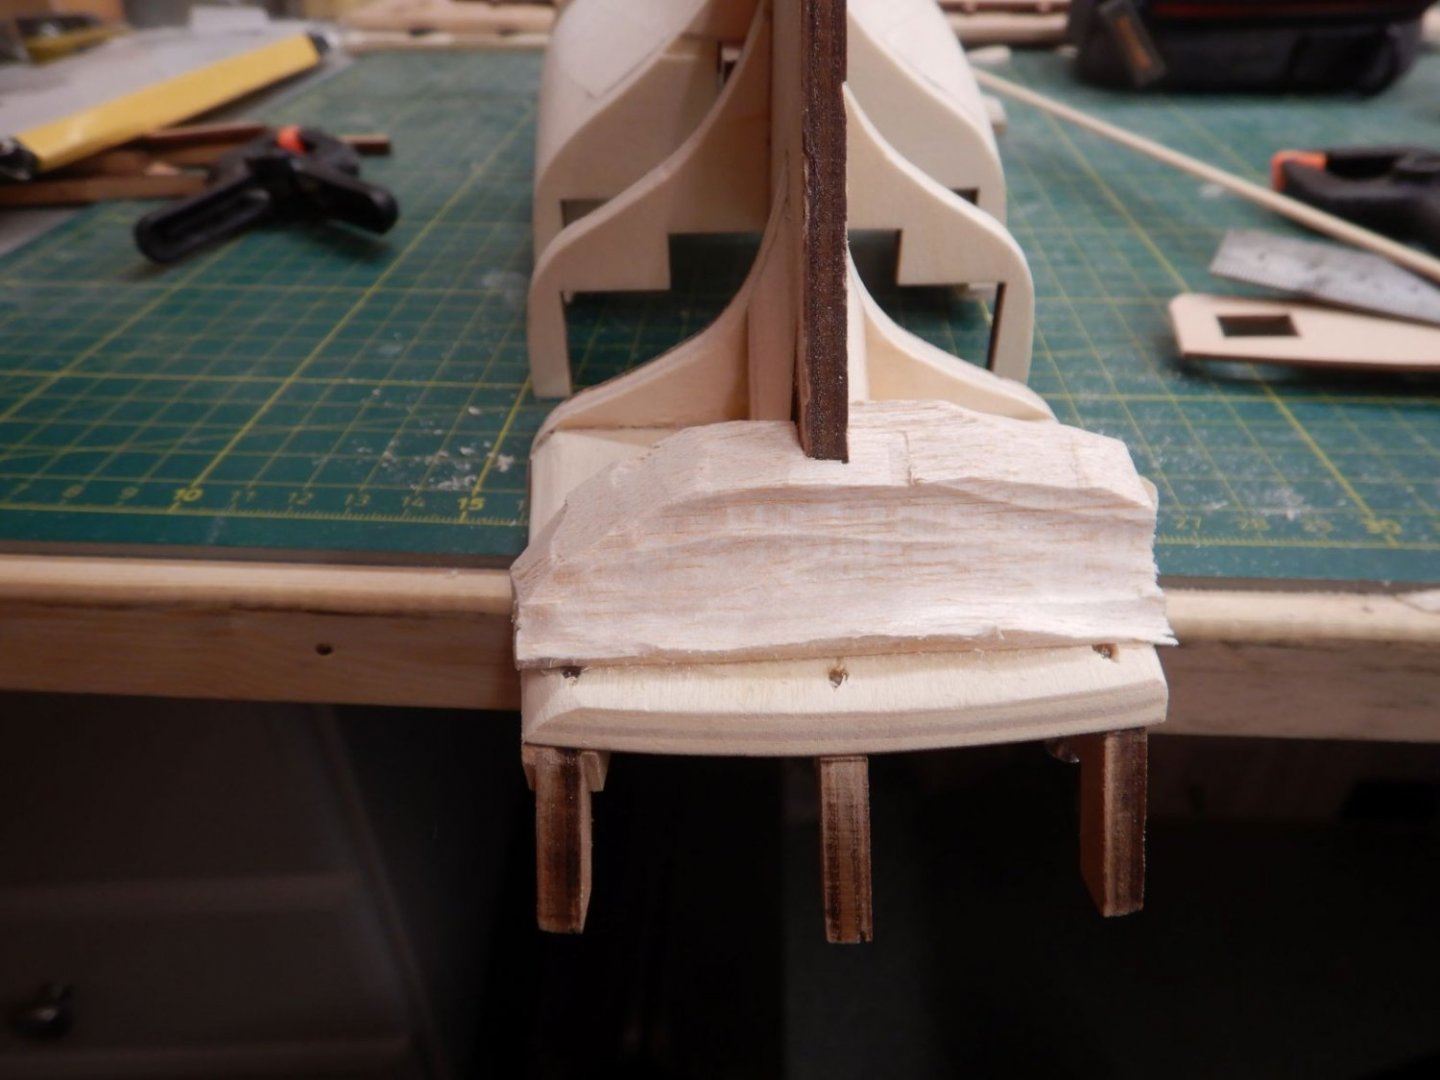

After some shaping and sanding, I think I'm getting somewhere..

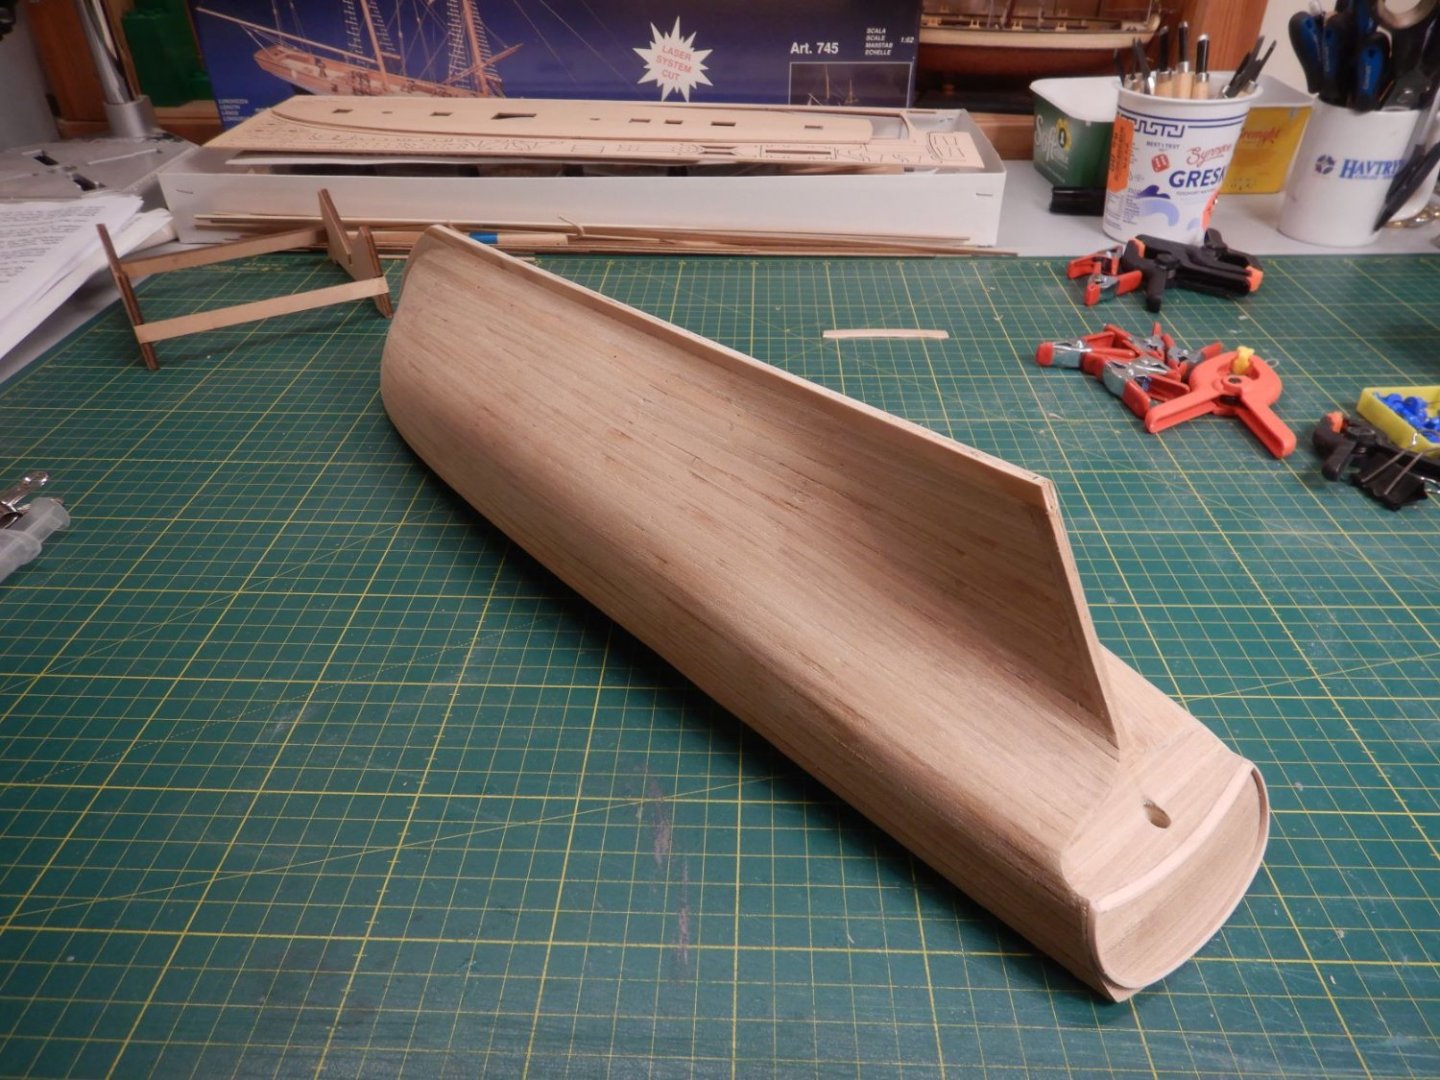
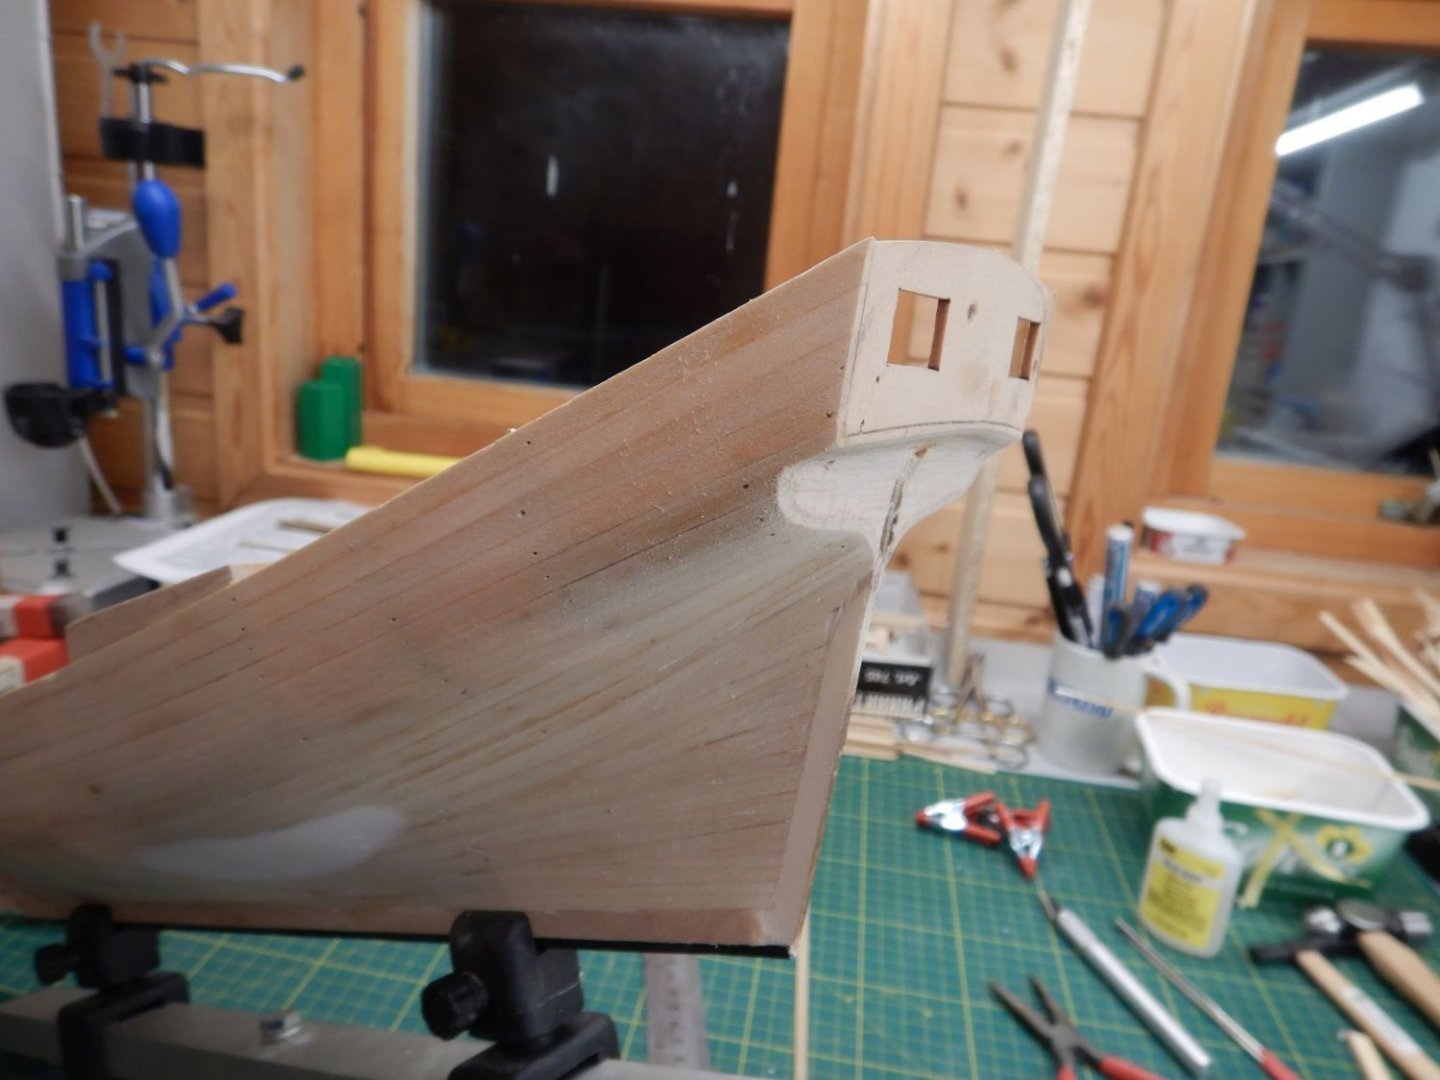
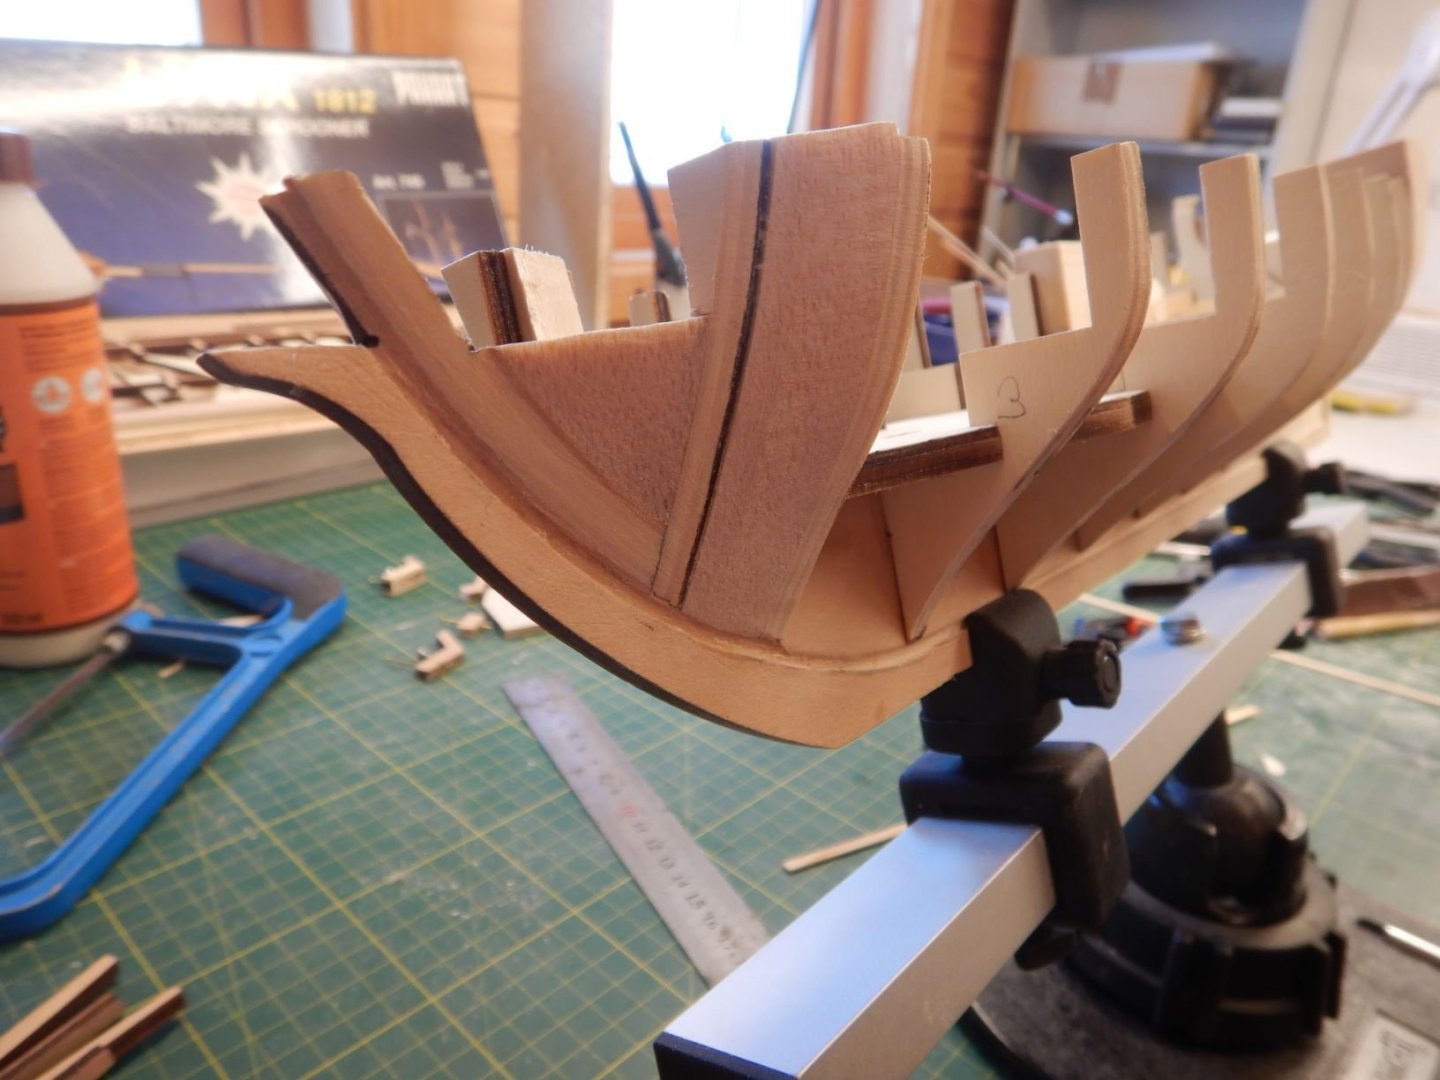
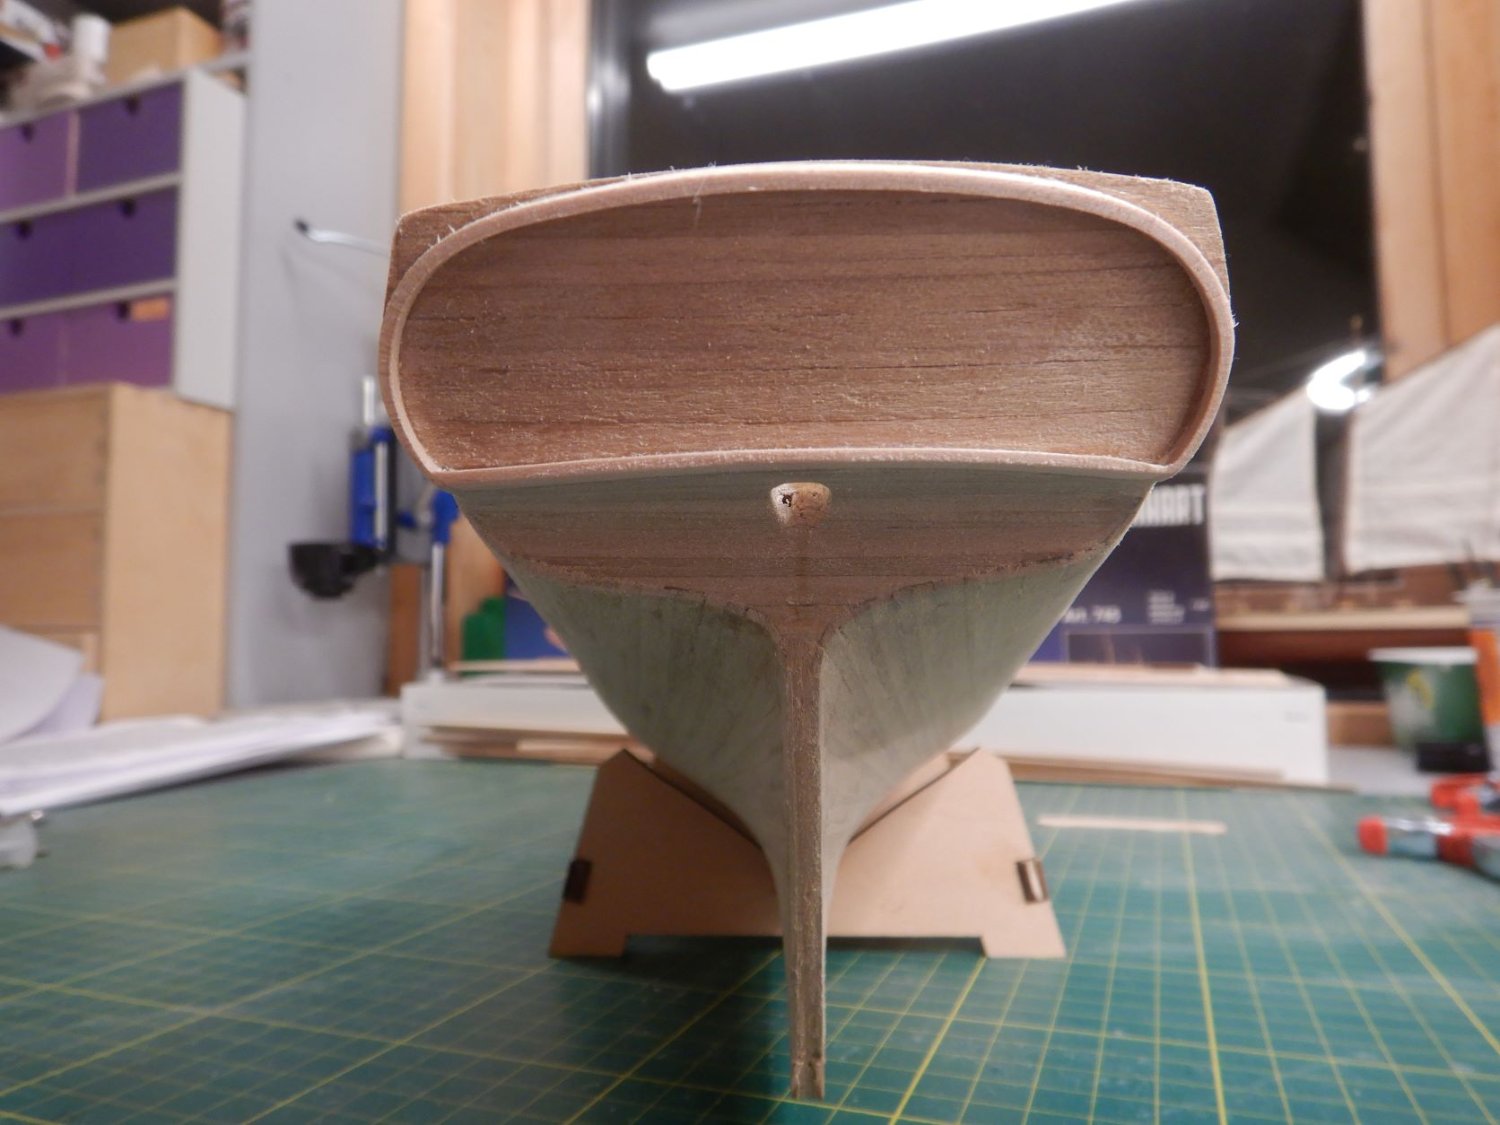
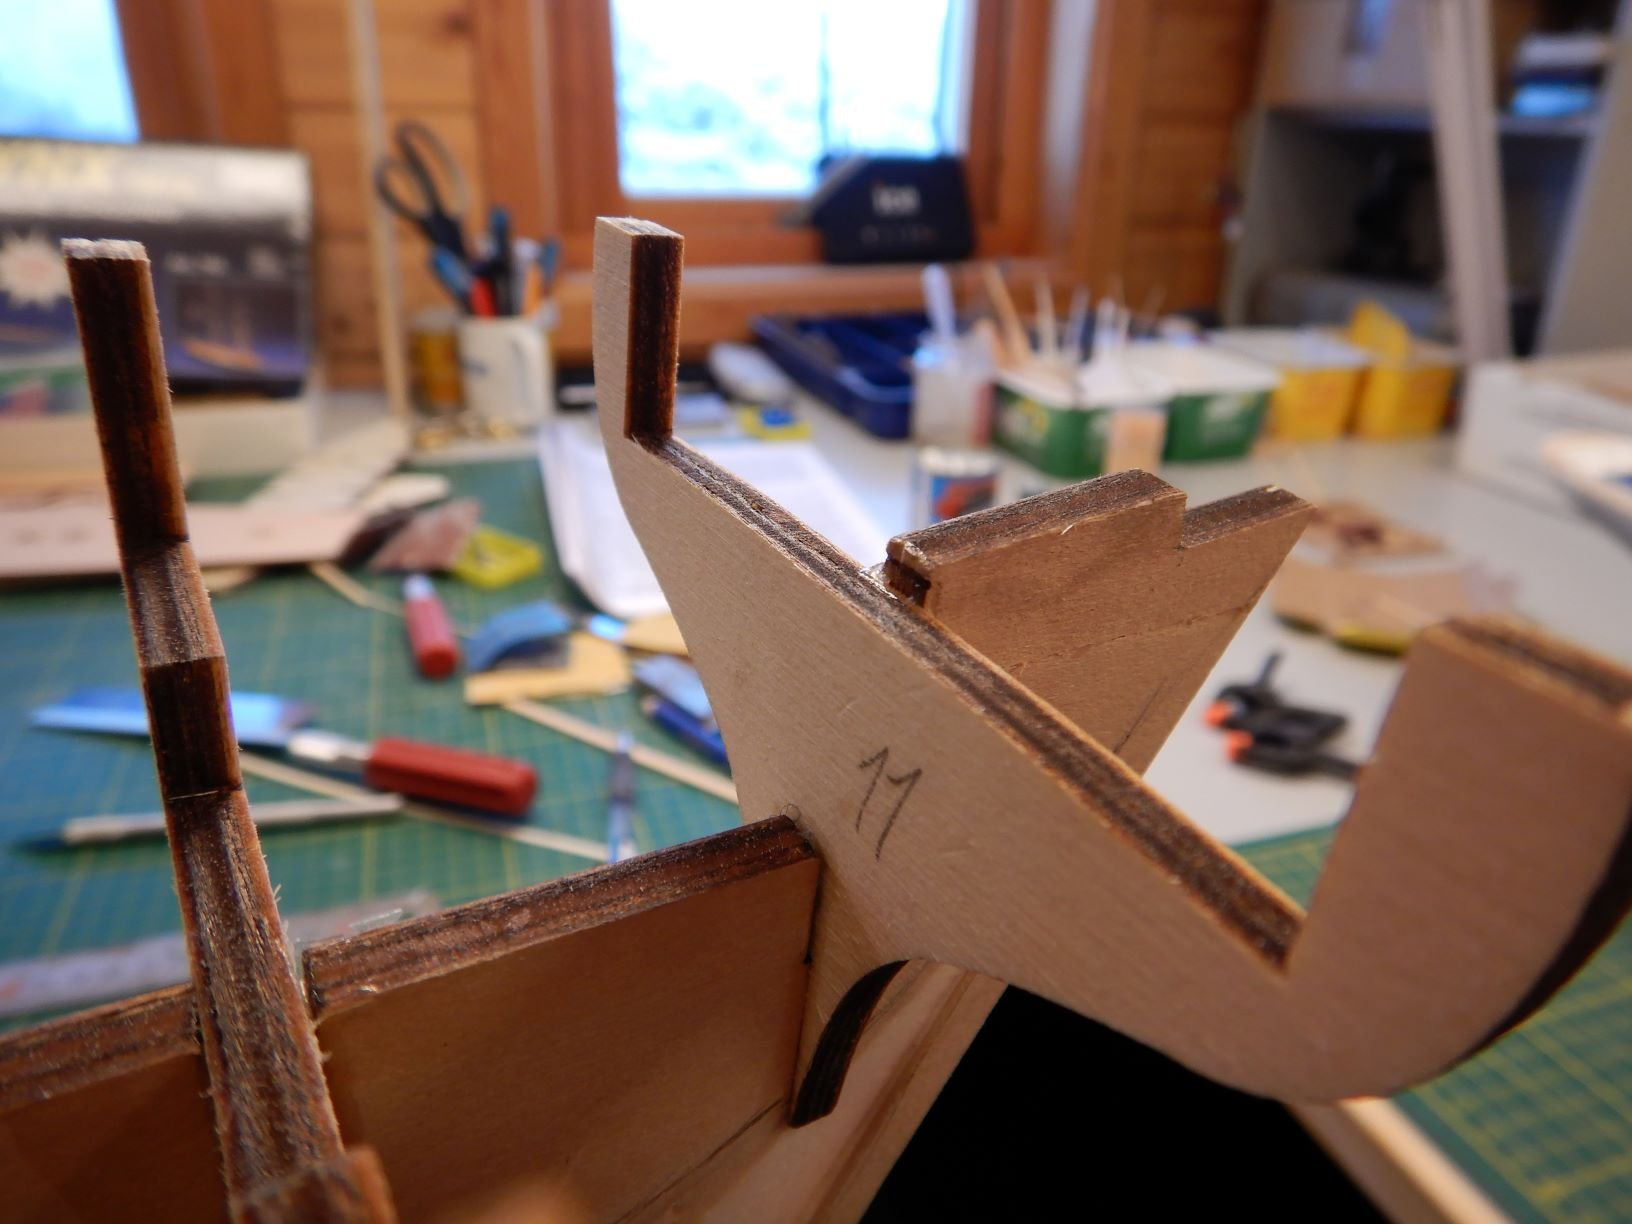
I realized from the musquidobit plan that the stern overhang also was a lot shorter than in the kit, so I decided to shorten it..
Cut of about 10 mm from it.
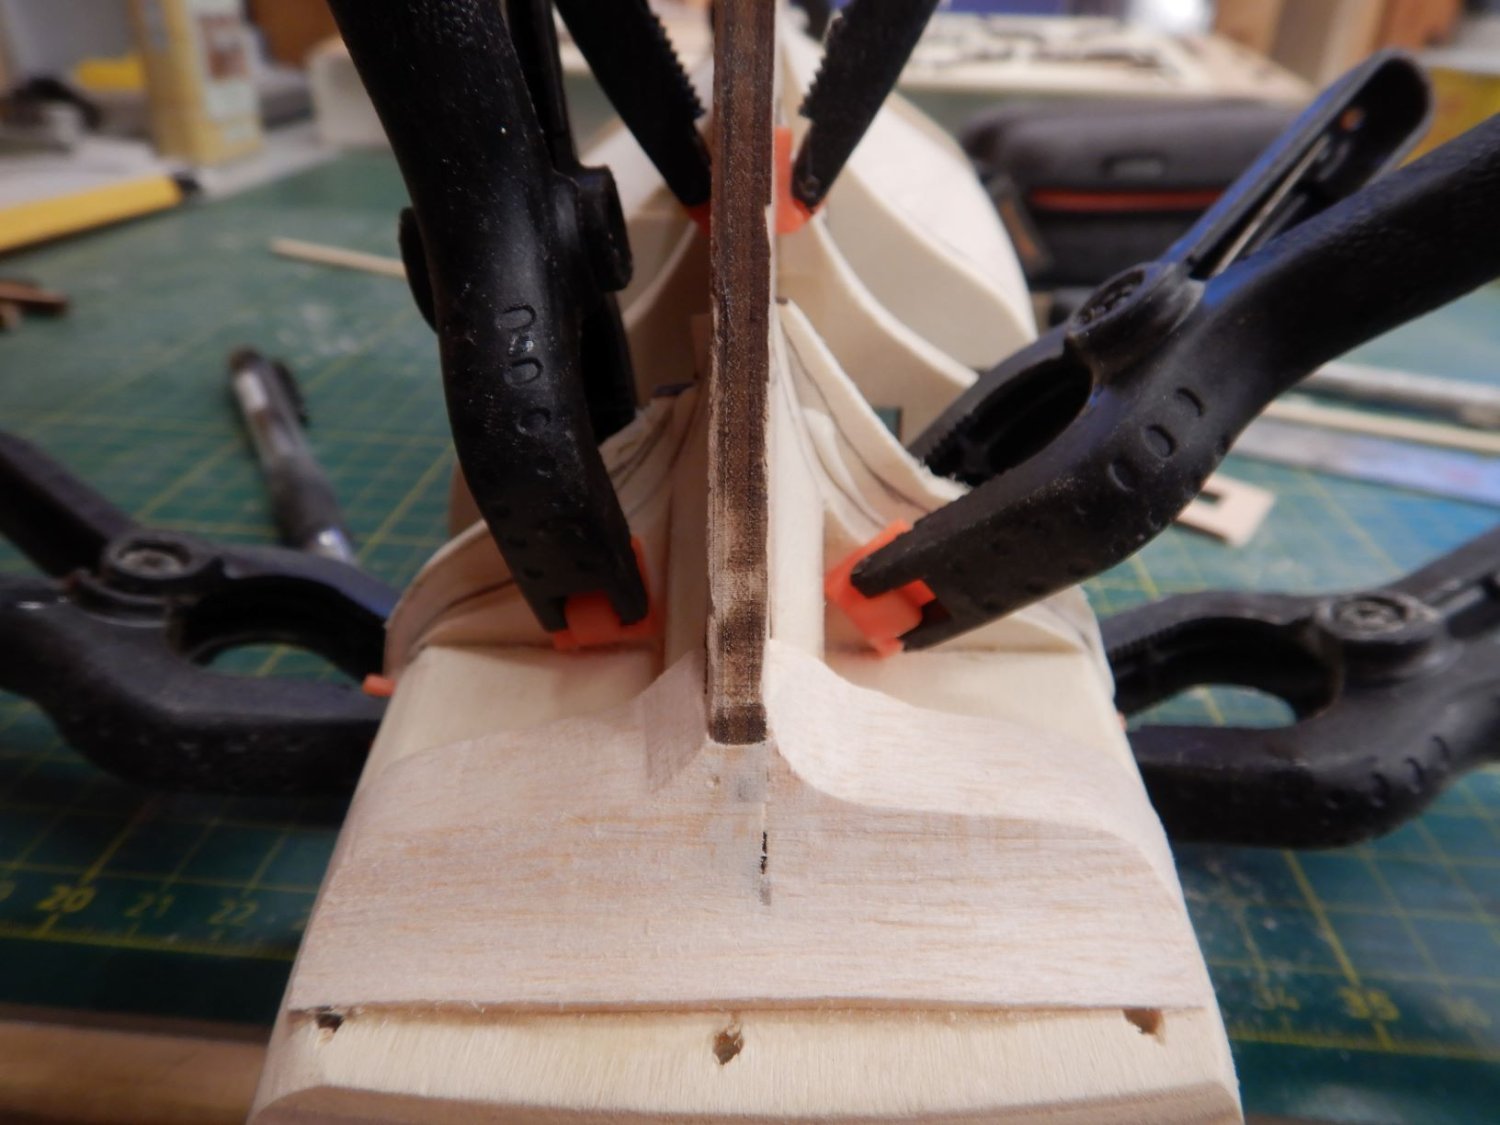
I then added to the aftmost bulkhead a little..

And voila! the run of the planking looks a lot better, at least to my eye!

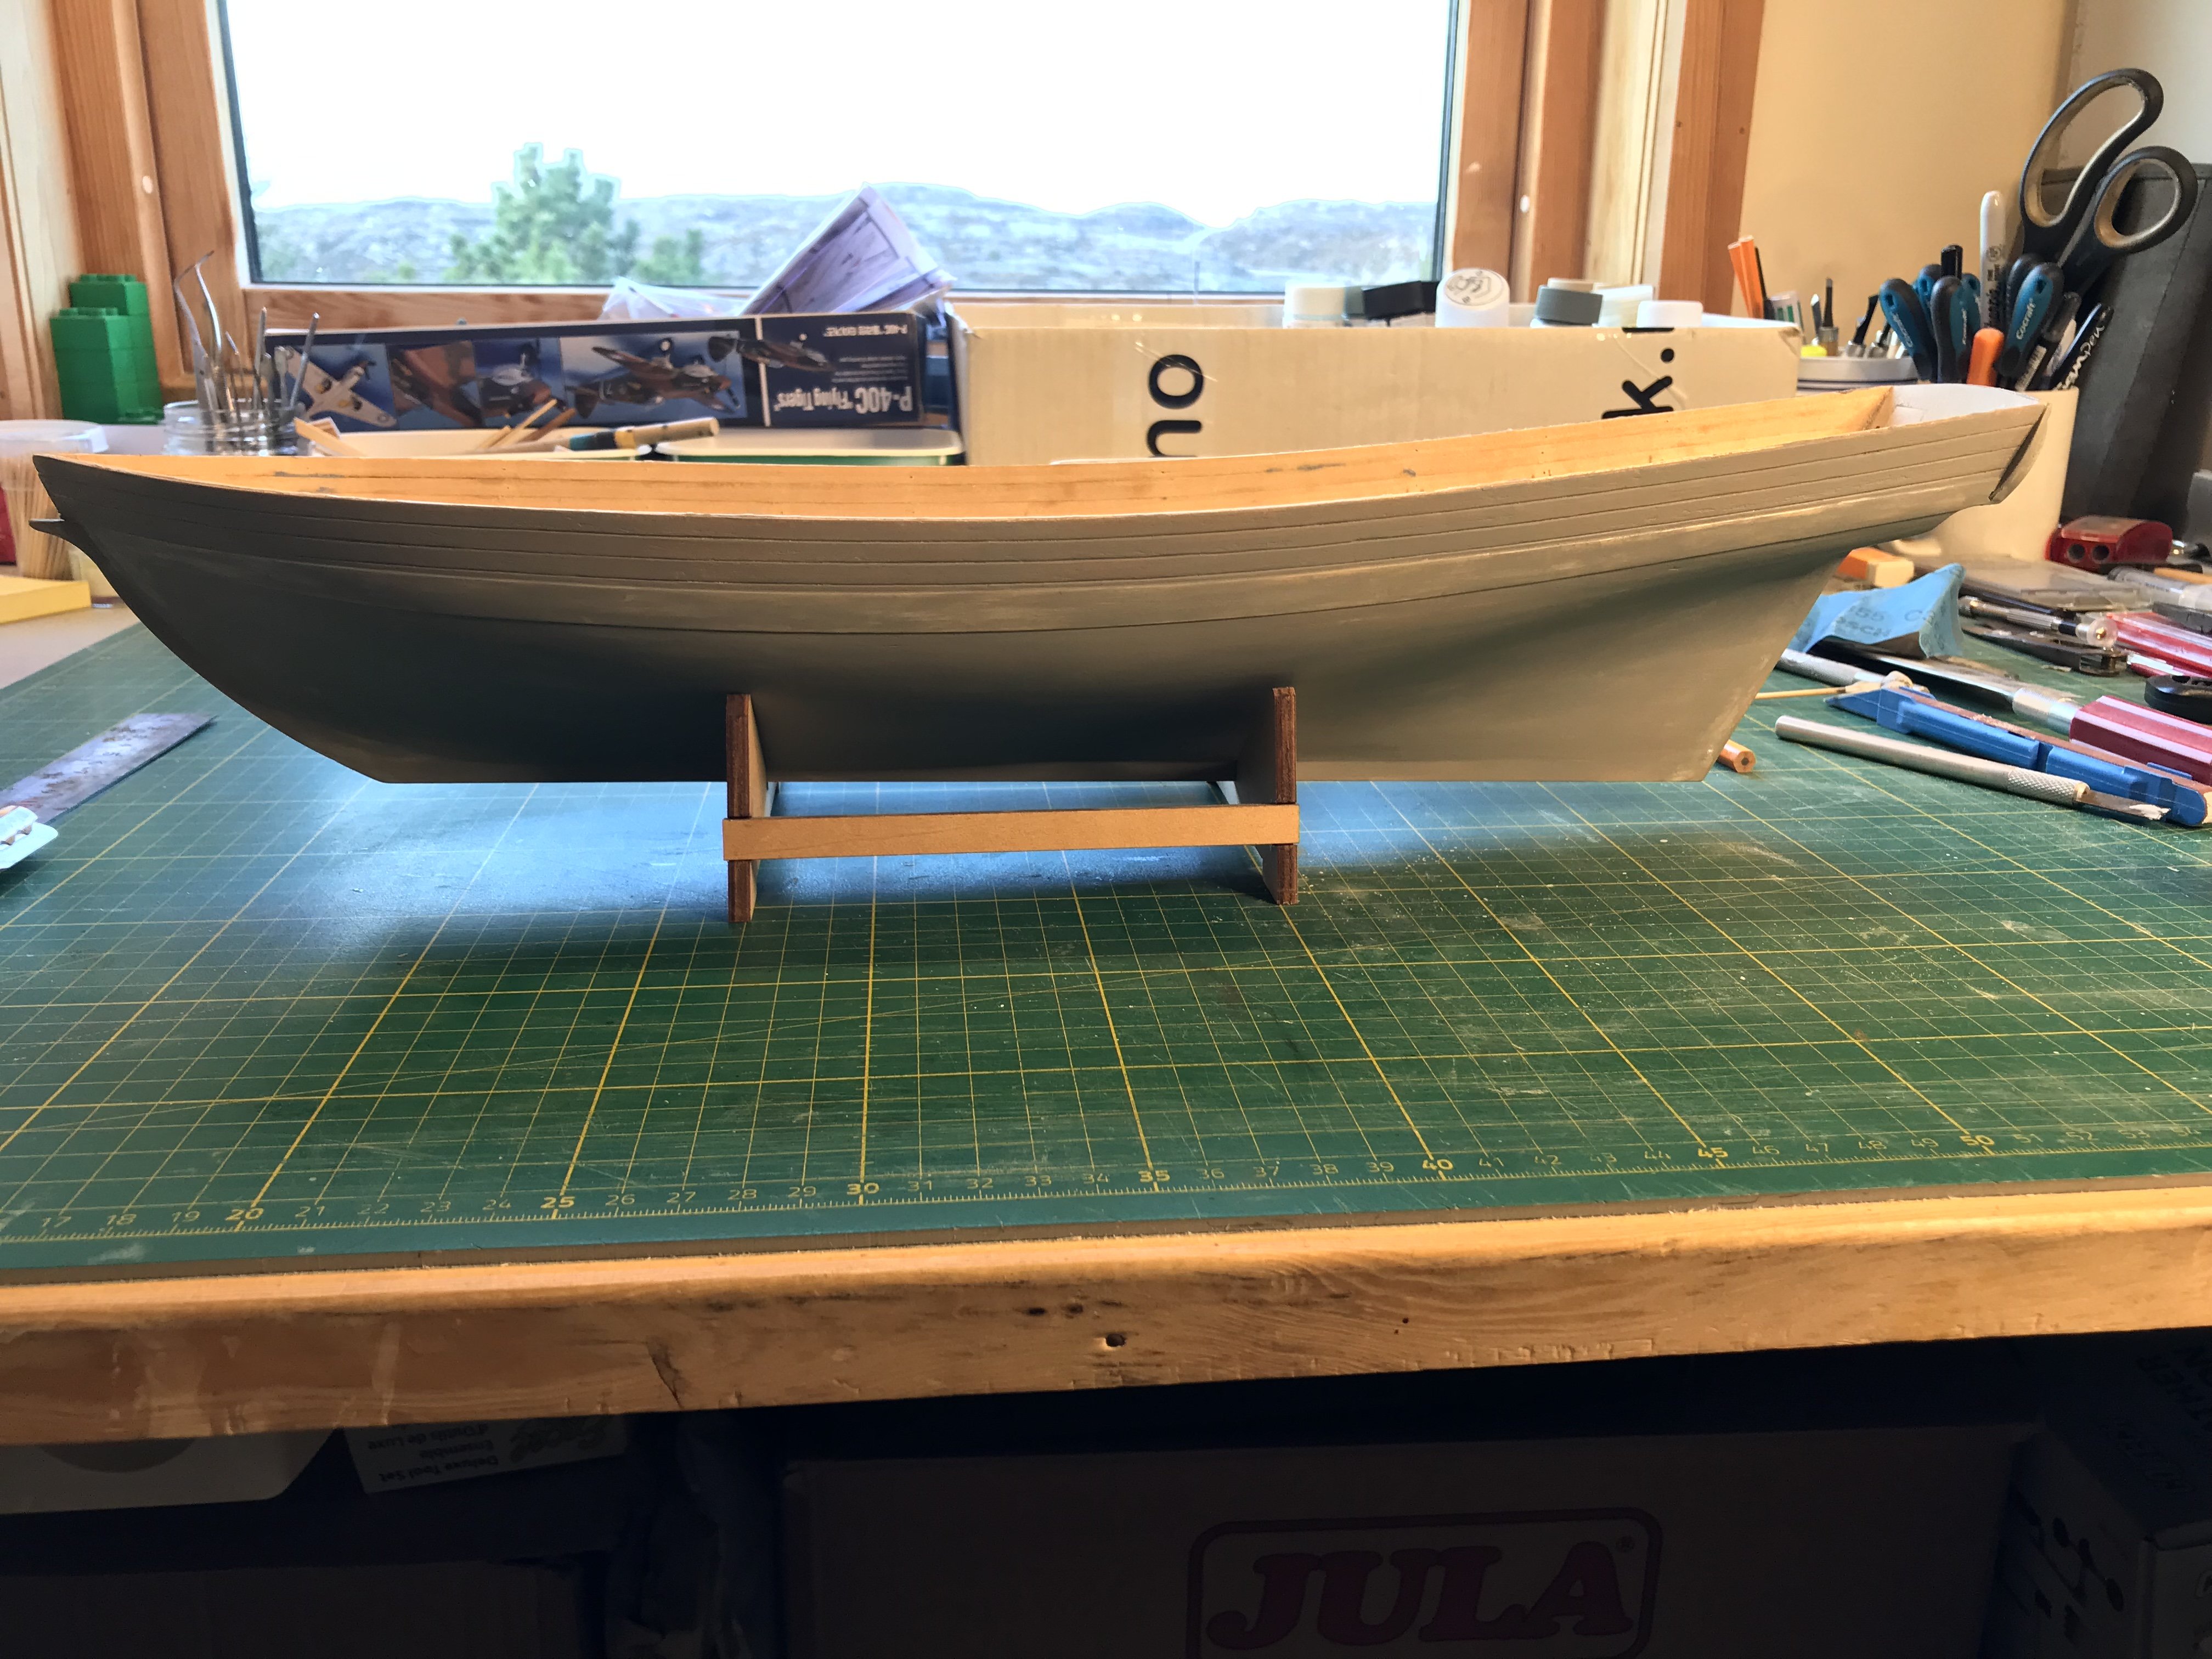
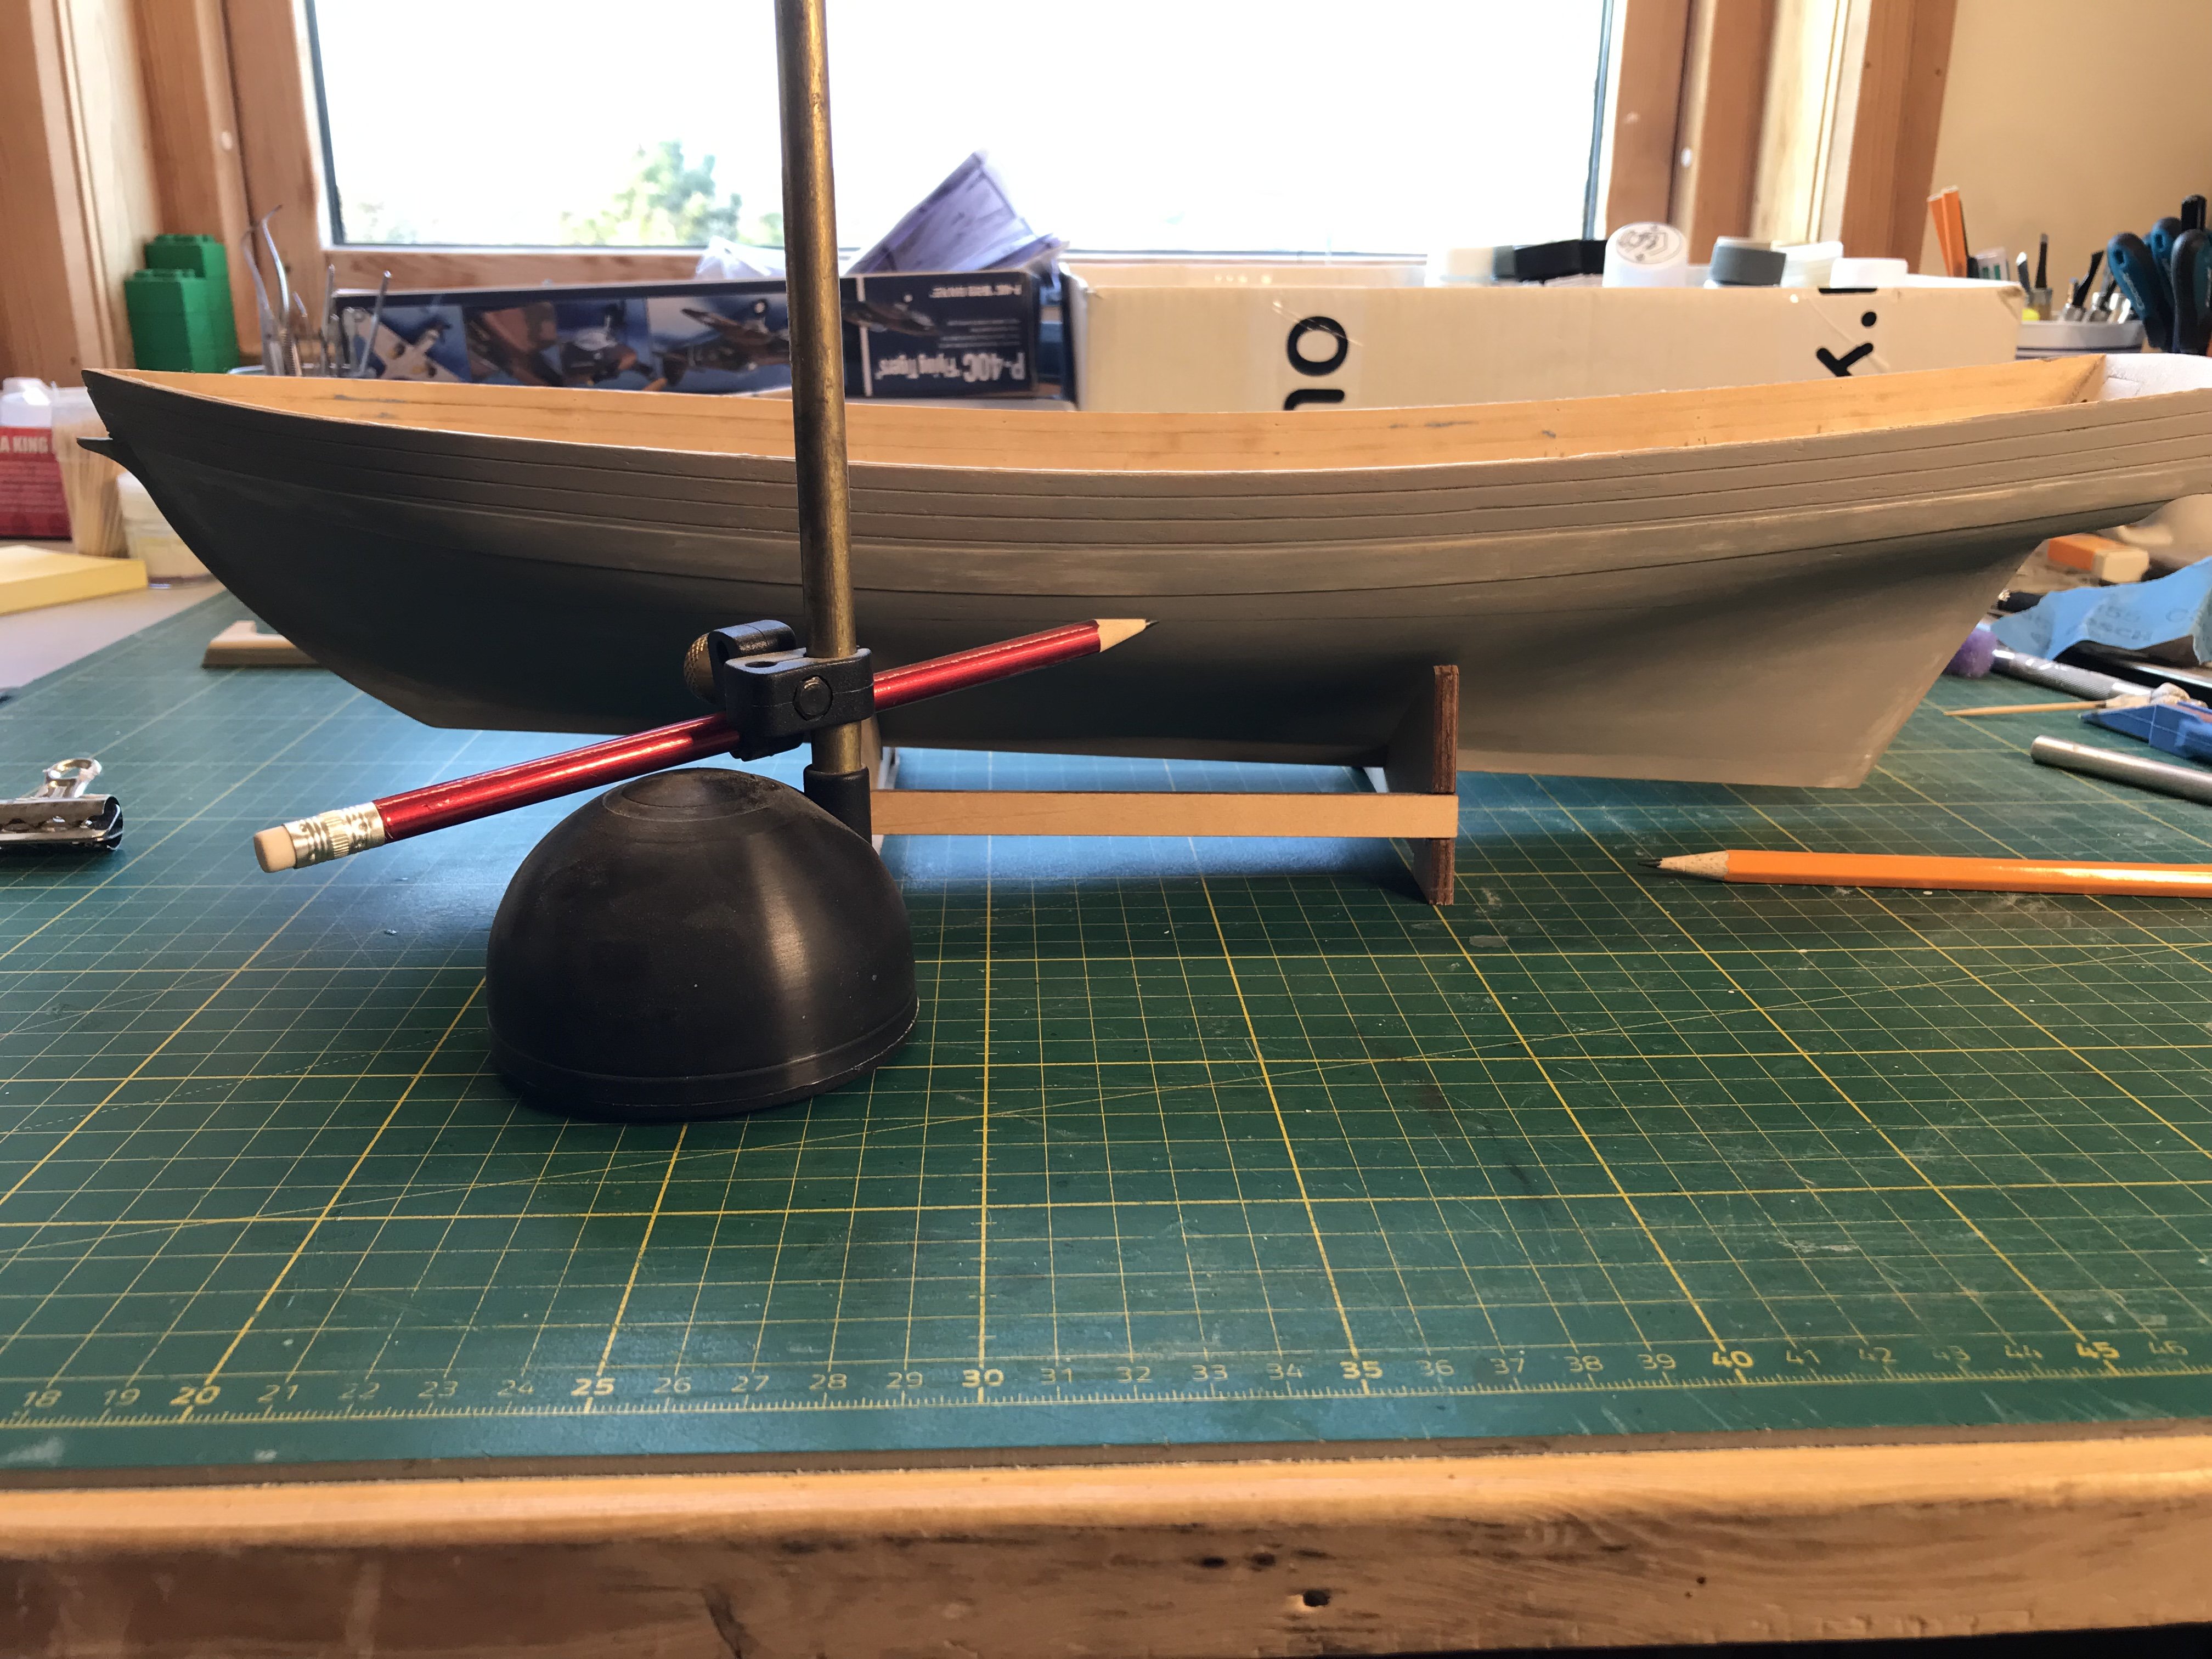
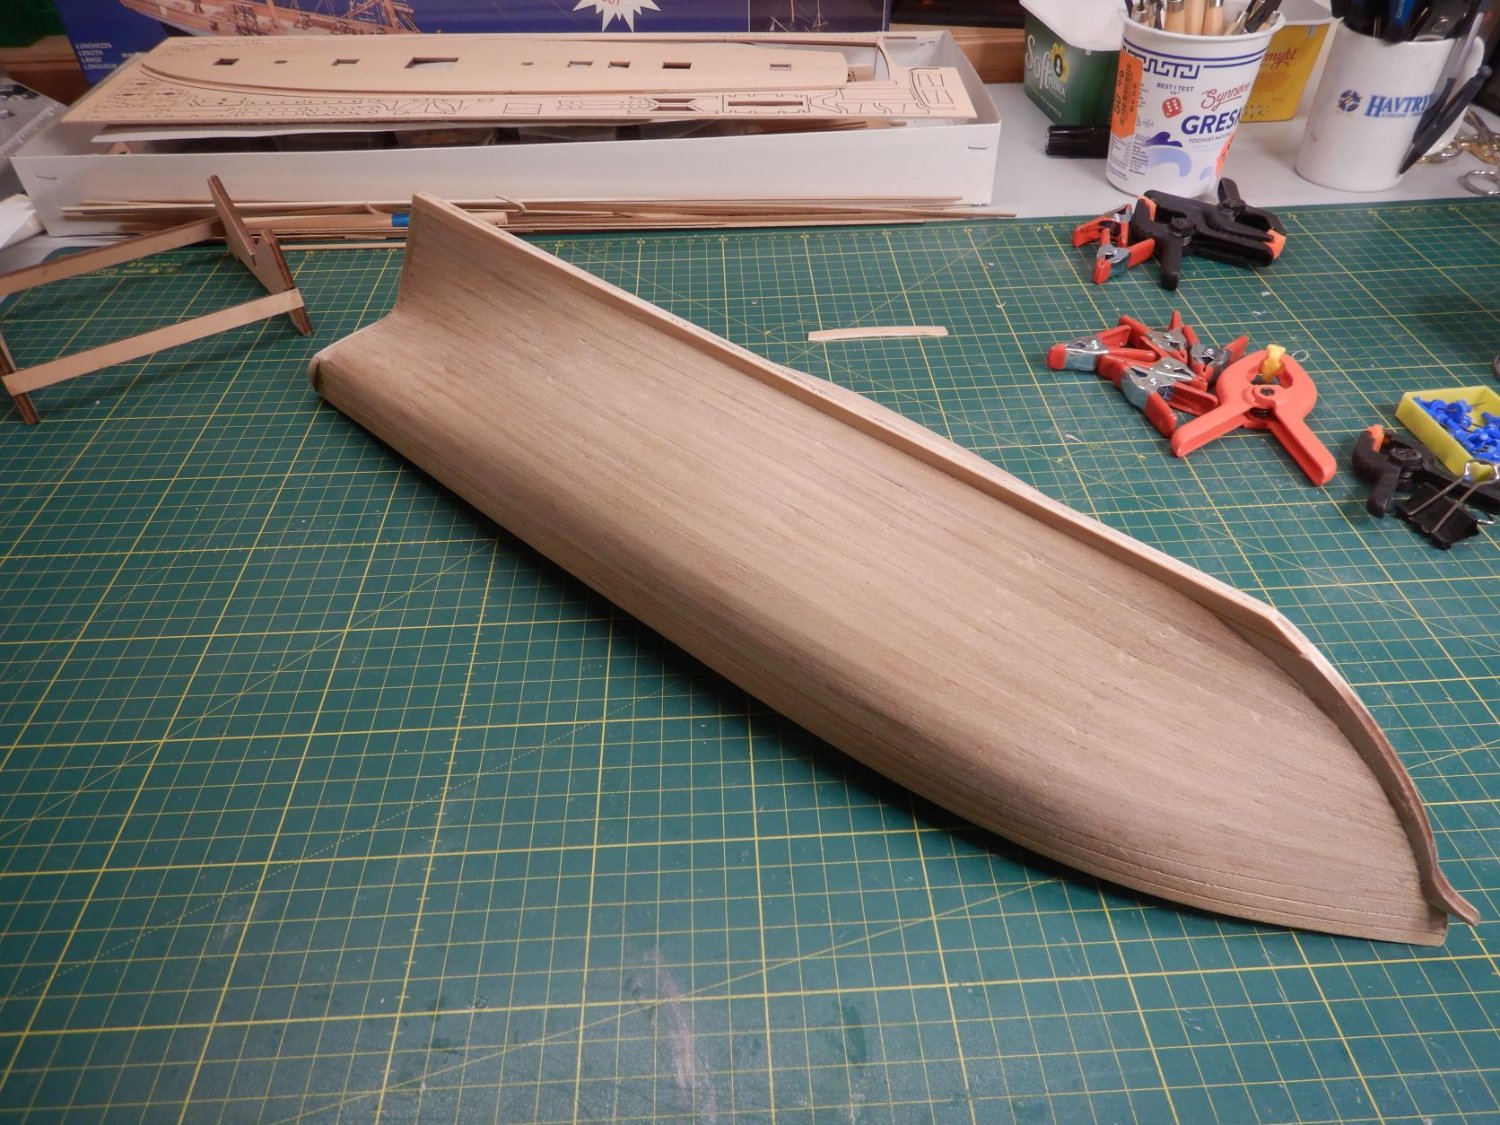
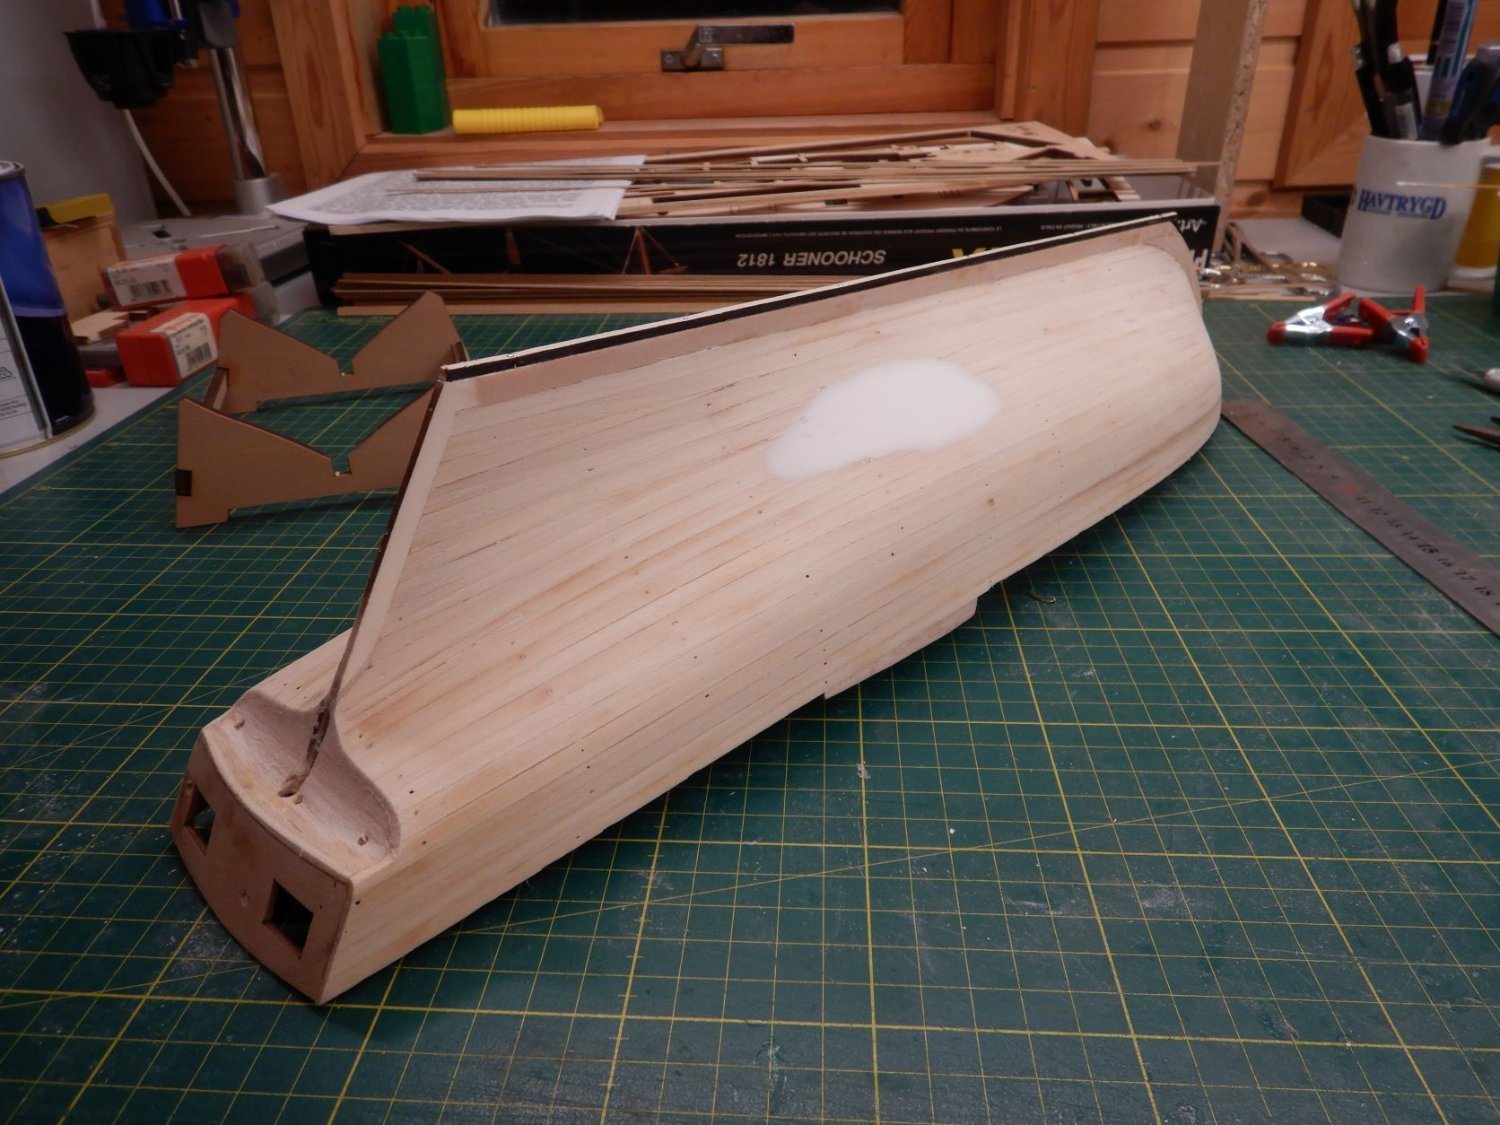
So, onwards with the first planking.. It seems the house photographer (me) has been sleeping or something, because the next pictures i have is with first planking done!
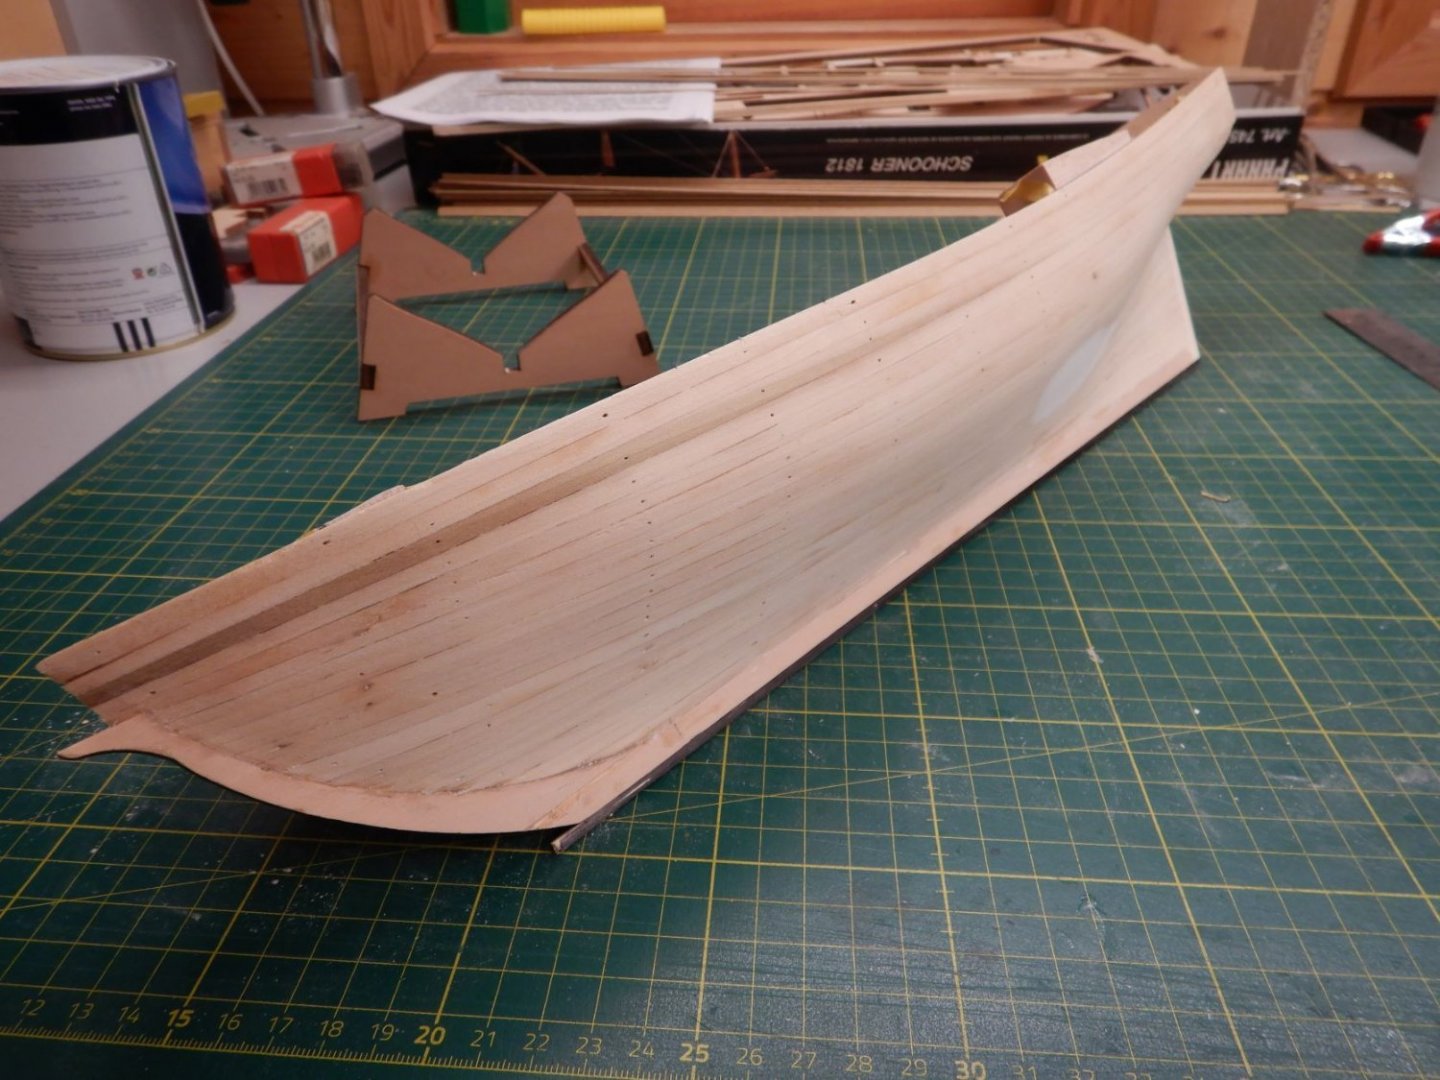
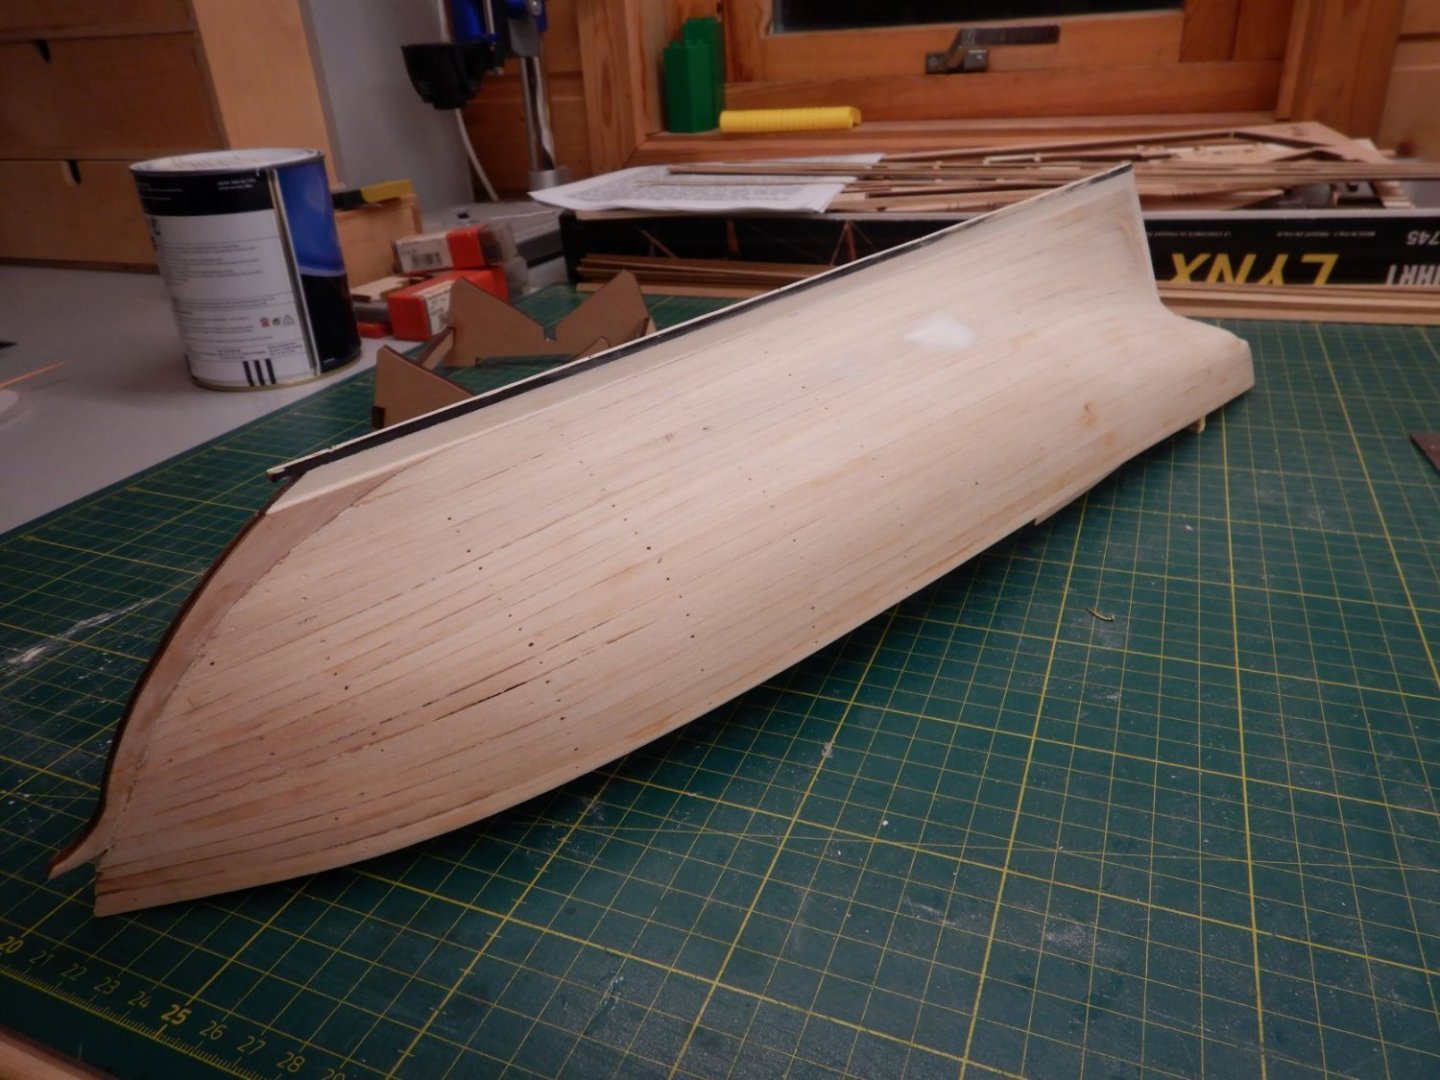

I think the stern turned out ok, at least it ended up looking like something I imagined.
So this brings the log up to date at where the build is now, next step will be second planking.
Gaffrig.
- ibozev, chris watton, GrandpaPhil and 1 other
-
4
-
Hello.
I see you’re located in Norway, as I am.
I recently bought a few of these at biltema, https://www.biltema.no/verktoy/handverktoy/klemmer/miniklemmer-10-stk-2000017620
They work pretty good and are not to pricey. They also have clamps similar to the ones you have.
I also use these from clas ohlson, https://www.clasohlson.com/no/Papirklyper-10-pack/p/34-1537
Your bounty is looking good!
Gaffrig.
-
Hi!
Any news regarding this kit?
Gaffrig.
-
Hello and welcome to MSW!
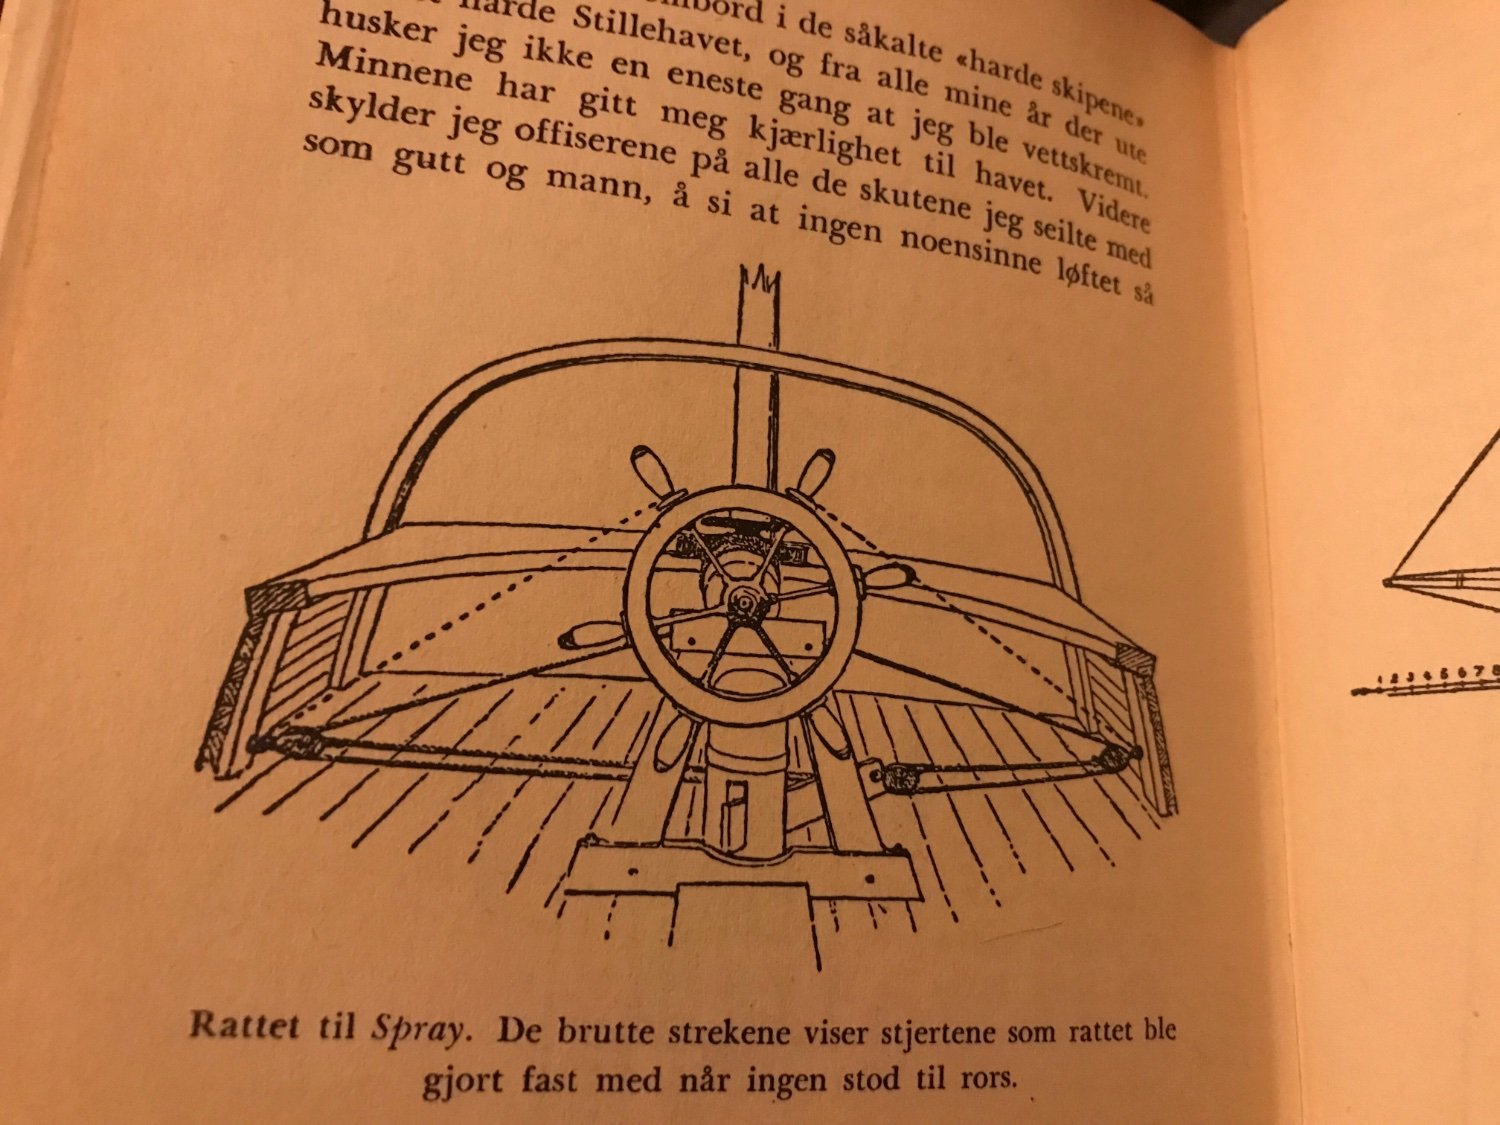
I don’t know if this will give the information you seek, but here is a sketch from Slocums book first man alone around the world, showing the way the tiller arm and rope/blocks are rigged to the wheel.

The text reads: Spray’s wheel, the dotted lines show the ropes used to tie the wheel when noone was at the helm.
I don’t know who made this sketch, but this seems like a way the steering would have been rigged.
Gaffrig.
- allanyed, lmagna, Duanelaker and 3 others
-
6
-
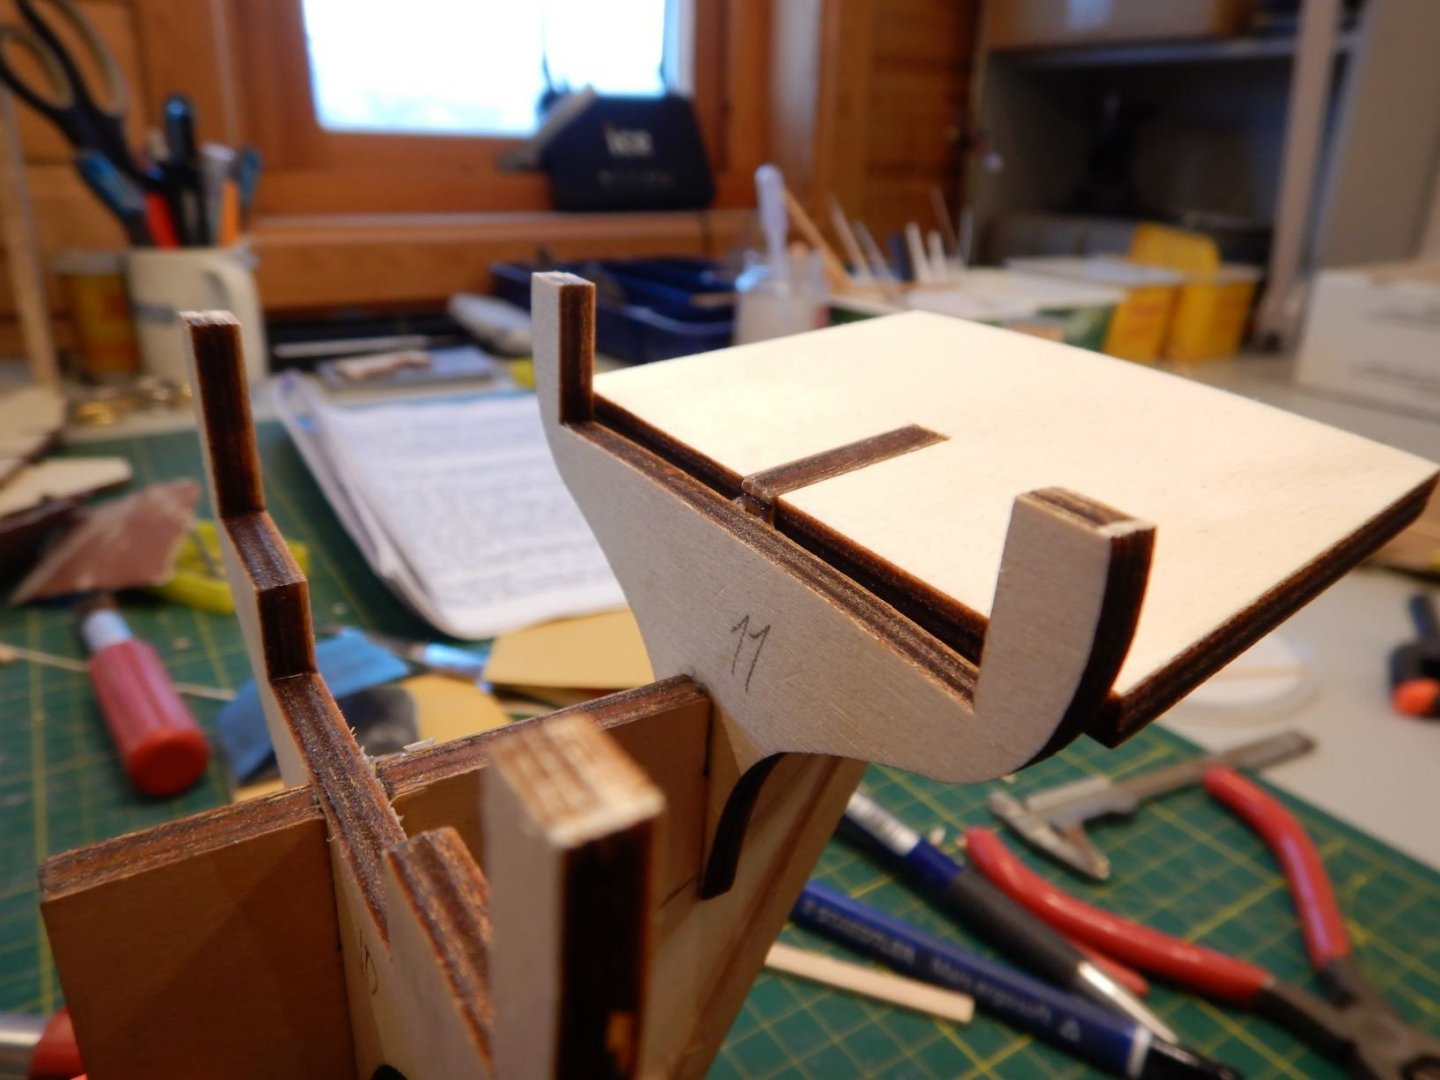
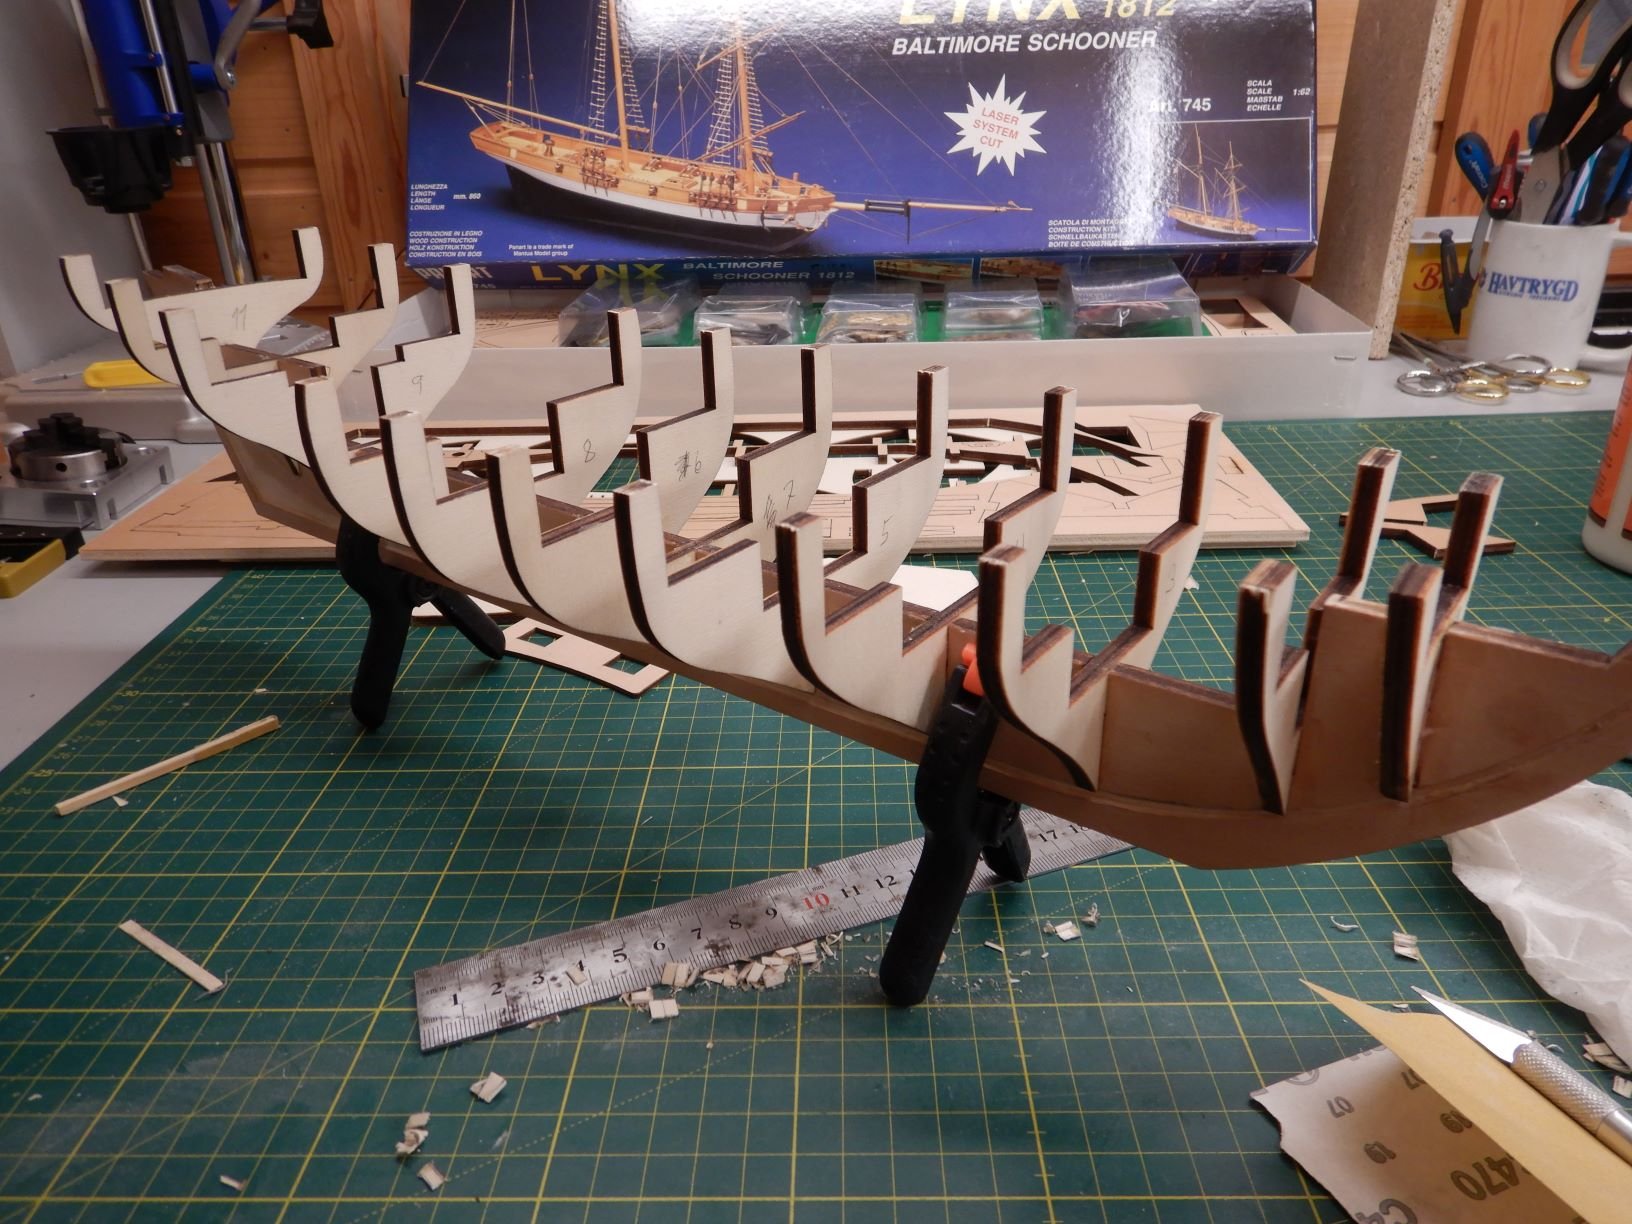
Hello to all!
The build continues..
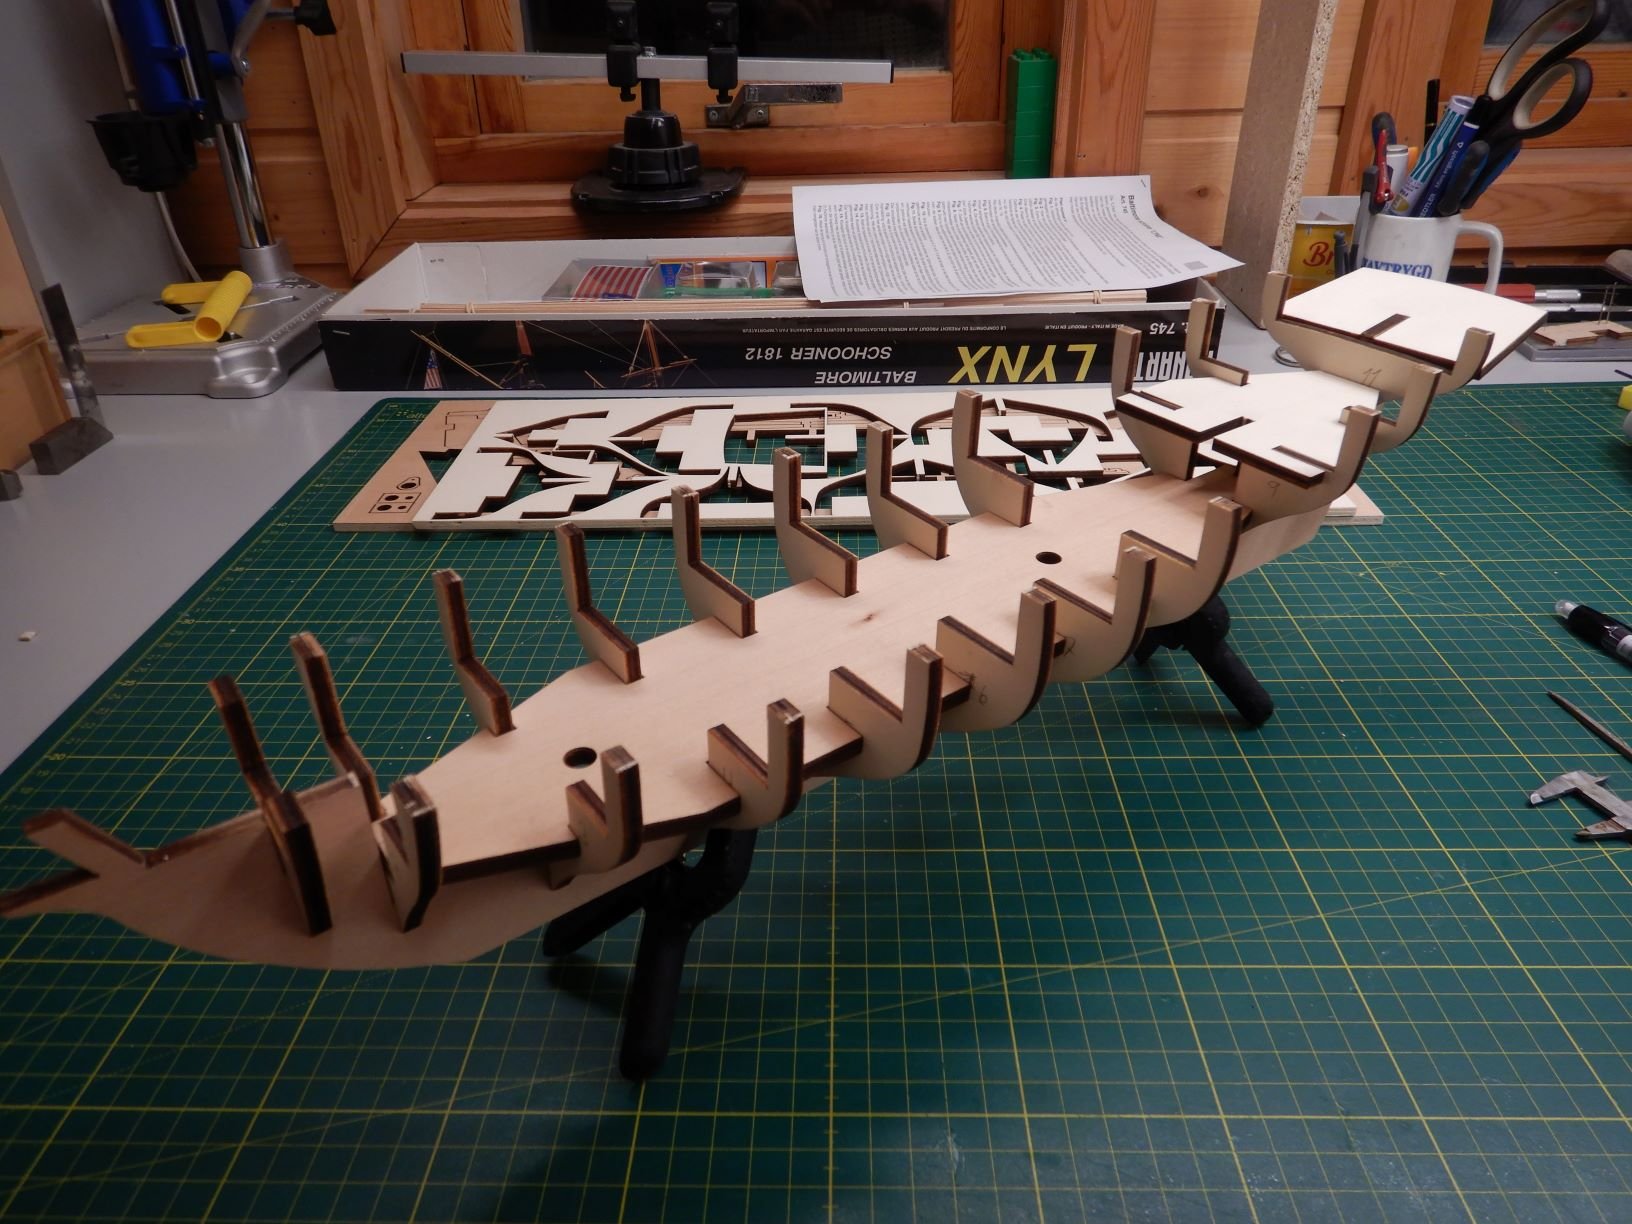
Have got all the bulkheads glued in place.

Appears to be nice and straight..

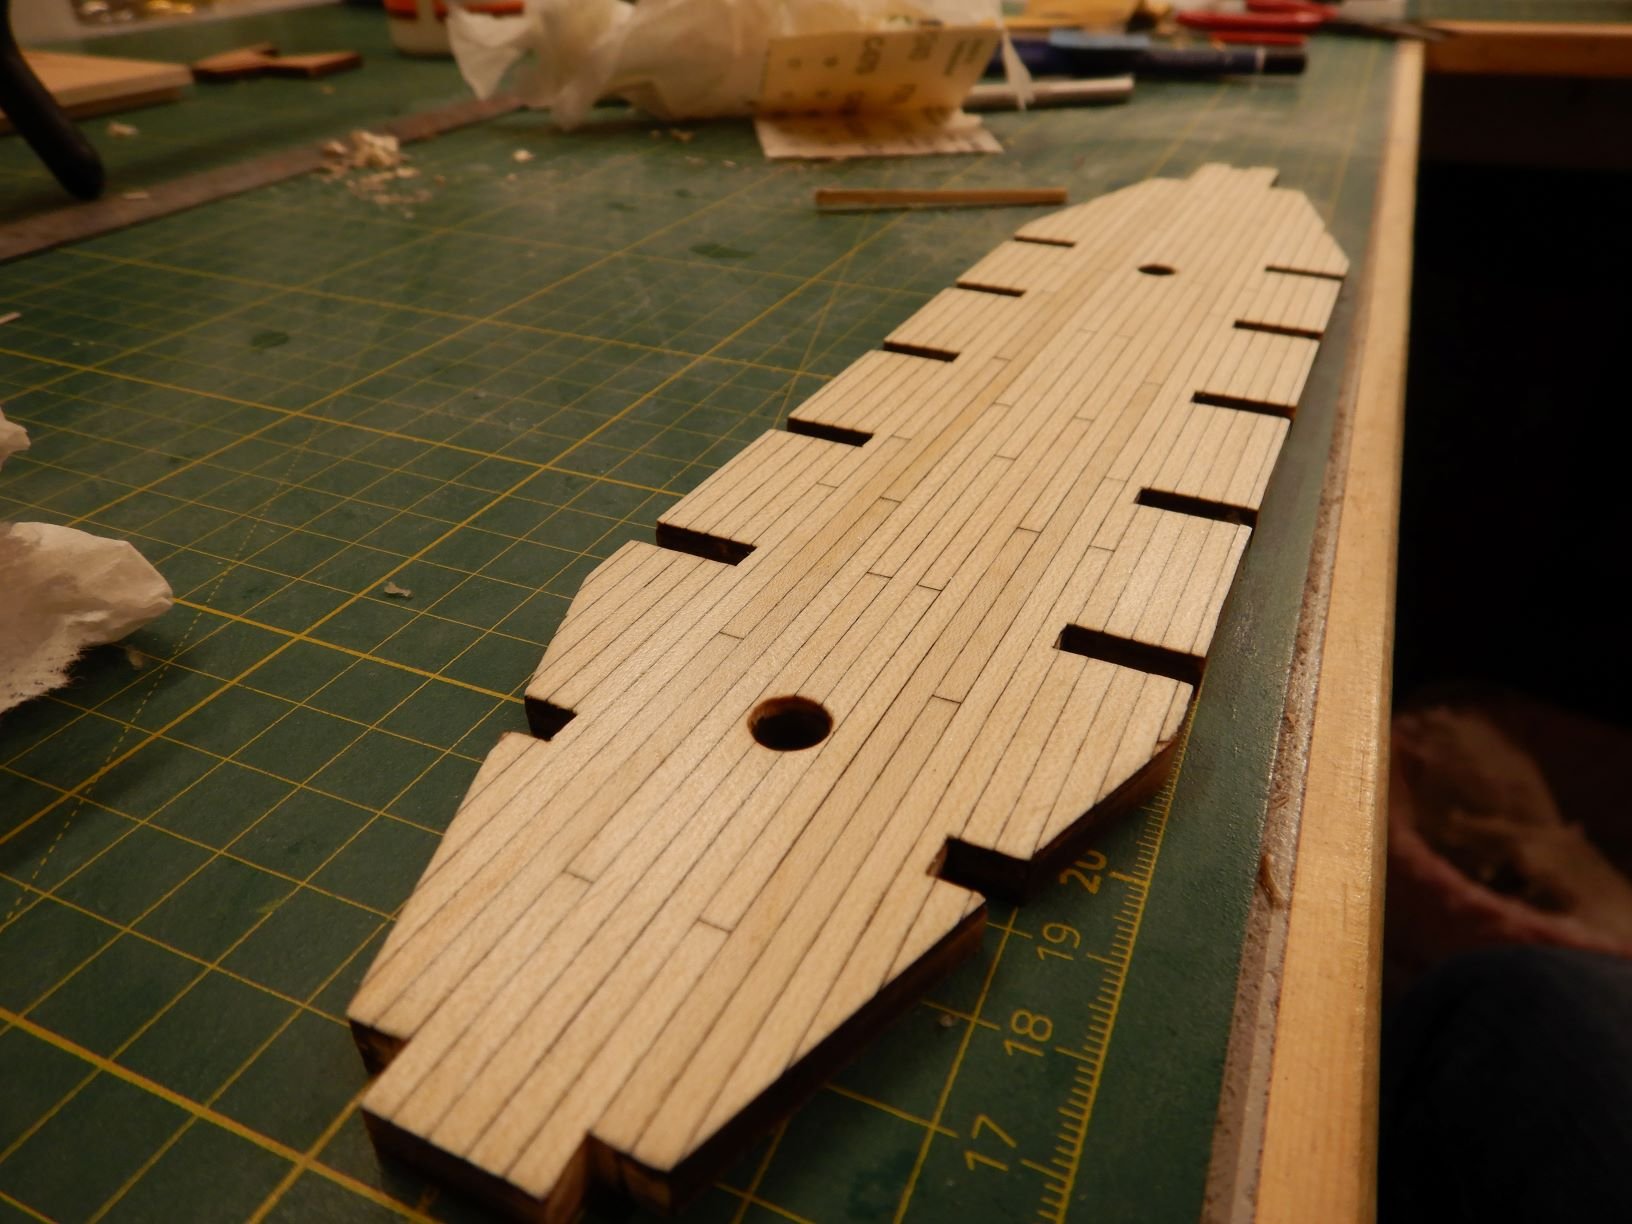
Test fit of the lower deck..

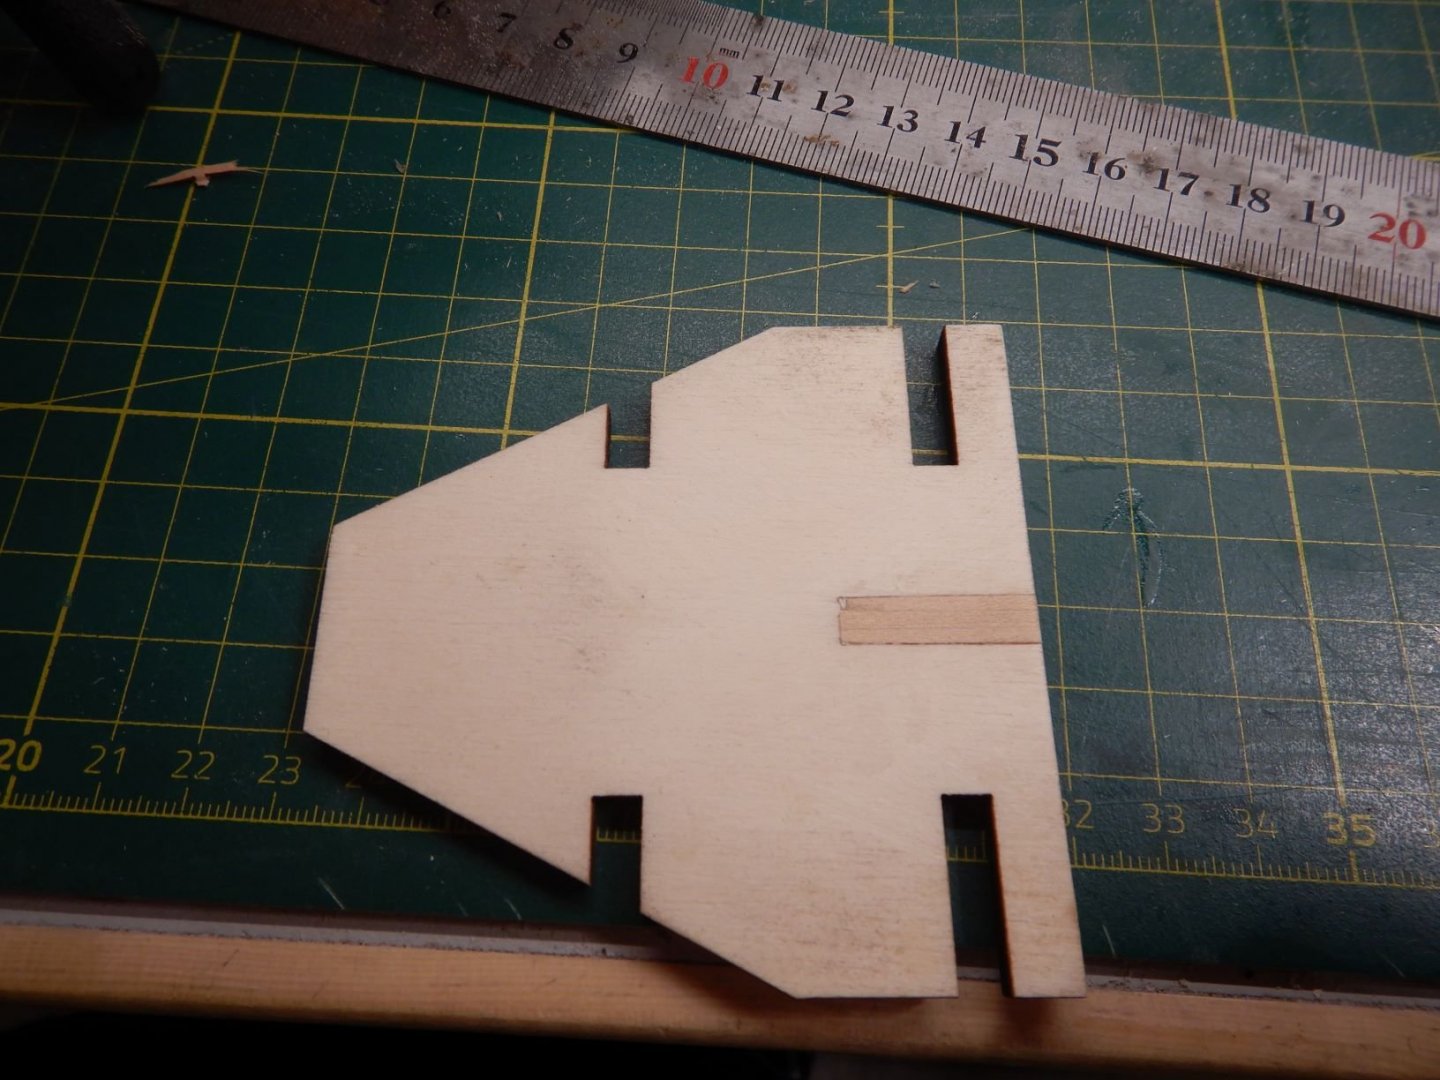
The lower deck also has a second piece in the stern.
I decided to plank this as well, but there is a lasercut notch that I don't quite understand..
Looking at the plan, this notch is not there.. 🤔
When looking further in the instructions there does'nt seem to be a need for this notch..

So I decided to fill it and plank over it..
When dryfitting the sterndeck plywood piece (for lack of a better word) I realized the aftmost bulkhead had come to low by quite a bit. (2-3mm)
So, nothing else to do but unstick it and glue it again with a small shim to get it in the correct place.

When this was fixed I glued on the lower deck.
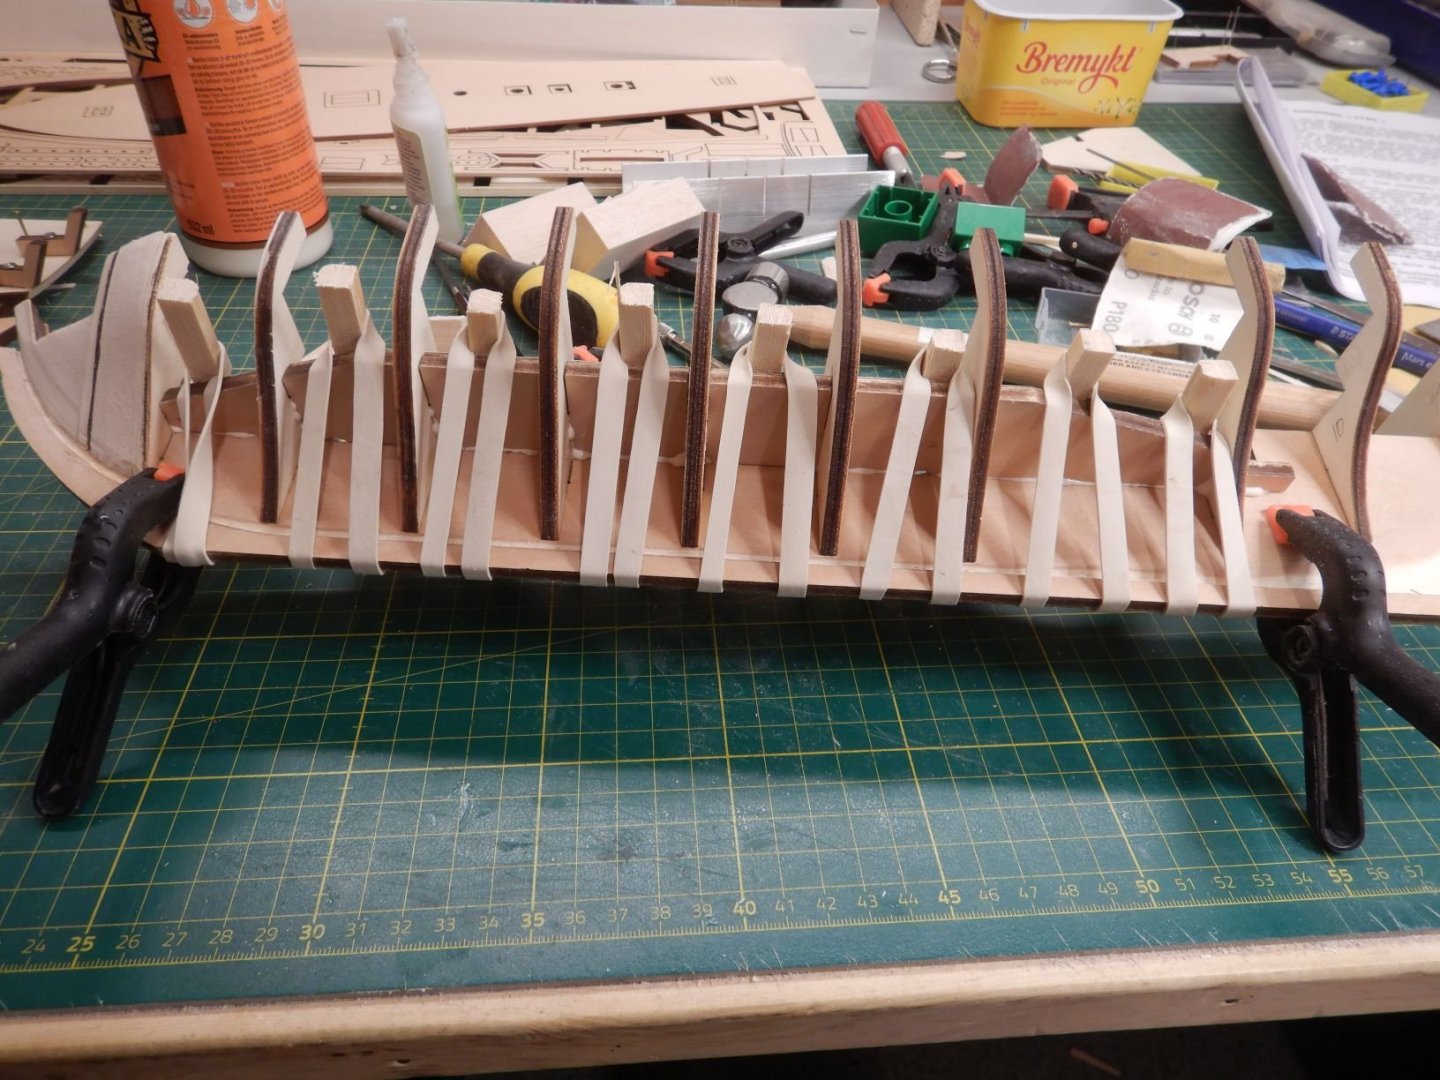
When this was finished I started beveling the bulkheads, and decided to fill with balsa in the bow.
So, a little more shaping of the bulkheads and I think I'm ready to start the first layer of planking.
Stay safe!
Gaffrig.

-
Looking great! 👍
That’s a lot of progress in a short time!It might be my eyes seeing wrong, but it looks like you may have got the transom upside down?
Don’t mean this as criticism, just something worth checking.
Might be easier to redo now than later in the build.Keep up the good work!
Gaffrig.
-
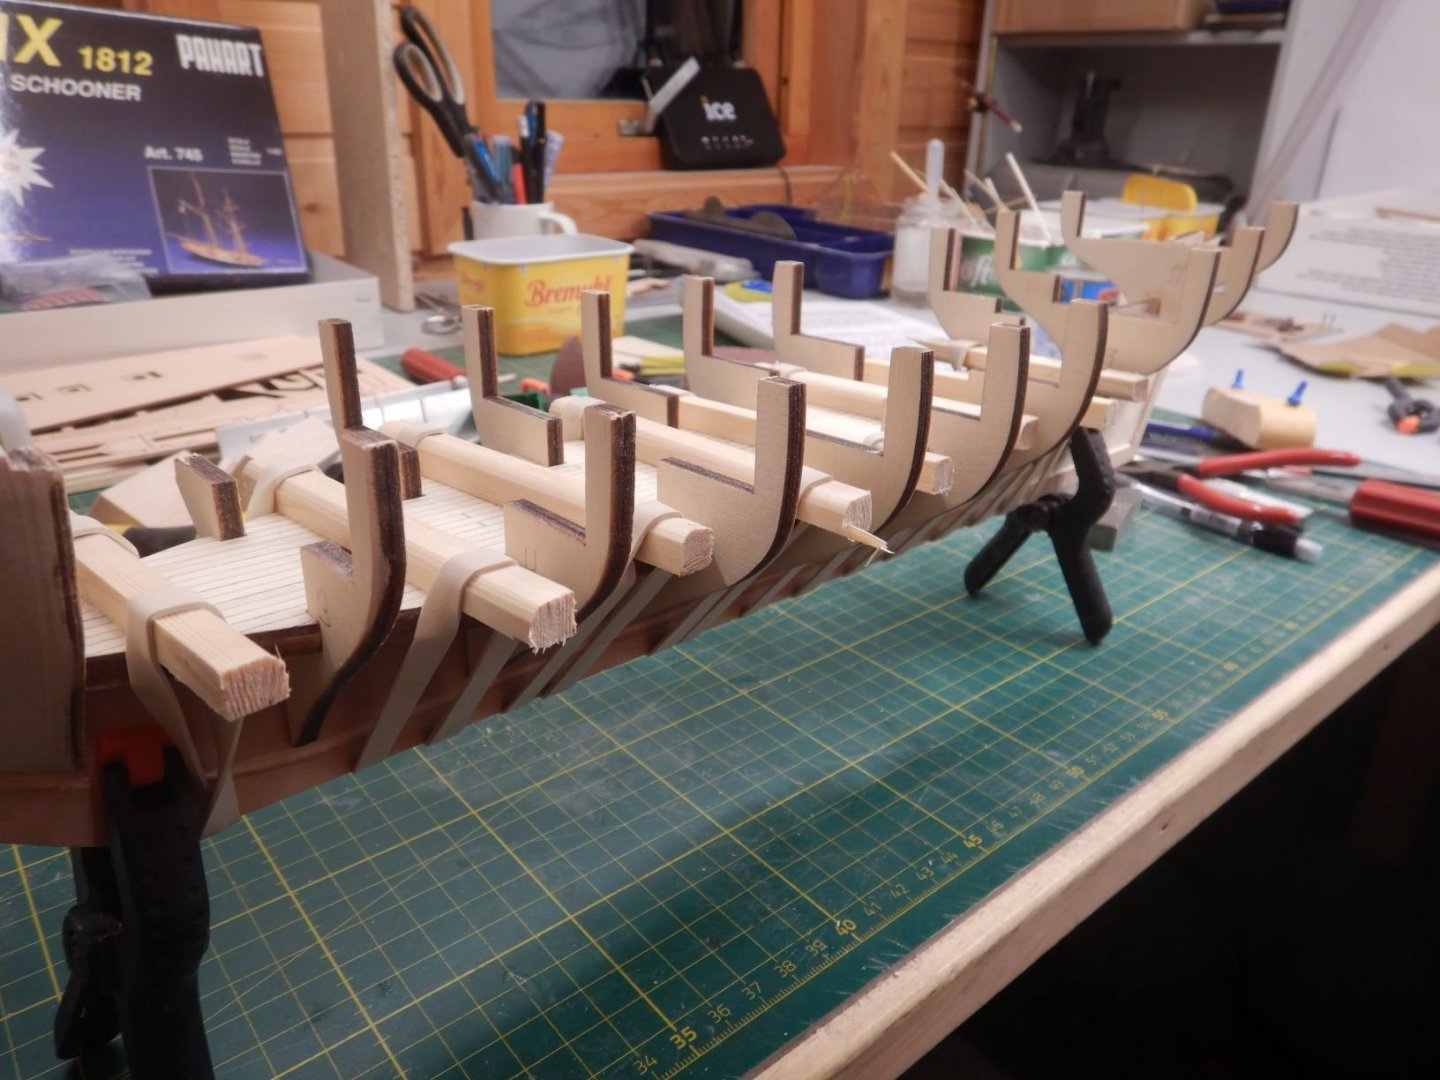
Hello all!
Another update as the work on Lynx progresses.
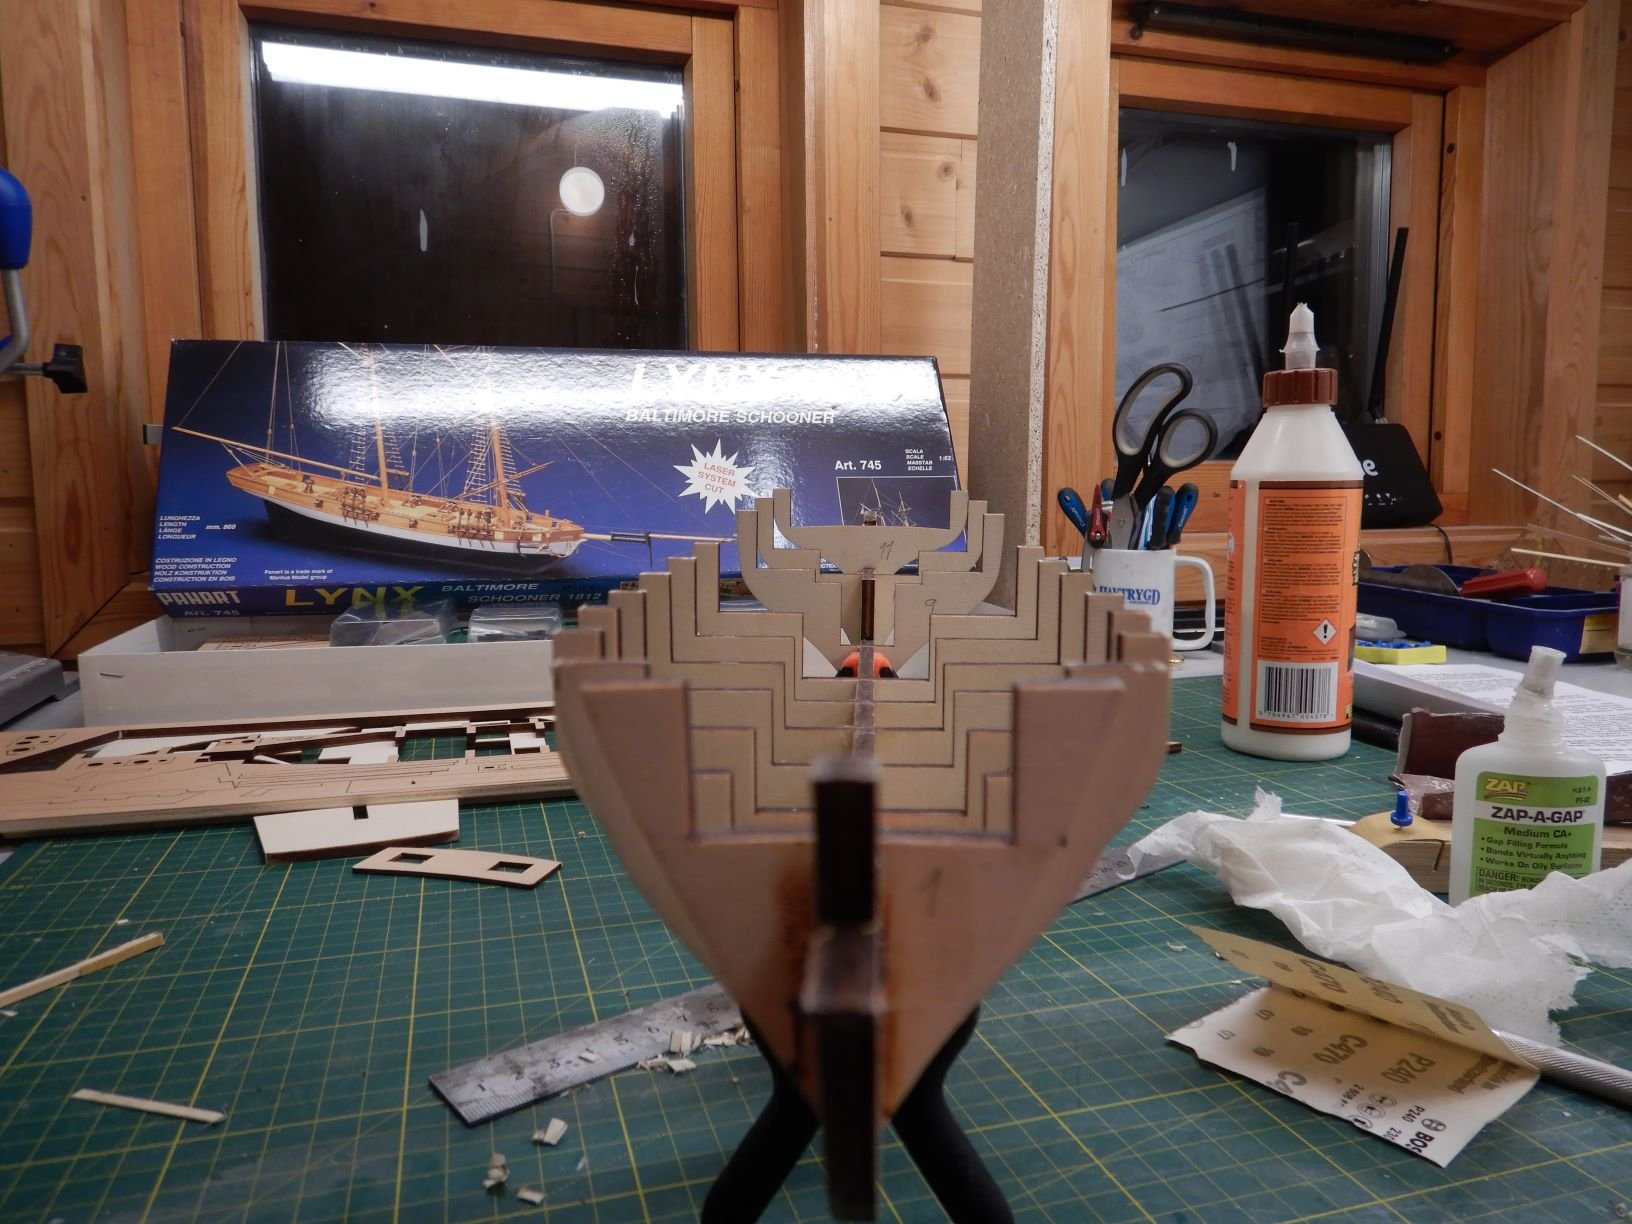
When dryfitting bulkheads, I realised all of them are riding a bit low in the keel.


I fixed this by glueing a piece of wood in the notch to make the bulkheads ride flush with the top of the keel.
Then I started glueing the bulkheads in place.

Bulkead number one glued inplace..
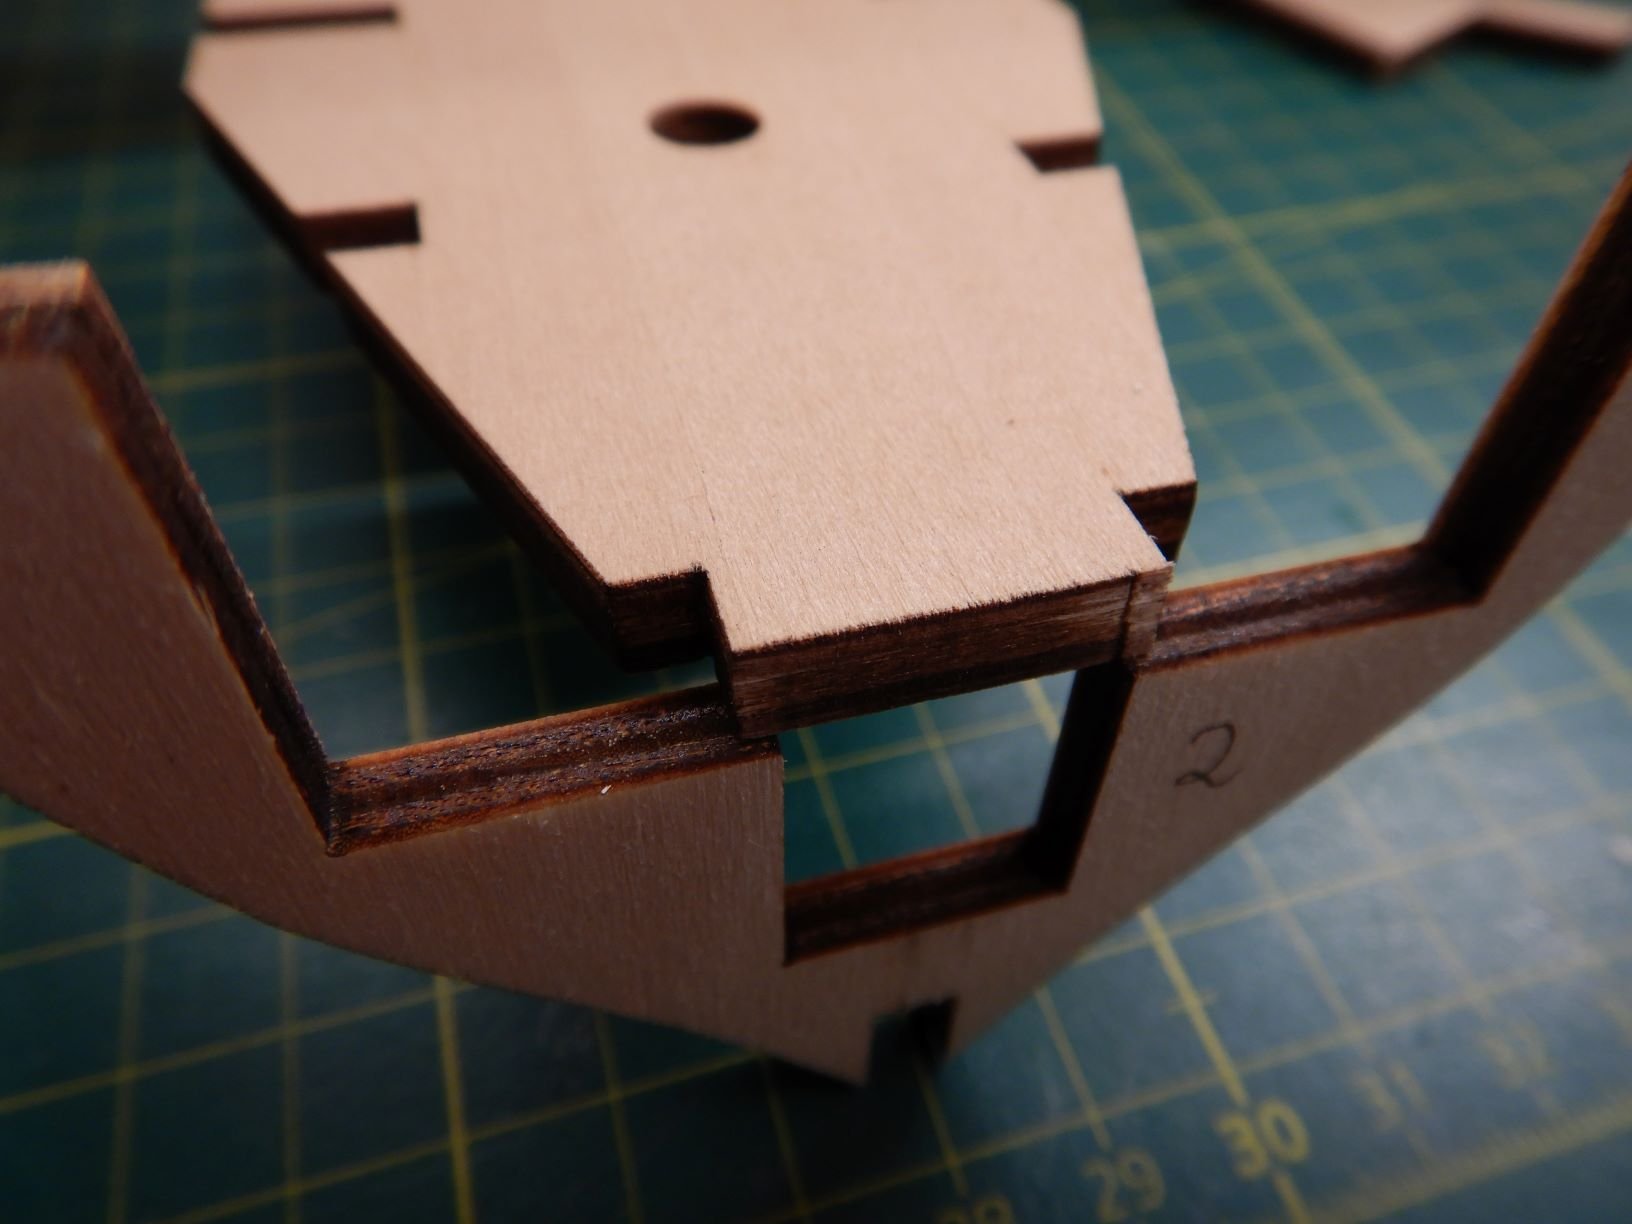
Upon dryfitting I also found out that the front end of the lower deck did not fit in the notch of bulkhead number 2.
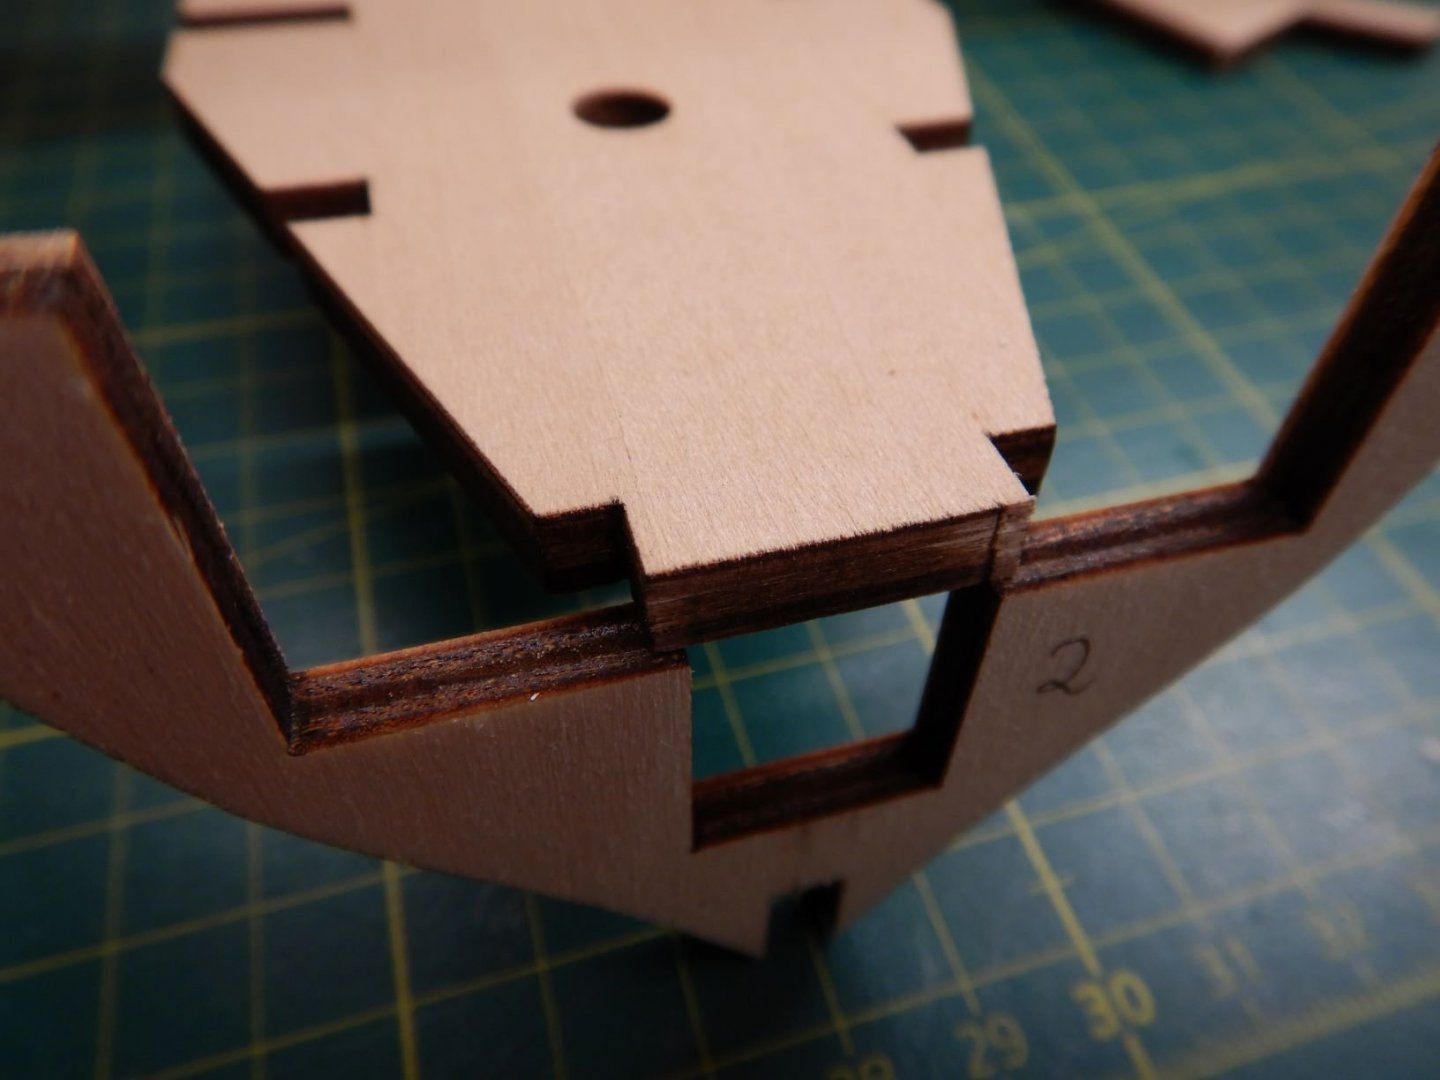
I decided to cut of from the deck. If I had cut of in the bulkhead, there would be little material left for beveling later.
A simple fix though.
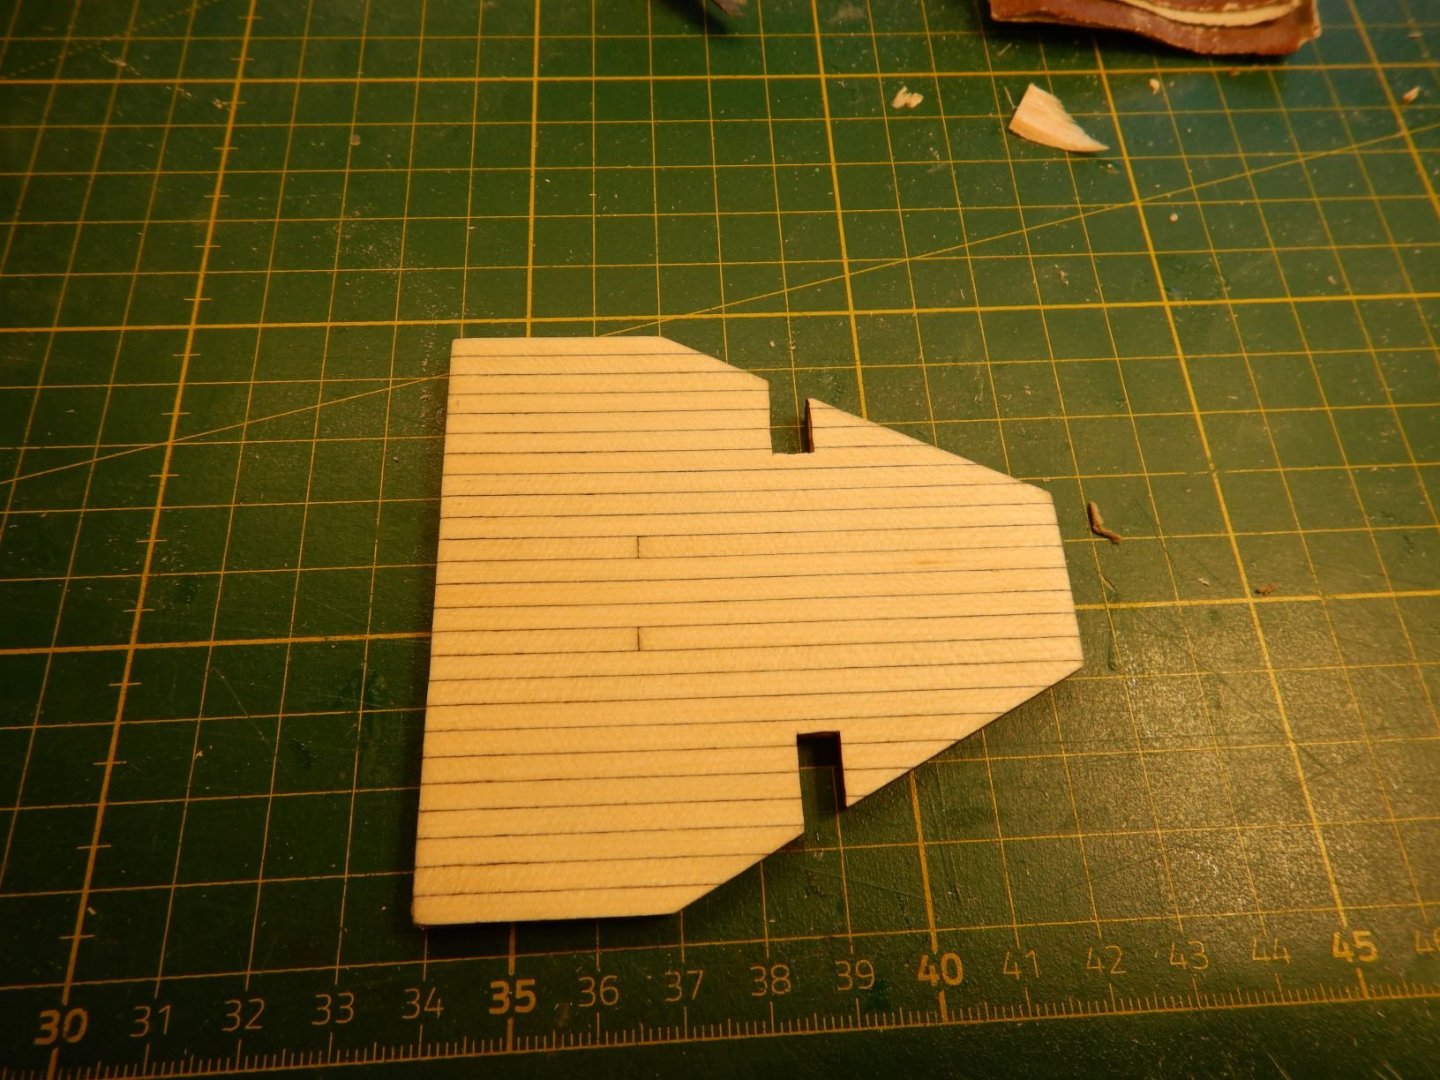
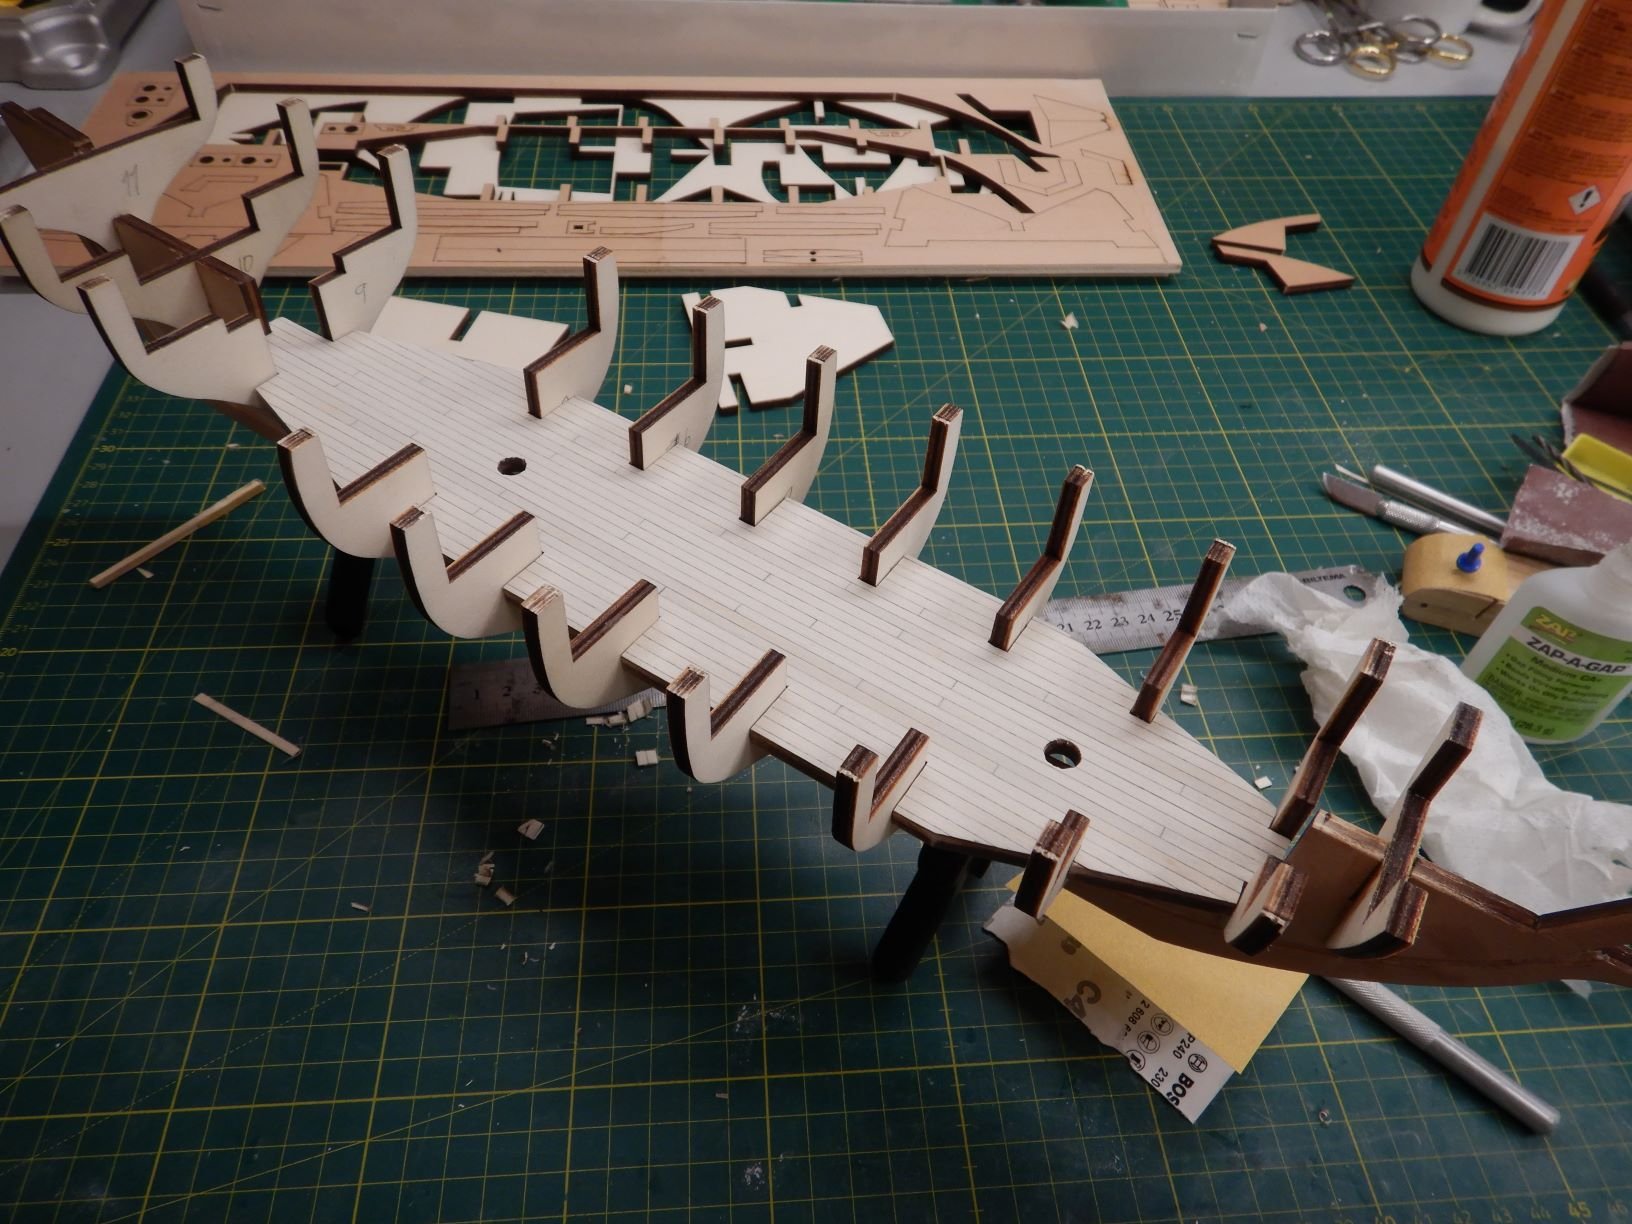
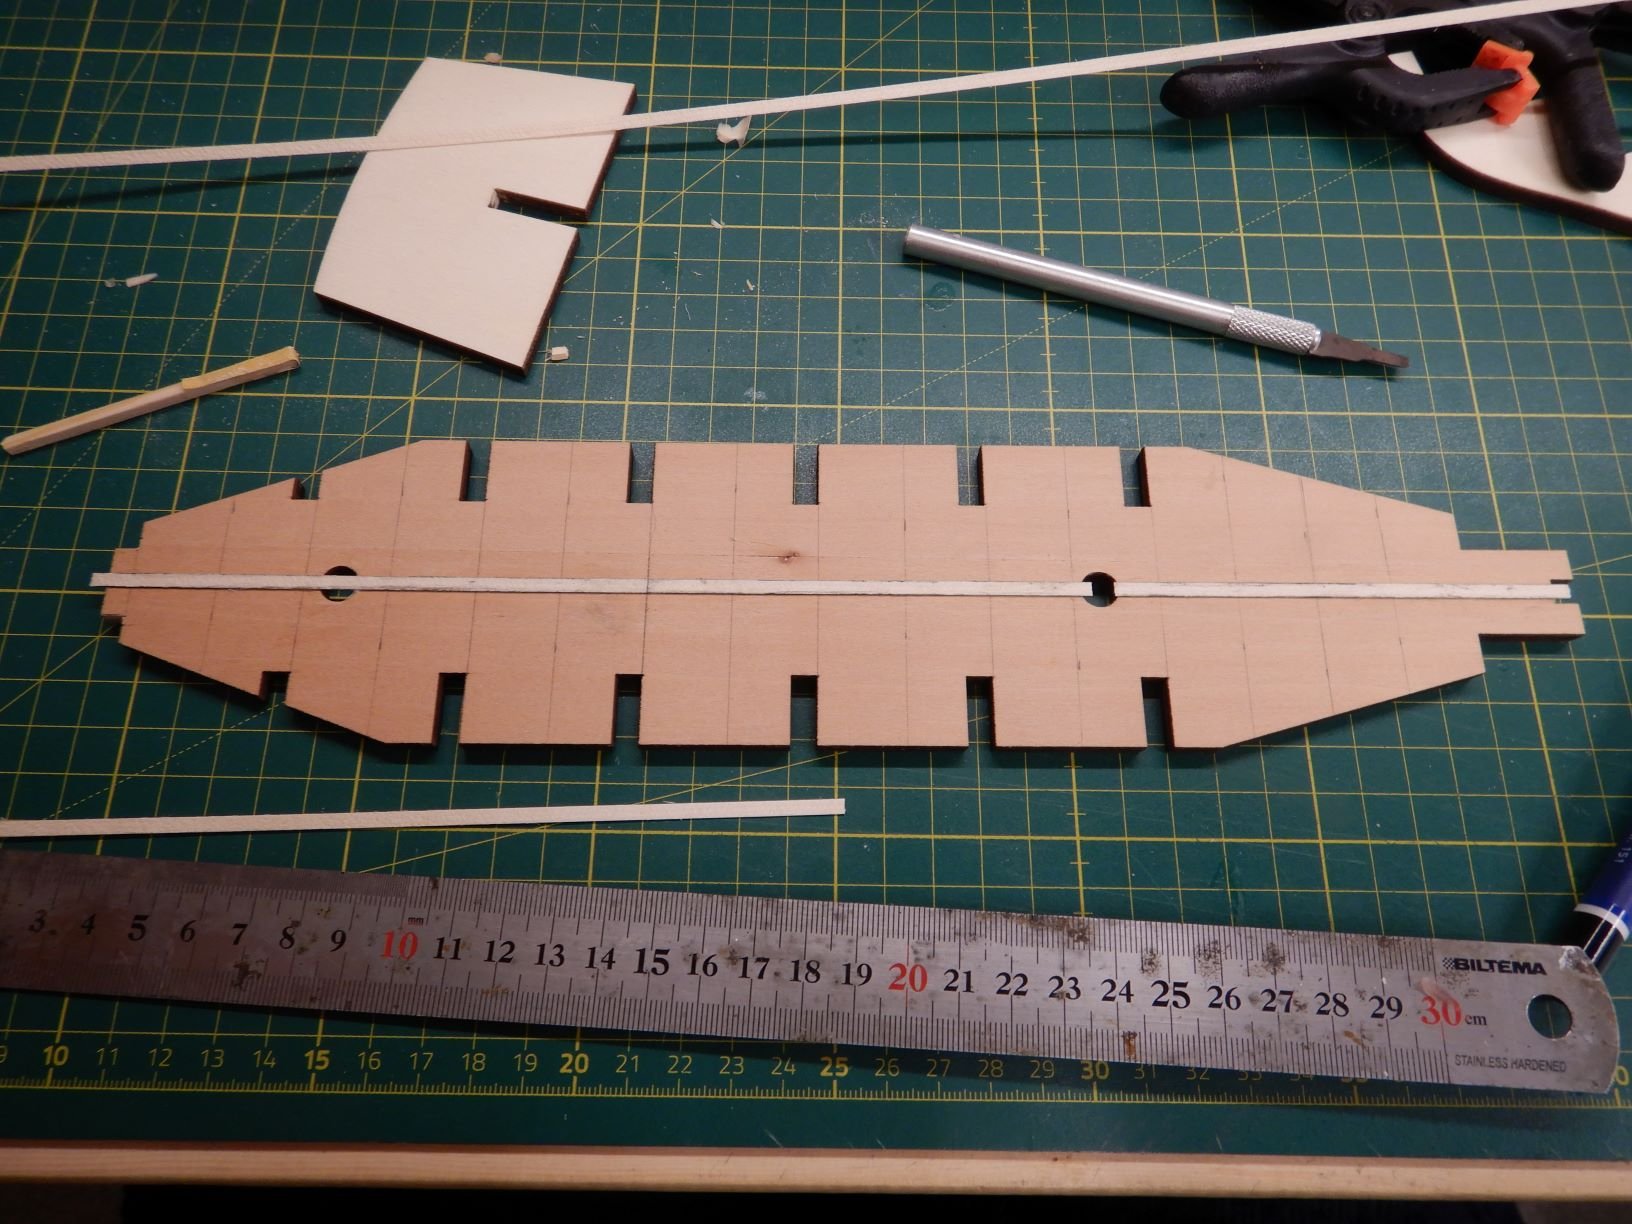
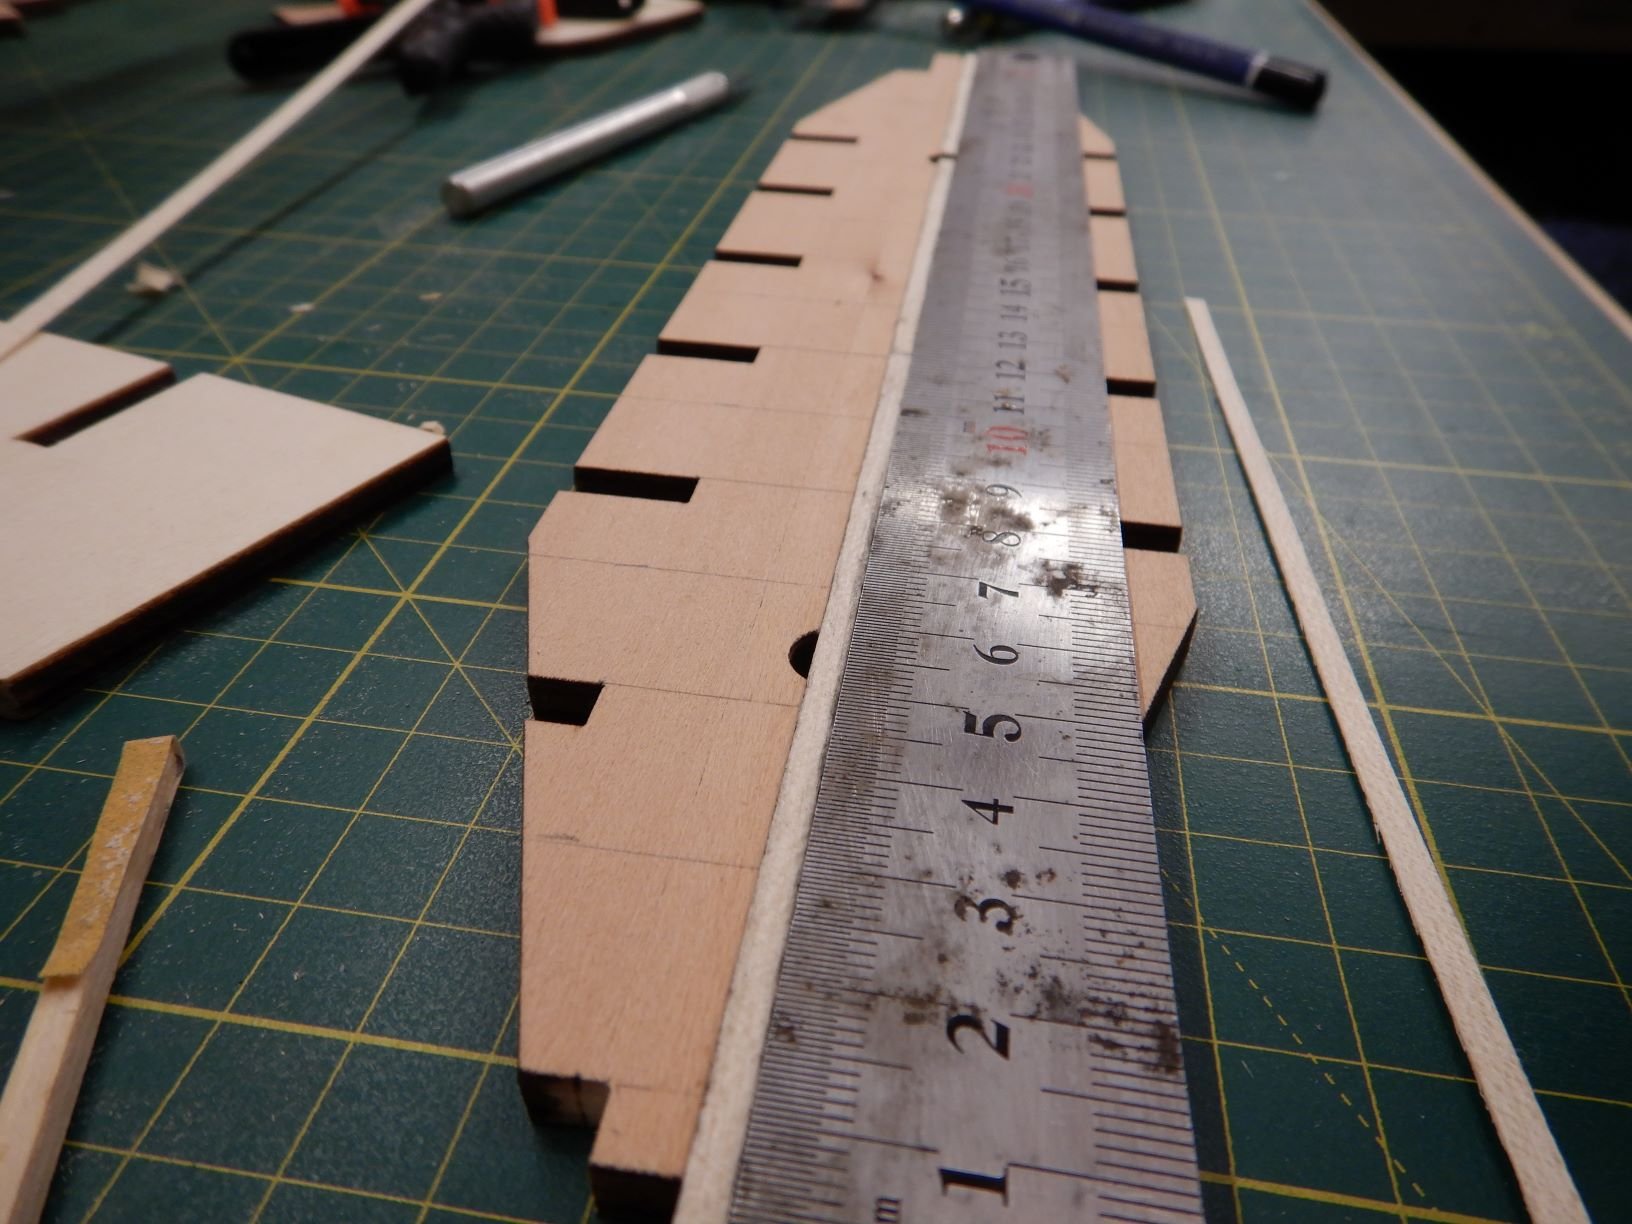
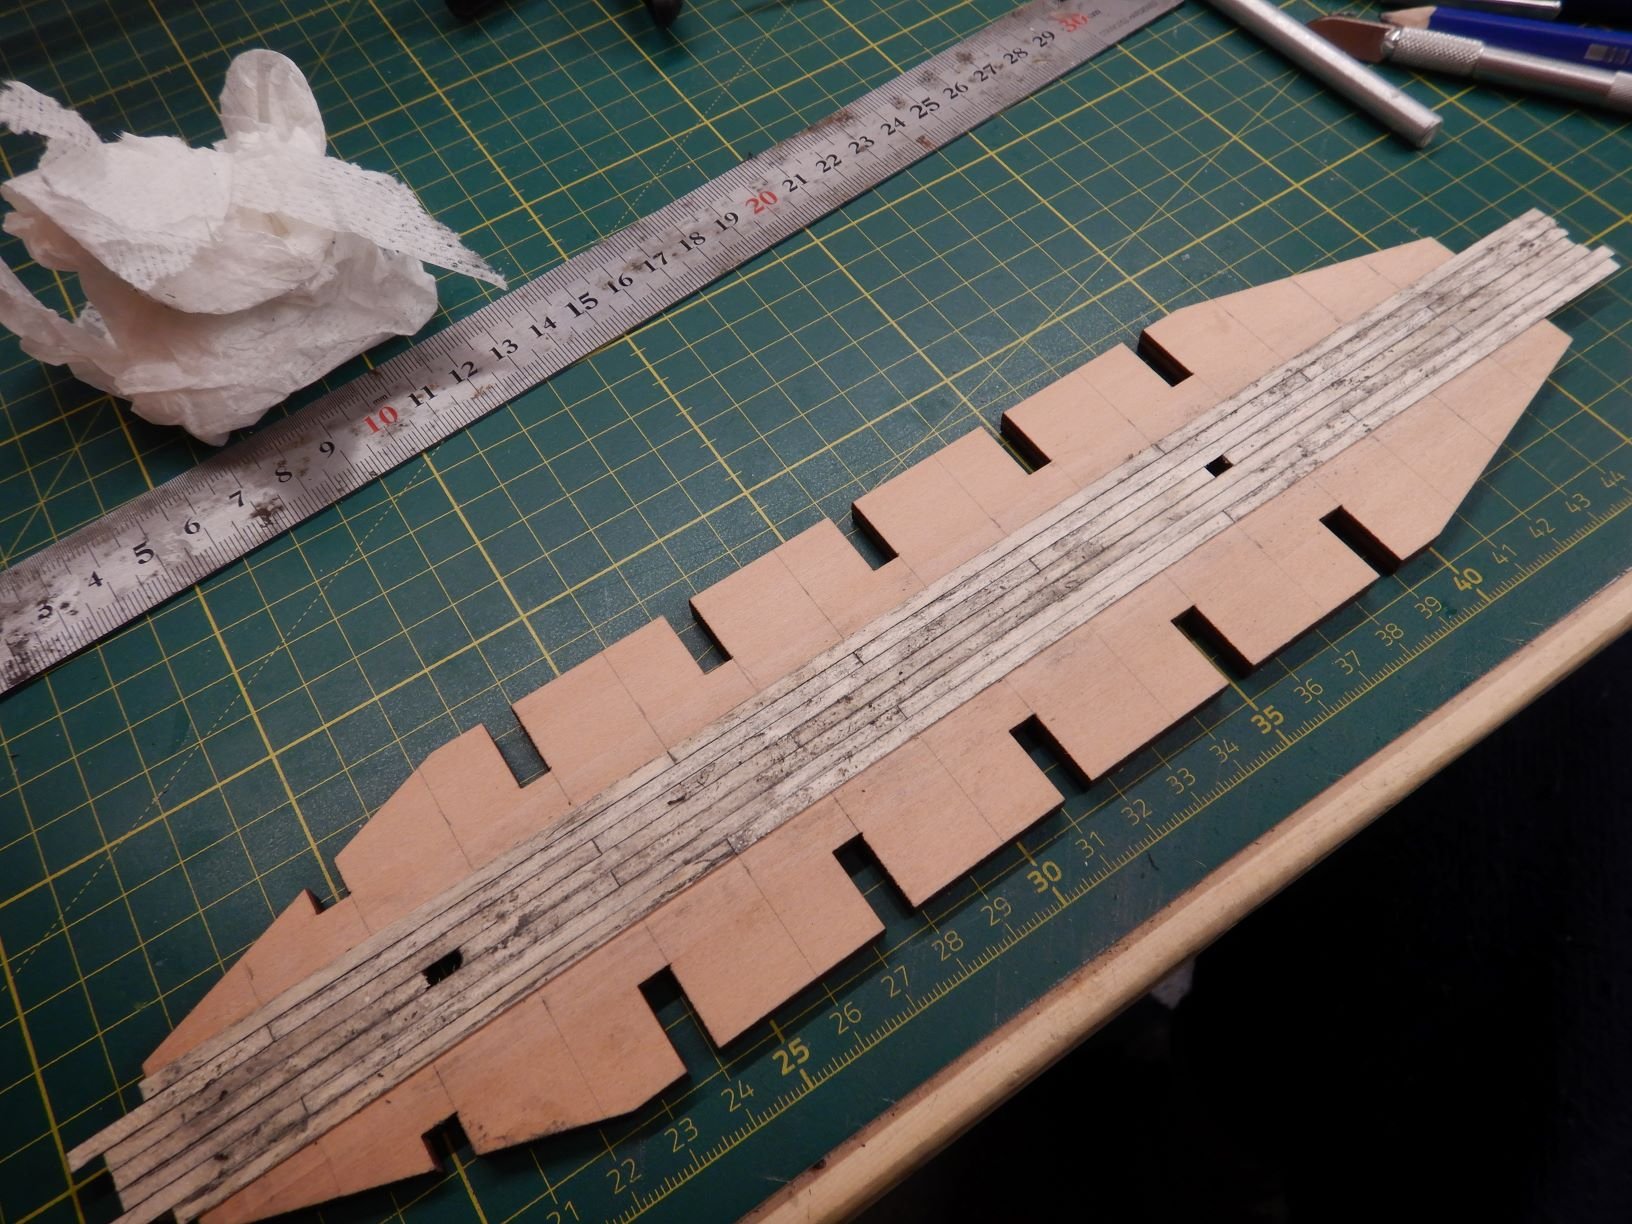
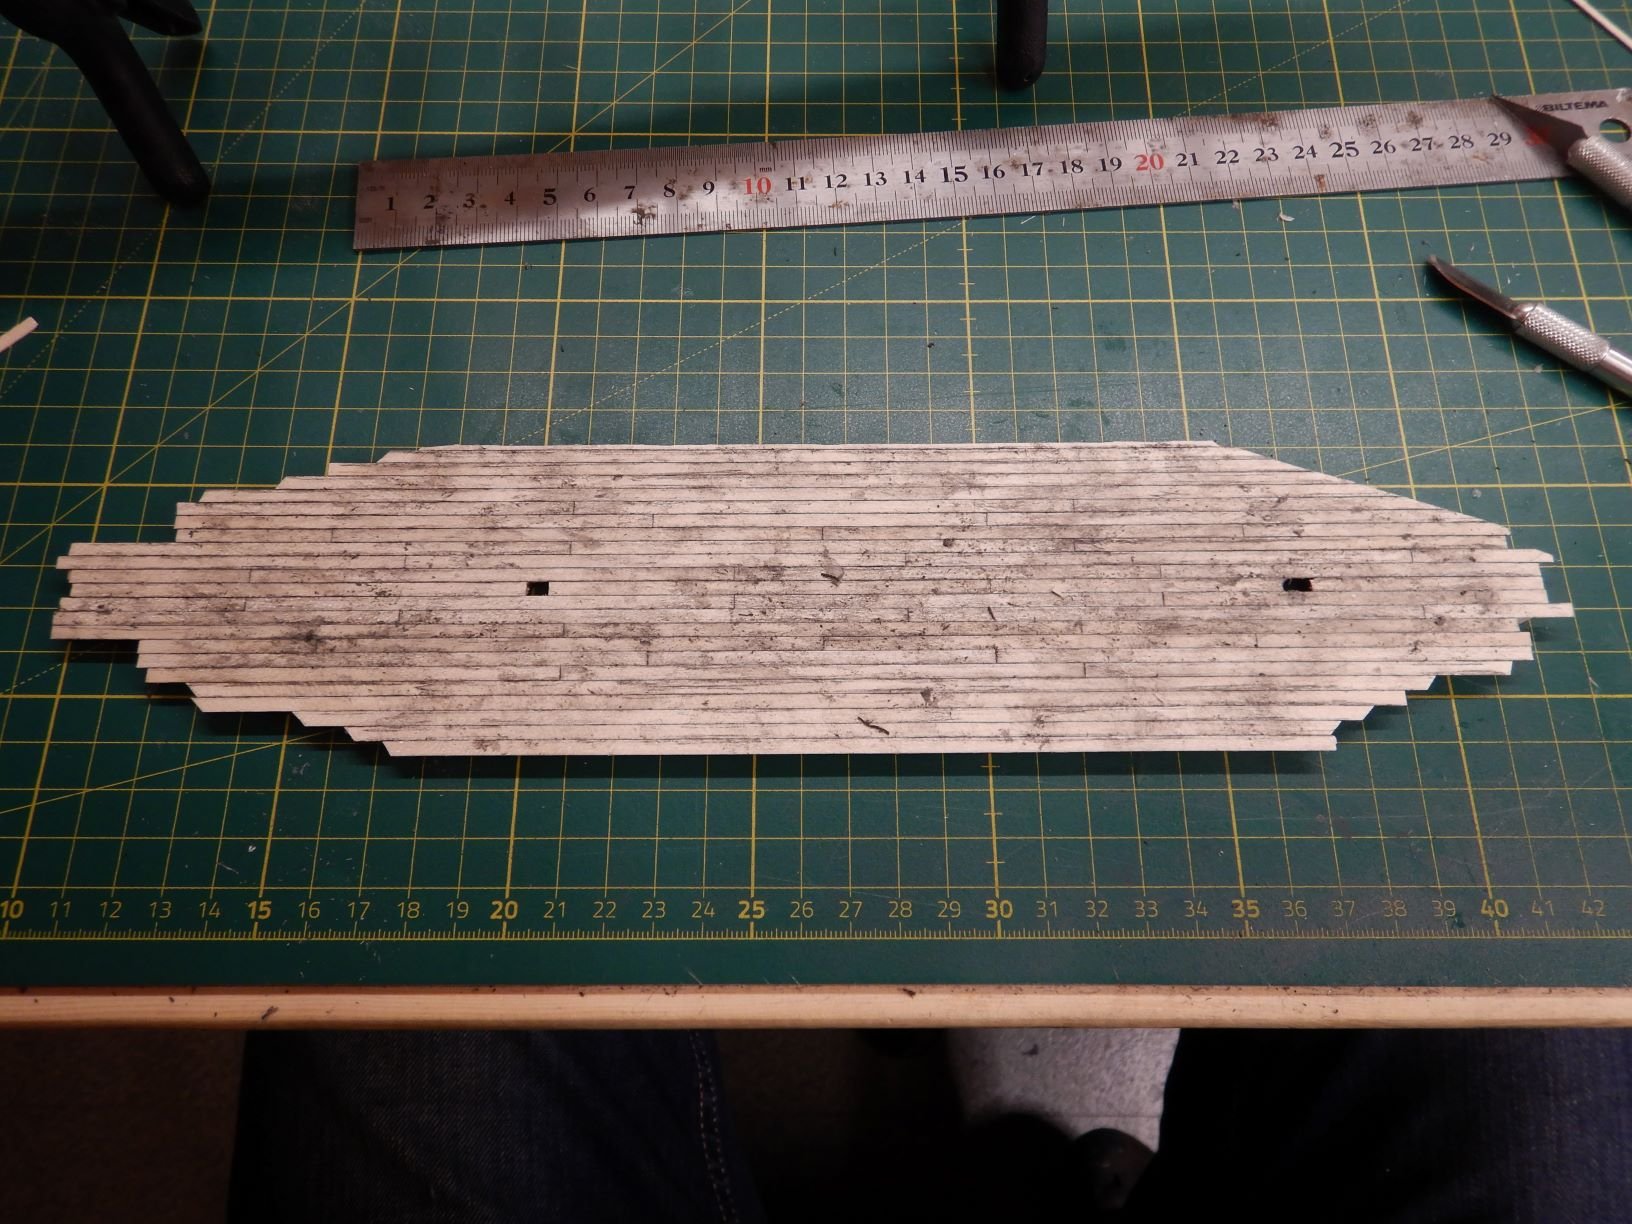
Since this model has several open hatches with ladders going down below, I decided to plank the lower deck, using some leftover materials from the Bluenose deck. This might be a little "over the top", as it will barely be visible, but a good feeling to know it's there!

Using a steel ruler to make sure the first plank is straight.
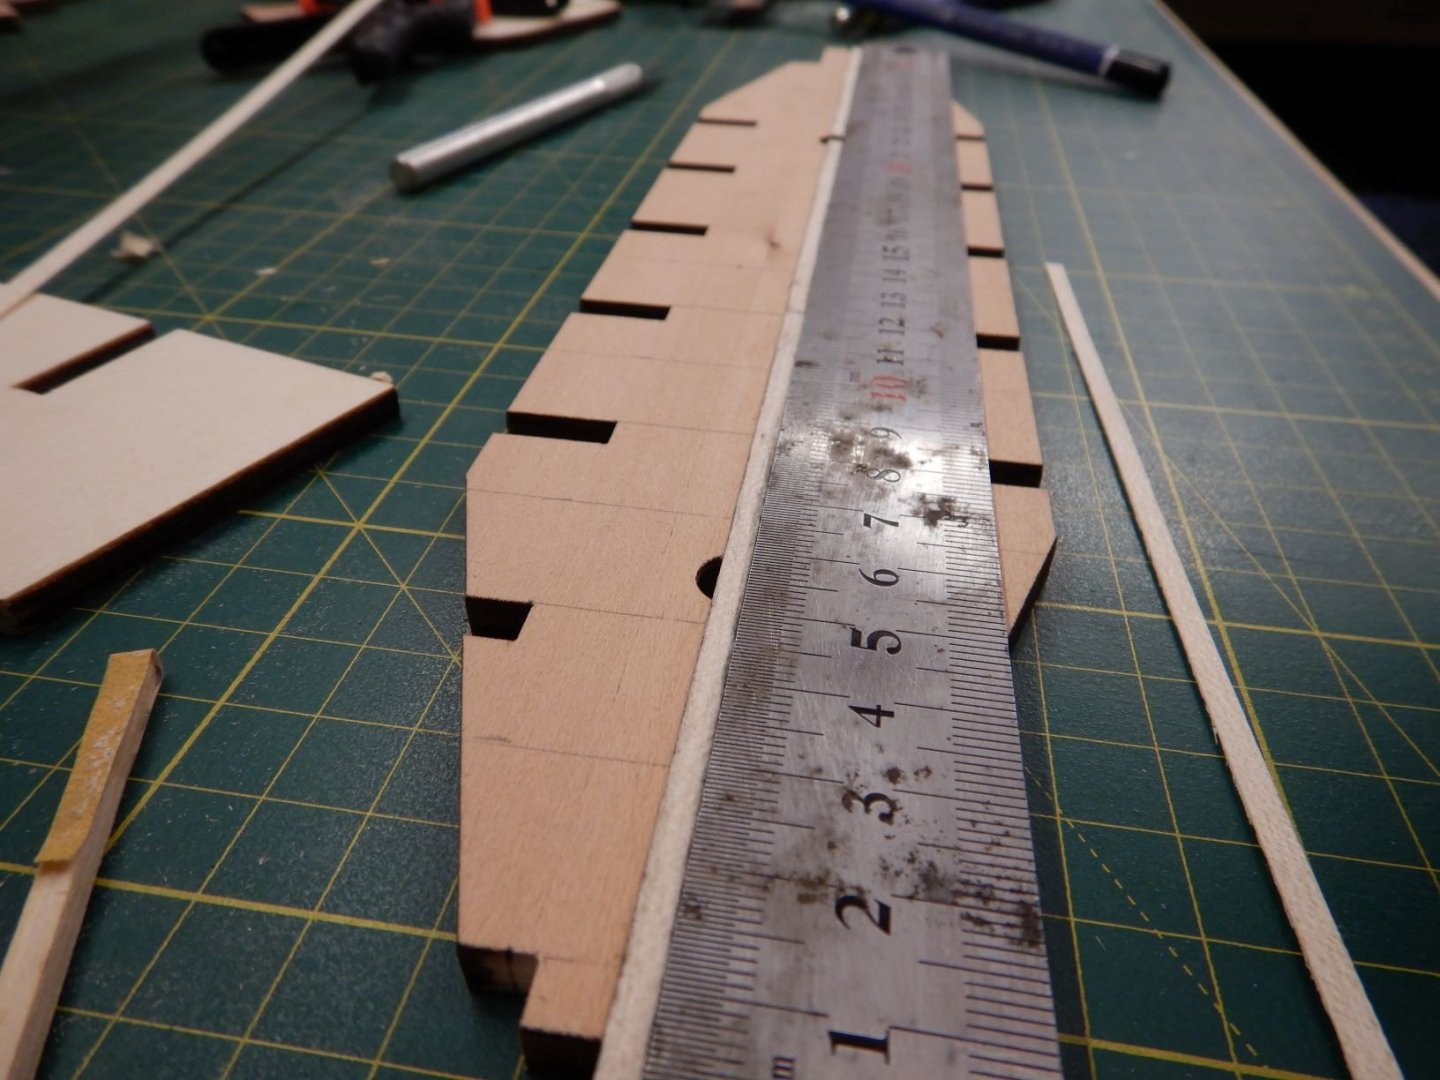
I decided to try using PVA glue to glue the deck. I have previously used CA glue for this.
It seems PVA is easier to work with, easier to clean up, and does'nt glue my fingers to the deck!
I think I'll stick with this method from now on..


Looks a bit messy, but with trimming the edges and some sandpaper...

And a couple of coats of oil it looks a lot better!

That's it for now!
Stay safe!
Gaffrig.
-
Ccoyle, I was looking through the buildlogs and there seems to be a few ongoing builds, but a long time since they have been updated.
I’m also curious to how it turns out! 😆
The instructions and plans aren’t the greatest, so I will probably need to study pictures and other references to figure things out.
Gaffrig.
-
Hello all!
Here we go again!
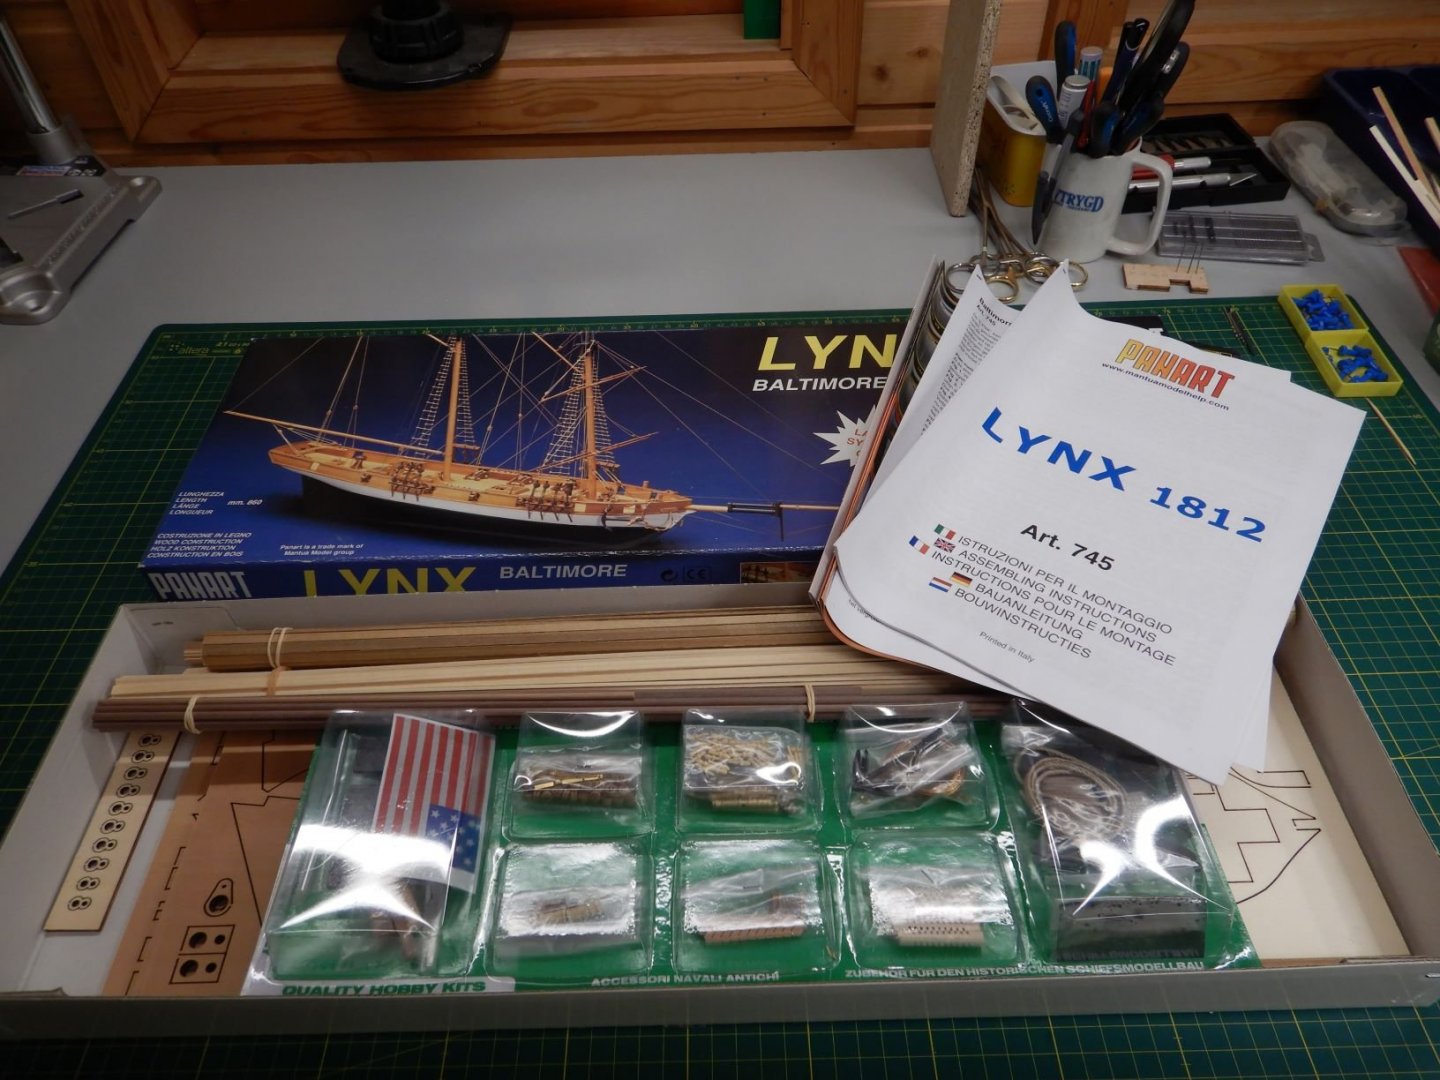
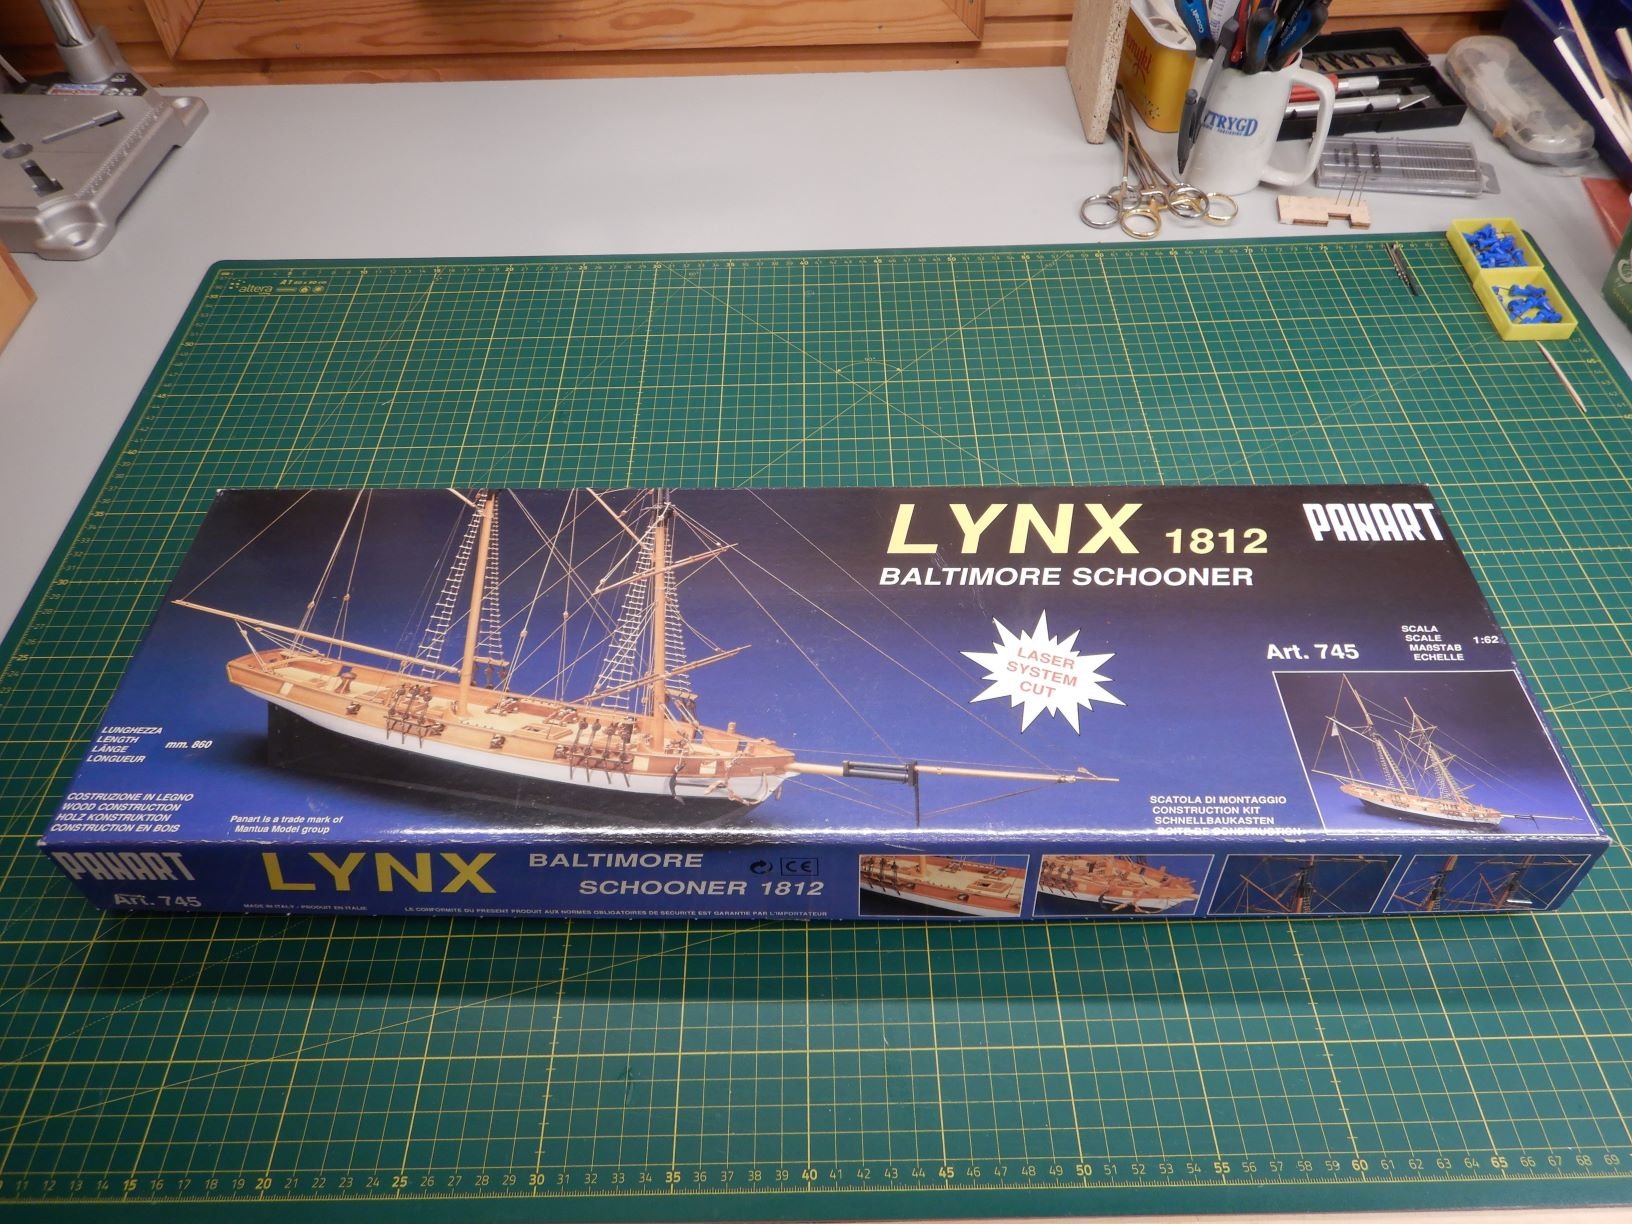
After finishing Le Renard, I have decided to start the build of Panart's kit of the Lynx.
I really like the lines of this ship with it's huge rig and raked masts.
I will be continuing my Bluenose build, but have found out that I like to have two (or more?) projects at different stages going at the same time.
This will be my first model with double planking, so we'll see how that goes!
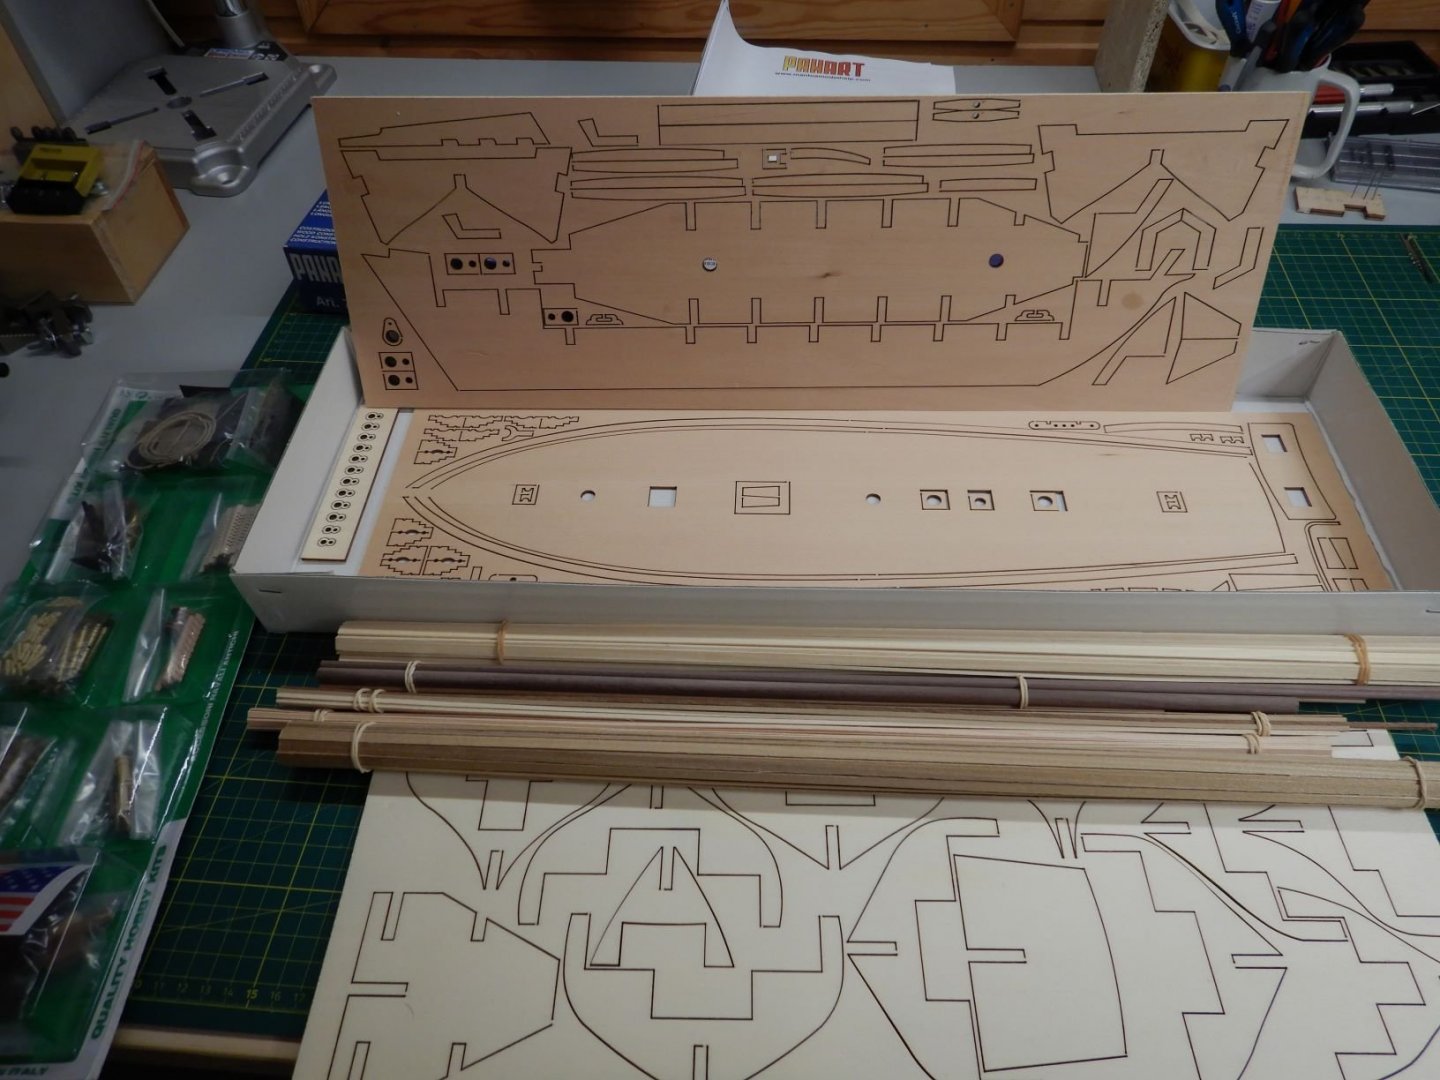
So here is a few photos of the box and it's contents.
The quality of the lasercuts look great, with no burn marks, and no warping.
The rest of the materials also look good.
There is two sheets with plans printed on both sides and a pamphlet of written instructions.

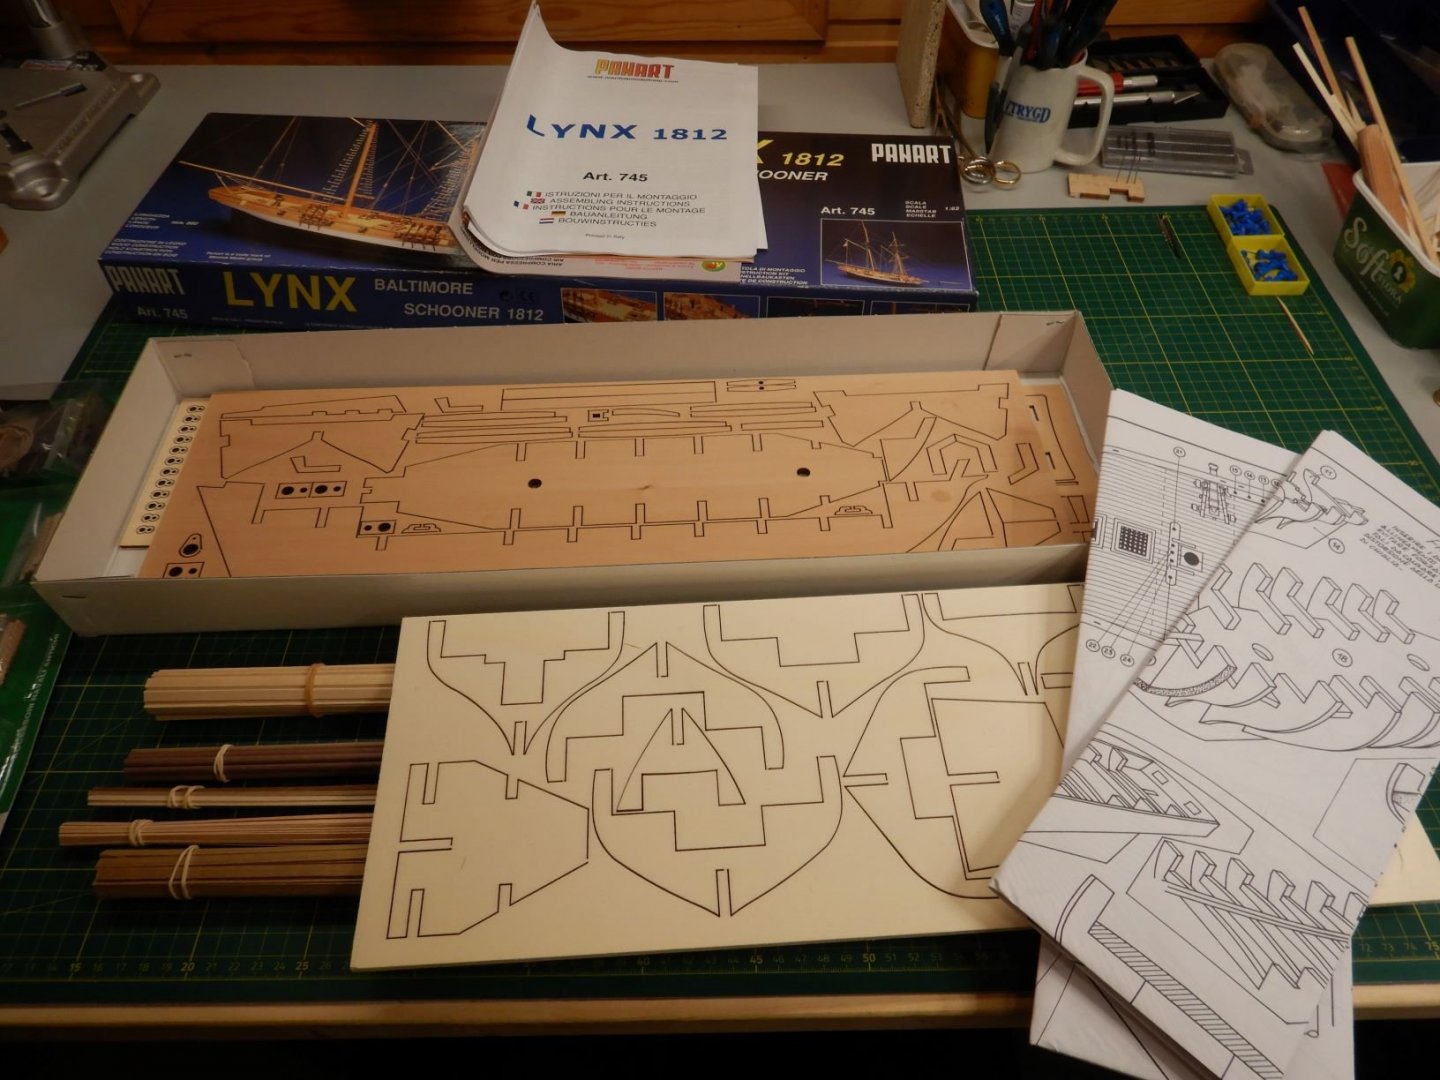
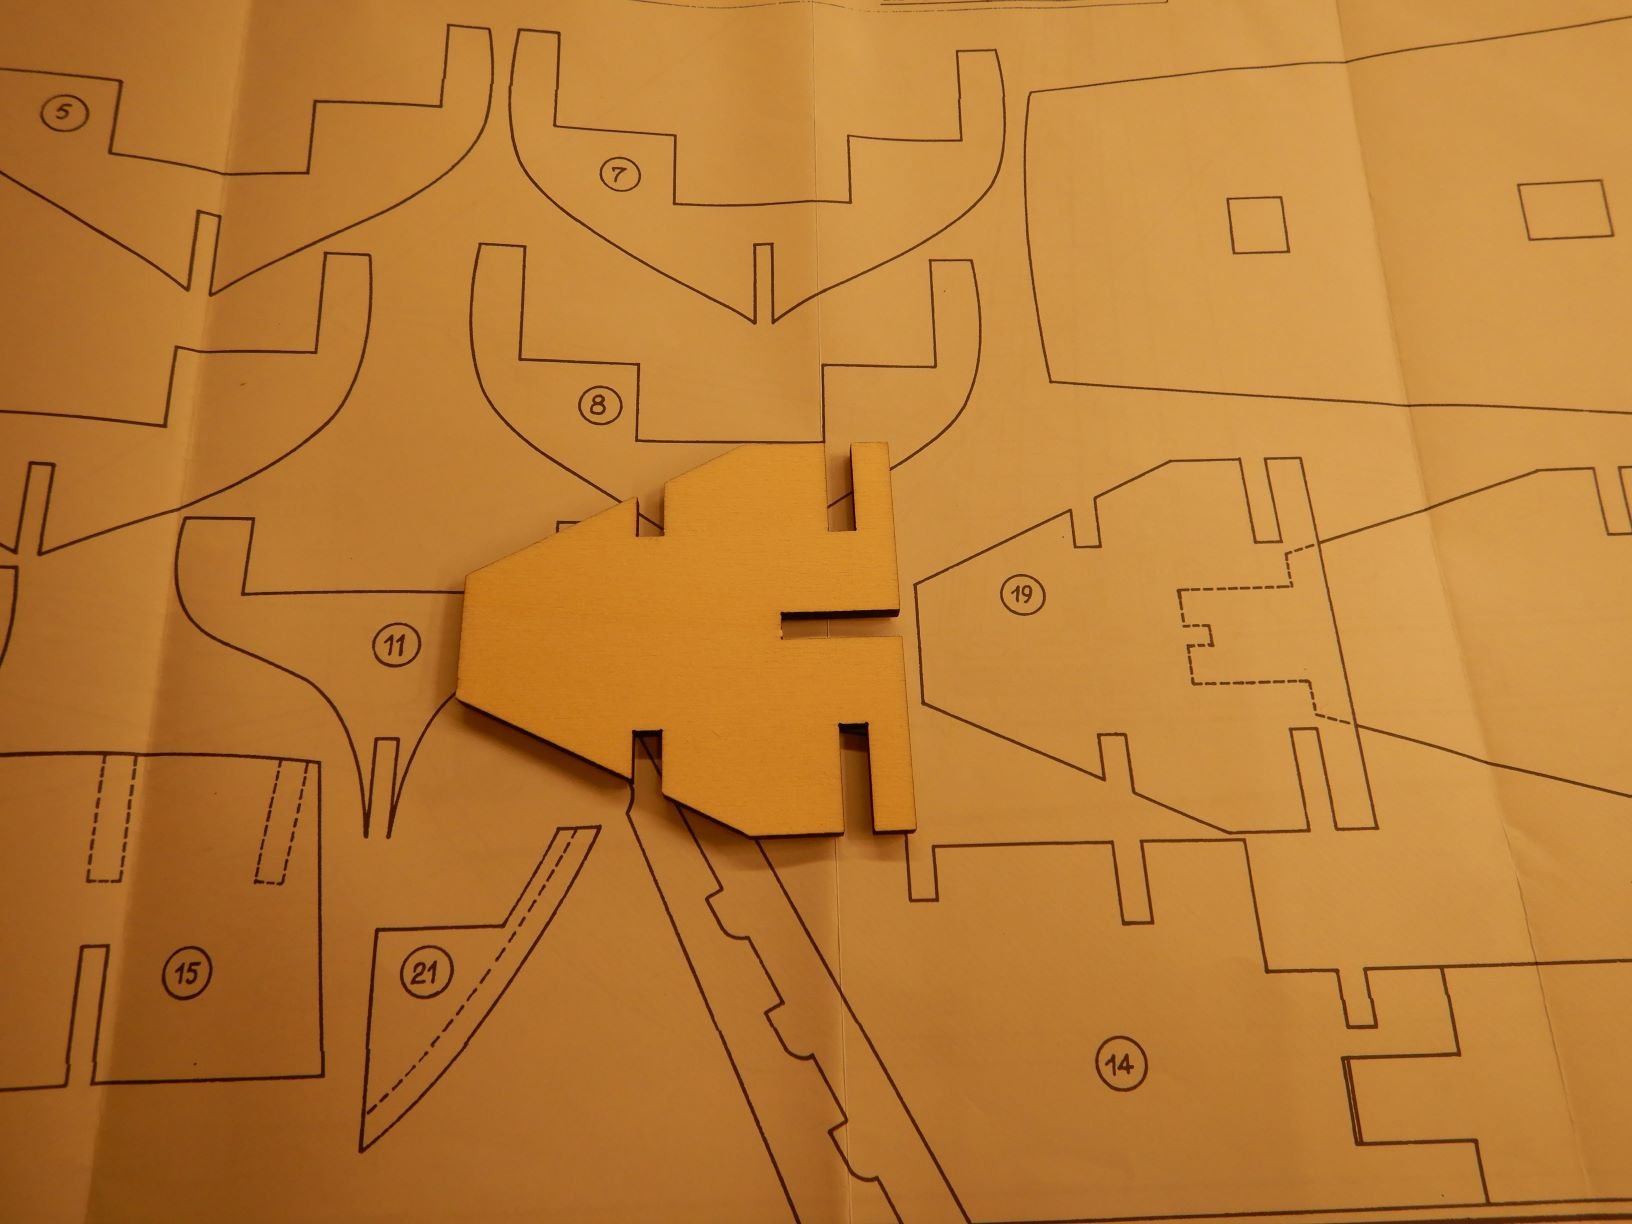
Upon starting to look things through and planning the point of attack, I realised that even though the lasercuts look great, they are not numbered in any way..
There is however a full scale drawing of most of the pieces on the plans, so I cut loose the bulkheads and layed them on the plan to figure out which was which.
The drawing (or the lasercuts) seems to be inaccurate as none of the bulkheads fit perfectly on the plan.
A little bit of guesswork is needed here..
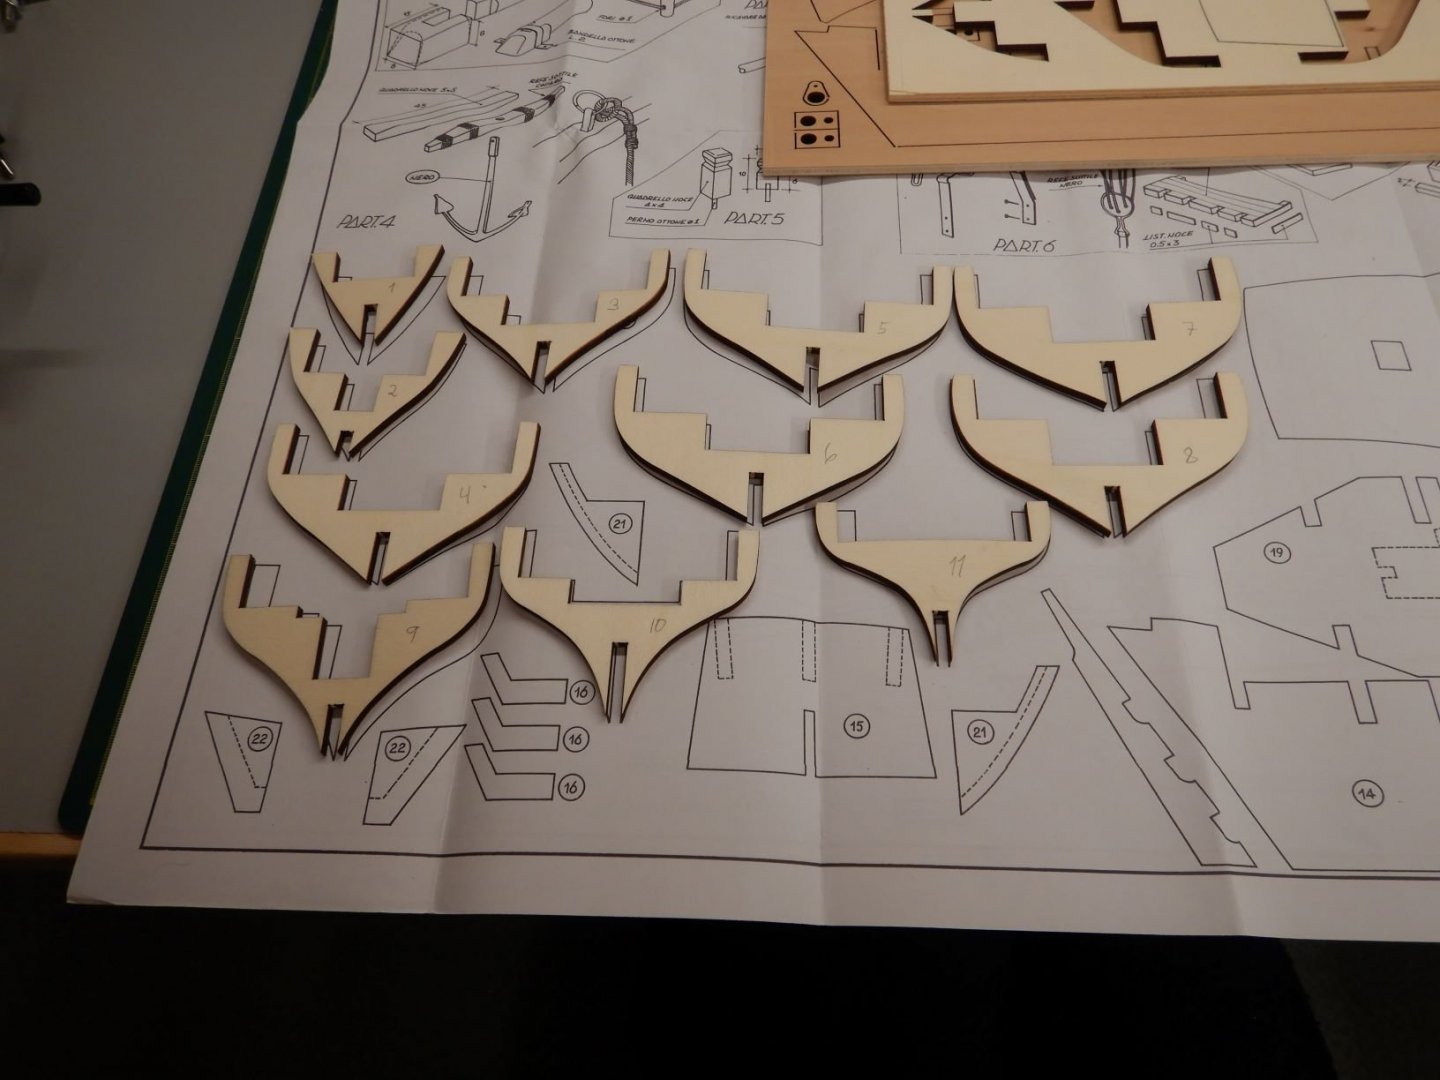
Bulkhead no. 6 and 7 is very similar, but I think I got it figured out.
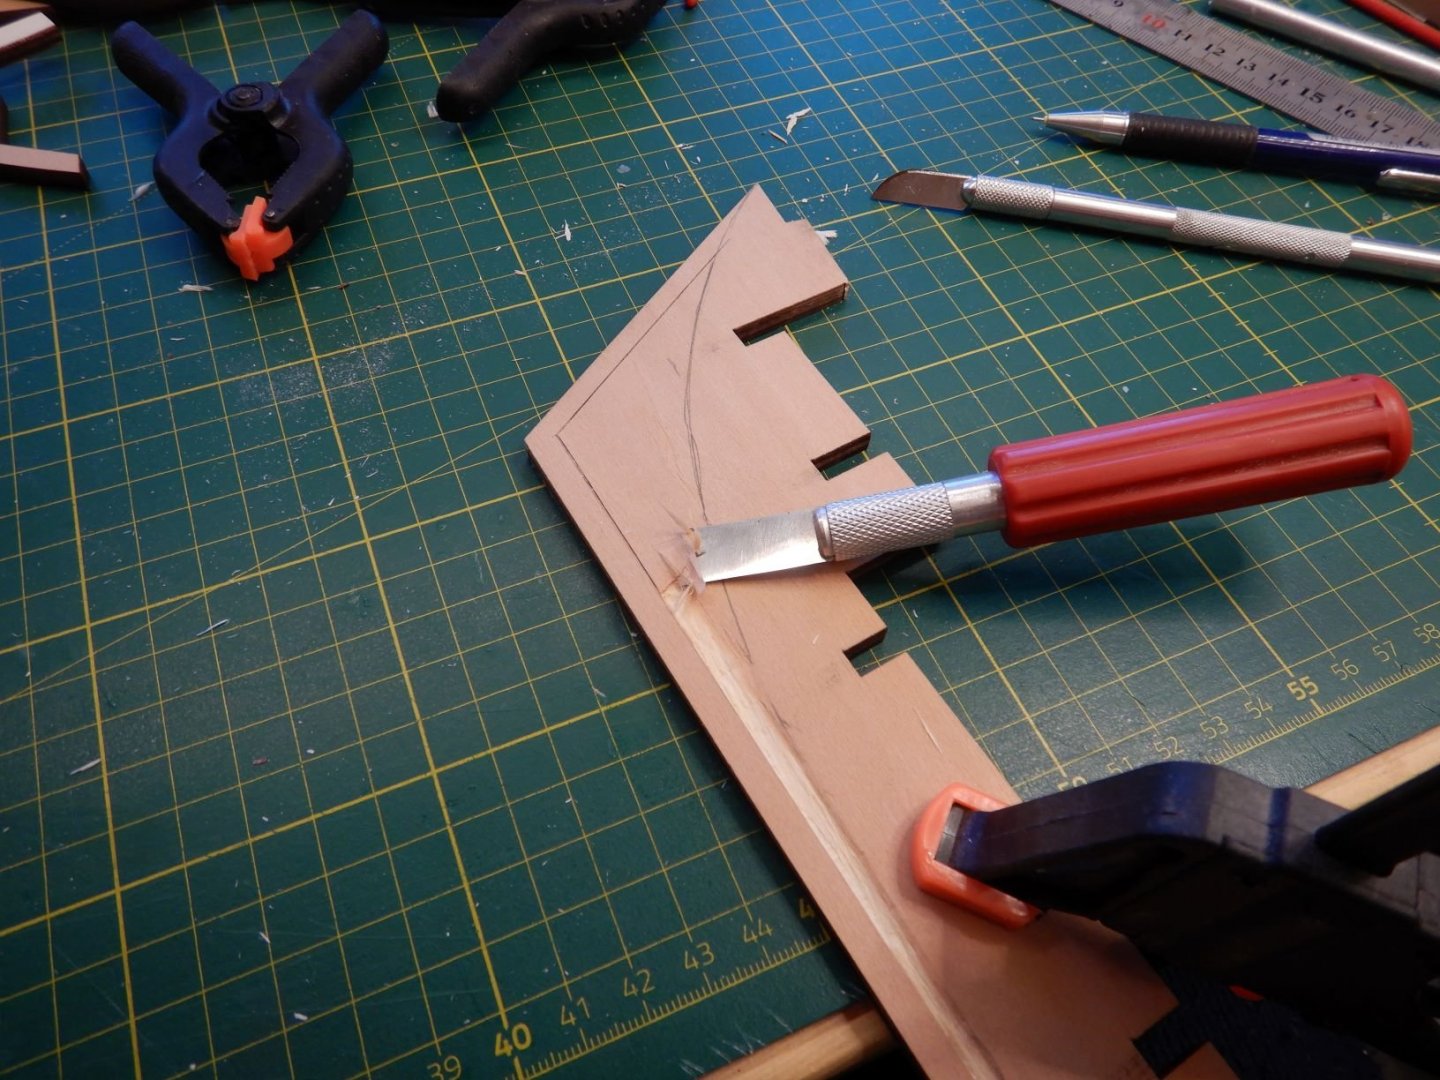
The keel is in one piece, but the plans and instructions say that it is three pieces that need to be joined together.
Maybe they have updated the kit and not the instructions?
I decided to cut a rabbet in the keel to take the planking. No mention of this in instructions.
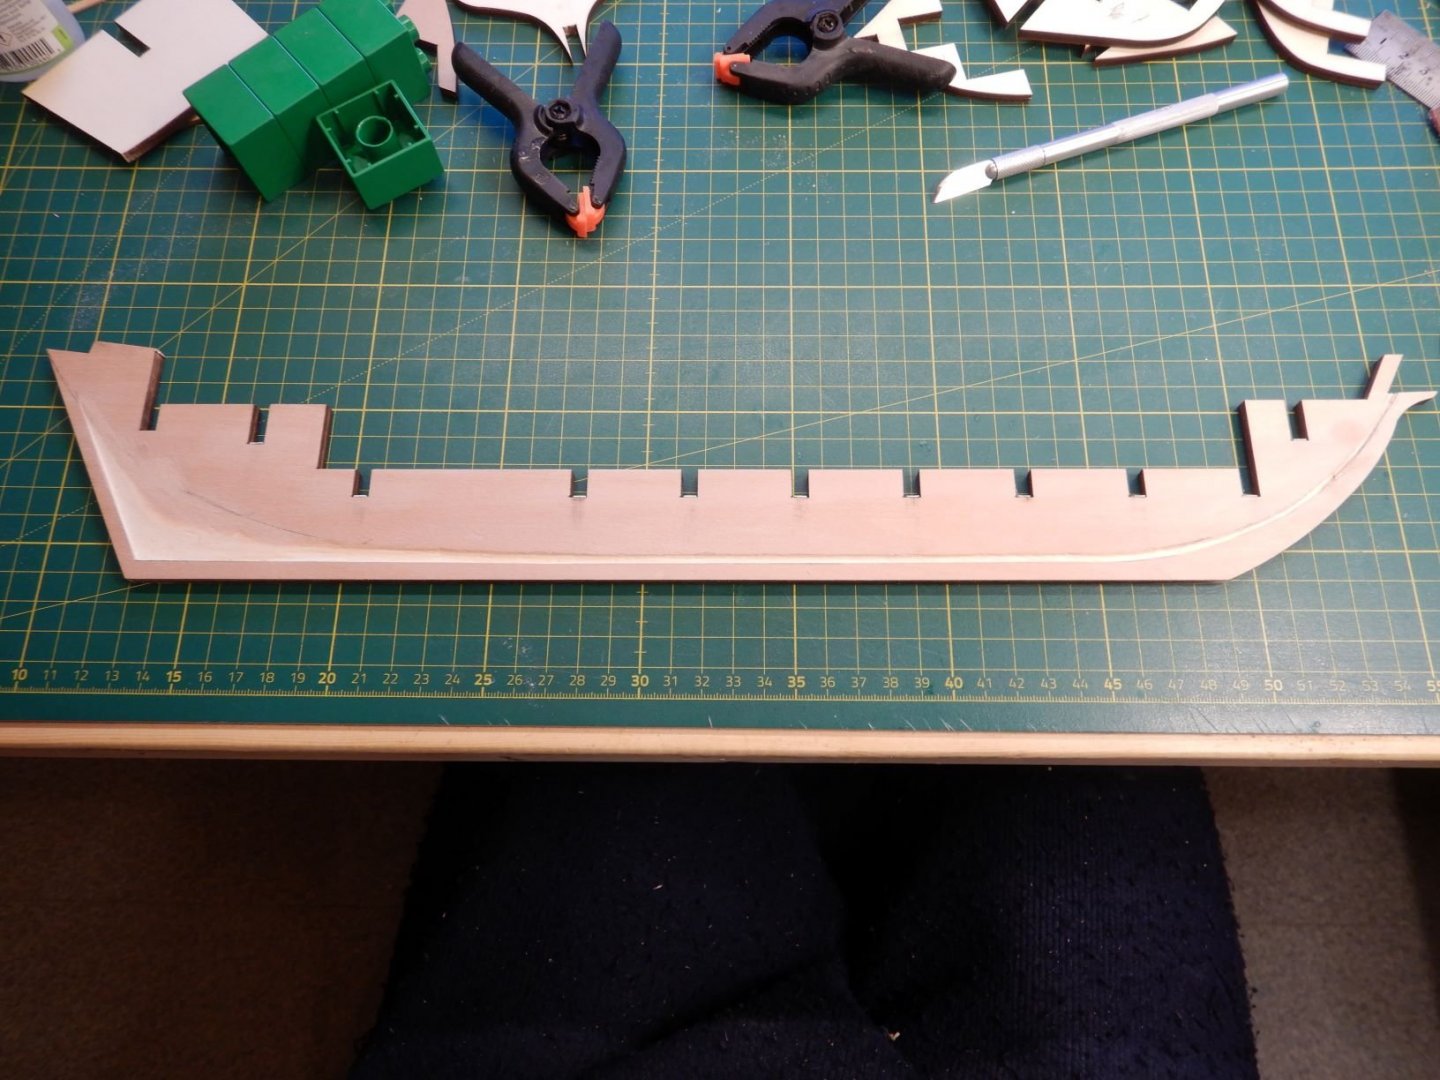
This is where I am now, more updates to come as work progress.
Stay safe!
Gaffrig.
-
Hello.
Ok, no problem. I understand your point.
I think I have fixed it now though!
Gaffrig.
- Obormotov, ccoyle, Duanelaker and 2 others
-
5
-
Hello.
I have a feeling this message i directed to (amongst others) me..
I appologize if I have done wrong, an will try to rectify it as soon as possible!
In the menu for creating new topic in gallery there was three options. I realise I should have chosen the «create new album» option, but there was nothing there to inform that «loose» images was wrong.
Gaffrig.
-
Hello!
Looks like you’re of to a great start!👍
I have just finished this kit and had a great time building it!
Gaffrig.
-
Jobbie,
thank you! I’m glad you liked it!
Gaffrig.
-
Hello.
Thank you all for the kind comments!
Rick01, you are right, bilge pumps would absolutely be a great addition.
Maybe I’ll have to make a couple and put on there.. 🤔
Gaffrig.
- Rick01 and Tompslattery
-
2
-
You are correct.
When tacking or gybing a schooner like the one in your plan, they had to loosen the downhaul, while someone aloft hauled the topsail over the stay and peak halyard. They had a downhaul on both sides, so once the sail was lifted over, the other downhaul was tightened.
hope this claryfies a little!
Gaffrig.
-
Moltinmark, thank you!
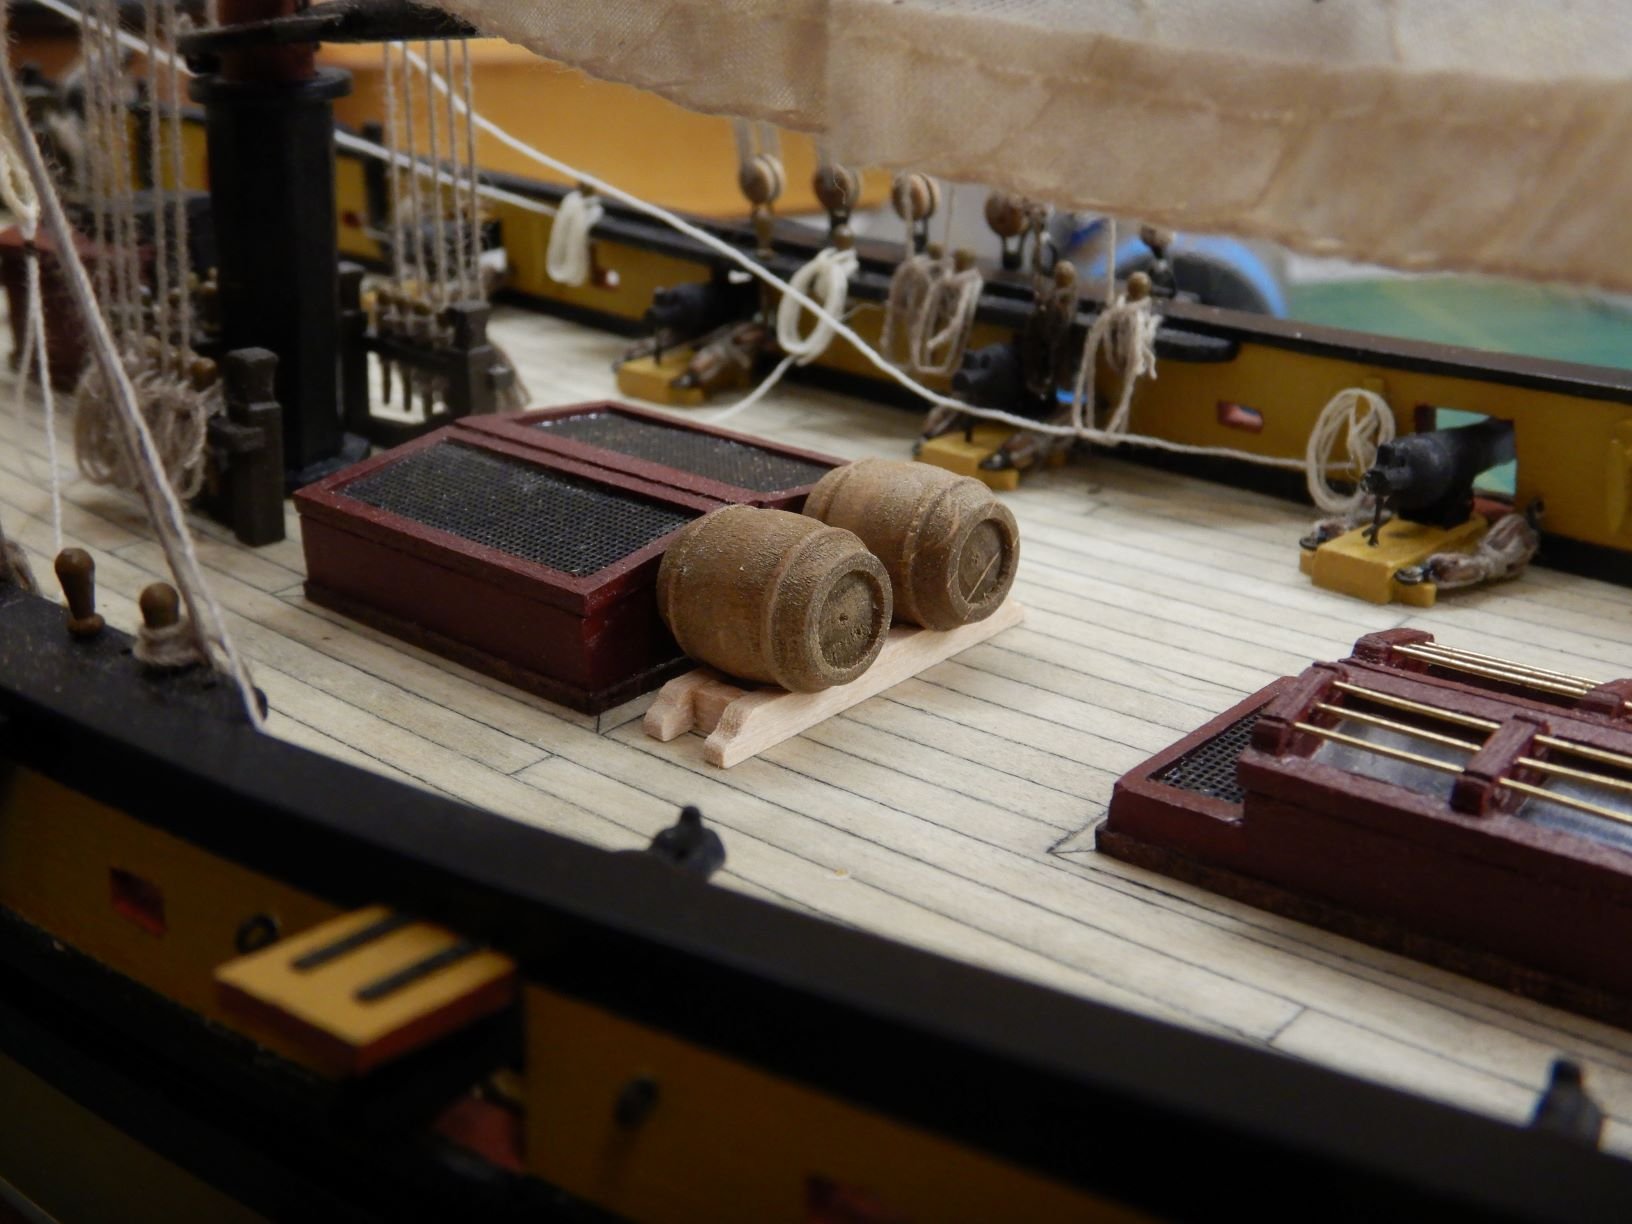
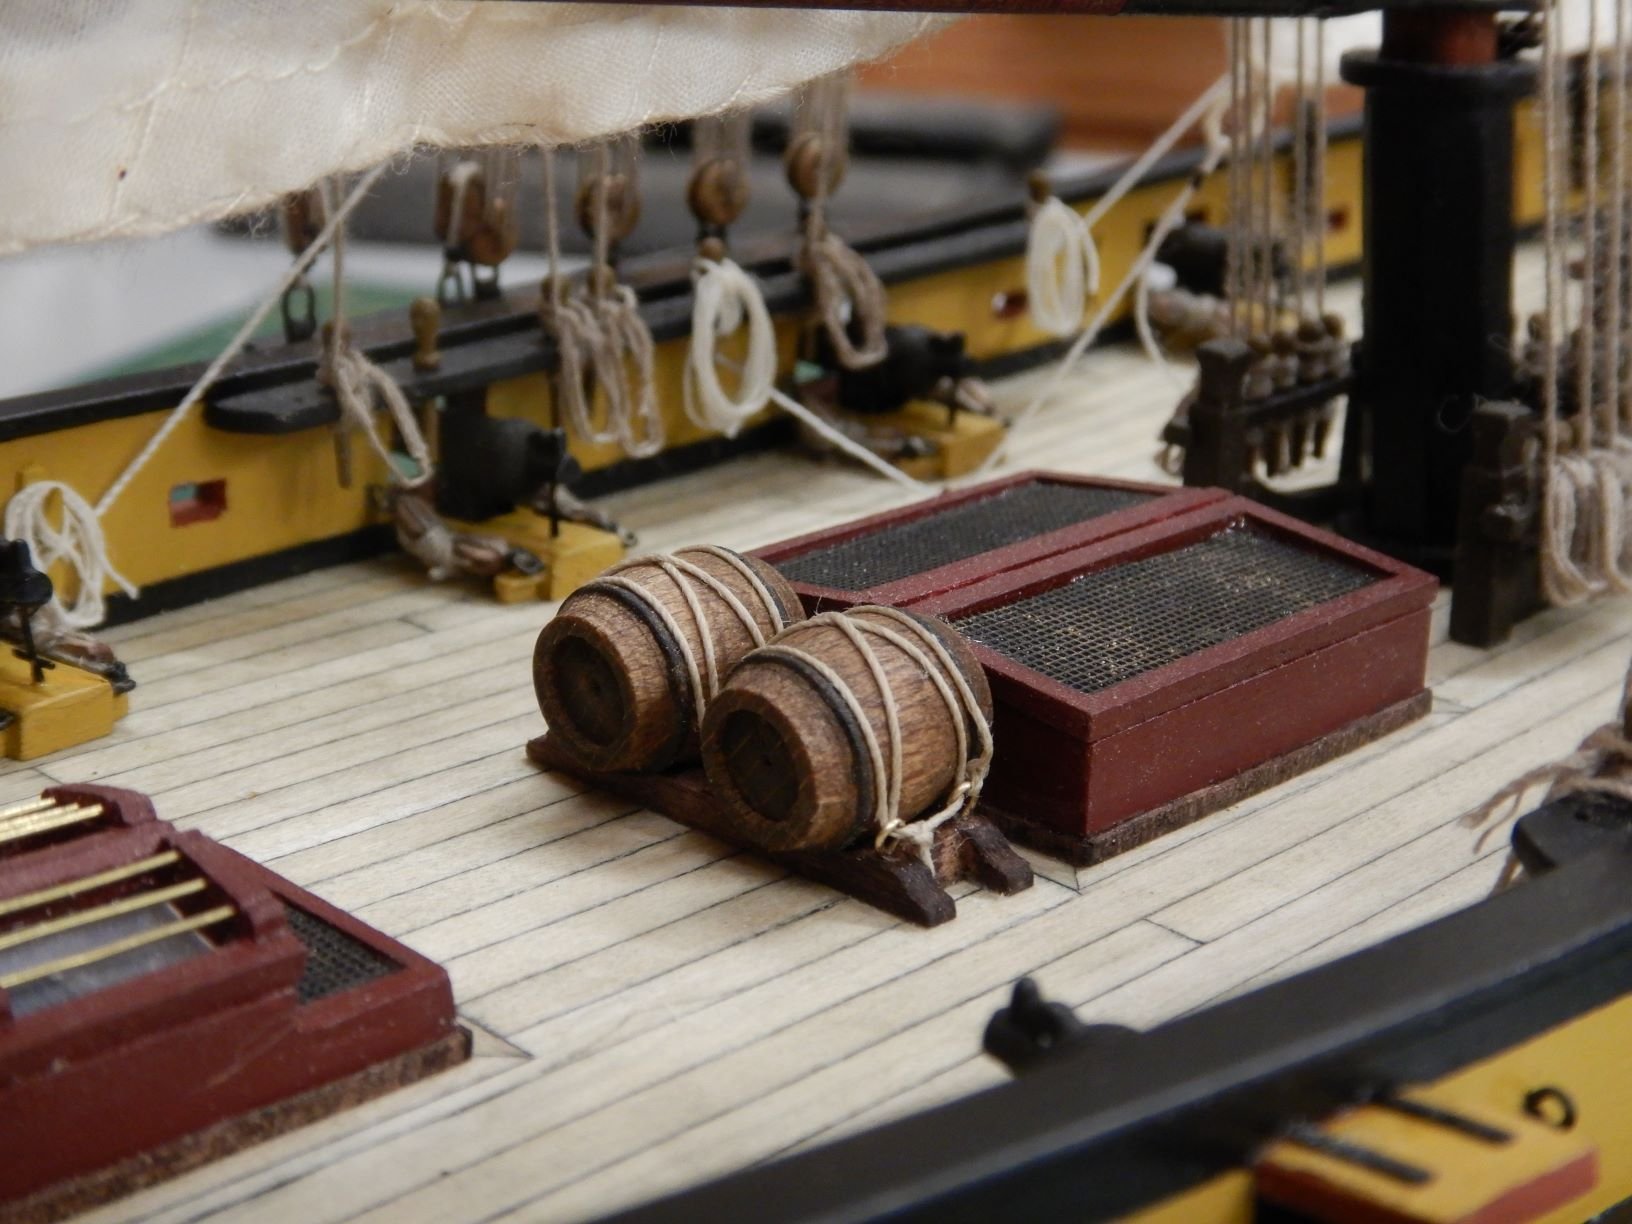
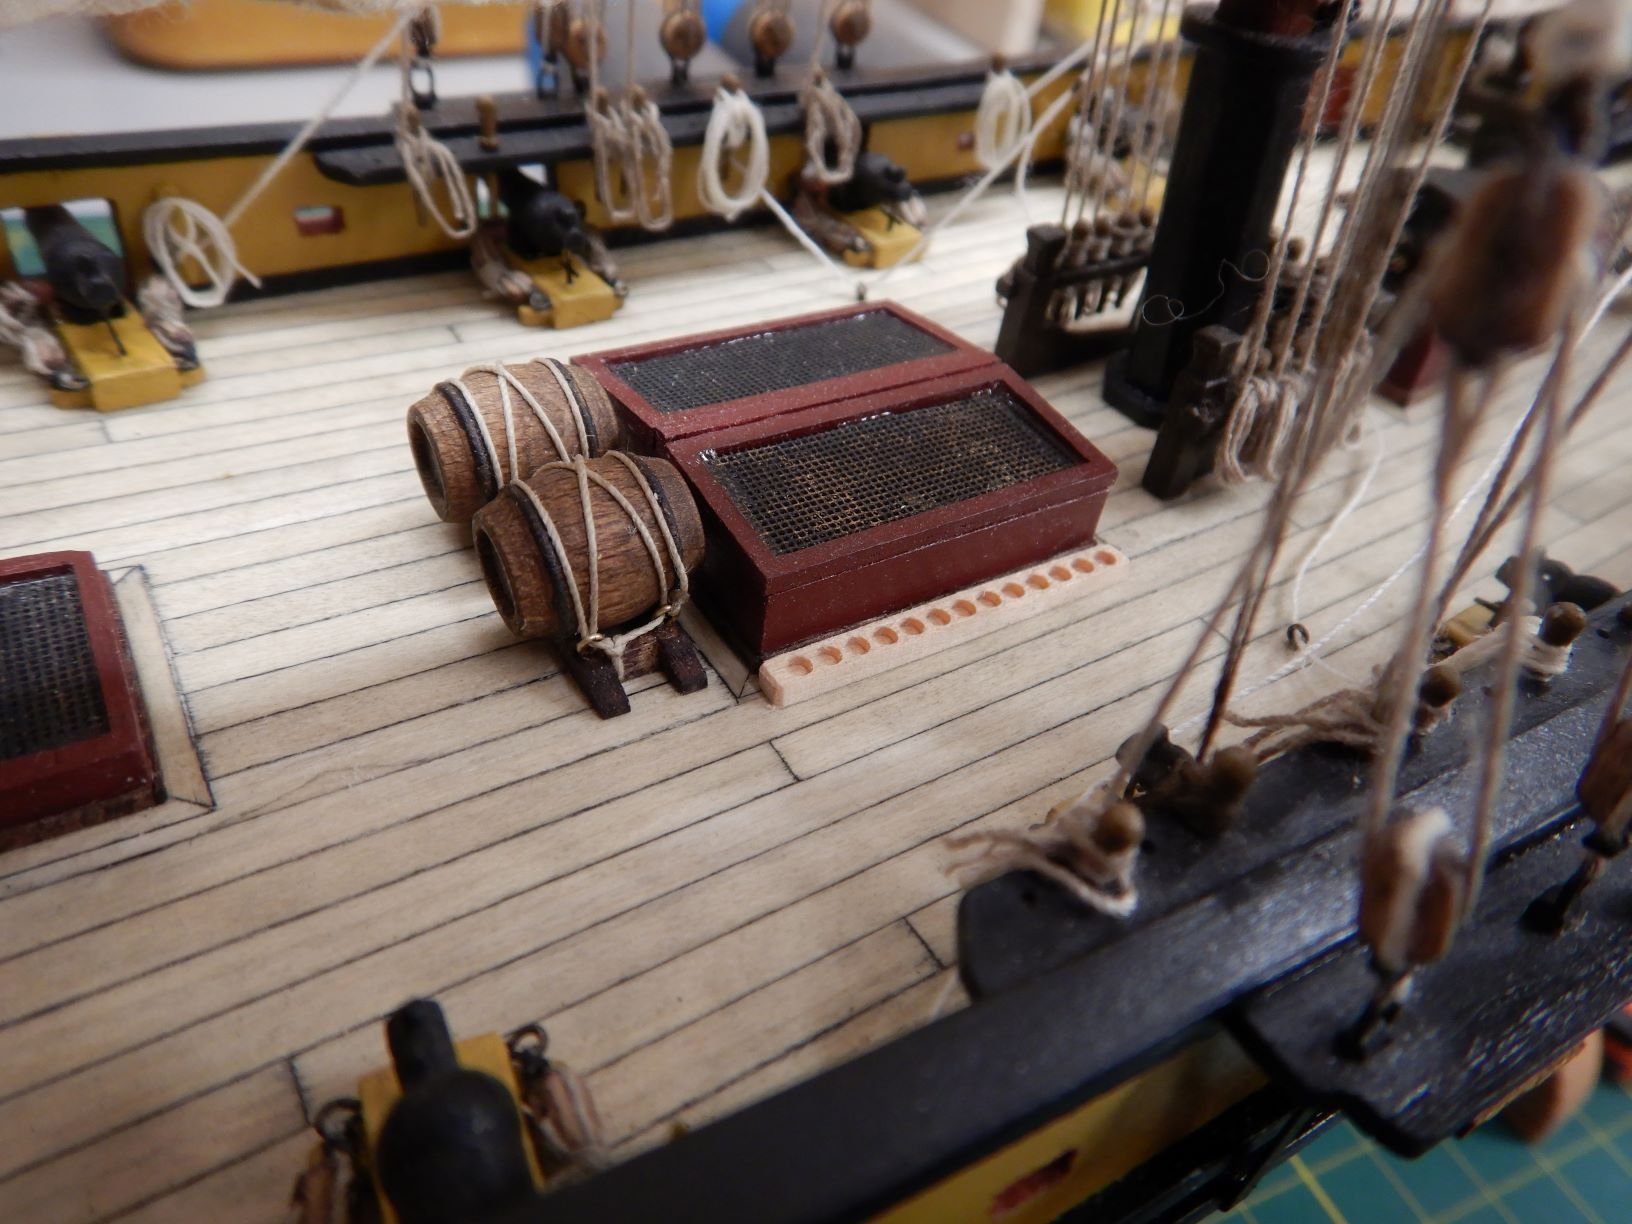
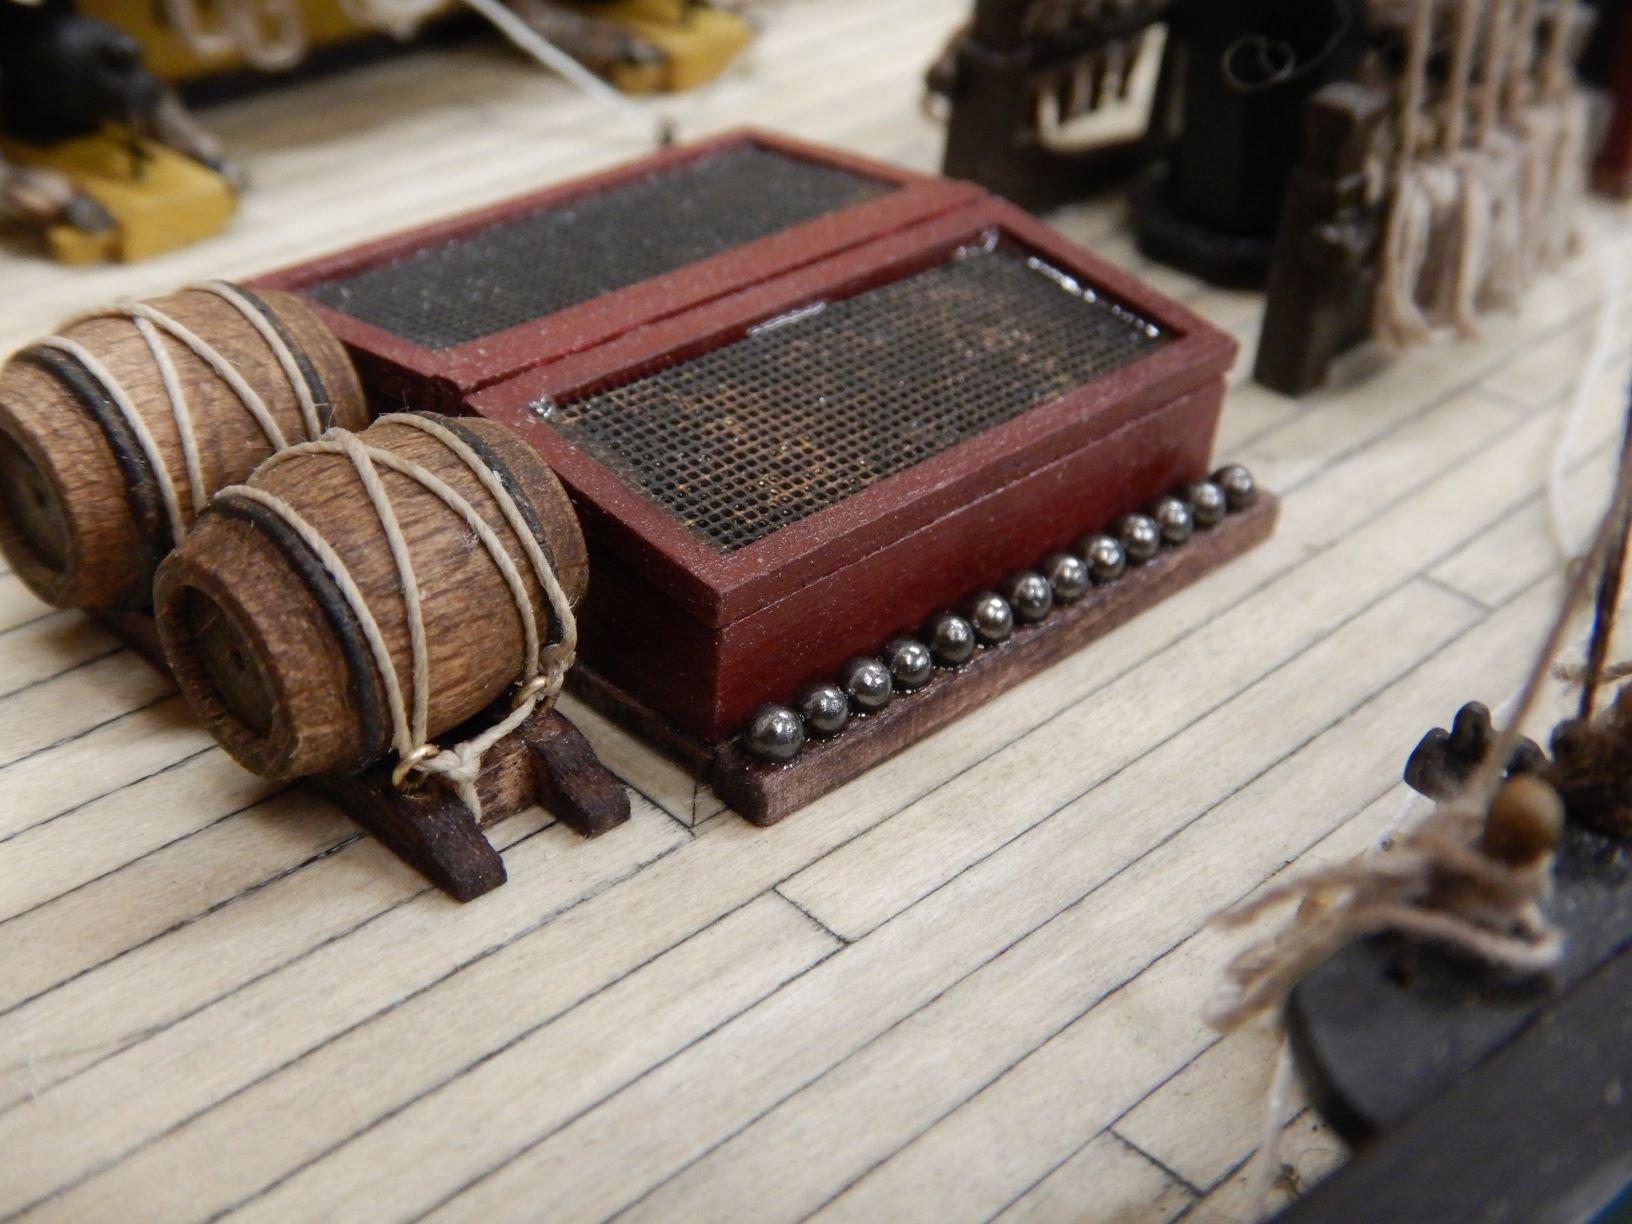
I think the cannonballs and barrels fit right in!
Any privateer with some self respect needs some shots for his cannons!
Gaffrig.
-
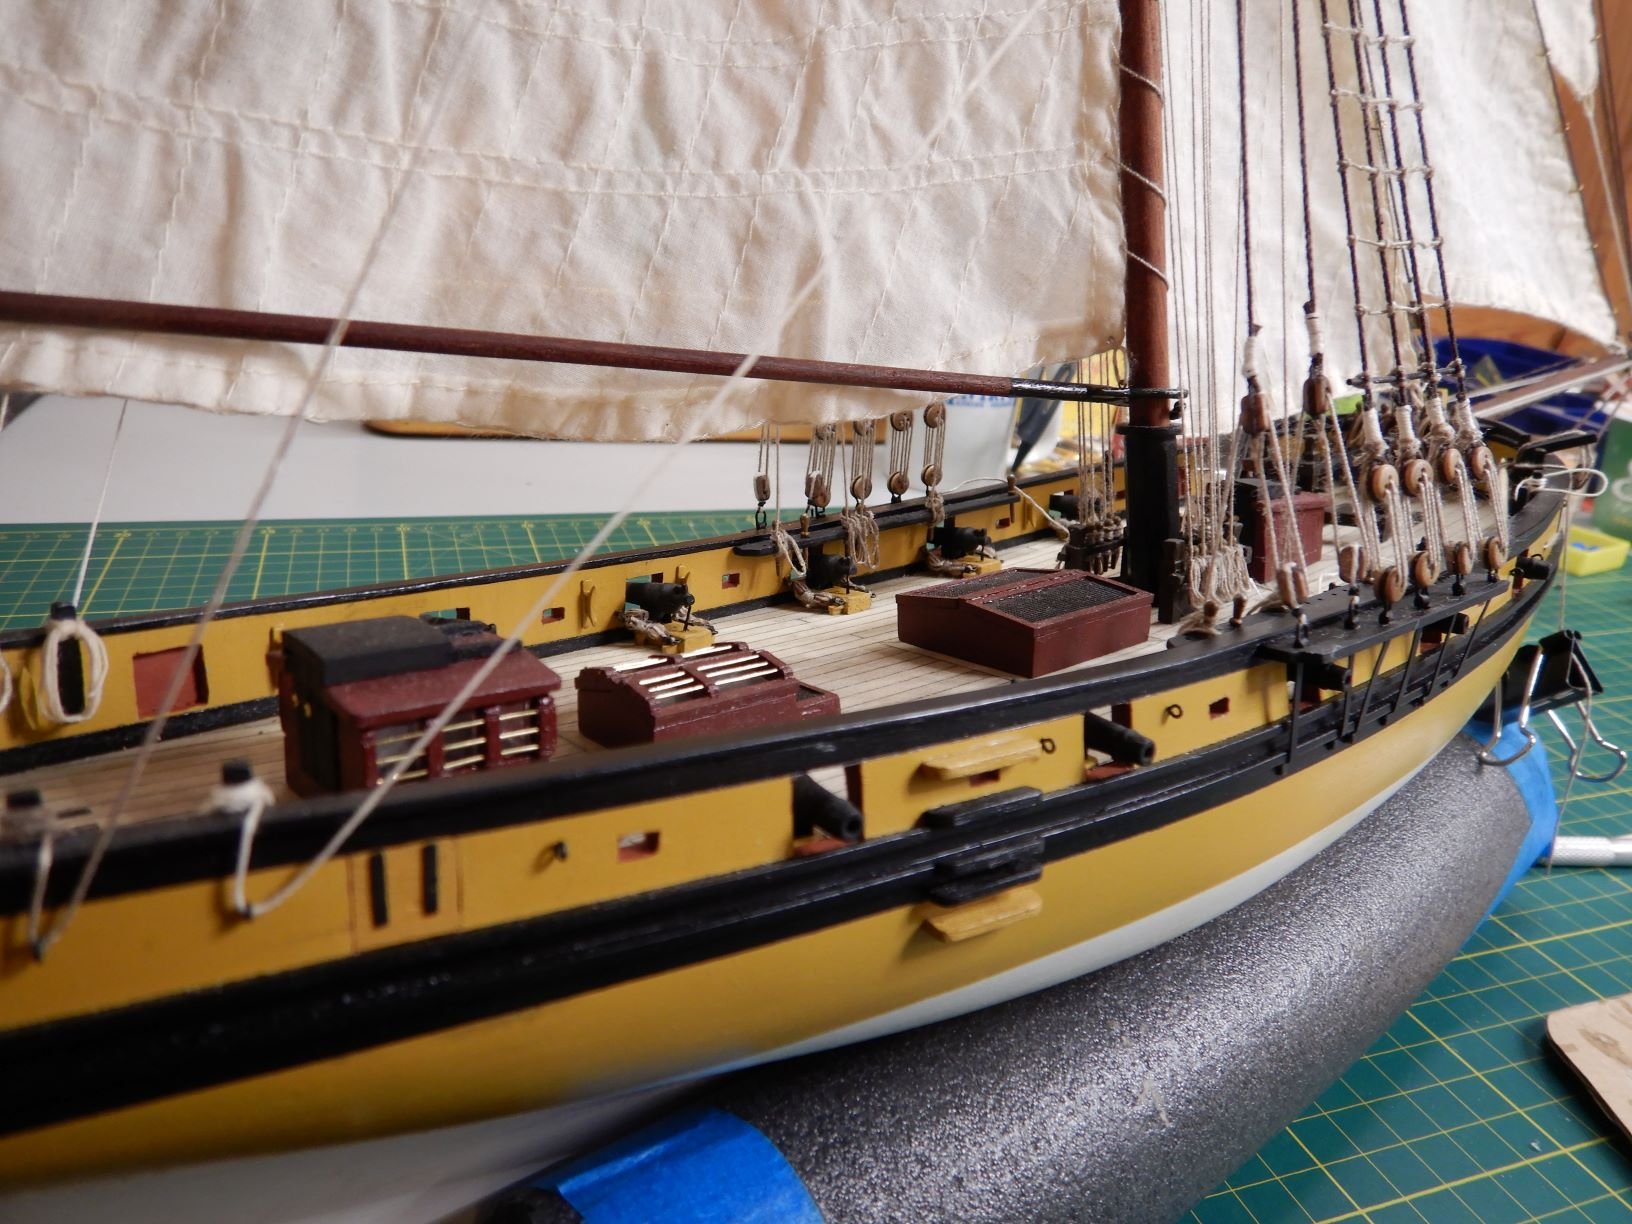
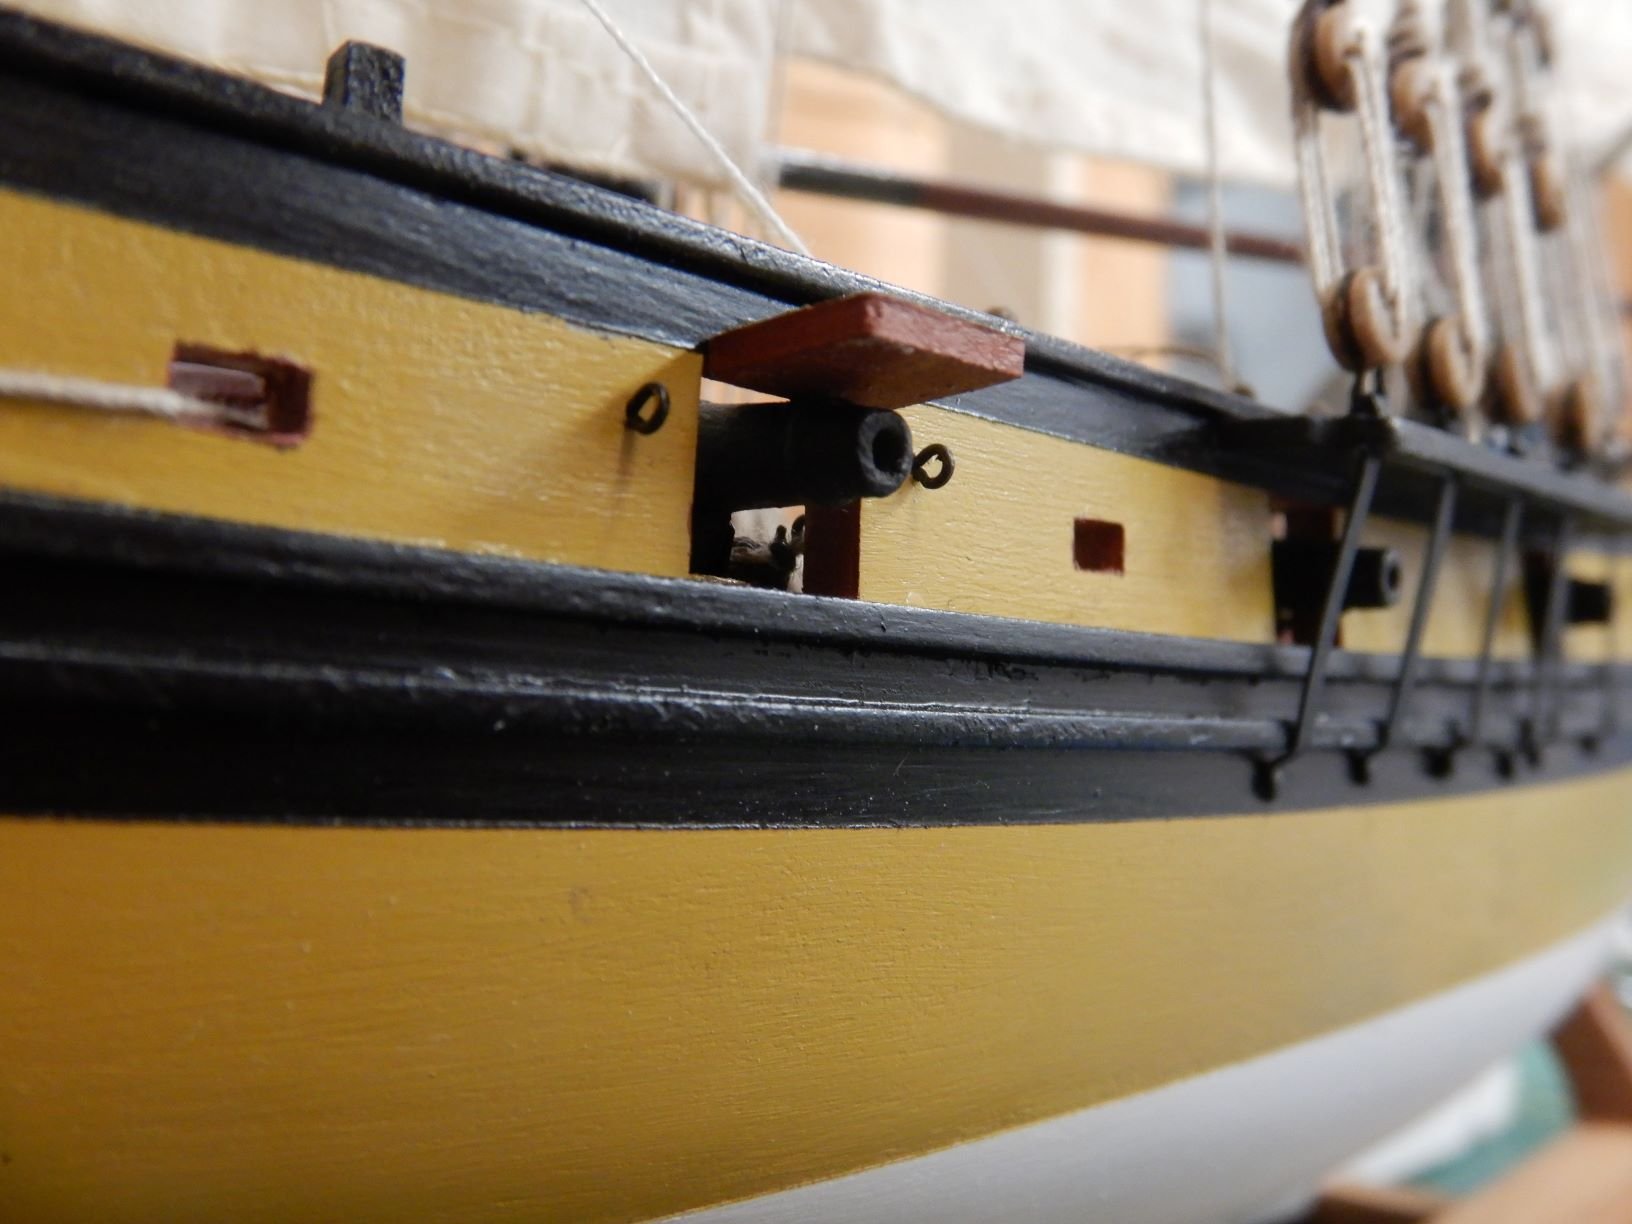
Hello all.
I've finished up the gunport lids, and tied and coiled the rest of the running rigging.
The instructions call for what I think is lifebelt boxes on deck. I've decided to drop these as I think it looks a little cluttered on deck with them. Then again it looked a little empty without, so I decided instead to make a rack with two barrels and two cannonball racks.
Dryfit of barrel rack.

Barrelrack stained and glued in place with barrels lashed down.
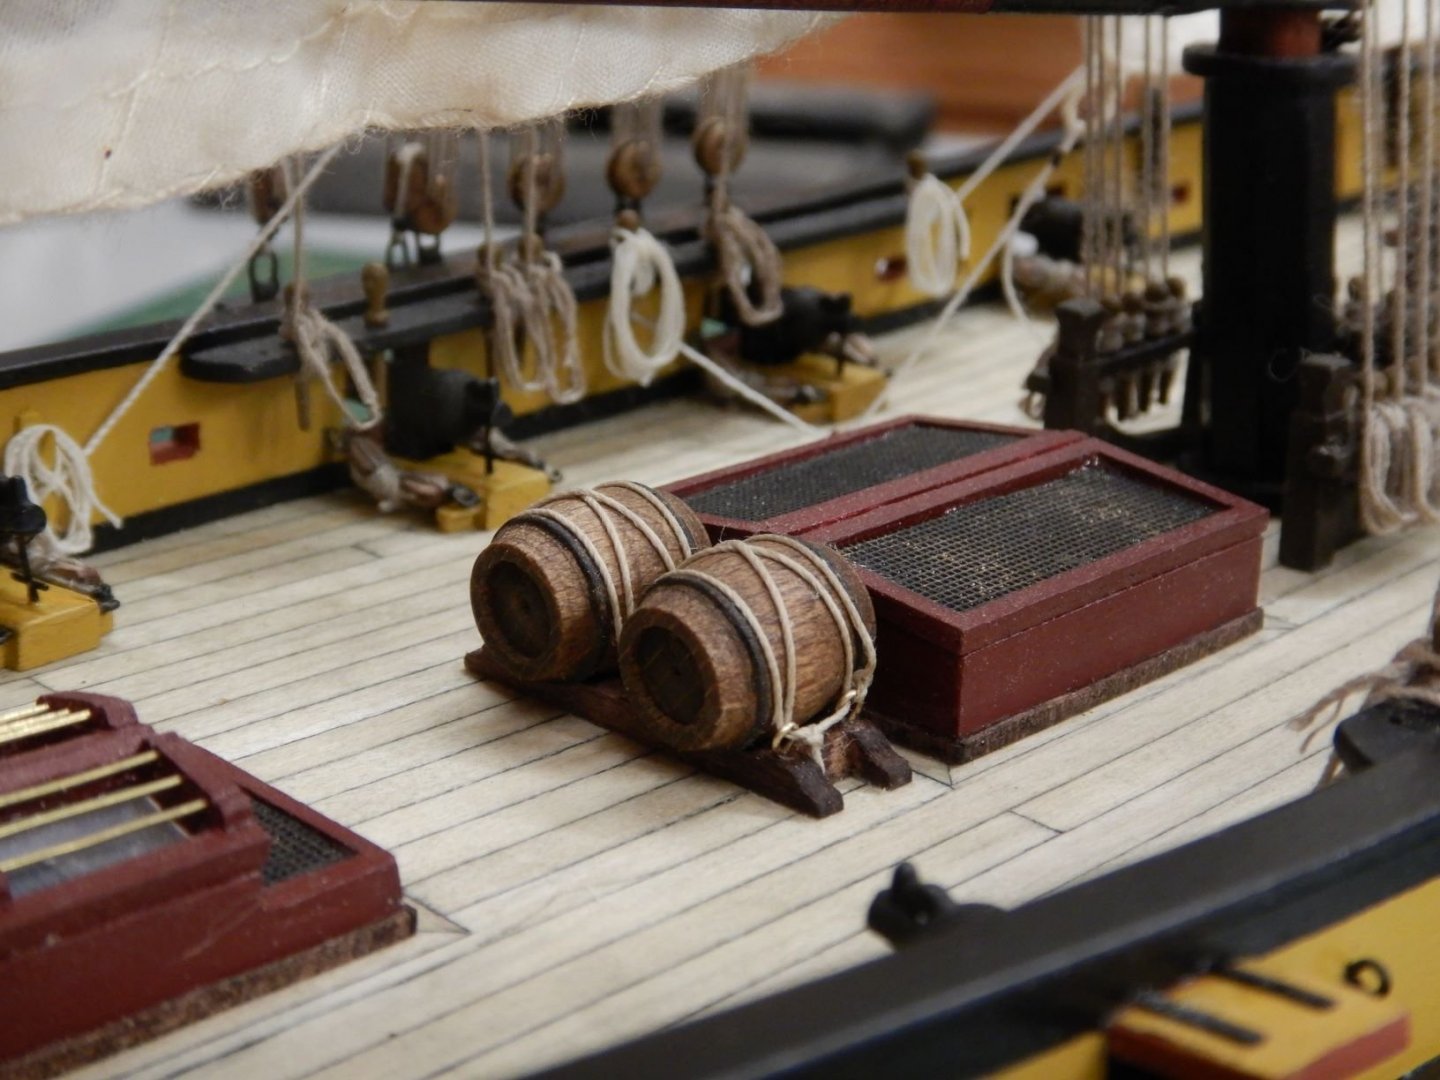
Dryfit of cannonball racks..

Stained and glued in place with cannonballs..

And with that I think I'm gonna call this model finished.. 😄
Maybe I'll add some more small details, but I need to let the model sit for a while and think about it.

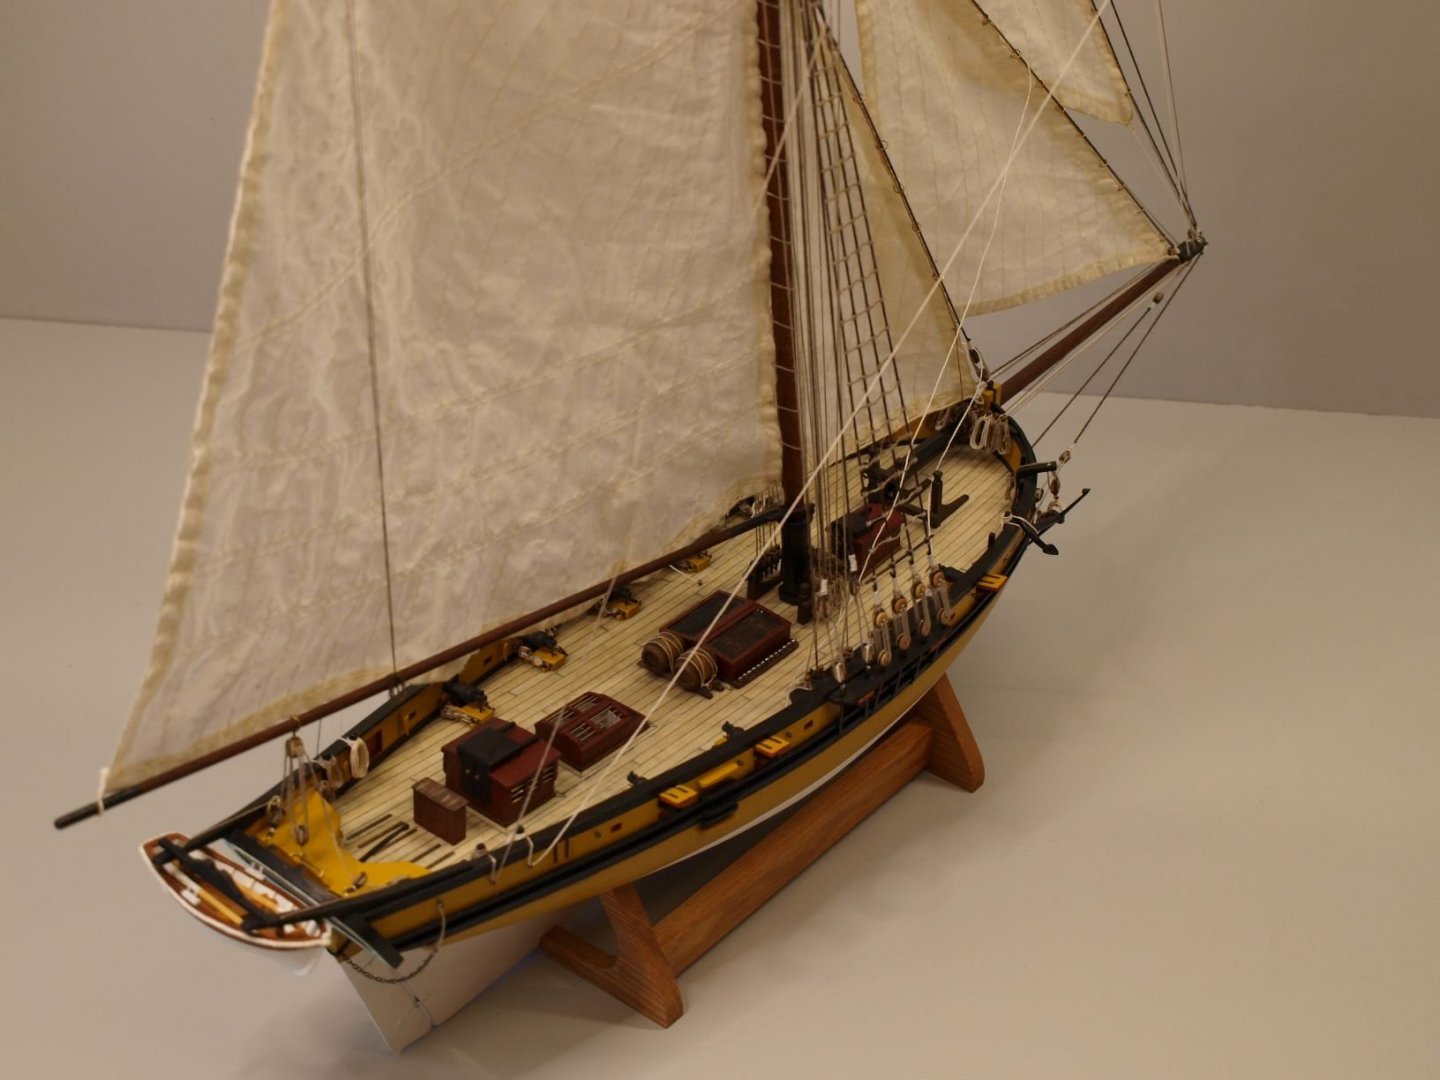
That's it!
Stay safe!
Gaffrig.
- Jobbie, iMustBeCrazy, Moltinmark and 6 others
-
8
-
 1
1
-
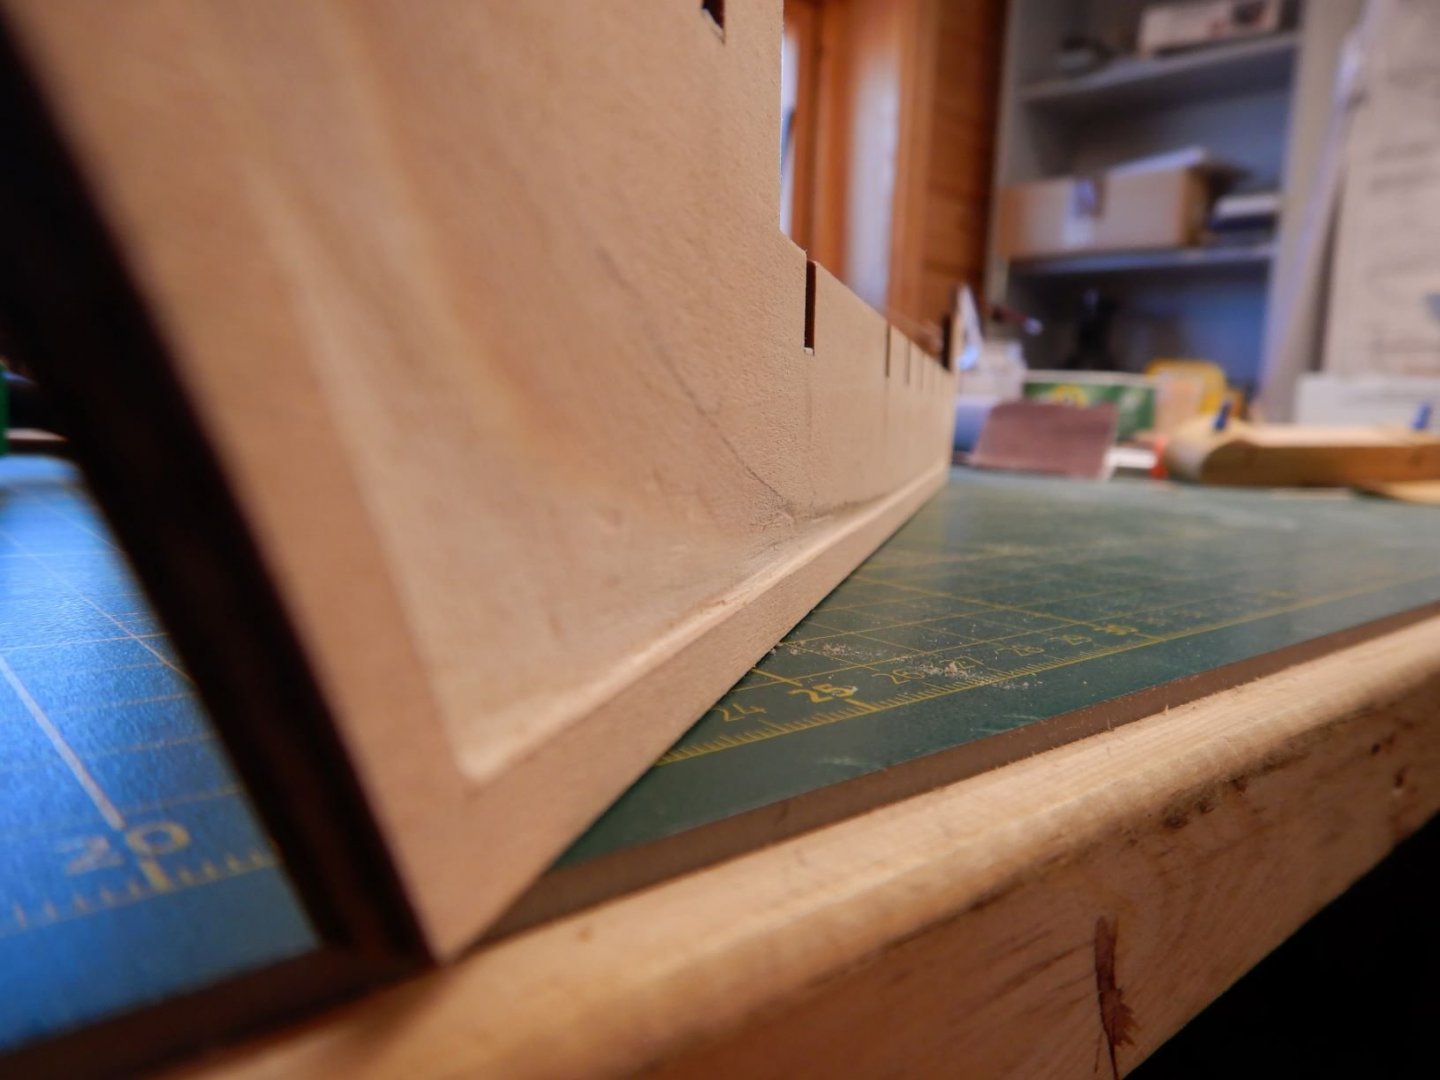
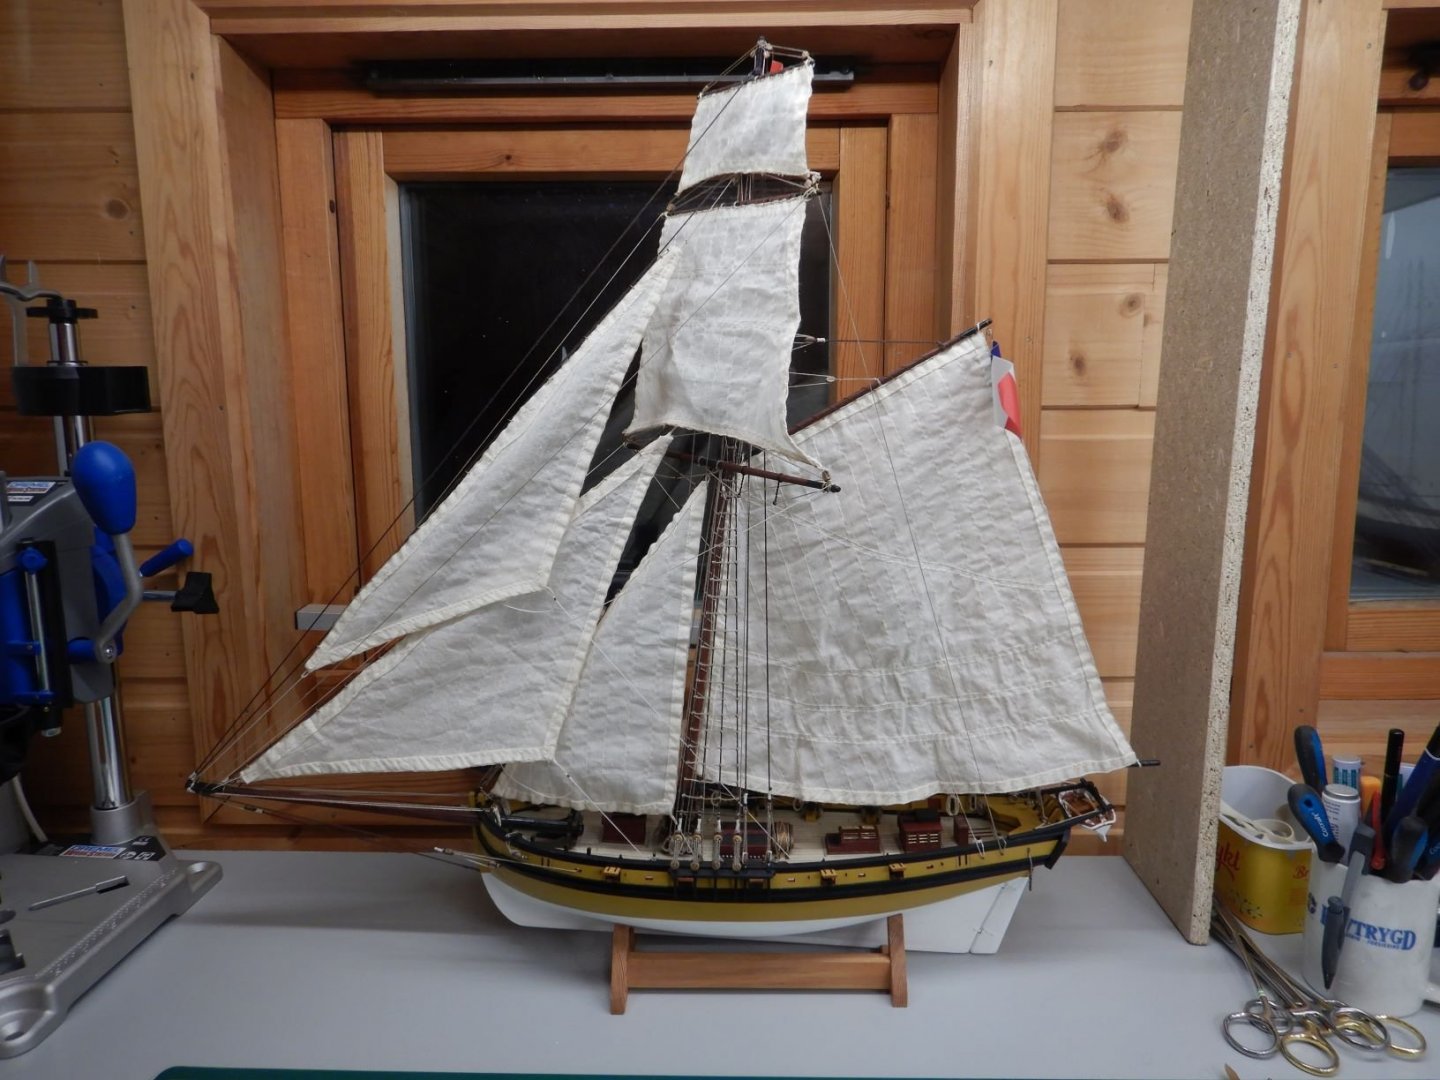
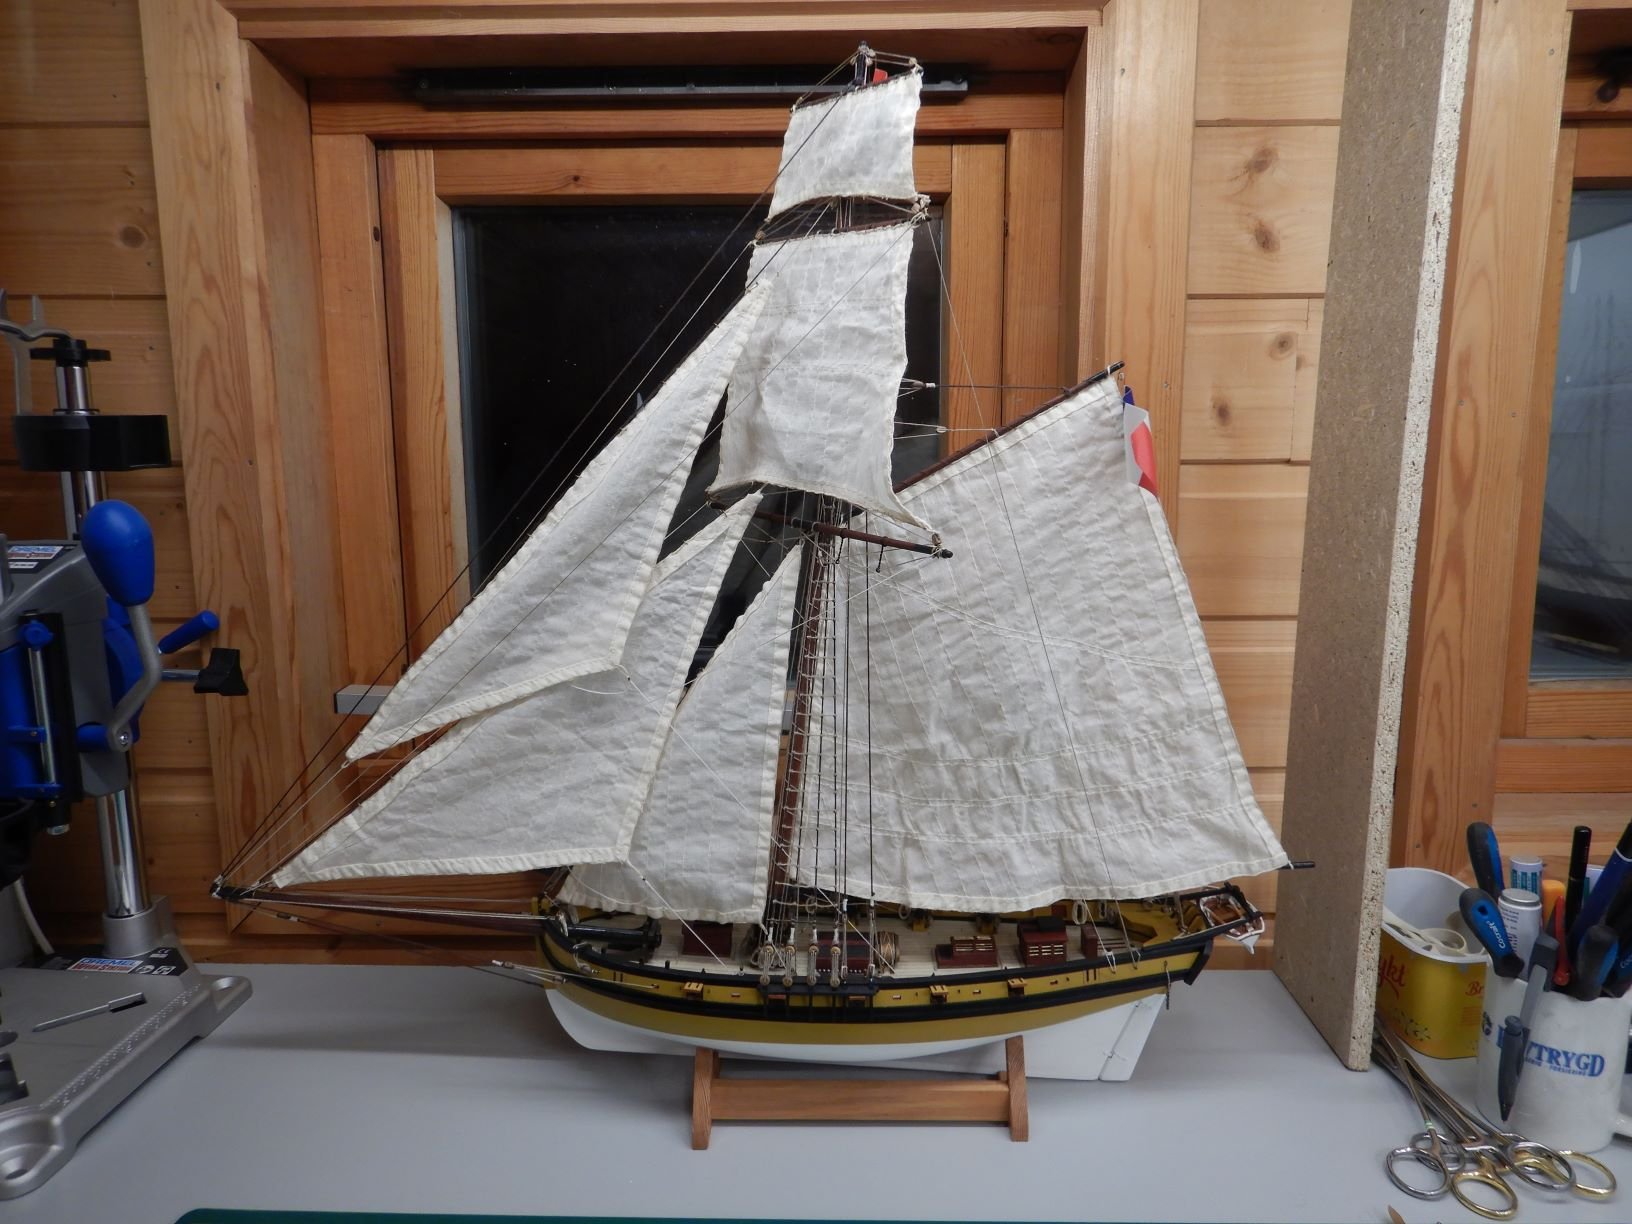
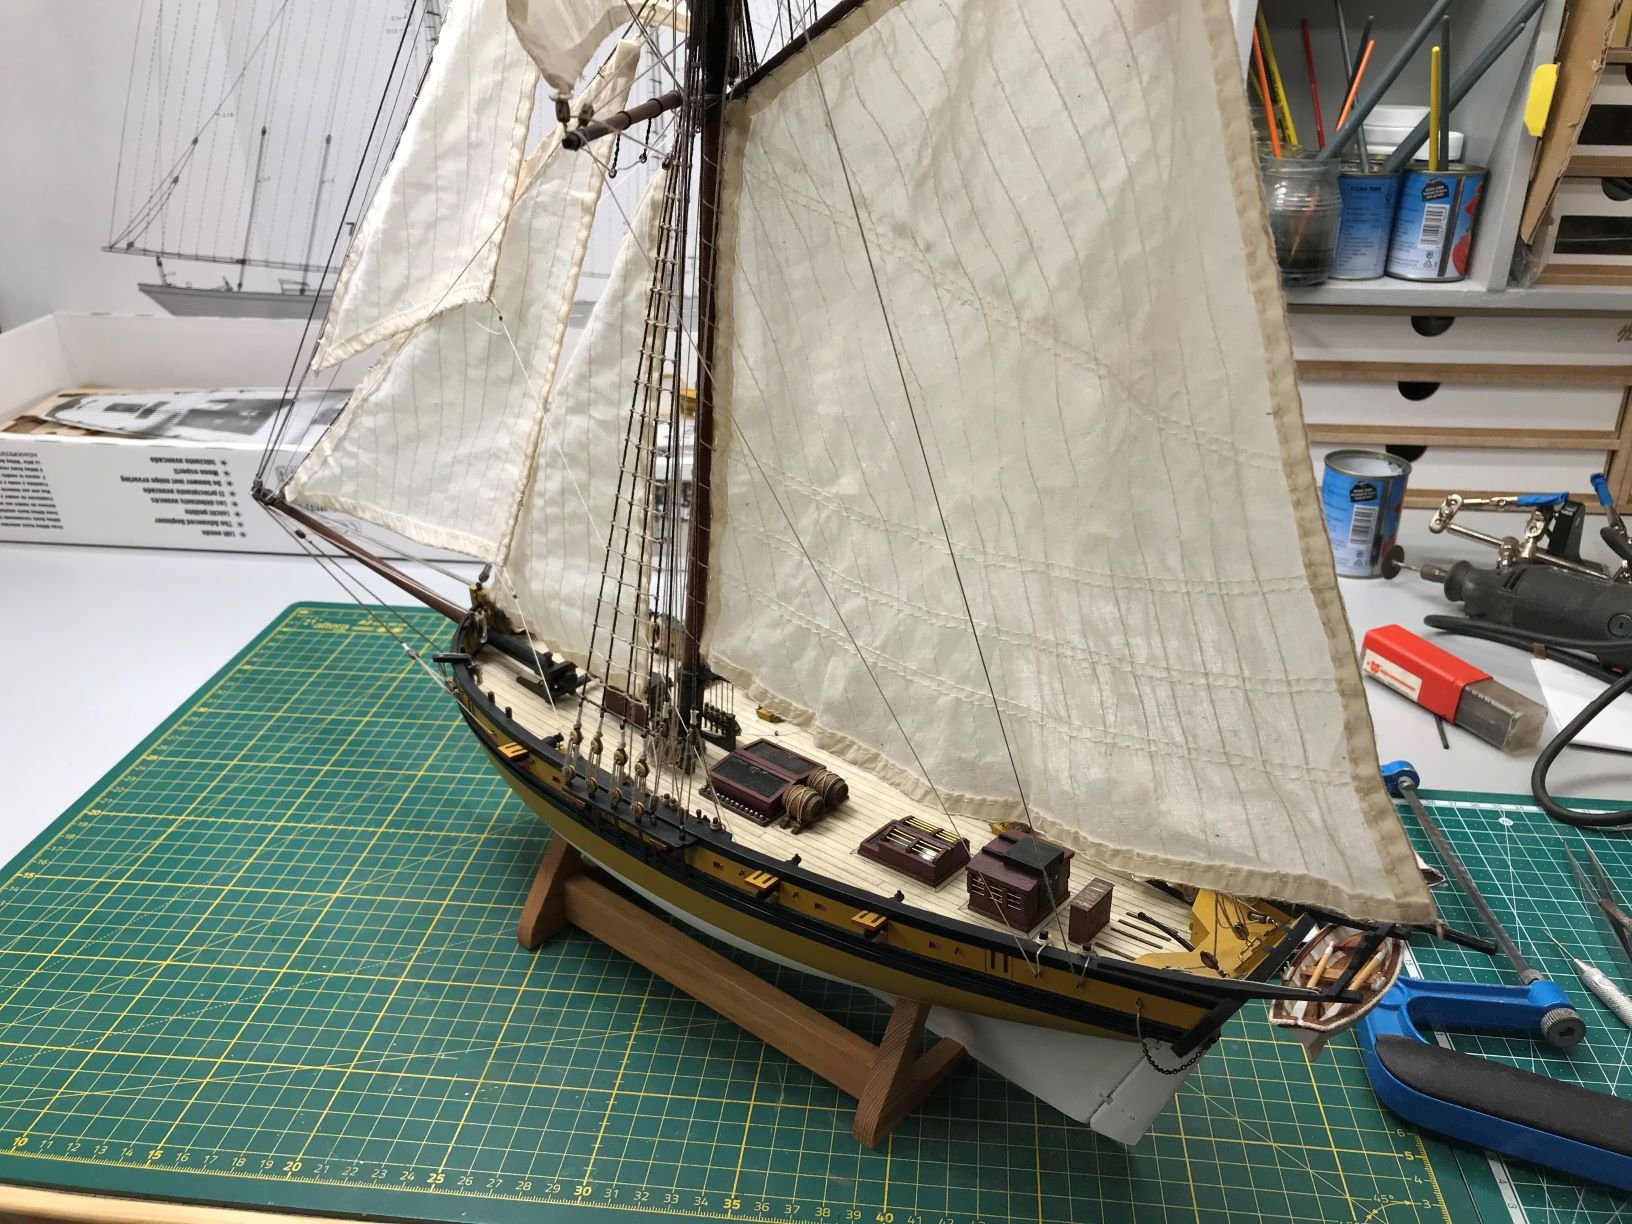
Hello all!
Work continues, the finishline in sight!
Got all the sails rigged, and the running rigging finished. (I think!)
Got the deckhouses/skylights glued in place.

Have also been mounting the gunport lids..

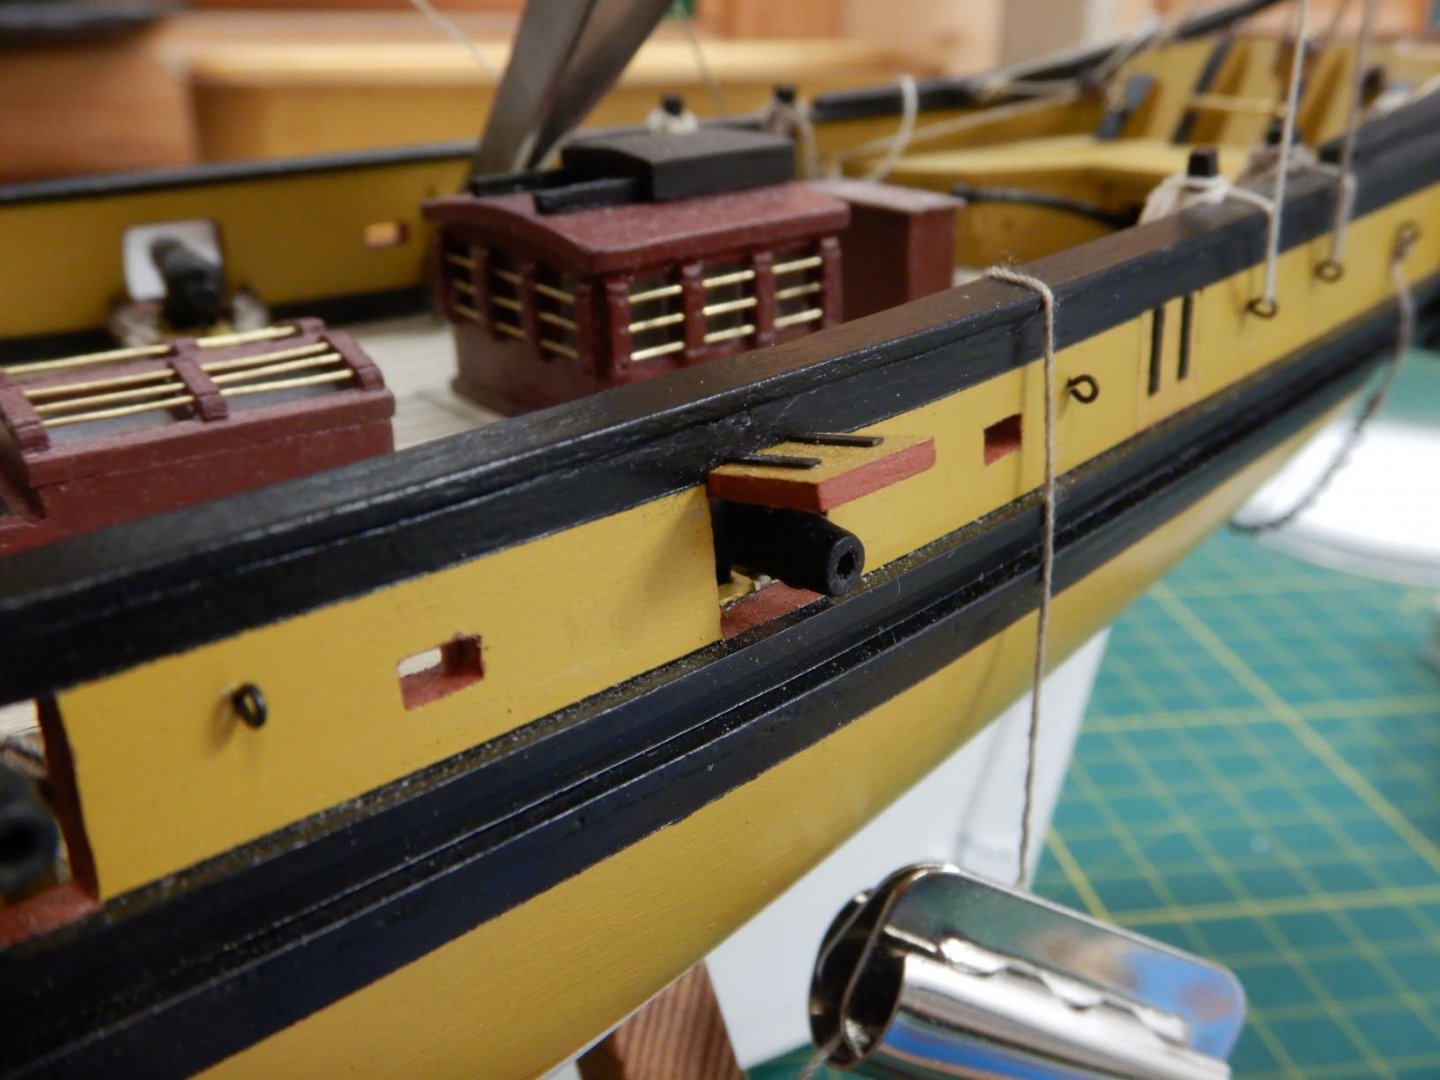
Still a few loose end's to tidy up, but it's getting there!
That's it for today's update.
Stay safe!
Gaffrig.
- Tompslattery, maurino, Rick01 and 3 others
-
6
-
Tompslattery, that’s great to hear!
Glad to be of some help.
This makes keeping the buildlog going a lot more fun, knowing that it is useful to others! 😀
Gaffrig.
- Tompslattery and Moltinmark
-
1
-
 1
1


Lynx by Gaffrig - Panart - Scale 1:62
in - Kit build logs for subjects built from 1801 - 1850
Posted
Hello.
Yes, the bulkhead tops are to be removed according to the instructions. The bulwark is now to be planked on the inside with 1x5mm walnut. Same as outer planking.
Gaffrig.