

Vladimir_Wairoa
-
Posts
1,509 -
Joined
-
Last visited
Content Type
Profiles
Forums
Gallery
Events
Posts posted by Vladimir_Wairoa
-
-
good day all
just a quick update here, I got a message from customs today to pick the parcel from U.S. gosh what a relief, cant wait though to see it and measure !!! my scaling doubts etc...
 and continue.
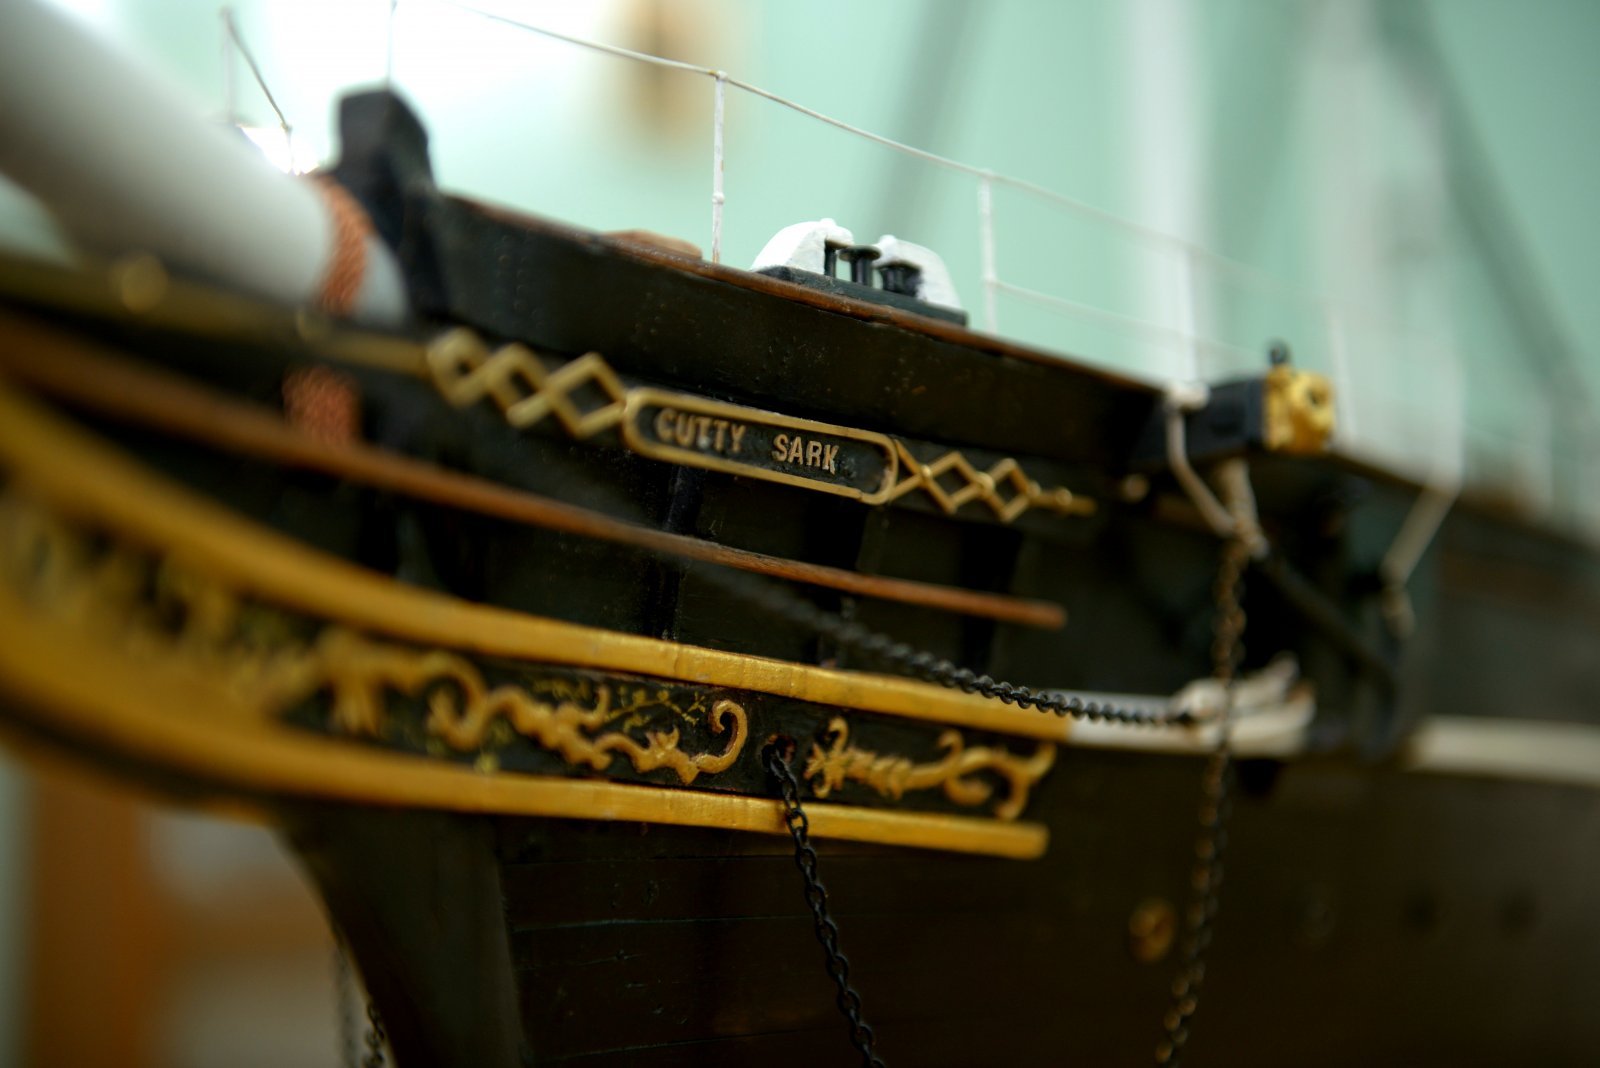
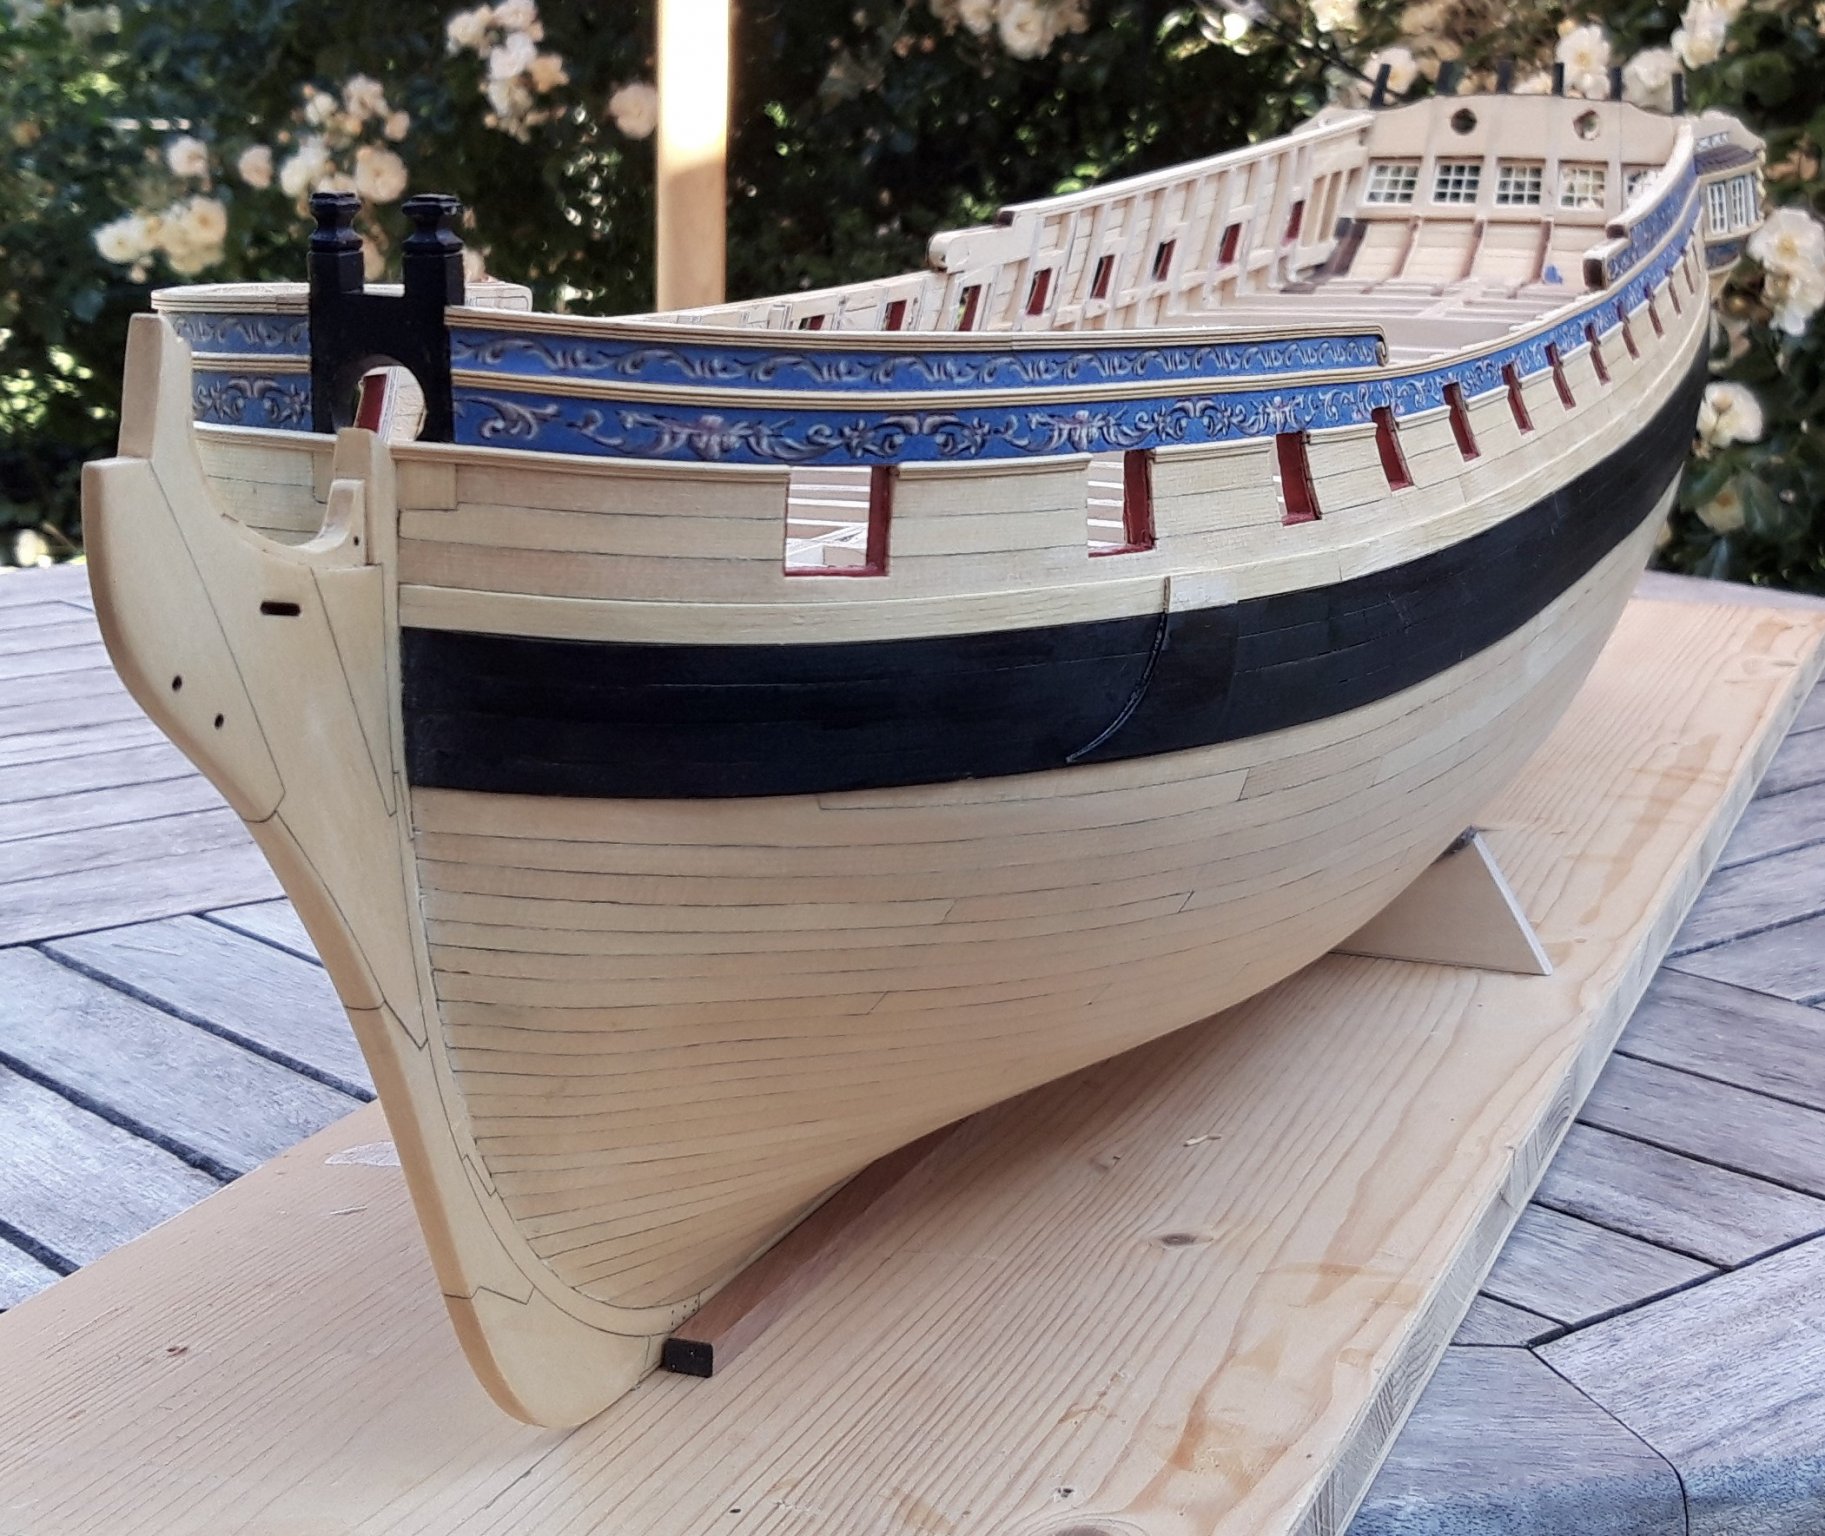
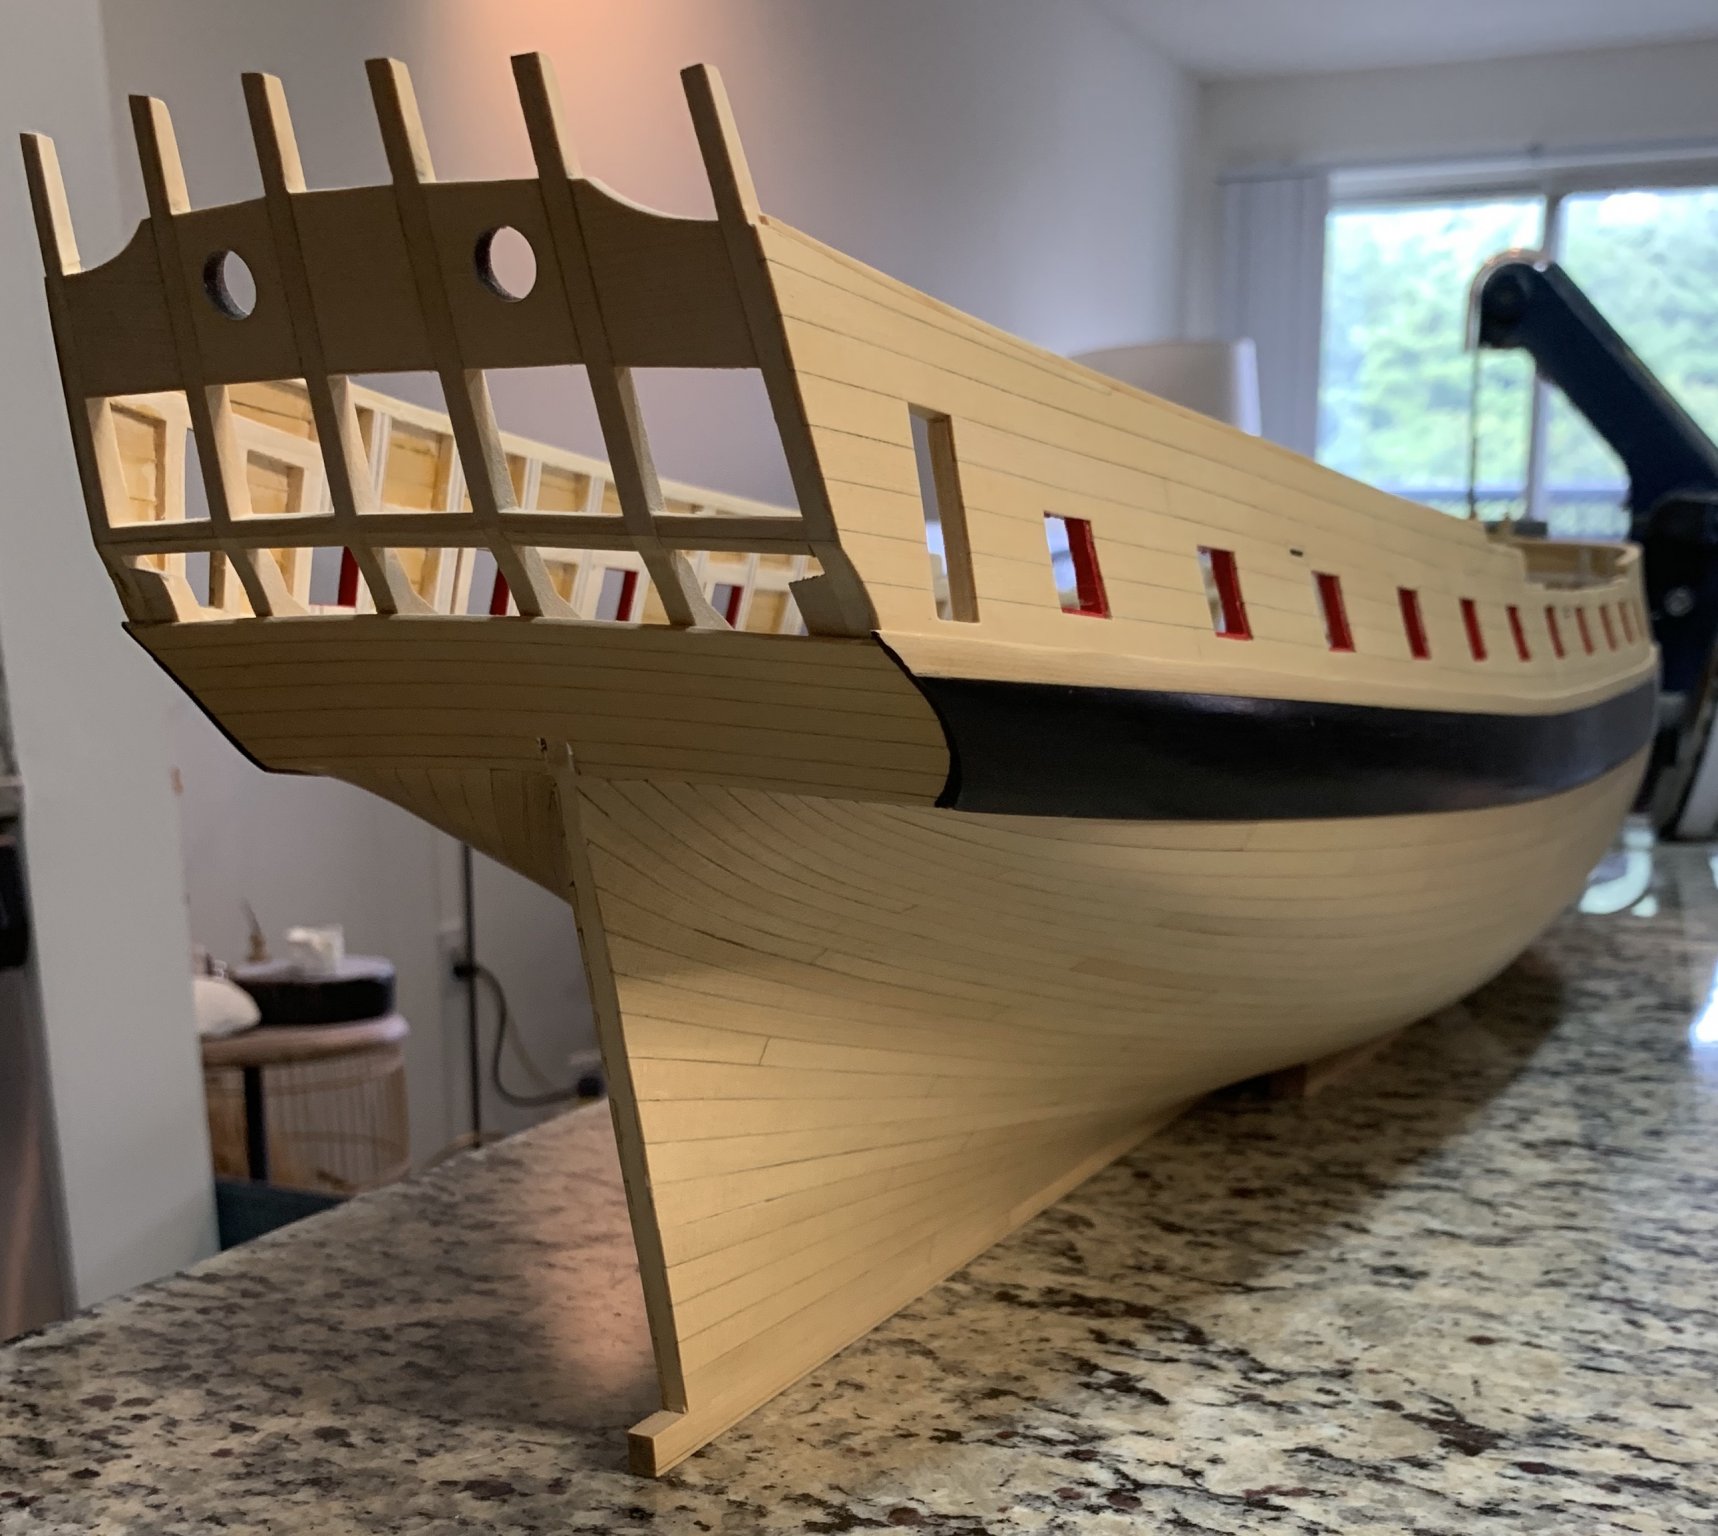
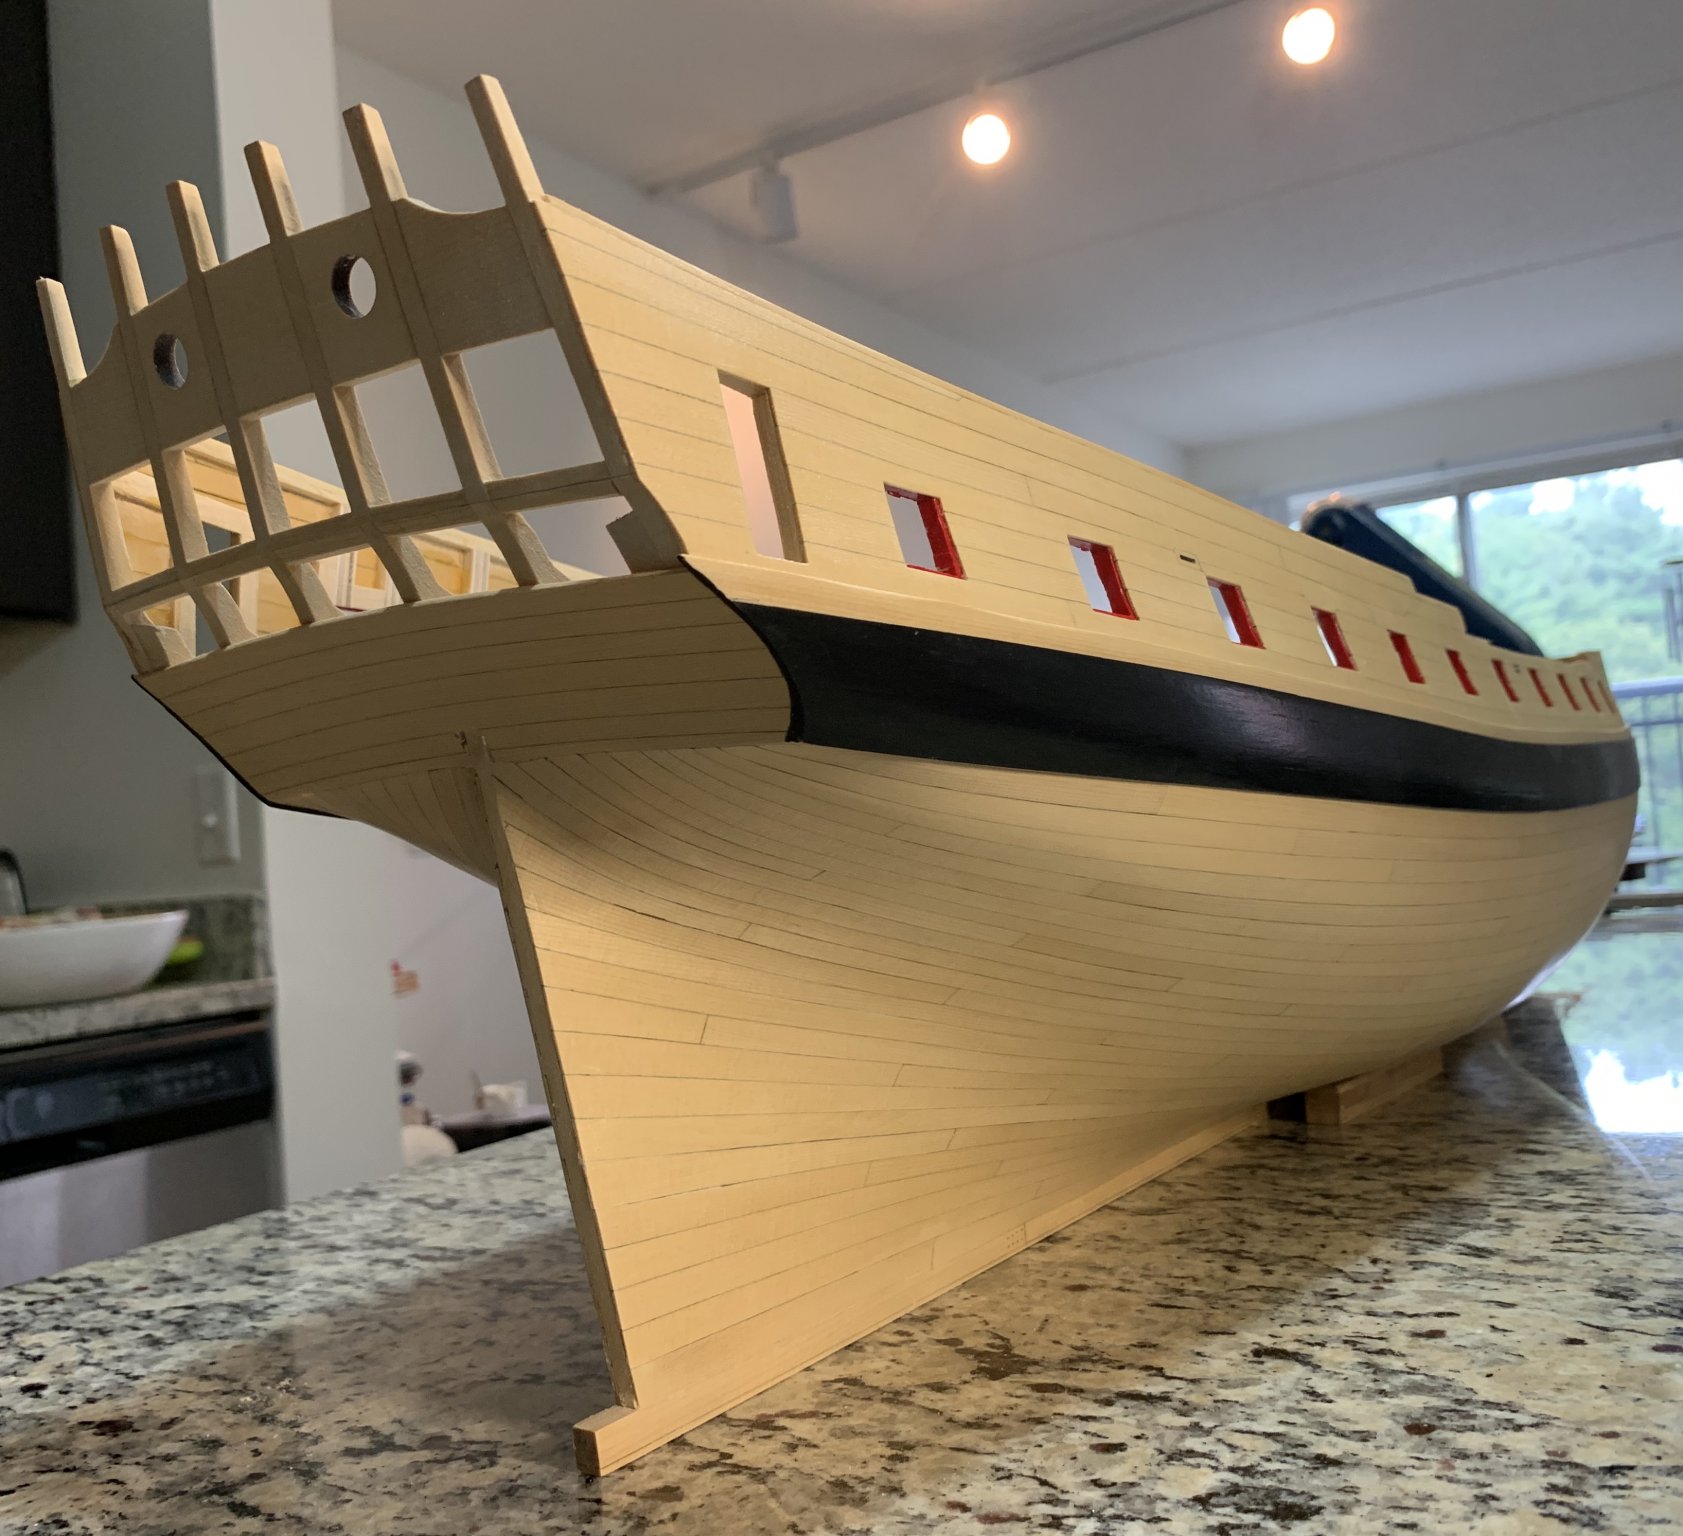
meanwhile i settled on red shades. it will be carmine like, more vith violet, darker pigment in it, here is the pic. no matter what angle light is affecting it a bit, its a color Chuck put on cheerful. slifghly subtler than shiny red. happy holidays vlad

- FrankWouts, Rustyj and Ron Burns
-
 3
3
-
On 6/22/2020 at 8:08 AM, Beckmann said:
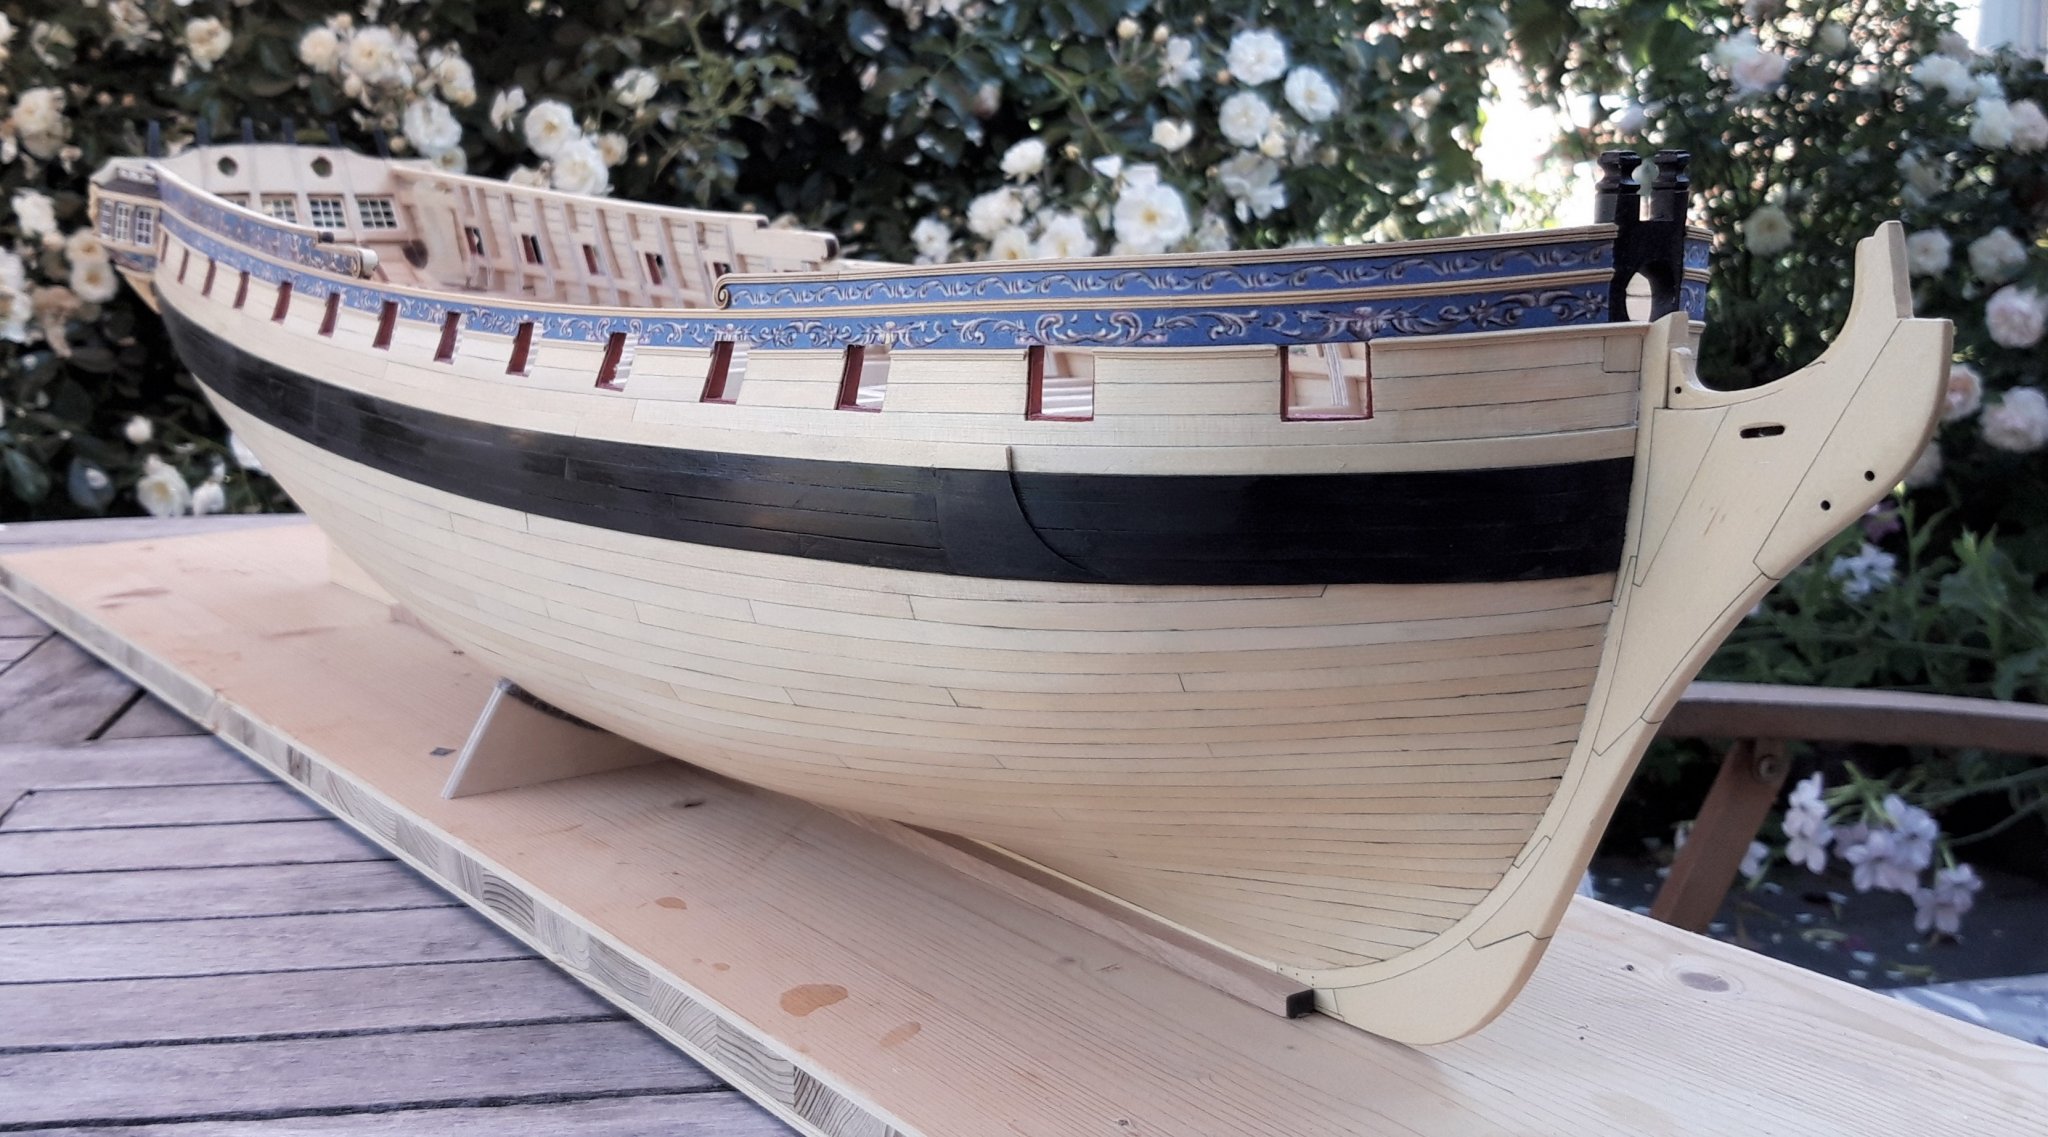
Thanks for the comments and likes, here some pictures of the model, after adding the moldings at the stern.


Matthias
Veery pretty Mtthias. congratulations !just wow
- coxswain, FrankWouts, Ron Burns and 2 others
-
5
-
On 12/26/2020 at 6:34 AM, wyz said:
Templates
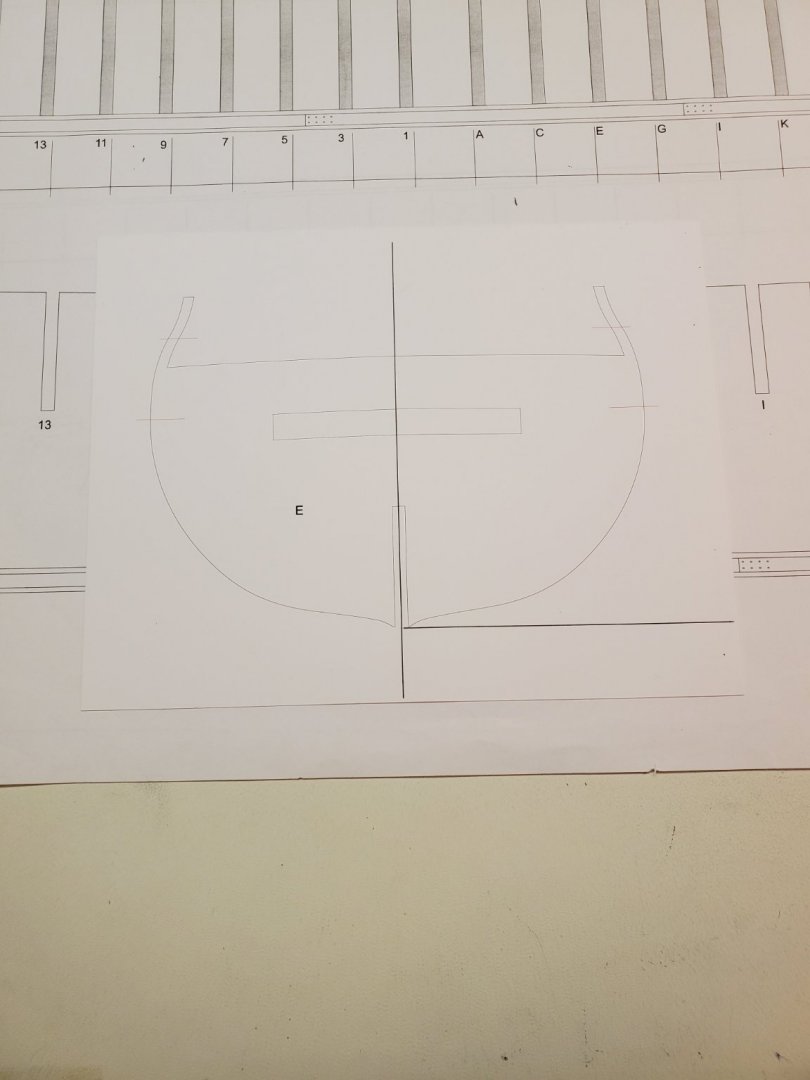
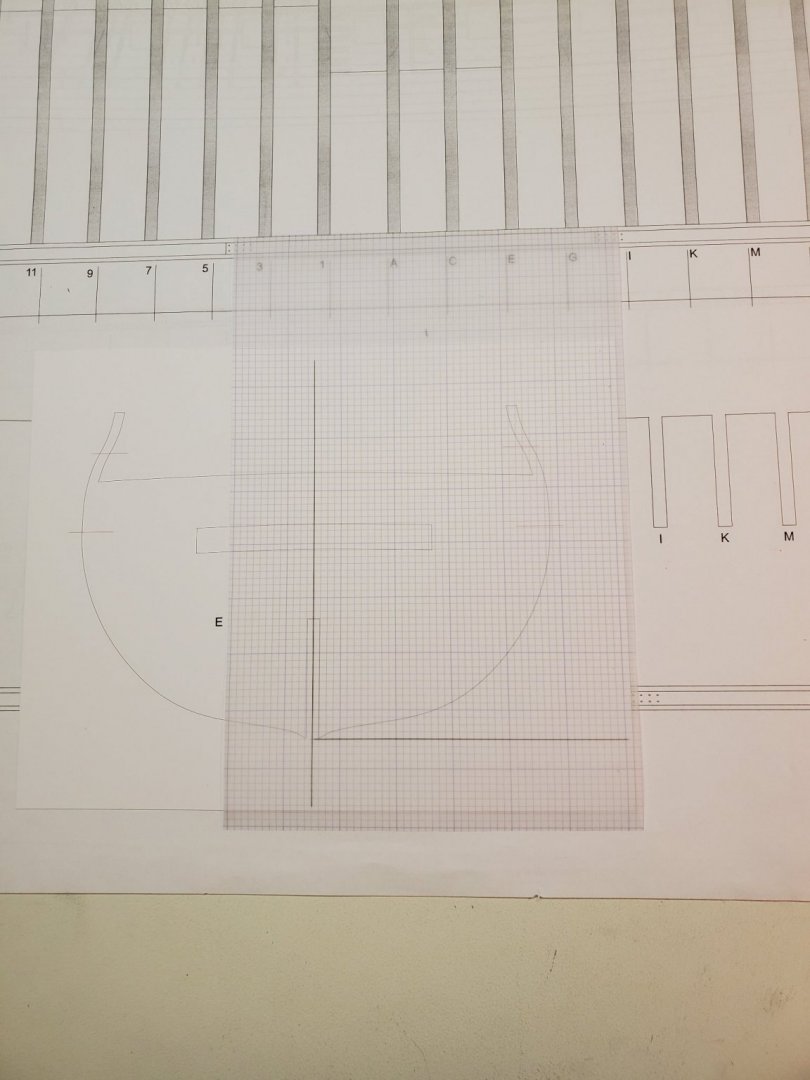
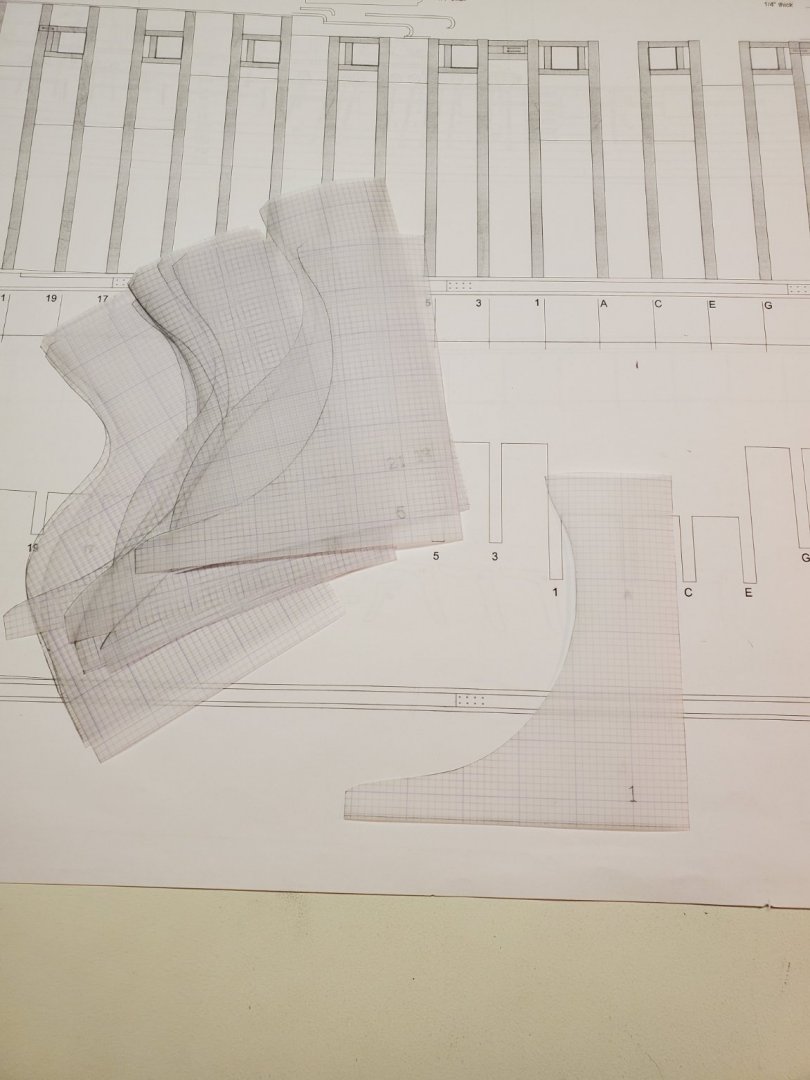
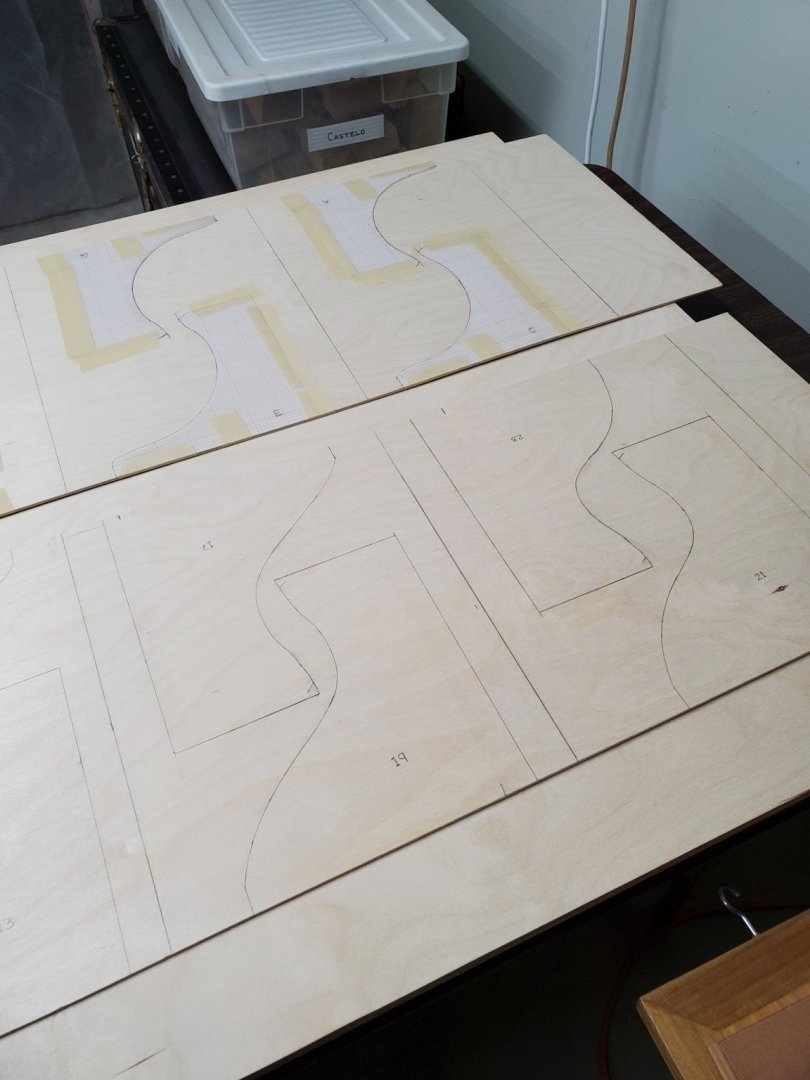
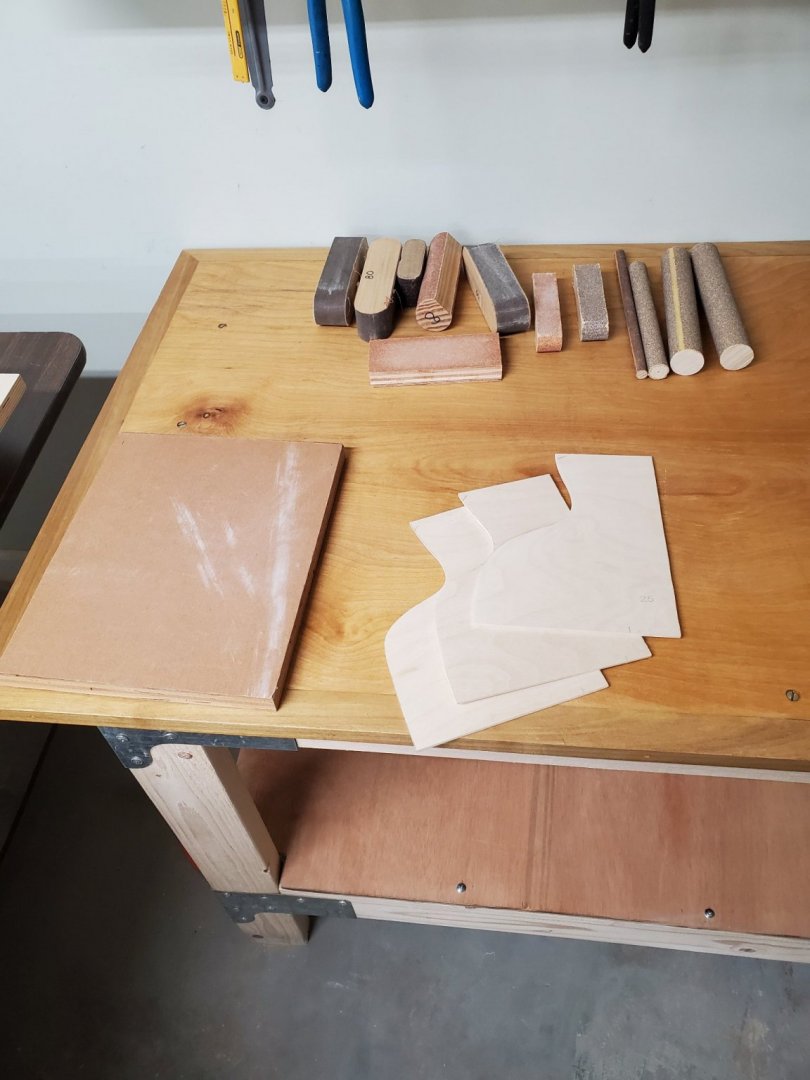
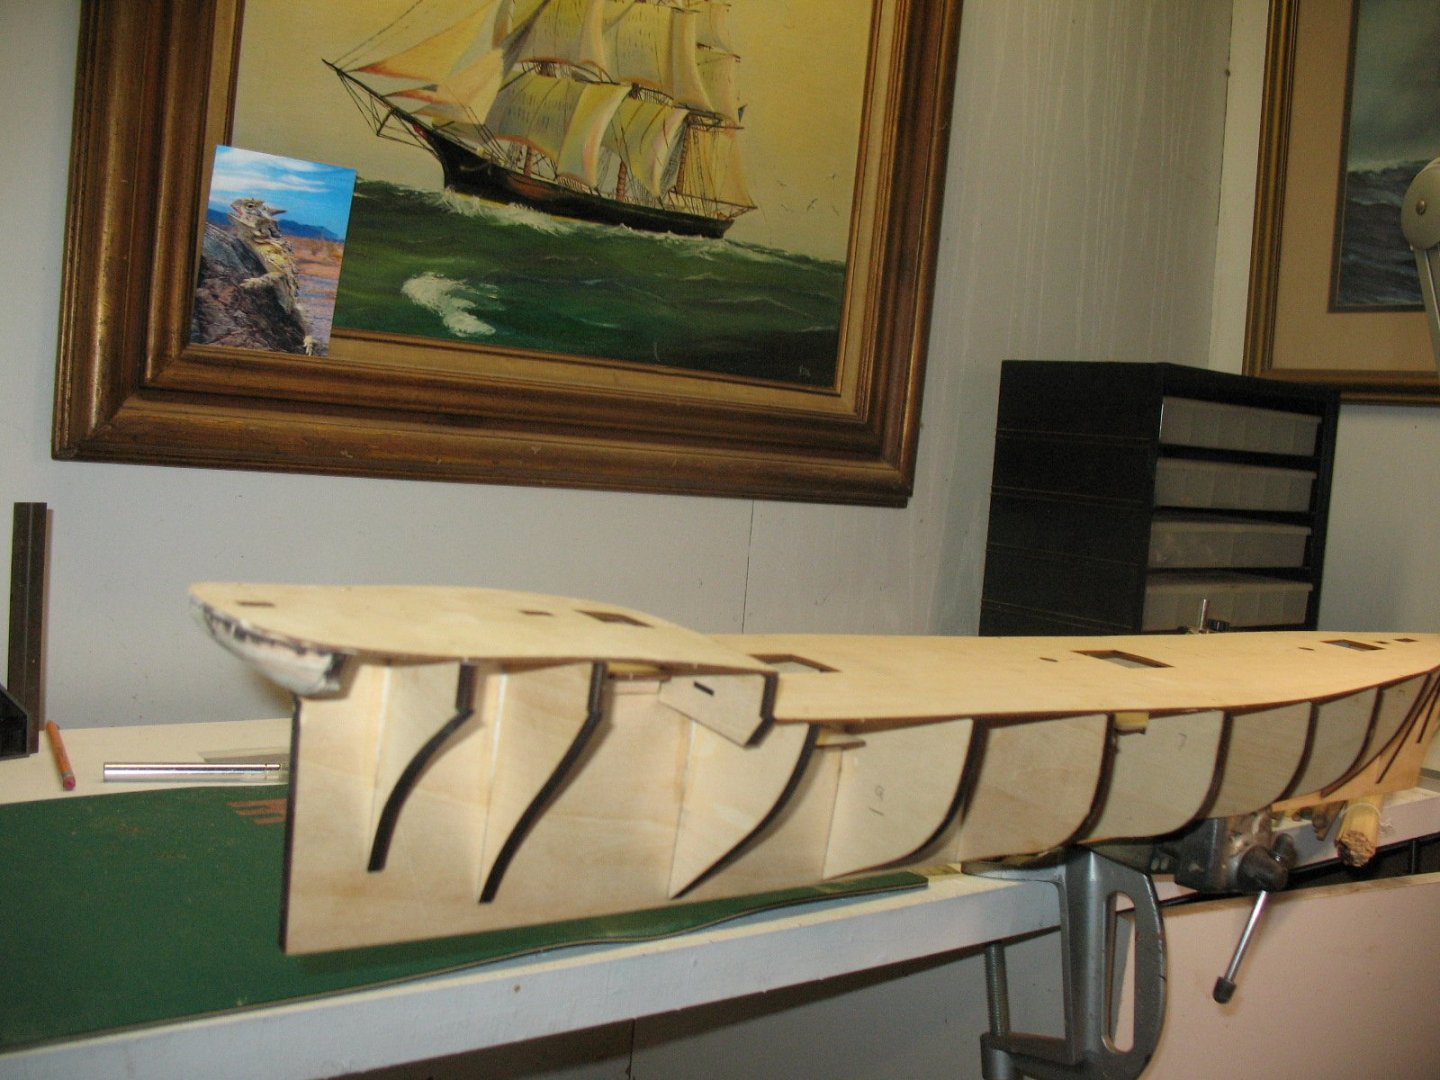
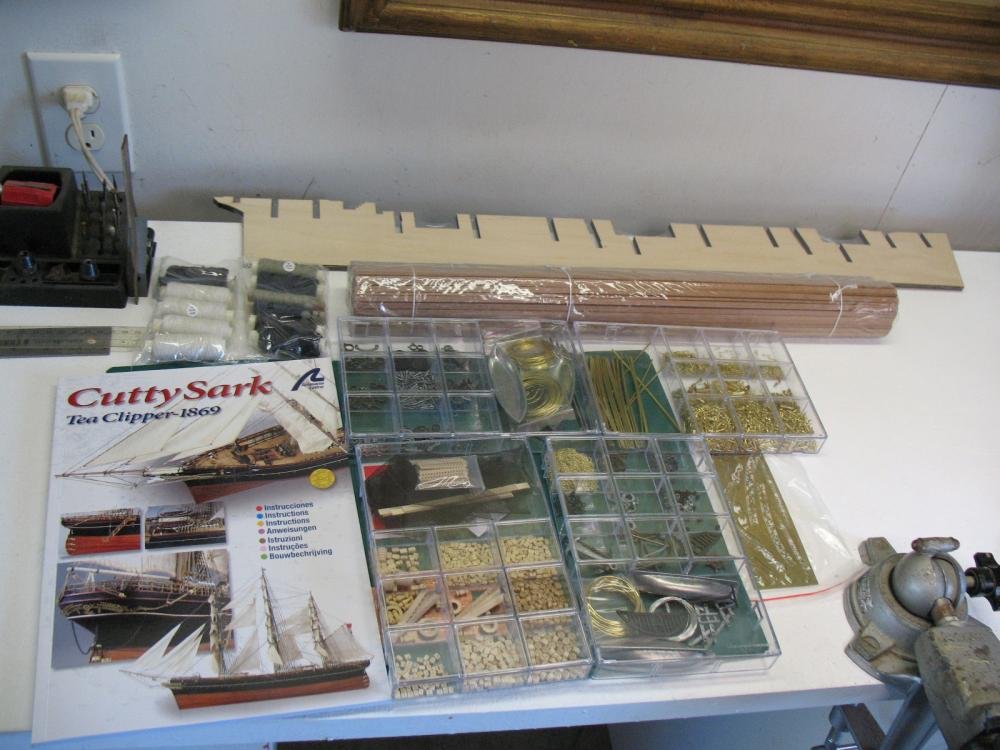
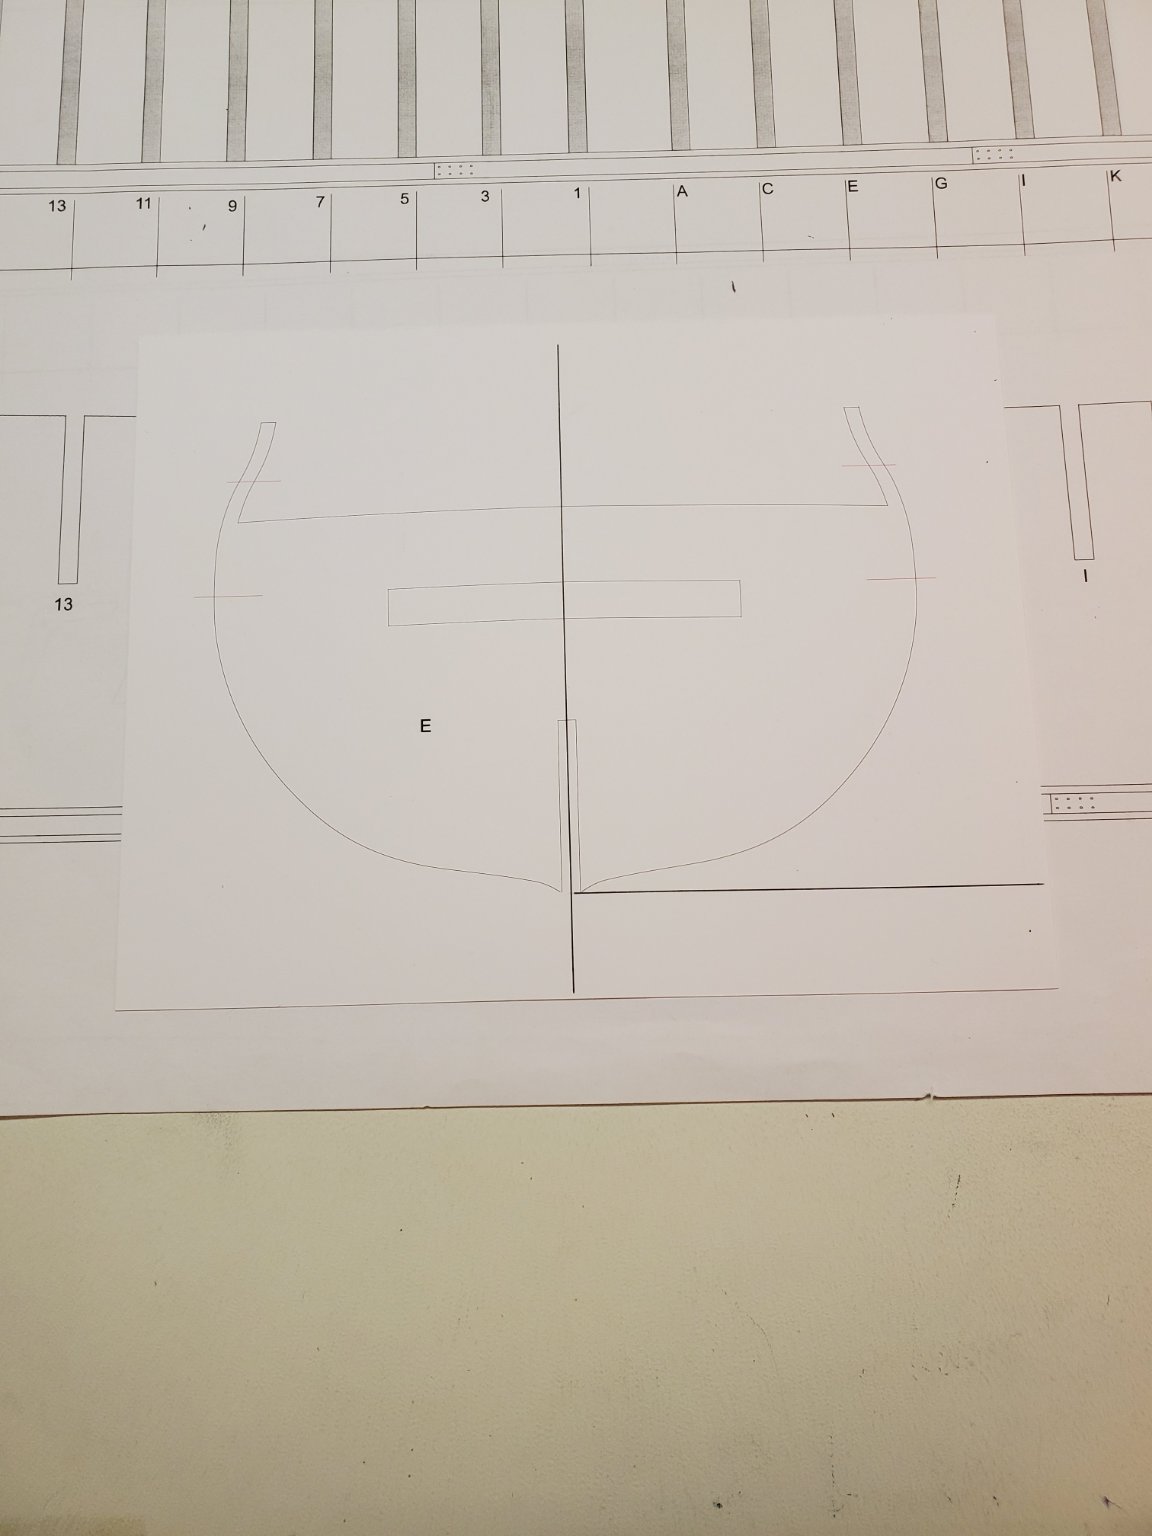
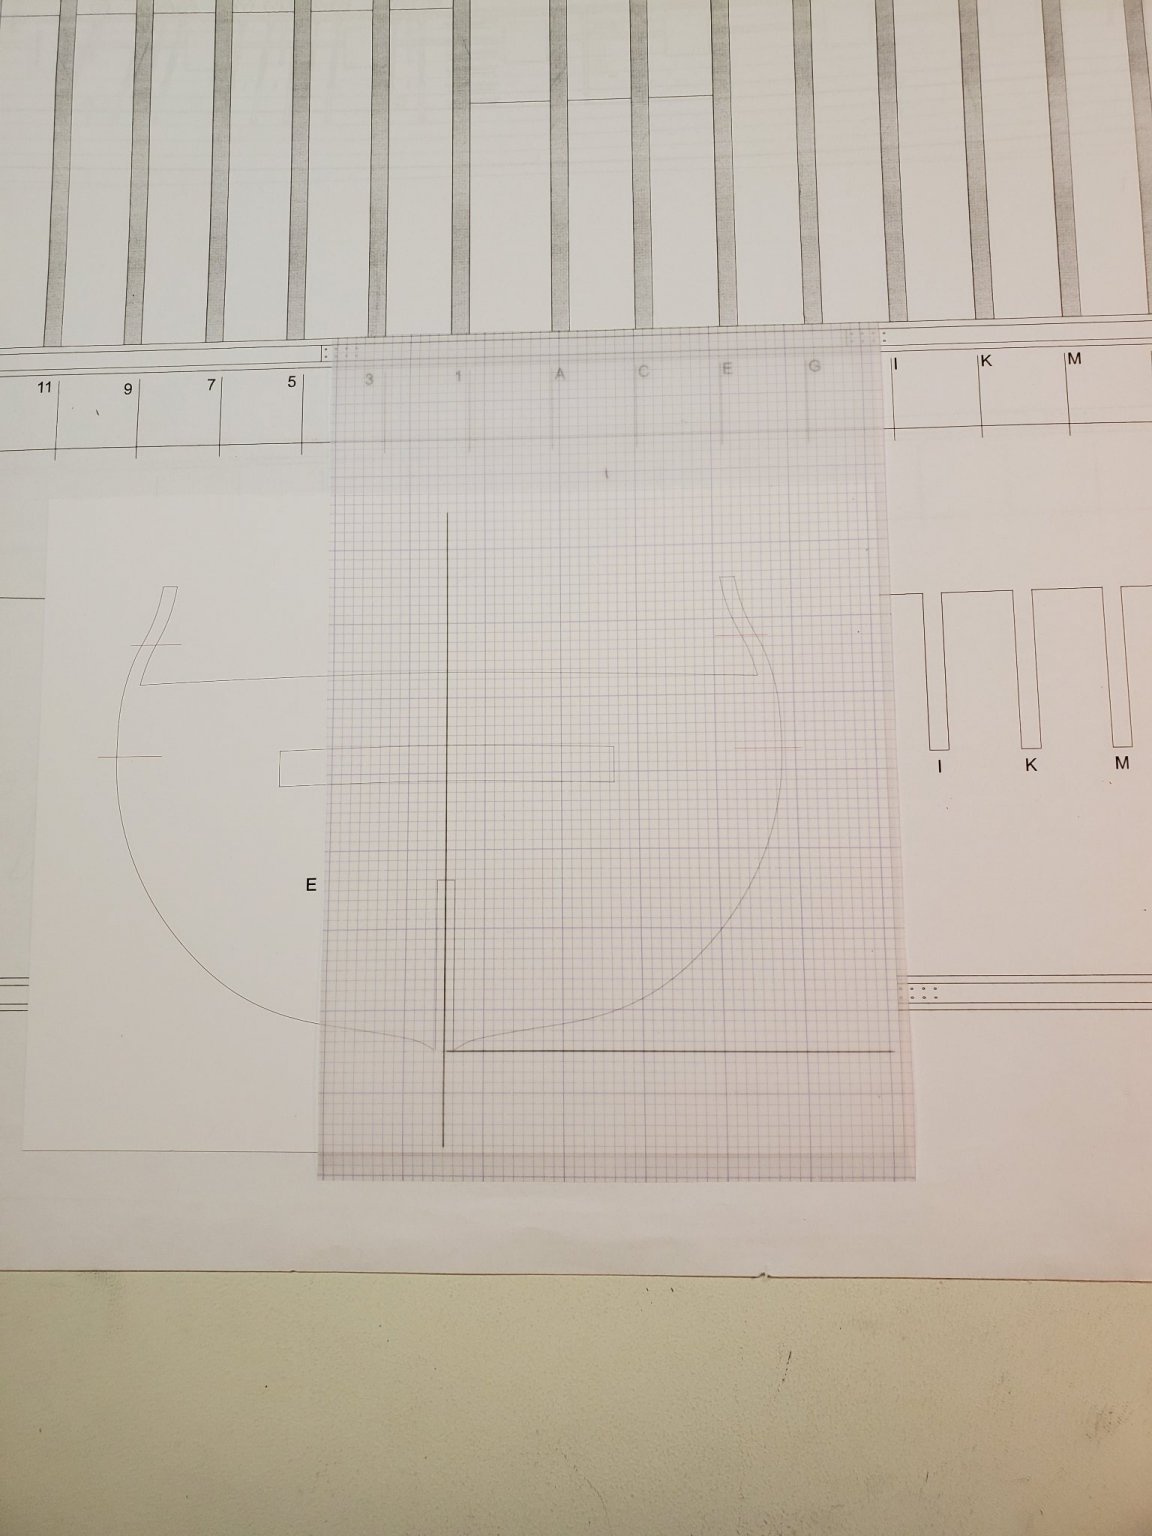
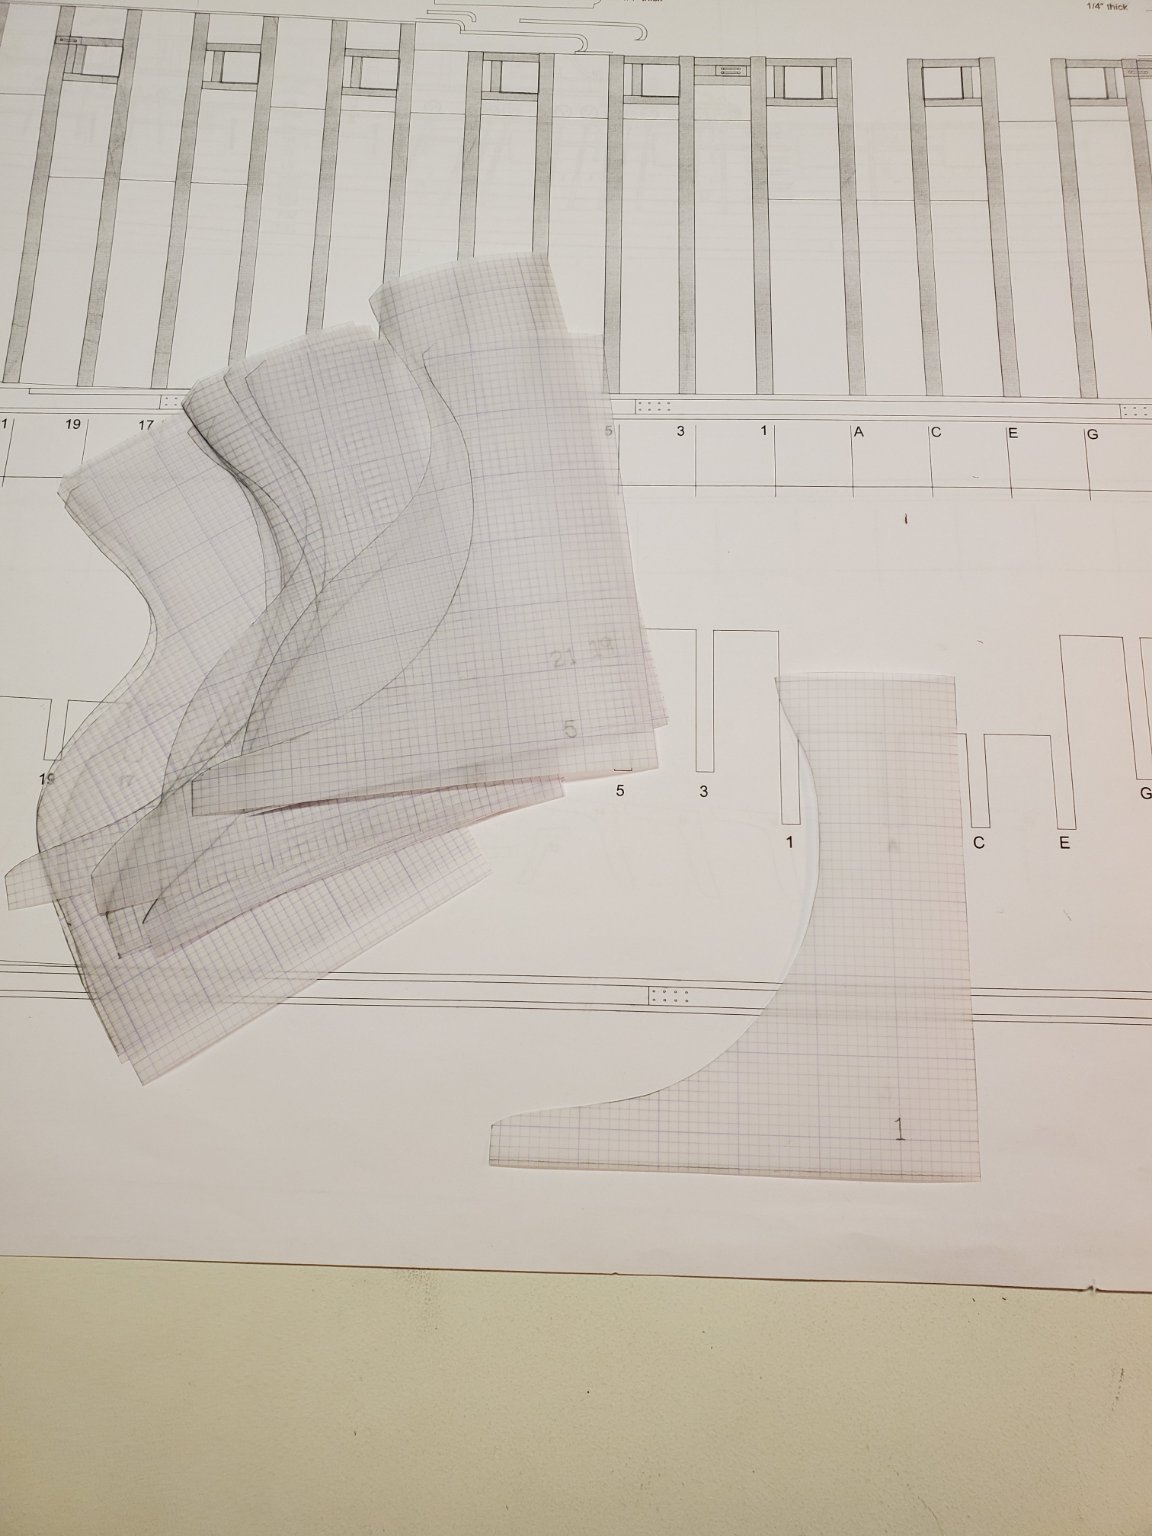
Before I can actually start construction of the model I still need to do a number of things. The very first thing to do is to download Chuck's plans for the Winchelsea. That's done. I got those a few weeks ago. When I printed these plans I had the hull shapes for each station line done on card stock, not paper. The extra rigidity helped. Number two on the list is to make a set of plywood templates to help shape the hull. Last week I purchased a large sheet (5'x5'x1/8") of Baltic plywood and have started this job. I have to say it was mega-helpful to have 8 grids per inch Mylar to trace the hull shapes on. First I draw a center line, and then, using a square, draw a perpendicular at the bottom of the drawing. I then carefully lay a piece of Mylar over it, lining it up with centerline and the perpendicular. With great care I then trace the hull's shape and cut it out. Remember to draw the keel in the right location and to add 1/16" more to its height. This is for the distance the hull is elevated off the building board. The Mylar cutouts are then taped to the plywood. Carefully draw the outline of the frame on it, remove the taped Mylar and then proceed cut out and sand the plywood template to shape. It's very important to be extremely meticulous in each step of the template making process! There are 27 station lines so pace yourself and don't rush.
i love to see old lovely transferring methods...
tedious but there something into it wishing all luck
") V.
V.
- wyz and FrankWouts
-
2
-
On 11/29/2020 at 12:37 AM, petervisser said:
Hi All. Well, it's been a while since any serious work has taken place on my model ship bench. I am happy to be back and have resumed work on my CS.
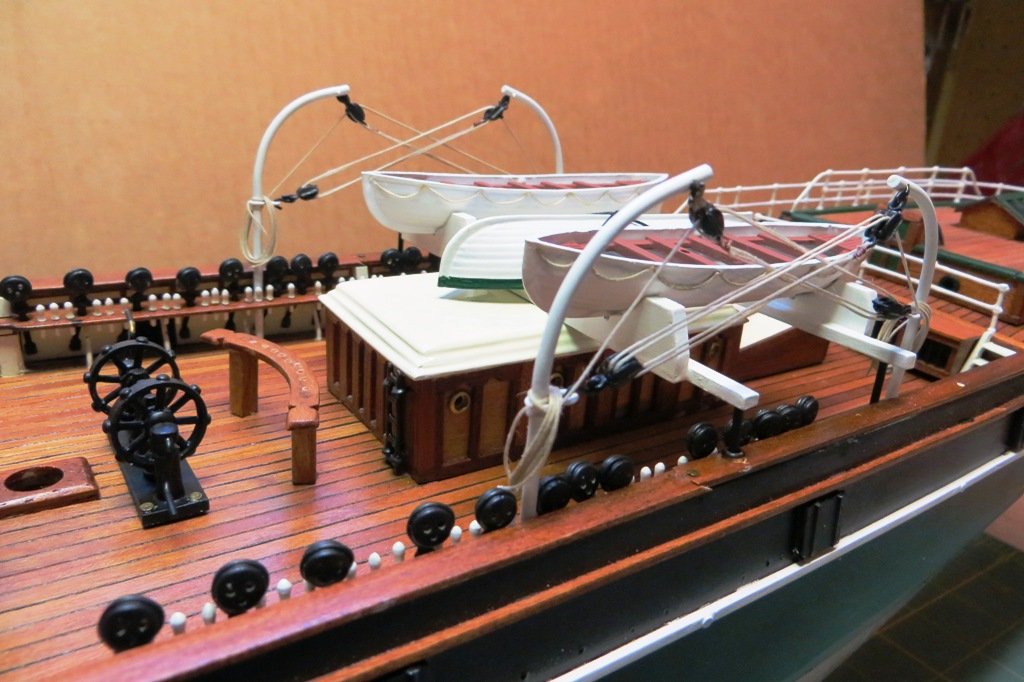
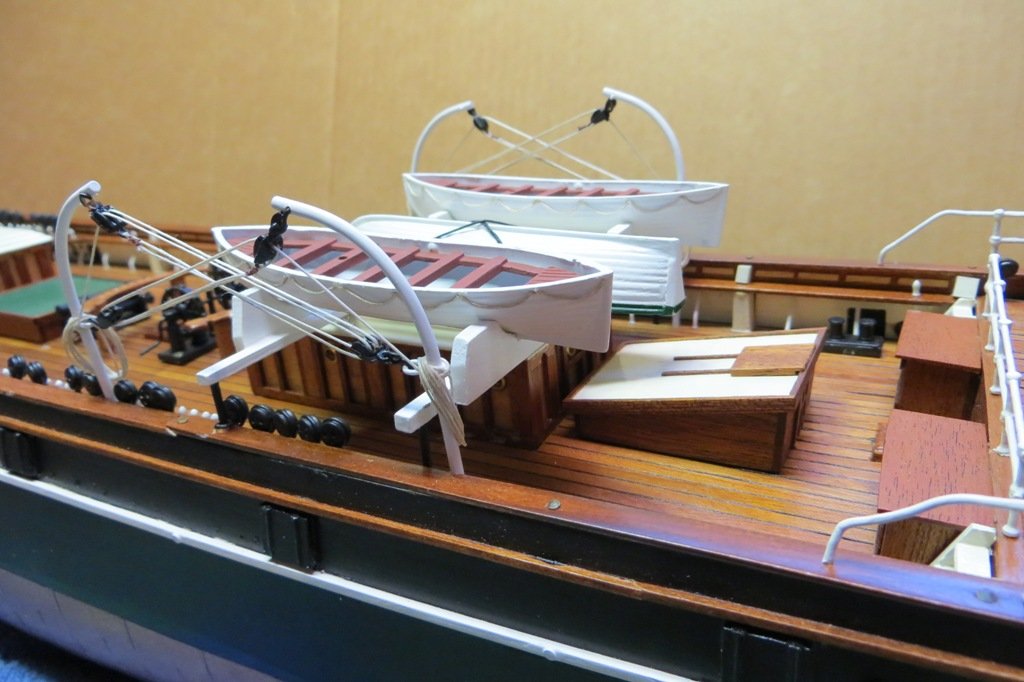
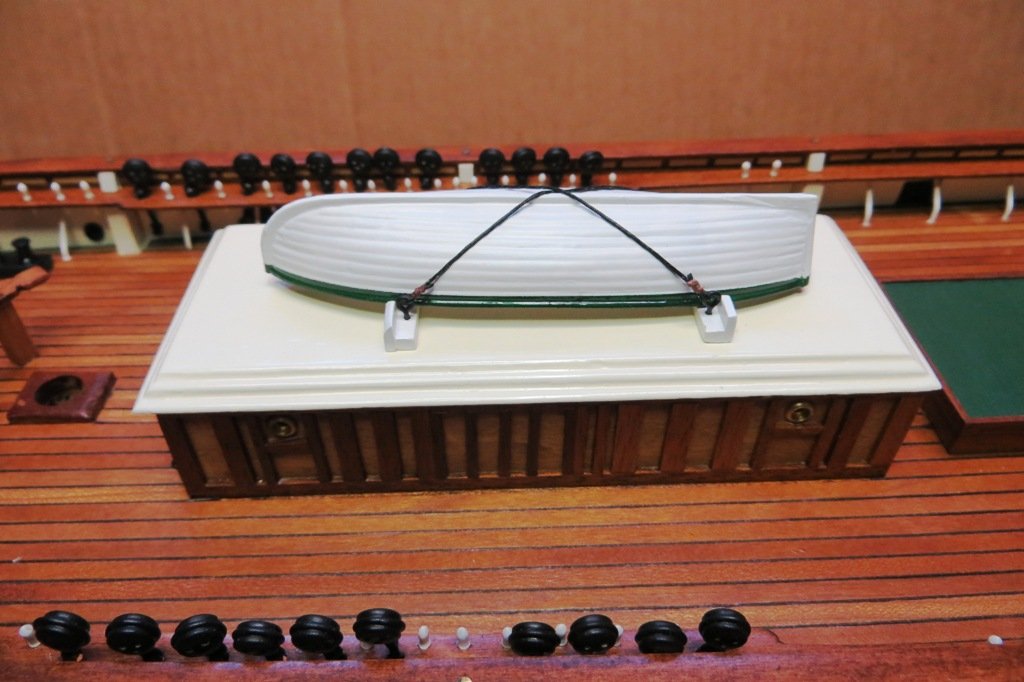
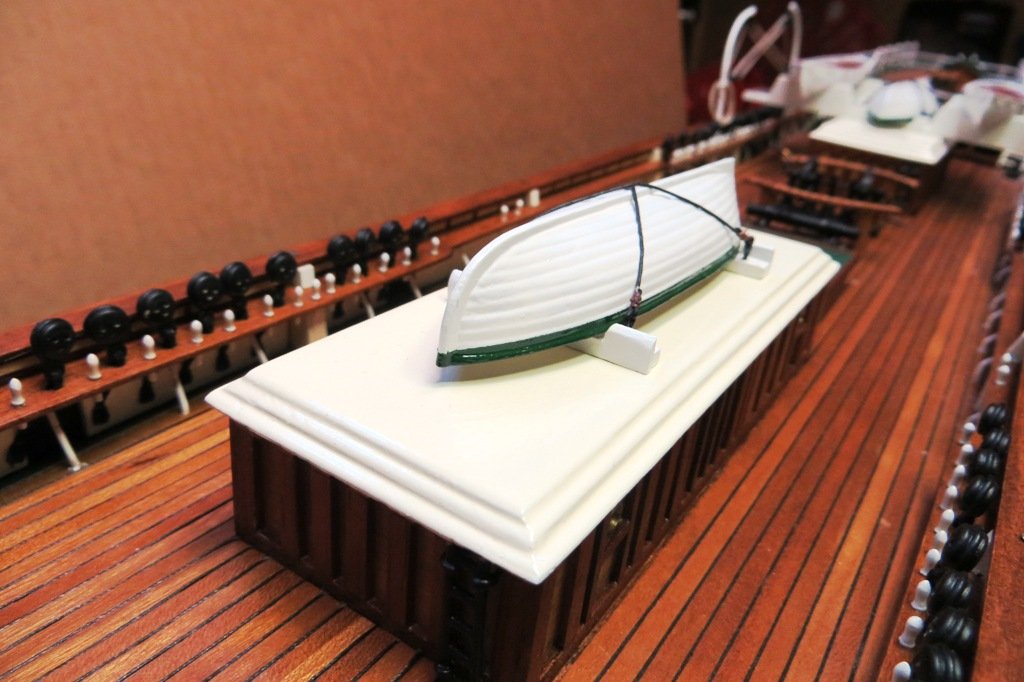
I have finally dealt with the boats that are aboard the Cutty Sark. Two lifeboats and the gig and jolly boat. The kit came with three plastic boats and I realize that they are a serious no-no to some builders. I am not one of those however, and with a coat or two of paint they look way better than anything I could cobble together.
The kit came with 3 boats all described as lifeboats. They were F167 (good) and F405 (not good) it being way to big for the scale of model. I decided to get two more of the F167's and modify them by altering their transoms. That would convert them into a jolly boat and a gig. I added some lifelines to the gunwales of the lifeboats to make them more authentic.
I lashed down the jolly boat and gig but have not done so yet for the lifeboats. They would be in the way when it comes time to set up the shrouds and the rest of the rigging going to the belaying pins. I'll have to tie them down after the rigging is complete.
So here are the results...
shes lovely.
-
On 12/13/2020 at 9:05 PM, Kathy Teel said:
Started on the bulk heads and positioning the decks.
Kathy i built mine (1:24 ) in 11 months :)) enjoy the built its lovely princess.
-
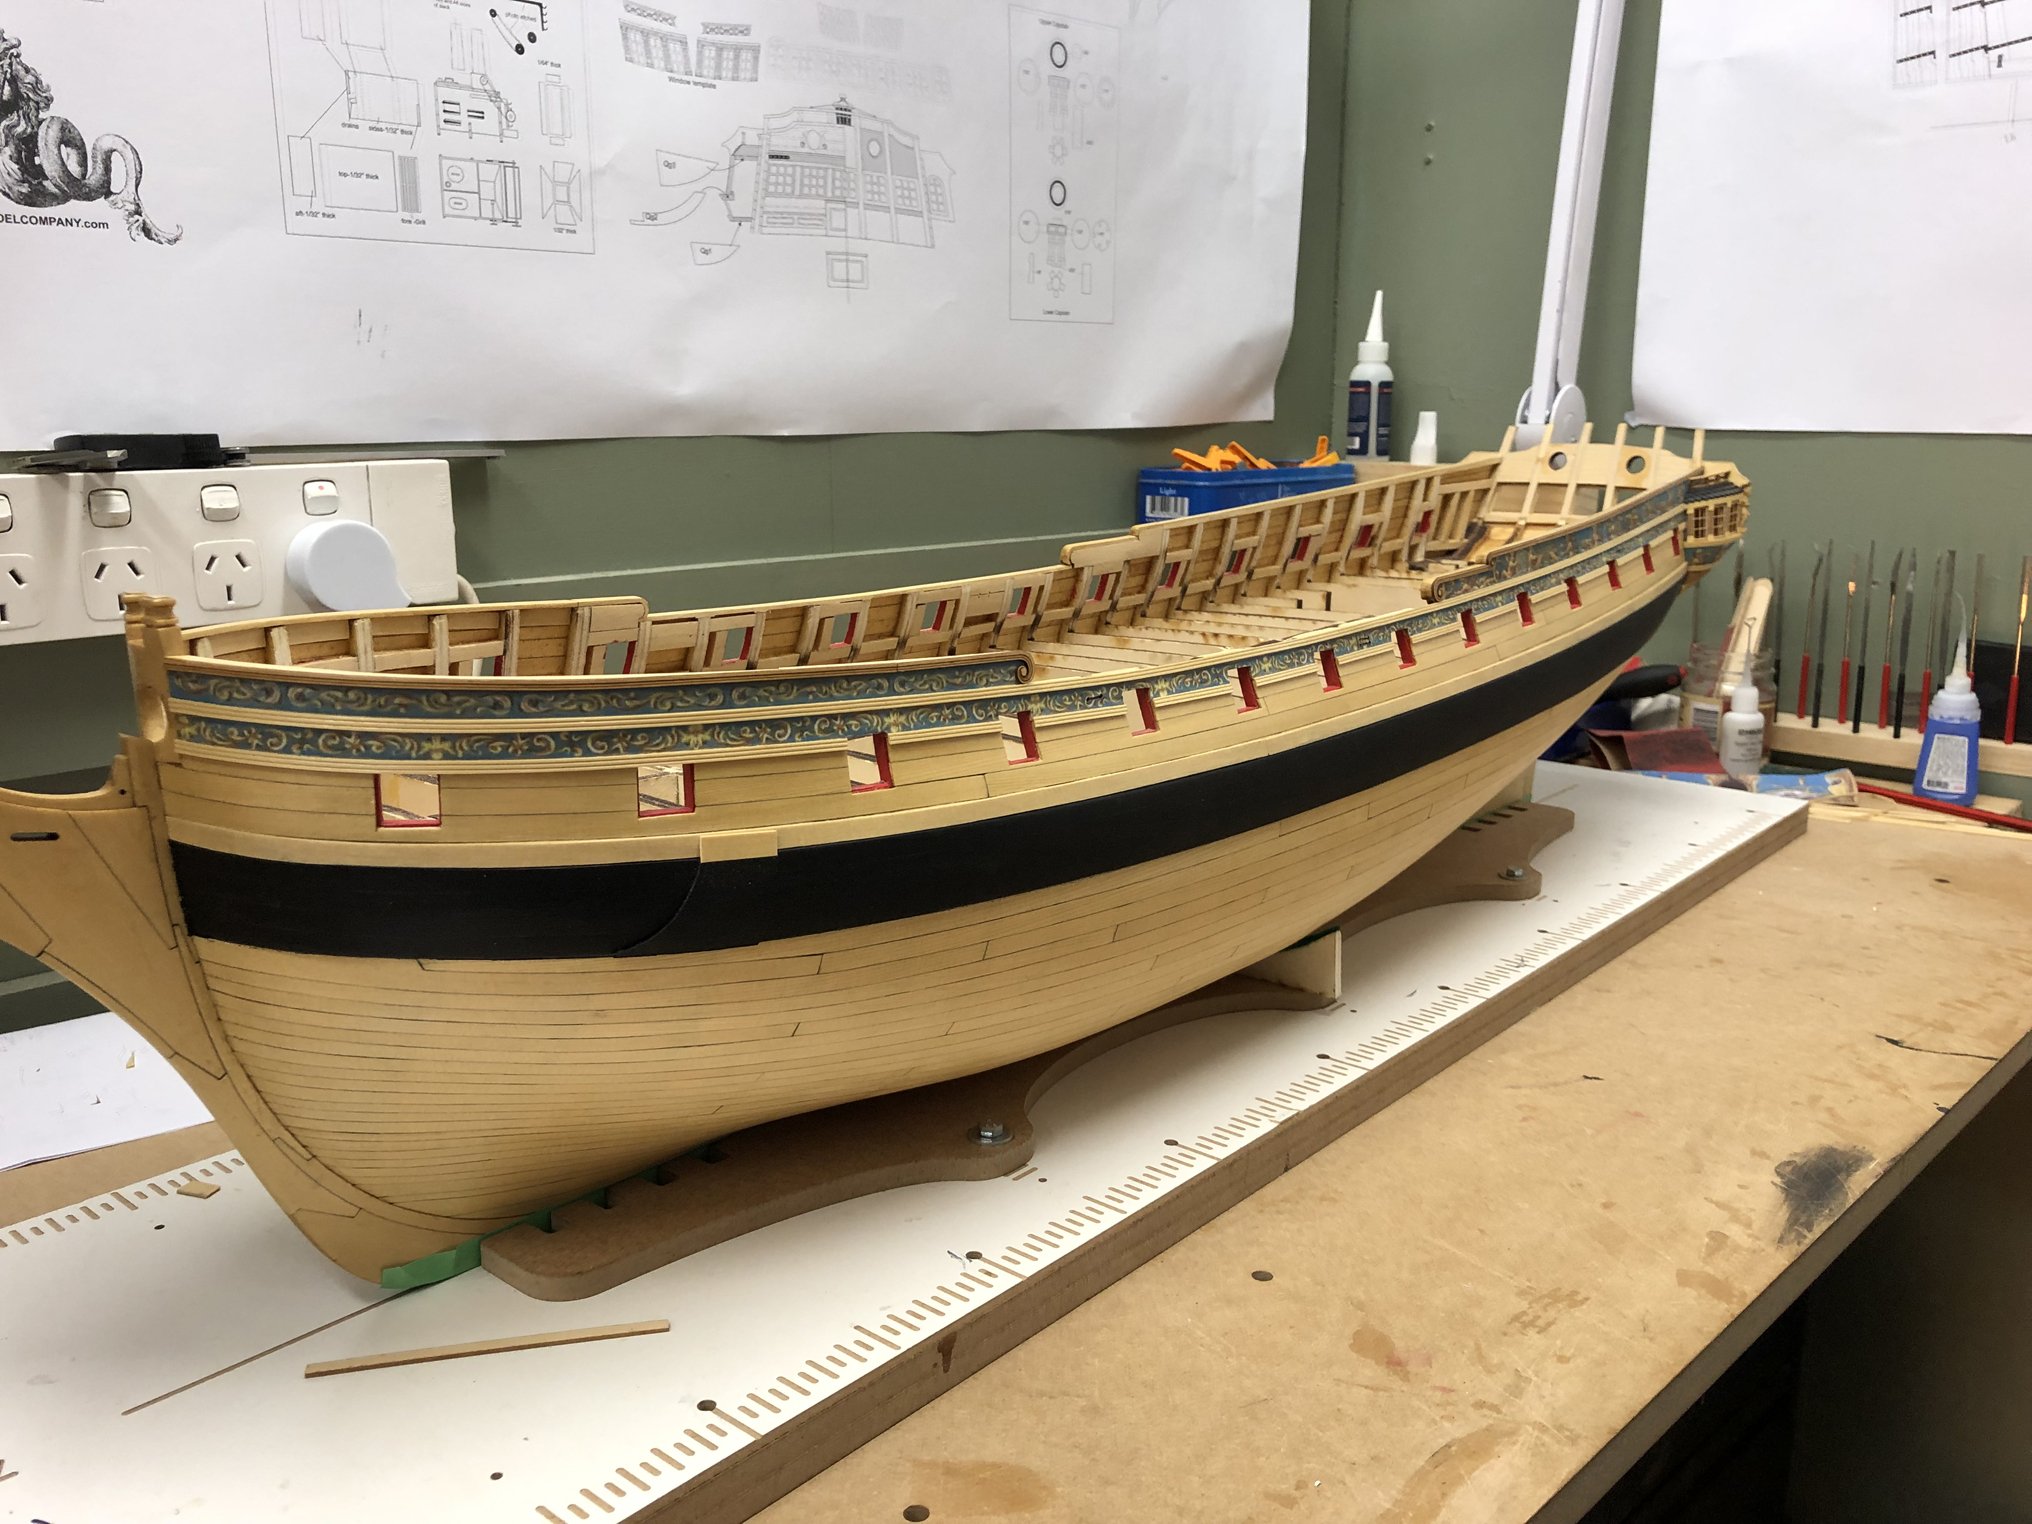
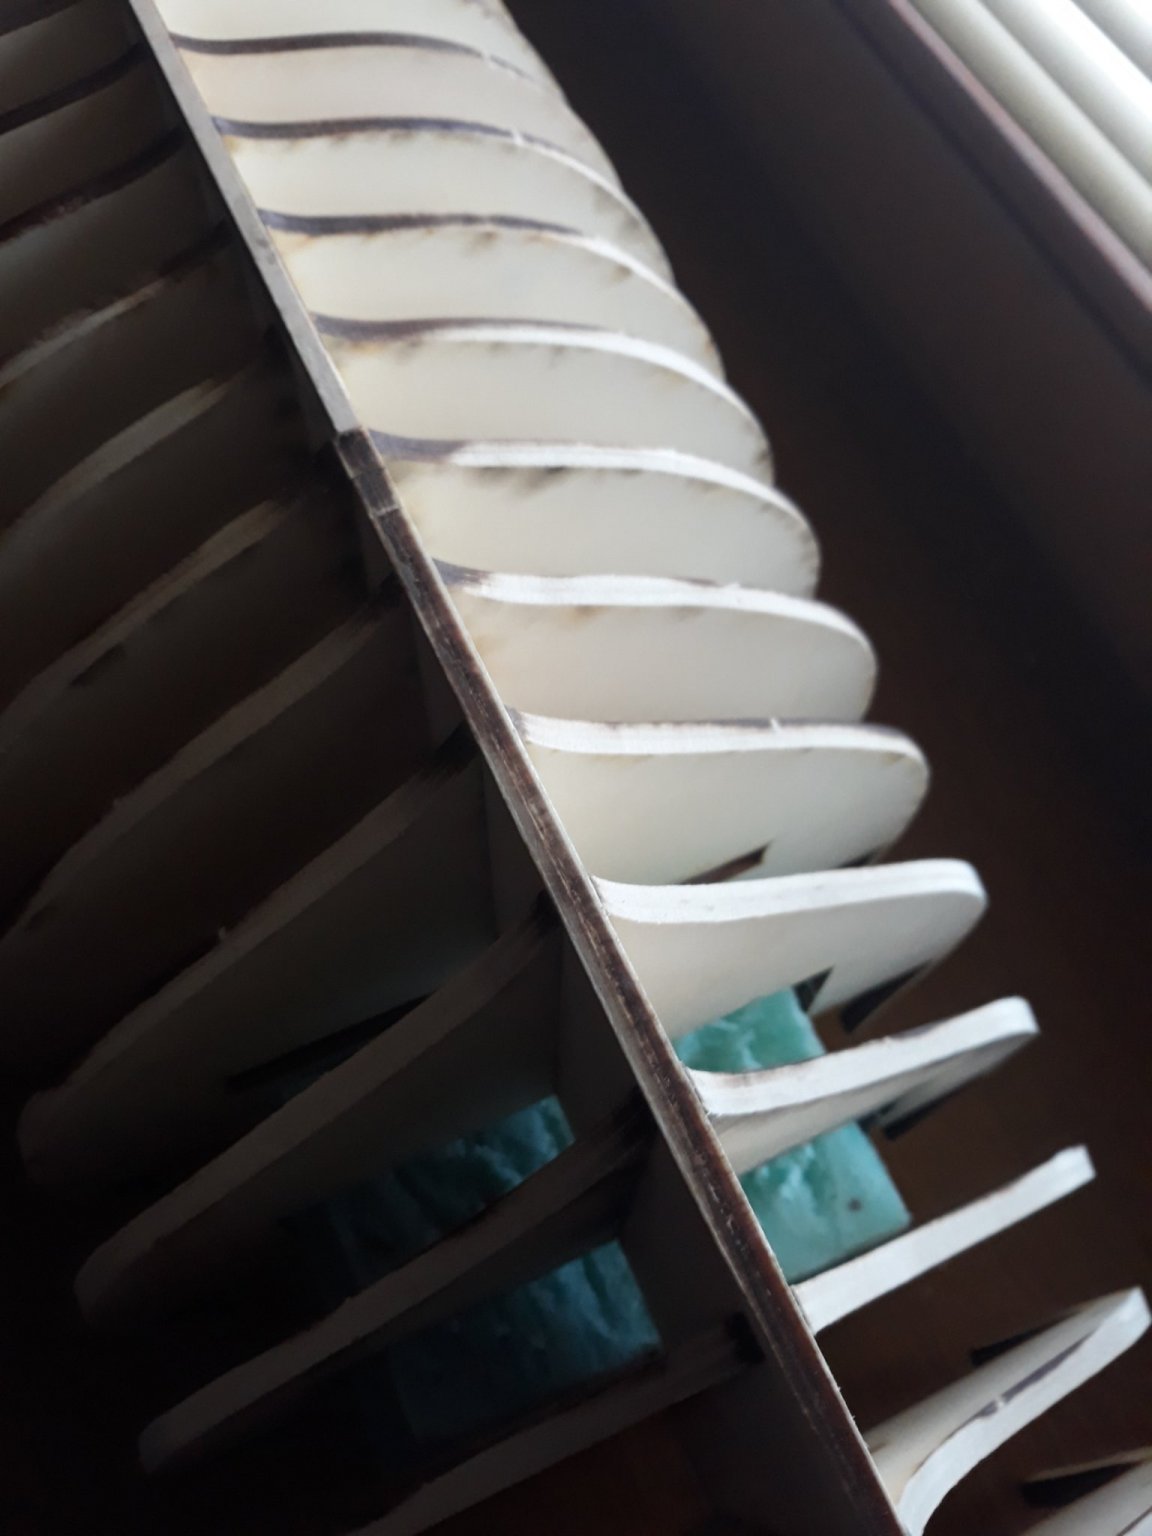
Good weekend folks,
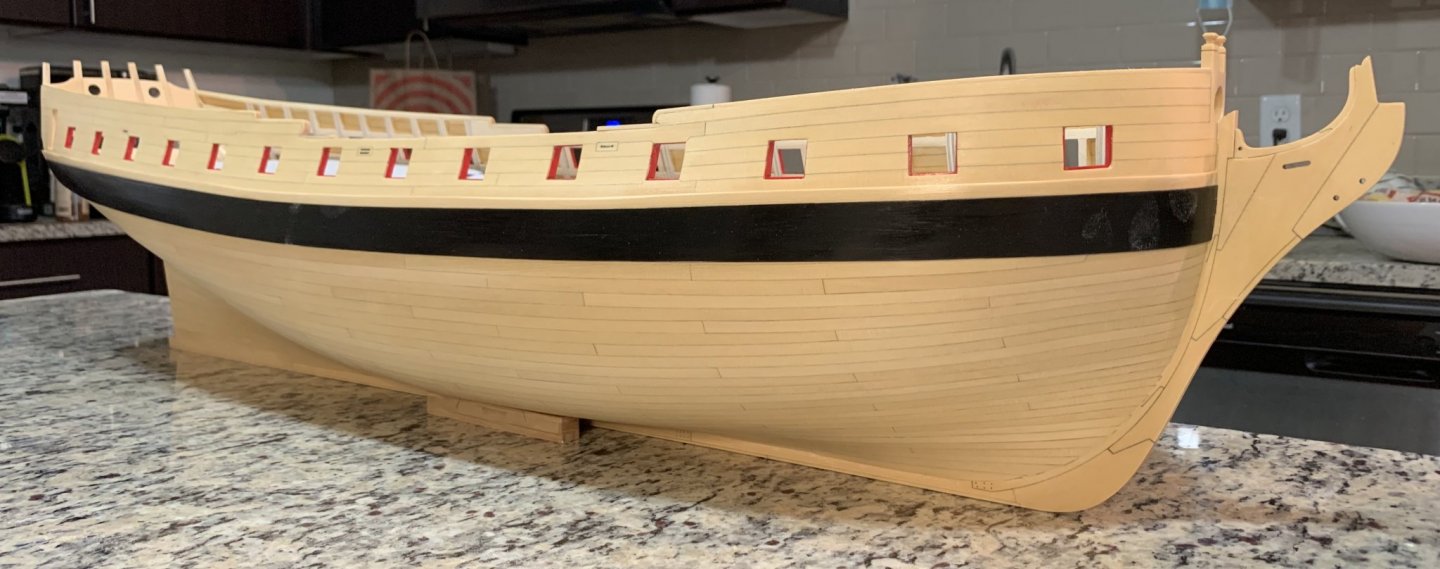
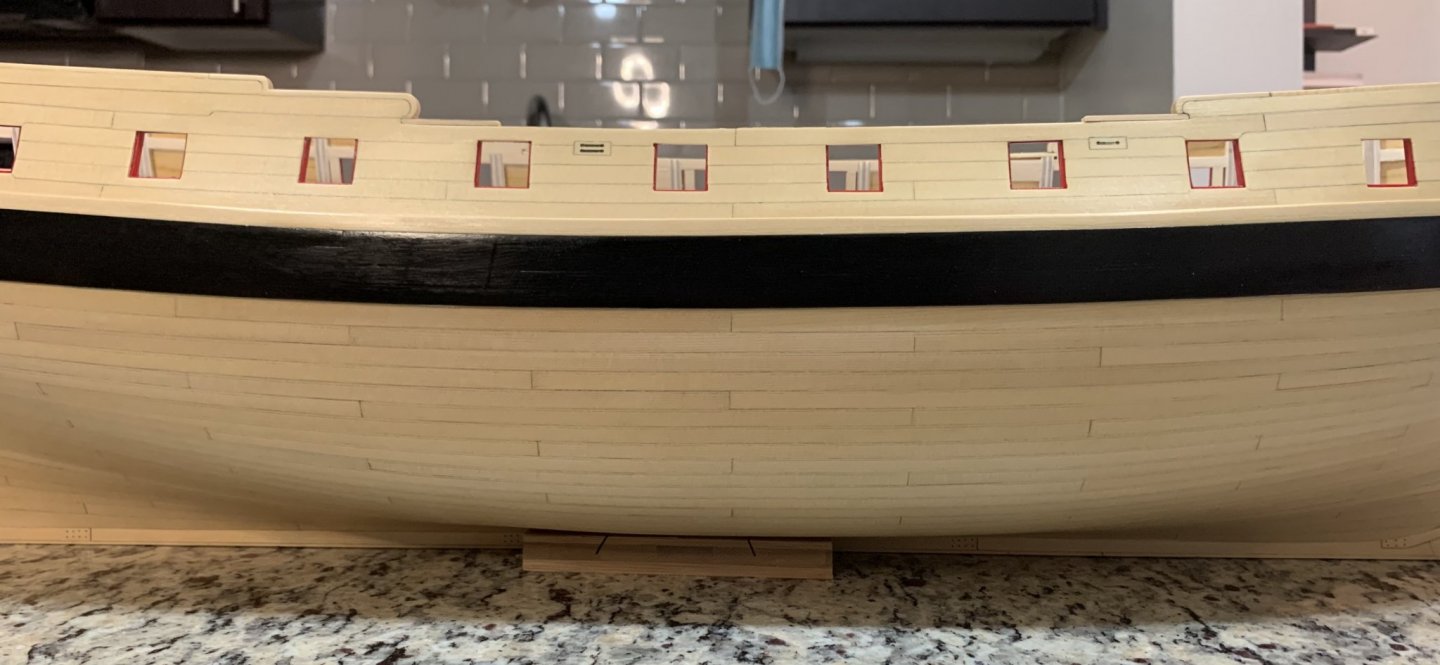
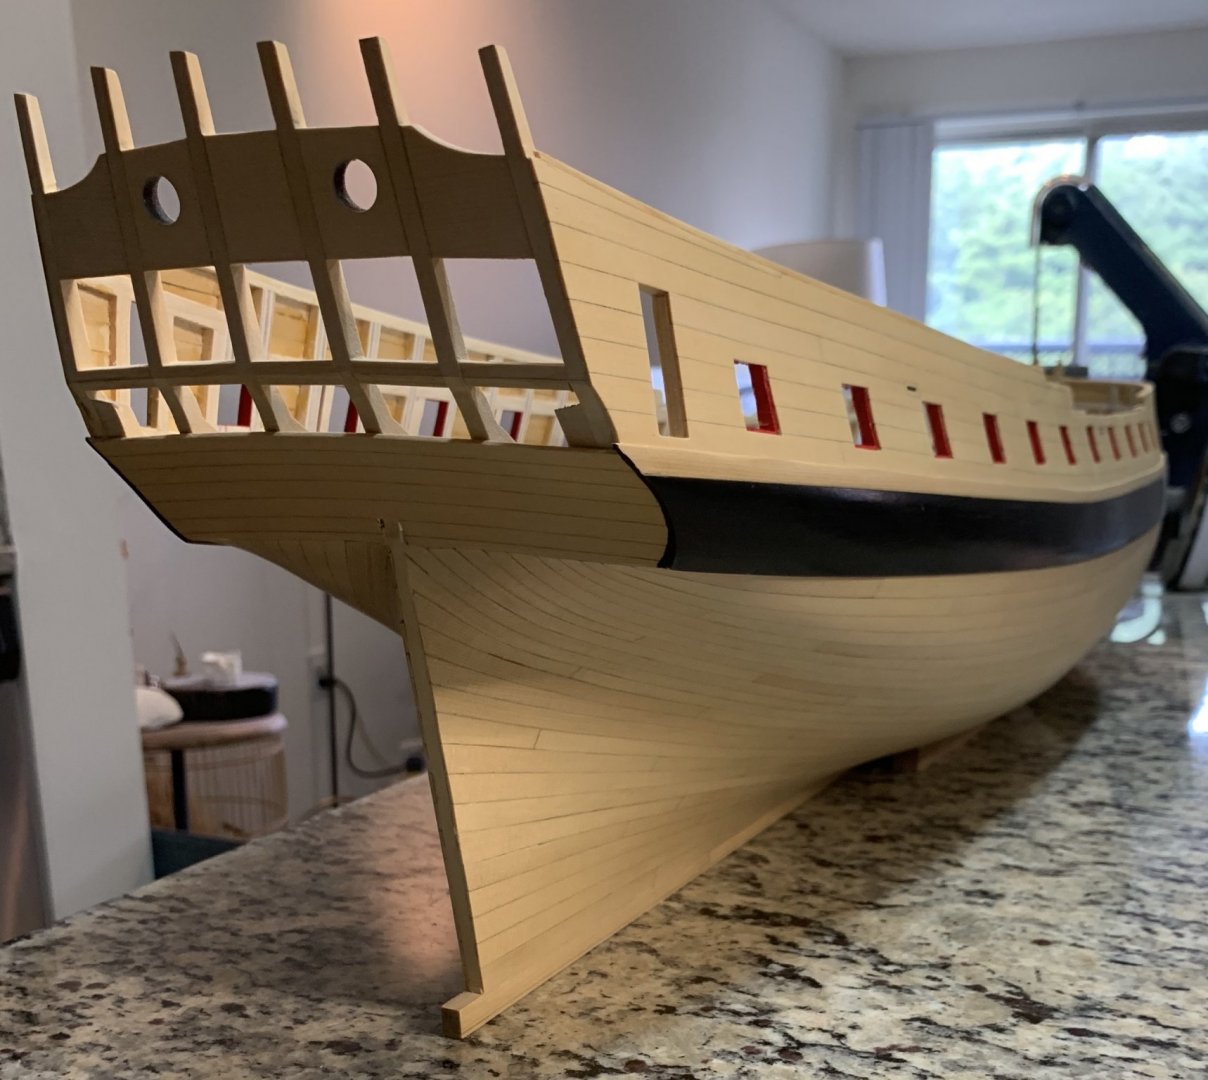
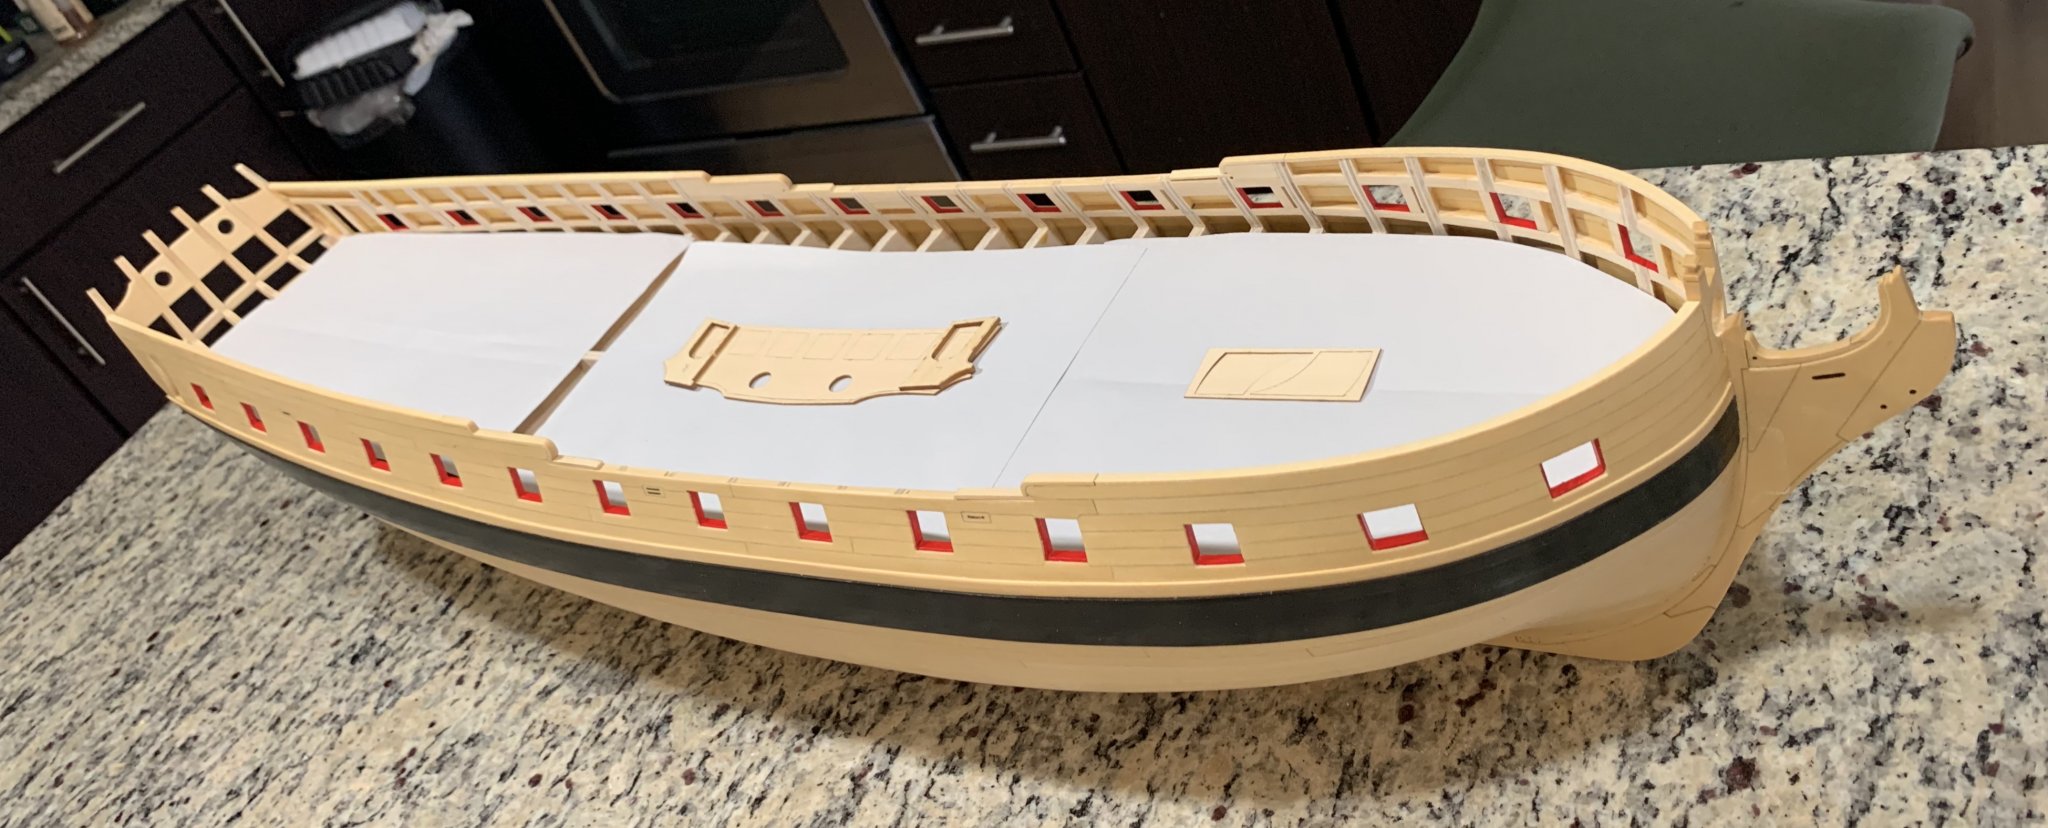
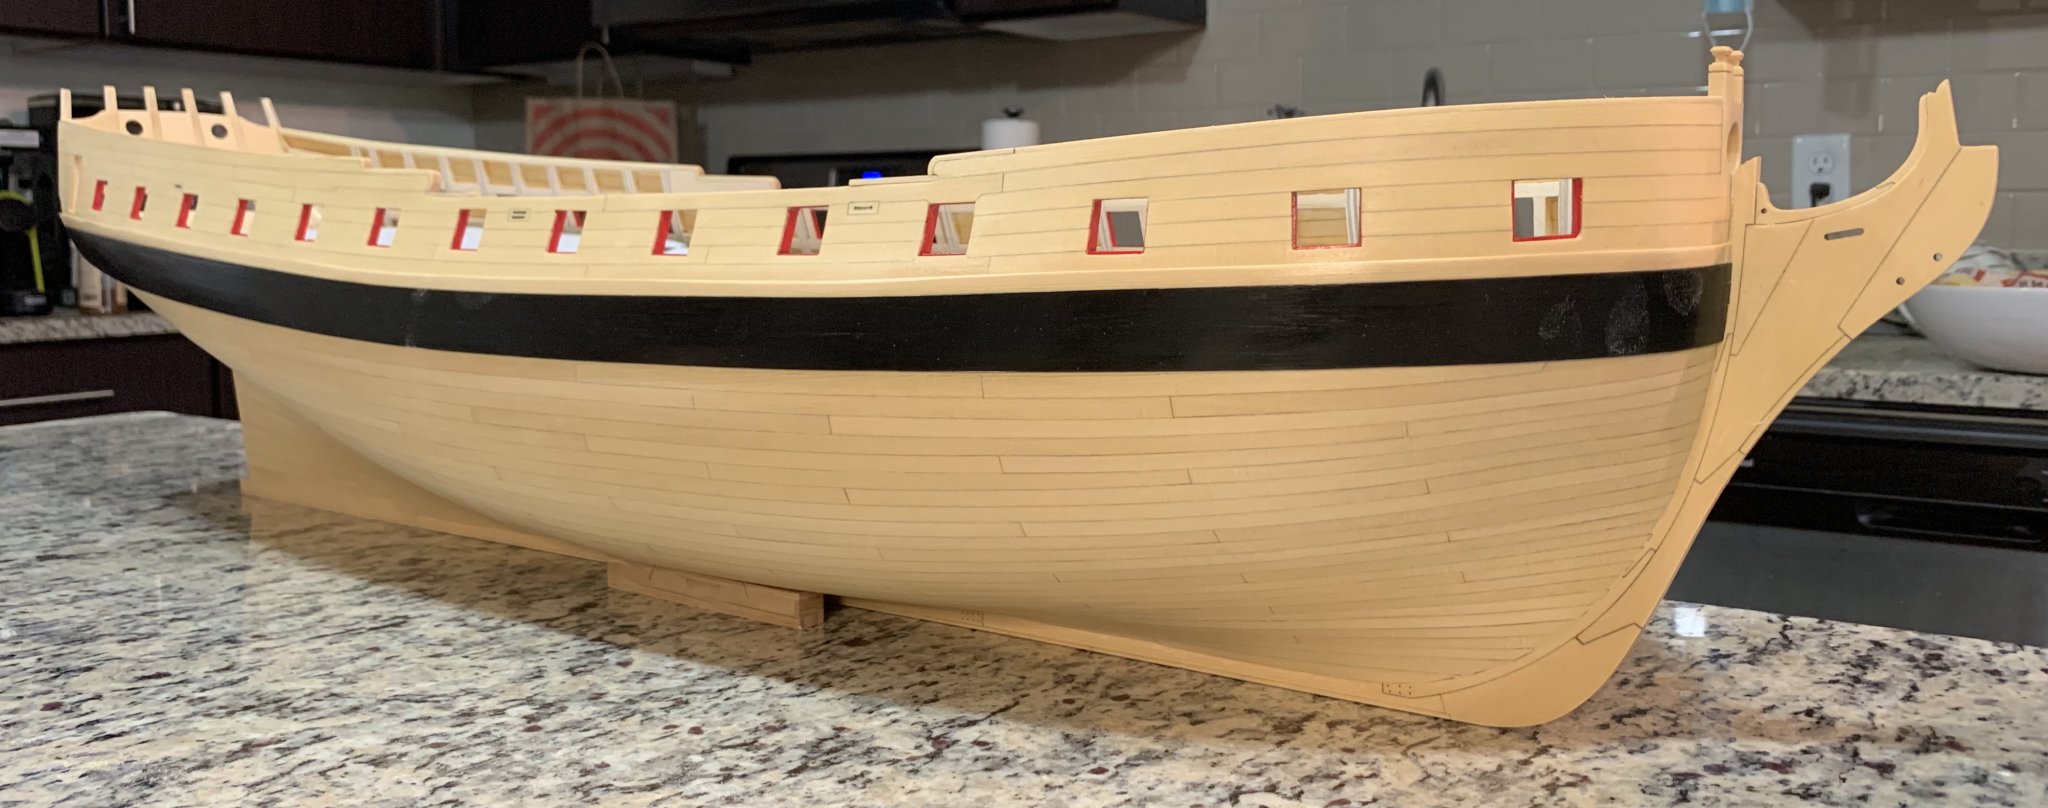
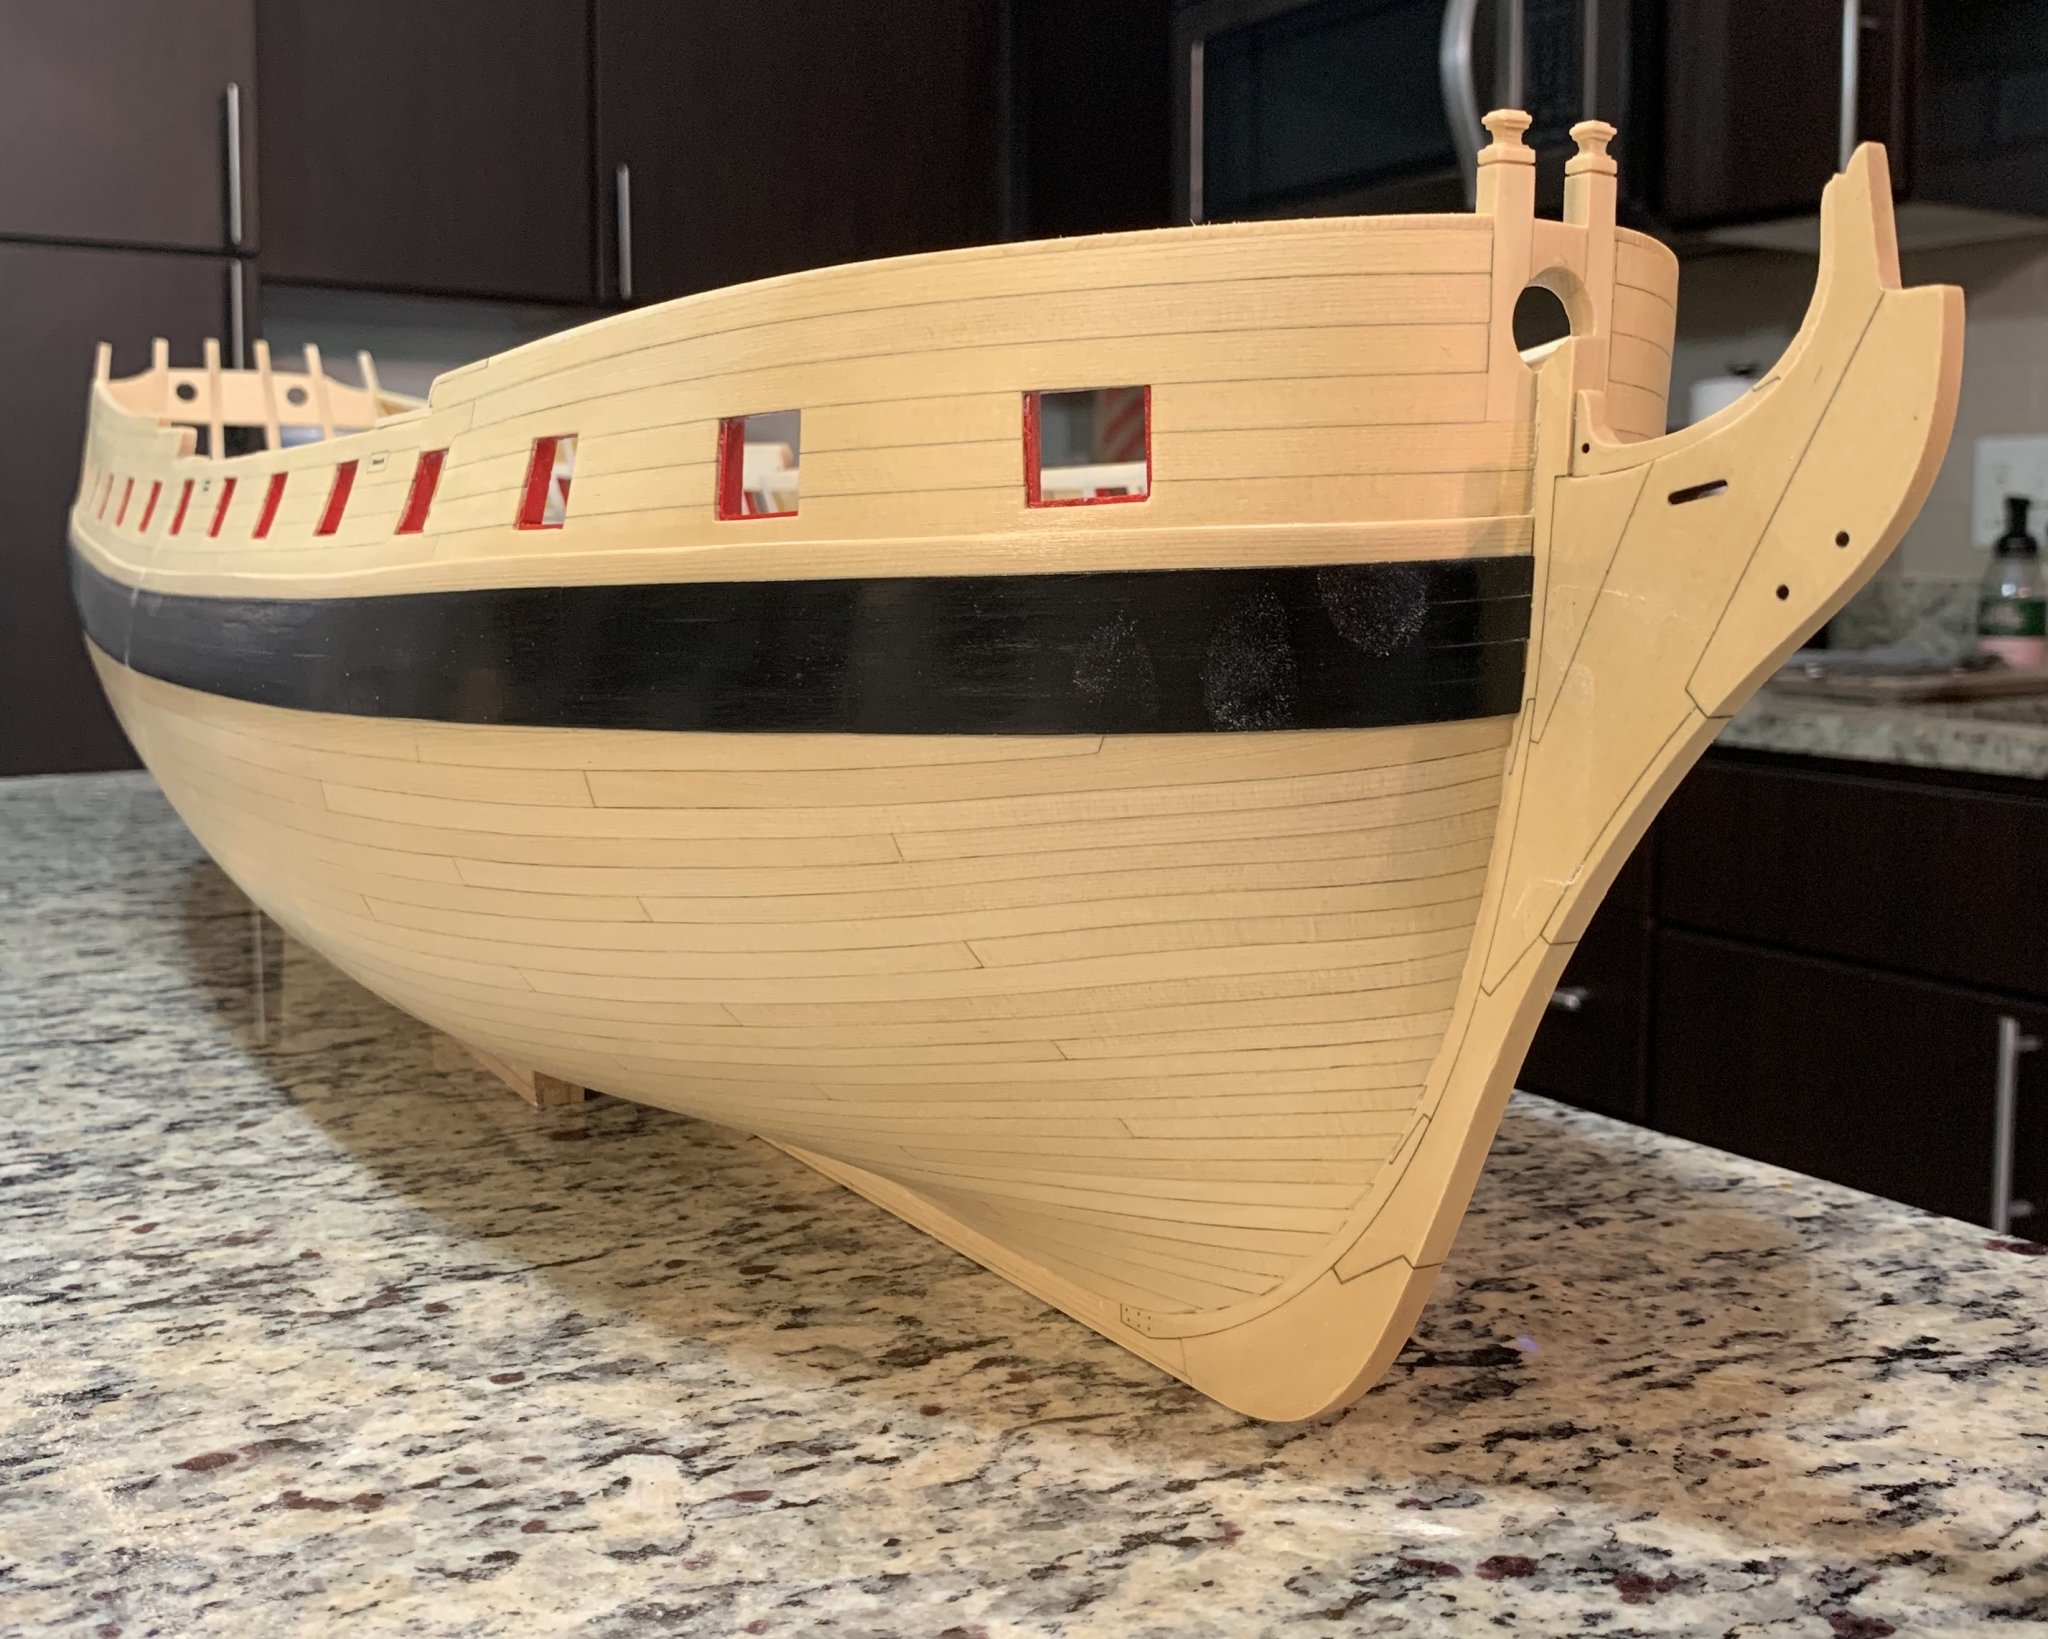
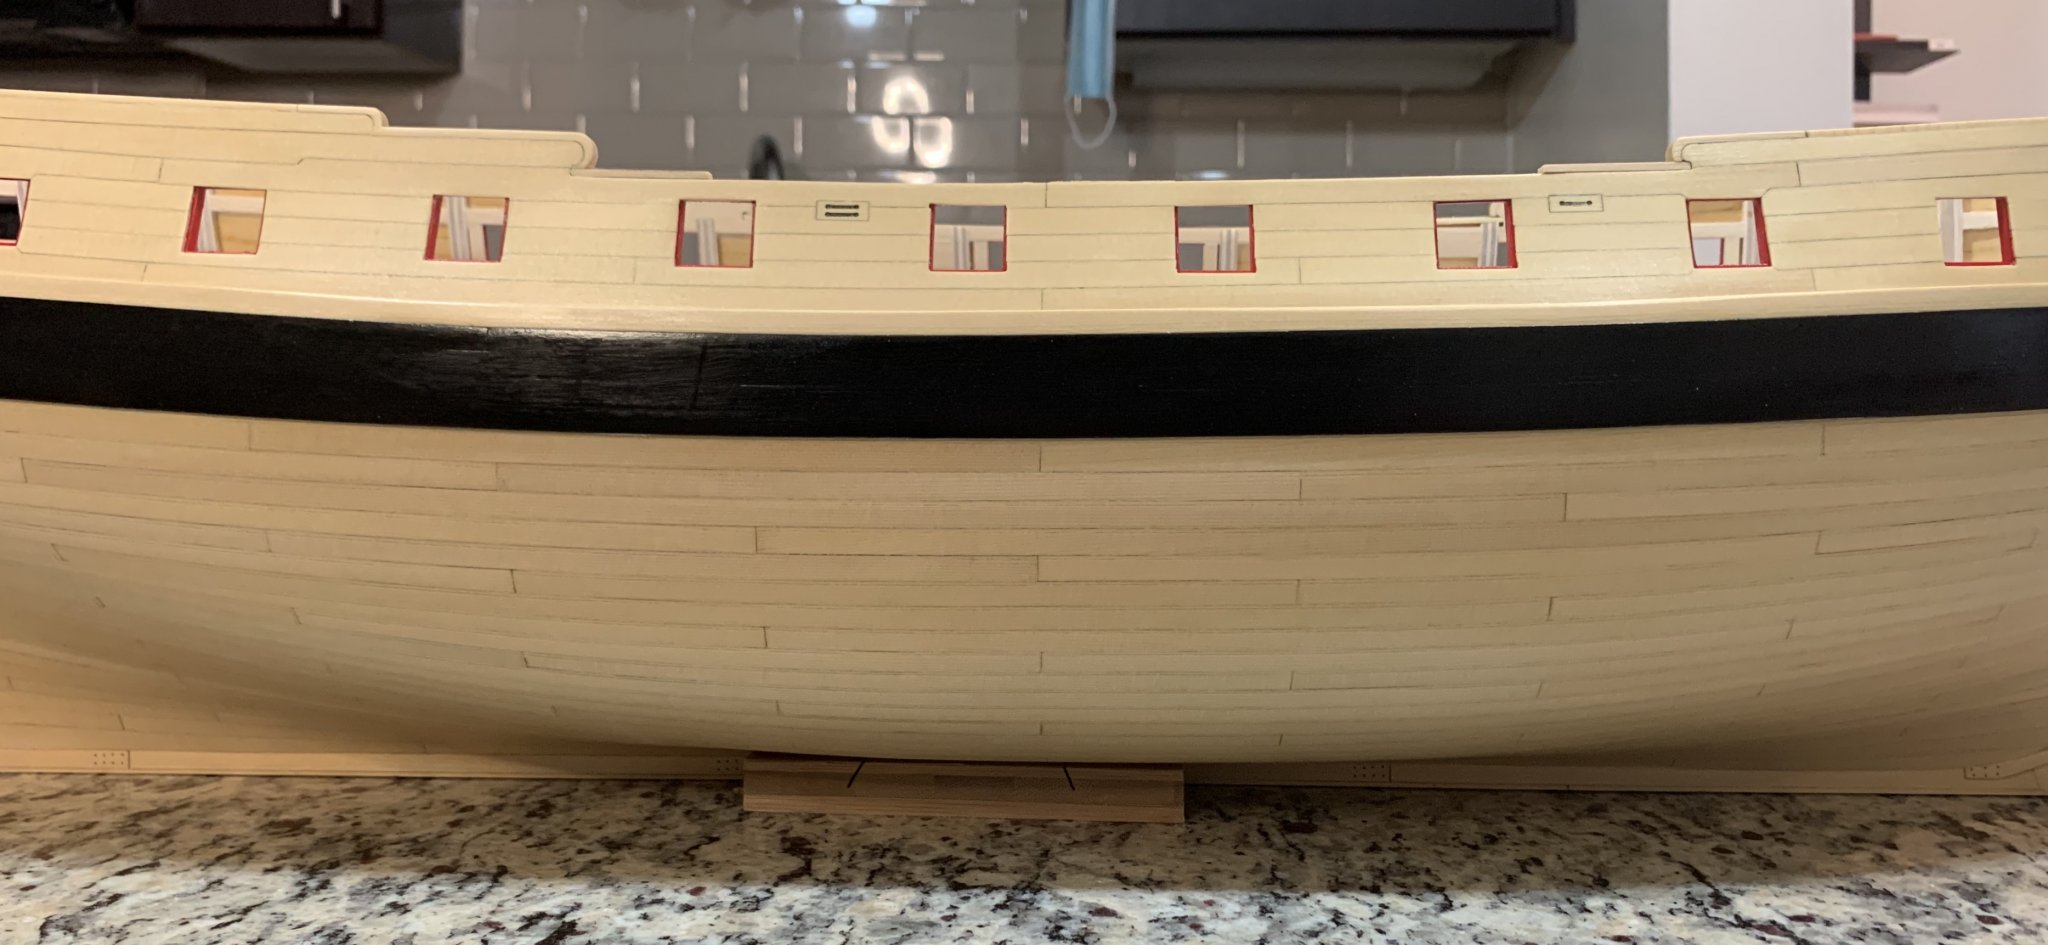
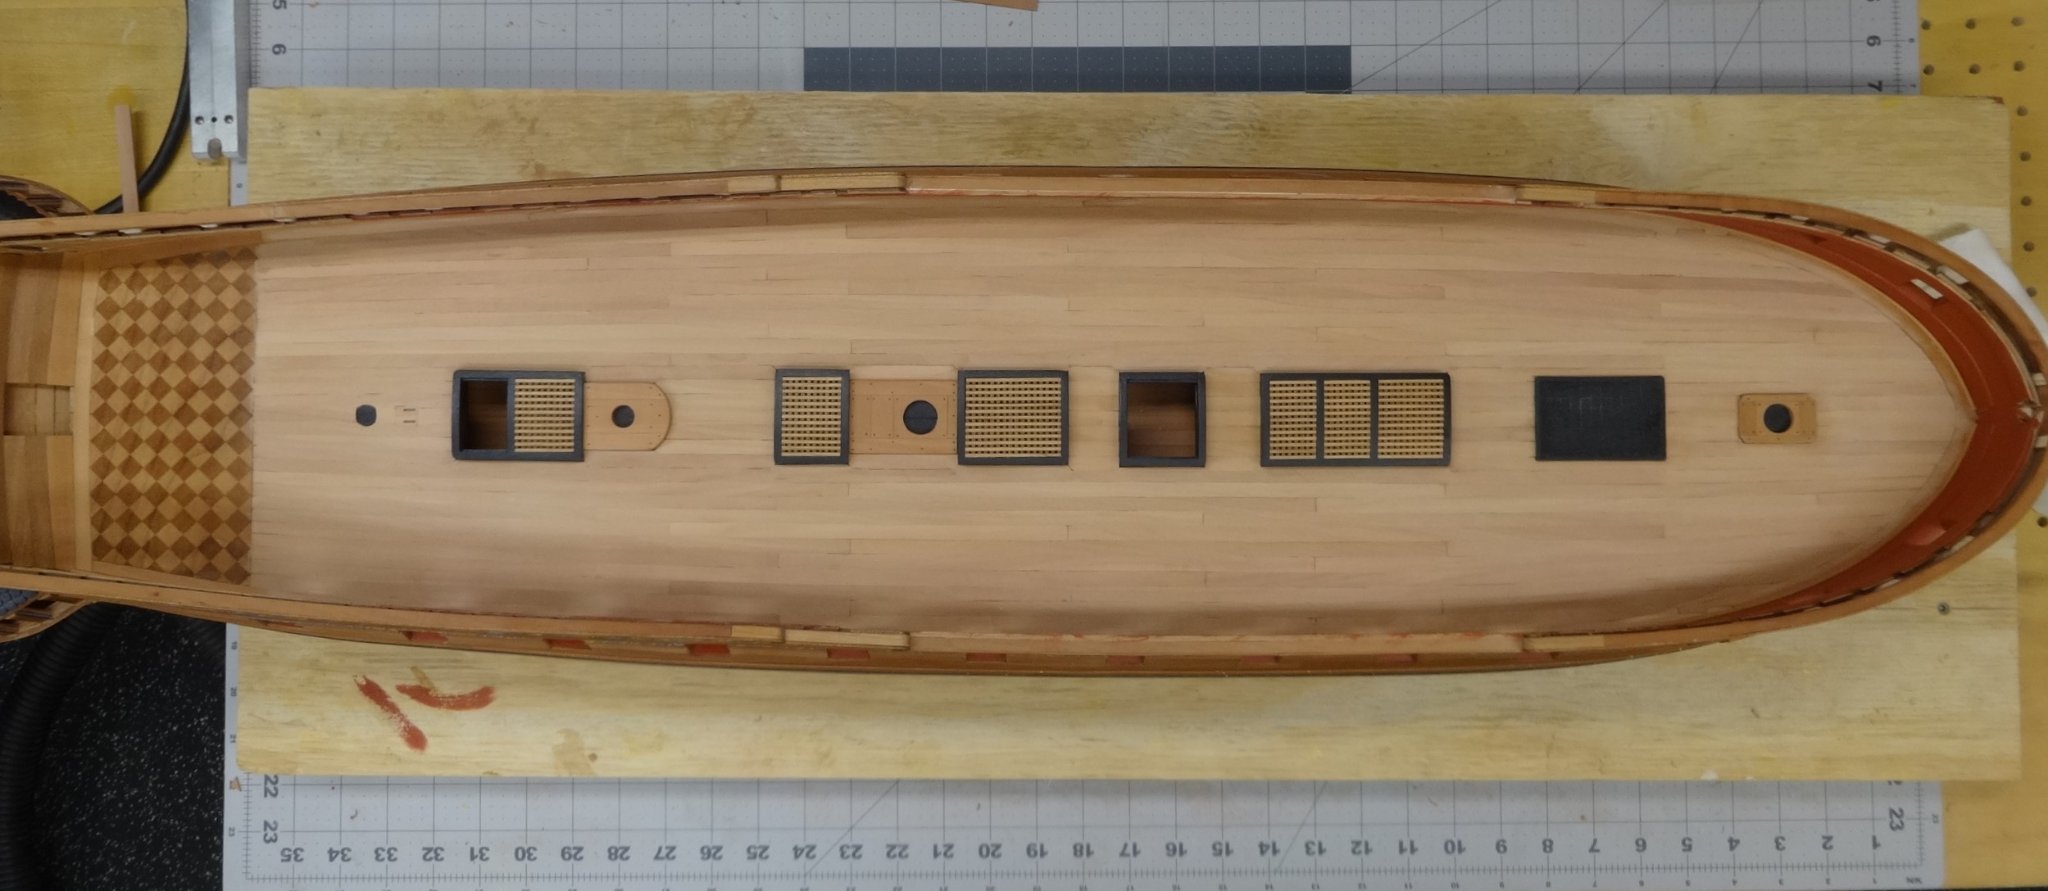
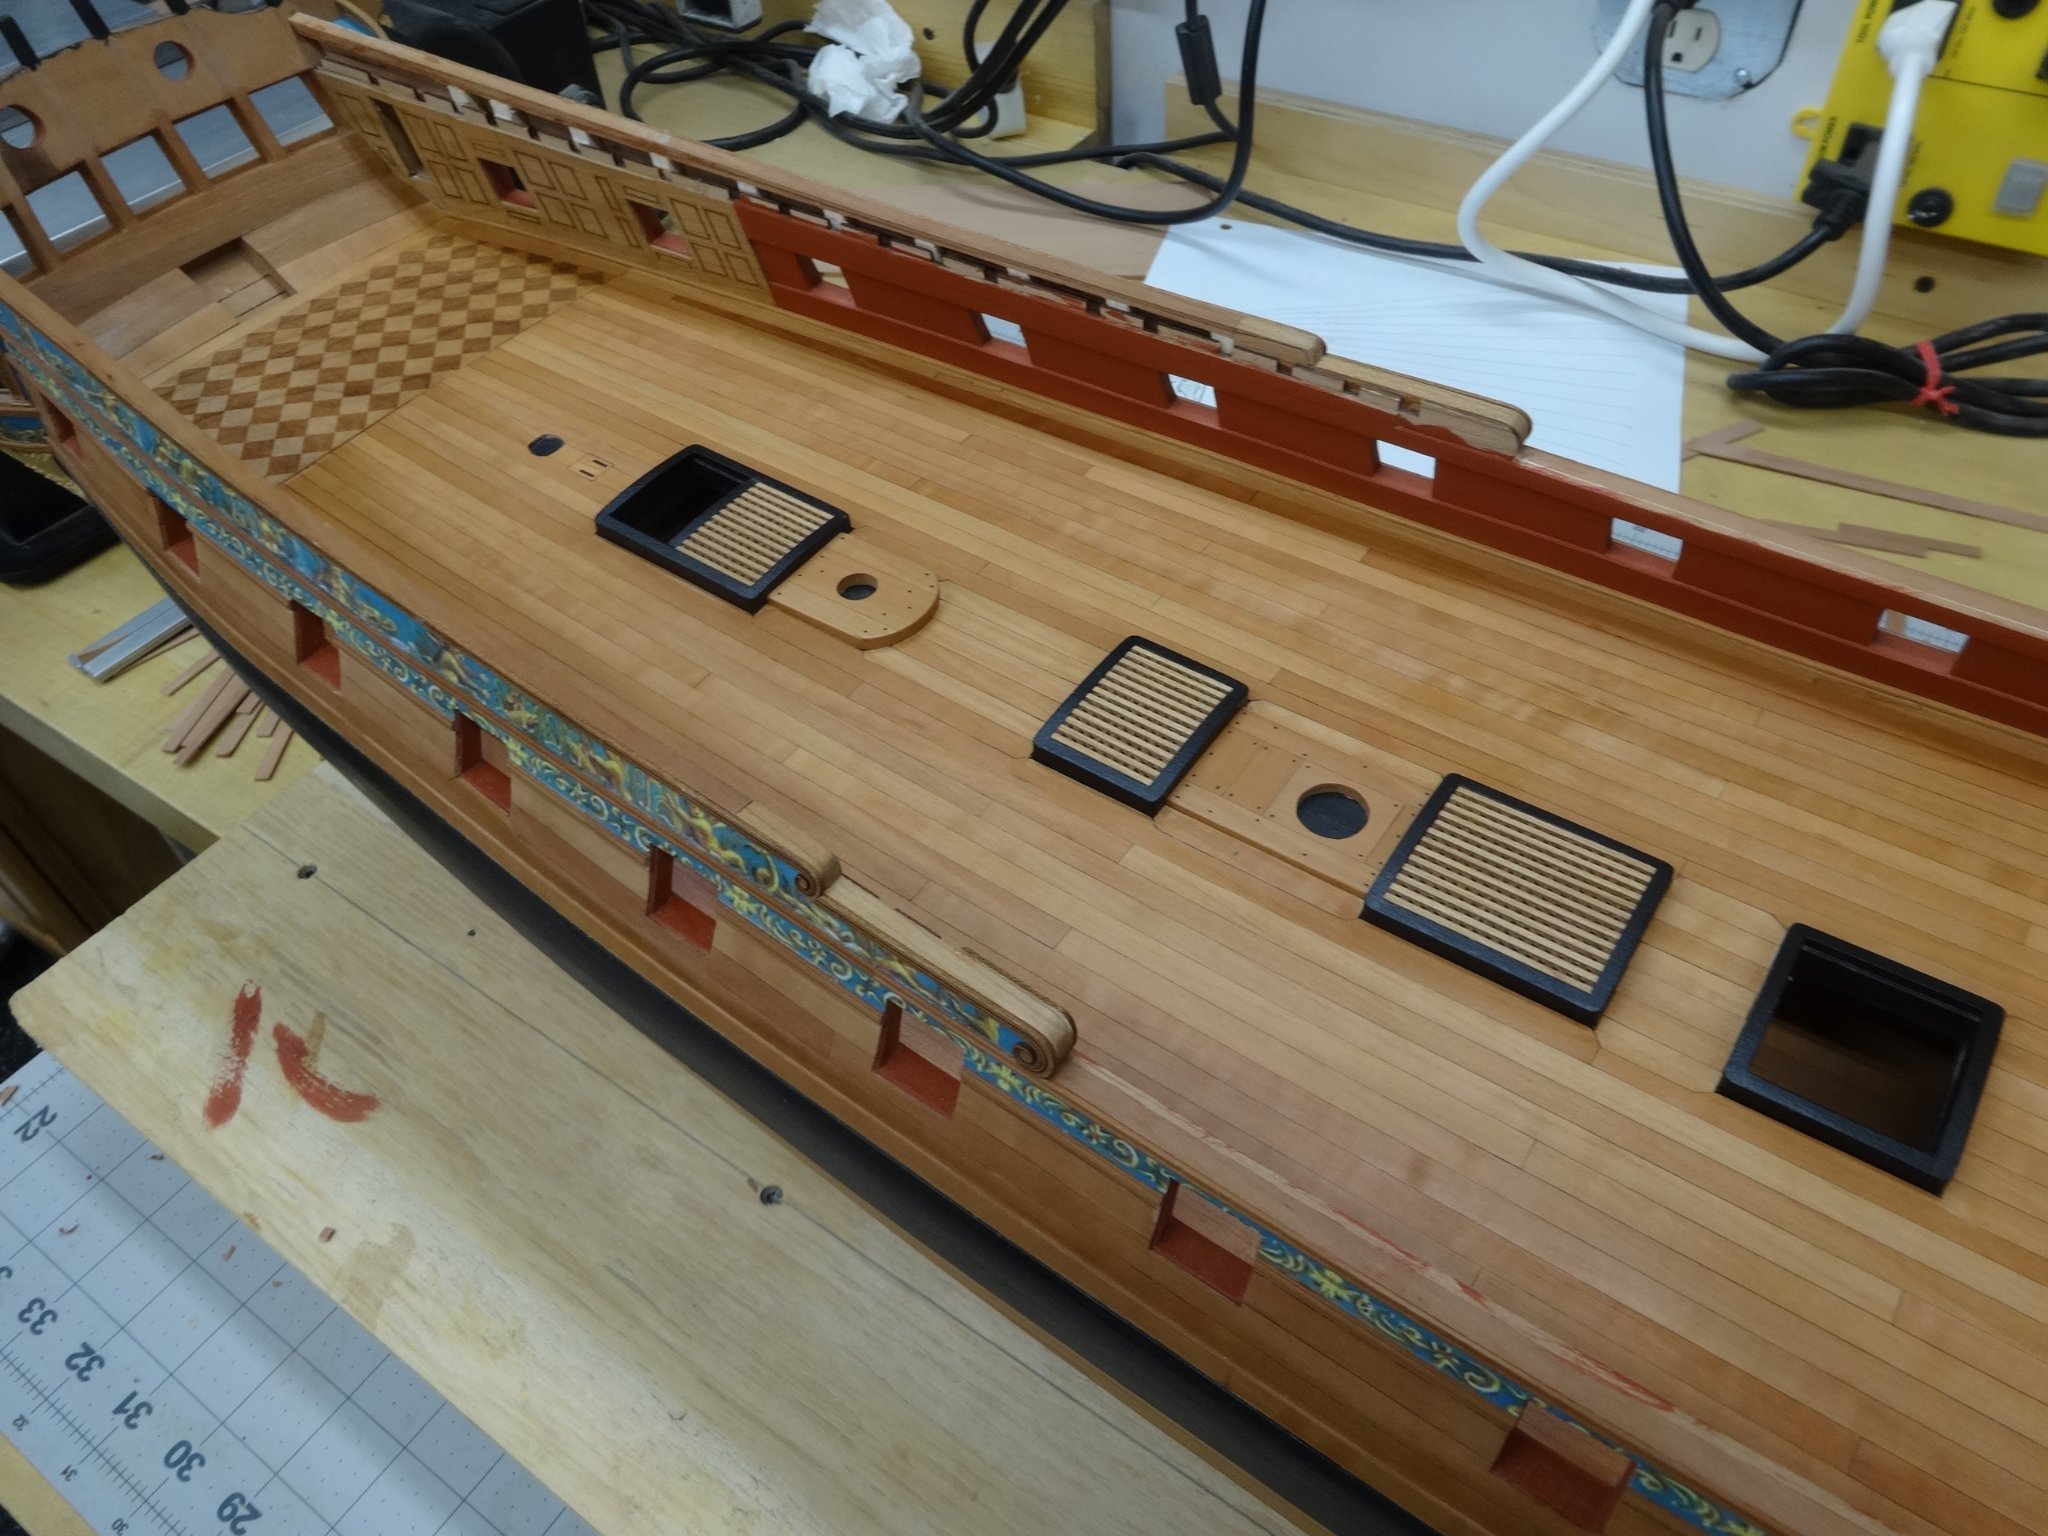
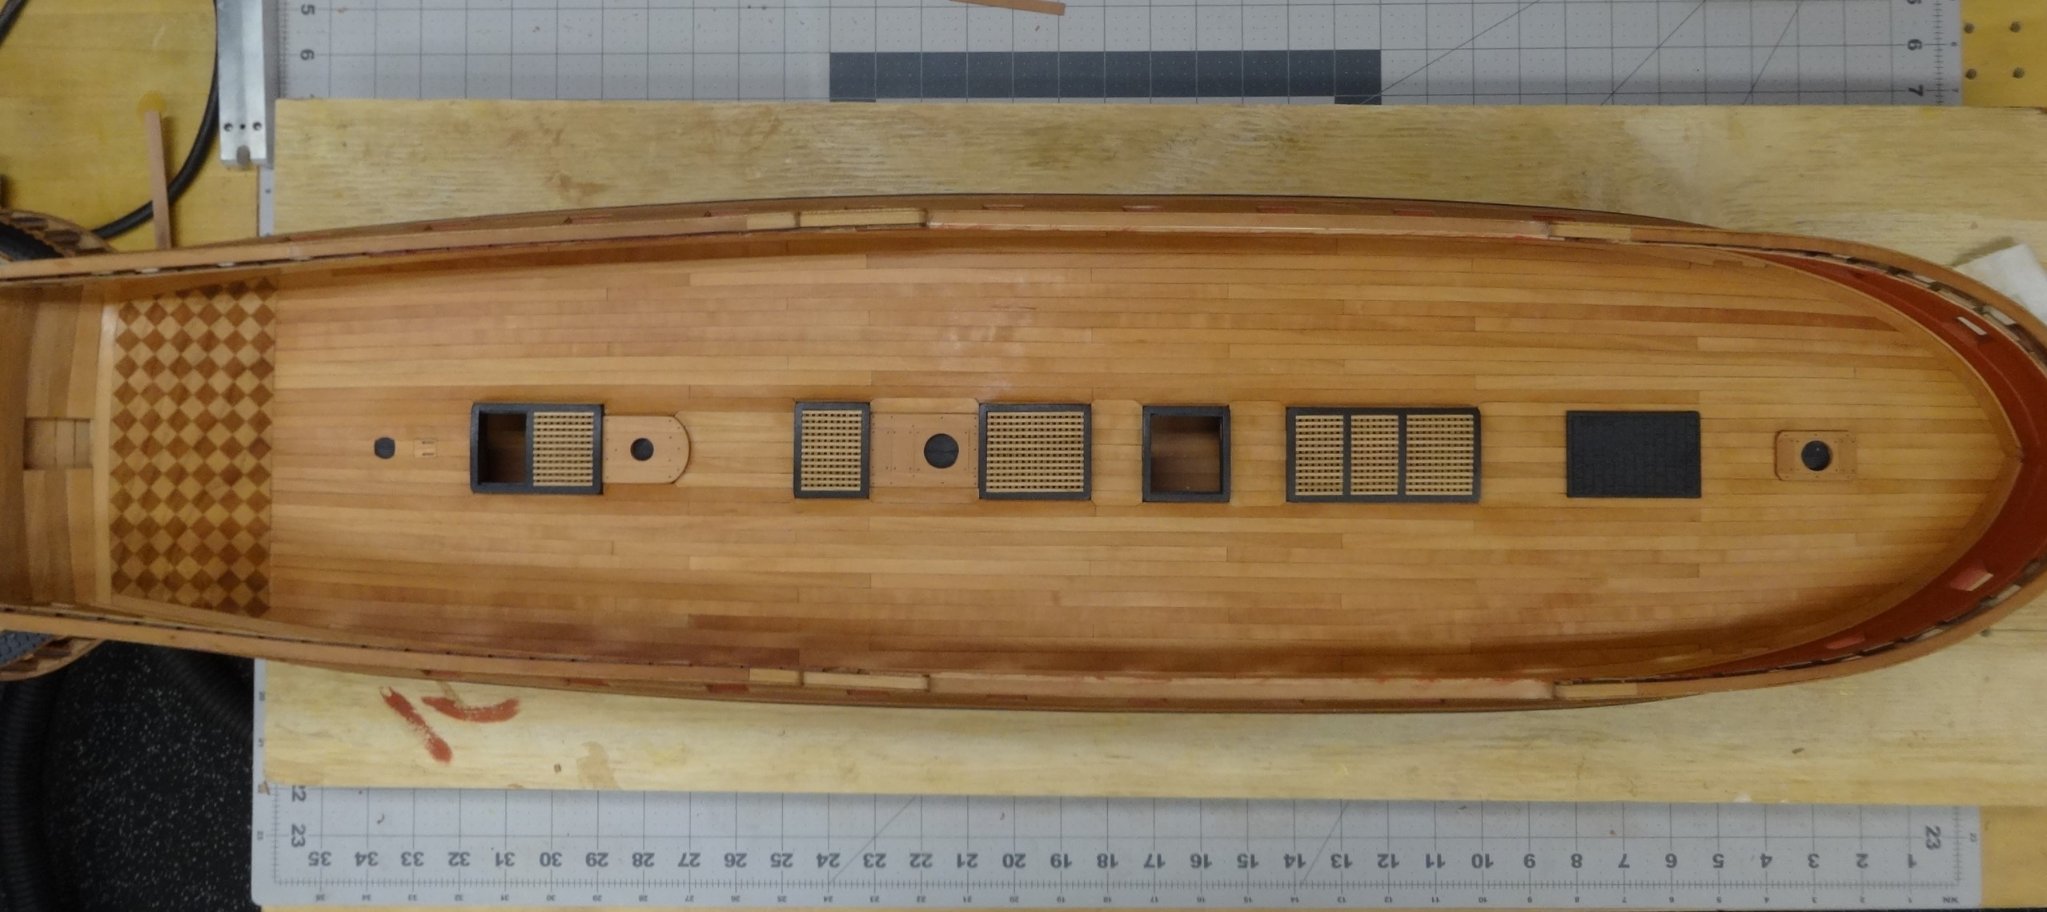
gunports are ready ( apart of three at bow which should come later... ) I took veeeeery slow aporoach with those ( 3 days :)) as instantly understood that even slight not sqaured line would destroy line shape in planking from every point so i tried my best ( complaints to my eyesight:))
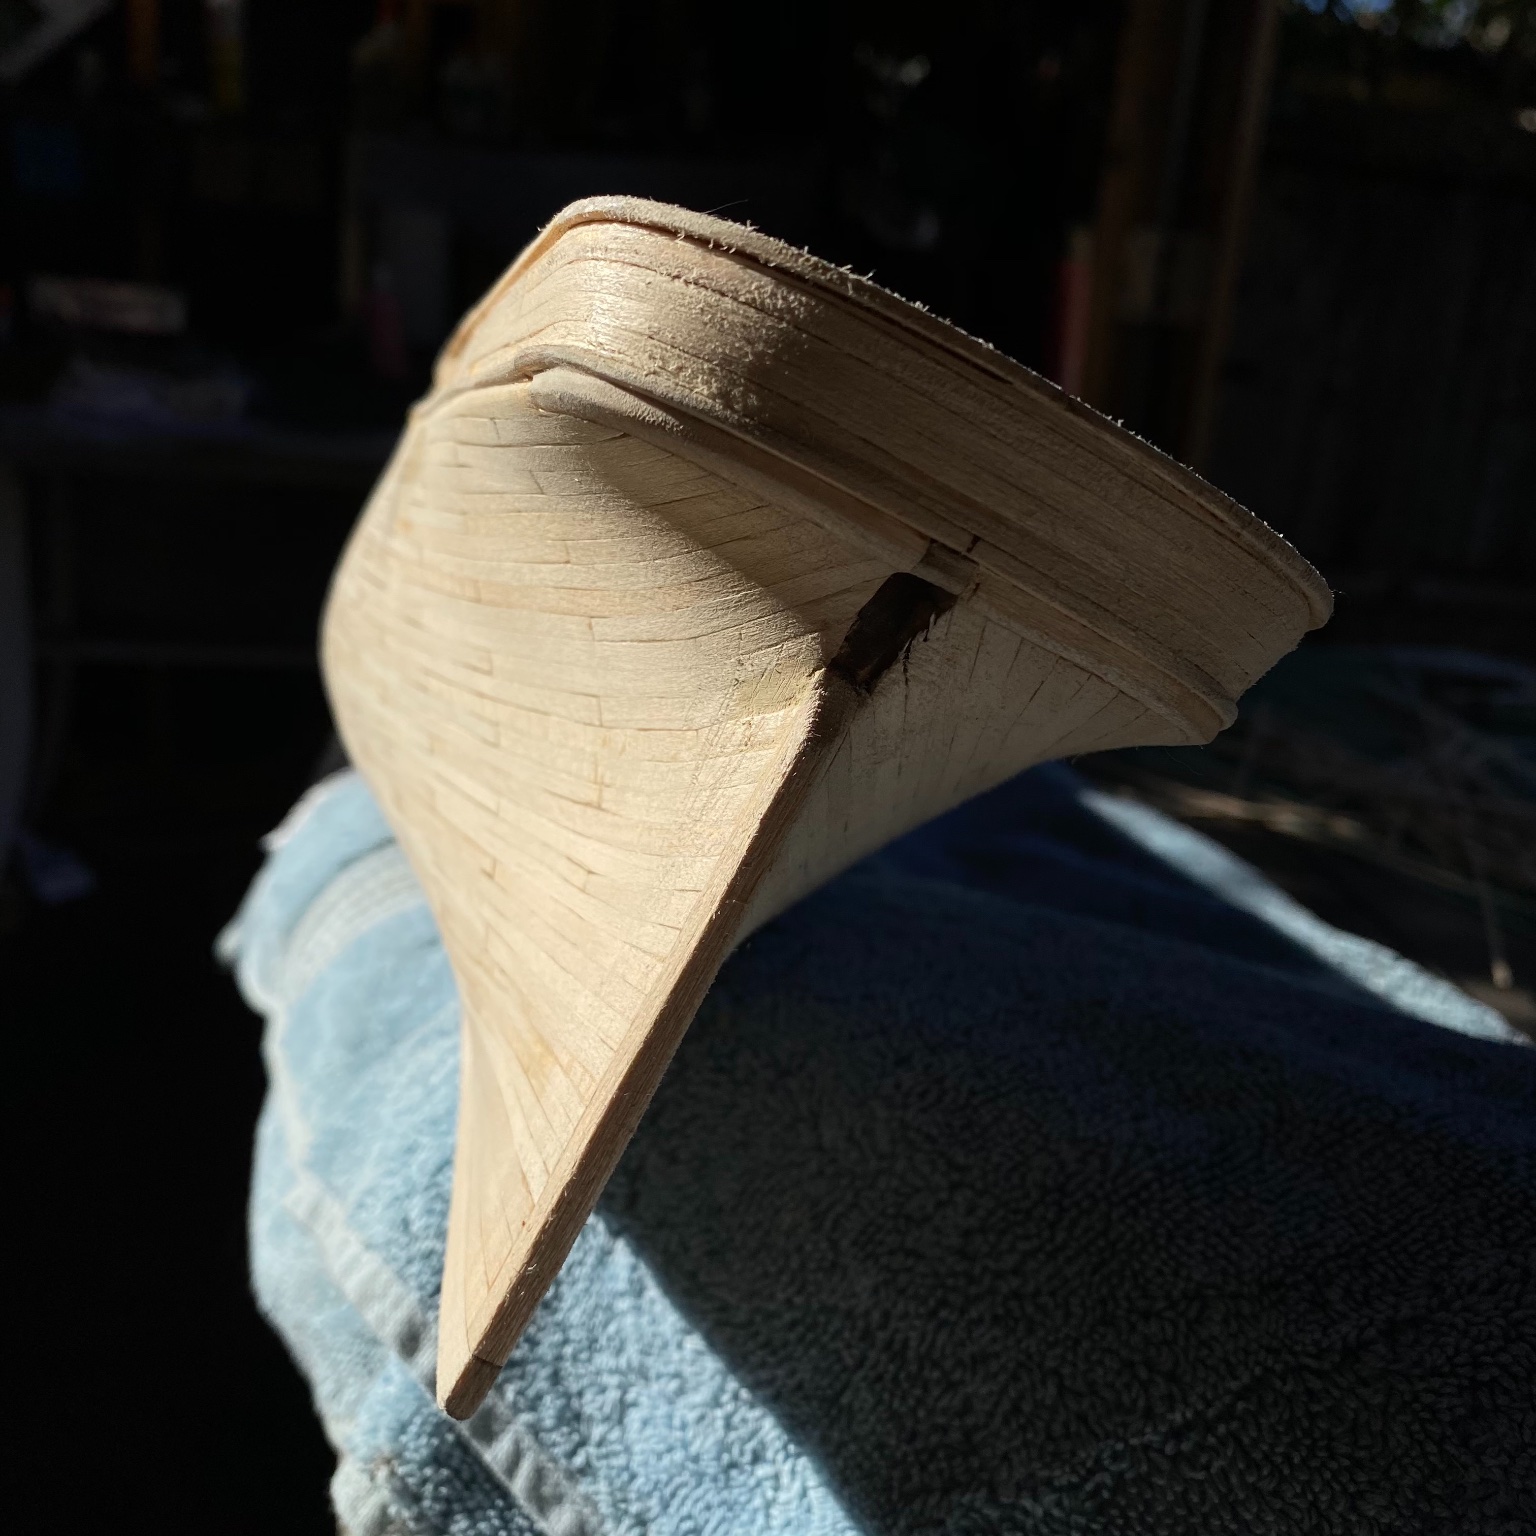
firstly i checked bottom of boat to see if rabbet line is straight ( as i dont have keel yet secured)....i unglued one piece of these sticks as straighten shape - and then glued back one that fit correct shape. then i Slowly found my way and after some initial struggle and unsucessful attempts to get shortcuts by batch i found out that measuring every piece with pencil is fastest and shortest method. I made square mold with shape of sunports so that gave measure and shape easily. I made sure to sand endings as flat as possible so they could stick to the surface as tightly as possible as i dont want them to unglue when sanding. Im still scared how i am supoosed to sand them safely. :)) maybe someone has a safe hint?
i have to read Chucks amazing tutorial closely.
From here i take a xmass break and wish Everyone safe healthy and merry christmas ! So i can start after christmas with upcoming parts and with pleasant work comparing to theese two initial tortures ..i look forward to keel stern structure and paintm after that i smell horror because someone call it "fun part" - panking but frok gunports line i see all of them will have to be bent ;D so scared. Thank you for comments etc...and enjoy the pics.


- scrubbyj427, Greg M, rafine and 5 others
-
8
-
4 hours ago, scrubbyj427 said:
Hey Guys, both ships are coming along nice. If you’re going for the Darker look I’d follow rustys log, he used cherry and Caldercraft red orche, which I used as well. That will definitely give you the dark red color you’re searching for.
JJ
Rhank you JJ, i will sure look into it.appreciated Vlad
- scrubbyj427 and FrankWouts
-
2
-
21 hours ago, Ron Burns said:
Vlad, she's coming together beautifully! I raided a construction site down the street for my Styrofoam. What wood have you chosen to do your Winnie in?
Well i may change the mind im mesmerized by darker look lately with white windows as shown on i think Jj winnie. i may darken hull by a bit to get something similar to cherry. and for gunports im picking now simple acryl cadmium red from winsor newton, i hope it will be dark red by a lot if i dont dilute it too much. .but thats quite a long ahead ..:) so i may be one of those that would like it to look darker than rather light colored. in not there yet so depends how luck plays on :)) v.
-
On 8/29/2020 at 11:58 PM, Guillermo Eduardo Madico said:
Thank you Eduard an for all the likes.
I have sanded the hull to 400 grid an give it 3 coast of water base satin latex translucent paint. I sanded the bulk guards as per instructions and added the reference cap rails except for the waste.
Thought I will remove the slay to get better pictures.Best,
G


oh flawless! fantastic stuff. congratulations.
- Ron Burns and FrankWouts
-
2
-
On 11/8/2020 at 4:11 PM, Rustyj said:
Thanks Mark and Sjors. Sjors I've been following your Flirt and you're doing a great job on her! Also thanks for the likes.
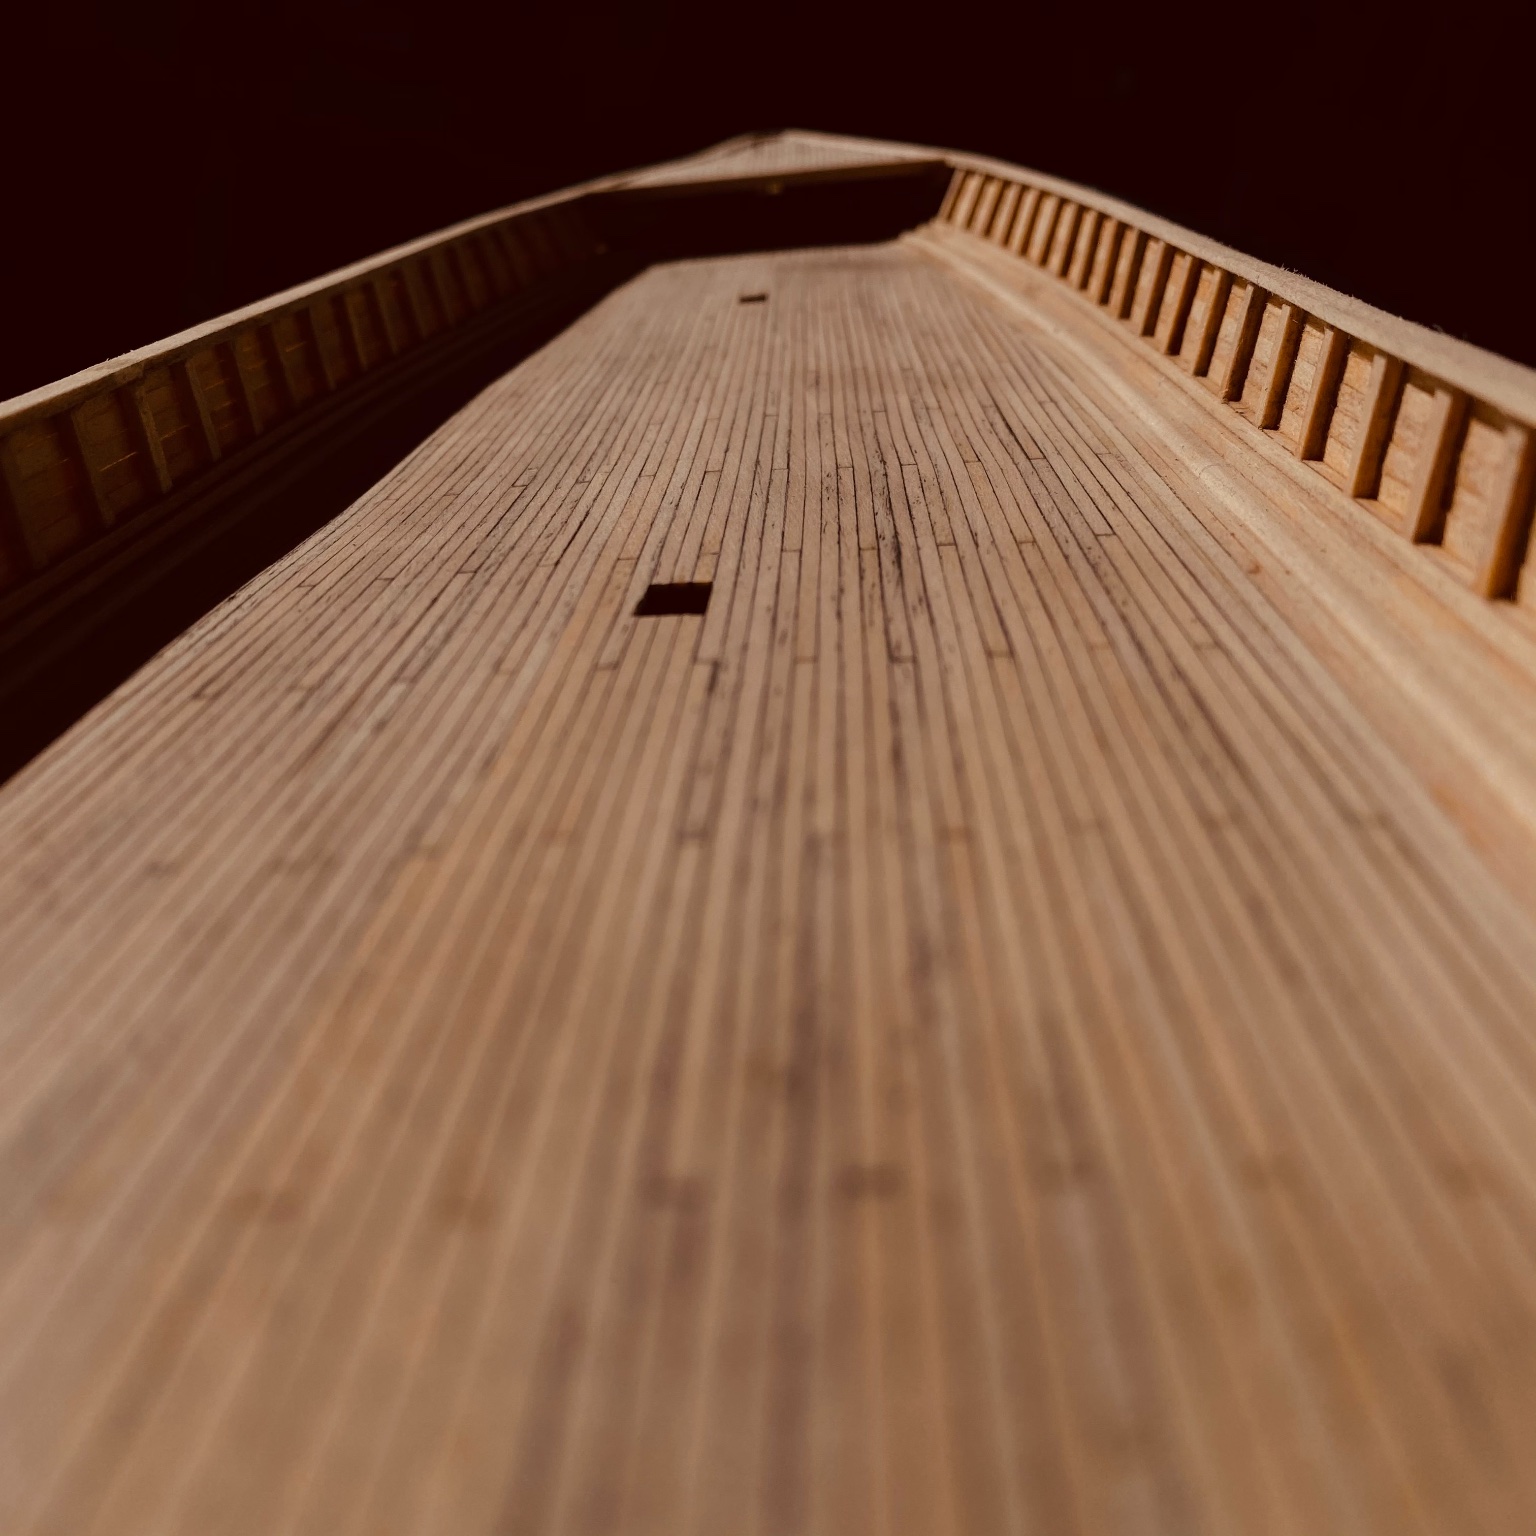
On to planking the deck. I planked her using pear wood. No big surprises, just follow Chucks directions!
")
Here you can see the start of laying the first center line plank and the the filling in between the hatches etc.
Then came the tabs around the hatches. You can see how I started figuring the cuts and just kept making small cuts and sanding until a tight fit was obtained. More pieces than I care to count went into the waste bin!
Here all the tabs have been completed. Planking the remaining deck came next.


First coat of wipe on poly going on. Brings out the colors nicely.


Whew that was a lot of fun!
is this a cherry one Rusty? so pretty !
-
those white windows are what i will go after JJ. fabulous. adds realism. V.
- scrubbyj427 and FrankWouts
-
2
-
-
7 minutes ago, Ron Burns said:
Vlad, she's coming together beautifully! I raided a construction site down the street for my Styrofoam. What wood have you chosen to do your Winnie in?
Ron, thank you for encouragement. your is impressive . im set on european limetree , ( or baswood if you wish) ( by the way a national tree of my country :)) but it is a bit stronger i guess. for simple reason, i have one big batch of it spared. so i ordered blonde version of stem from Chuck. i dont know how much that cedar differ colorwise but that is to observe later on...:)
- Ron Burns, FrankWouts and Edwardkenway
-
3
-
7 hours ago, MartinB said:
But, after all that work, a ships lines begin to appear.
Looking just like they are supposed to.
Keep it going Vlad.
Cheers
Martin.
Hi Martin, yes Im happy working again. cant wait to see those galleries , but i hope i wont spoil planking im novice in that. but Chucks and others instructions are top notch im so glad i got into this. are you building something yourself now?
-
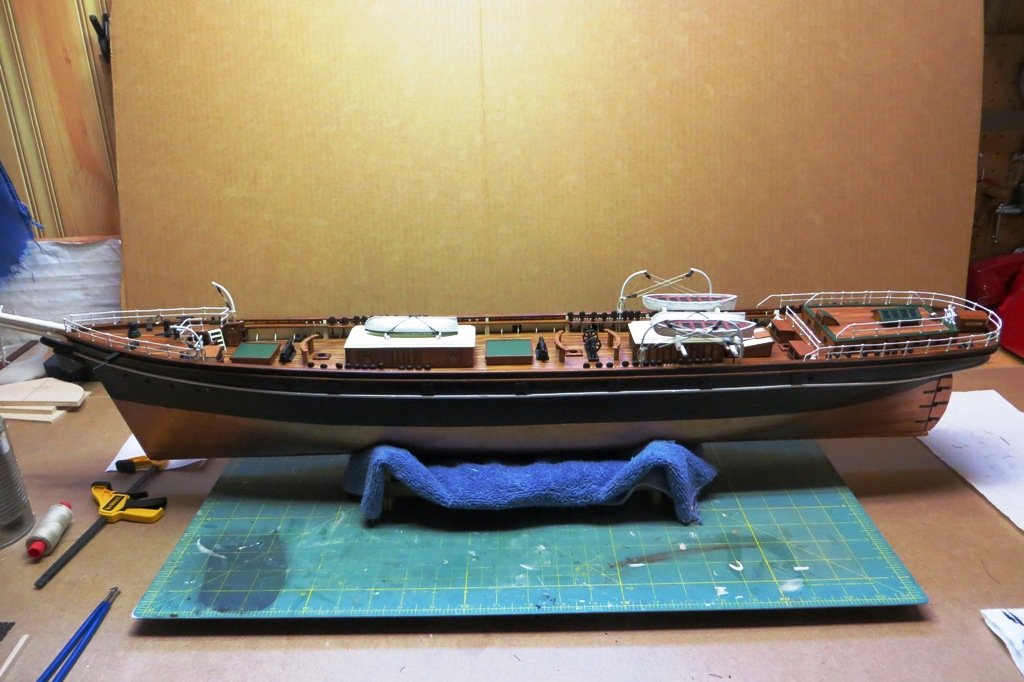
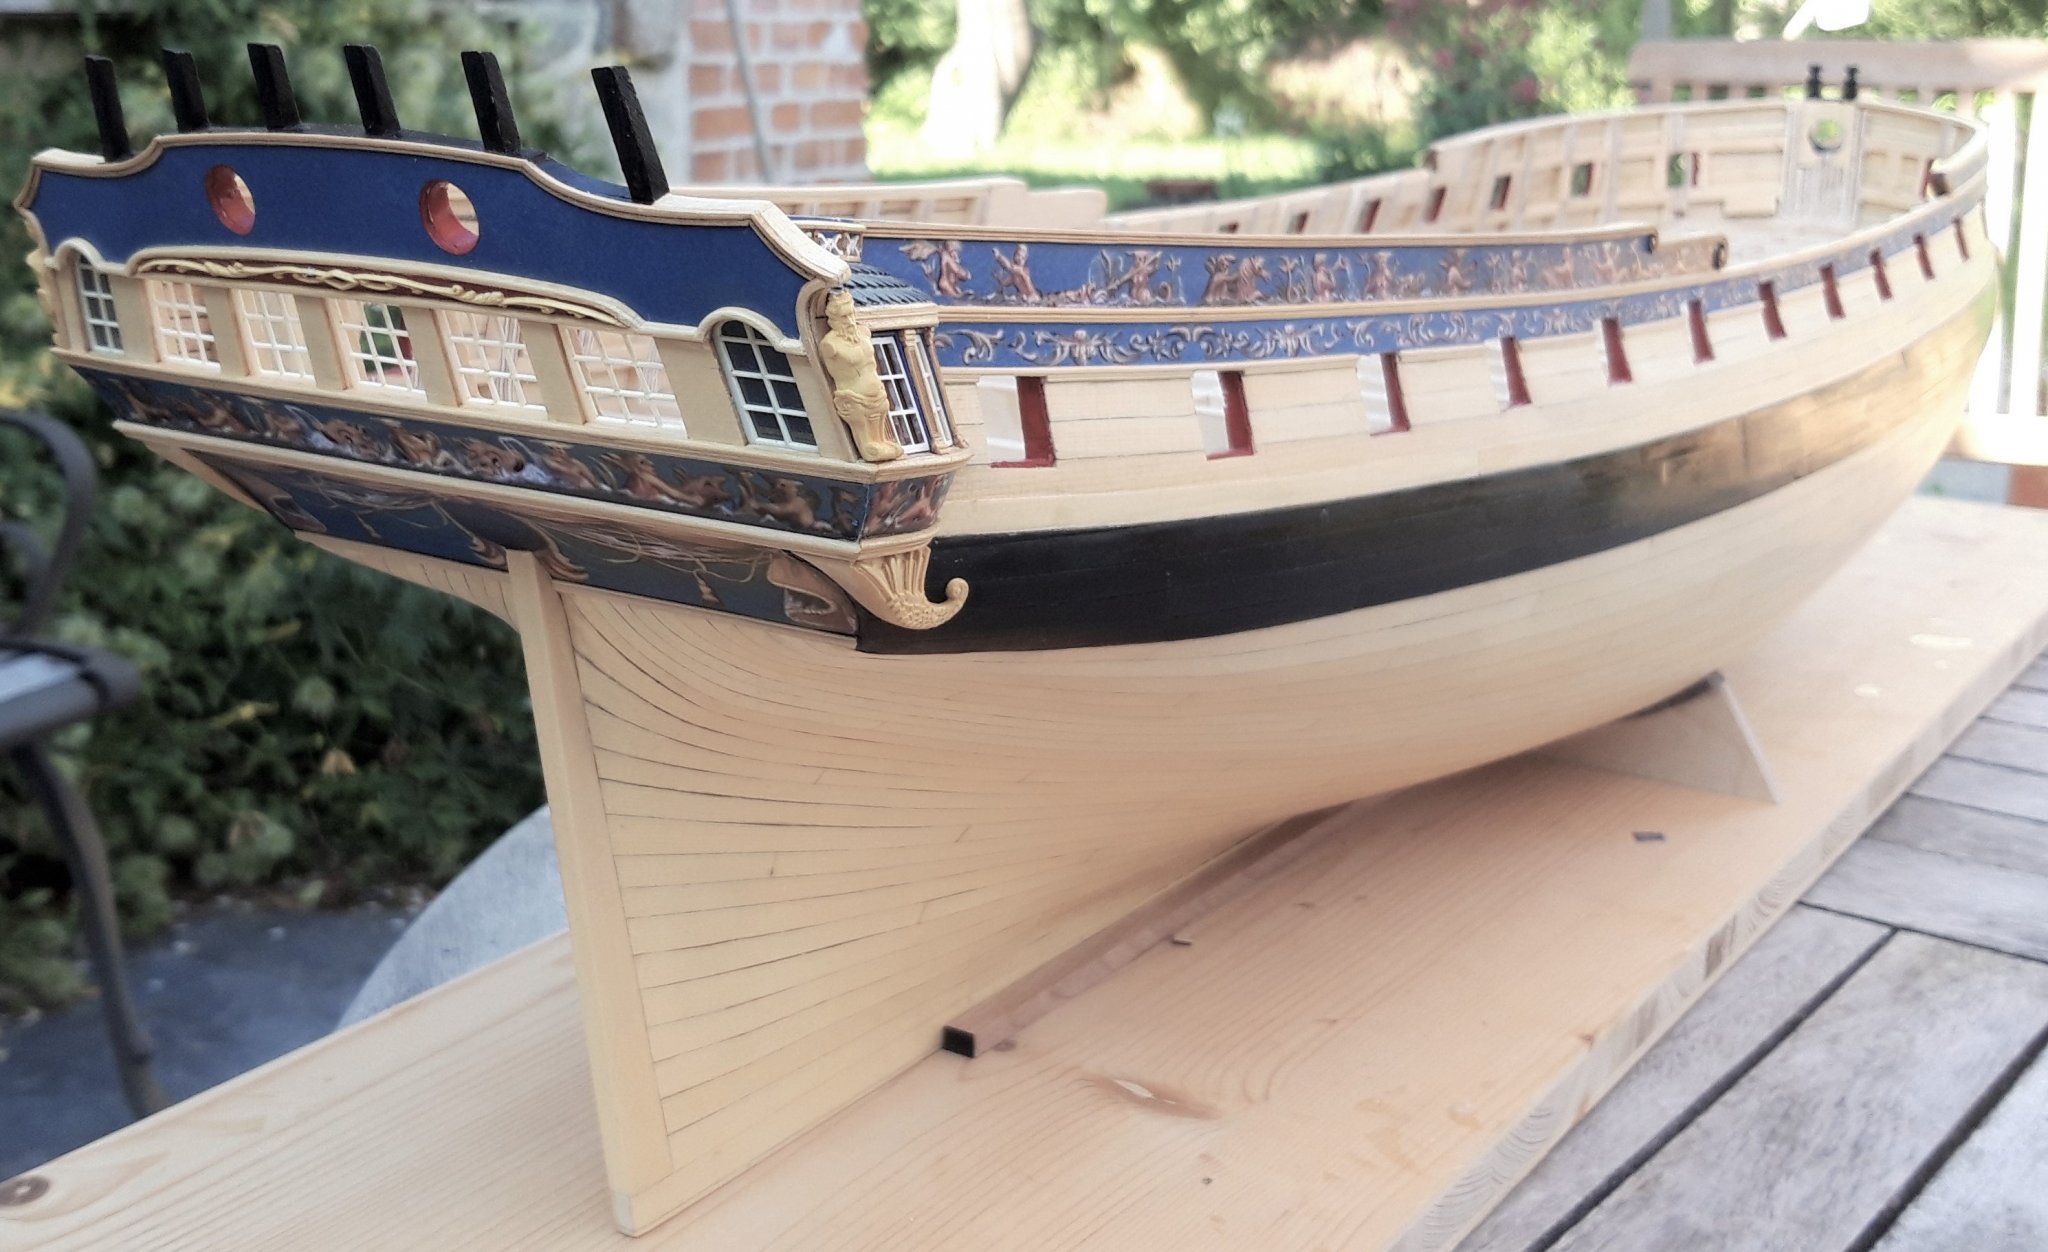
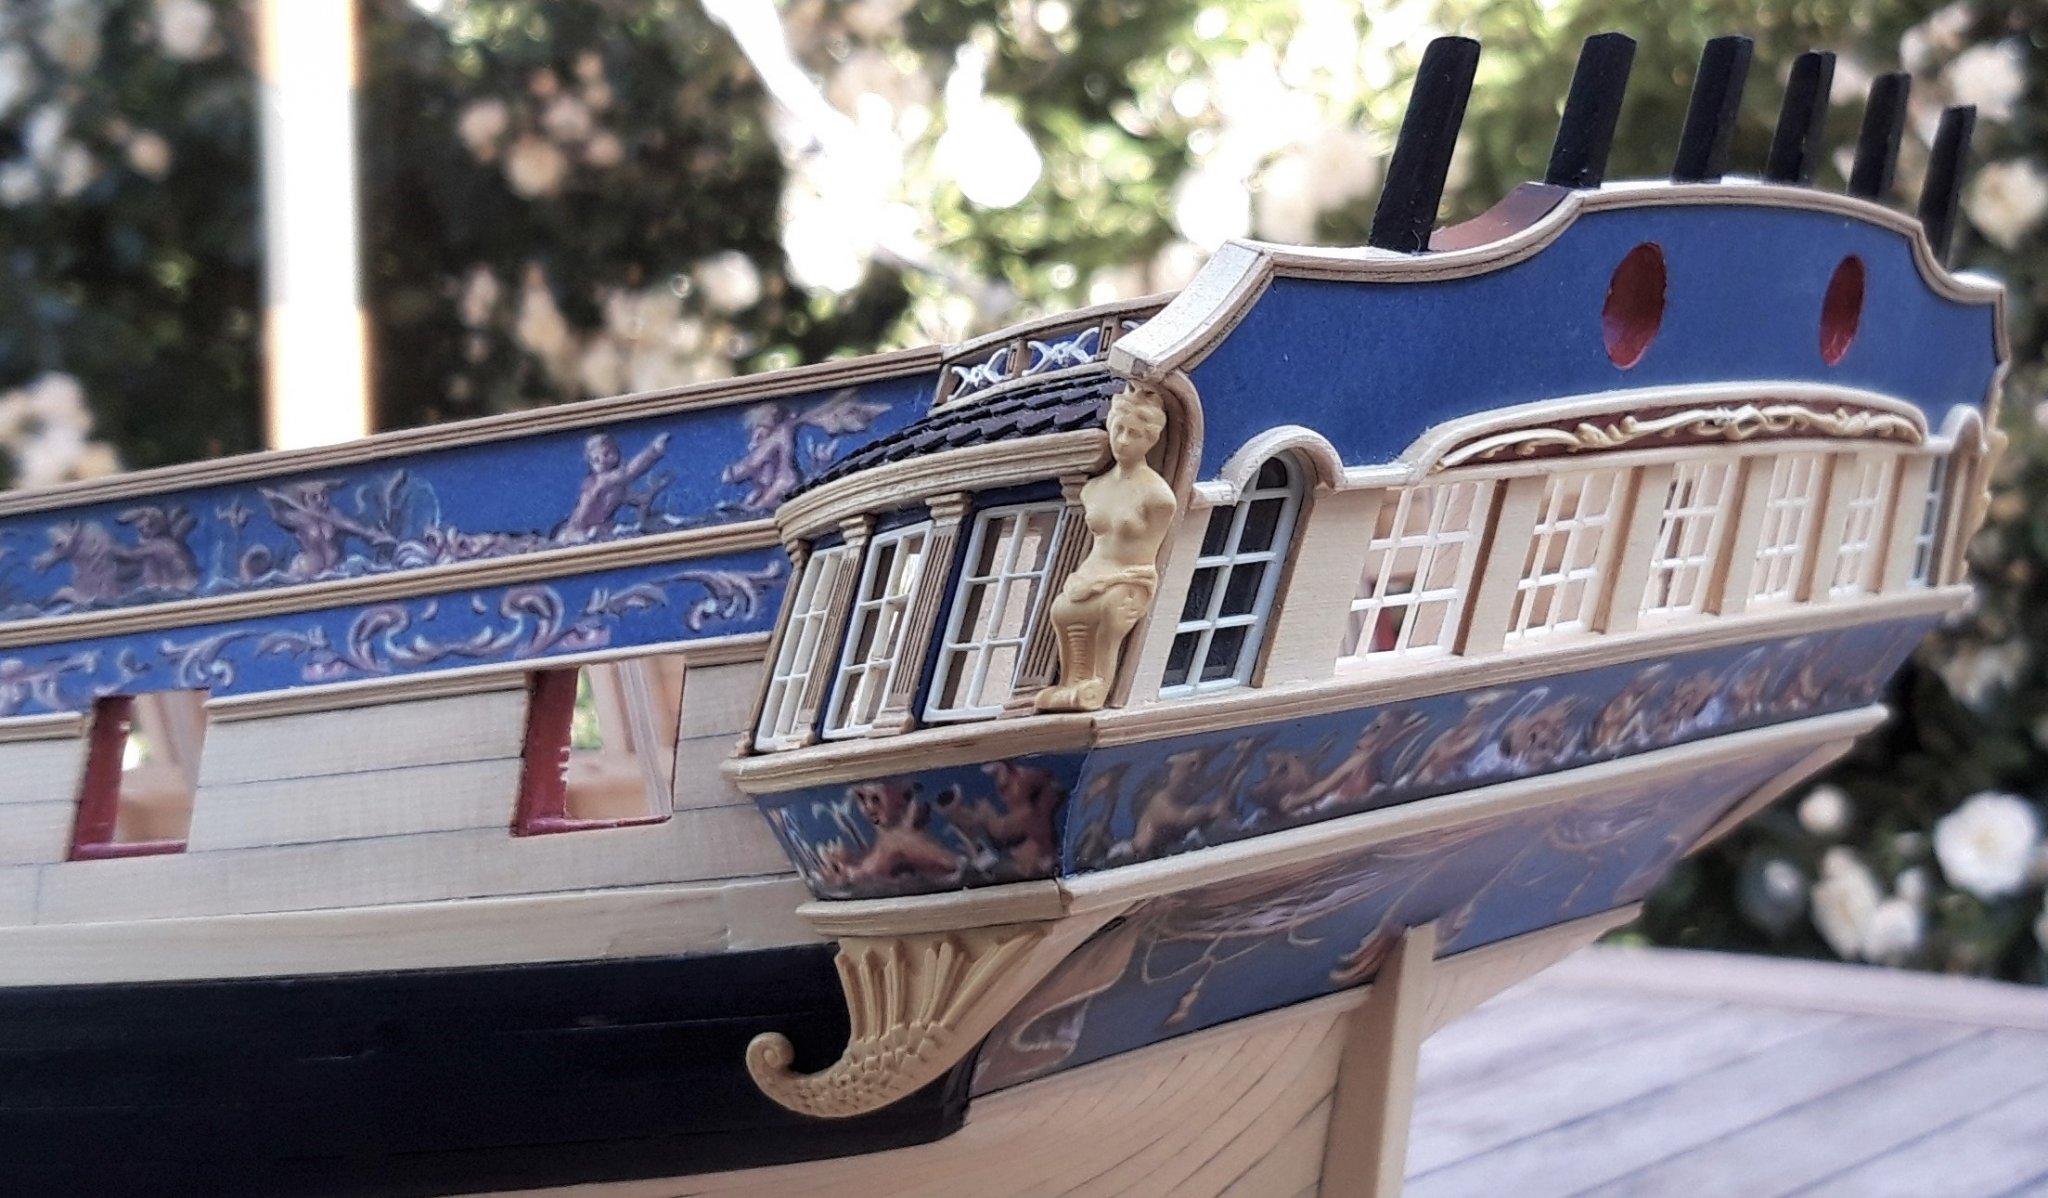
On 6/25/2020 at 5:14 AM, nzreg said:
Slow progress to date, the port side quarter gallery and frieze installed.
The mouldings are not as per Chuck, the making of the scrapers for them had me beat after many, many attempts so I decided to go with the A.L. scrapers I had
As Mr Sinatra said "I did it my way" whilst trying to keep the ship in the spirit of this fine prototype.
The roof and lady in the corner are only sitting there as are the windows, I consider them too delicate to permanently attach at this stage.
And so onto the starboard side.
very pretty
- FrankWouts and Ron Burns
-
2
-
On 12/1/2020 at 4:45 AM, Ron Burns said:
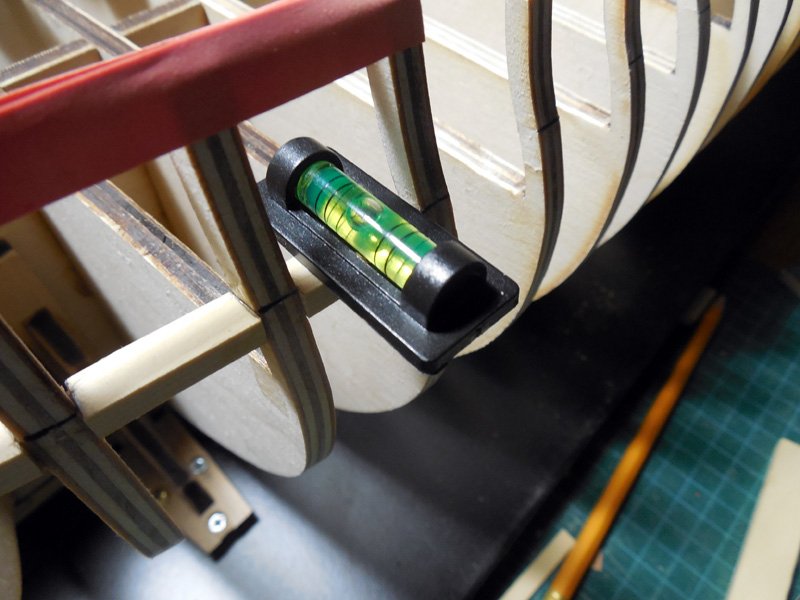
Hi everyone, Just wanted to say thanks for the likes! Not too much to report except for one wee thing...Use a darn level instead of eyeballing it! I started installing the framing and completed the lower frames on one side. Man was I proud of myself! (until I moved it to the dining room table for a different perspective). Long story short, I cut out all the segments and re-did them all using a mini level. Supposed to get wiser as we get older. hehehehe:)
buautiful work Ron
- Ron Burns and FrankWouts
-
2
-
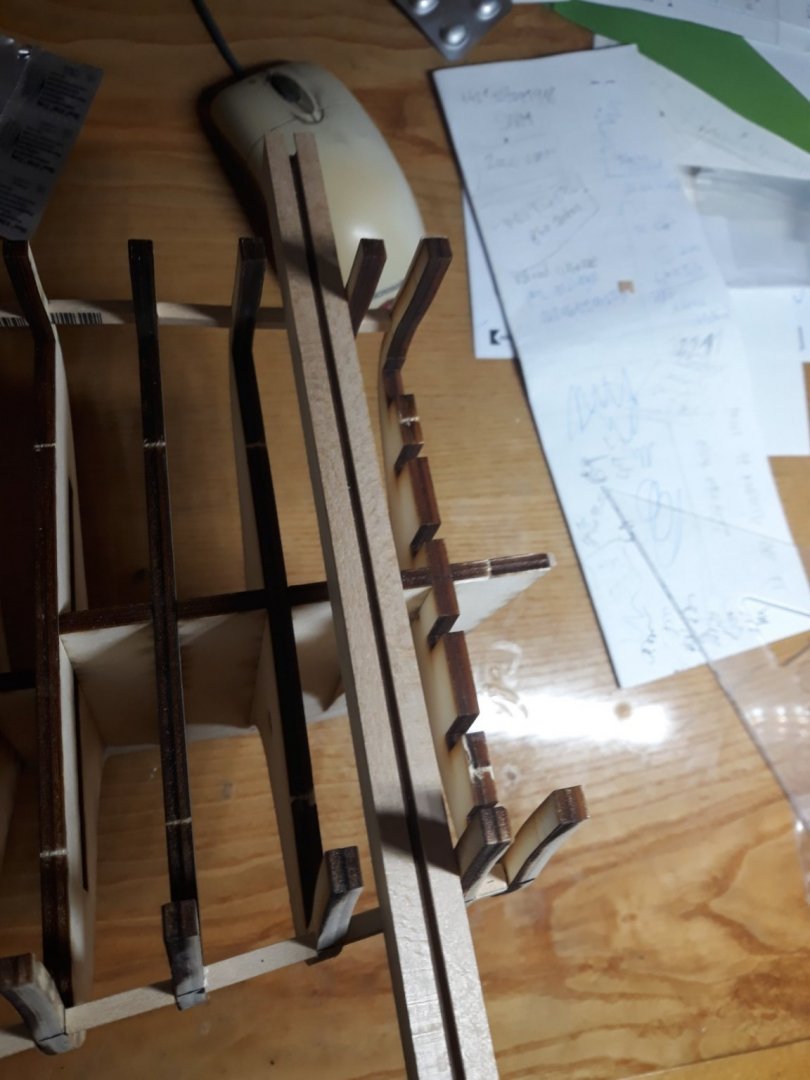
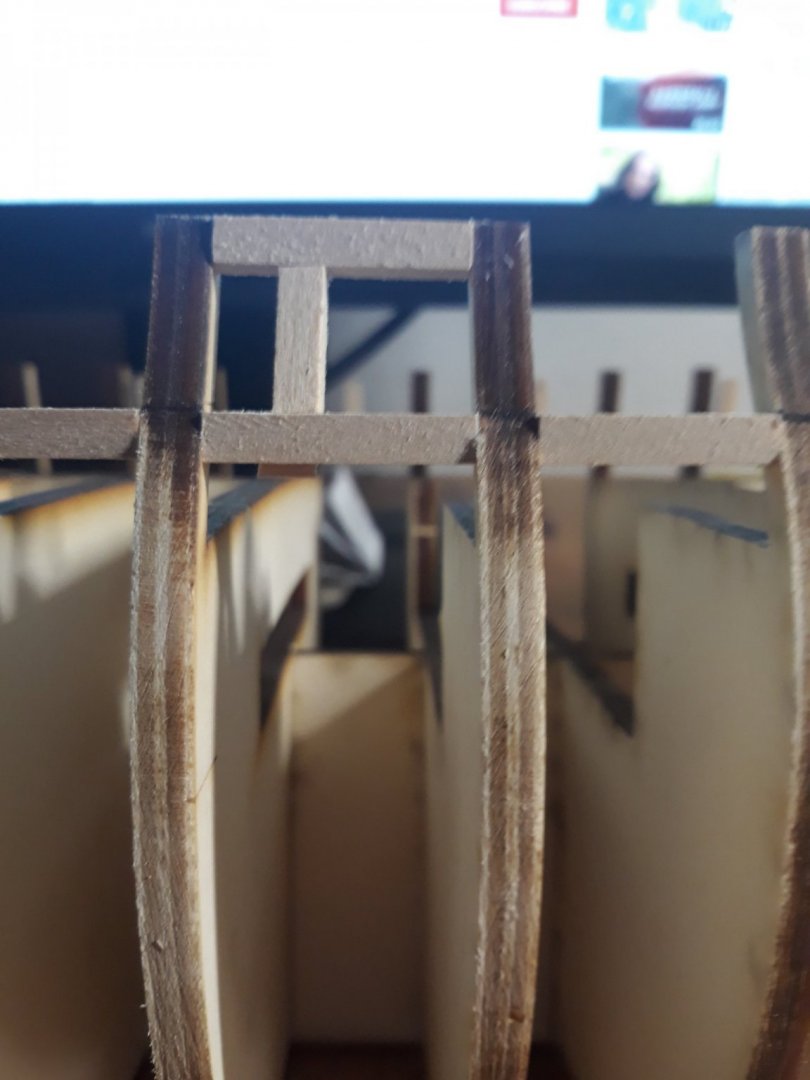
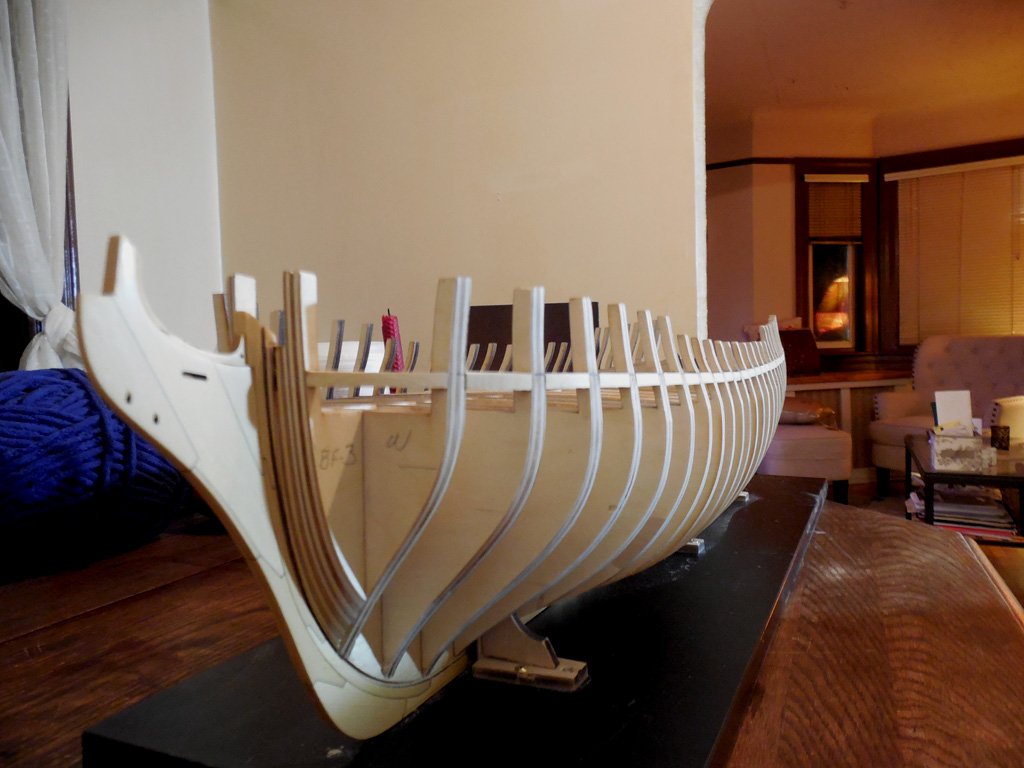
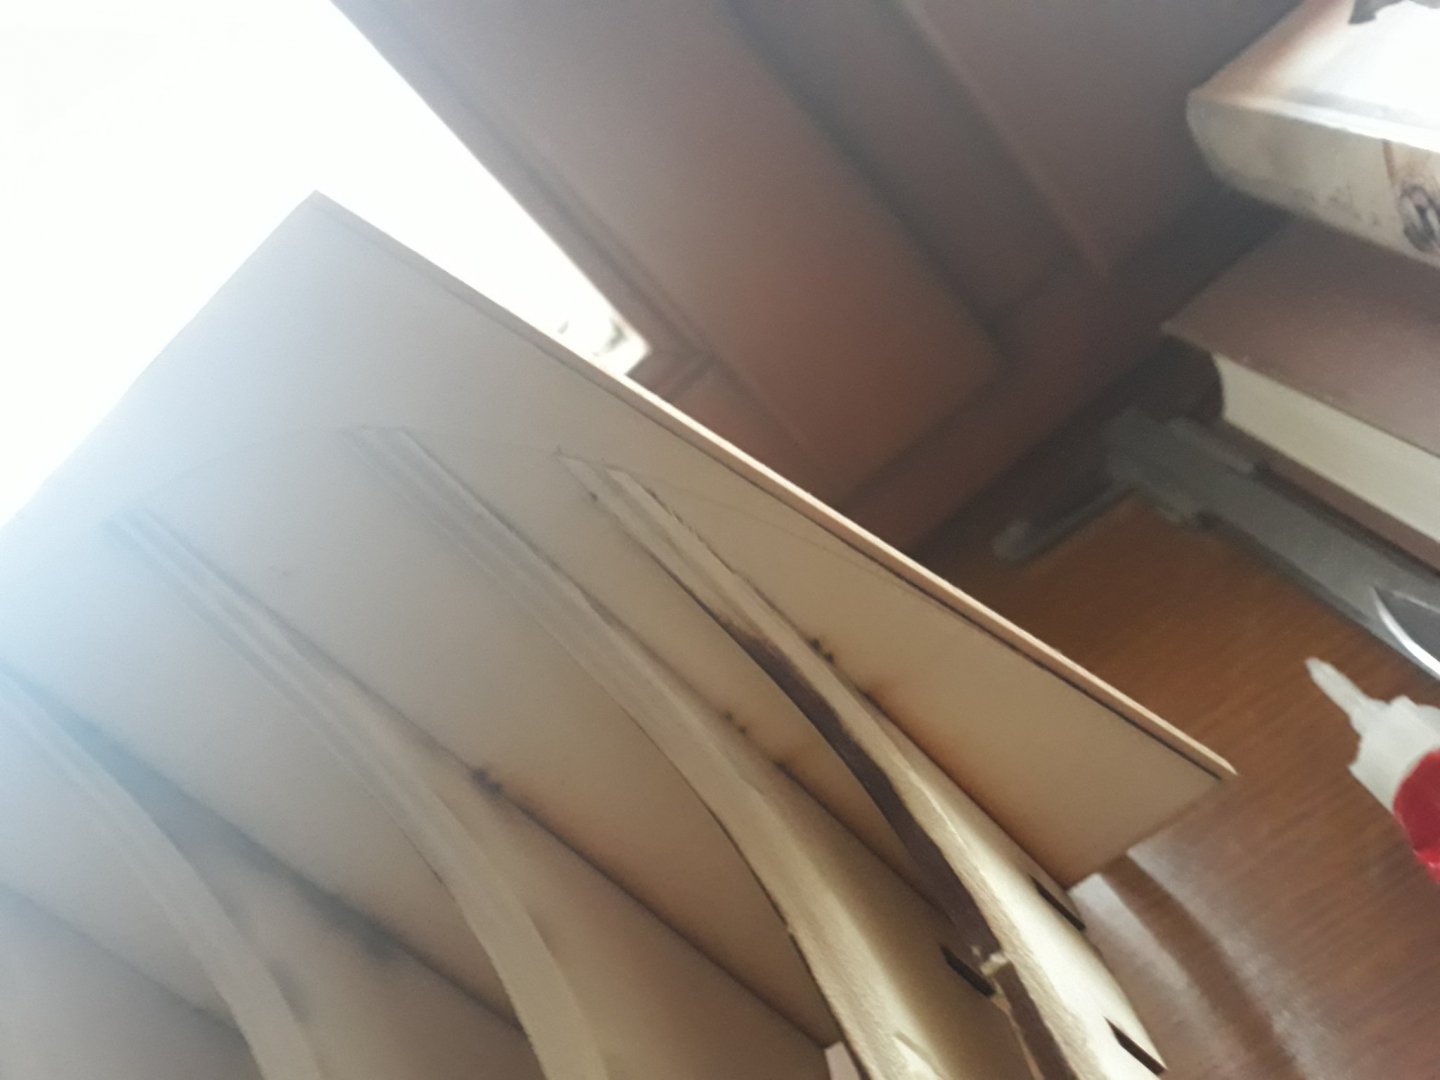
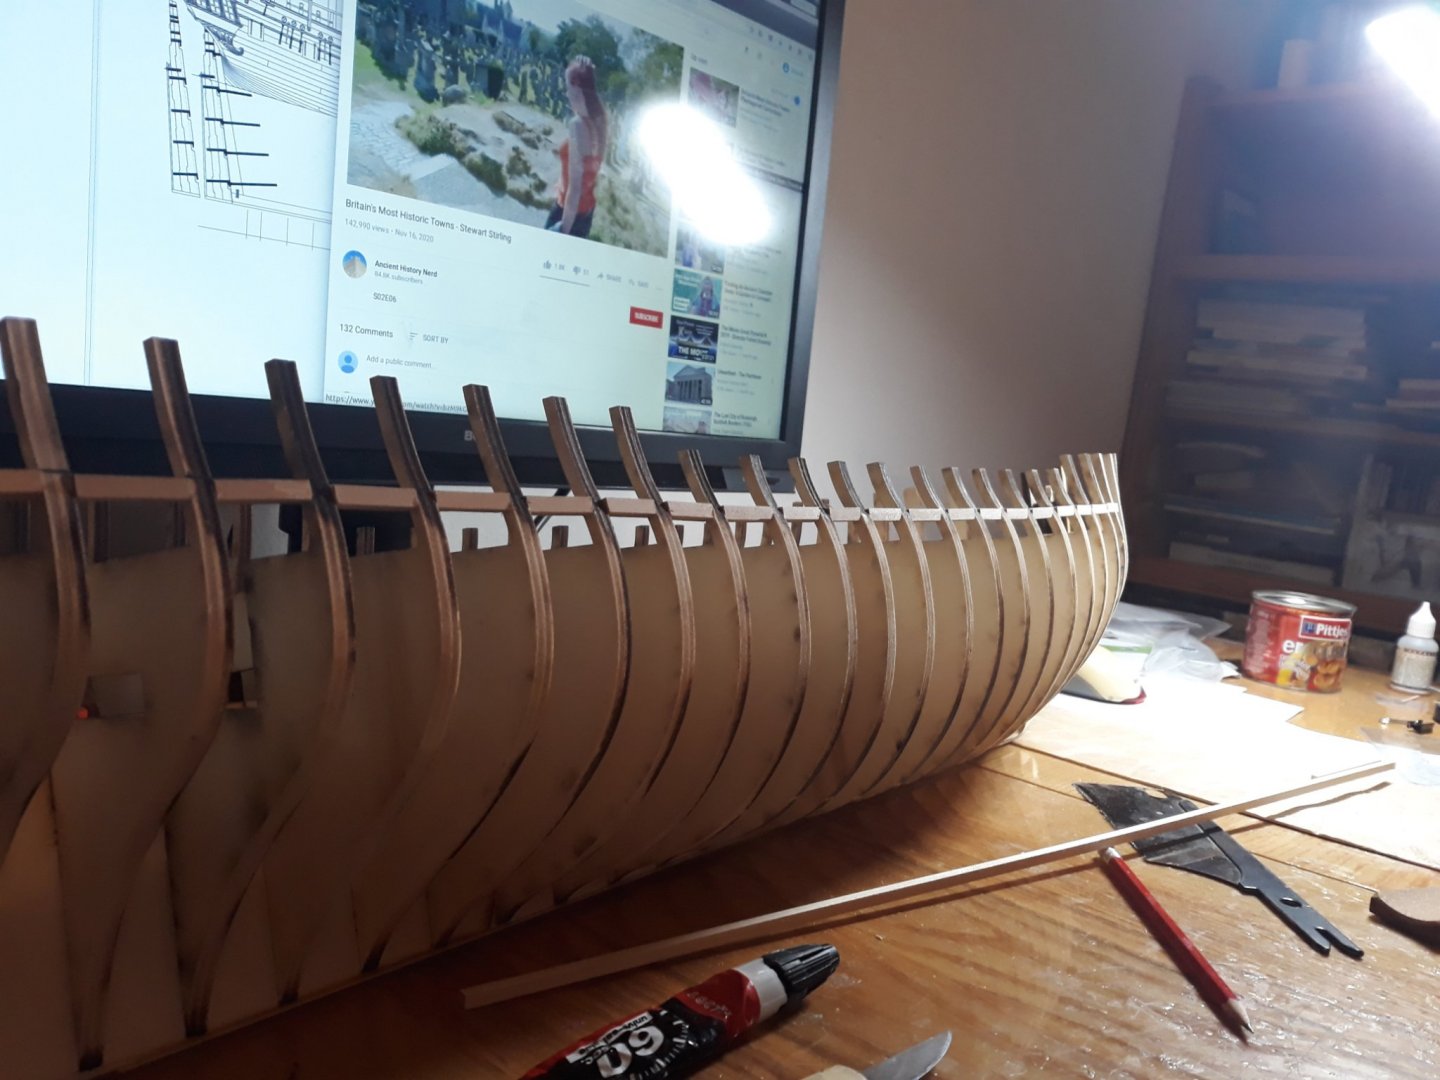
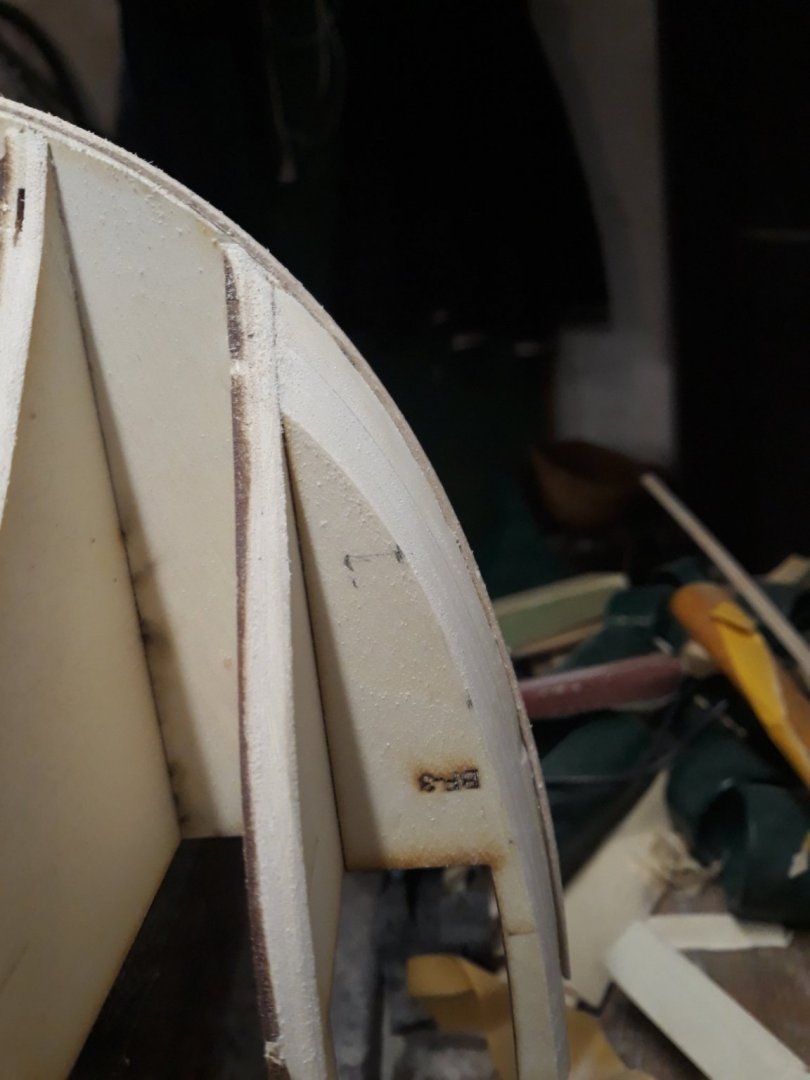
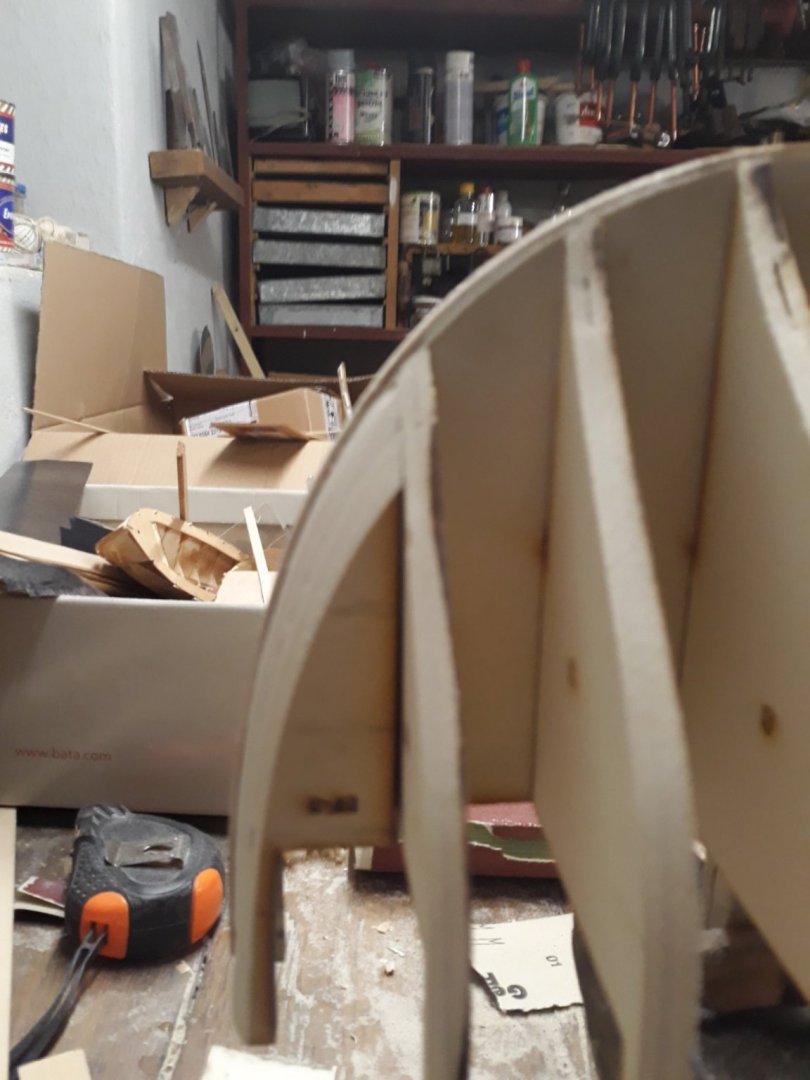
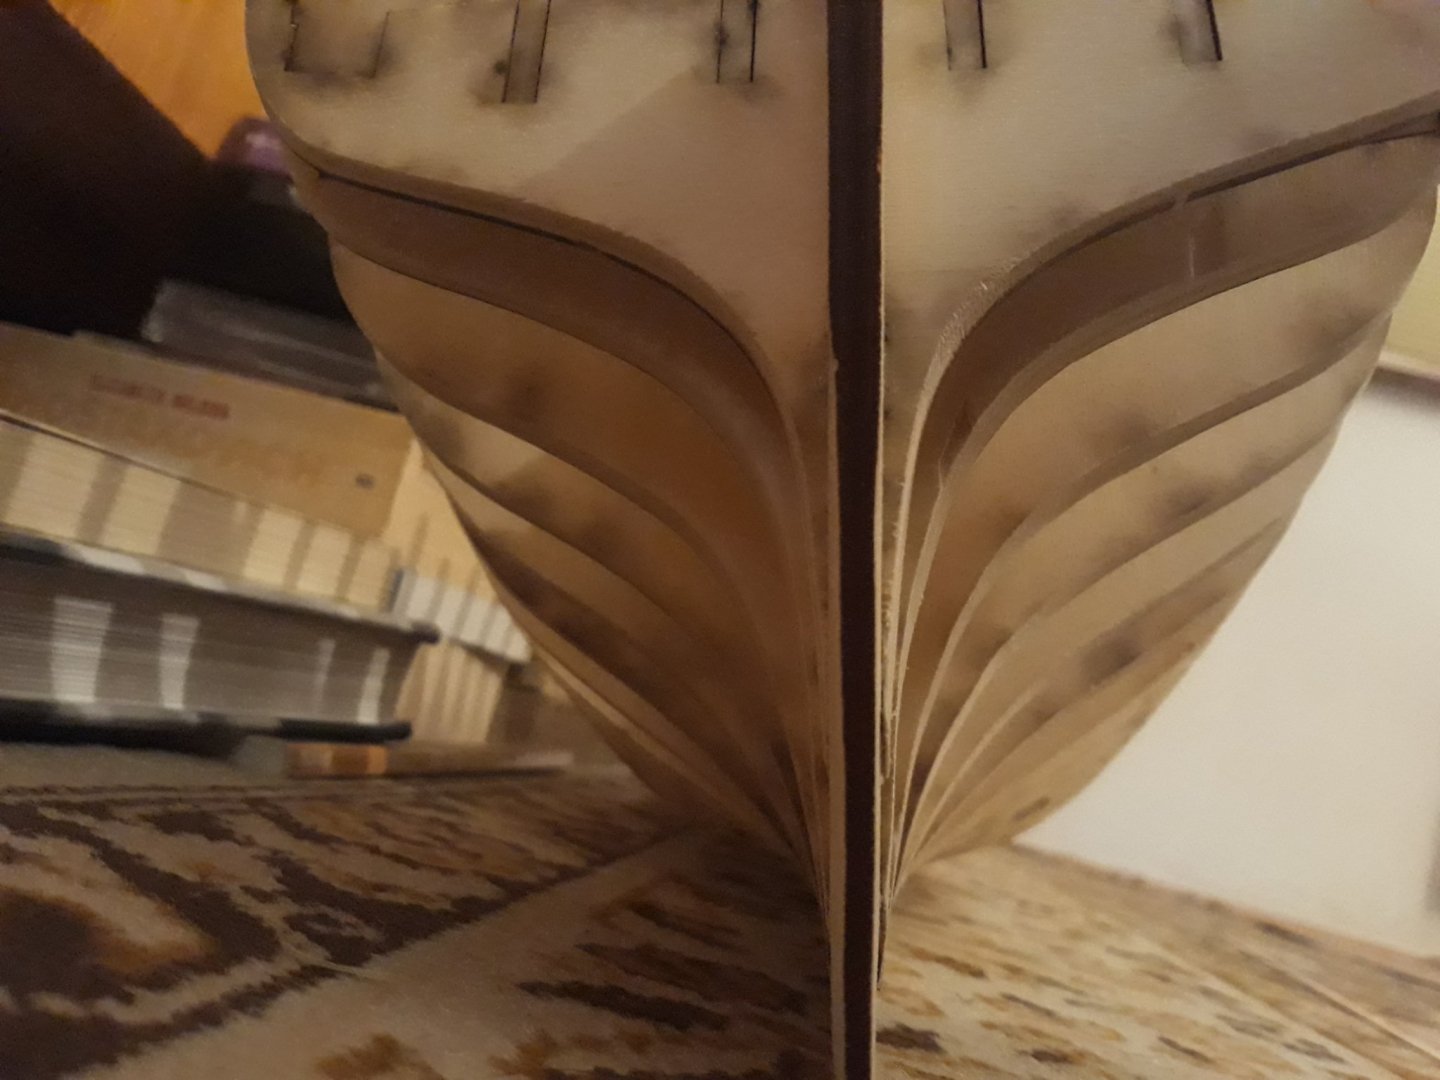
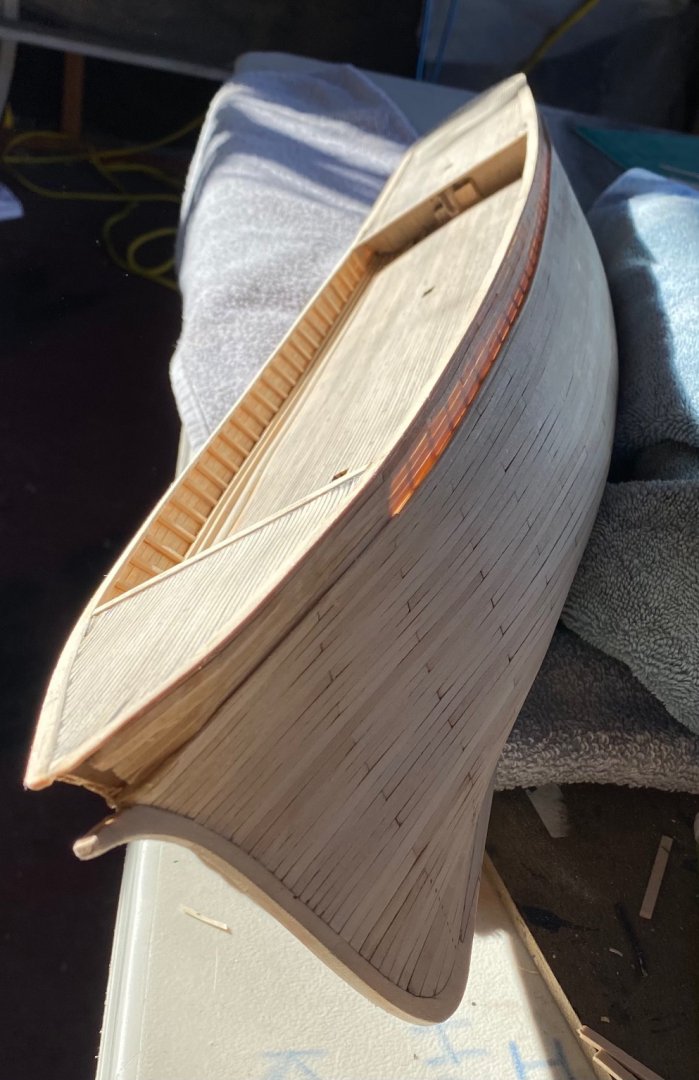
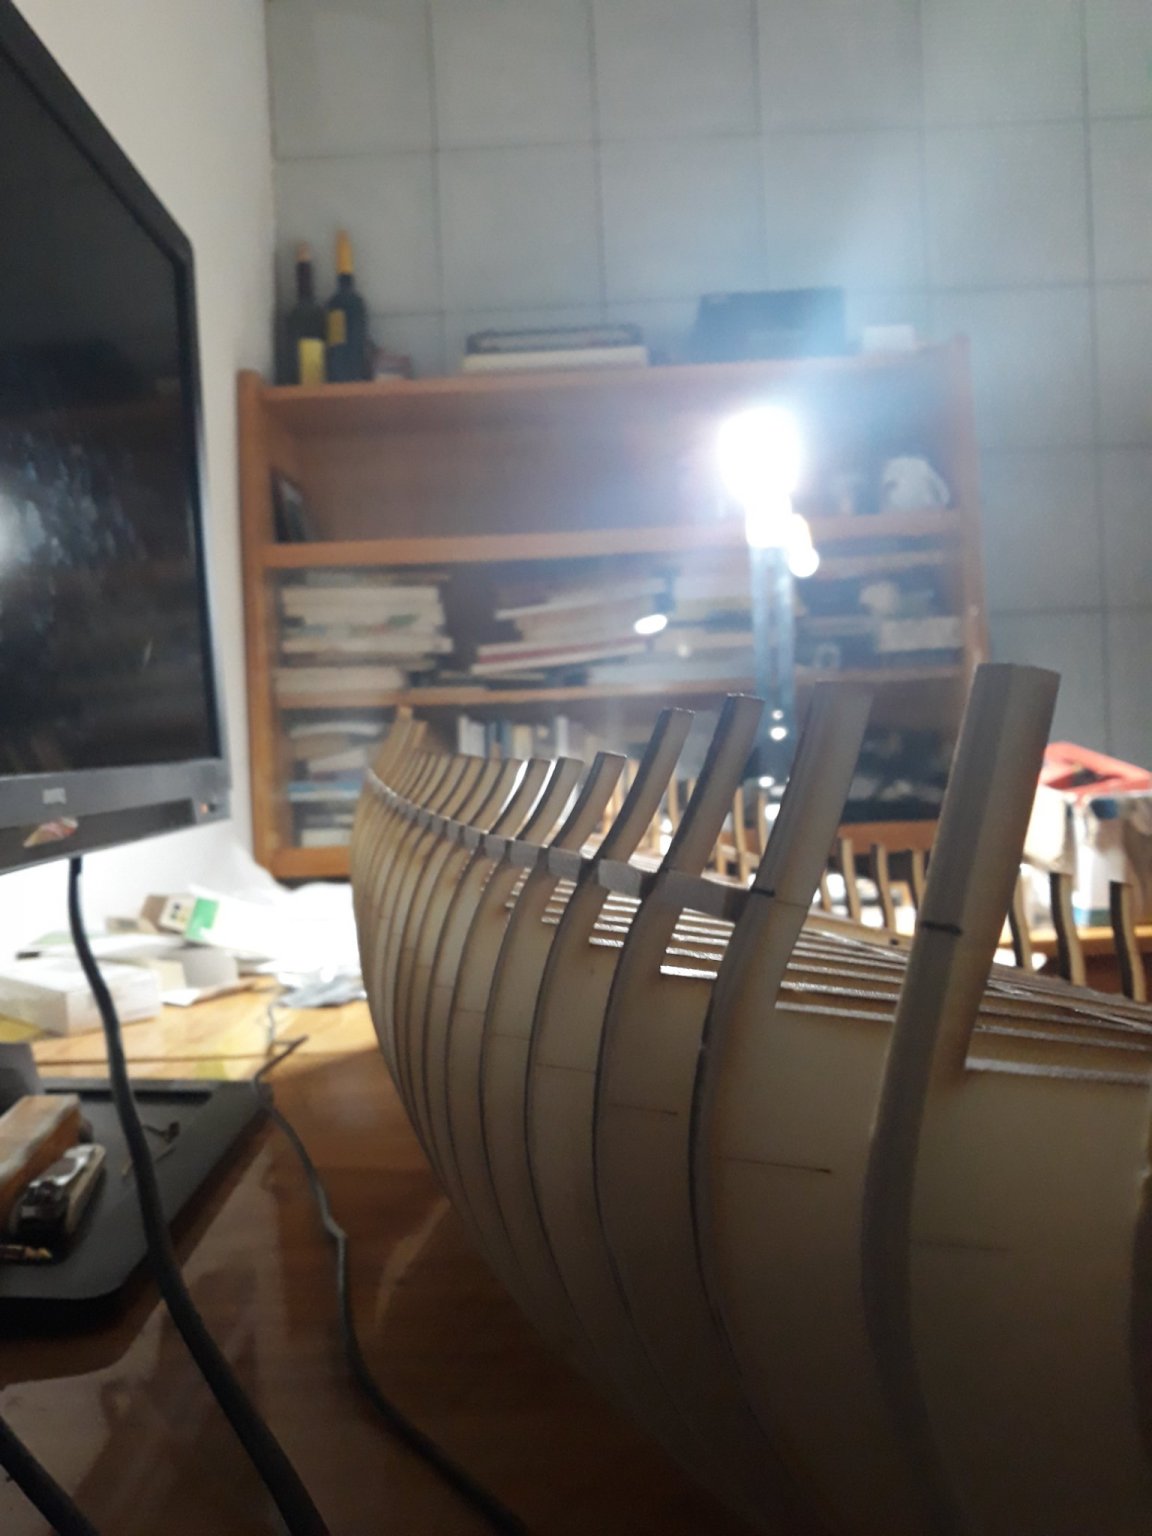
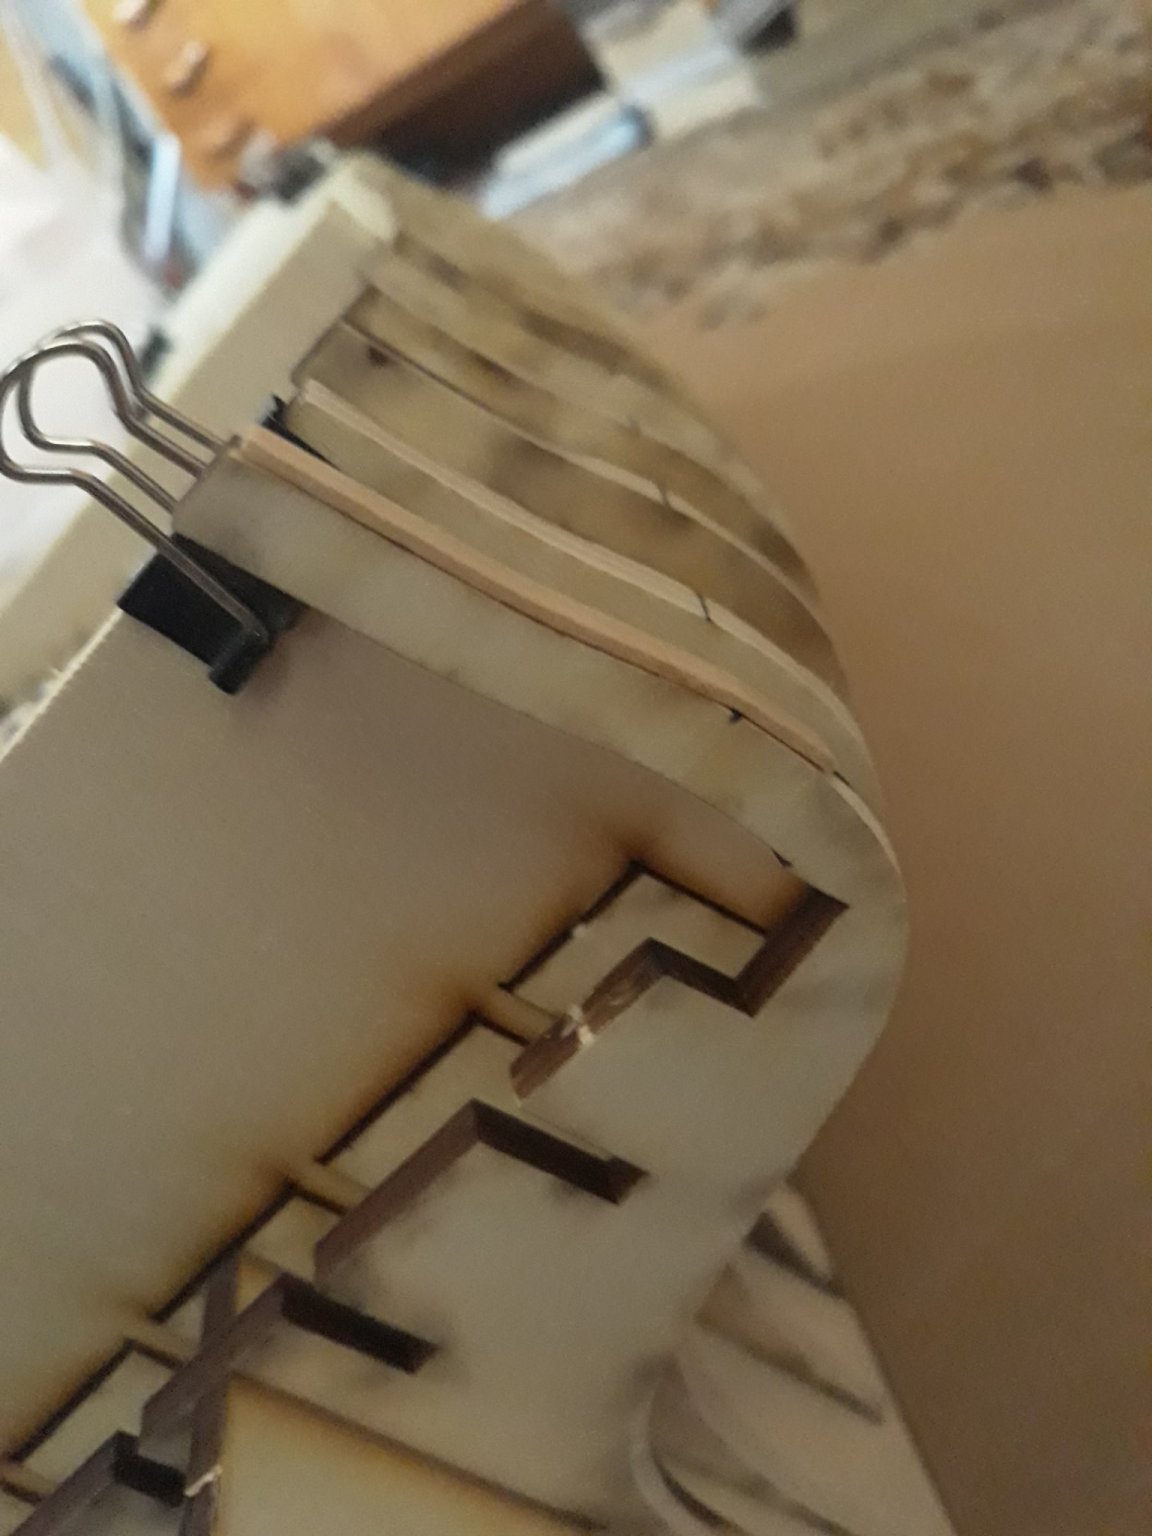
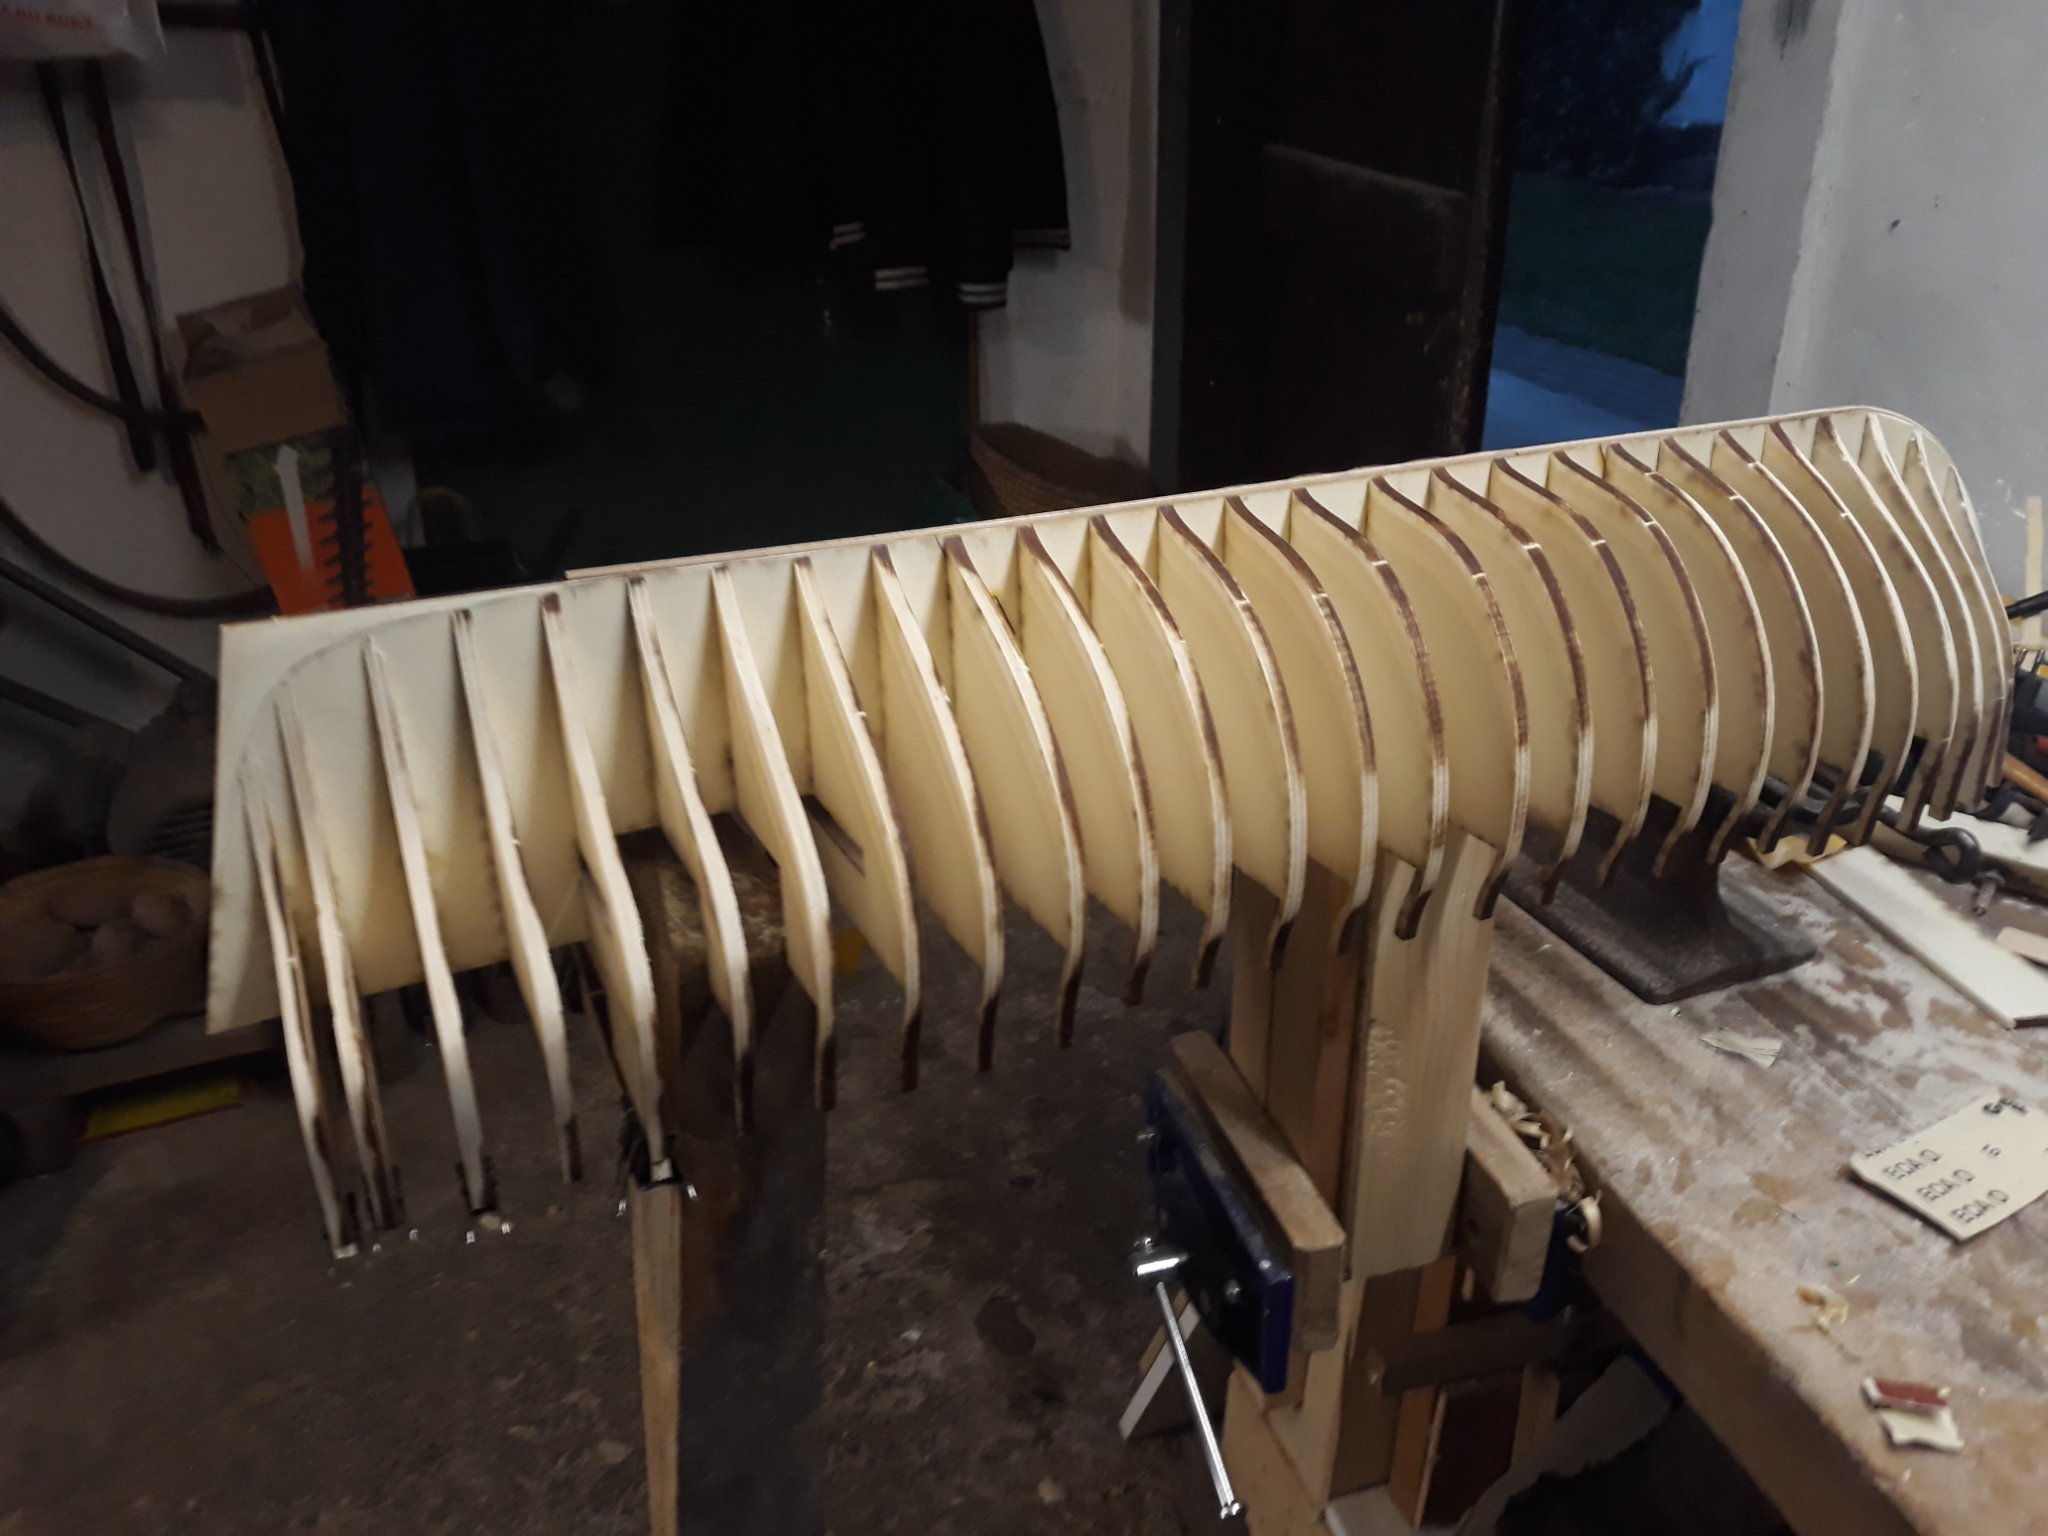
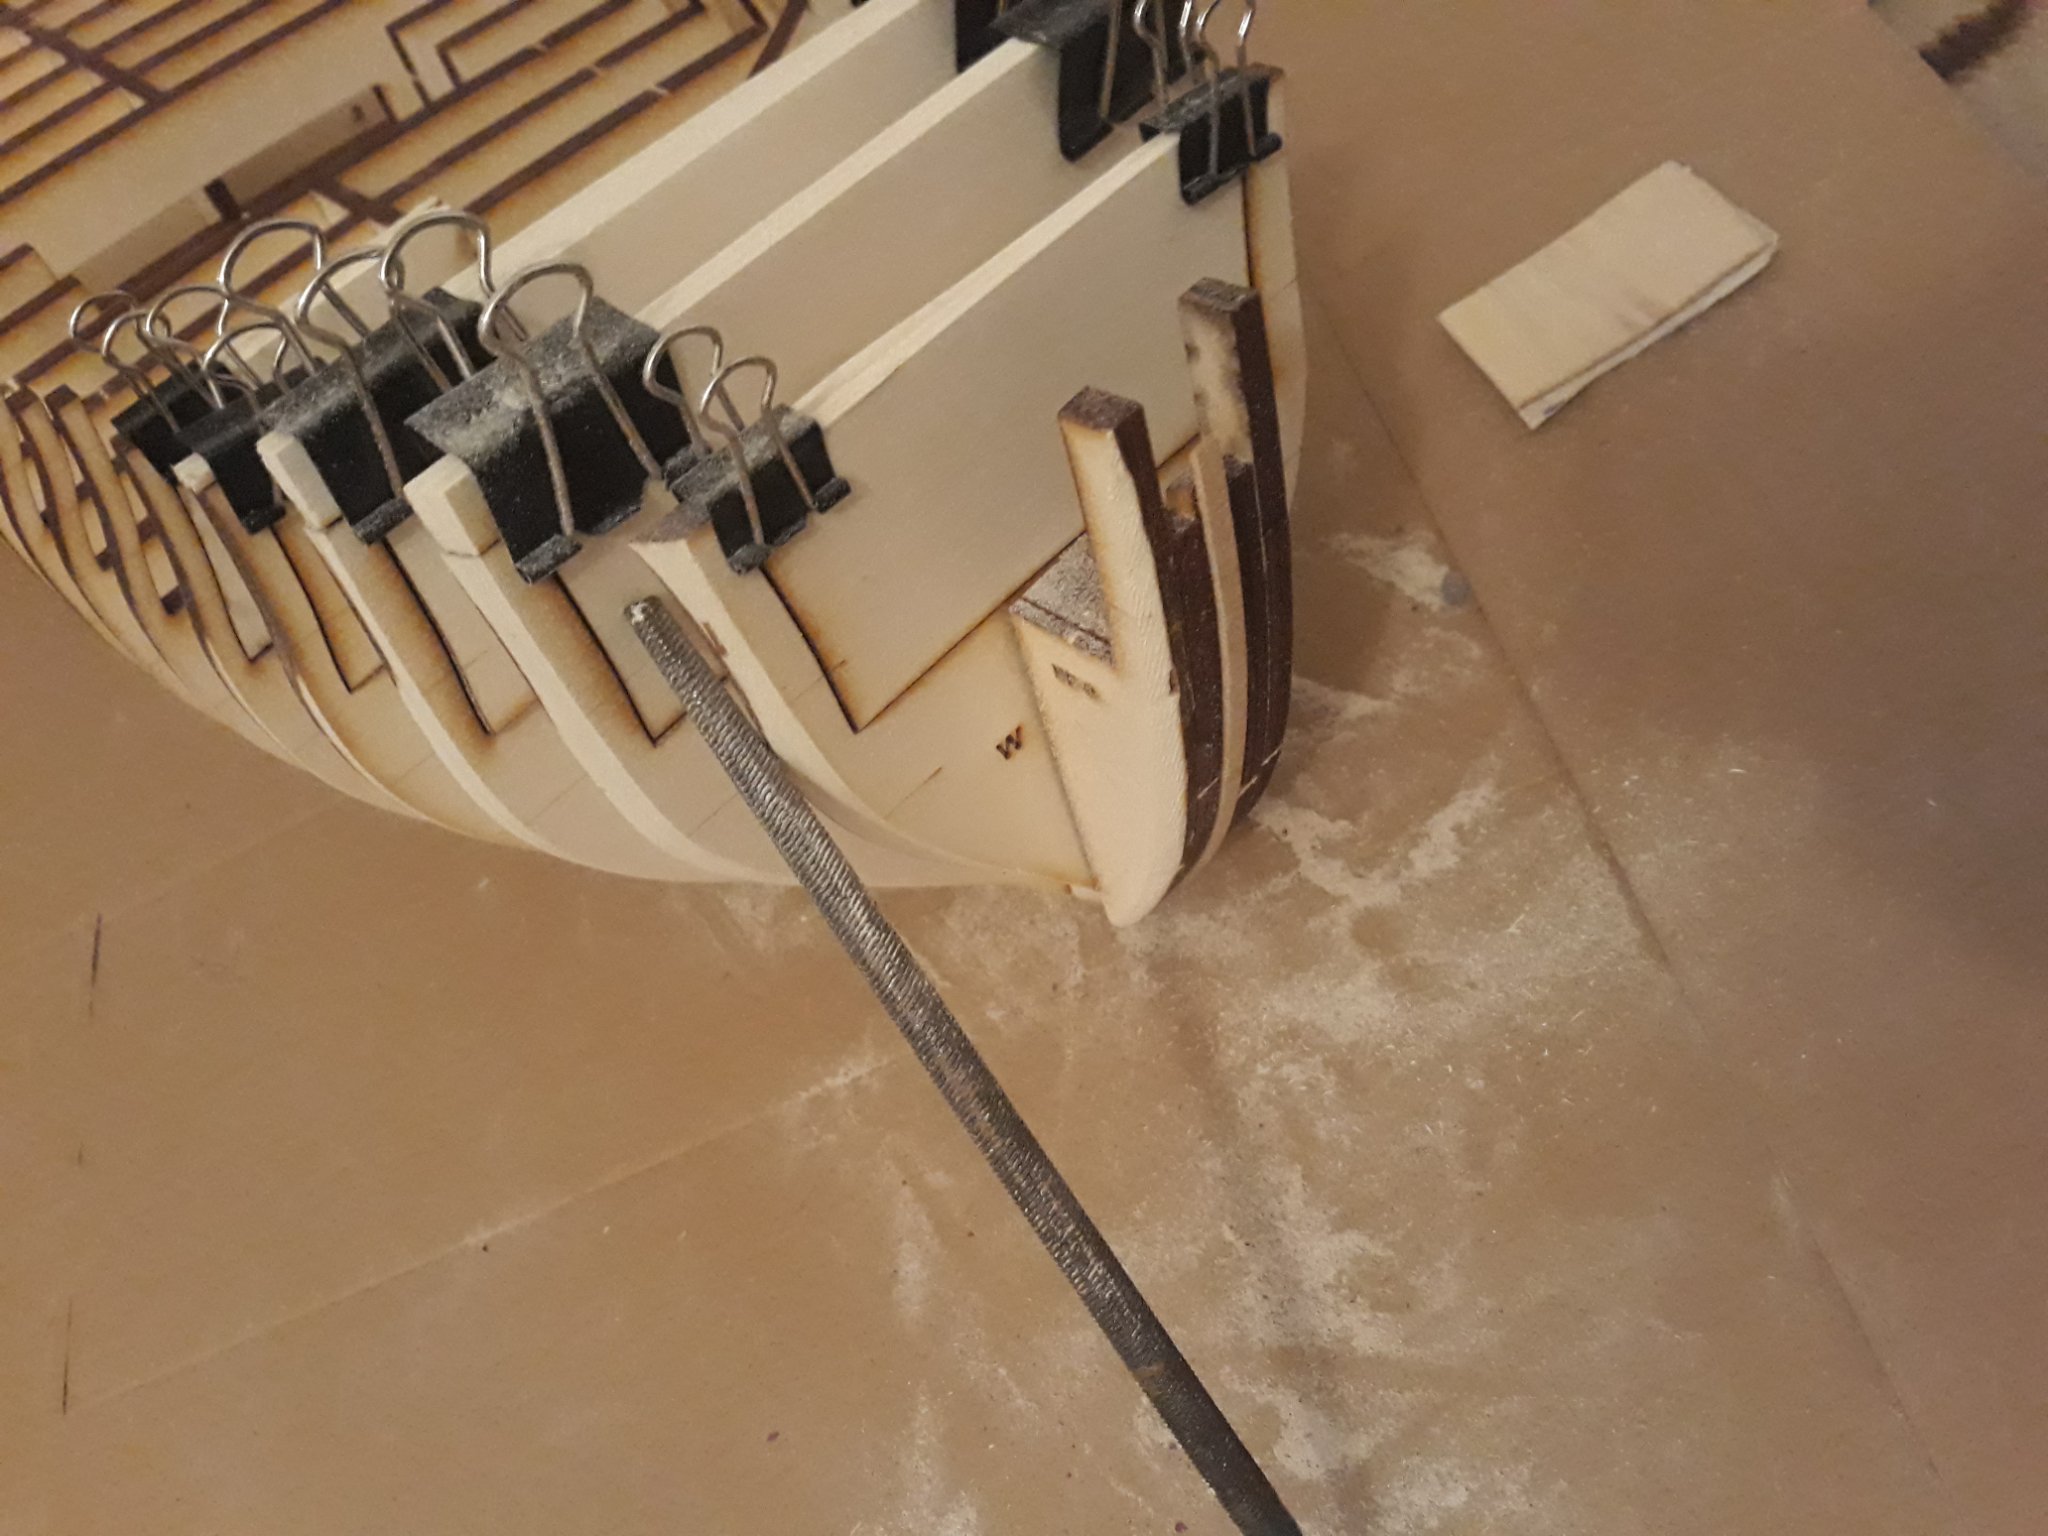
Good day, continued today. Happily took winnie to my room upstairs. I observed few of folks winnies and must say they are all being worked beautifuly. Day two chapter one. I did few small but important revisions and repairments from yesterday. Firstly i built swiftly temporary stand out of styren so i could turn skeleton back to repair unglued rabbet linem. I cut, cleaned and glued up small piece of rabbet that unglued, attached sgernpost rabbet, and faired hull here and there. Than i started with fastening bulwarks extentions. Took it slow. First two three are a bit scoopy though..:/
Like that work anyway it is pretty relaxing doing it while listening to music. I plan to continue tomorrow tith bottom starboard side and than building up upper line. Using only handsaw and sandpaper and pencil so far. Enjoy. As far as I didnt fair all middle extentions being dark brown still they are absolutely flat so i think they are ok like this. . V.


- FrankWouts, Ron Burns and Zarkon
-
3
-
11 minutes ago, Ron Burns said:
Great idea using the scrap to support the uprights. Looks like you have a great space to work too. I do my building in the dining room and I'm always 2 mm away from crucifixion by my wife
oh yes thats proper workshop:) grandpa worked there father snd son now:) there is no heating though. but good excercise with hand planer and i end up wearing tshirt :)) well, sanding dust cannot go to room. i feel for you but ahe will go to my room as well as i like working on the desk. and i made 1:24 cutty sark last year halfly in my room sitting on carpet. there was swearing around but they got used to it. this time they asked why i am going downstairs with her - i just answered - sanding:D
- FrankWouts, Matt D and Edwardkenway
-
3
-
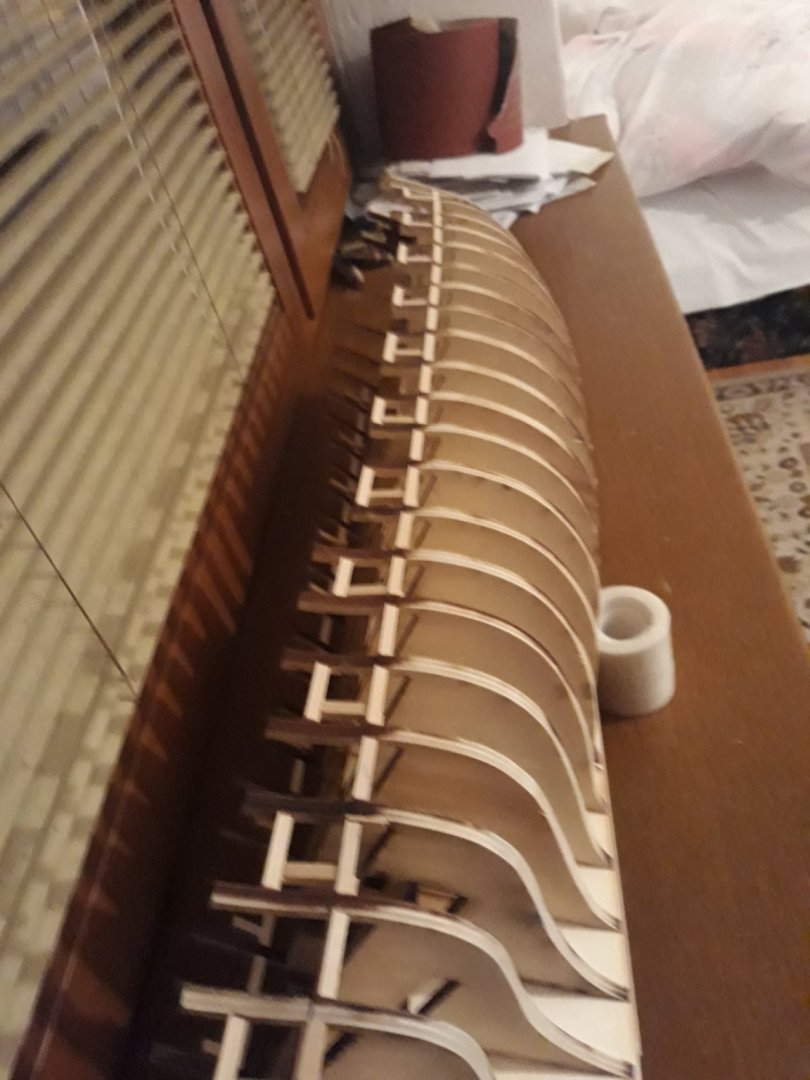
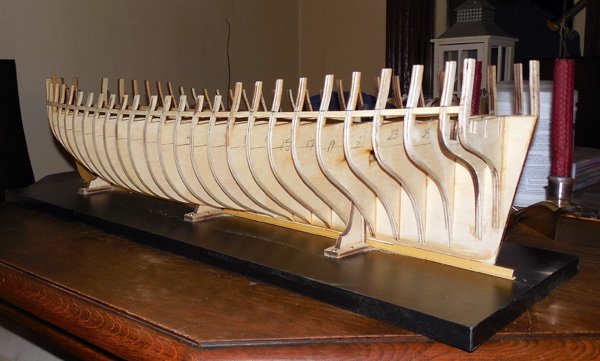
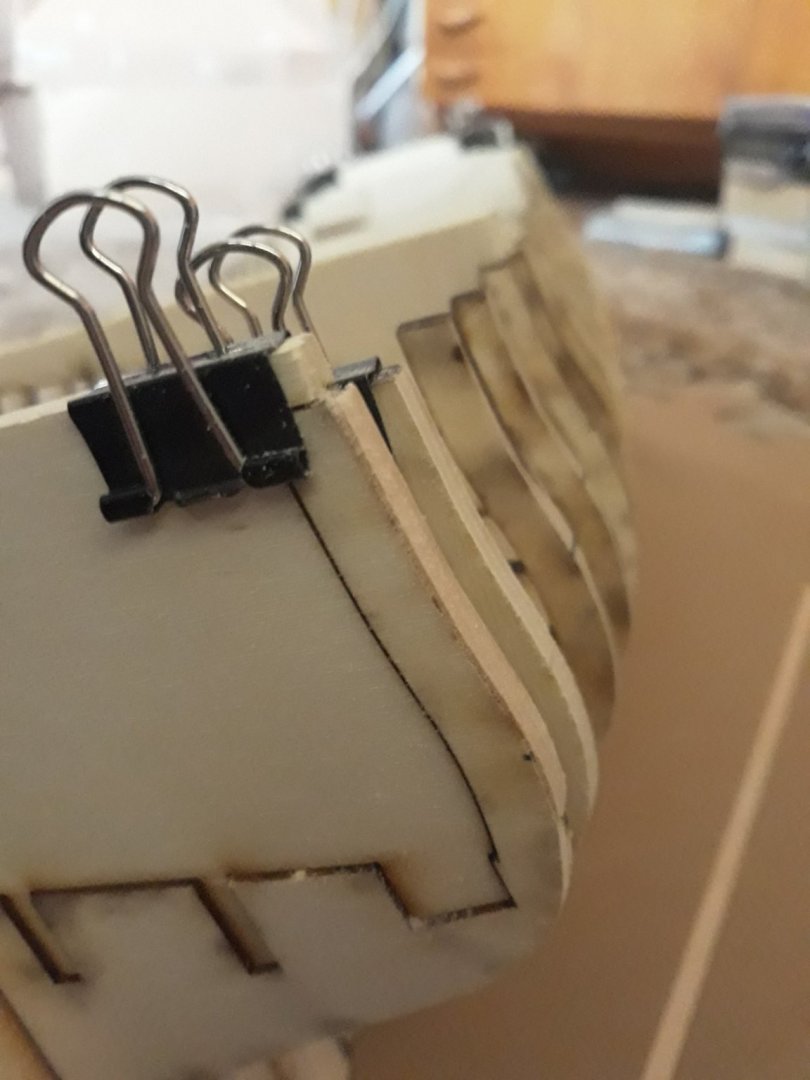
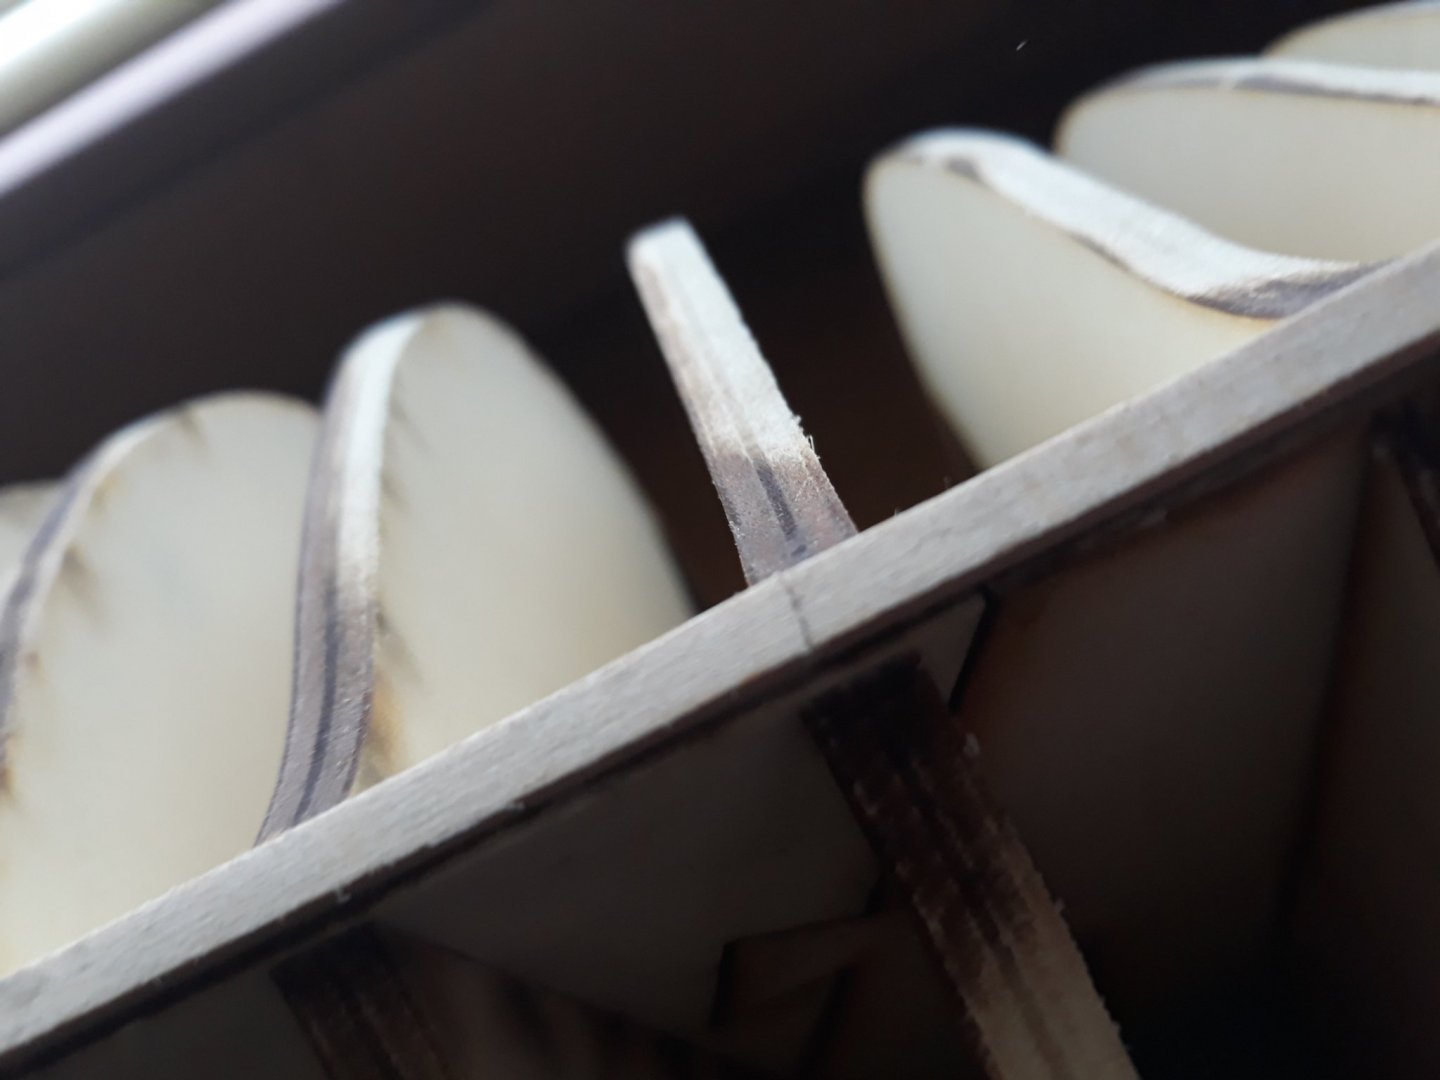
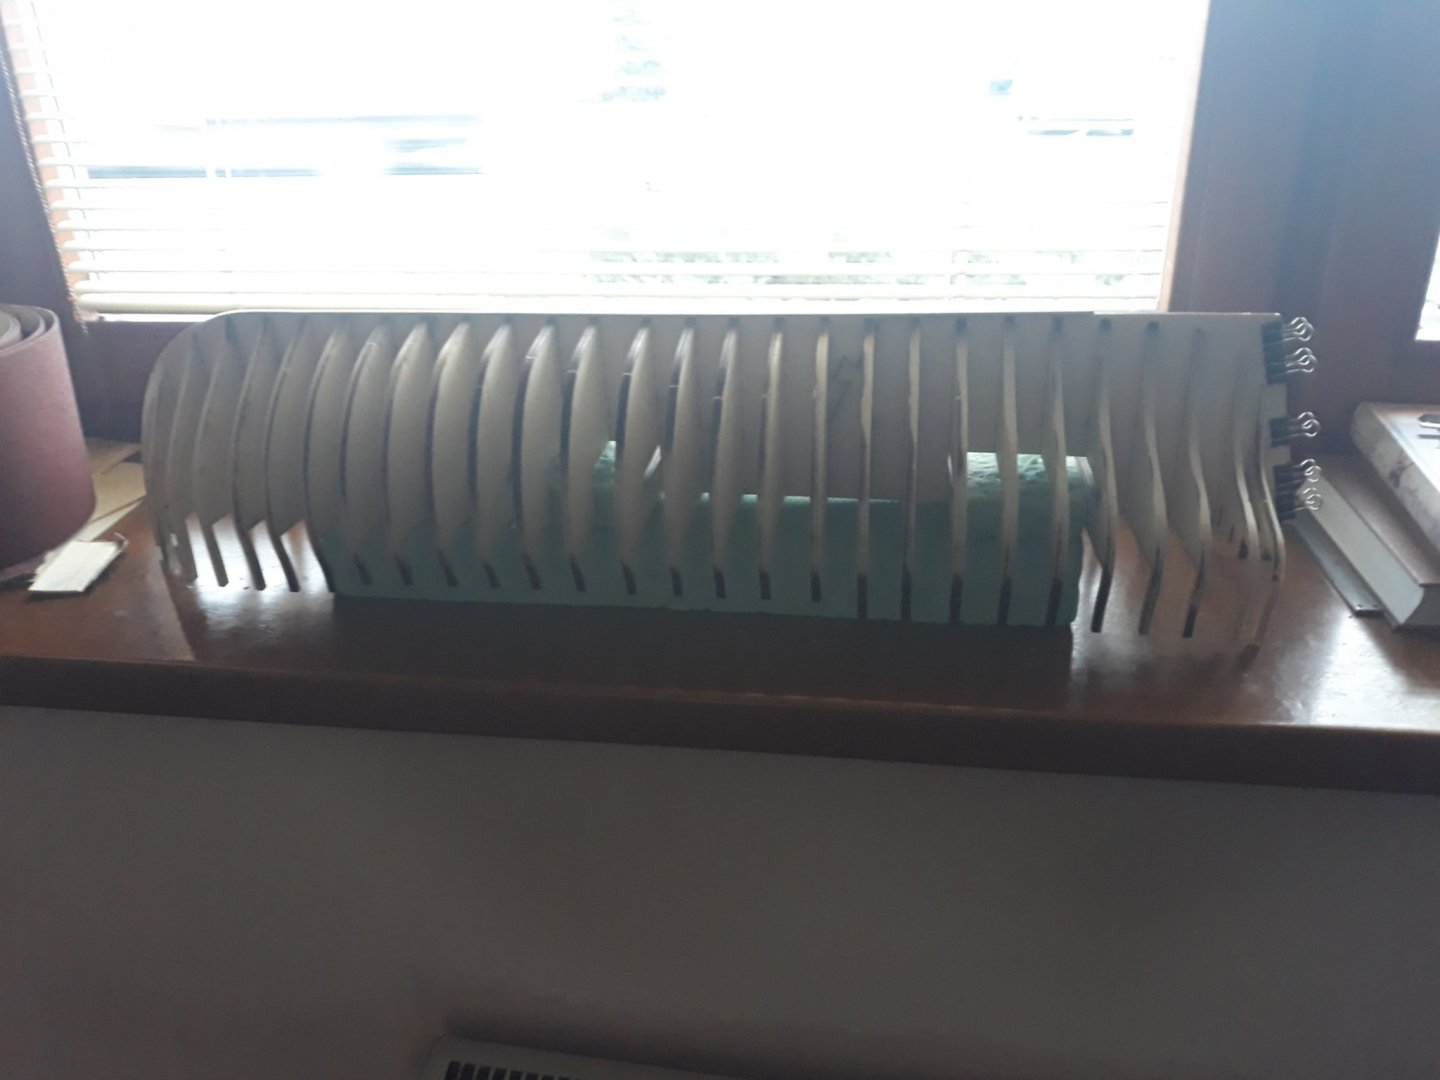
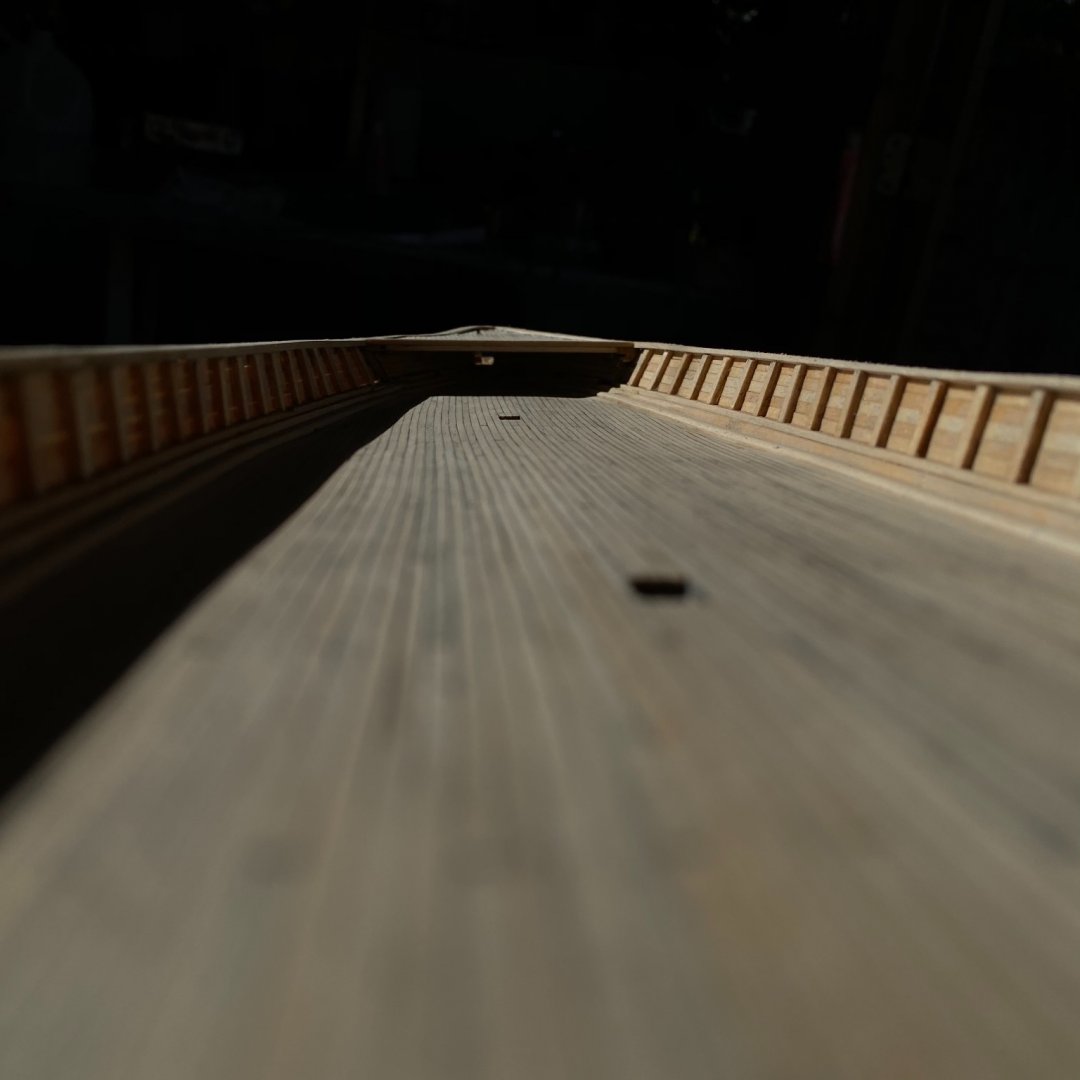
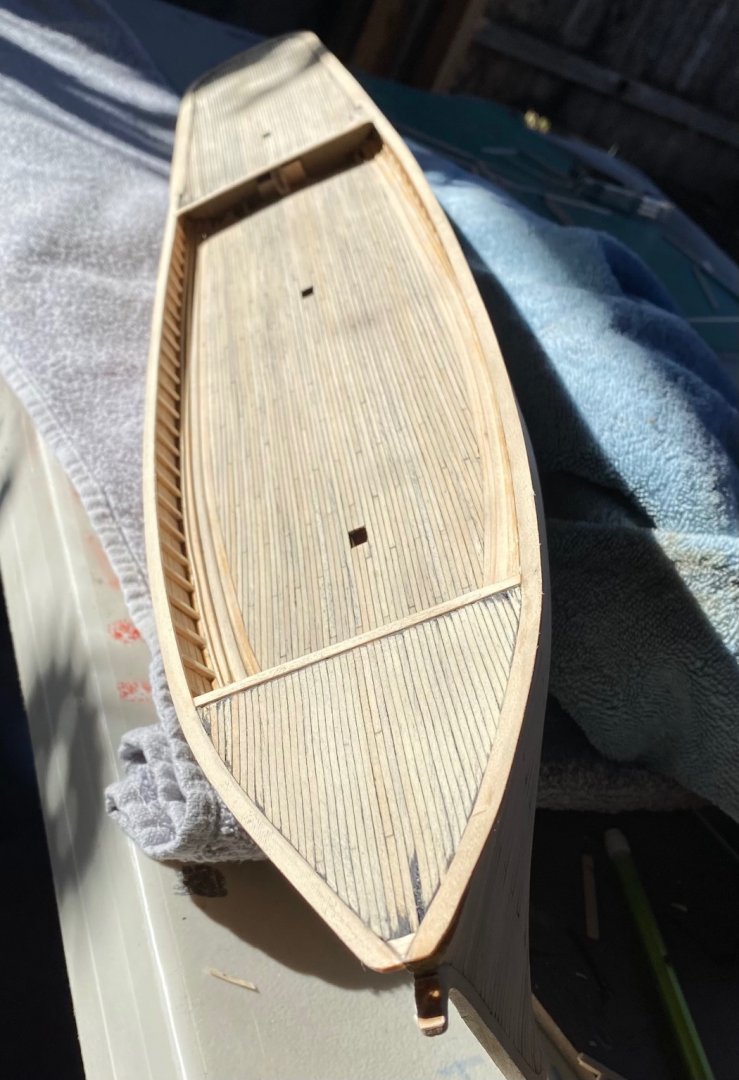
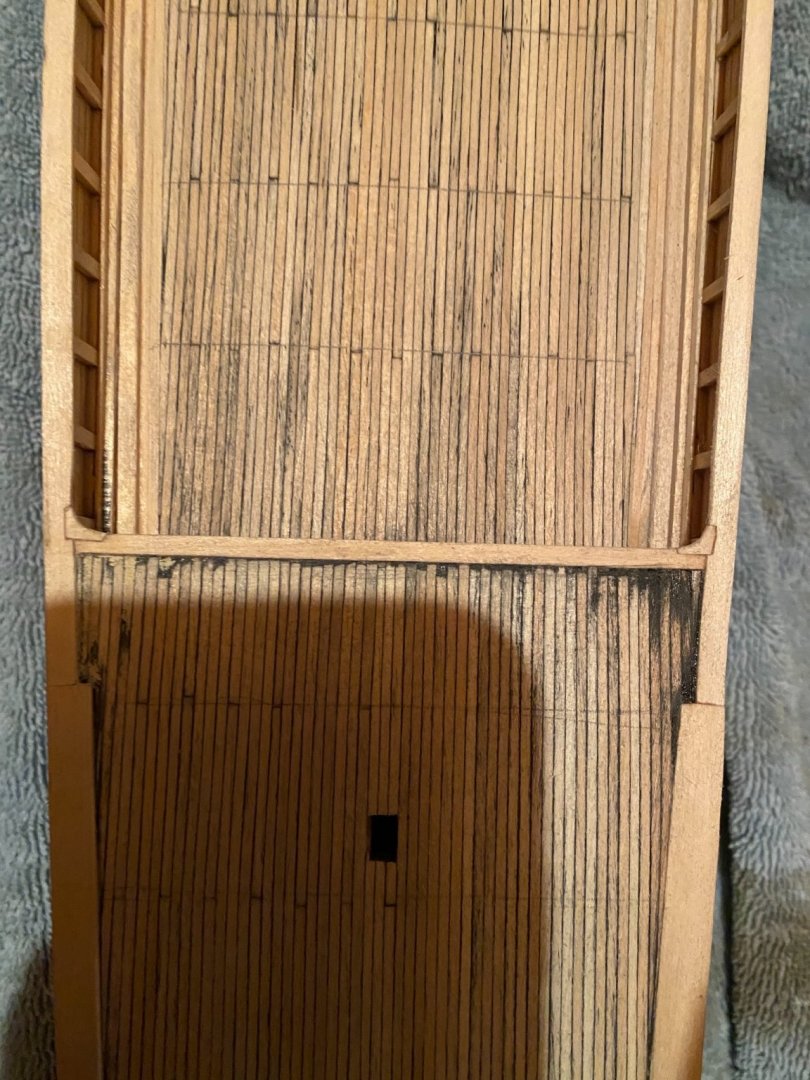
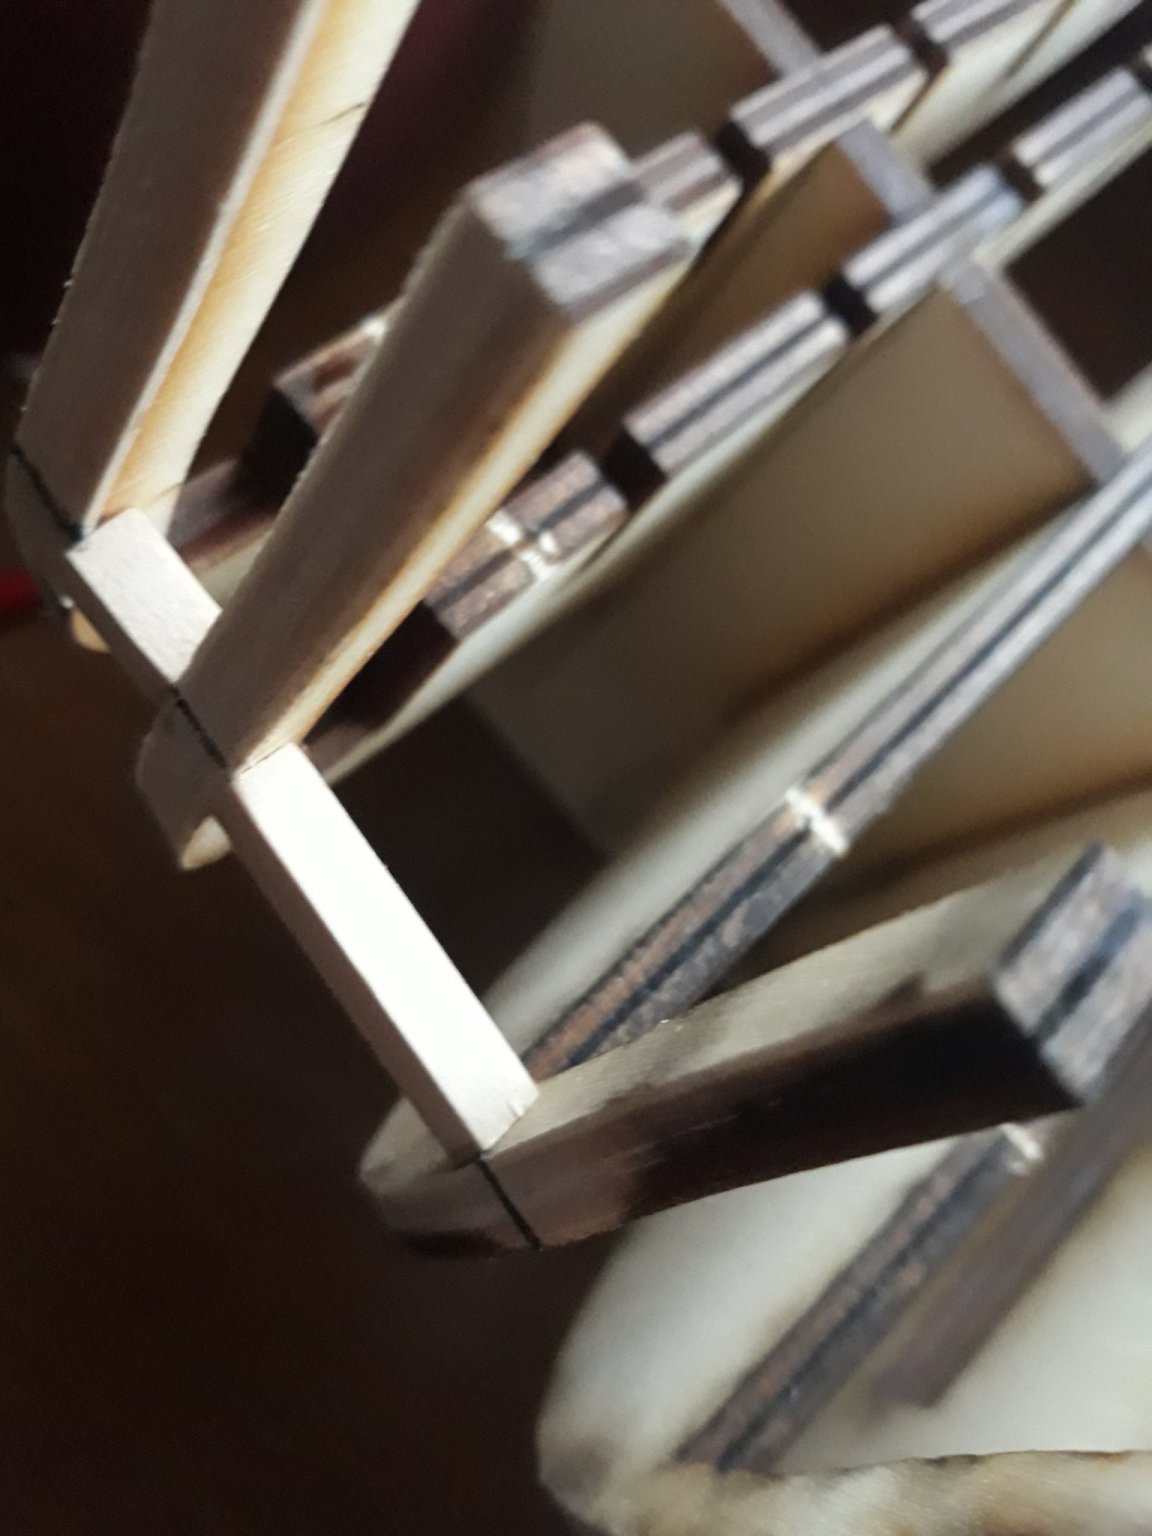
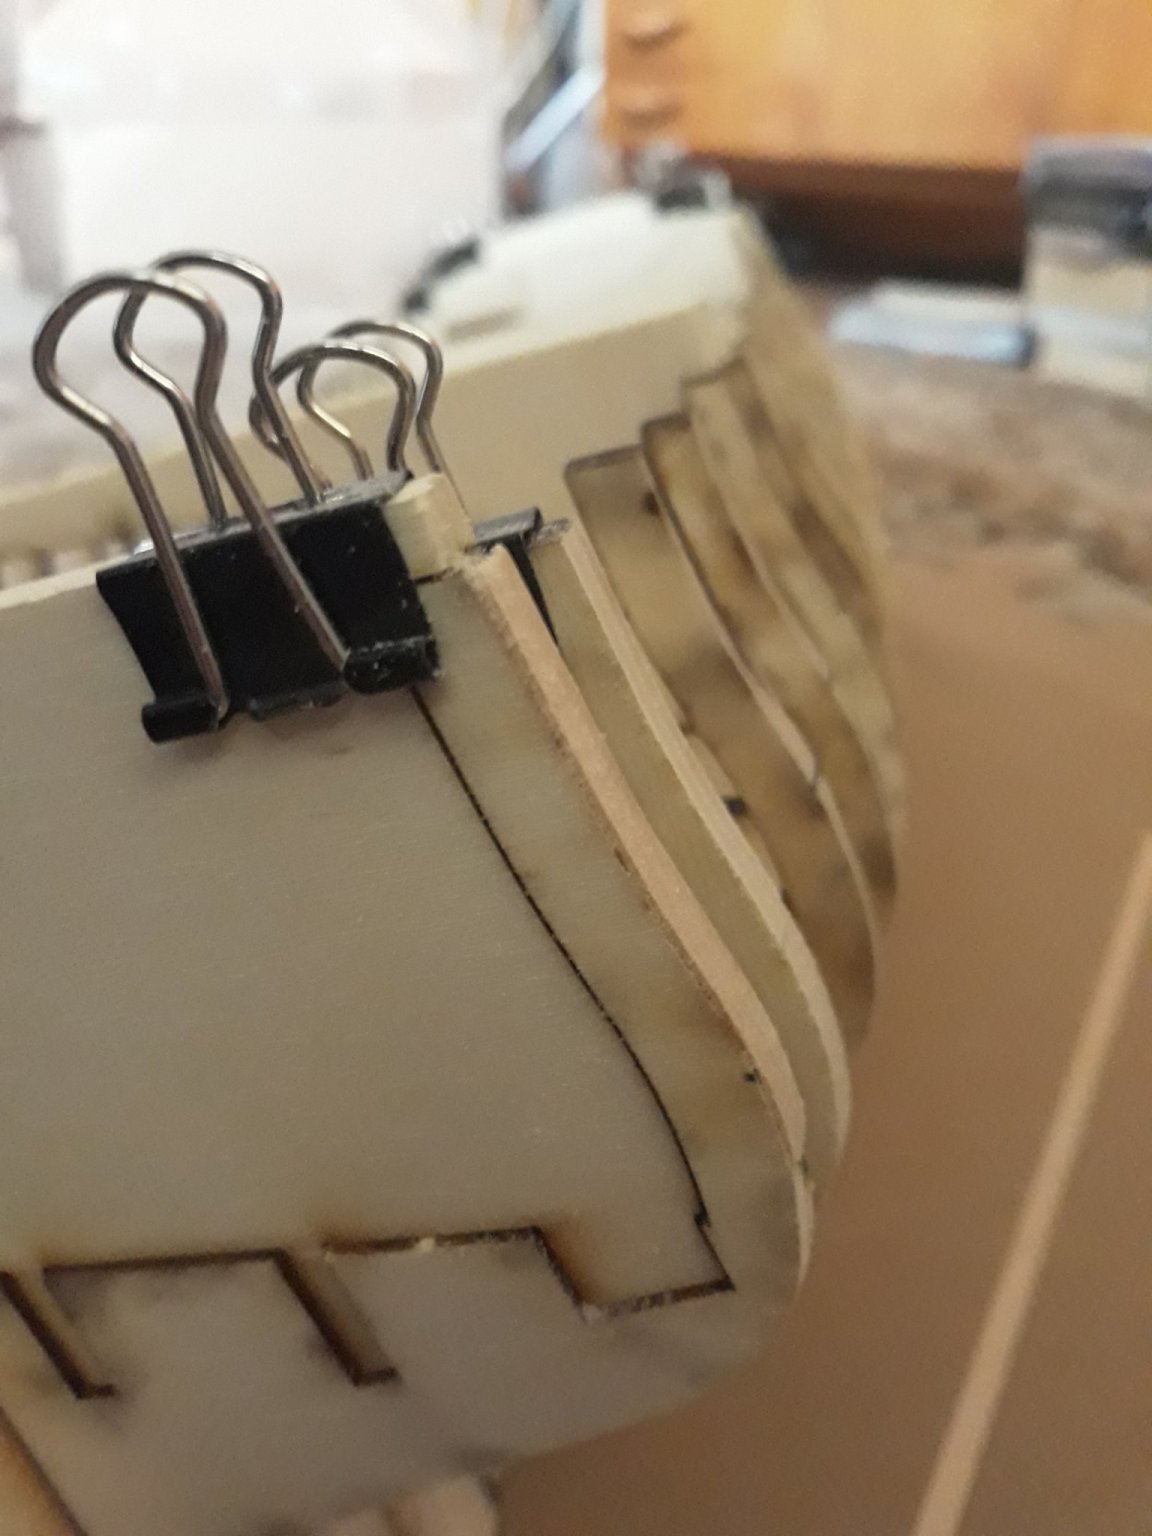
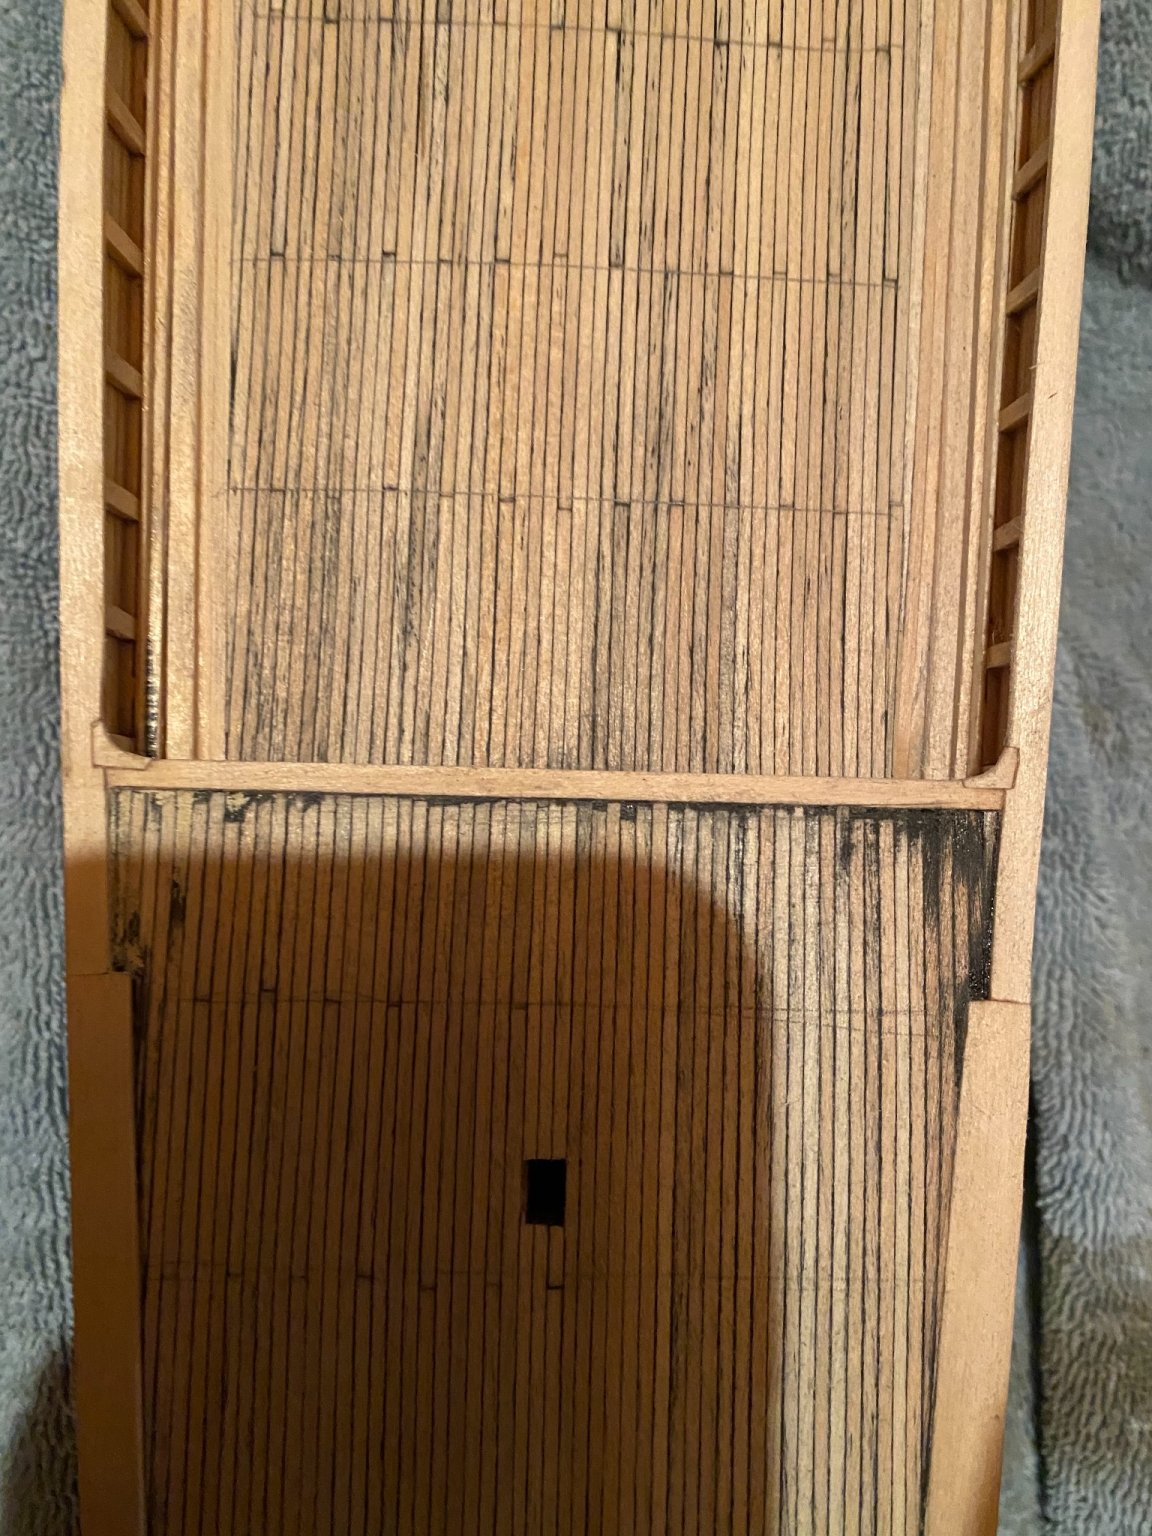
Hi guys, sanding hull in one go.
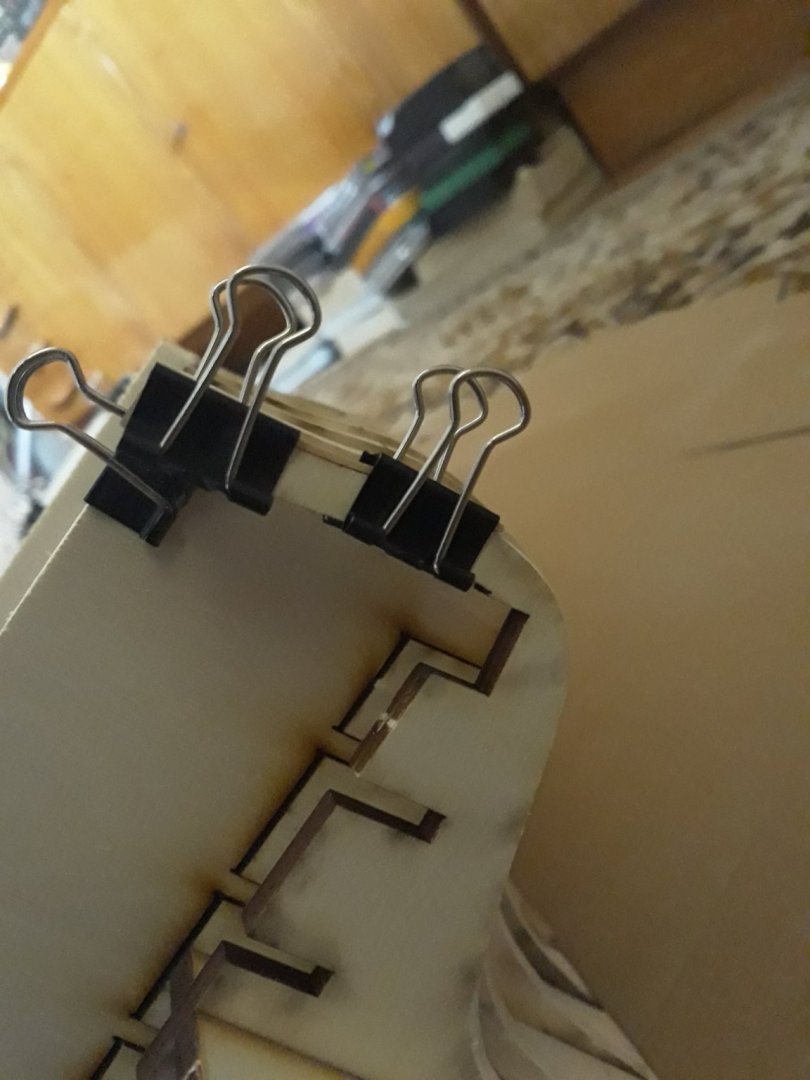
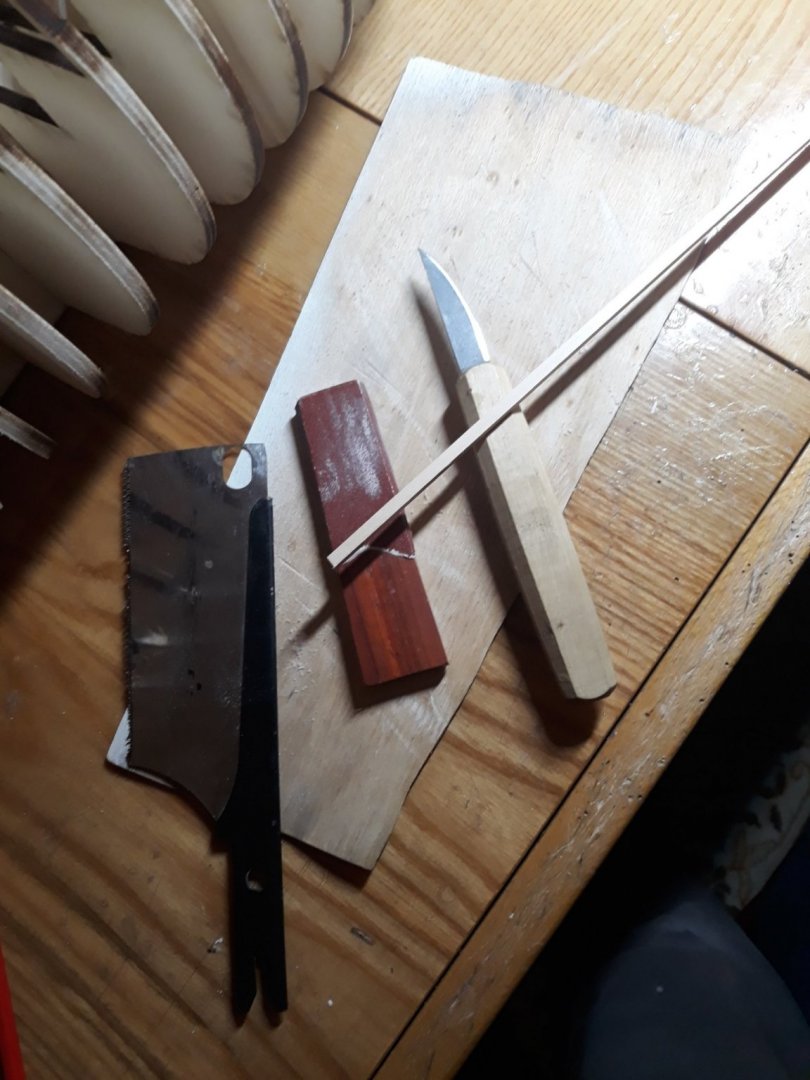
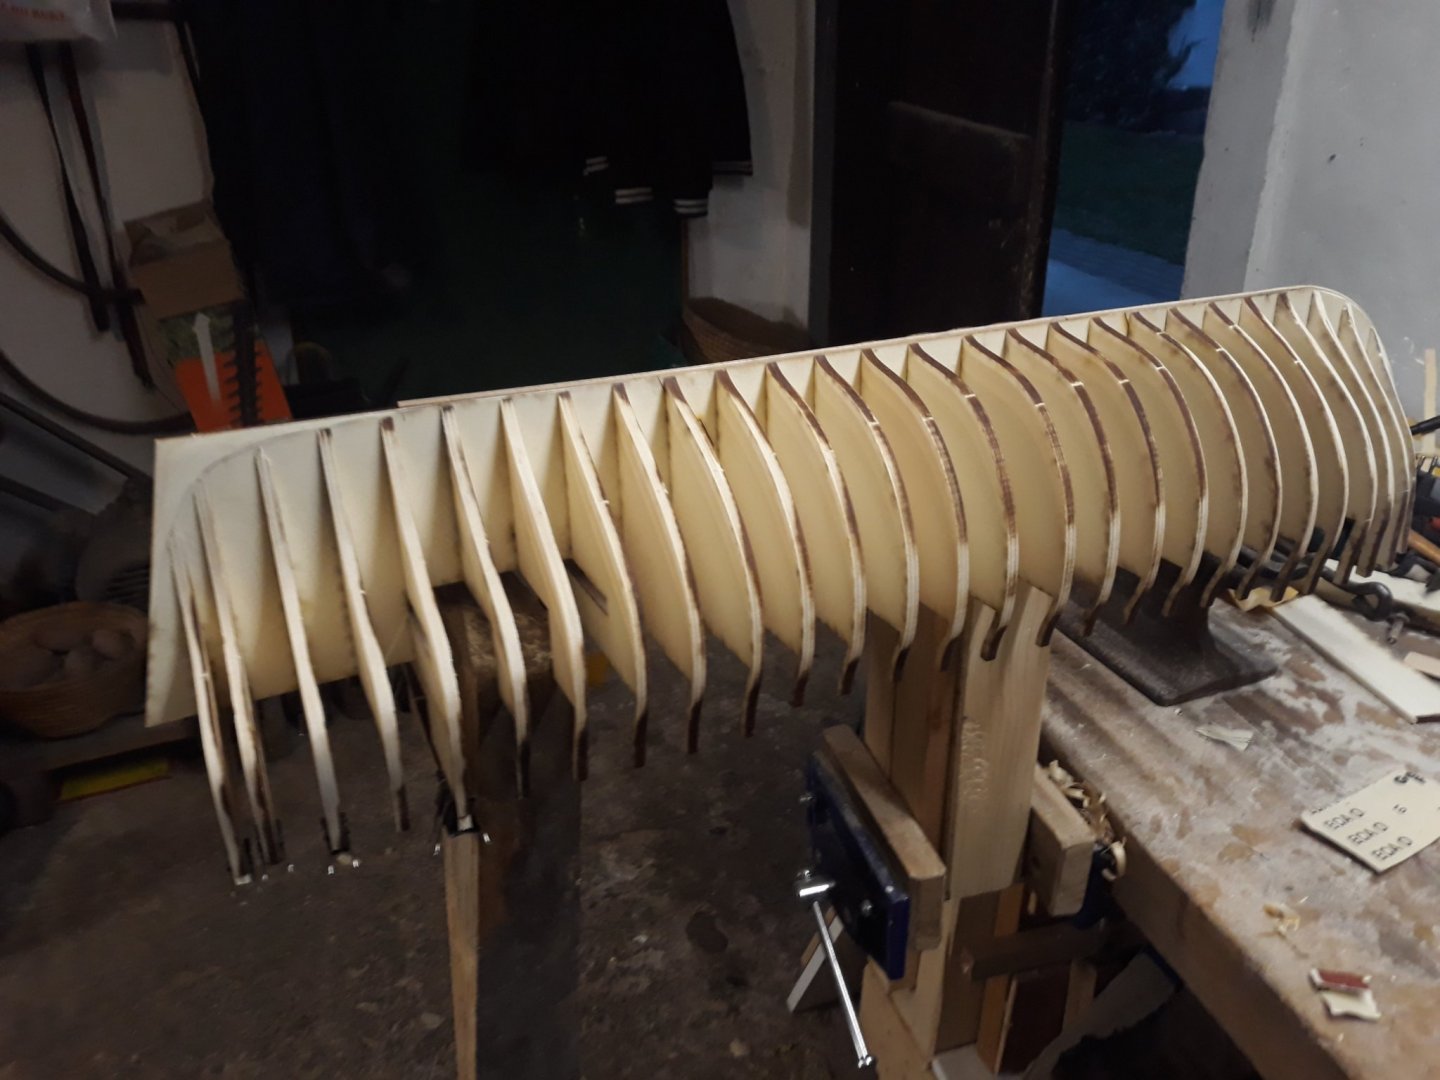
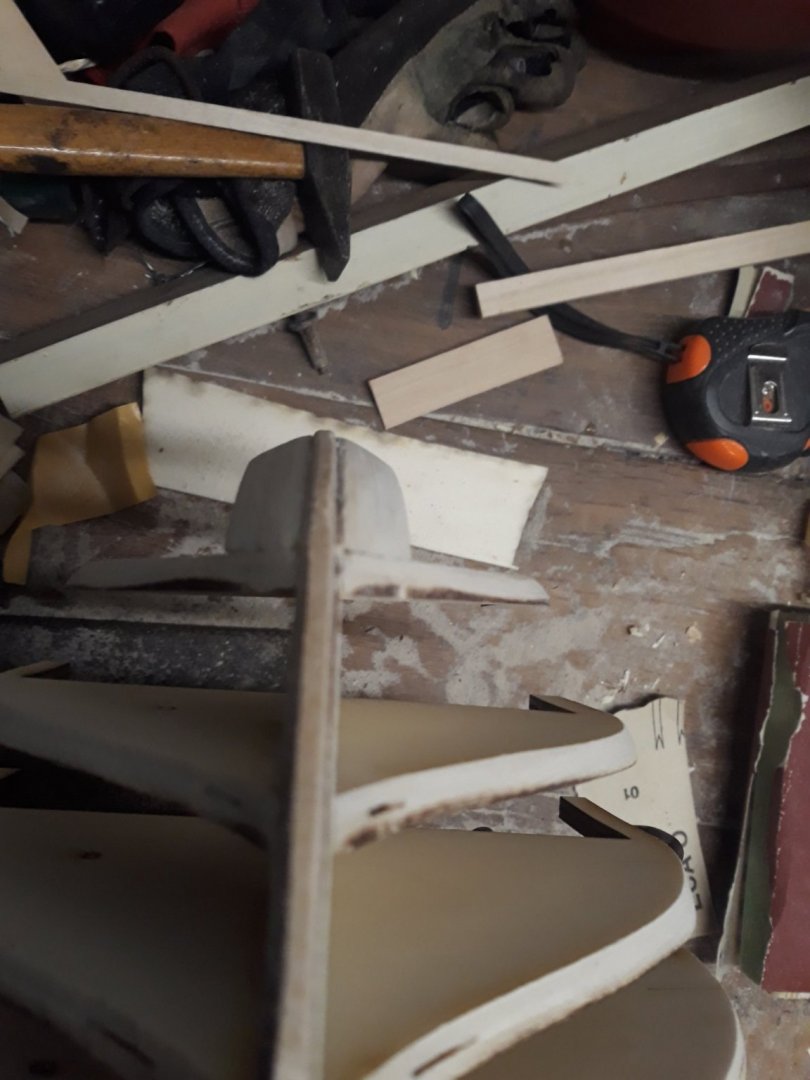
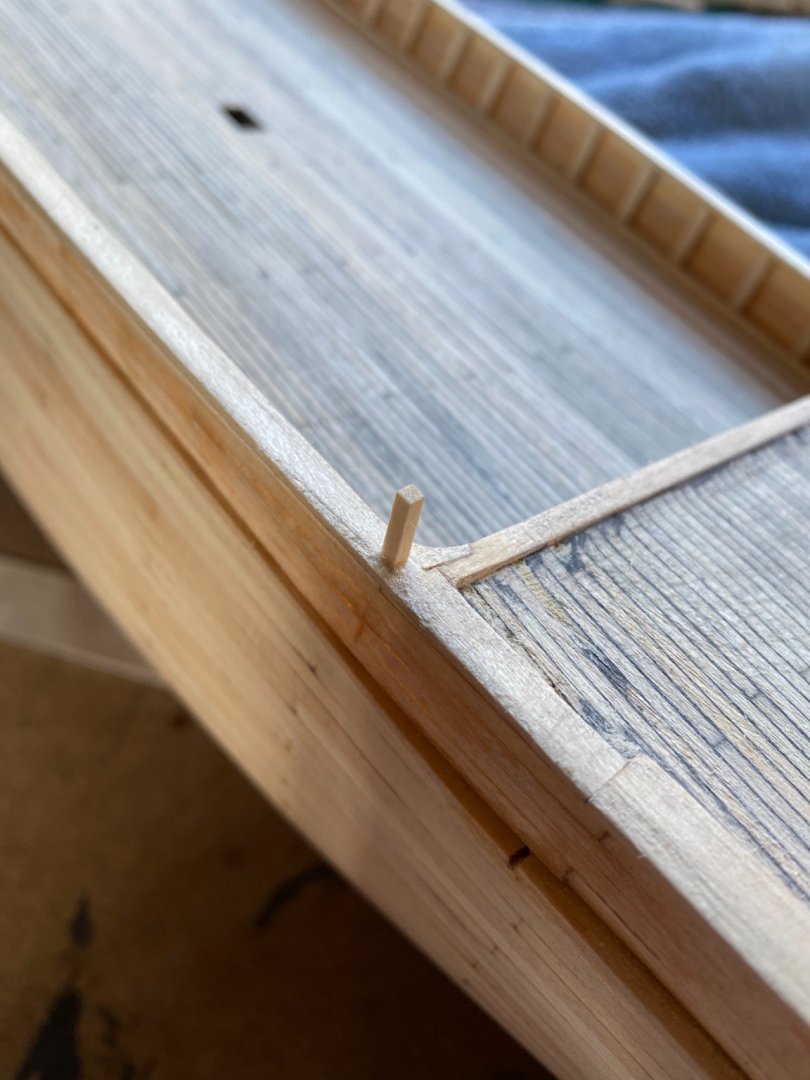
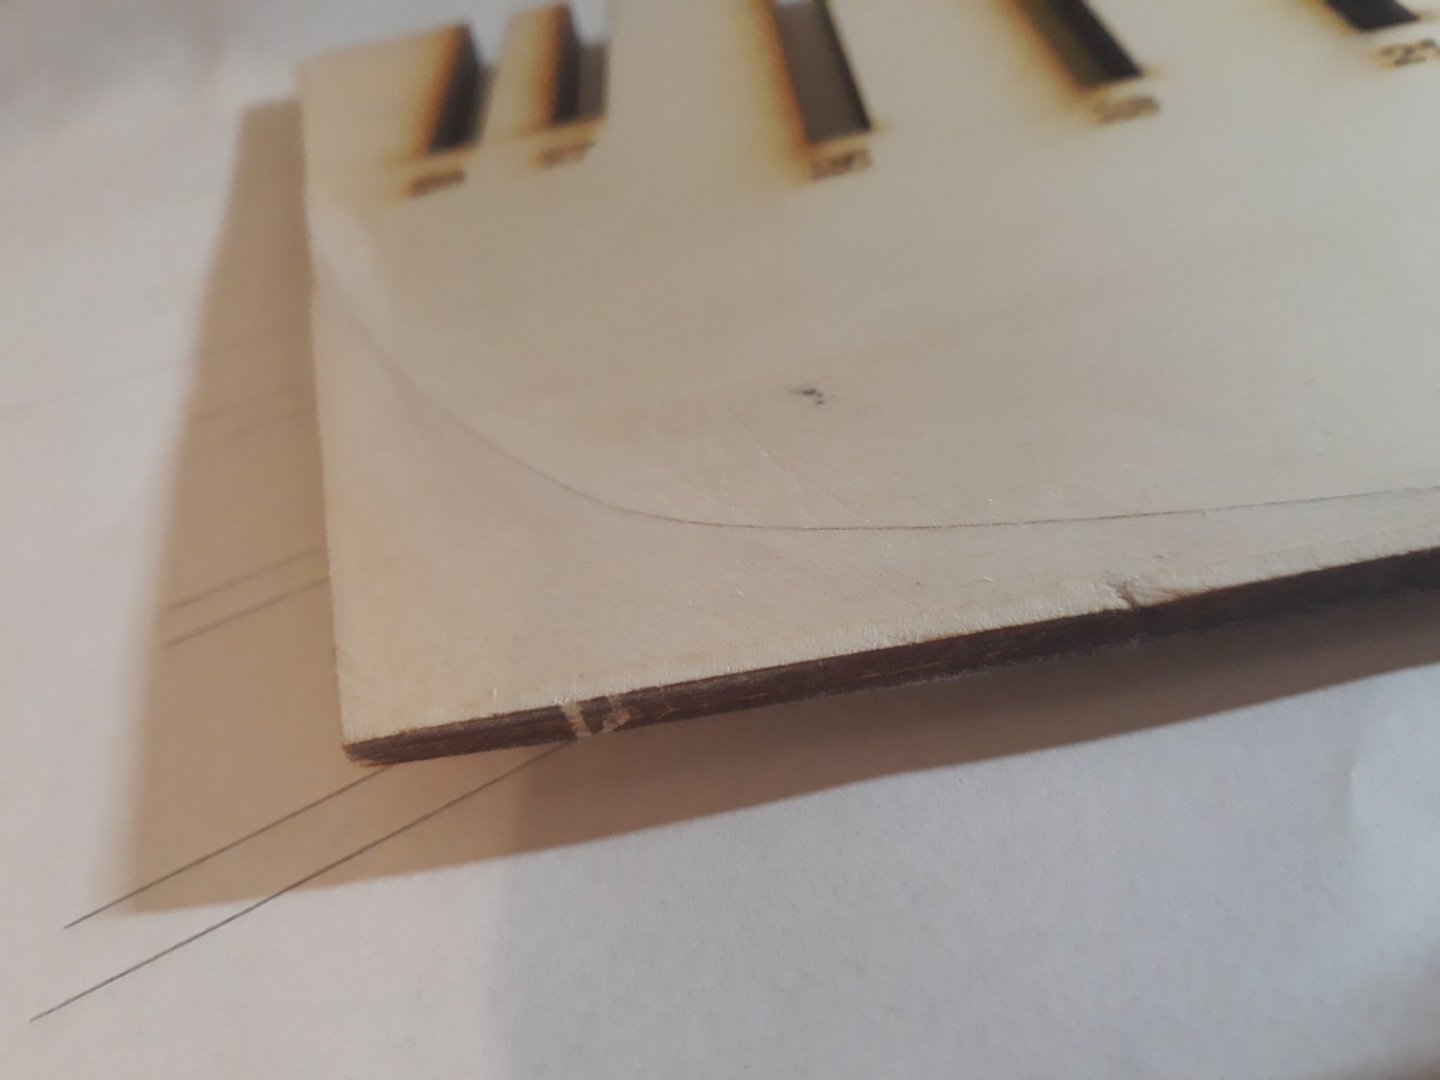
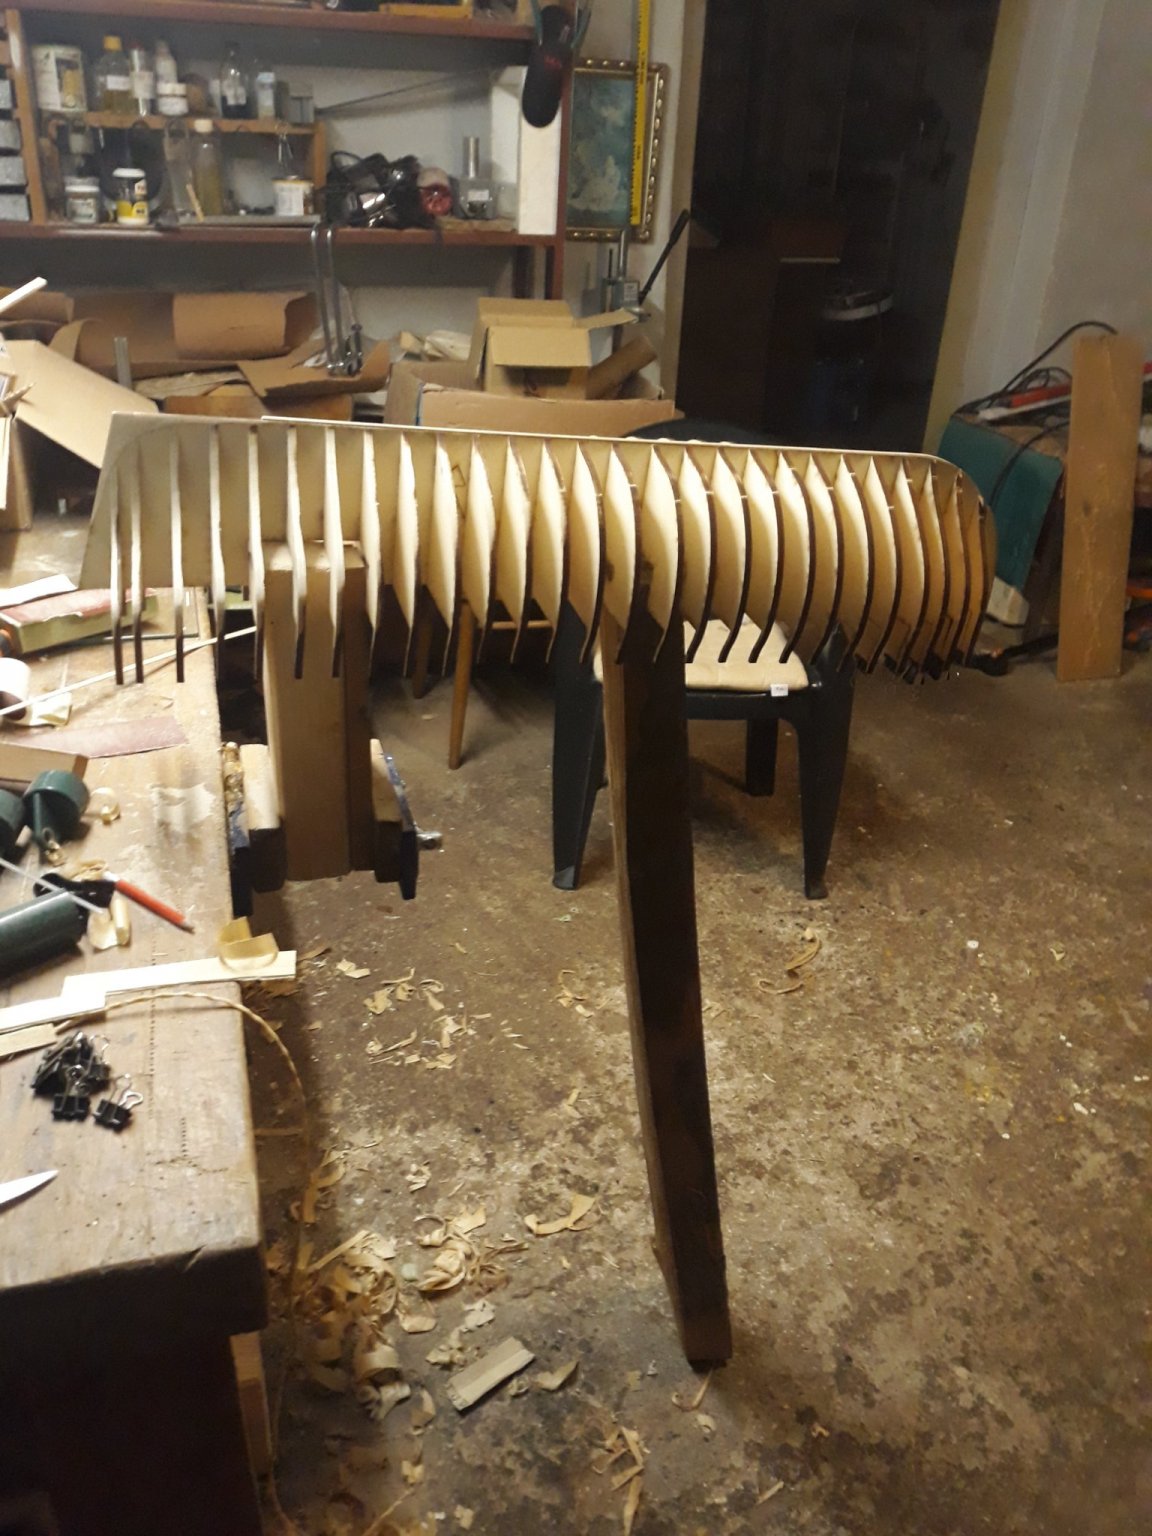
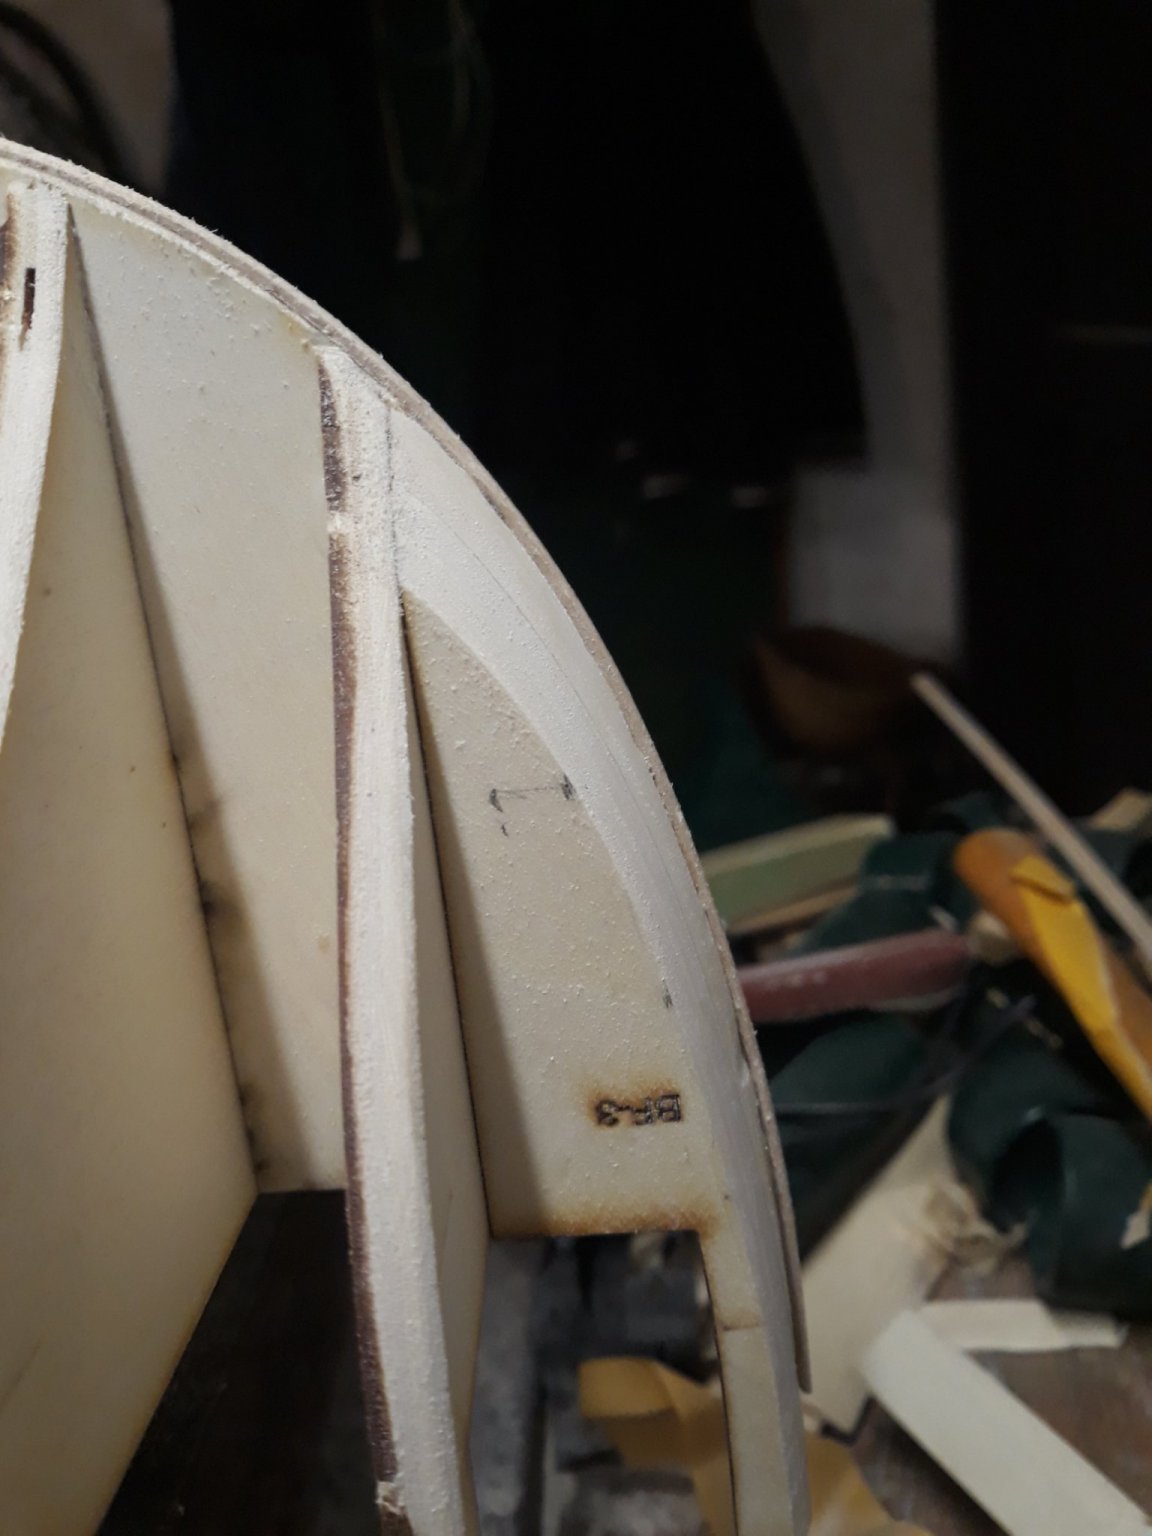
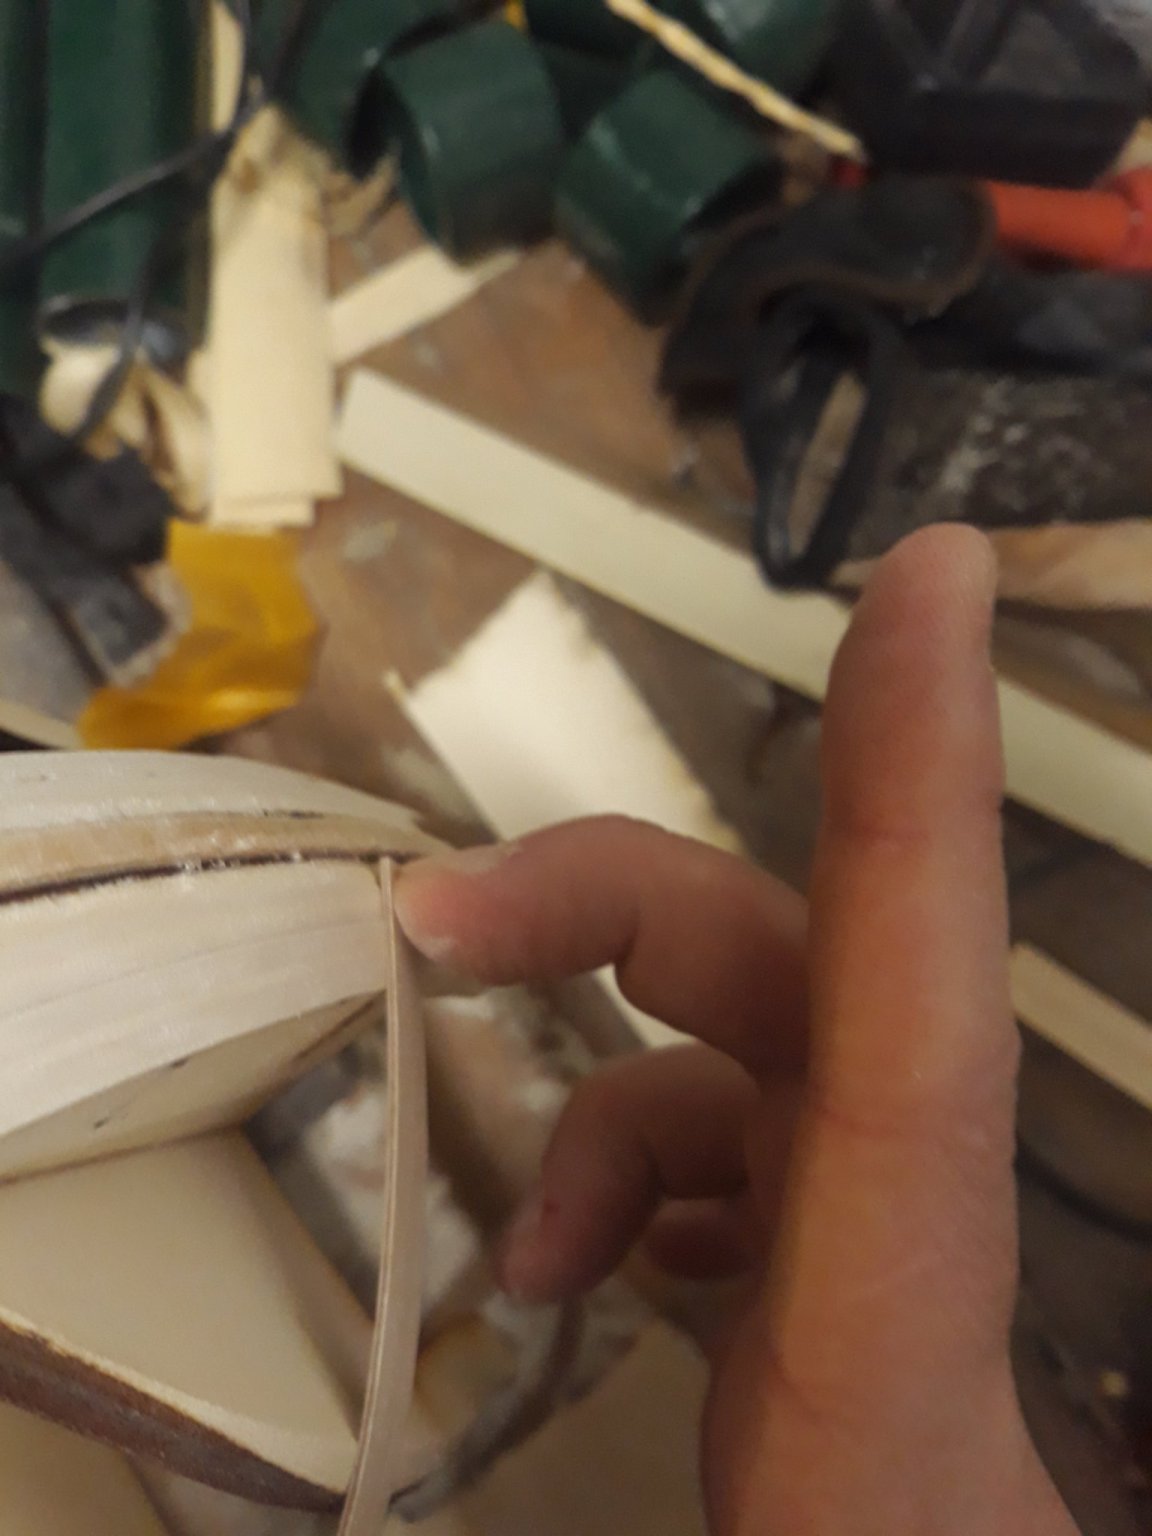
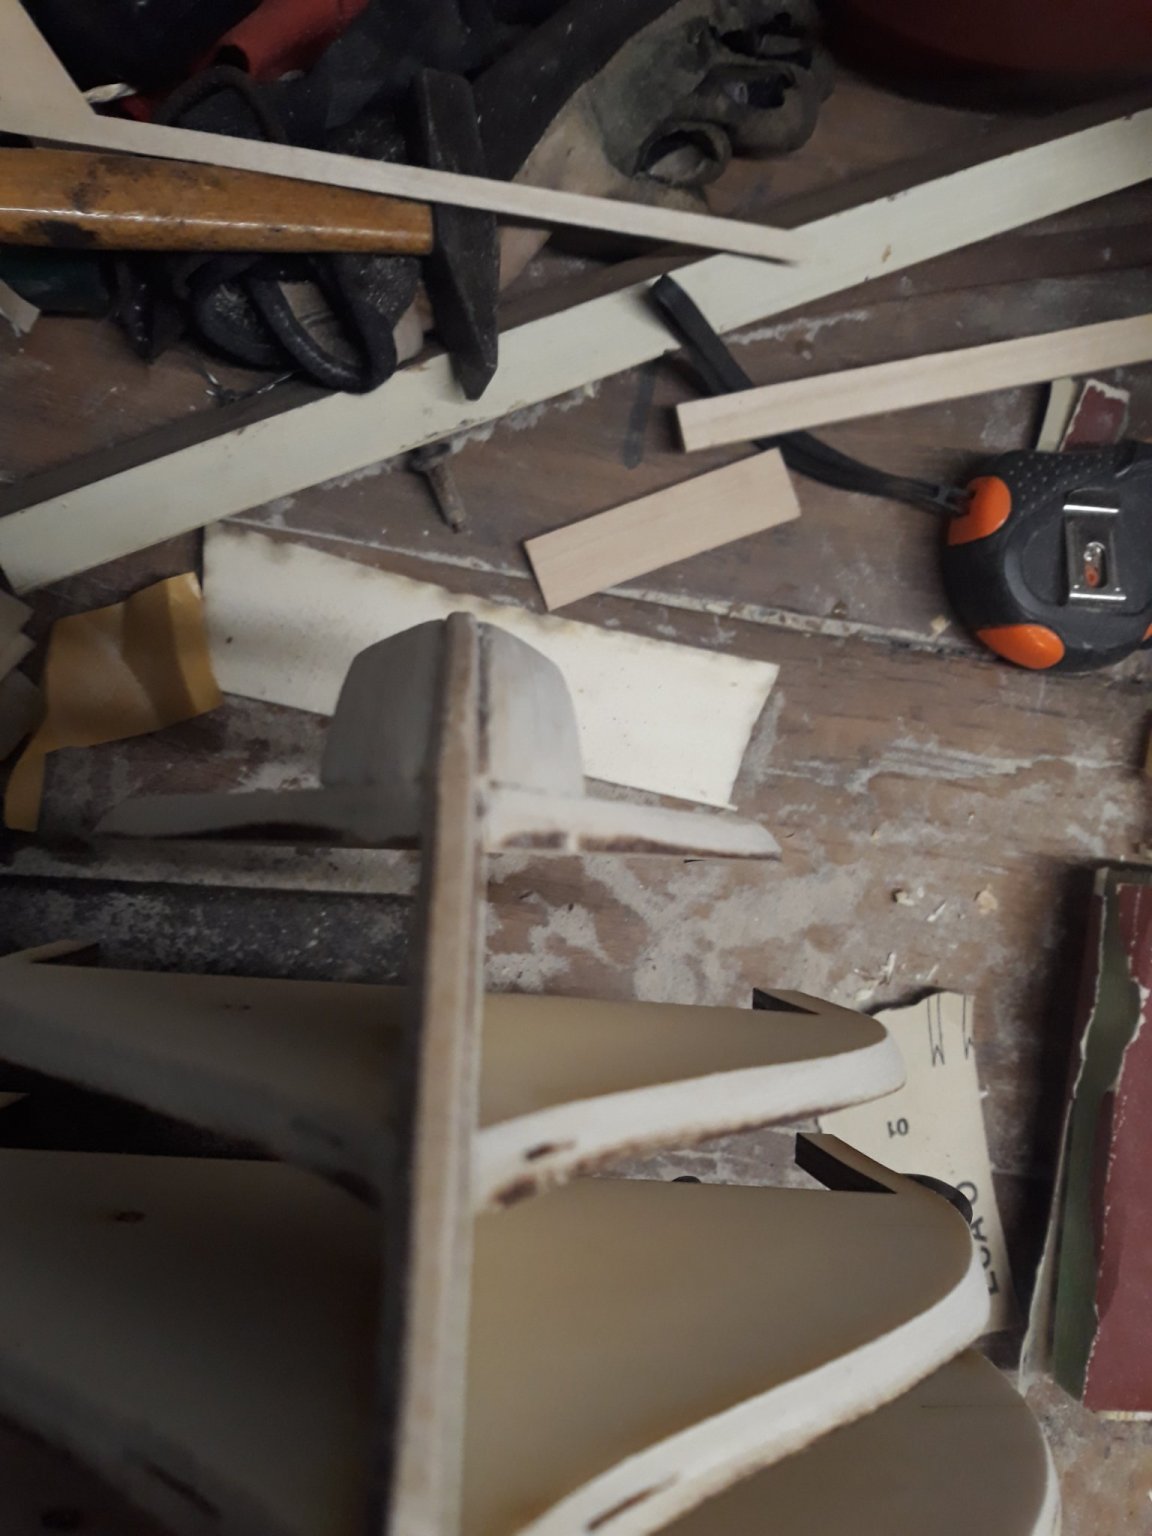
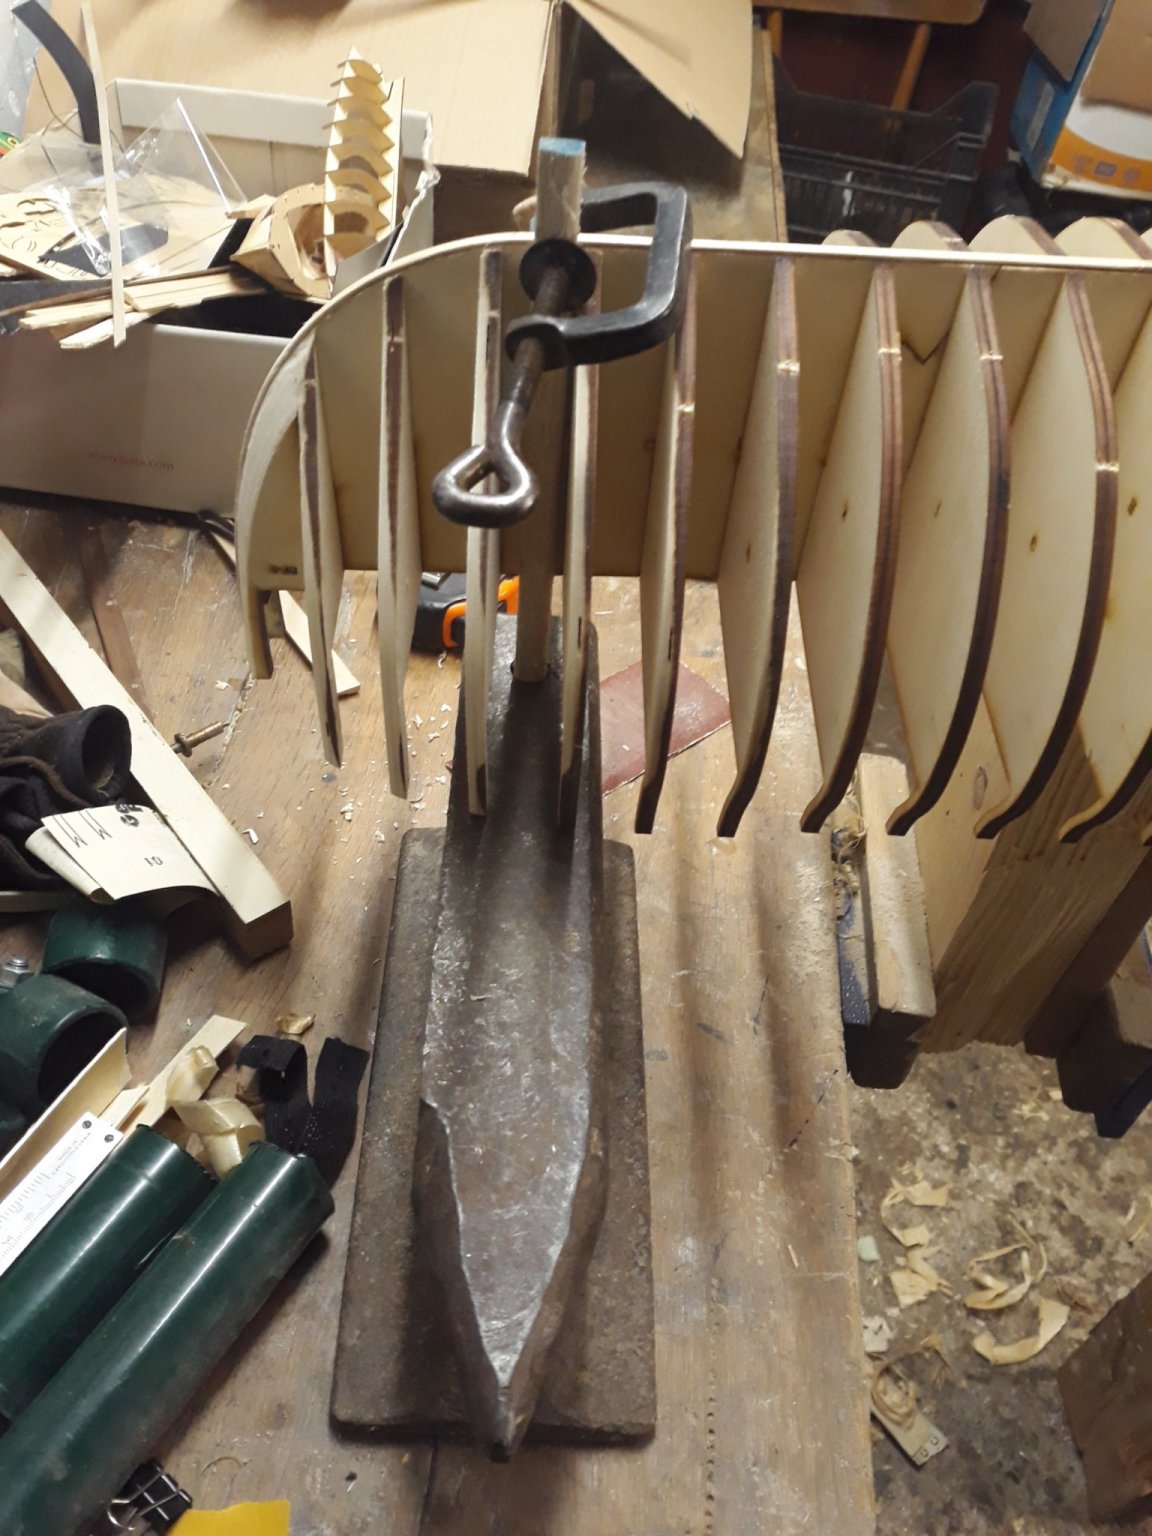
As I feared those sticks or upper walls quite a lot, to find out a way not to break them. I found my way apparently as i used mirroring gap between them - leftovers from laser cut wastage. Just clipped them up, viola. I would not have dared to sand them without that support. i was able to put some pressure on sanding blocks without any fear. just to move sandpaper vertically, no horizontally. used no60 and no 120.... and you were right poplar worked like a charm. i thanked for it massively. Im worn out like a... but happy i hate this tedious work. I went skowly and checked sandings properly with strip of wood. Tomorrow making proper standing board and gluing together those beasts so they wont be so fragile hopefully anymore. Point is? Not one broken bone so far!
from there I am on track... just waiting for the parts to arrive so i can continue look at my horrible instalments to fix her so she didnt wobble.:)) those squareholes worked - vice, some wooden block...:))


- Edwardkenway, Matt D, FrankWouts and 4 others
-
7
-
On 12/15/2020 at 1:33 AM, Matt D said:
Vlad, try measuring across all ten 1/4” marks instead of just one. It will reduce your measurement error by a factor of ten.thanks Matt, ill now wait for the parts as i move along.:)
-
3 hours ago, Keithbrad80 said:
Hello again everyone,
I finished deck planking! Well... I finished putting the planks in place and a good sanding with 60 grit paper. I still have tree nails to do, which will probably take me awhile but thats ok, its something I can work on for awhile when i have time. I experimented a bit with the tree nails and found the thing that looks best is just a .4 mm hole, and not filling them with any thing. Once sanded they should look pretty good, and from a feet away they will just look like tree nails. Now i did start this process on the poop deck with my Dremel but did a terrible job, so I’m switching back to drilling by hand which should produce a much much nicer look.
After I’m done with tree nails ill start sanding things to their final smoothness and only a few planks left on the hull and I’m pretty much done with the basic structure of the hull. I spent a long time today going back over every part of the ship and sanding things to the correct dimensions so when the top gallant rail is done I can paint and copper the hull. Here is a bunch of pics of my build so far:

I couldn’t leave the knees the way they were so i cut them out and made some new ones. Here is a pic:
And then the one thing no ship modeler ever wants to happen, happened... I bumped my model off the table! As i was closing up for the day my jacket caught the corner of the table, just enough to roll the whole thing off the table. Thankfully the damage was kind of minor, I had started cutting the timber heads for the top gallant rail and getting them glued in place when it happened and of course knocked everyone of them off. It was frustrating but ok because i wanted to change a few things any way. Here is a pic of what i was doing before it fell:
Thanks again everyone for checking in!
Bradley
hat off sir, very nice work ! so beautiful .
-
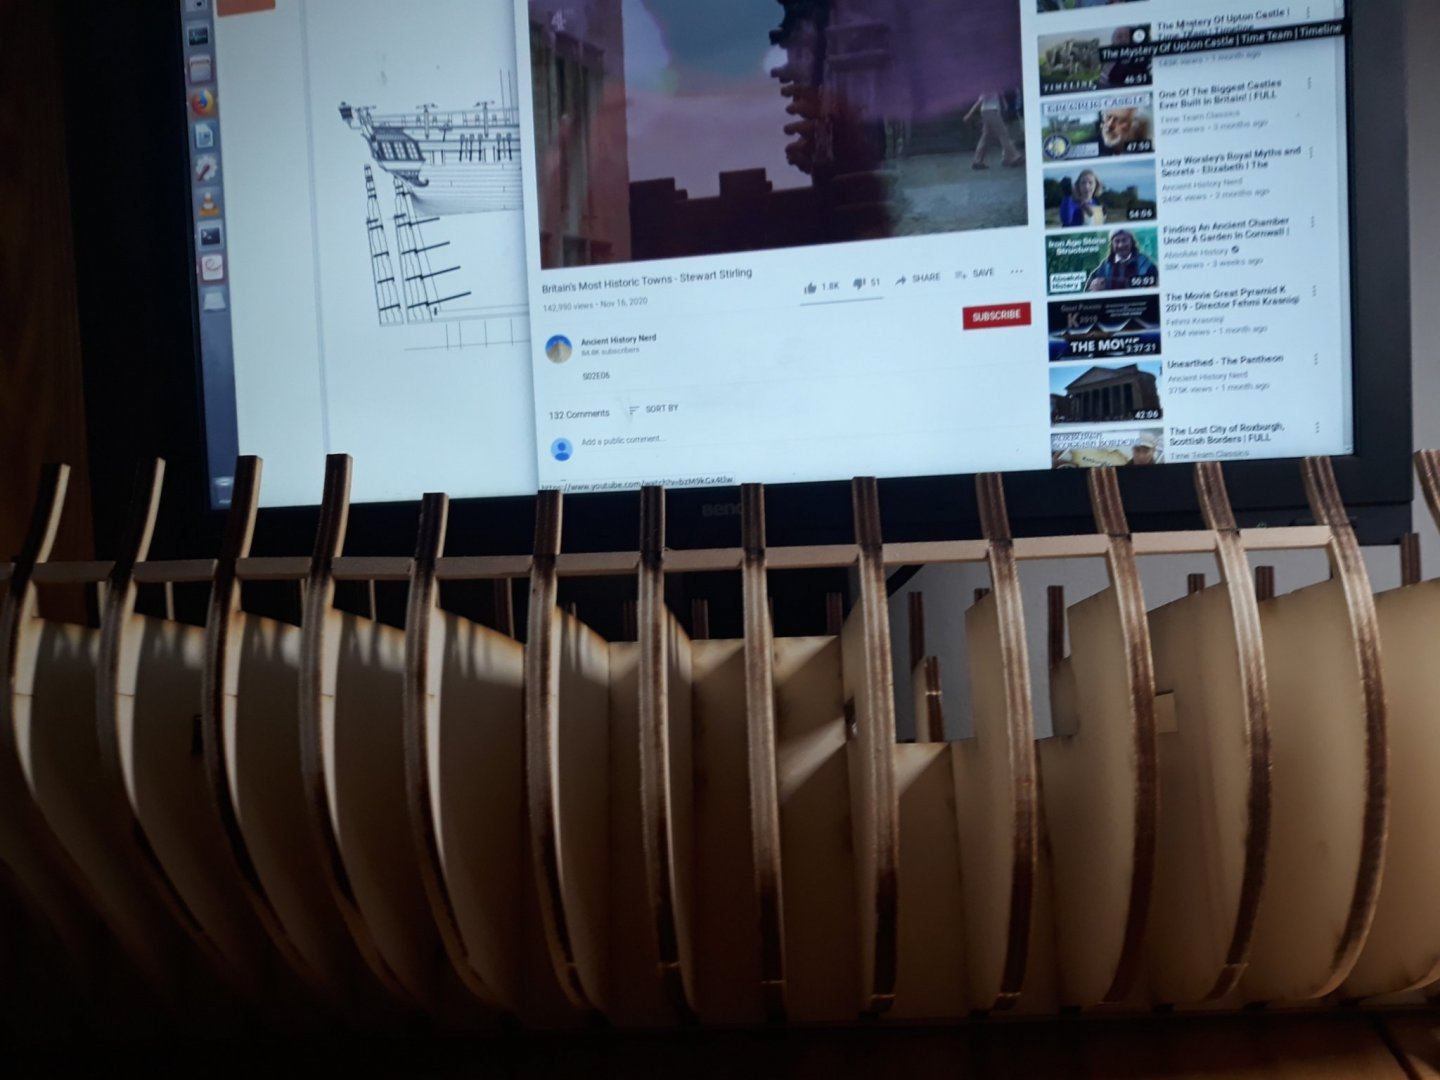
I started guys. So happy back in modeling, missed it. Decided to attach keel later when arrives. Doesnt bother me at this point i can fair hull and insert those pieces of wood between upper walls. I think i cut off a bit more around stern post than it should so i will check it when sternpost arrived. Plenty to work meanwhile. Plan and lasercut is so precise. If i struggle wuth something ill ask. Thank you vlad.

-
3 hours ago, Ron Burns said:
Vlad, I measured mine with a digital Vernier caliper and it comes to 14.19mm but that doesn't account for a bit of laser char removal, etc.
I still have my original scrap sheets outside of my building where I could get you a measurement from the cutout if needed. Let me know before they become snow covered
Ron thank you ! much appreciated. it seems OK. anyway even if not, game is on! already started. Chucks plan is so precise i never come across such skeleton, as bulkheads are so close its faboulous. i admire folks who make own bulkheads as i made few myself but this was piece of cake so precise. i had to push them down by hammer. ...
-
23 minutes ago, Chuck said:
Its really hard for me to tell with certainty. Best to wait for the parts to arrive and do a comparison to see if the printout is correct.
Chuck.
Ok, thank you.


HMS Winchelsea 1:48 by Vlad
in Member Build logs for the HMS Winchelsea
Posted