

Vladimir_Wairoa
-
Posts
1,566 -
Joined
-
Last visited
Content Type
Profiles
Forums
Gallery
Events
Posts posted by Vladimir_Wairoa
-
-
45 minutes ago, Edwardkenway said:
You have a good friend there, to do those parts for you!
Good luck and happy modelling!😉
Thanks Edward & folks, well that friendship involved money too
") as there is no free lunch obviously :)) but part of the decision were many leftovers from previous work. also one packge of planking suff that was lost in shipping and arrived half a year later
as there is no free lunch obviously :)) but part of the decision were many leftovers from previous work. also one packge of planking suff that was lost in shipping and arrived half a year later
- Edwardkenway and FrankWouts
-
 2
2
-
56 minutes ago, Chuck said:
Well that is a great start. Hopefully you will get those parts soon. Shipping is a mess right now just about everywhere.
Welcome to the group.
Thank you also for all amazing effort.
-
Hi folks,
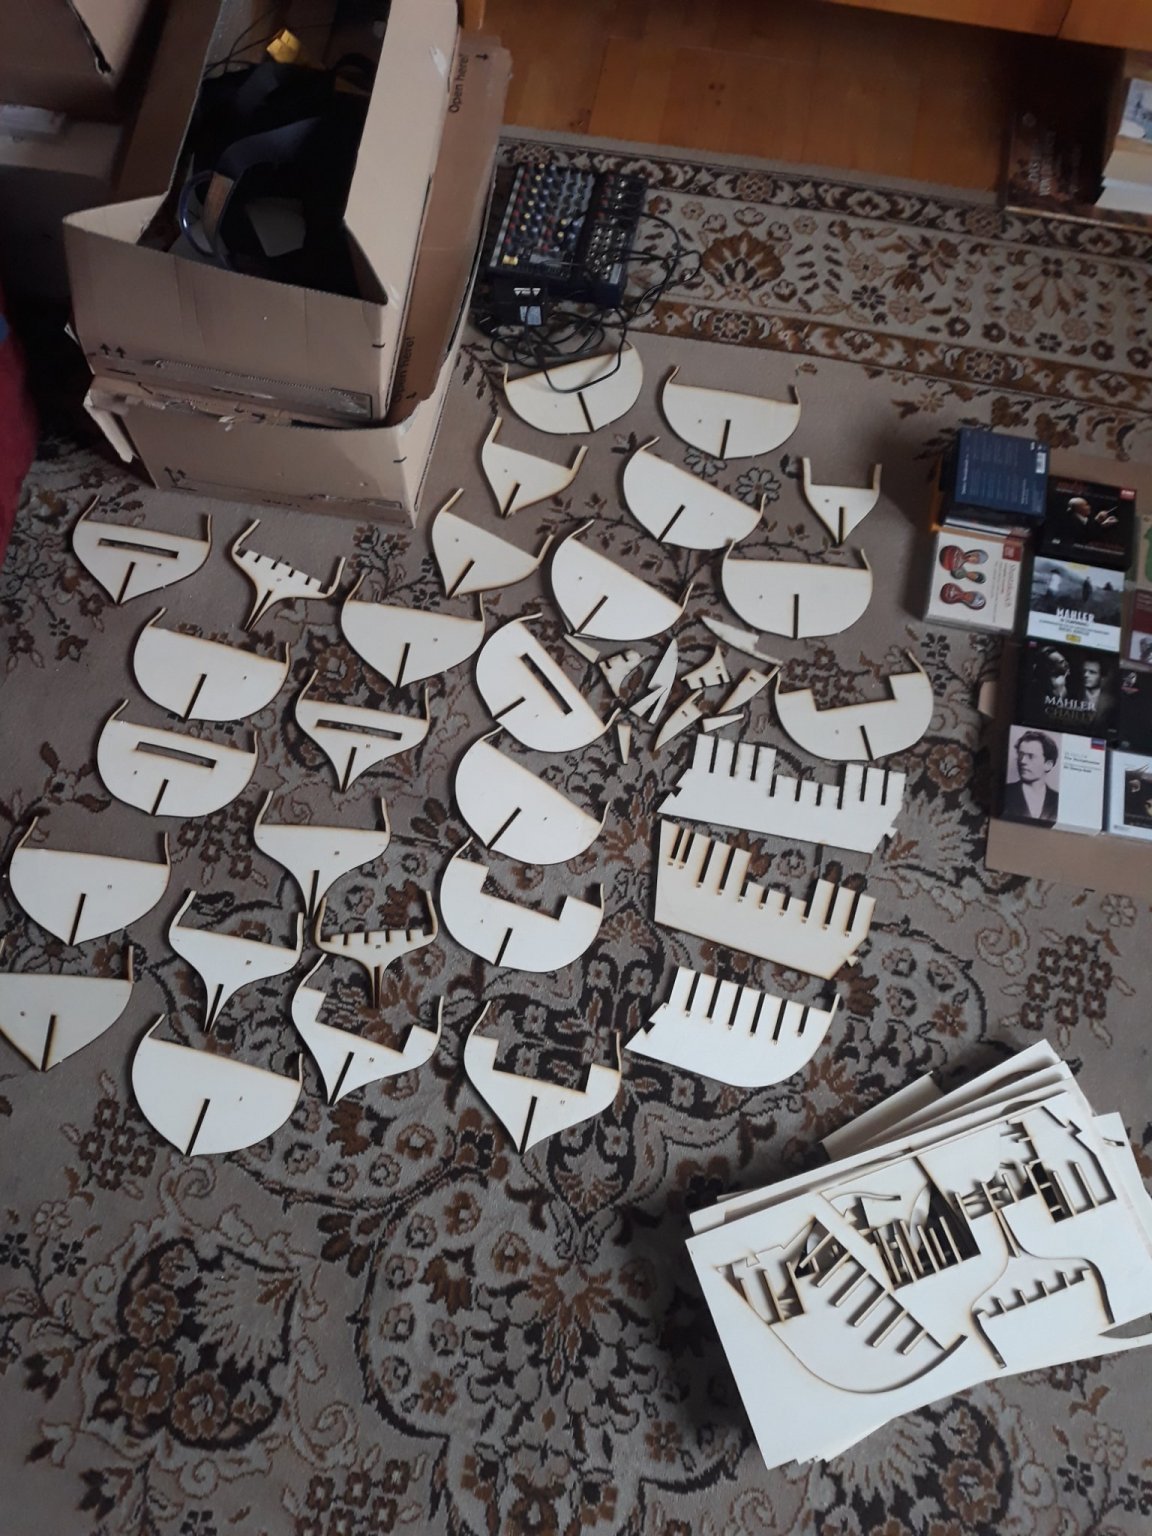
Im trying to catch up with rest of the bunch throughout winterly snowy evenings on this magnificent project, hopefully learn soke new skills and back myself up of Chucks and yours guidances photos etc. Still nervously awaiting package with 1234 parts from overseas but already started as friend made for me the bulkheads on cnc. He was so nice even marked letters and so on...And thats a ton of pressure he put off my chest. Its poplar, extremely light and so im pretty nervous how it be around those tiny wooden walls...i have big build behind me from scratch without any guidance nor buildijg lan now trying to learn propper stuff if up to it. Thanks for any comment like etc so ...i cant go on further at this point :)) . Central frame glued. ! So i wish her luck! hope everyone healthy and already arranging christmas tree with taking sips of favorite drinks. I do though
V.


-
joy to watch Bradley. thanks for showing.
-
I hope/wish for speedy recovery @Clipperfun
-
-
7 hours ago, rwiederrich said:
Today I spent some more time in the asylum and added a bit more stone to the hull. It is slow going because I wait for each application to dry before moving on.
Rob
wow it looks very nice and of course Rob R. style - out of the box
her deep body starts popping up. clearly nothing like flying fish. cant wait to see it further.
-
Happy to see the progress Rob. Nice idea with separate wood for deck curvature and subdeck for strength. You could also glue up some pieces of wood around centerline and bulkheads joint, to fix bulkhead firms apart of subdeck, but you will do it later probably.
she starts to emerge....
happy continuation
V.
-
-
8 minutes ago, svein erik said:
hi
congrats, you are duing a fantastick job , the model is big but its also looking beautiful....
with rigging it wil be a master peace .
i hope i can build a cutty from scrath but not so big then😉 i love to see it rigged sometime in the future.
have a grait day☺
svein erik
Hi Erik thanks for nice words.
Well, if I was to start now, I would think differently in this direction. if going with full rig definitely go smaller at least 1:48 would do beautifuly. If going 1:24 - BOF without masts at all would be astohisnig but being frame not wooden - that would be a unimaginable challenge. also it woudl be long long work.
my piece of advice now is if someone desires to build larger than rest - be prepared for long route i mean long route - even longer than long
thats for sure
another piece of lesson i learnt was - it does not matter how big is ship - rather choose smaller boat dor intricate details - can be obtained in smaller vessel ( according scale) but some boats are too big in life that for detail they need to be built bigger to have those details appear.
i encountered a small piece of big deadeyes or eyebolts etc rigging there - and I struggled.
but trying big rigging can be tricky because you will soon run into other problems that small scales omit - splicing and other nightmares:)
so it realy doesnot matter at the end each scale have its own advantages and disadvantages - for example - in big scales you have t omael own deadeyes - impossible to buy - and mostly everything that comes with ironwork -
rudder hinges? not existent .
most suppliers have things commercialy sold up to 1:65 i would say.
that itself would have shortened my timework approximately to the half!
so building smaller has numerous asvantages over building big -
but that is obvious i guess
for that I take hat off every smaller scale builders who rig their boats fully. that is unimaginable for me to achieve. i would rather make 10 boats hulls and cabins than one small 1 masted rig. :))
- svein erik and mtaylor
-
1
-
 1
1
-
19 minutes ago, Mark P said:
Congratulations on completing her, Vladimir;
A very lovely model, and built with remarkable speed. There is a lot of good detailing on her, and I agree with the others above: it has been a pleasure to watch her taking shape under your hands. I hope that whatever well-earned rest you take now will not last too long, and you will be back in the workshop on your next project; which I look forward very much to following.
All the best,
Mark P
Thanks Mark for kind worlds and valuable support on this journey.
Truth is I will not have granted such time as I had building cutty ever. Due to work it will take linger to post. hovewer I have paln in my head established , as usually winter is my workshop time. i have violin and cello half built but not touched over 1.5 year now but i dont want to leave ships abandoned so i have to figure it out. - im eyeing some small models 1 or 2 - whaleboat or historical lognboat cutter and scottish fishing vessel. but my main project will be McKays glory of the seas as I have merchant clippers in my heart:)Now i can establish quite fast route with hull ( being way smaller im not scared that much - and having build cutty without any building instructions apart of campbel plan i had to follow try and continue route -
for glory i have i intend to use model shipways detailed building plan with step by step insteuctinos which would be breeze i suppose if i nail main things. but at the same time i want to make hull filled with balsa maybe for filled up hull - two layers of planking and I wish to make bow glorious so i would have to probably search for ways where to purchase a figurehead. that that would be later. - so i wish i can get hands on glory this winter and complete hull. fingers crossed.
oh by the way - i worked carelessly with chemicals and glue on cutty with bare hands and unfortunateyl ideveloped kind of
 alergy on hands. so i will prefer to use wood glue from now on. its agressive chemical bastard that fastglue..meanwhile i will sit , watch and enjoy and like projecs of others...V.
-
On 9/25/2020 at 9:32 AM, Bruma said:
Why? Because she will be too long or too complex?
Anyway, you did a great job, and she looks fantastic even now! And... Who knows, maybe in the future you will come back to her and complete the rigging!
Thank you for sharing your journey!good point Bruma , thanks!
- Paul Jarman and mtaylor
-
2
-
23 hours ago, Paul Jarman said:
Great job Vladimir,
I personaly think she looks Good without all the rigging. You get to see all the details better.
I have a few sailing ships in my stash. But I find my hands shake far to much when attaching small parts, and especially when tieing knots.
I will take inspiration from this and build one without the rigging.
Paul
Thats true as well Paul
thanks
- mtaylor and Paul Jarman
-
2
-
Thank you everyone.
@rwiederrich I did intended but the moment I setup the length without jibboom I realized it was merely a sweet dream. maybe foolish one: D
-
Wrap.
Dear fellow Builders,
there is no prettier object in the earth than boat lines....for us....i know ladies would be protesting but ...we know thee is no point in arguing
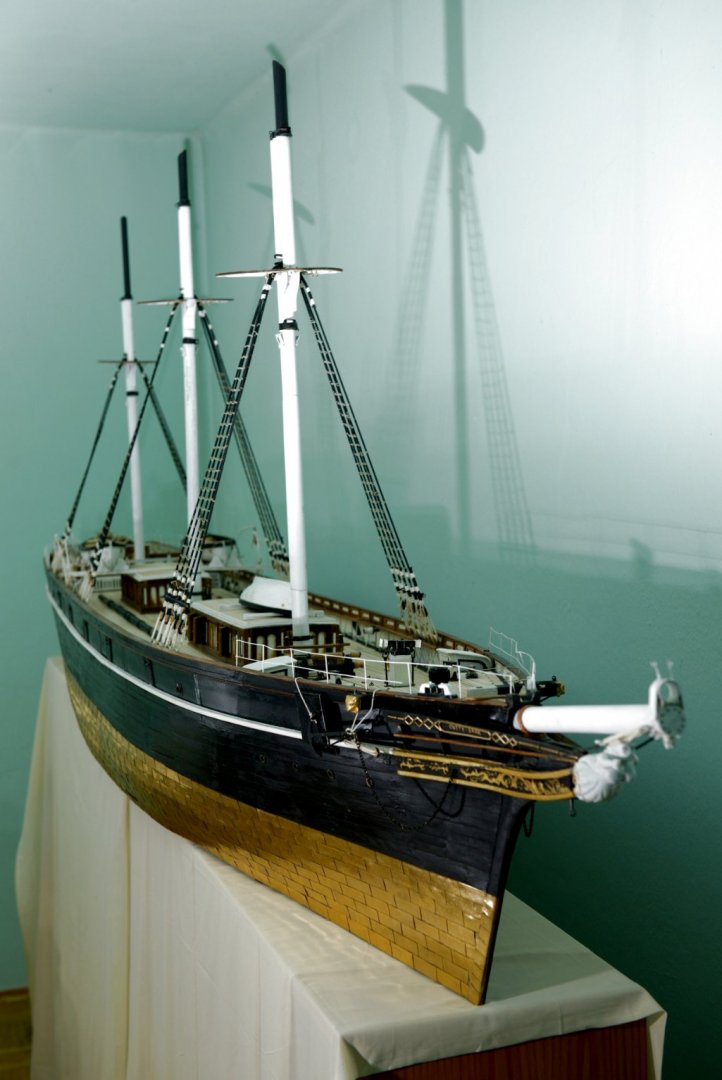
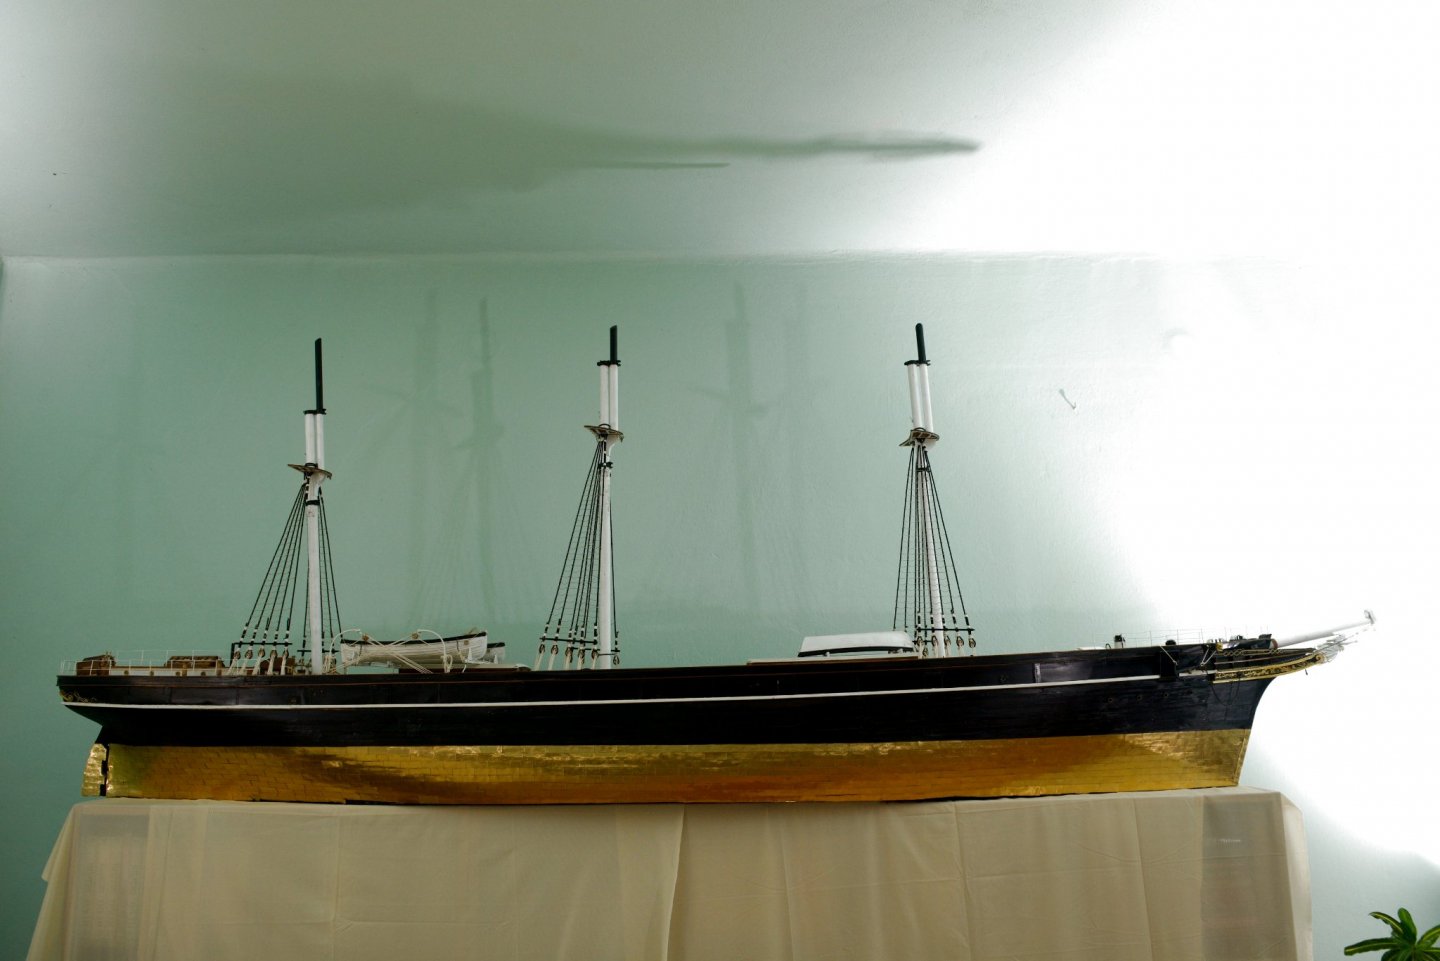
im closing the cathedral of the oceans. first, Id sincerely like to thank you All, that watched, looked, commented, liked my build. I would most likely not finished it otherwise.
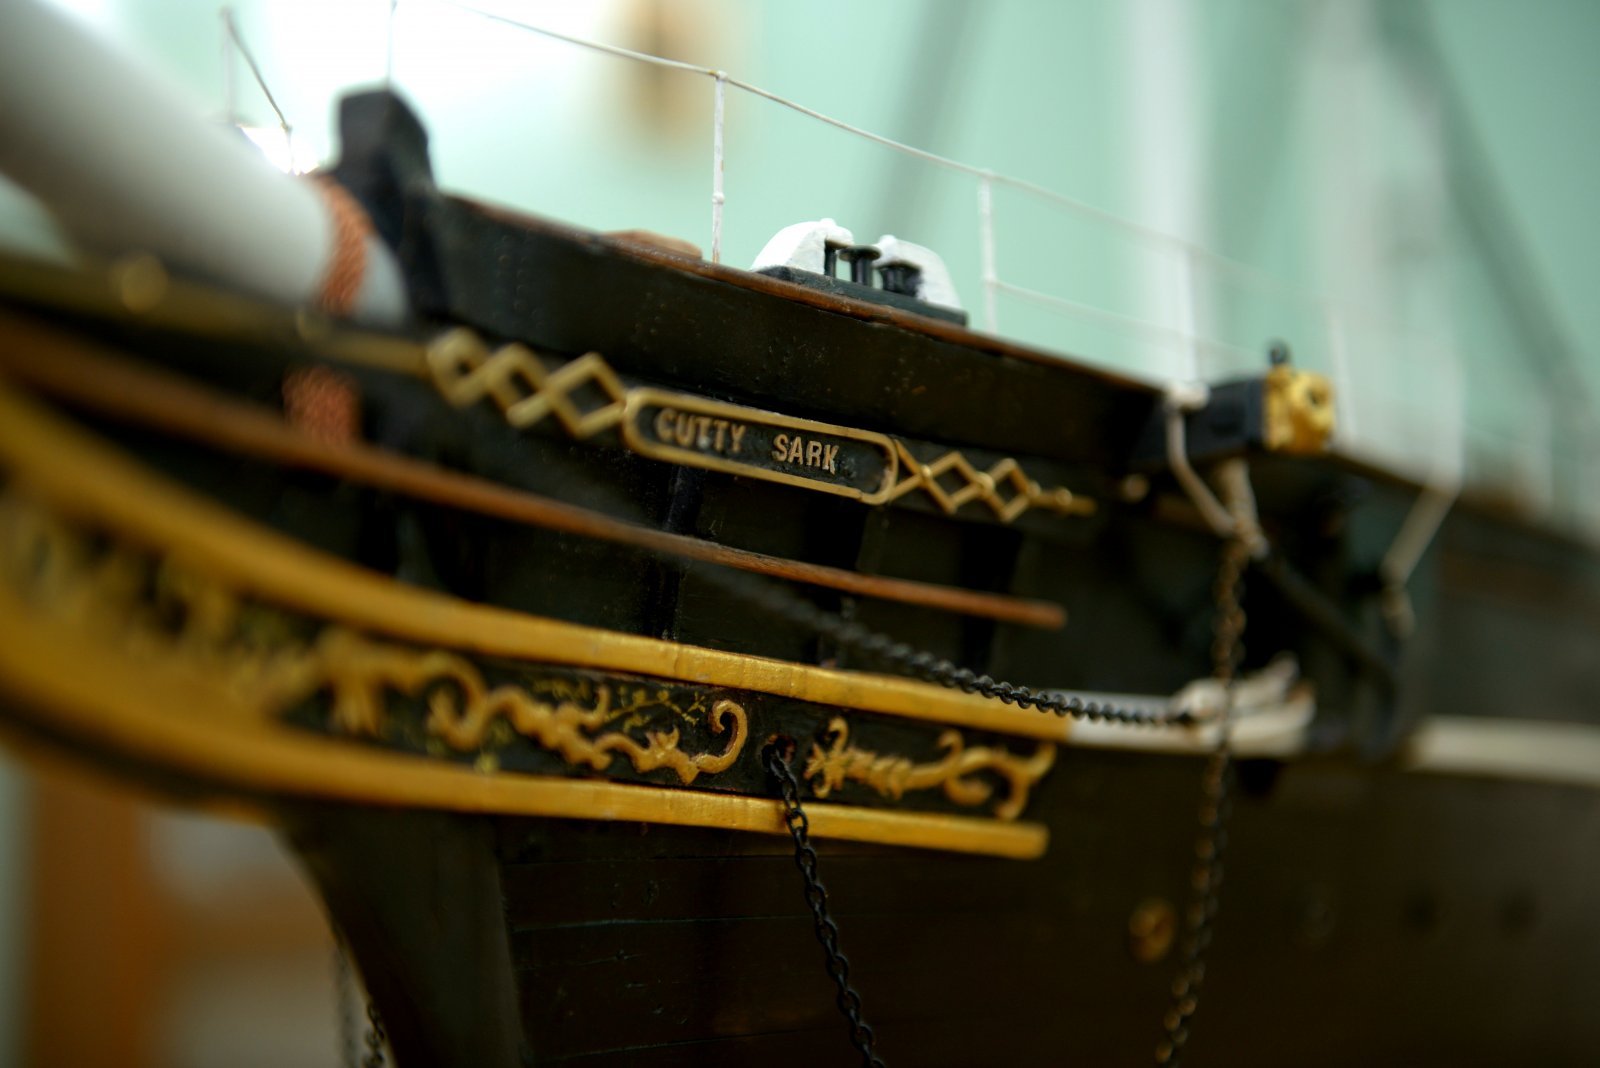
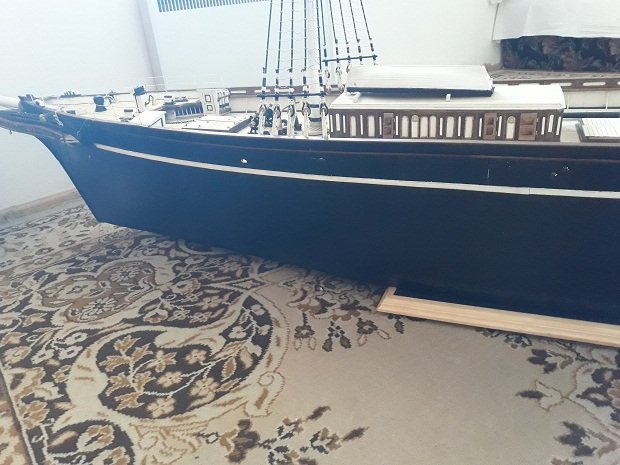
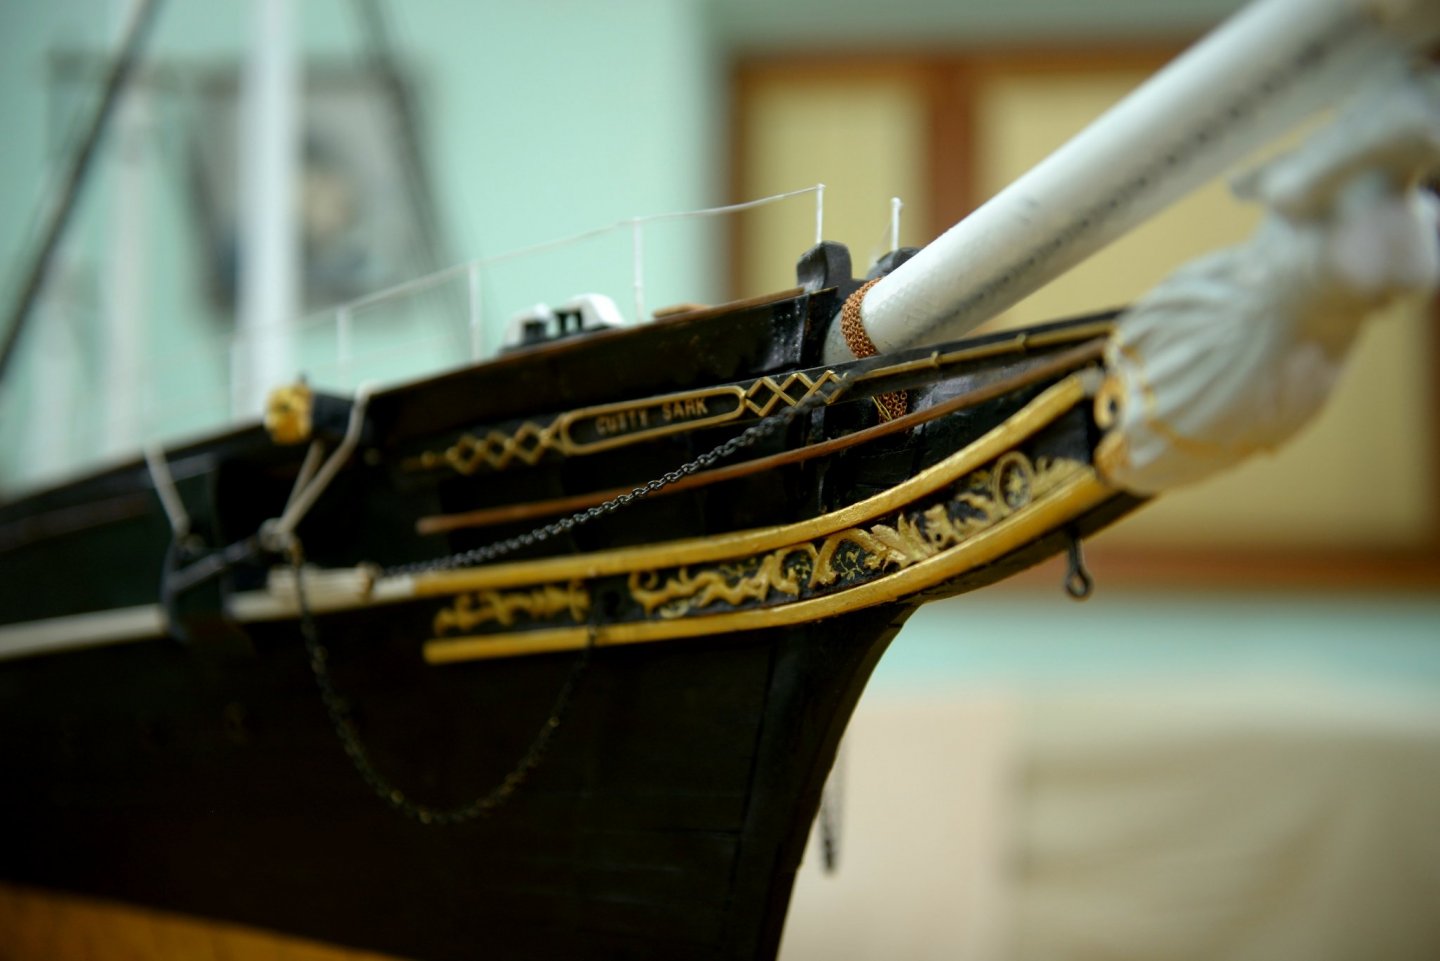
I am amateur violinmaker, that once told myself i will try to model cutty. Having thought of myself, it cannot be more difficult than violinmaking. what is art of ship modeling? where that art lies? I had to try it having had only one attempt of halfbuilt hms terror in the pocket,/ and no other small ship whatsover / i looked at cutty sark bow pamous pic wharving at sydney quay...and told myself, that would do. - wrong. it is far more difficult than i thought it will be....
I did not know what i will step into....where will i go. hull went smooth, unless, one cannot miss small part of modelbuilding even in huge projects....
looked at small models of it, I tried to do someting different, than just another 1.96 cutty sark, I wanted to smell the more realistic details of the deck. If i was told to do it again I would certainly back off. w hy? because i know now what is to dvelve into mere 3000 hours of repairs. I need to mention the way I worked. It was not up down process than designer set out plans and hand work down to workers , carpenters and so on rpecise instruction clearly having in mind what process would look like etc. even material. I mean ship modeling surely is up- down process as there is plan to be fullfilled and rather closely than vaguely for the saek of reault. but as aome cathedral in the past were (to peoples astonishment when they realize) built without an architect following rather bottom up rule - I built up closer to this approach. as thought or idea sprung, or someone led me to some direction there was not clear from start what would deckhouses looked exactly like - it went various ways some mistaken and had to be reversed. some good some totally wrong that had to be scrapped from start. experienced builders know by expecience what works for them. i have to find my own paths as well...slowly
I dreamt with her I had to watch her in my room even I did not wish to ....:) she was in my way to the desk, to my wardrobe. she is hell of a MONSTER. but she has tender lines in her.  She is crippled from the bottom and even more cut off from the top. but if i managed to get her body, she would shine even crippled diorama
Wise people dont make mistakes of fools, as saying goes, they learn that is better to make 12 small models to know what is it to build one big one. seems i am not one of them. I soak myself with troubles and try to skirmish away from abbys with some grace. it is not always possible but i know one think.
i hated her during process I sweared even, but i was the wrong for whats count. I repaired almost everything unill satisfaciton. I learned a tons. I will go SMALLER next definitely. I carved as I loved her. I wanted to see her shine despite my lack of craft. I gave the most of my abilities to her I possibly could. and for that reason I am satisfied whatever the flaw. she is not perfect by any mean. her butt is approx 2 cm narrower that plan is telling, but I dont mind even I can tell the curve of her butt from memory even in midnight....e.g. revell model is horribly wrong in this direction and possible other makers as well..
.She does not have rear companionway as I deliberately did not want to make it. she does not have rudder finished as I dont have strenght nor material to do it properly. she is ready to be fully masted if someone ever desired so. who knows. Her steel bulwark is sound and strong. there is lot to critisize. I dont know whether I managed to create the charm she has.
Others must tell. For what I know, I gave her all I have in my abilities.
there is never another time.... I need rest. I am eager to build small boats like, whaleboat, or cutters or so before I start way smaller and hopefully better that this - Glory of the Seas.
I must say, for me it was definitely more difficult than to make good sounding violins. I have both to prove now
thank you . im posting some pics and will make a small gallery. you can feel im glad it is over. True. I just tasted of some masting and rigging and full masting and rigging of such giant would take another 2 years or so. I must asy though I regret not seeing her under sails though. but she is way too big for that. SO i have to stick with whats there hope you enjoyed it as I did. Whats most important? I did not loose interest of shipmodeling, quite contrary... thanks Vlad.


- Roger Pellett, marktiedens, Bruma and 7 others
-
8
-
2
-
I am adding some more pics I found... around spring of this year.
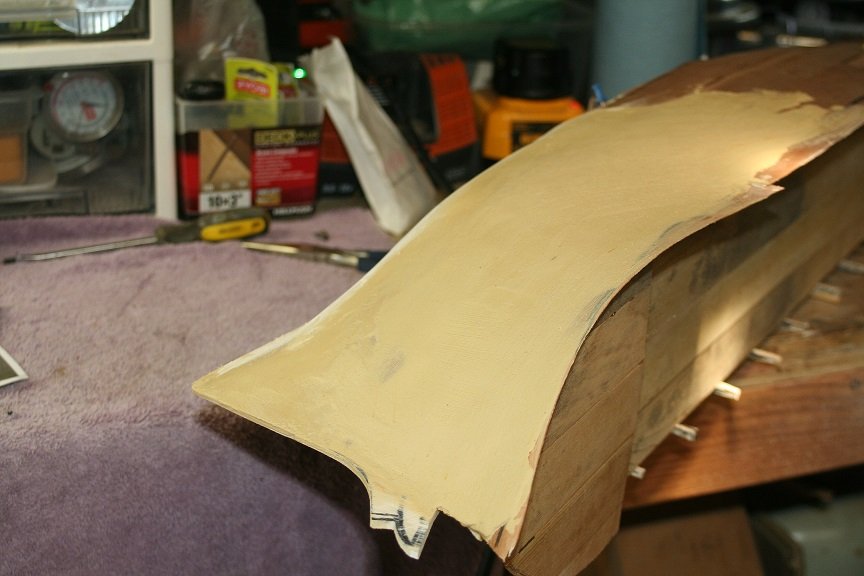
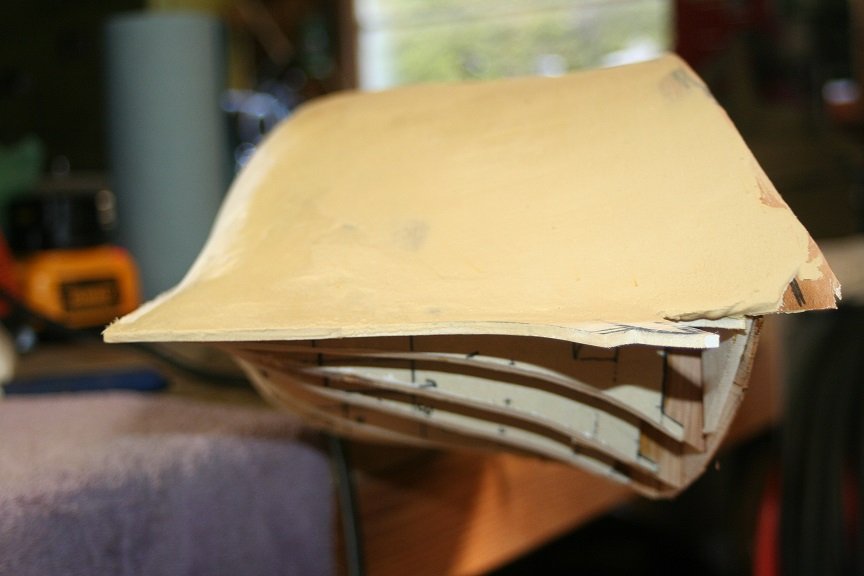
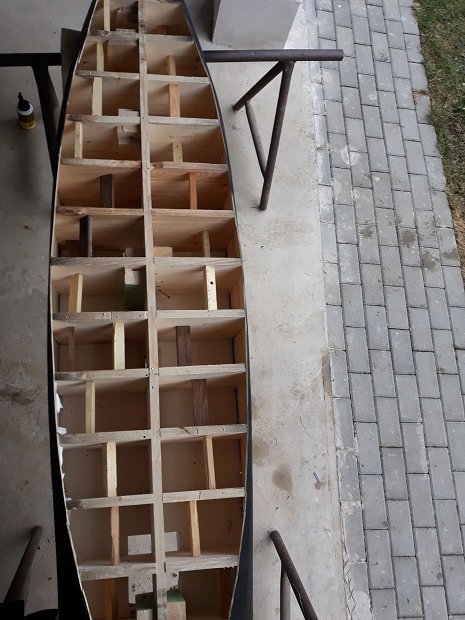
as I wanted to mainain relative lightweight of the ship, and tried to stiffen whole construction I installed some wooden bits to the sfkeleton from the bottom, so they work together to both directions of the installment and add overall stiffness to the boat, leaving it relatively light. skeleton is made of pine which remain lightweight well, i did not weight it. mass of wood on deck added up and butt is heavier of course...being solid. as 2 adults lift the boat i would suffest of some 50 kilograms entire built boat. i will will weigh her probably at some point out of curiosity...:)
- GrandpaPhil, mtaylor, gieb8688 and 1 other
-
4
-
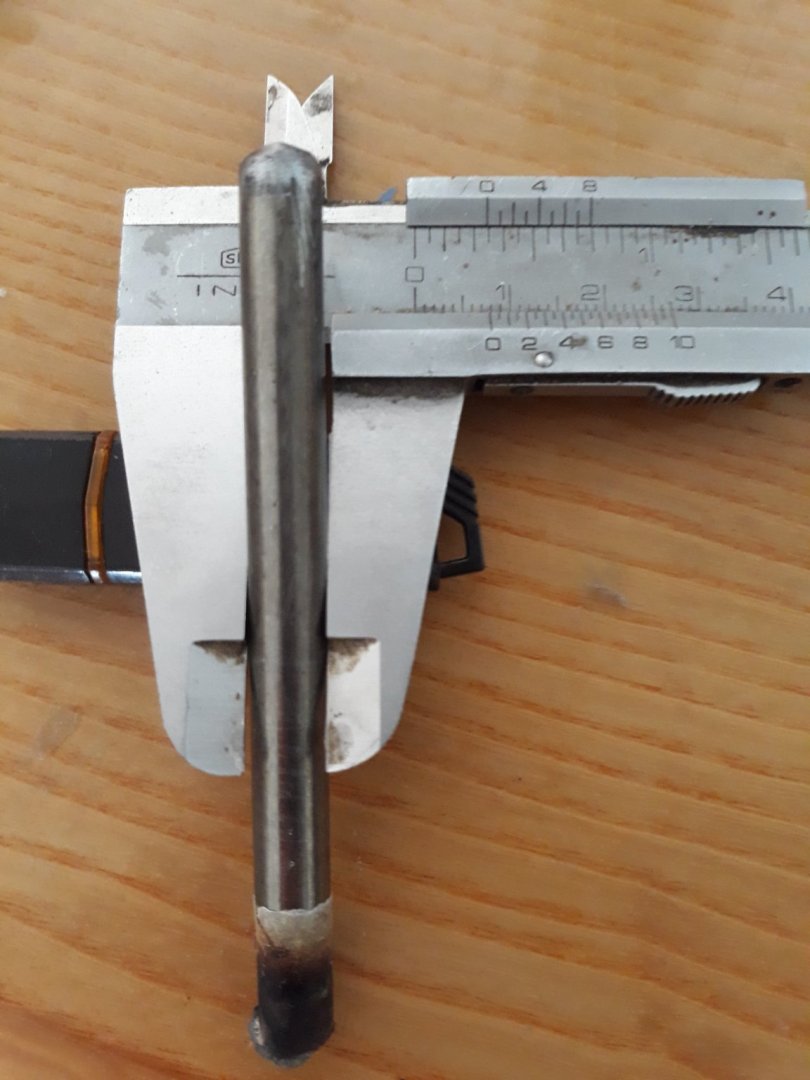
17 hours ago, the learner said:
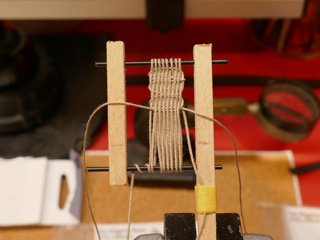
Post 141, 1st picture, what material did you use for mast boot.
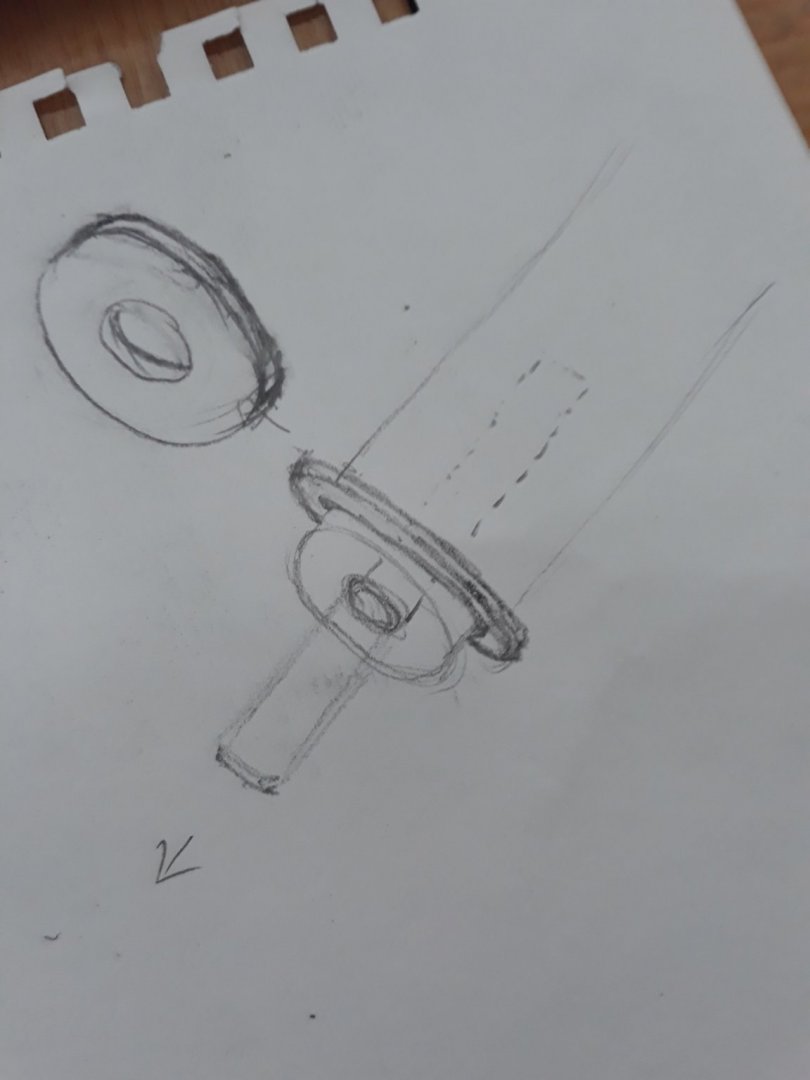
Hello, good question thanks. there is an 10 mm thick and maybe 15 cm long iron rod installed in mast bottom to fit the hole drilled into bulkhead . i will try to find photo. its different instalment of two other masts but pretty much solid to withstand entire rigging if ever continued
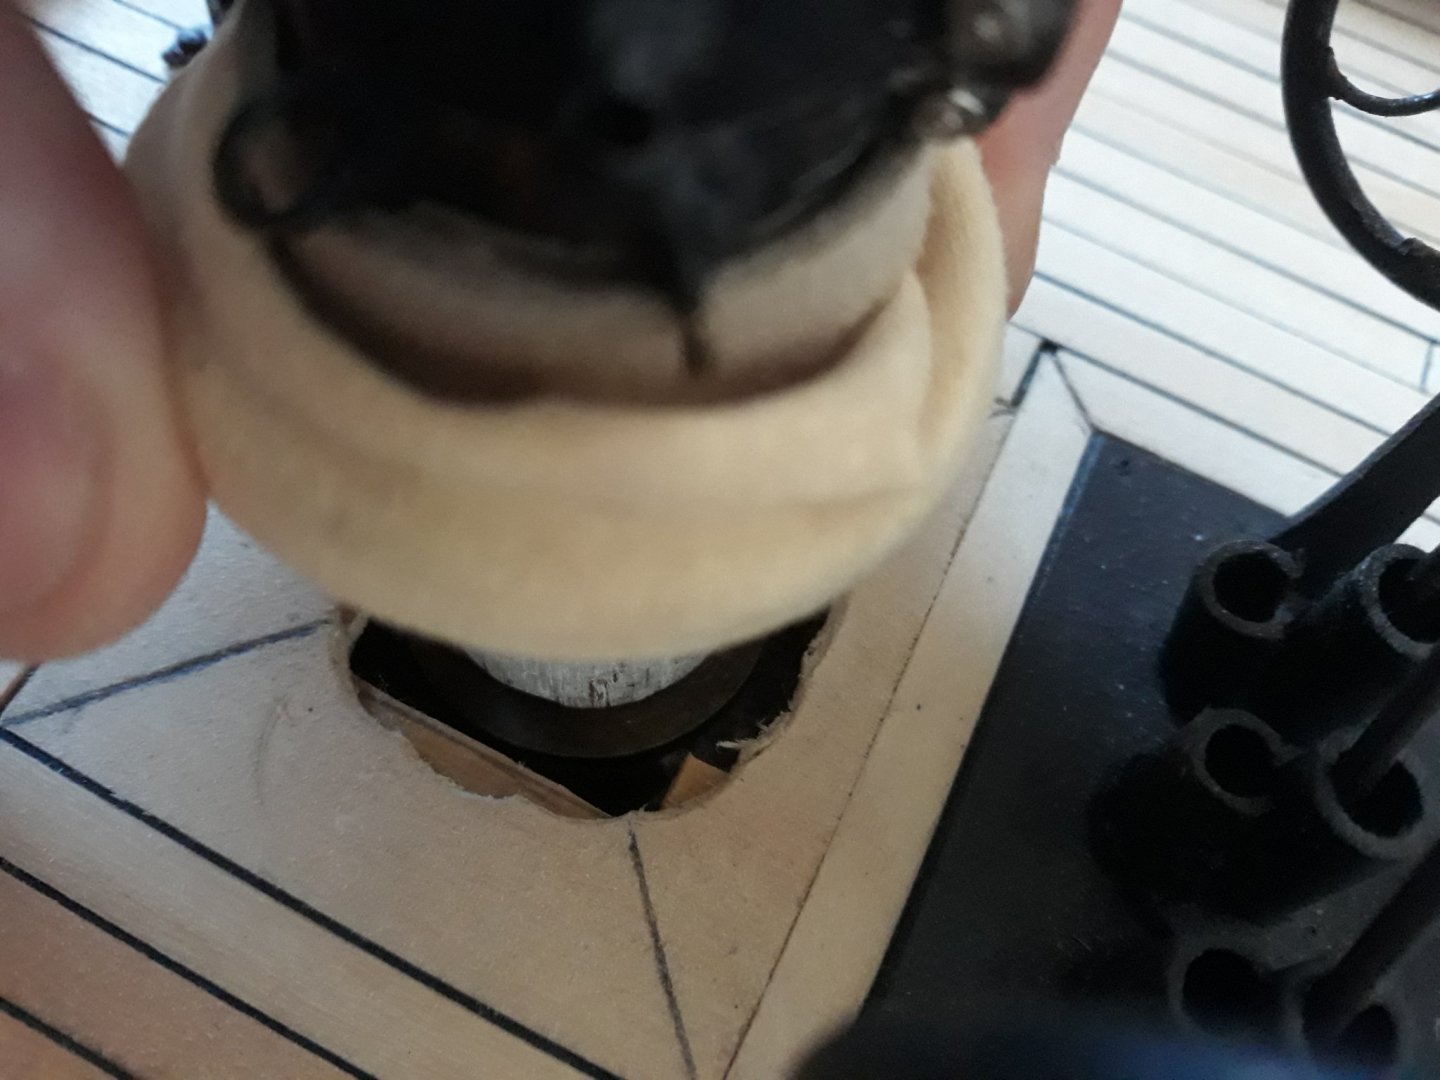
So, unfortunately i did not photographed all process, but i found leftover from rod, and will try to explain. Mast itself is of beech wood which is stiff itself and there would not need to be any outer protections against potential cracking speaking of rigging. Its strength would withstand any possible rigging tensions itself perfectly. ( speakig of model of course) I however secured it just in case of any horrifying cape horn roaring 60 ties by bronze cap.
You can see from pics. 8 mm steel rod bored into mast bottom about 10 cm length into. Than i secured some 2 mm thick solid bronze cap to the outer shape of mast to prevent any tensions and potential cracks. After i simply bored mast into predrilled hole in bulkhead. As you can see from post 144 That is secure as hell because in sipte bulkhead is inly 24 mm thick in fore - aft direction - center of bulkhead where is hole is ineed shuffled into centerline wood-)which it pretty much secures agsinst longitudal tensions and left right tensions are negligible from crack also because bulkhead is 200 mm solid in that direction. In case of curiosity, as you can see mast and bulkheads are approx 24 mm thick and rod is about 8 mm so there is plenty of solid surface around to keep it firmly in place.
Thanks for asking V.

-
i now see your mastering in painting Bruma, i like very much what are you doing with revel model. Vlad
- Cirdan and FrankWouts
-
2
-
17 hours ago, Mike_In_RI said:
Hi Mario, thank you very much for the encouragement. Just today I was looking at your very sharp and clean whaleboat. I really like your use of different woods as well.
I have slowed down some in the last few weeks when I didn't get the look that I wanted from the .045" whale line. It just seems too pudgy to me as they sit on the harpoons. In any case I ordered a Rope Rocket from Syren and today ordered assorted threads for experimentation. I'm trying to get as much scale into the project as I can so I'll attempt to get the line a little thinner and a more "bright straw" color. I hope the learning curve isn't too long! In the meantime I put some time into the steering oar brace chaff mat: (somehow all my shots are smaller ..??..)
... trying out the look of a "sword mat". Ashley #2964
The oar lock lanyards and the shroud lines are in as well as the trip line and steering oar strop.
The strop covering is a piece of shrink tube painted with a little burnt umber.
Comments, corrections and suggestions are always welcome.
Mike
im coming to learn Sir, Splendid.
-
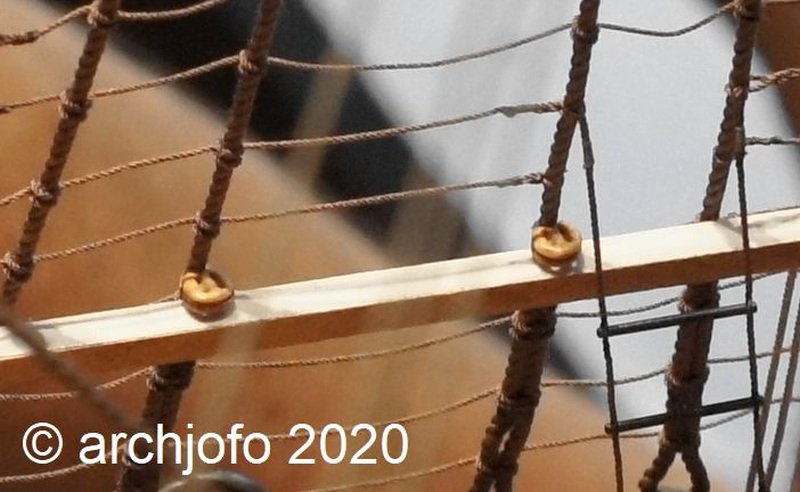
On 9/12/2020 at 6:53 PM, archjofo said:
Hello,
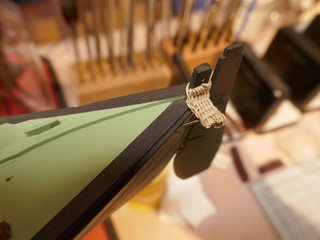
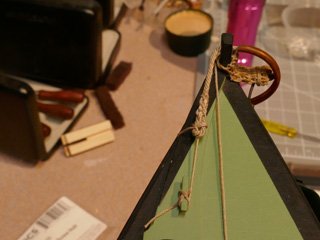
the first of these blocks was attached to the main shrouds.
As an aid I used a wooden strip which was covered with a double-sided adhesive tape.
Nevertheless it is a very difficult job to tie up these tiny pieces with Japanese silk yarn.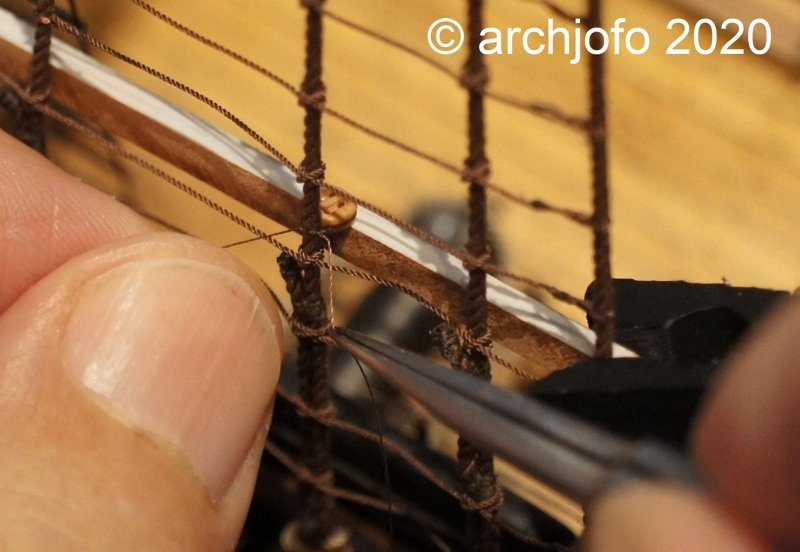
Archjofo, Beyond words , fantastic
- Jorge Diaz O, EJ_L, Keith Black and 3 others
-
6
-
-
Mario this is my go to model im watching. interesting aporoach with plastic cup, hovewer i would not go that route
neat details for sure. go on. Vlad
- Cap'n Rat Fink and mtaylor
-
2
-
-
On 9/7/2020 at 10:35 PM, mbp521 said:
Hello again everyone,
Work has begun on the boiler room walls this go round.
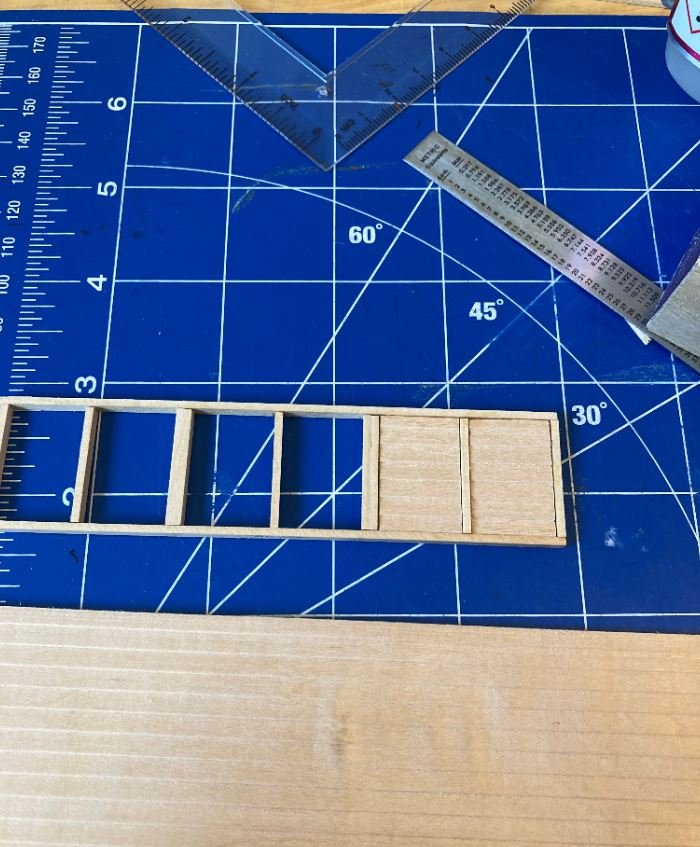
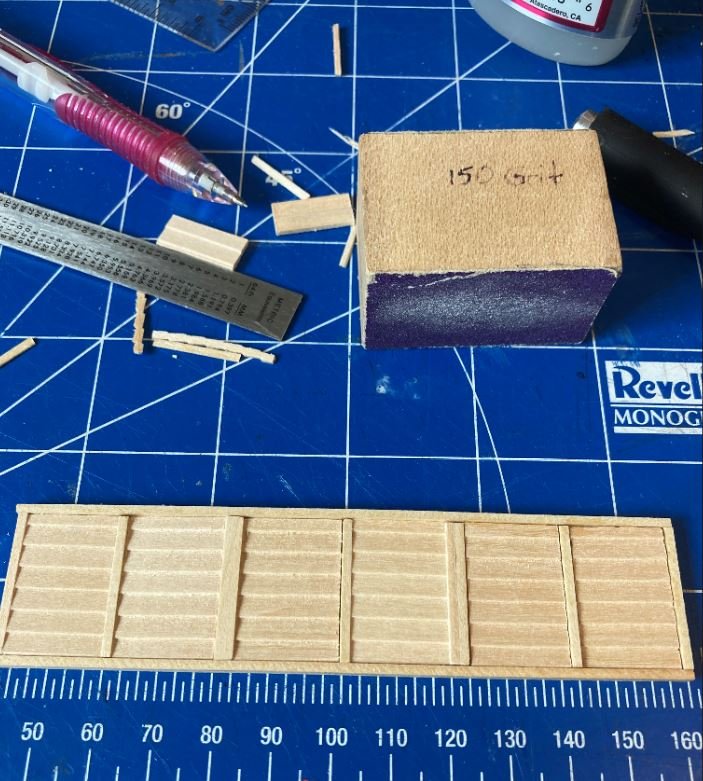
So I finally decided that in order to show the interior of this model, I am going to leave one side partially open and complete the exterior of the other. In order to show some of the details I will also be installing LED lighting hidden behind lanterns and such.
I took some ideas from the St. Louis build on how the boiler room walls were constructed. Since none of these walls survived the salvage and the plans are pretty vague on the true construction, builders liberties were taken in my interpretation of them. I installed louvered windows around the boiler walls, under the assumption that these were used for cooling and warming purposes. Air flow from the forward gun ports and funnels mounted on top pf the Hurricane deck was forced down to the gun deck, through the louvers and up through the skylights. Again, this is just my assumption as to how this worked, and I could totally be off base with this.
Rough sketched plans of the fore and aft walls used as a template for the louvers.
Bottom framework of the walls.
Construction of the windows.
Forward and aft wall in place.
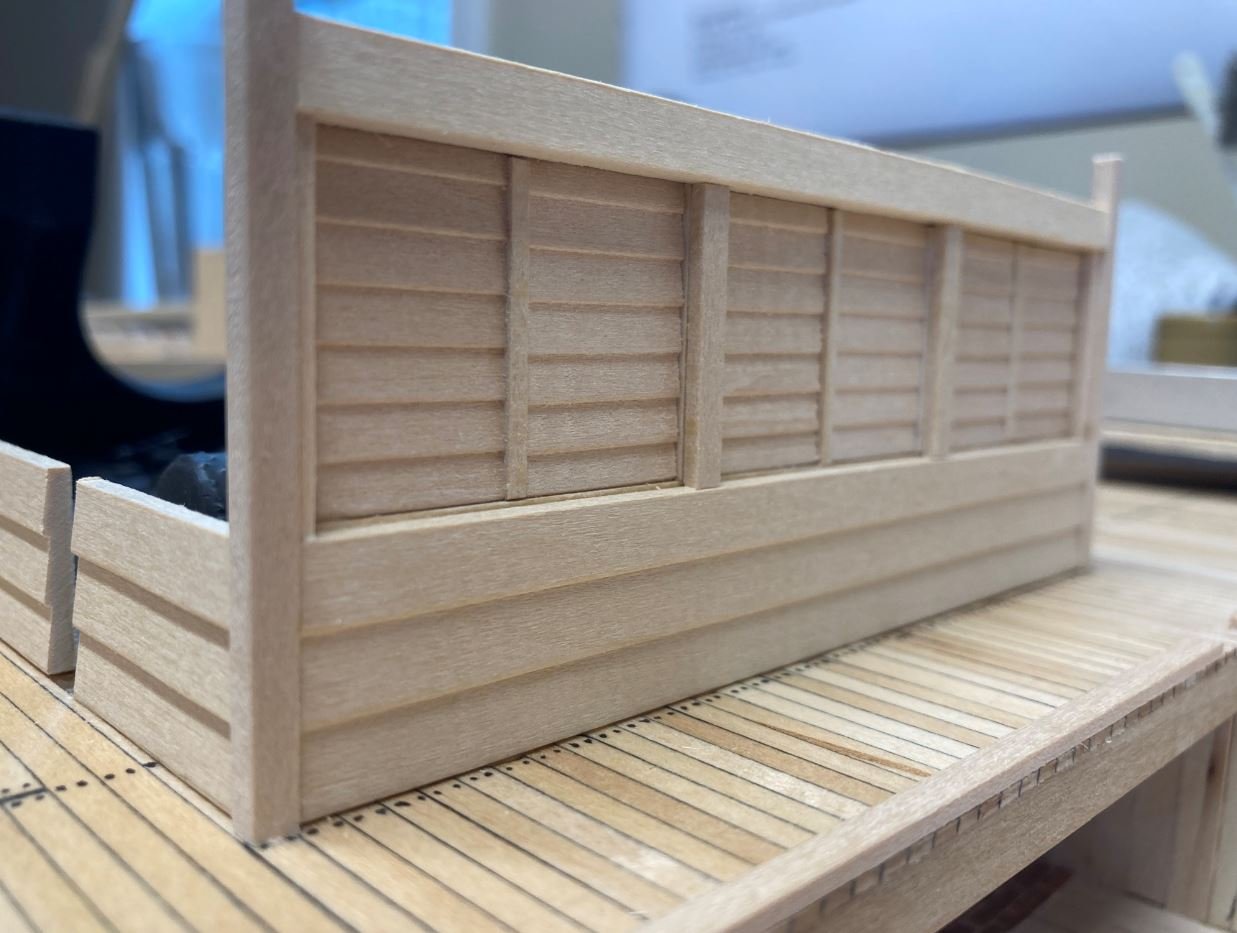
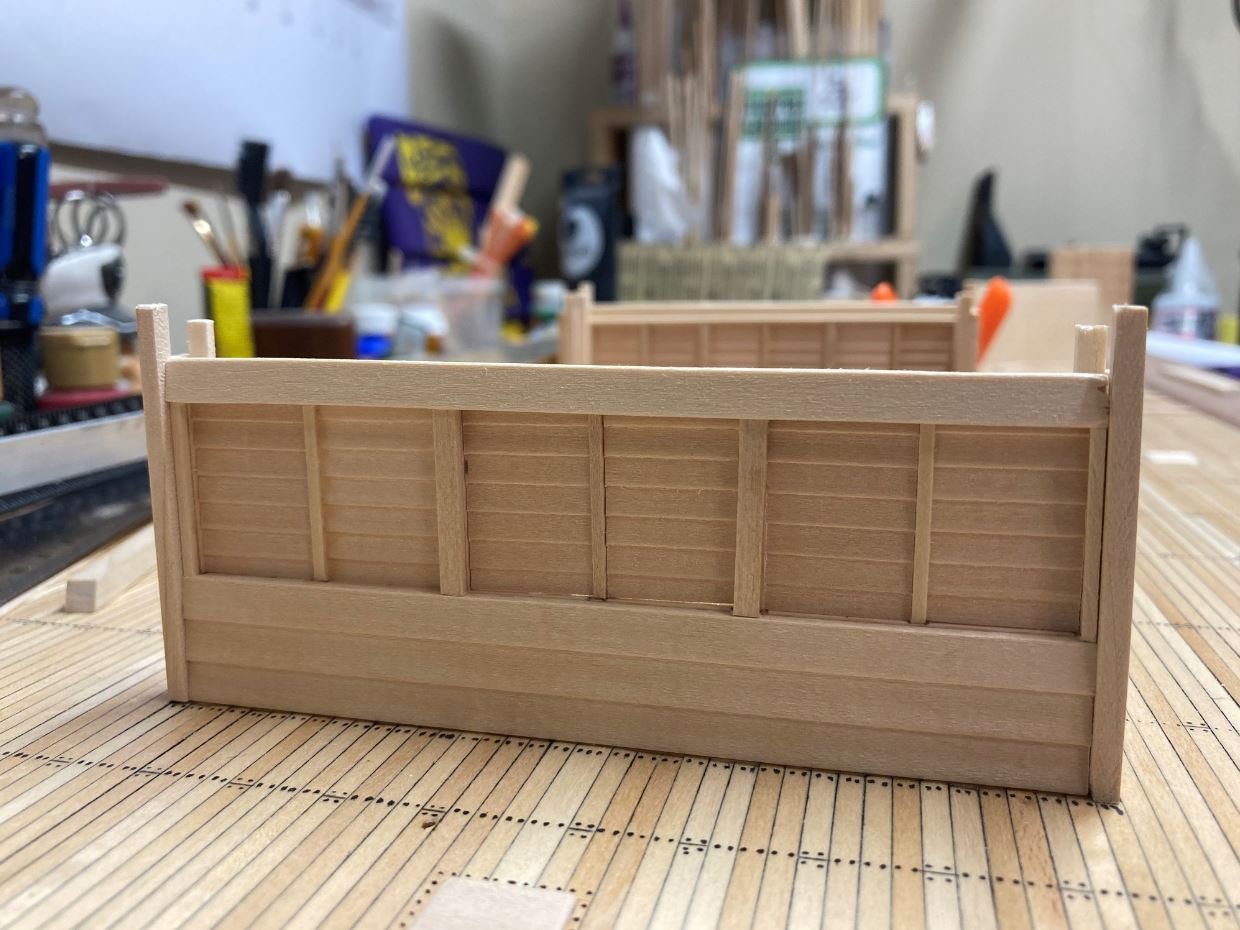
Construction of the starboard windows.
Starboard windows in place.
Coat of white paint and the boilers set in place to get a view of what it will all look like.

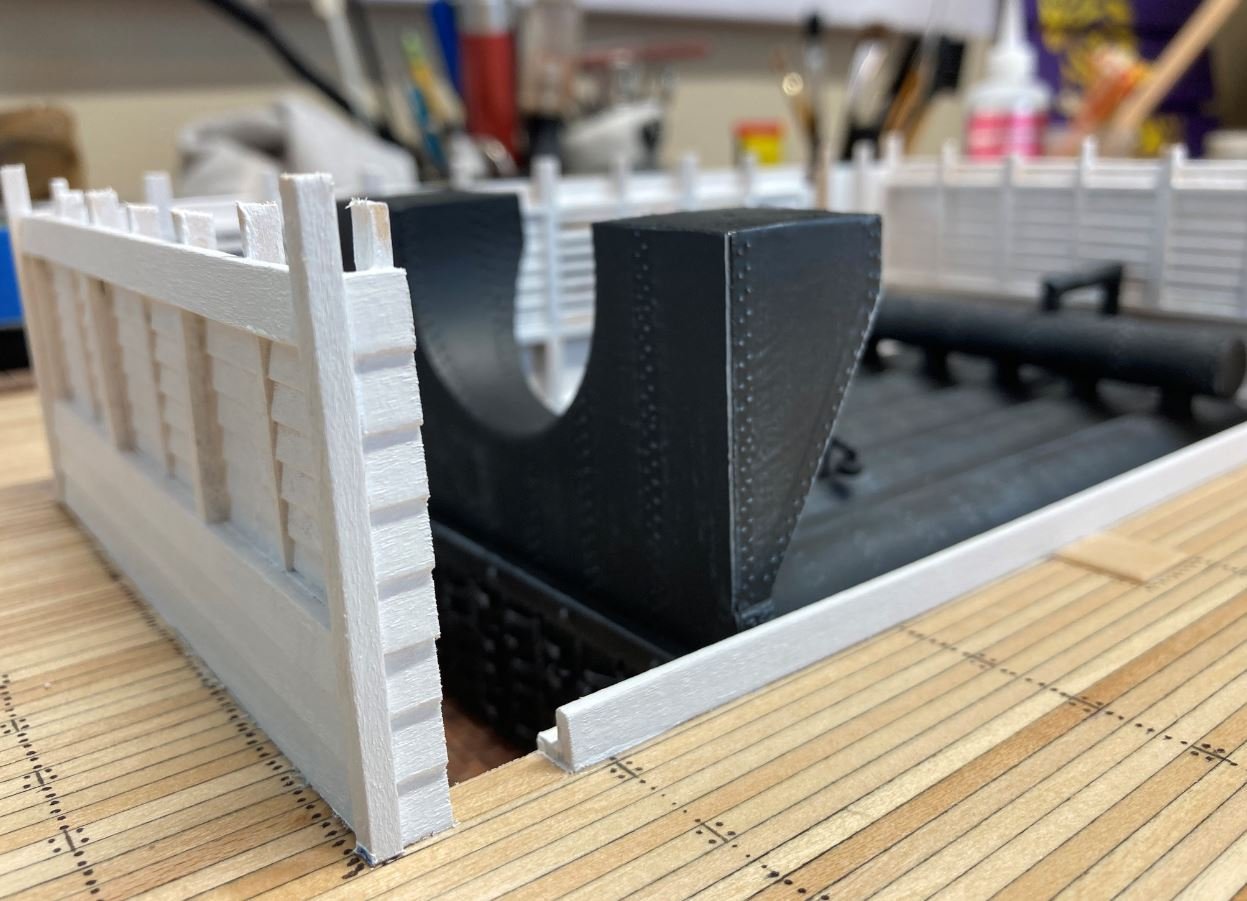

Not much else was done. I have been dividing my time with other projects around the house, trying to take advantage of a few cooler days. I have some micro LED's and 3-D printed lanterns on order for the lighting, hope fully those will be in some time this week and I can get started on the lighting and wiring.
That's all for now. Enjoy, and thanks for the kind comments and likes.
-Brian
fantastic Brian . like it very much
Vlad


HMS Winchelsea 1:48 by Vlad
in Member Build logs for the HMS Winchelsea
Posted
good point about sanding Ron, thank you.