

Vladimir_Wairoa
-
Posts
1,566 -
Joined
-
Last visited
Content Type
Profiles
Forums
Gallery
Events
Posts posted by Vladimir_Wairoa
-
-
-
25 minutes ago, Keithbrad80 said:
Hello everyone,
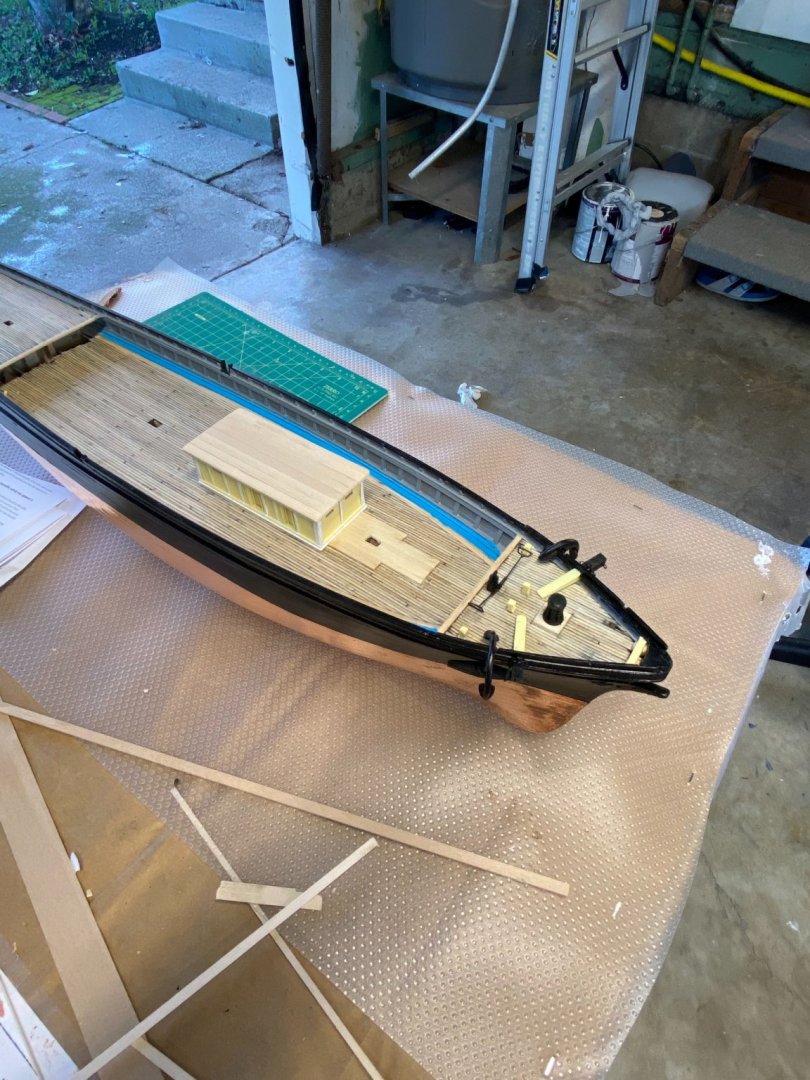
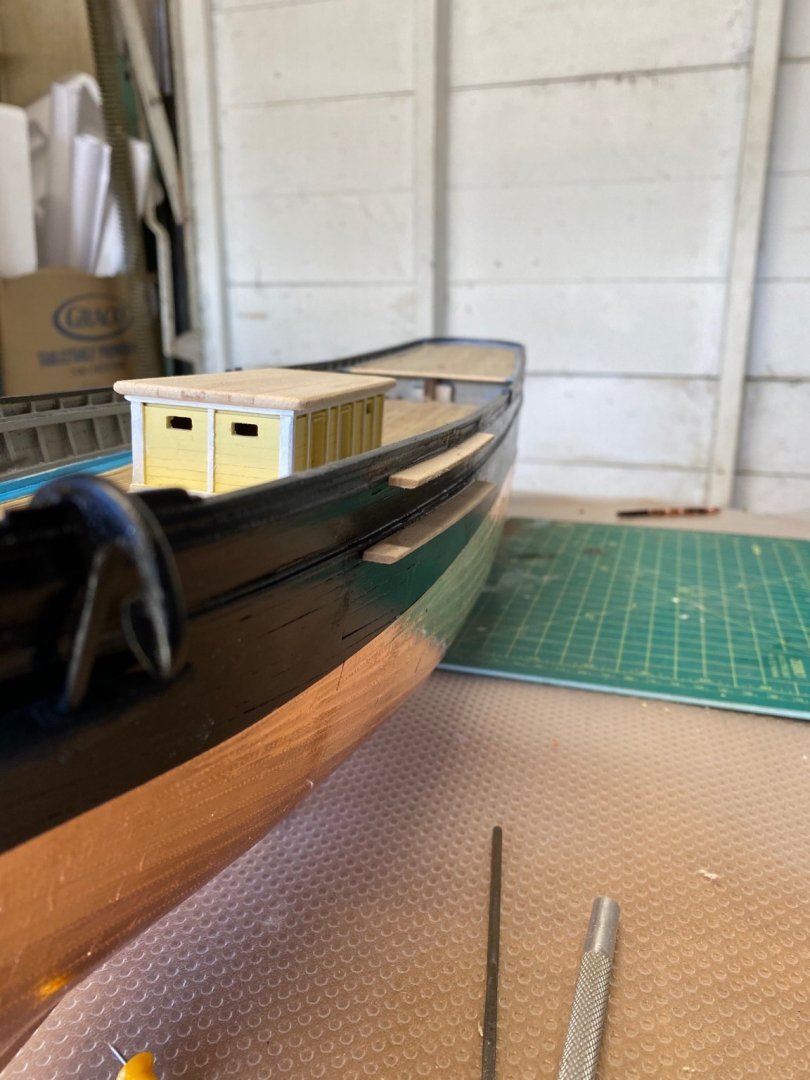
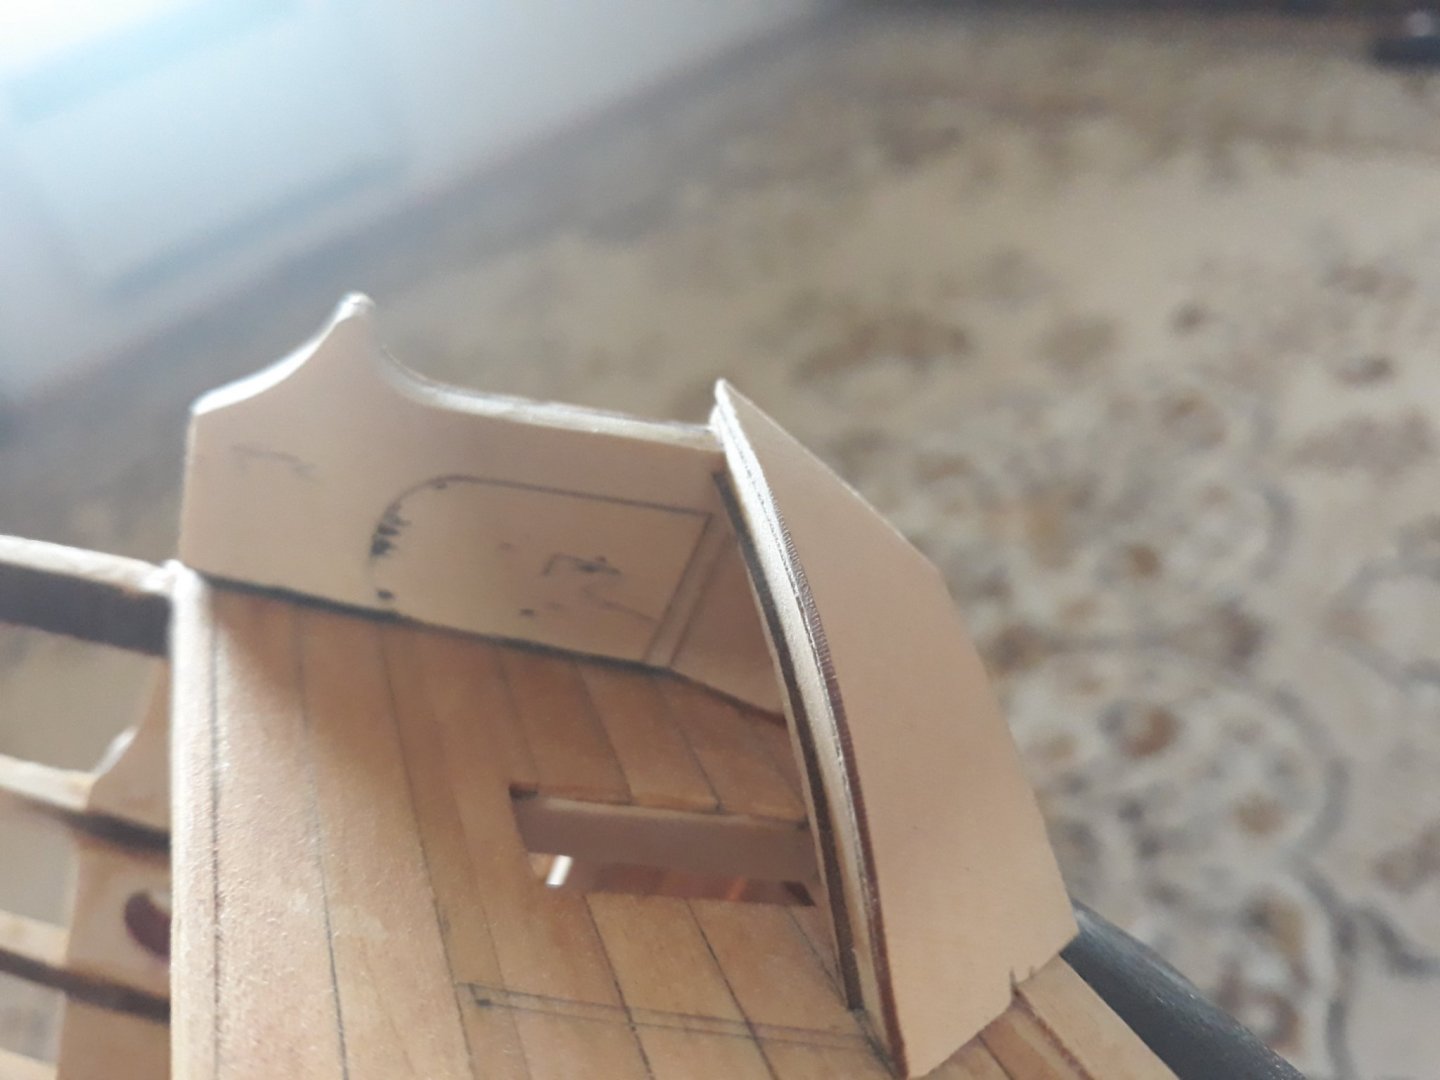
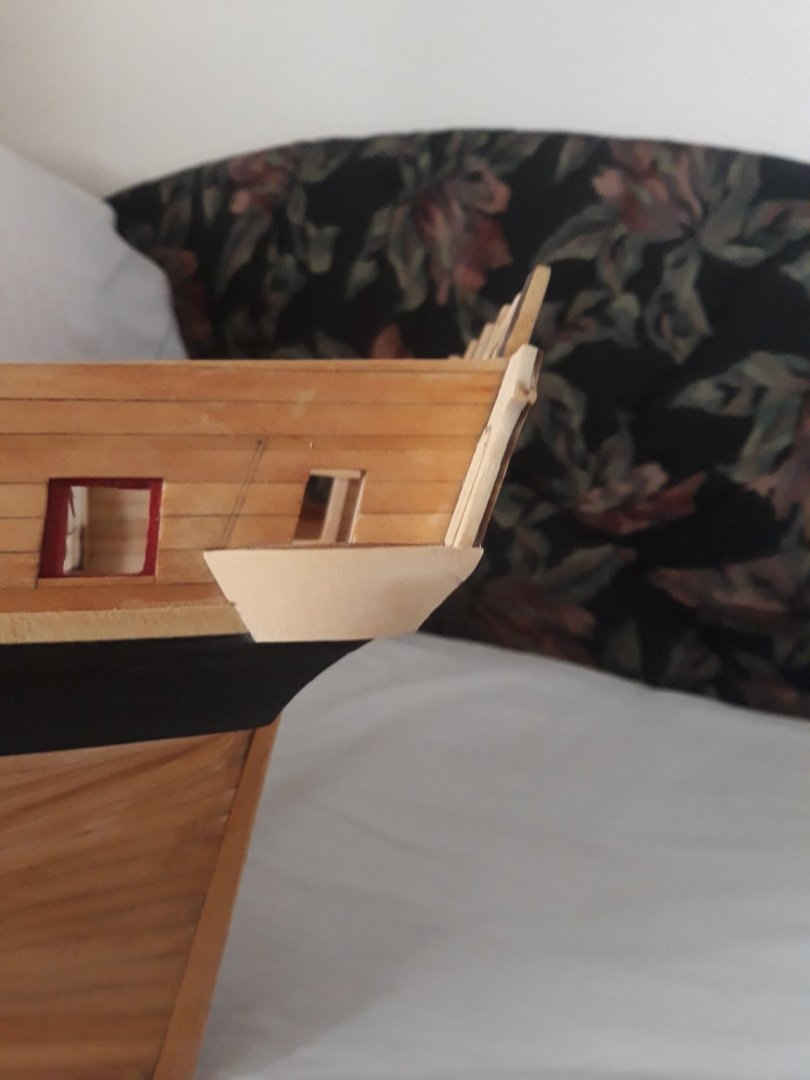
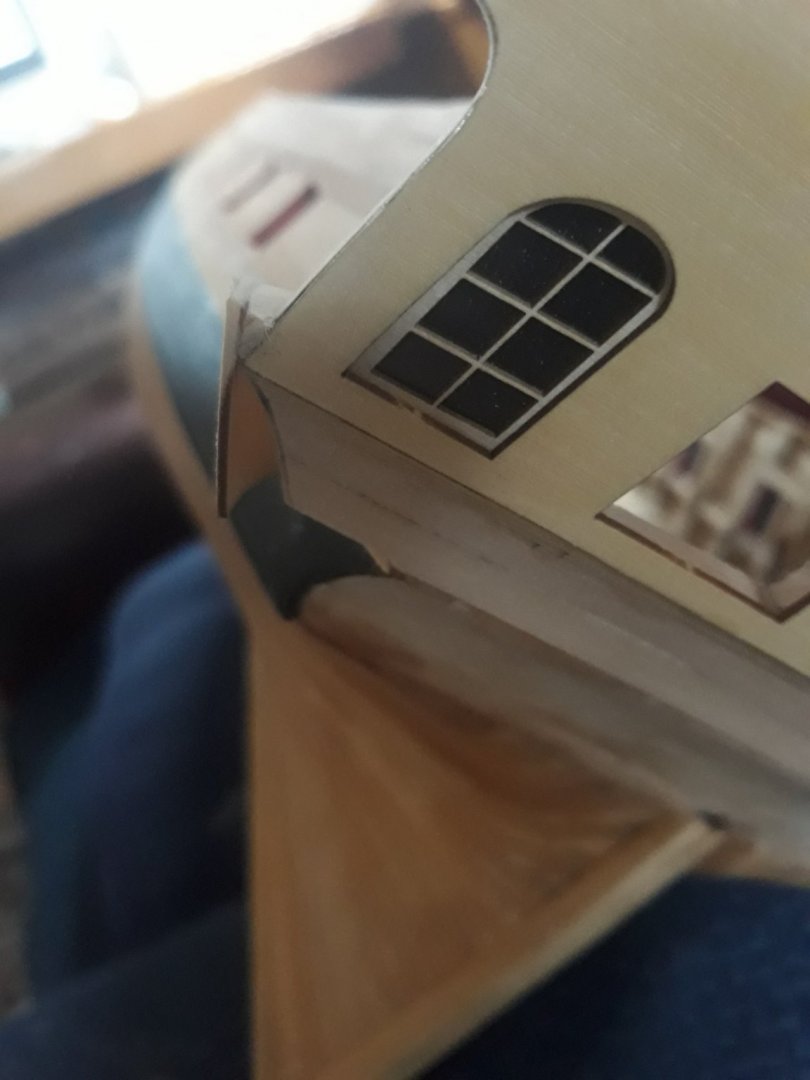
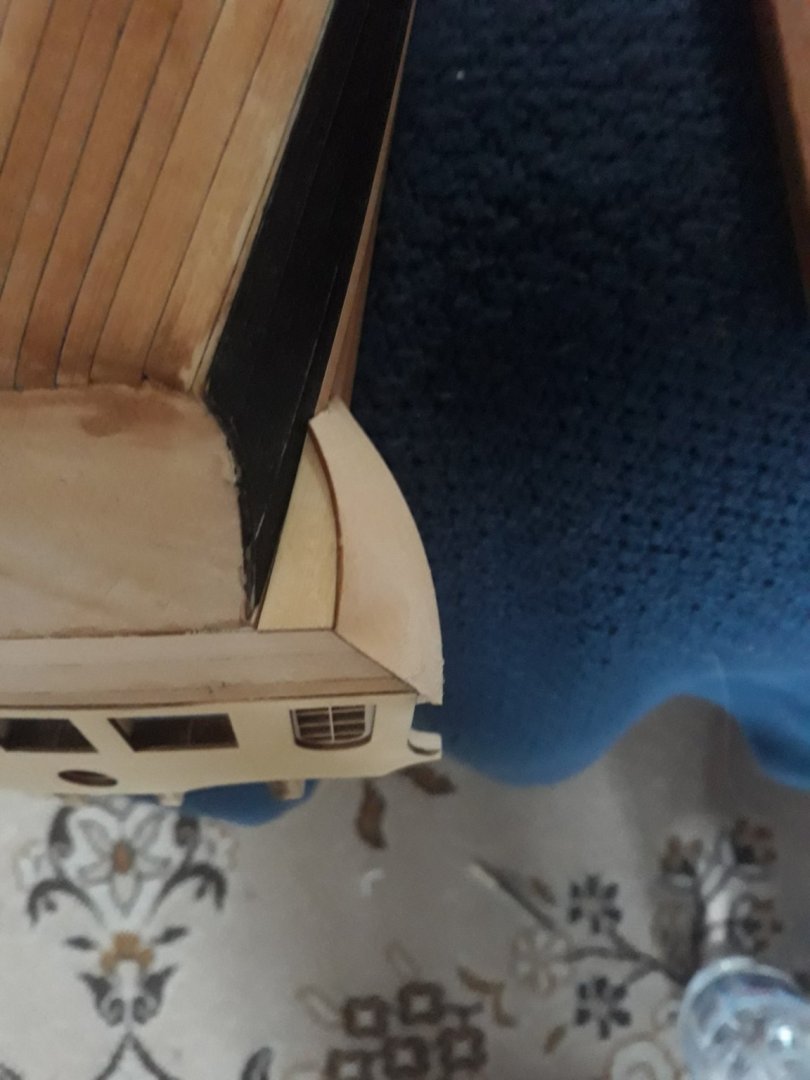
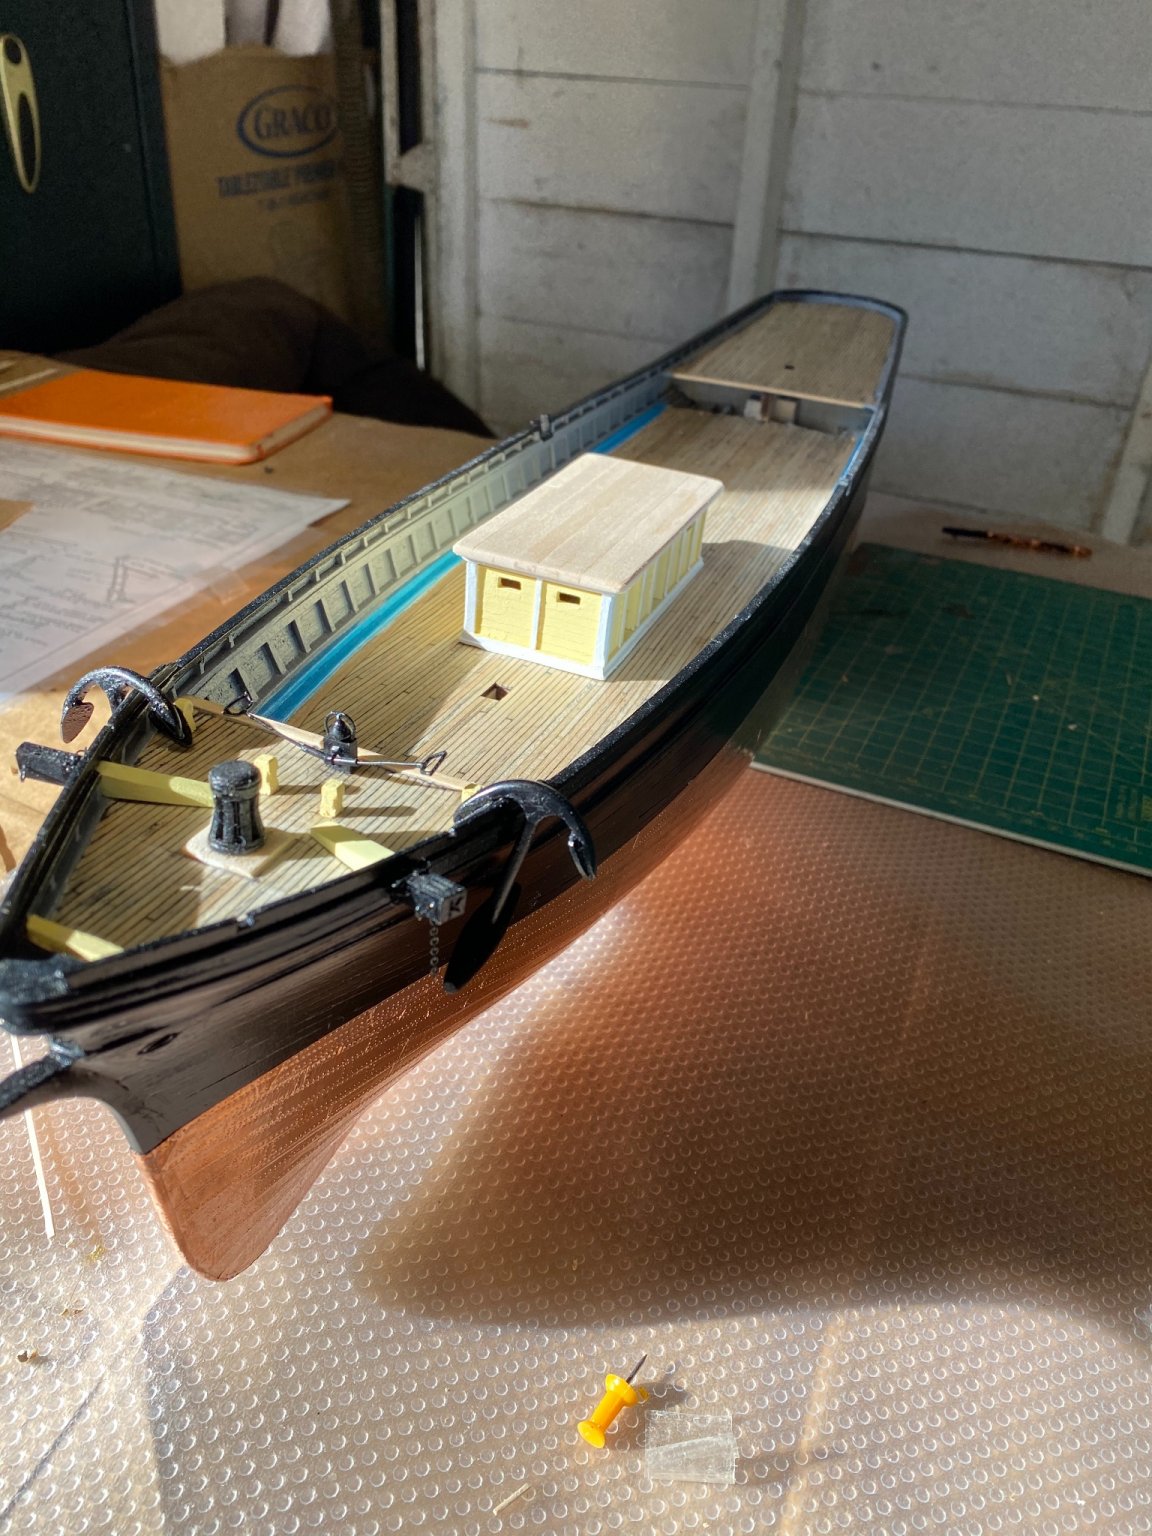
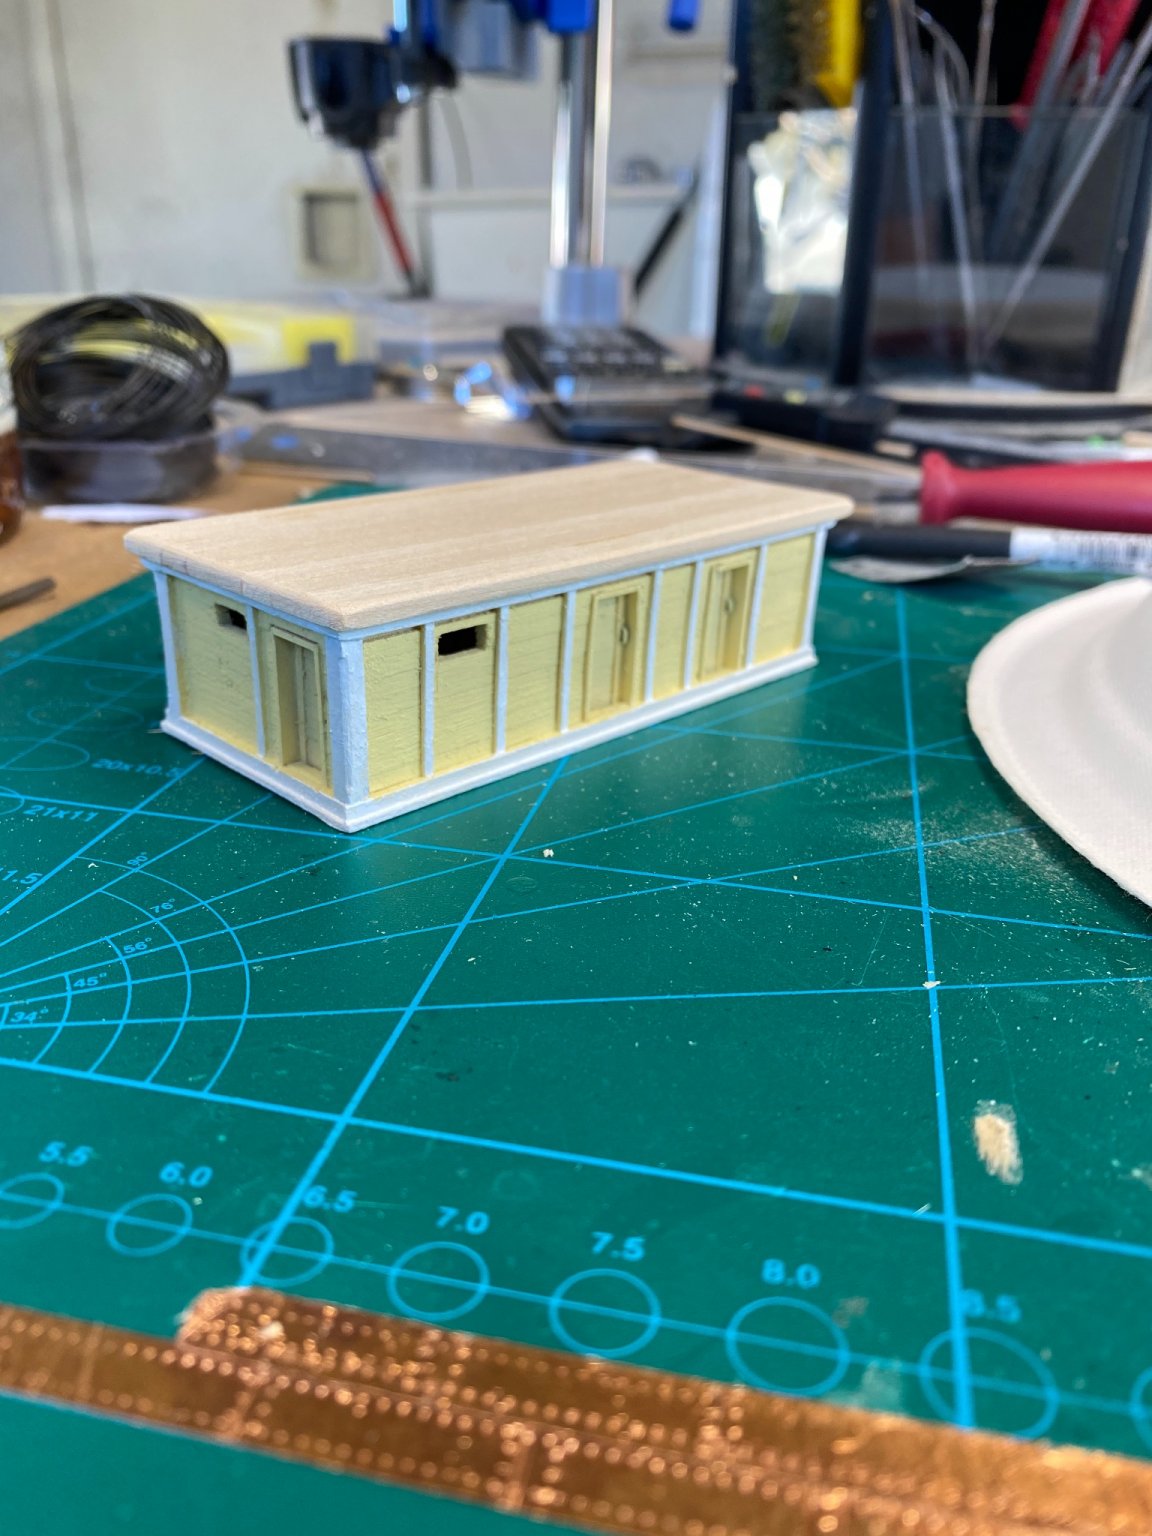
I had a good feeling once that deck house was on it would make installation of other things easier, which it did! I haven’t been able to get much progress done in the last week or two but I got the deck house installed, the thick pad installed in front of the deck house, the channels for the shrouds and started working on the windlass.
The deck house was a lot of fun to make and I’m looking forward to making the second and larger one. I still have some detail like the tarp, vent, and boat supports to install on the top but I’ll do that once all the furniture is built. Here are some pictures of the installed deck house:

Afterwards I got the thick pad installed in front of the deck house. This was just a couple extra planks put on top of the existing planking, next time I will incorporate the thicker planks in the actual deck planking. Getting this installed only took me a half hour or so:
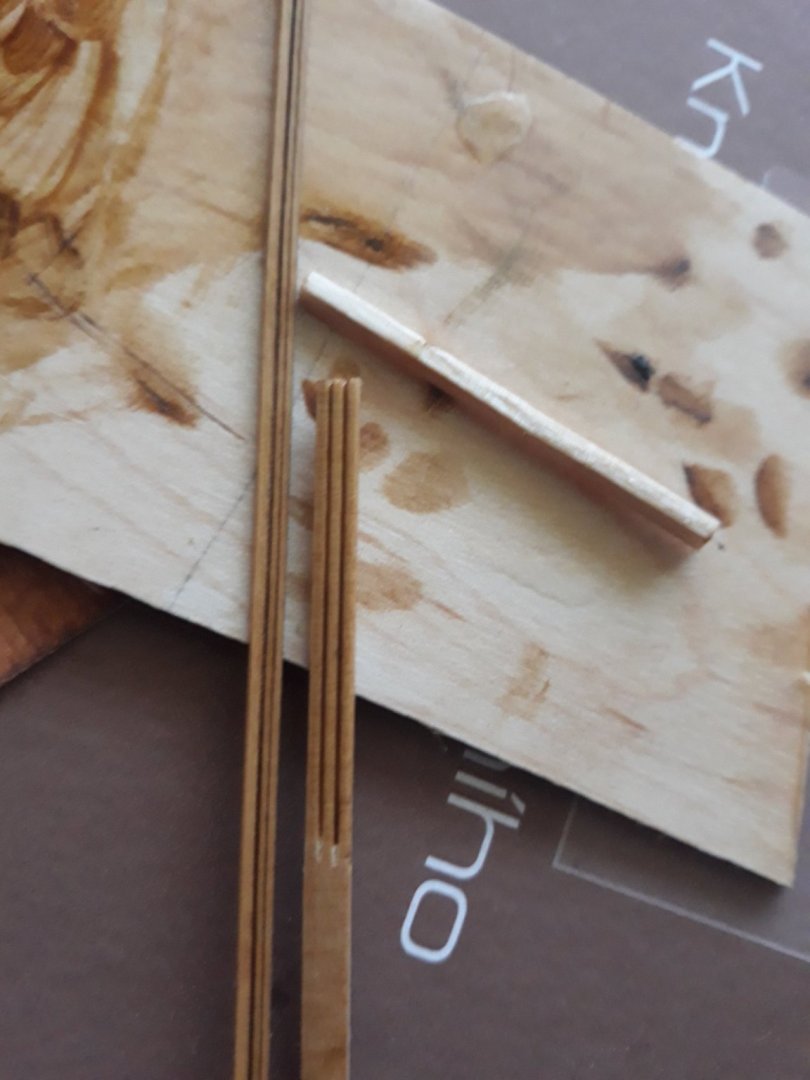
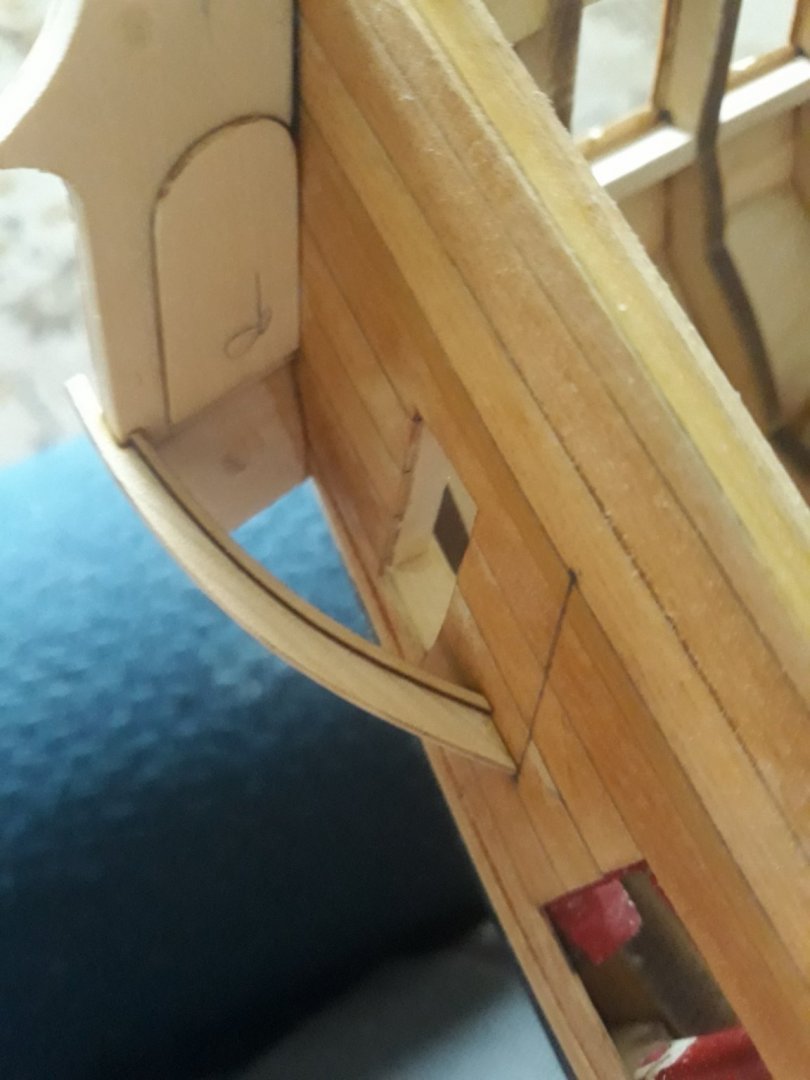
the next thing was the channels, as of this moment I have all 12 channels built but only 4 installed, I’ll do the rest tonight or tomorrow. I found that these were kind of tough to get the right shape. They didn’t want to bend so I sanded them to shape which wasn’t to hard. They really add to look of the model IMO!
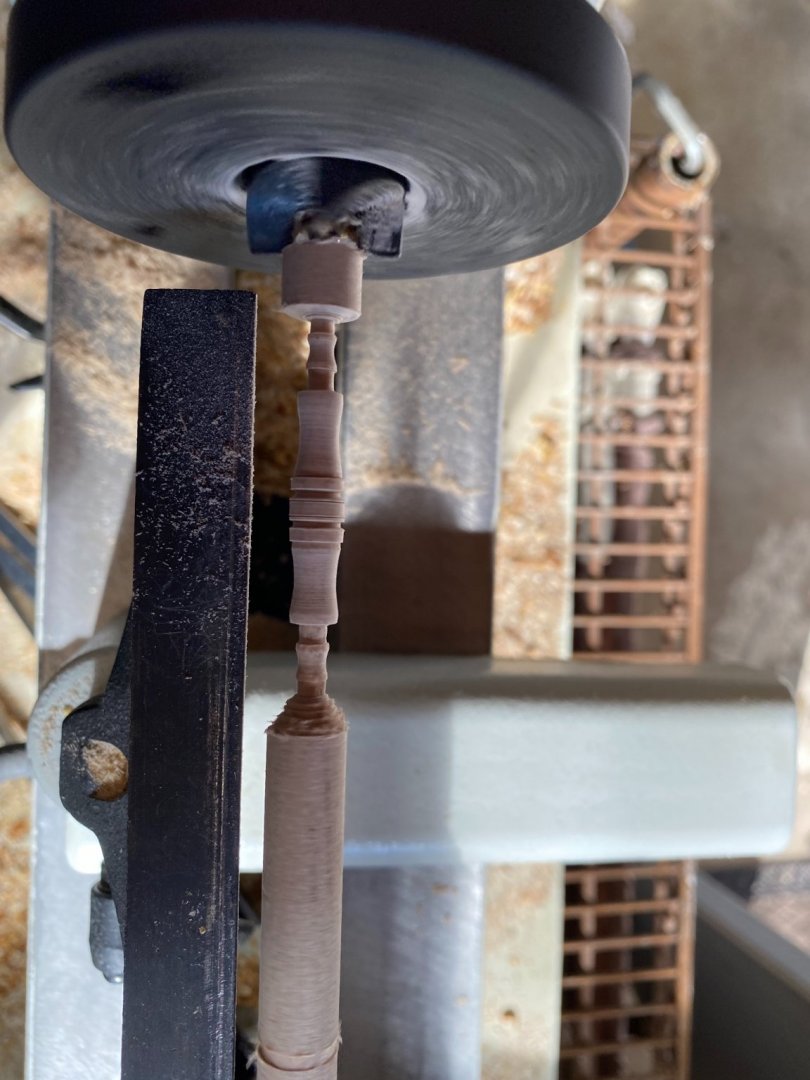
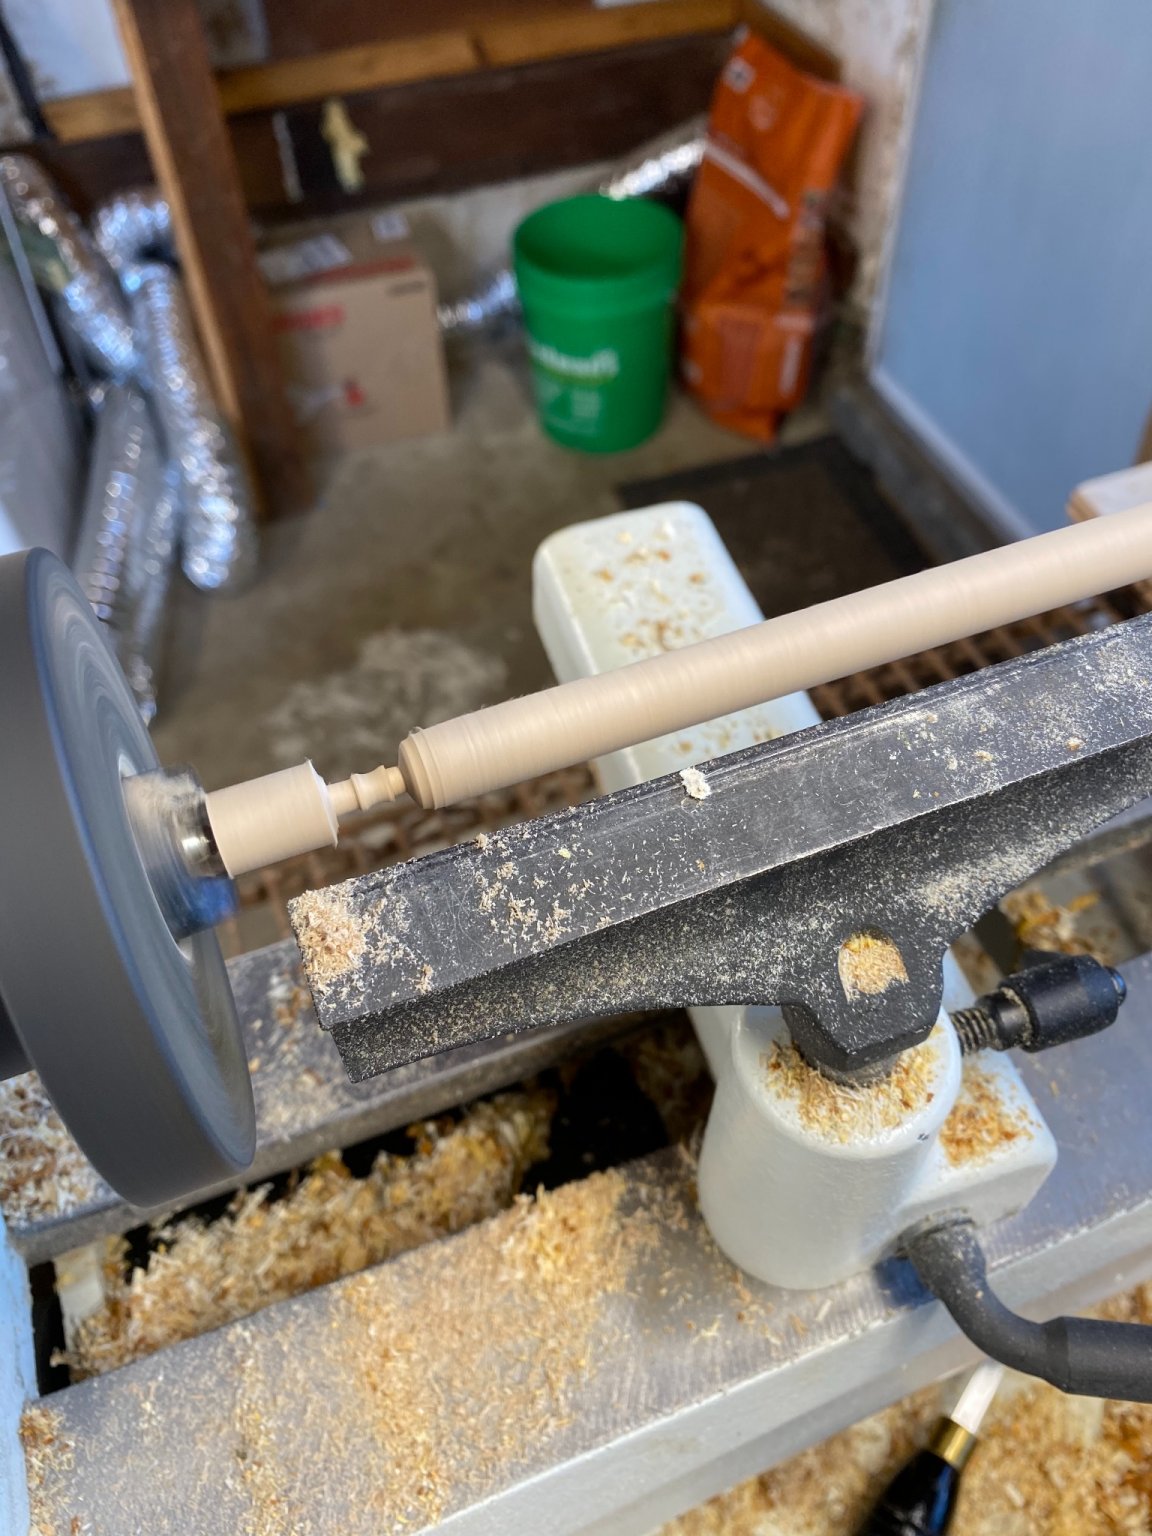
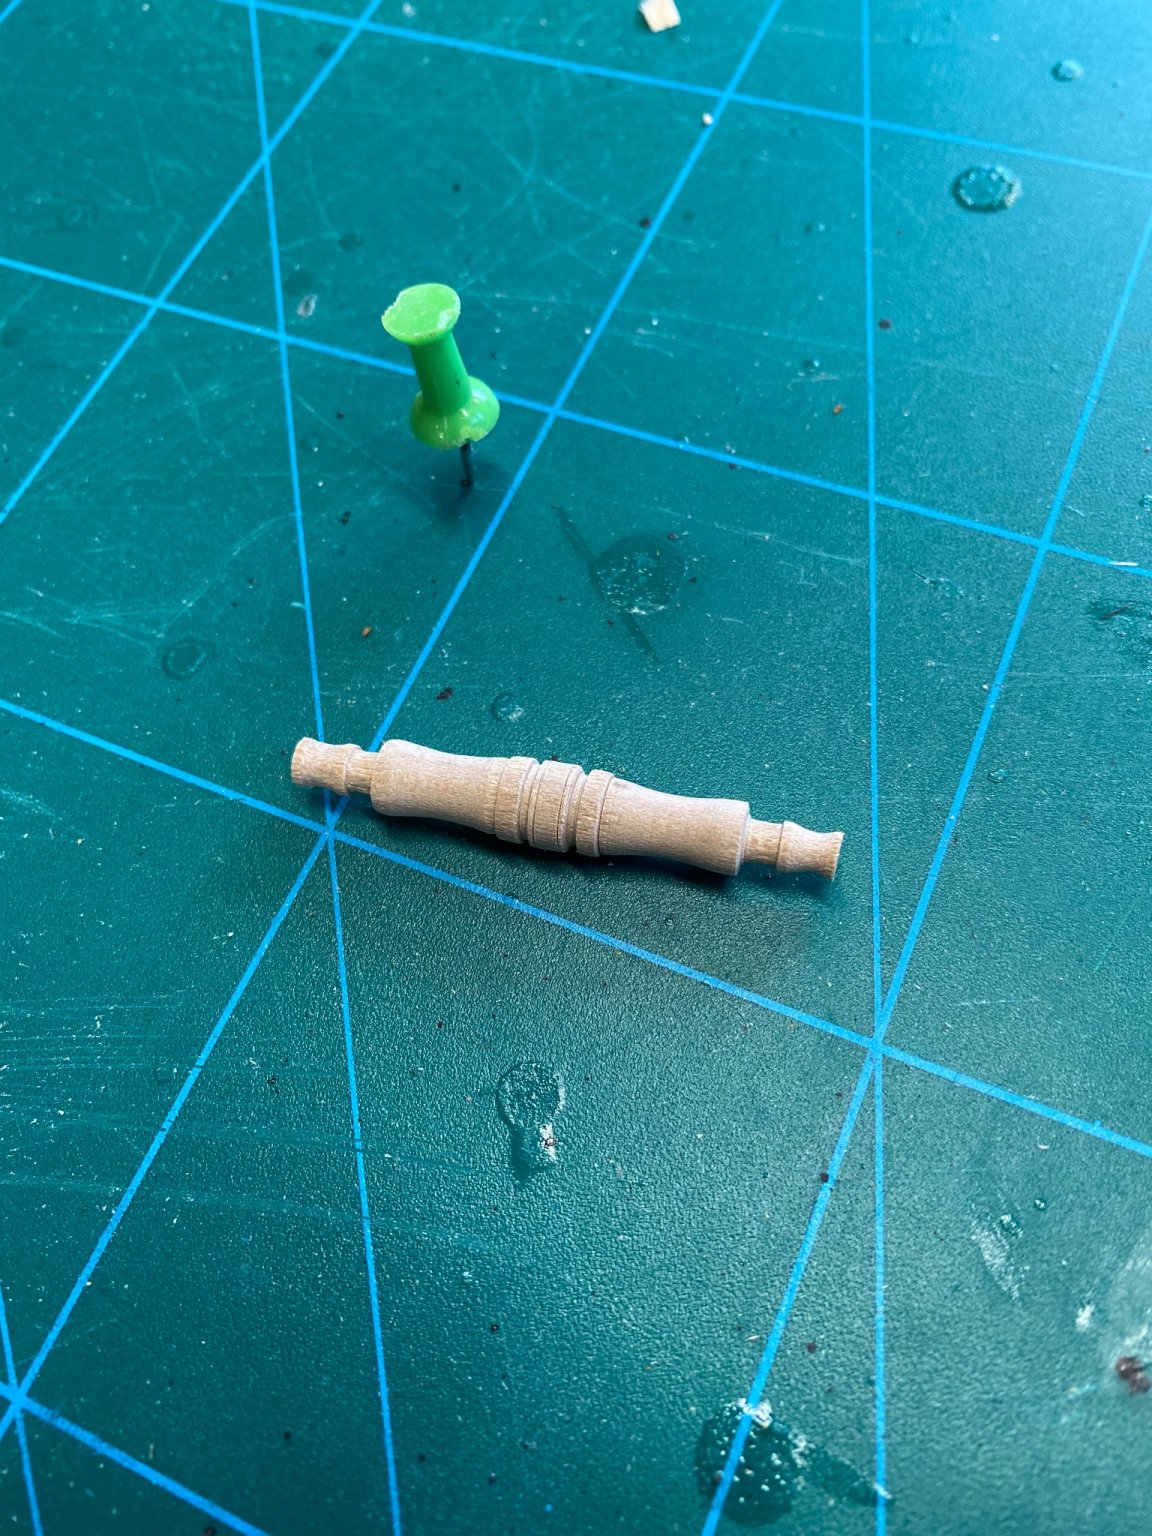
I wanted to try my hand at turning the windlass on my lathe. Before this build I had never made any thing as small as the windlass or capstans so it has been fun to learn to turn something so small and fragile.
so this is attempt number 1 at the windlass:


Thanks again everyone!
Bradley
fantastic Bradley.
-
Hello winnies masters,
how are your Winnies doing?..cant wait to show off the roof rail of my princess, she is being dressed to point she could go dancing soon
") dont be too harsh on me please hope you enjoy it. what a miniature, i firstly thought Chuck designed it himself as some kind of revenge to torture us
dont be too harsh on me please hope you enjoy it. what a miniature, i firstly thought Chuck designed it himself as some kind of revenge to torture us  v.
v.
-
awesome . congratulations Bill and thanks for sharing !
-
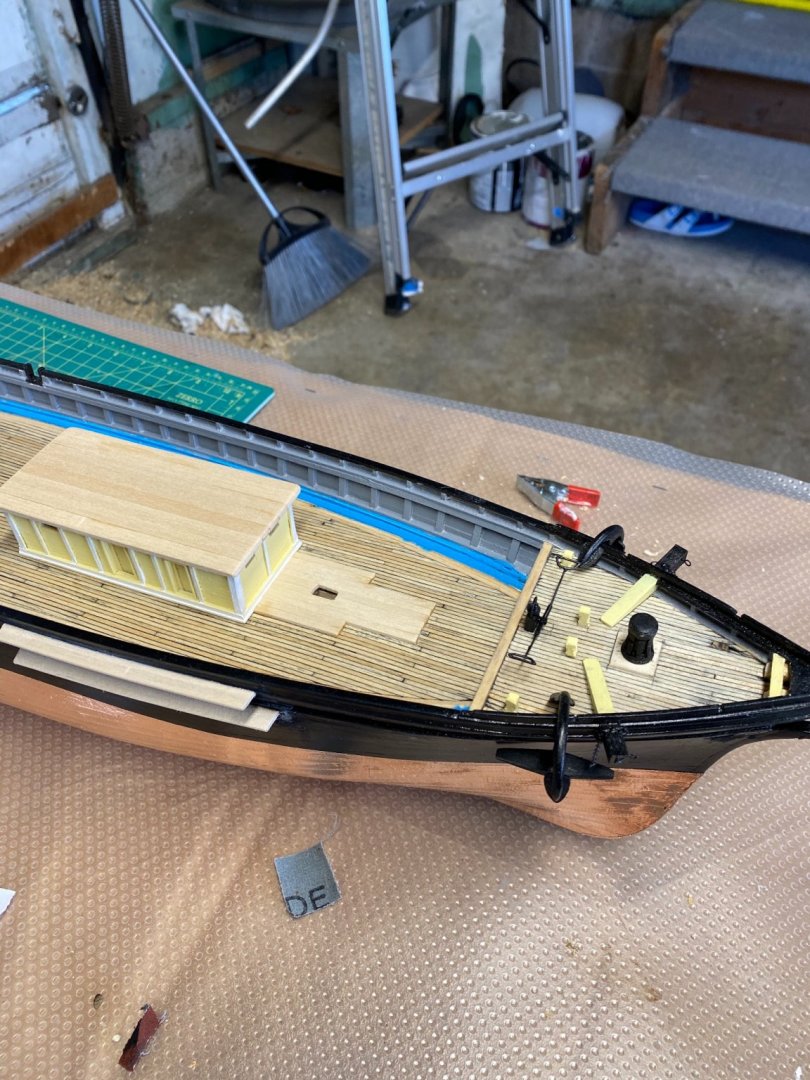
20 hours ago, Keithbrad80 said:
Hello everyone,
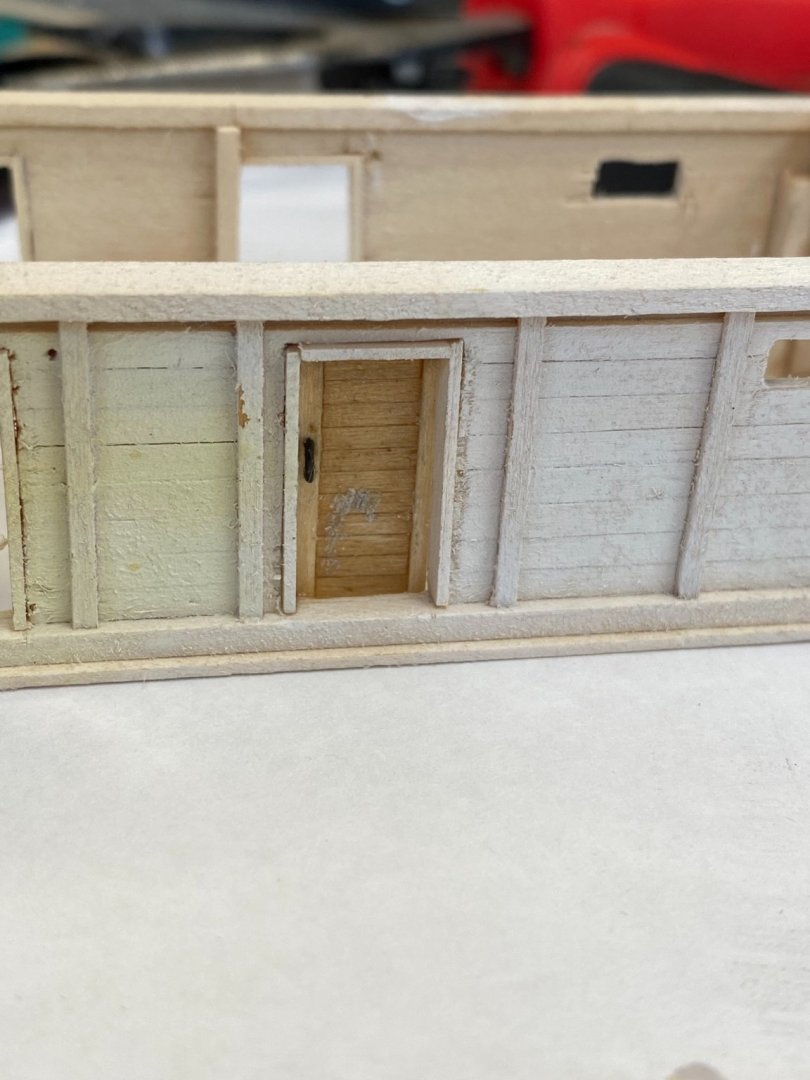
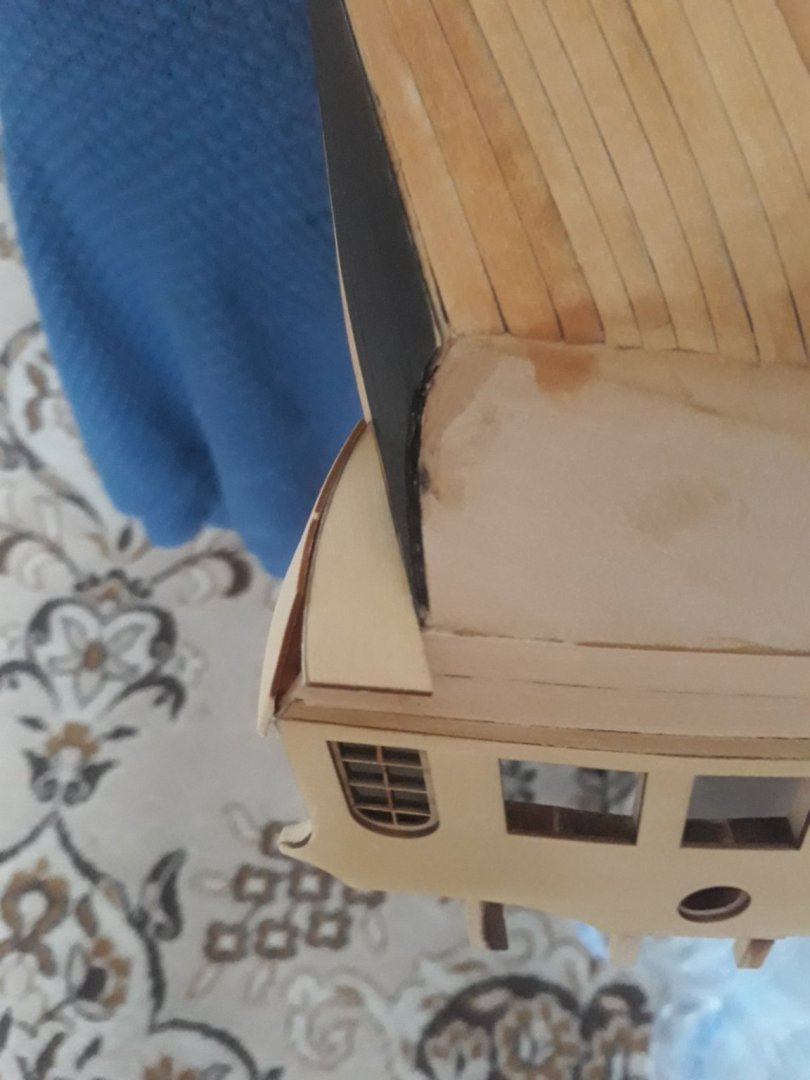
So I finished the main deck house! I like the way it looks but like everything else I’m making mental notes (and some times physical) on what works and what doesn’t. The house just seems sort of flat to me, and I’m not really sure what else to add to make it look a bit better. I will be adding a canvas tarp over the top of the deck house and the boats will go on top of that. Here is a picture of the doors that I built before painting:
Here is a picture of the main deck house now:


looking lust great Keith. enjoy the ride
V.
-
lovely work Bruma, I have one revell in the storage shed somewhere , contemplating i could jump on her for the rigging and masting sake. looks great.
V.
- FrankWouts and Bruma
-
 2
2
-
13 hours ago, ClipperFan said:
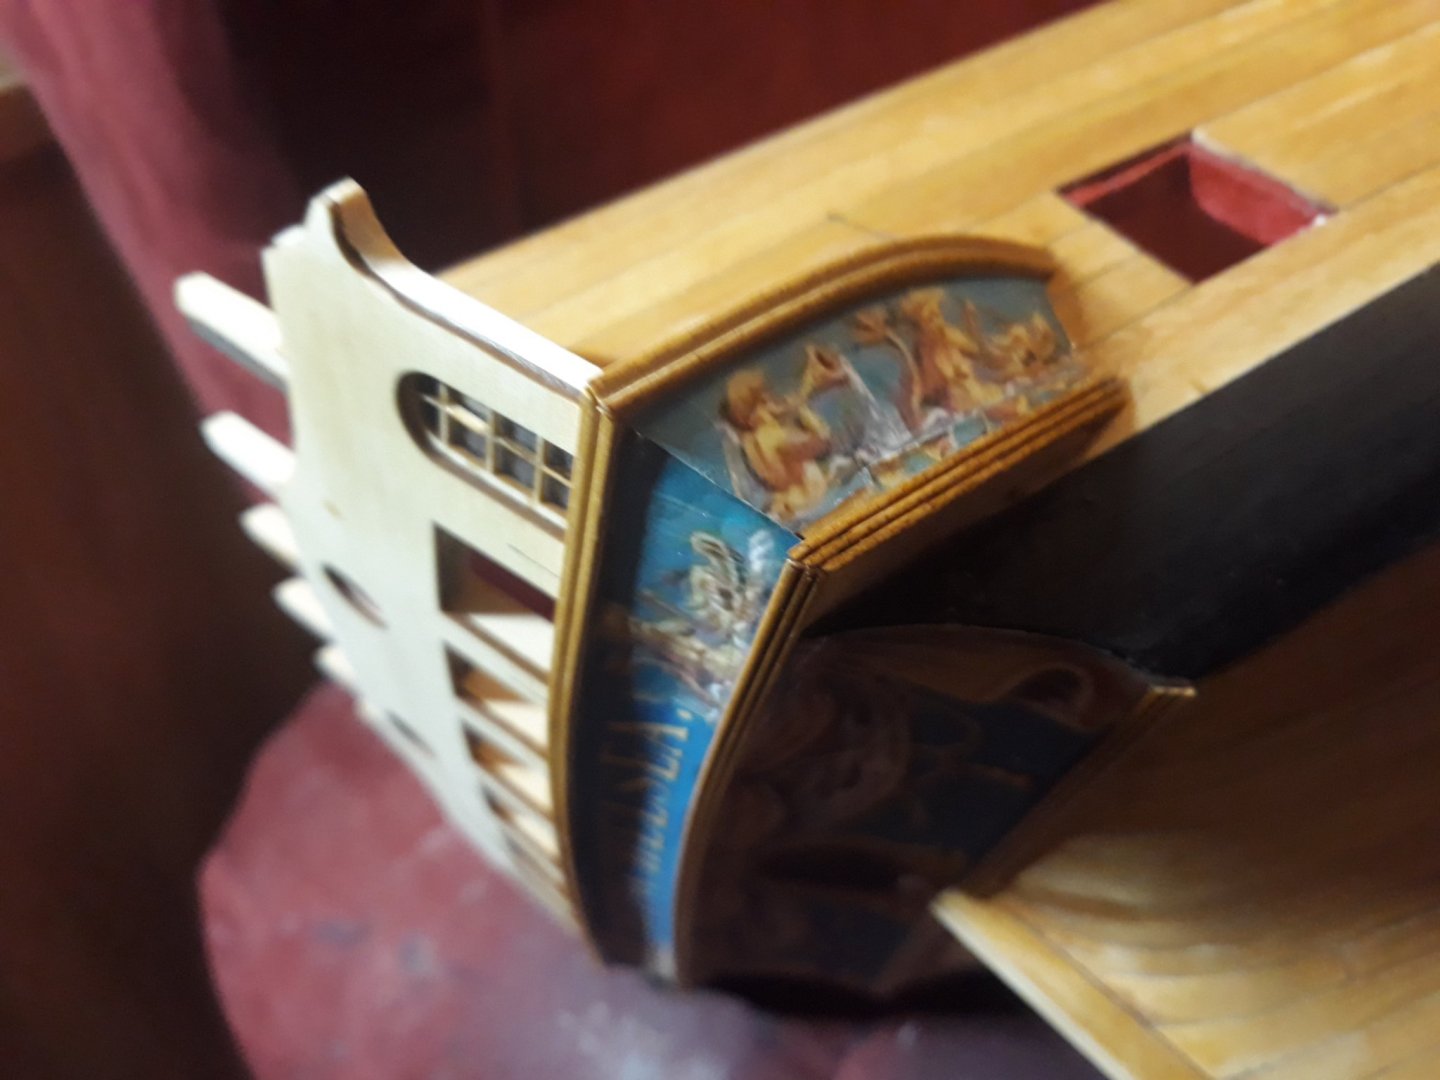
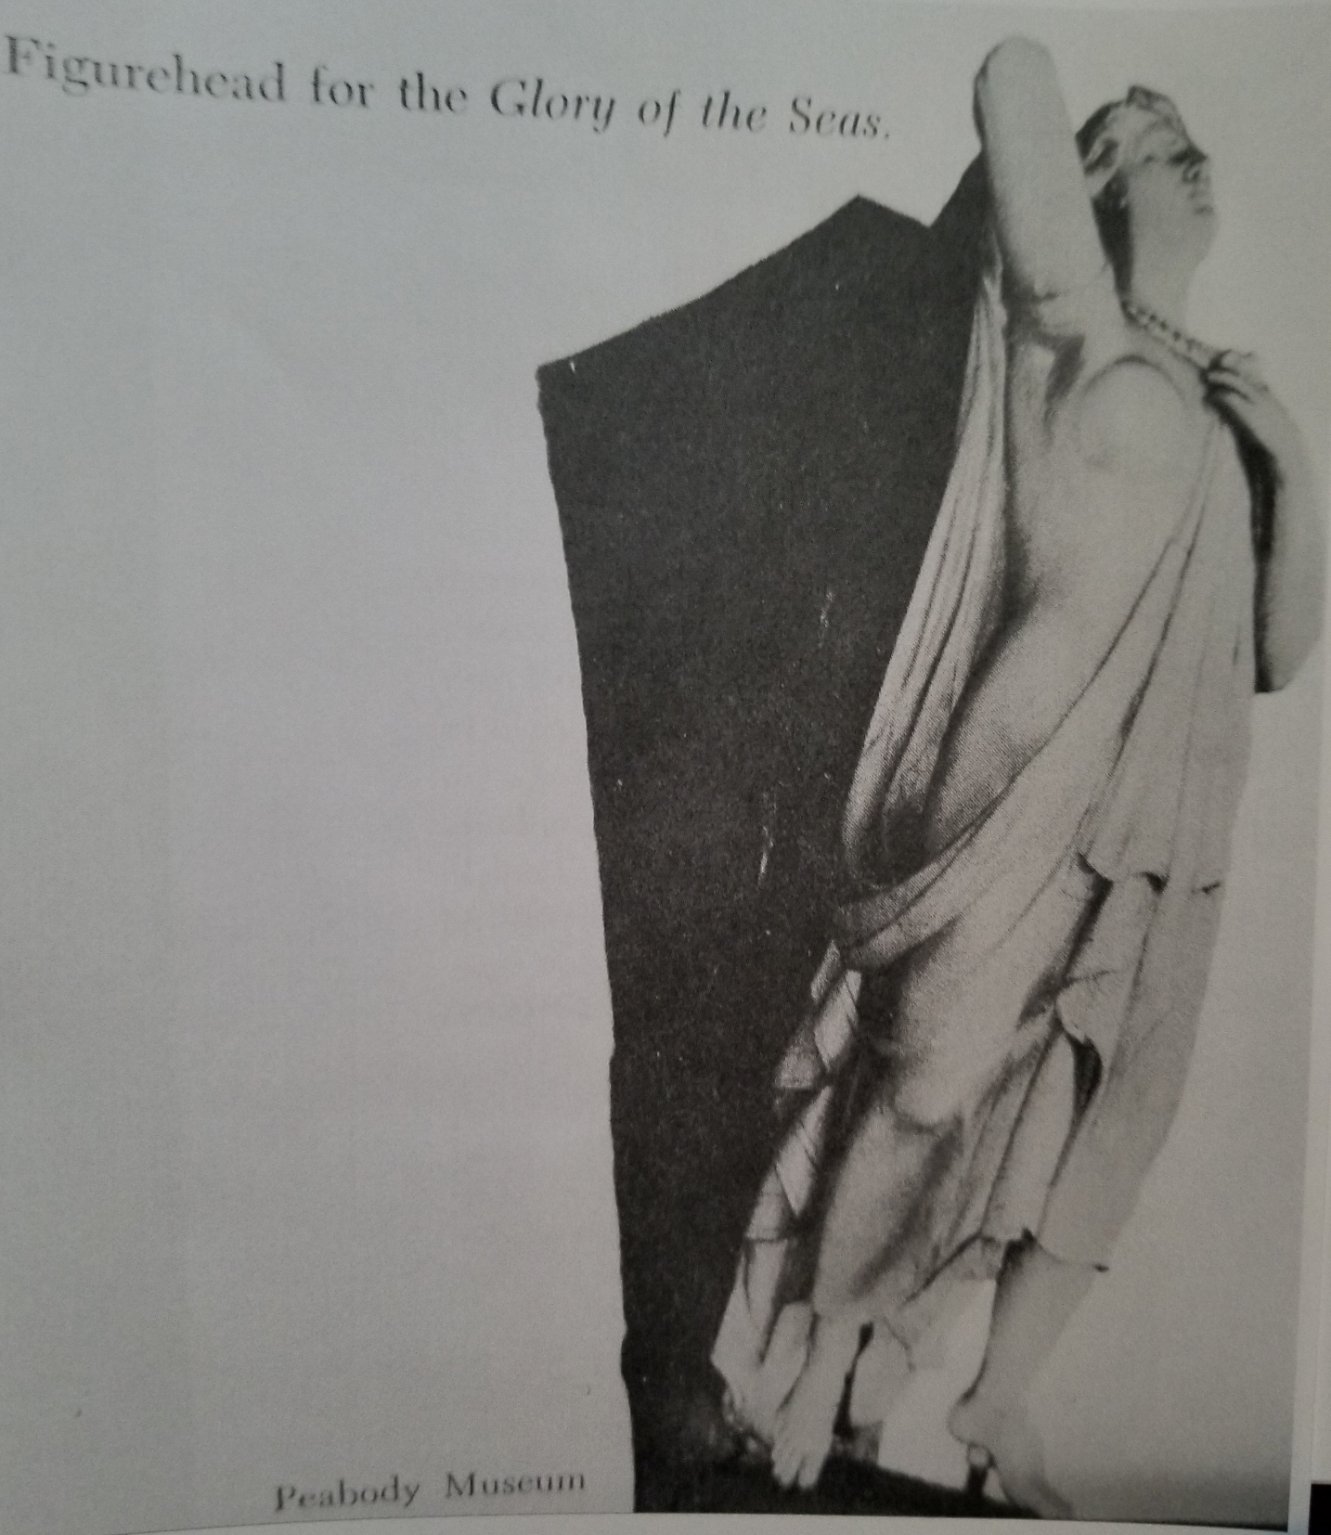
Here are the best images I have of Glory's Goddess "Athene" Figurehead. The first is from a Magazine article about the Shipcarver's work. On the bottom it states her height as being 90". Second is from Time-Life which depicts her floating against a blue background.
Third is a small image from a little pamphlet, possibly about India House itself.
Fourth is from a fascinating children's book which has the sole image I've found which depicts Glory's figurehead from the right side. Look closely and you can see what was probably original gold trim when she was first launched.
These are the sources I've been relying on in my efforts to capture her true beauty.
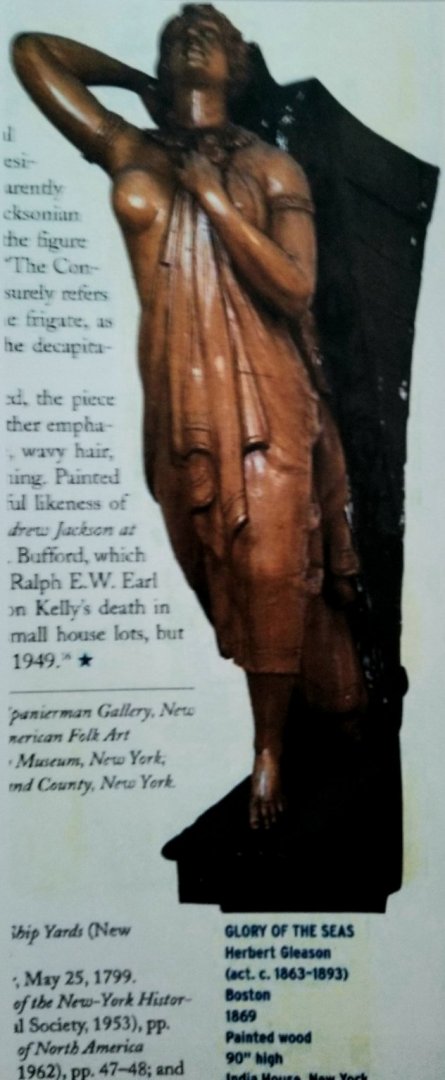


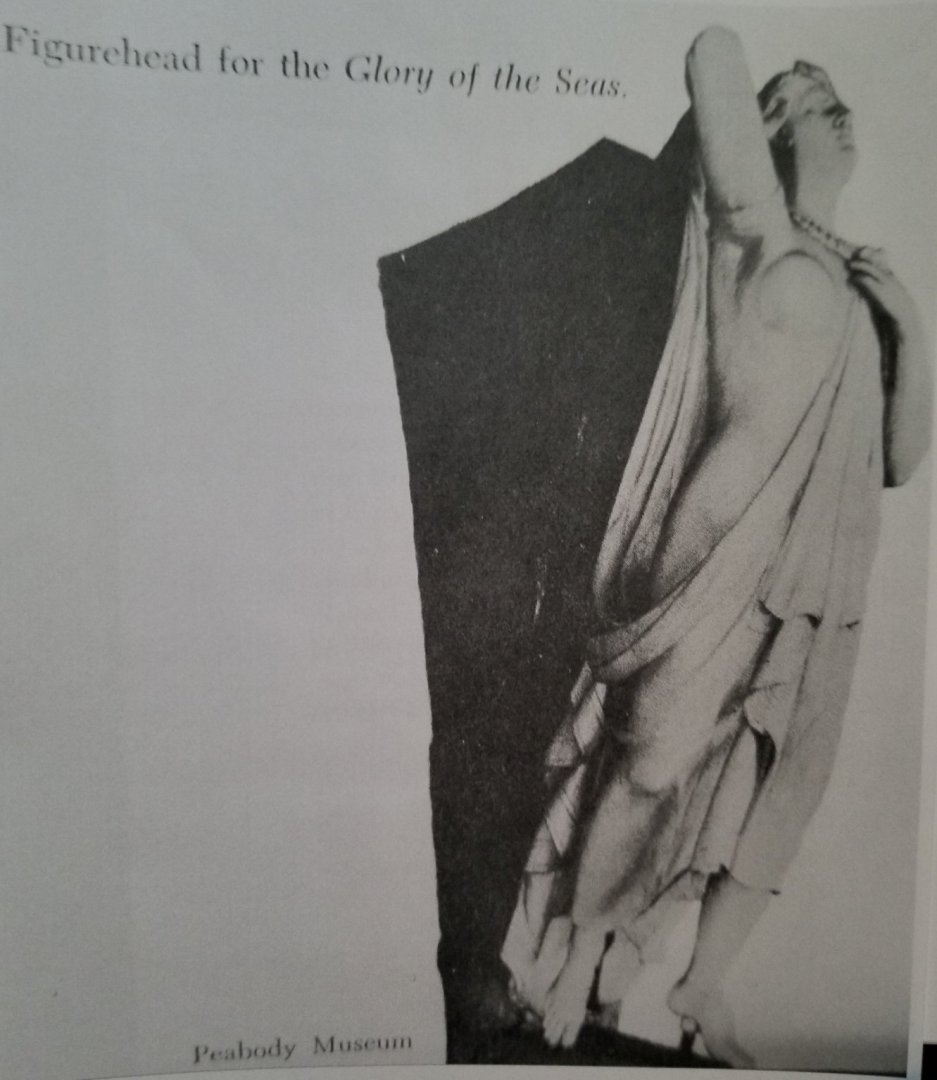
wow i never seen starboard side view....its far from non erotic postures other greek figures are shown.... One of few most beautiful figureheads in my opinion. (not olny by fact of late figureheads era, but from various aspects. its shockingly erotic for the acceptance of the era, more so in such religion driven or influence absorbed society that america of that time was - ...whatever...
v.
- druxey and popeye the sailor
-
2
-
Oh my goodness...where to start
few days not following and what a read.
@Rob, i enjoyed immensely your photos and description of meeting with Mr.Mjelde.
by the way, on the table - Fantastic model on its own. ! wow !
@ Dear Arina, please pass to your father a sincere Thank and admiration for his phenomenal talent and effort with writing the books about Glory. The way that it far beyond just ordinary writing.
I spent two lovely summers being drown into the books so immensely it was unputdownable. I rejoice those moments with as happy warm feelings still giving me a pleasure with fighting my longterm healthy problems and psychiatric diagnosis.
at this point I wish endless speculations about plus minus verticality of bow ends soon and Some plan materialised I can buy of jump into i just want to start assesssing preparations and material so i can start building the glory by autumn this year hopefully if hlealthy....:) looks like i can turn back to my own observations stating bow agressiveness cannot be that radical
but from now on I outstep from these discussions.
@ Clipperfan , great stuff about figurehead also some great artistic skills.
even im in the middle of different boat but you made me unroll my glory plan today to look at :))
I guess we all enjoyed past postings with enormous joy. ! you are doing great effort Rob. Thanks.
stay safe V.
.....
-
Enjoy the build Frank. V.
-
Good moring folks.
I halted any progressing on chapter 3, and focused on curing the blotches on hull....they stepped away plain ugly. I spent a week on it... I possibly made few mistakes after 220 sanding mostly not sanding hull perfectly with few places leaving glue so varnish didnt apply evenly and not having proper brush and working with clothes from the start I happen to blotch specially bow part....Lime or basswood does not particularly like staining - and I am not fan of any commercial available stain product also not the shades or outcomes it produces. I was quite satisfied but bow is a critical part that I was not able to run off of blotches. And I cannot live with that awfulness on hull. Unfortunately I dont know product that would even out blotches if someone has experiences I would be happy if you can share those...the point of multiplying darker and darker coats will result in just darkening blotches and at the end mess will multiply. So i had to sand off....completely.
here is the outcome Im defintiely more happy / . It alsways goes like this. Eye forgives a lot. Than take camera and pic and look. if it looks OK just be sure its not OK and try harder and third time you take pics ....it will be OK. There is no blotch I can see by eyes, but camera can see it. I consider coloring wood one of a hardest part of woodcraft, but i always listen to urge to experiment. according to slogan - best learn mistake = own one. I m sure you would agree that was necessary to correct those. These are pics before and after correction. v.

- Captain Poison, Matt D, ccoyle and 3 others
-
6
-
On 2/1/2021 at 10:10 PM, Ron Burns said:
Vlad, great job on your quarter gallery! It's really nice to watch it come together piece by piece. The stain you used has an excellent tone. What tint is it?
Thanks a lot Ron, appreciated.
Im glad you like the color and curious about it. Its asphaltum, https://thefinishingstore.com/blogs/news/asphaltum-a-forgotten-finishing-gem
i know many dont like it as its possibly never dries completely, but I use it extensively for detailing work. It covers all warm excellent shades of wood and its transparent. Glazing with it is pretty much used in woodworking still as much as in painting. I use simple artistic color like https://www.royaltalens.com/en/catalog/rembrandt-oil-colour/oil-colour-paint-asphaltum-414-40ml-tube/
You can pretty much mimic Chucks laser black lines in molding to the point you wont recognize which is which if you scrape it to same size scraper. I always wipe off content with cloth so it leaves nonblotching surface. Boxwood is literally painless...I would not use it on blotchy woods like boxwood but its possible. and take my condolences that you had to replank.
hope it pays off.
...
- FrankWouts and Edwardkenway
-
2
-
6 hours ago, Chuck said:
That is correct.
Thank you Chuck.
-
I would humbly inexperiencely think coppering would ruin beauty and philosophy behind it for me. and cover palnking
 . im with Greg. elegant with simplicity. its same logic applied as going with treenails. posibilities are endless. - fully ? partially with framing ? one side? I would for sure not put scuppers on mine. Im eager to see how top deck would look like apart of cannons. Would there be those crossbeams like on greenwich model we see? only Chuck knows im looking forward to explore it as it goes....
-
@Chuck Guys,
I have a question to ask please,
I guess i should even these holes in this case to wider umdertransom hole ( not sure how yet...? 😕 to match stransom one as i observe monograph is that correct? Thanks a lot.
V.
- Ryland Craze and FrankWouts
-
2
-
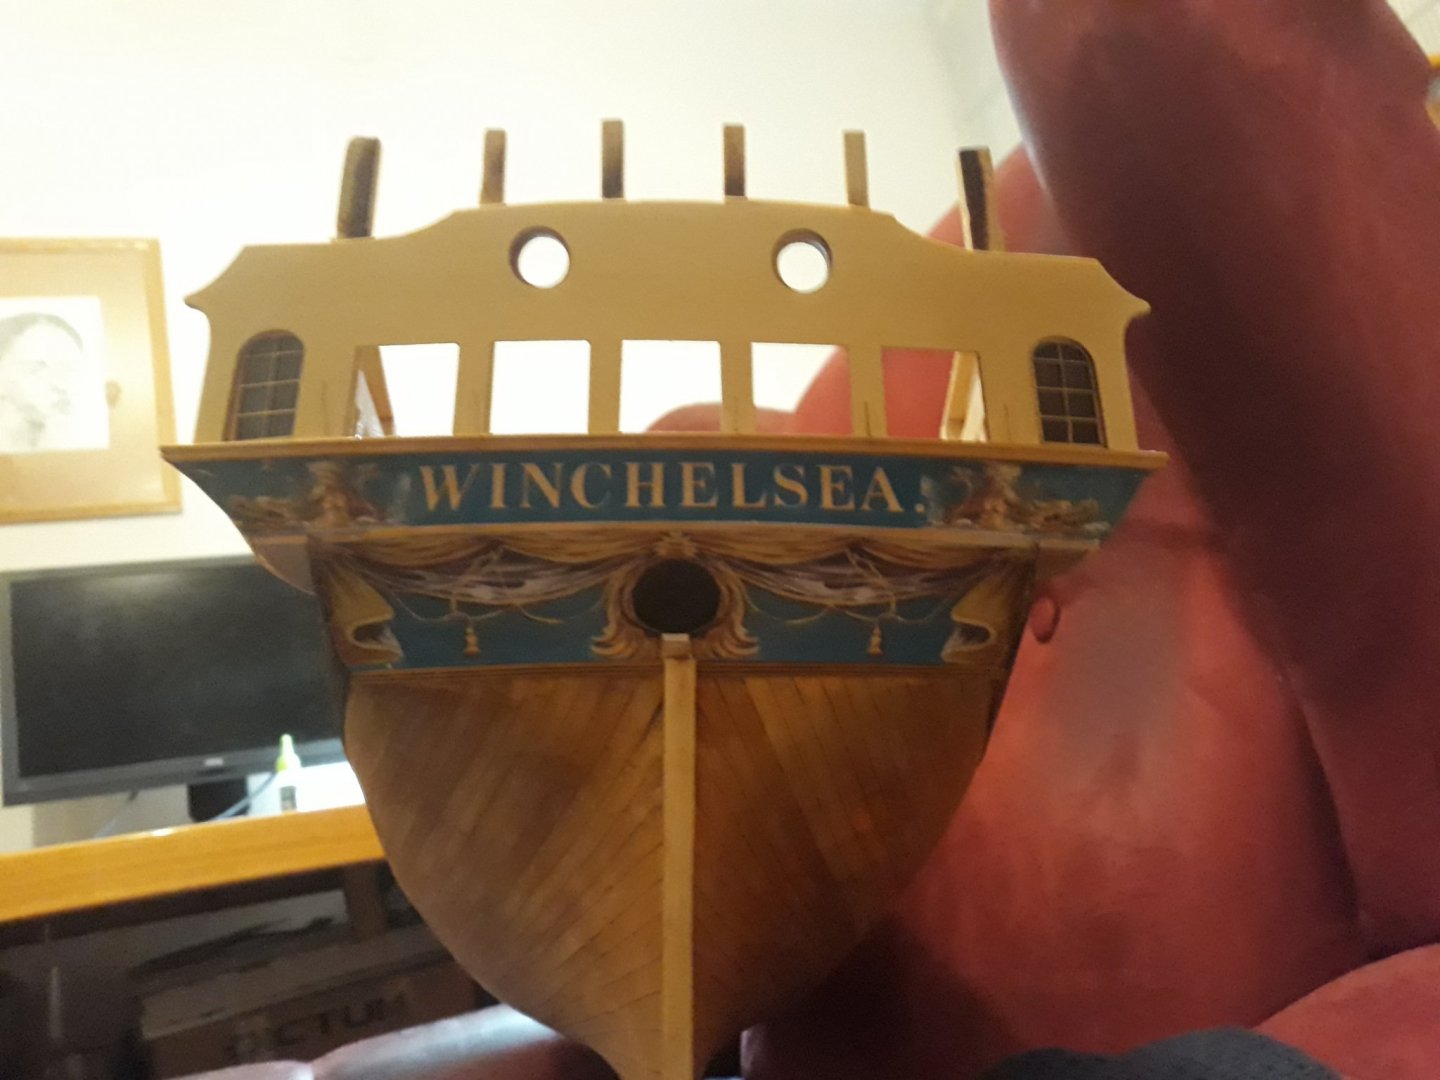
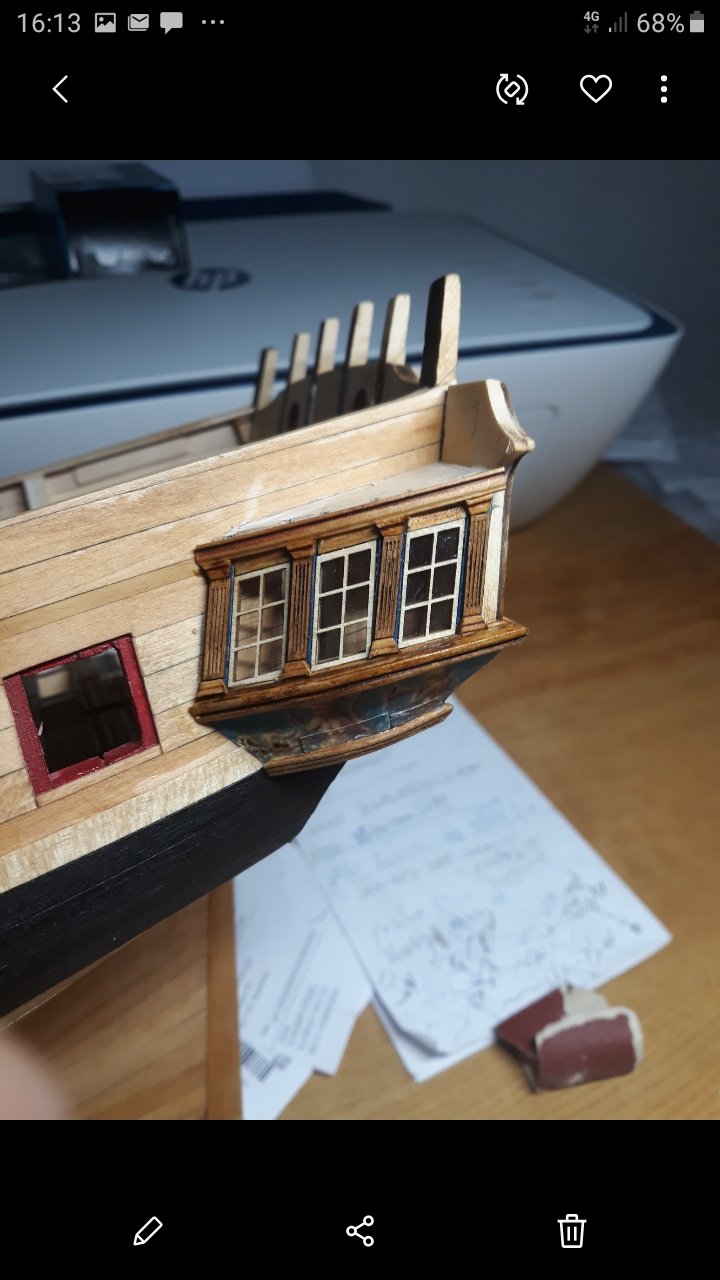
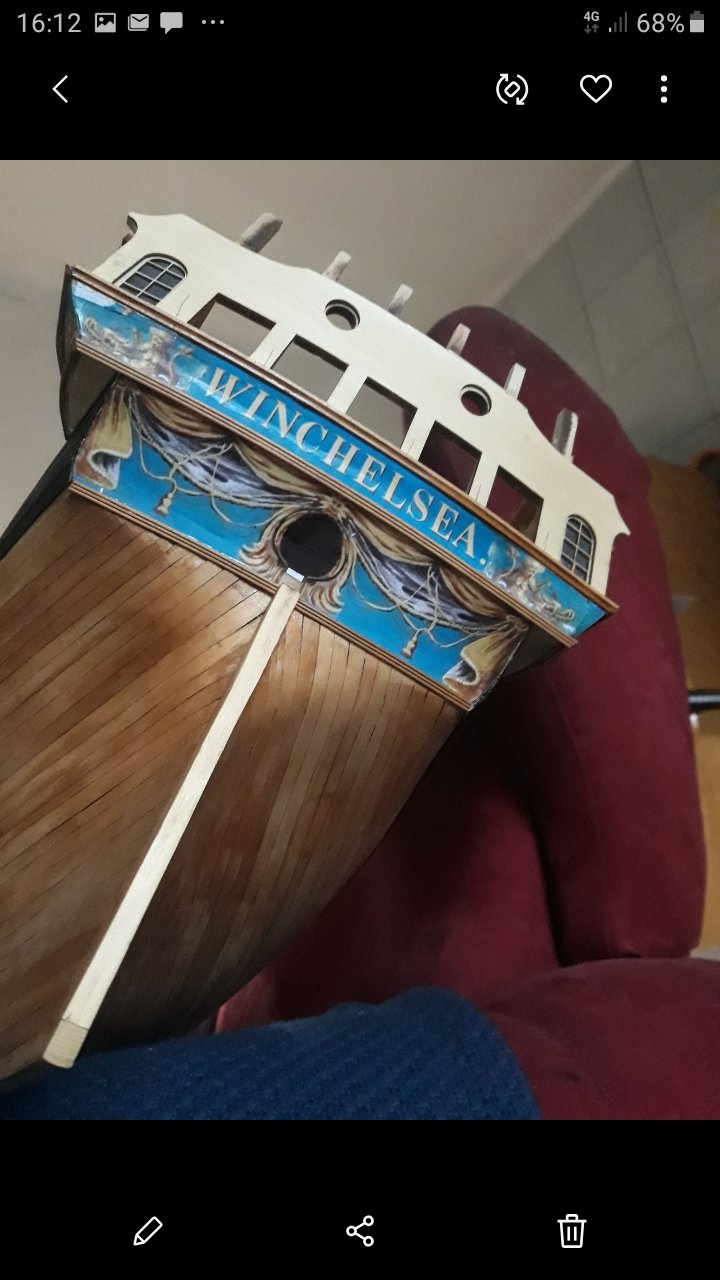
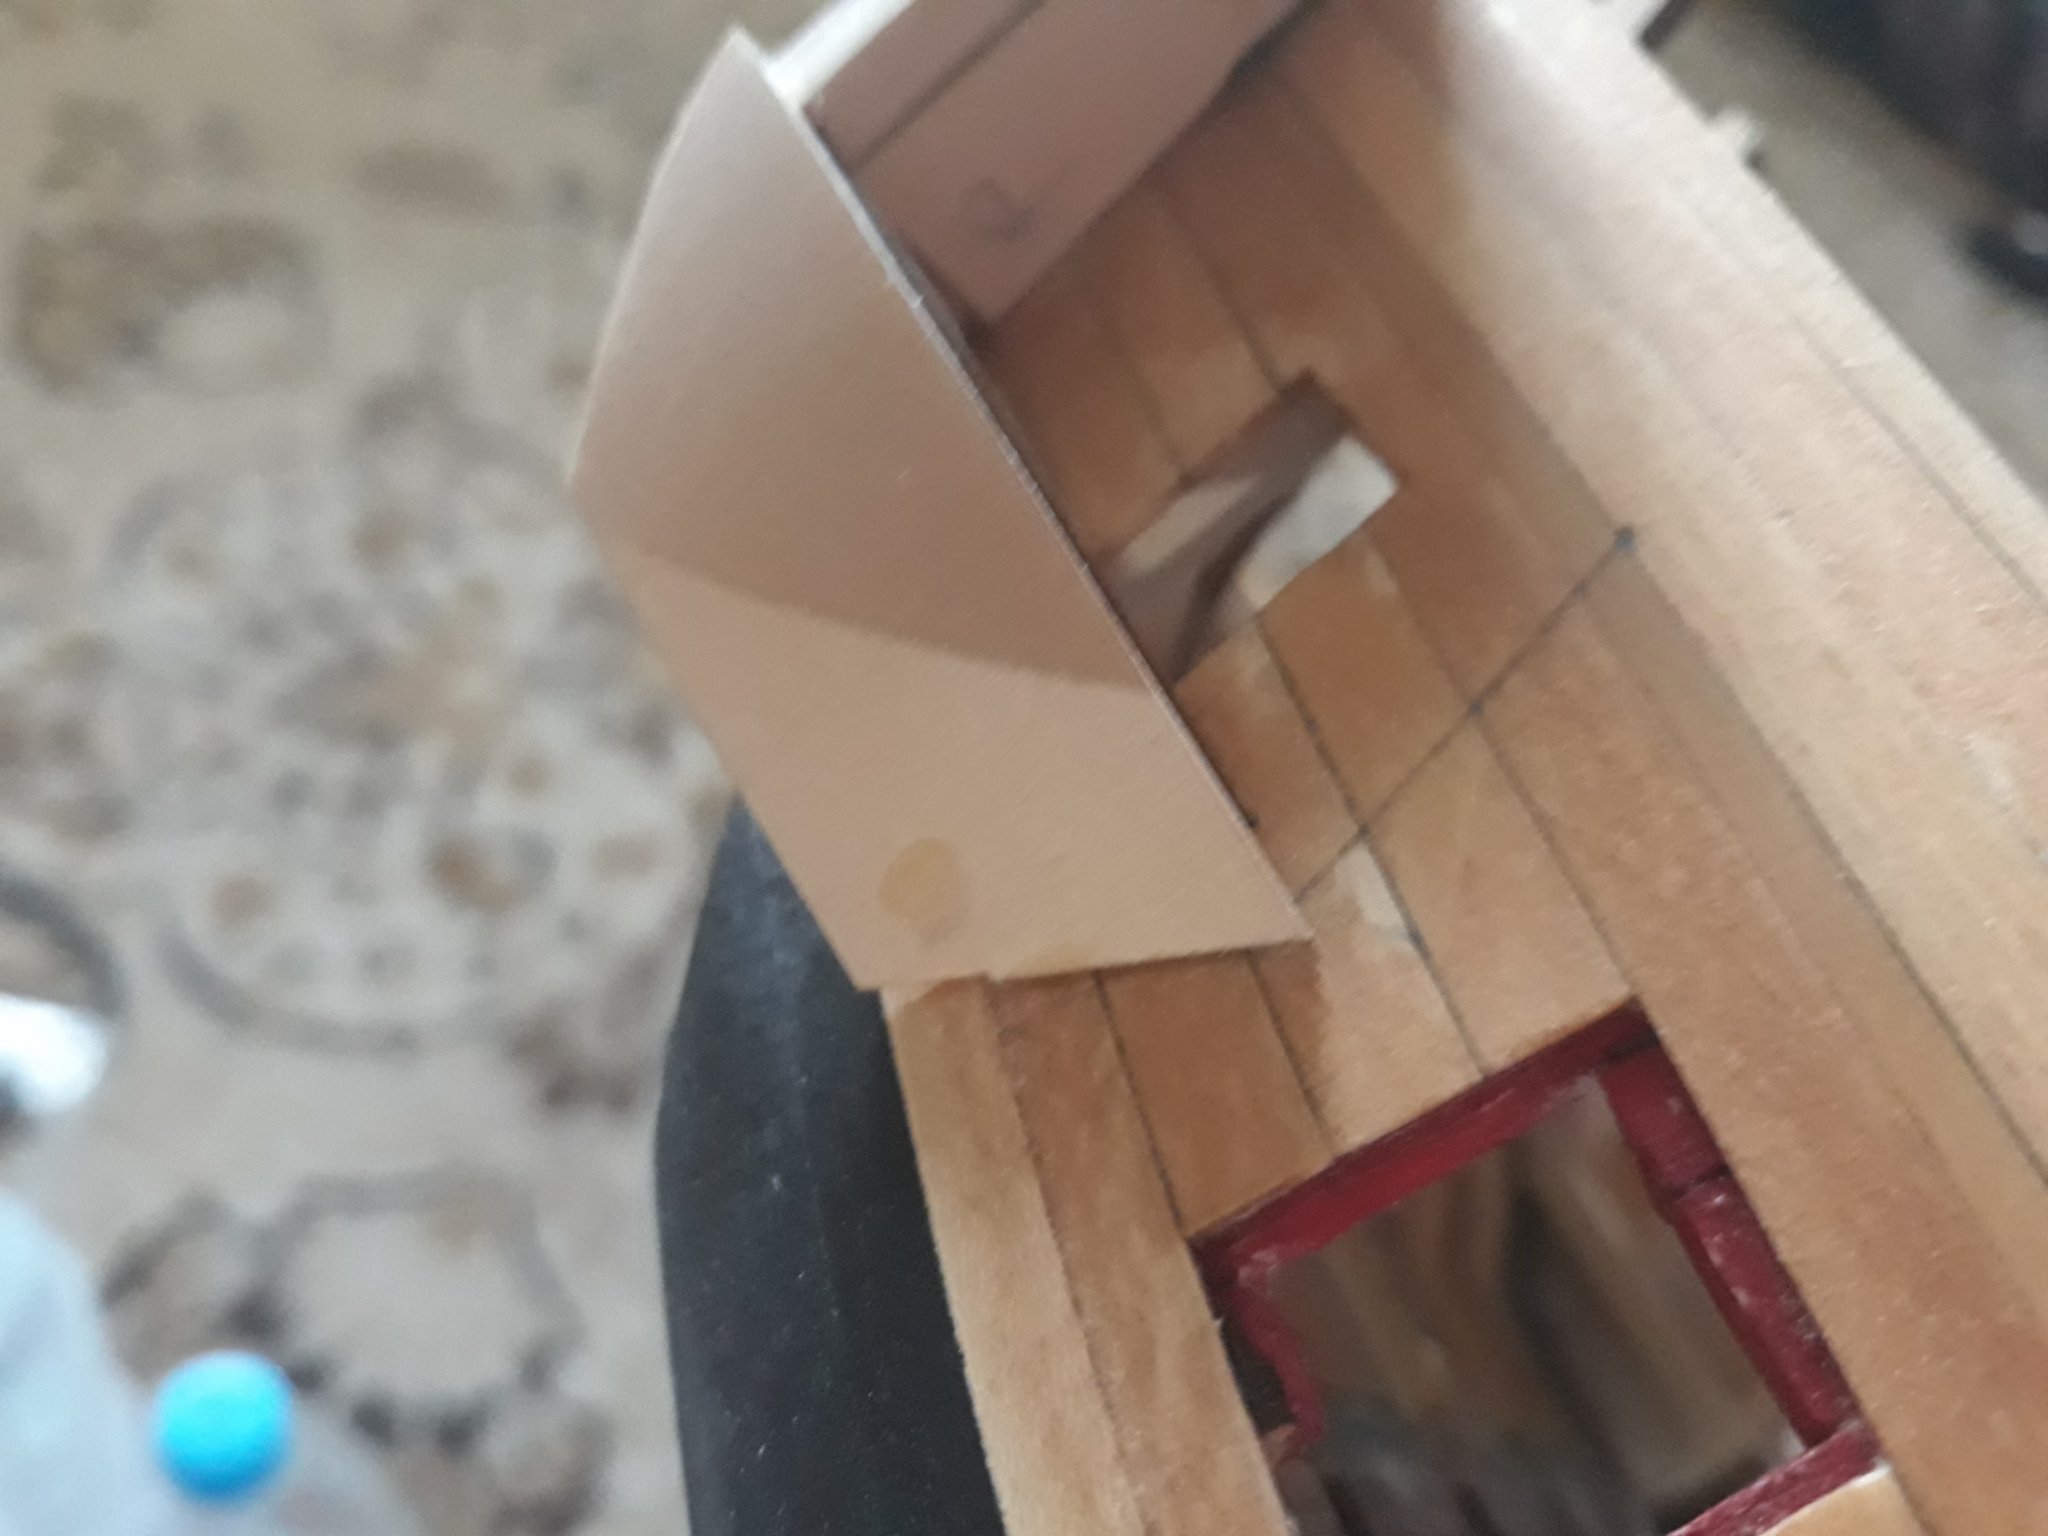
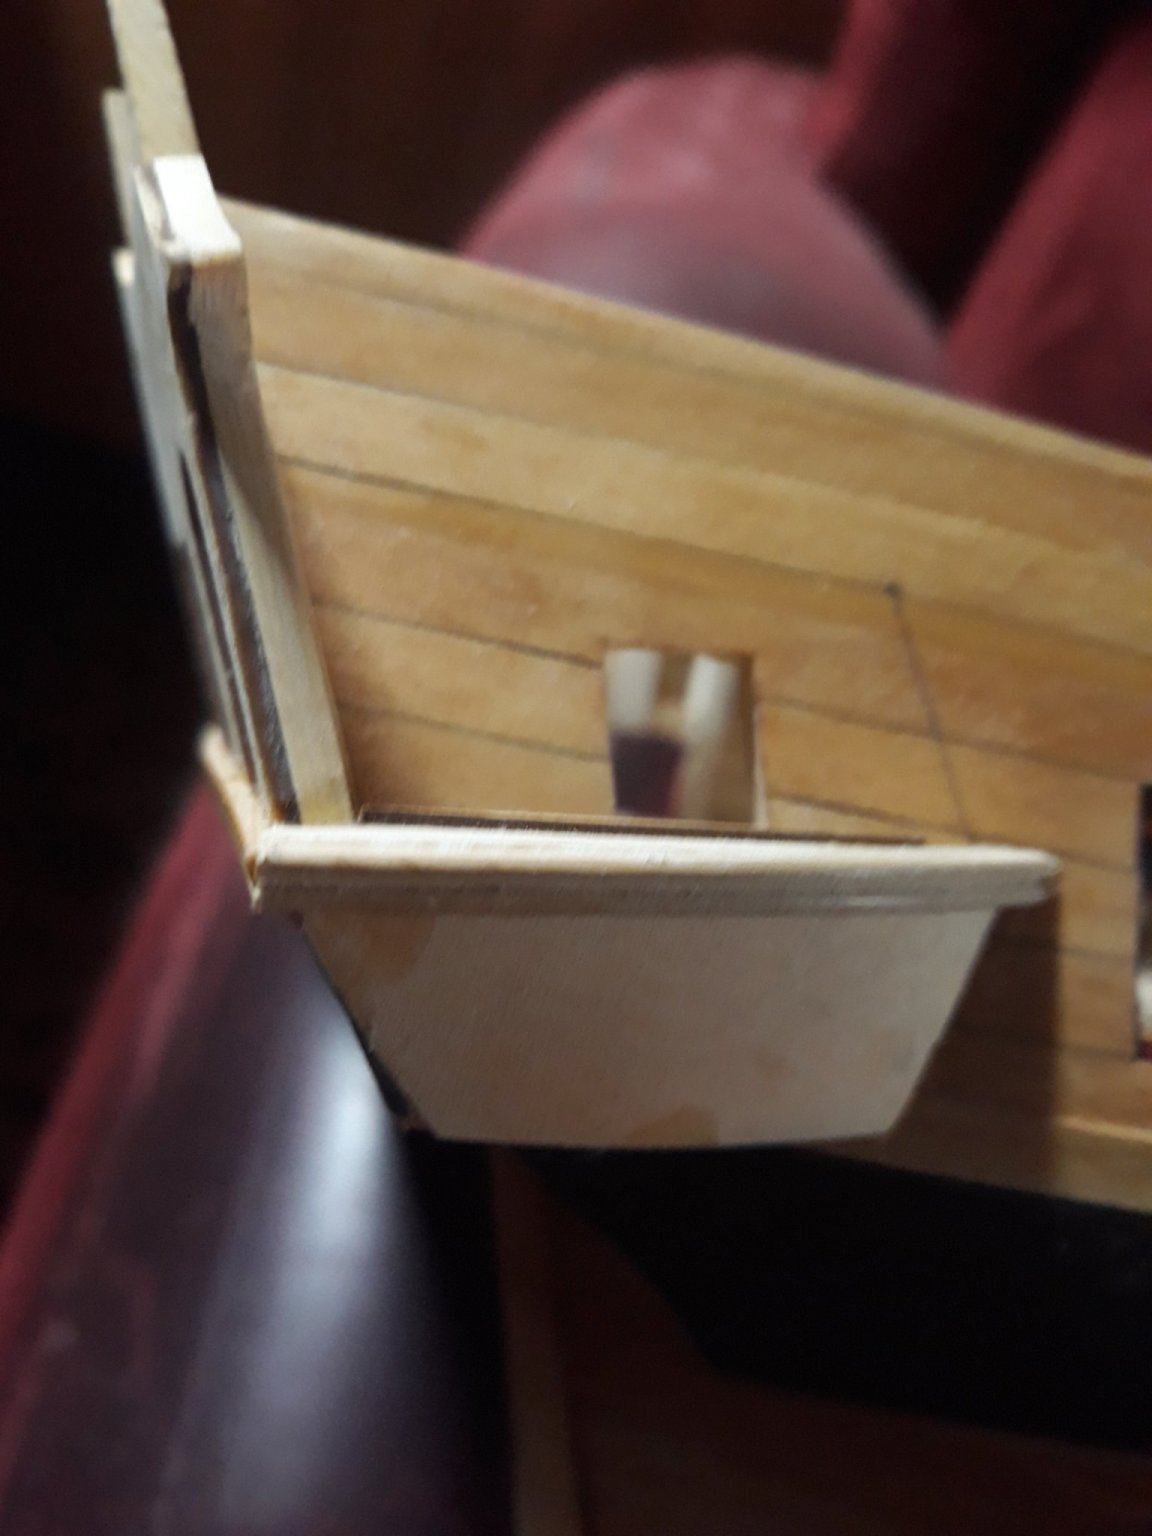
Good health everoyne. I was just about to ask whats the news but reading thru Robs news a Im like kids getting christmass and what a company we have here. Cannot wait for those outocmes i myself little abandoned plan to continue as realized there still would be somenthing i am not really up to. nice start of year just hope everyone stay healthy safe, to update myself i started to build rigless model of hms winchelsea under Chucks group project ( sou can chcek if youre interested) meanwhile, which got me in touch with nice fellow around here who is cutting laser stuff and made me fantastic bulkheads for very fair price. So I cant wait to see some proper glorys lines. I would jump on wagon in 1:65 scale even it would be hell of a big beast.
cheers everyone.
-
Ron If i had to adopt such critical thinking of milimeter here and there in places where it wont affect anything and will not be visible I would have to grab axe and my winnie would heat the room in fireplace !
i call it third mastering dirty rule of modeling- to charmingly cover imperfections to the point noone ever notice there was any
- Ron Burns and FrankWouts
-
1
-
 1
1
-
Good weekend everyone.
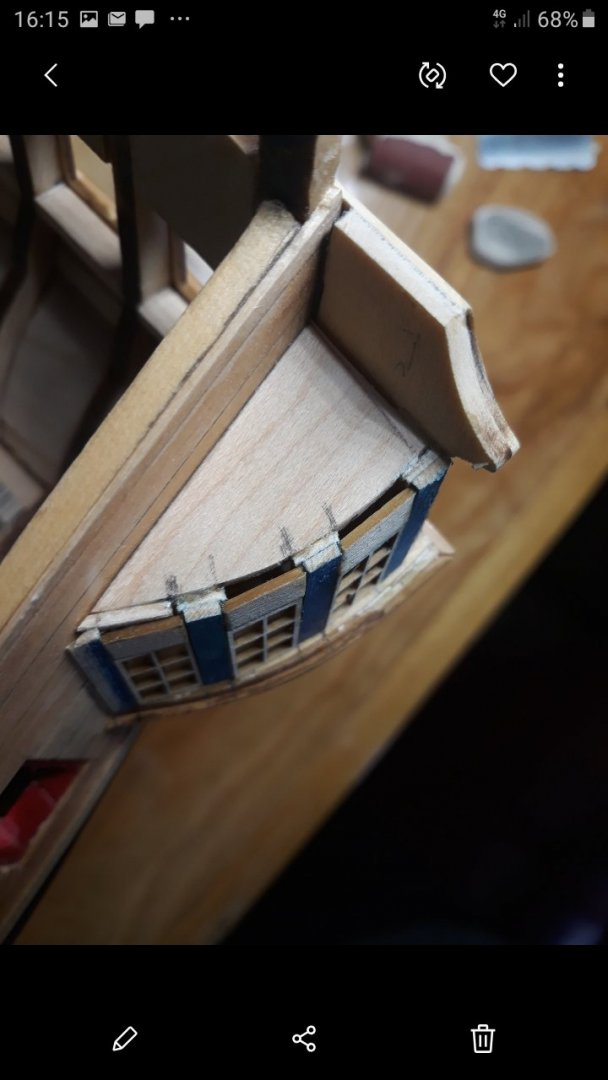
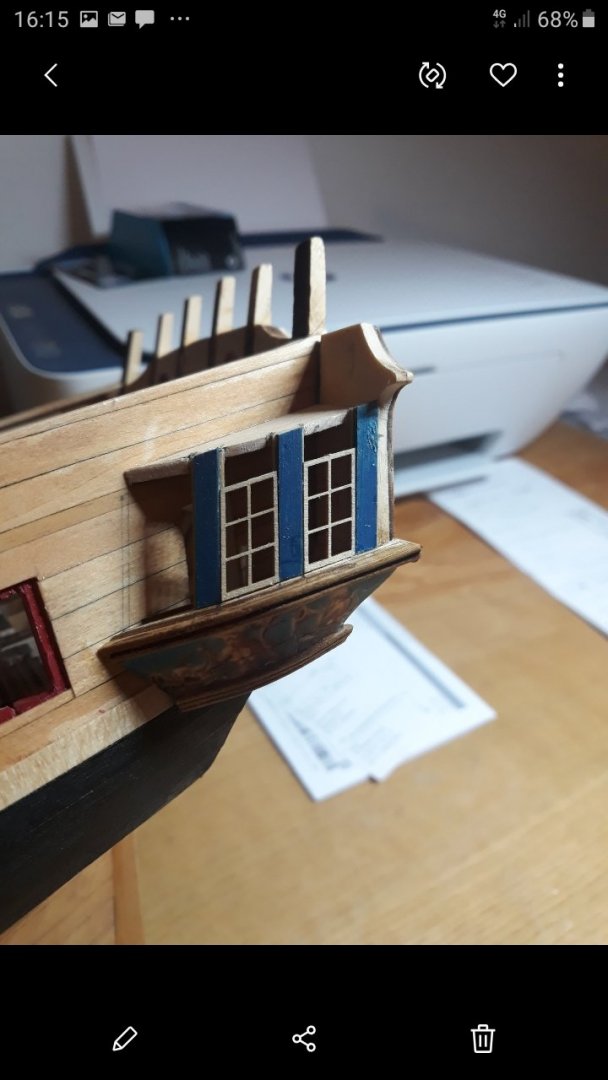
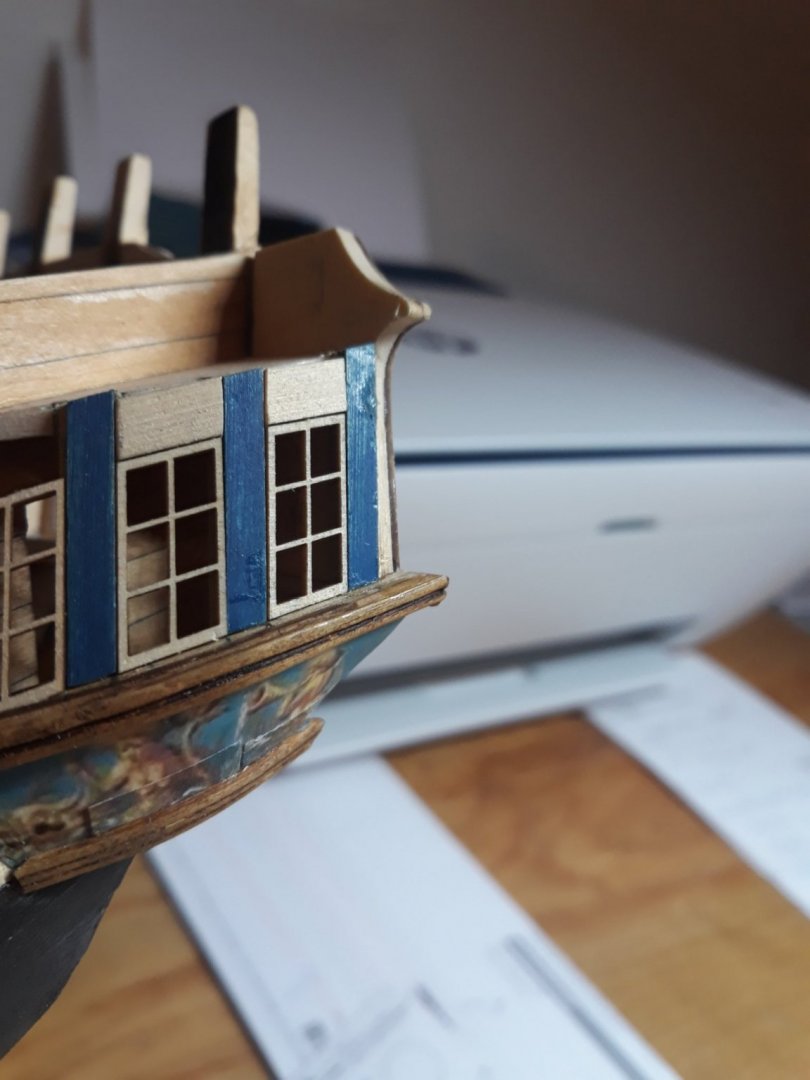
I took a lean way this week and made only one gallery. It is tough! I only now understand why Chuck left almost entire chapter to it. Unless measurements match of course. otherwise windows would not match...I had to improvise a little as roof was not aligned properly. At the beginnig i was thinking of painting window frames white but i changed mind as along with darker hull and fluted statues i think now it makes nice contrast...I also changed main stern underwingows molding and as i got used to scraping more i made classic 90 degrees one one that its top reaches more outwards ...finally i painted columns underroofs filling blocks that sit on windows with diluted asphaltum to unify the look. .next week i am about to sand down few blotches from hull and put another coat up. And second gallery. Thank you for look, any comment, etc.


- Edwardkenway, Ron Burns, FrankWouts and 3 others
-
6
-
On 1/25/2021 at 11:26 PM, Ron Burns said:
Tom, I would definitely 2nd the fact that fairing the Baltic birch is a king-size PITA! I had the bulkhead set laser cut up here to save a few dollars but I regret it now. Just for sheer accuracy and ease of sanding, go with Chuck's offering. If I do it again, I think I would go with the cherry even though the cedar works like a dream, bends easily and really holds an edge. The cedar shows up my bad workmanship a little to easily
We'll see..by the time I'm done, perhaps I will need to put in an order for more cedar to build the next one. Hope you're doing better!
Vlad, I don't think your scraper will have a difficult time with the cedar. It's such a great wood to work with and cuts almost as easily as basswood. You just wouldn't have to deal with fuzzy edges
Ron I should take writing slow as well as my inexperience with scraping - i realized Chuck provided boxwood for scraping. which is definitely tougher than even cedar. Well I had to elarn how to scrape along the grain. key is to have sharp one. even touching scraper firmly and pulling timber works flawlessly. there is no ugly fuzziness on that wood. so i stand corrected folks. therefore cedar must be easier than boxwood by definition
- wyz, FrankWouts and bruce d
-
3
-
On 5/1/2020 at 12:03 AM, Trussben said:
Had to clean off a little bit of casting flash and glue the arms on, starting to add some color, quite a nice figurehead that Chuck supplies.
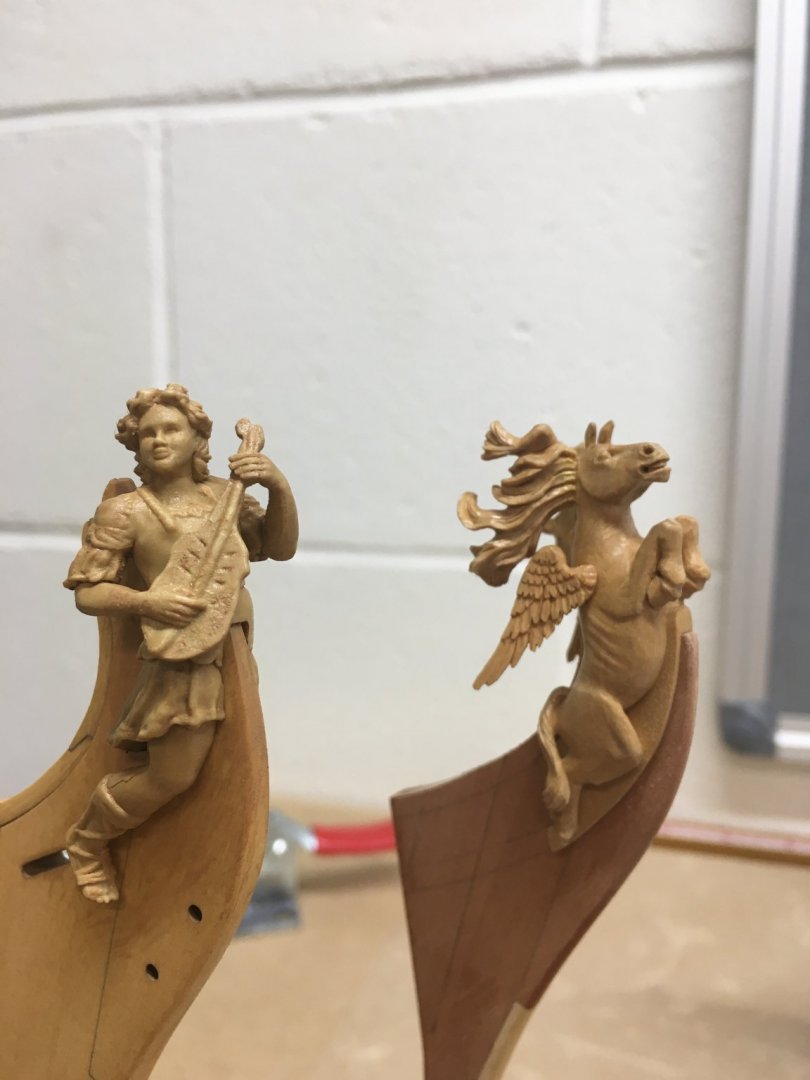
Where can I get such horse Ben? id prefet to have it on winnie instead of that angelic musician:) . thank you, Vlad
- Jorge Diaz O, druxey and FrankWouts
-
3
-
fantastic lantern JJ. wow.
- FrankWouts, wyz and scrubbyj427
-
3
-
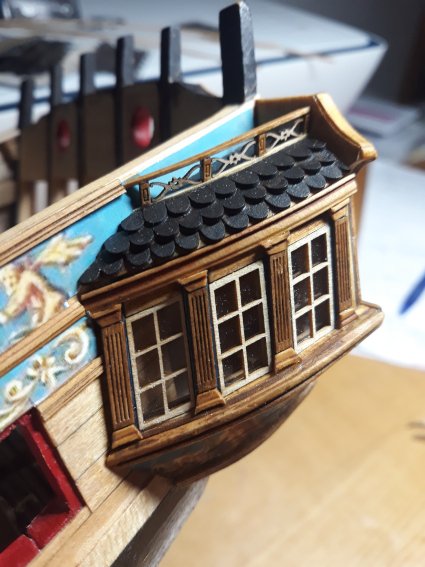
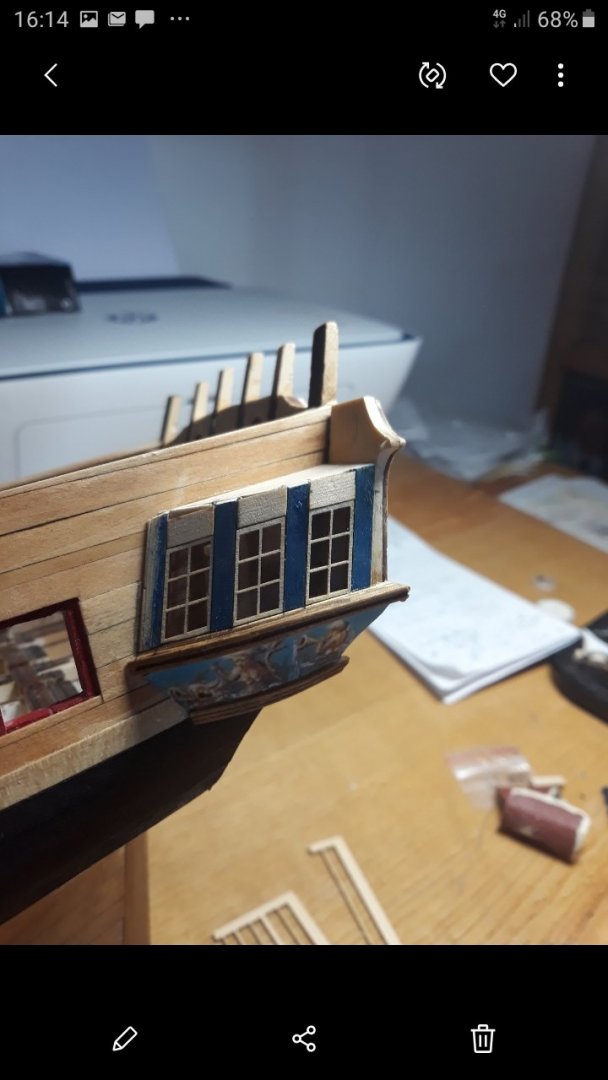
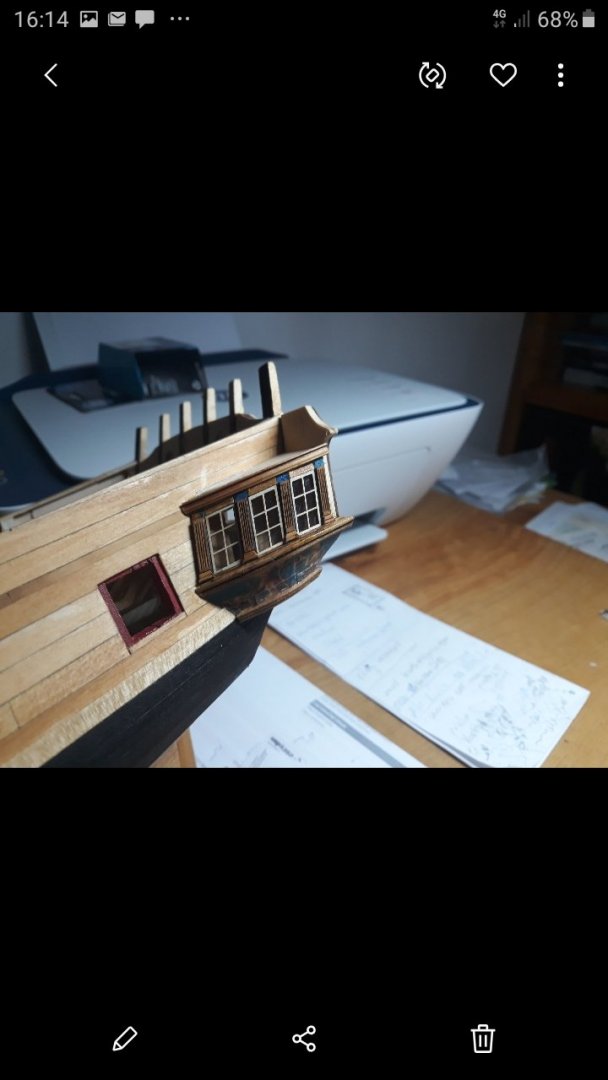
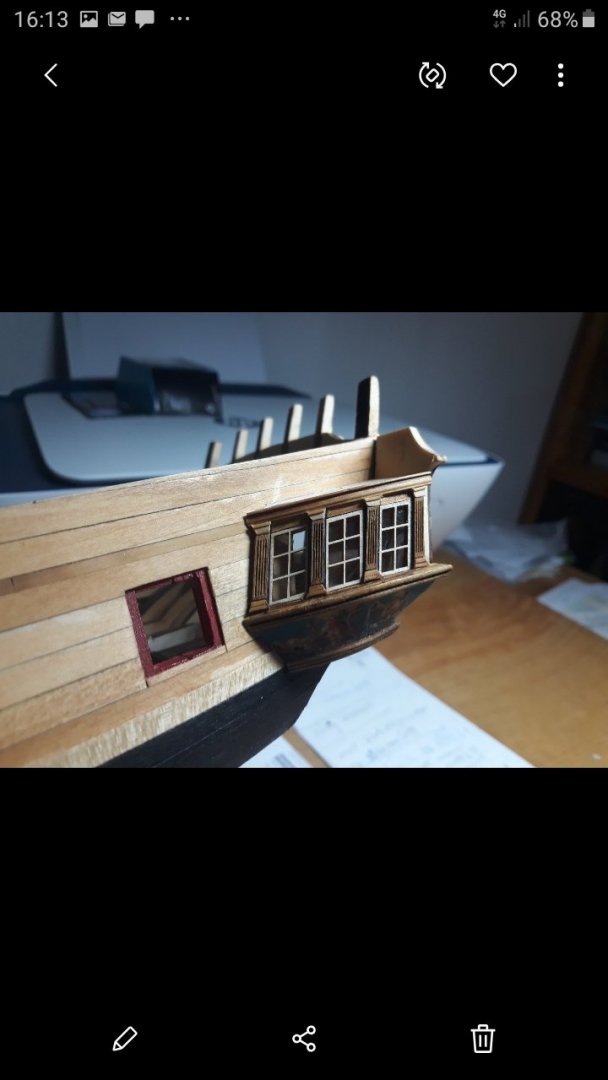
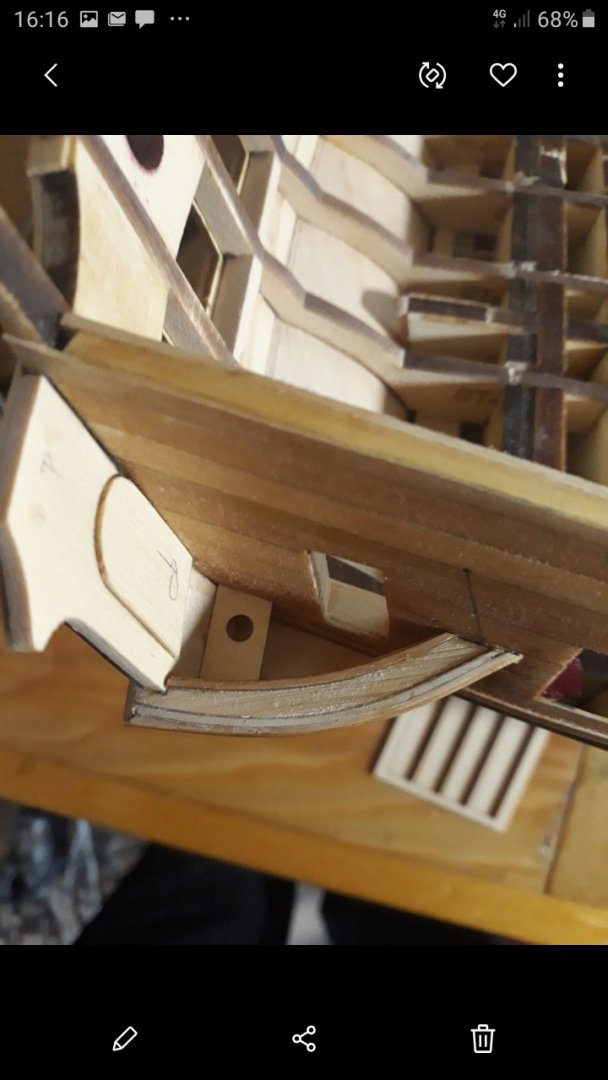
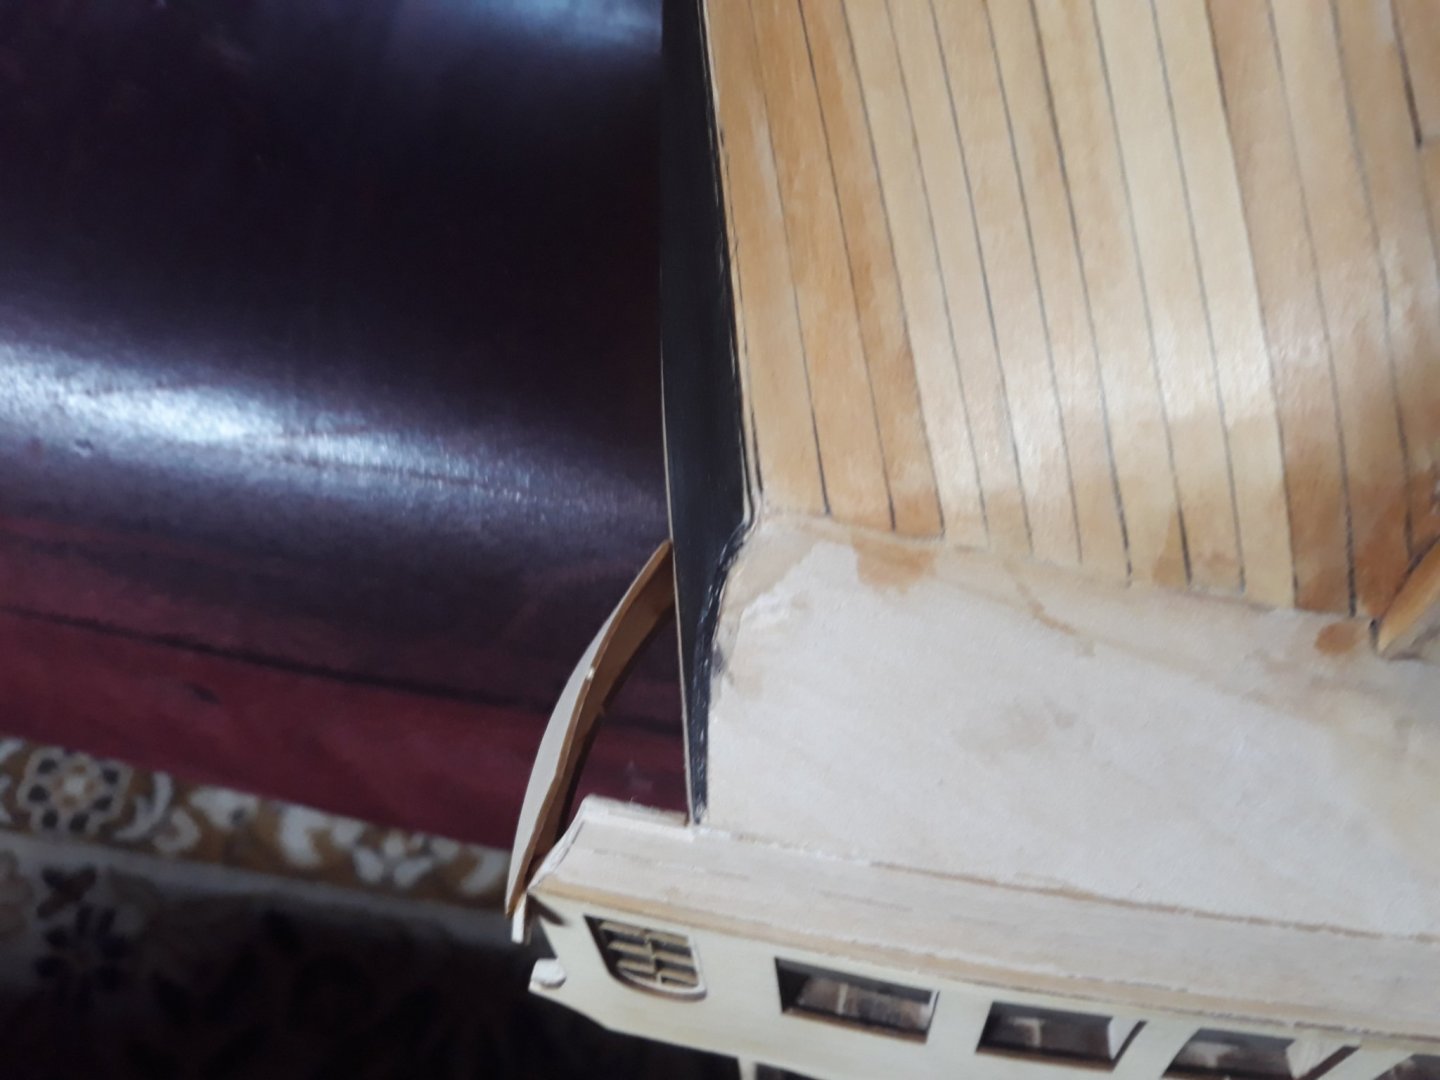
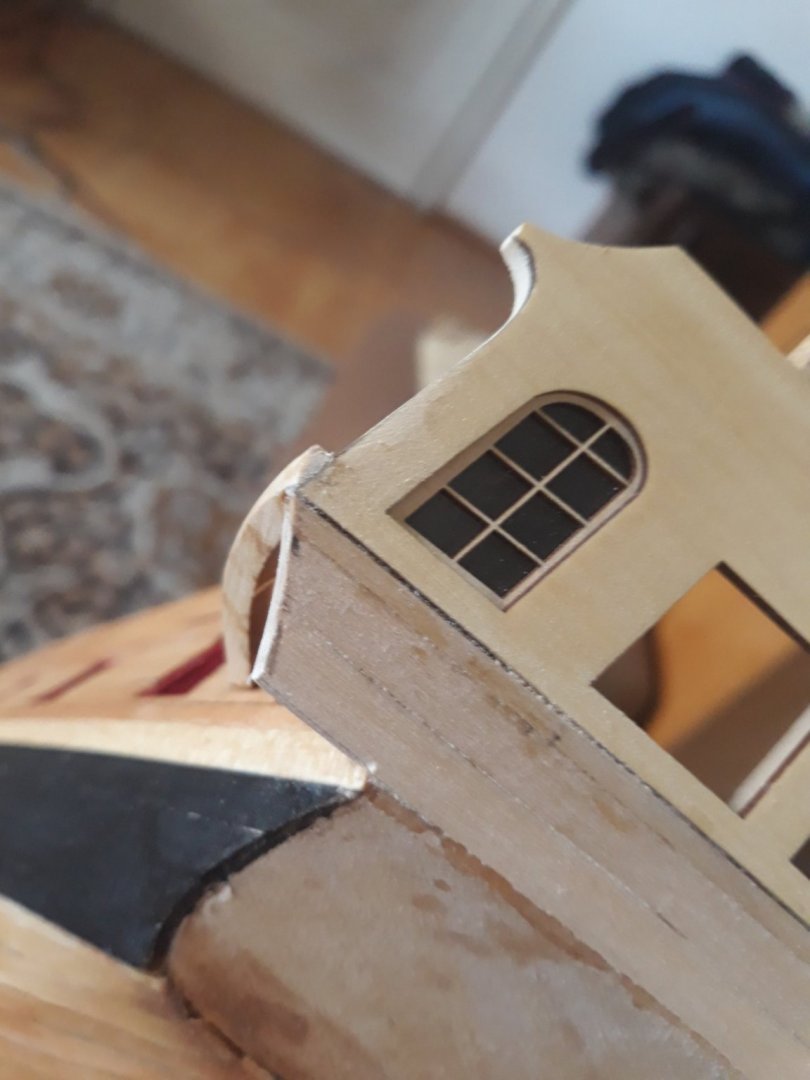
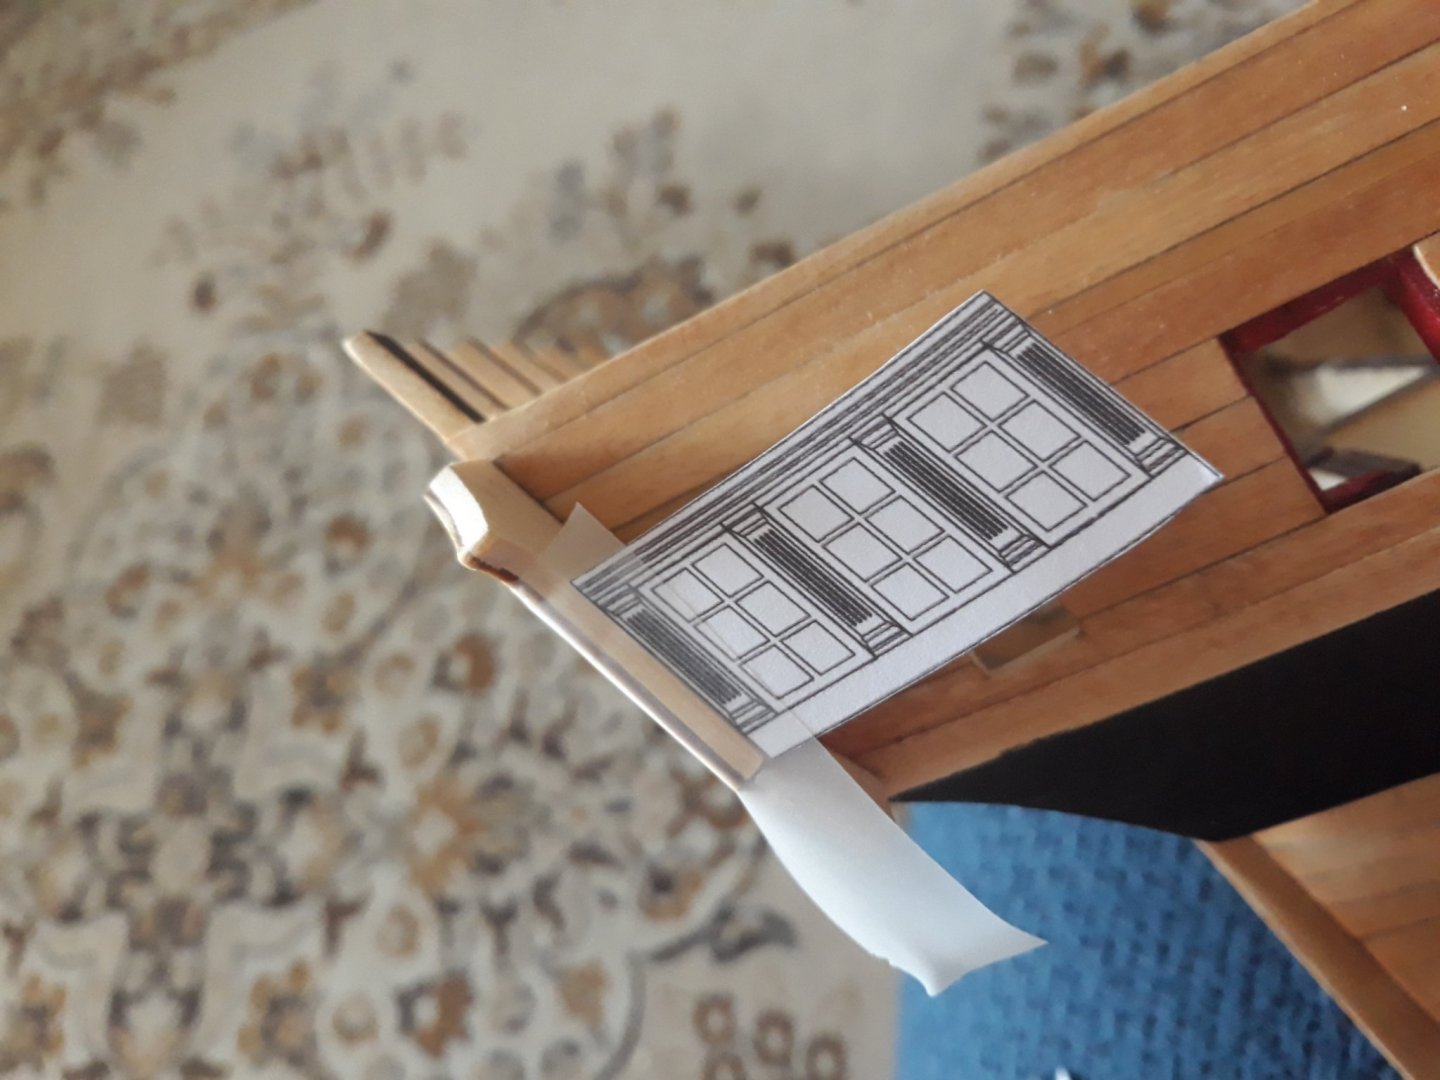
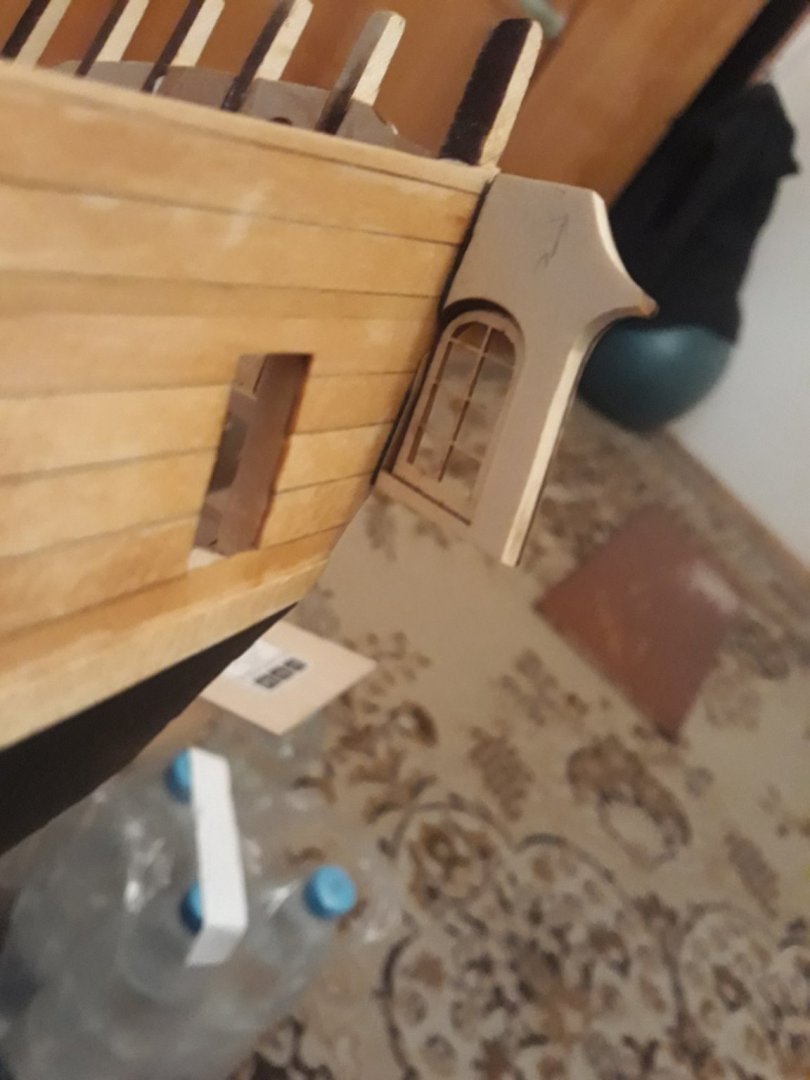
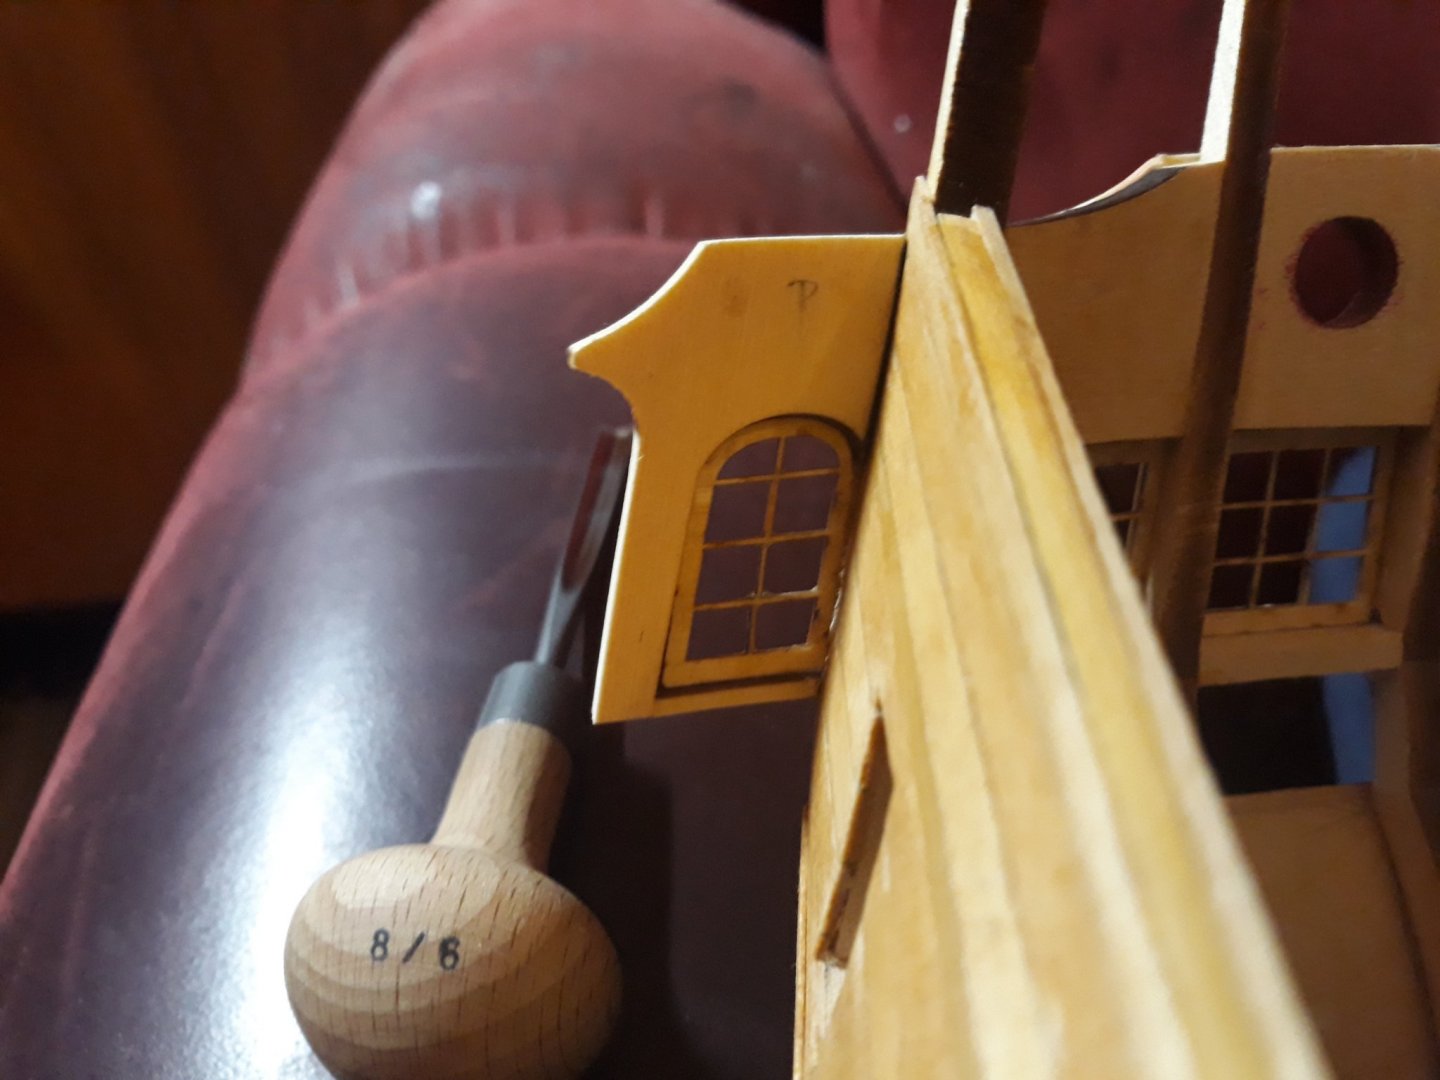
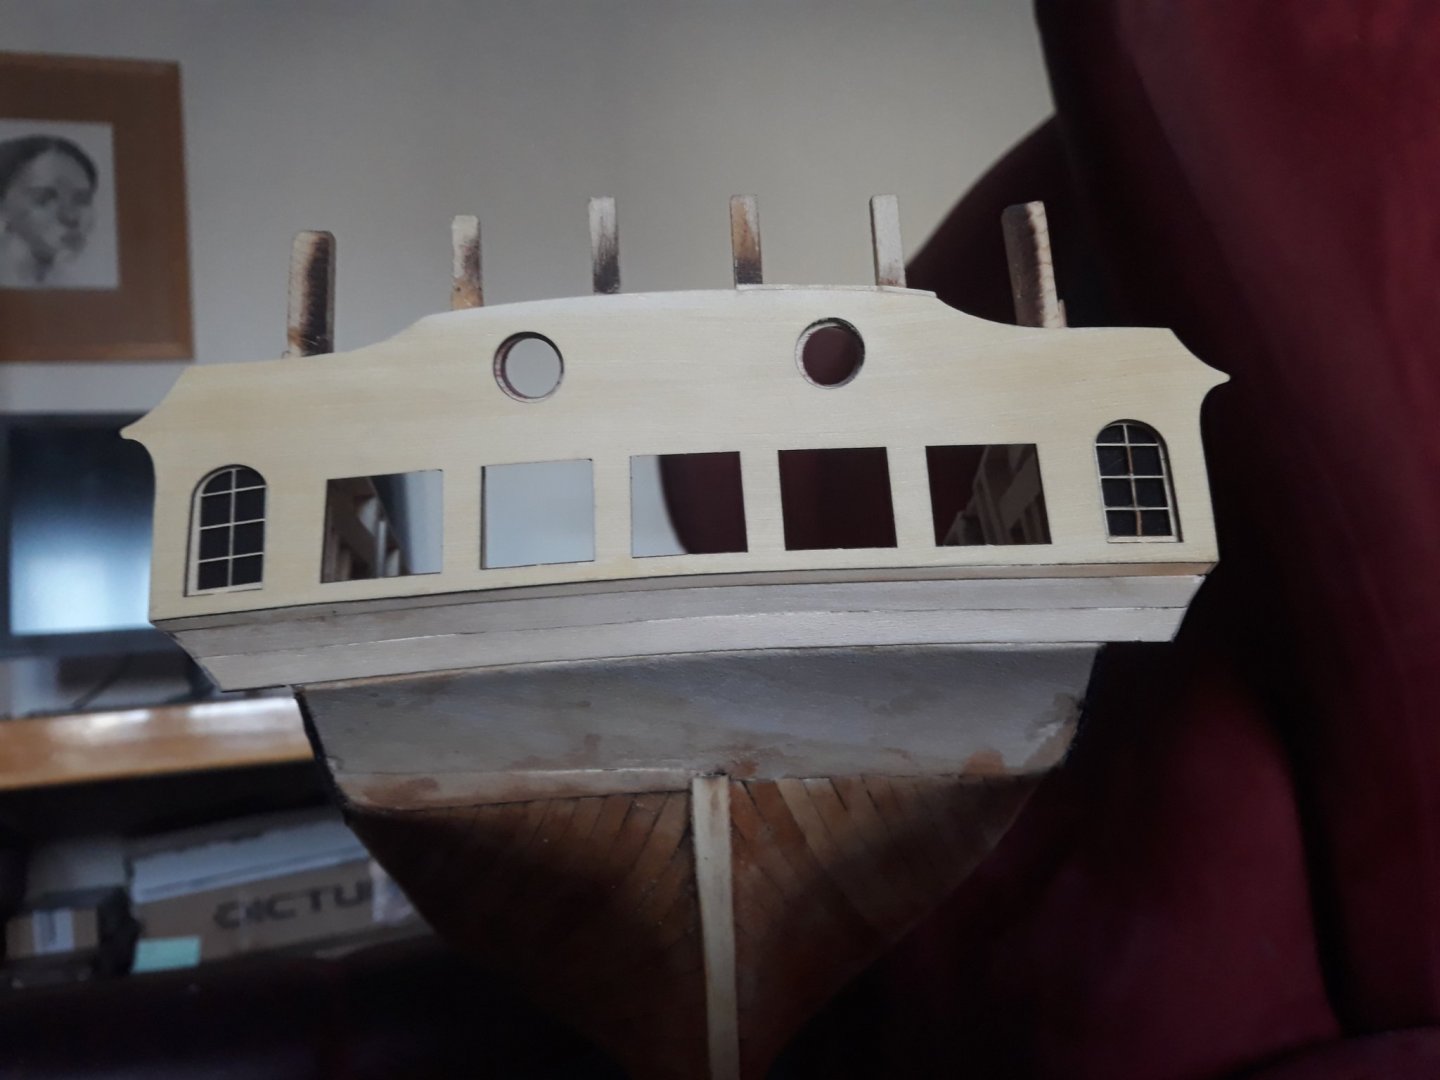
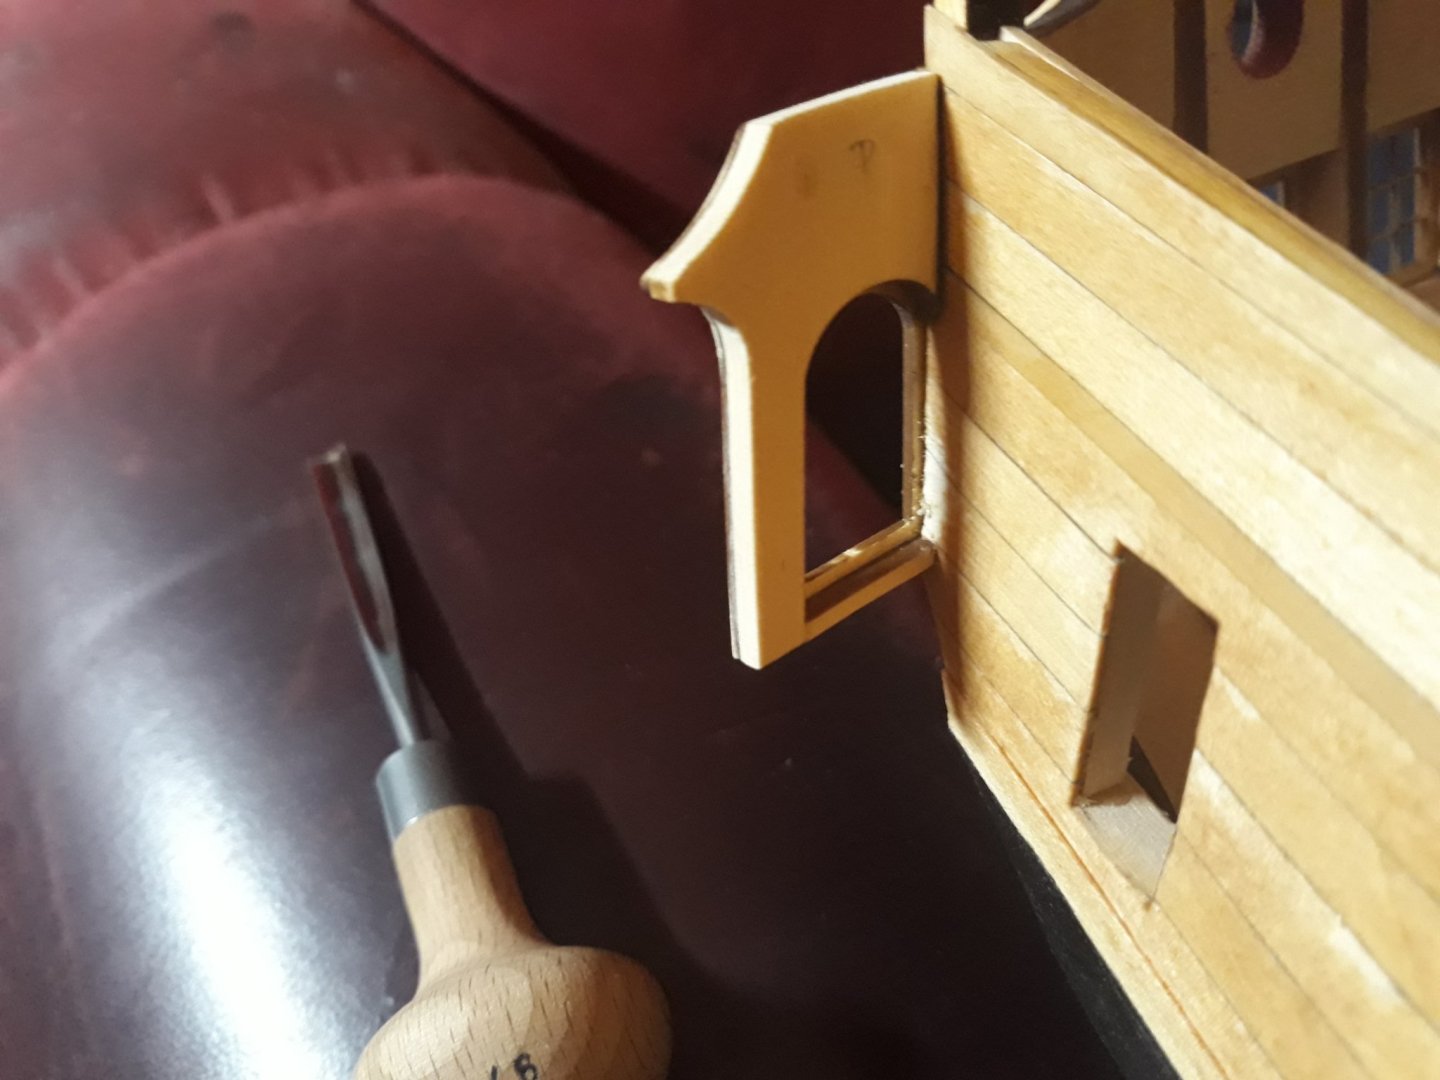
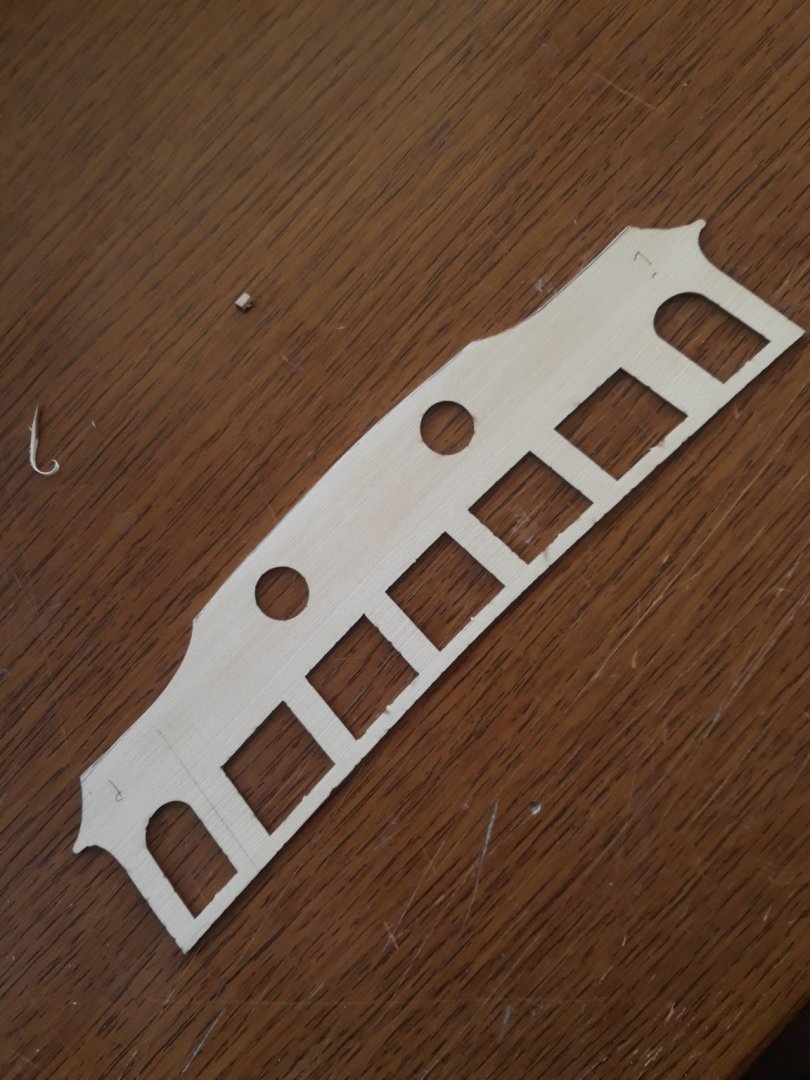
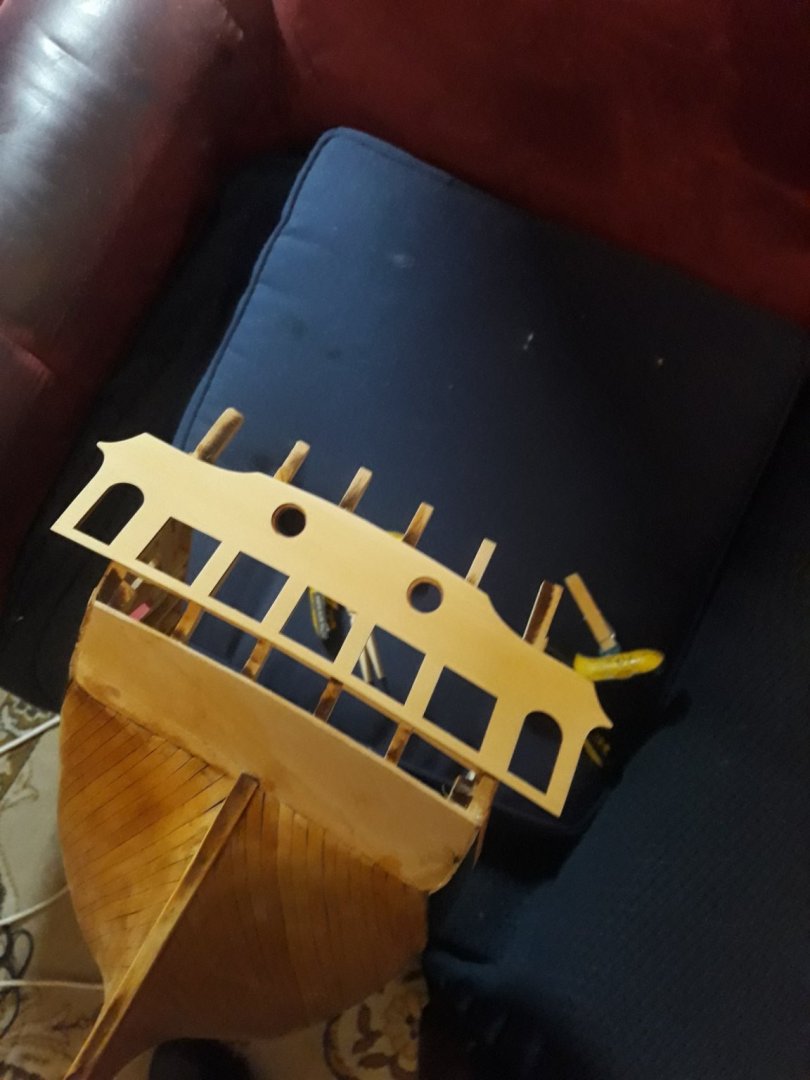
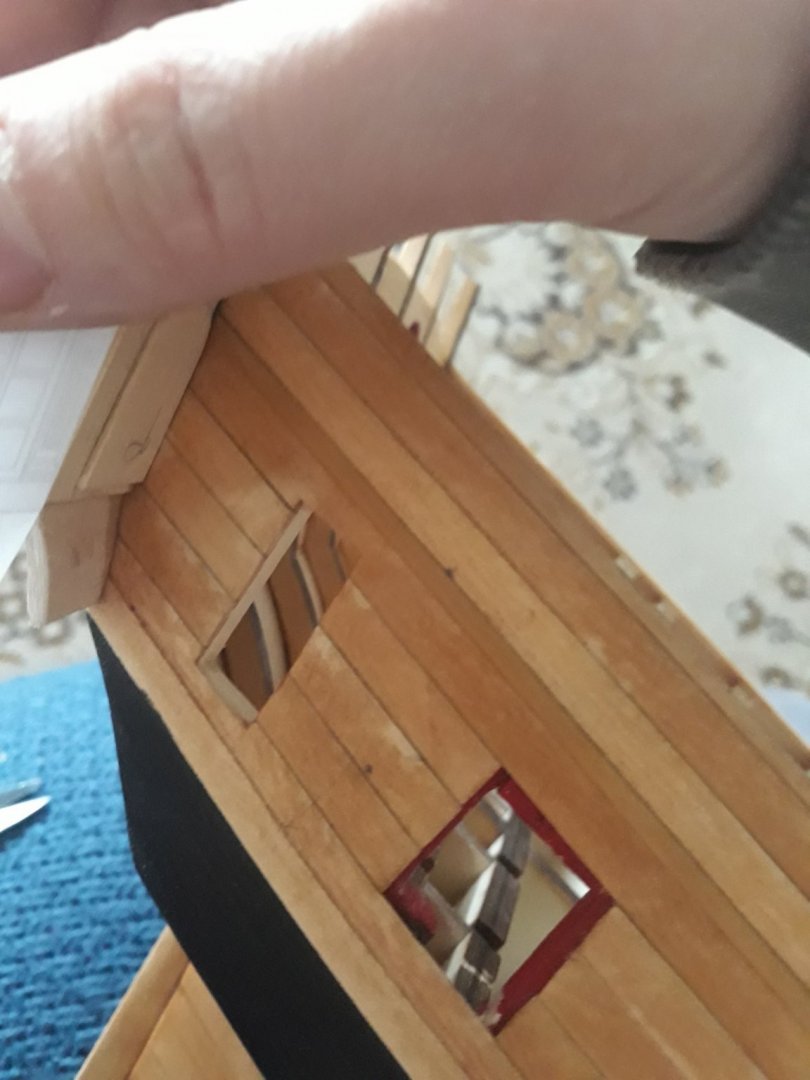
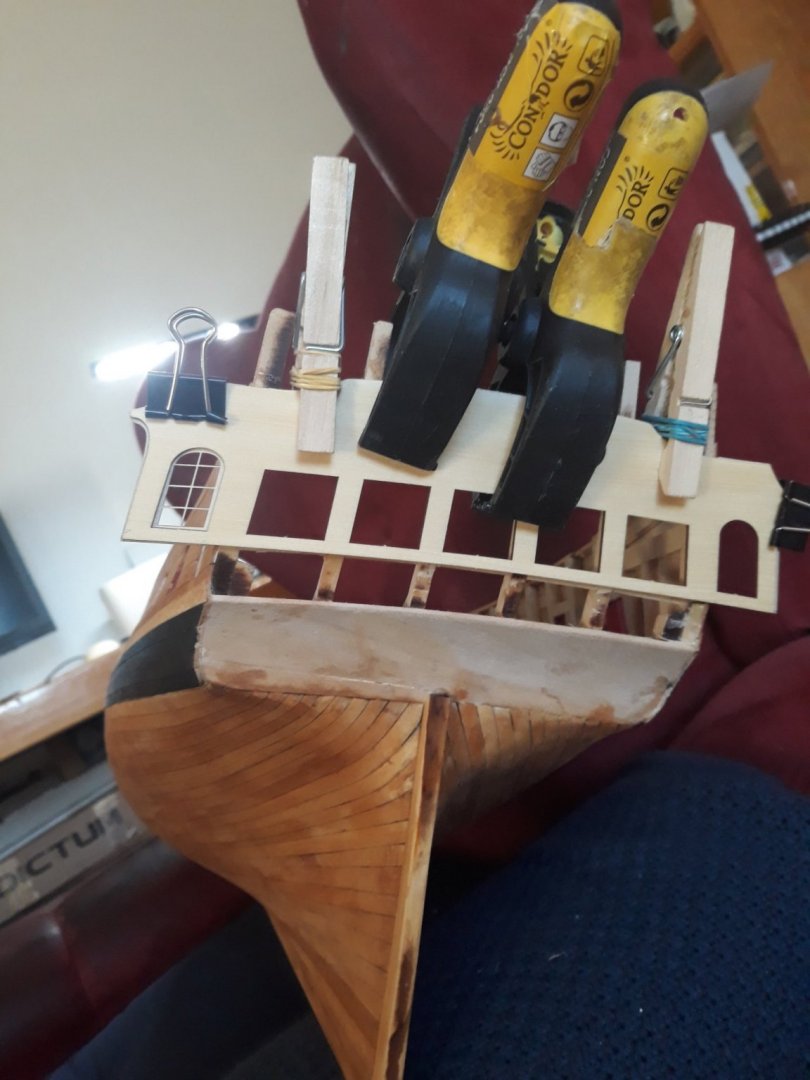
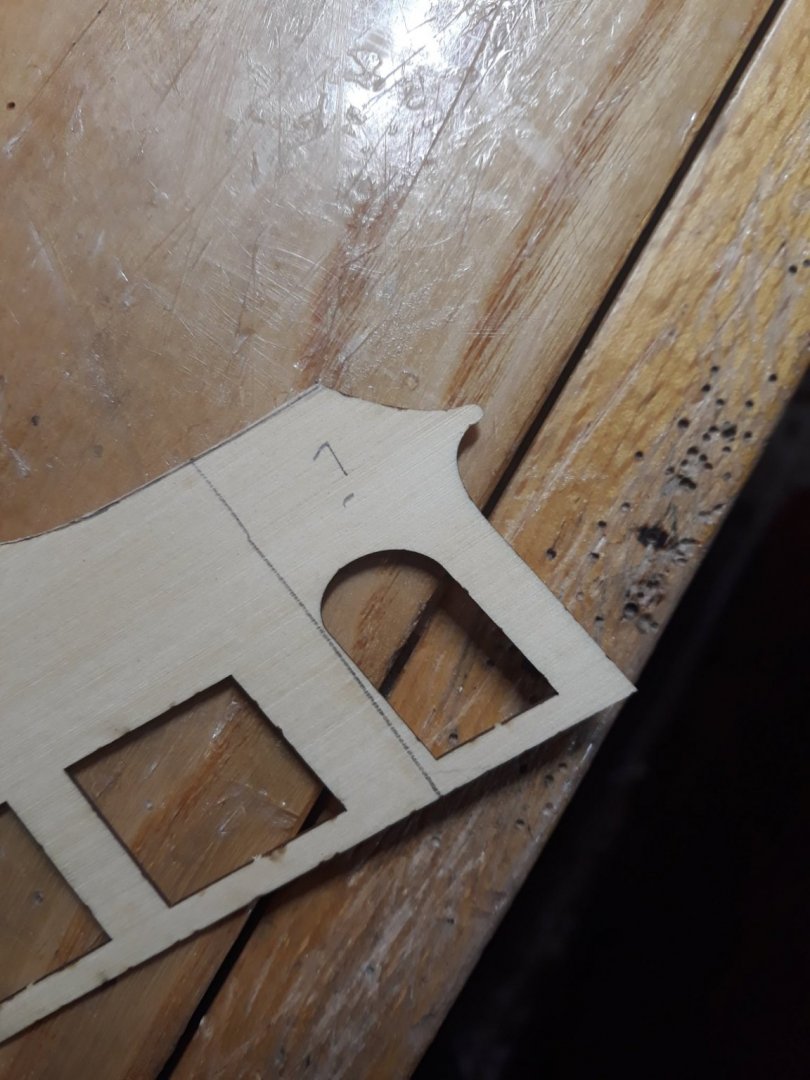
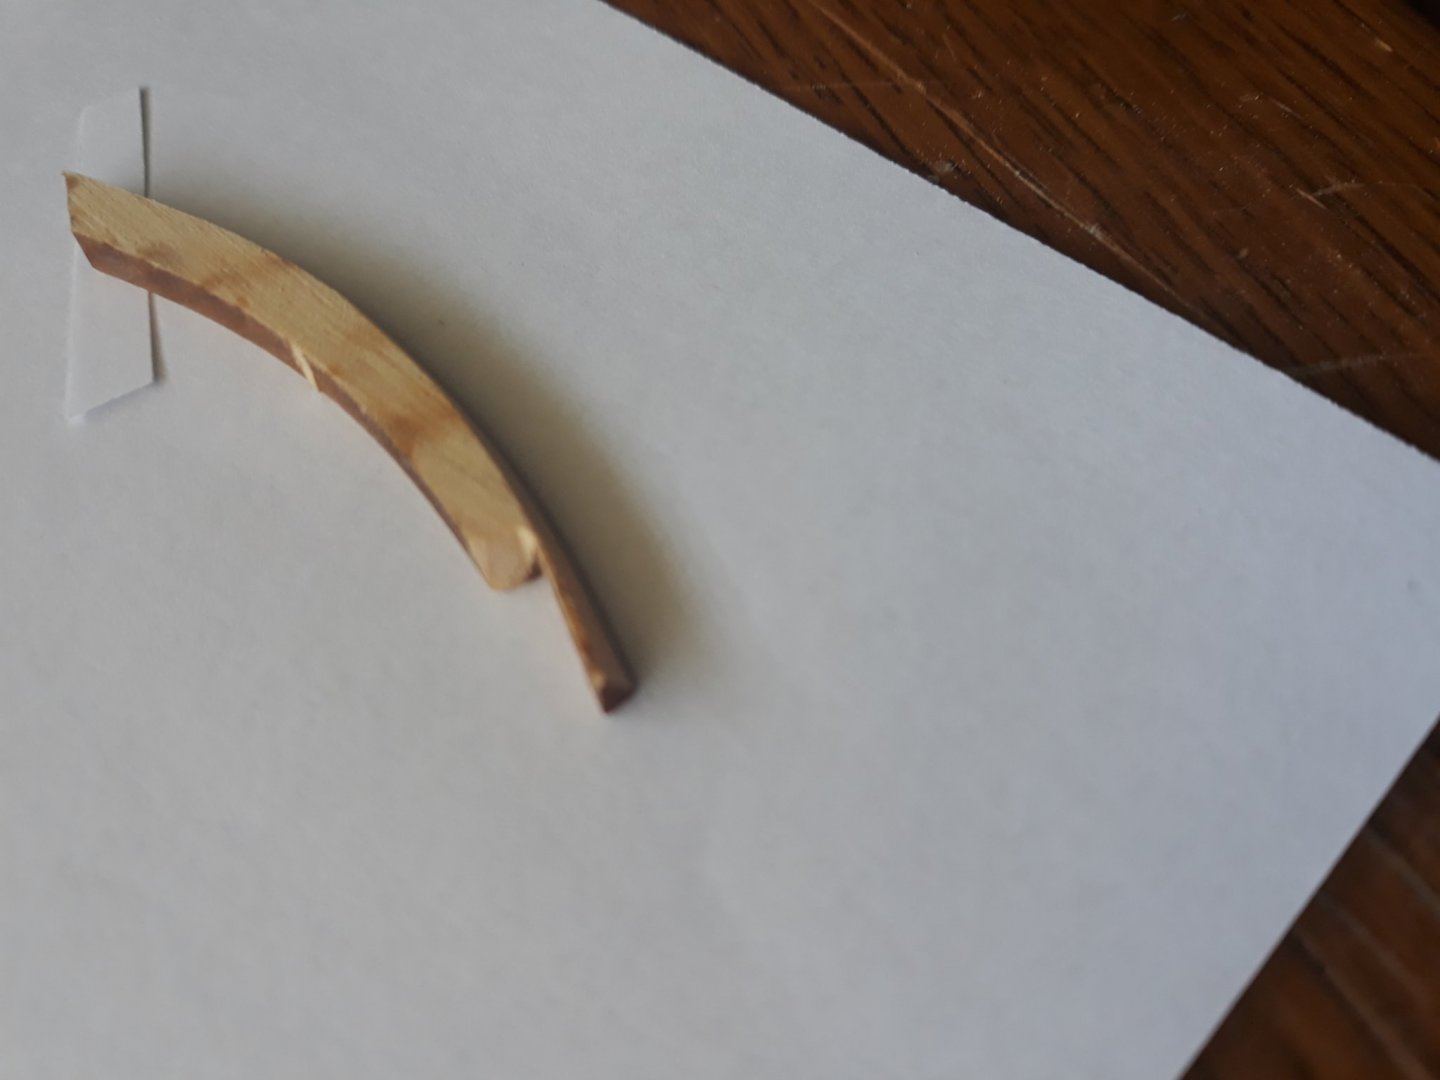
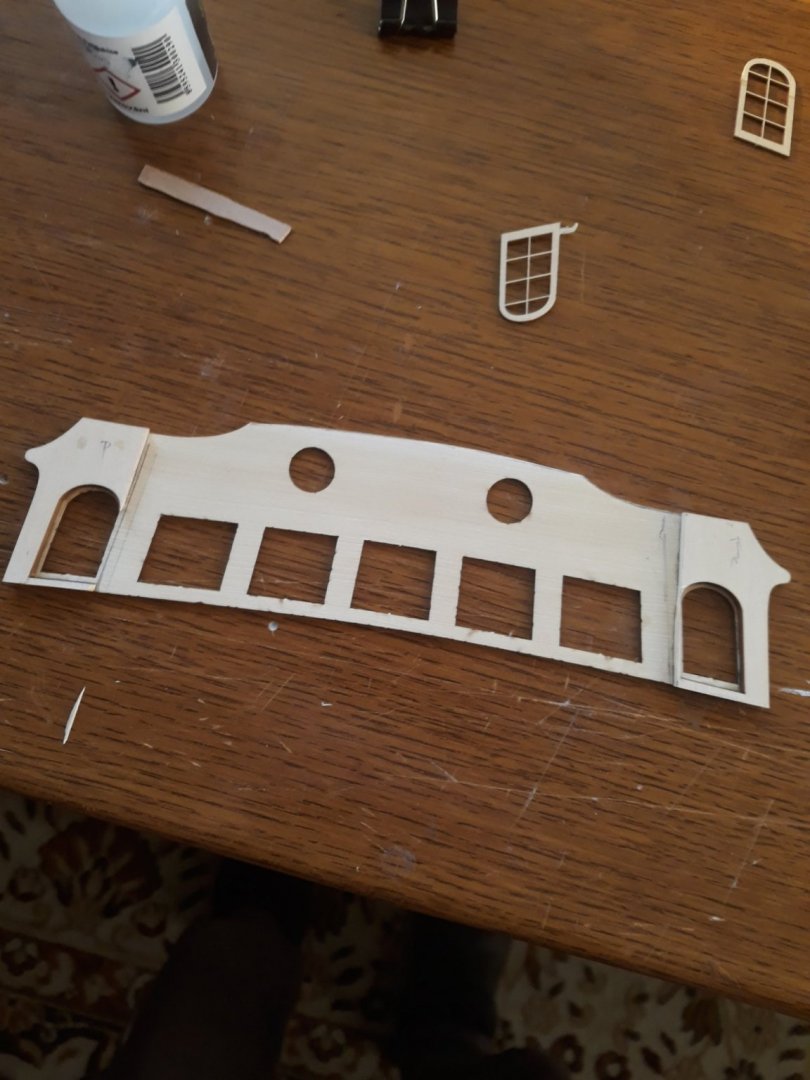
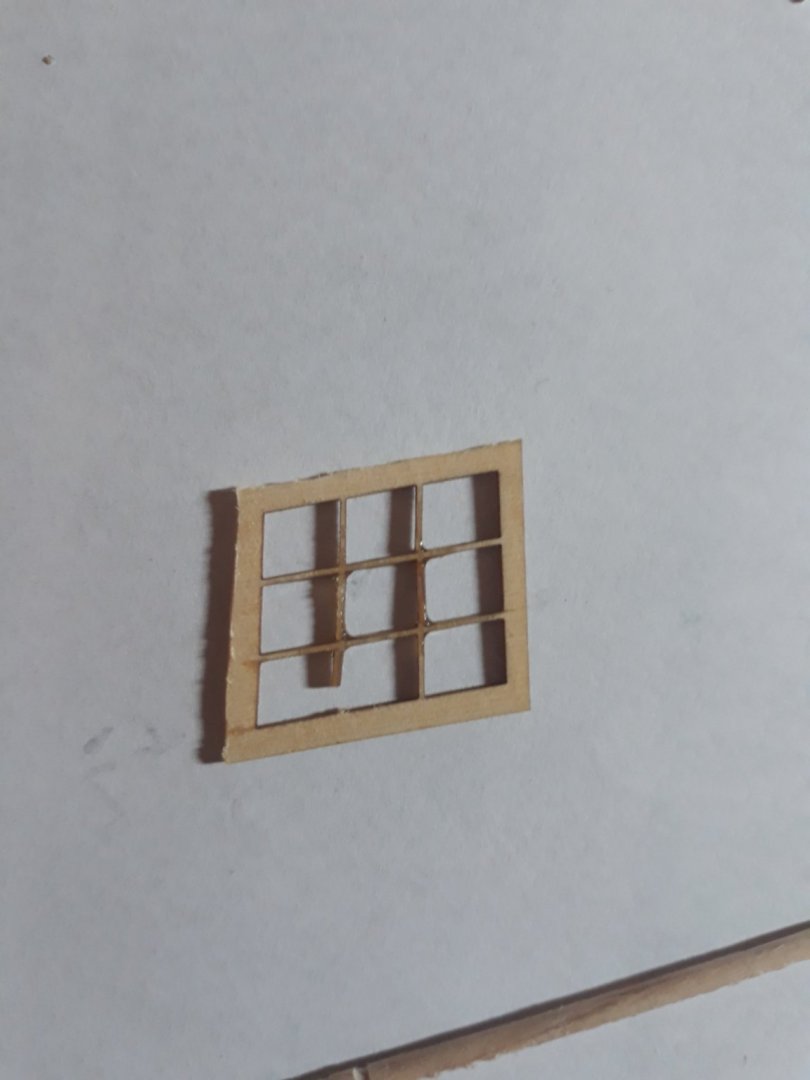
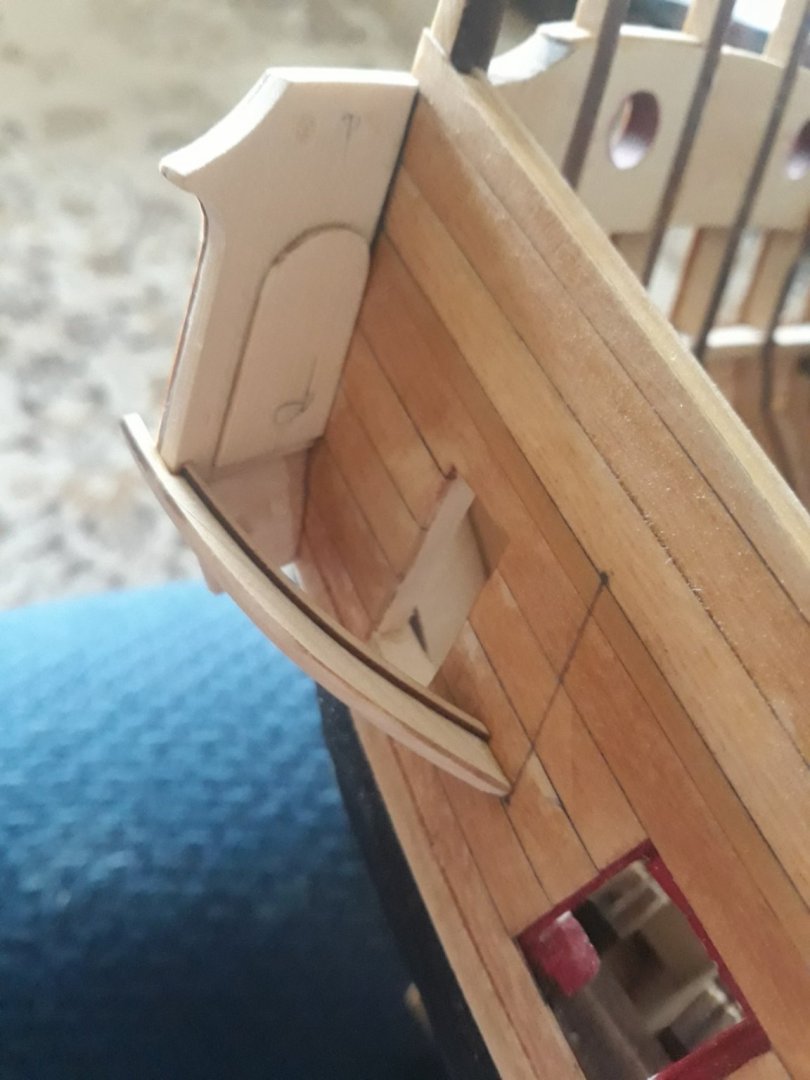
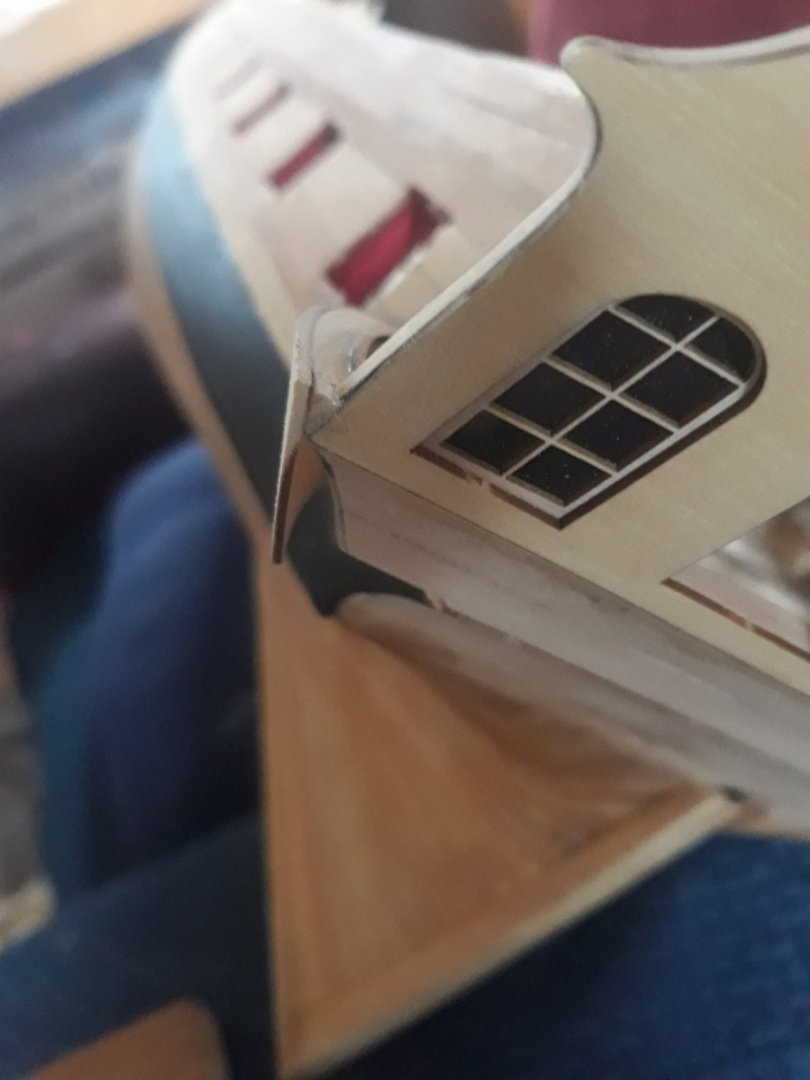
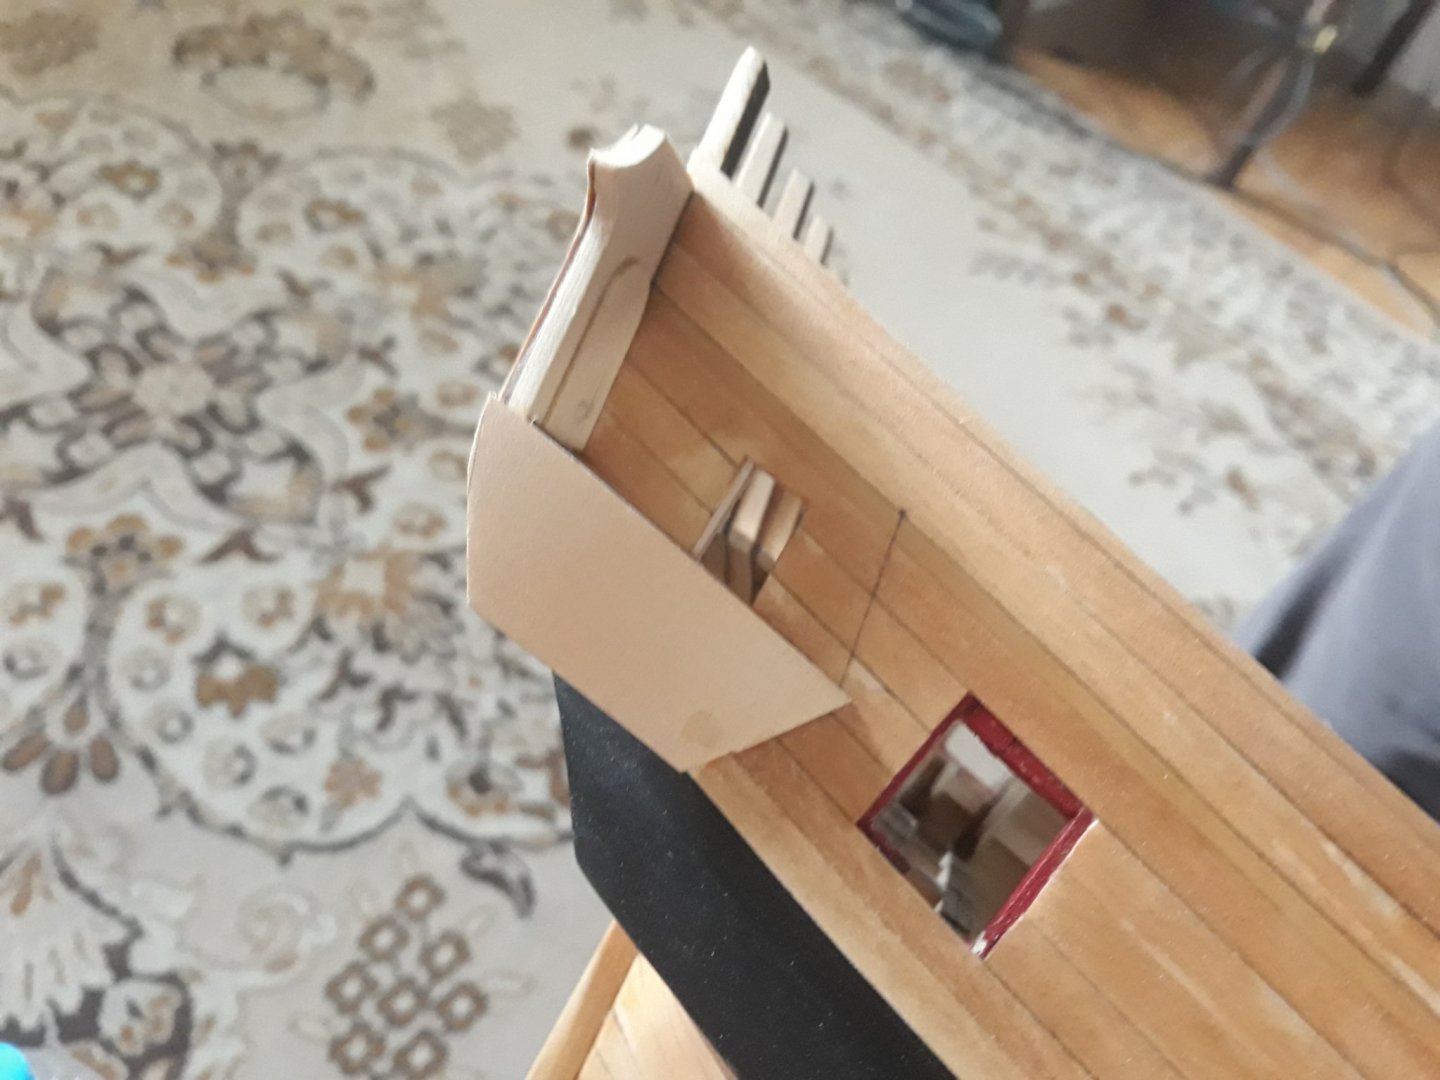
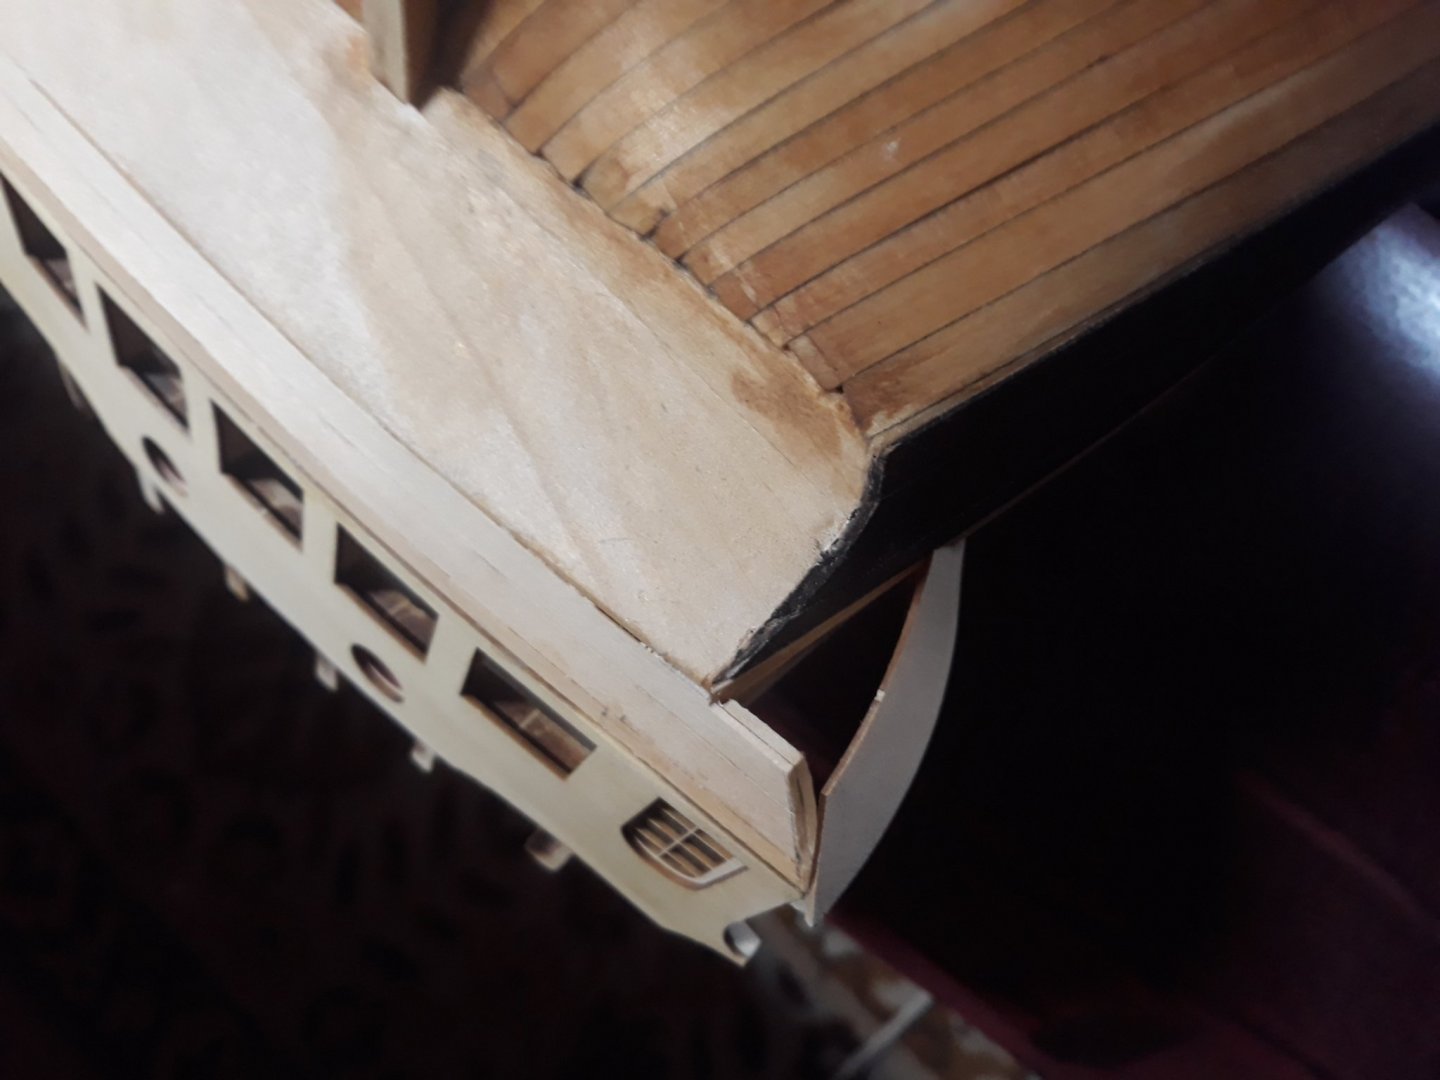
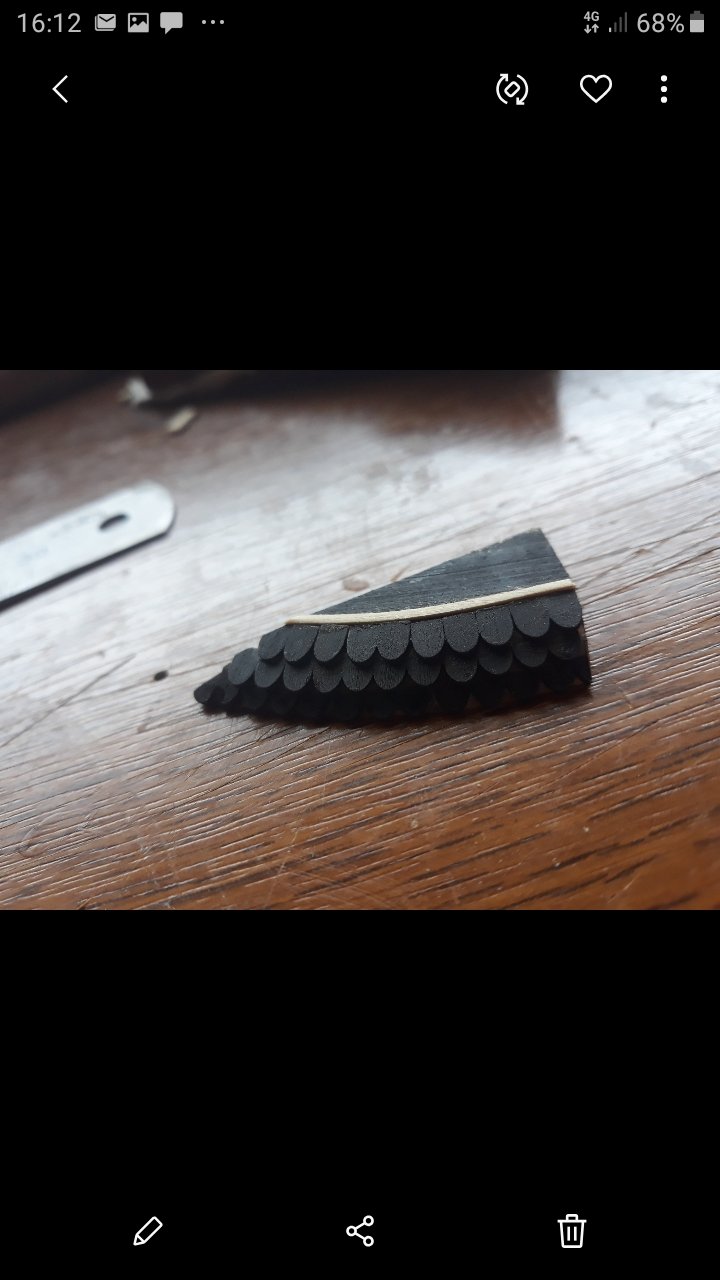
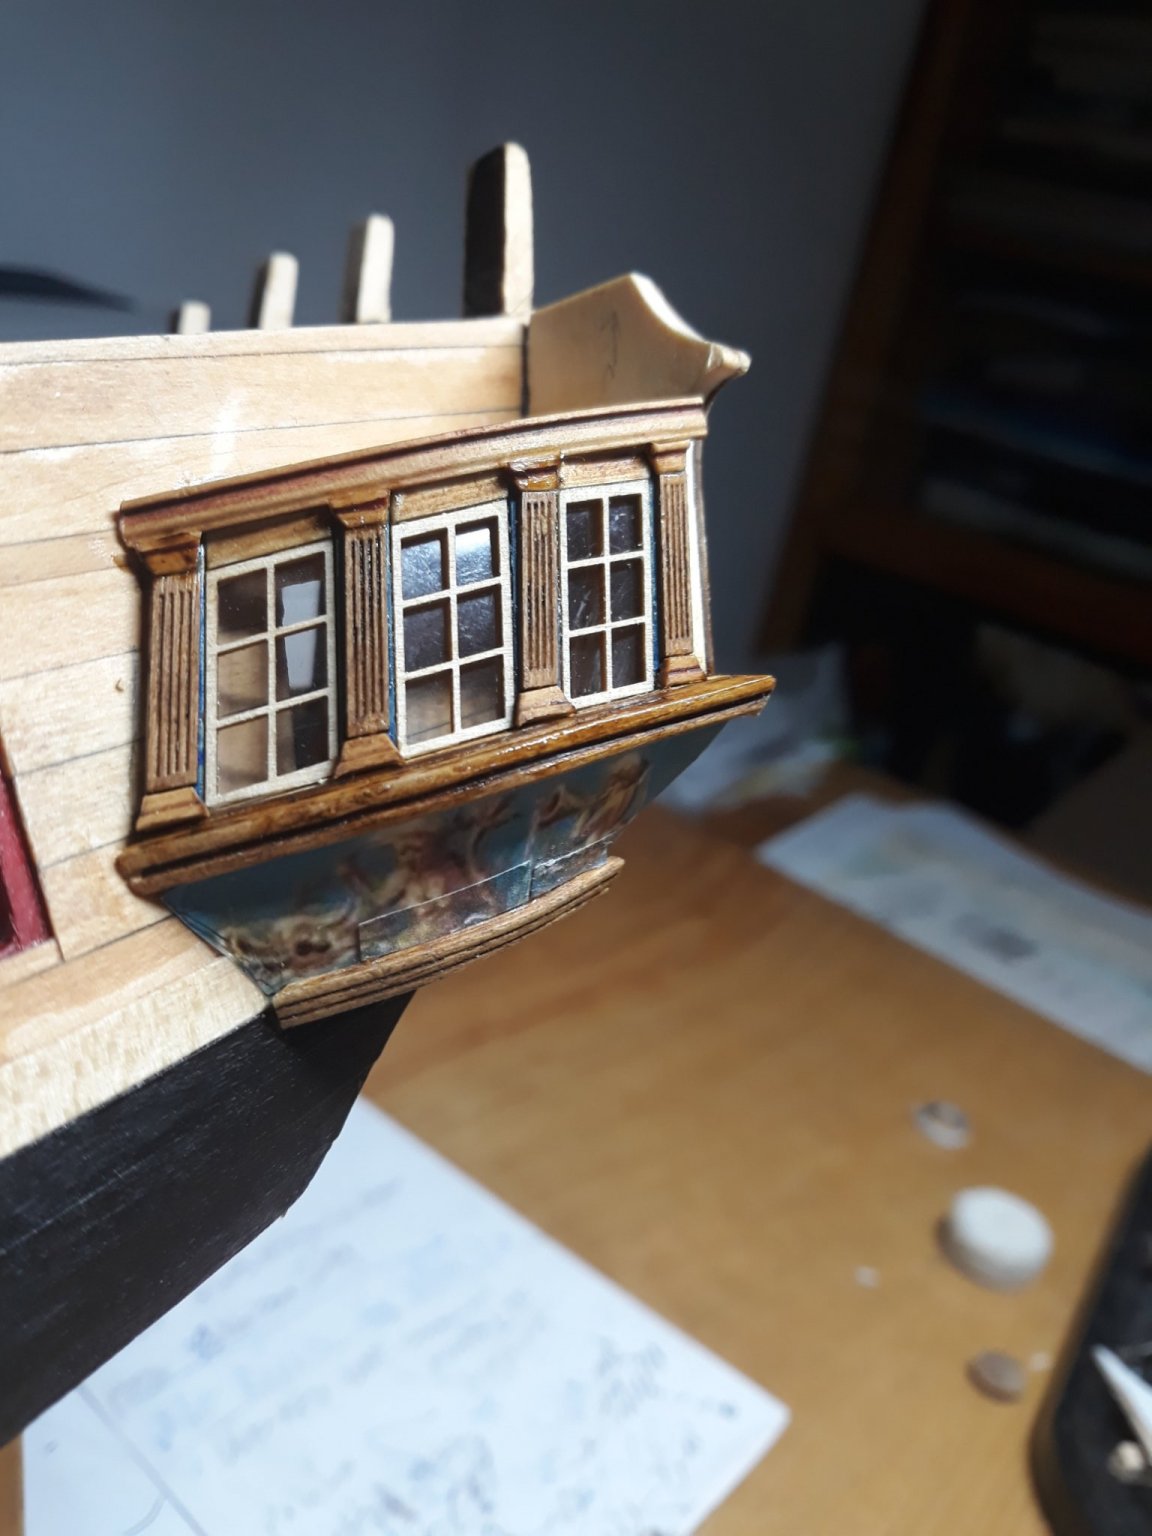
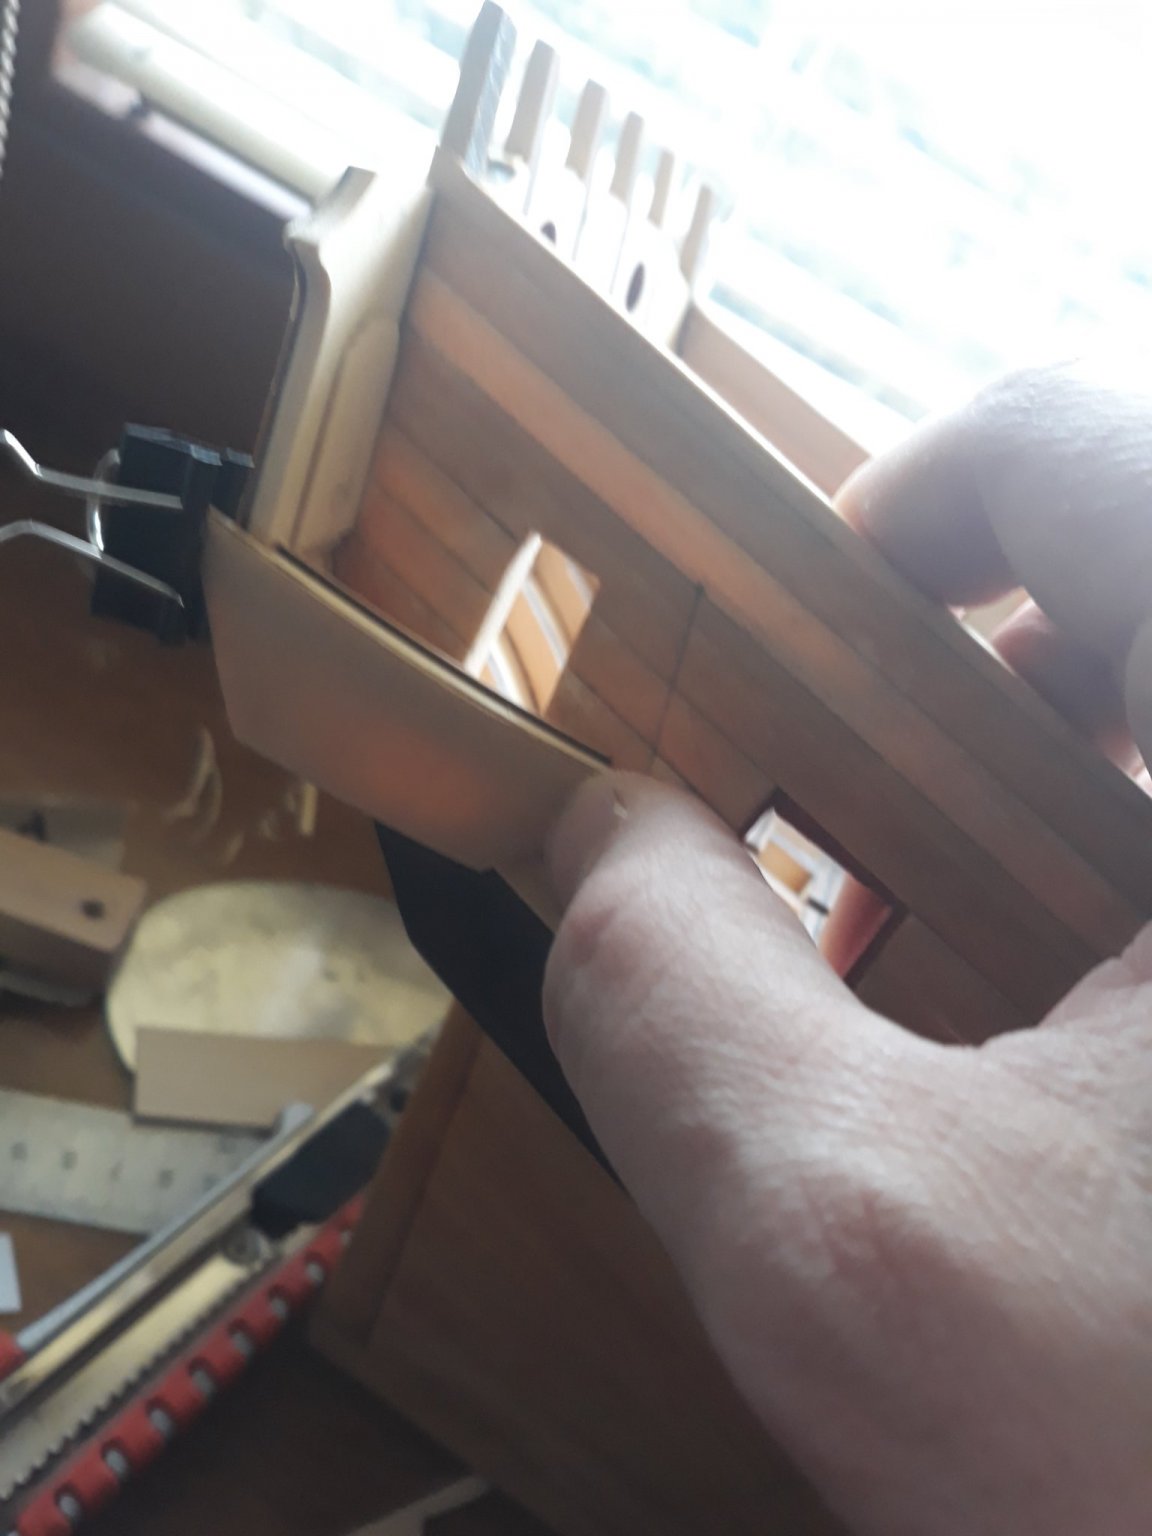
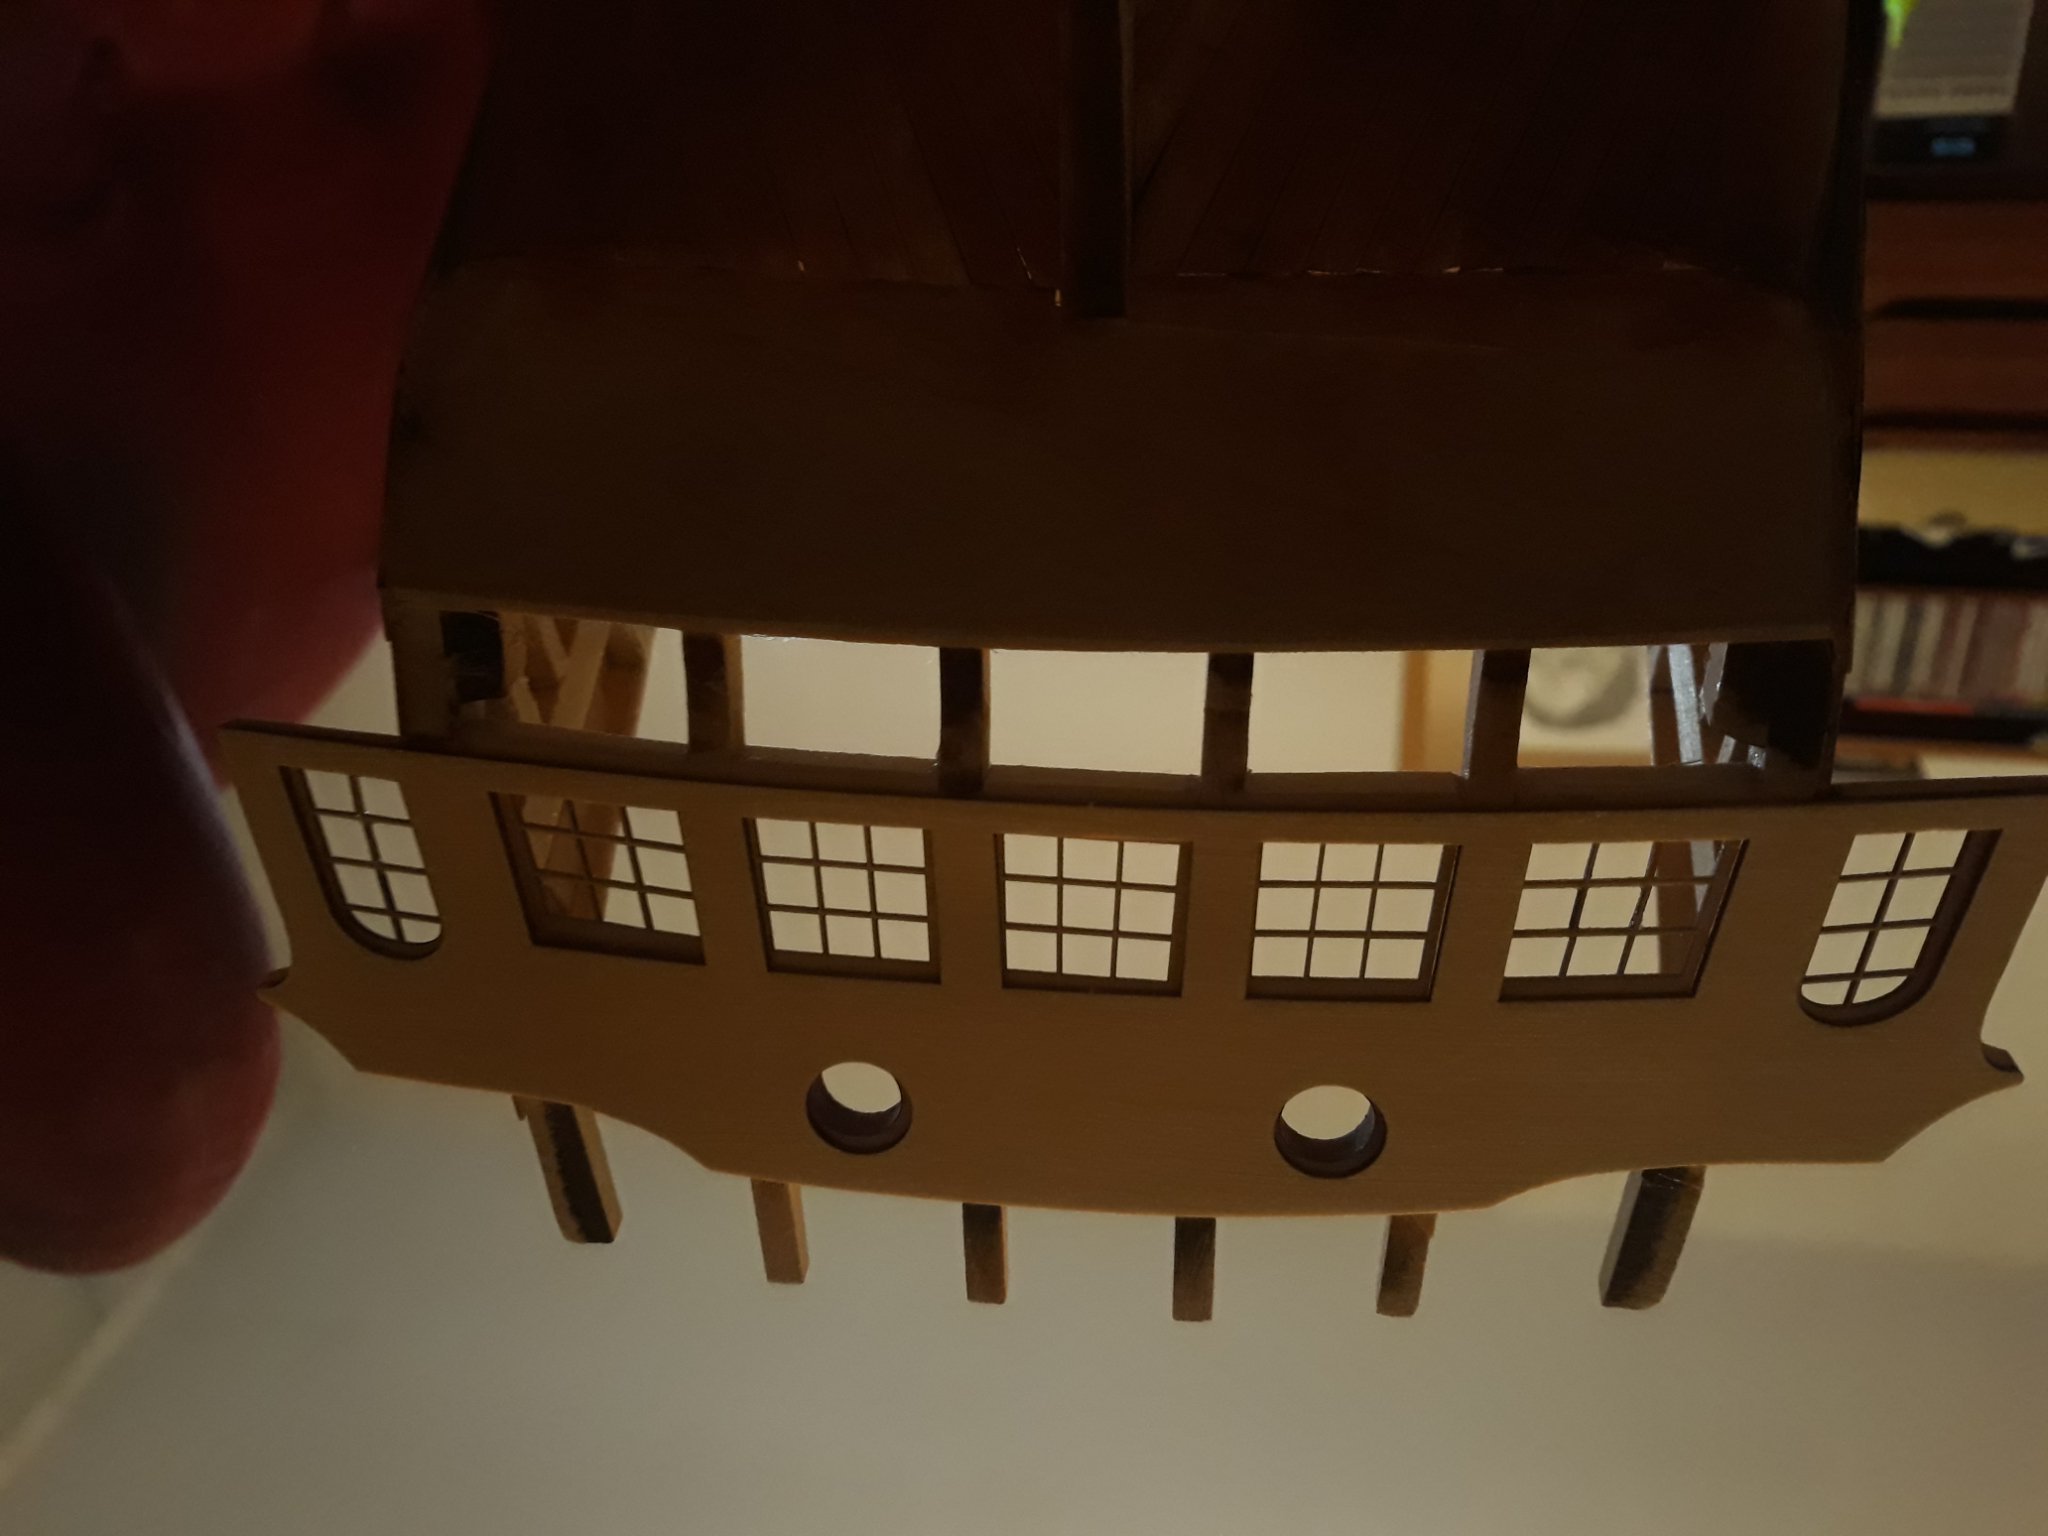
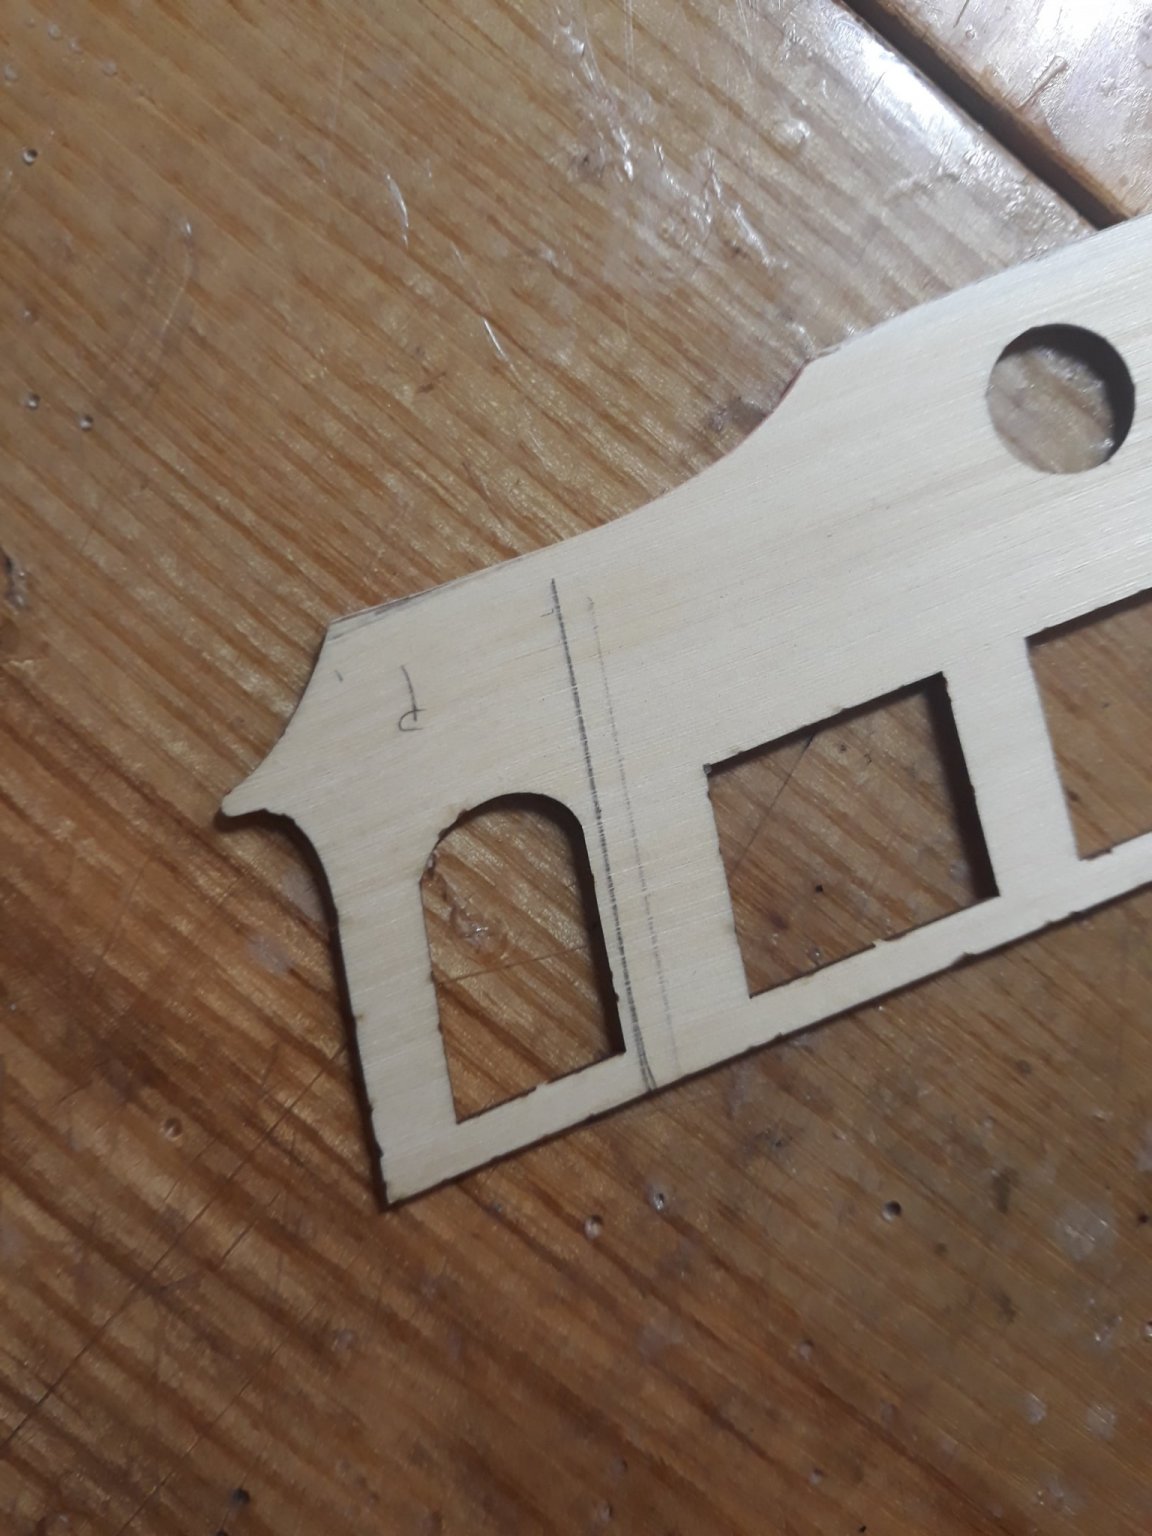
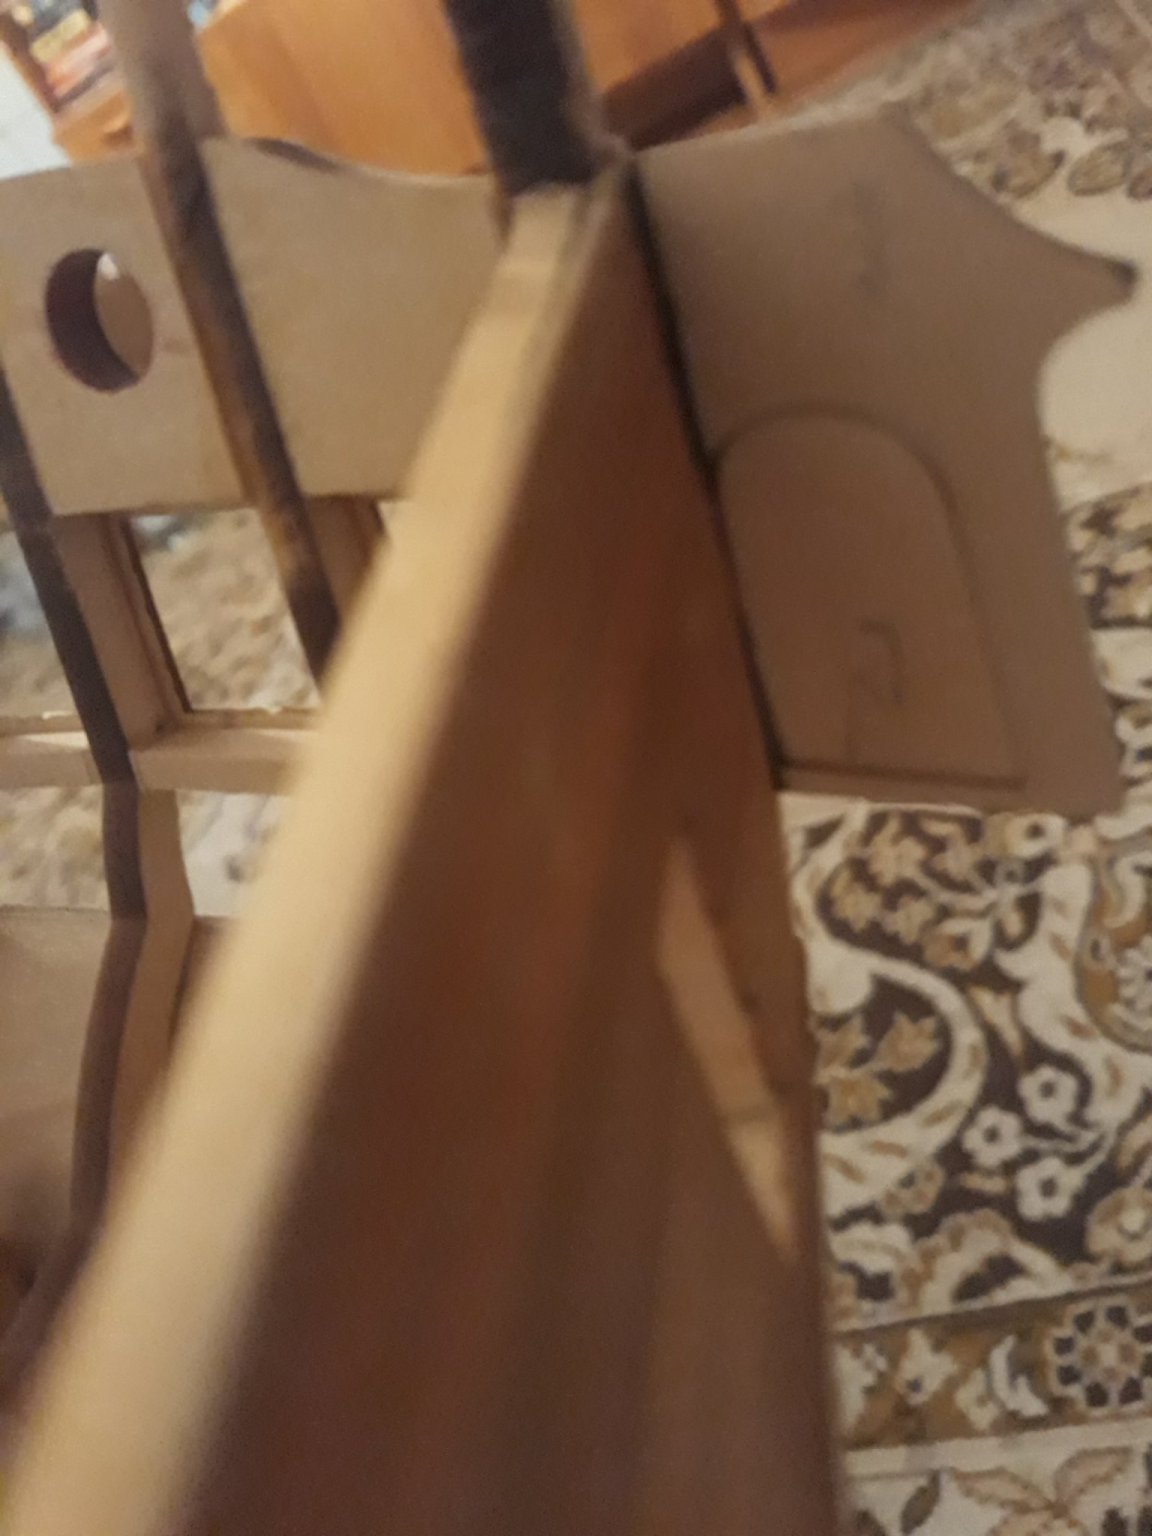
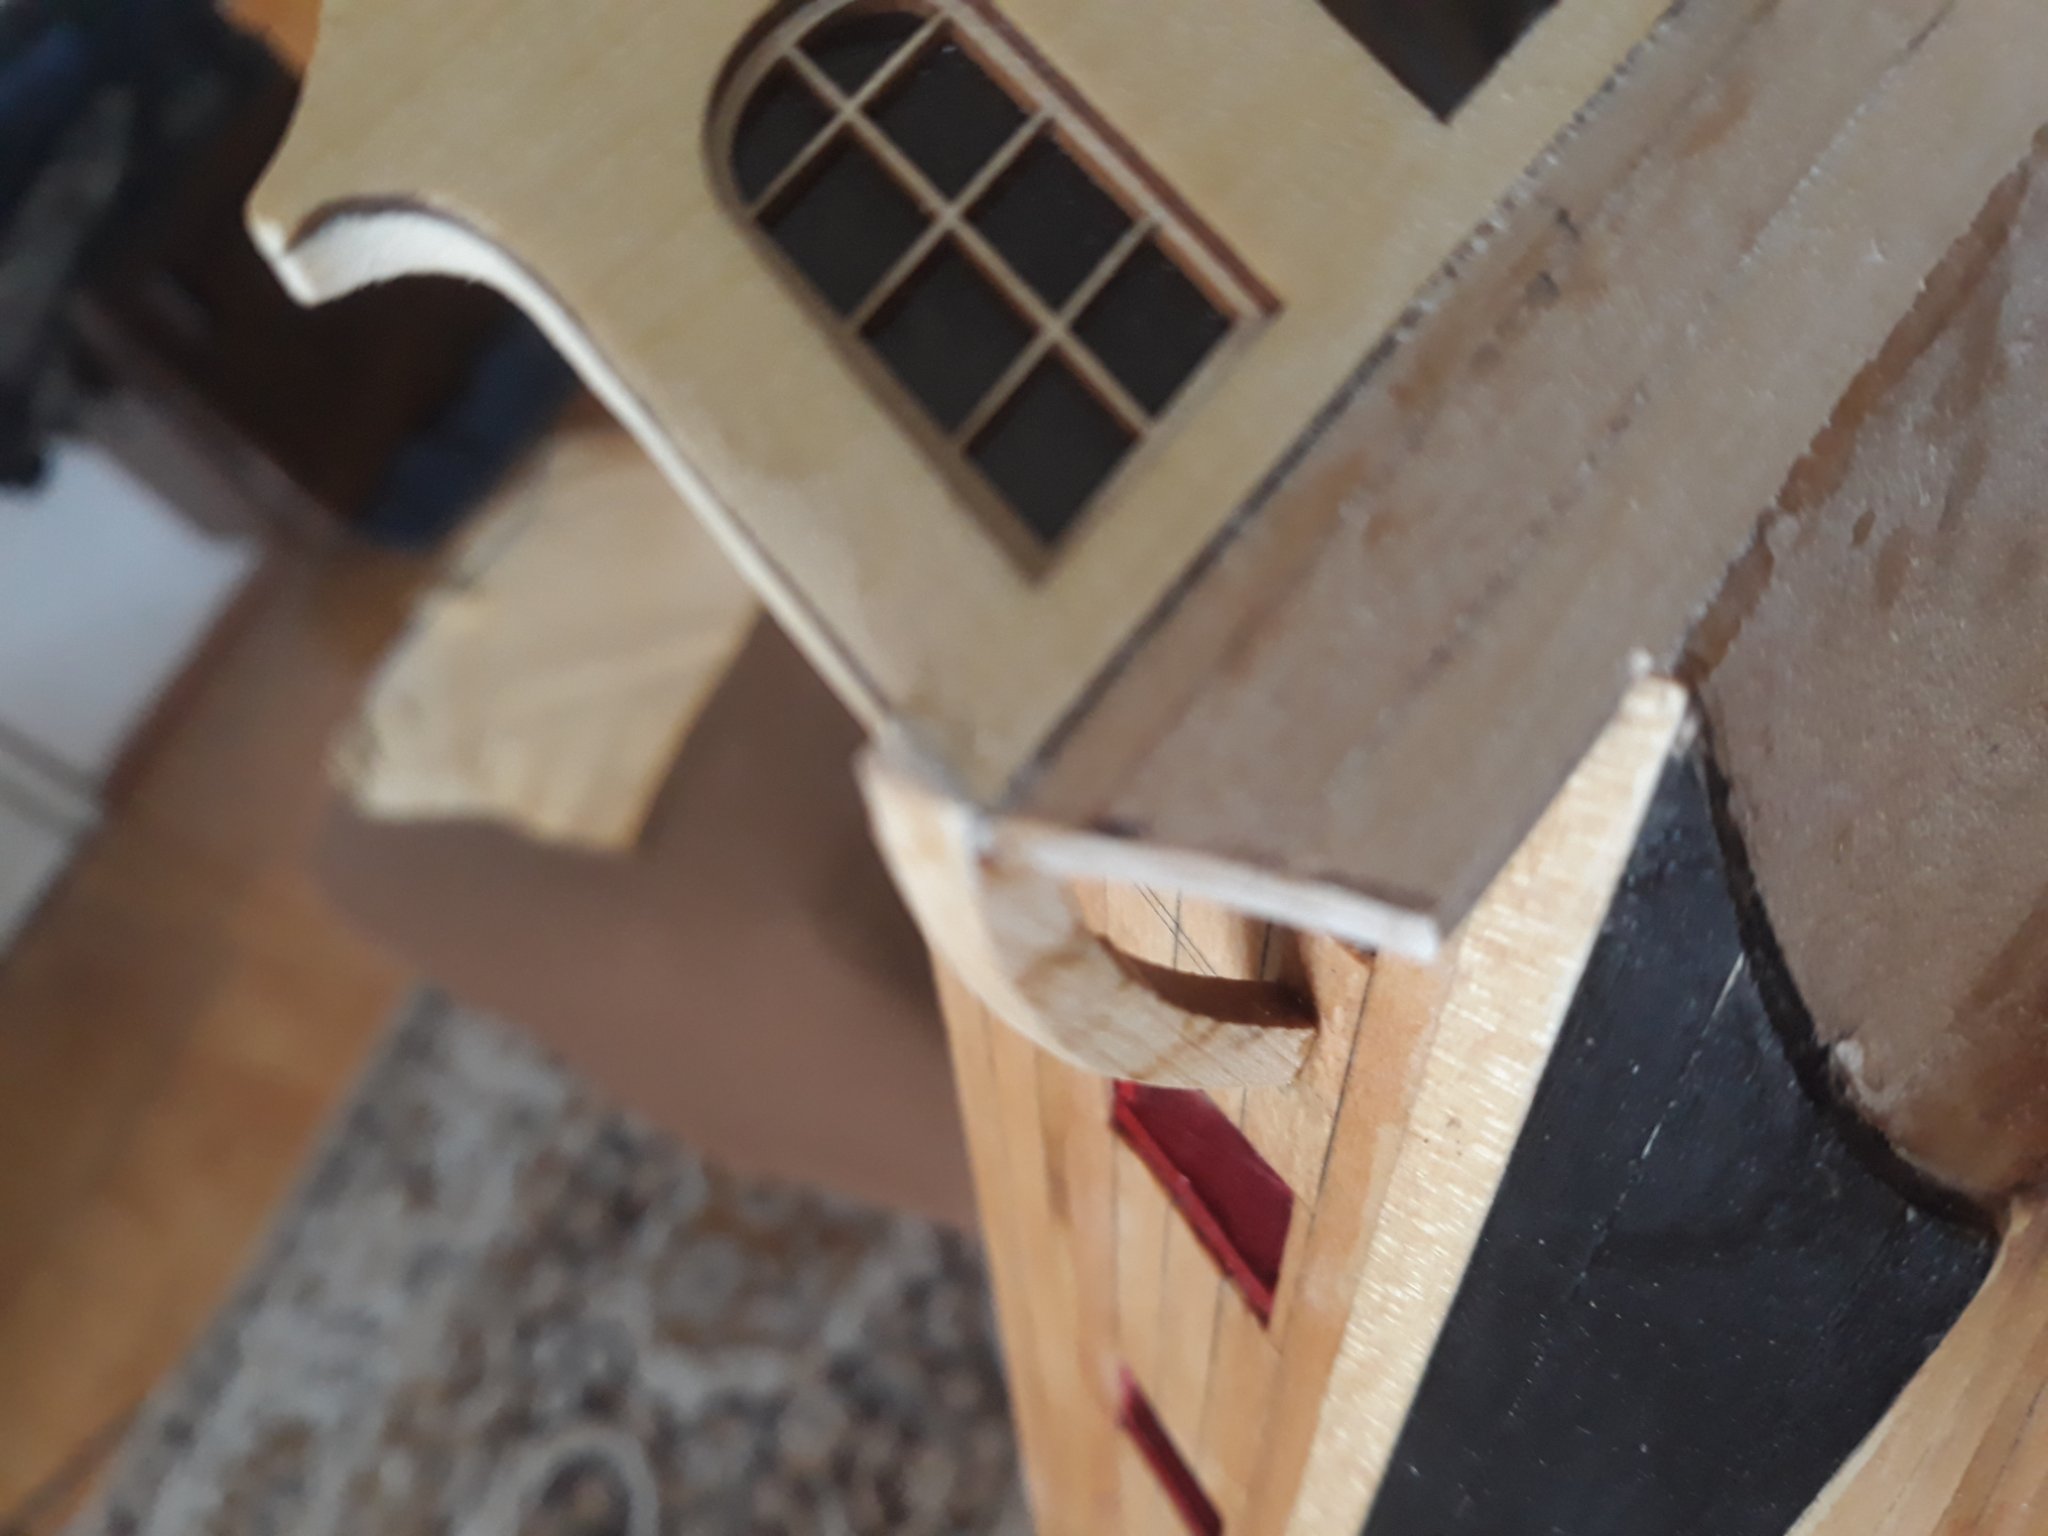
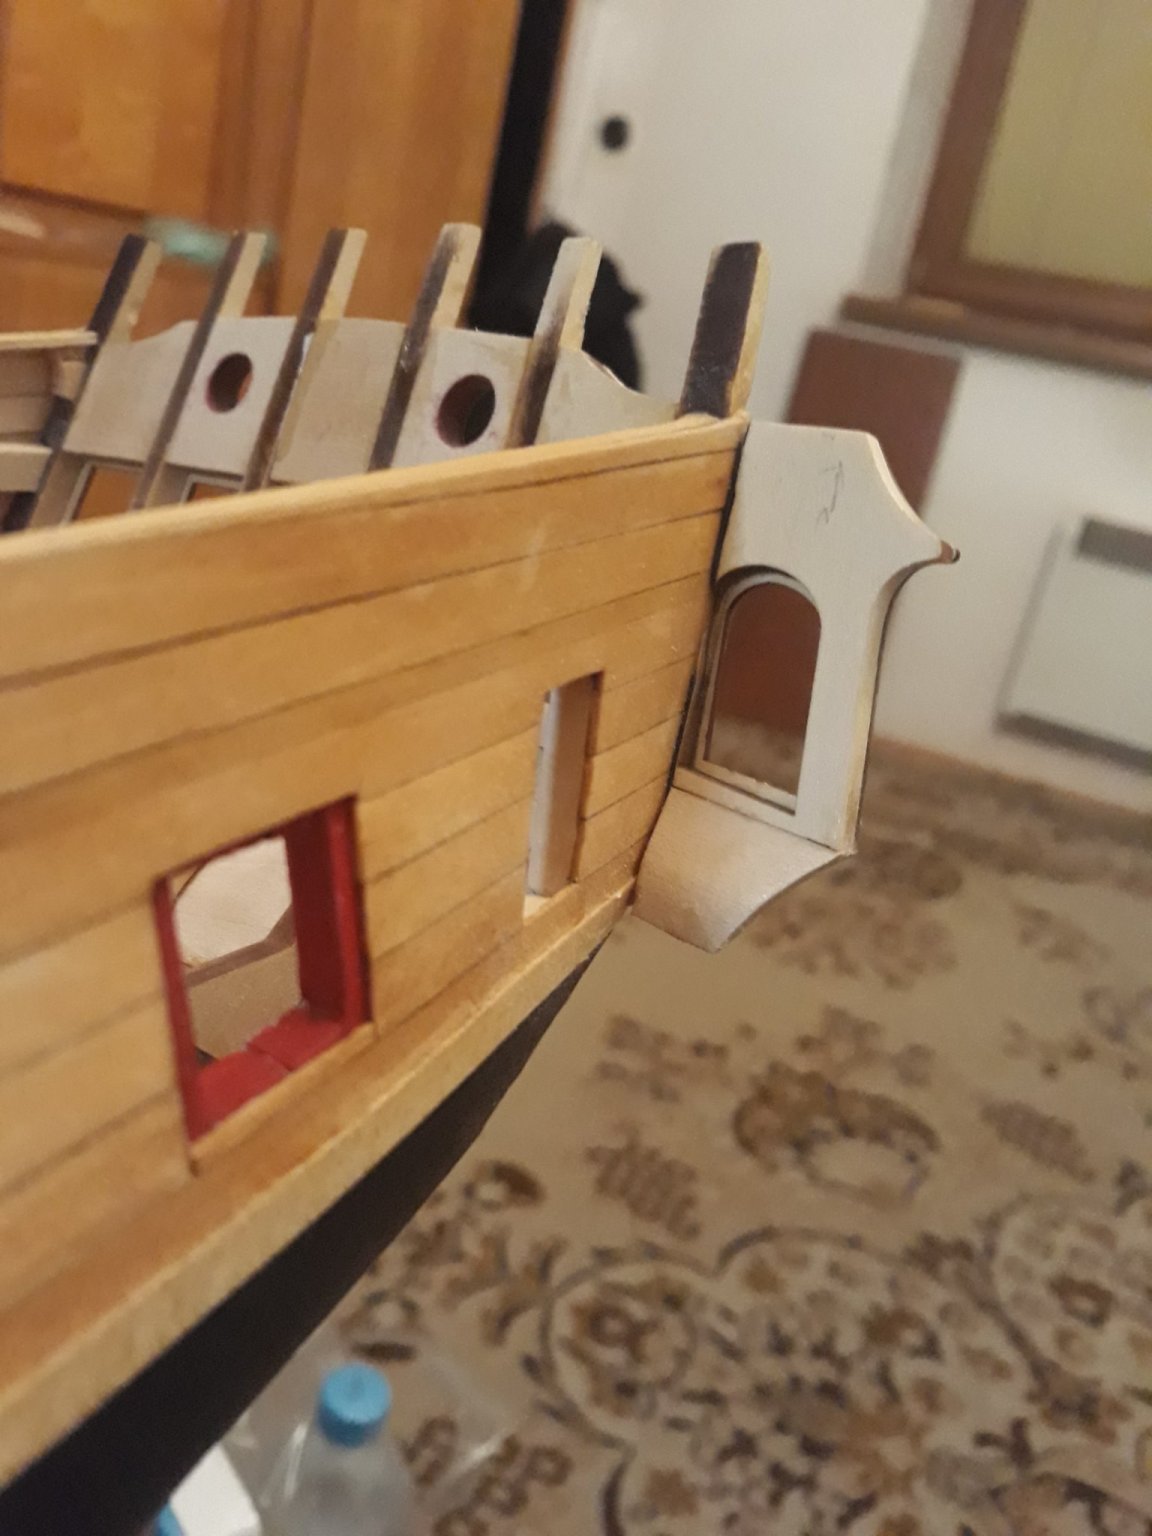
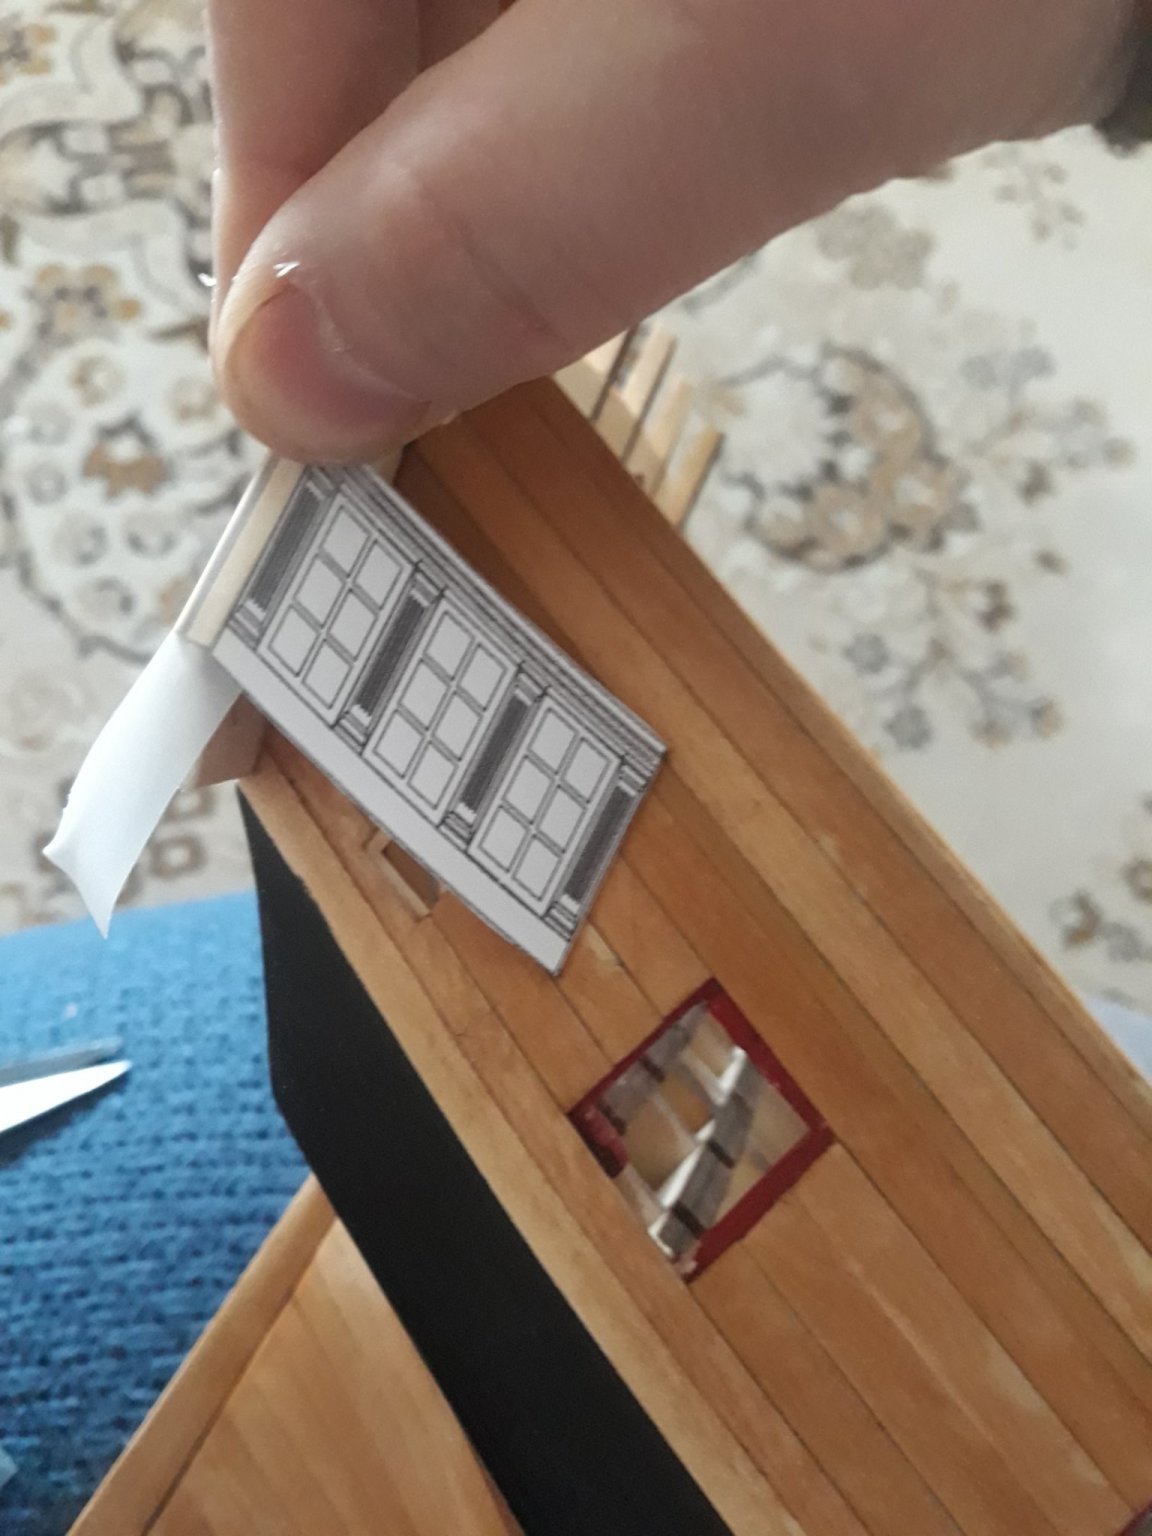
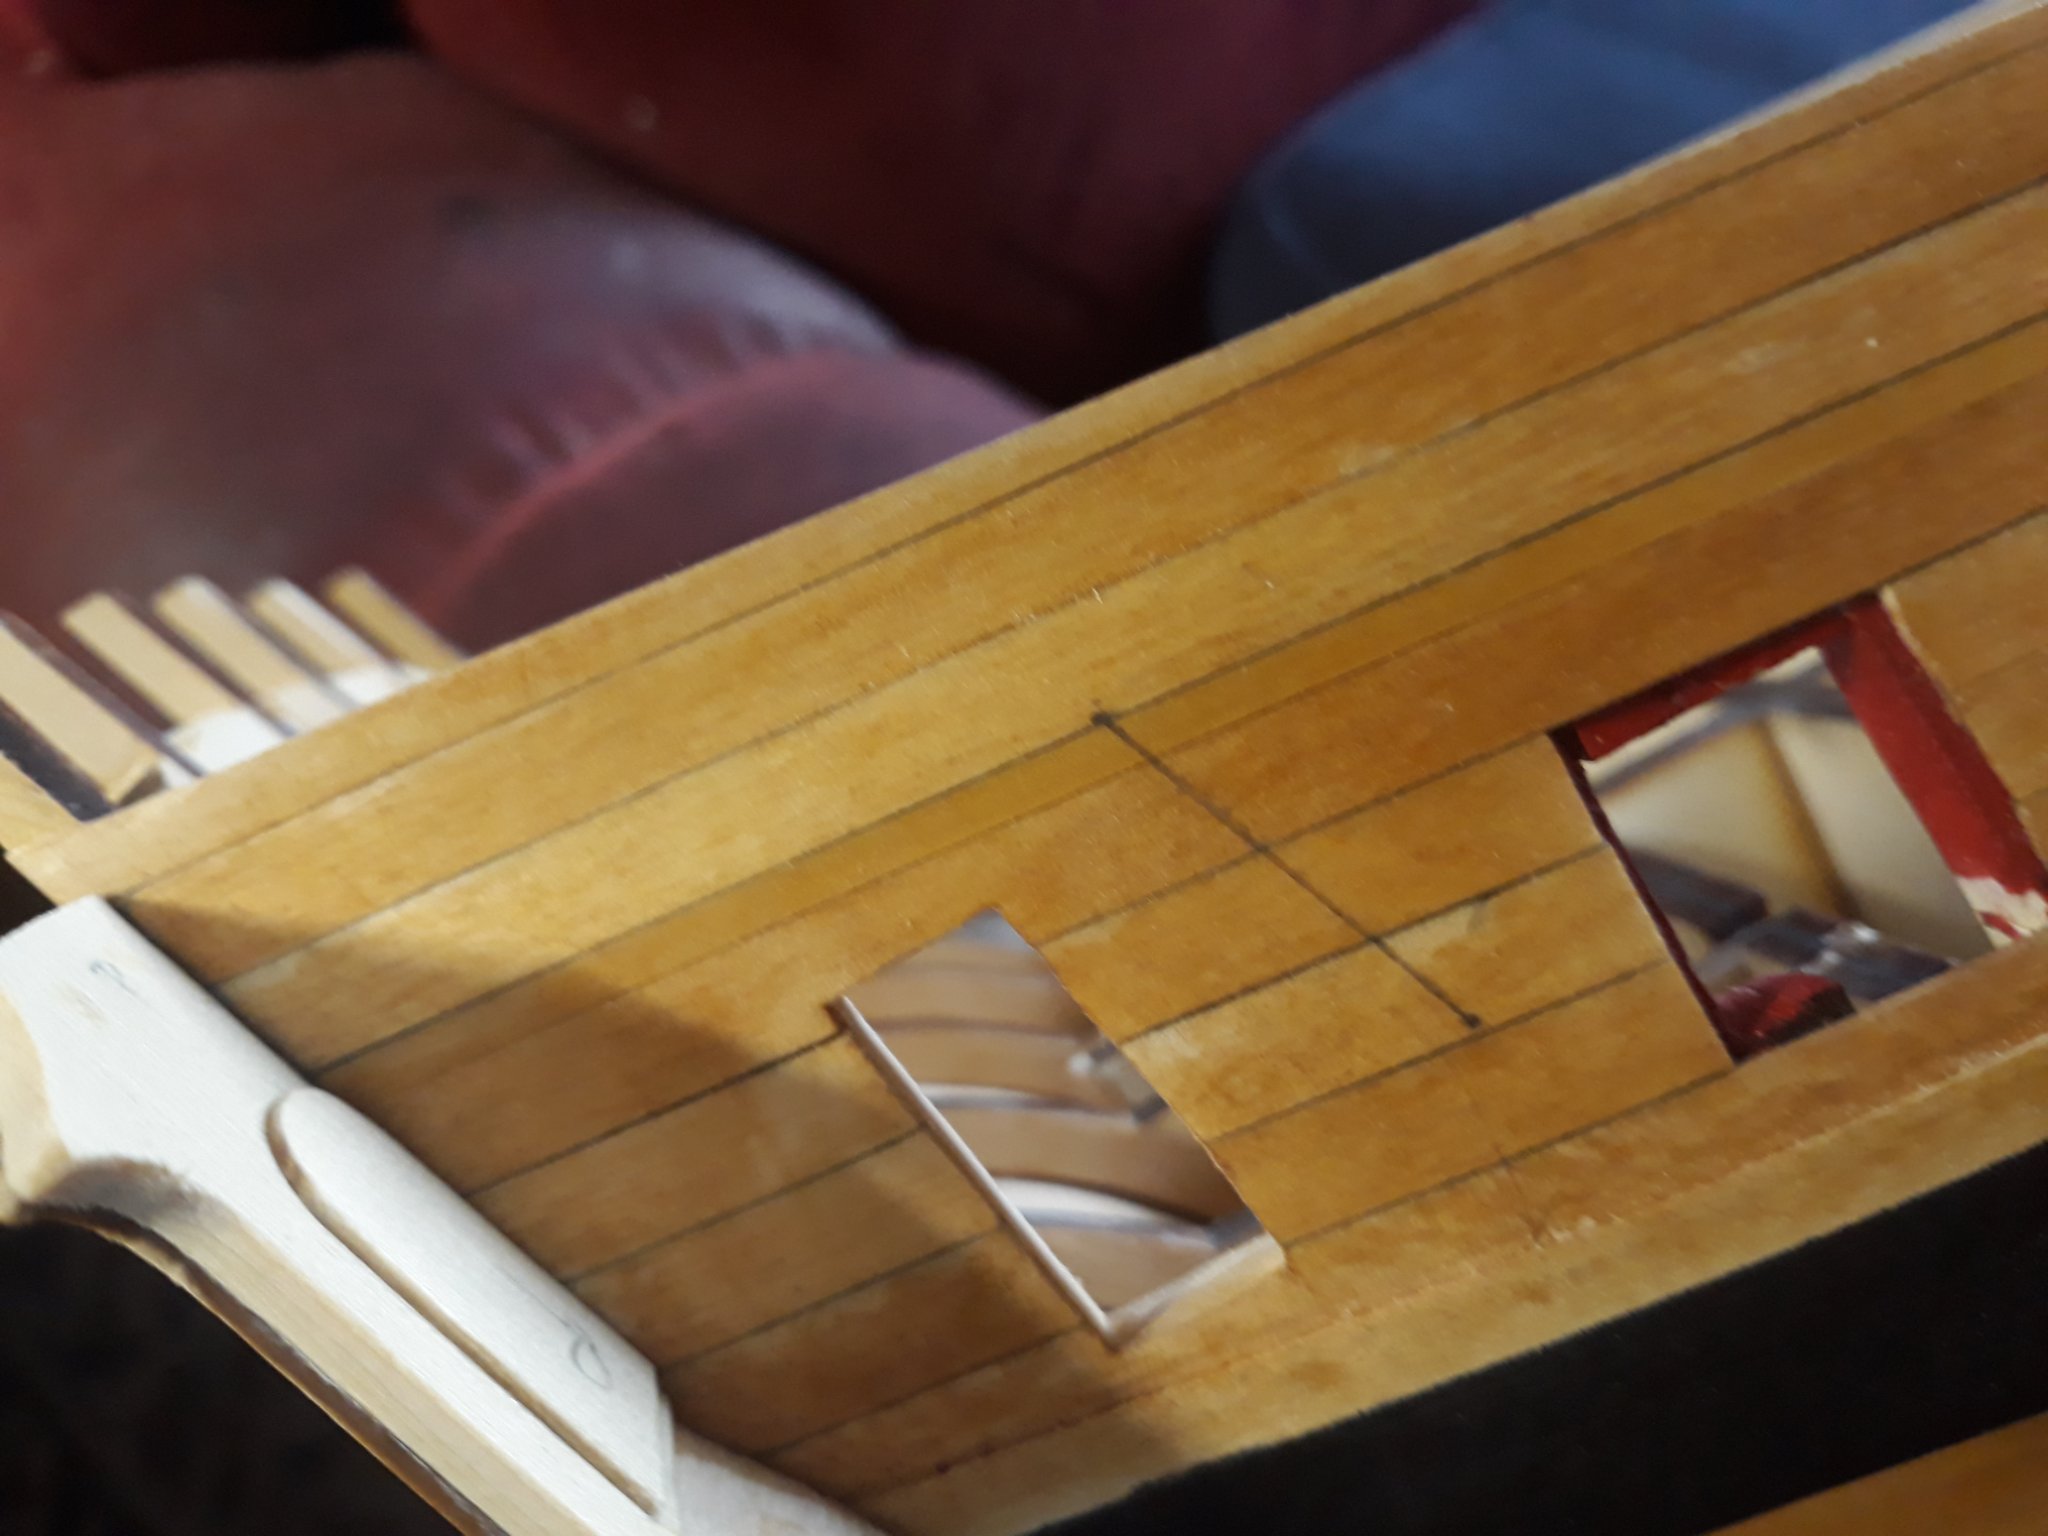
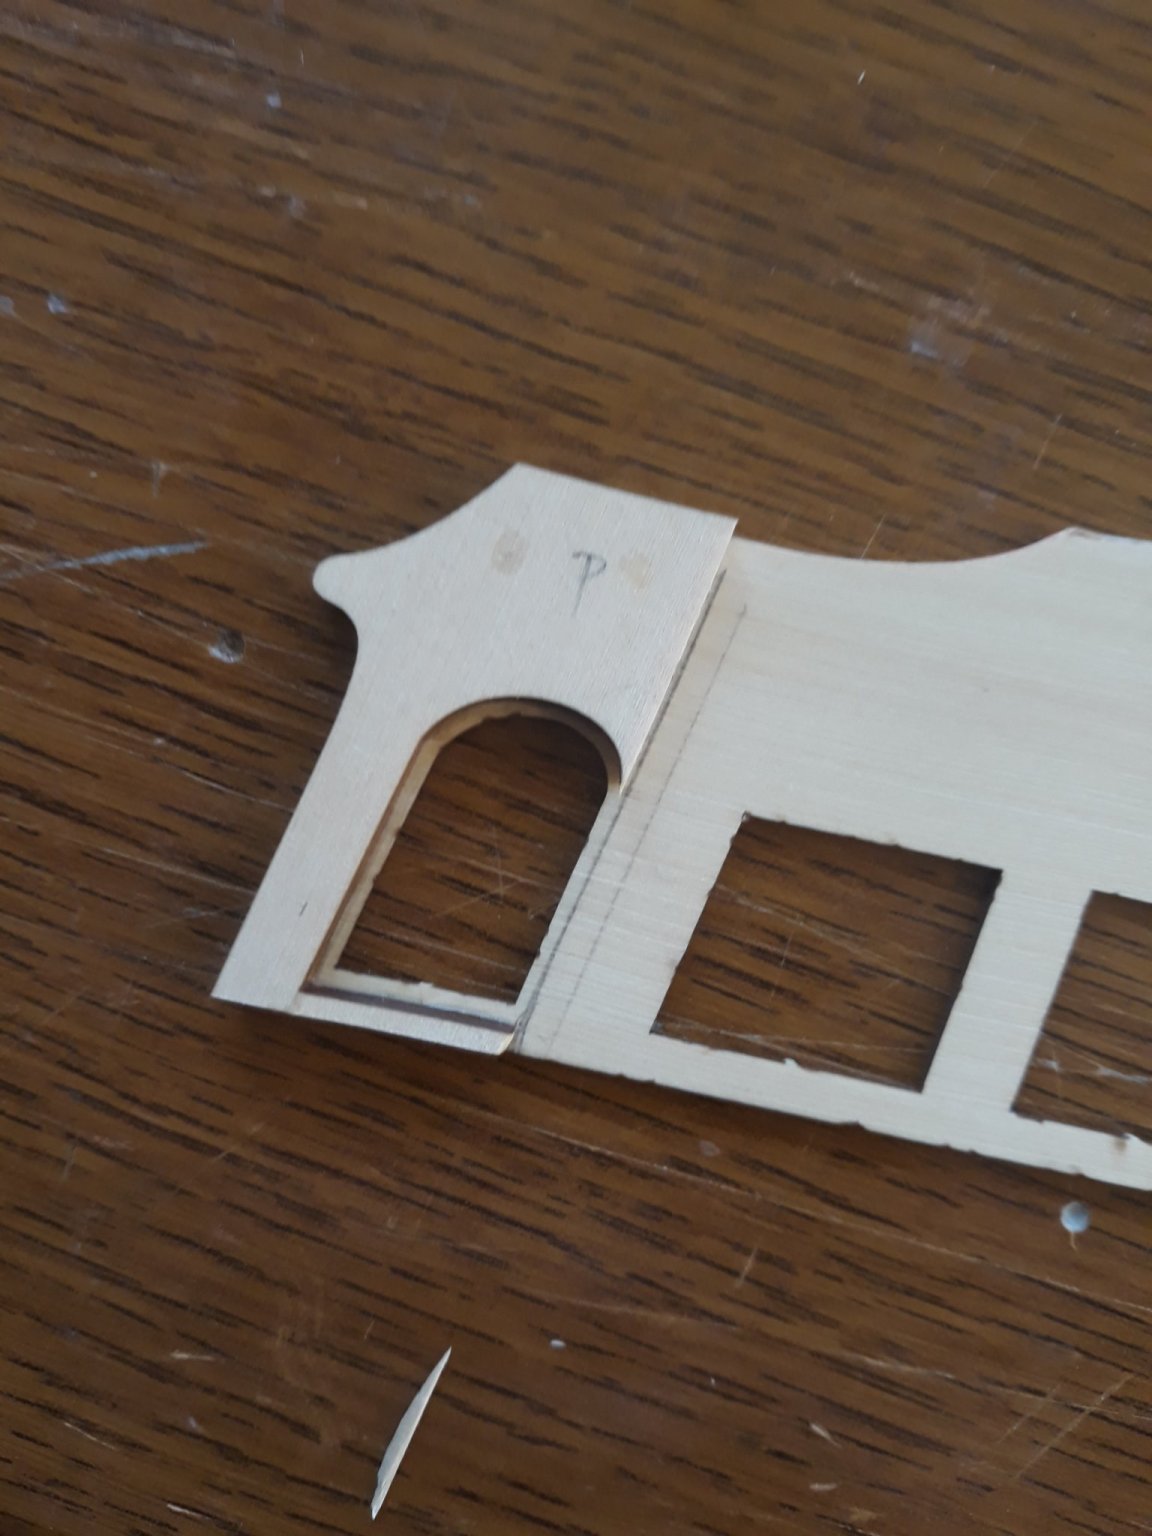
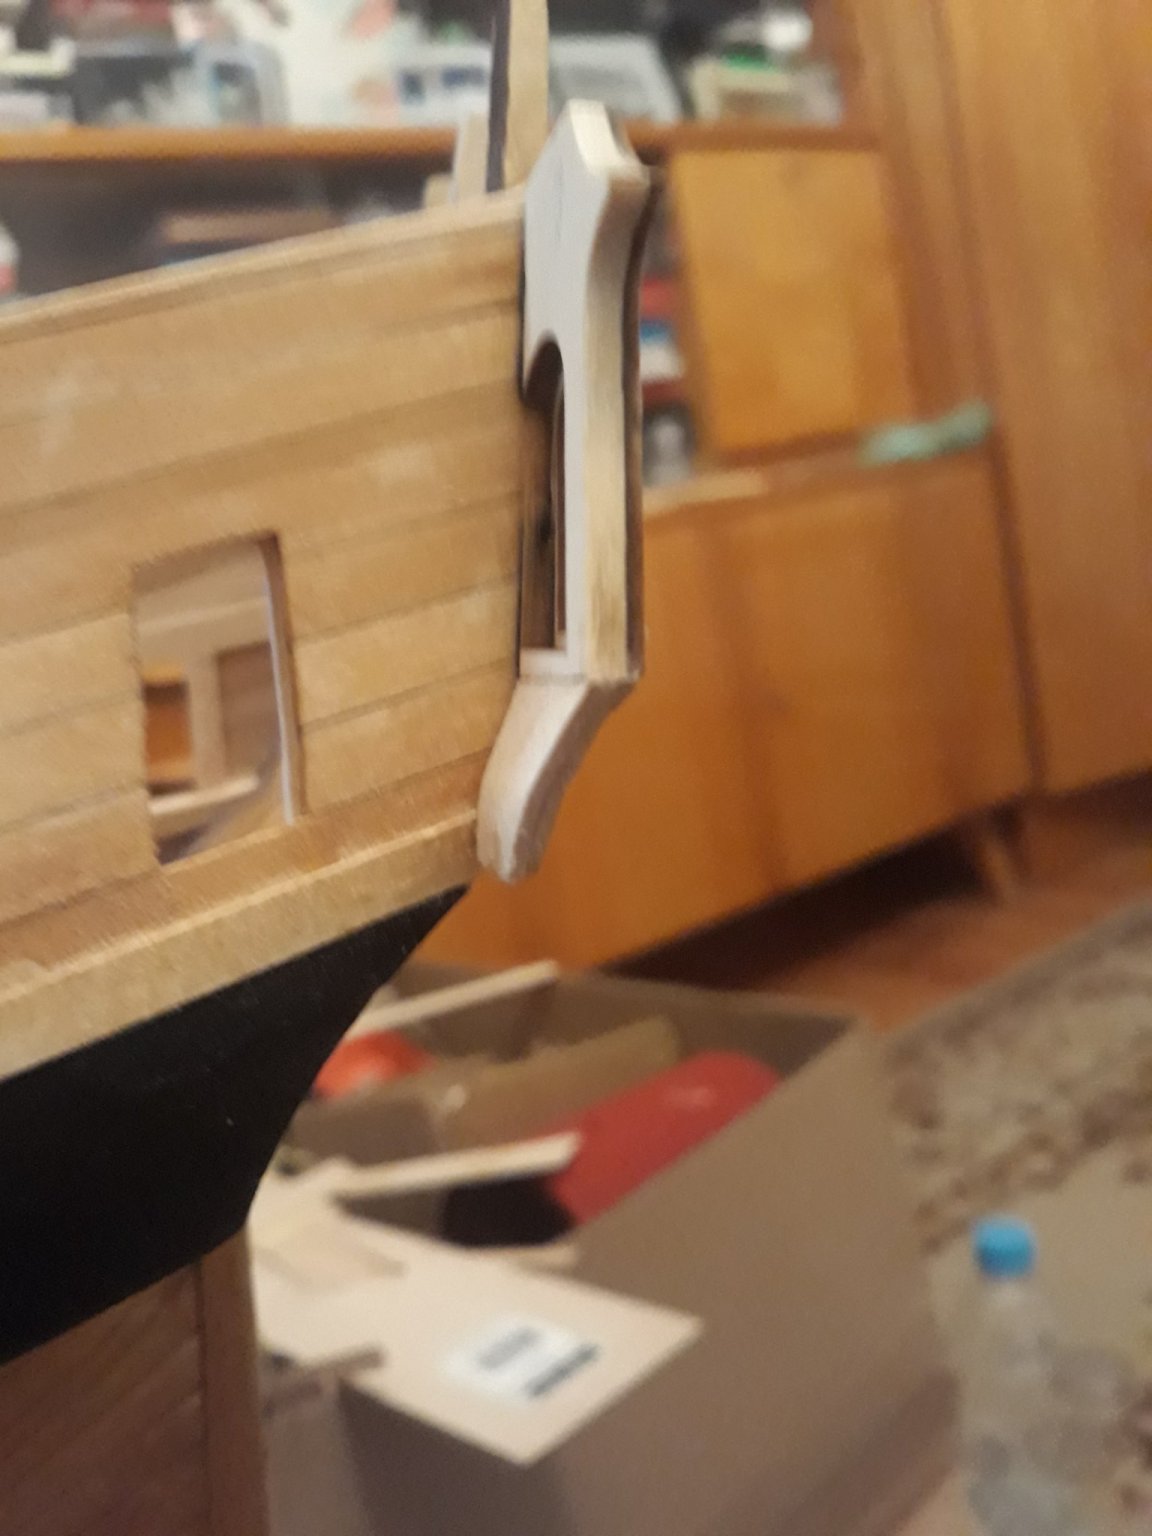
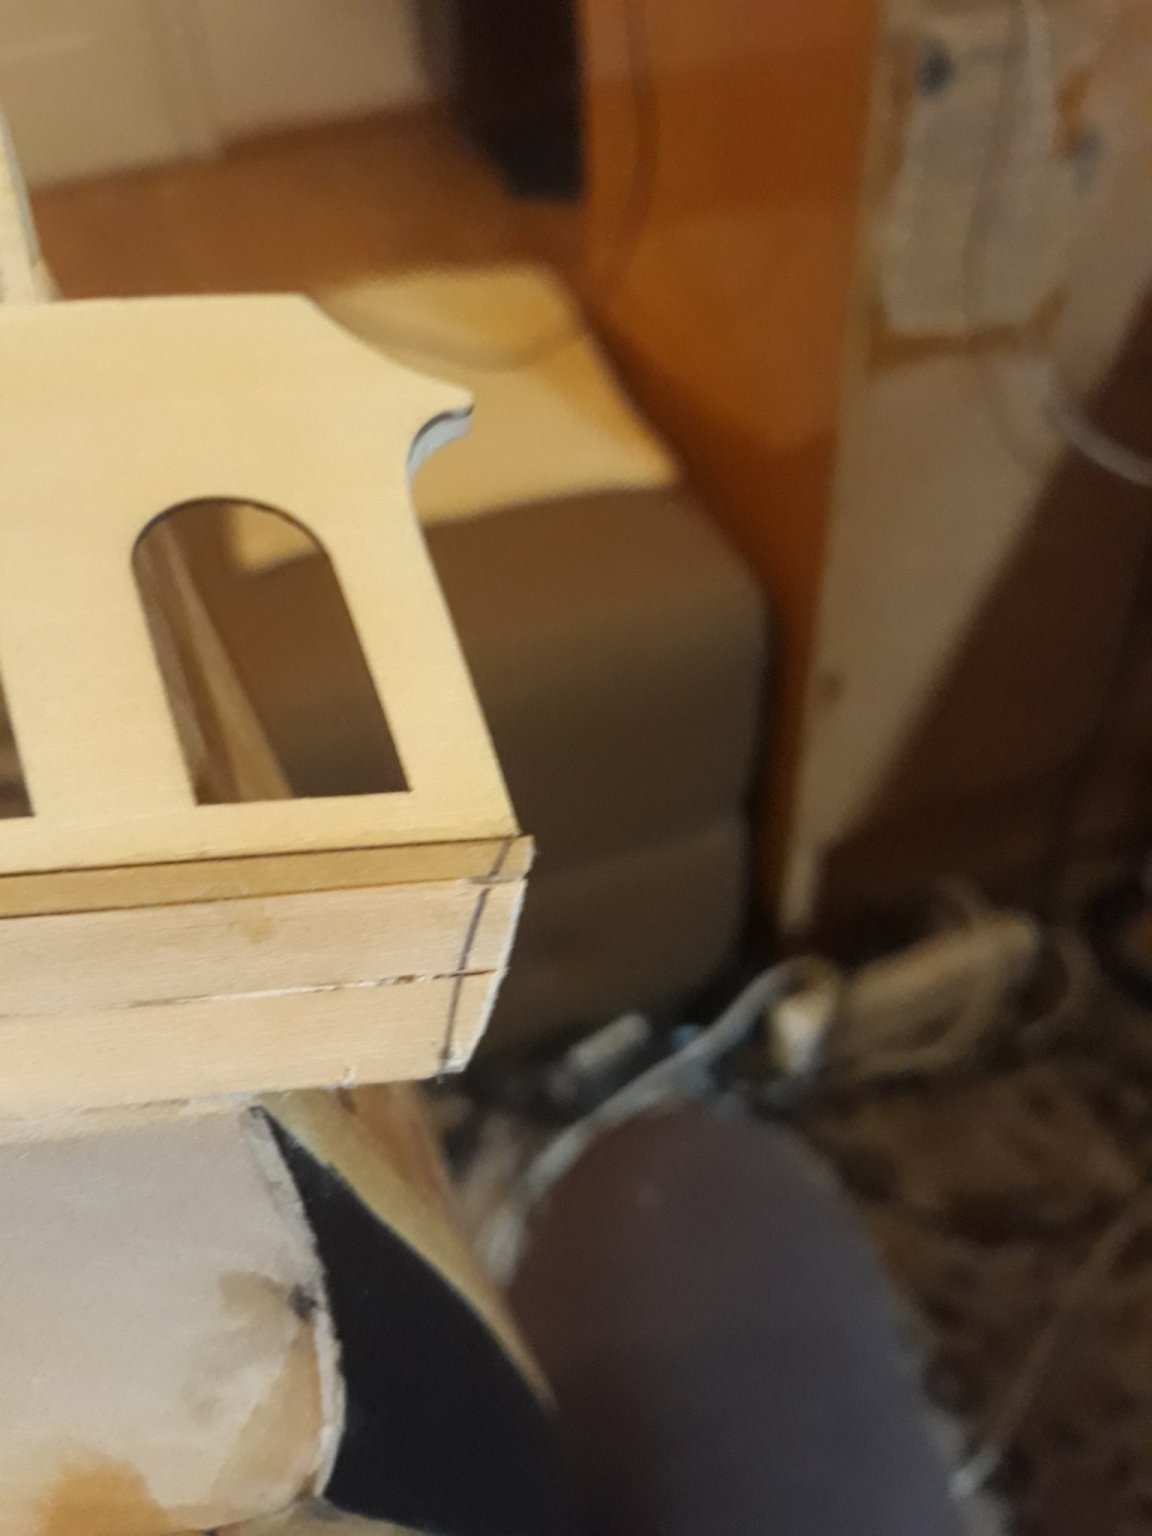
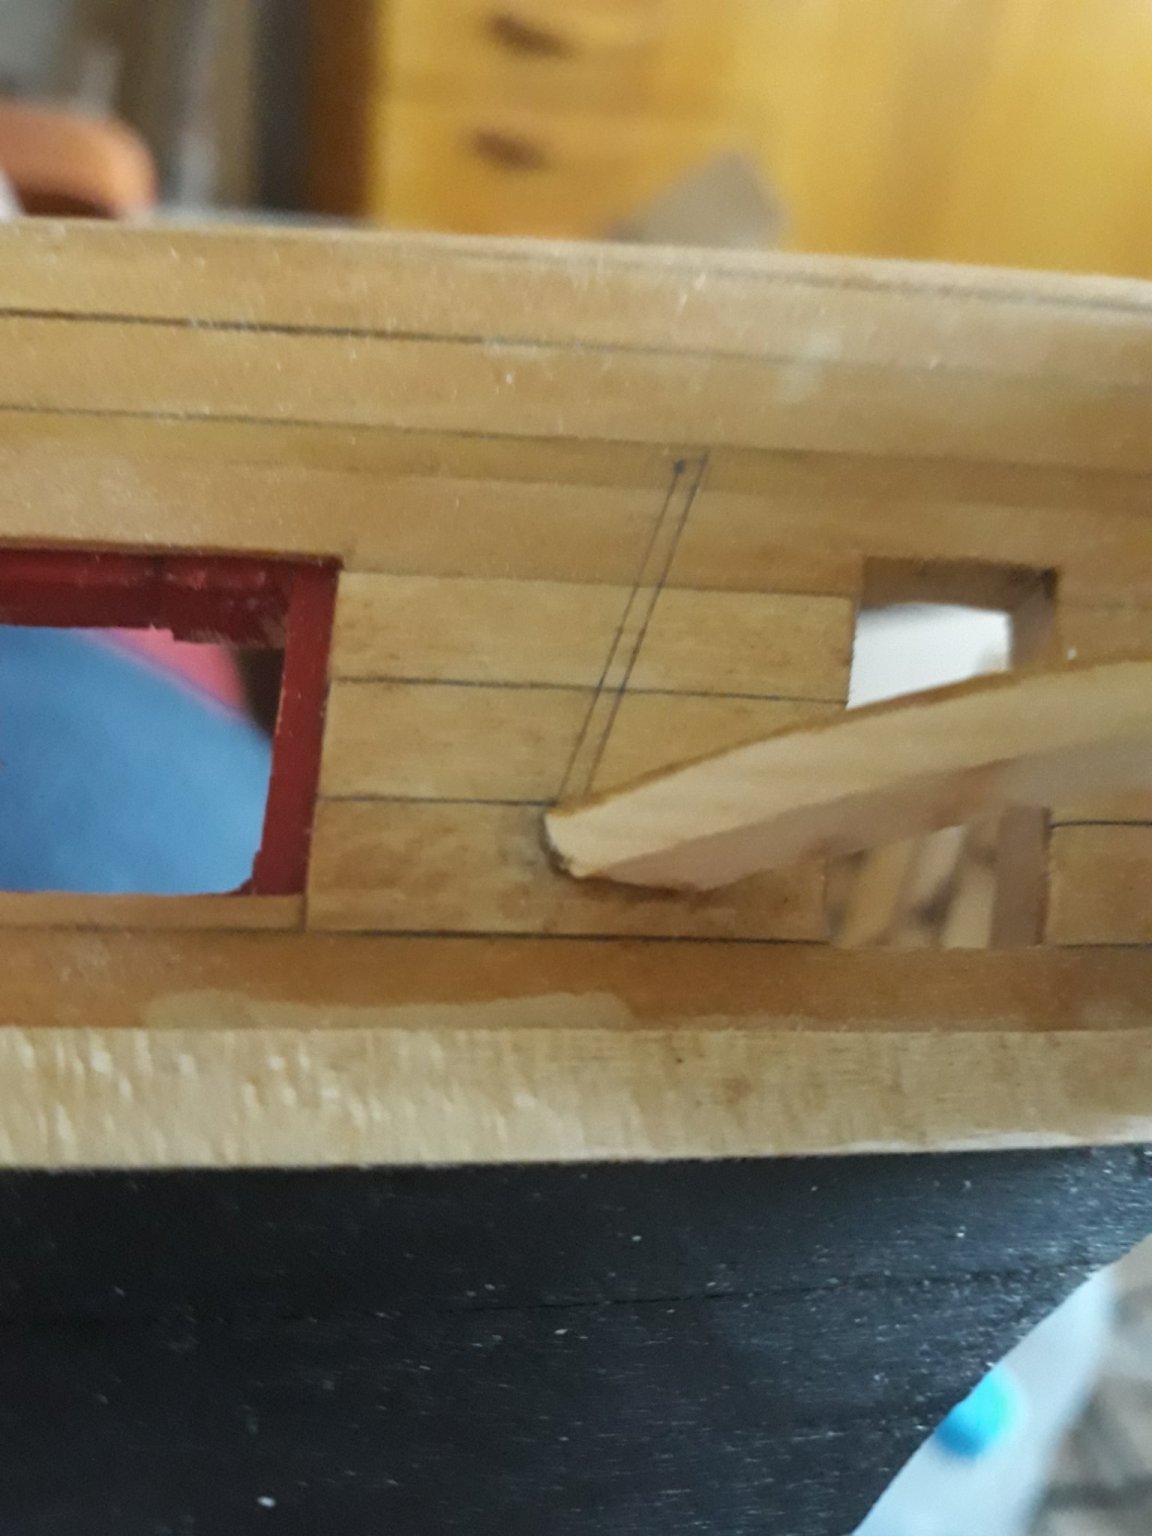
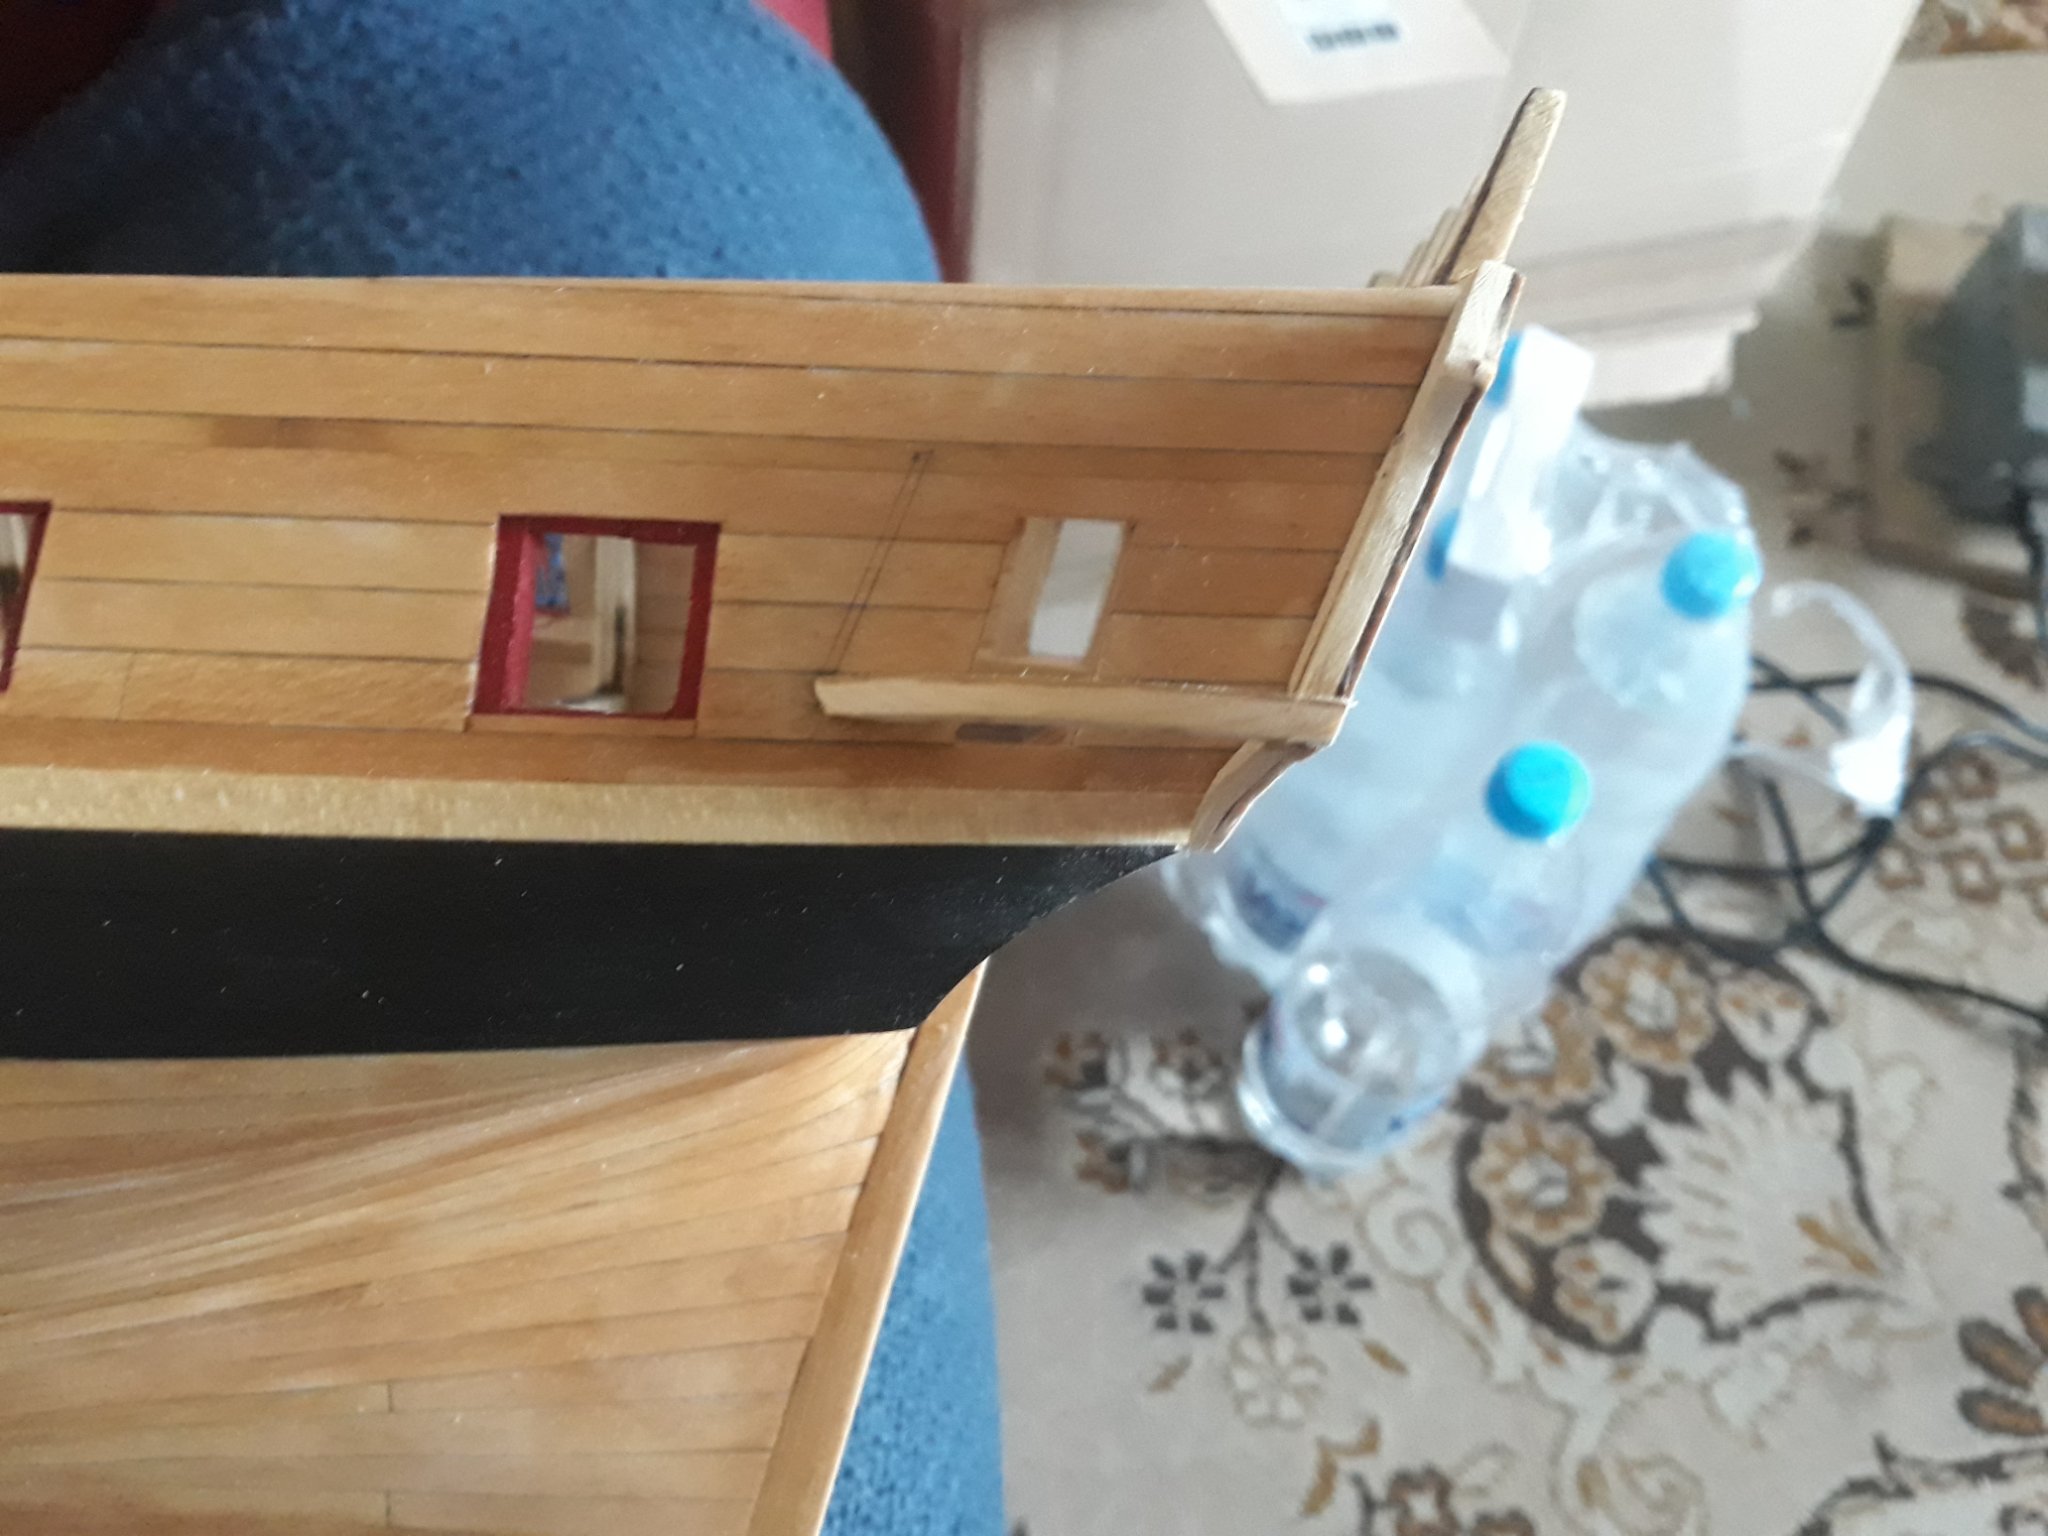
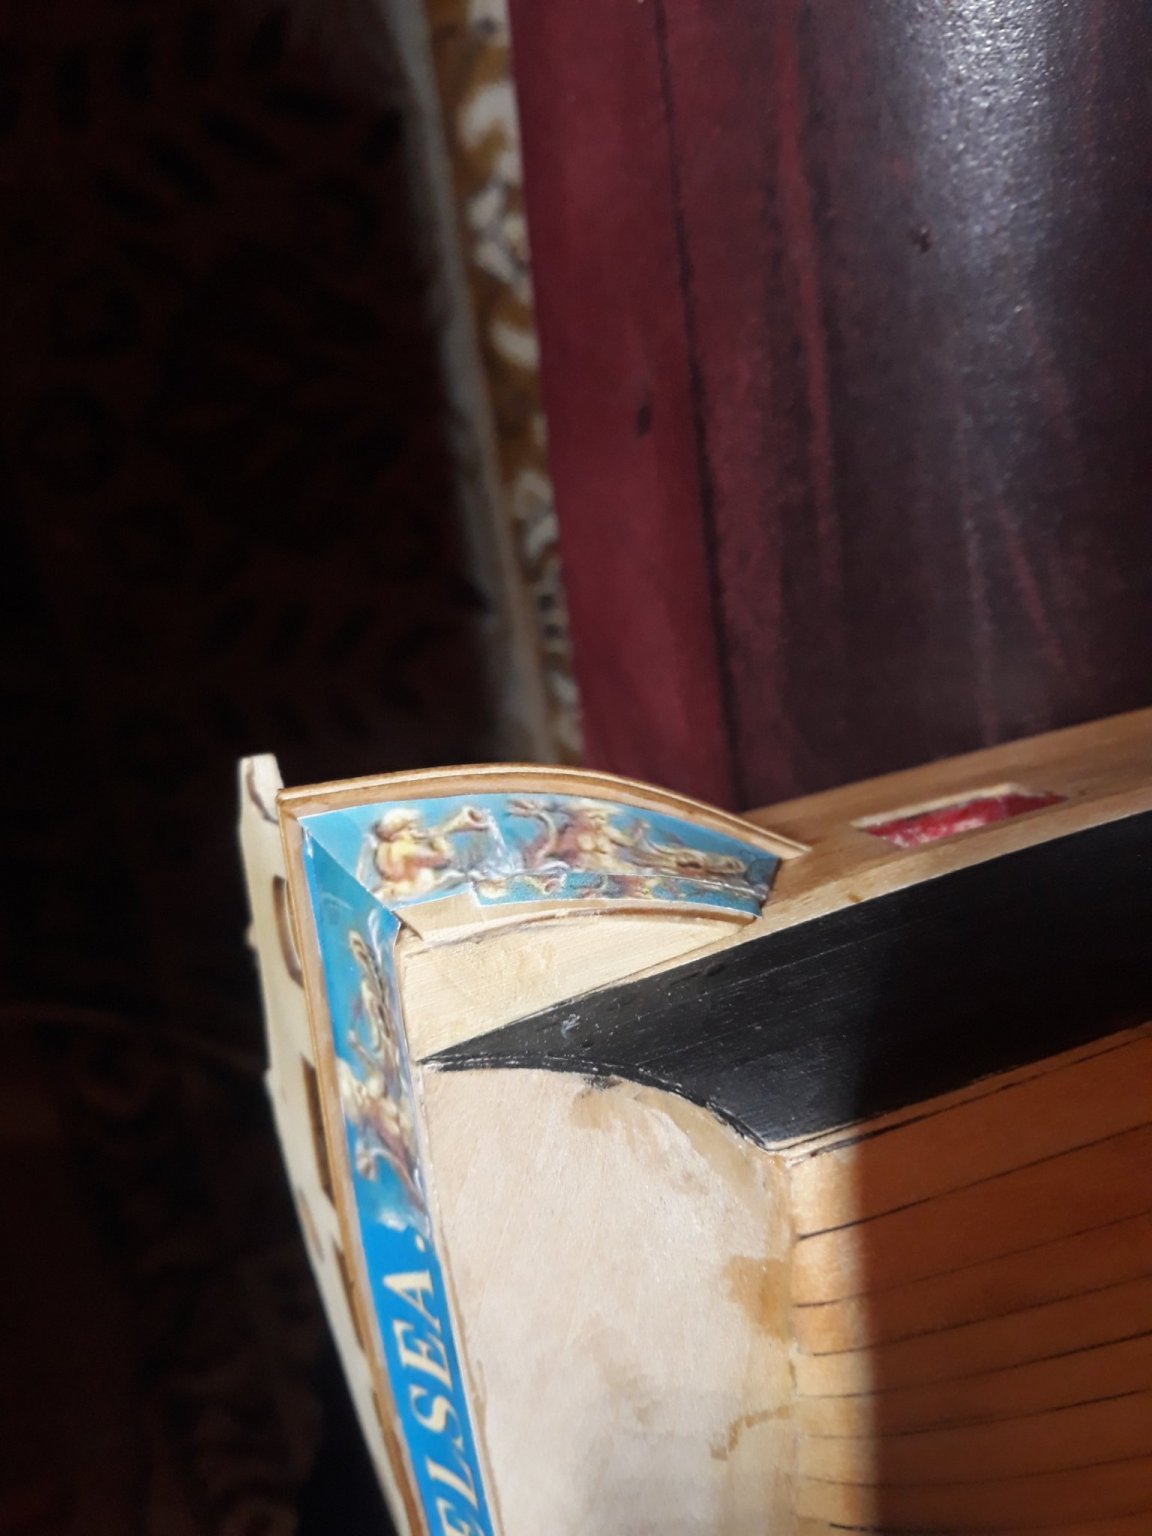
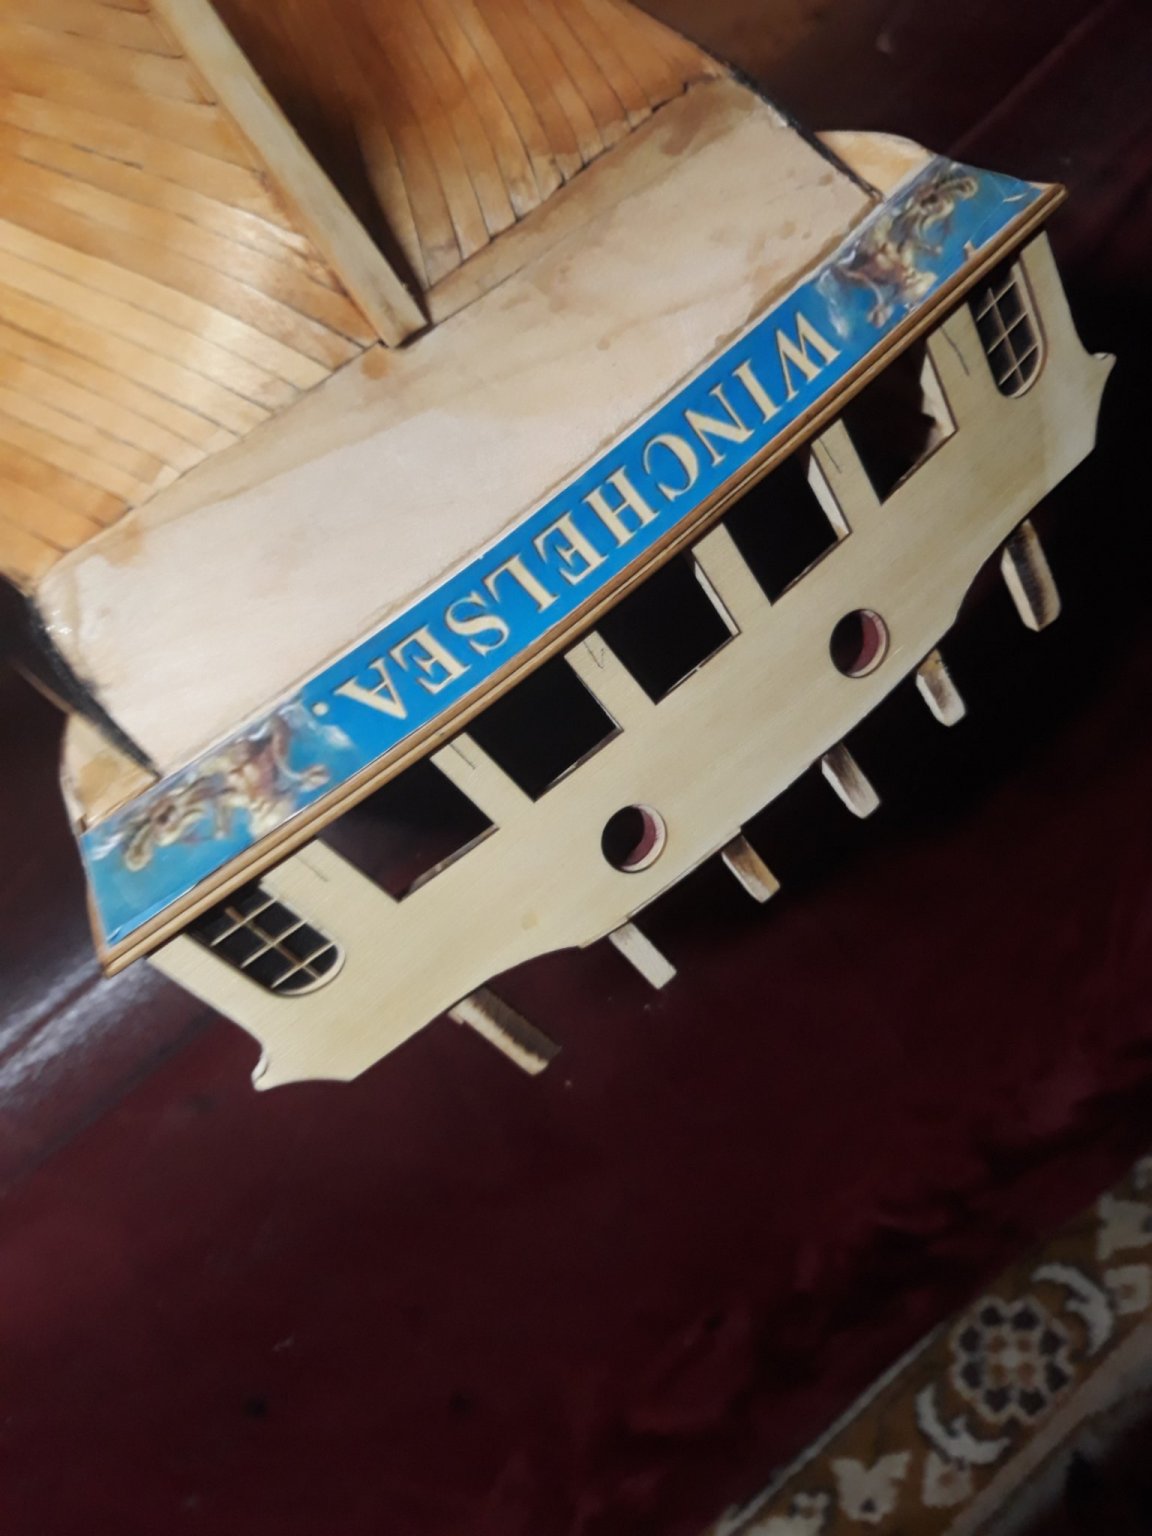
How i worked transom...
I must say it is like a price for me after planking, but it is not easy even it may look like. Chuck carefuly mentions all tricky parts and dangers in monograph. I never read better written guide for modeling. He mentions more ways and i opted intuitively for gluing outer windows frame to transom outside the boat not when transom is glued. Im glad i did because i made one important mistake ij chapter one and put windows little bit lower than should be or my boat is wide whatever. You cam see i had to remove inner side of window frame so i could stick windows in . Thabkfully no broken bones. I carefully tried windows and finally managed to glue ttansom firmly to the boat. Than i despite of Chucks waring dared cutting on windows here along the grain and even sanded with grinder. But never do that, its like feather. I crushed one window and managed to repair it, but I wound not like to again :). So after satisfied i left them aside - untill finally firmly glued. Than I mounted round side windows - easy task and i protected them by tape so tape is not touching it. With work around aft, there is really dust coming and visible oj black window- yes those windows are just so georgous. ...
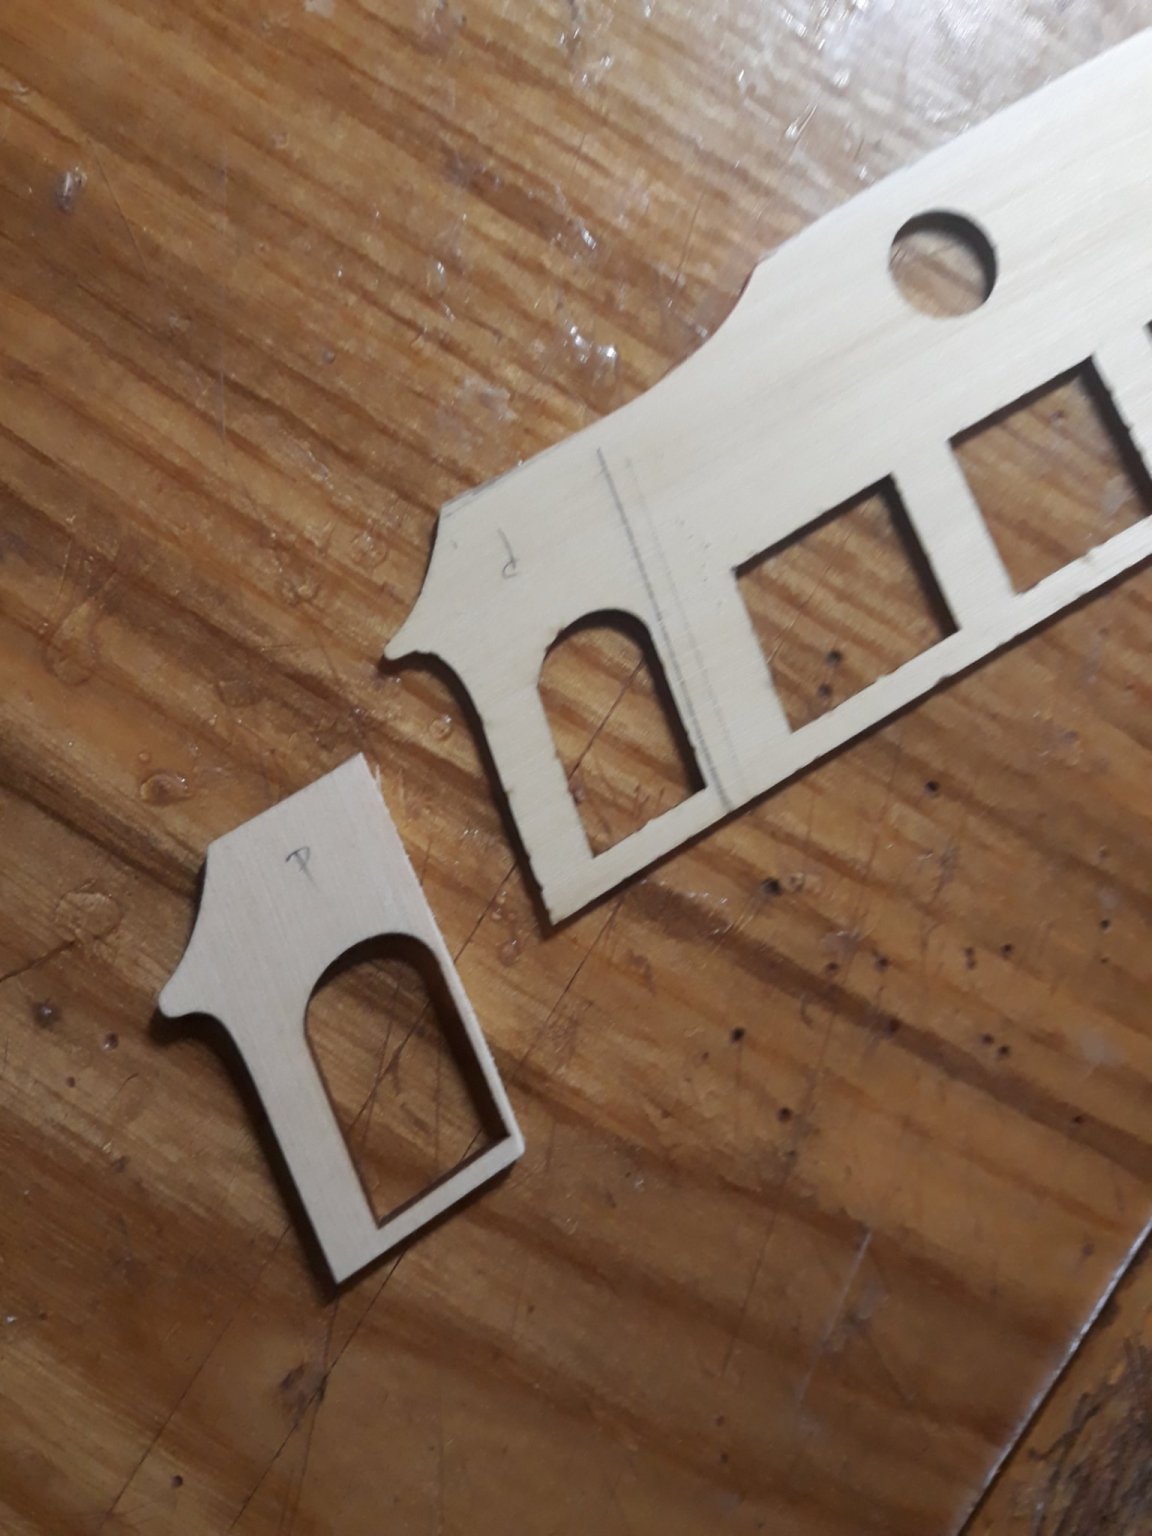
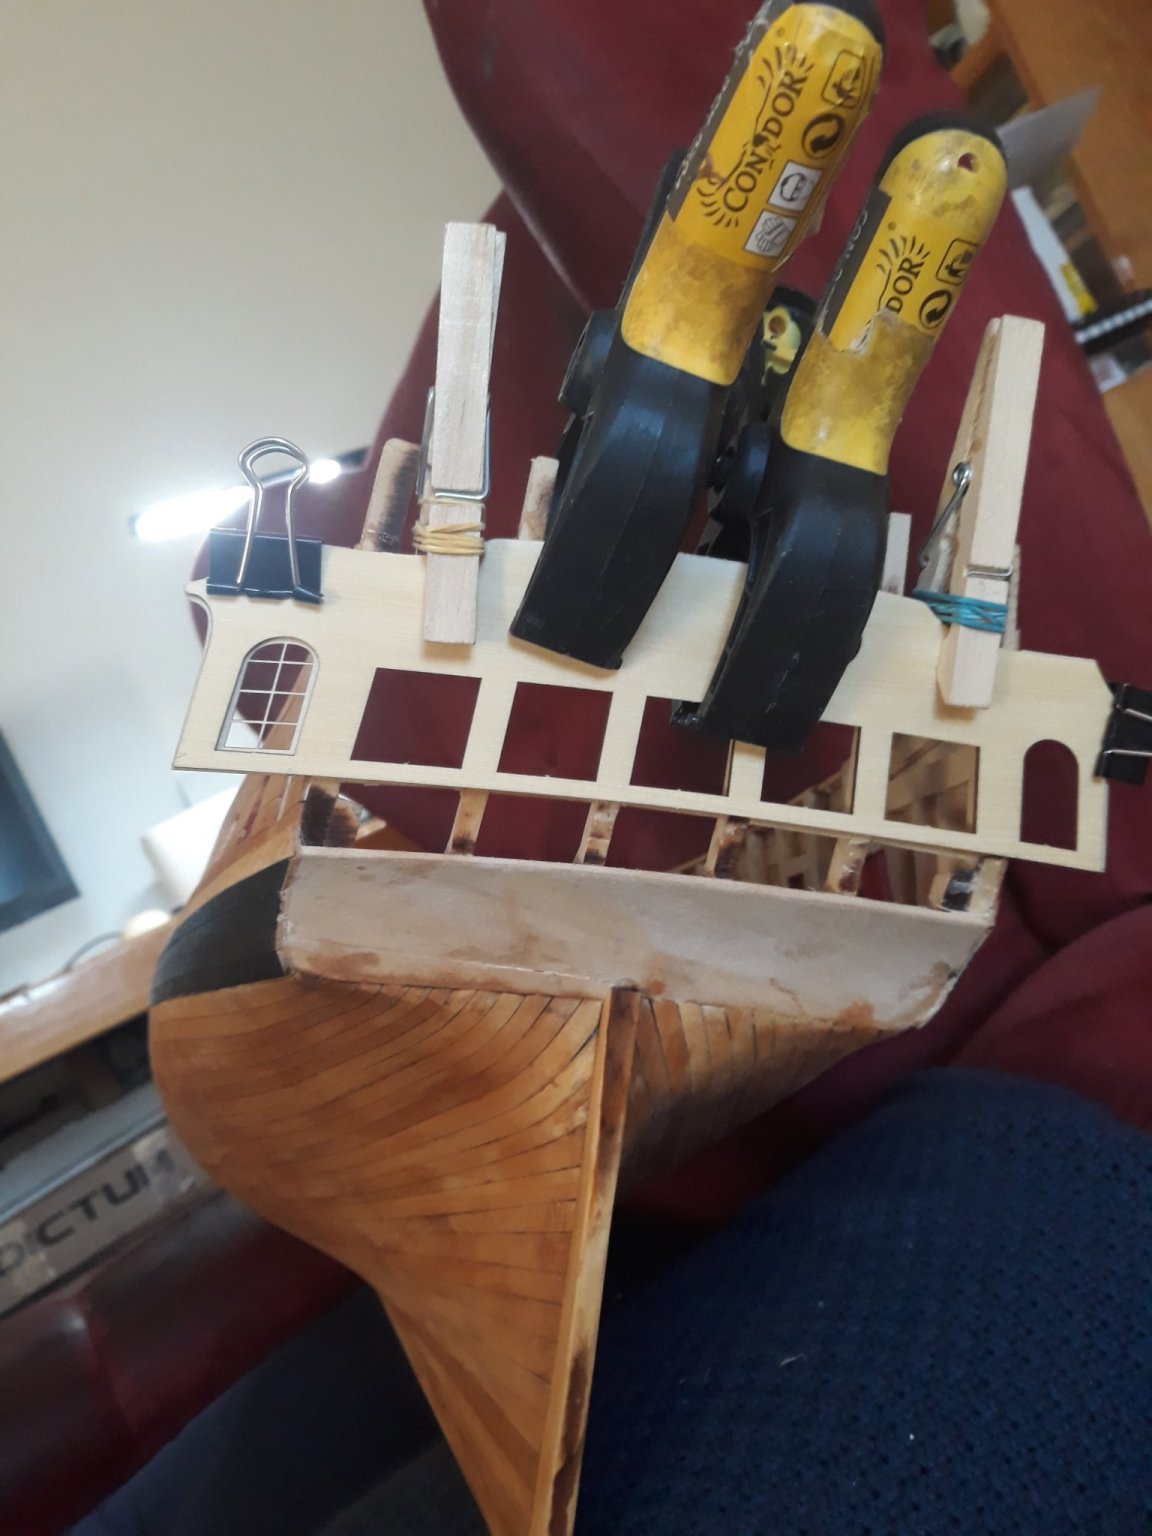
than i started most difucult part. Gallery base. Main complex beam is godsend to us from Chuck ! And i want to thank for all parts. It so rewarding working them. Beam must be sanded so it touches flush all parts it touches to. Plank is grear But most dufficult part was attaching plank and bottom of the base - each boat us skightly different and those parts are perfectly oversized to accomodate that. I went with different approach. I first glued plank to too base and than gradually cut bottom side to match the curve. But i again cyt counter a little bit more than i should so i pushed plank a but too much towards the boat to touch counter. I funally managed to glue it together satisfactorily but it is not without flaws even those are hidden now. So again no pain. With moldings - i first attached frezie to see how big and where is the border so there is no gap between molding and paper. And for the finish I onky regret i dont have mire complex scraper to make more complex underwindows molding. But i wont try to make scraper so i go safe route. I managed ky way to combine them with paints and i like the outcome so even if not complex i think they are pretty. What you think? I observe other so i can see how to proceed further so I hope my pics could be of some value to someone. Hope you enjoy it and thsnk you. V.


- Ron Burns, rafine, FrankWouts and 3 others
-
6
-
1 minute ago, Chuck said:
Sloooow Doooown.........Enjoy the ride. ⏱️ There is absolutely no reason to rush through the build. Plus you will just end up waiting for the next chapters to be released.
Chuck, it only looks like rush. I have possibly week or max two to finish 3d. than I will have to leave it until end of summer so there will be no waiting for parts soon. I am at home in quarantine next 14 days cannot go anywhere as i dont have covid test . so I worked in relaxed pace thru it last two days up to the bits i like finished. no disaster so far I follow the chapter it is so completely and helpfuly written.
- FrankWouts and Rustyj
-
2
-
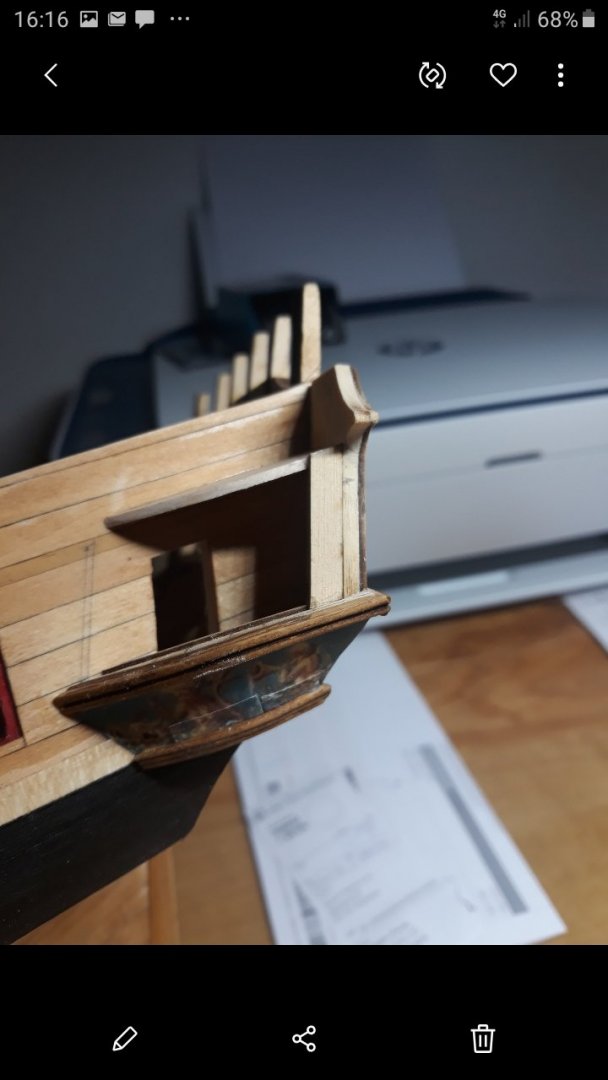
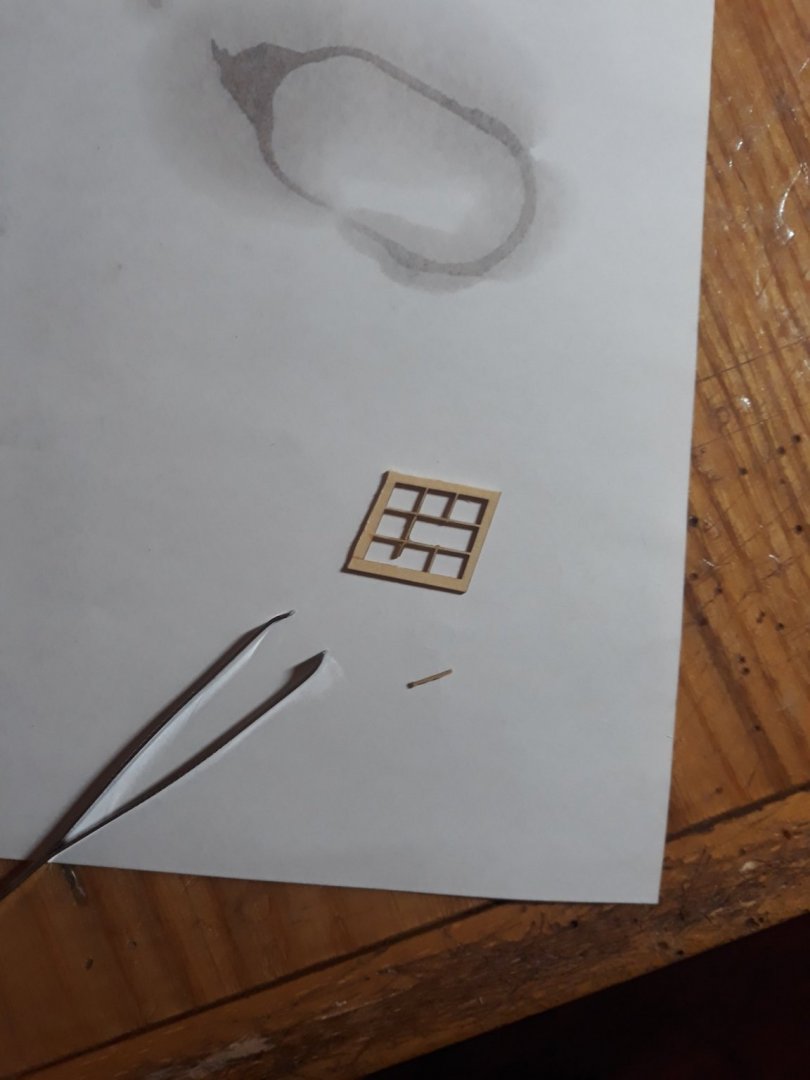
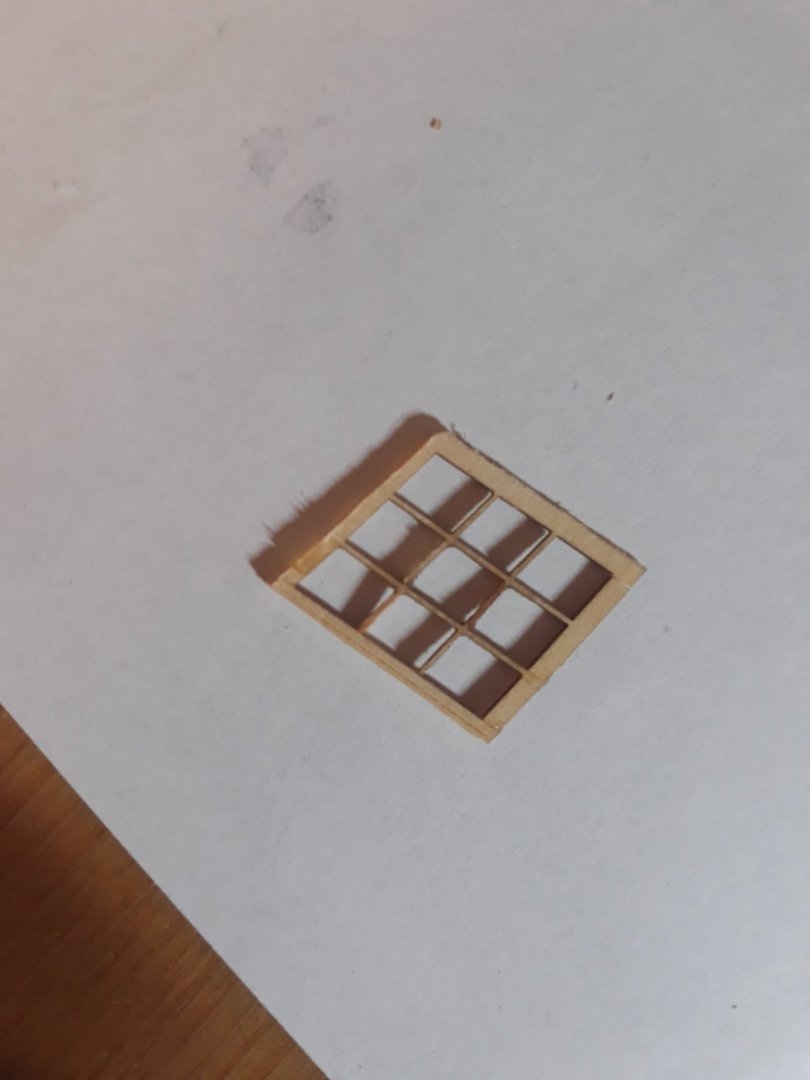
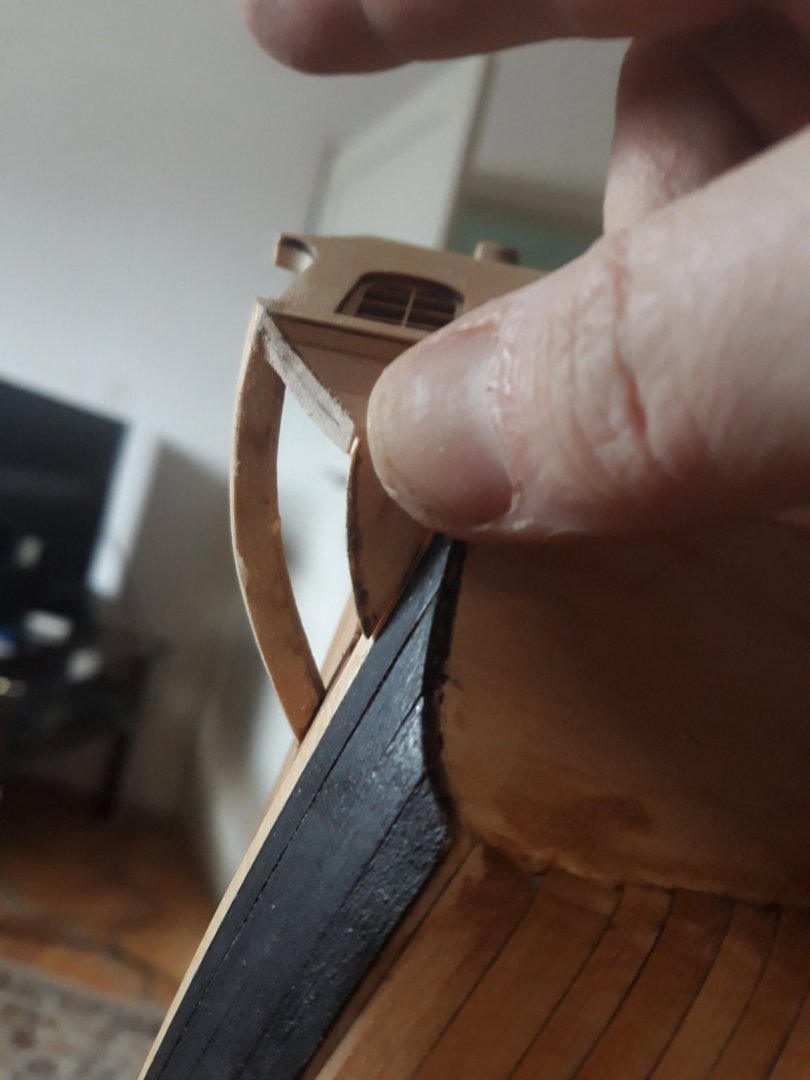
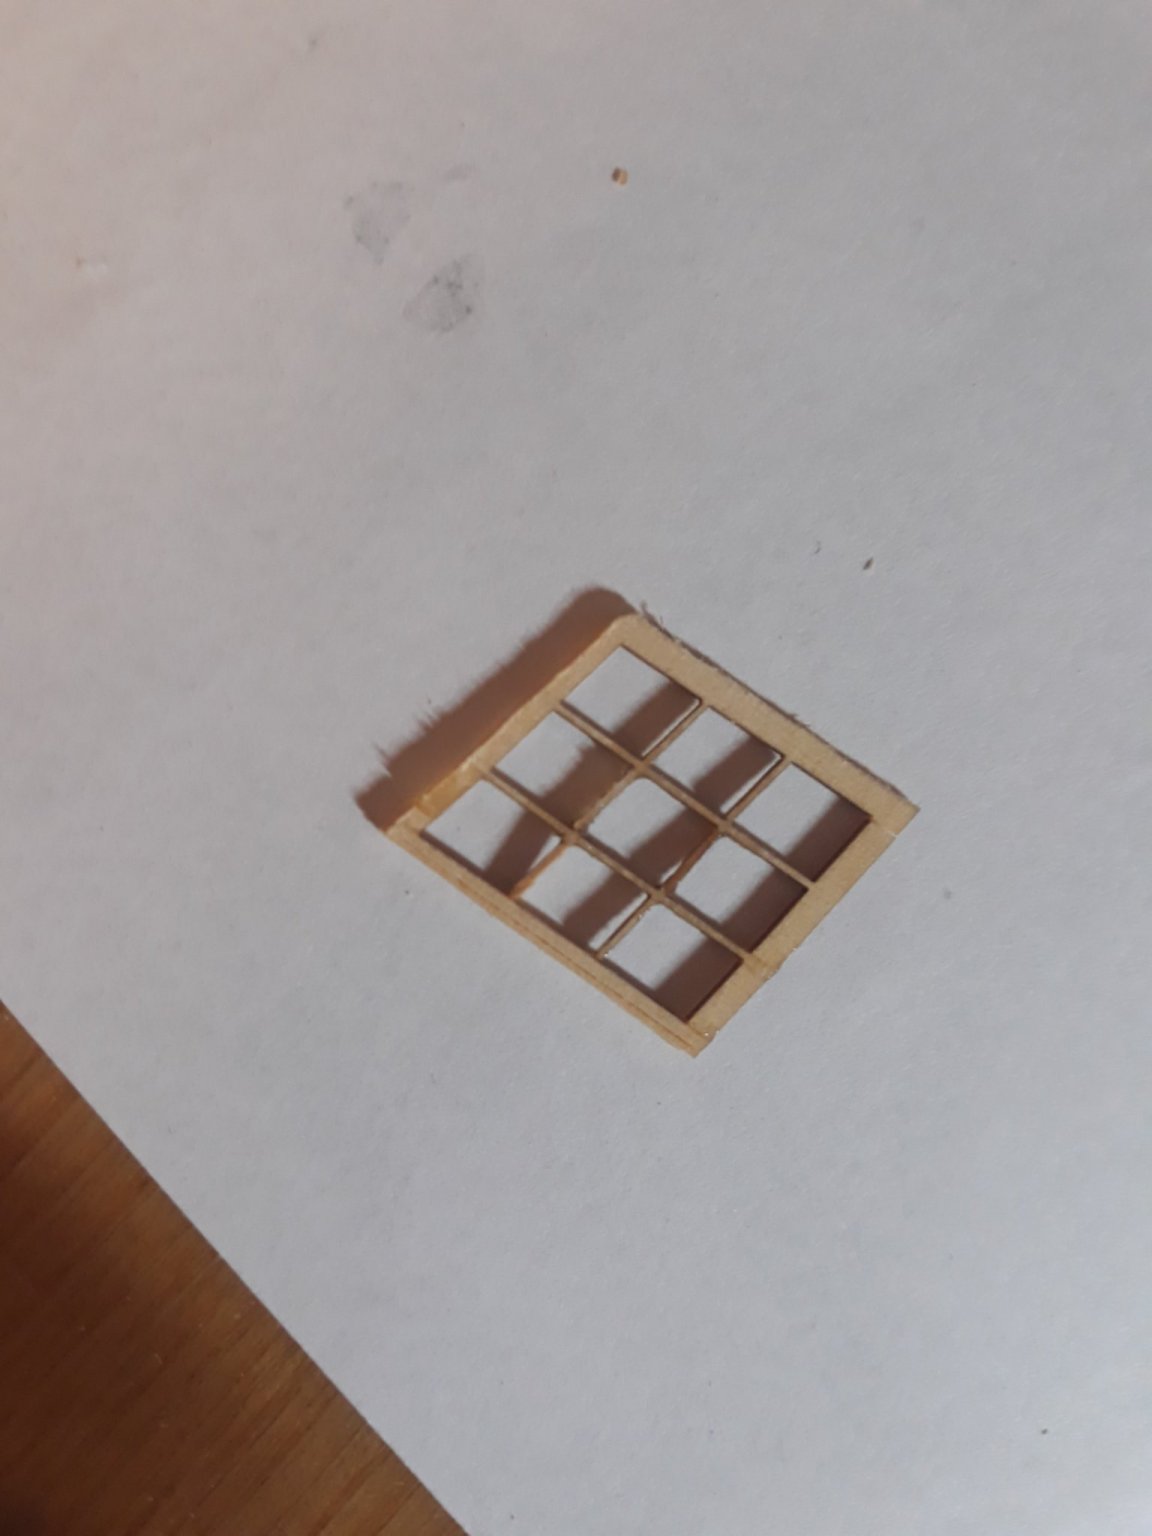
Enough for today. If you look closely - Yesterday disaster happened. I smashed one glorious round window to 5 pieces ! .And - impossible task for 2 hours and surgical instruments - i managed to restore it !
I used asphaltum color for moldings - just from the tube on t- shirt and wipe out -or with tiny brush into bigger hole - it will leave color inside the lines...and leave awesome boxwood beautifuly golden.


- Ron Burns, Edwardkenway, rafine and 4 others
-
7
-
28 minutes ago, Chuck said:
Thank You....No CNC.....Its 100% laser cut and engraved. It took about 2 dozen attempts and maybe more to achieve that look. Lots of experimenting. I tried to push the limits of the laser technology as much as possible.
its wonderful Chuck.
- FrankWouts and Chuck
-
2


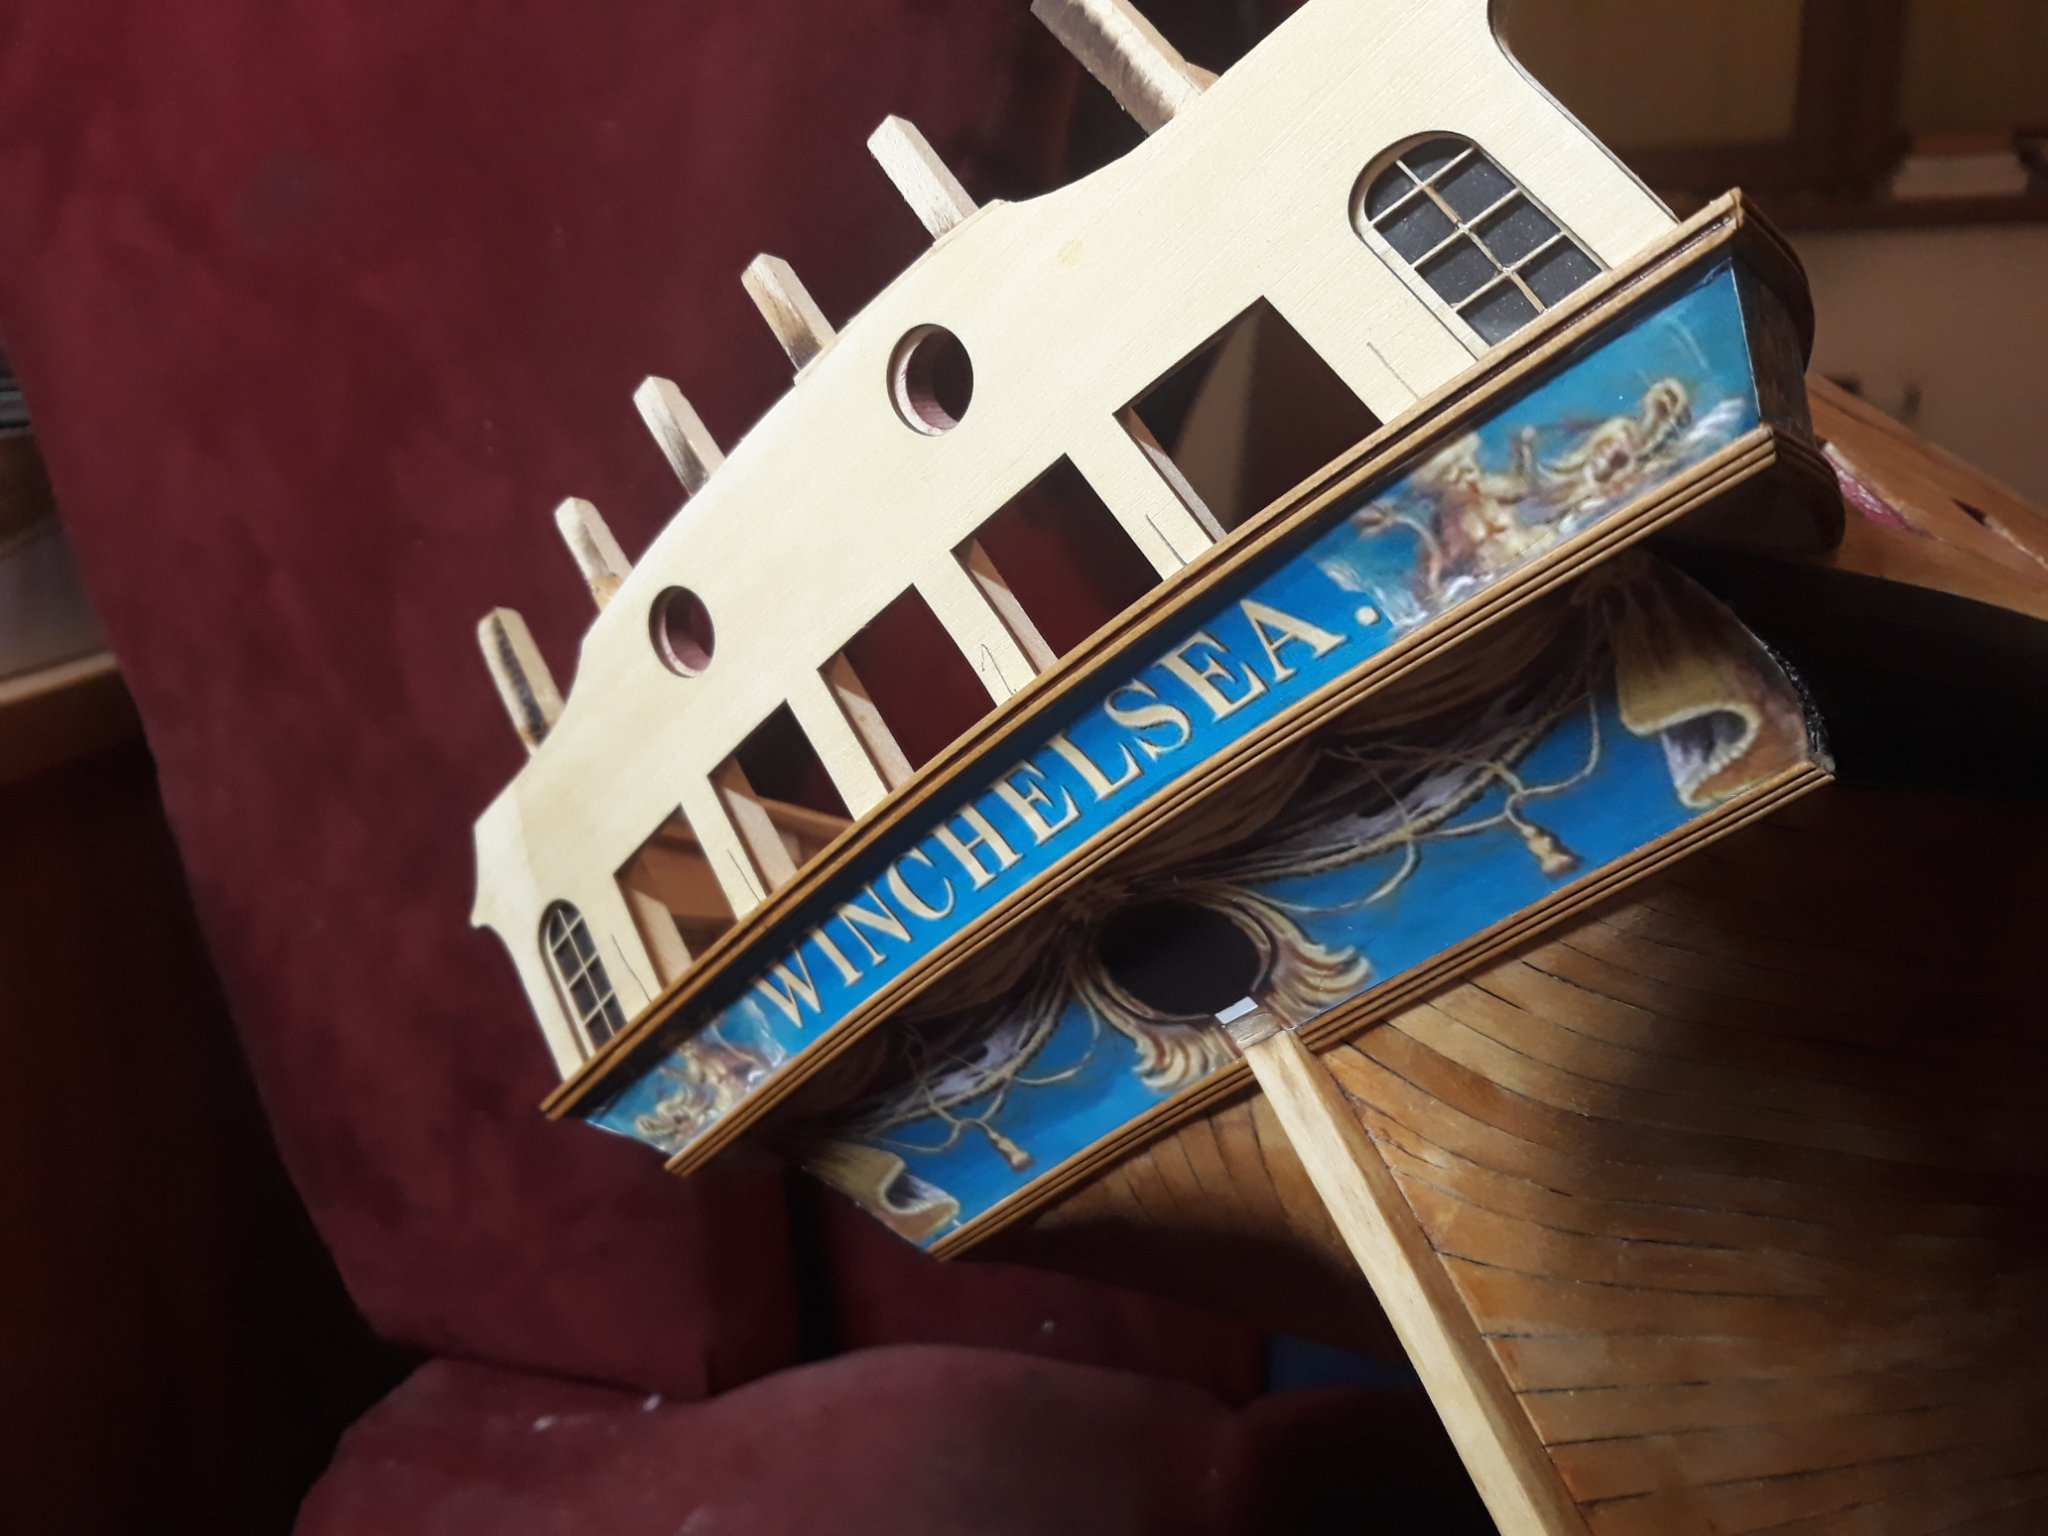

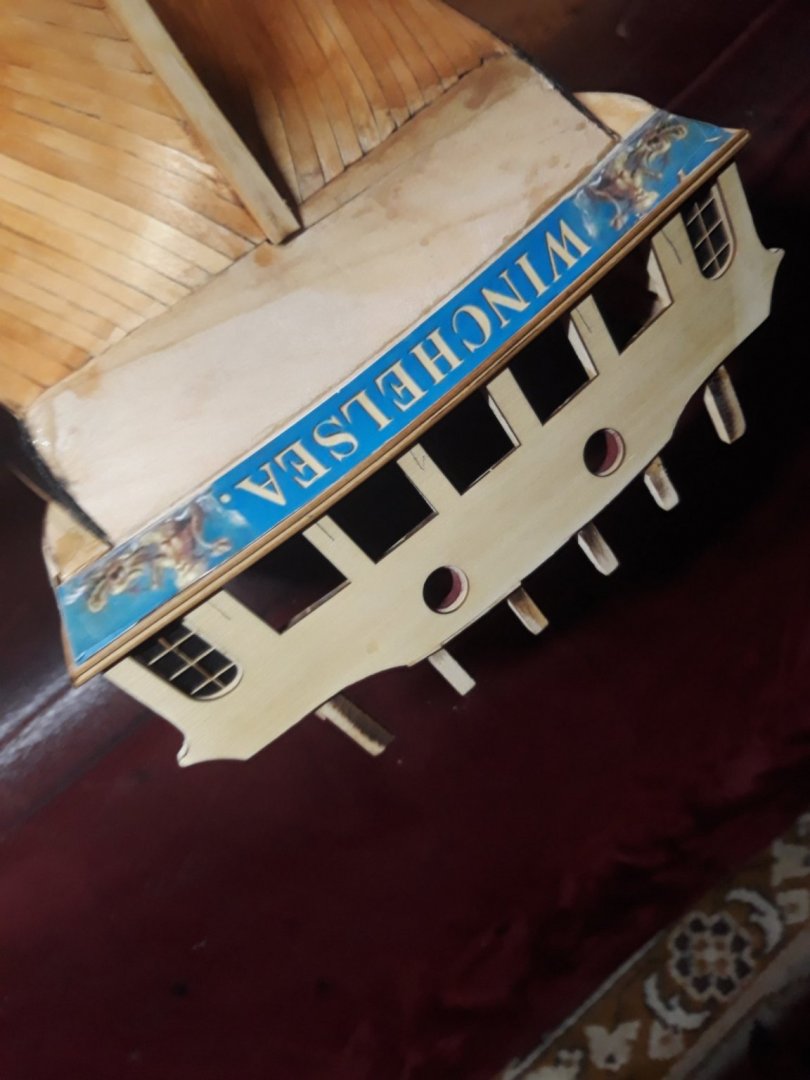
HMS Winchelsea 1764 by Matt D 1:48
in Member Build logs for the HMS Winchelsea
Posted
weee... you are there Matt, lovely work on rails and freezies. i do enjoy. those are b*tches for me those frezies, i go slowly thru them. Soon your lady will be dressed up :)) thise columns are ahead of me now...ow . vlad