

Vladimir_Wairoa
-
Posts
1,508 -
Joined
-
Last visited
Content Type
Profiles
Forums
Gallery
Events
Posts posted by Vladimir_Wairoa
-
-
3 hours ago, mtaylor said:
Thanks. Not to bad actually. I have couple of cut off pieces of plastic pipe in various dimensions. Wrap the paper around it and it does curves nicely.
") oh of course, clever. how come i forgot i do curves same way ?
oh of course, clever. how come i forgot i do curves same way ?
- Keith Black, EJ_L, Canute and 3 others
-
 6
6
-
beautiful model. congrtulations!
-
Very nice work Bill, superb looking lady. i like the sails particularly
.
-
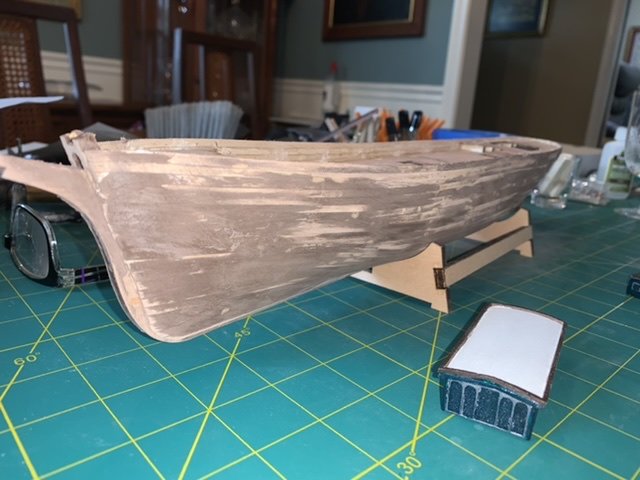
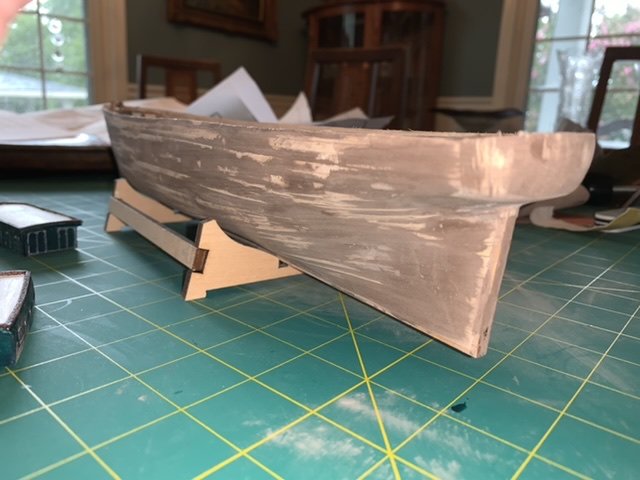
2 hours ago, Devildog36 said:
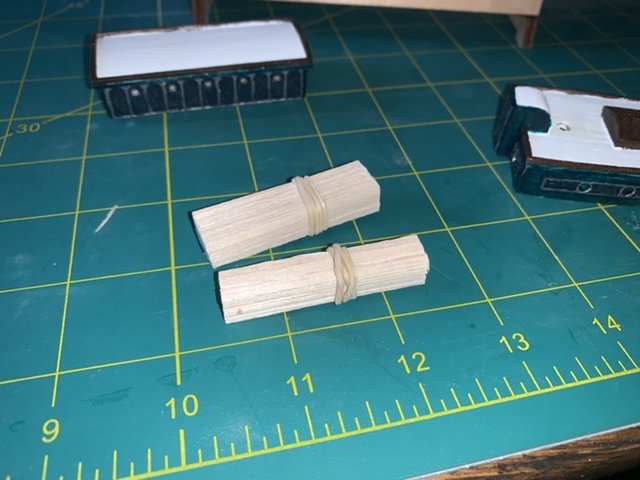
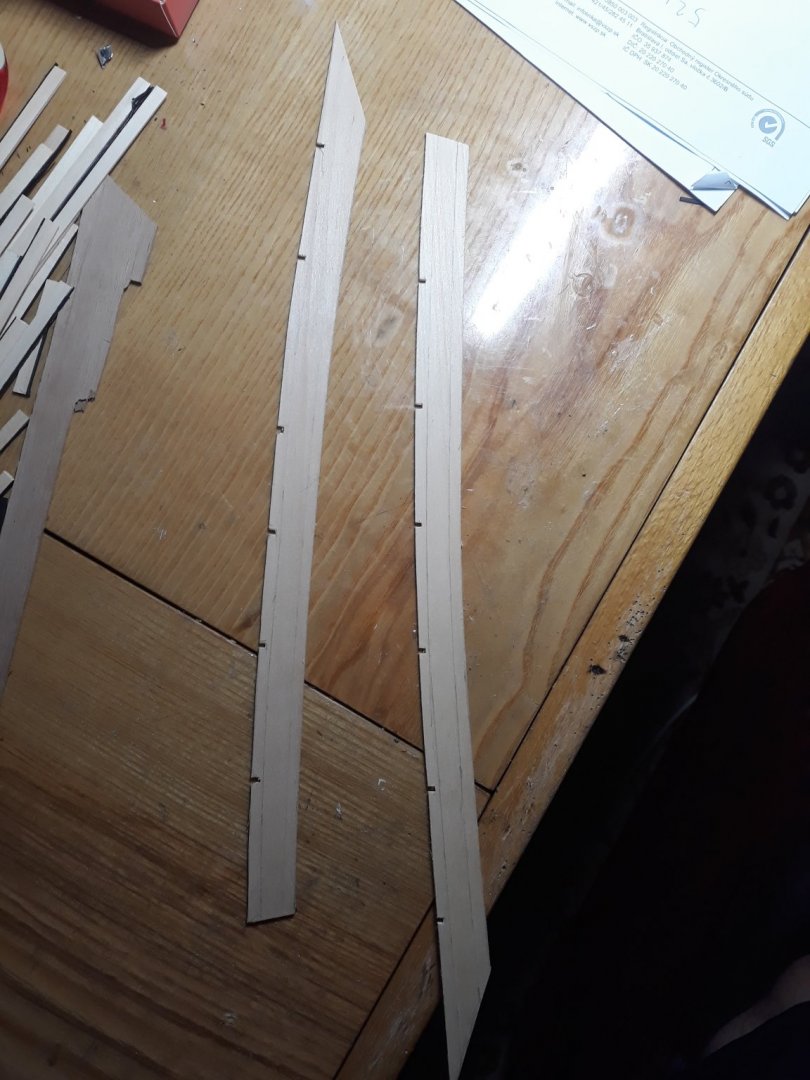
So I finished the first hull and applied some mud. Before any of you comment I’ve already done a rough sanding and, yes there is a lot of mud remaining. I treated this like the first time I primed a car. I applied tooo much mud and plan to sand..... a lot. After I get it smooth and the shape fine tuned I will apply the outer hull. In the meantime I began cutting the decking for the main deck. I bundled them together after cutting to ensure they sanded to the same dimension.

and beauty is born
nice!
-
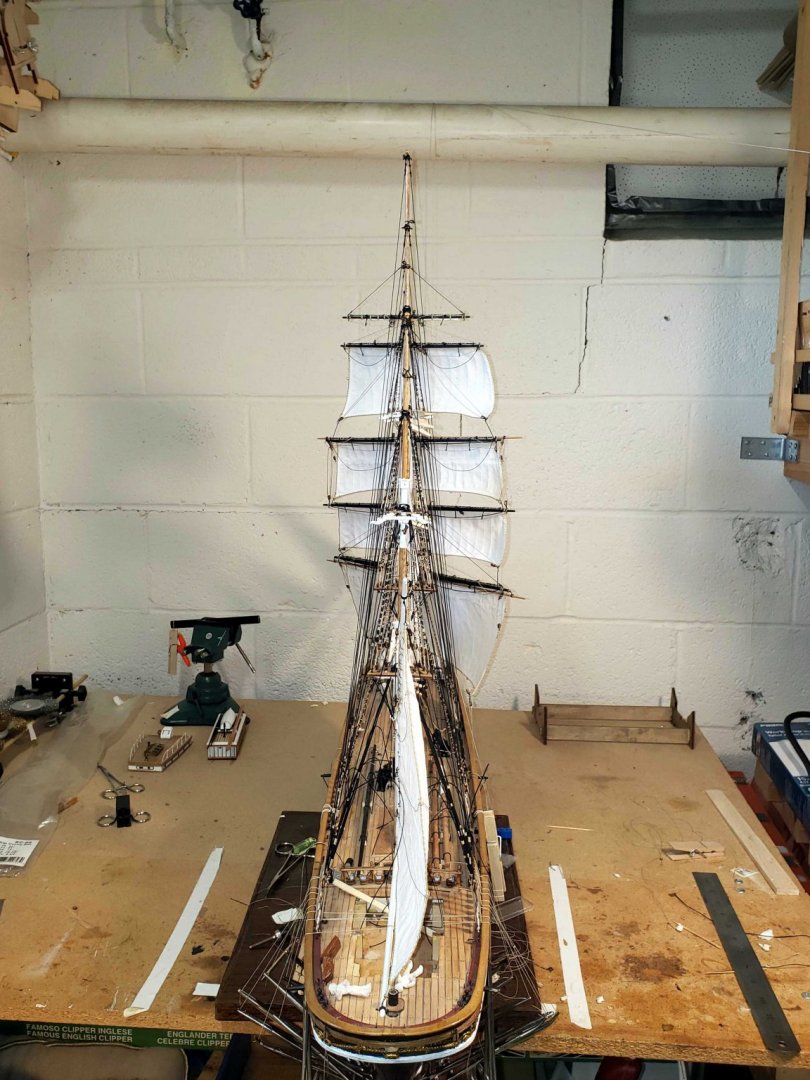
On 7/24/2020 at 8:42 PM, keelhauled said:
After letting the shrouds and lanyards sit overnight, I adjusted the tension where needed and let it sit again for a few days. Then I checked the tension and alignment of the mizzen against the other mast again. this time I got a better photo. The caps are lined up, the tops are lined up and the royals and sky are lined up. I'm sure that they never were on the actual ship. But I tried to keep the rigging ship shaped
 For reference, the only square sails set thus far are on the fore mast.

thanks for looking!!
no 1!
")
-
On 7/13/2020 at 11:43 PM, keelhauled said:
hello everyone,
thanks for your support Harry! I've been learning to use the lathe. I've been accomplishing turning threads at the correct pitch and turning rods to the correct diameter within a 1/10000 of an inch. I have a way to go to before tackling anything of substance. working on skills. I'd like to make some parts for my tiny wood working lathe (like a following rest) and make some jigs for modeling. Eventually I want to turn the ships bells, stanchions for the rails, sheaves and maybe cannon and belaying pins.
Sorry, I haven't posted. Unfortunately, I've been working long hours as a result of COVID-19 and when I've had time off, I wasn't overly productive and didn't feel like being in front of a computer screen. I don't think I checked email more than once a month. Anyway, I have worked on the Model some when I can get myself motivated - seem to be in a funk and extremely tired. Then I moved my home work environment from my house in Virginia to my house in Florida for the month.
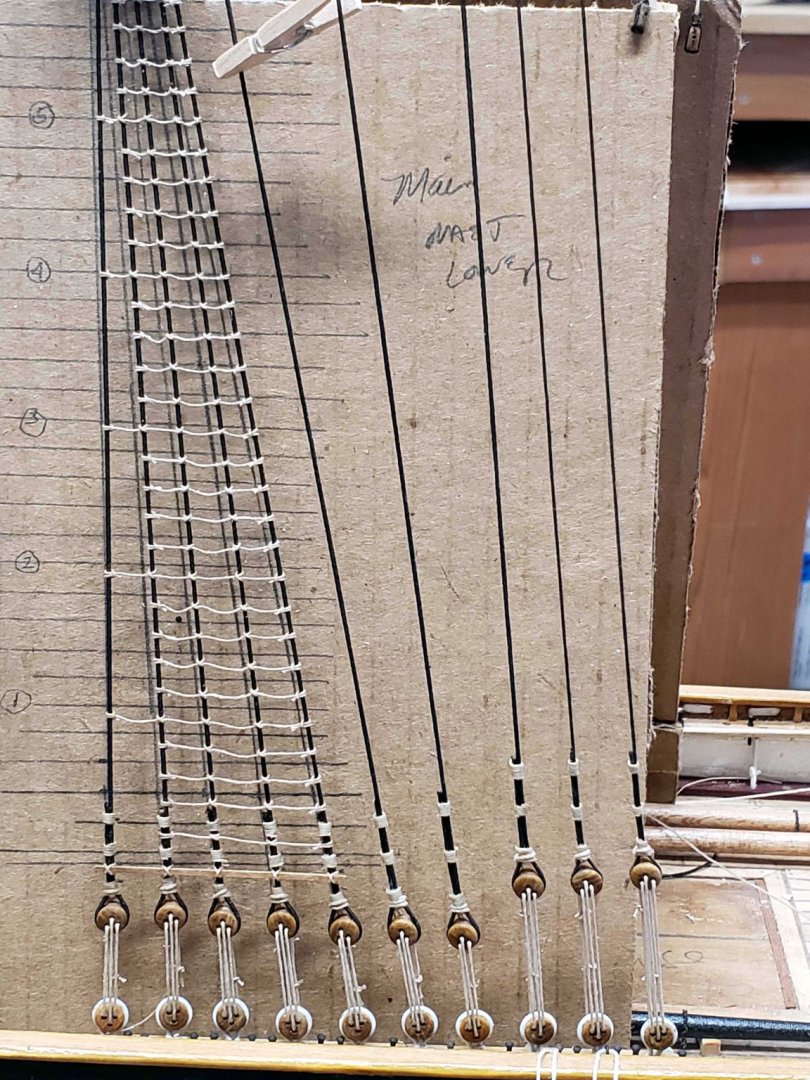
On to rigging -
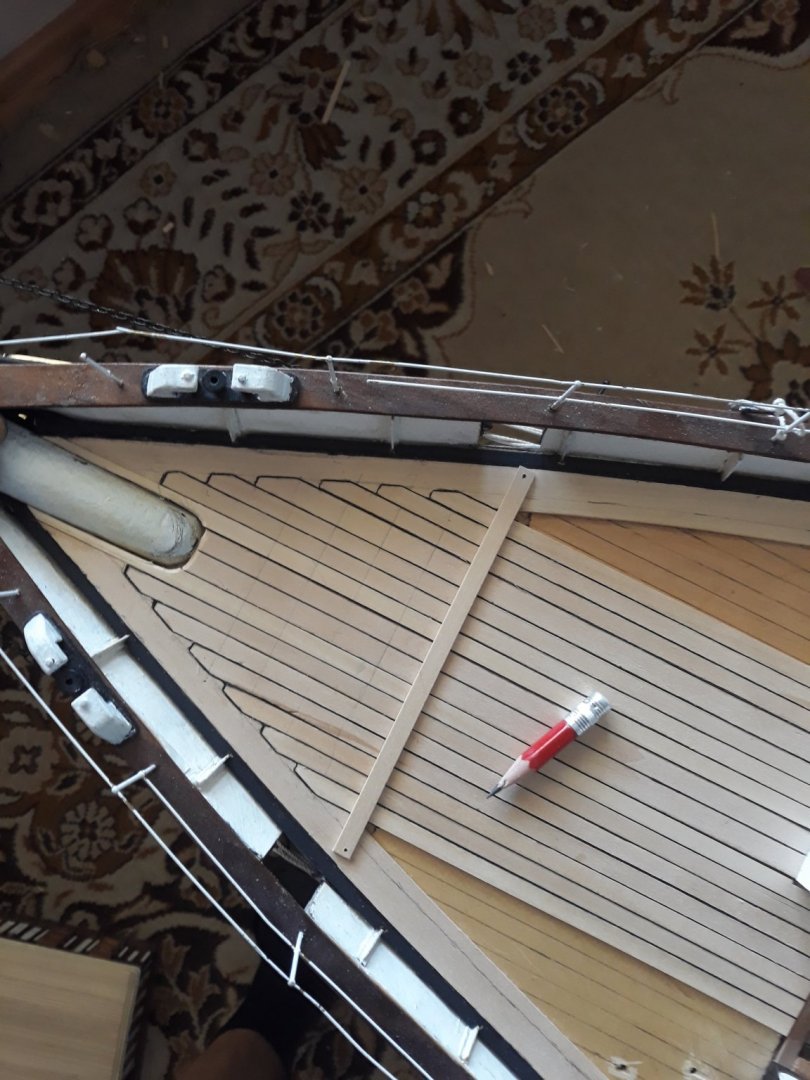
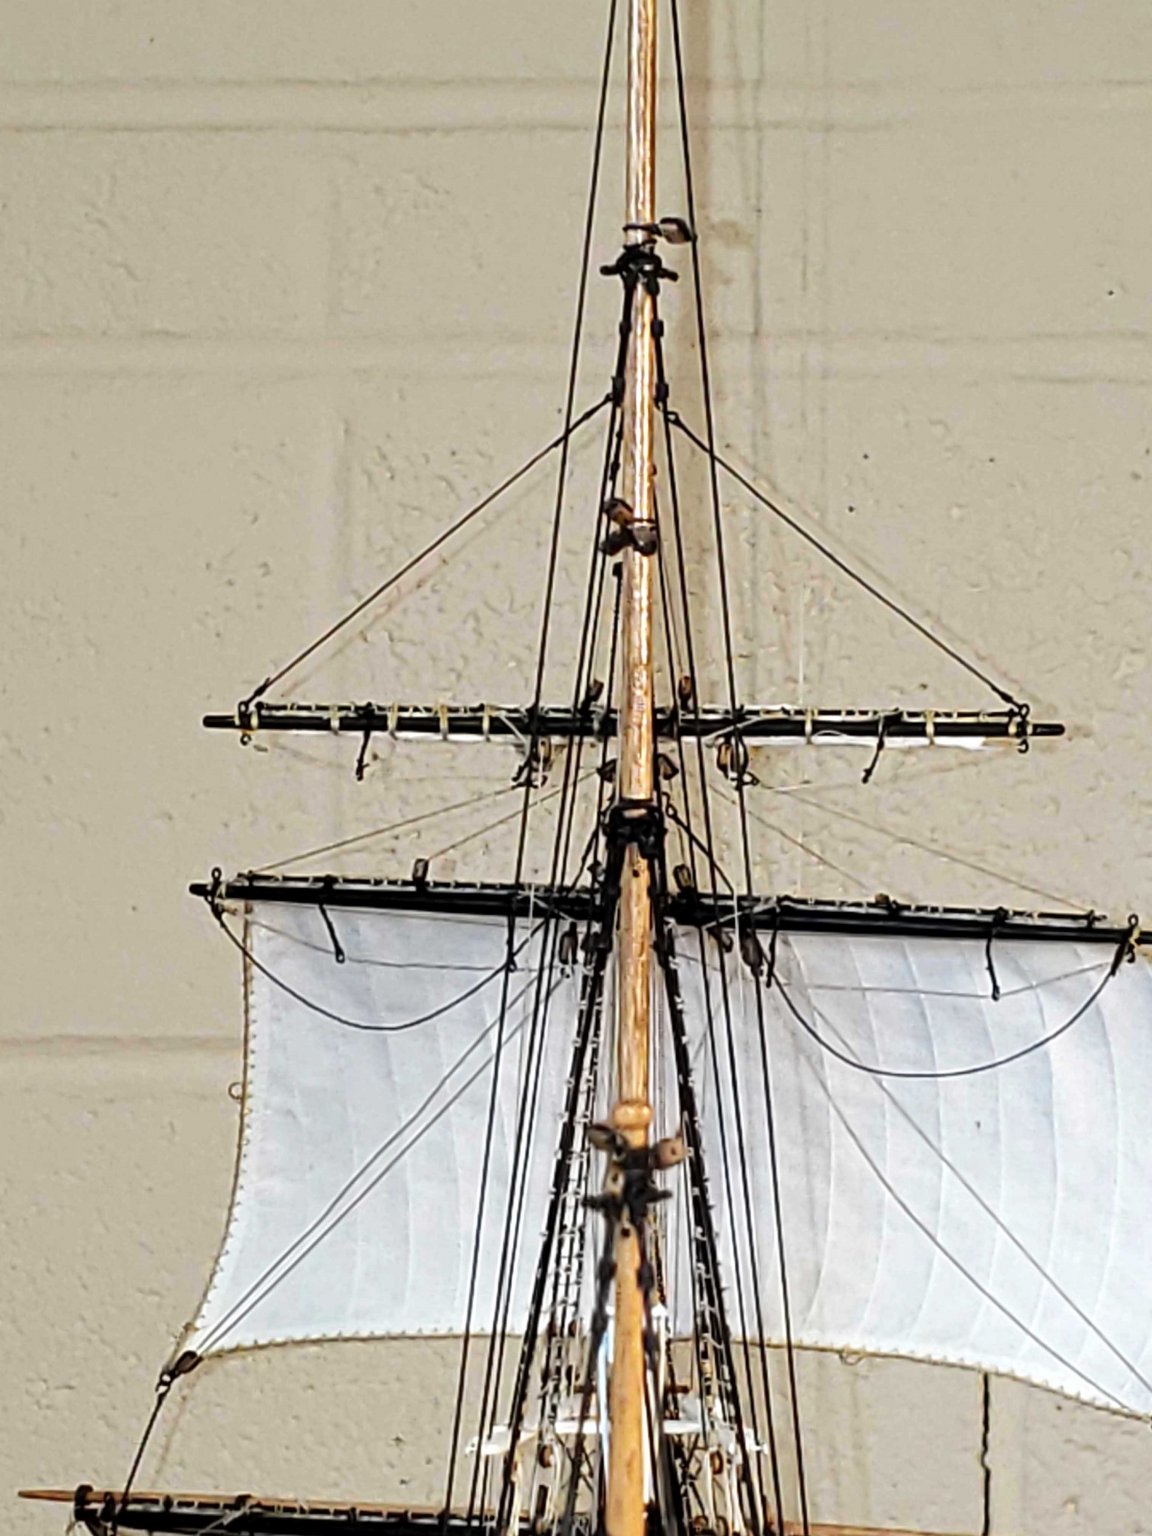
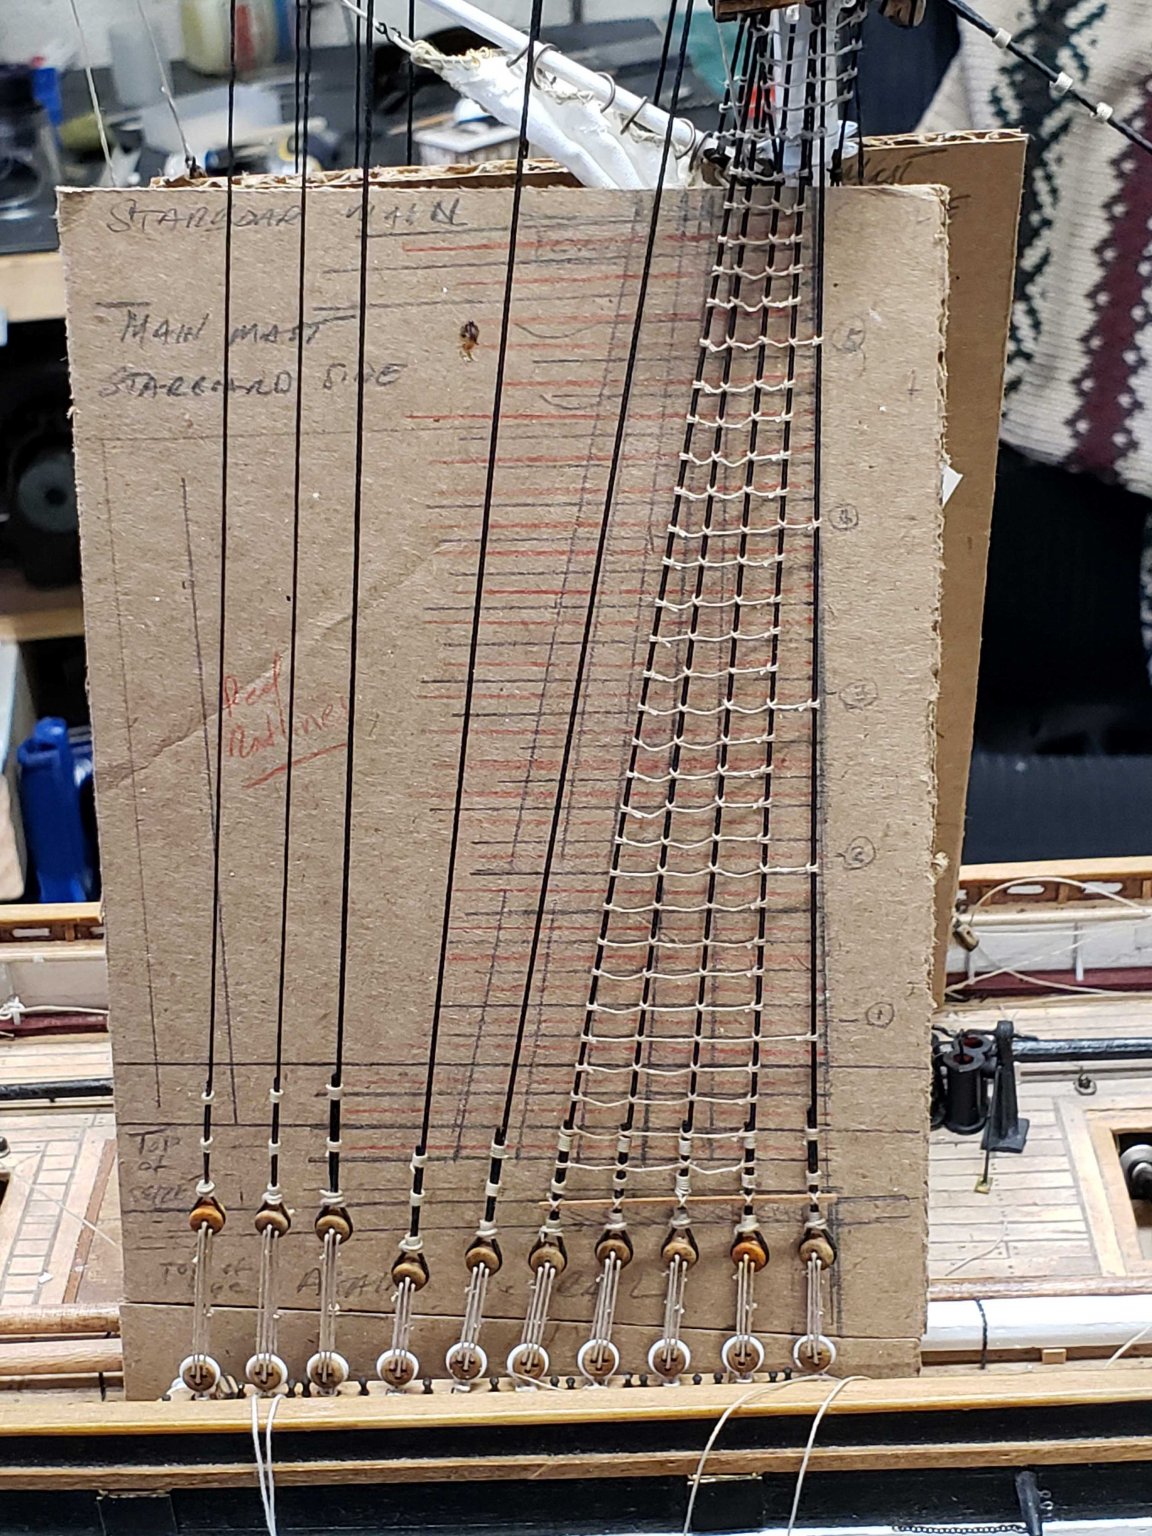
I continued work on rigging the mainmast. I continued with rigging the ratlines, using templates created for both sides.
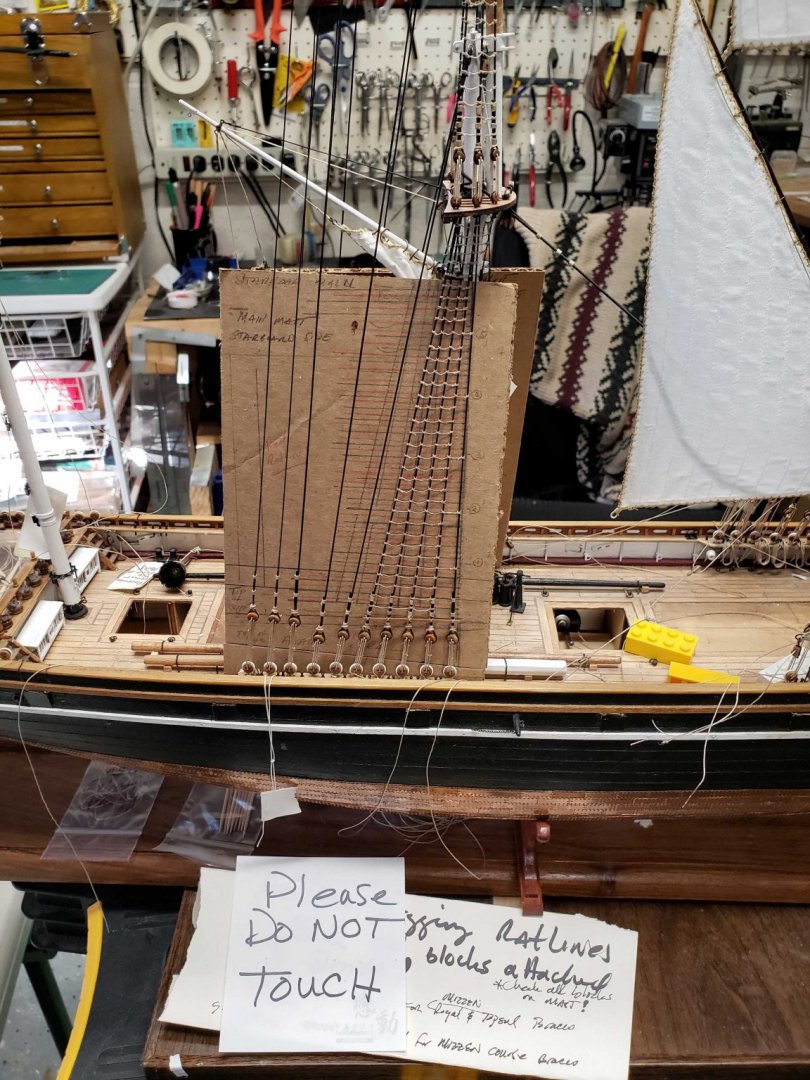
The template is designed to be up against the shrouds to align the ratlines. The view of the template isn't aligned with the ratlines in the photo (its leaning against the mast, so the ratlines don't line up with the correct template lines.
You might notice that there are two groups of lines red and black. I screwed up which was evident when I checked the port and starboard alignment and height above the deadeyes. The red lines are the corrections to the spacing.

port side
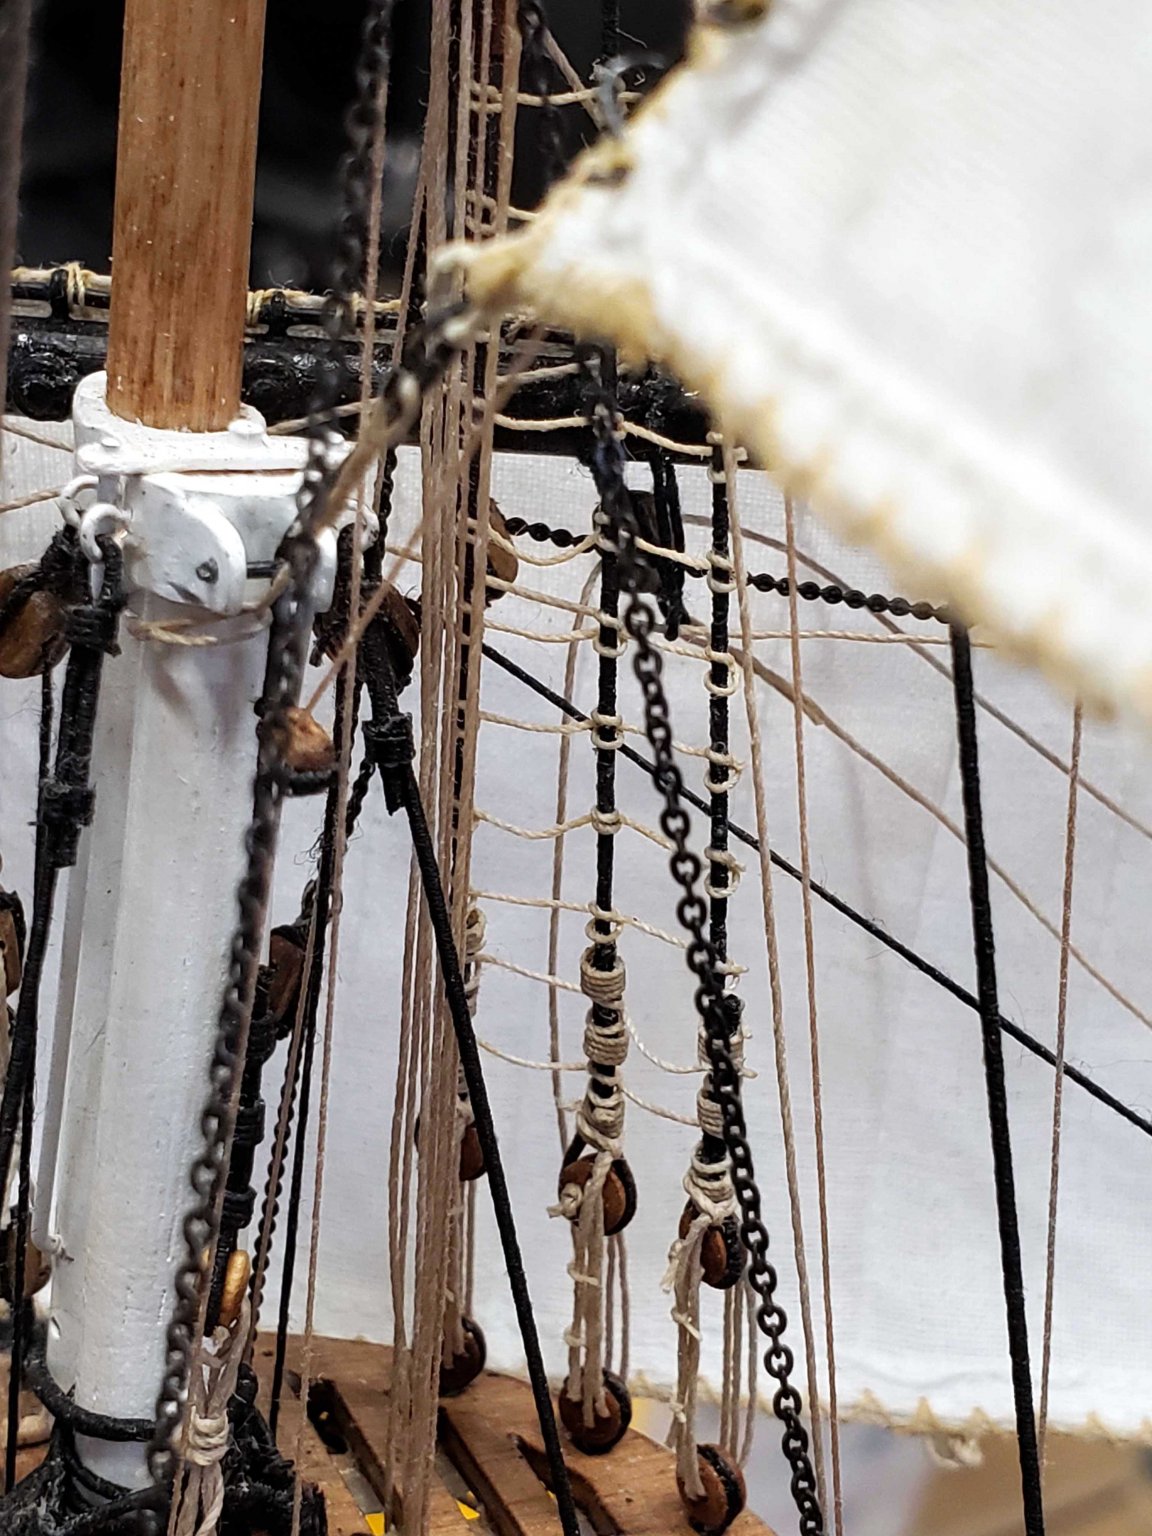
some views of the foremast and the pin rails. You can see the serving of the main stay.

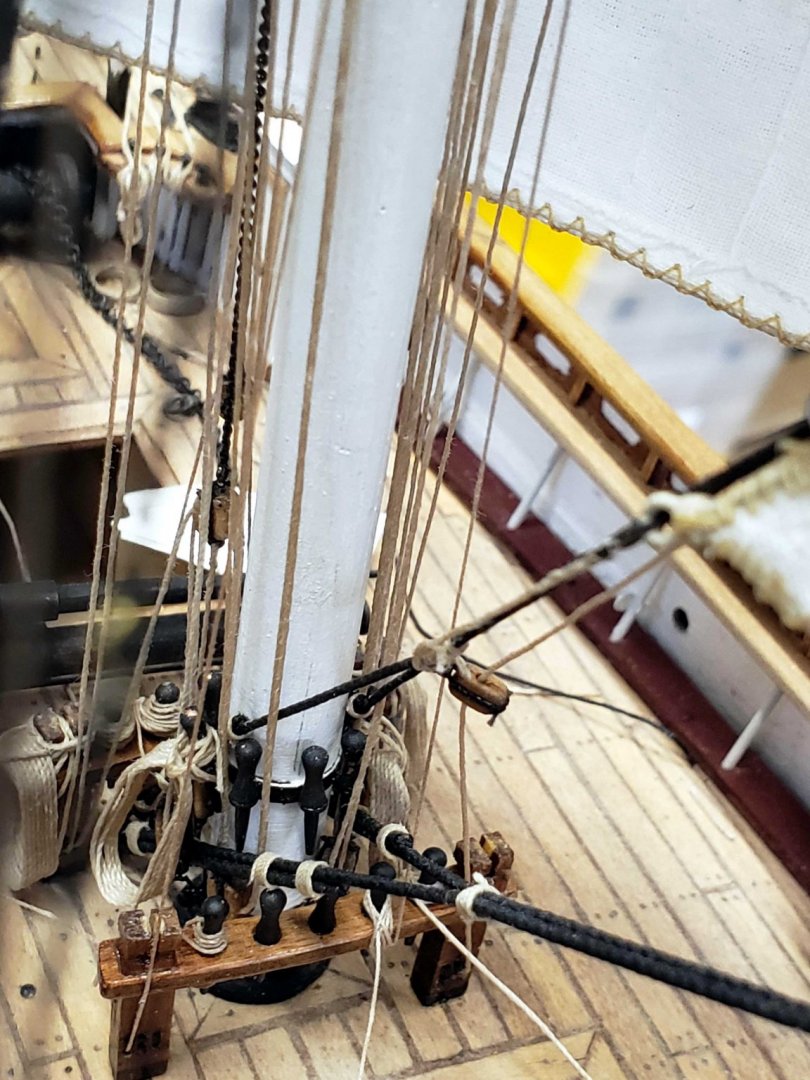
a view of the fore top from aft. can see the

Next is some work on the ship's boats
thanks
Marc
oh yeees how come i have missed this so far Mark ? SUuuperb work ! astonishing. i only cry i cannot continue rigging on mine. ;( . pressing follow now.
-
-
19 hours ago, Mike_In_RI said:
Although it has been a month since I've had a log update, I have been working steadily on my knot and splice tying shortcomings. So, I am now an owner of The Ashley Book of Knots and The Arts of the Sailor as well as a practice kit of three strand, right laid, synthetic rope. All in the effort to set up the harpoon and lance splices in the scale required in the plans. I have learned some sailor vernacular and really got into the weeds of tying essentially all the assorted variations of the eye splice... sticks, tucks, against the lay, with the lay, marlin splice, half tuck, Z, S,... whew!
On to the rope mountings of the harpoons and lances. The harpoons use a lightly tarred version of the whale line which is right laid, three strand and ~.045 inch in scale. The only .045" miniature rope I have is the Syren left laid, 4 strand rope and can't seem to find any other source of the right laid three strand version. So, just to keep the project moving, albeit slowly, I went with what I have in stock.
Harpoons: Syren .045" left laid, 4 strand, light brown rope "bent to the shanks with a round turn and eye splice". The splice is stuck against the lay and terminated with just one tuck. Two tucks, especially with 4 strands, looked too long to me. As is, I think the eye splice looks a little chubby.
Lances: Syren .025" left laid, 3 strand, light brown rope with a Marline splice stuck into the lay, skip two crowns and tucked one more time against the lay. I could not repeat a .025" regular 3 strand eye splice with any good consistency.... more practice is in order as usual!
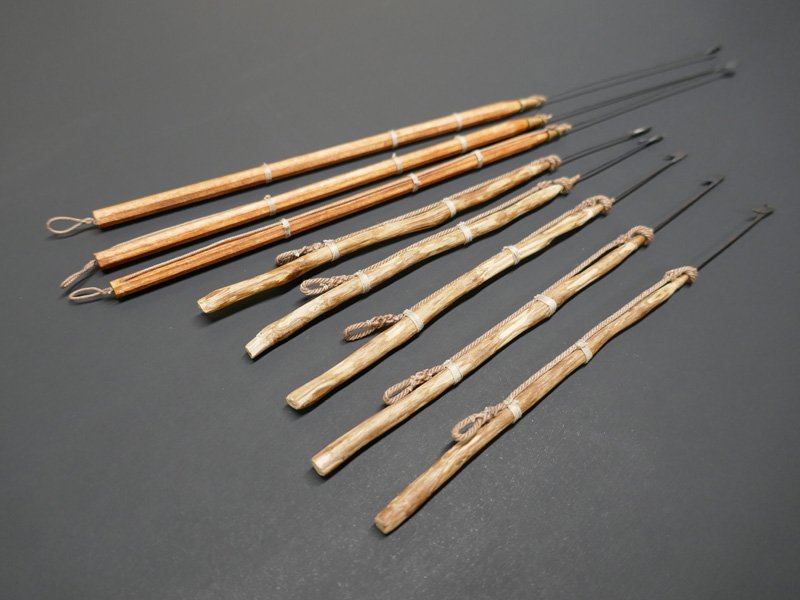
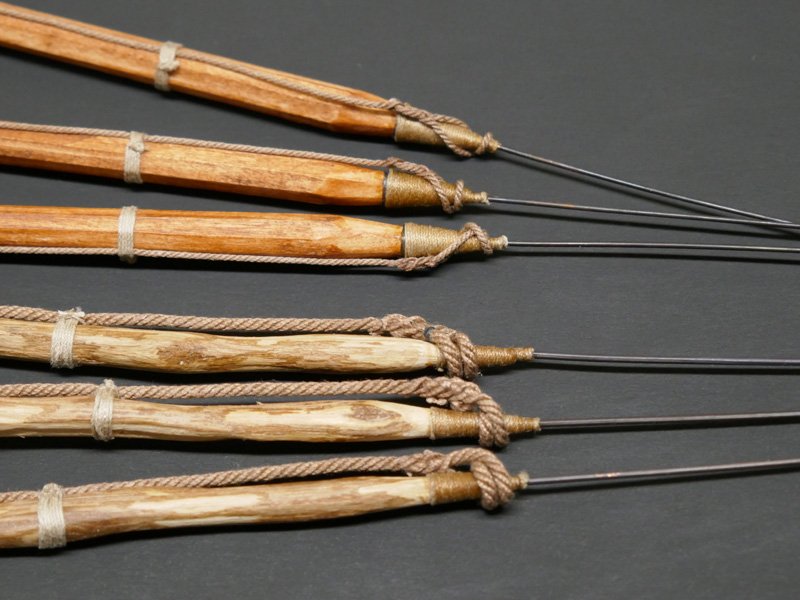
The last big storm that hit Rhode Island was about 3 weeks ago so I finally got a reasonable amount of dead oak branches to make the harpoon shafts. The grapnel and boat spade is next along with a few remaining small items.
Thank you for the likes. I really appreciate them and any comments and suggestions.
Mike
Amazing Mike. wow.
-
On 8/27/2020 at 12:16 AM, mtaylor said:
Finally, an update. After several tries, I finally got the garboard strakes like I want them. Here's photos of side fore and aft. On to the wales area. I'll touch of the sanding and possibly need to add a bit filler up there. Things got bunged about while doing the garboards.
perfect sanding on gunwales shapes Mark. like . that must have been tough. Vlad
-
Went theu log Ken, very nice work exceptional planking, inspired. following V.
- mtaylor, KenW and Edwardkenway
-
3
-
-
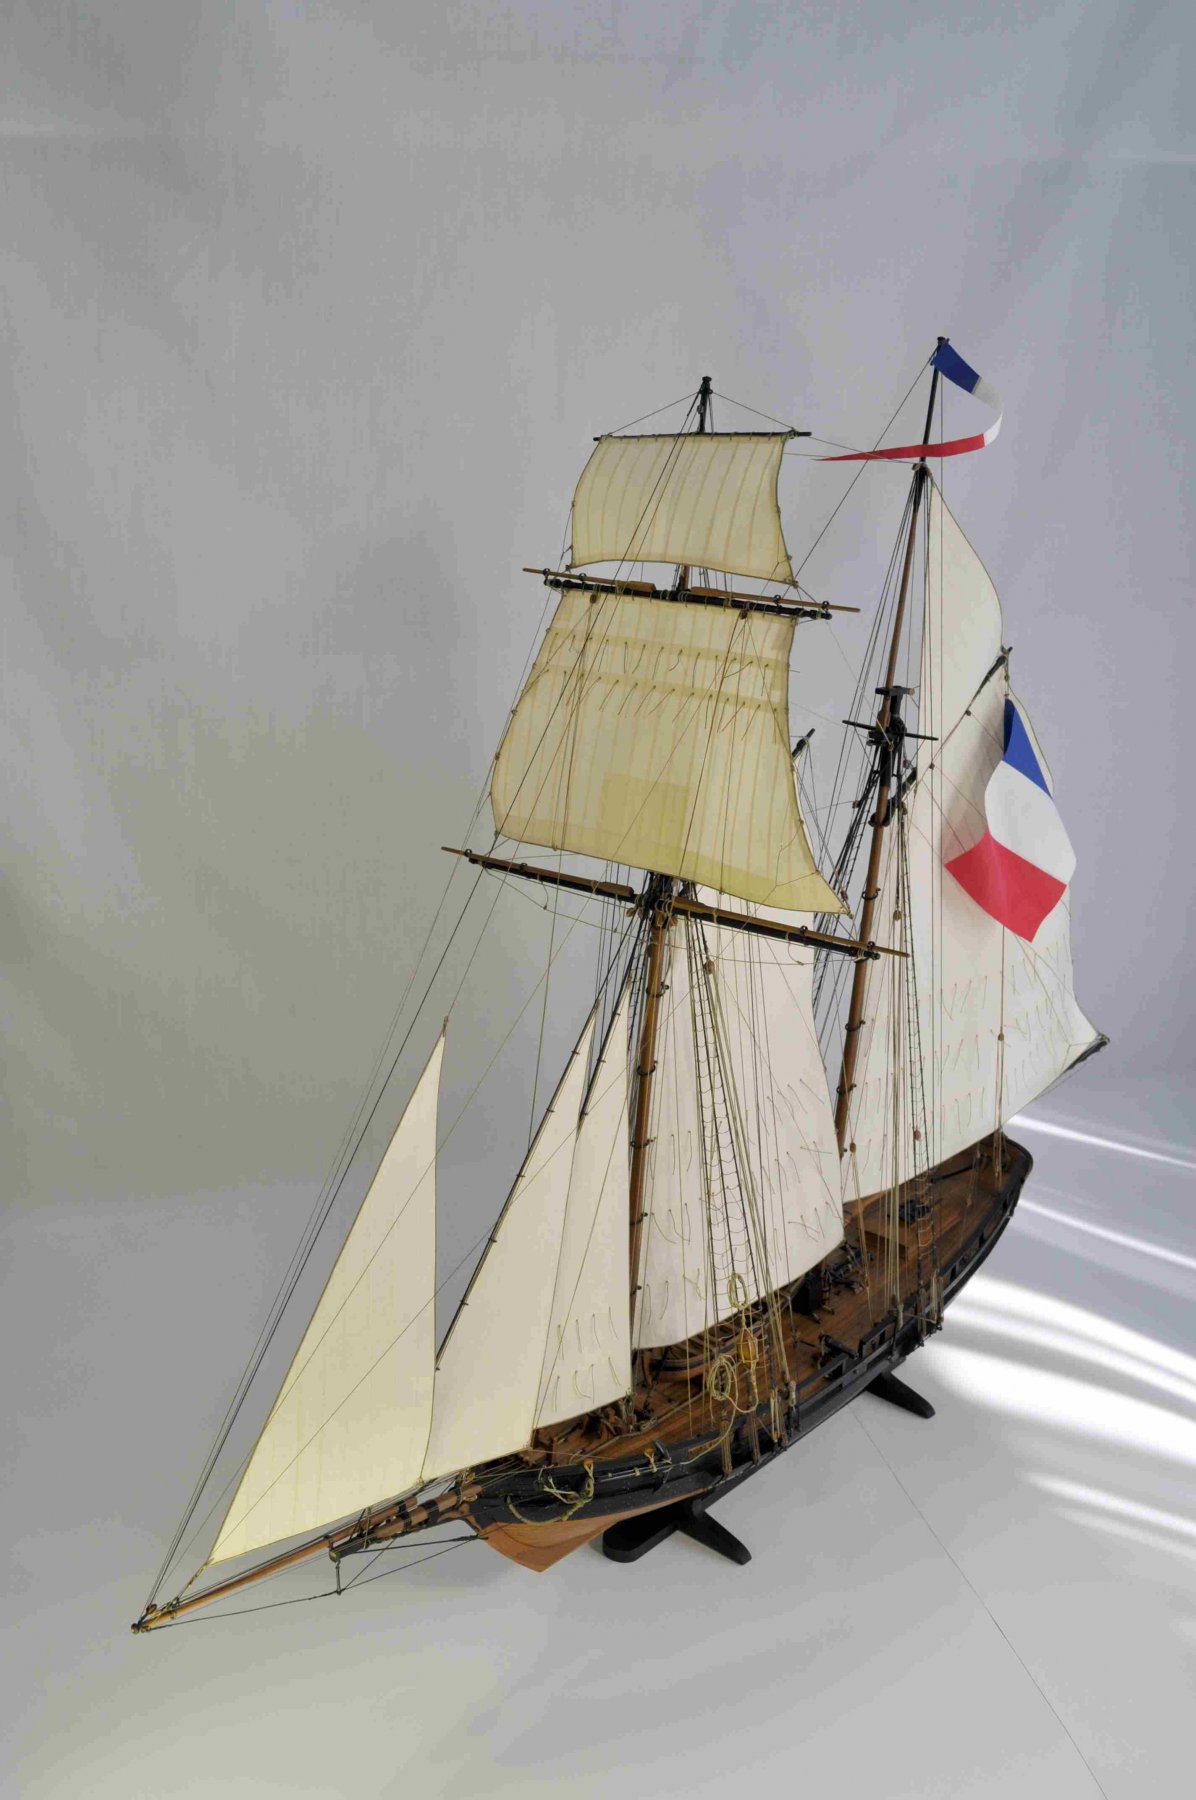
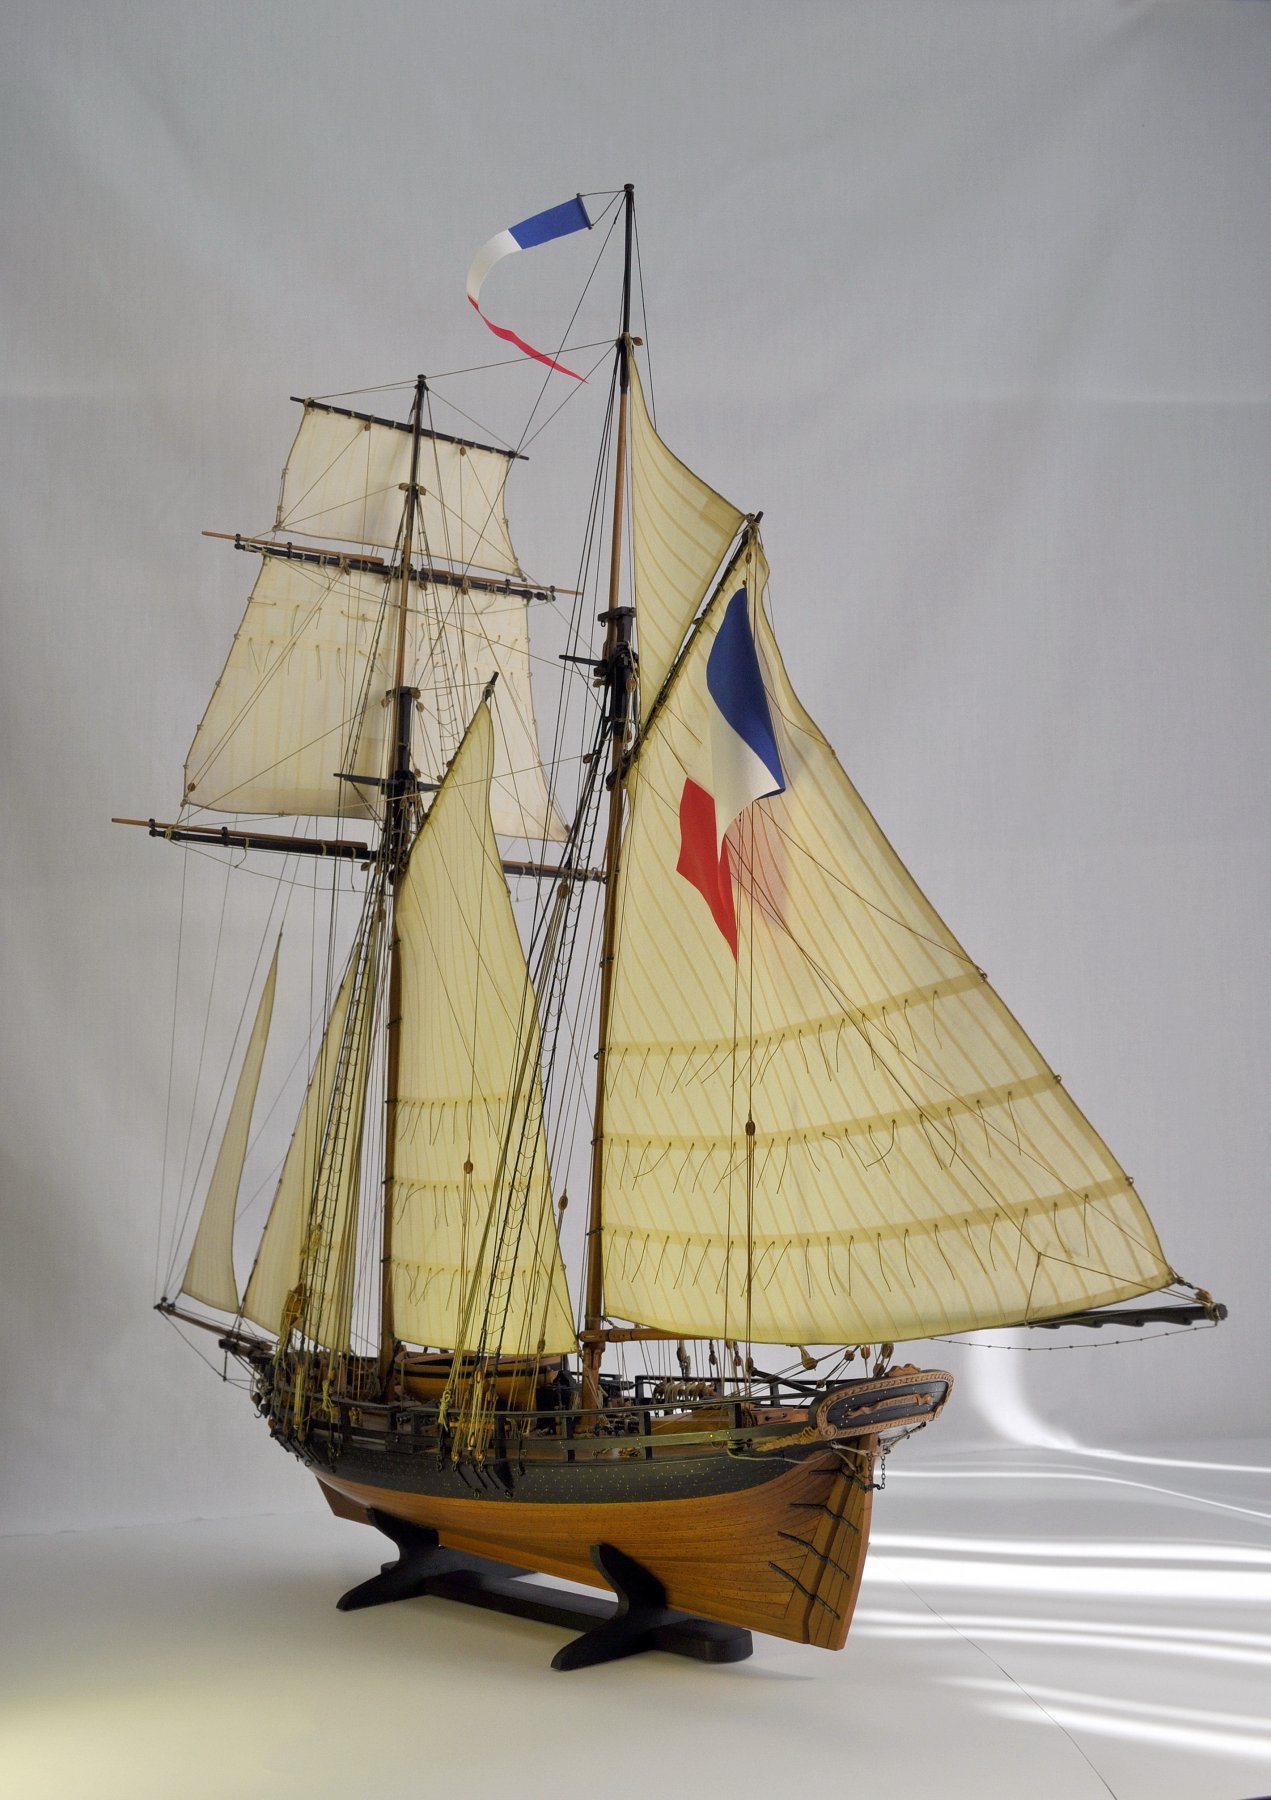
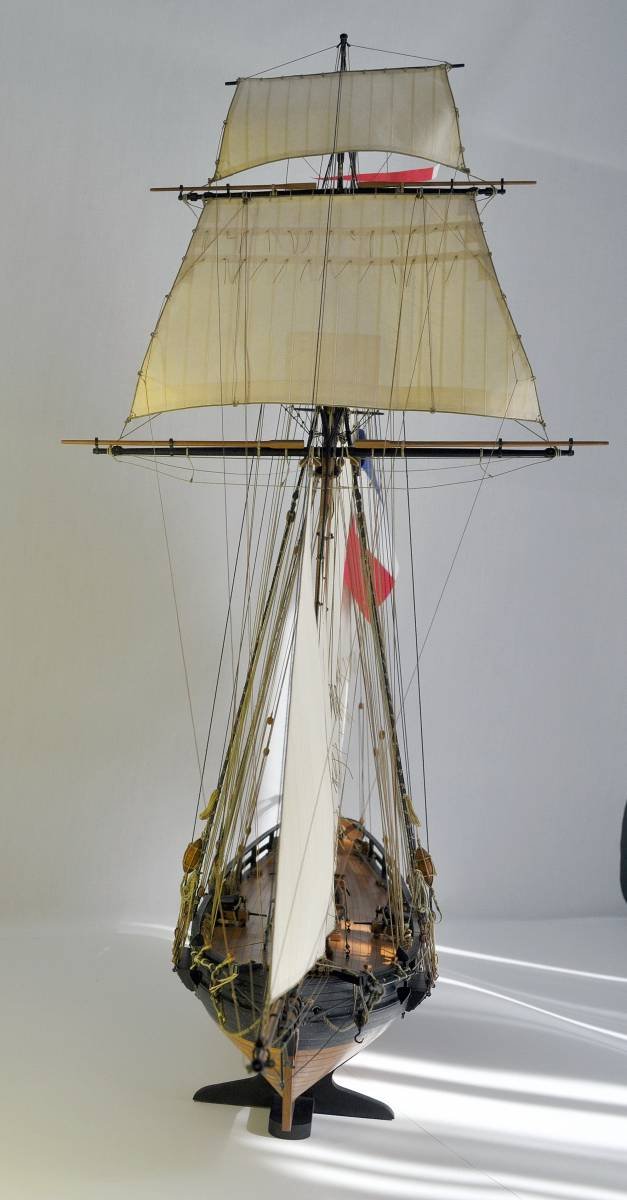
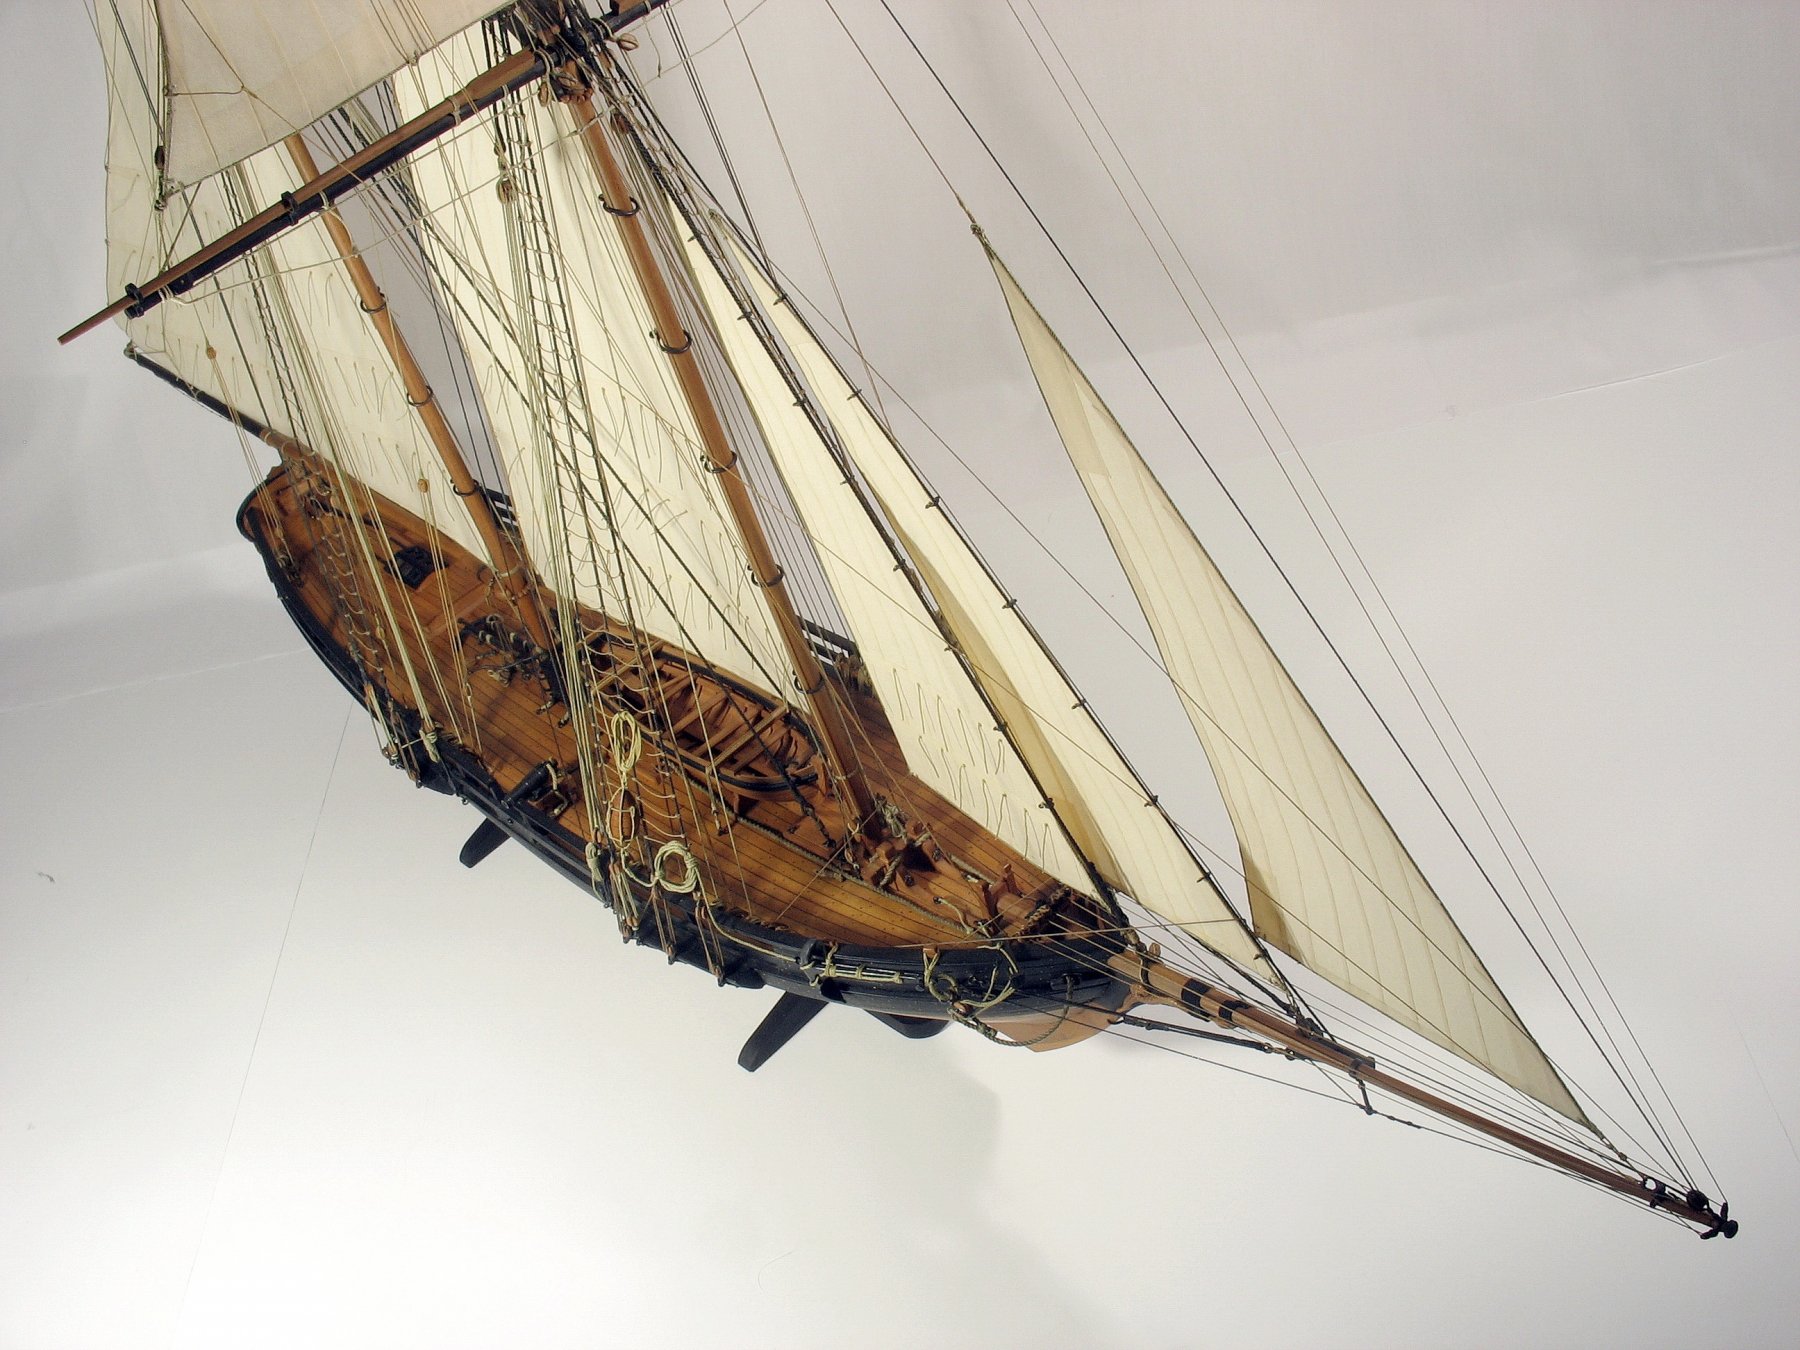
On 8/9/2019 at 11:33 PM, GrandpaPhil said:
The Prince de Neufchatel is done.
It’s my first ever scratch build.
I learned a lot from this build.
I thoroughly enjoyed it.
It’s not perfect, but it’s not bad for a first try.


Beutiful GrandpaPhil. i can imgine her fly under such enormous sails. thak youvlad
- mtaylor and GrandpaPhil
-
2
-
On 12/15/2019 at 6:41 PM, Gregor said:
The interior, part two:


To be continued soon...
oh my. thank you . so sweet .
-
On 8/16/2020 at 12:49 AM, Edwardkenway said:
Hi again, thanks to everyone who has looked in and also for the likes.
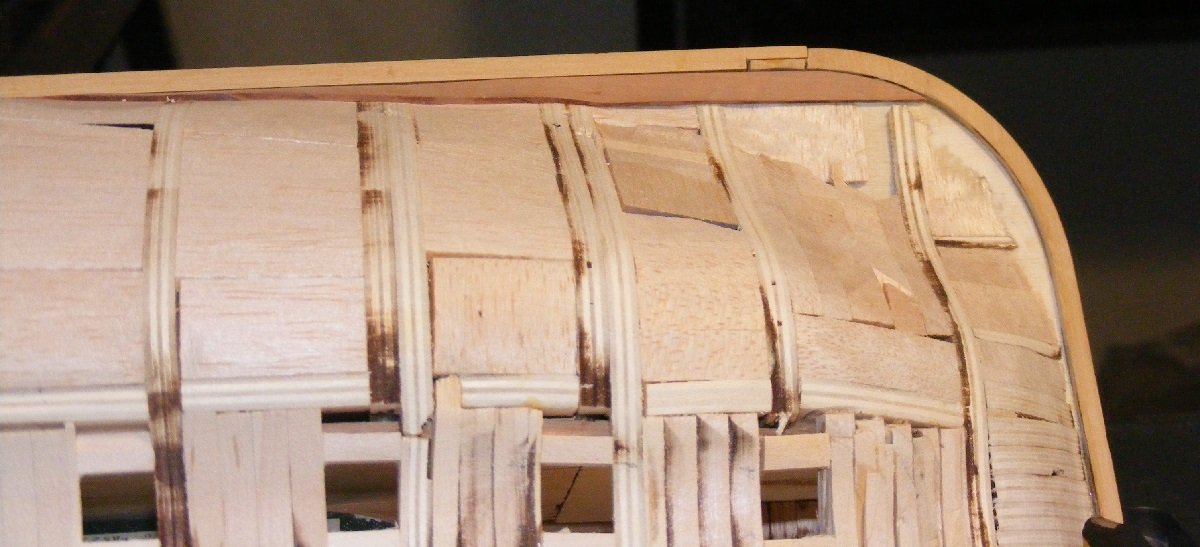
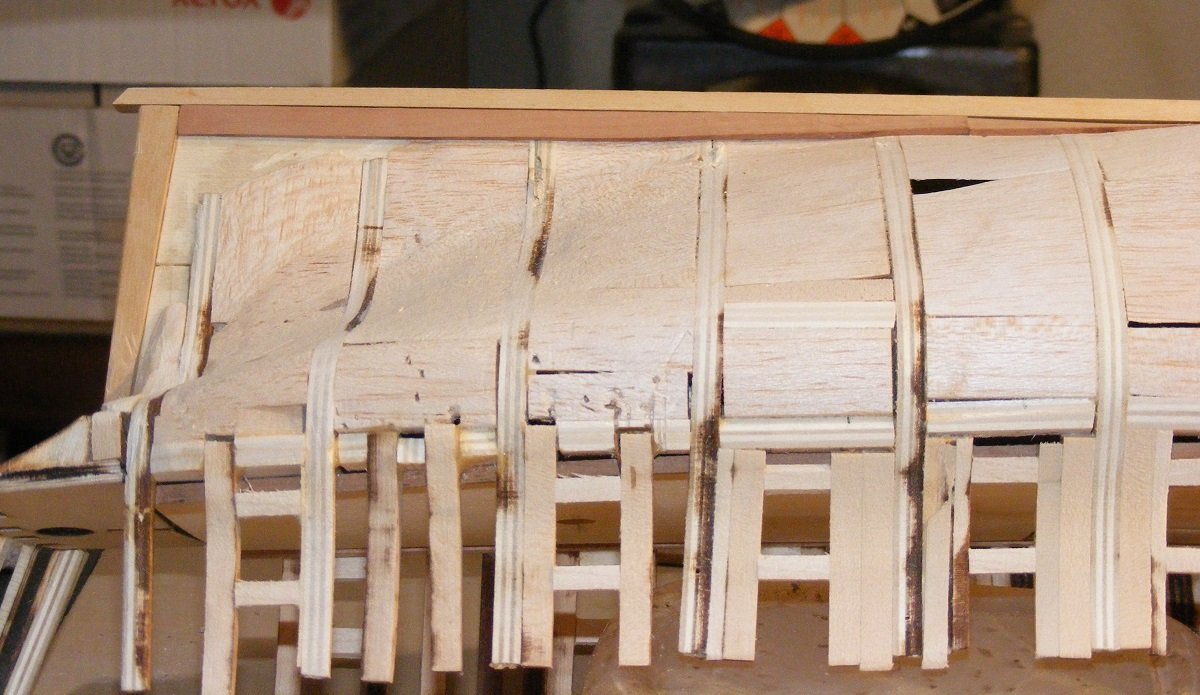
Planking on the port side slowly proceeds, as I put planks on from the keel and the main wale, I kept adjusting the marking out for the plank lines and it seemed to help.

Another day and it's done, I'm much happier with this side than the starboard,
stern planking is also done, but I think that I will put a moulding across the bottom of the counter.
just need to give both side a good sanding, paint the main wale and a coat of matt varnish or oil.
I am happy I've got the planking done, I'm hoping that when I do finally start to planking Winnie that the AYC will edge bend better than the walnut I used here. The cedar I used on Triton definitely in my opinion took bending alot easier!!
Til next time
Cheers 😃😉👍
i clap hands as well very very nice. hat off. .Vlad. british cutters are so special.
- Edwardkenway and FrankWouts
-
2
-
On 6/6/2020 at 12:20 AM, Keith Black said:
Thank you Roger, Tony, and Gary for the comments and kind words and thank you to all for the likes.
The two 100 LB Parrott breech loading rifles are done with the exception of the circular deck tracks. I'll be making those next.
100 LB Parrott breech loading rifle statistics: Bore, 6.4 inches. Barrel length, 138 inches (11.5 FT.) Barrel weight, 10,266 LB. Shell, 80 or 100 LB. Charge weight, 10 LB. Maximum range, 7,810 yards at 30 degrees (80 LB). Flight time, 32 seconds. Crew size, 17. This from Wikipedia.


Very nice clean workKeith, I like the floor particularly among other things. like real. what an interesting ship.
- Keith Black, KeithAug, FriedClams and 3 others
-
6
-
On 8/24/2020 at 8:31 PM, mbp521 said:
Hello again everyone,
So it has been a very unproductive productive week or so.
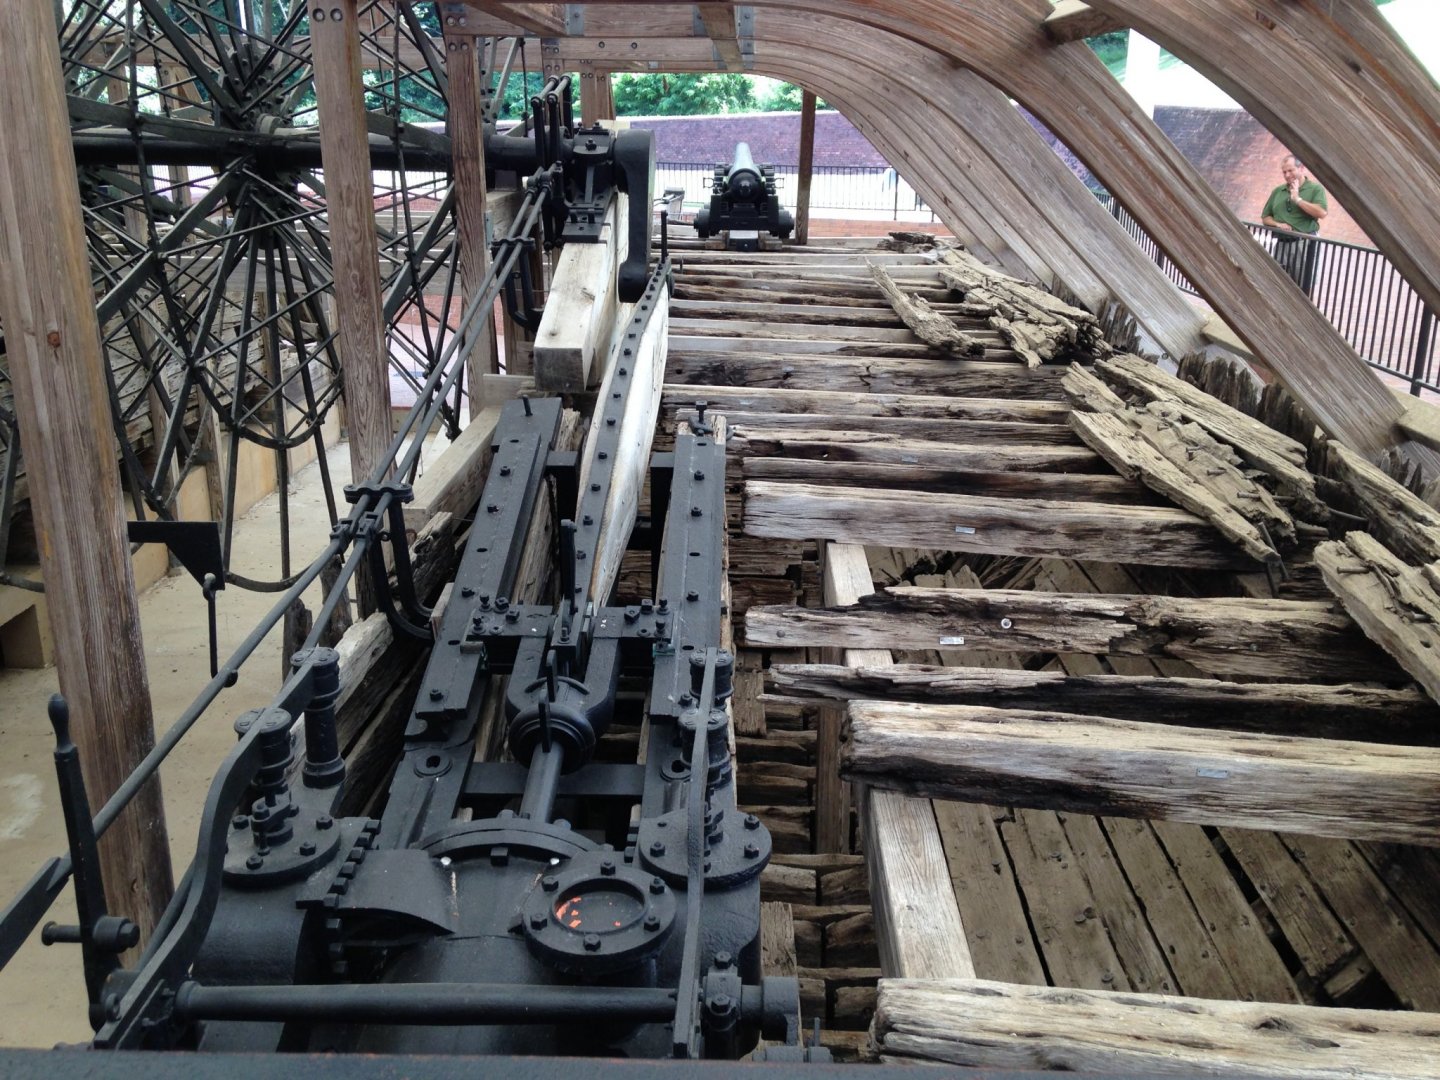
I started working on the engines last week and got them about halfway built when I started to realize that they just weren't looking the way that I wanted them to. Unfortunately there are no real good detailed drawings of them (the HSR drawings are somewhat useful but are still a little lacking in details), so I am having to rely on photos of the actual Cairo and other builds to get an idea of the shape and reasonable size of them.
Working off the photos is tough given that everything is painted black and doesn't show a lot of depth.
So I gave it a shot to see what my first version would look like.
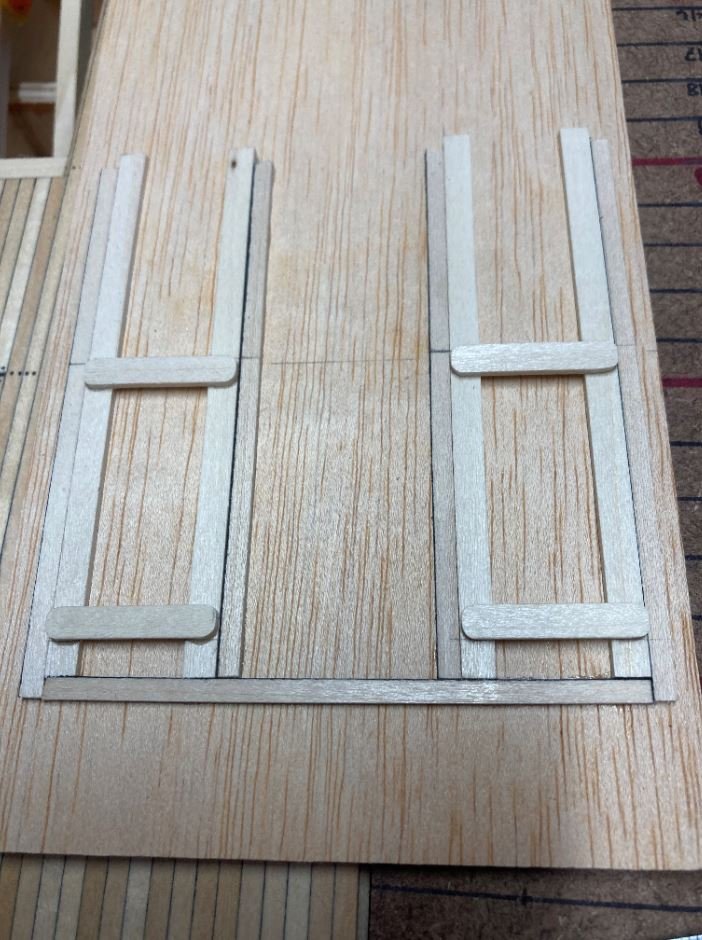
I started with the bottom support rails. The width was pretty easy to figure out since the HSR Gun Deck Plan drawings have them in place and since I have the plans scaled to 1:48 I could get this part close.
I then turned down and carved the connecting yokes.
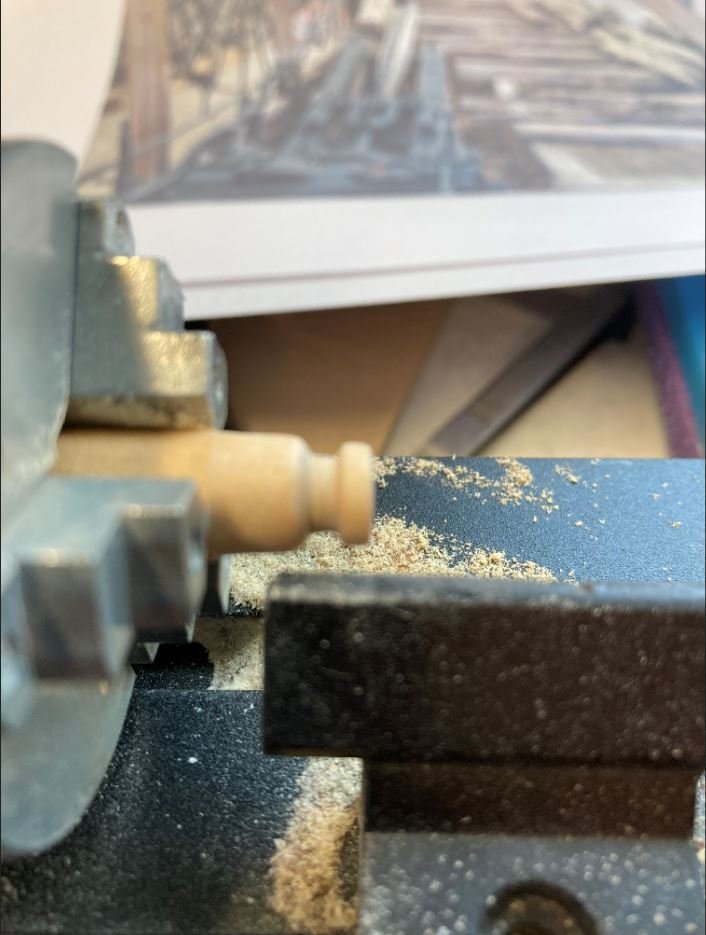
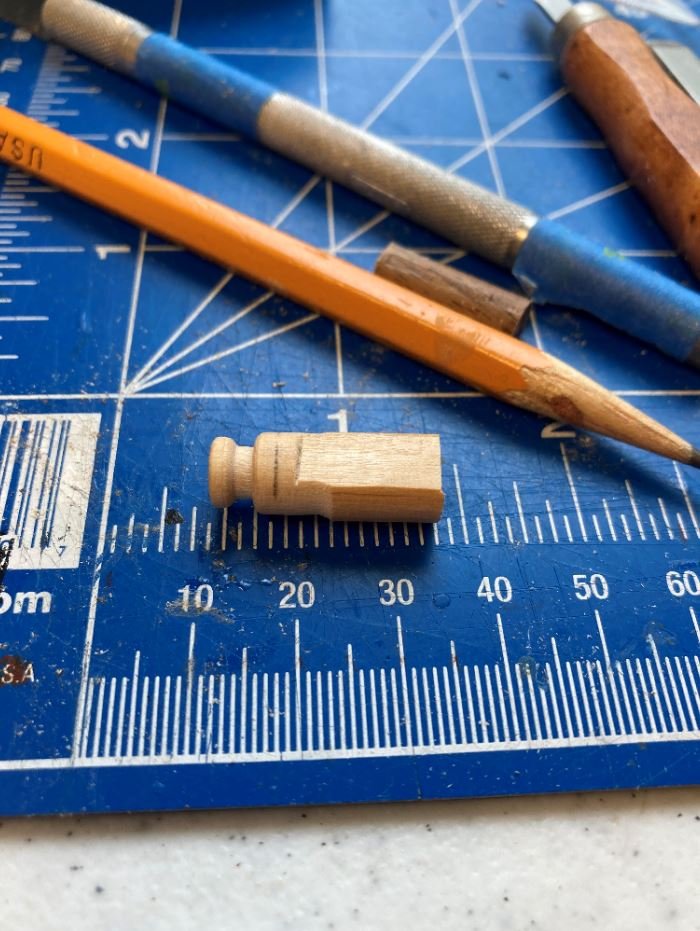
Then using 3 different size dowels I made up the steam drums and piston rods and laid out the assembly.
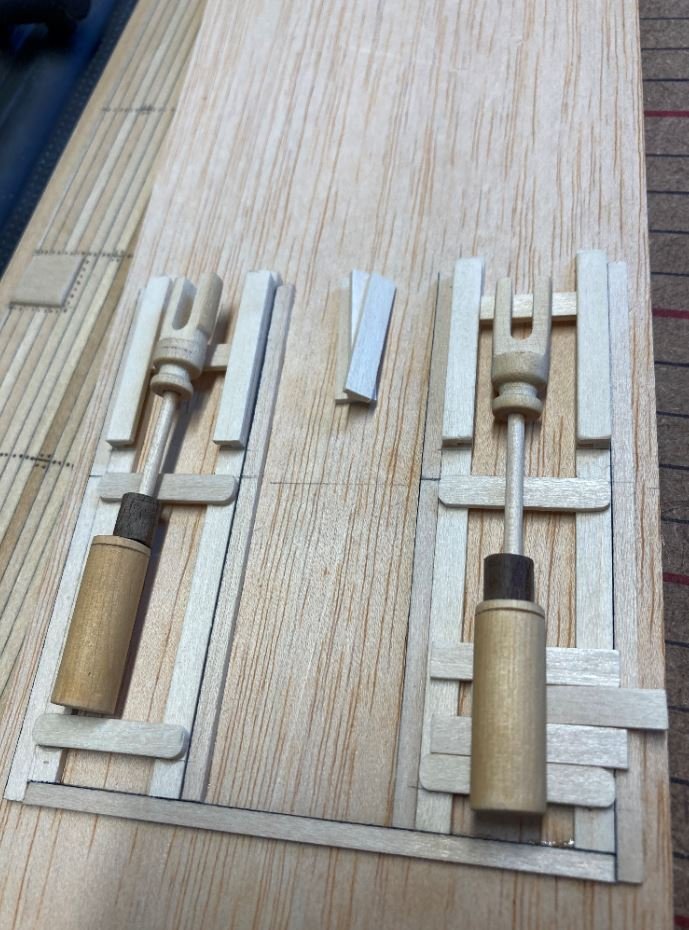
It was here that I started to think that they just weren't looking correctly proportioned. So I decided to work on other features and figured I'll circle back to these when I can get a better understanding of the size proportions between the assemblies.
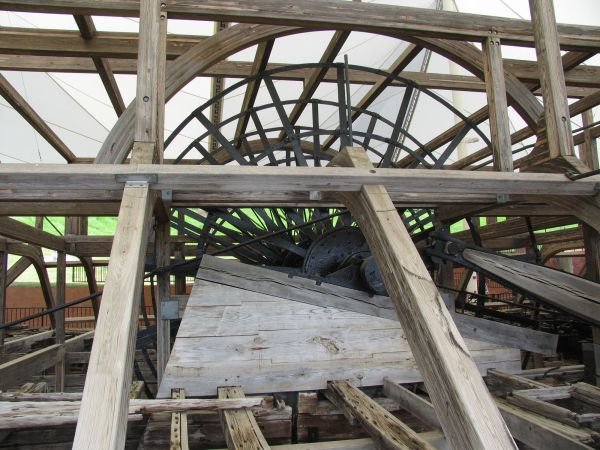
So I decided to start work on the support pillars for the engines and paddle wheel. These were a little easier to figure out. The hardest part of this was getting the height position of the paddle wheel and the correct angle of the timbers.
These are the ones from the actual boat. Although they are not original, they gave me a general idea of how they were constructed.
These are my versions.

These are all just dry fit for now. I am waiting on another order of scale lumber to complete some of the interior walls. Once I have those in place can get everything glued down.
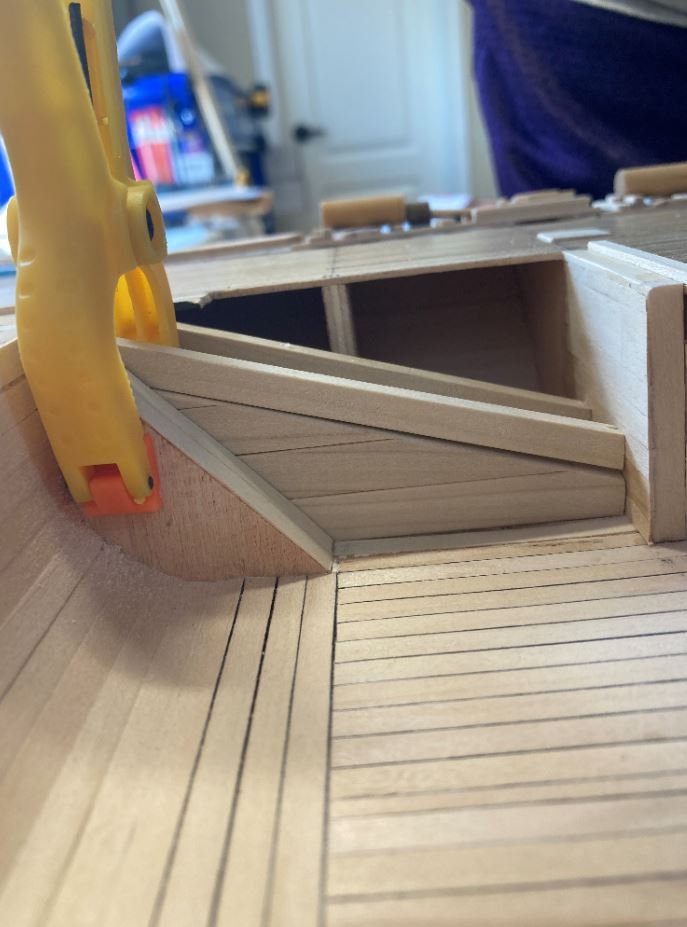
Next, to stall for time while still pondering my engine dilemma, I decided to get the toe boards in place for the crew quarters.
Starboard quarters.
Port quarters.
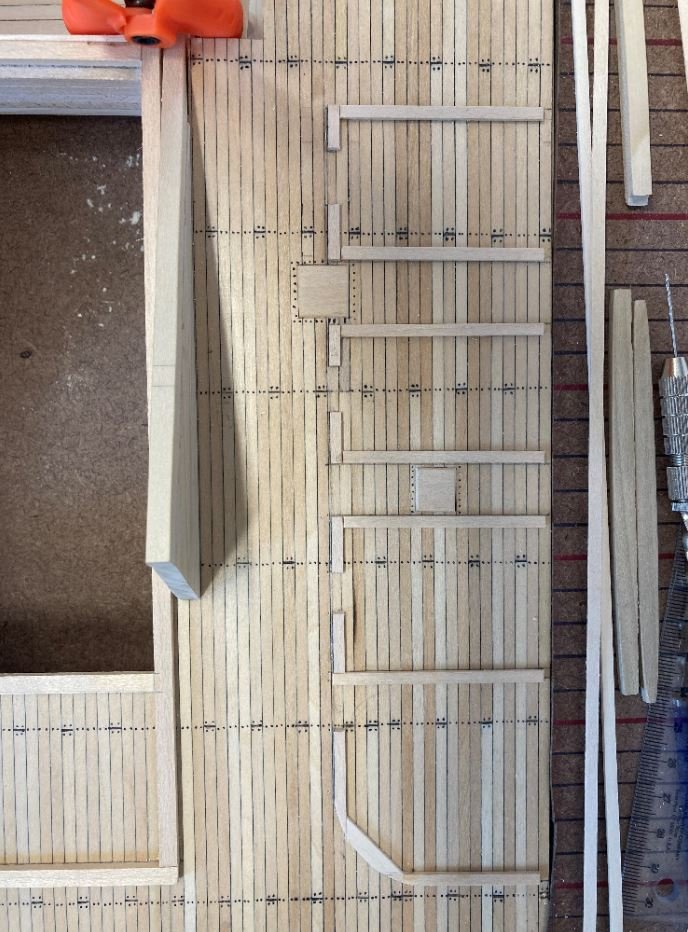
Lastly I finished installing all of the hatch covers and cut out the rough version of the Pittman arm wooden inserts. These will be used a rough draft for now until I can get the engine situation straightened out. I just wanted to see what it was going to take to get these carved out.
Pittman arms.

And how she sits now (pardon my foot photo-bombing the picture). I removed the boilers and set them aside so they wouldn't get dinged up while working on the other features. I still need to get the boiler hold painted with a whitewash and touch up the coal, but I'll get there.

Doesn't look like very much right now, but soon I will start going vertical and it will then begin to look a little more like a gunboat instead of a barge.
That's all for now. Thanks for taking the time to visit.
-Brian
Very nice work Brian. Vlad
- mbp521, mtaylor, Keith Black and 2 others
-
5
-
14 hours ago, mbp521 said:
Vlad,
Magnificent job on the Captains gig. I have four cutters to build from my Cairo. I can only hope they come out half as nice as this one did.
Sorry to see this project coming to an end. I’ll have to switch over and follow you progress on your Glory of the Seas build.
-Brian
Thank you, cmon Brian, if I can do it, everyone must! :)loooking fwd to see yours!
-
Thank you Guys! well i still stay commited to finish her with propriate detailing like rudder, lifeboats metal fittings and rudder hinges, poop deck rail, and display stand. working on it by evenings more to come soon. some like catheads openings metal sheet already done, some small parts still pops up...stay tuned.
V.
-
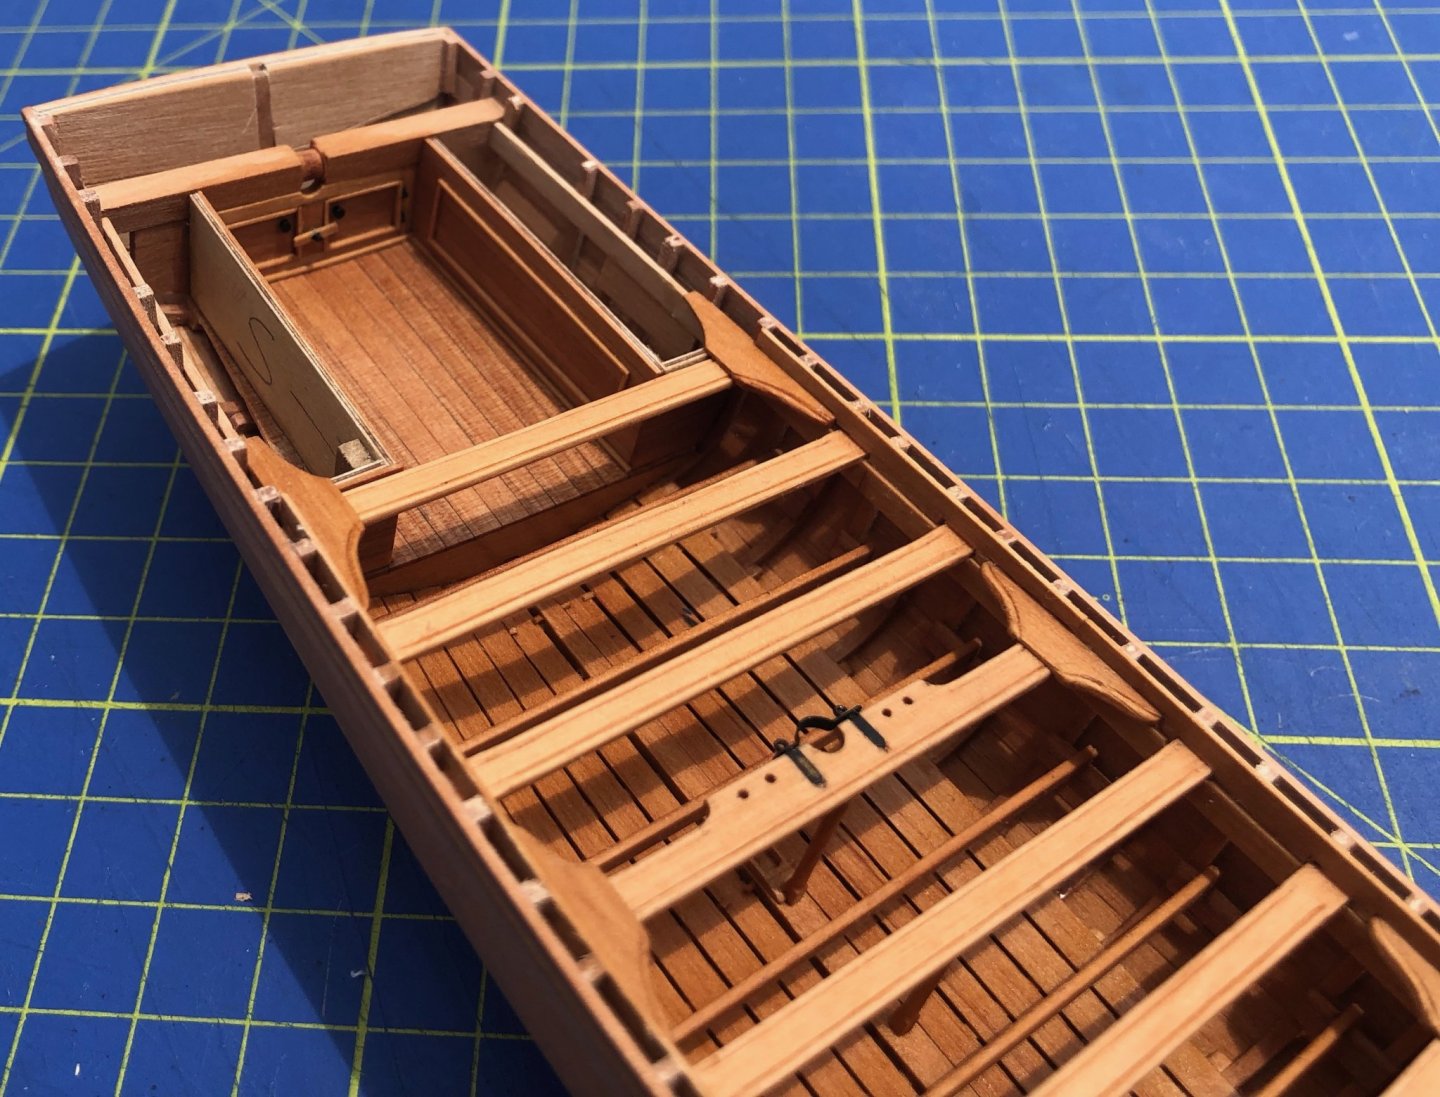
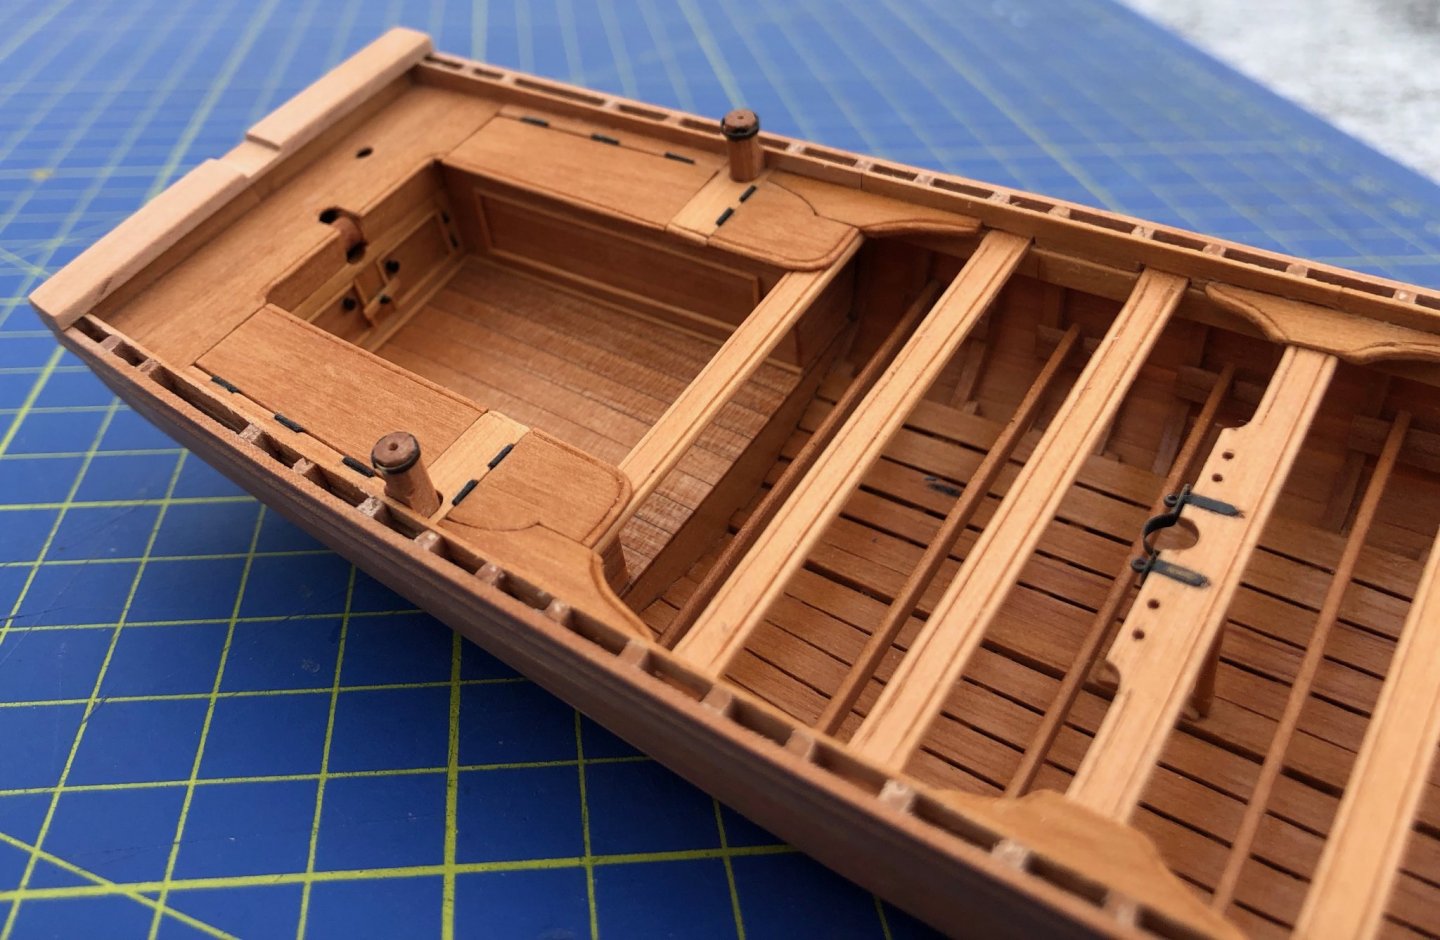
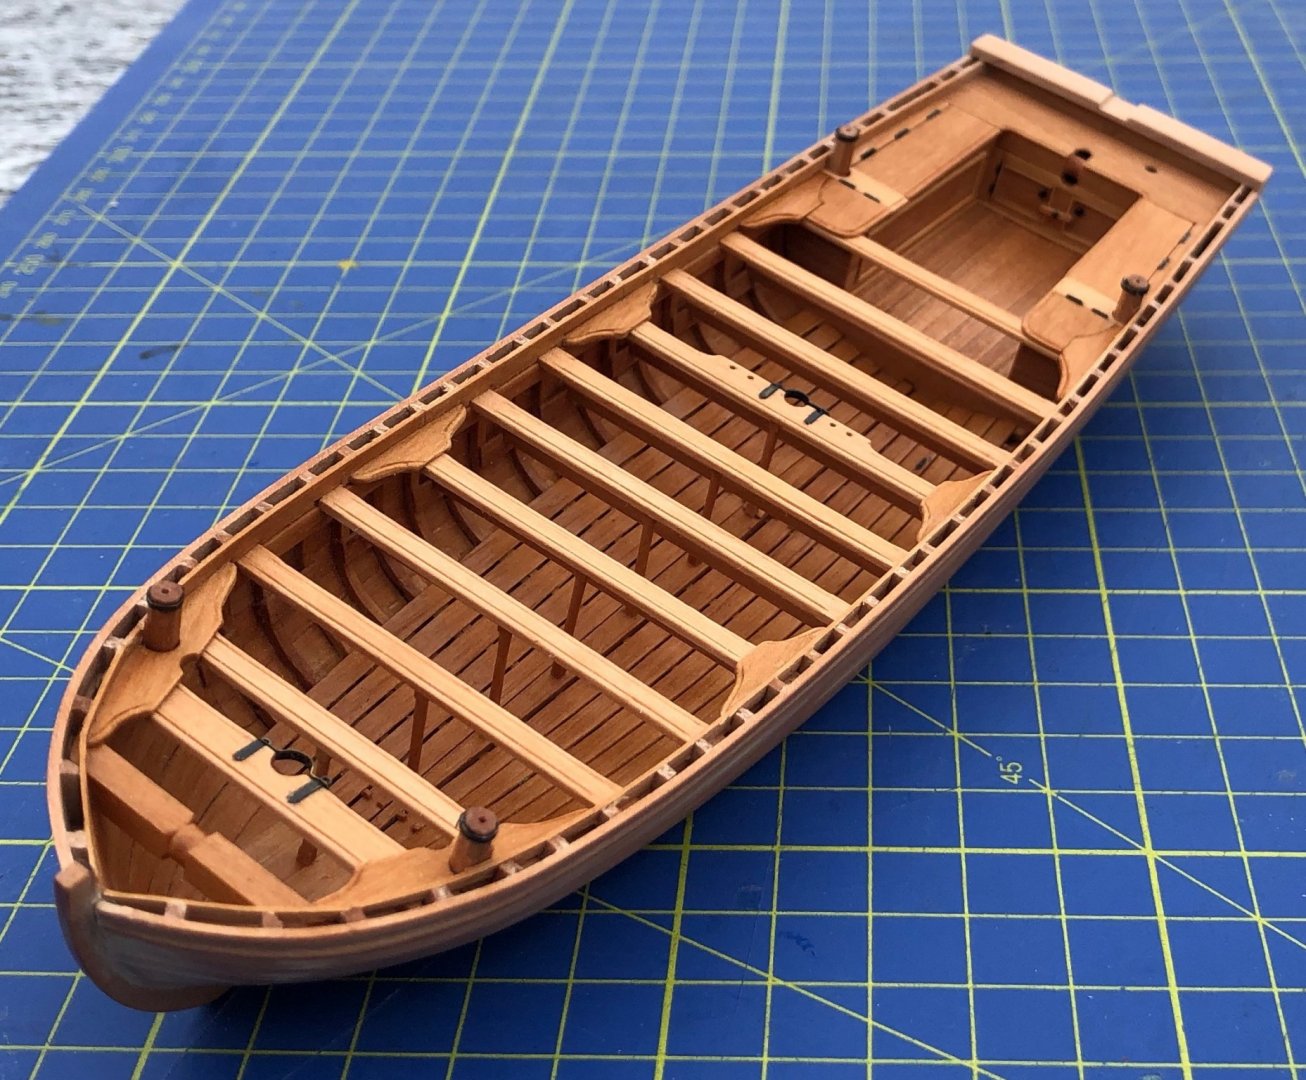
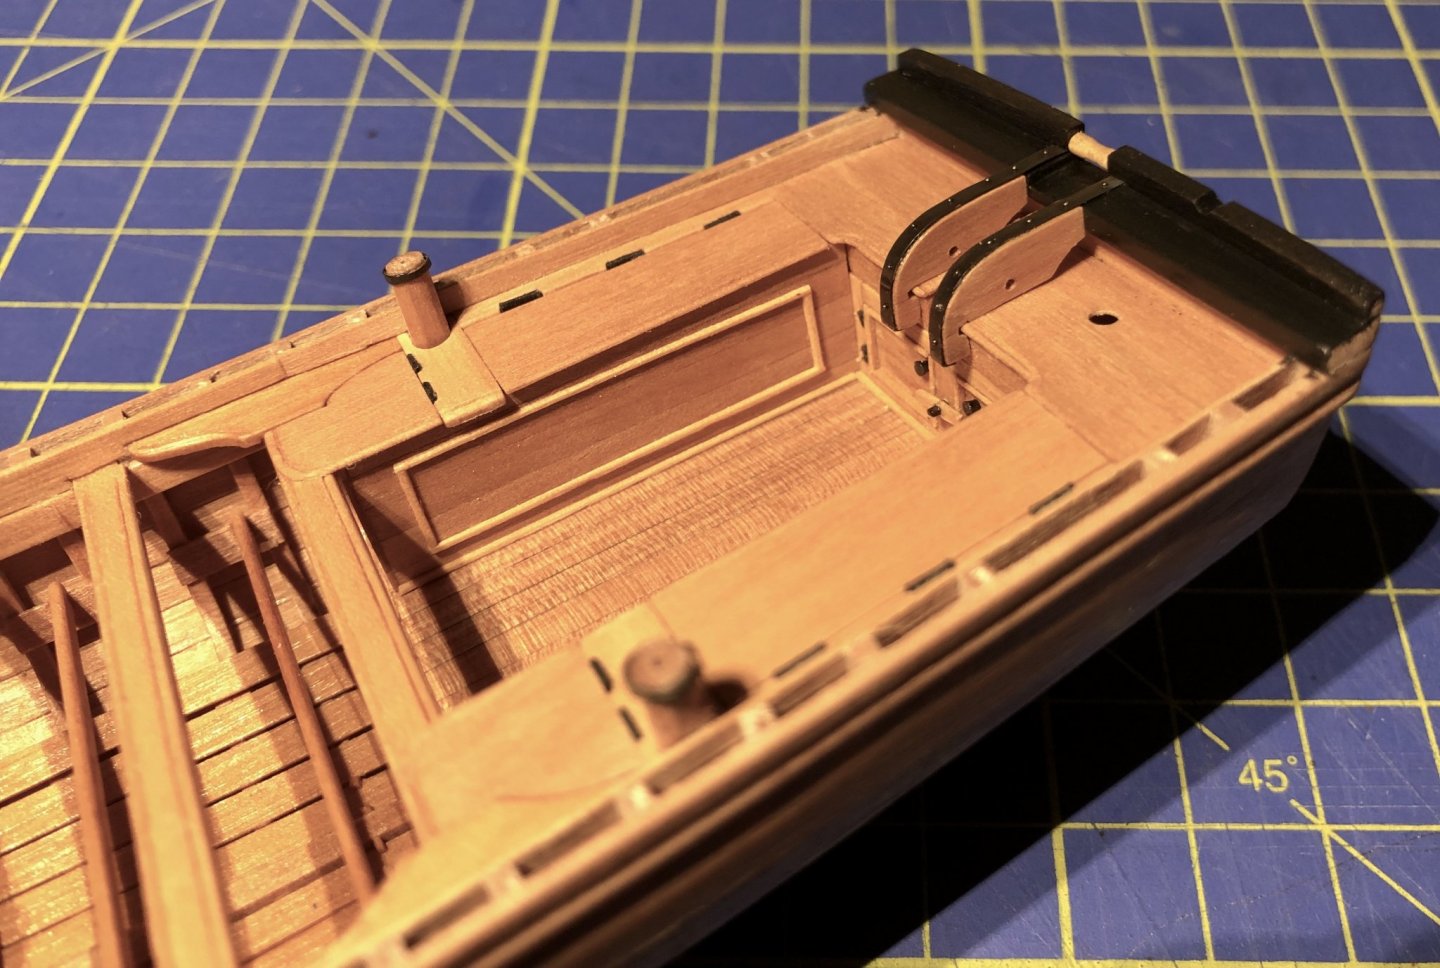
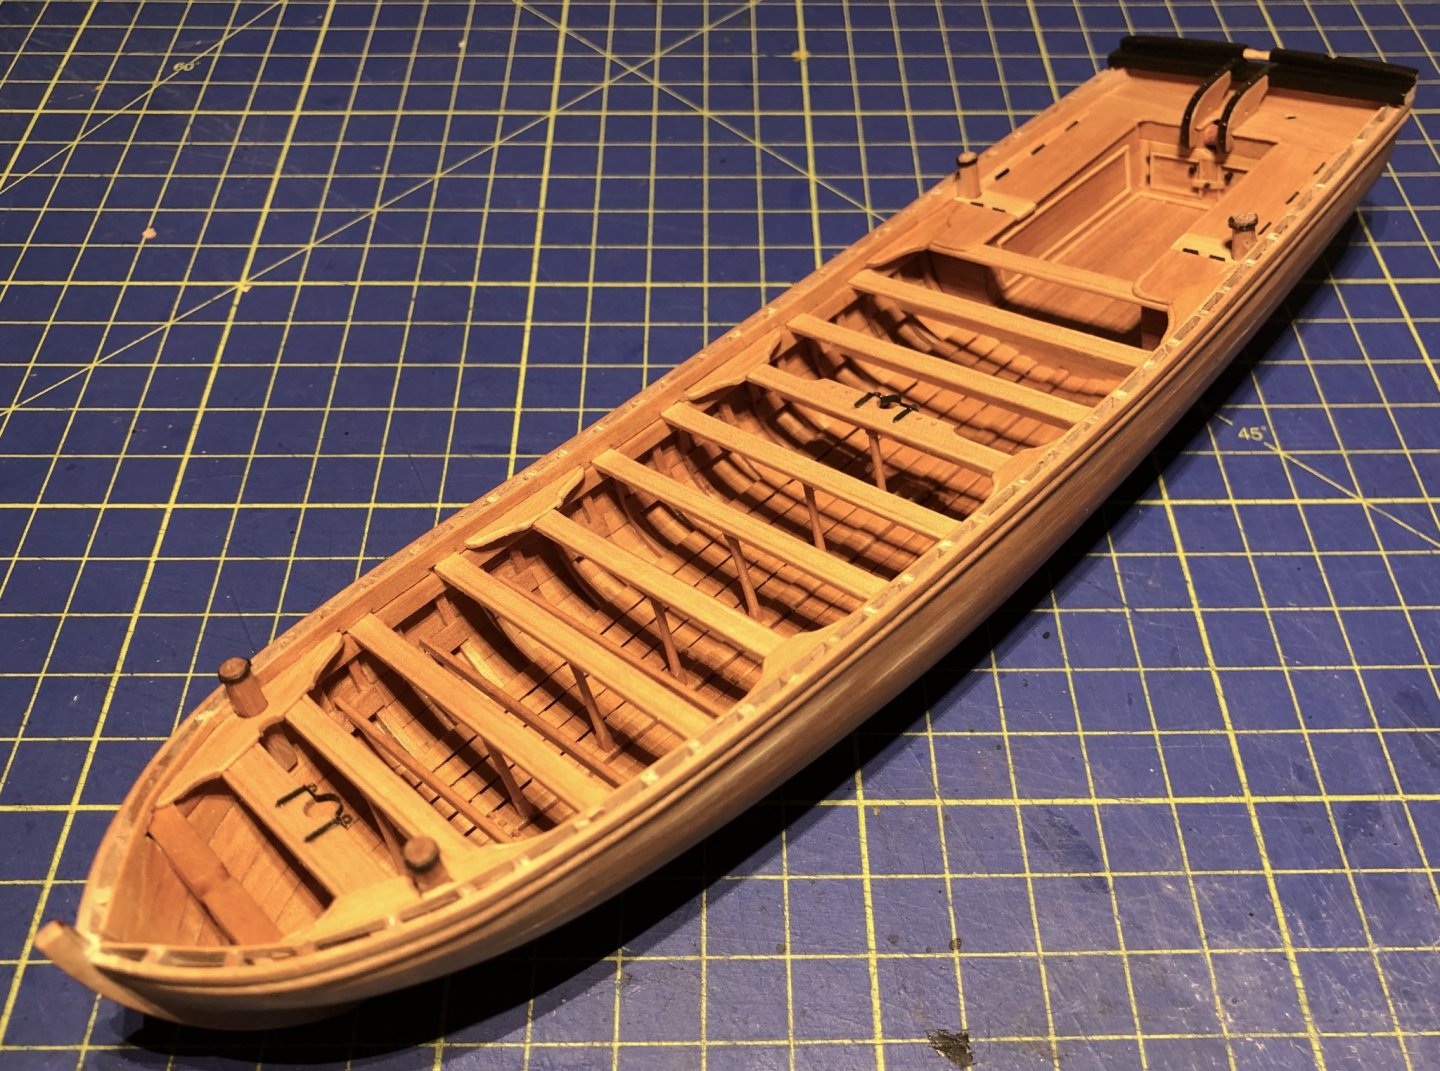
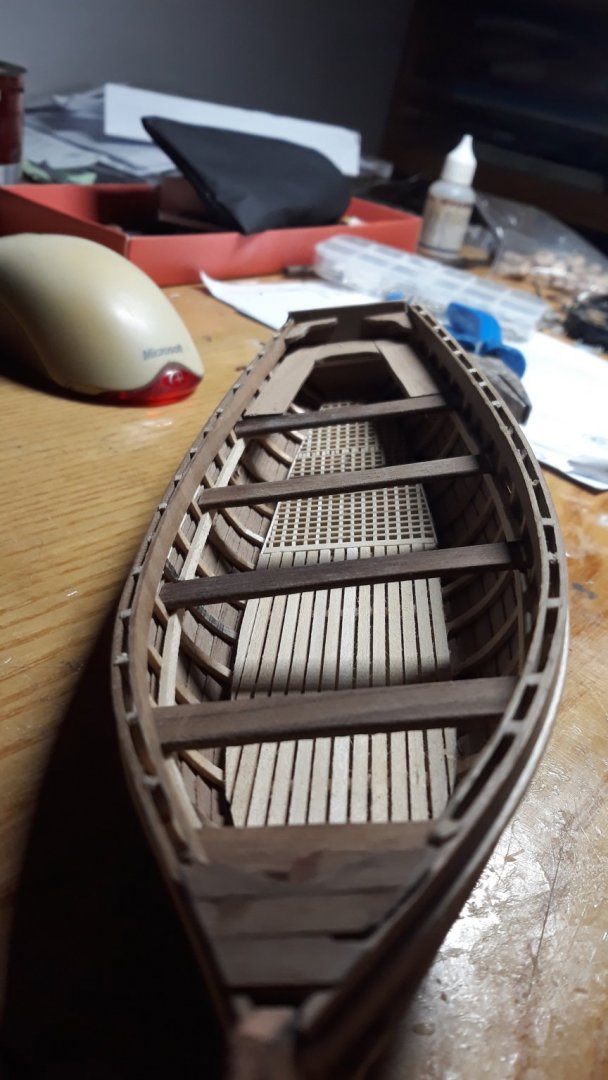
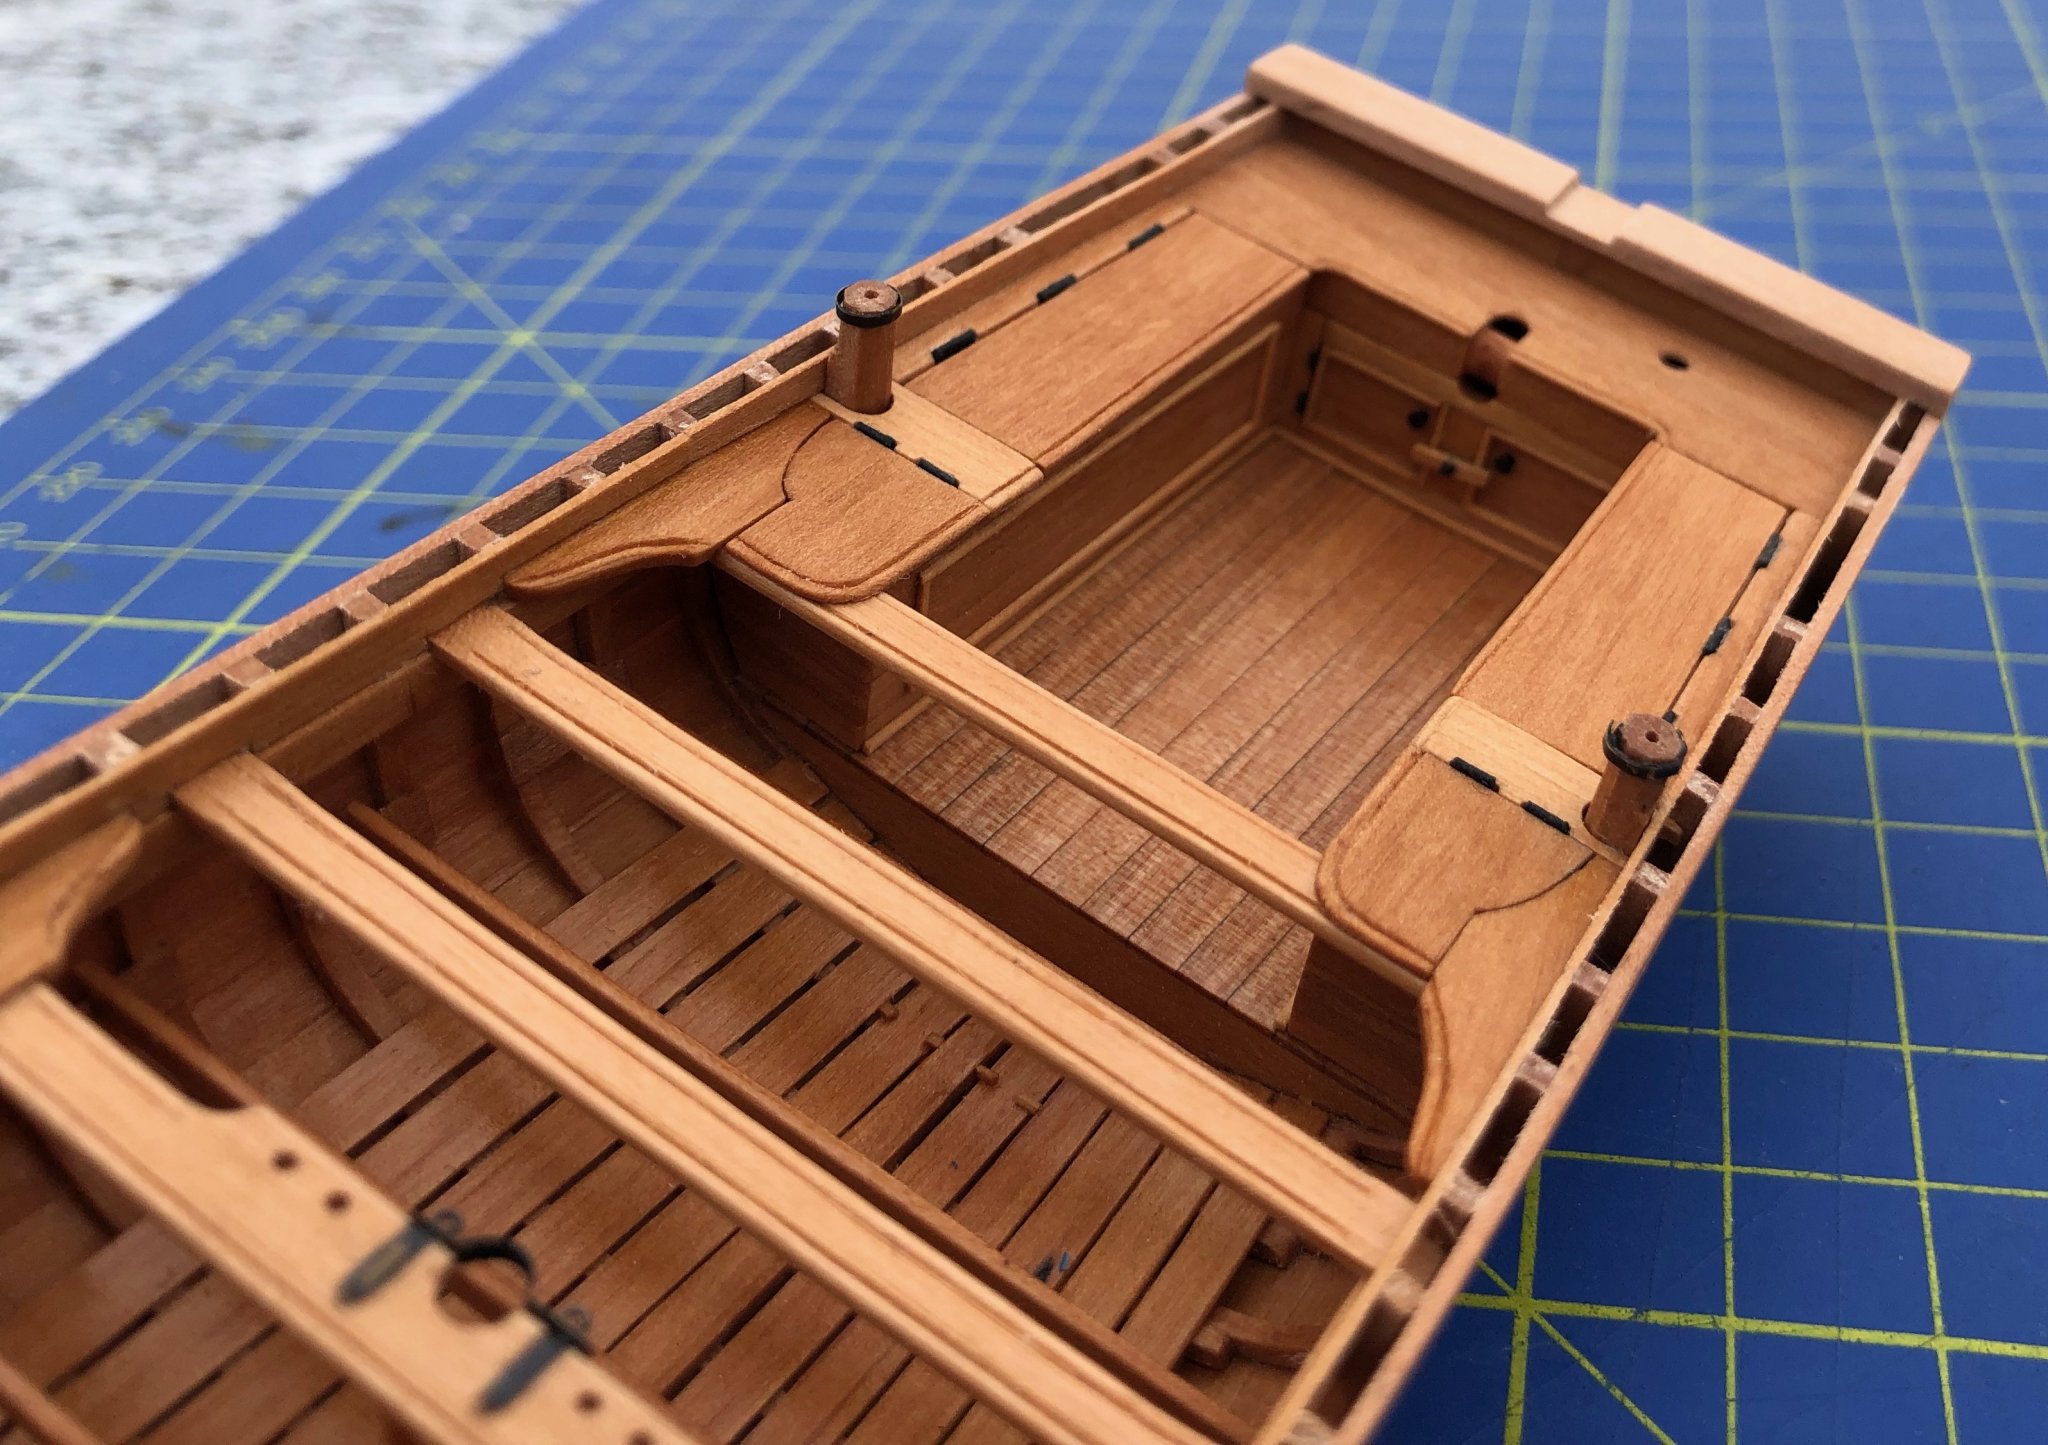
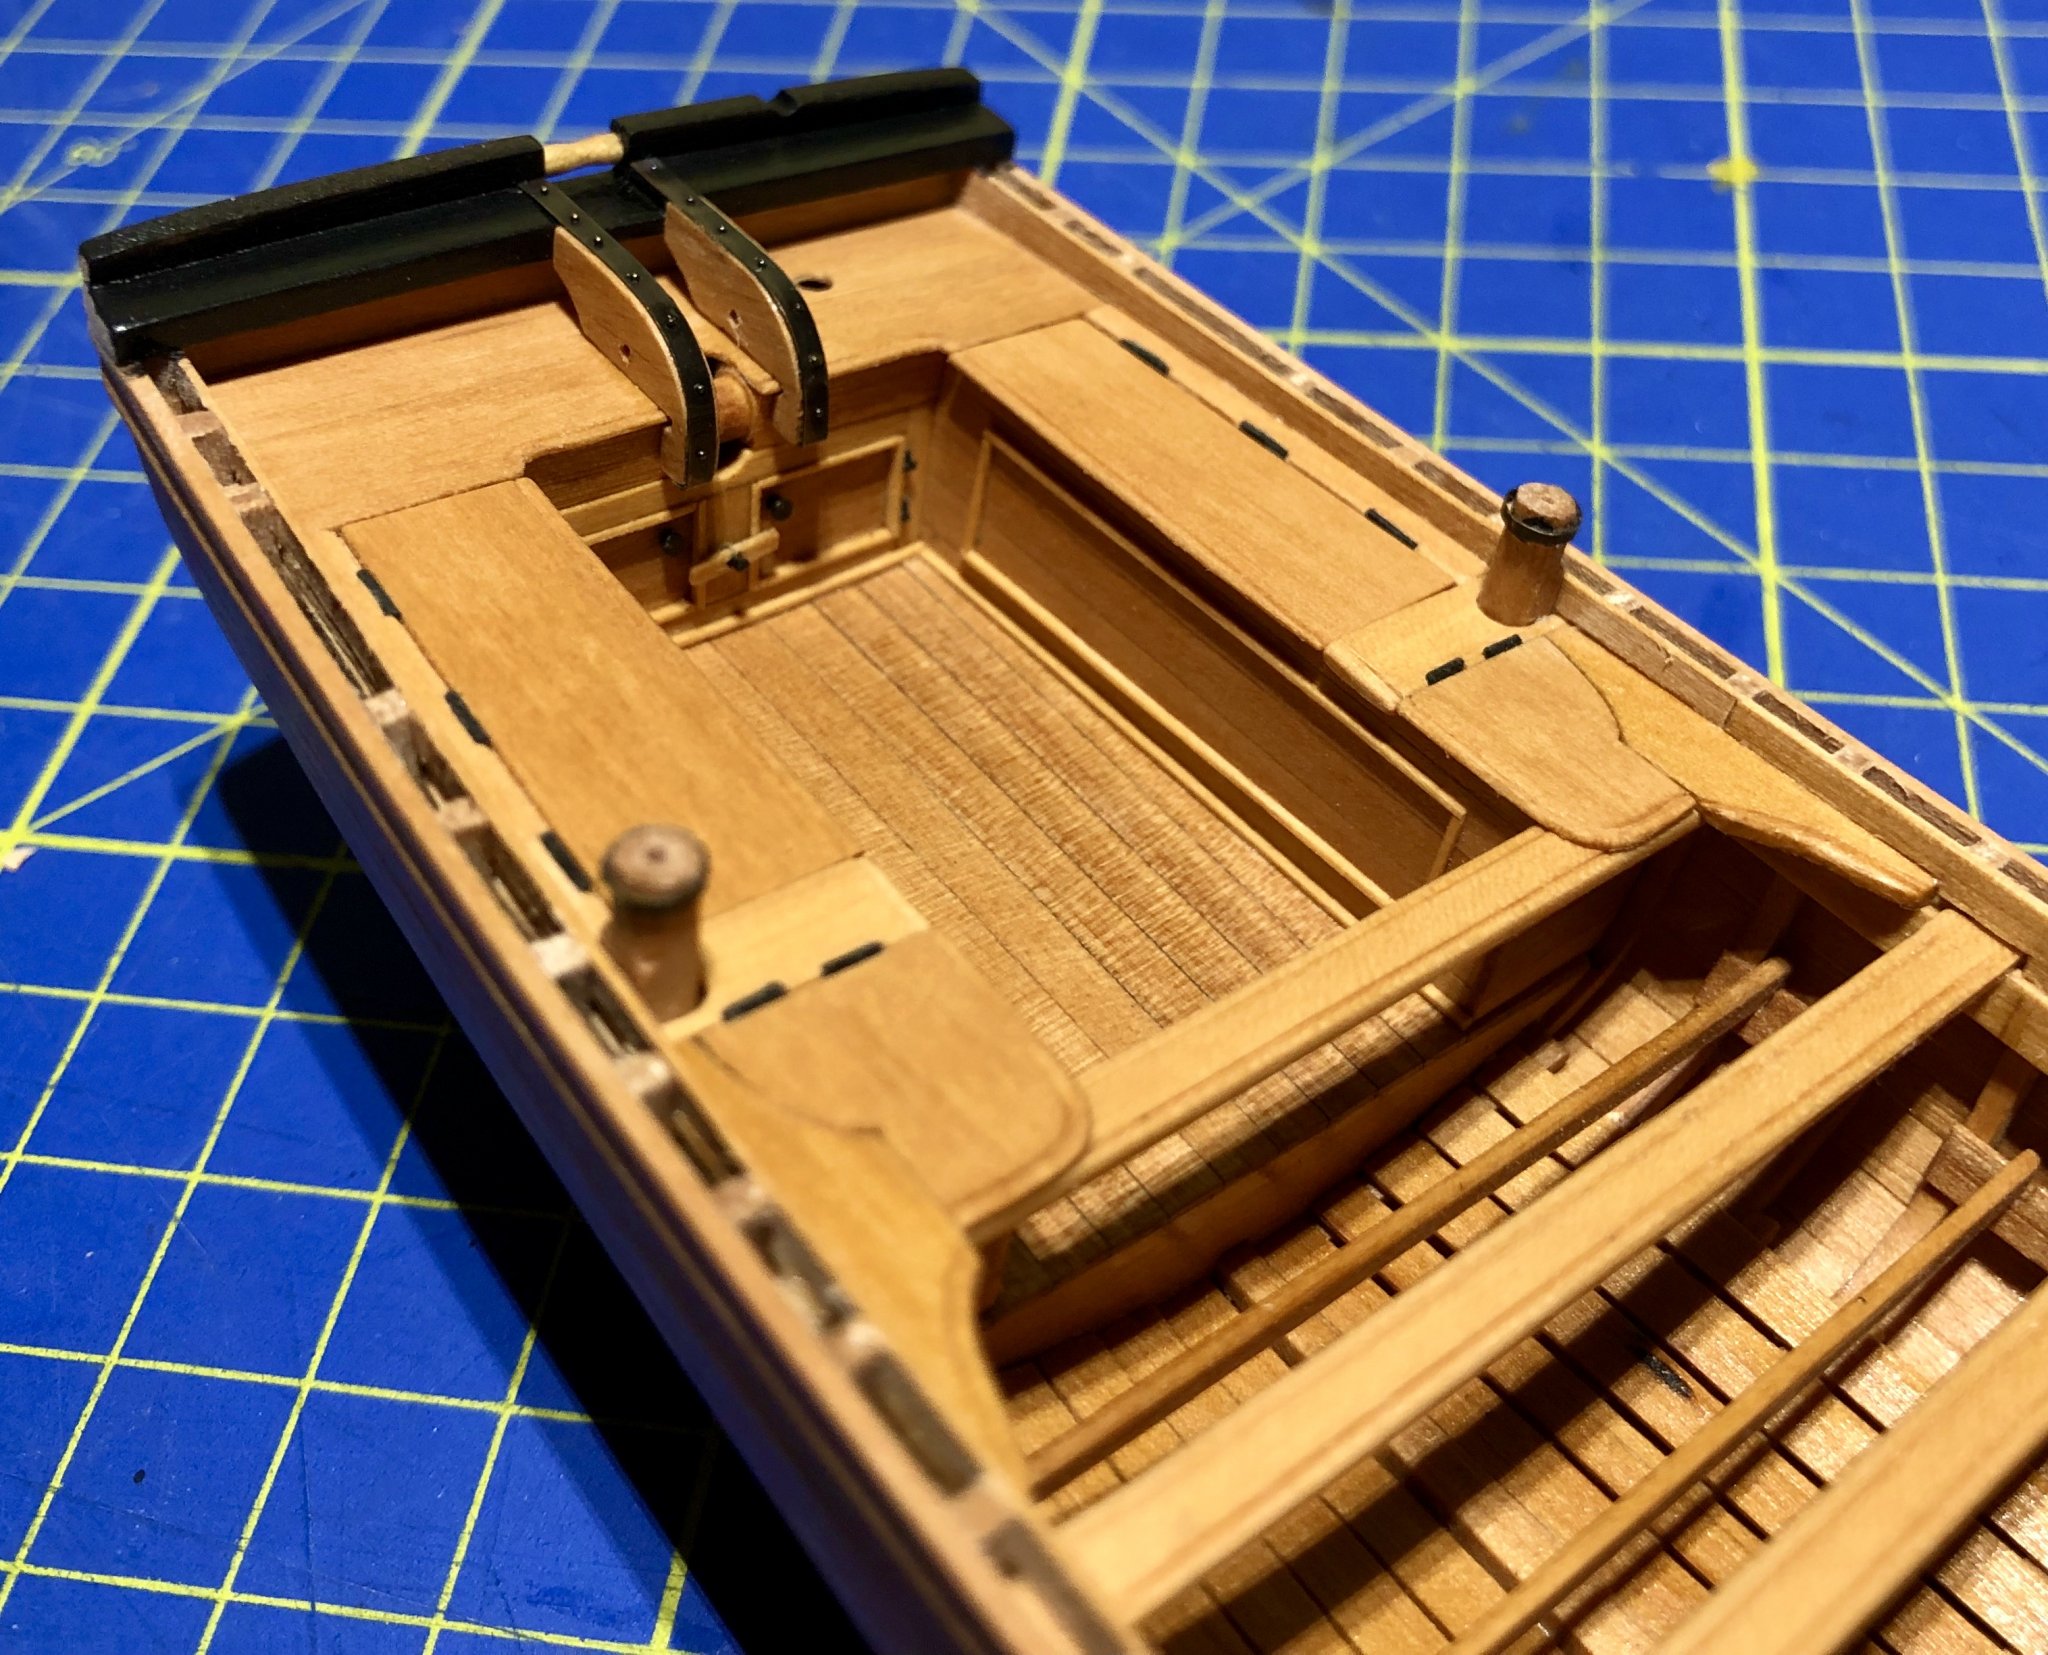
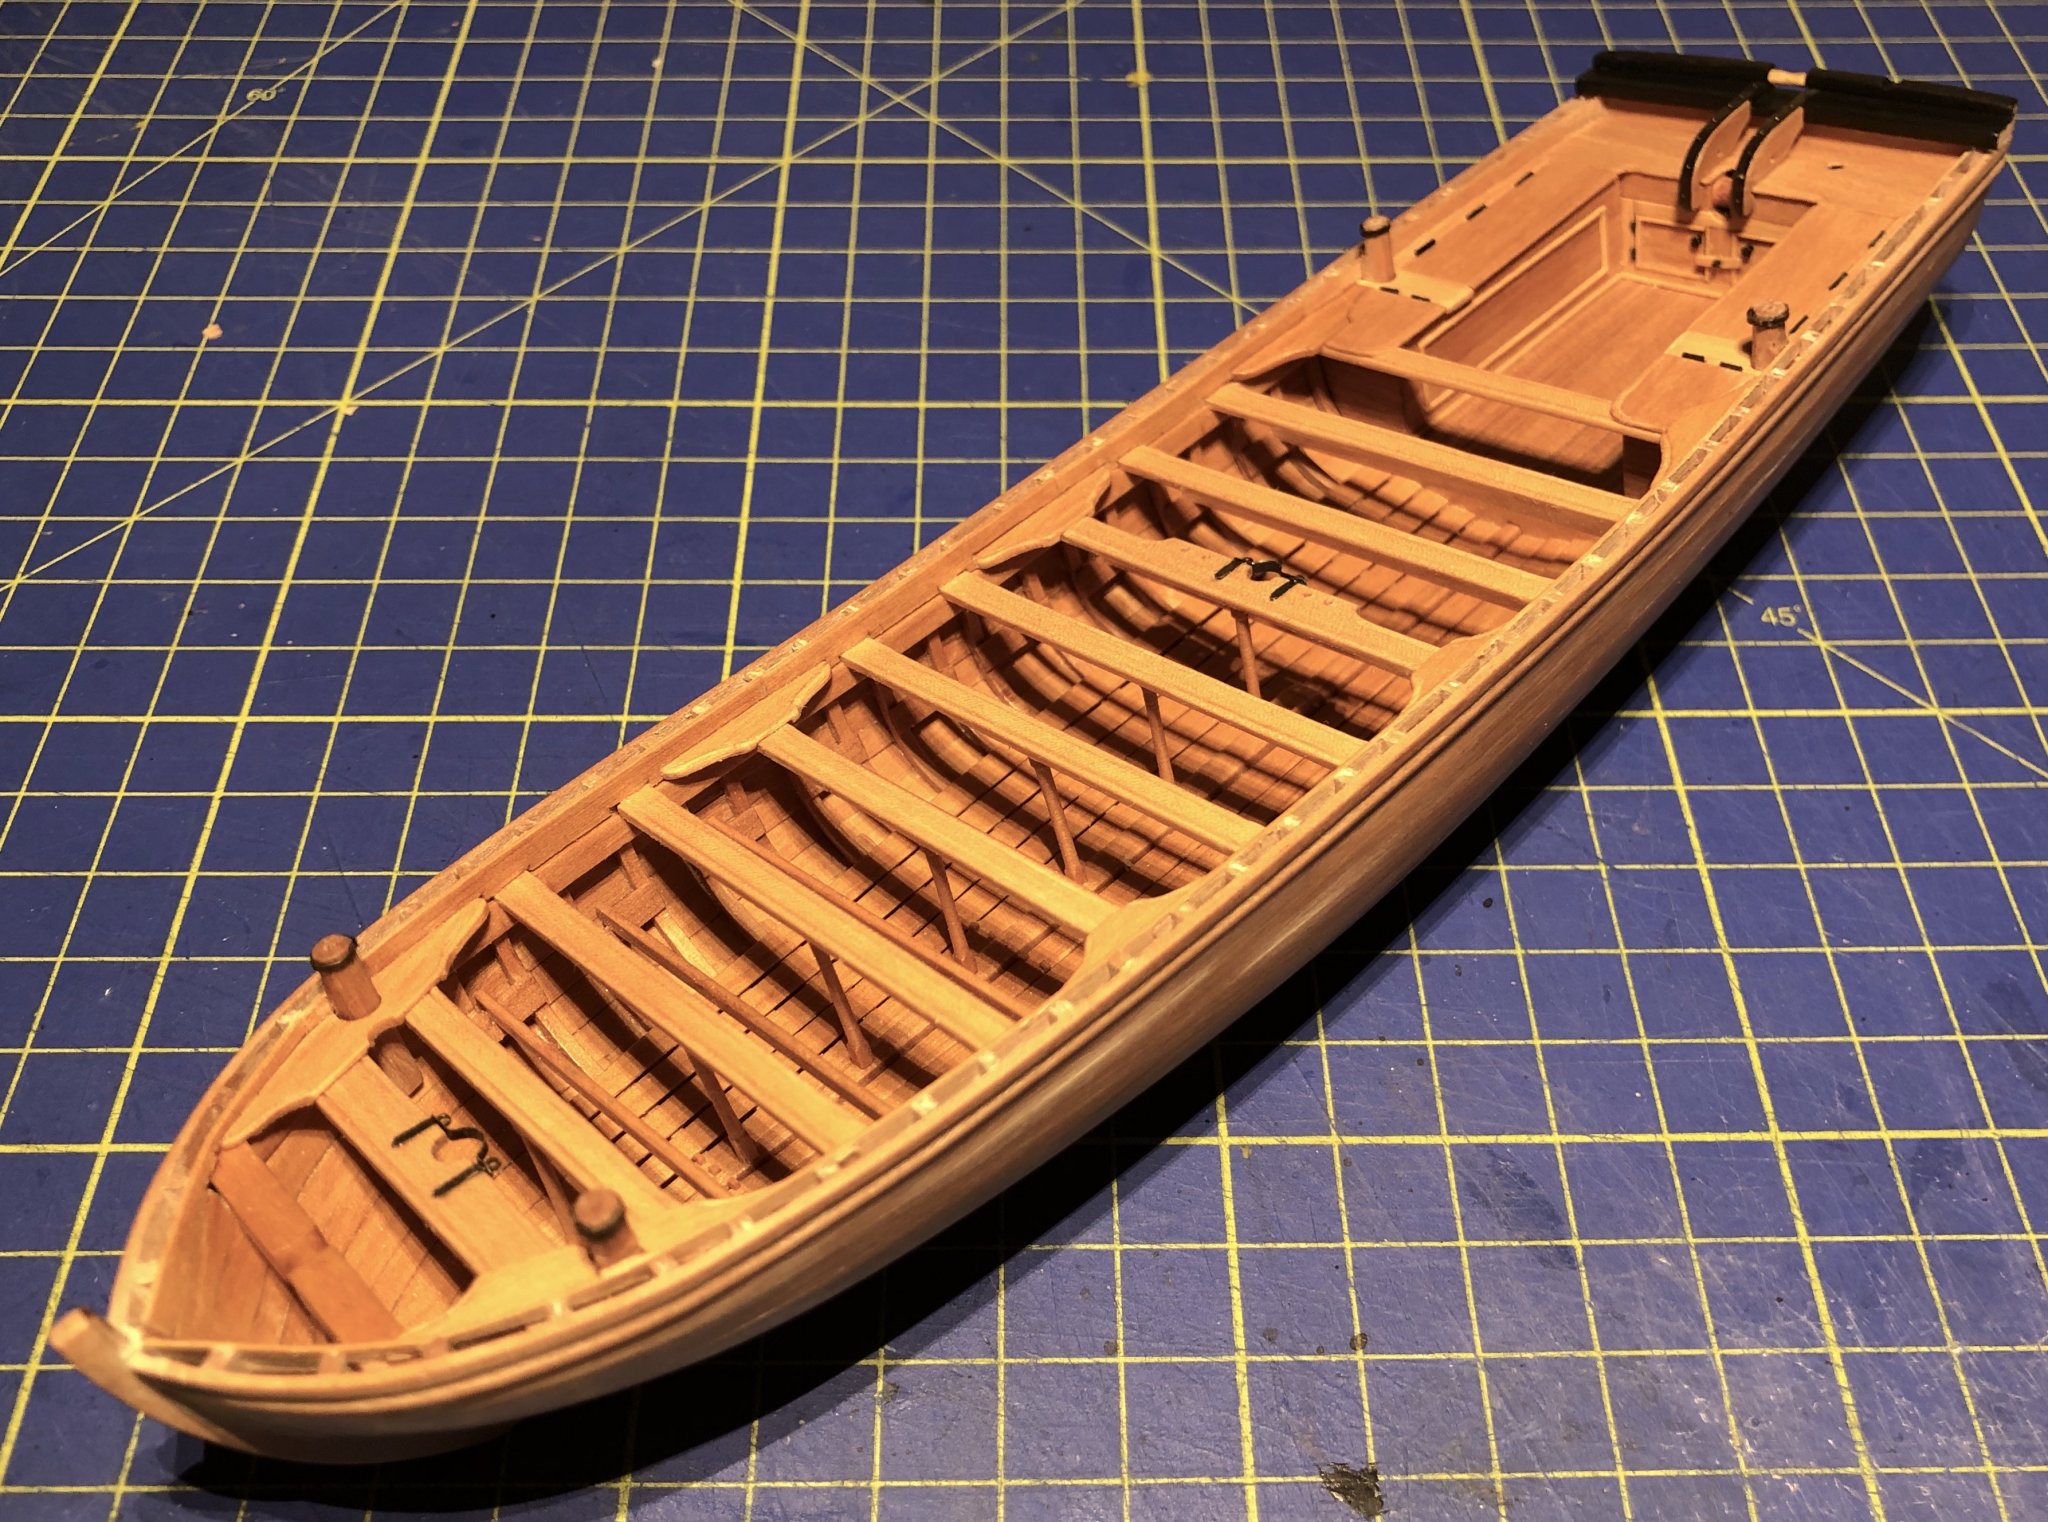
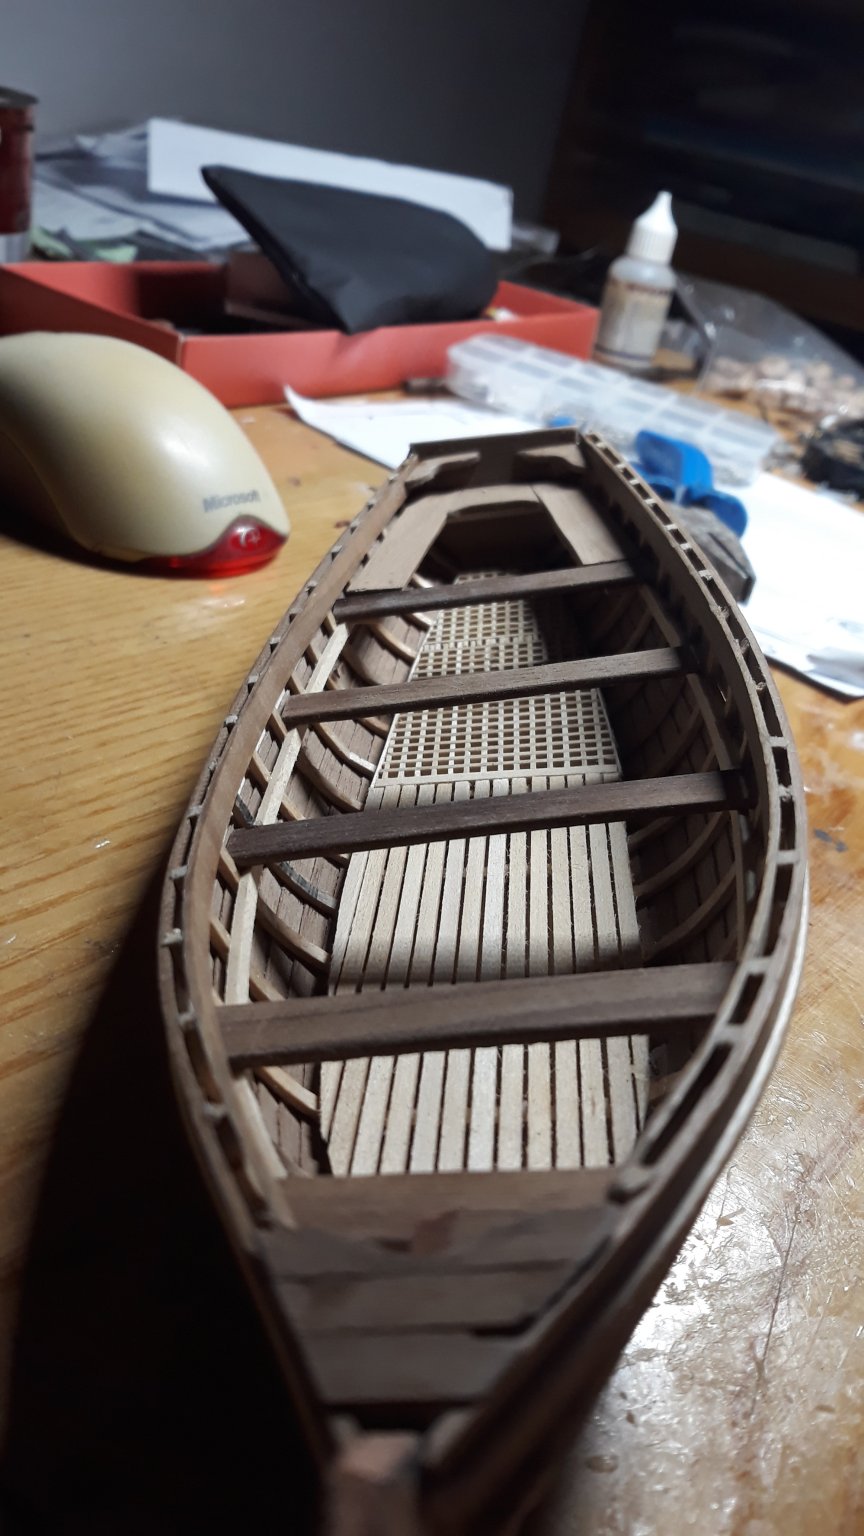
Dear all,
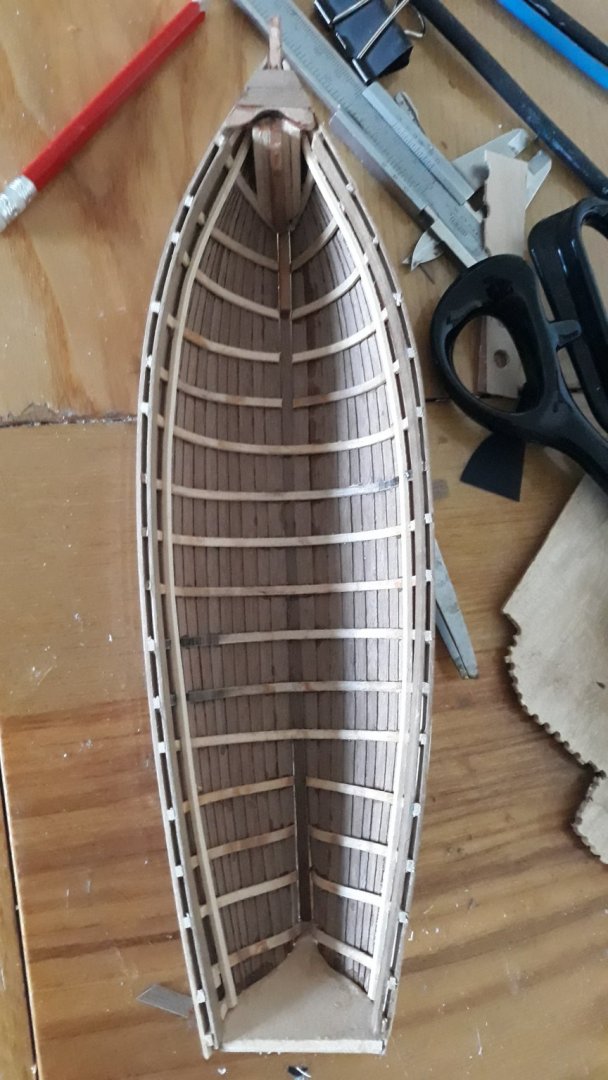
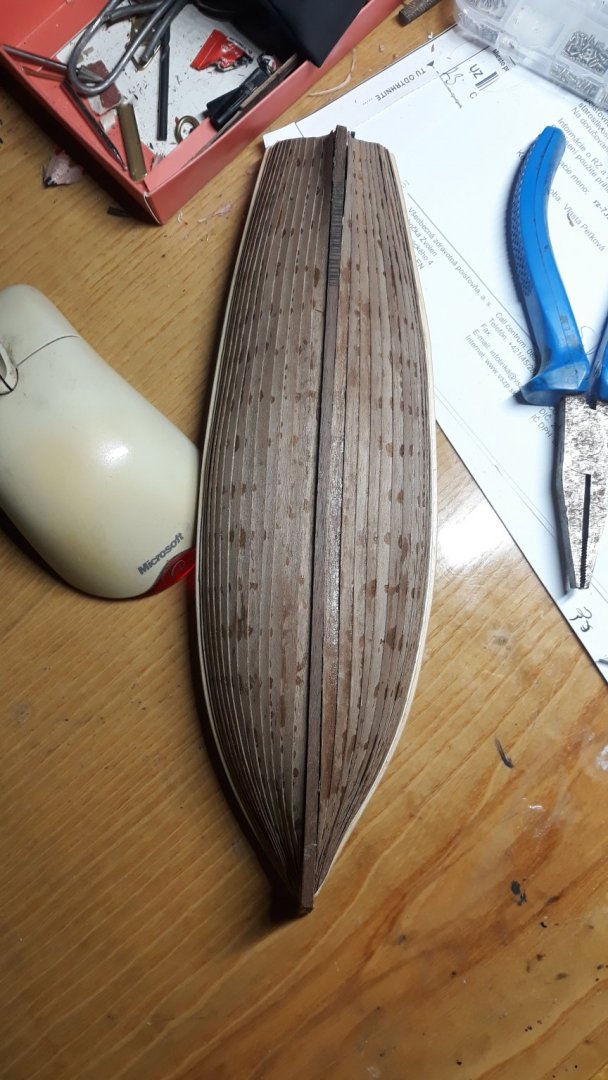
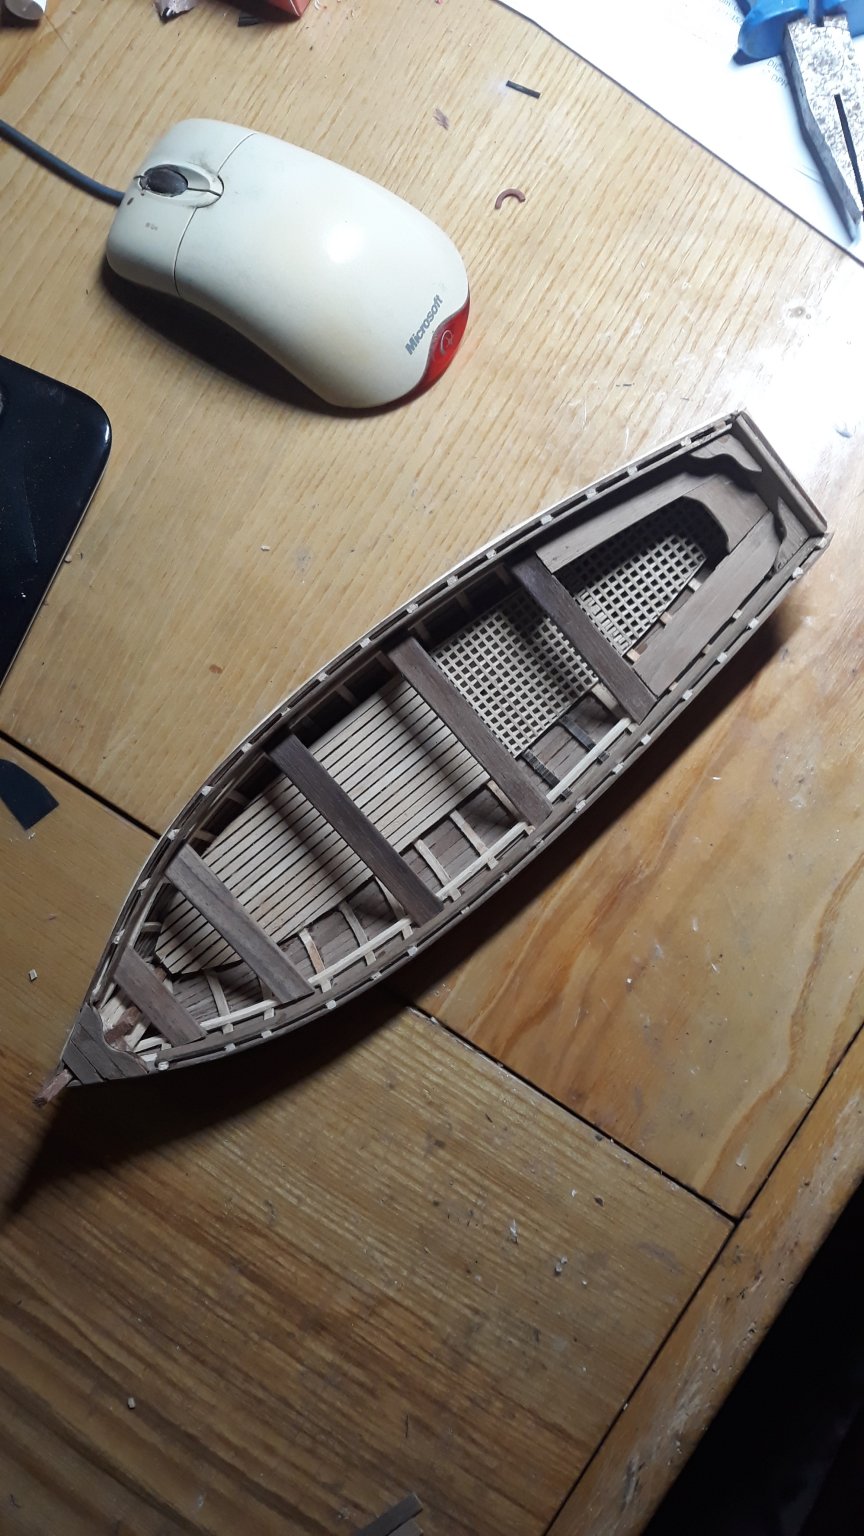
Last chapter, Captains gig.
Irony of life do magics. Its strange that such small boat would bring me most joy of entire mammoth project on scale vessel. I have lits of small leftovers so i decided to make captains gig as a last point before wrap.
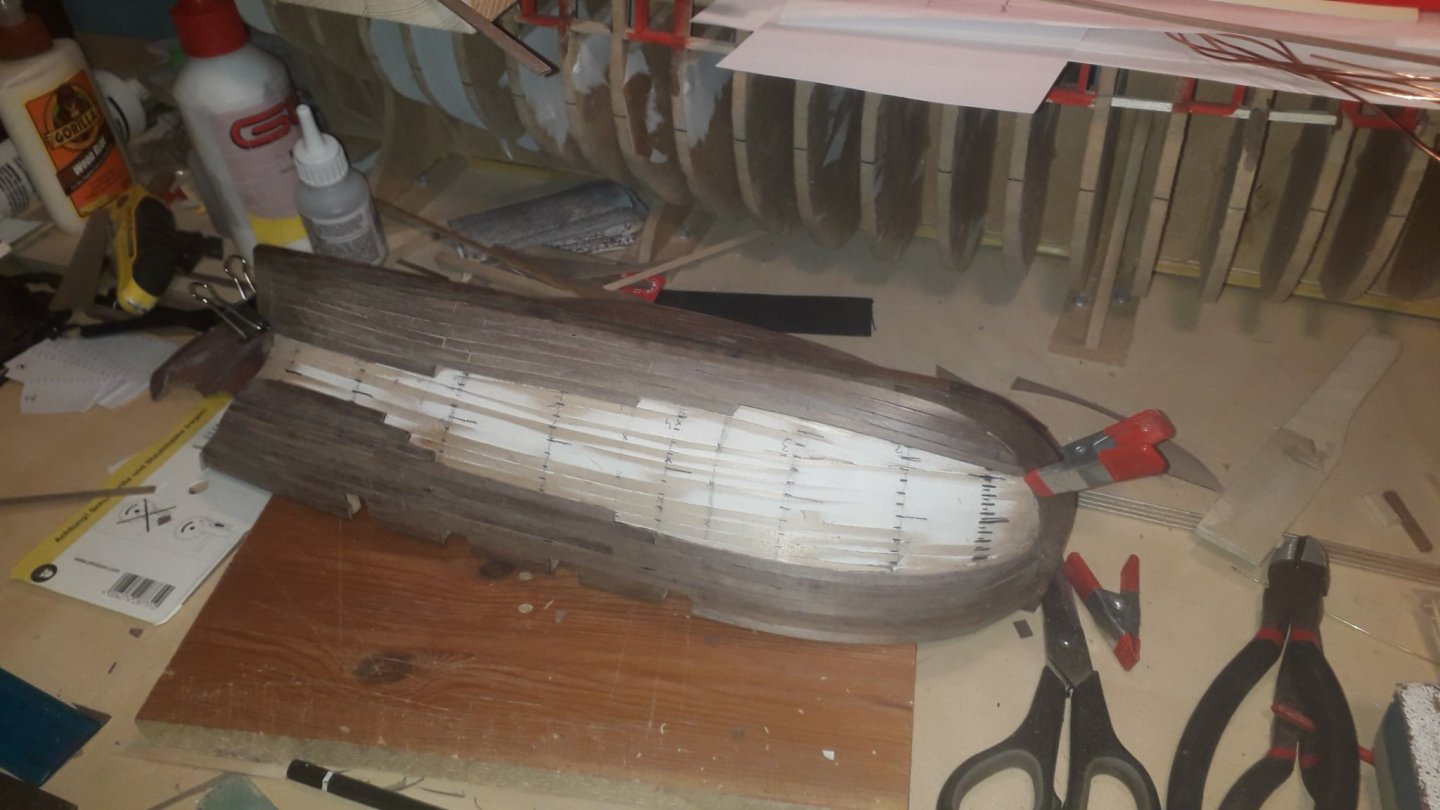
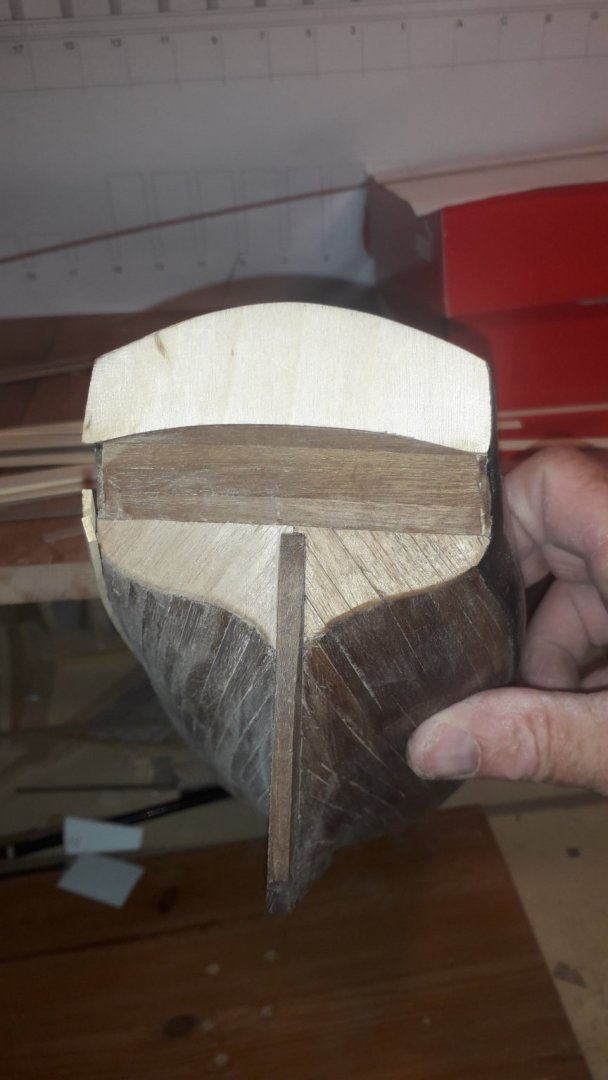
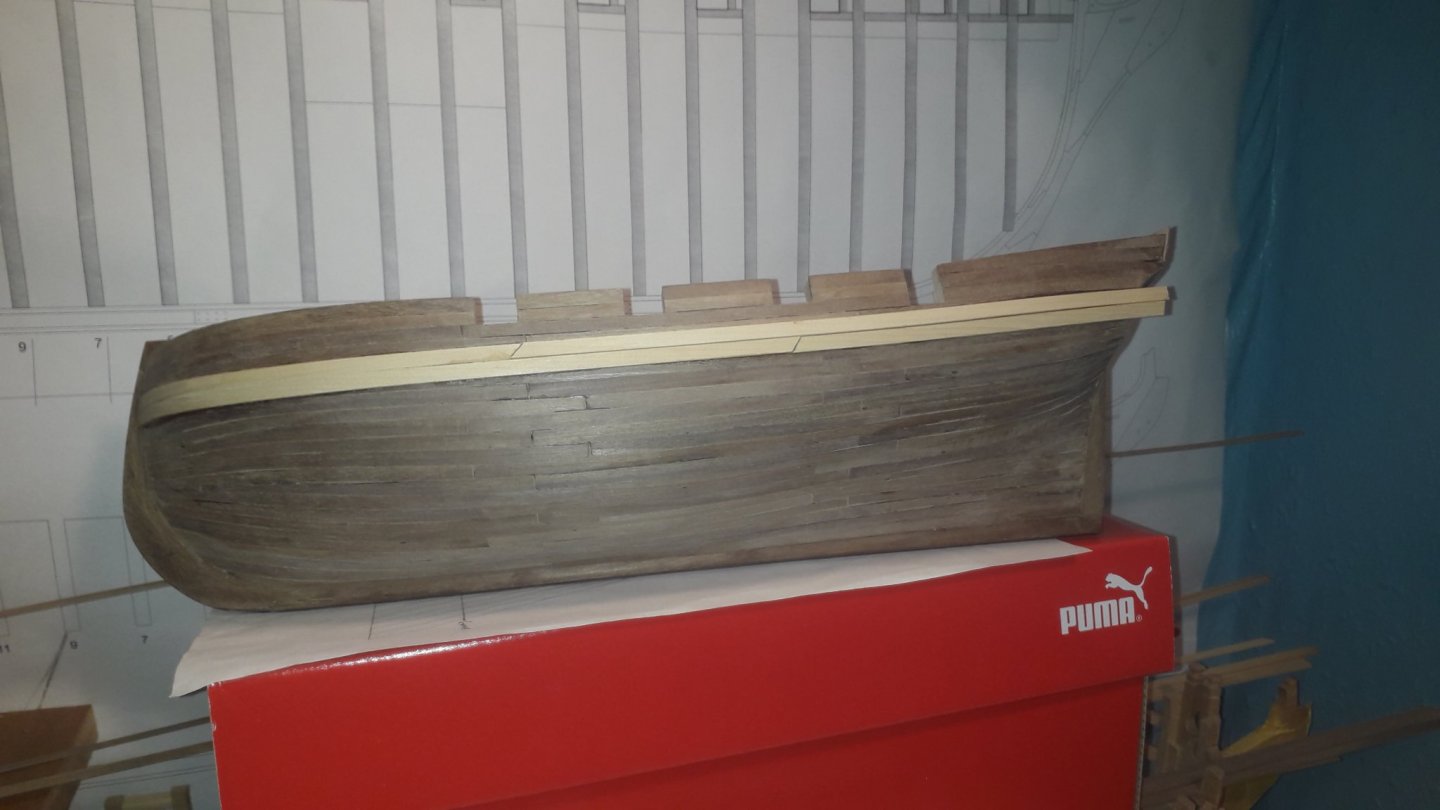
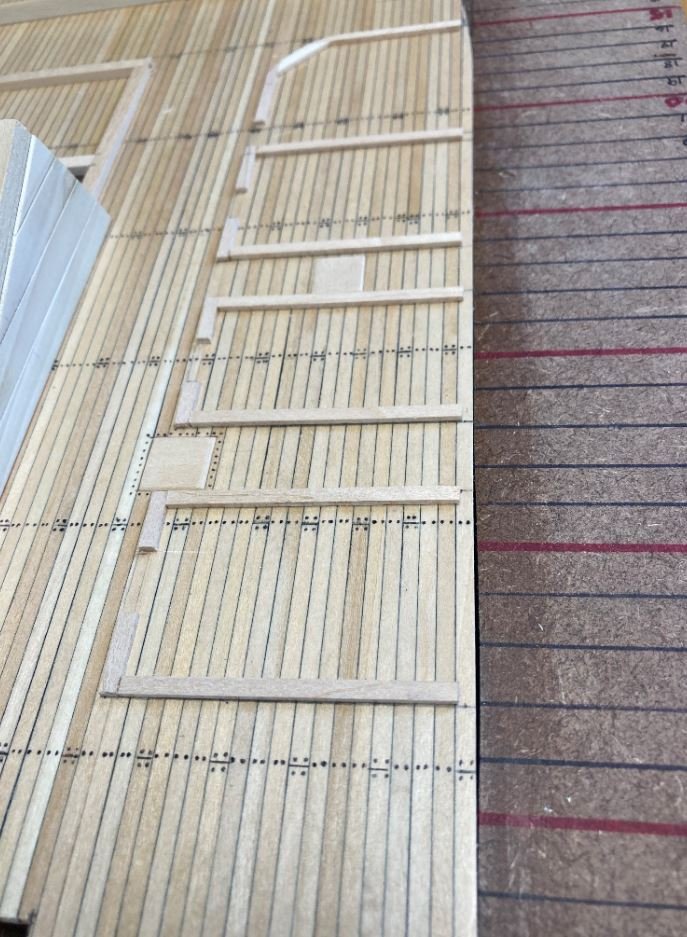
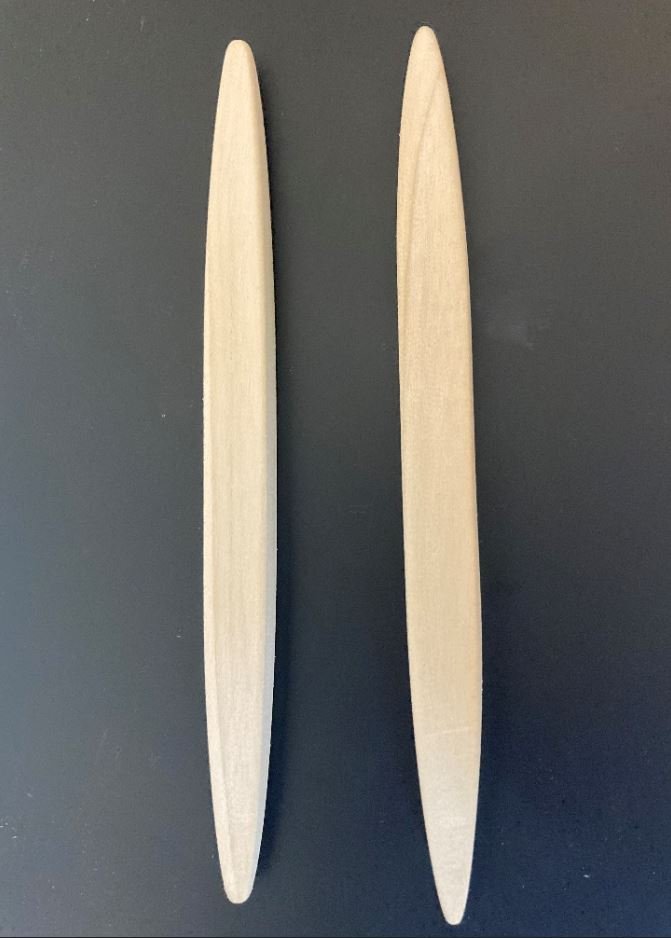
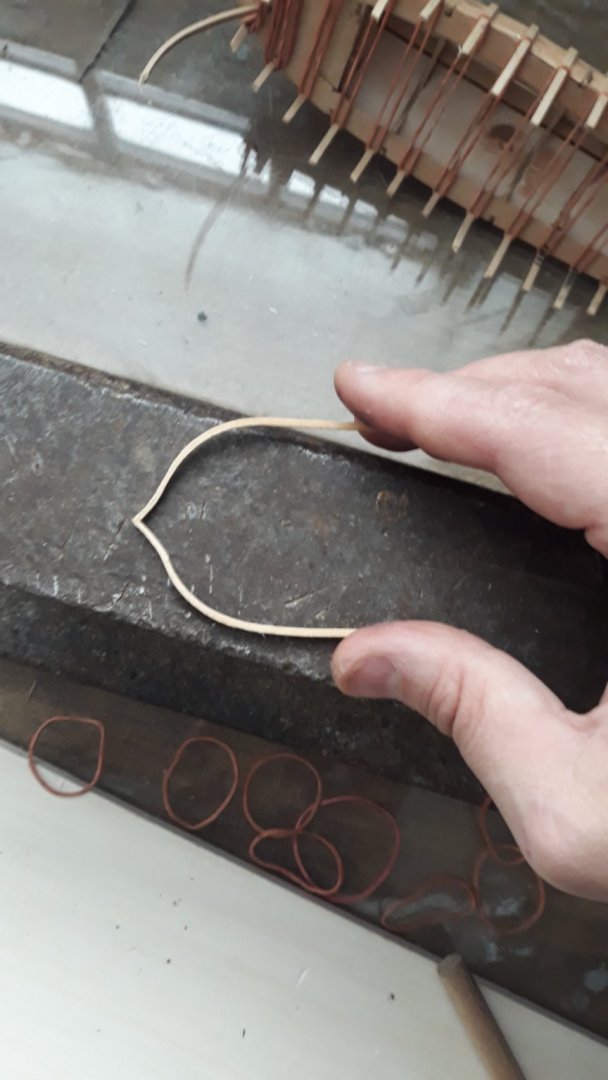
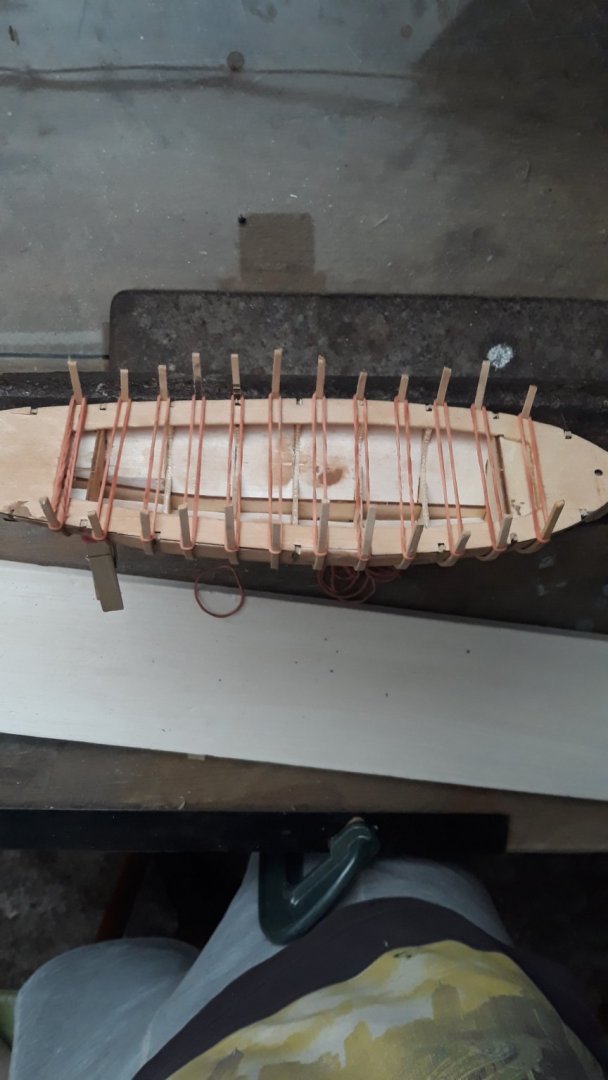
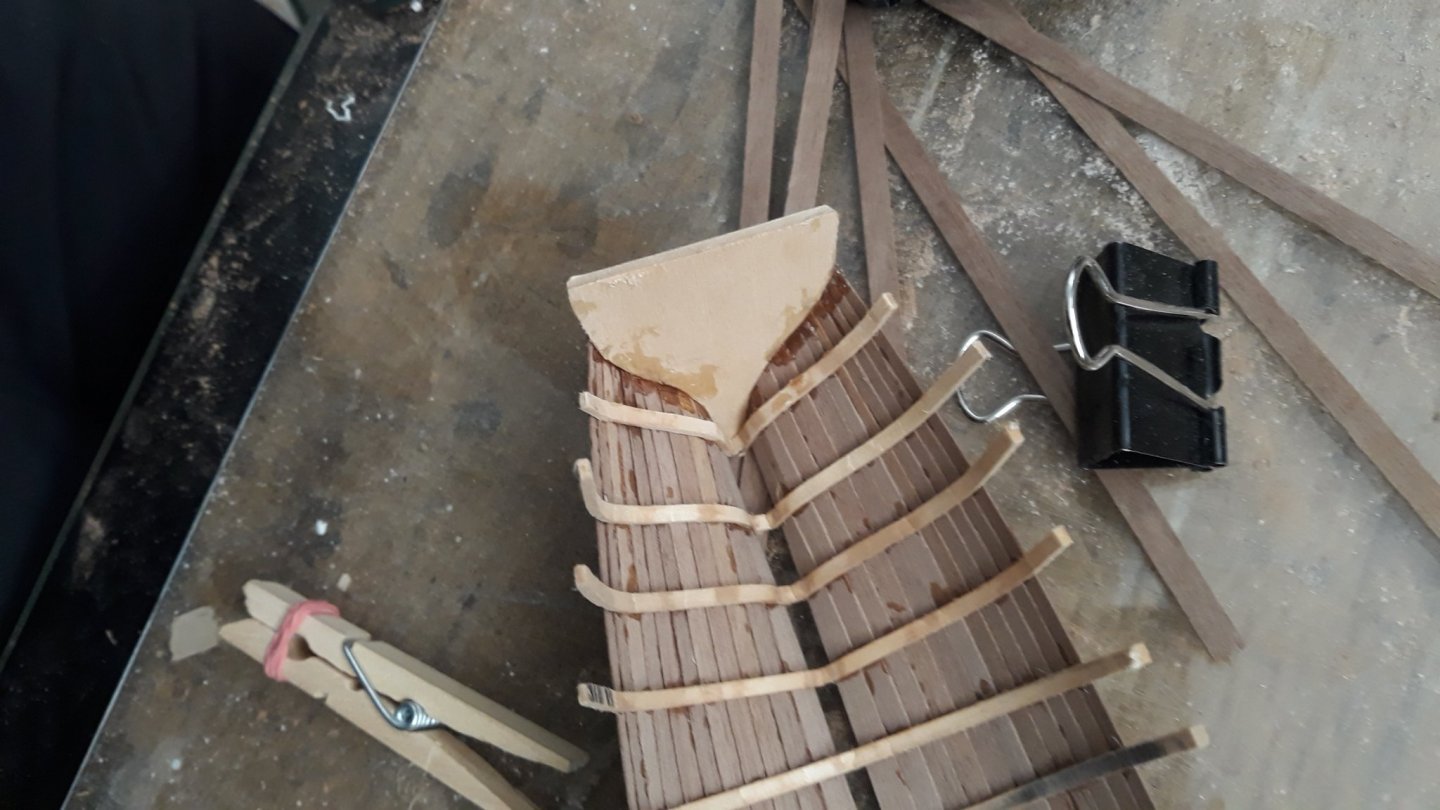
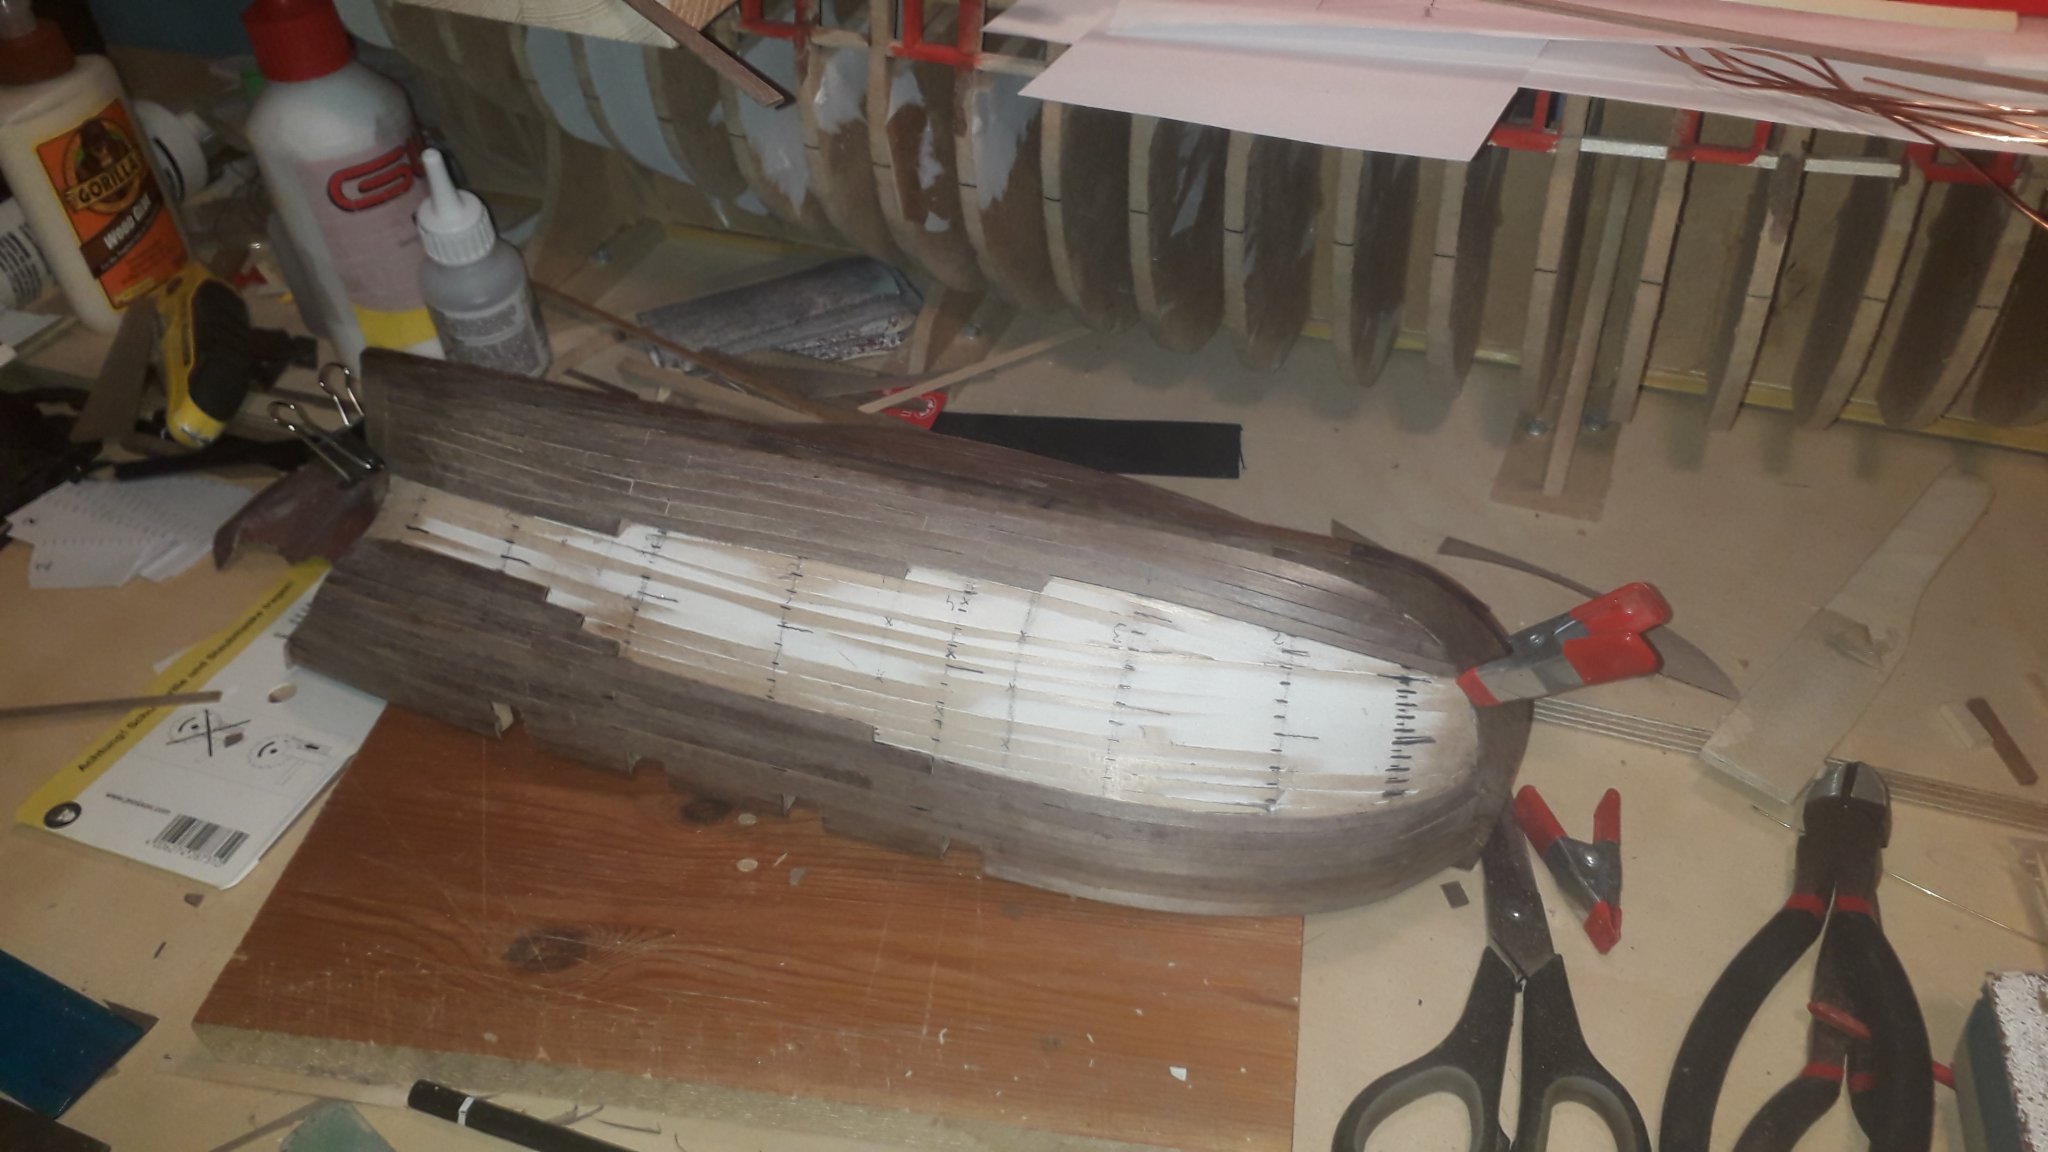
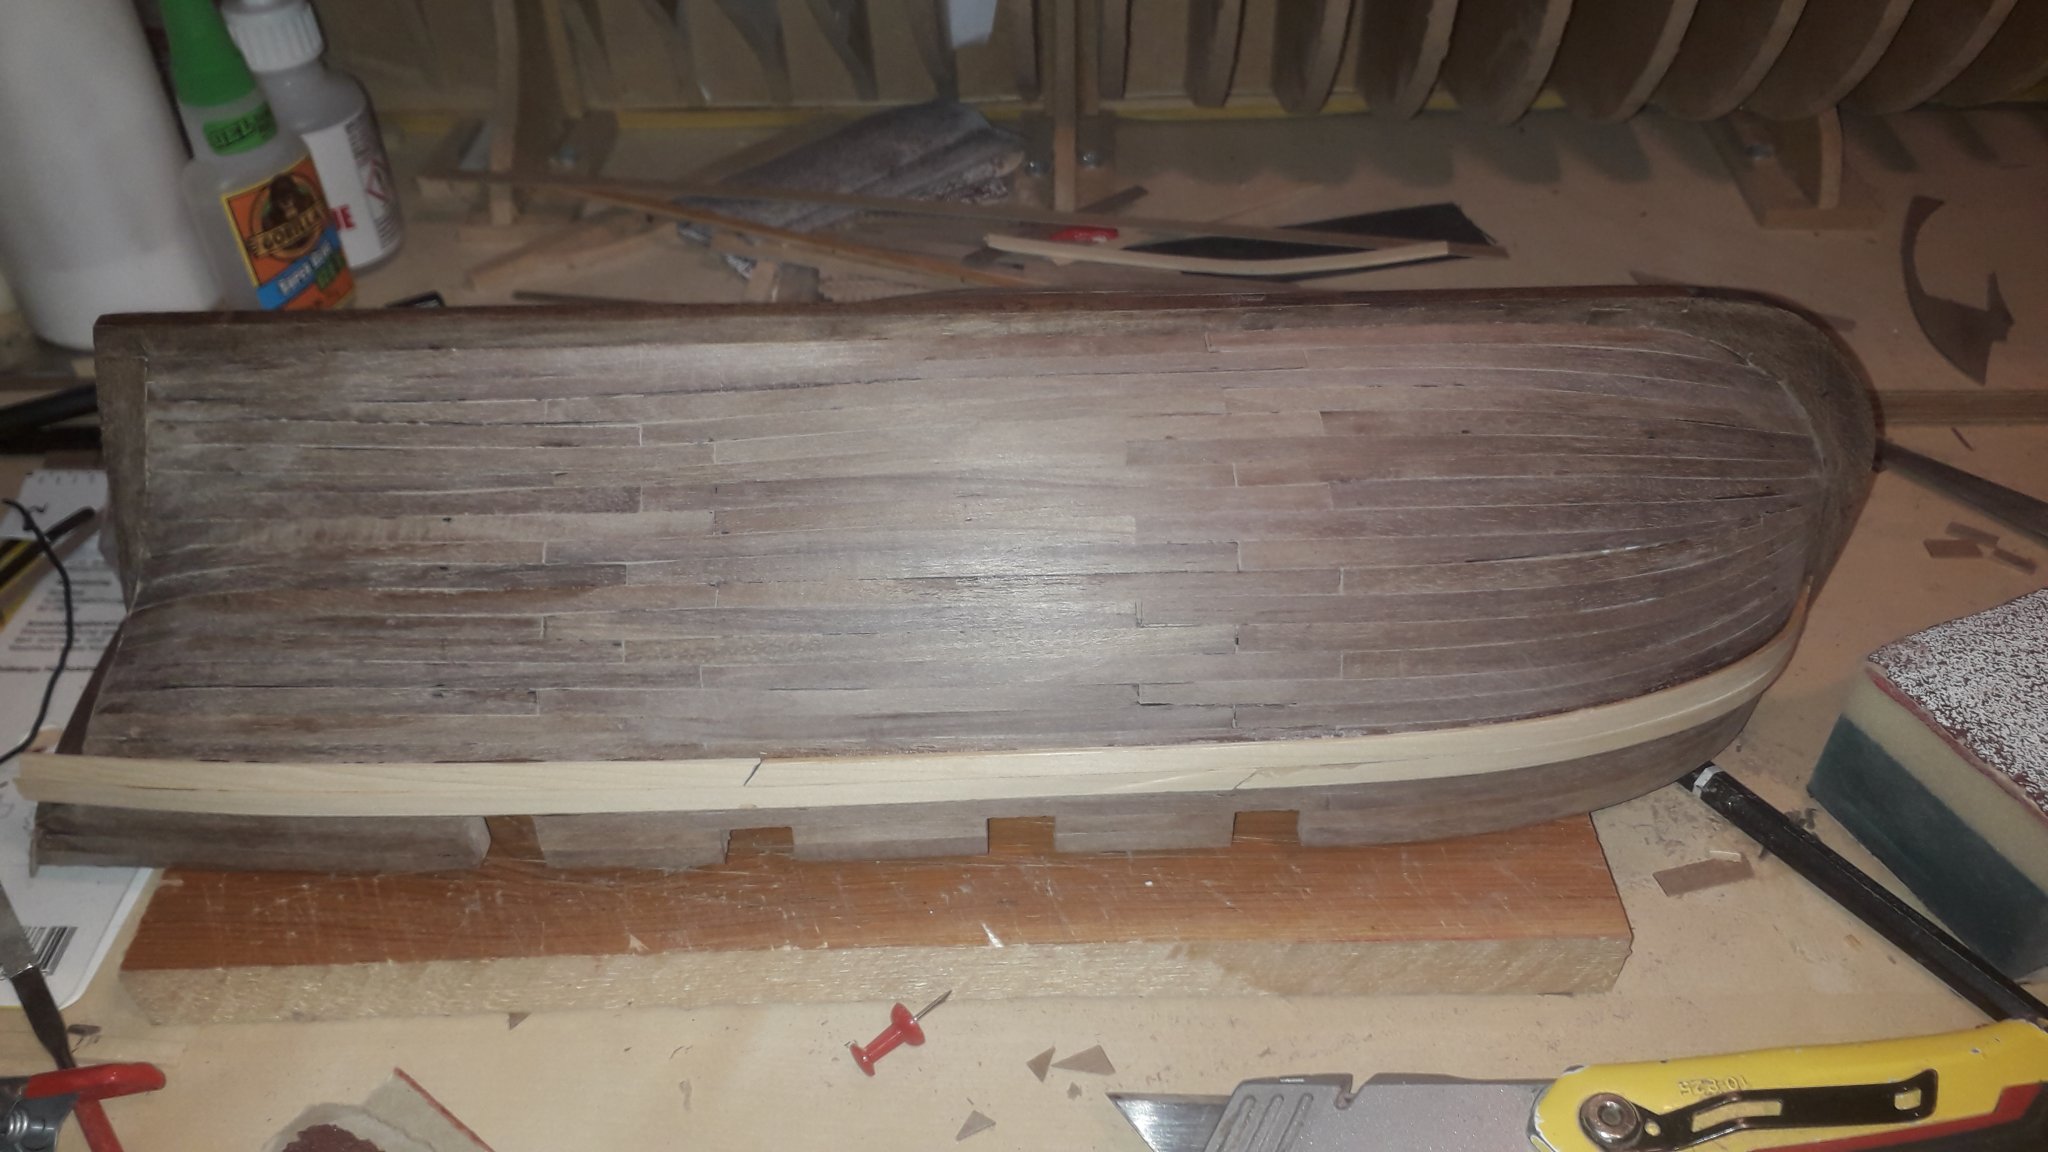
If someone is interested i can describe this method i tried. I observed mold works - so i bought small boat model for few euro. Completed bulkheads Filled up with balsa wood and voila - mold ready. - than i bended ribs/ to be oversized / and just simply clamped them with some rubber ring fasteners. / girls clamp their hairs with those/ ...
.....rest is usual as any clinker....
Even she is not symetrical gave me fun.

-
5 hours ago, rwiederrich said:
Vladimir...she sure is looking swell. Your planking work is exceptional. I applaud you for taking on such a large redo. I can only hope my planking of Glory of the Seas comes out nearly as well.
OH....I've never seen anywhere in your log about what, where, you plan on displaying this large model....what are your plans for her?
Rob
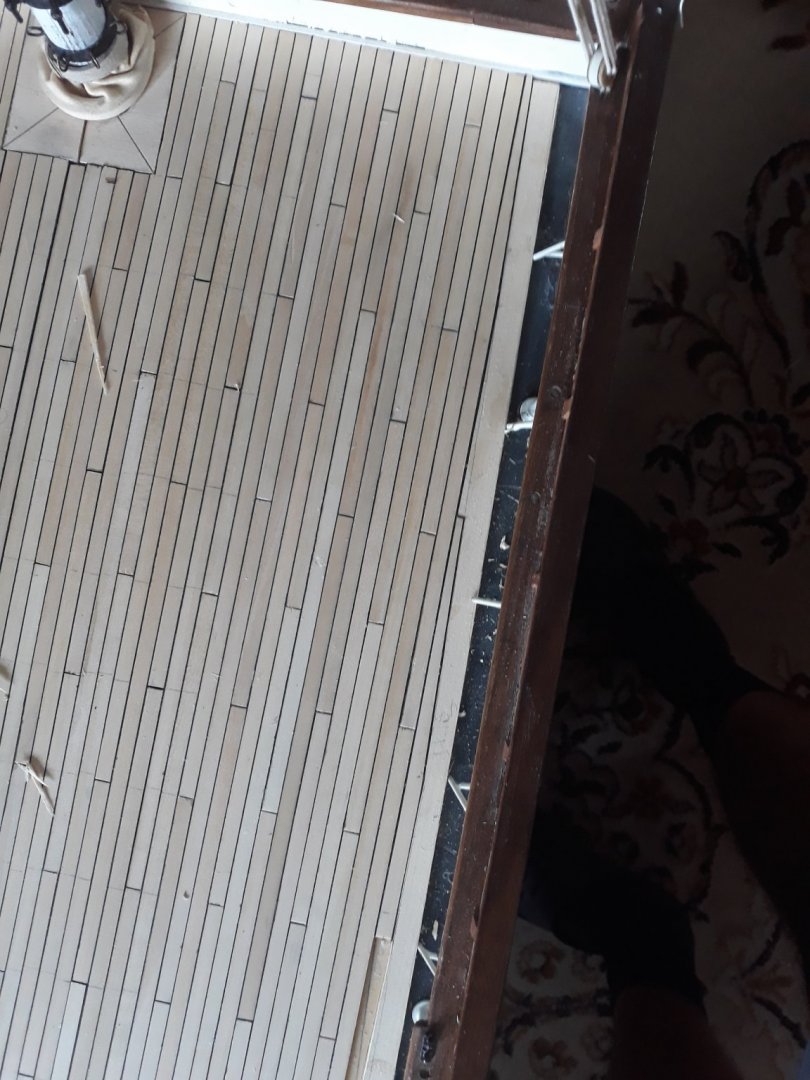
Thank you Rob for the liking and gratifying comment. Im sure you can do better i saw your striking sails and wonderful cabins..... its always place for getting better, i was not particularly picky. One thing i ensure was i didnt want oil varnish to change color to amber..so i obtained one that doesnt color wood. Im pleased for almost white floors though...
.
as this project taught me to be humble observing others work, well well, good question of placing her.wanna truth? I dont want to keep her for some reasons rather let her go.... I wish more people could see her so i will try that route first not sure what route that would be..and if not succeed, i will try to offer her if there was sign of interest somehow .
and if not i will keep her. will see.. and now last chapter so i can catch up with glory of the seas fanclub. V.
-
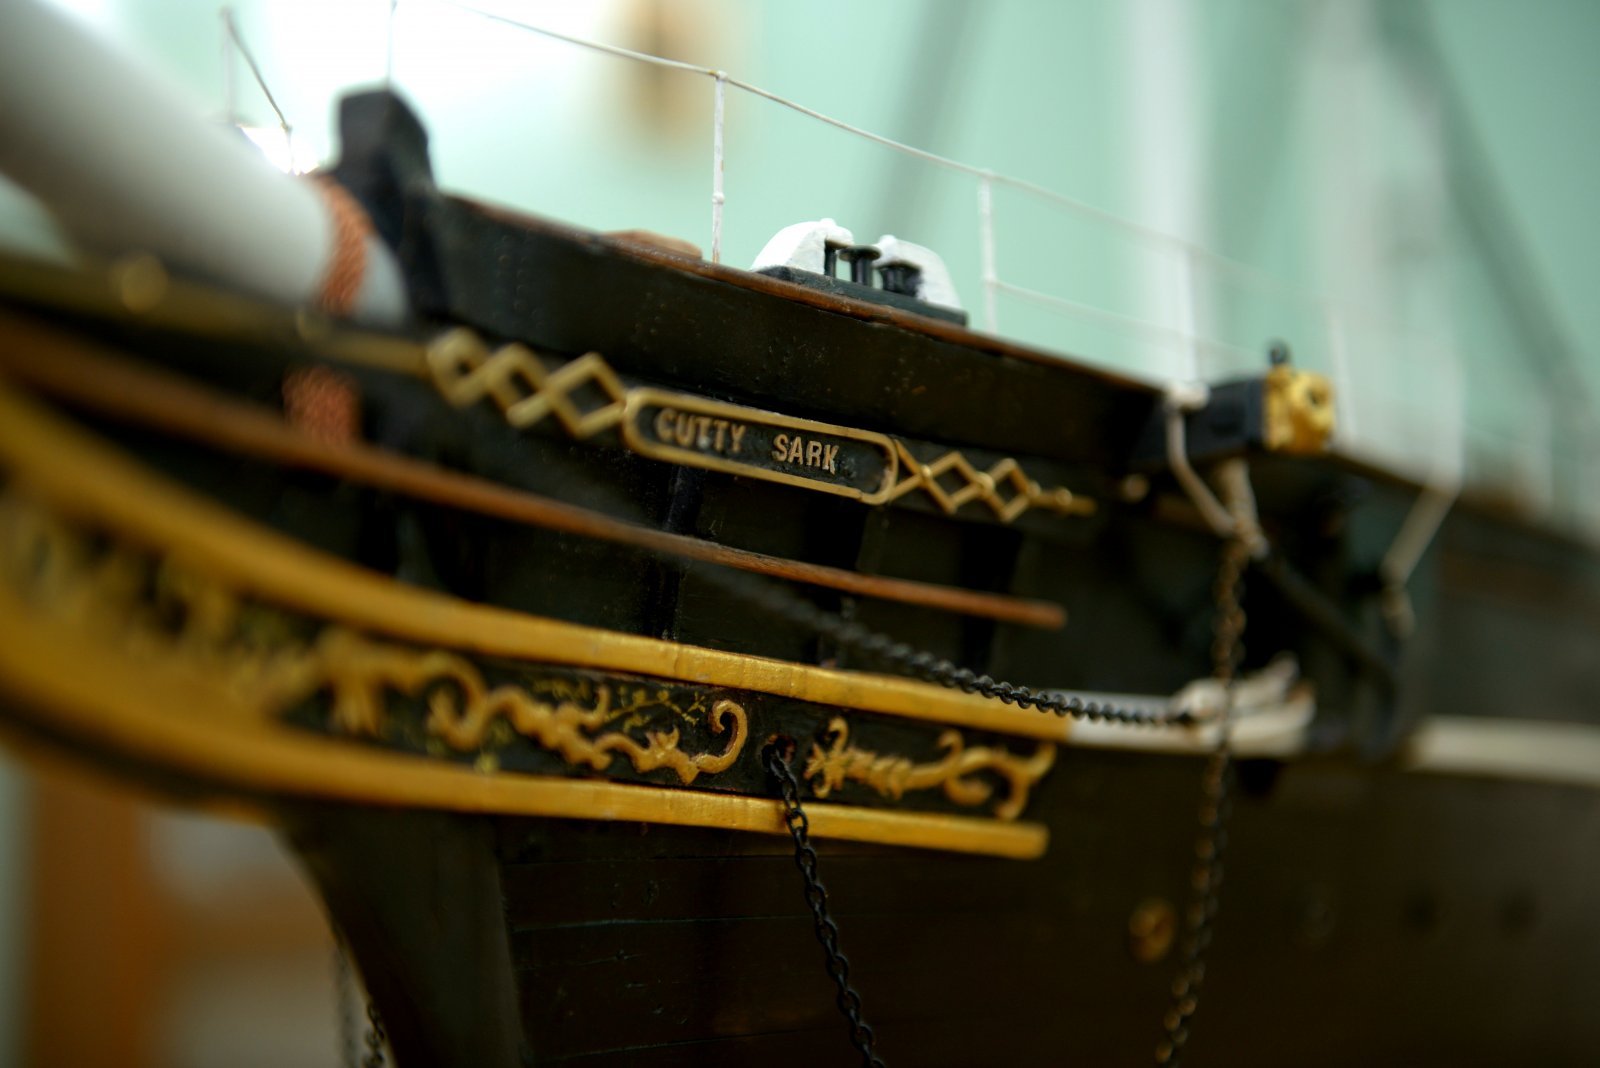
3 hours ago, Bruma said:
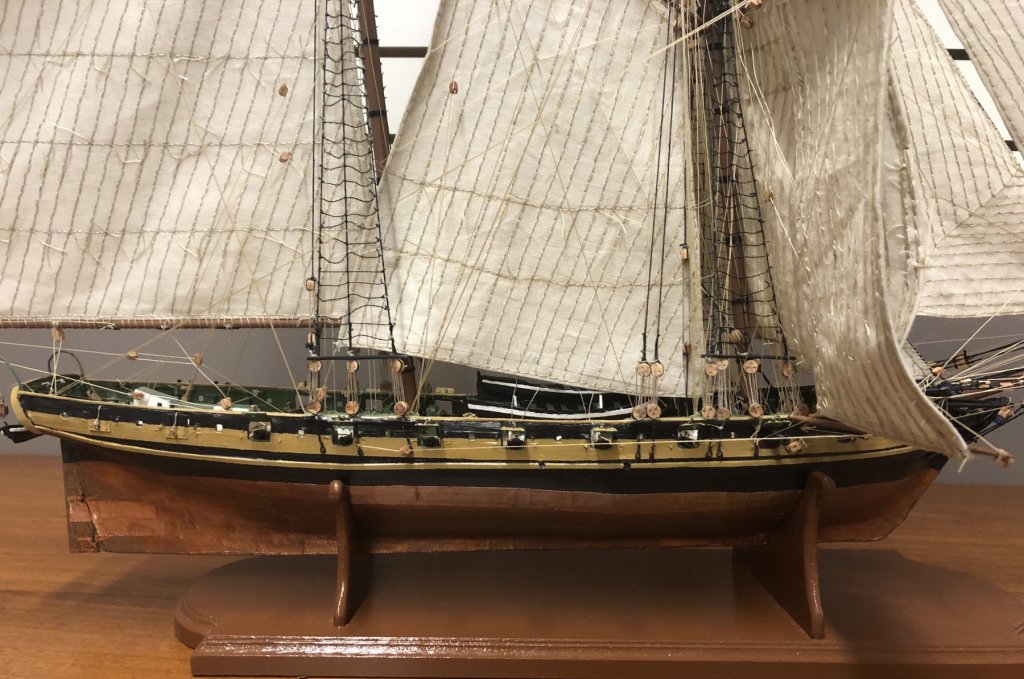
Vladimir, your Cutty Sark is growing wonderfully!
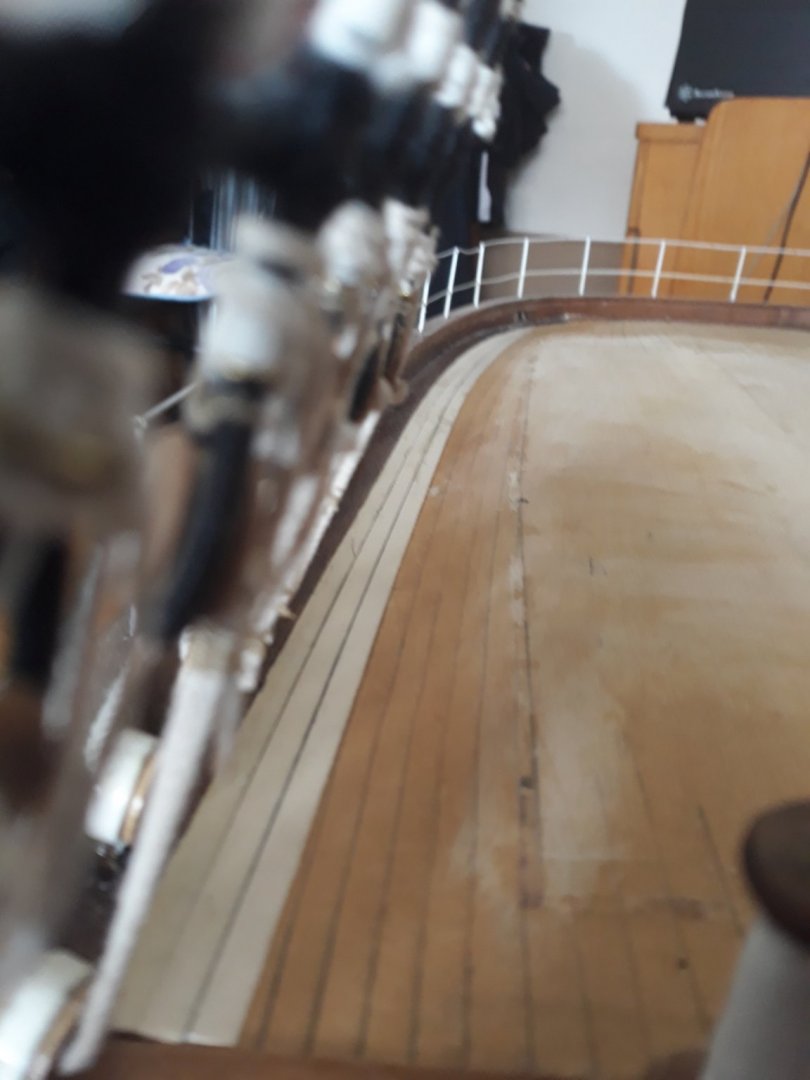
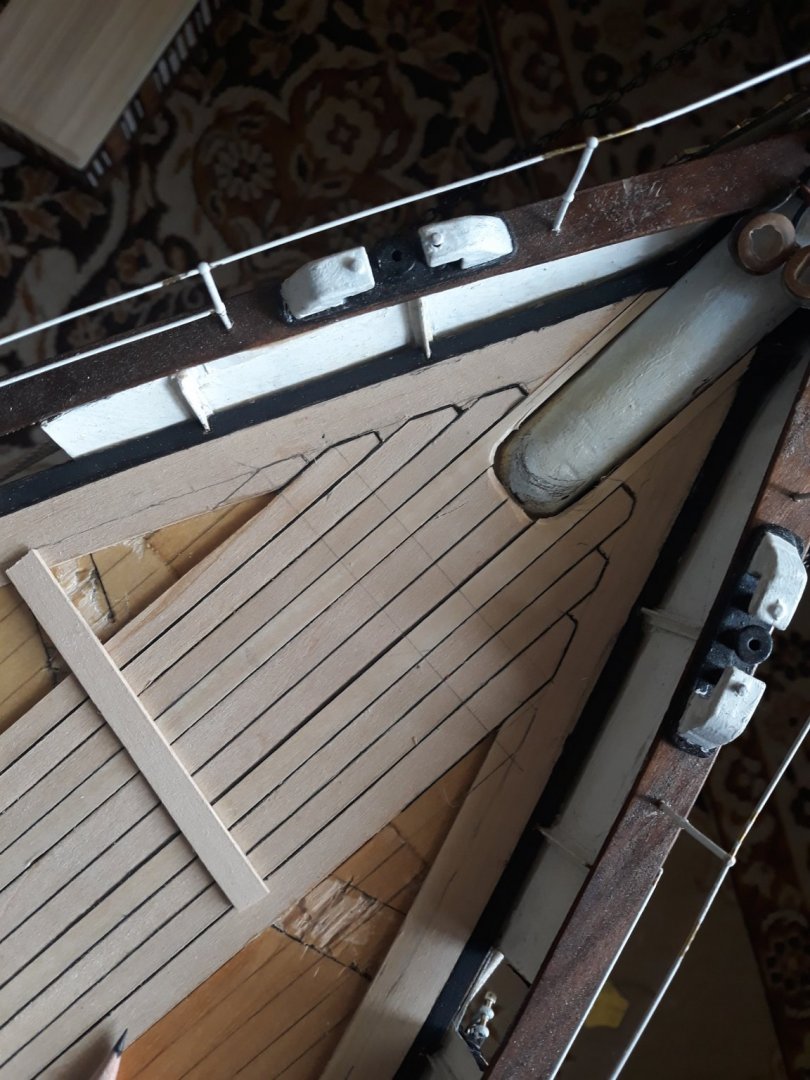
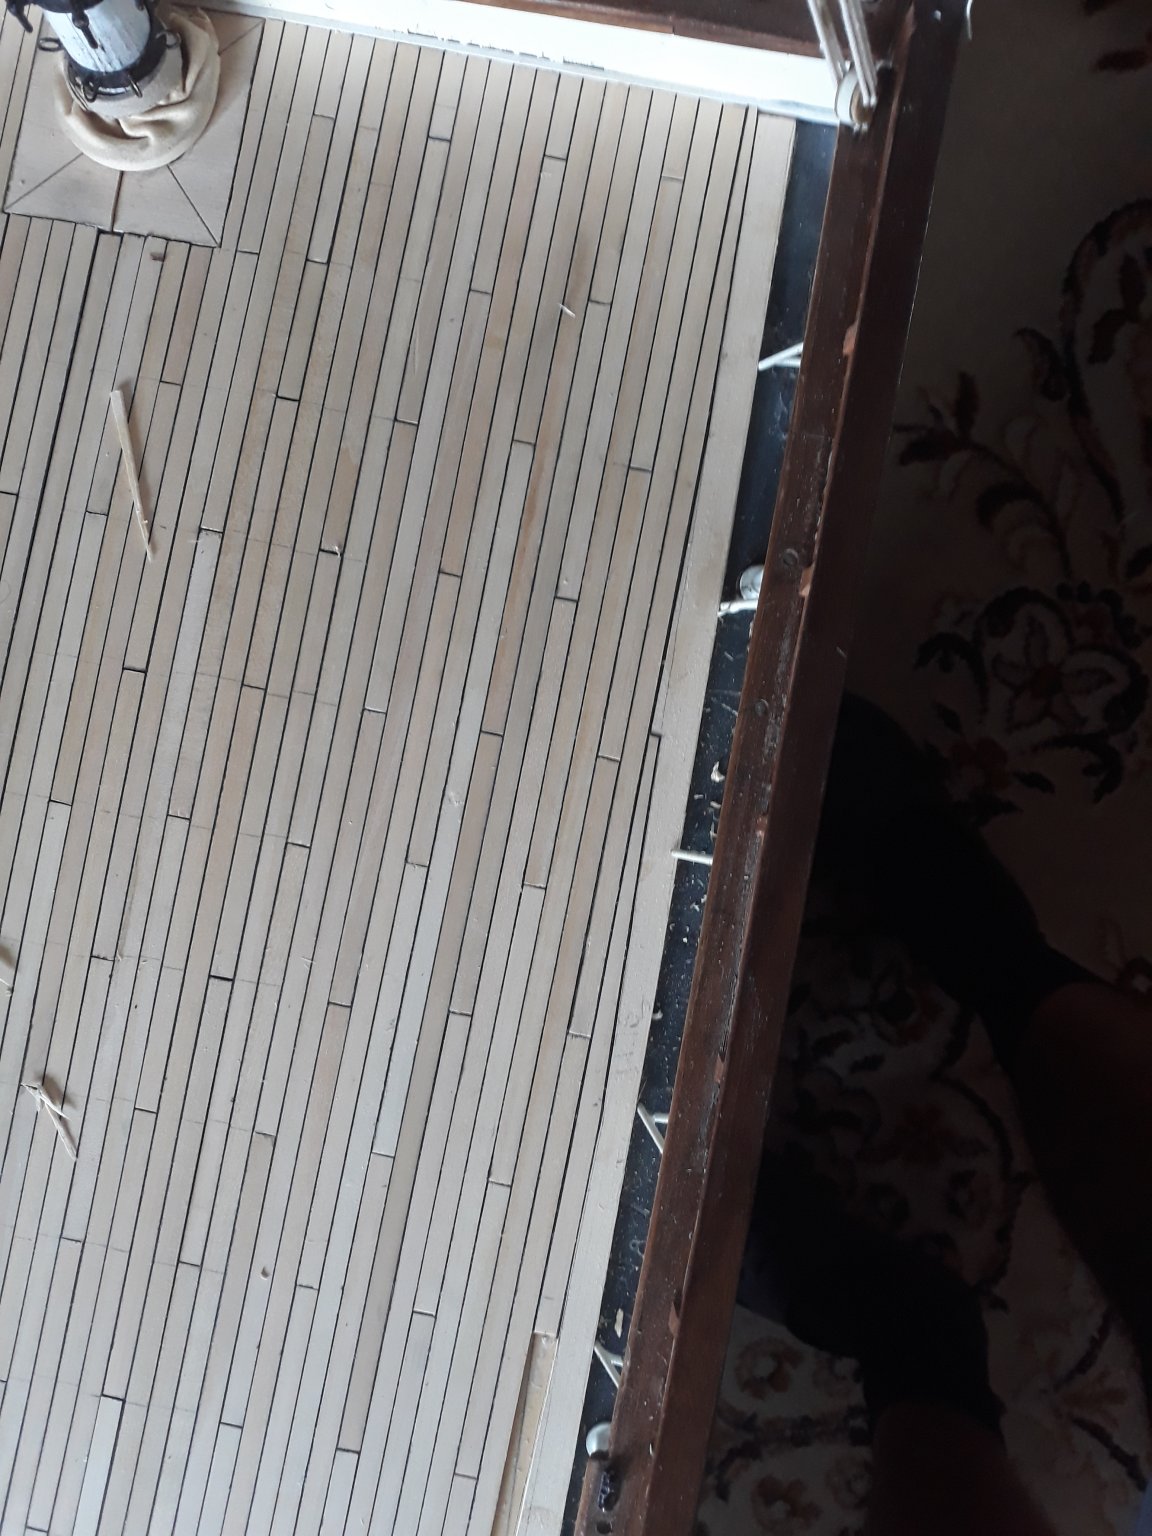
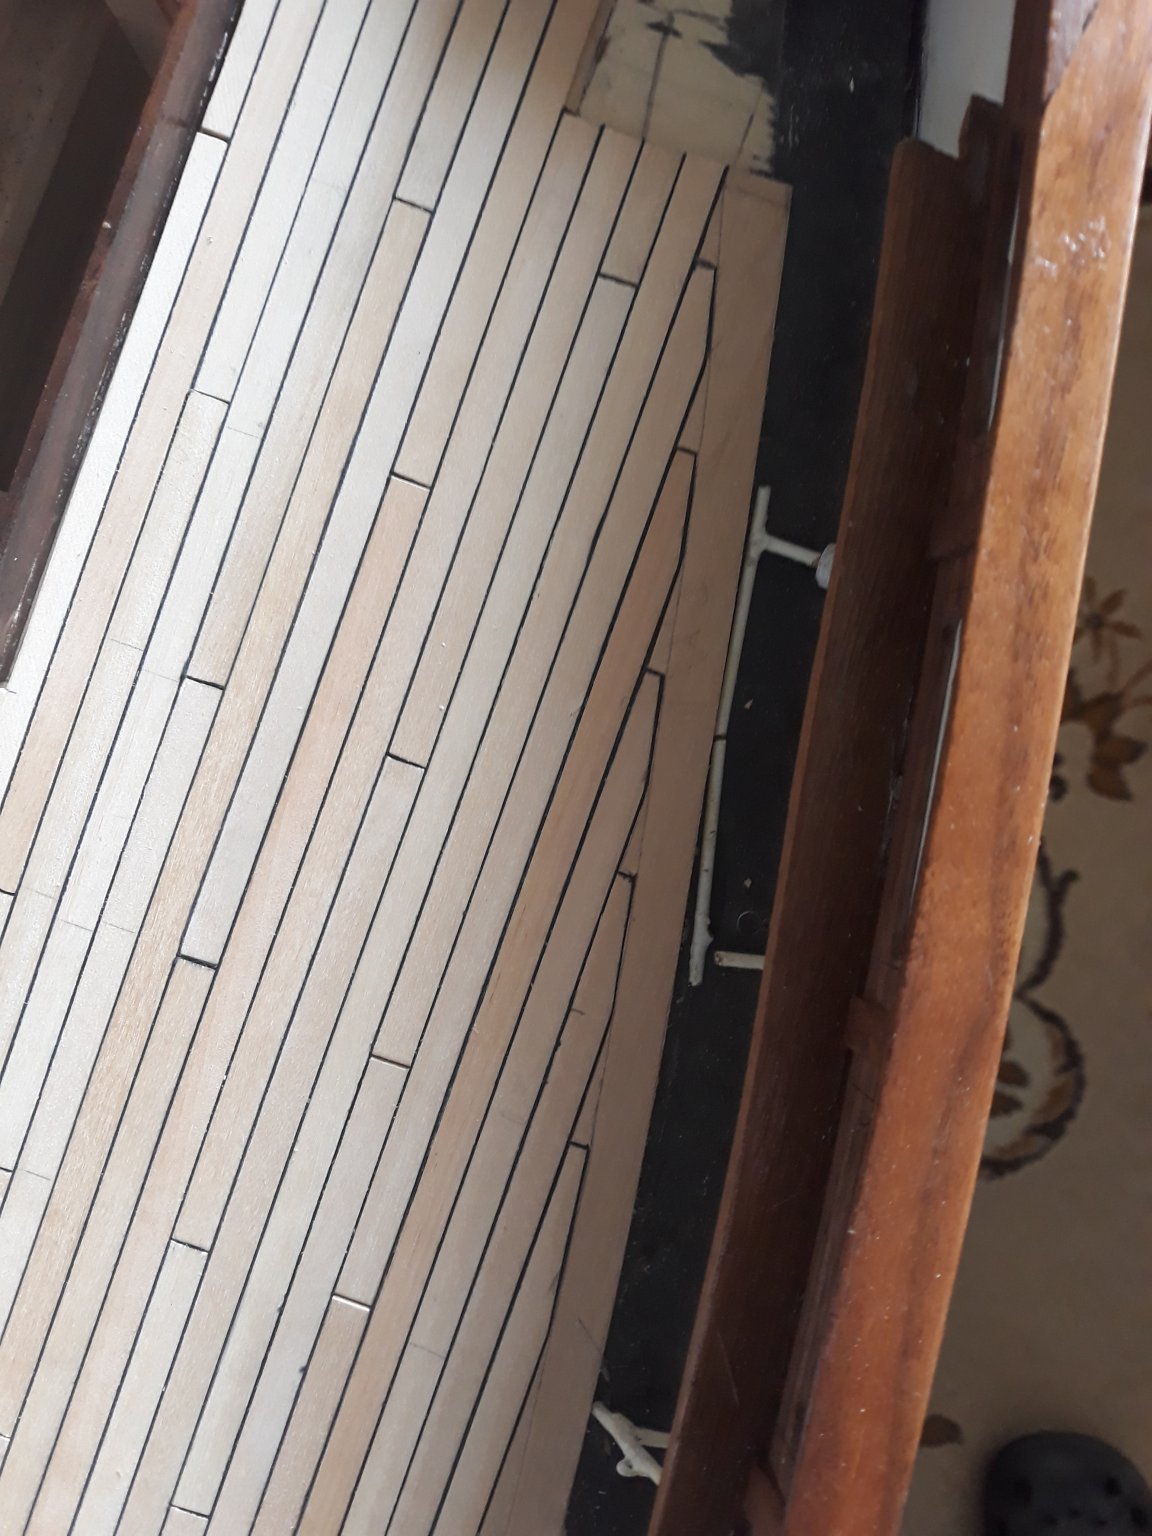
Looking at your last pictures, there is a detail that catch my attention: the stern deck planking pattern.
You mentioned, "Poop deck floor is properly curved along the gangway...and met in center/ probably not like prototype but...well..."
Why did you choose to use this specific pattern?
In Campbell's plans they are straight and parallel.
Just to clarify, mine is not a criticism, your planking is really nice and well done, especially in this difficult area. I'm now a Cutty Sark addicted and I would like to know it better, any source of information is welcome. ☺️Hi Bruma, thank you for great comment and good observation. first off, if you look ver carefully sou can see that curved planks should follow not only line of gunwales but also poop deck itself. therefore there is slight curvature discrepancy of stern towards end i am aware of and sharp eye sees it...even though i was correcting it. that pattern is something you may call laziness prbobably. as it was easiest how to finish it quickly. not really something to be followed, campbell panks are being straightened towards center and possibl cut narrow , buI just have basically enough after more than 3000 hours of building i consider it feature not design flaw :))) . there is wheelbox laying ot center anyway ao it is not visible at all anyway. i just have enough. i am finishing captains gig and that would be all.
need to move on as i do not have more energy . i will not even finish rudder at this stage as I dont have capacity to weld such big hinges...so i decided that will be done maybe next year . thanks for liking I believe there is always room for upgrading, but i learnt a lot on their mammoth
-
-
very nice work on deadeyes
Bruma . lovely .
- shipman and FrankWouts
-
2
-
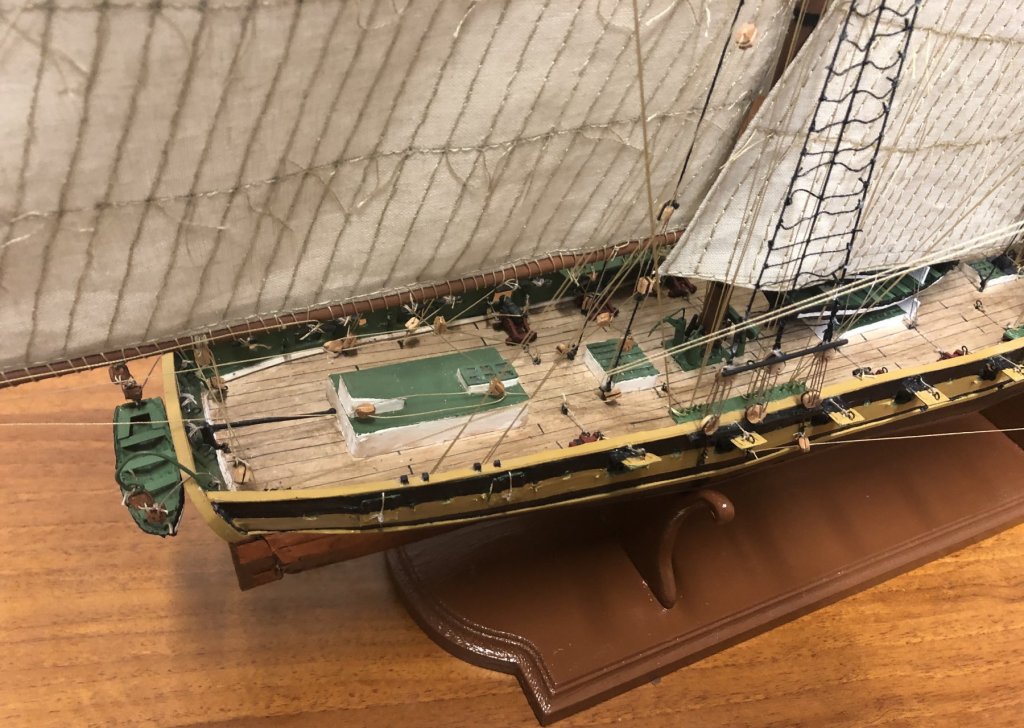
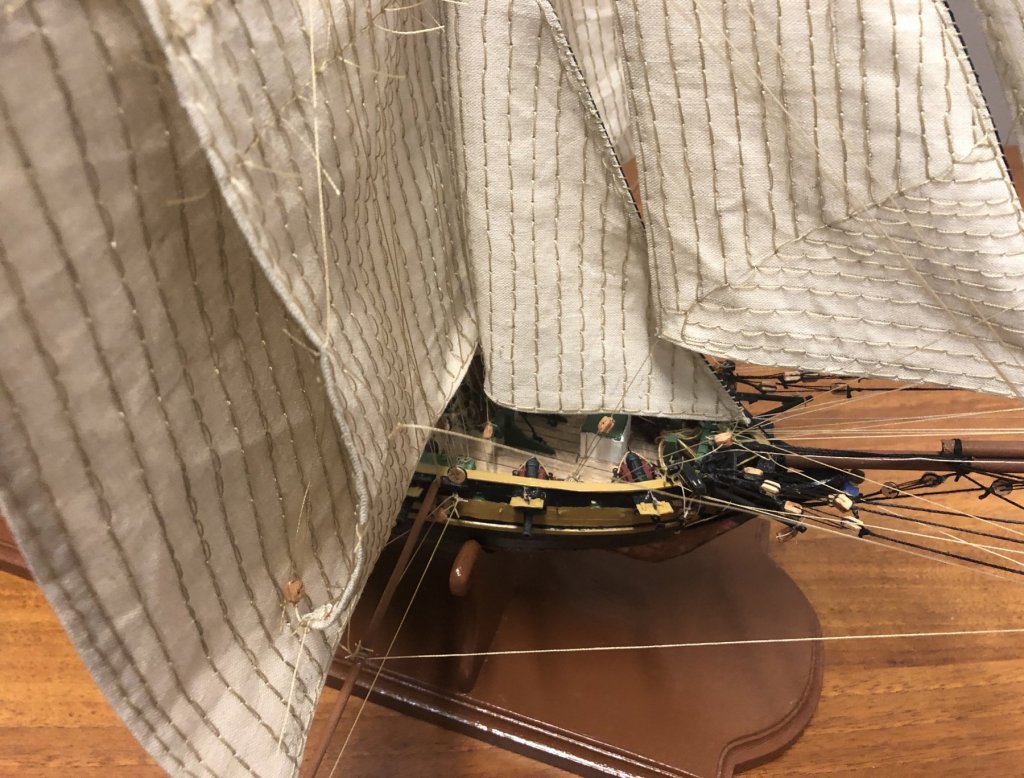
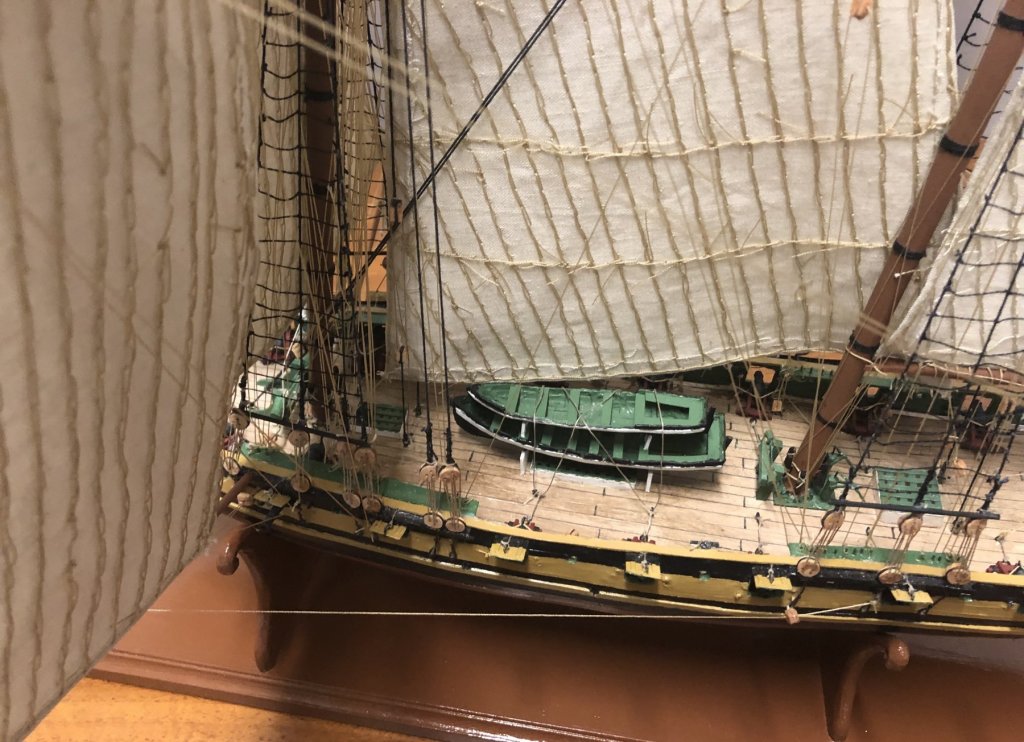
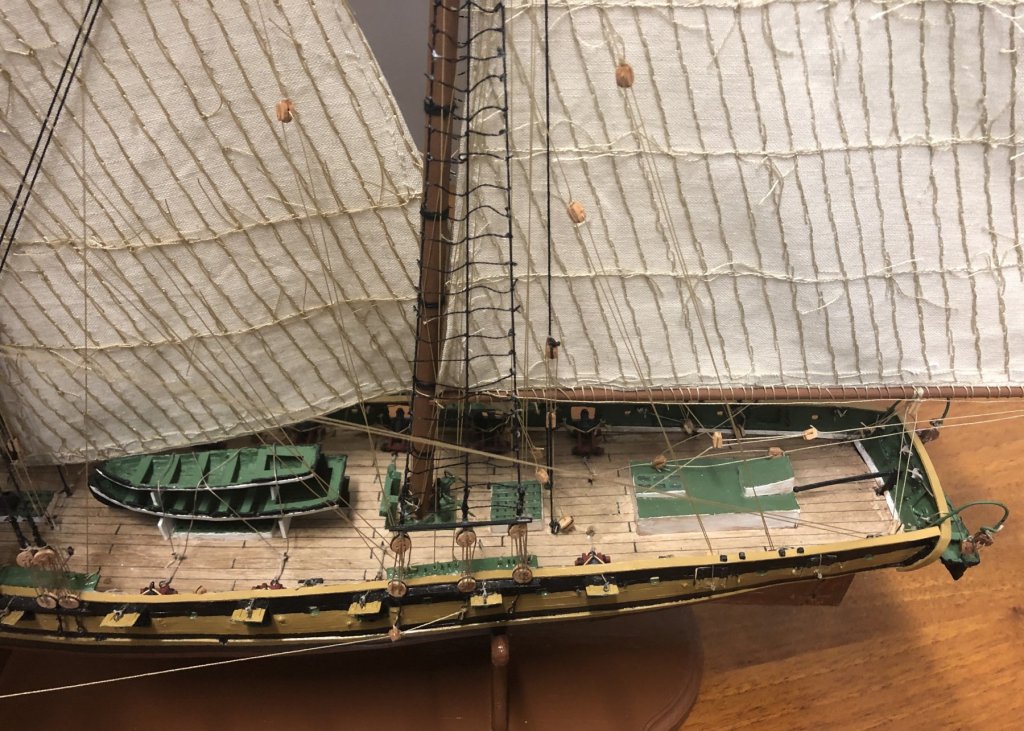
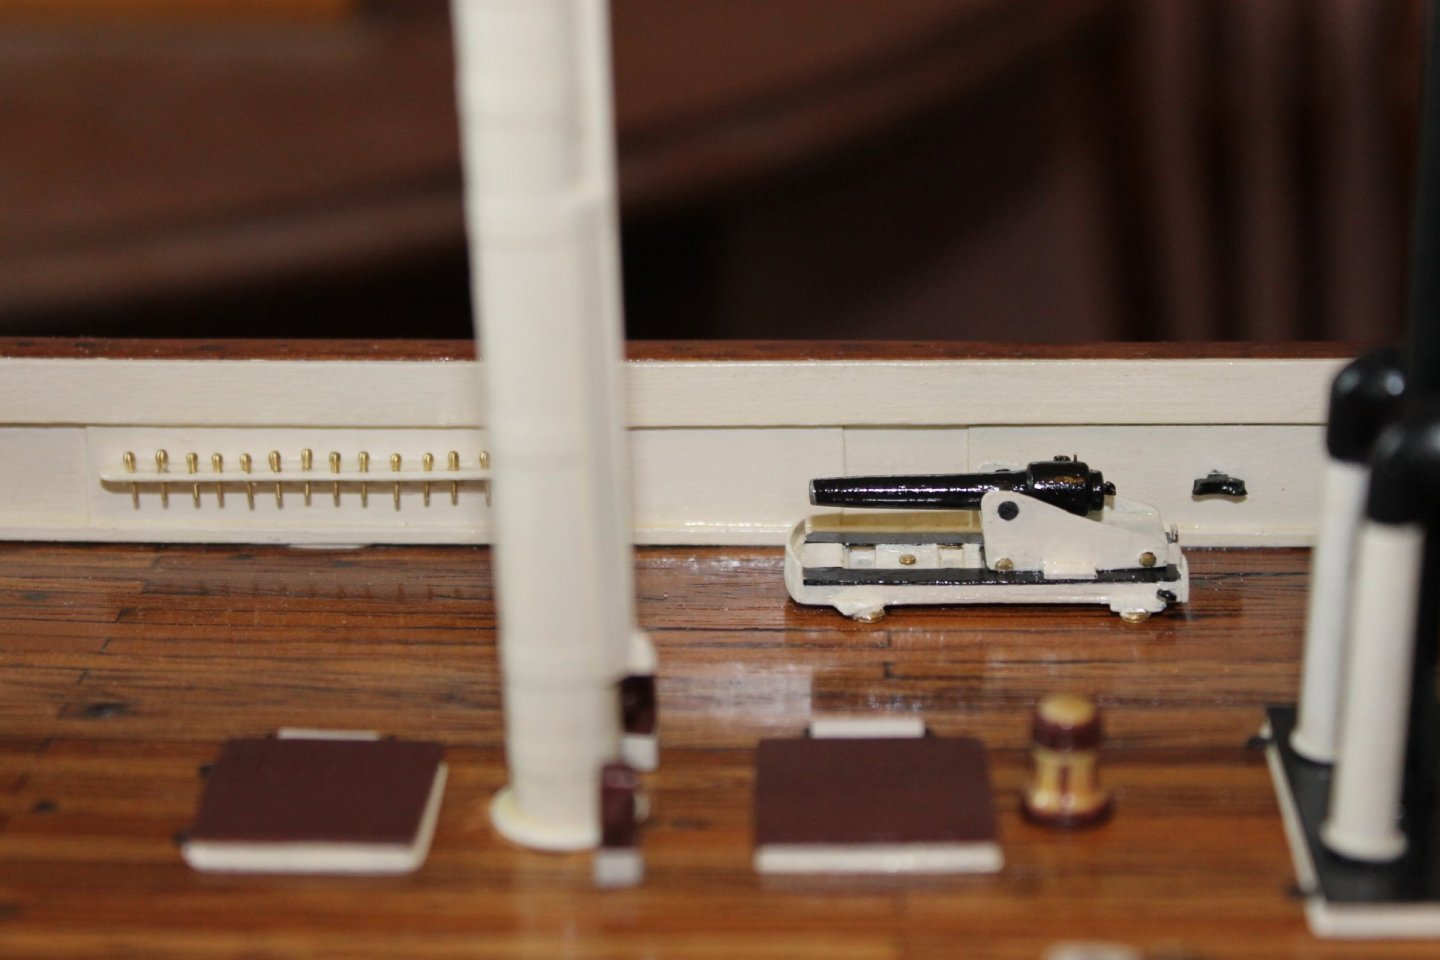
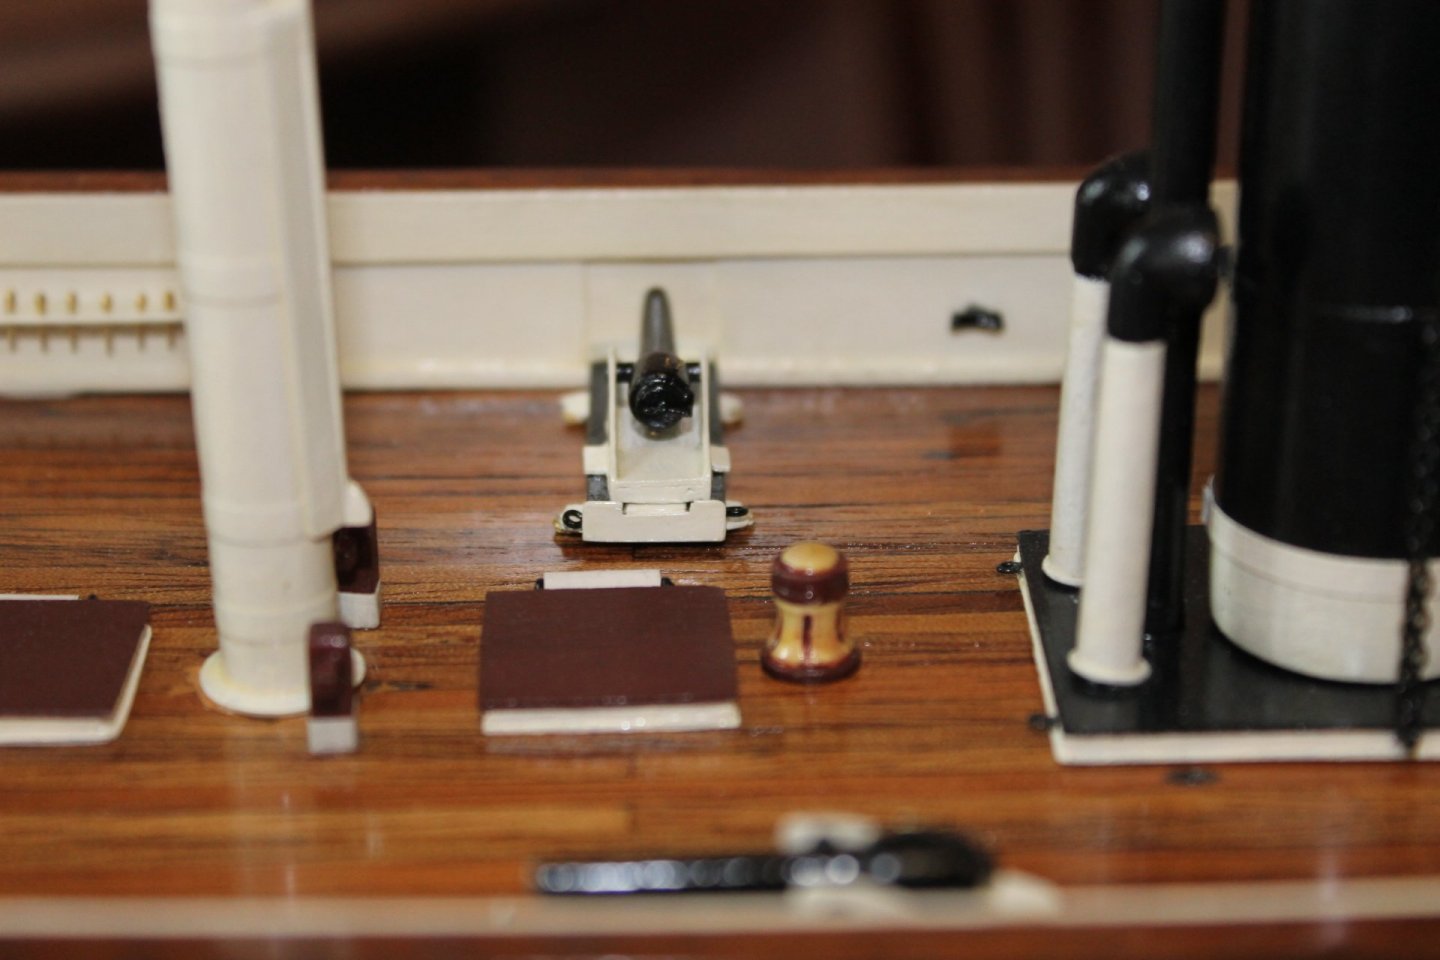
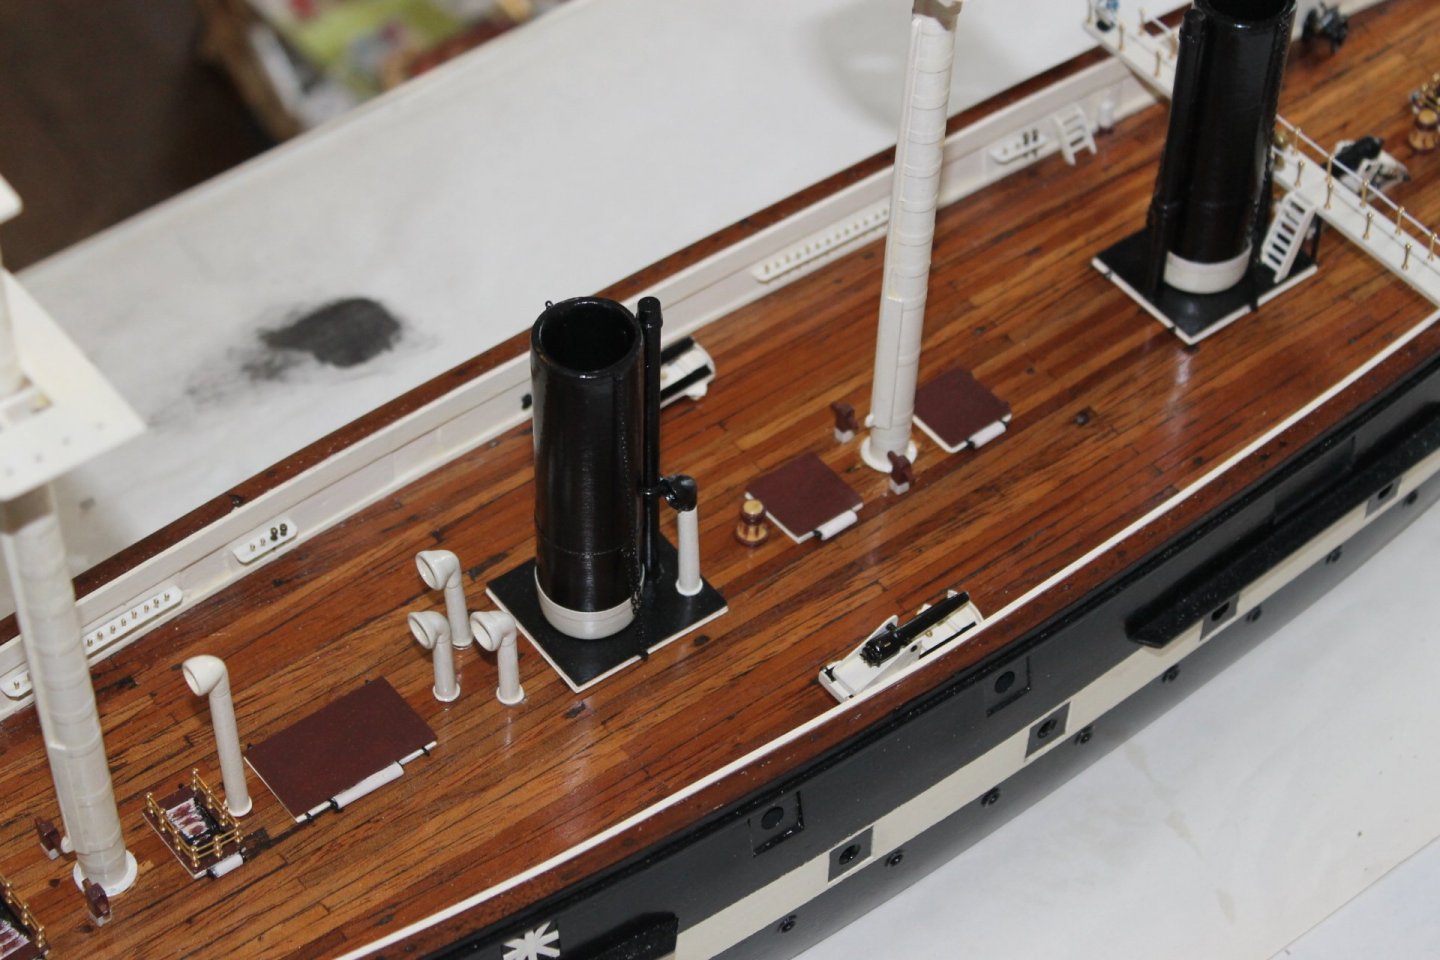
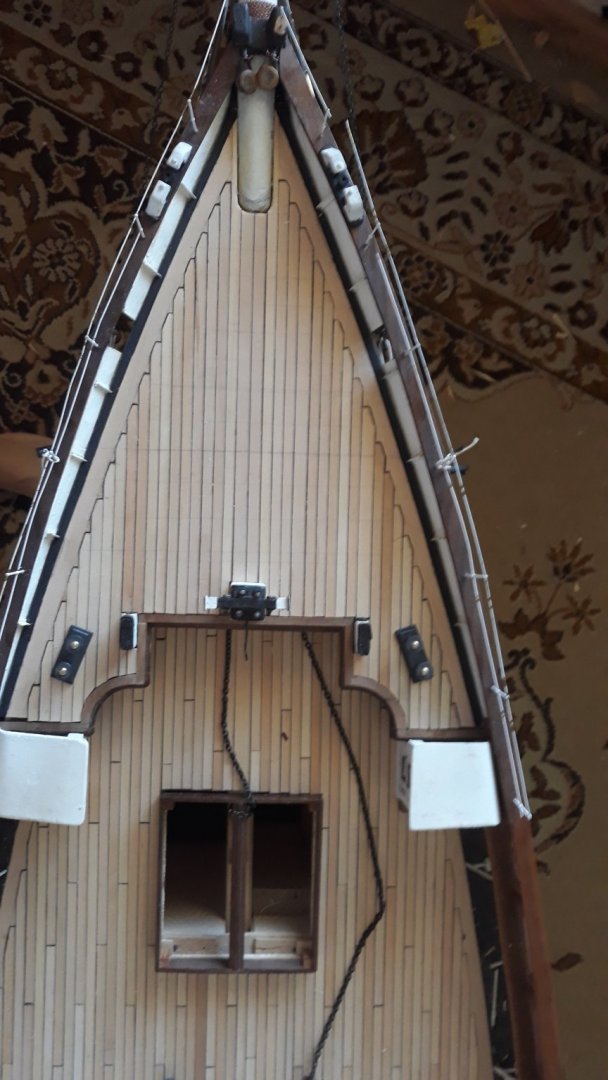
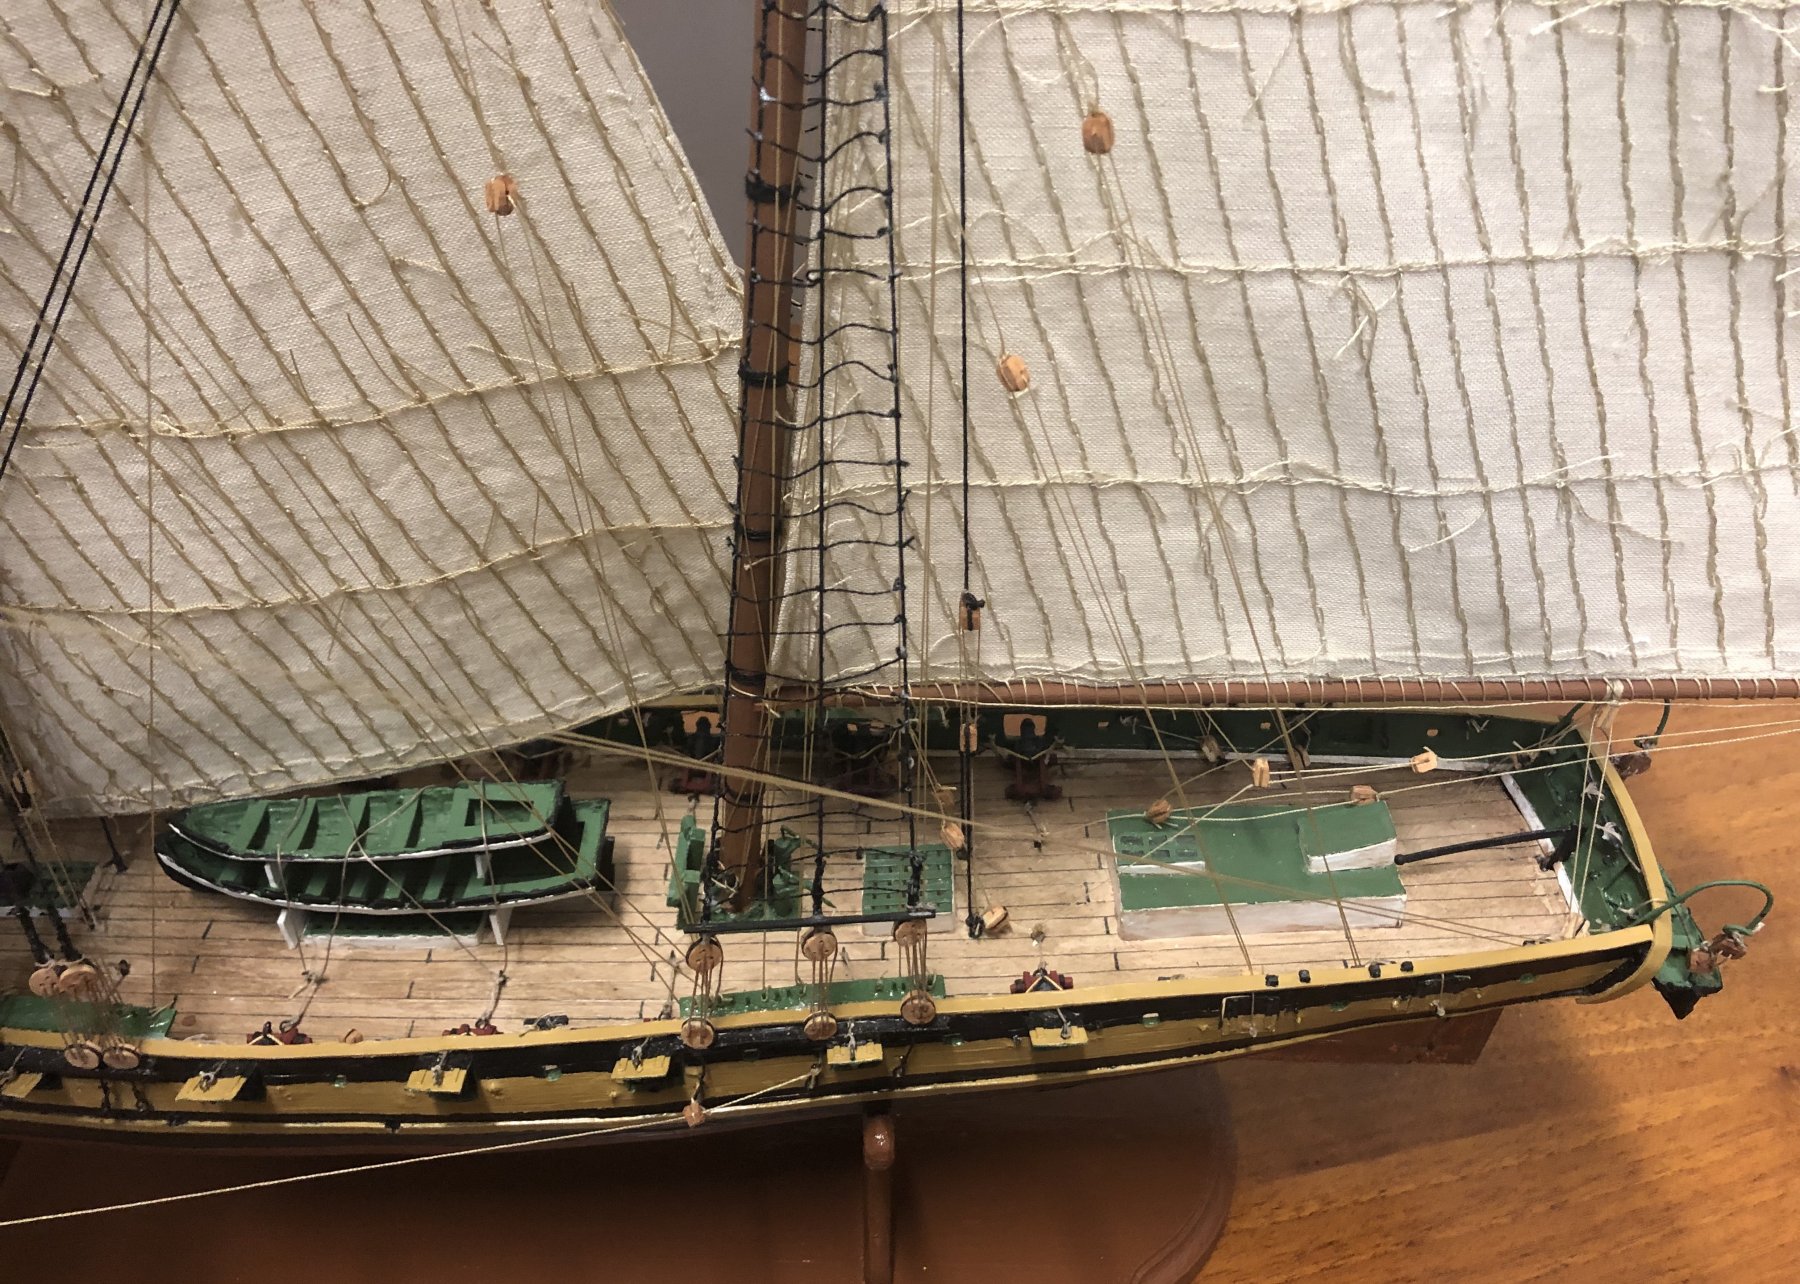
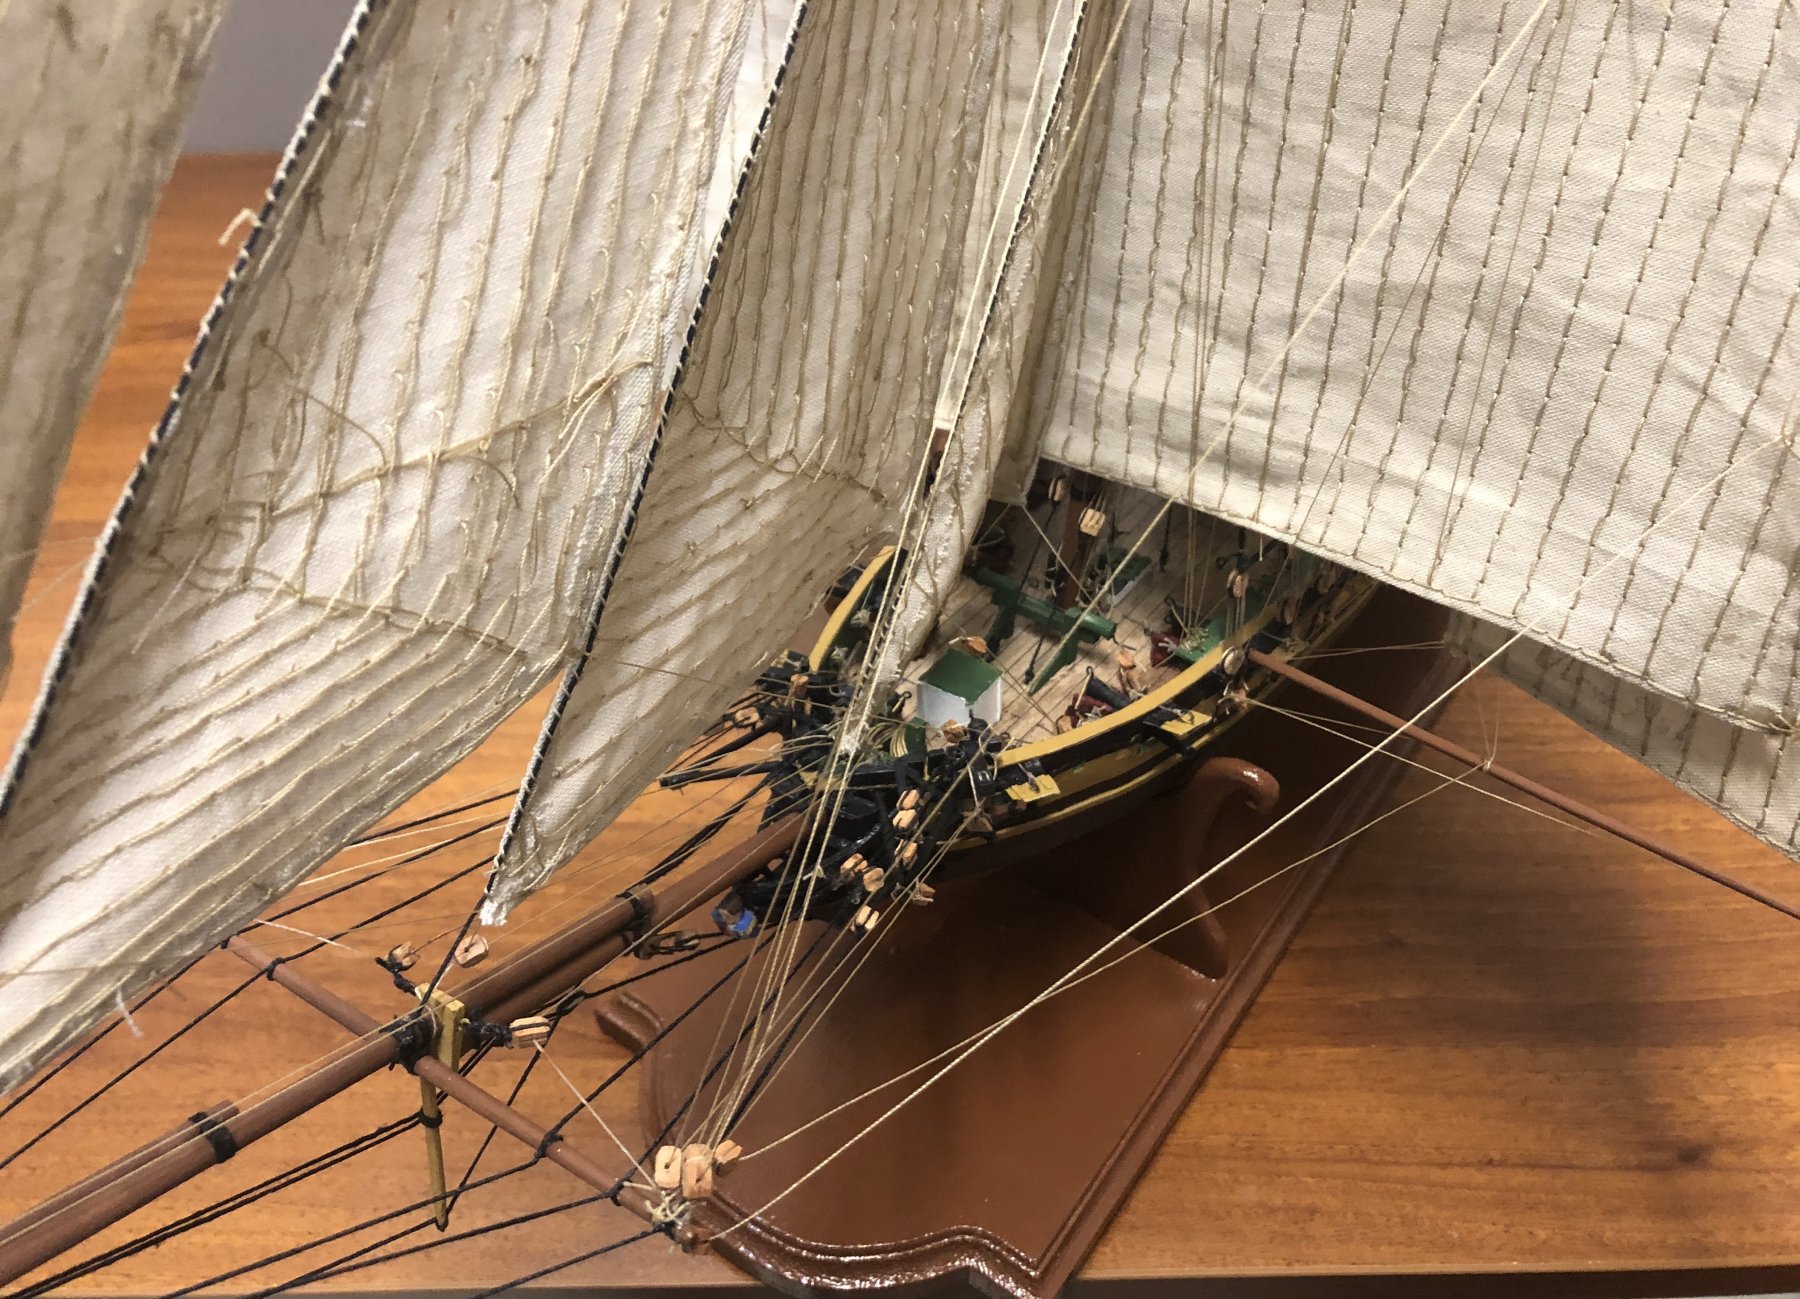
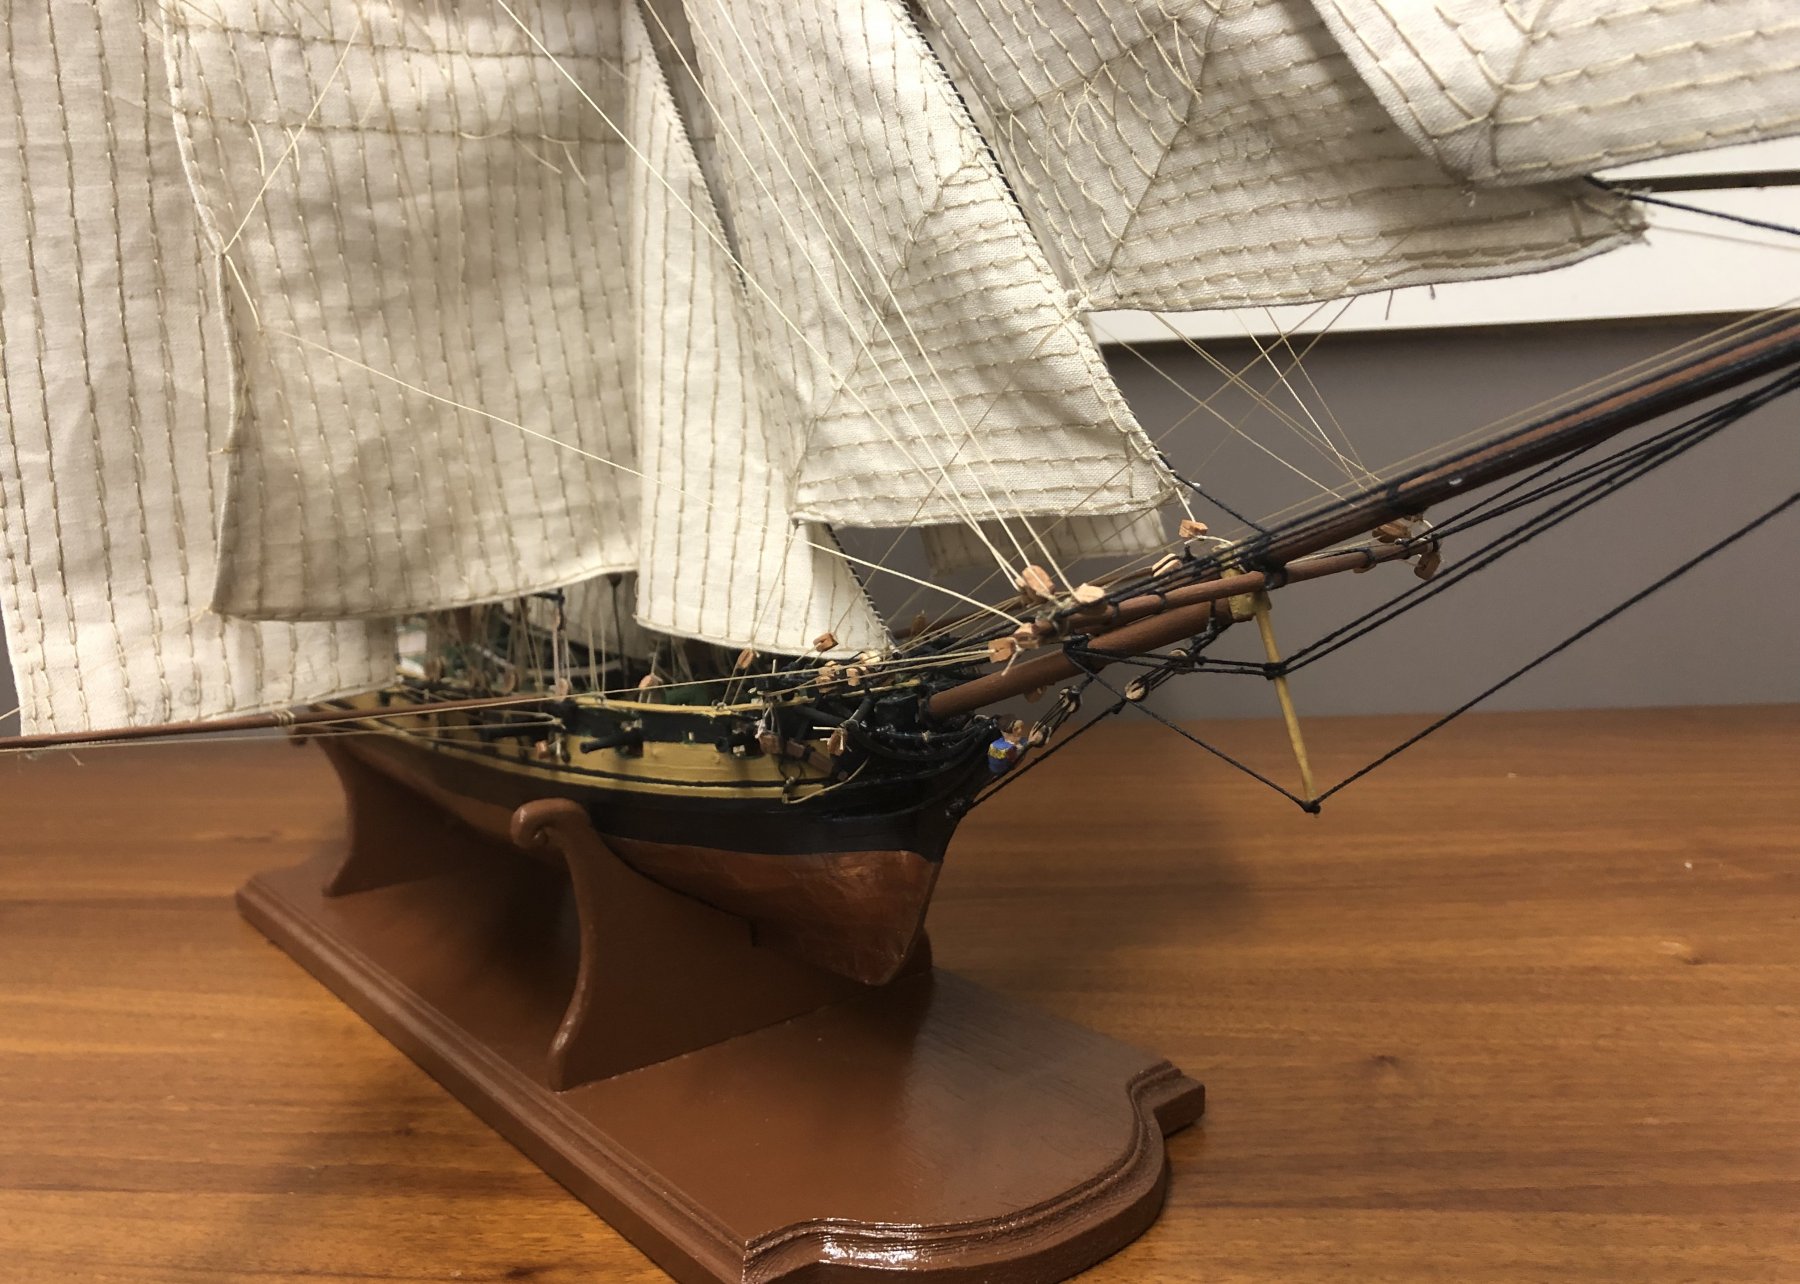
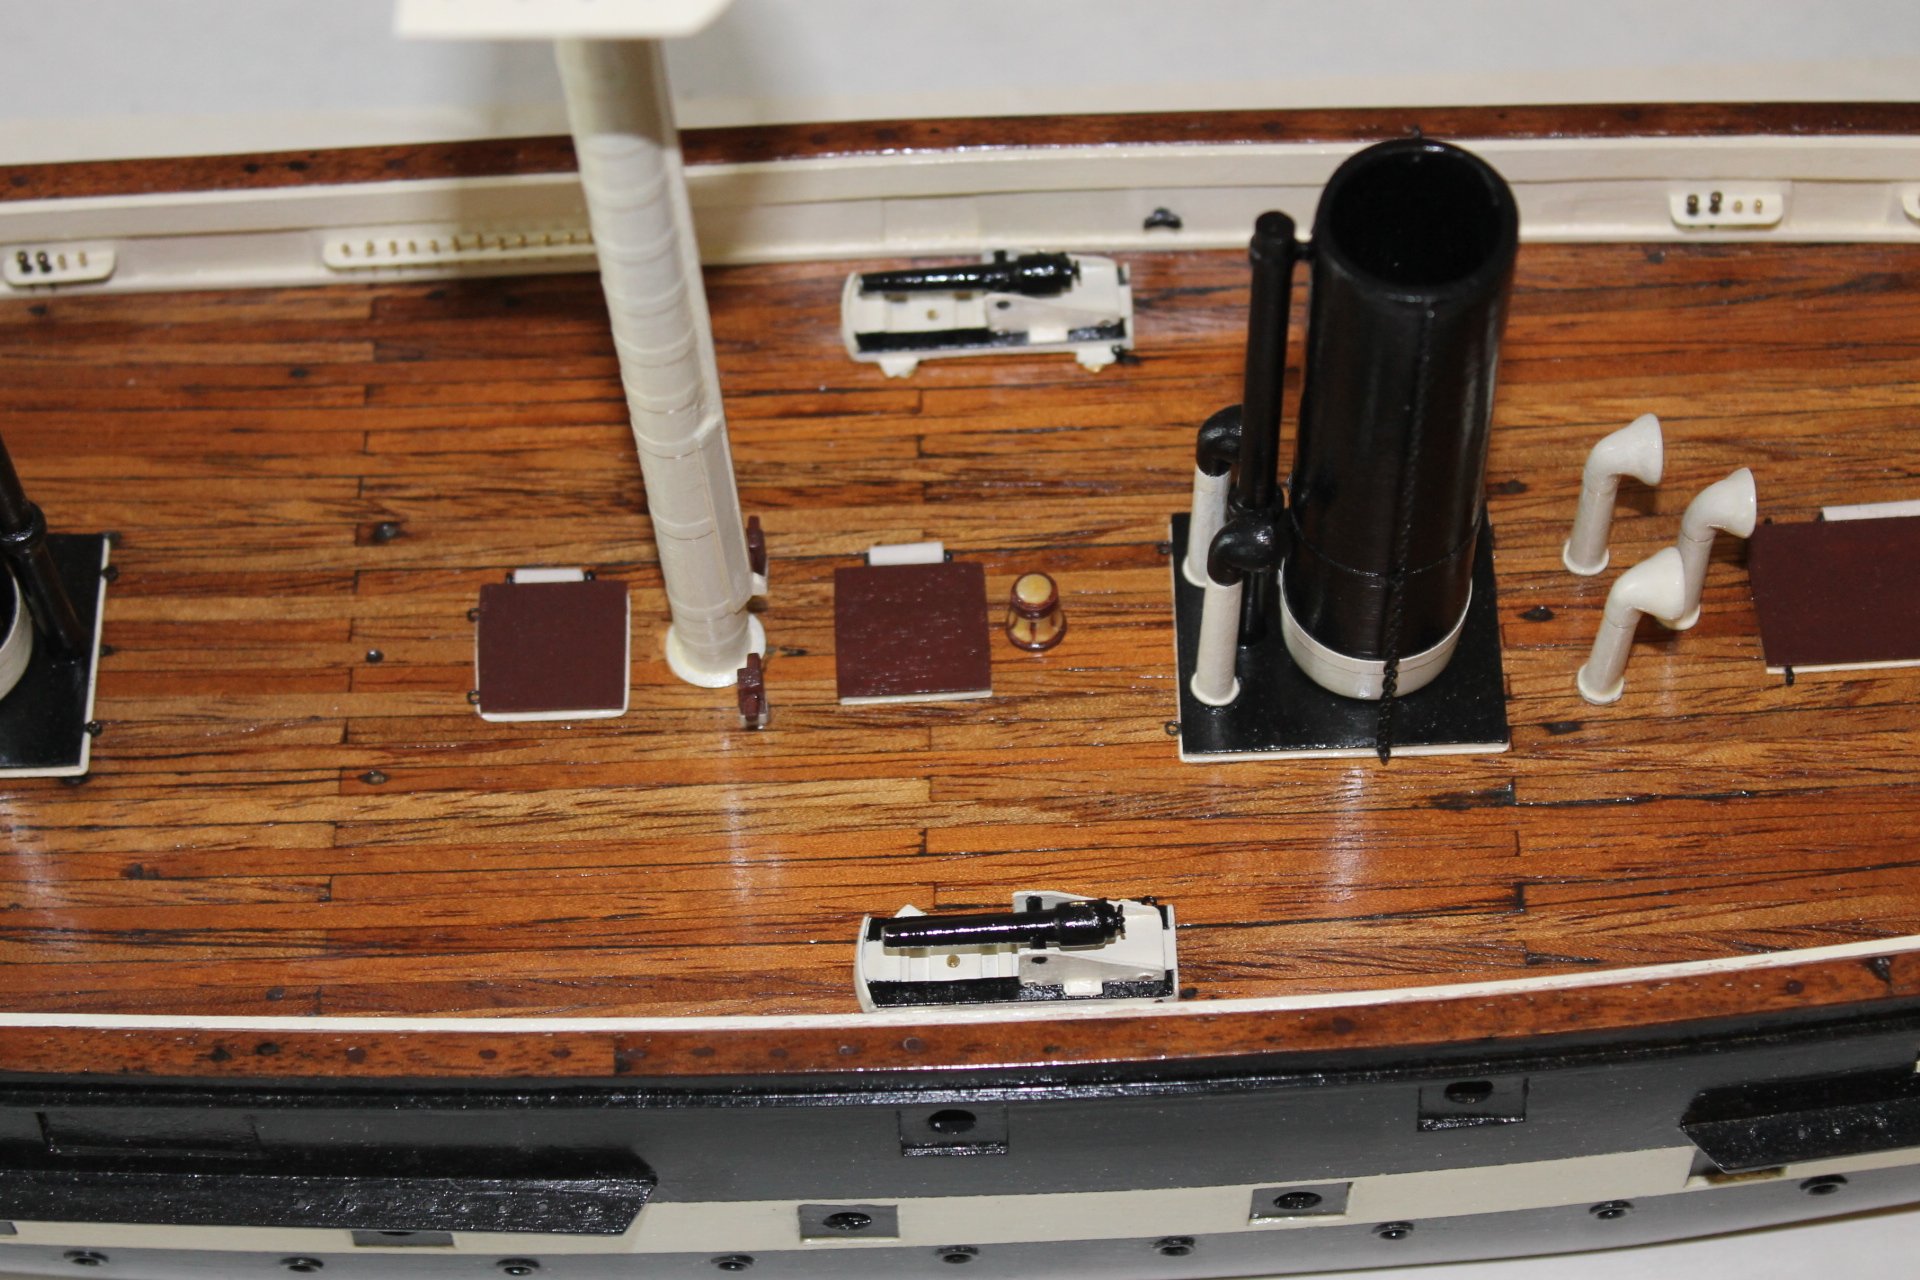
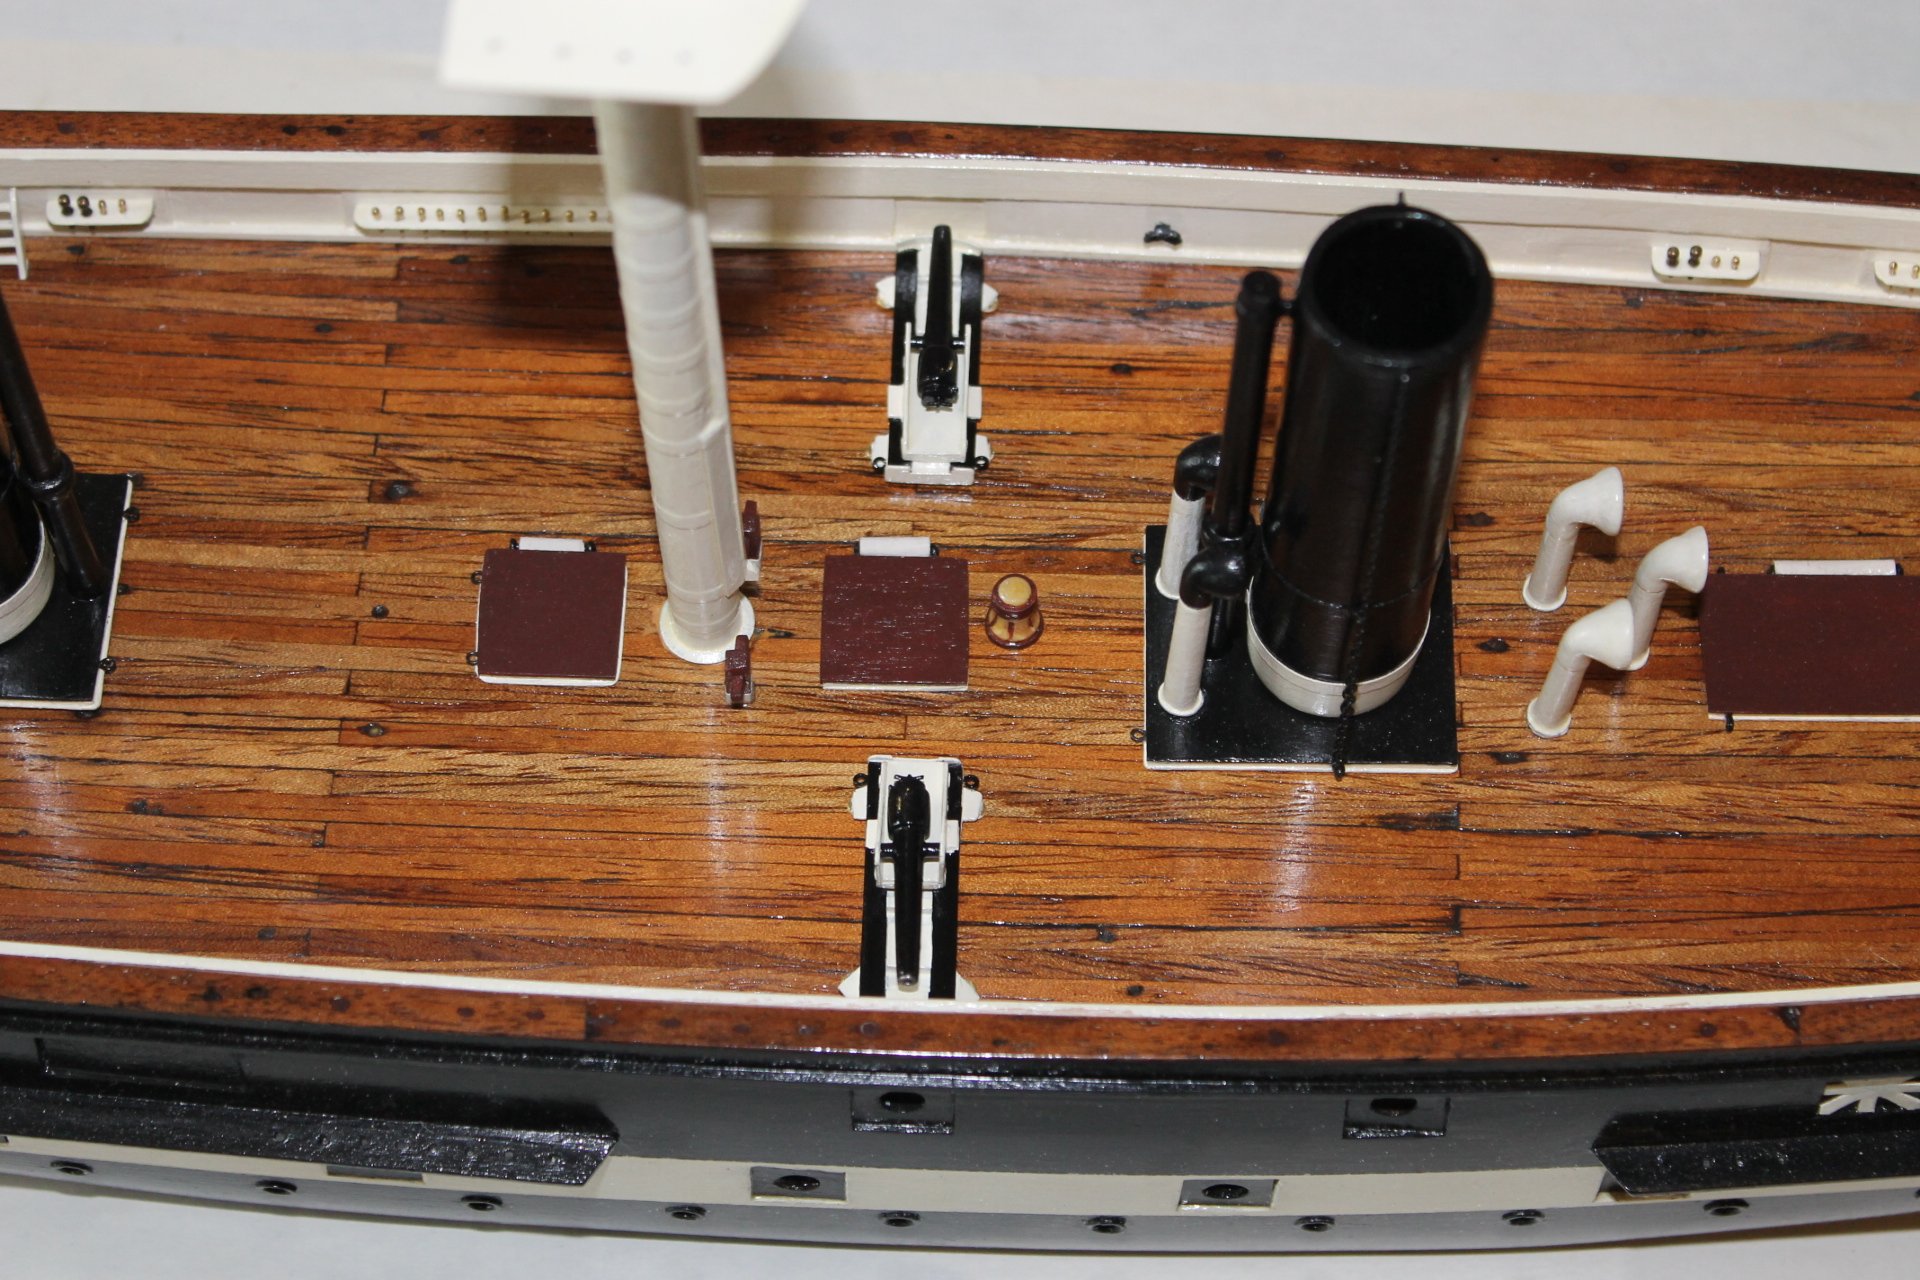
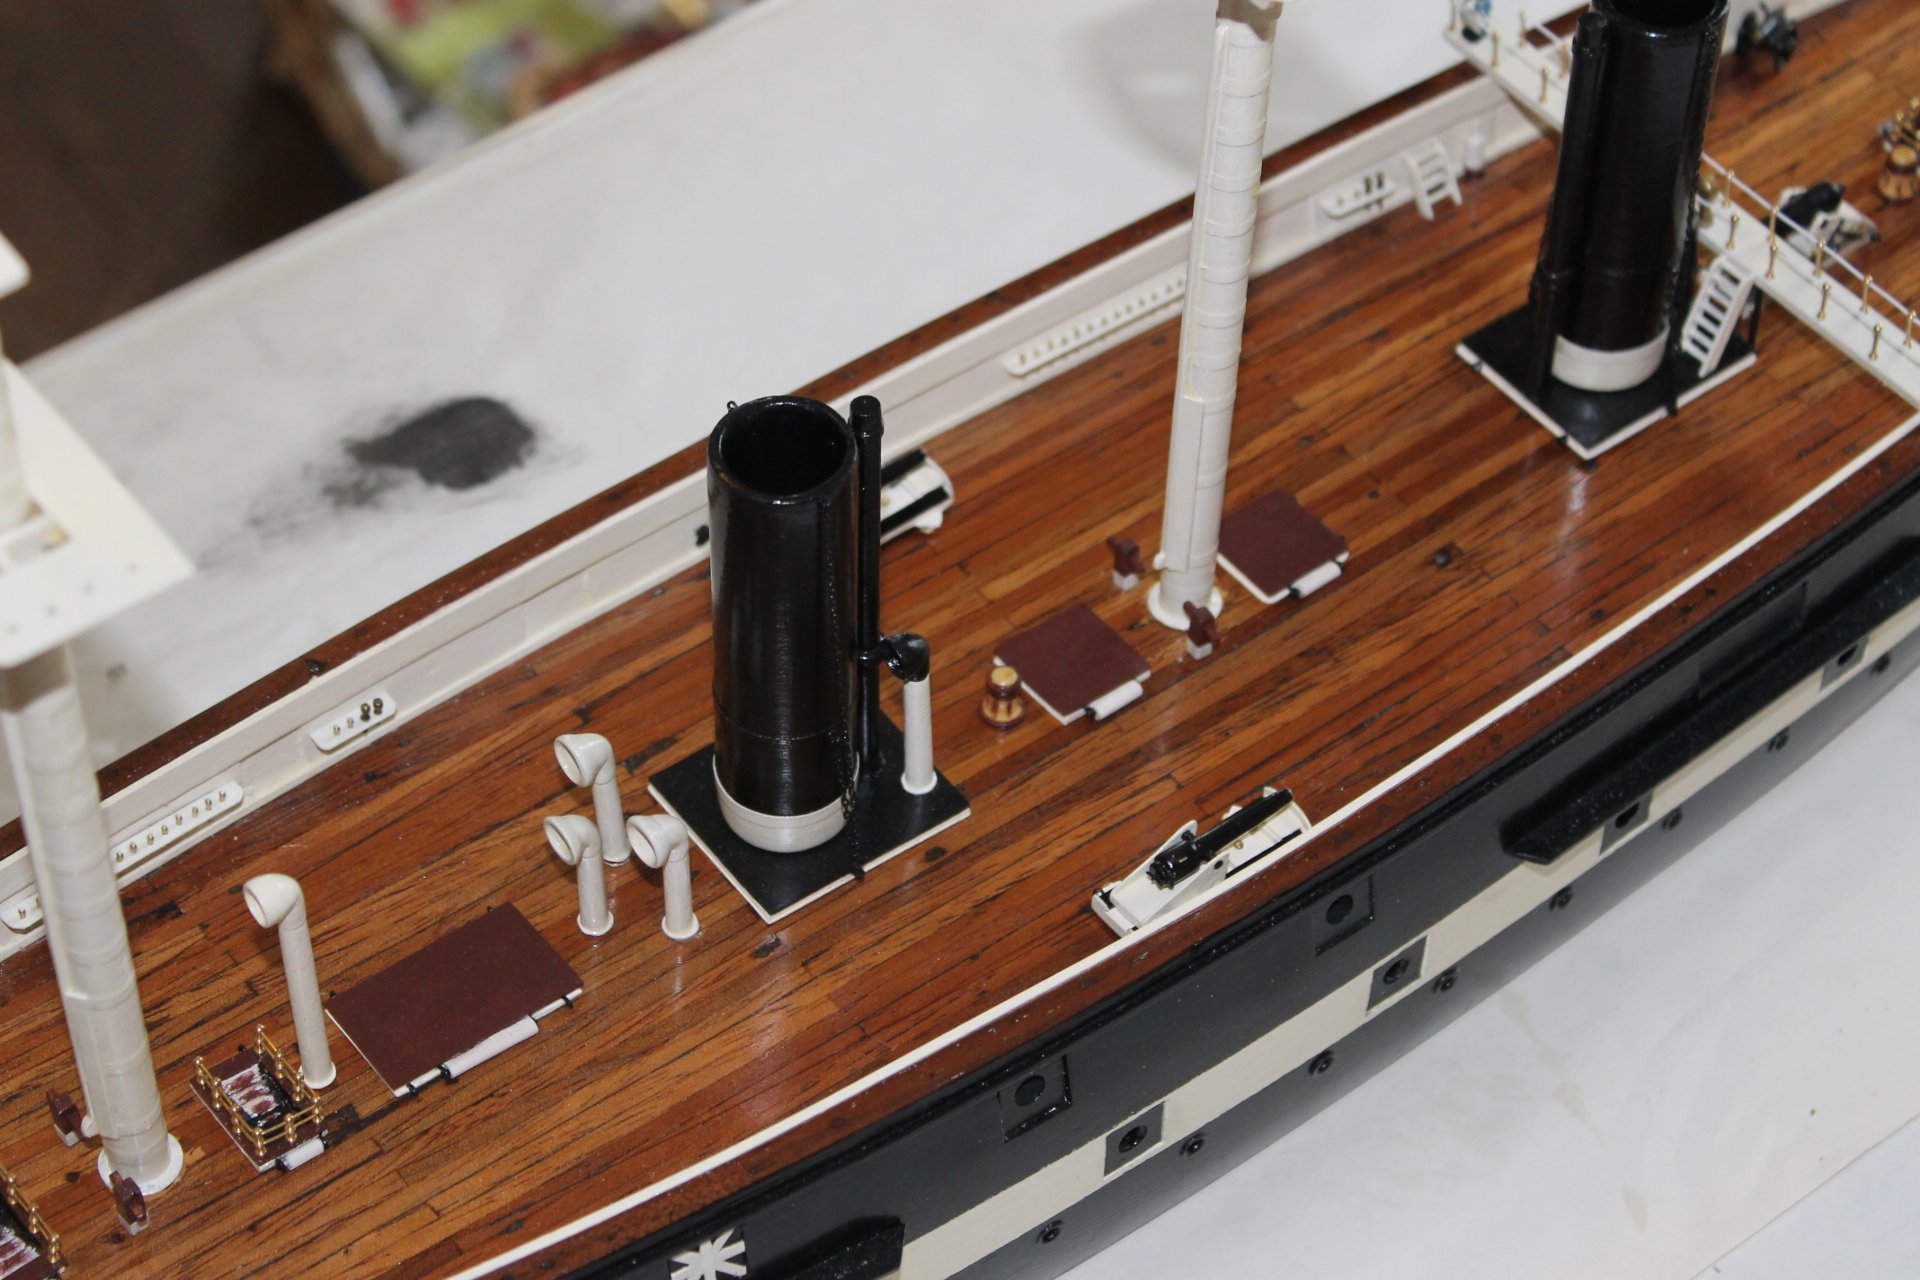
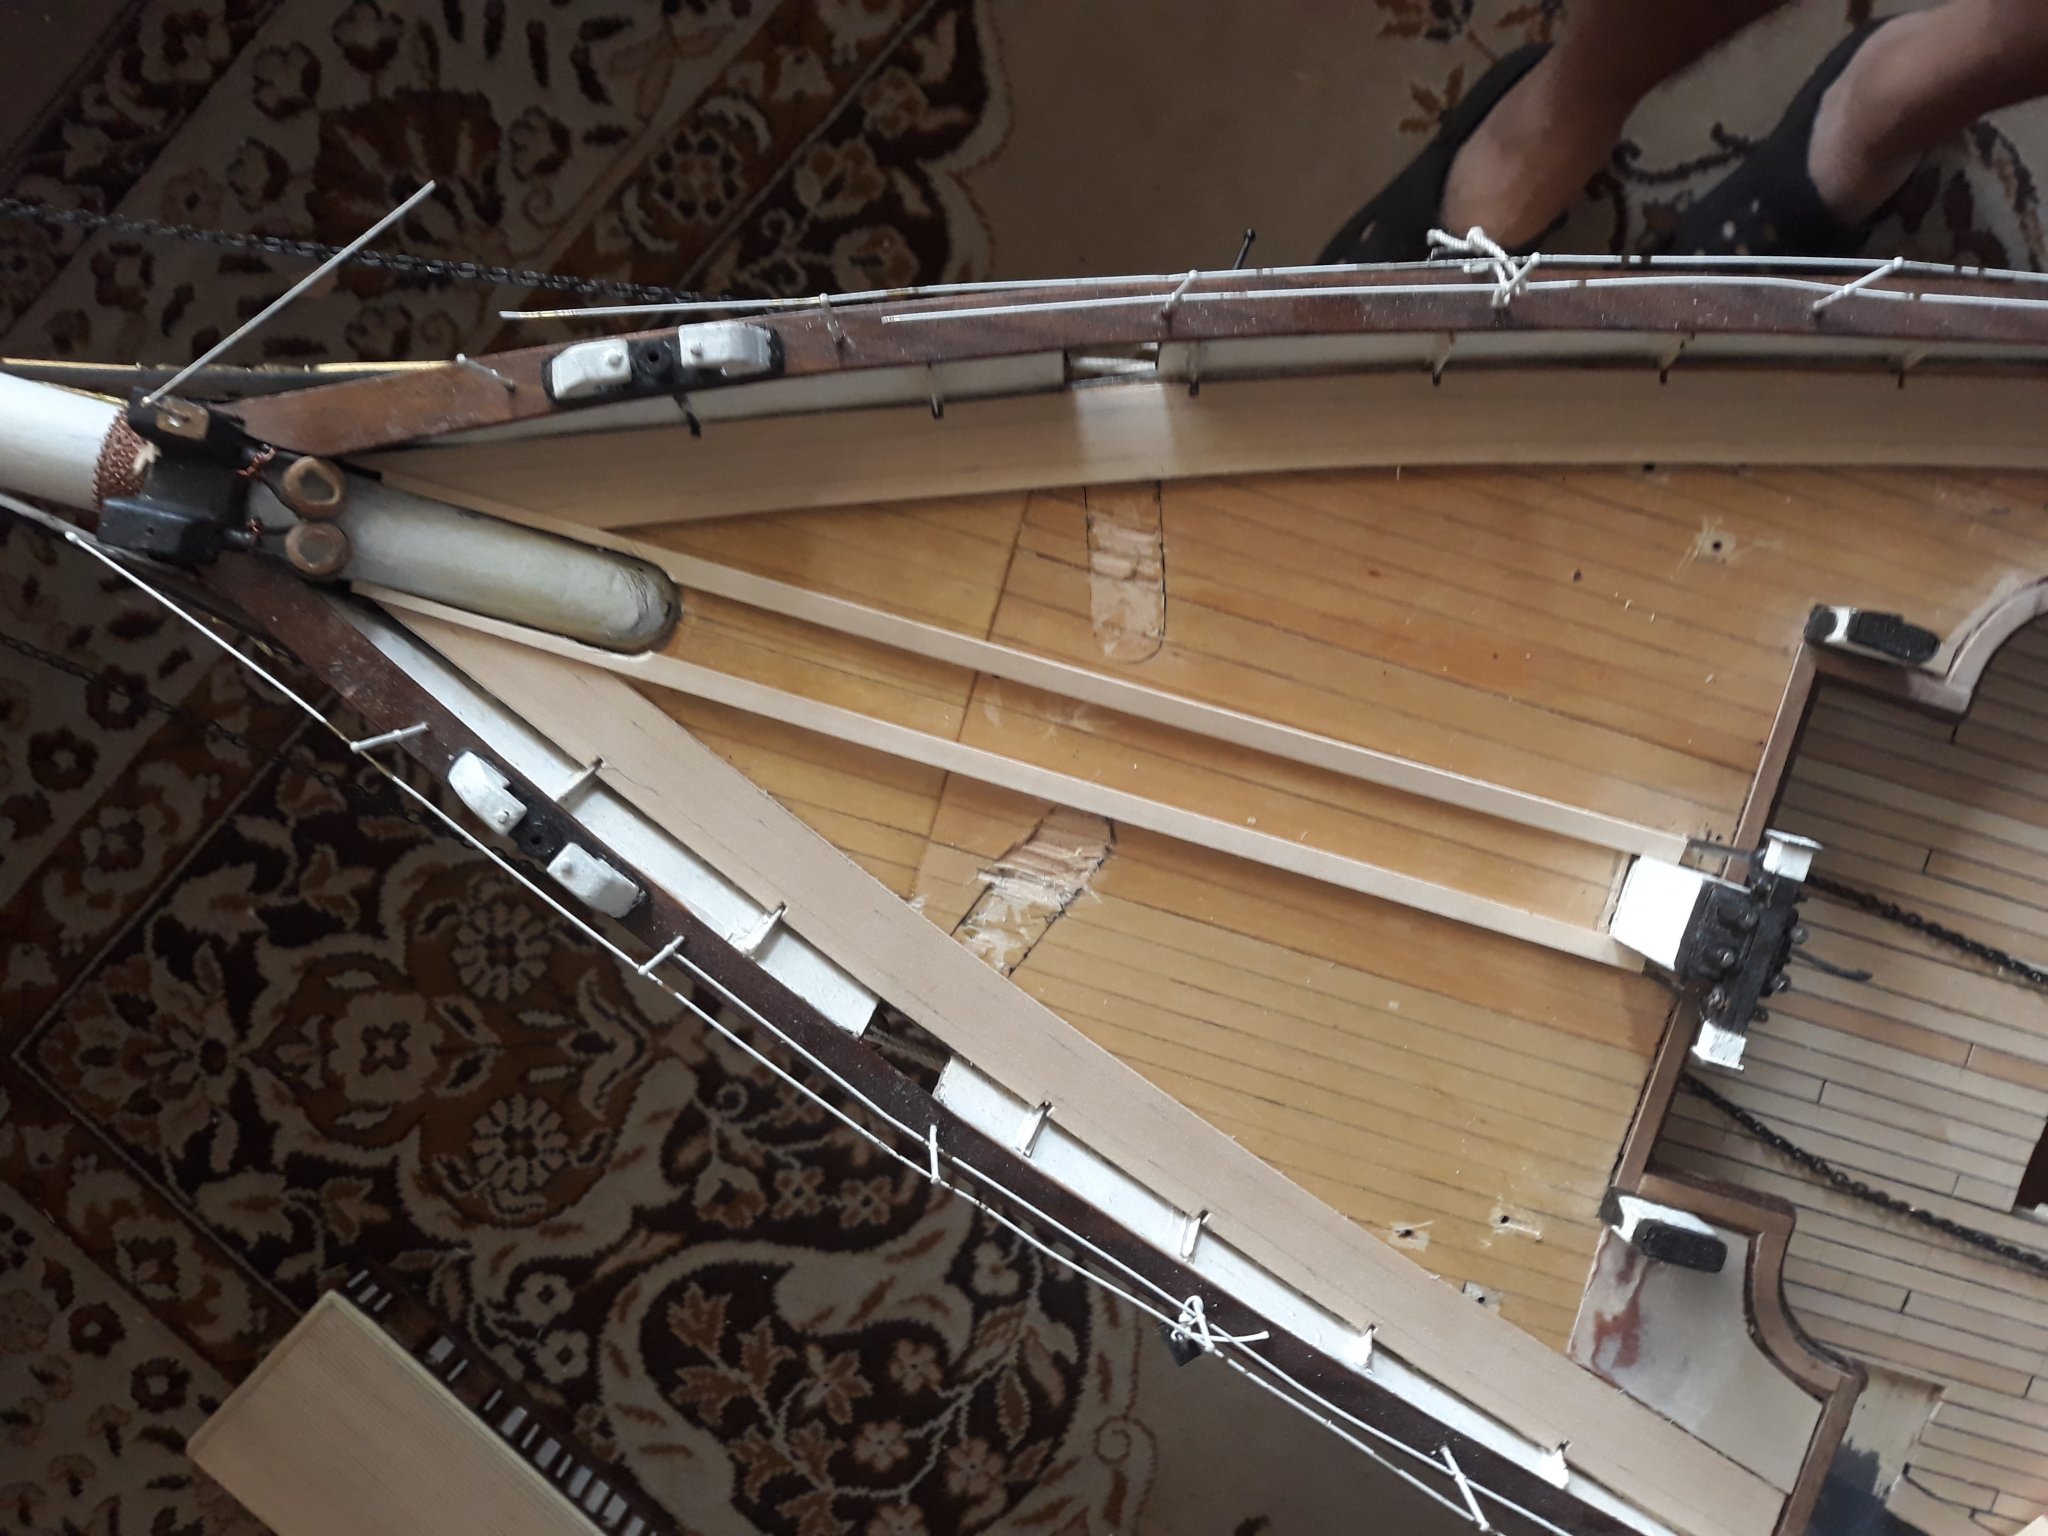
Good day everyone,
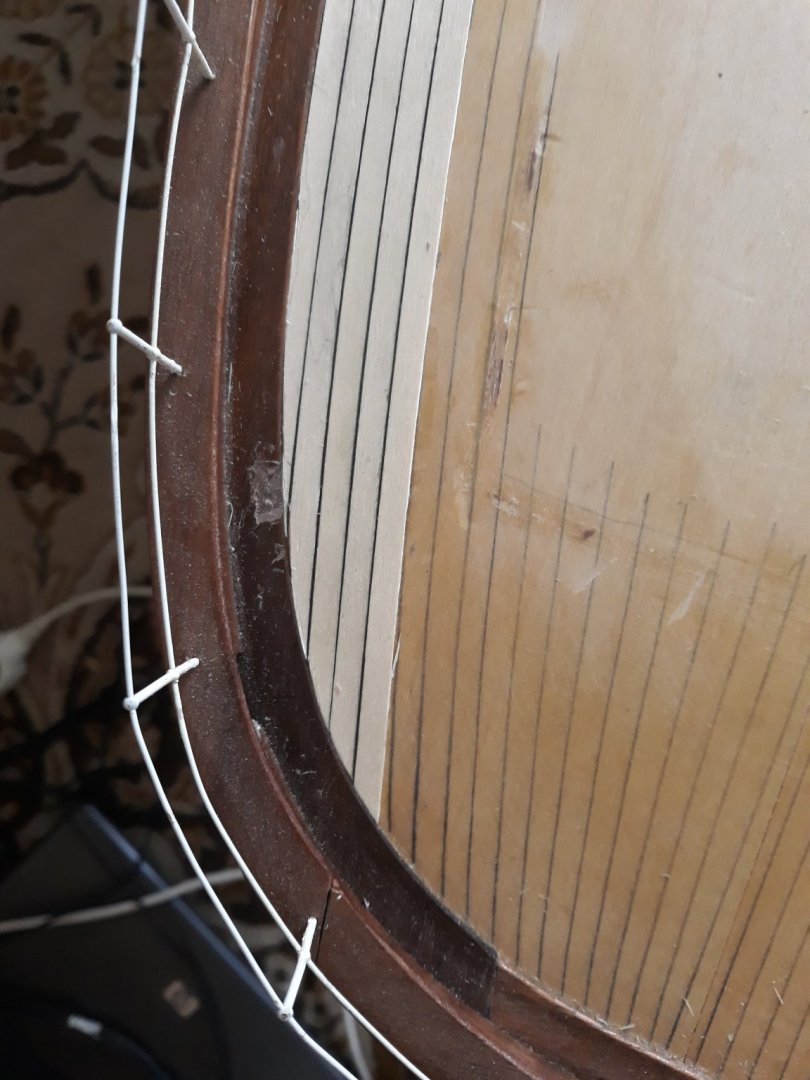
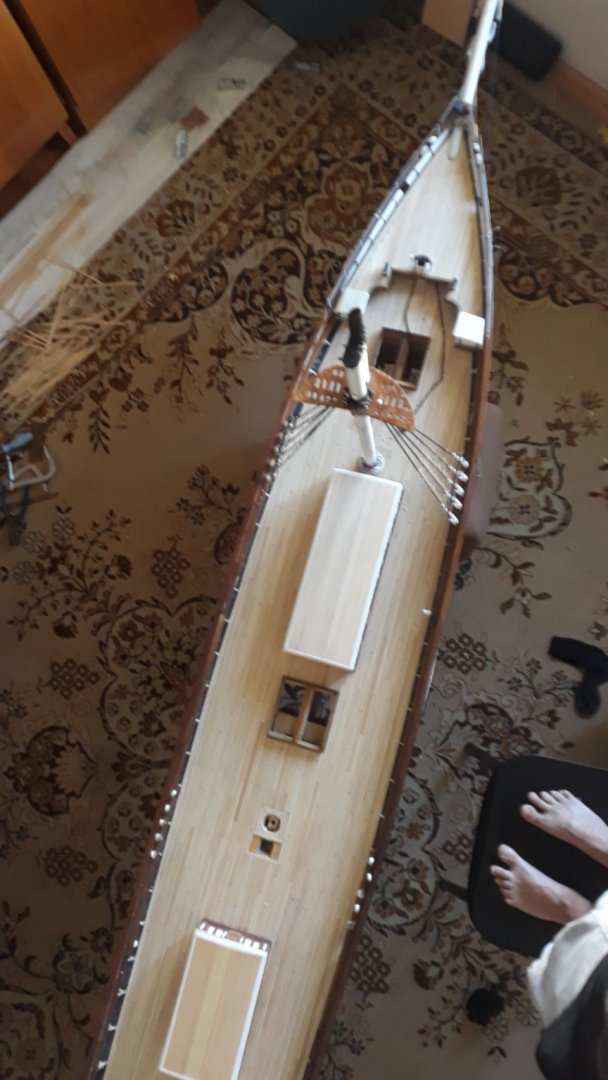
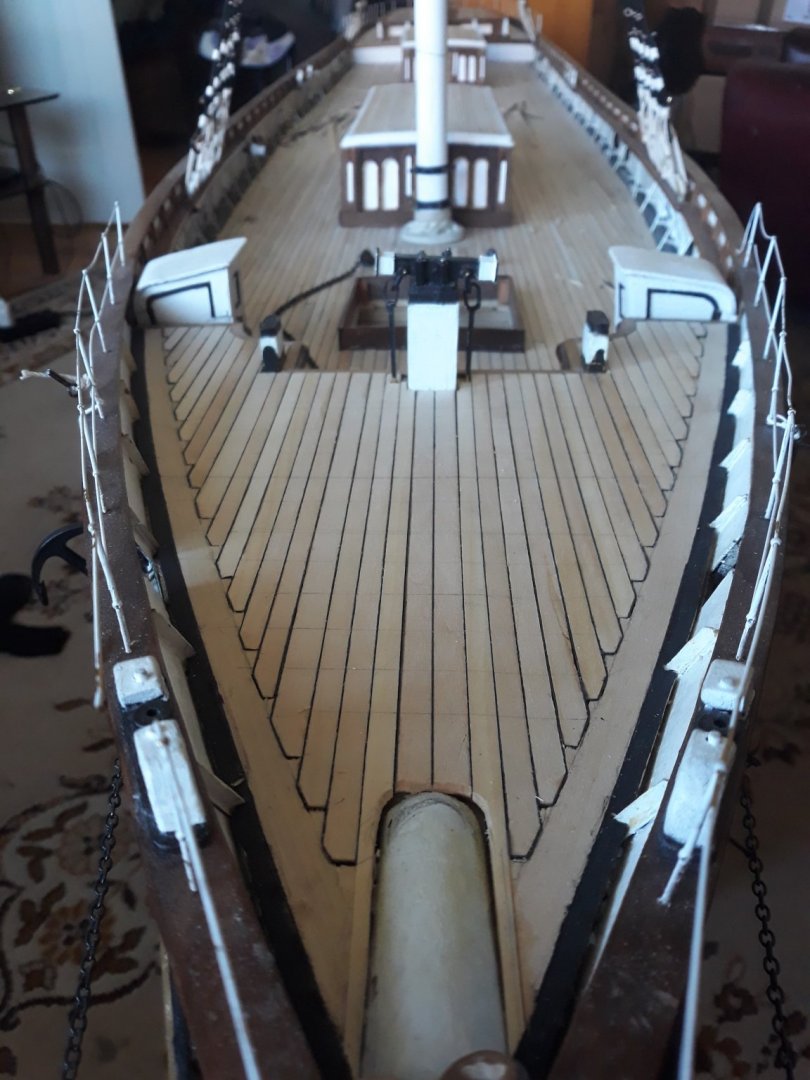
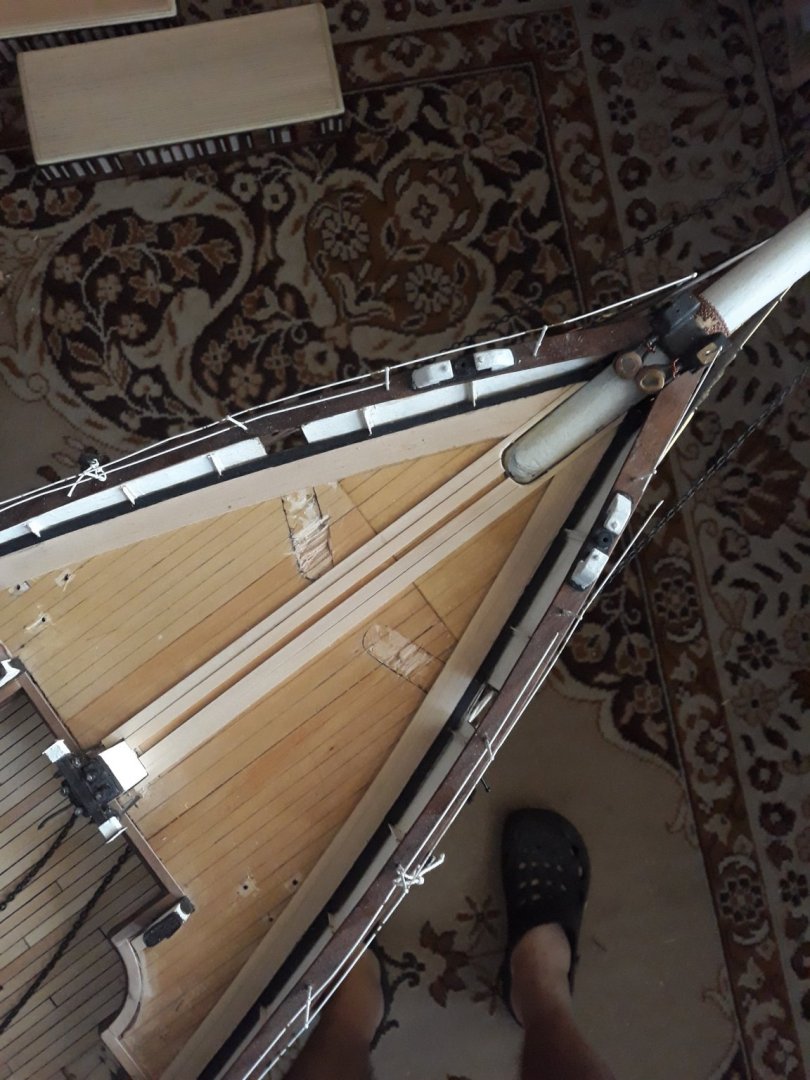
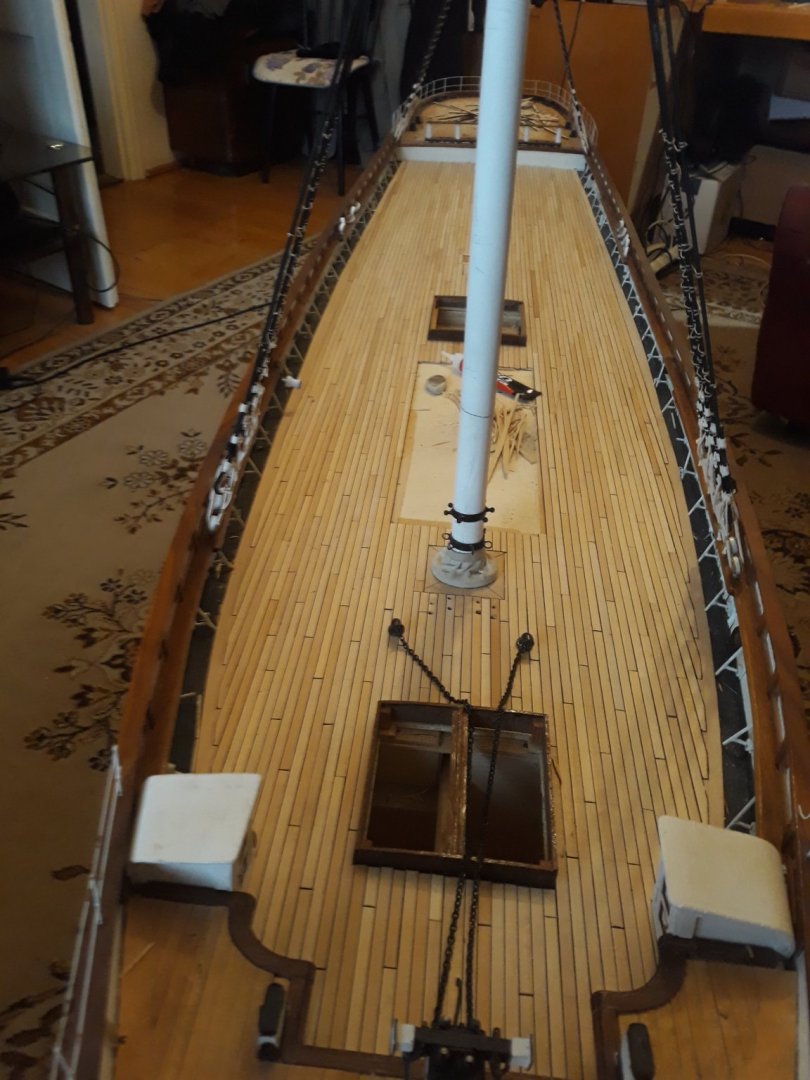
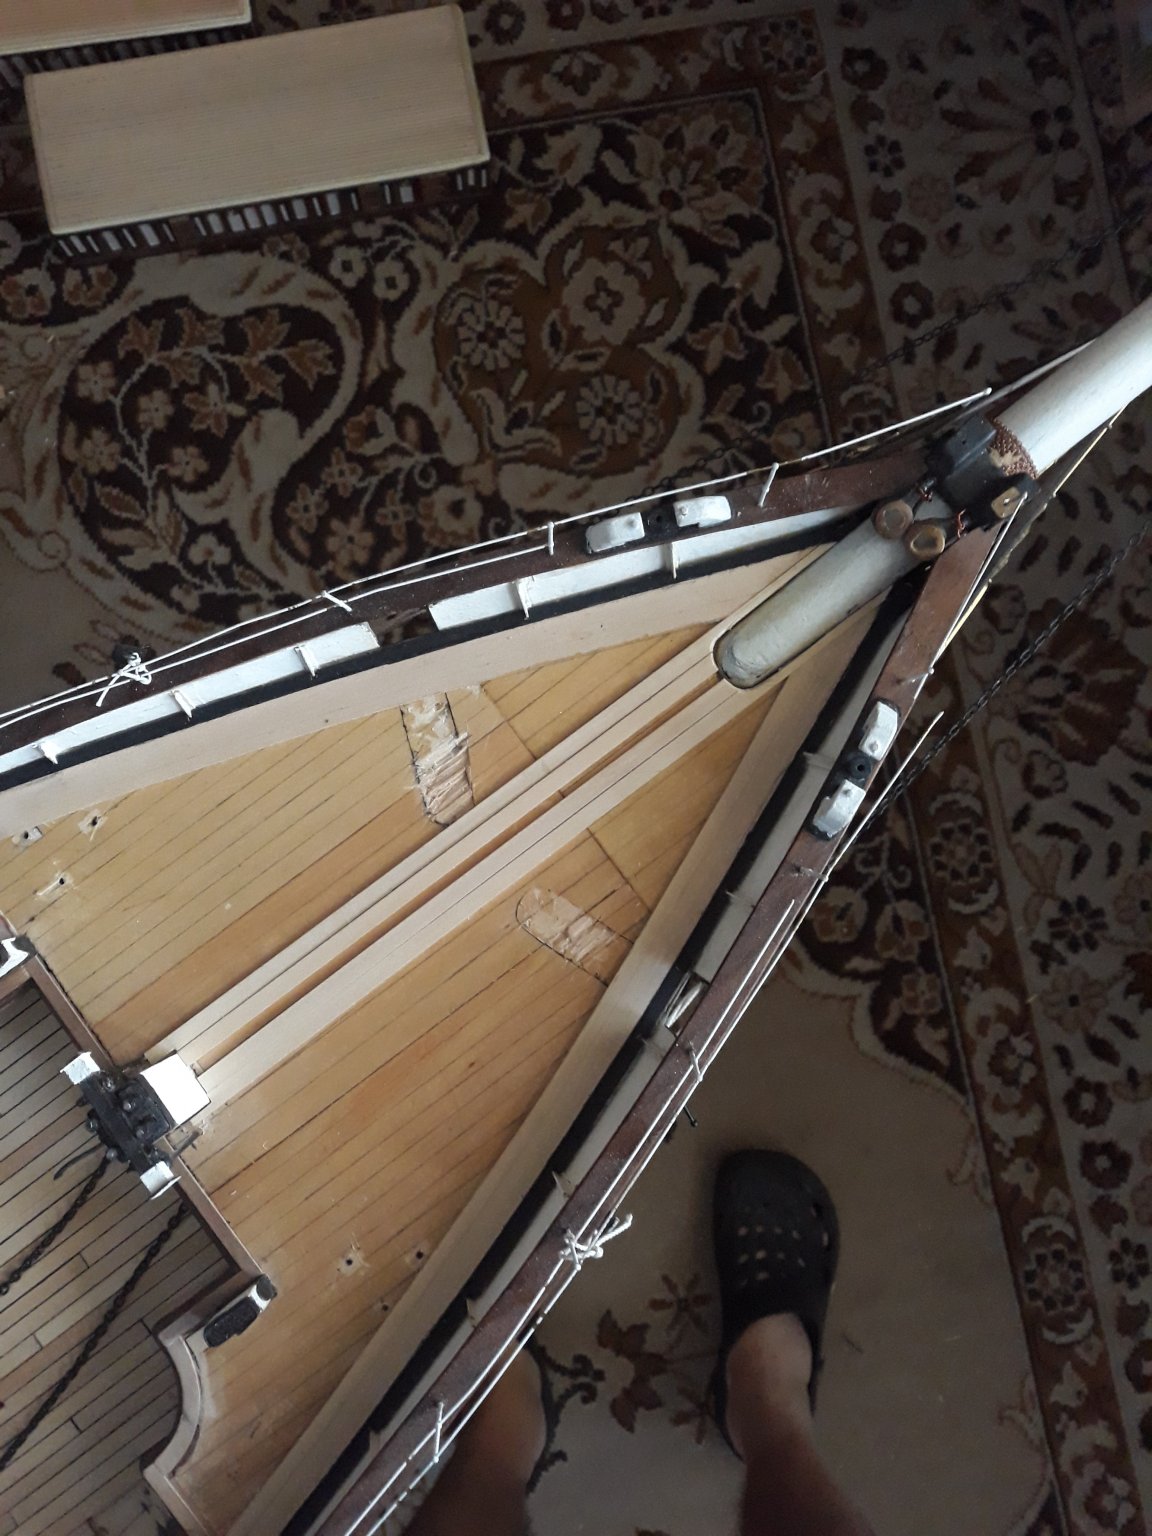
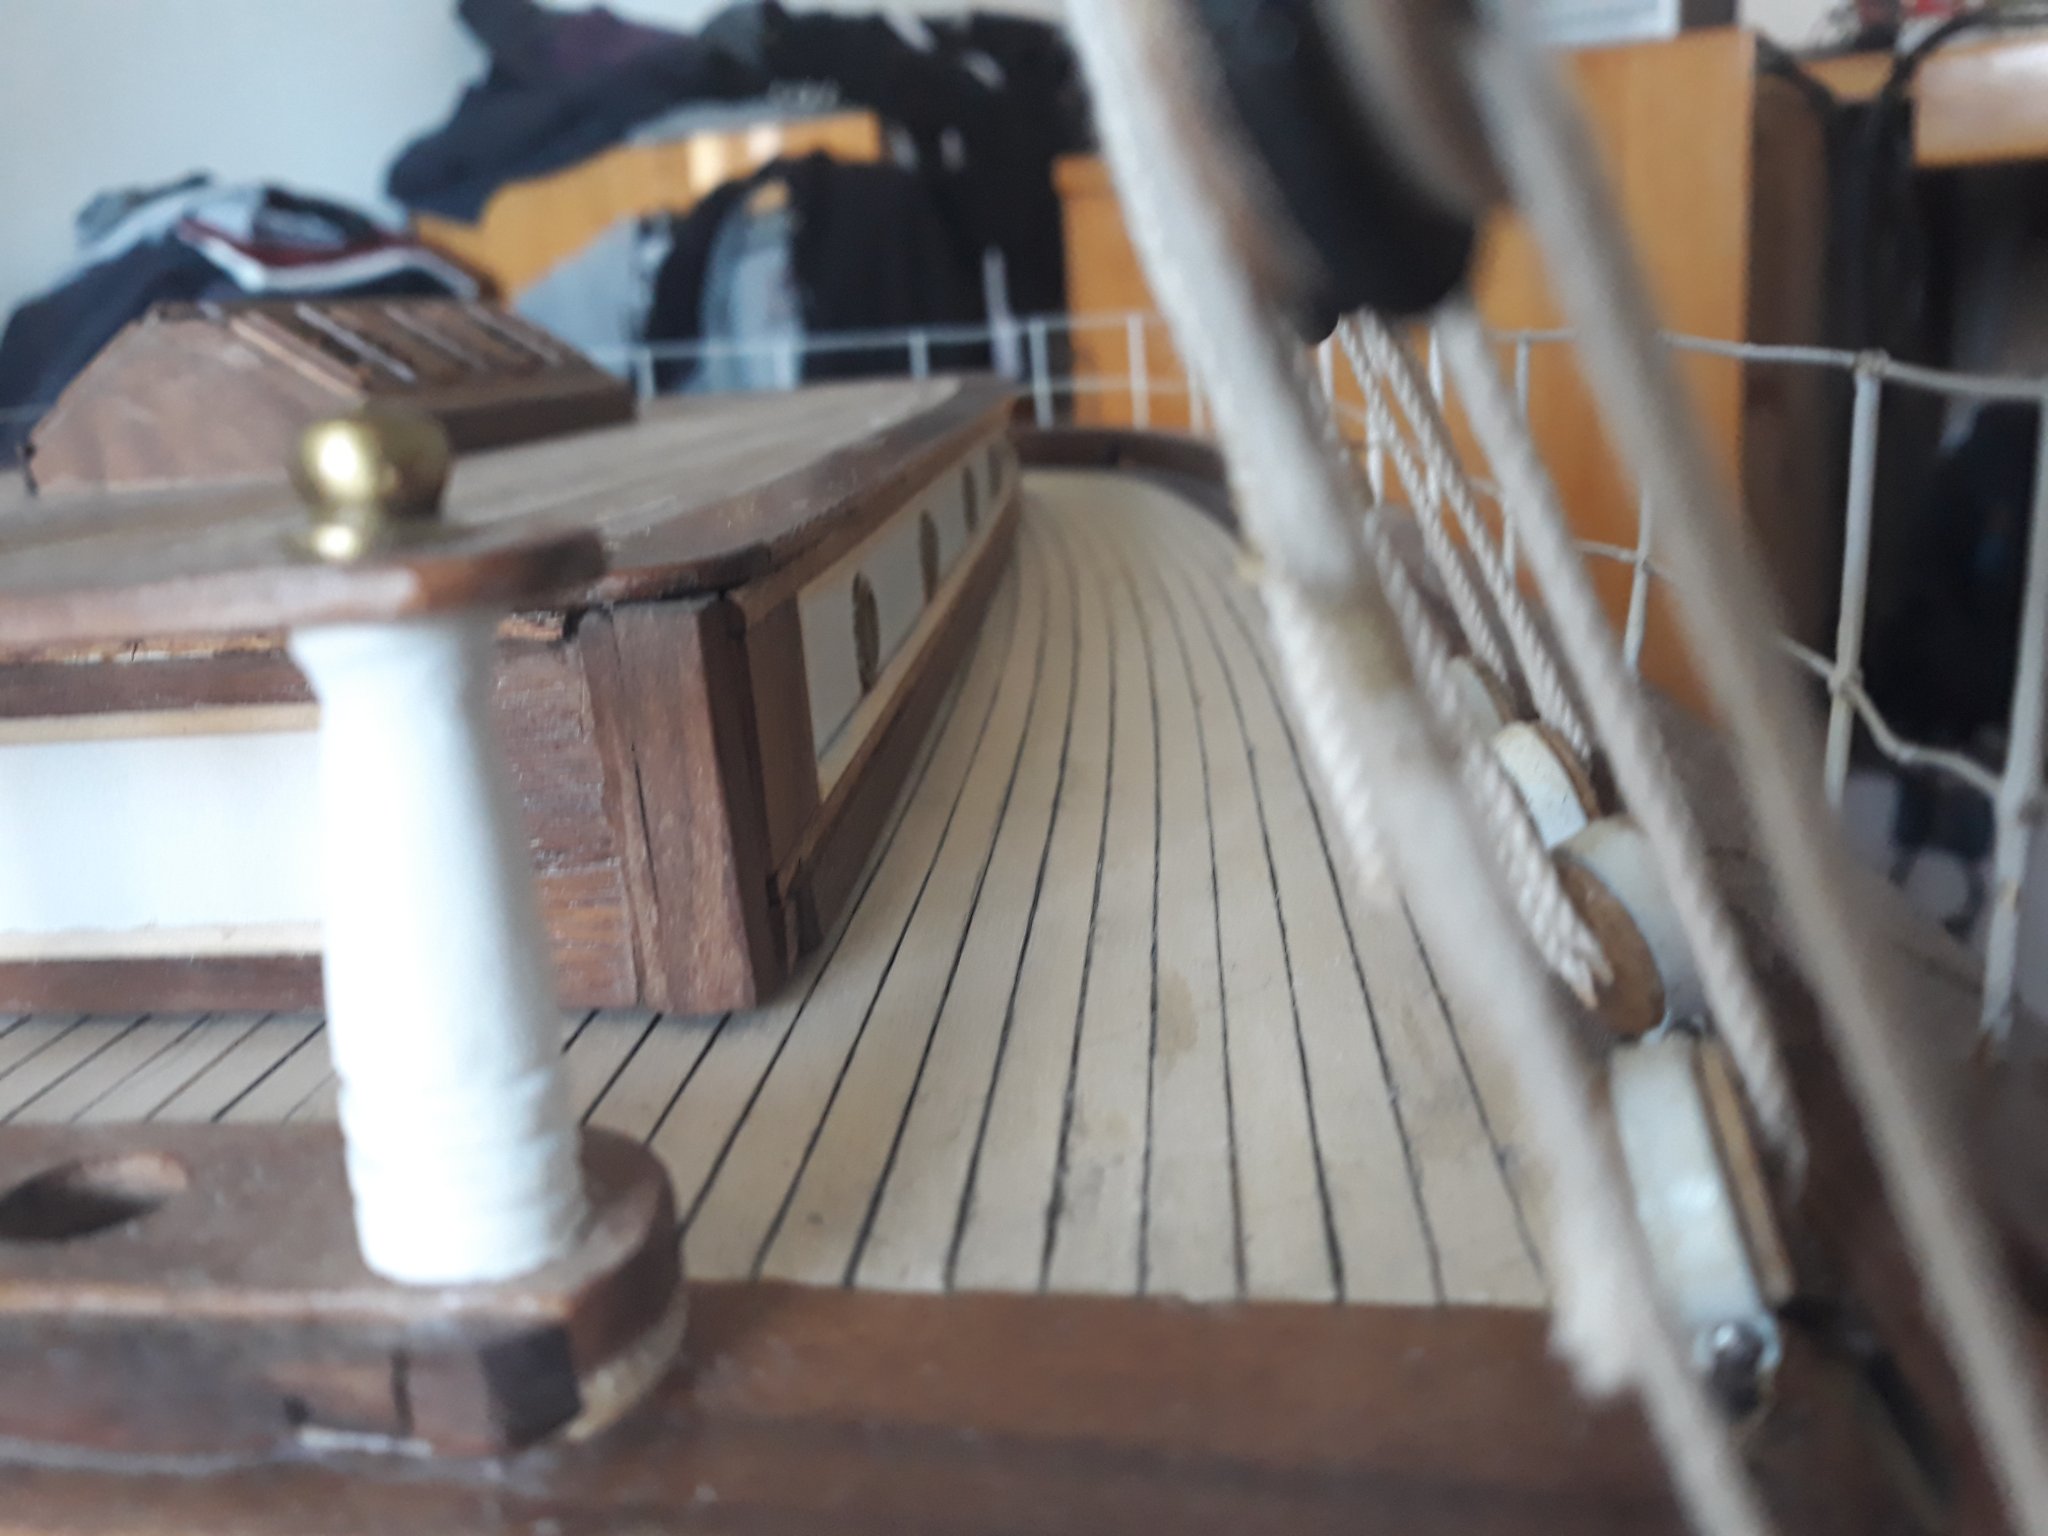
Im posting some updates from last twoo weeks. There is proper flooring completed on all decks at this point, I aimed for symetry of bibbing on forecastle deck. I installed new sheer and painted proper "cemented dark grey strake stands are moored into, i quite like what it looks like after i twisted metal sheet to prpoper topraip curvature facing outwards. ...i need to fill bowsprit / floor gap though... also showing how did i worked on forecastle from start to finish. Poop deck floor is properly curved along the gangway...and met in center/ probably not like prototype but...well...Toilets have dark paneling as seen on famous picture of cutty moored at melbourne wharf.
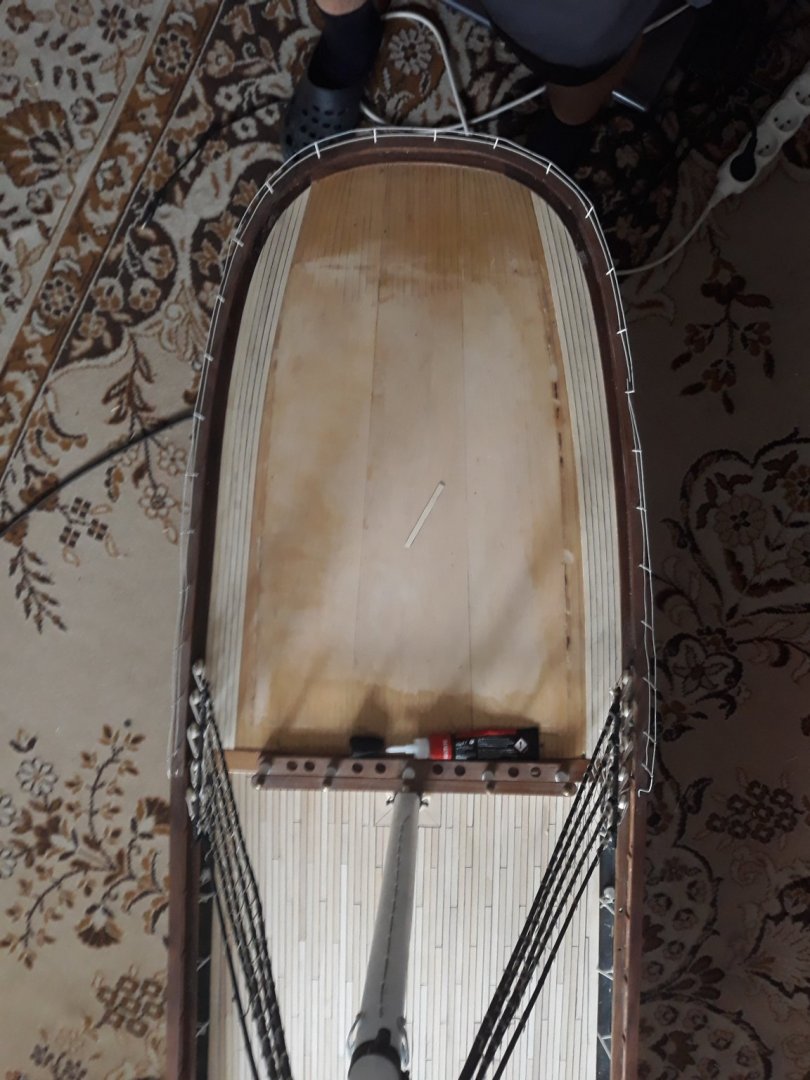
I see now that proper decking is probably one of most essential parts of boats designing / structural and functional object covering vast amount of space in ship. It looks majestic now..
From now on I will install functional machinery, etc....i have still work on remaining 2 rowboats ongoing, capitain gig and dinghy.
so that will come further. This time i will try to put on the floor osmo top finish that should not color the floor. Willl see the outcome. Many thanks for watch etc... V.


.thumb.jpg.0e4a0df6432327fa9c20bf323e34d7c8.jpg)


.jpg.fd12e2b3ace9db928ee95385309f9e63.jpg)


Glory of the Seas 1869 by rwiederrich - FINISHED - 1/96 - medium clipper
in - Build logs for subjects built 1851 - 1900
Posted
This log is fascinating guys.