
.jpg.8f8939eb11584d346cdeb2a7ec4e1e42.jpg)
Kusawa2000
-
Posts
343 -
Joined
-
Last visited
Content Type
Profiles
Forums
Gallery
Events
Posts posted by Kusawa2000
-
-
17 hours ago, chris watton said:
")
Chris: I have been quiet for the last while on my lobbying for having the Bellona on your list of next kits but now that its out in the open I would still love to see her released as a kit! I still remember your prototype you had worked on years ago.. It would be great to see her released sometime down the road
MIKE
- chris watton, mtaylor, hollowneck and 5 others
-
 8
8
-
On 5/7/2020 at 1:51 PM, SaskieinSoCal said:
Looking forward to seeing your final-final product and learning along the way. Heading out tomorrow for the 26 hour drive north. We're not quite heading as far as Whitehorse, but closer. It will be good to be back north of 49 again. All the best and thank you again for the template.
Trent
Have a good trip.. make sure you have all your paperwork in order for the border.. they are still limiting traffic to Canadians, americans going to Alaska and essential traffic. I dont think you will have a problem but things are still not as it was.. I will be posting more pics in a couple of days.
MIKE
-
On 5/6/2020 at 9:45 AM, SaskieinSoCal said:
This is so impressive Mike. I've just started the 2nd planking on my Aggie. Hope mine ends up half as good as yours did. The sails are going to be impressive.
Trent
Hey Trent: If you have any questions regarding let me know.. She is a beautiful ship and you have a fun time ahead of ya!
MIKE
-
8 hours ago, SaskieinSoCal said:
This is so impressive Mike. I've just started the 2nd planking on my Aggie. Hope mine ends up half as good as yours did. The sails are going to be impressive.
Trent
Trent: Thanks for the cudos.. This has been a long, long, long project.. I have done quite a few modifications that just seem to delay the completion date but it has been worth it. Now, Im just making a push to get her finished. It will be good to get her finally finished...
MIKE
-
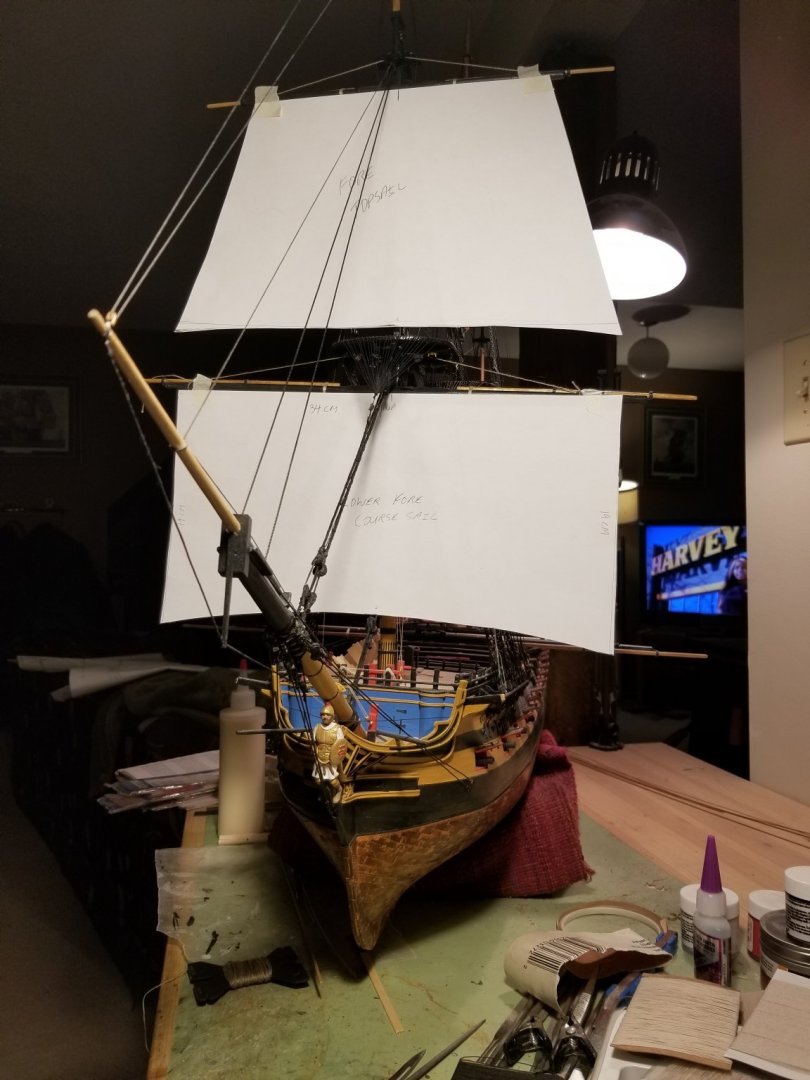
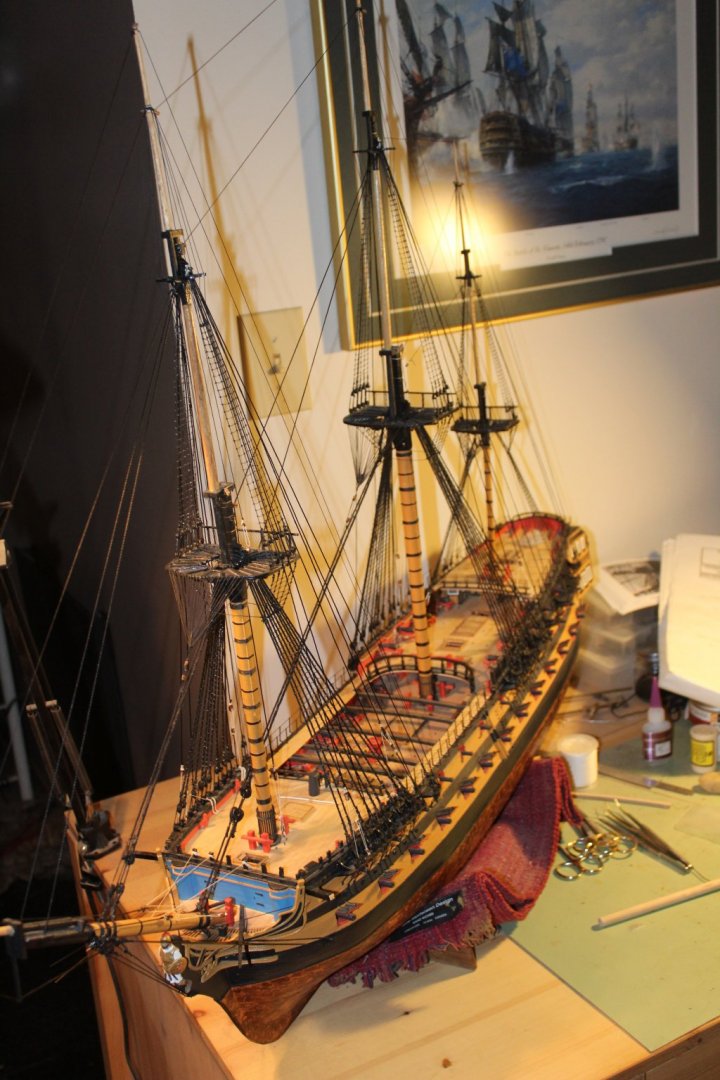
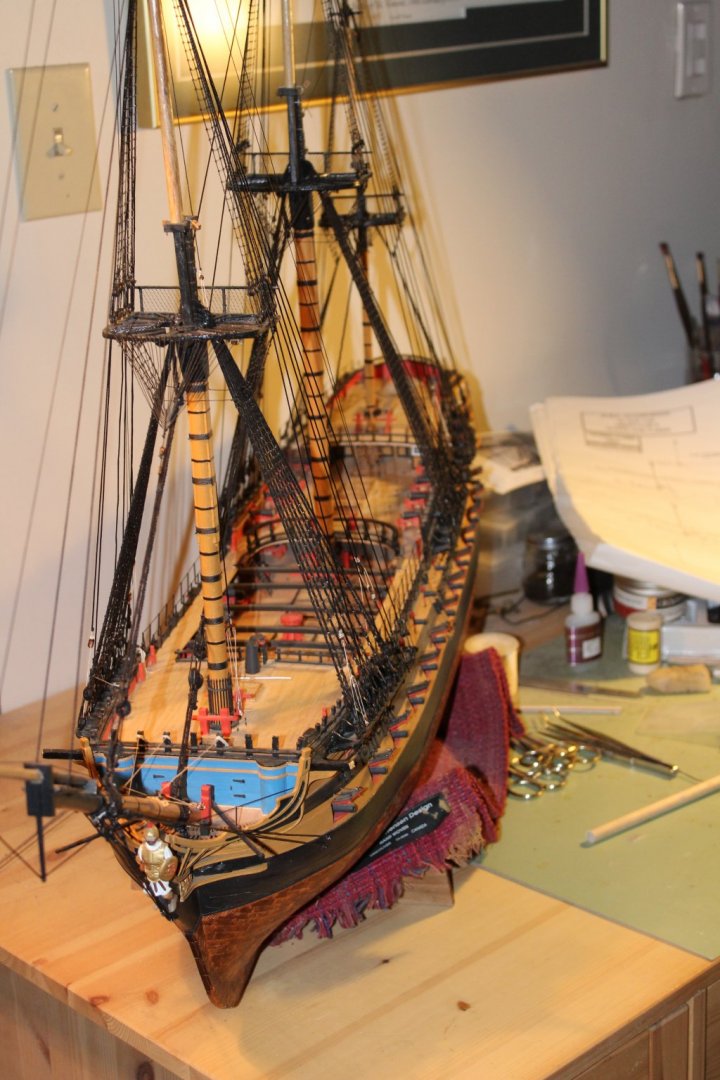
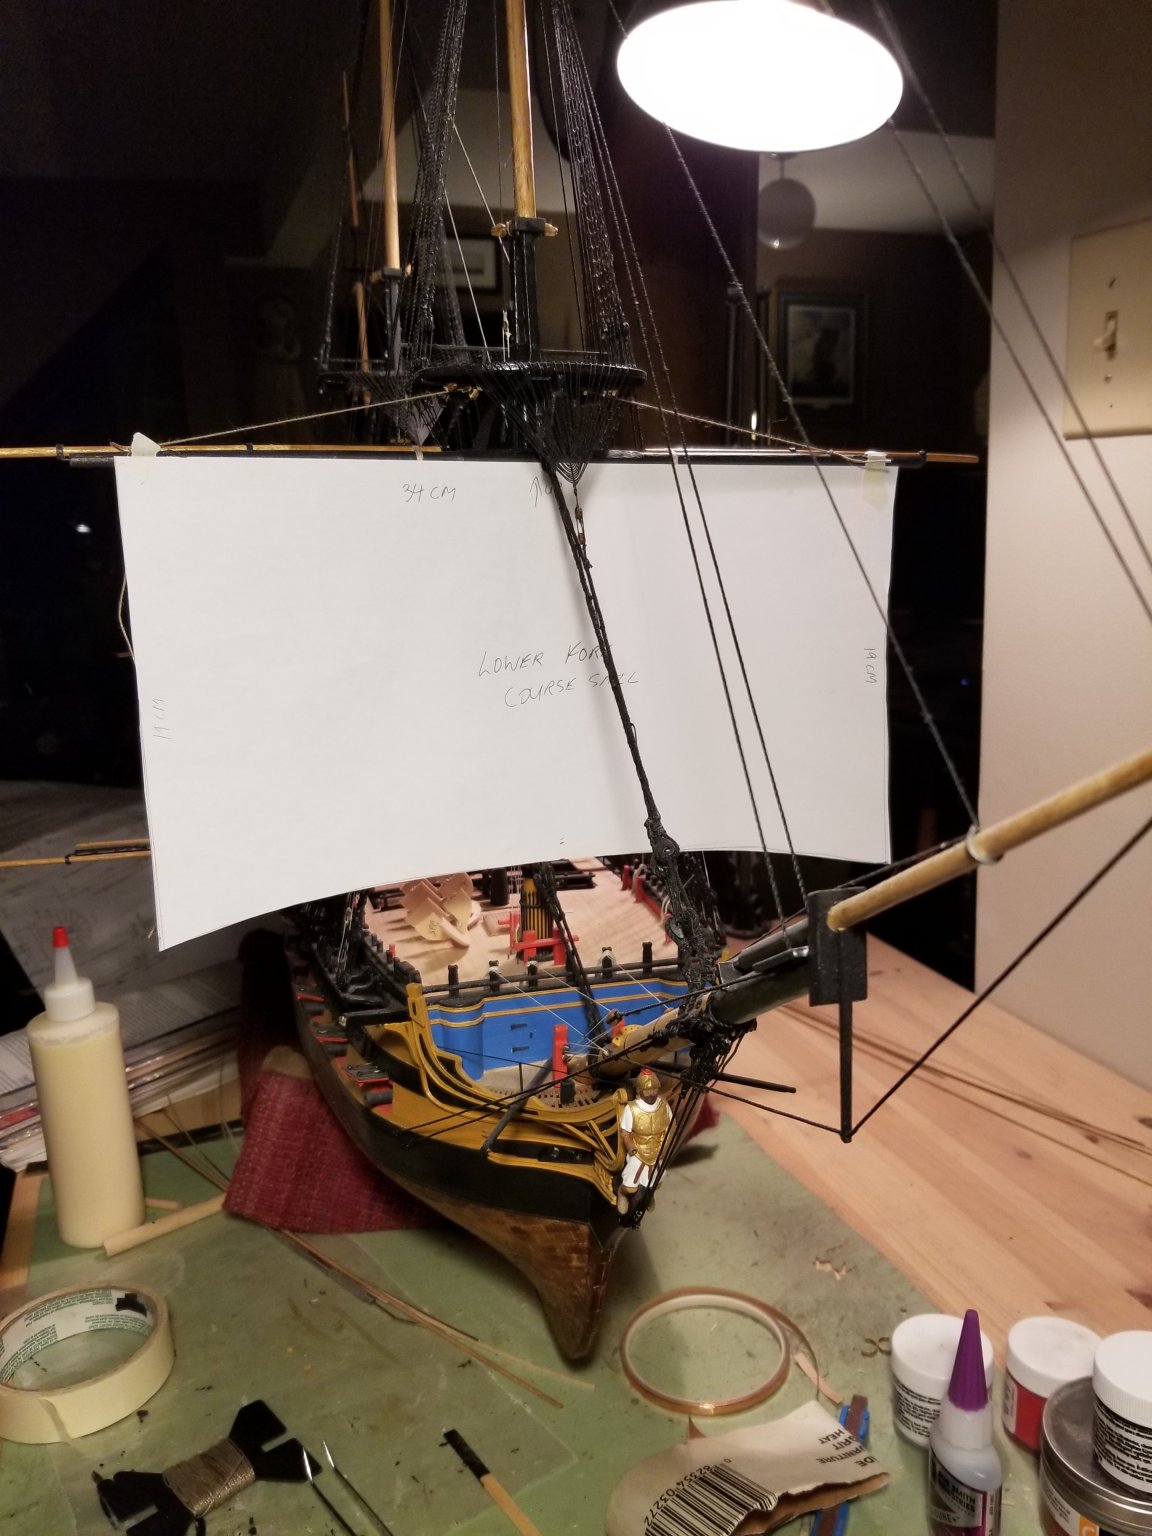
Everyone: Got the paper foretop Sail on the Agamemnon. Keen on getting these paper templates done so I can then get the real ones rigged on her.
Enjoy
MIKE
- stuglo, mort stoll, GrandpaPhil and 5 others
-
8
-
19 hours ago, garyshipwright said:
Good Job Mike. She is looking great. Gary
Thanks Gary... finally getting some progress under my feet. Im stoked on getting sails on her
MIKE
-
Everyone: Just a quick update.. I have finally finished building the yards on the Agamemnon.. I dont know if everyone knows but Im planning to rig her with sails. So... in preparation for that small exercise (yah.. right.... ) I am making paper templates to use to get the shape and dimension. The Caldercraft plans dont contain any sail plans so using a few sources and lots of measuring I think I have done a pretty good approx of the sail. Dry fitting them onto the yard and mast helps me ensure they the measurements match how they look on the ship. She is finally starting to come together..
Mike

- mort stoll, gieb8688, GrandpaPhil and 1 other
-
4
-
10 hours ago, Retired guy said:
Brilliant Mike 👍 has it stop snowing
")
Stay safe
Regards
Richard
nope.. we got 2 inches last night.. winter hasnt left us yet... going snowmobiling this weekend! 🙂
MIKE
-
1 hour ago, Chuck said:
Looks great Mike. You are getting close. The home stretch....hows that running rigging coming along?
Chuck: I have the standing rigging all done. Once I get the yards made, I can then start on the running rigging.. there is light at the end of the tunnel! As per usual, the Winchelsea is calling 🙂
-
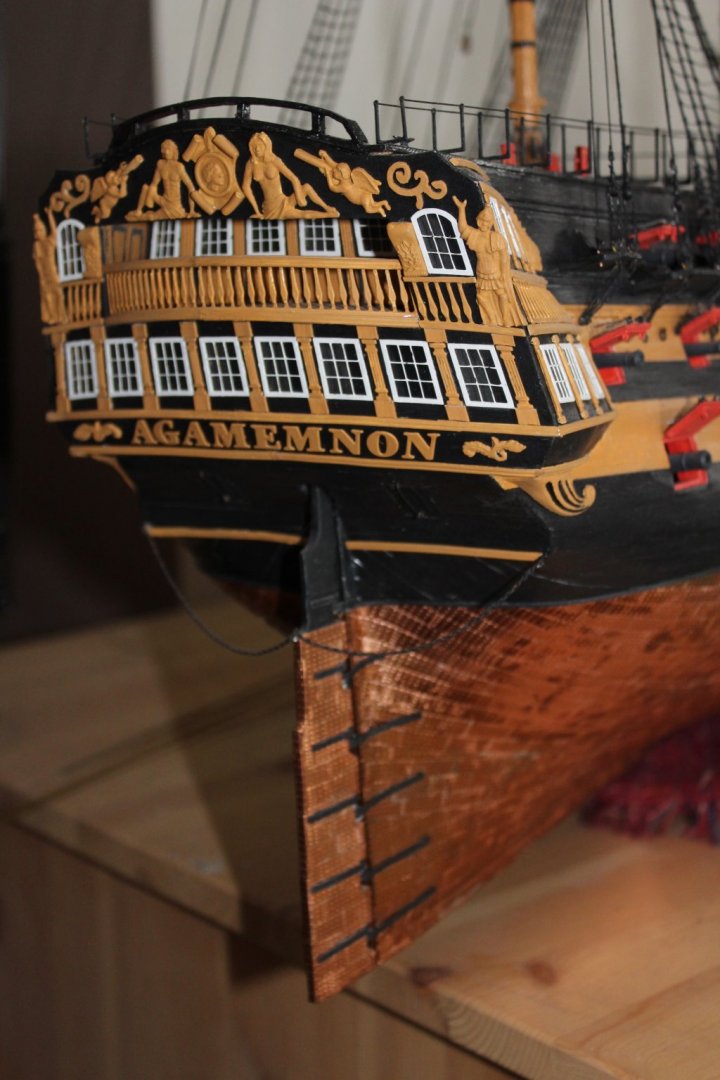
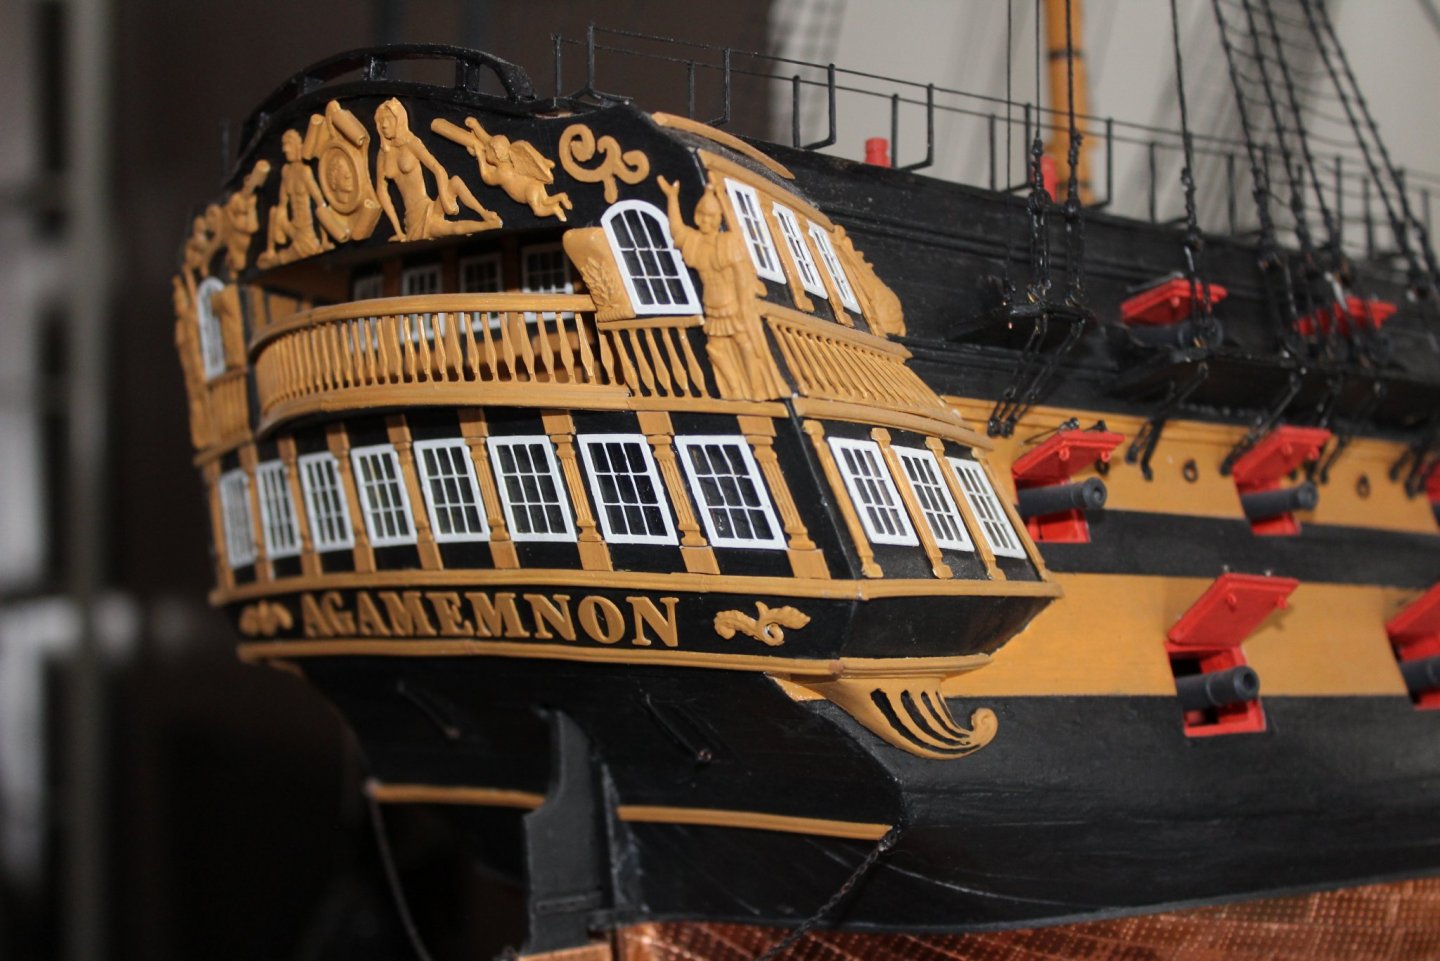
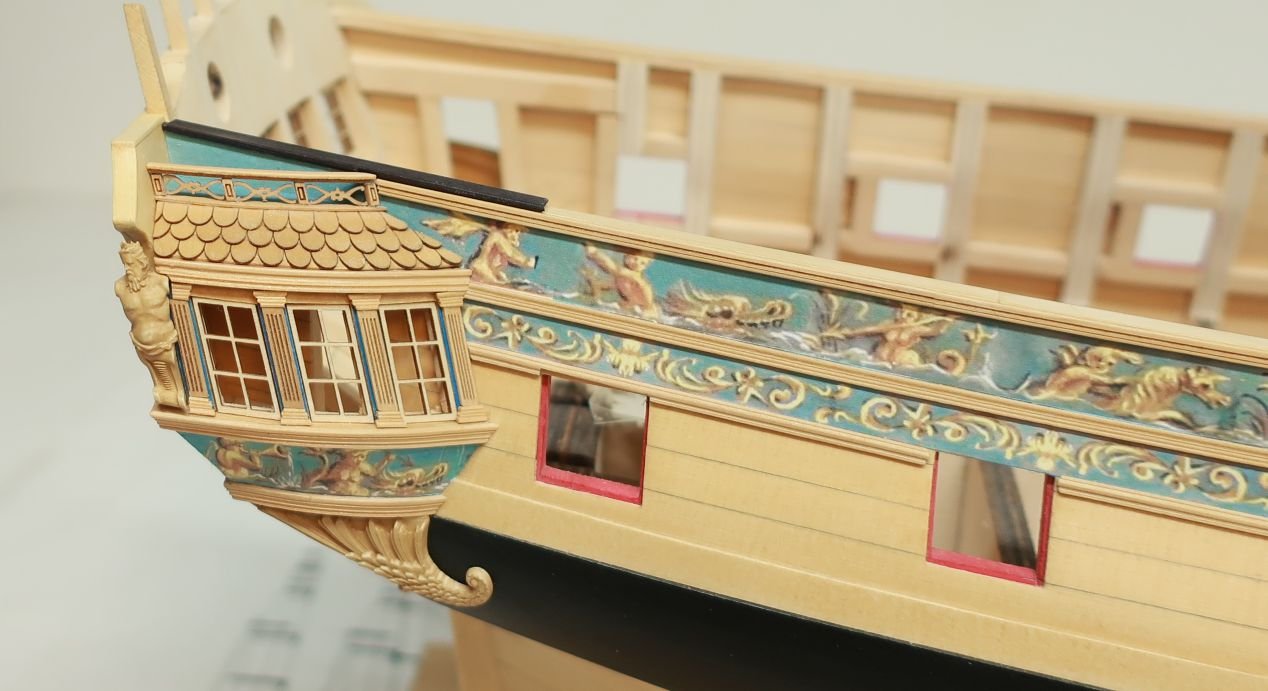
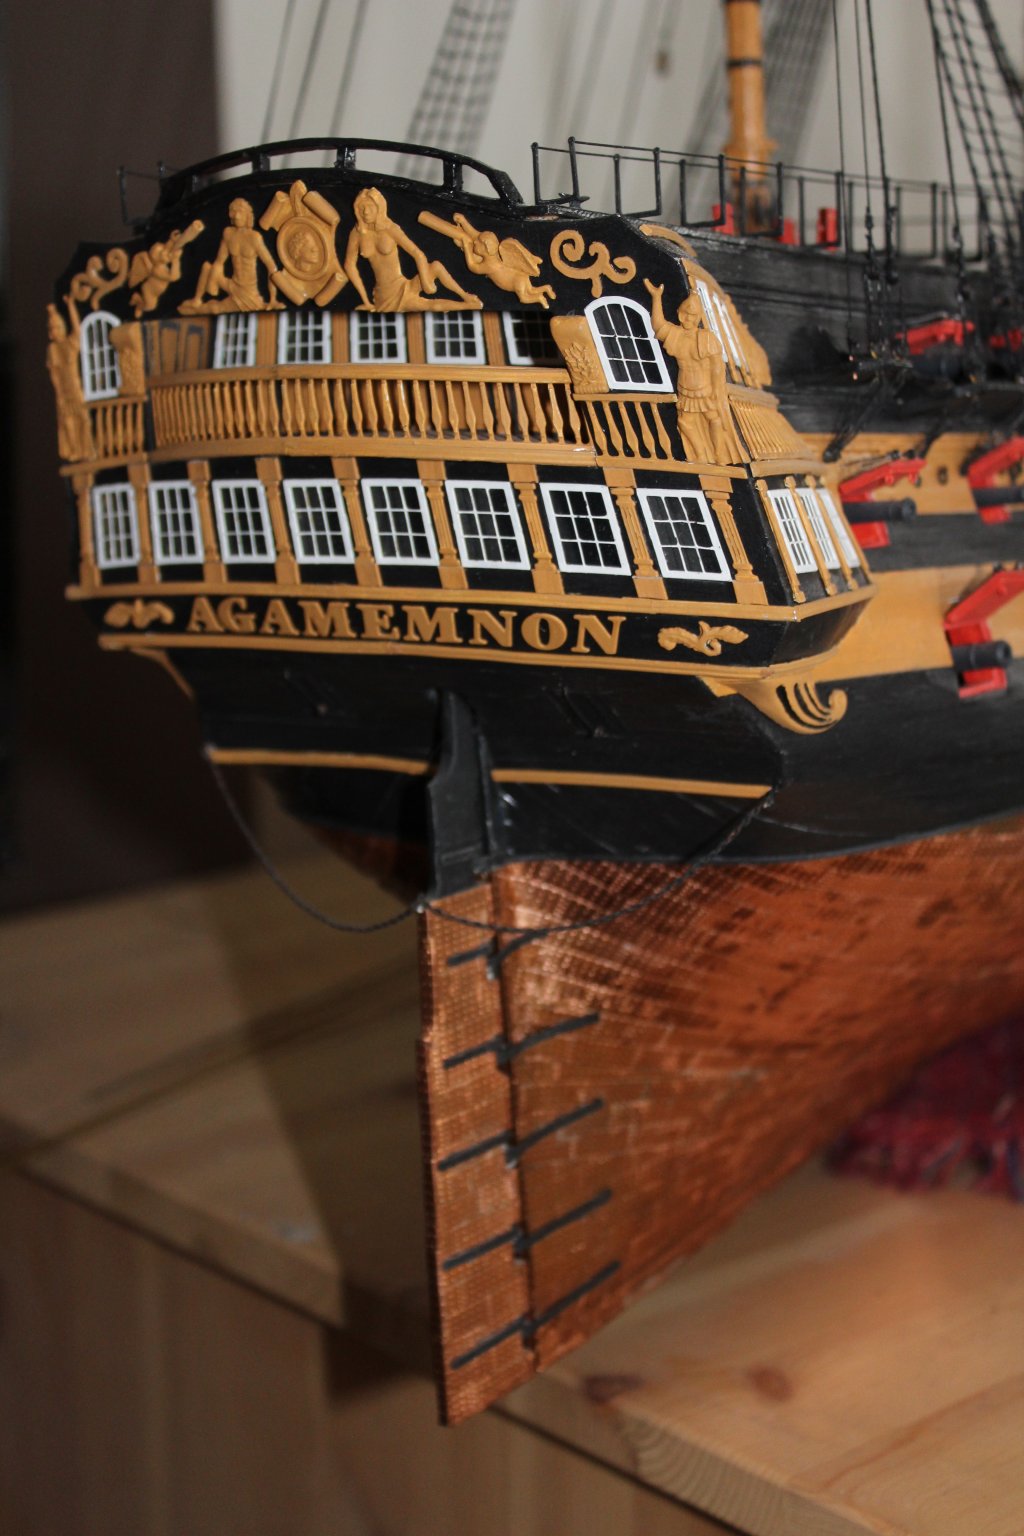
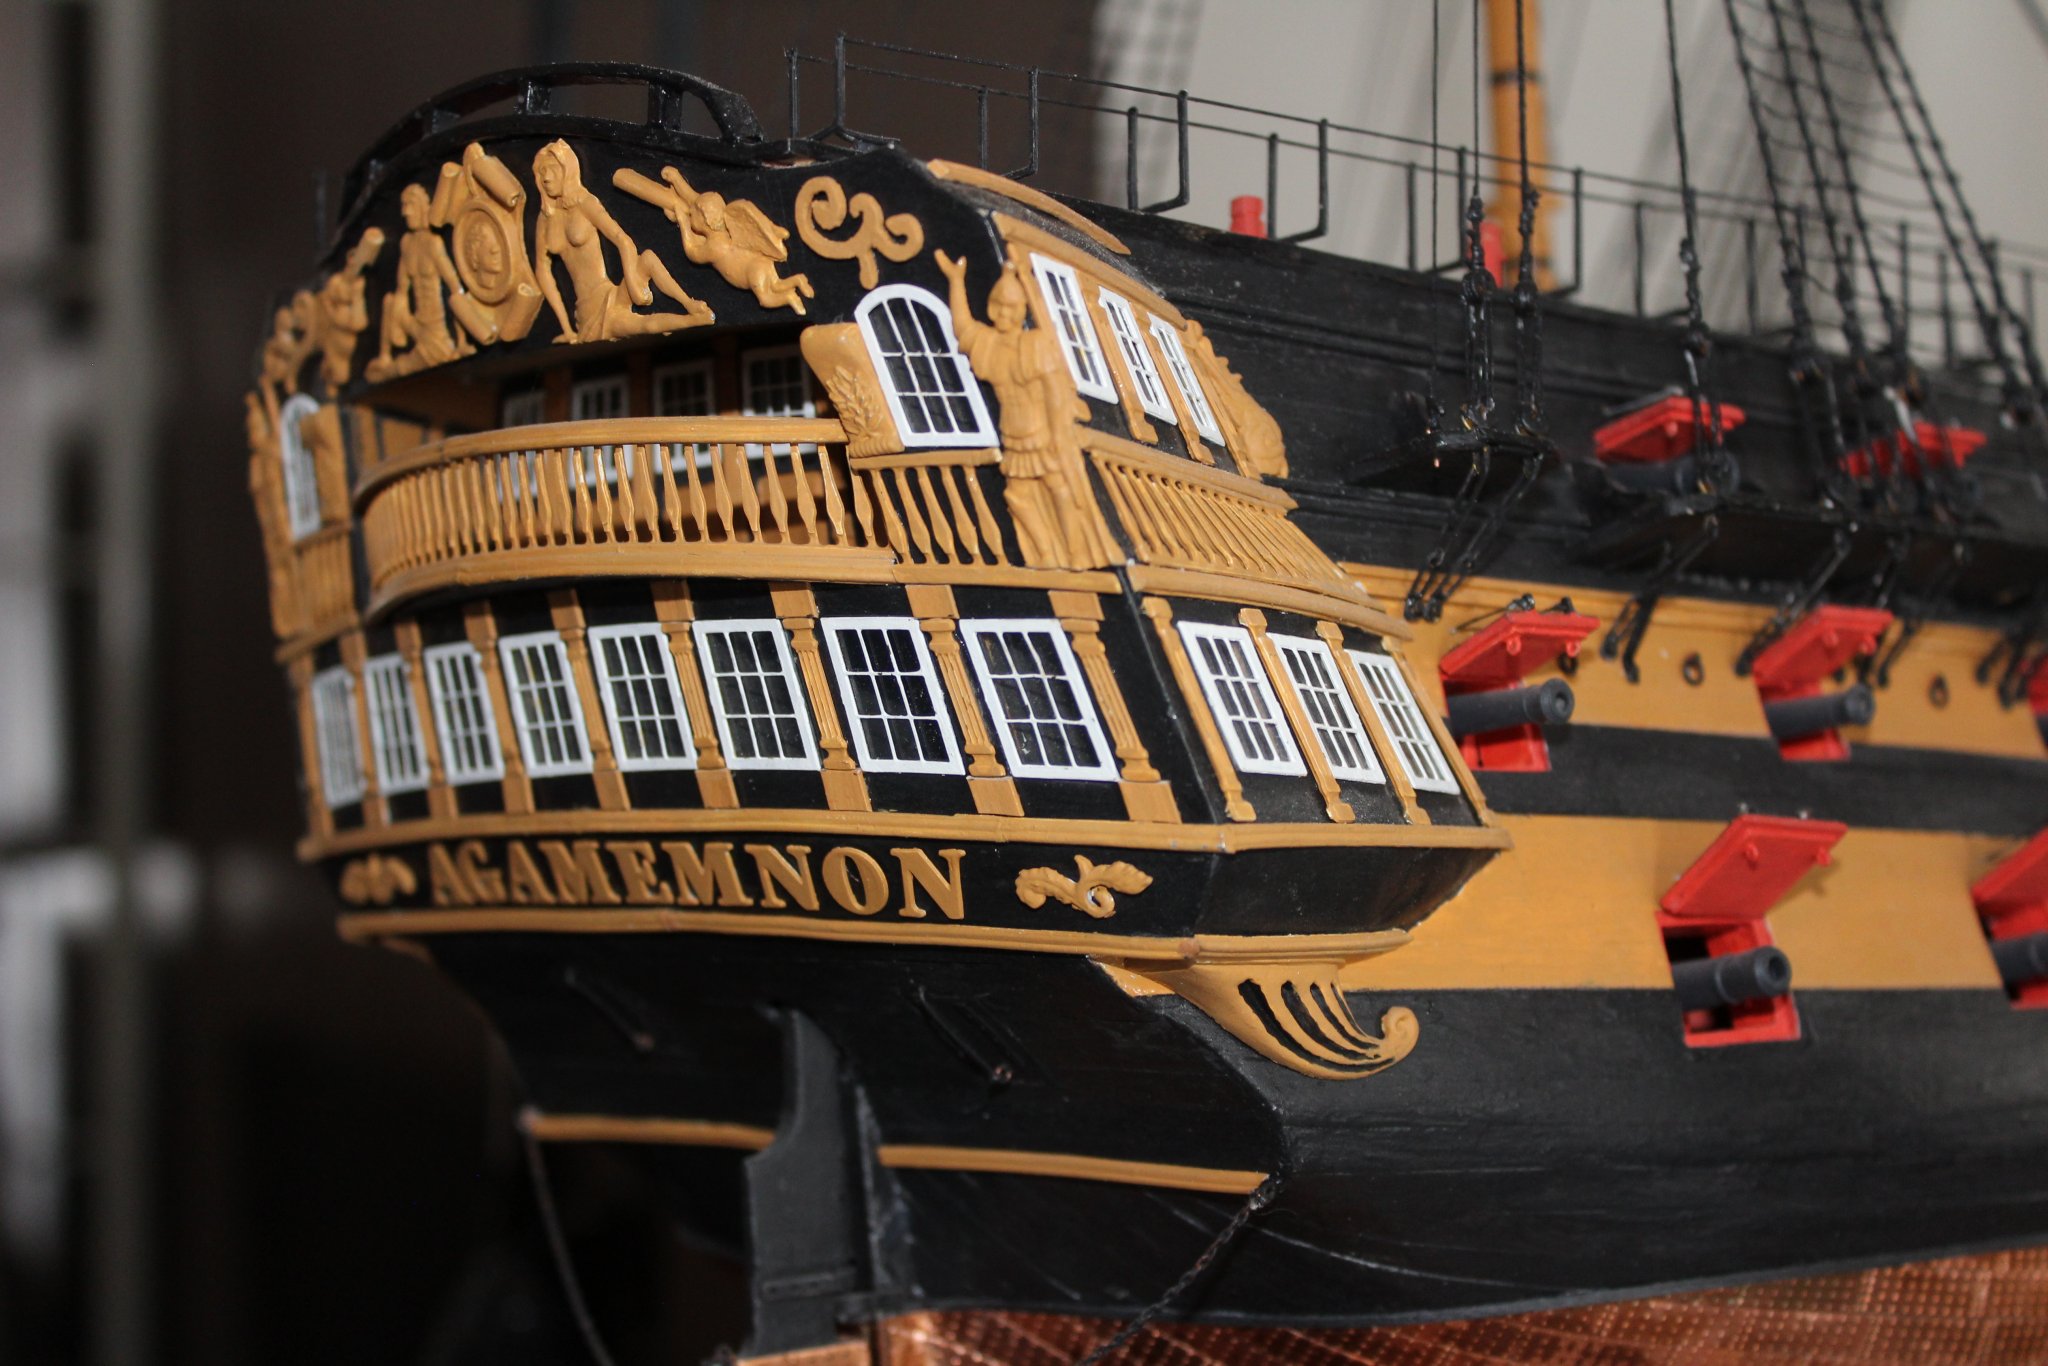
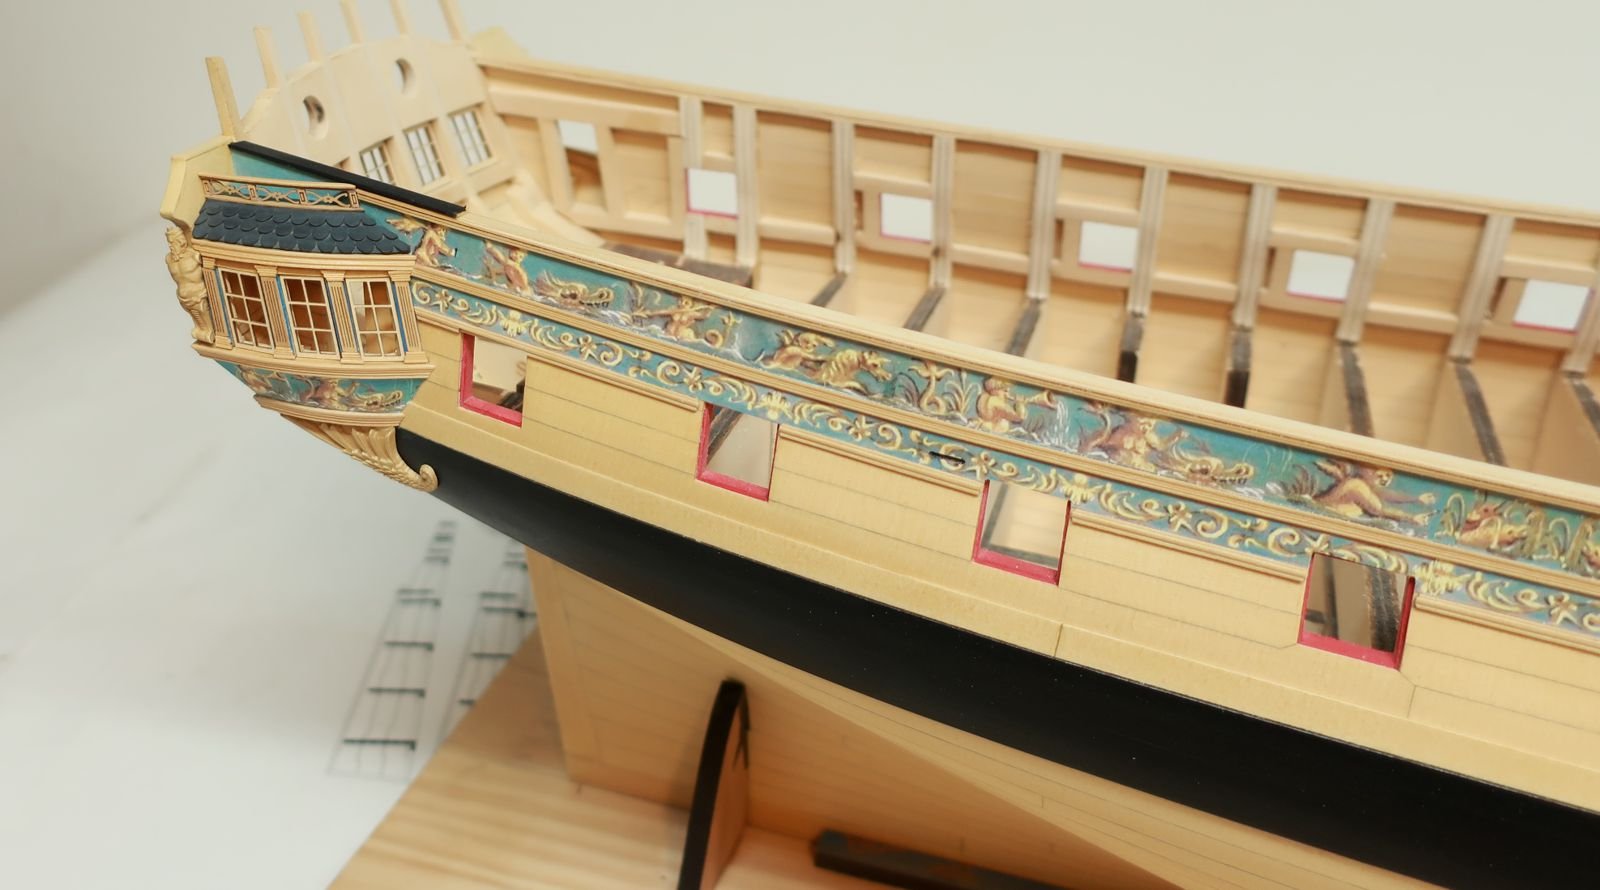
Everyone: While Im busy building yards for the Agamemnon I realized I havent posted pics of my stern gallery so here are a few. I noticed I need to go over the gallery with a few touch ups but you get the idea! The yards have been a slower process than I originally thought. oh well.. progress is being made.. slowly!
Enjoy
Mike Draper
-
1 hour ago, Retired guy said:
Hi Mike what an achievement she is looking brilliant you should take some pics outside as you did with the conni 😁👍
Regards
Richard
RIchard: Plan to as soon as it stops snowing! 🙂
Mike Draper
-
55 minutes ago, Chuck said:
That looks fantastic. Glad to see you moving right along.
Chuck: you have no idea how many times I have been tempted to lay the keep down on the Winchelsea and just work on it "for just one evening" but I got to keep the focus and get the Agamemnon on the "done" pile...
Mike Draper
-
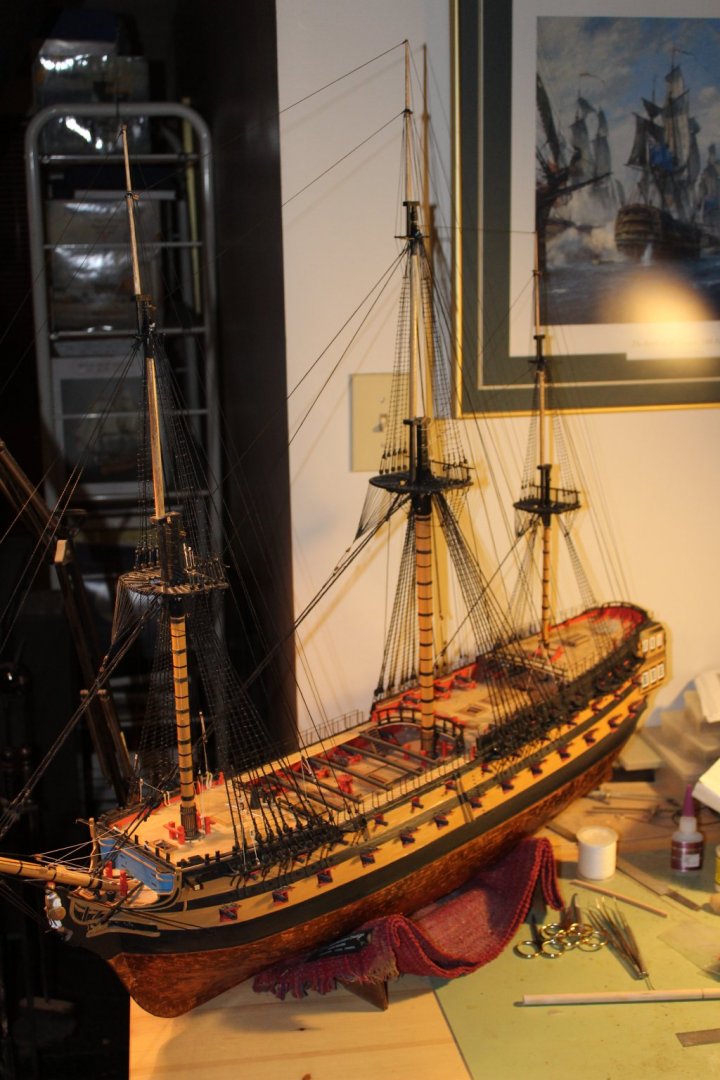
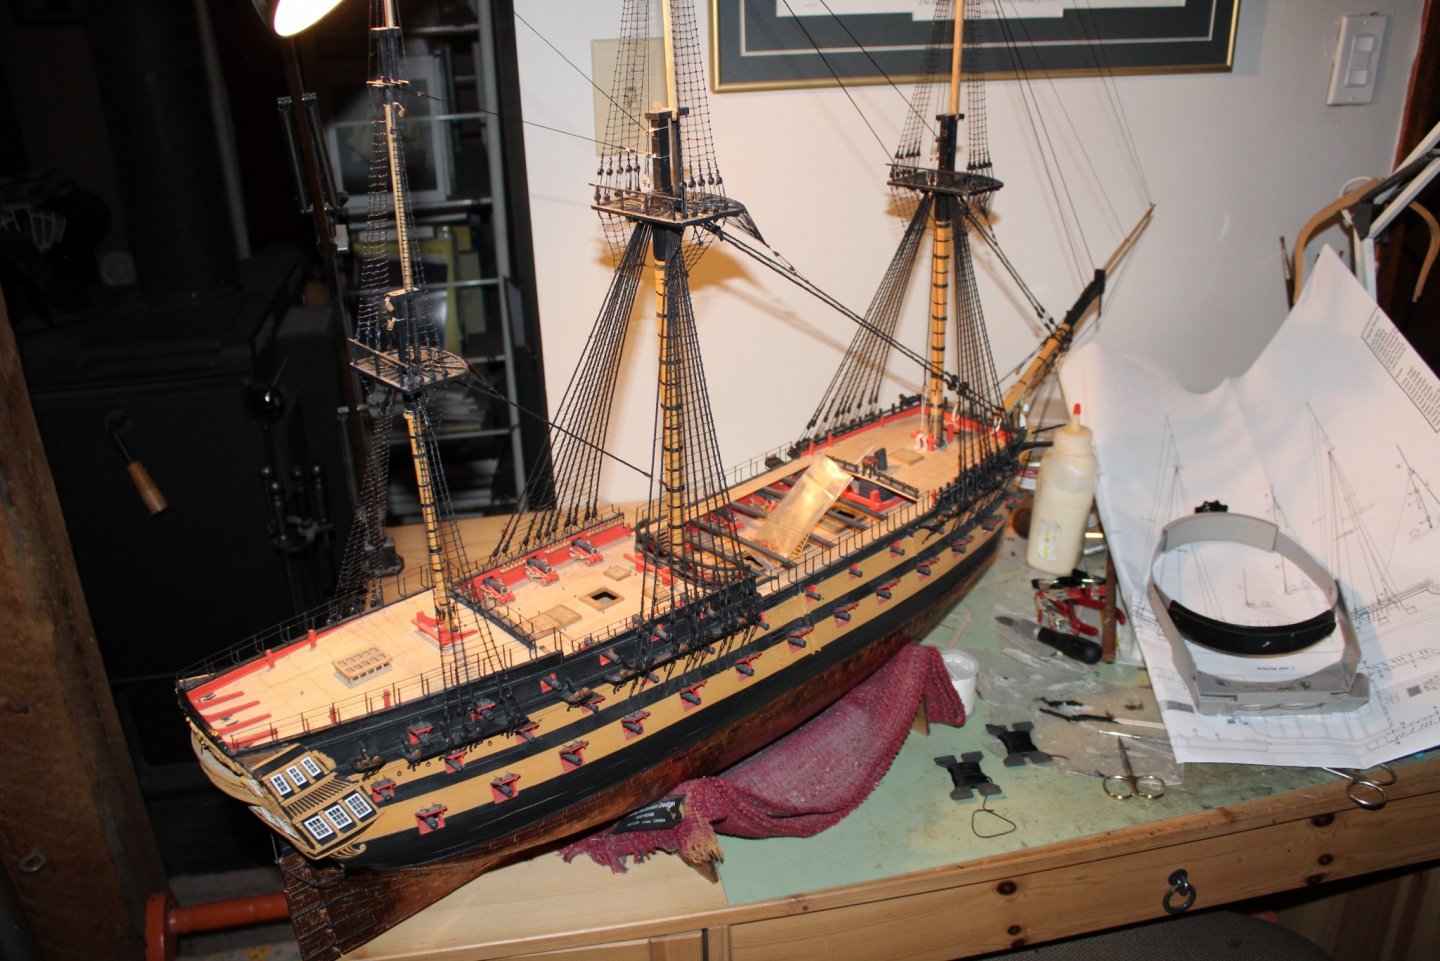
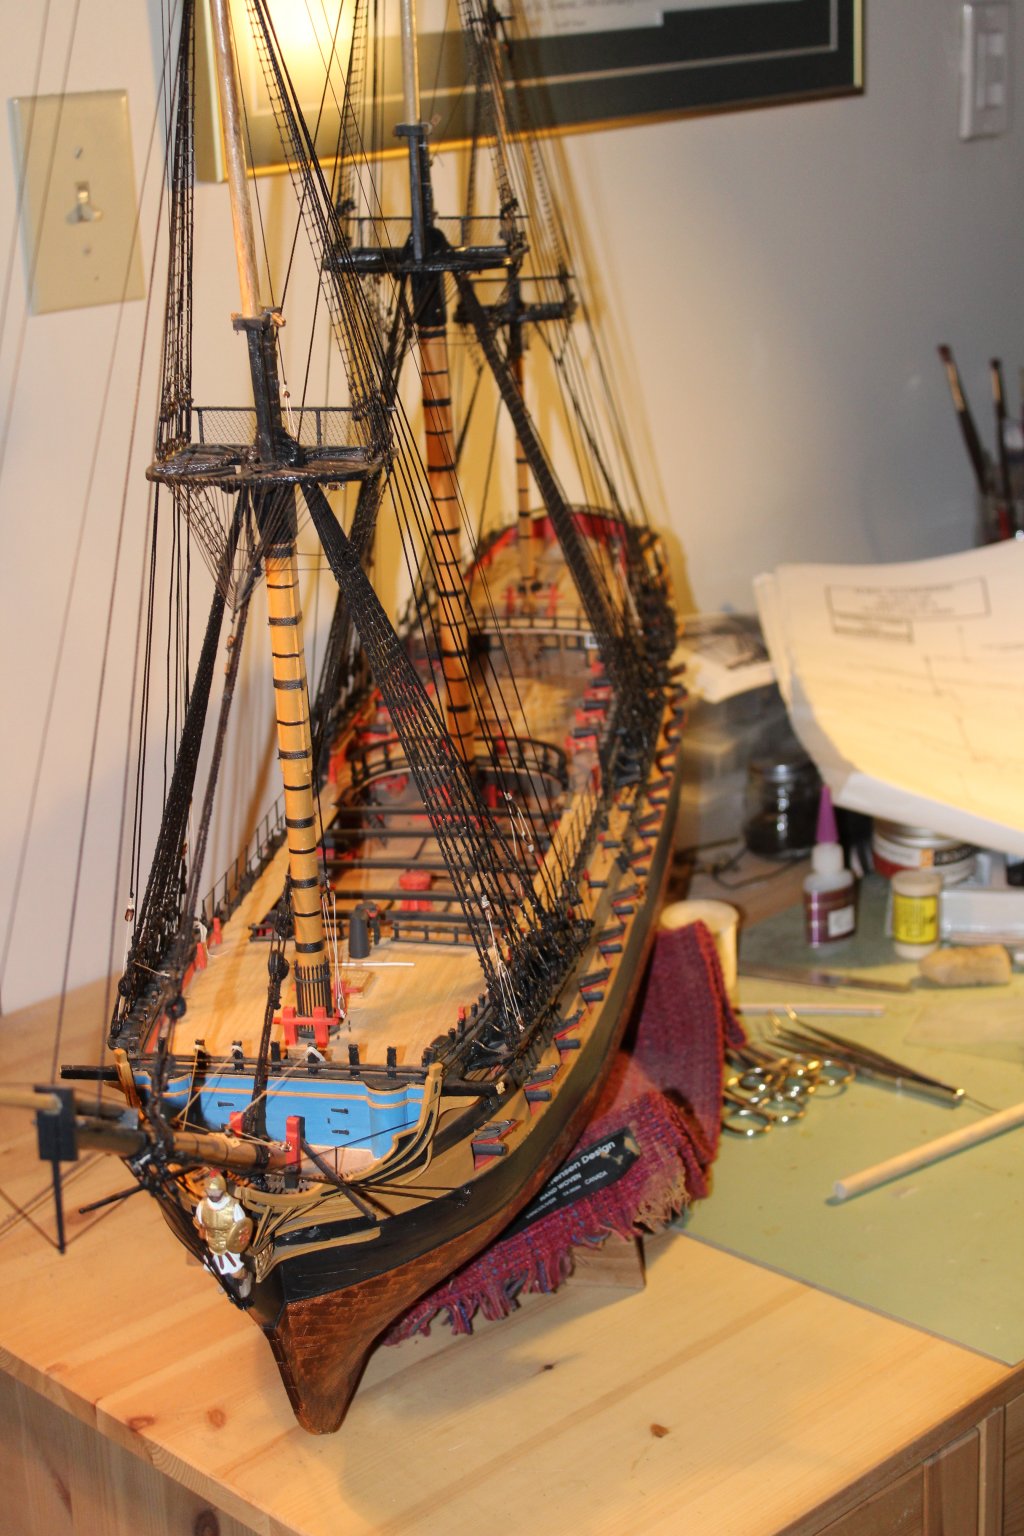
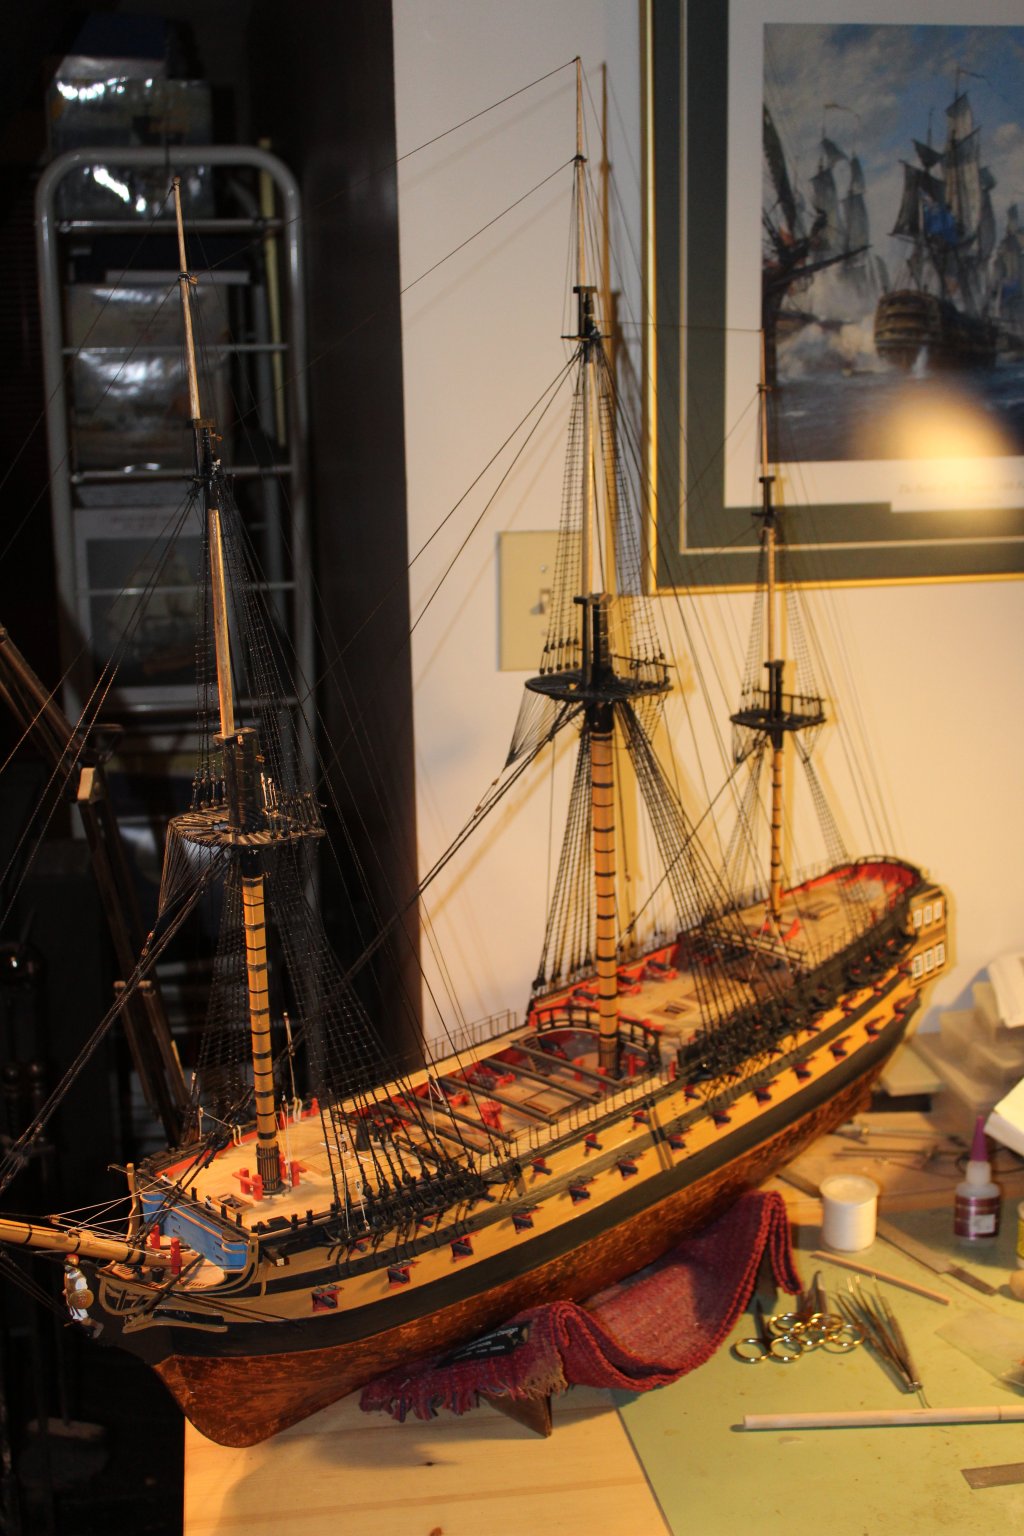
Everyone: I finally did it.. after the last couple of years (yes.. years...) I have finally got the standing rigging done on the Agamemnon. This project has gone way tooo long but now that I have the Winchelsea on the horizon Im putting the pedal to the medal on the Agamemnon.. I never thought I would get to this point after seeing the masts unrigged for so many years. And last night I cut the length on my first spar (lower foresail). A new chapter has started. I still have launches, anchors, stern lights and i suspect lots of other things still to do but i finally feel I see progress... Hope you enjoy the pics!!!!!
Mike Draper
- Jonny 007, Retired guy, ccoyle and 13 others
-
16
-
Richard: I did buy the guns (I cant remember from who but you could make them or kick around on this forum to find out who sells them). I used the full carriages as a template and added a extra length on the bottom to allow for adjustable height.. so take a existing side of the gun carriage that was supplied with the kit and add about 5 mm on the bottom to allow for adjustment of how the gunport will sit attached to the floor on the lower deck and sit nicely in the gunport.. i had one piece of wood with the tiered edges of the top of the gun carriage and just cut pieces off like slices of cheese....
MIKE
-
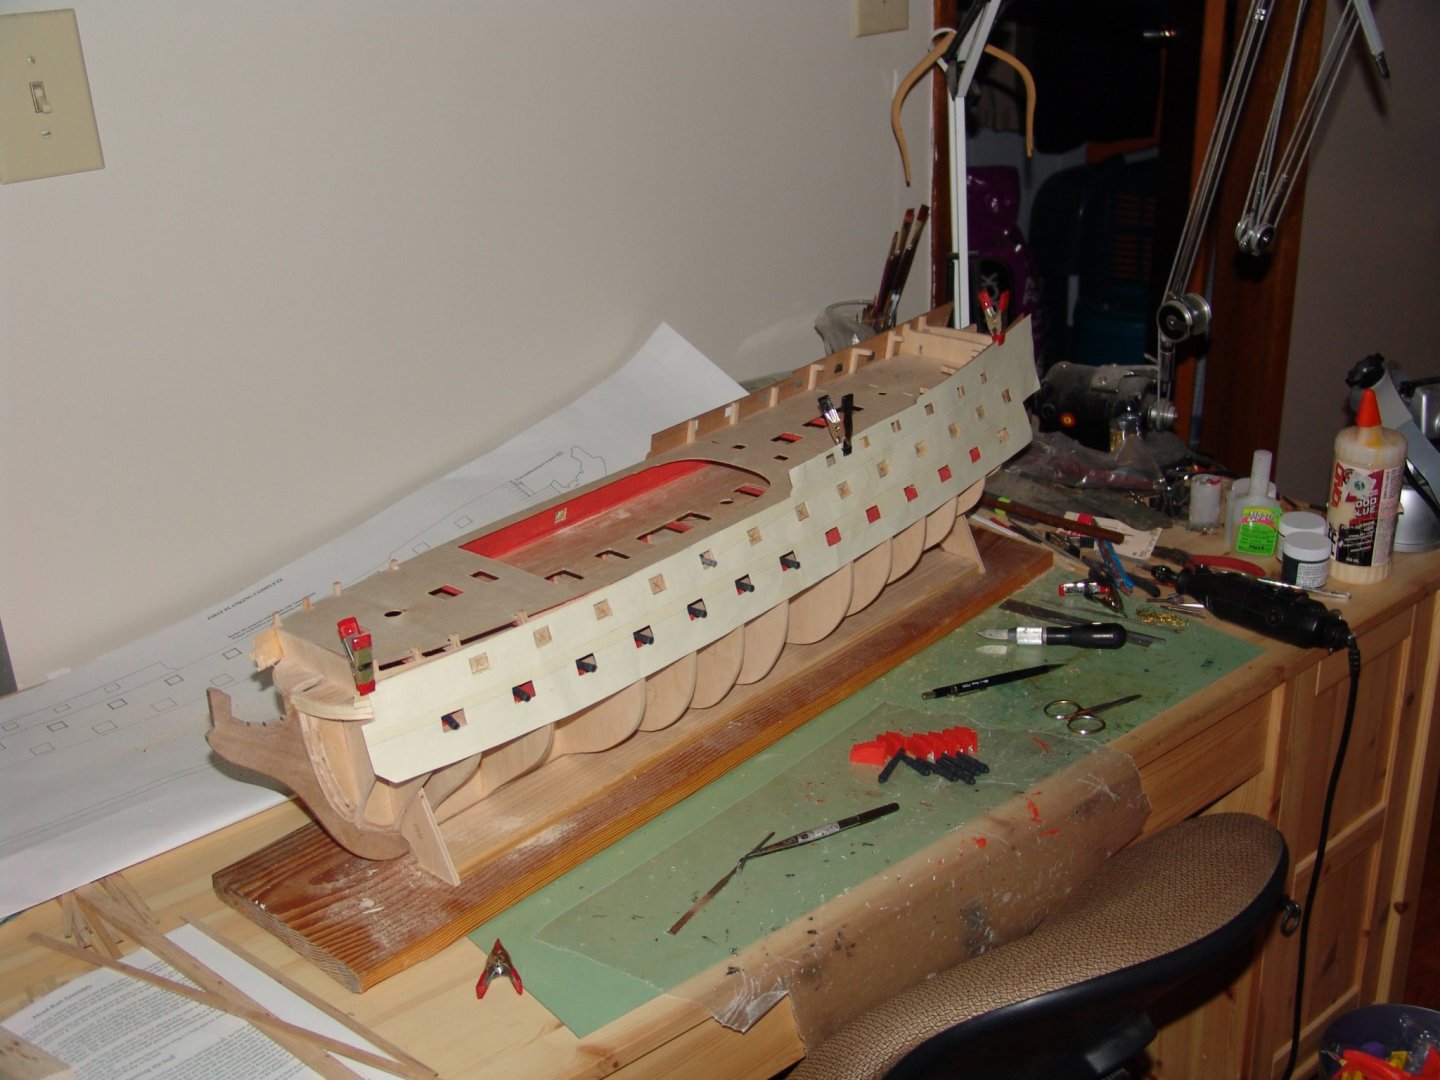
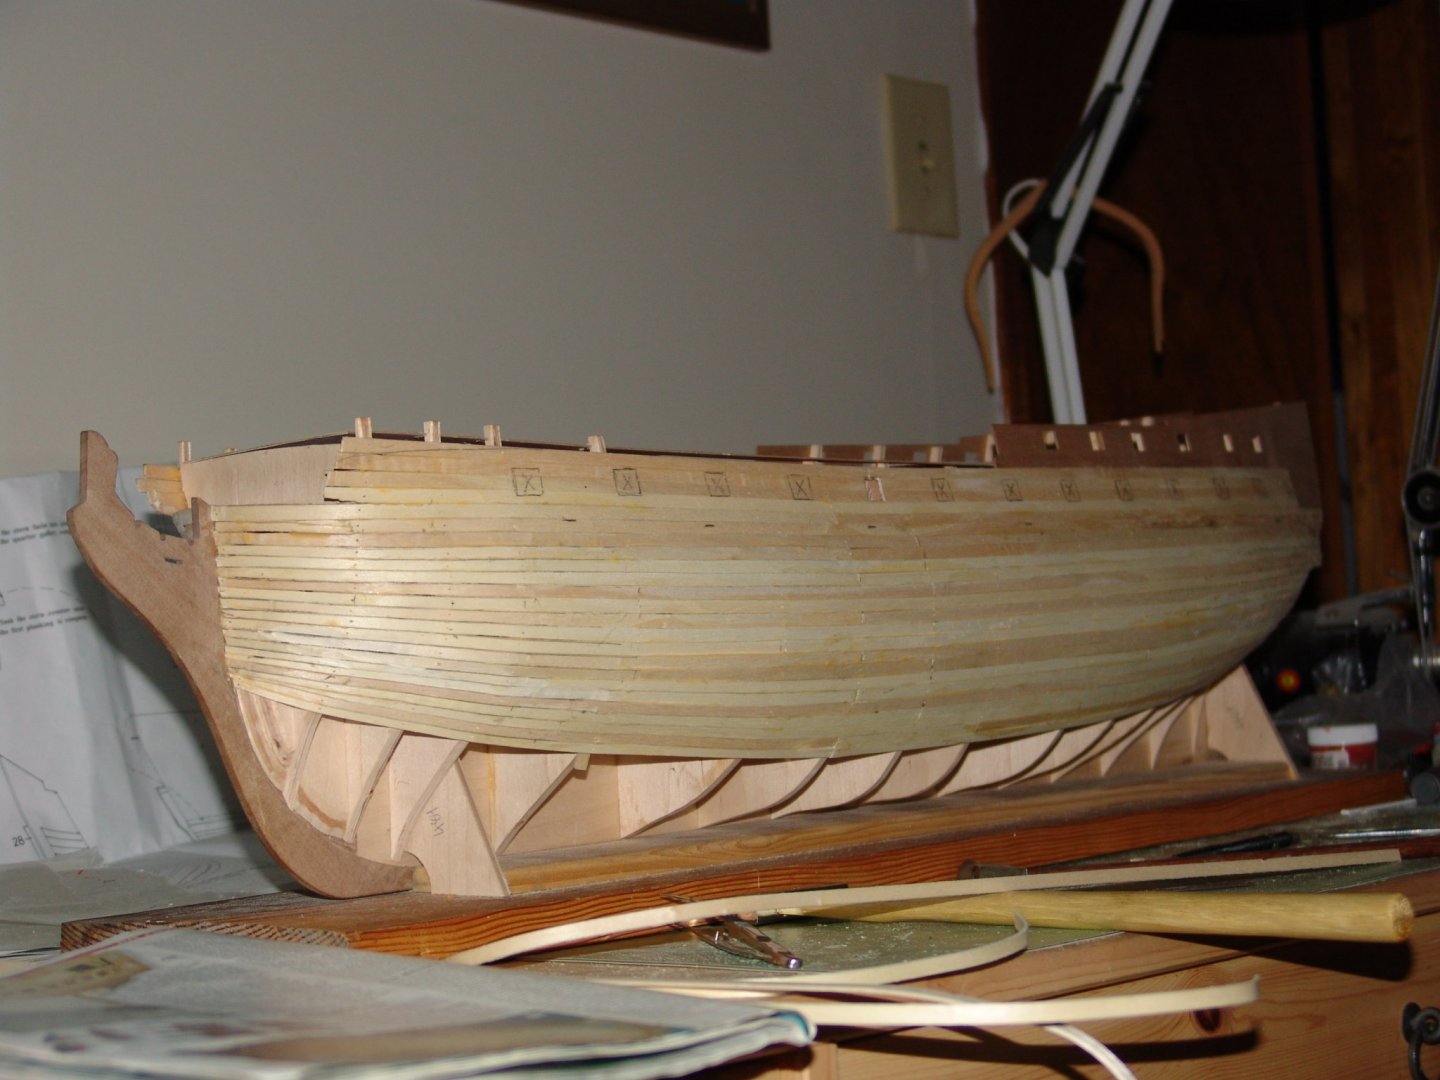
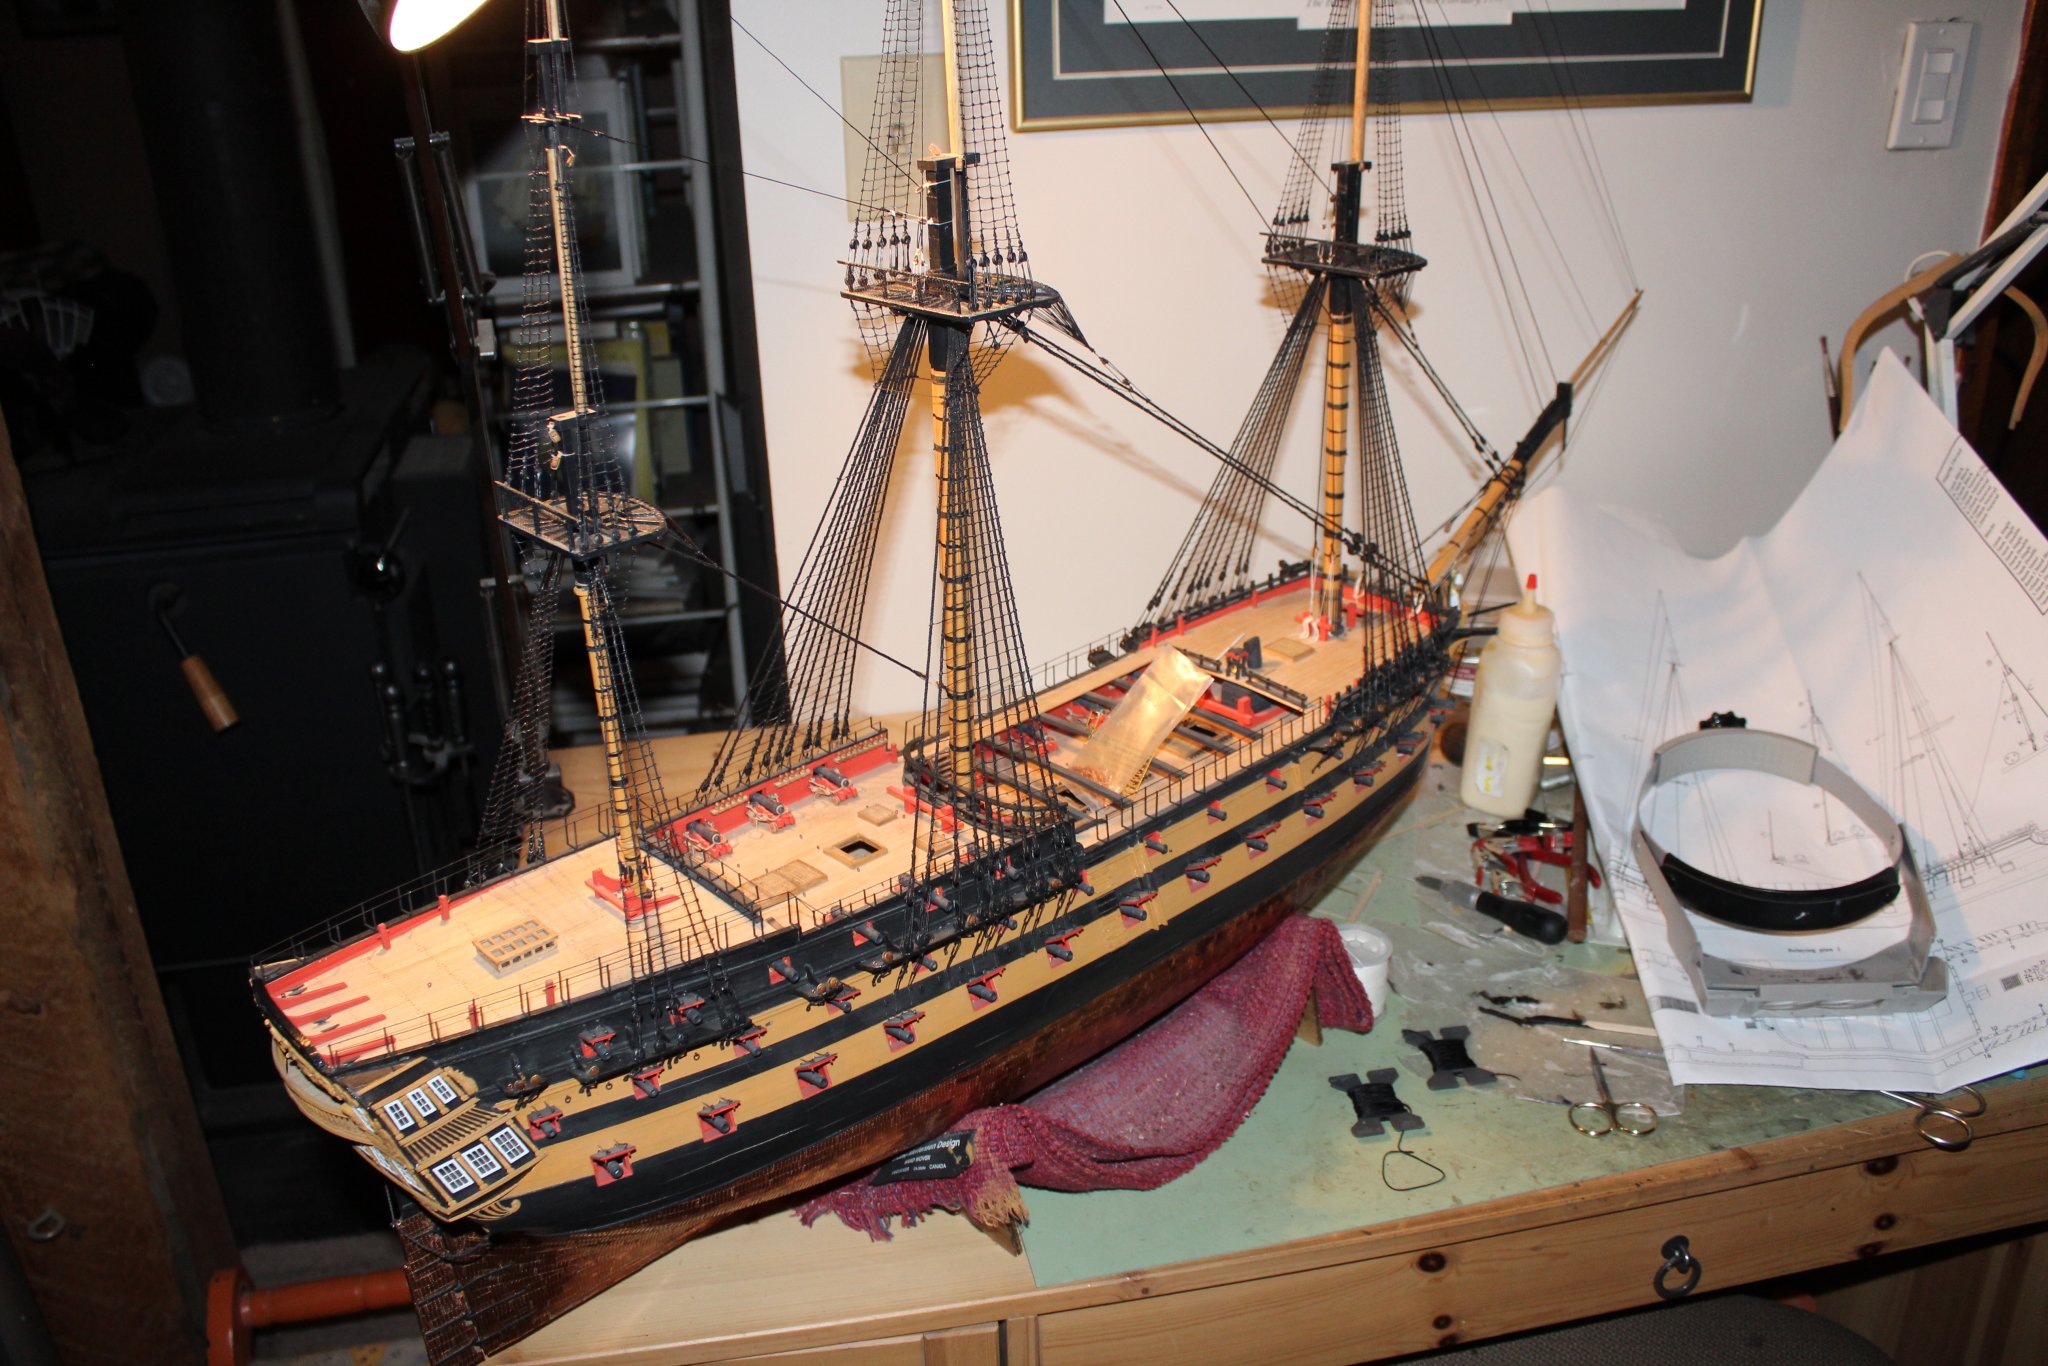
Richard: here is a quick and dirty on how I made the lower gun carriages. this is only the lower gun carriages.. the gun deck carriages below the spar deck are full gun carriages
1) First they arent full carriages. if you look at the photo below I have constructed the upper part of the carriage but left the lower half flat without wheels.. there will be a reason I will explain in a minute
2) I used the lower deck Caldercraft had you install with the bulkheads -i figured if I installed one that was flush with the run of the hull and that I could use with wheeled gun carriages it would be a big headache.. what I did instead by leaving the bottom flat it allows me to adjust the height of the gun carriage by removing the wood on the bottom flat edge
3) When the carriages are constructed (i took a long piece of maple cut the upper tiered look of the gun carriage on a saw and then cut them off the long piece of wood like slicing cheese.
4) hung the paper template that I had copied and firmed up with masking tape.. clamped it to the hull and begun arranging the gun carriages according the where the hole was for the gunport. Once then were all done I would dry fit them in the gunports and then had the guns to the carriage to see if they had a proper run along the hull (you will need to buy full guns as the dummy guns are junk with you doing the full carriages)
5) then I removed the gun carriages and guns and then begun planking the hull.(dont forget to number them so you know which gunport they belong to
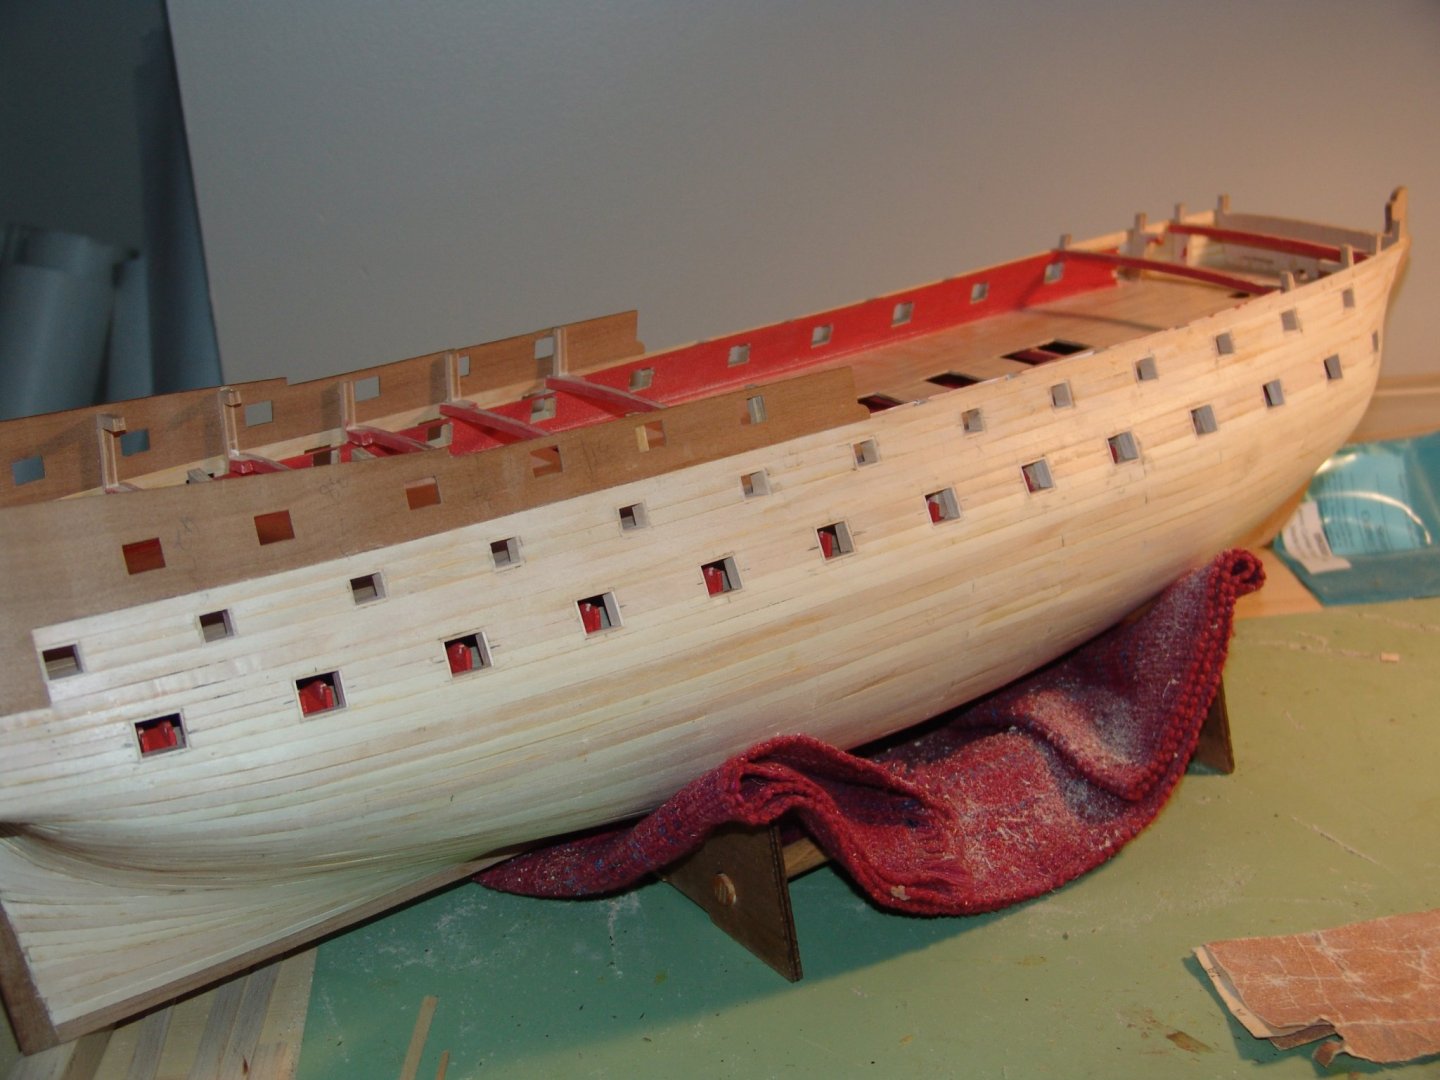
6) once hte hull is complete I then laid the same taped template over the planked hull and penciled the gunports..
7) when all of the gunports were drawn I would then drill a hole in the centre of the gunport lid and start carving them out with a dremel and a sand bit and finish off with the file..
8 ) insert the carriage with tweezers through the cut gunports -glue them into place and dry fit the guns to make sure the run of the guns along the hull is still good.. you may need to fine tune one of the carriages by adding or taking away wood on the bottom of the carriages.
9) once the carriages are glued in.. keep the guns out of the carriage until you have painted the hull and gunports.. it just makes the job easier
The hardest part of this process was after planking the hull and then cutting the gunports.. make sure you use the same gunport template and have it lined up in hte same place you did when you were using it to build the carriages. Also... before you plank the hull paint all of the interior of the lower gundeck black.... with the carriages and full guns you can now see bulkheads and floors.. paint them black hides that....
Good luck and let me know if you have any questions..
MIKE
.jpg.2746deec2b23113eb2cdb9f0face1705.jpg)
.jpg.ede157ad50d94f2ee755a425367cca85.jpg)
.jpg.de6436b8c1c2a4ef9e23a631cacea1b0.jpg)
- GrandpaPhil, gieb8688, Jonny 007 and 3 others
-
6
-
Richard: I dont have a CD of how I did the gun carriages but I can write a longer post later today when I get home. I warn you though... its a real time sucker.. 🙂 But it is worth the effort.
As far as Richard Traut, I heard he has moved to the island and is enjoying life down there..
I didnt have any real problems with the measurements. You have to be really careful on where the channels and chainplates go on the hull. You have to make sure you arent blocking a gunport as well they line up with the mast and fighting top. I had to fiddle with that for a while before I got the right fit. The template for the gunports is a life saver.
As far as making gun carriages, I would first recommend you make a copy of the template at a printing shop and cut it out and then back it with masking tape to make it firm.. you will be relying on that quite a bit -cut the gunports out as well. I will send you a longer email tonite.. I hope I can explain it to you clearly enough
MIKE
- Jonny 007 and Retired guy
-
2
-
Everyone: I never thought I would see the day where the ratlines were finally done.. and they are.. I have started on the stays and hope to have them done soon. We have had a bout of very cold weather here in the Yukon... we are on our second week of -40c and it has been a great motivator in making some progress. Once i get the stays done I will start constructing the spars and maybe even make a launch or 2 as a side project. I may get this beast done after all! 🙂
Mike Draper
(alive at -42c)
- Ryland Craze, davec, druxey and 7 others
-
10
-
Richard: I think it was SMF forum that was where we hanging out talking ship modelling. I should be getting a new pic update soon.. Made some good progress the last couple of days... I hope you have a good new years as well!
MIKE
-
Chuck: Thanks for the reply! Will be looking forward to the release of chapter 3!
MIKE
-
On 12/20/2019 at 5:23 PM, Chuck said:
Yes indeed. Luckily our models dont see the outside and any water. The cedar really works well and has a great color that is so complimentary with the use of boxwood.
In fact, to point that out, I finished the qgallery on the starboard side. For the most part, all of the wood that makes up what you see on the qqallery is boxwood. It blends really well with the cedar. You get the benefit of the cheaper price so you can use it for planking and frames and other big stuff. Then like done here you can switch to the ever more expensive boxwood for the details and other fittings. In fact, most of the deck fittings and molding will all be done in boxwood.
The qgallery roof rail is all laser cut from boxwood. You basically have to evenly space the four uprights which are at an angle leaning aft. There is a nice etched detail on each of them. These are super super tiny at only 1/16" wide give or take and 1/8" tall. Then the top rail is added. This is laser cut with an etched detail along the bottom to give it some depth. I sanded the laser char and rounded off the edges a bit. Then I glued it on top of the four uprights. Yes it a bit longer so you van adjust it to fit your model.
Lastly, the three laser cut fancy "flowers" for lack of a better description were glued into the space provided for them. These are fragile. Only 1/64" thick and again soooo tiny. Dont even bother trying to remove the laser char from the edges. They will break. Just glue them in position. That is what I did.
This completes all the work for the starboard side as described in chapter 3. Now to repeat this on the port side!!!
Left natural and unpainted...just so you can see it. Its too bright for my tastes. I am going with the painted version.
The painted version....weathered to look like a slate color....I may still lighten it up a bit.
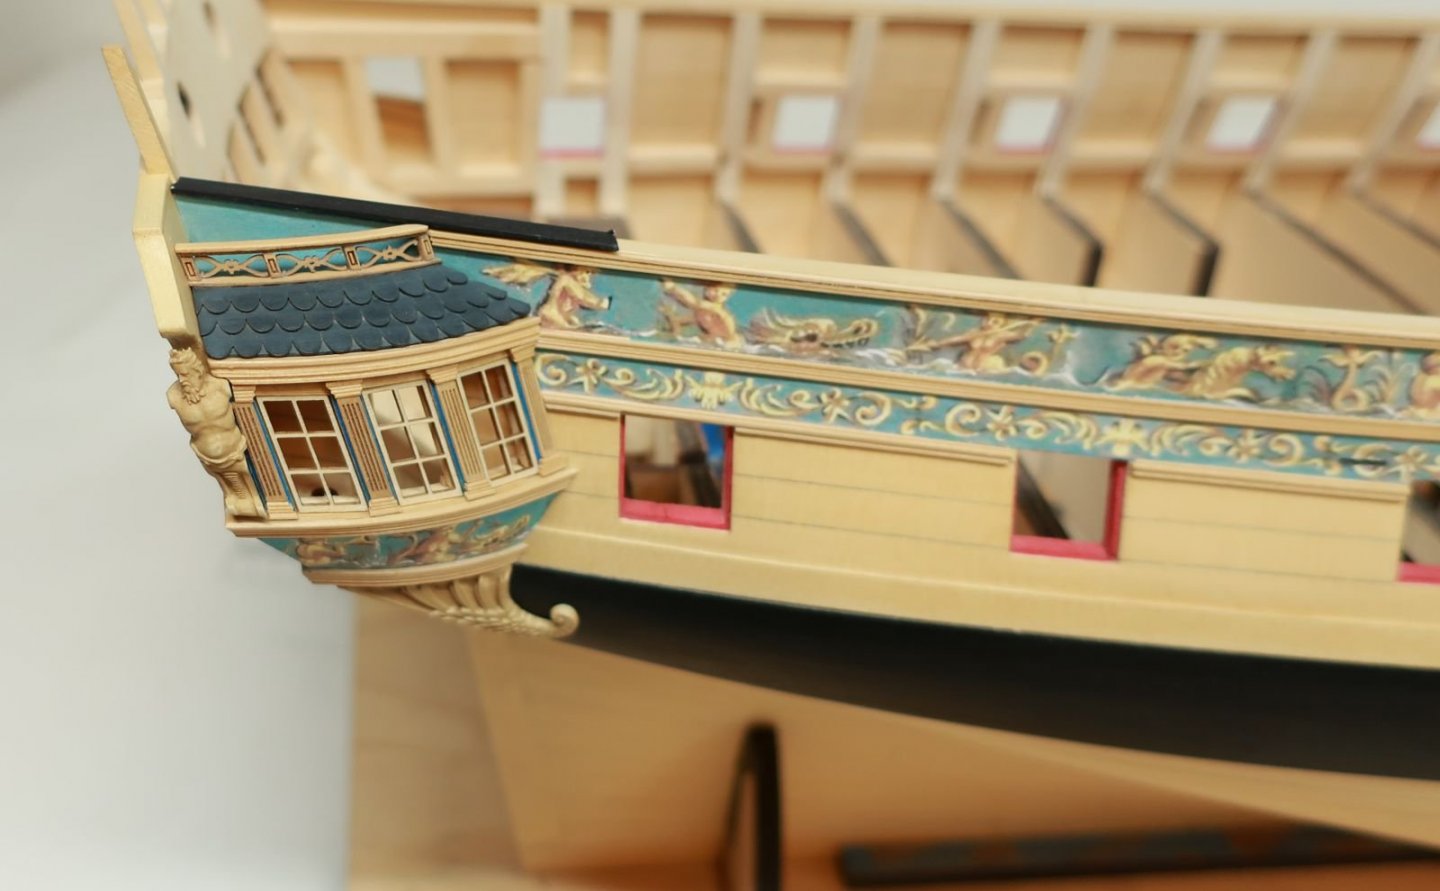

Overall the galleries came out well. But these are tricky with so many complex angles. I definitely recommend buying the laser cut pieces for these even if you are trying to build most everything from scratch. The windows and glazing and the columns with laser etched flutes etc. All of the laser cut and etched scrolls will be included too. The angles are all worked out for you and this will make building the qgalleries so much easier. These parts will be mostly boxwood for the cedar version and cherry for those building it in pear or some other darker wood.
Oh and I added a scrap piece of painted strip to show you guys what the cap rail will eventually look like. This will be painted black and glued on top of the sheer much later in the project. After we finish planking inboard. Much later...but it shows how nice it will be finished off.
Any questions or comments???
Chuck: FIrst.. I hope Santa was good to everyone and their tool drawer is nice and full.. 🙂 With the presents open and breakfast in my belly I had a chance to catch up on Chucks posts and I have one question. I assume the laser cut pieces for the galleries will be become available for purchase or do I need to turn on my carving (or lack of) carving skills? I assume if there will be a laser cut set it will become available with the release of chapter 3? As mentioned before.. amazing work.. its continuing to give me lots of incentive to get the Agamemnon done ASAP!
Everyone.. have a merry Kris Kringle!!!
MIKE
-
15 hours ago, Retired guy said:
Your Connie is brilliant Mike glad you do remember me, live on the Island now so one day we will meet up but until then will be watching your fantastic HMS Agamemnon
Regards
Richard
hey long time no hear! When did you move down to the island? I envy you... I could handle that weather over the Yukon! I will be posting some more pics of the Agamemnon soon
-
Jack: That is great news! Im looking forward to getting a PM from you sometime soon. Excellent work.
Mike Draper
- FrankWouts and Jack H
-
2
-
13 minutes ago, Retired guy said:
Hi Mike,
Just wondering if you remember me, Richard from Calgary, was on a forum with you when I was building my Endeavour and you were building your Connie I think this was back around 2004/2005 could have been before this as well hope all is well with yourself and family.
Here is a picture you sent me dated March 2005, love to see a finished ship are there pictures on this site?
Also did get to visit Whitehorse back in 2012 when my wife and I visited Anchorage Alaska on our Motorbike, sorry did not know how to contact you would have loved to meet up.
Here are couple of pic's of your lovely place
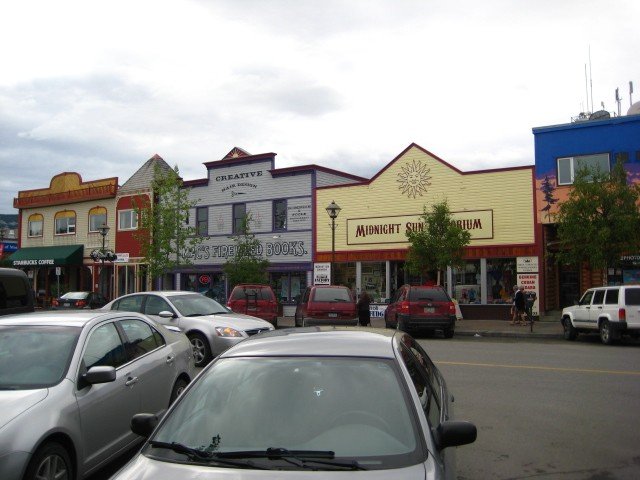
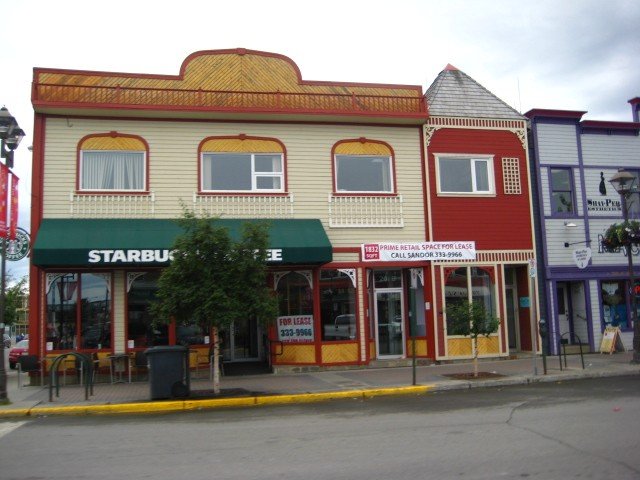
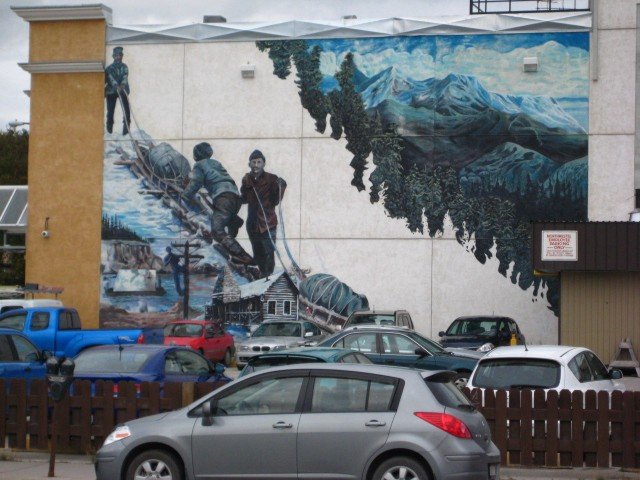
I do like how your Agamemnon is coming along got to get back on mine.
Regards
Richard
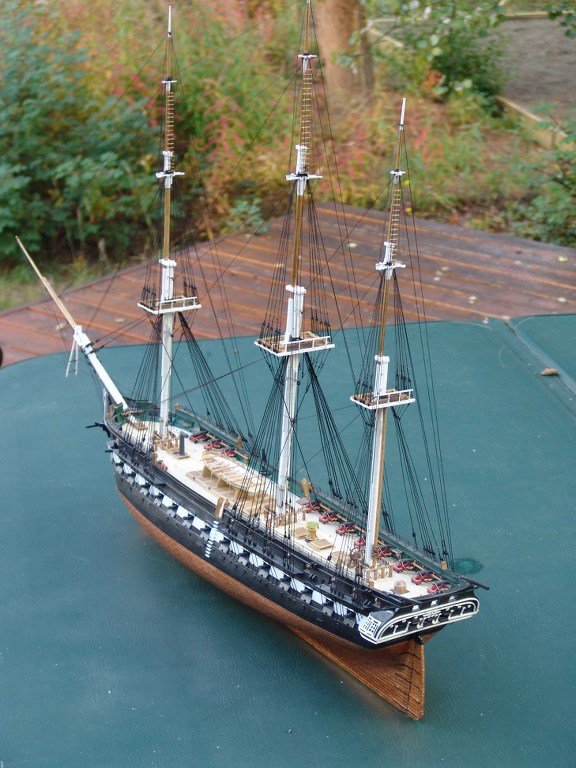
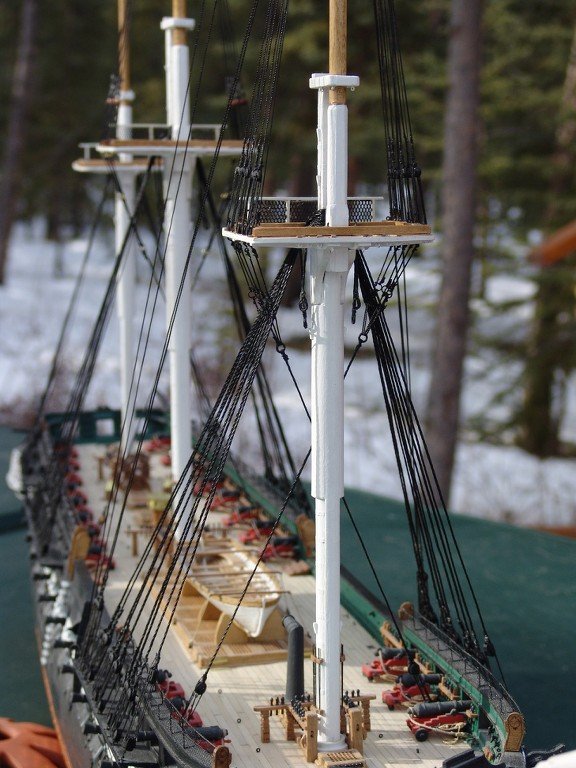
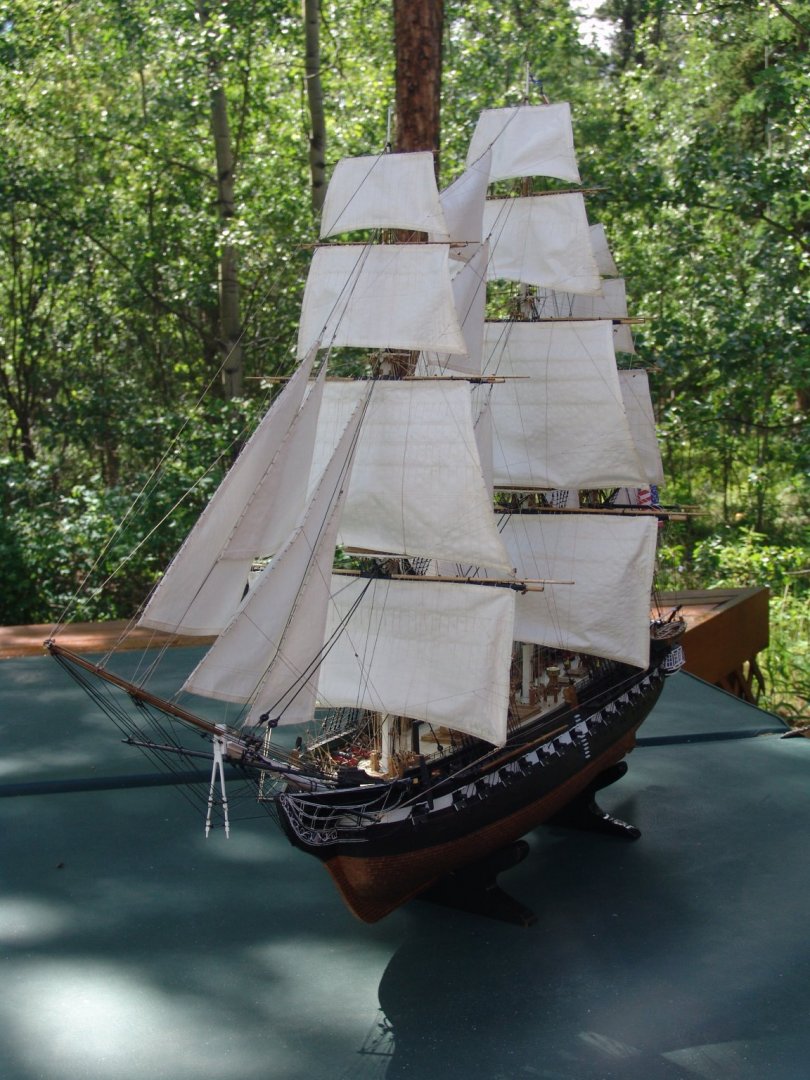
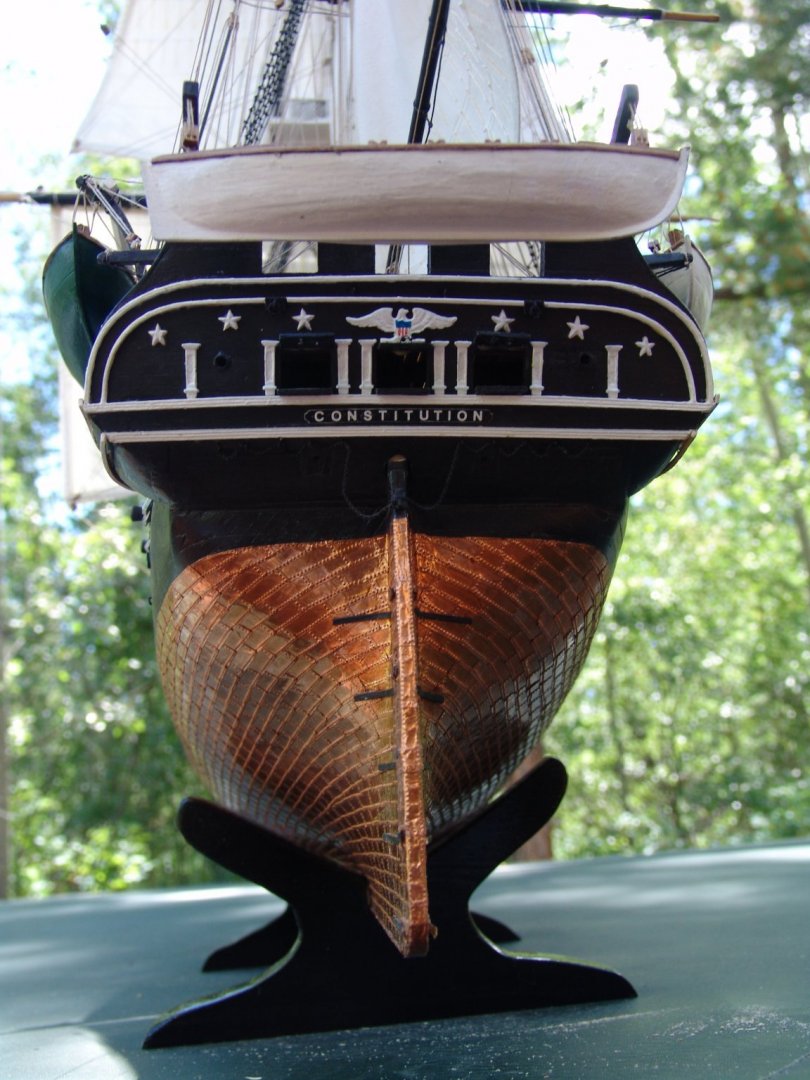
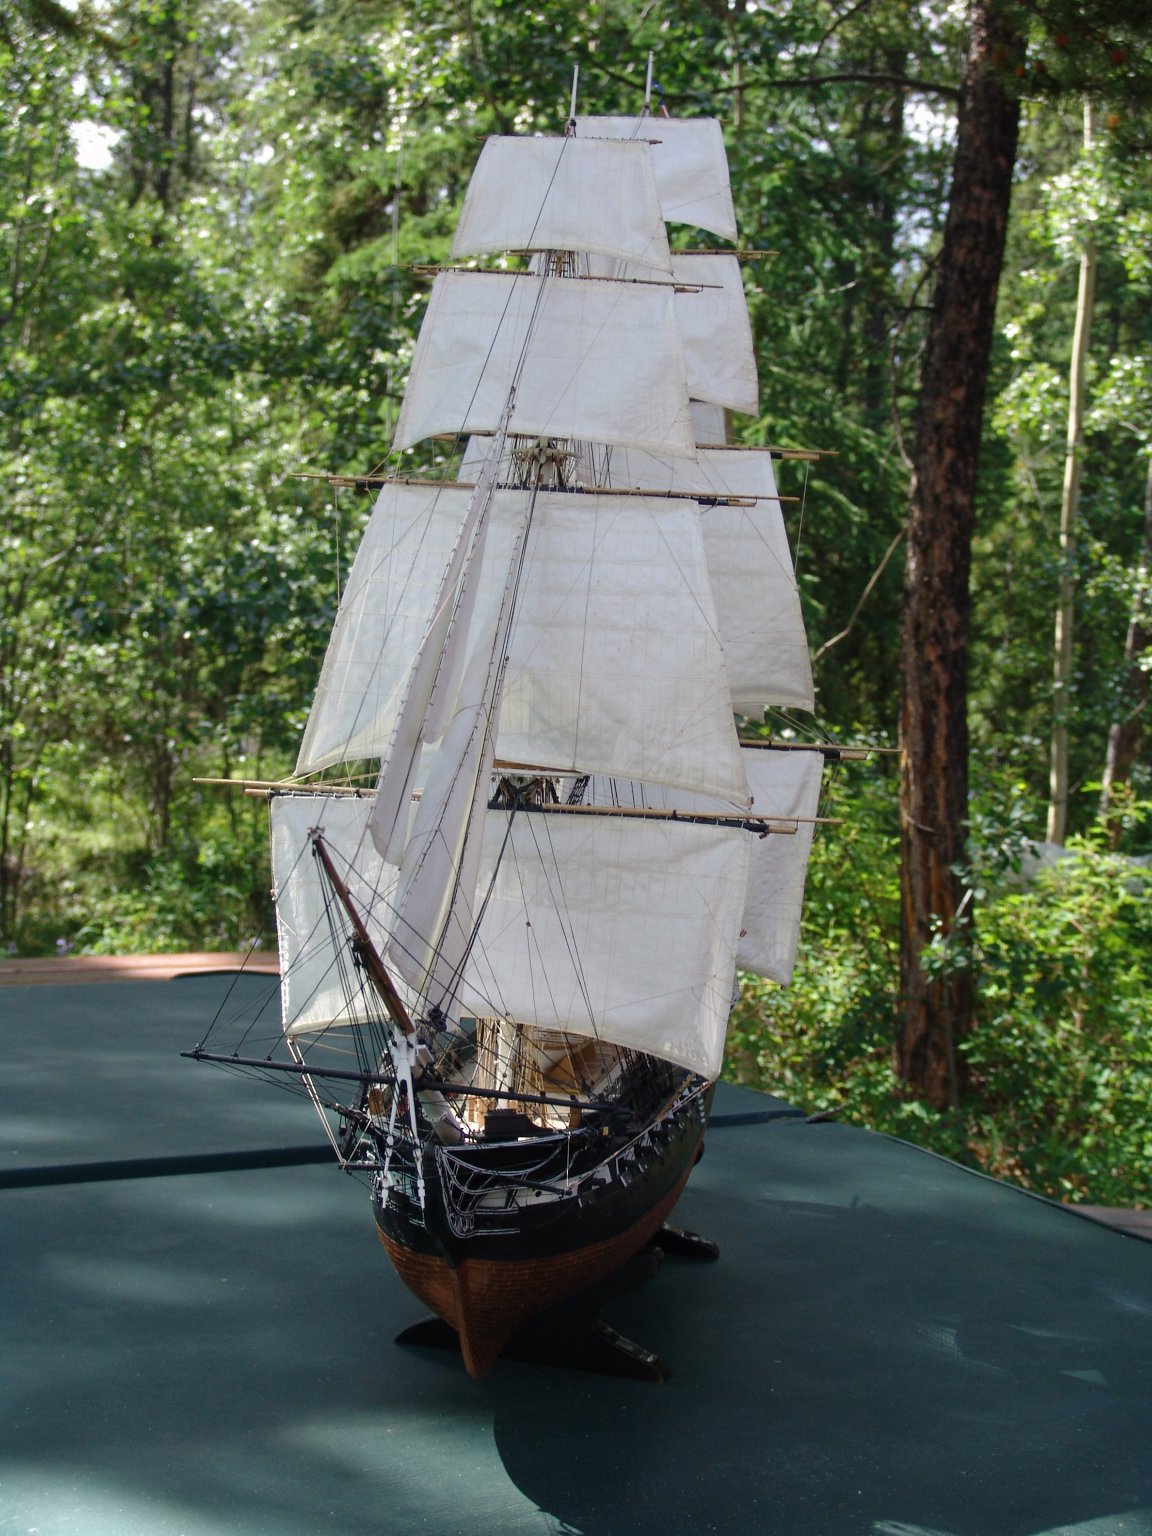
Richard: Its great that you got a chance to get up to my neck of the woods.. Too bad we didn't meet up as I could have showed you some pretty amazing areas in the back country. I had some friends up last summer and I took them for a 3 day boat trip down the 90 mile long Tagish Lake and did some wilderness camping. Maybe you can get back here some day soon. Yes.. I did manage to finish my Constitution. Here are some pics that I took when she was finally finished. I was actually got a chance to see her last fall in Boston. It was a really surreal experience for me actually standing on her decks.
I just finished working on the Aggy tonite.. ripped out some of the ratlines and redid them as I didnt like how they looked. I will be loading some new pics soon. Good to hear from you!
MIKE

-
10 hours ago, Henke said:
Please hang on now Mike. Your model looks so nice. What else can be done at this time of the year when you live at 60 deg north latitude? Clearing snow or..... finishing Aggy?
Kind regards
Henrik (on latitude 58 deg north)
Henrik: Actually this winter has been pretty warm and as a result not a lot of snow.. but for us we are now down to 4 hours of daylight so its giving us lots of time to work on indoor projects. The push is on to get the Aggy finished.. lots of work ahead of me still.


HMS Winchelsea - FINISHED - 1764 - by Chuck (1/4" scale)
in Member Build logs for the HMS Winchelsea
Posted
Chuck: Great news! Im hoping to get at that project soon. Just getting to rig sails on the Agamemnon so the completion of my existing project is in sight.. Cant wait.. 🙂