


HardeeHarHar
-
Posts
610 -
Joined
-
Last visited
Content Type
Profiles
Forums
Gallery
Events
Posts posted by HardeeHarHar
-
-
-
18 hours ago, Knocklouder said:
Count me in, I really liked your work in the past , I am going to start my Pegasus soon, I figure 5 to 7 years for it look at the fun we are going to have ship mates for ever lol

Bahahaha, I am ready for at least another 5 to 7 years. Bring it! Also, i am going to be in Toronto soon, ey! Look out Canada....
11 hours ago, jpalmer1970 said:I'm interested to follow your progress on this - it is on my list of 'maybe the next build' ......
Welcome aboard. I may not make the fastest progress by far, but that won't be because of the kit. It is awesome. What is also awesome is Penrith. I have been so fortunate as to visit the Blue Mountains a few years ago. You certainly live in a beautiful part of the world!
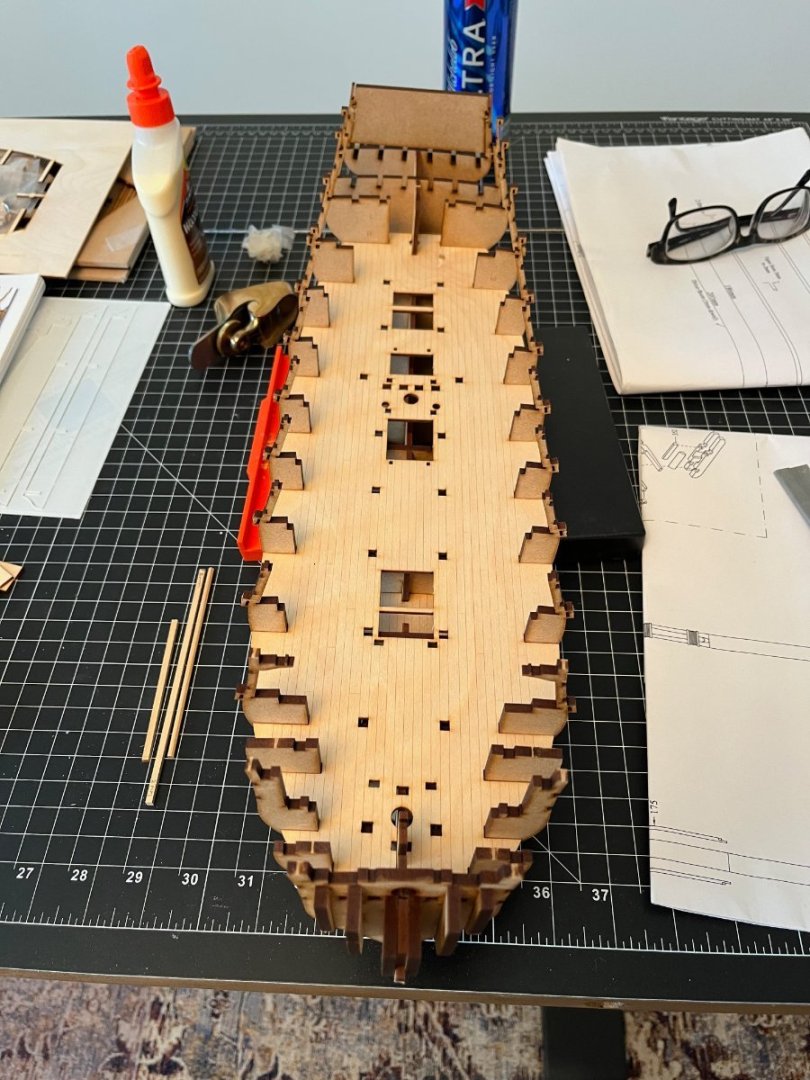
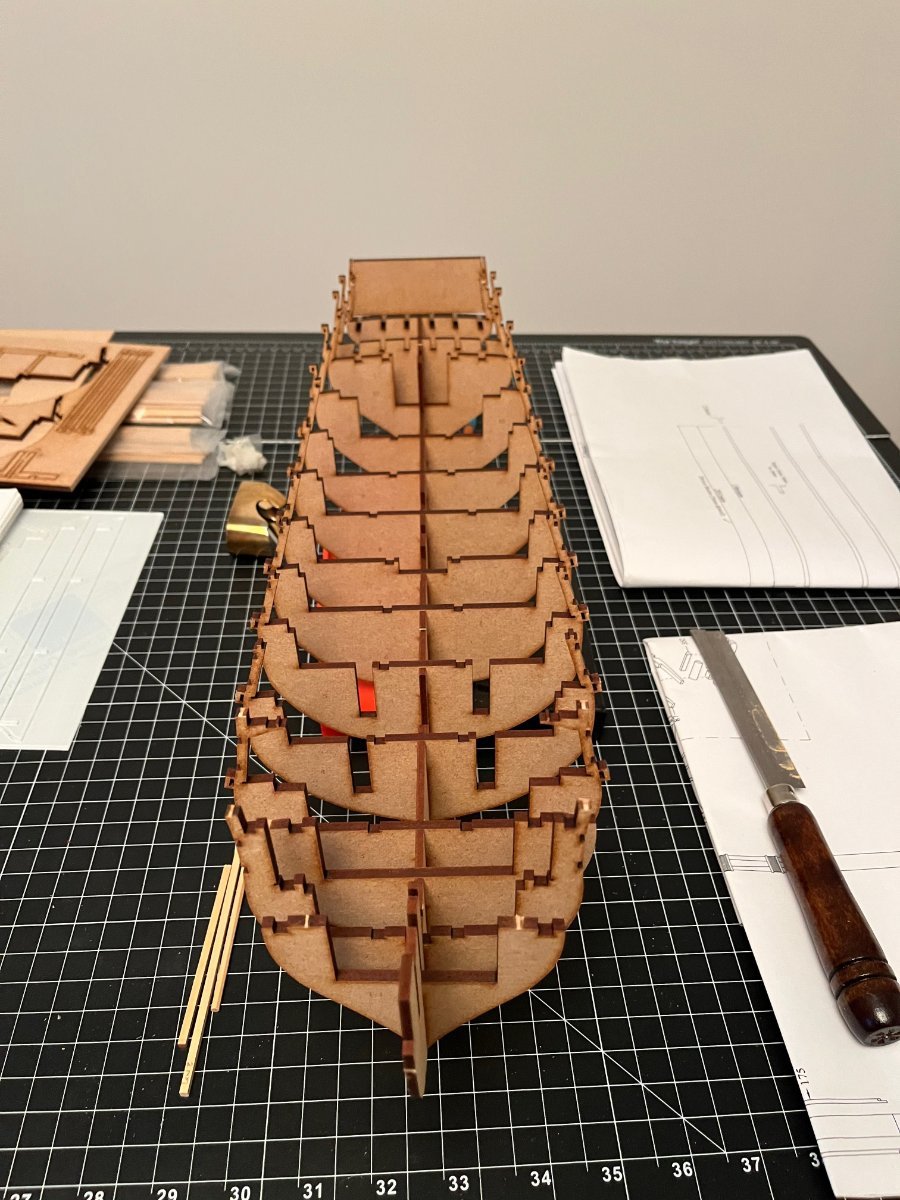
I am just about to glue things down and let it sit overnight:
- KARAVOKIRIS, Javelin, KurtH and 7 others
-
 10
10
-
1 hour ago, Matt D said:
This looks like such a great kit! I'm going to pull up a chair and follow your built, Brian. I'm looking forward to watching it come together.
Welcome aboard MattD, I'll be counting on you for your support and honest feedback.
15 minutes ago, AJohnson said:Hi Brian, looking forward to seeing your progress with this one.
Andrew, I'd be much less productive without your encouragement and assistance in my building. You set the bar high in your builds and your forum participation.
5 minutes ago, hollowneck said:You're off to a great start, Brian, swimming in the deep end now...however, there are many life preservers nearby, so enjoy!😊
Seriously, this is a superb kit that will reward you every step of the way.
I have no fear, I know where you live, and I have access to the GuildFather's build log! What could possibly go wrong!!!! In all honesty, Chris sure does know how to make a great kit, and I am super happy to be following in the footsteps of such awesome previous builders. With everyones support, I can most likely finish this thing in less than 10 years!!! 😃.
-
And so it begins. Having arrived back to an empty dry dock in Durham, NC, it was time to fill the vacuum and put the shop to work. I will do some research and try to add some helpful or informative content to this topic as time permits. I will say that the kit arrived in a timely fashion, in perfect shape, well packaged and prepared for the builder. It is a big box, and the parts all look to be of high quality. The manual is spectacular in detail, and the pieces fit together with amazing precision. Here is a sneak peak of my progress.

- KARAVOKIRIS, markjay, dunnock and 11 others
-
14
-
Making progress on the masts, yards, etc. I have learned a lot, and have hacked a few items (e.g., the main yard) to the point where a redo might be appropriate. It might not be so obvious when they are painted black. It is slow going, lots of other tasks to address, etc. However, all the channels and deadeyes/chainplates are pinned to the hull and ready to be nailed down, and the main mast top has gotten its finishing coats of wipe-on and is looking pretty good. Slow and steady as she goes.
-
-
Nicccccceeeee work there Roberto!
- Glen McGuire, mtaylor and Keith Black
-
3
-
Ahoy mate, welcome on board.
- mtaylor and Keith Black
-
2
-
1 hour ago, glbarlow said:
Don’t do that ! Use a smaller dowel with 220 then 320 sandpaper wrapped around it and/or a fine tooth round hand file. Go slow, check often and it will be fine. I never use anything but hand tools, a Dremel risk isn’t worth the speed.
it was a long time ago but the above I’m sure is what I did on mine since I’ve done it on all my models. If you have to reduce it for the seat then only ways not seen below the deck. And yes it will have some rake to it so account for that in rounding the hole at an equal slant.
Hope that helps
Yes, that is what I needed to hear. Thanks very much Glenn, I will proceed according to your sage advice.
- The Gimps Chimp, glbarlow, Peanut6 and 1 other
-
4
-
2 hours ago, glbarlow said:
The mast would never be a smaller diameter where visible above the deck. But at this point it would depend on the seat you built for it below the deck. It needs to fit tight and snug. I don’t see any advantage to decreasing it in size.
I hear you loud and clear Glenn, and I greatly appreciate your input on this matter. The space, or seat, below the deck is what was created per the instructions in the kit, and I don't think that is much at all (it may be slanted to some degree, but it has no diameter in dimensions as I recall). However, the holes in the deck and the deck reinforcements are much smaller than the diameter of the main and mizzen for some reason. This means I will need to carefully enlarge these holes with a dremel or something, which is a terrifying proposition as I can see shards of decking flying off. I was hoping someone who had made the Granado would remember this issue and offer some sage advice, as I was clearly considering reducing the diameter to fit the hole because it wouldn't be obvious or observable if done in a sufficiently sneaky fashion. Any additional thoughts and advice and encouragement will be greatly appreciated.
- The Gimps Chimp and Peanut6
-
2
-
It seems like I have been working too much, and have been unable to make a lot of progress on my Granado. However, I have made a little progress, and I like to post any progress I make to keep up even a teeny bit of the momentum. While it is not part of the instructions, I decided to plank the main mast top to give it a little contrast. It needs a coat or three of wipe-on, but I think it looks pretty good with the maple planks similar to the deck, and it slips right on the main mast nice and snug like it should. I am curious if people tend to make the hole for the masts in the deck as big as the mast is in diameter, or is there some advantage of reducing the diameter at the point where it goes into and below deck (like what is done on the bowsprit)? Opinions and thoughts please?!?
.thumb.jpeg.9f36ca89d9567c415986f78eca47fb74.jpeg)
-
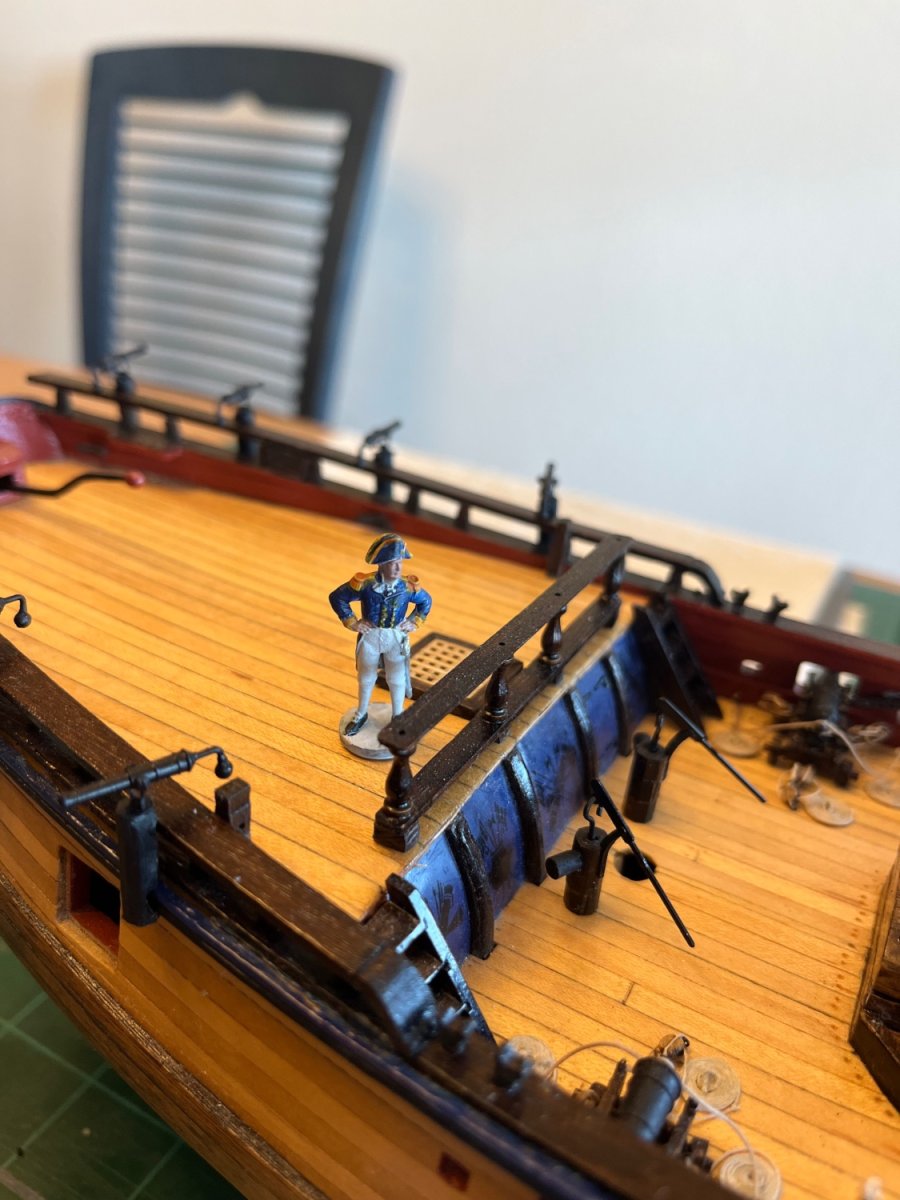
Admiral Thomas on deck. New uniform.

-
Did that one. The other one was moving the tool guide to far to the left. Both were noisy, but the tightening tools FLY with some velocity as well!
- hollowneck, AJohnson and glbarlow
-
3
-
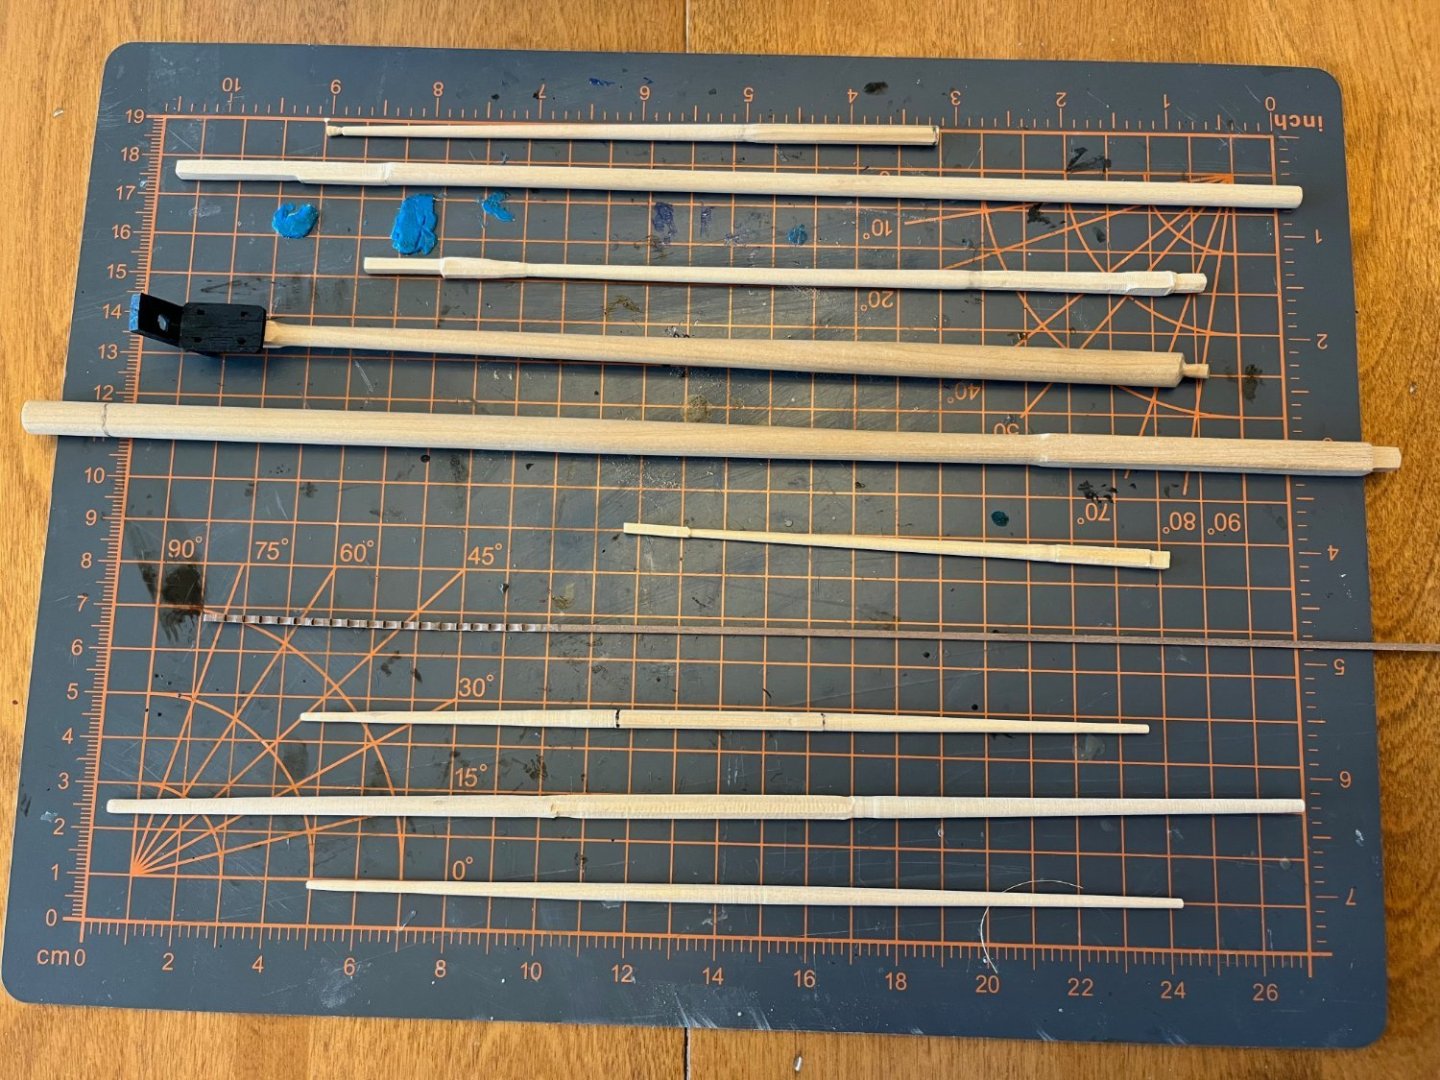
I thought I would add a note for everyone who might be considering the purchase of a mini-lathe like the one made by Proxxon (DB-250). It is a great little lathe, and makes working on the masts and yards a real pleasure. I typically use sand paper, but occasionally I break out a cutting tool as well. My digital caliper is used frequently, and I feel like I am learning new skills while I am having fun at the same time. Having said all of these positive comments, I should note that I have had a few "surprises" occur due to operator error. These instances of "operator error" have not resulted in any egregious injury or loss of tissue or biological fluids, but they have served to remind me to think carefully before turning it on or doing something stupid, and serves to reinforce my decision that I don't need a table or scroll saw at this time =). In the photo below, on the left is the lower section of the main mast, which starts at 8 mm round for a while, then tapers from 8 to 7 mm round, then ends with a 7 mm square end. On the right is the bow sprit, which starts at 8 mm round for a while, then tapers to 5 mm round, then will have a 5 mm square and a 3 mm square end. I have been working hard, which has made my available time for shipbuilding rather limited, but I am making some progress and enjoying it, even with the occasional "surprise".

-
-
Glenn! I agree about the IBEX, it’s real smooooth! With regard to the sweep port lids, I would stick them on as you have, but I like the look of them too much to hide them. I’m going to keep mulling it over and make a decision soon. Your Granado is an awesome model, and I am hoping to emulate your work and the work of so many other talented builds. Here is a picture of the bowsprit in progress, the rain chased me indoors…

- Peanut6, CiscoH, hollowneck and 3 others
-
6
-
22 hours ago, AJohnson said:
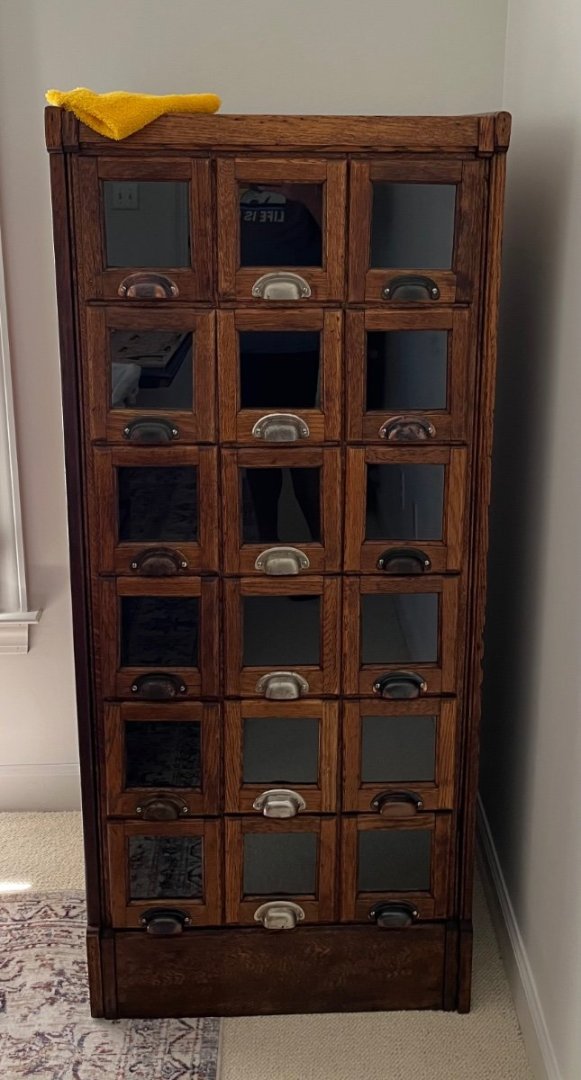
What a great looking cabinet Brian 🤩
Work does get in the way, I know it has for me, barely visited the workbench for over a month now. Please do start a Sphinx log, I’ll be there! 😉
Thanks Amigo, I was pleased when I was able to get it out of the shipping crate and clean it up. It had some 18th century dust and dirt in it! Makes it “Authentic”. I’ve been doing a lot of writing lately, which is very time consuming and frustrating occasionally. I’ll start my Sphinx log soon, and will be delighted to have you there for help and encouragement. I’ll do my best to make it worth your while! Having you and the others on board is one of the best things about the forum, everyone is awesome!
22 hours ago, hollowneck said:I spot a couple boxwood octagonal sticks! Good job on jigging-up the square stock, Brian.
When the Proxxon arrives, keep the ShopVac nearby as you'll be generating lots of fine sawdust. Don't forget that the Proxxon chuck has a through hole that can accommodate up to about 10 mm diameter material; this becomes especially important when maintaining the central octagon and turning (sanding)the symmetrical round tapering for the spar ends.
Nice cabinet; I'll bet you can keep all kinds of things in those drawers...😬
the Proxxon has been here, I just hadn’t had the time to spin her up….I made a ton of sawdust yesterday, but I am going slow while I learn what I am doing. I did use the through hole for the bowsprit, and it is working like a charm as I taper it down from 8 to 5 mm. I’ve starting “stashing” all sorts of stuff in my cabinet dood! 😉
18 hours ago, Peanut6 said:HHH "you got some splainin' to do" (remember the reference?), first the antique drafting table and now the beautiful cabinet. You definitely scored aces on those purchases, so how/where are you able to come up with such finds? The Secret Vessel turned out fantastic and you found the perfect spot. At first I was really worried about the placement then I saw the books were a "boxed set" which allowed my heart to start beating again. Educate me on this finger plane thing you got. Looks like something I would want since I learned that X-Acto no longer makes replacement blades for the mini-plane that came with their hobby kit I got 35 years ago (and before anybody starts, the blades for the mini-plane were disposable, just like a #11 blade, and not intended to be resharpened). You talk about your poor eyesight and shaky hands yet you produce the tiny hinge side with eyelets that look fantastic. Love seeing your progress, thank you.
KEV! Thanks for the continued kind words and support and interest. My wife found the drafting table and the desk for my computer, and I found the cabinet at Industrial Artifacts. They have a lot of nice stuff and the prices are negotiable!!! That cabinet is in really good shape considering it’s age, and can hold a LOT of stash and stuff. The finger plane is an IBEX flat soled plane that makes working on masts and yards a pleasure (making octagonal sections in particular). My source for information that is shipworthy, @hollowneck, (aka GuildDiddy, GuildVater, ObeeRonKanobee, MasterRonCommander, etc) turned me on to IBEX and provides me with all my knowledge base. He is full of it! 😜. And you are quite right about the box set, it would be quite dangerous if they weren’t “contained”. I am listening to the series on Audible, and am in the middle of book 9 I think, Treason’s Harbor. I’m addicted!
Big shout out to everyone for stopping by and being so kind. This community is incredible.
- Peanut6, AJohnson and hollowneck
-
3
-
That sounds like my kind of Sammie!!! I love spinach, and kale too. I REALLY love spicy foods, and a good jalapeño sausage sandwich sounds like something I could really enjoy. With a tankard of a frothy golden nectar I’d be in heaven!! I just finished eating some lemon blueberry buttermilk pancakes so I can hardly move…. Have to take the doggies for a walk, run to the grocery store, then hopefully I will have some time to work on my masts and yards on the lathe. It is working well, so far so good. I’ll answer your questions on my build log (re: finger plane), since some others might want to know. How you been doing my friend?!? You staying happy and healthy? All is well here in NC. Nice weather, interrupted by the occasional downpour. No complaints though.
-
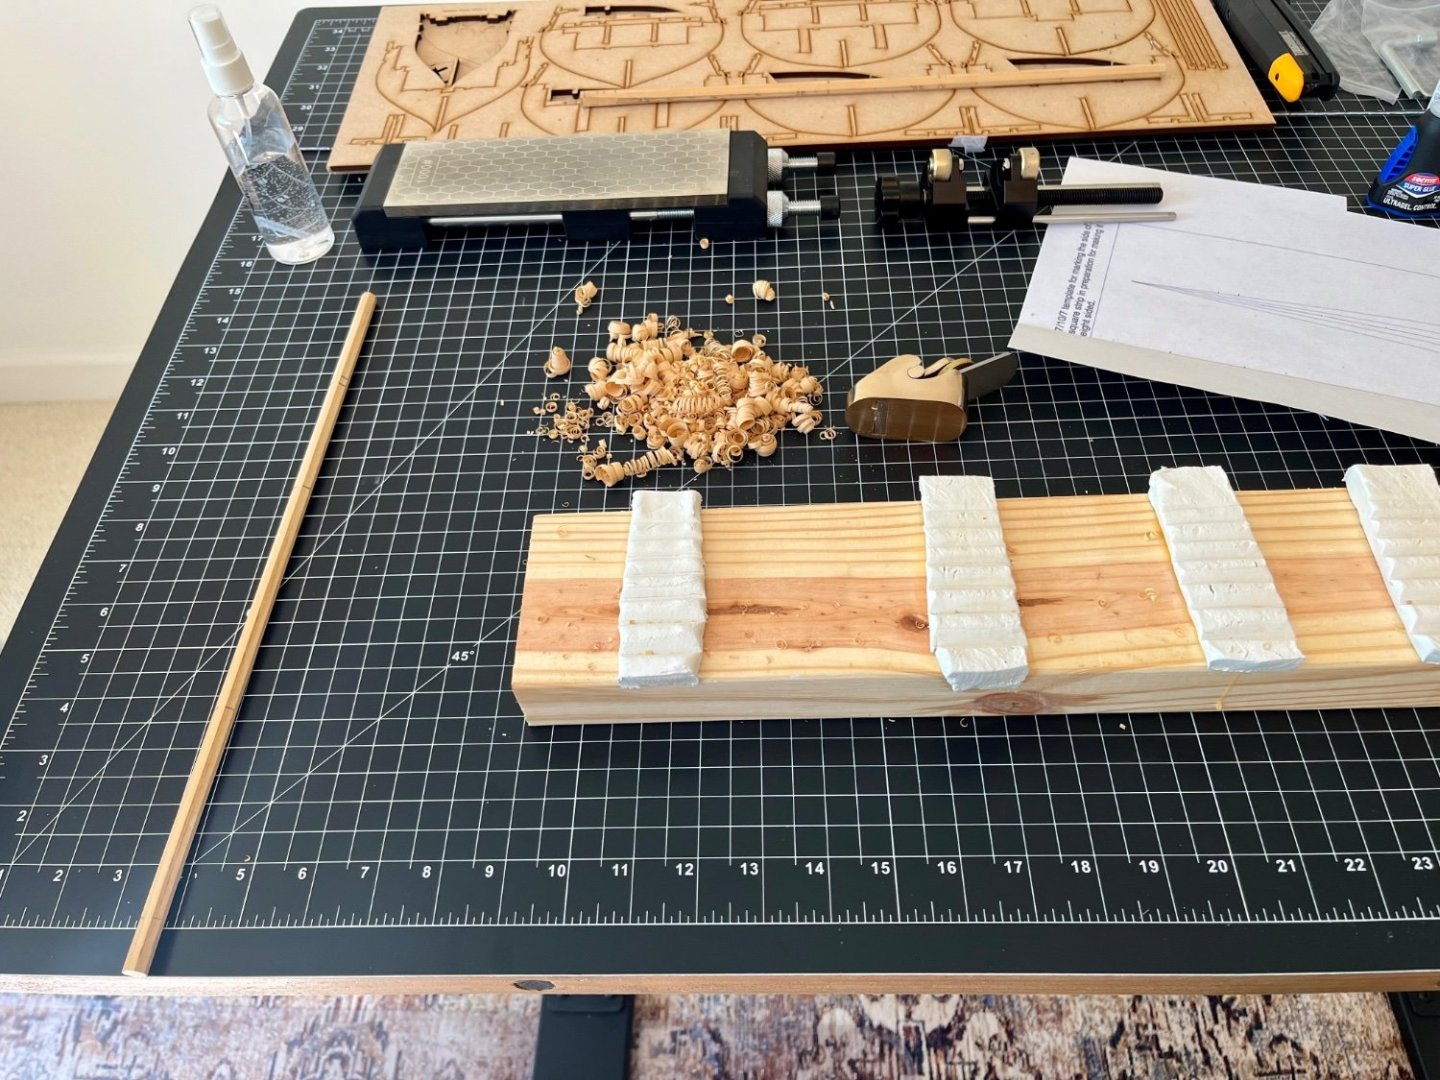
Work has been interrupting my woodwork! However, my IBEX finger plane has begun its work on the main mast and bowsprit. My new lathe comes out today and will be set up in the garage with a shop-vac to try and control the sawdust. I’ve also begun the Sphinx, and will be starting a build log ASAP. And….I scored an antique cabinet for storage of tools and equipment in my “office”.
-
I must say that the drill bits that I purchased following @VTHokiEE advice have held up remarkably well, despite my abusive nature! I haven't pushed them all that hard, but they seem to be SOLID. I'd rather use a pin-vise than an electric tool for drilling holes on the side of a ship model.
- Canute, Knocklouder, VTHokiEE and 2 others
-
5
-
On 4/4/2023 at 4:44 PM, Papa Duke said:
Nice lived all over the state, just bit west of Charlotte now
Long term Durham resident with increasing time spent at our place on Roanoke Island.
- mtaylor, Keith Black and Ryland Craze
-
3
-
Welcome aboard Papa,
Looking forward to watching your build. We might be neighbors, as I am in NC as well.
Cheers!
Brian
- Keith Black, Ryland Craze and mtaylor
-
3
-
-
Andrew, glad that you found the forum and welcome aboard. Hopefully you will find the crew and contents increasingly helpful and enjoyable over time. Thanks for sharing the history of your interest in model ships, and I am looking forward to seeing pictures of your Albatross. Please do consider starting a build log to document your work!
- Keith Black and mtaylor
-
2


.jpeg.62359afdf7f3504eb59faaa288364f99.jpeg)


HMS Granado by HardeeHarHar - Caldercraft - 1:64 - Bomb Vessel
in - Kit build logs for subjects built from 1501 - 1750
Posted
Hello Francois,
That is an excellent question! In fact, it was supplied as brass at one point, but when I purchased the kit they came as resin. They look fine, but I would have preferred brass. I wrote the supplier and asked if they had any brass ones I could purchase and was told no. So the ones on my Granado are plastic resin.
Thanks for your question and interest, I appreciate your inquiry!
best regards!
Brian