
pwog
-
Posts
221 -
Joined
-
Last visited
Content Type
Profiles
Forums
Gallery
Events
Posts posted by pwog
-
-
-
Alan, that is a great suggestion. However, I really don't have the room to display anything in large cases. There are no prying little fingers about.
I was wondering if I could spray an acrylic lacquer clear coat over the matte enamel paint to help protect it from scratches, etc. Can you or anyone else here shed some light on that?
-
-
@schooner
Thanks to you Tim for your support.
-
-
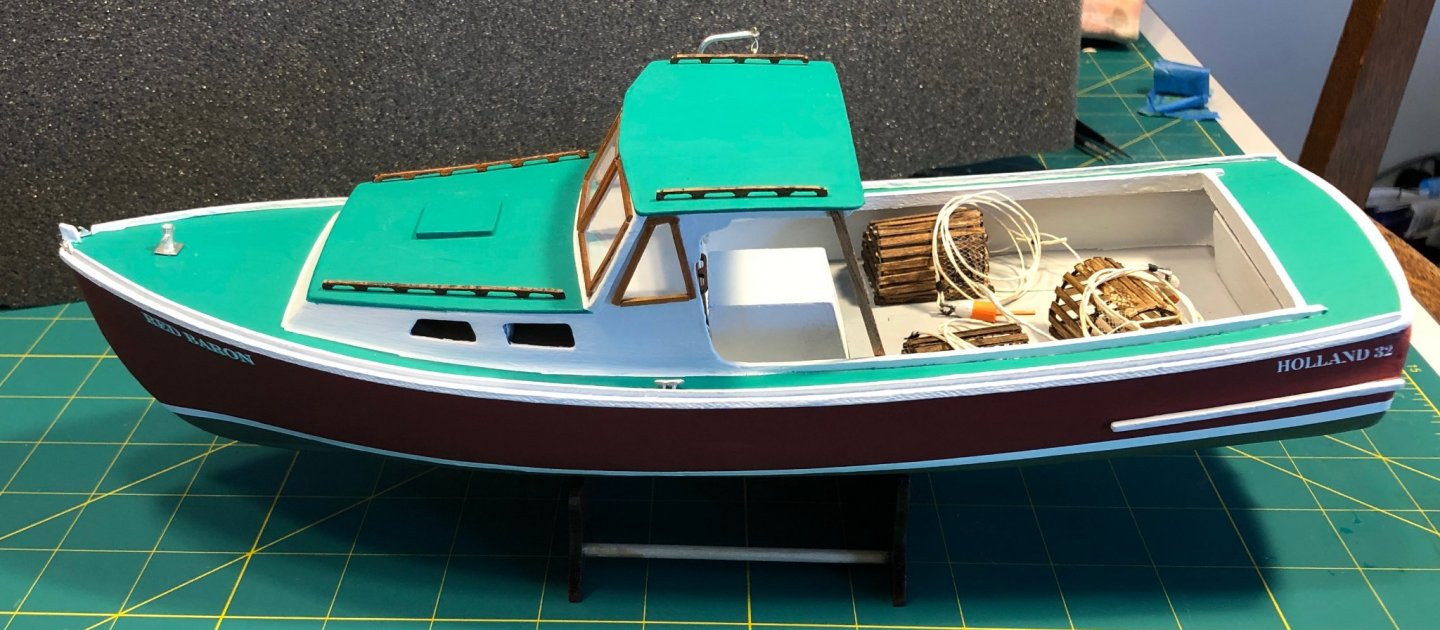
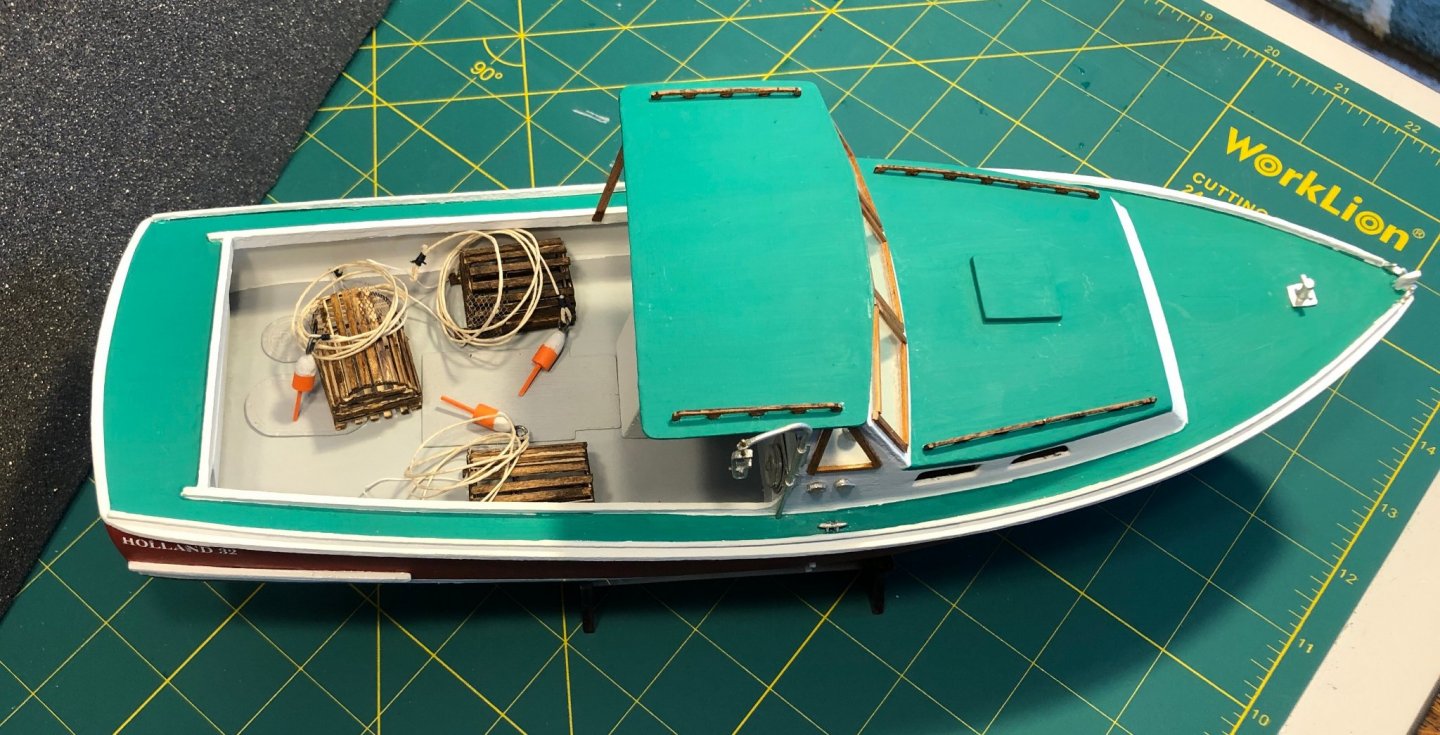
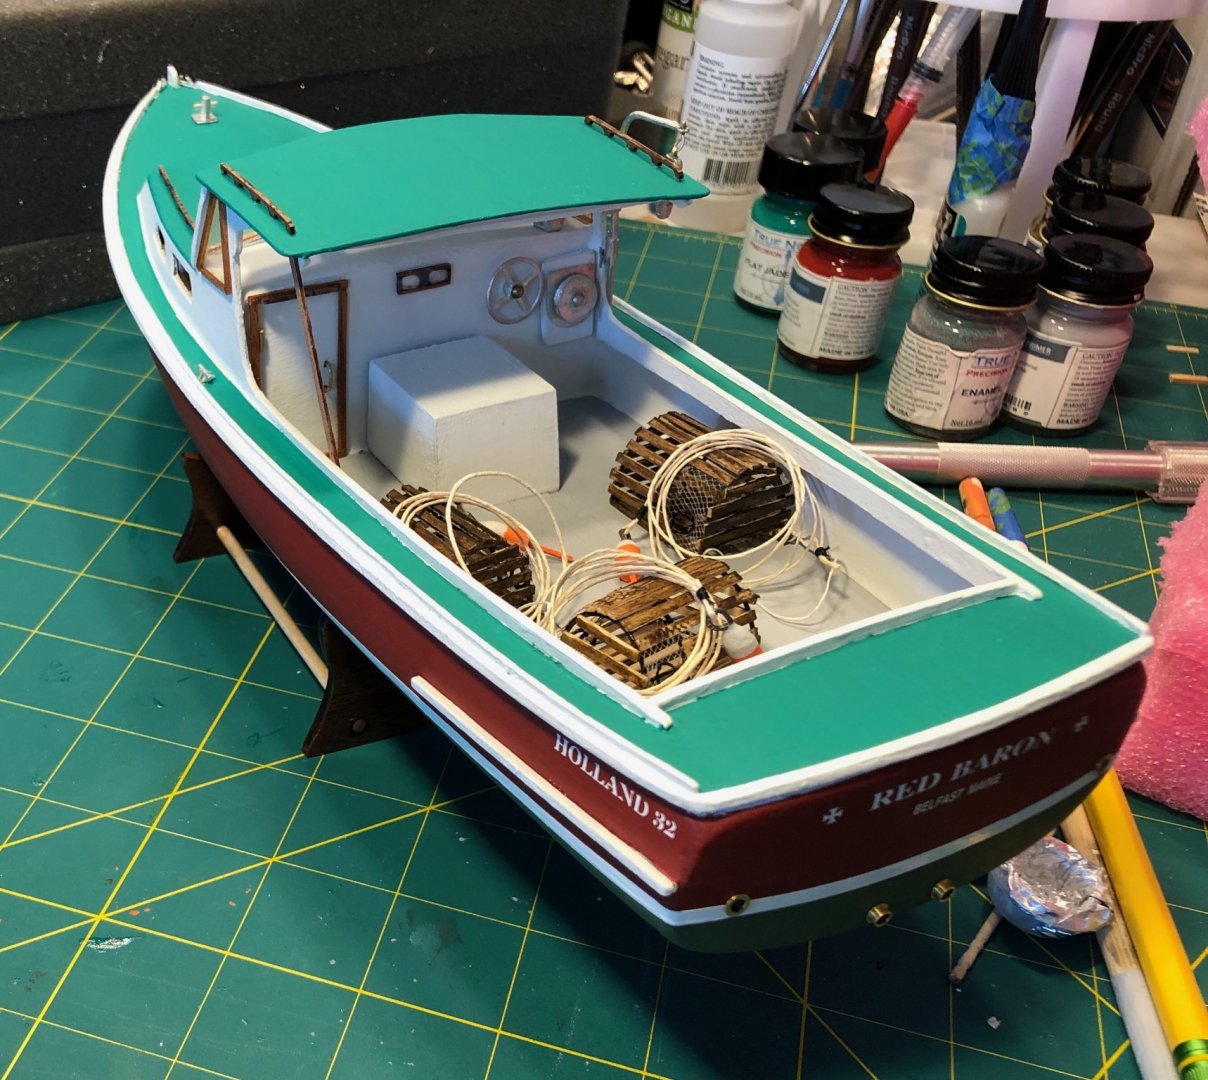
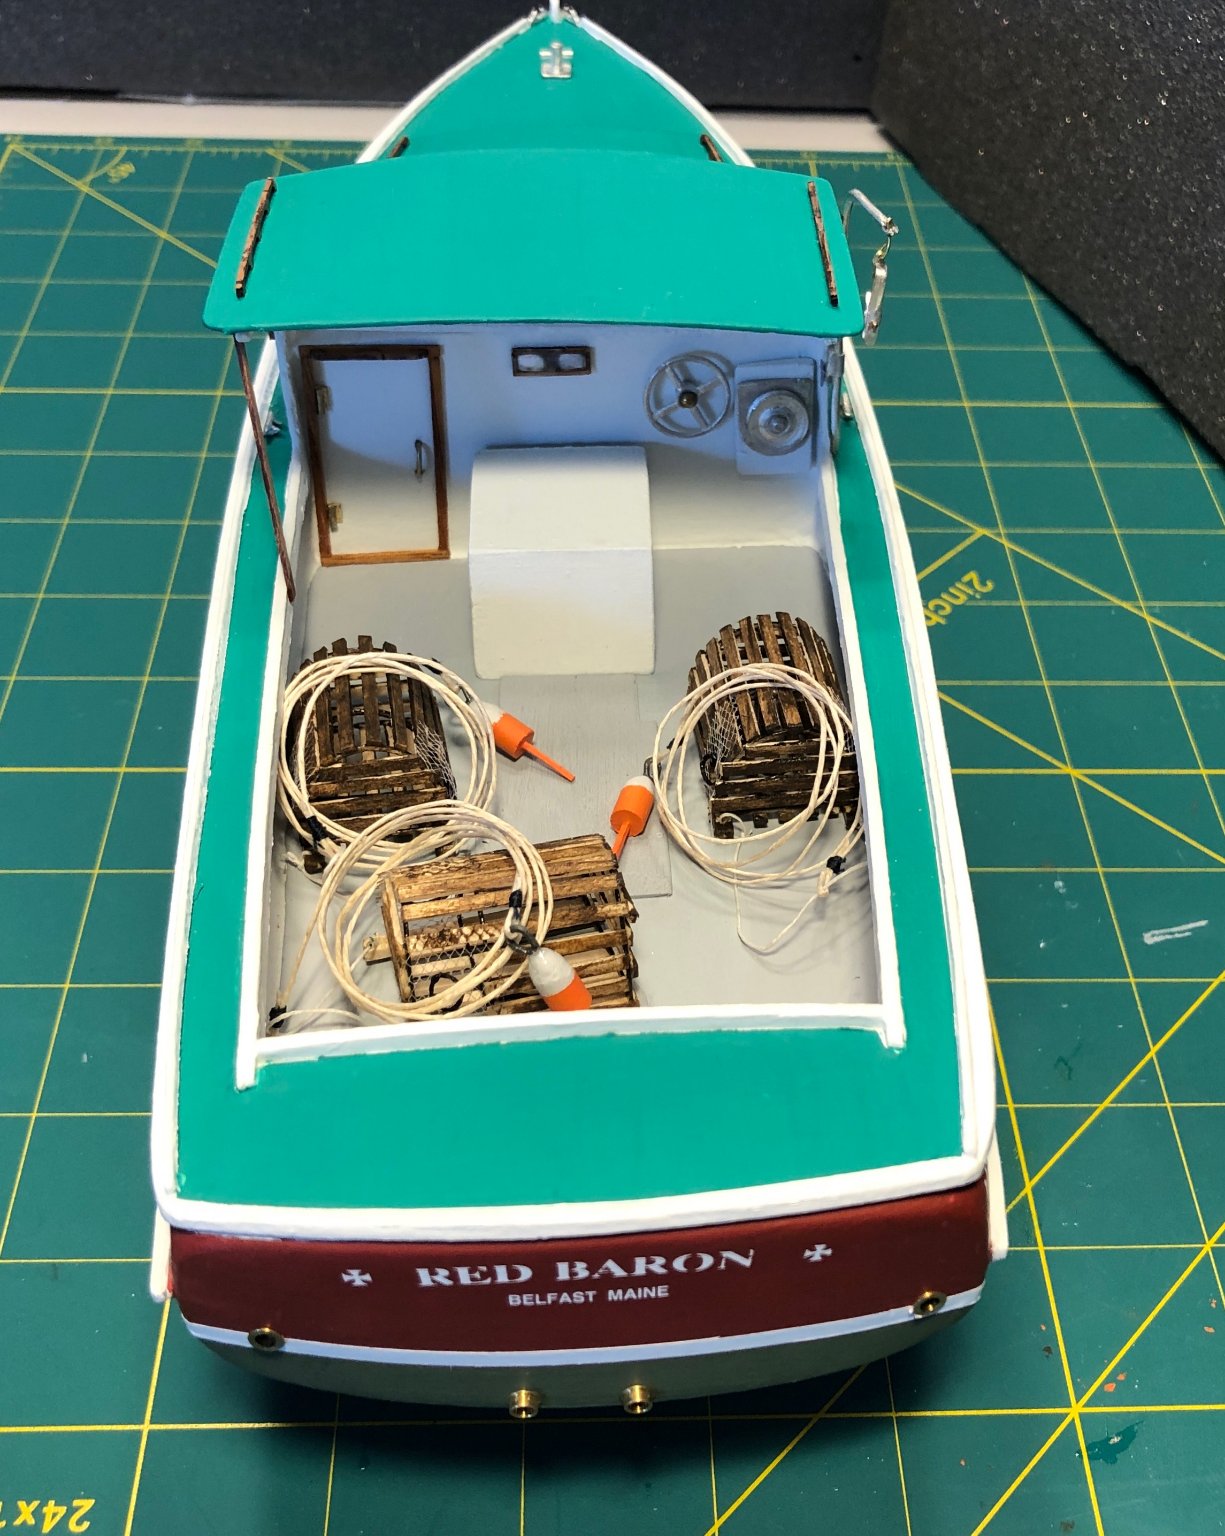
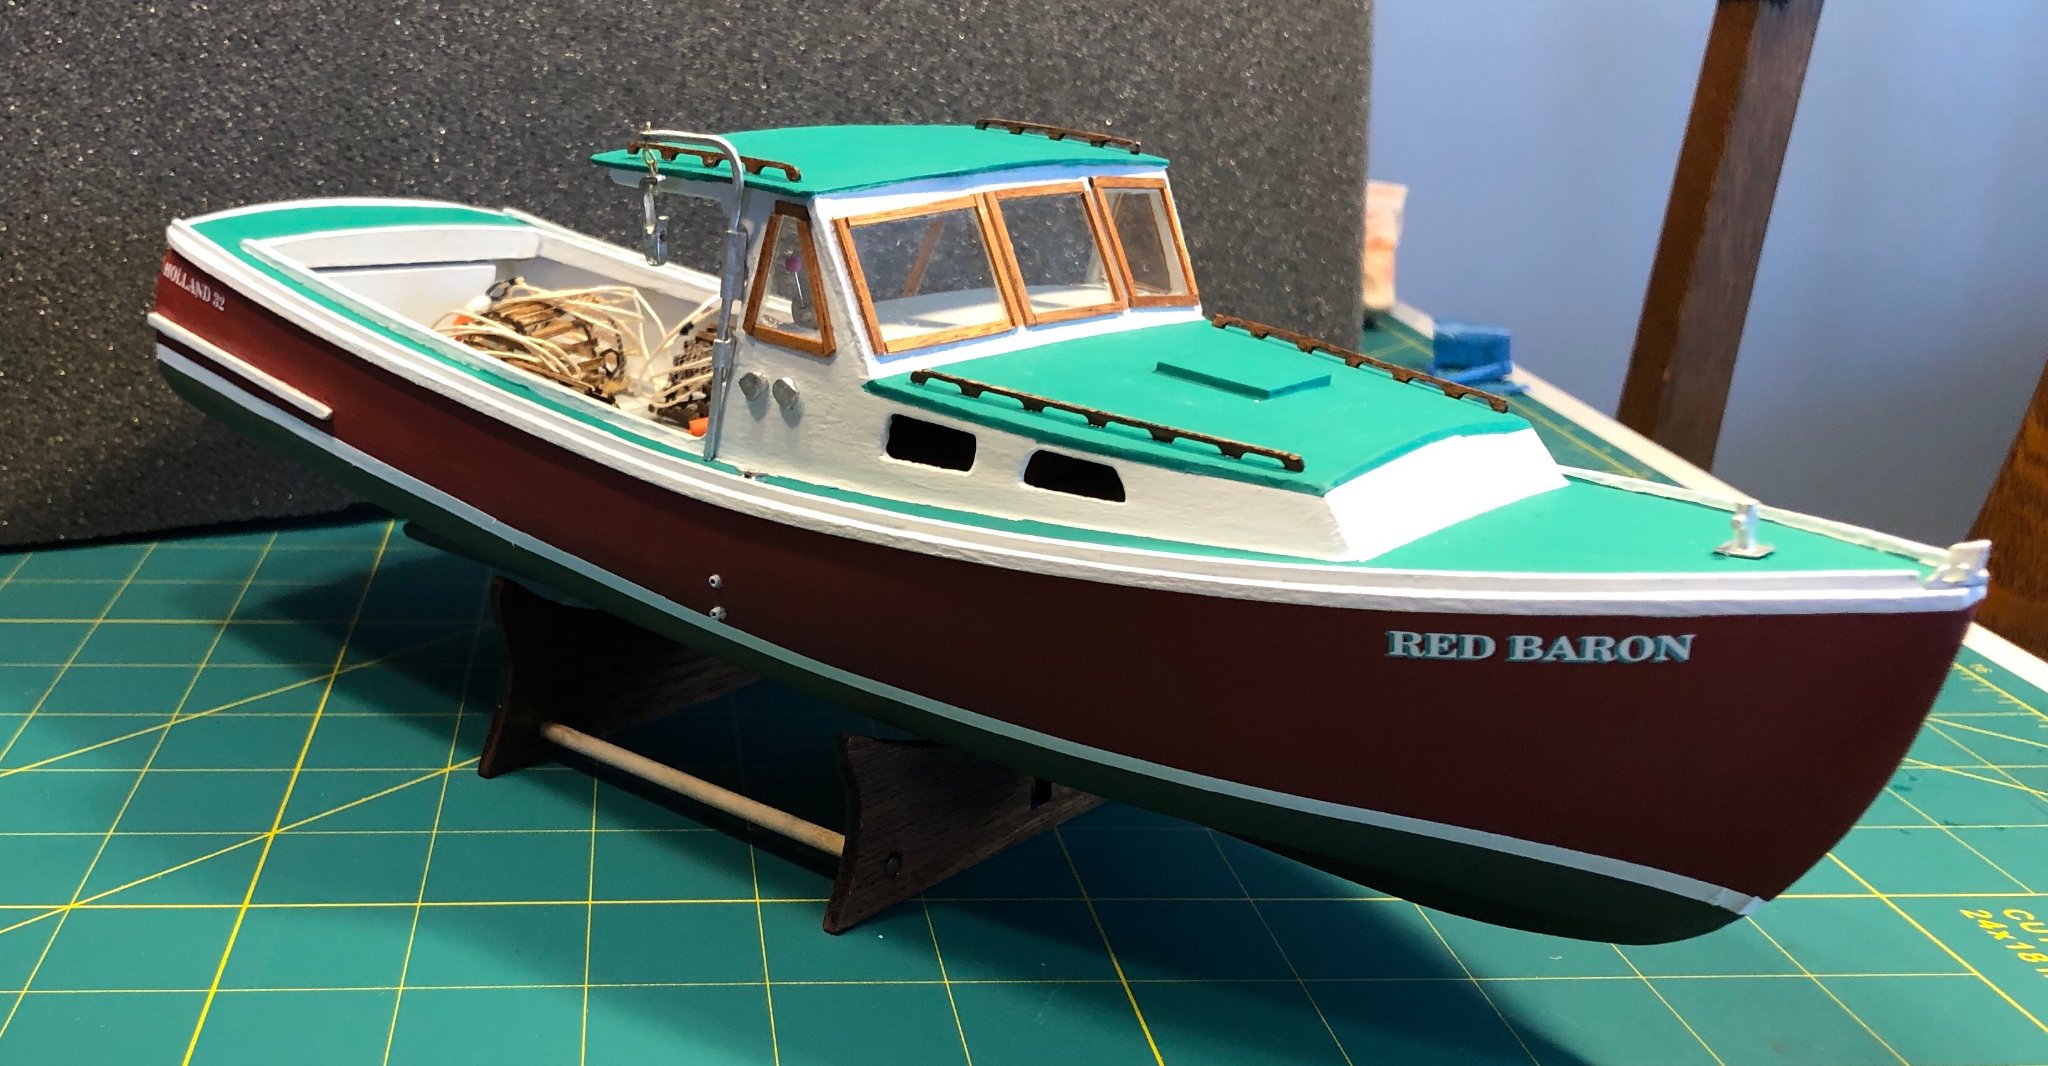
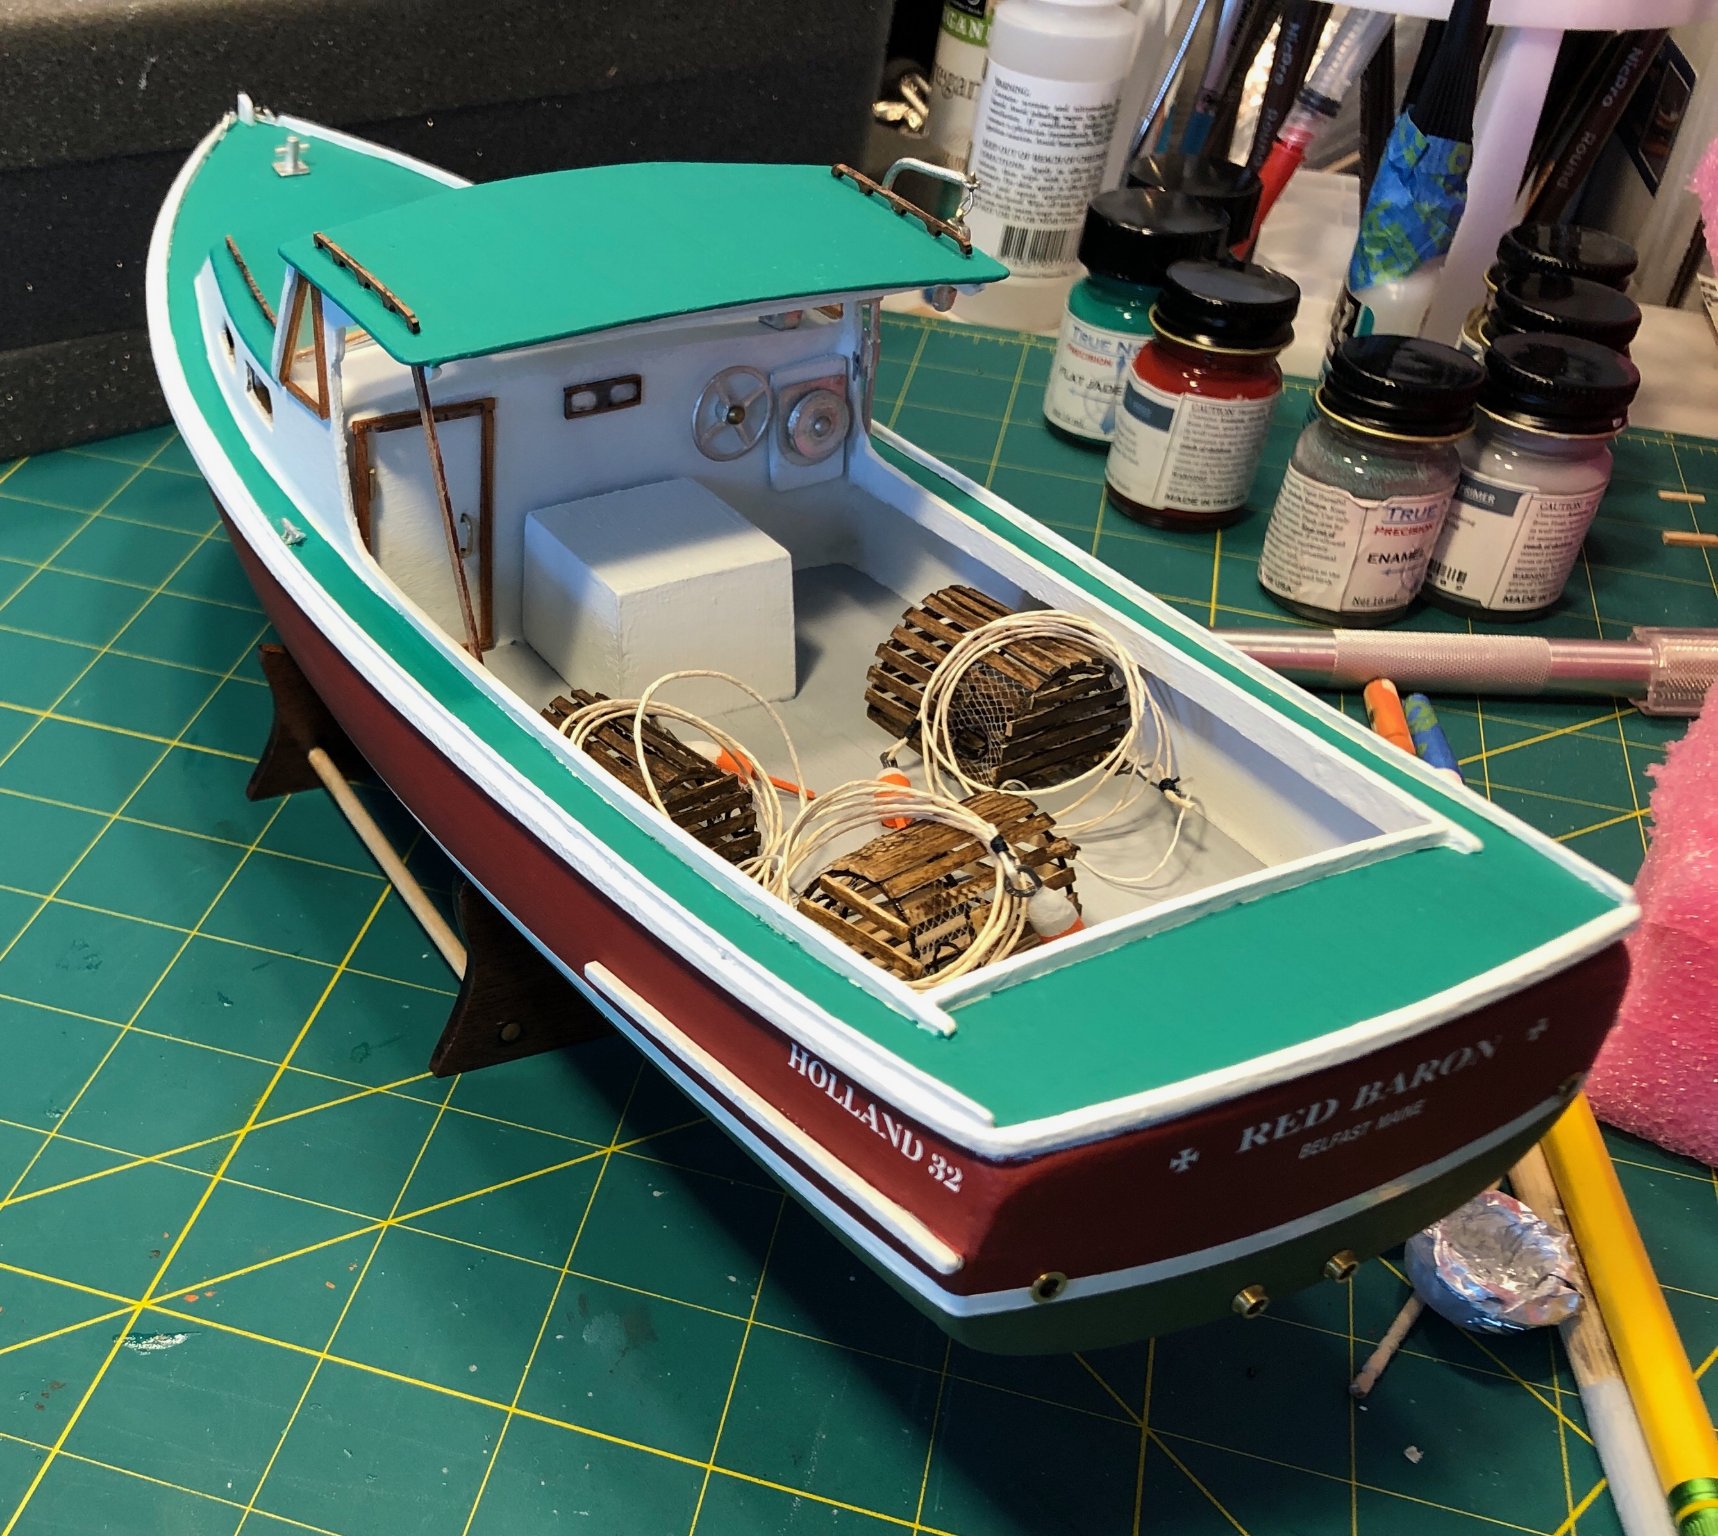
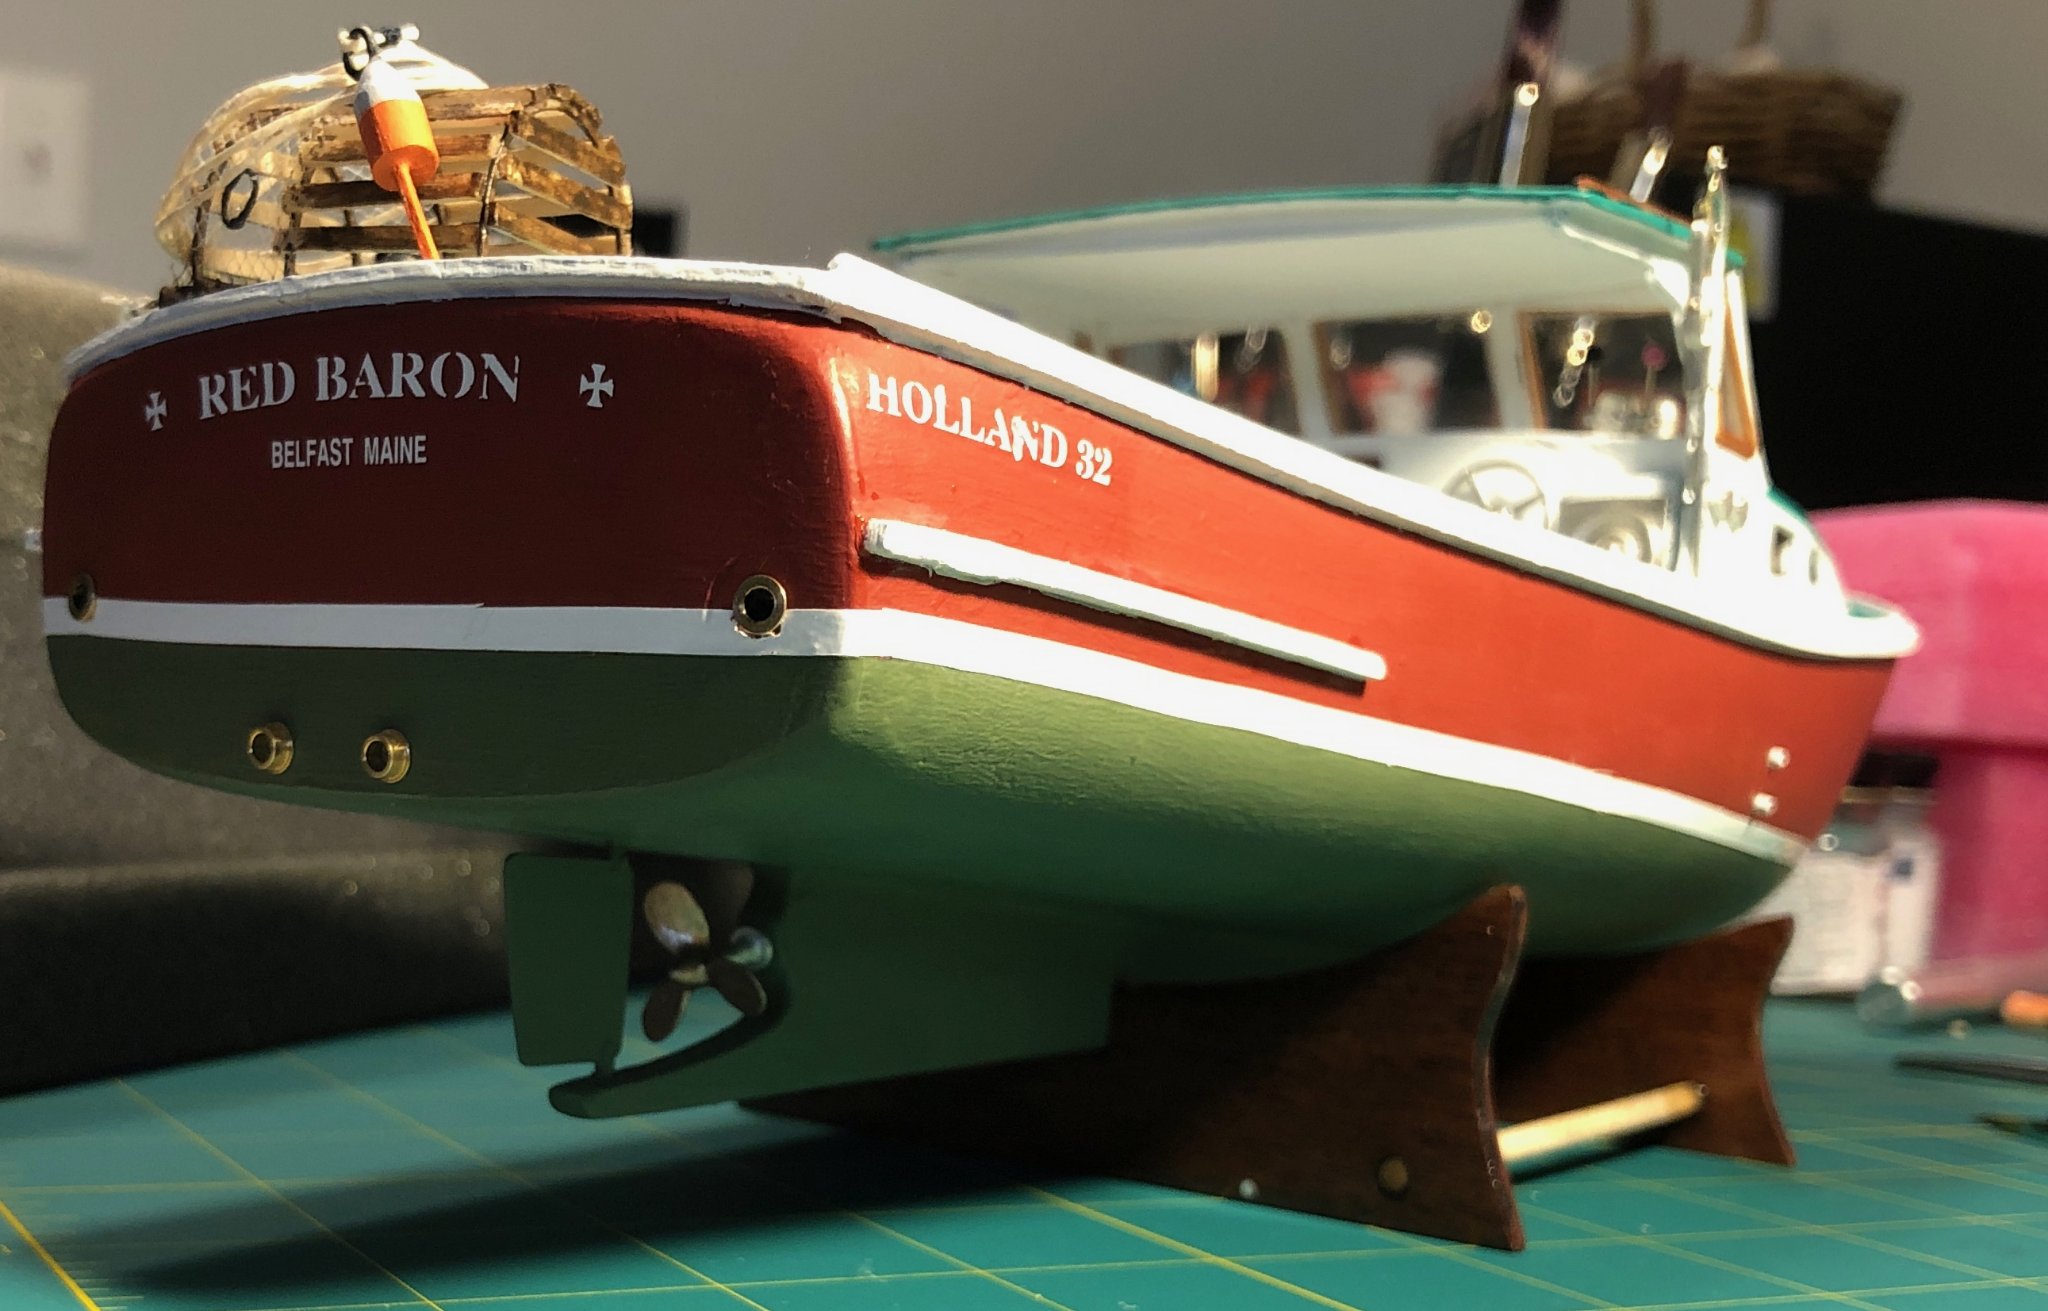
Okay, I believe I am finished my first build. After all is said and done, I am very happy with my result. Looking closely, I can see many imperfections, some I may touch up or try to correct. It's not perfect. After all, it would be unrealistic of me to think I could be perfect my first time out. I might also say that if you've ever seen a working lobster boat, they can look very rough and sometimes scratch built.
") That being said, I have learned a lot from this build. I have started using skills that I have never tried before, especially when it came to working with wood, scratching out some details and figuring out how to do some of the tasks involved.
That being said, I have learned a lot from this build. I have started using skills that I have never tried before, especially when it came to working with wood, scratching out some details and figuring out how to do some of the tasks involved.
I would like to thank everyone following for their support. In particular, I would like to thank schooner (Tim) for his insight, ideas and guidance.
I enjoyed building this boat so much. I am looking forward to starting my next one.
Your thoughts and/or suggestions are always welcome.


- VTHokiEE, Duanelaker, Sea Hoss and 10 others
-
 13
13
-
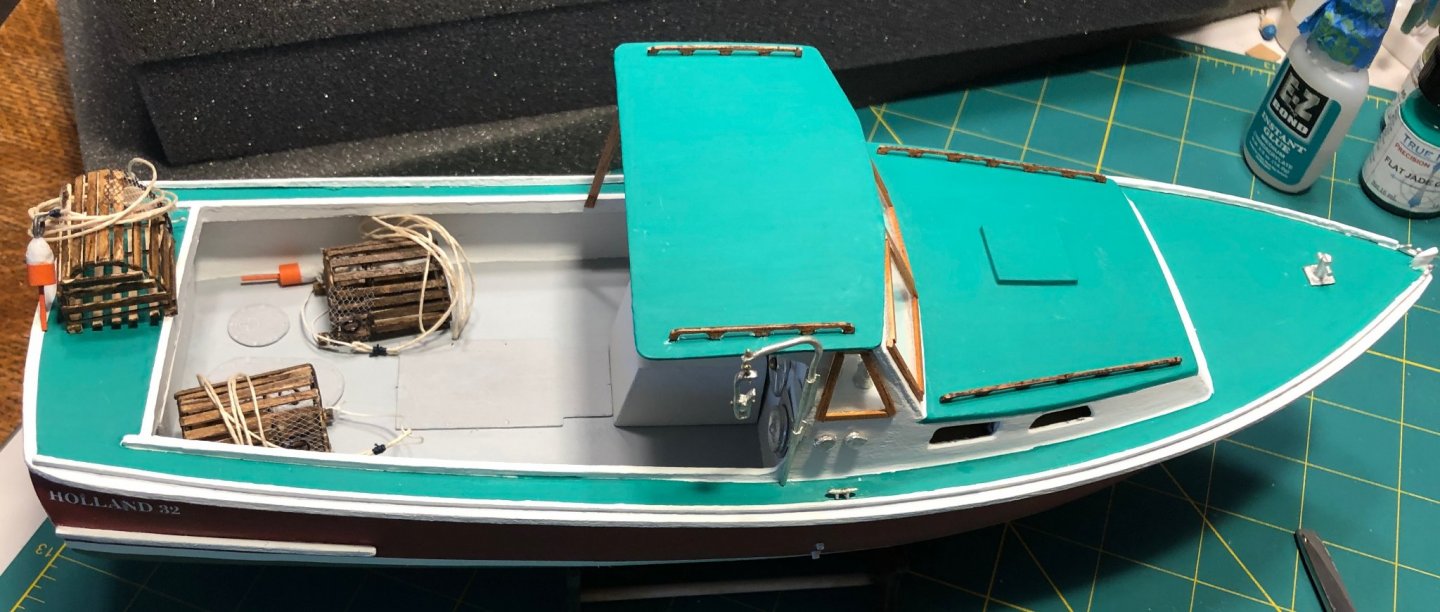
Everything looks great! Great job on the oars, trap, buoys, so cool.
-
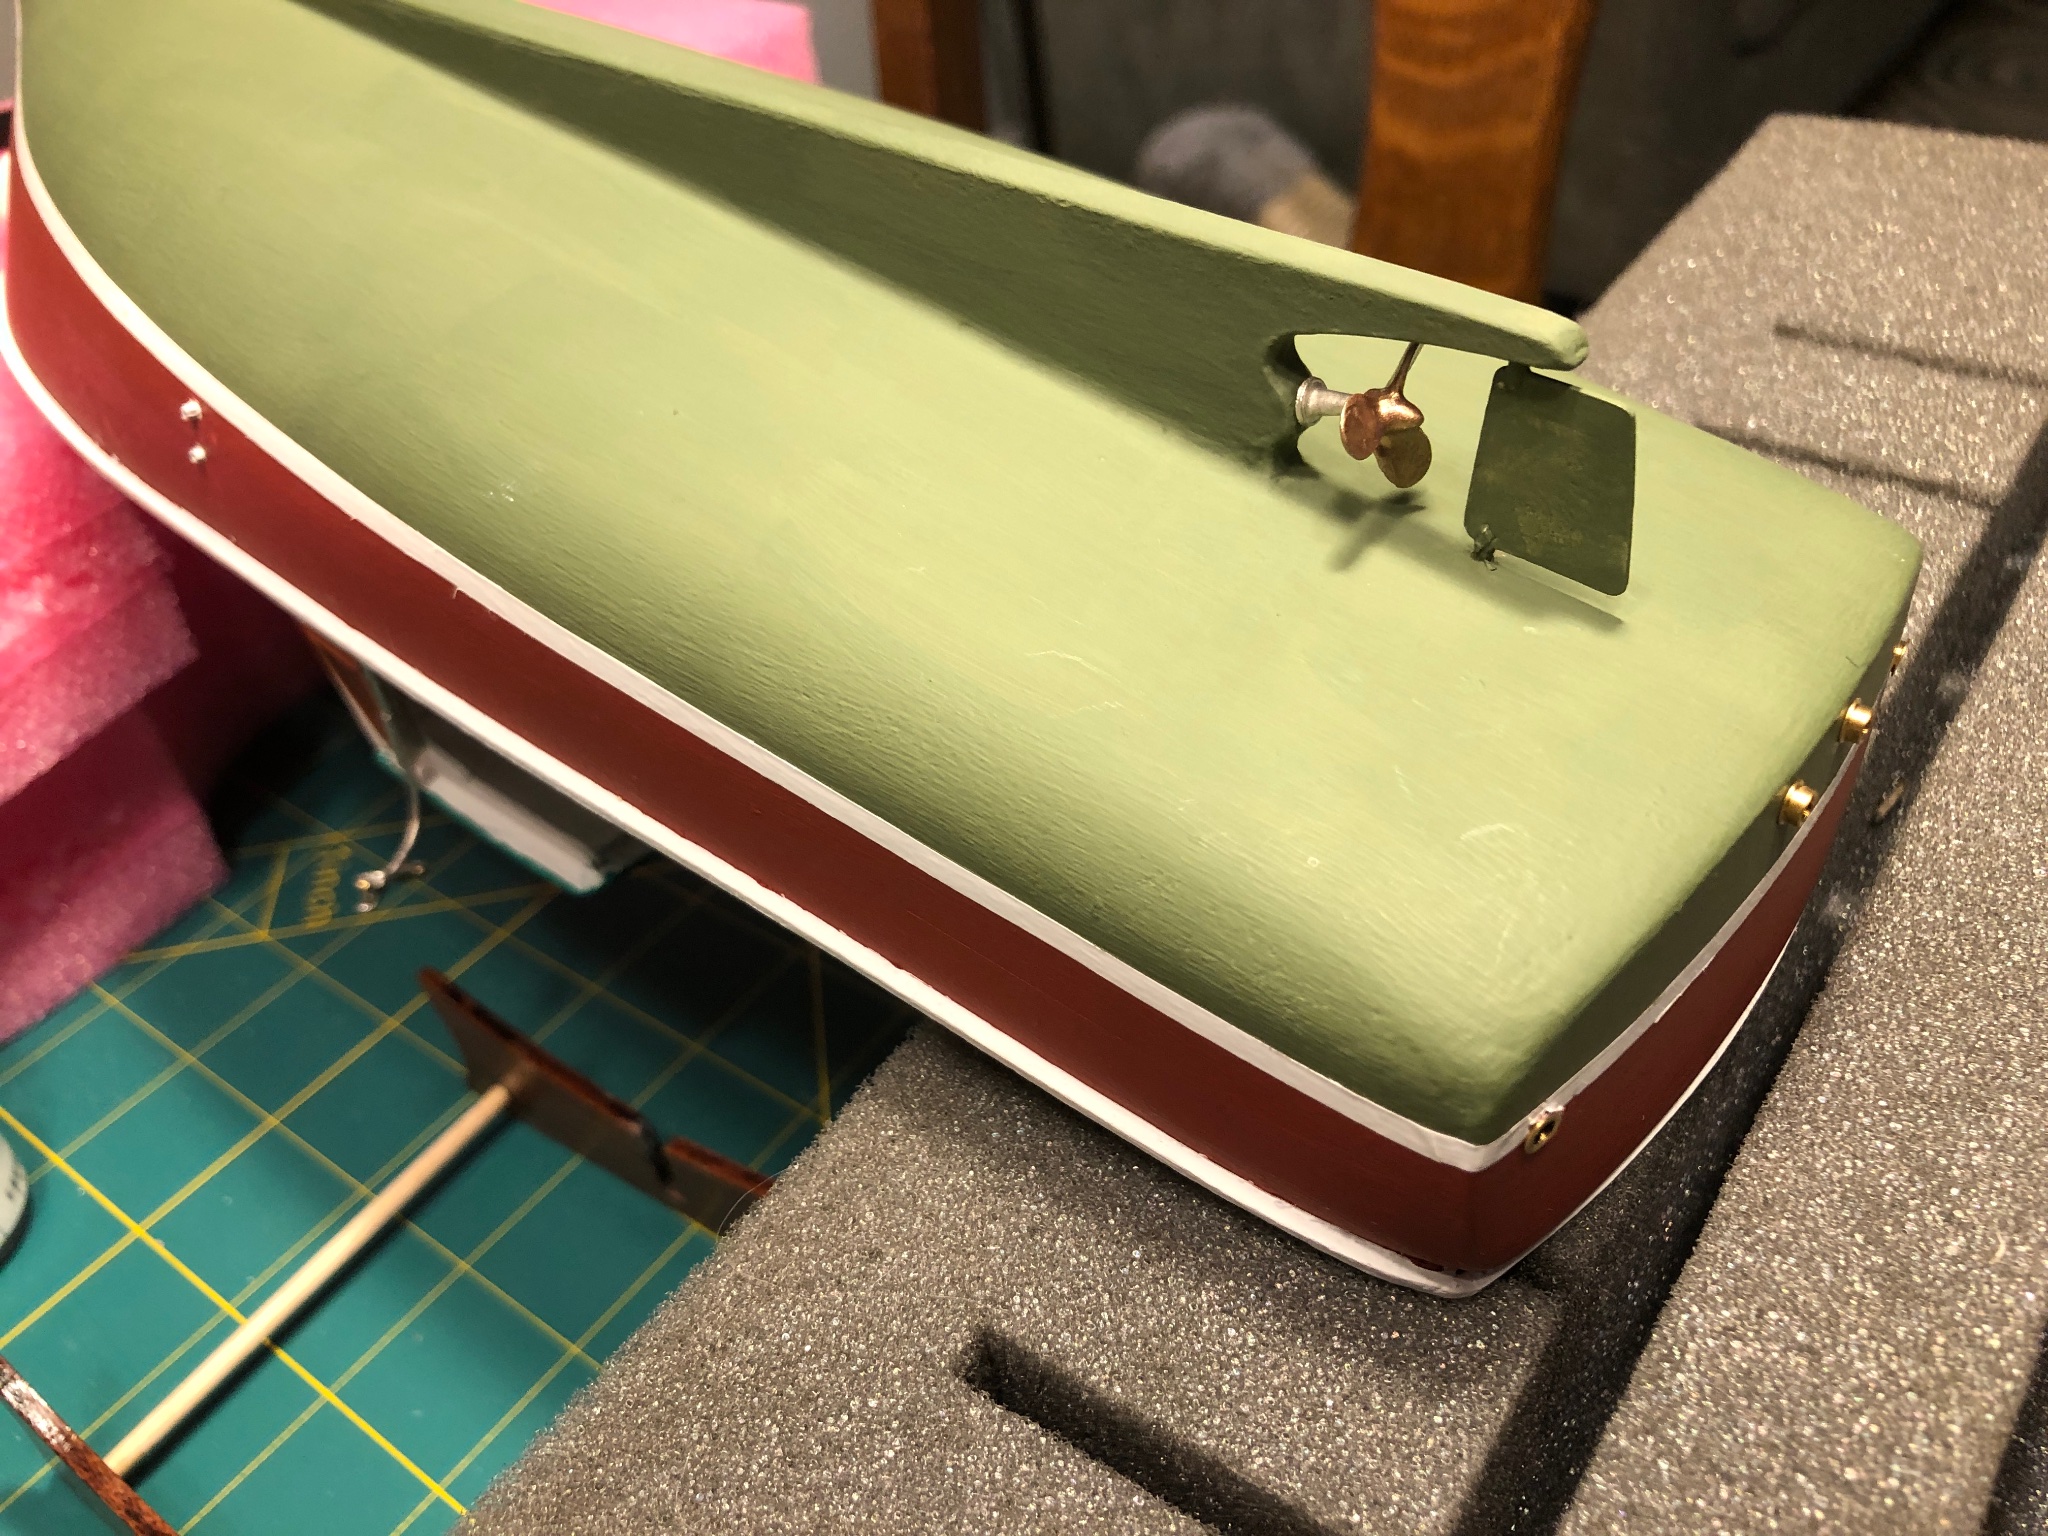
Another quick update. I painted the propeller bronze and I’m in the process of painting the rudder. Once that is done I’m going to do some tweets and touch ups and finish with adding the dry transfers for boat name, hailing port.
Happy Halloween!

- Moab, FriedClams, VTHokiEE and 3 others
-
6
-
Everything looks great! I can’t wait to see your lobster traps.
-
Welcome Bud! I’m relatively new here as well. I’m on my first build. There are a lot of great, helpful people here. So, ask and enjoy.
- mtaylor, Ryland Craze and Photo Bud
-
3
-
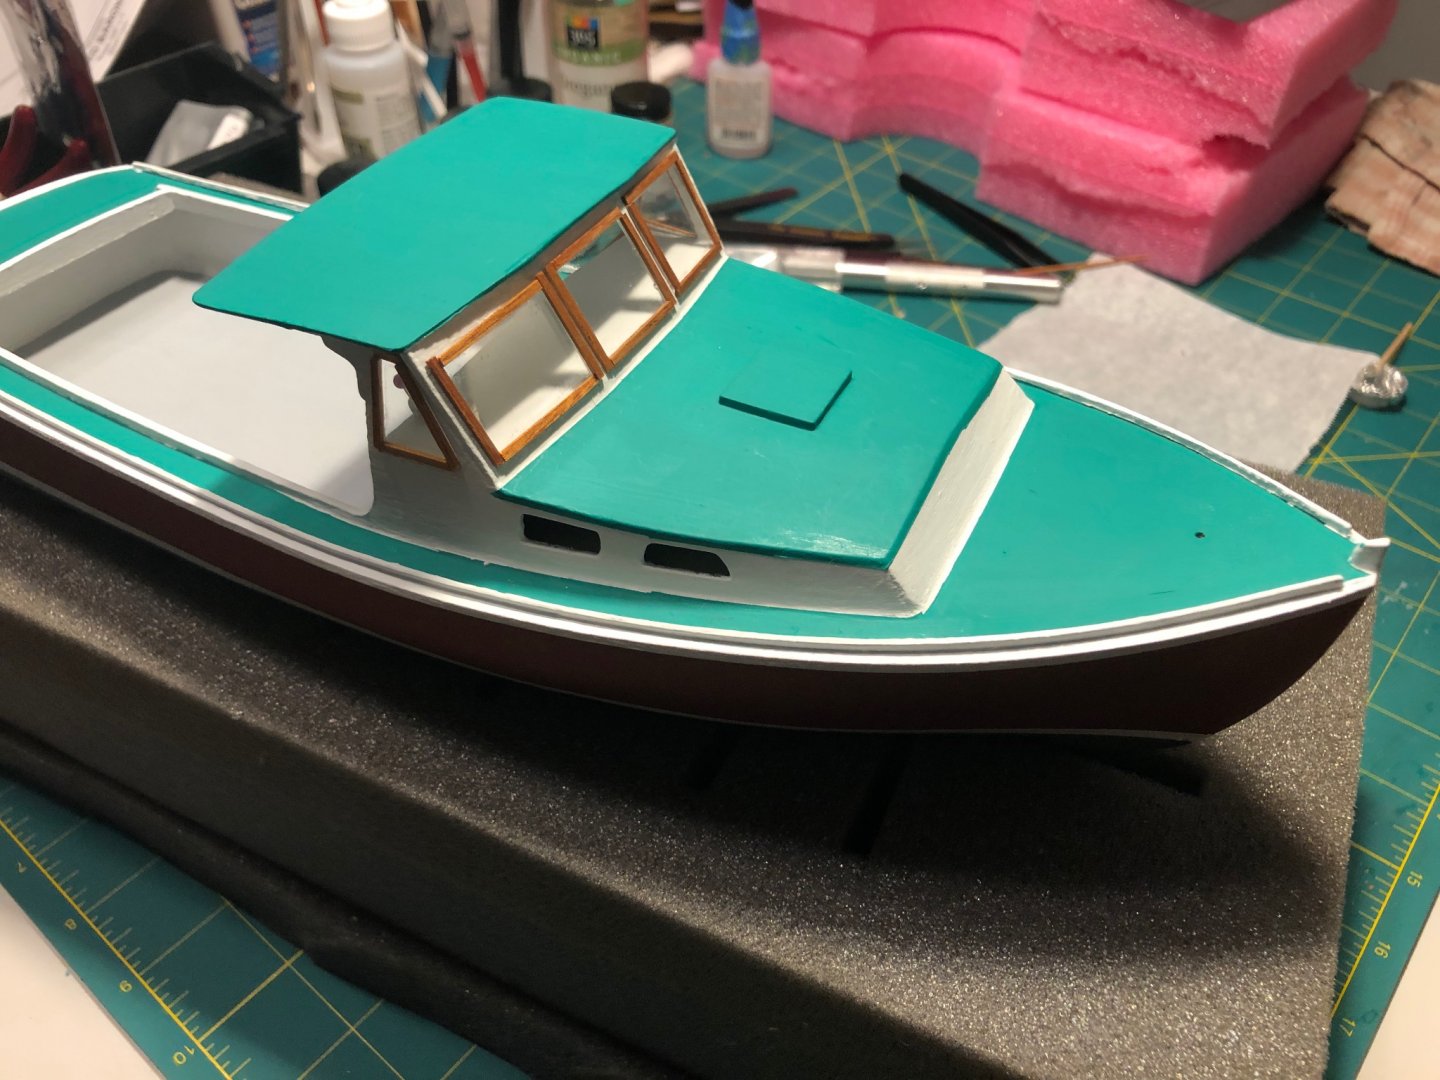
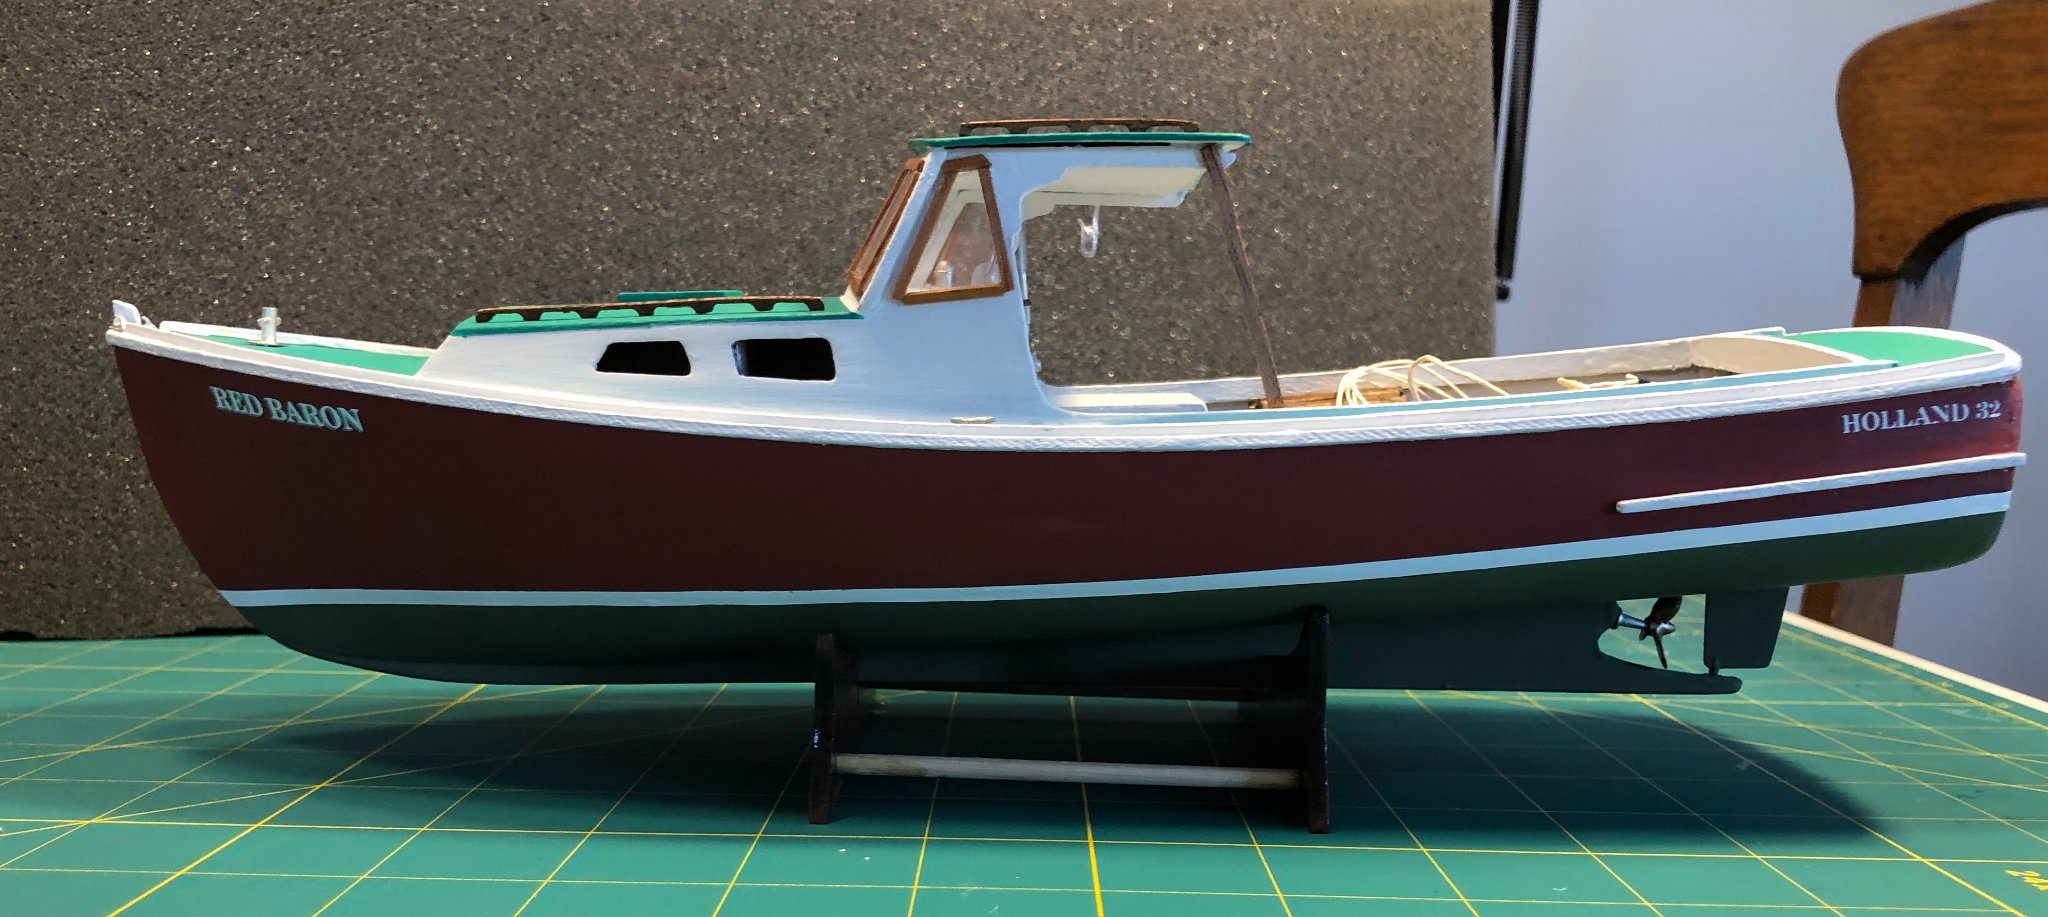
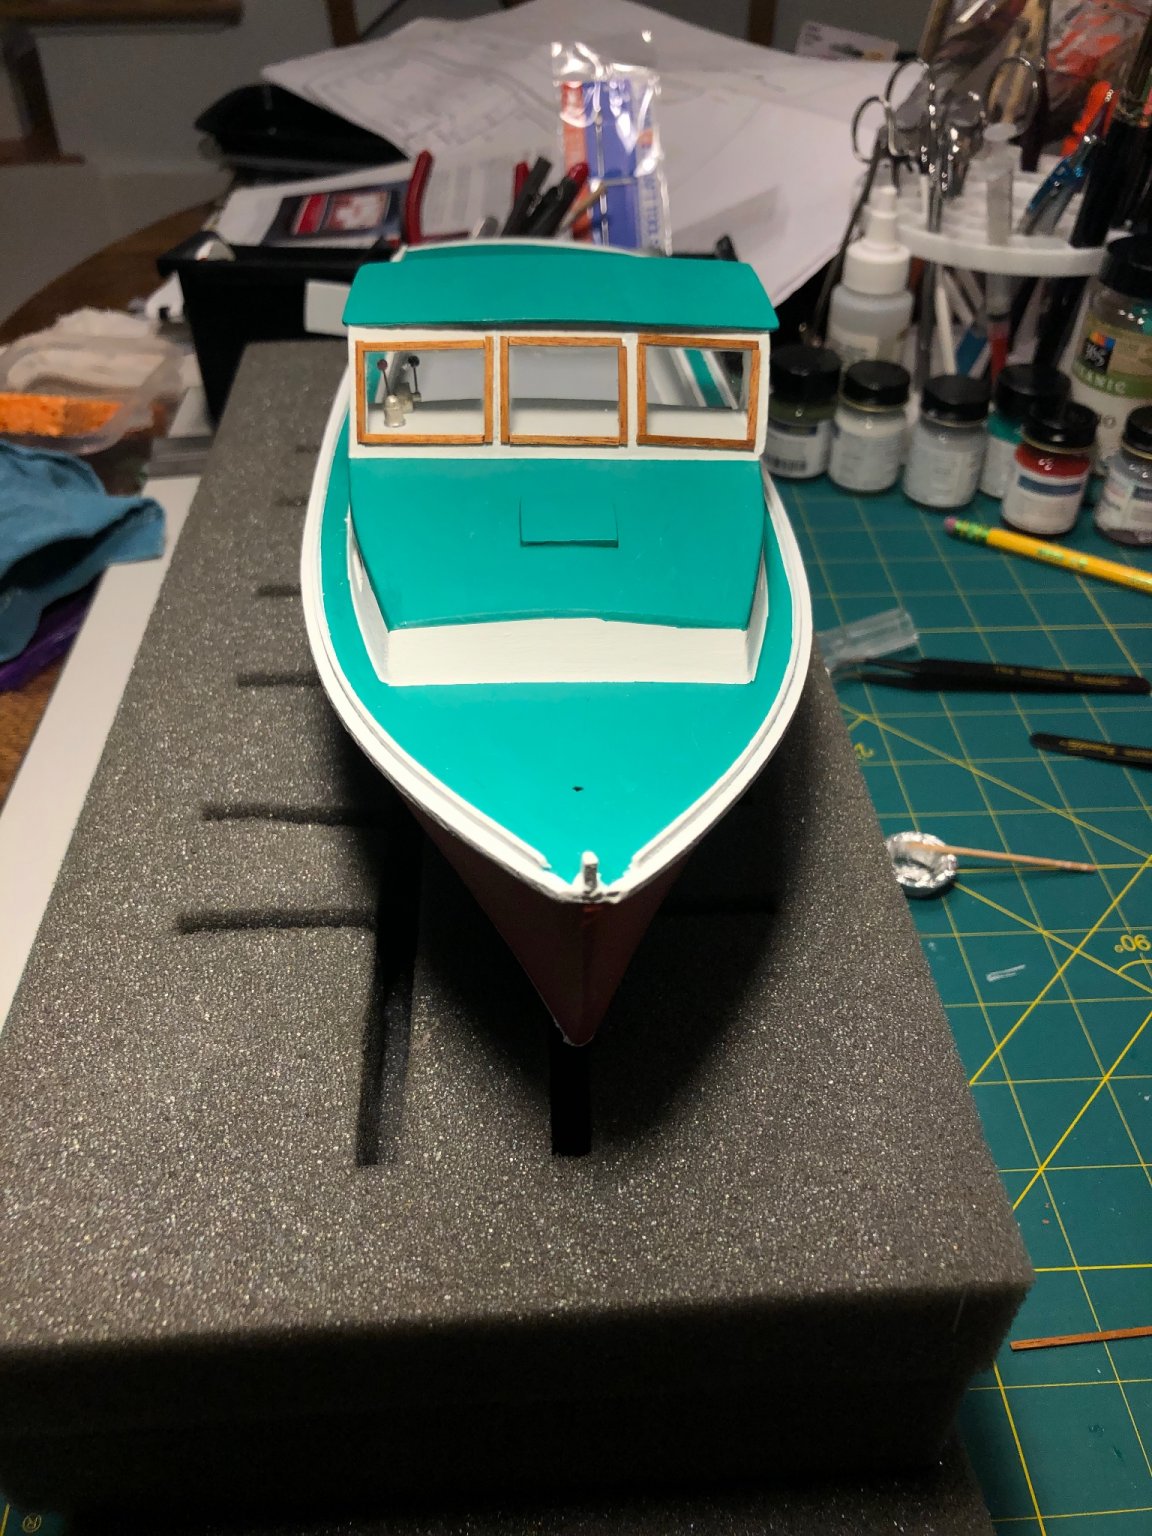
Got my windows cut, mounted and framed. I’m not really happy with my job on this one. I was pondering taking it all off and trying again, but I am afraid of ruining the paint job and making an overall mess of everything. So, I decided to use it as a learning lesson. Isn’t that what first builds are for?
I would definitely use a different method when cutting plexiglass. Also, I think I need better tweezers. I don’t have any with serrated blades, so everything seems to slip a lot.

- Duanelaker, MEDDO, Boxbuilds and 6 others
-
9
-
-
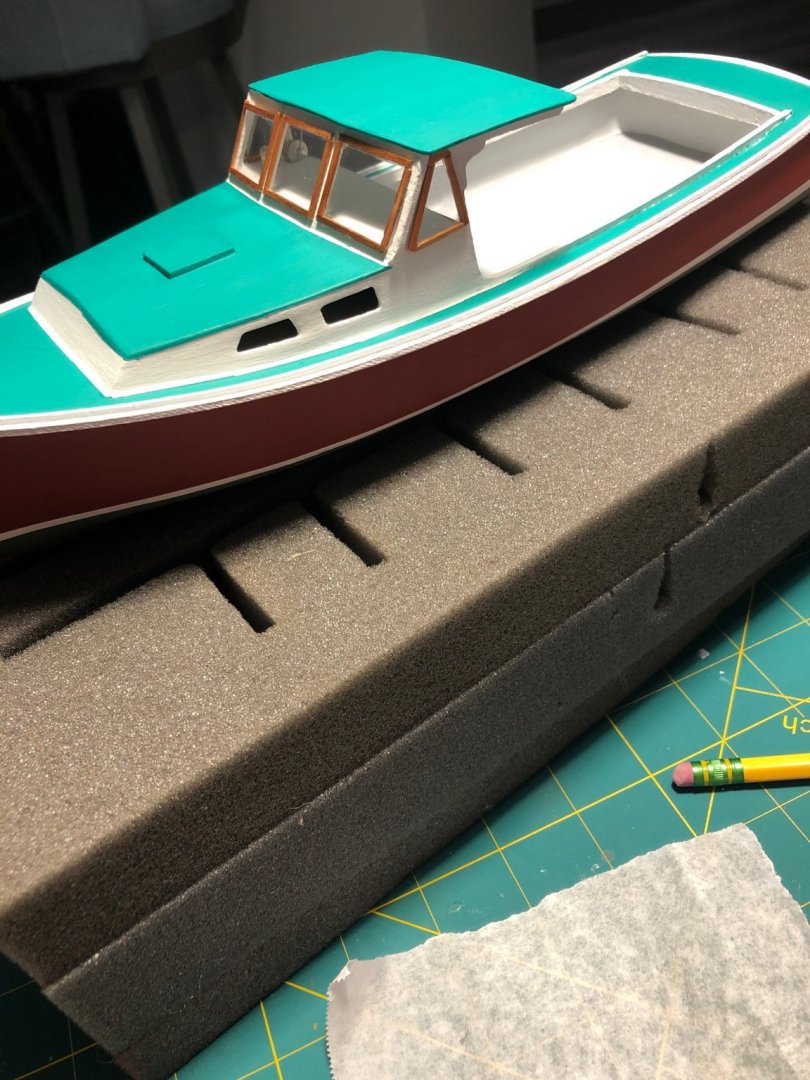
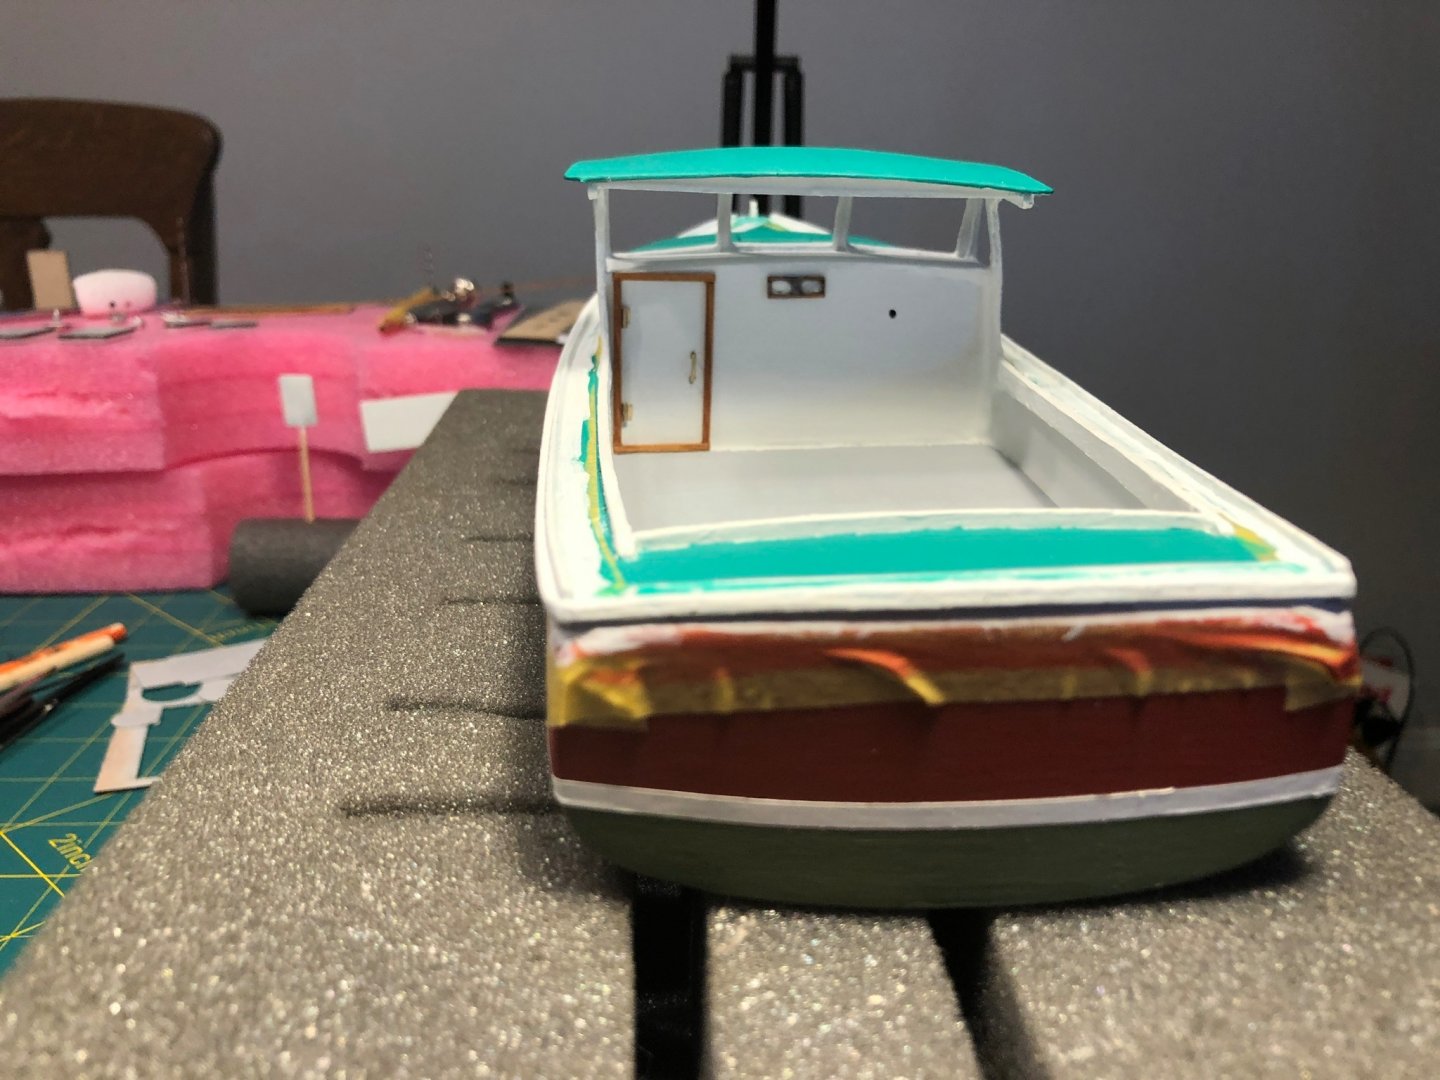
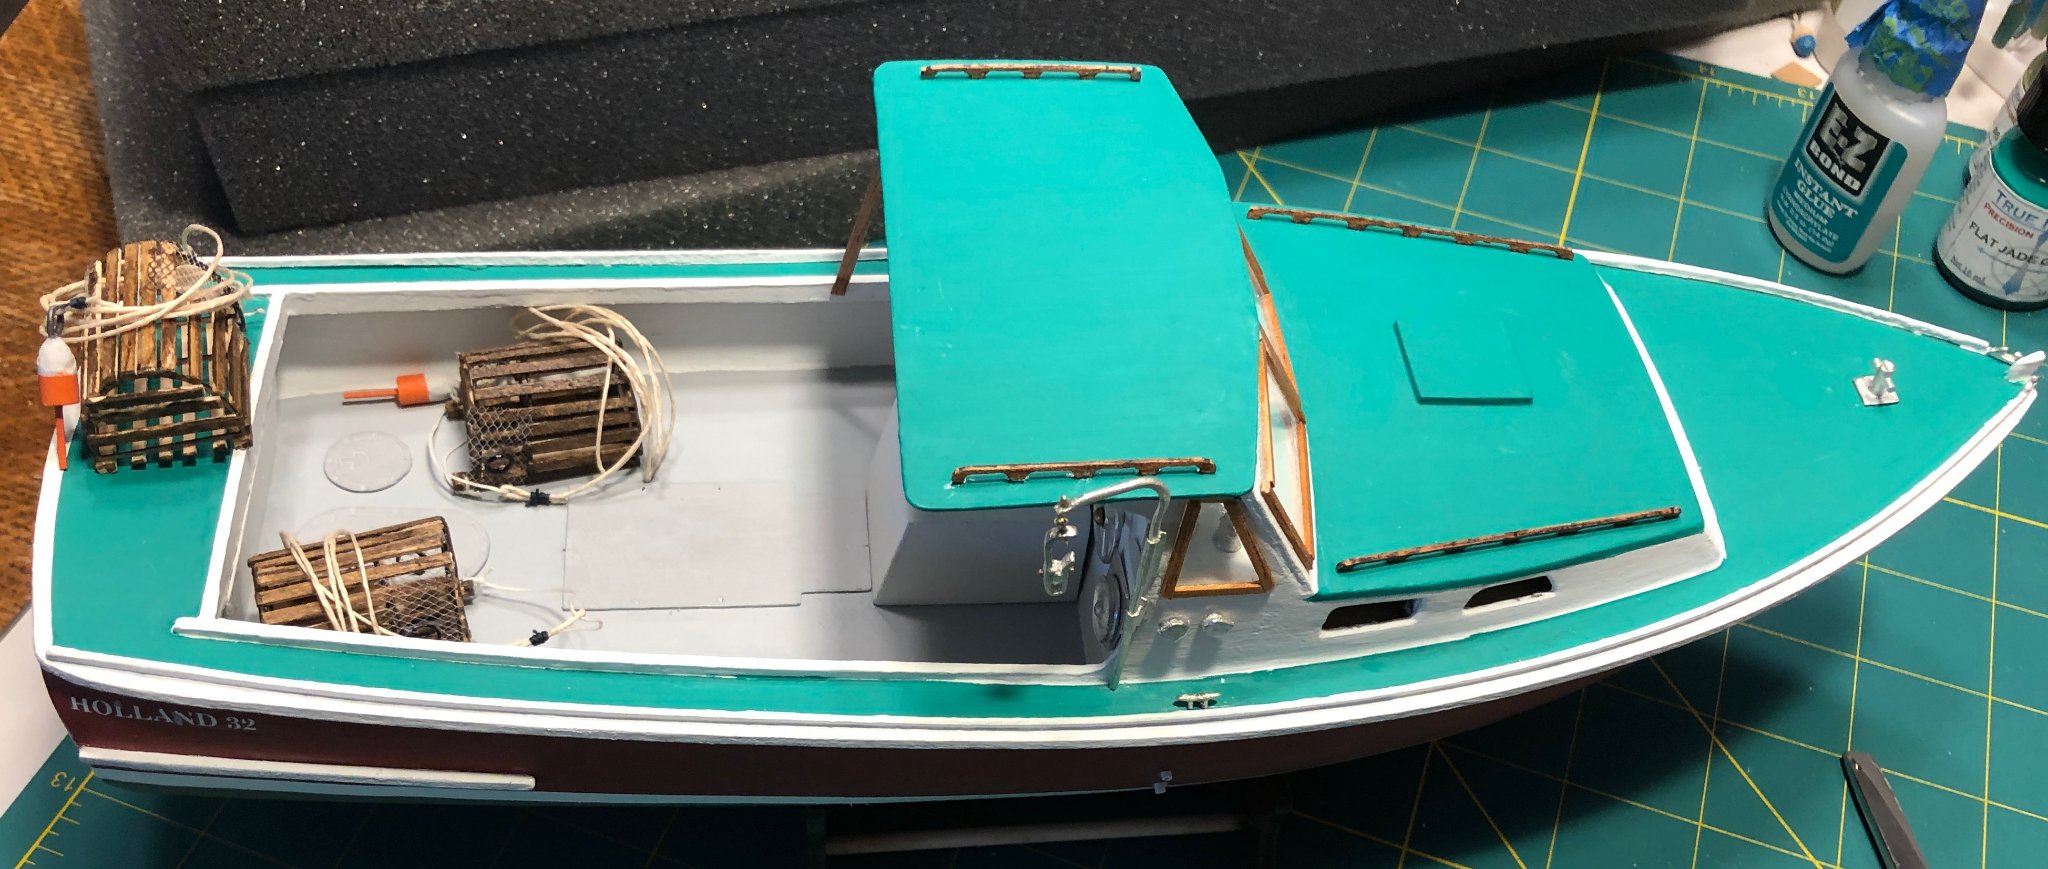
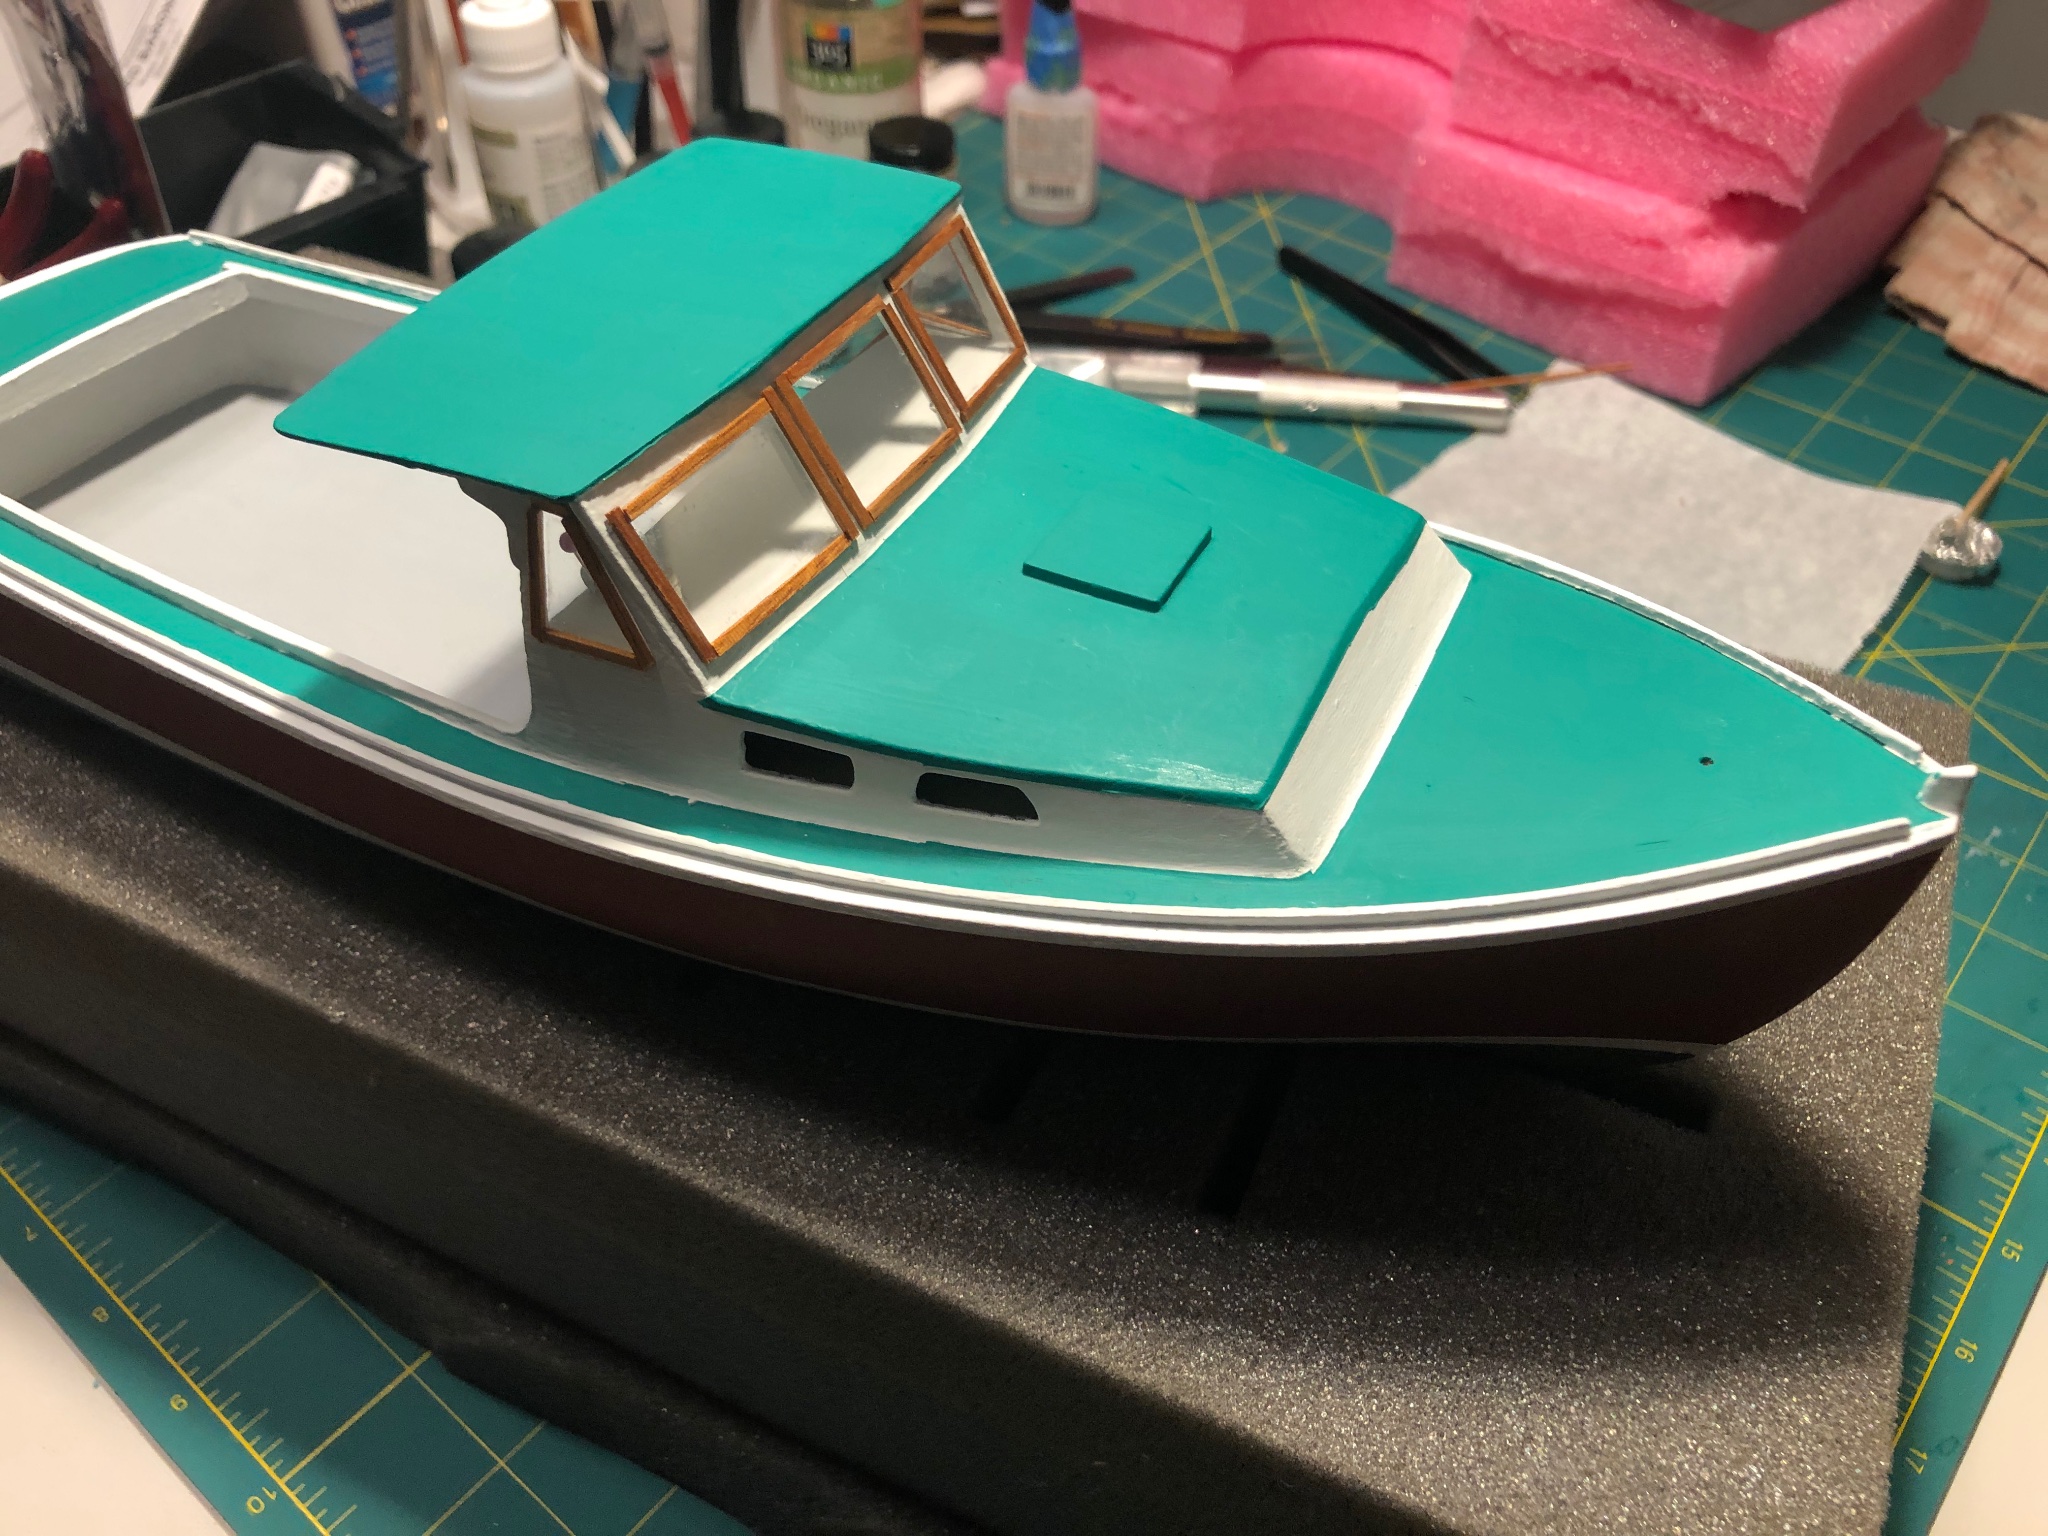
Almost finished with the majority of the painting. I am currently working on painting the sheer guards and toe rails.
As I’m waiting between coats I am prepping some of the other details required for fitting out the boat to complete the build.
I framed the cabin door and scratched the hinges and door pull. I cut two small pieces of 30G .010 brass sheetIng and then cut two pieces of brass rod to make the hinges. For the door pull, I cut a piece of brass wire and bent it to shape.
-
49 minutes ago, VTHokiEE said:
The waterline looks sharp! Nice painting!
@VTHokiEE Thank you! I appreciate your support.
-
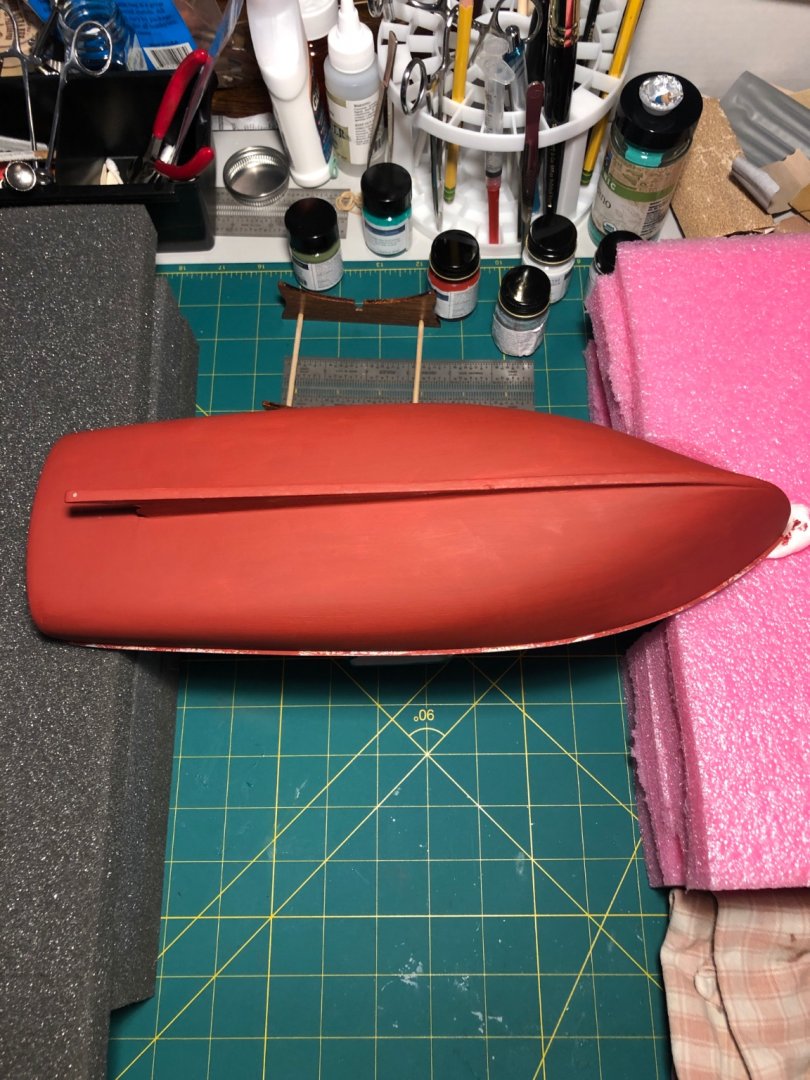
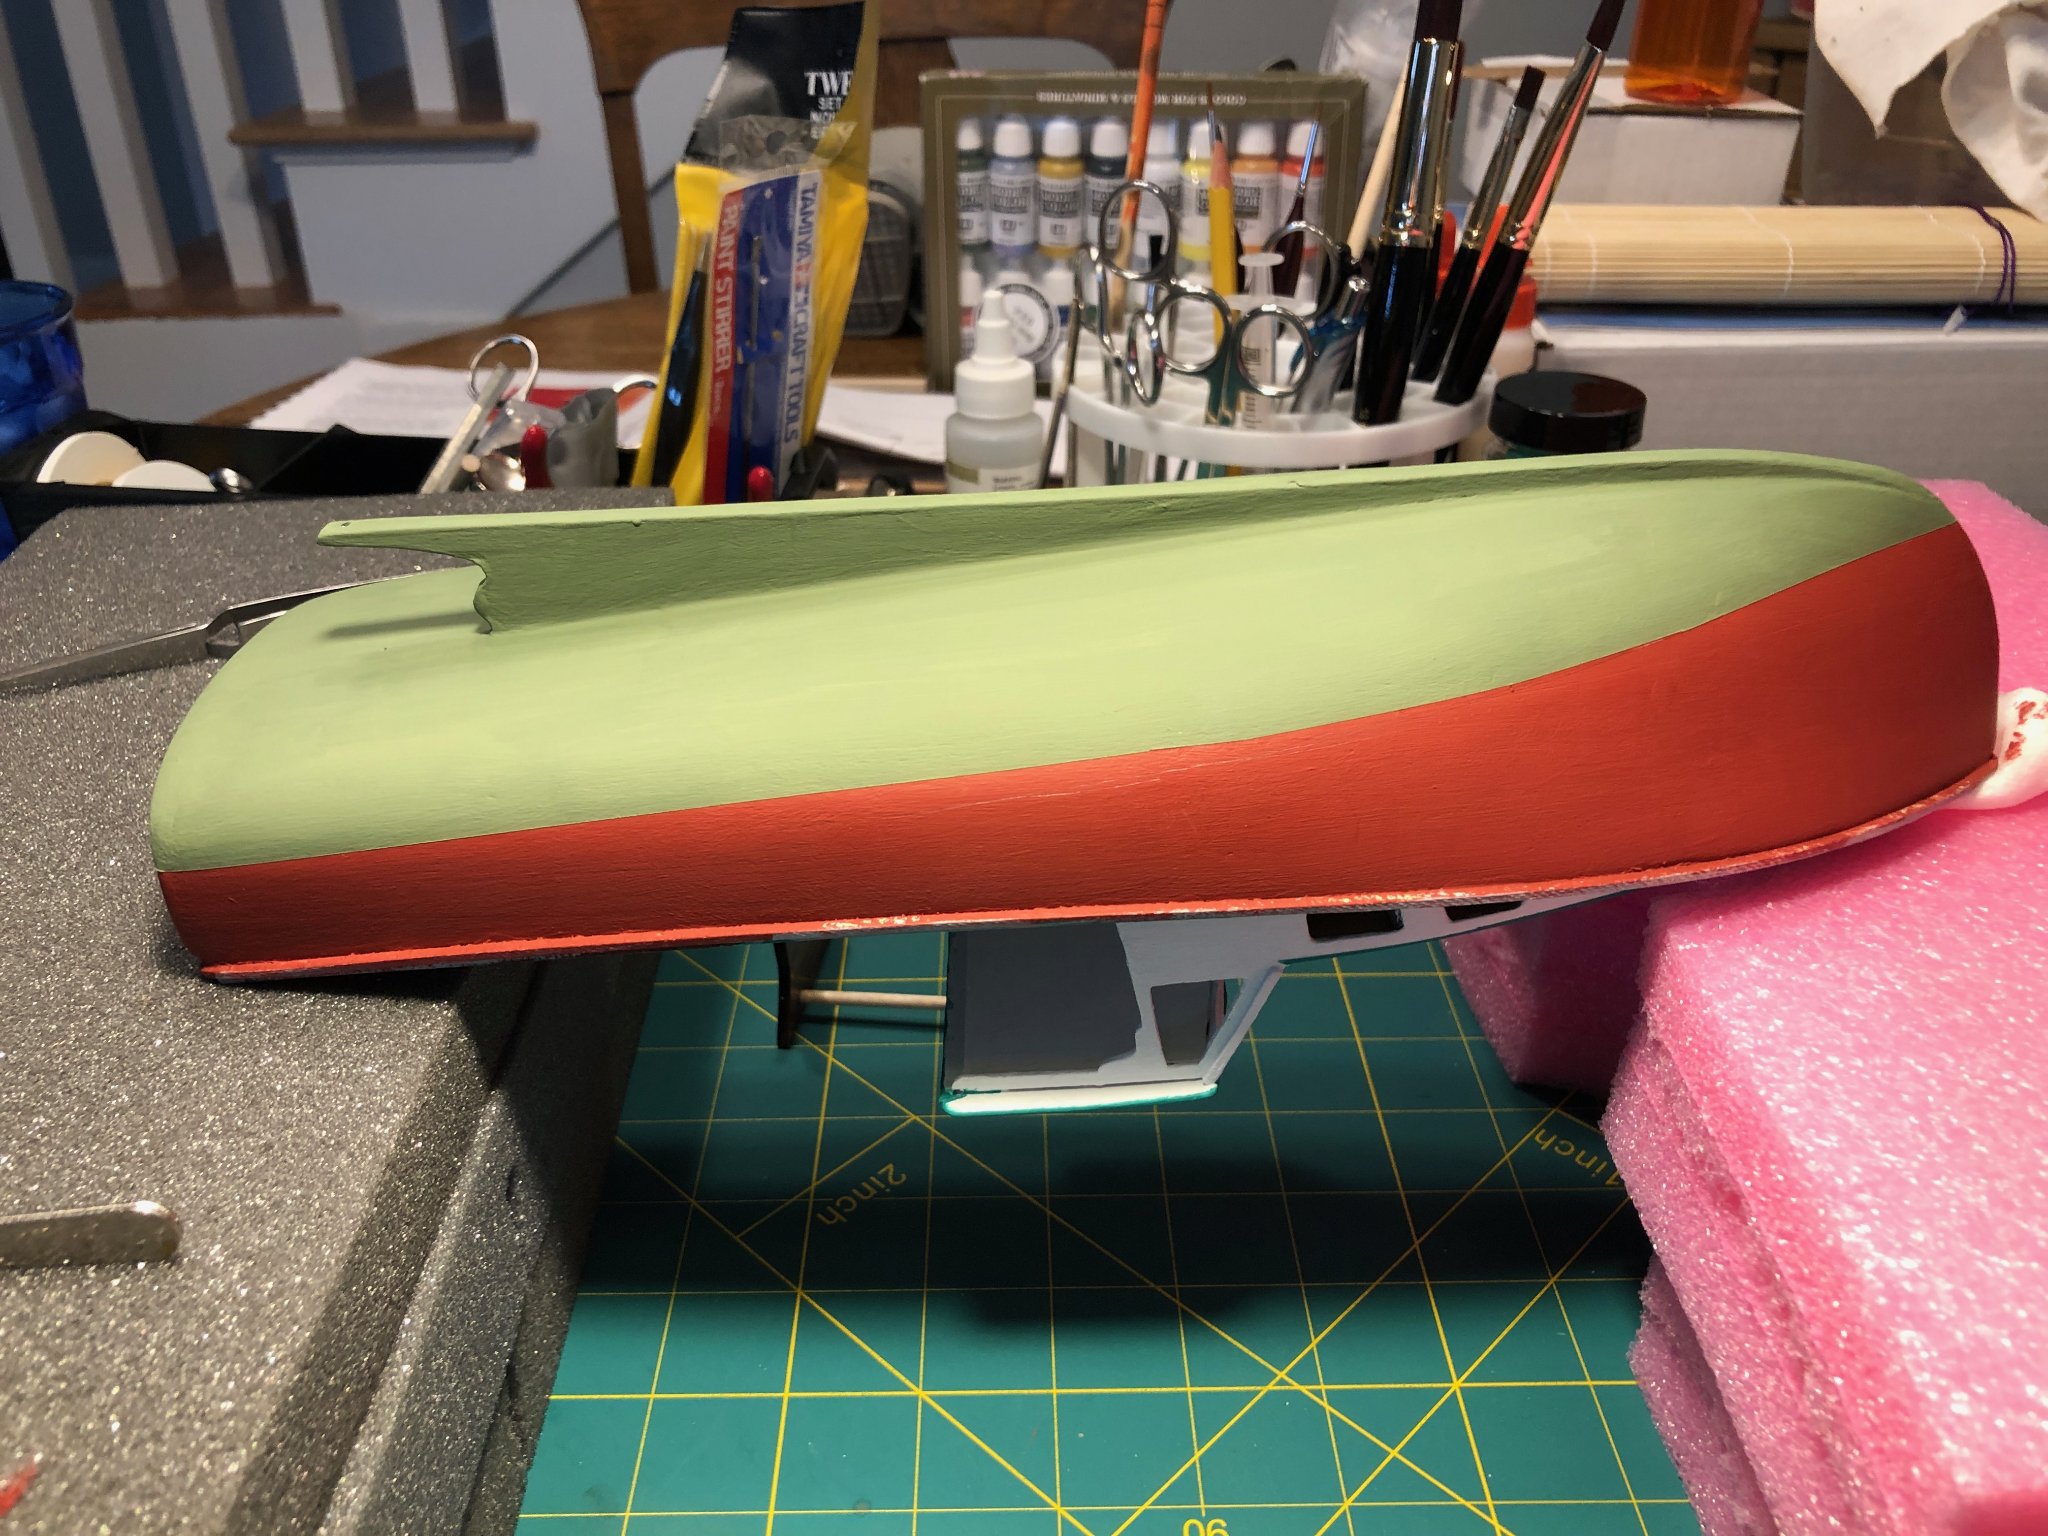
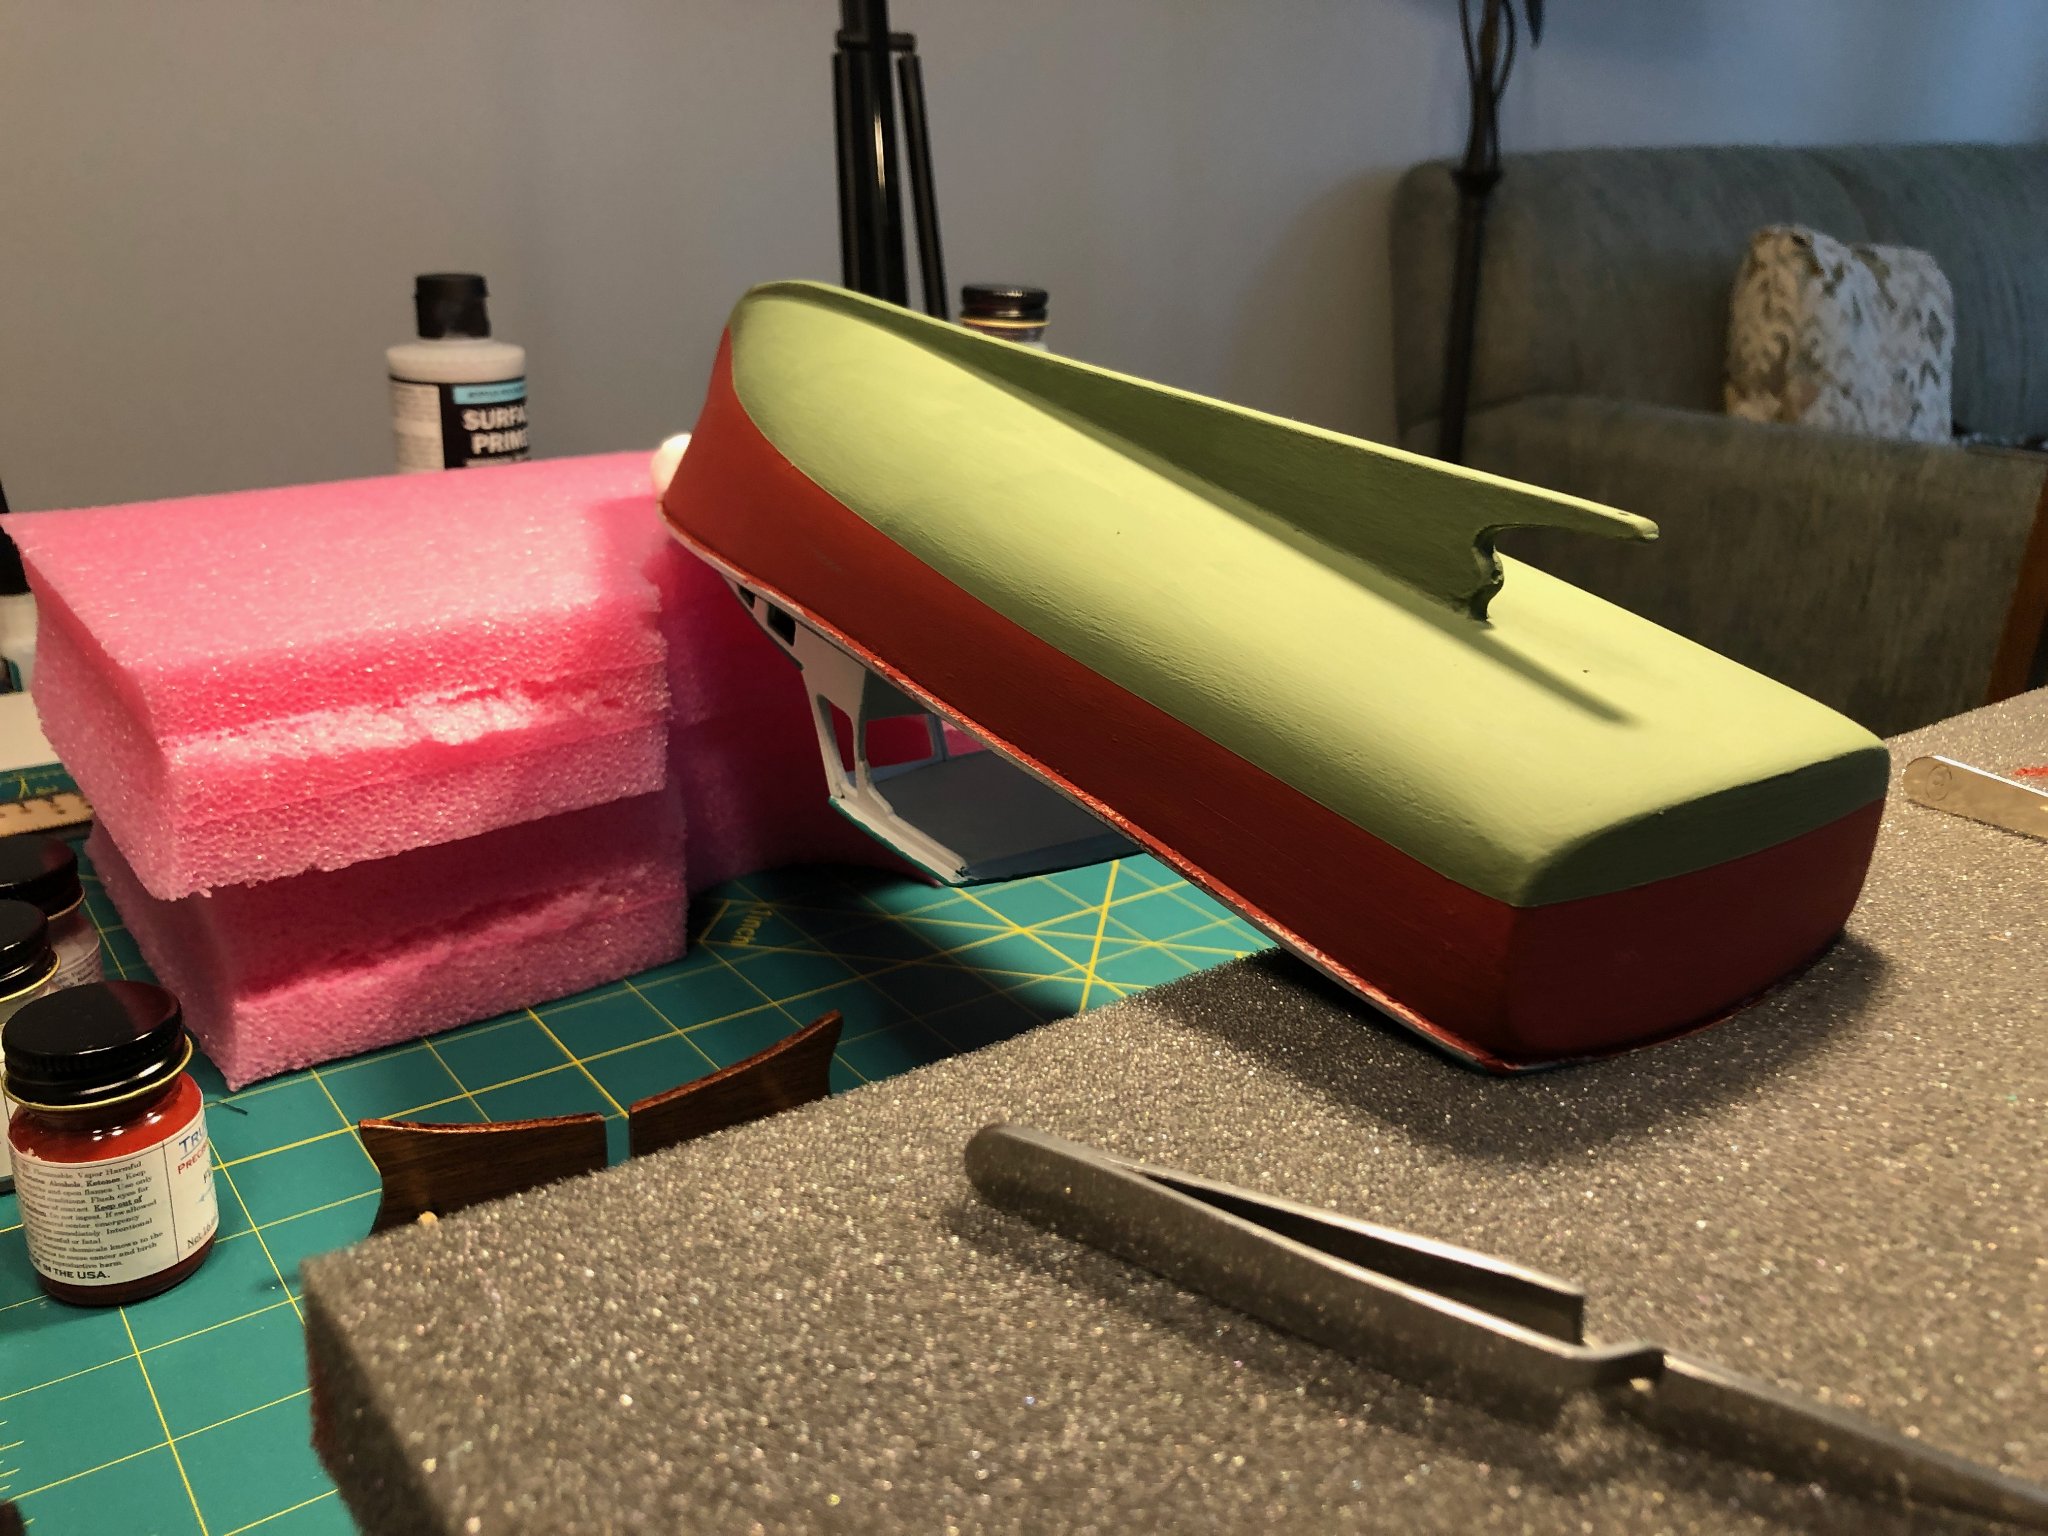
Another quick update. I have completed the hull painting including marking my waterline. I strayed from the instructions, as I used Tamiya masking tape instead of the supplied pin striping tape. The instructions called for using the pin striping tape (which will also be used to make the boat topping) to mask off the waterline by rubbing the adhesive side between your fingers to decrease the holding power to minimize the tape lifting paint when removed. I didn't trust myself that I would prepare the adhesive surface adequately, so I used the Tamiya.
The image was taken as I'm waiting for the final coat of bottom paint to dry. I was so nervous about the waterline tape lifting the red paint on the hull that I couldn't wait to remove it. I'm very pleased with my result.
As much as I complained about the other paint coverage and application (see above log), the flat red and Green or Grun, as it is named, went on and covered beautifully! I am still baffled by the difference in paints across the supplied bottles. In the end I am pleased with the end result, so far. I have just a bit more painting to do.


-
1 hour ago, CTYankee said:
The issue I am having is not with their paint. As I mentioned in this thread or another, I used the True North Primer very quickly as I was practicing use a bit before committing paint to my boat and at the time I was not thinning it enough so it didn't last long. Both issues I had were with Testors products (model master brush on and main-line rattle can). I am going to try some HW store primer next I think as I have read many folks, such as Schooner have good luck with it.
@CTYankee Sorry James, I guess I missed the part about Testors. I thought it was the True North primer.
-
Absolutely gorgeous Gary!
-
-
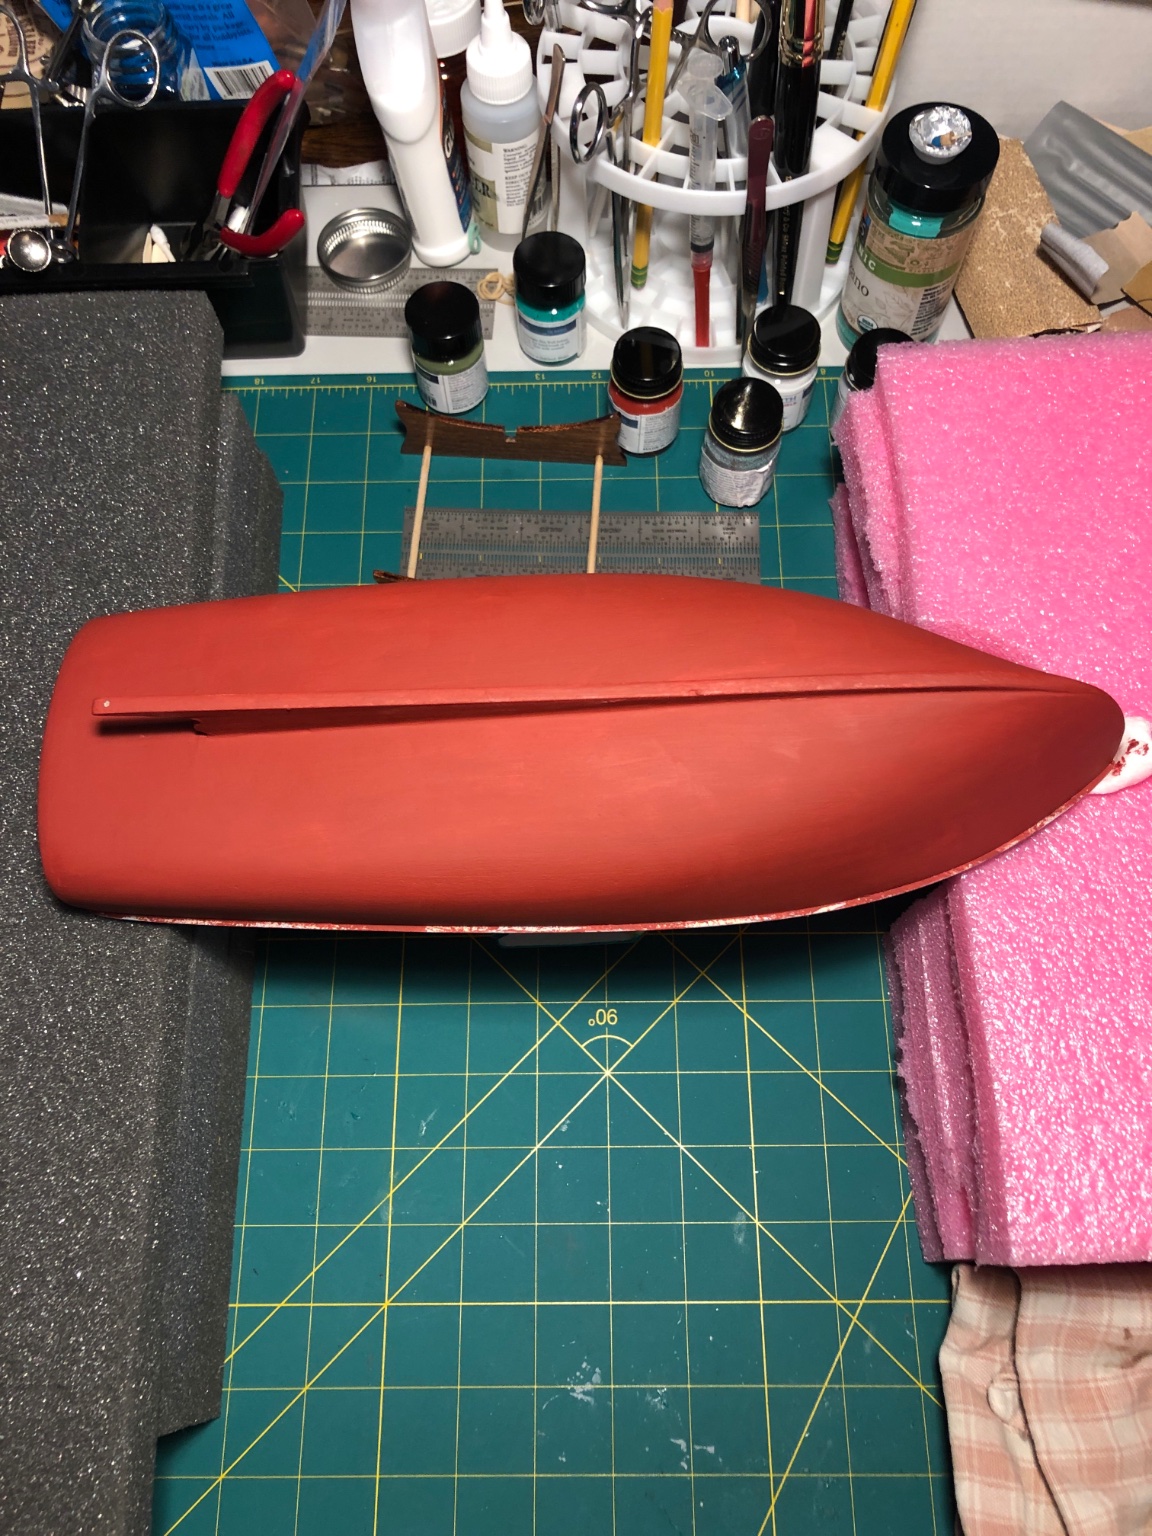
I thought I would update my log, as I am still a bit mystified about the painting. I am now in the process of painting the hull. Those that have been following along will know that My painting process has been taking a while. The flat red for the hull is pretty thick, but I really like the way it is going on. The following image is after just three coats. I think one more will do it for this color.
-
I’ve been watching that build. I never thought of bashing it, but now you have me thinking. I probably need more experience before taking on something like that, but that would be cool having a model of my boat.
A lot of people think the Monk is a Grand Banks. They look very similar, especially the older ones. Personally, I like our layout much better than the GBs of the the same era and size. The Monk being a lot more comfortable and sensible layout.
-
1 hour ago, schooner said:
Your right, sorry.
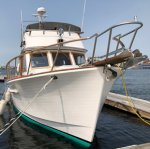
BTW, is your "avatar" photo your boat?
@schooner
No reason to apologize.
Yes, my avatar is my boat. It’s a Monk 36 trawler. They only made 254 of them. Mine is hull #077.
-
Hi Tim,
I think you meant to post the above to this build log:
James is having problems with primer.
-
Hi James,
I’m sorry you’re having a difficult time regarding the painting. Hang in there! Have you tried calling Bluejacket? They’re very helpful.
-
@VTHokiEE I’ve started researching acrylics for my next build.


Red Baron by pwog - FINISHED - BlueJacket Shipcrafters - 3/8" - Lobster Boat
in - Kit build logs for subjects built from 1901 - Present Day
Posted
@schooner
Tim,
Are you talking about plank on bulkhead or plank on frame? Or does it matter?