


Clark Griswold
-
Posts
57 -
Joined
-
Last visited
Content Type
Profiles
Forums
Gallery
Events
Posts posted by Clark Griswold
-
-
The greatest value of any model is assigned by the builder by the time and love he/she put into it. Many of us only dream of a descendant caring enough to not put in a garage sale. I see this as a crossroads... you could enter the hobby and carry-on your great grandfather's ship modeling legacy with hopes of restoring the models eventually or you can put some coin down and enjoy them in their own right as family relics.
There's no wrong choice here, but we'd love to have you join our ranks.
-
-
I use a foam brush to "paint" the false deck with wood glue in an area I can accomplish within a few minutes time before it begins to set up. Once I'm done for the planking session I use popsicle sticks with rubber bands attaching both ends looped under the keel to hold the fast. Slight curling may still happen but not so much a good sand cannot cure it. There are likely a ton of ways to skin this cat, but this has worked for me.
Good luck from a Kansas City native!
-
MicroMark has a product similar to what you are searching for...
- Keith Black, Canute and mtaylor
-
 3
3
-
-
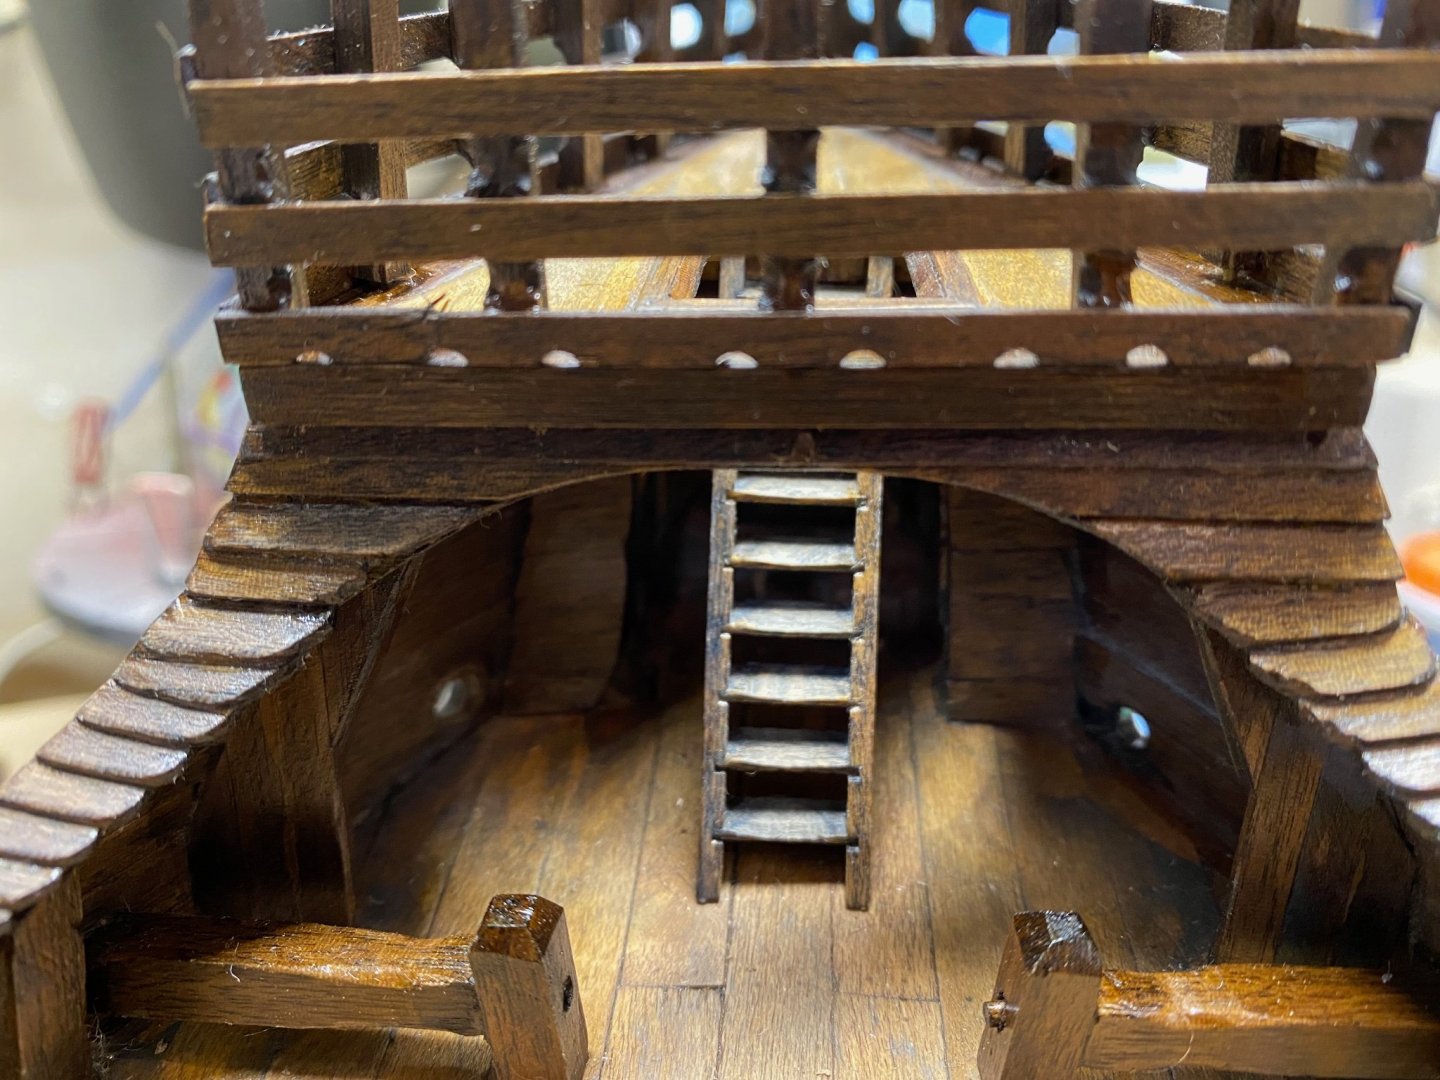
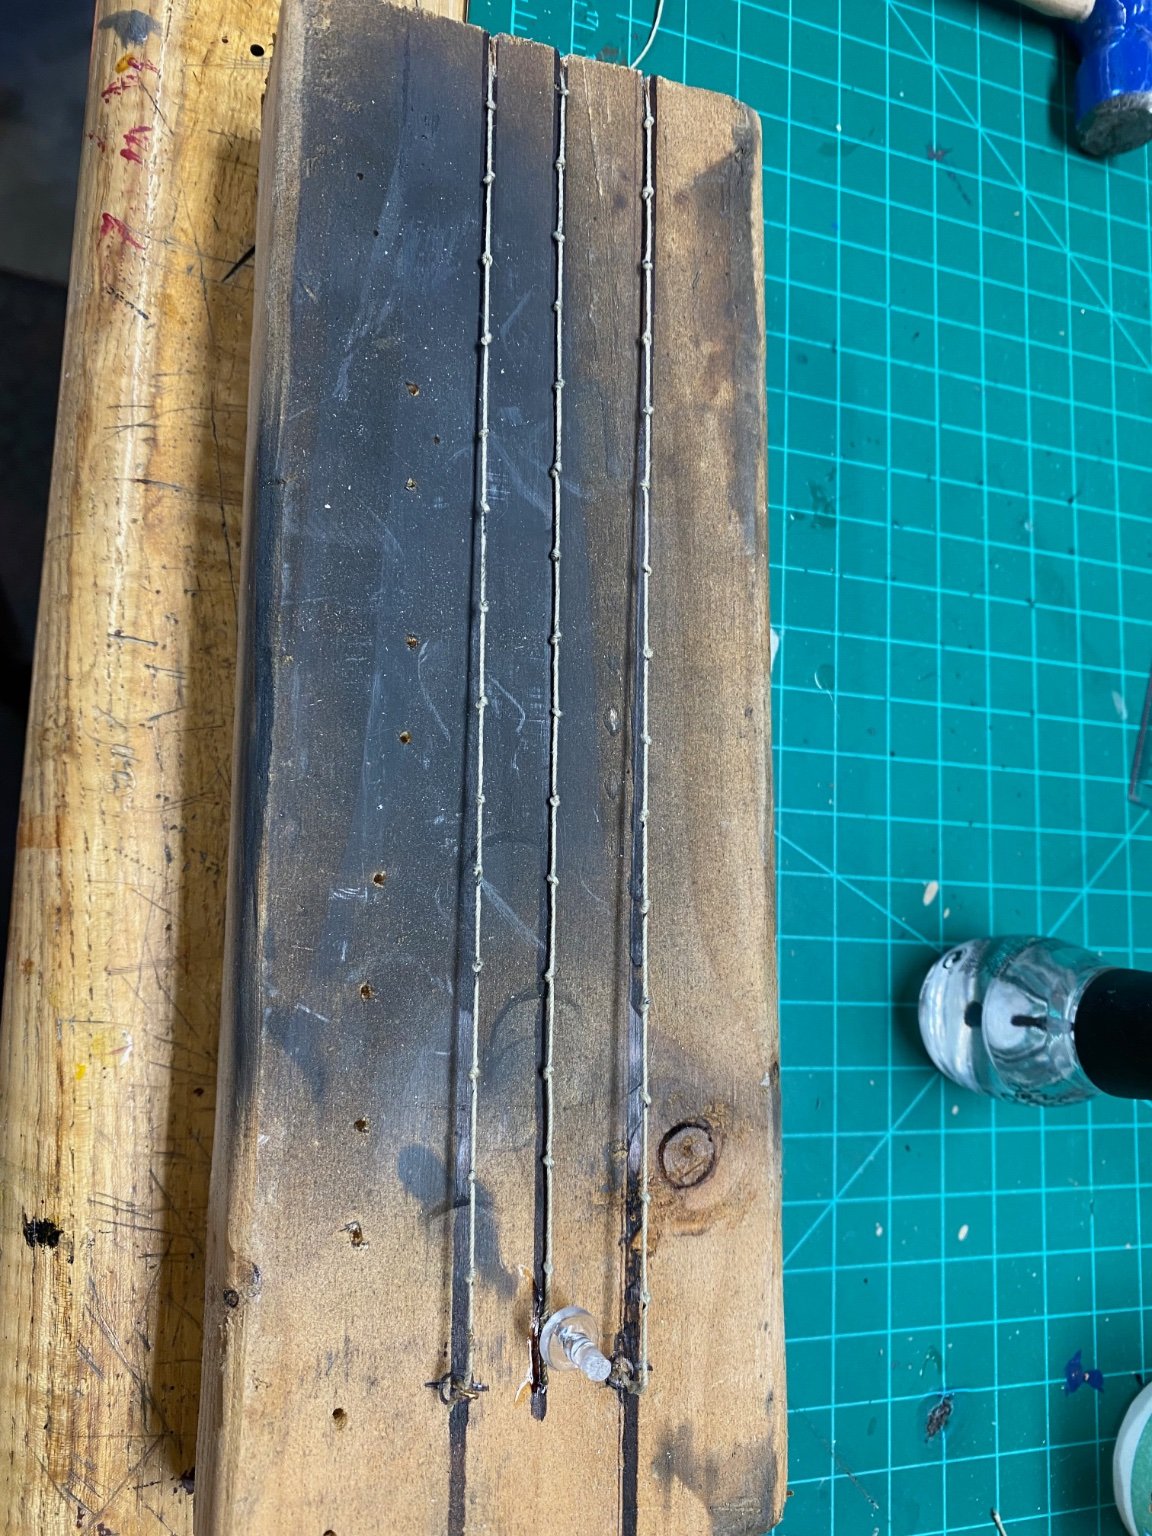
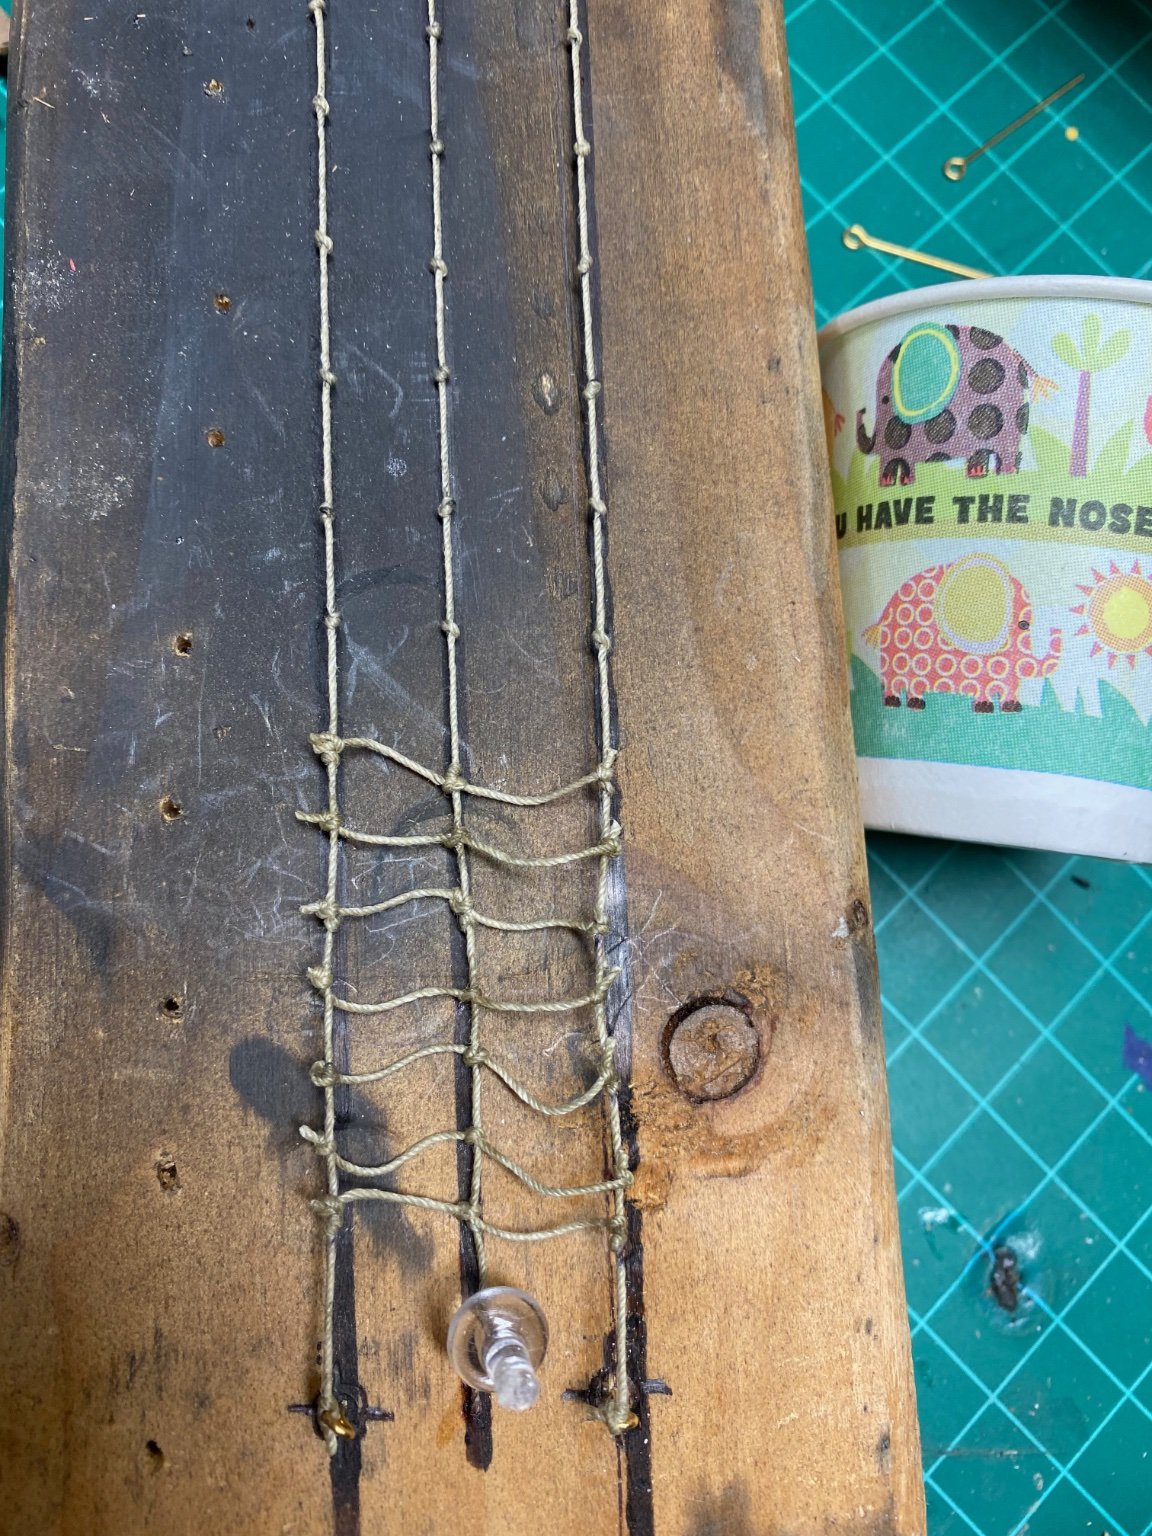
Ladders, how I loathe thee.
I started off with the intent of making a rope ladder, placing knots every .5" (only to realize later they should have been placed every .25")

Here is .5" spacing
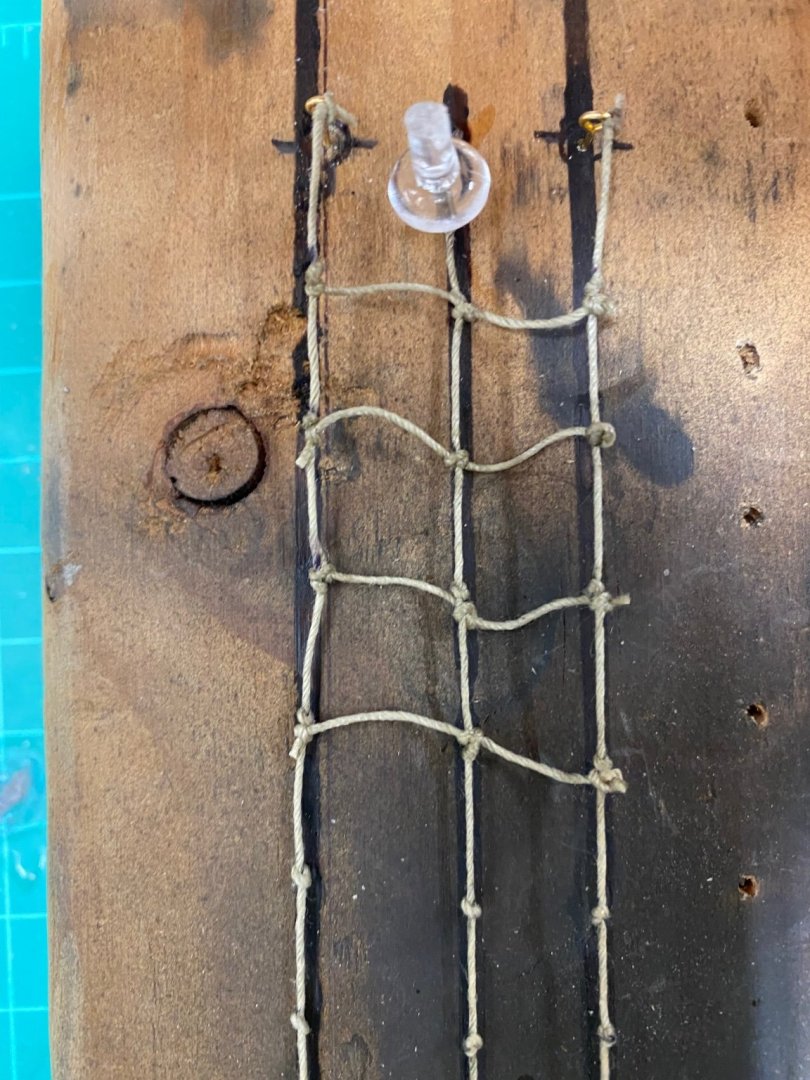
Here is .25" spacing. I was very unhappy with how loose the rungs were.

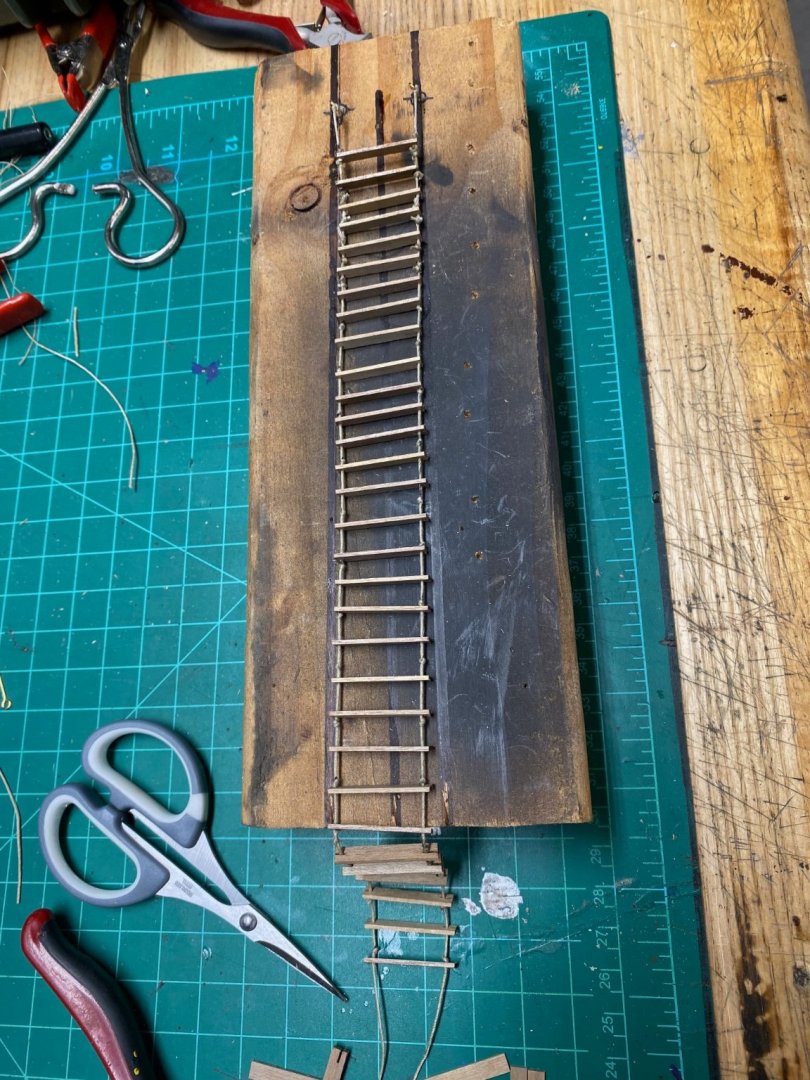
Frustrated, I decided to go with wooden slats. I used some left over wood from the kit and slotted the ends to tightly grip the ropes. Once the ladder was complete and I was happy with the spacing, I coated the unstained rungs in shellac to seal them and "lock" them to the ropes.
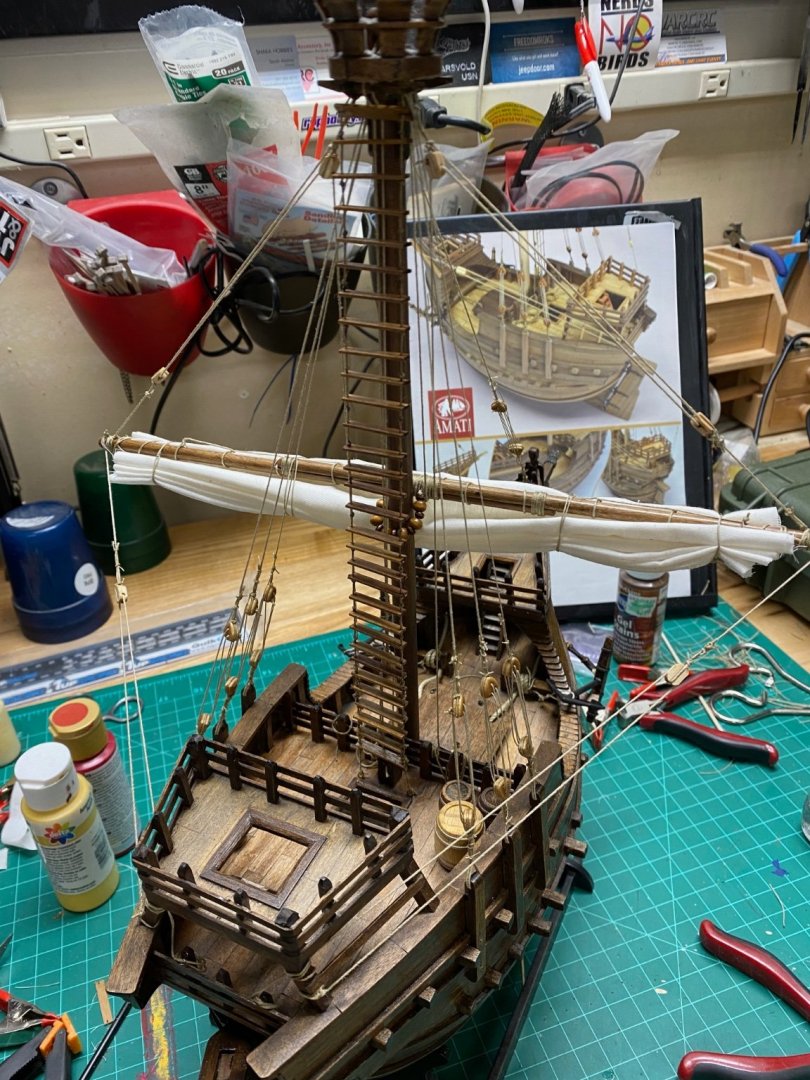
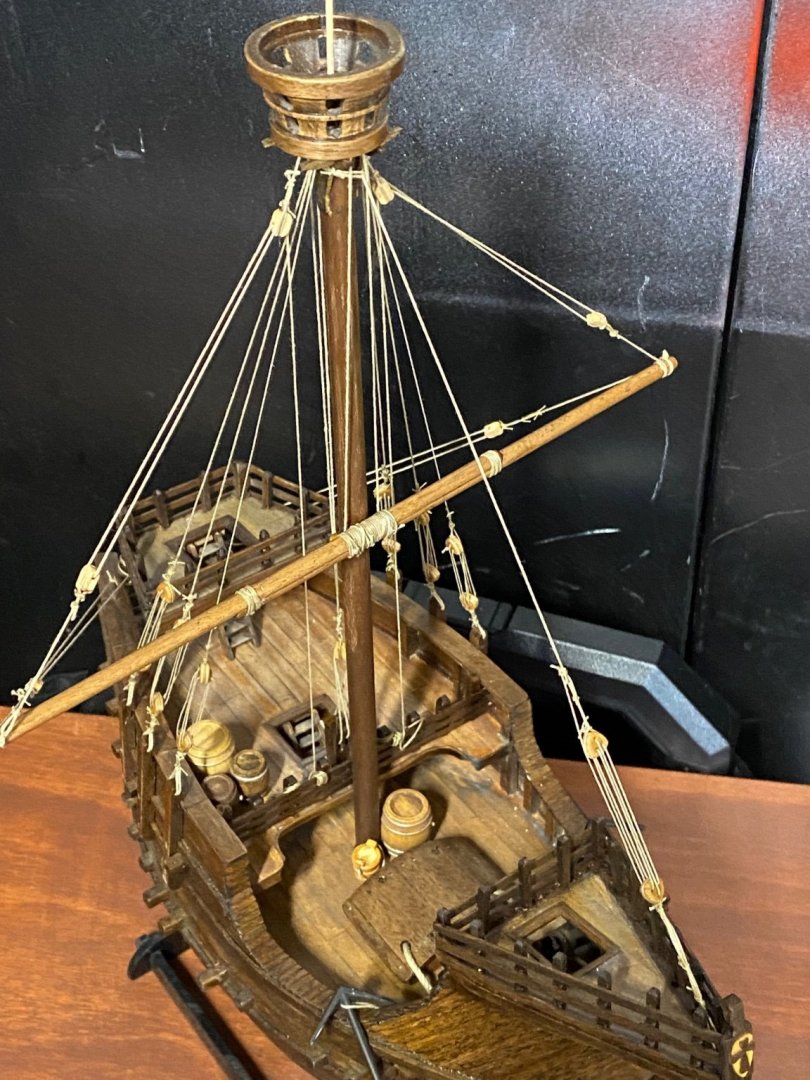
I am not pleased with how the sail turned out and will likely cut it off and replace it with finer cloth eventually. The fabric Amati included was heavily starched making the sagging sausage more difficult. I'm assuming they used the same fabric from kits with unfurled sails where the starch would be a boon.
- ccoyle, Louie da fly and GrandpaPhil
-
3
-
Although intended for R/C, the Dumas tugs can be built as static models. They can be somewhat of a challenge due to the subpar materials and plans but fun nevertheless. Of their tugs, I have built the Jenny Lee and Little Shelly Foss. I would recommend the Lord Nelson Victory Tug (its on my list of future builds).
-
One little detail I forgot to mention is I did my own little mast stepping ceremony. I came across a package of sterling silver beads at the craft store for $5 and decided why not. I now have enough silver beads to step every ship model mast I'll ever build. I simply put the bead in my jewelers vise with the hole on the jaw face and crushed it to about .25mm. Keeping the orientation the hole correct made it quite easy to pin it to the mast base.
- GrandpaPhil and BikerMart
-
2
-
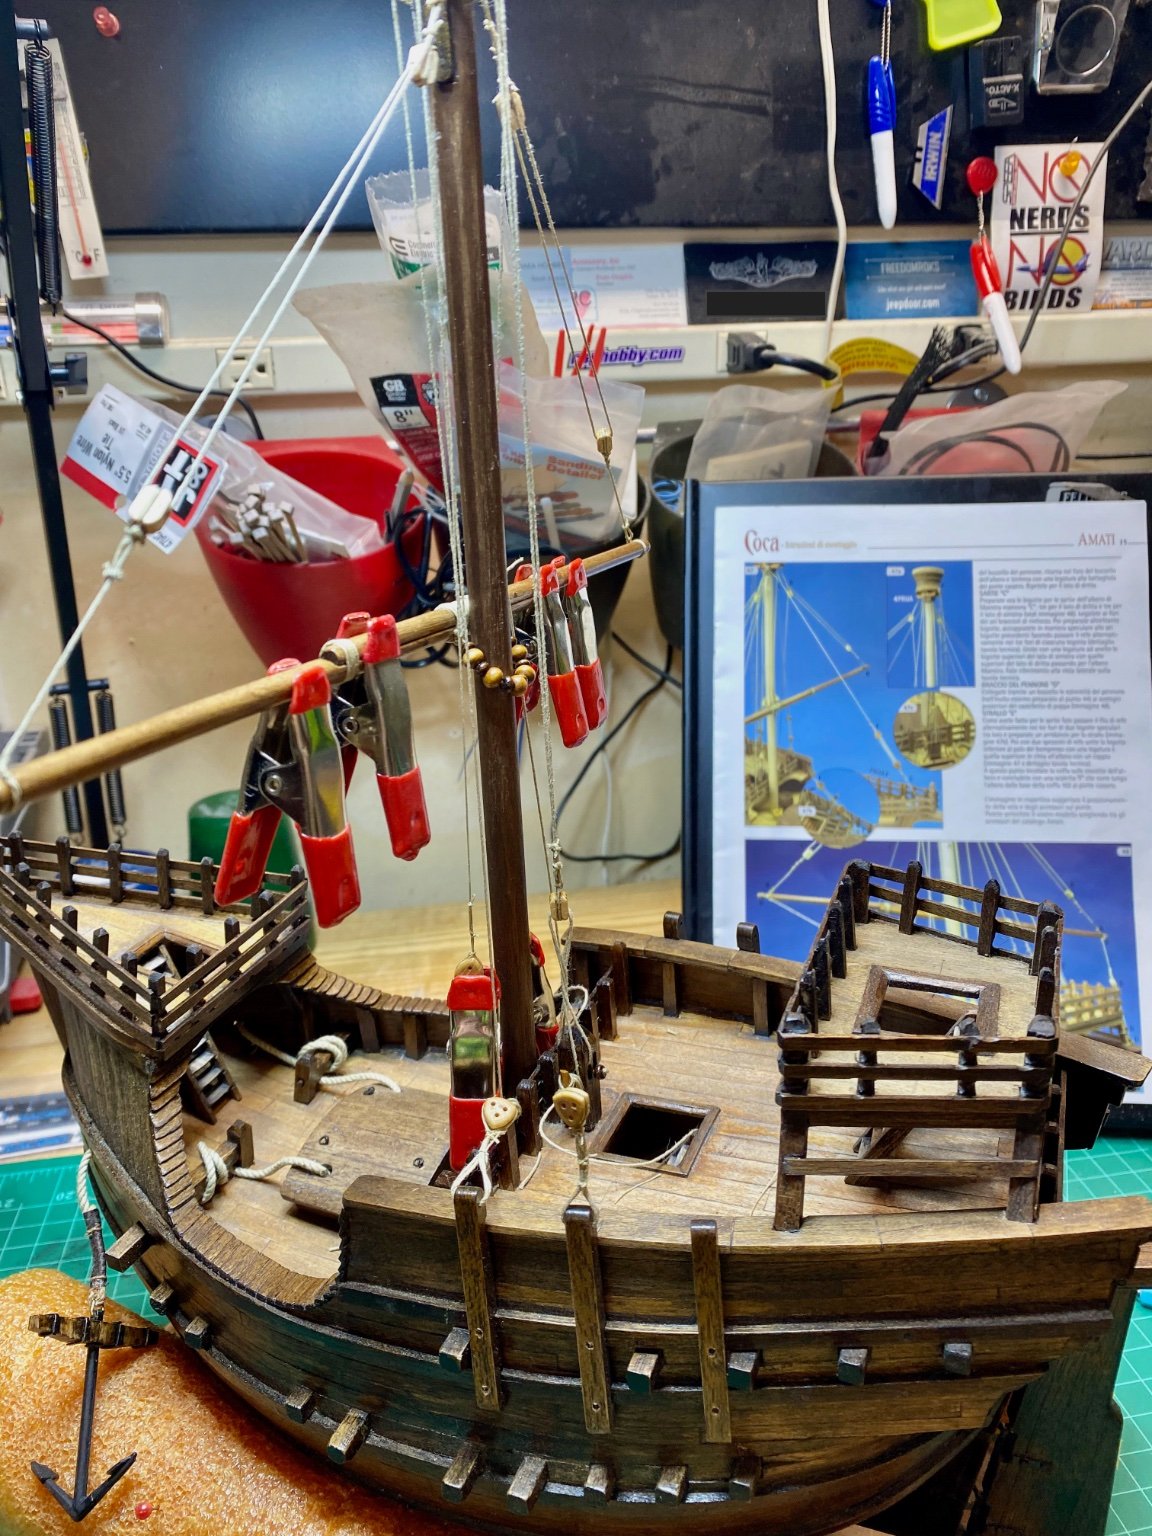
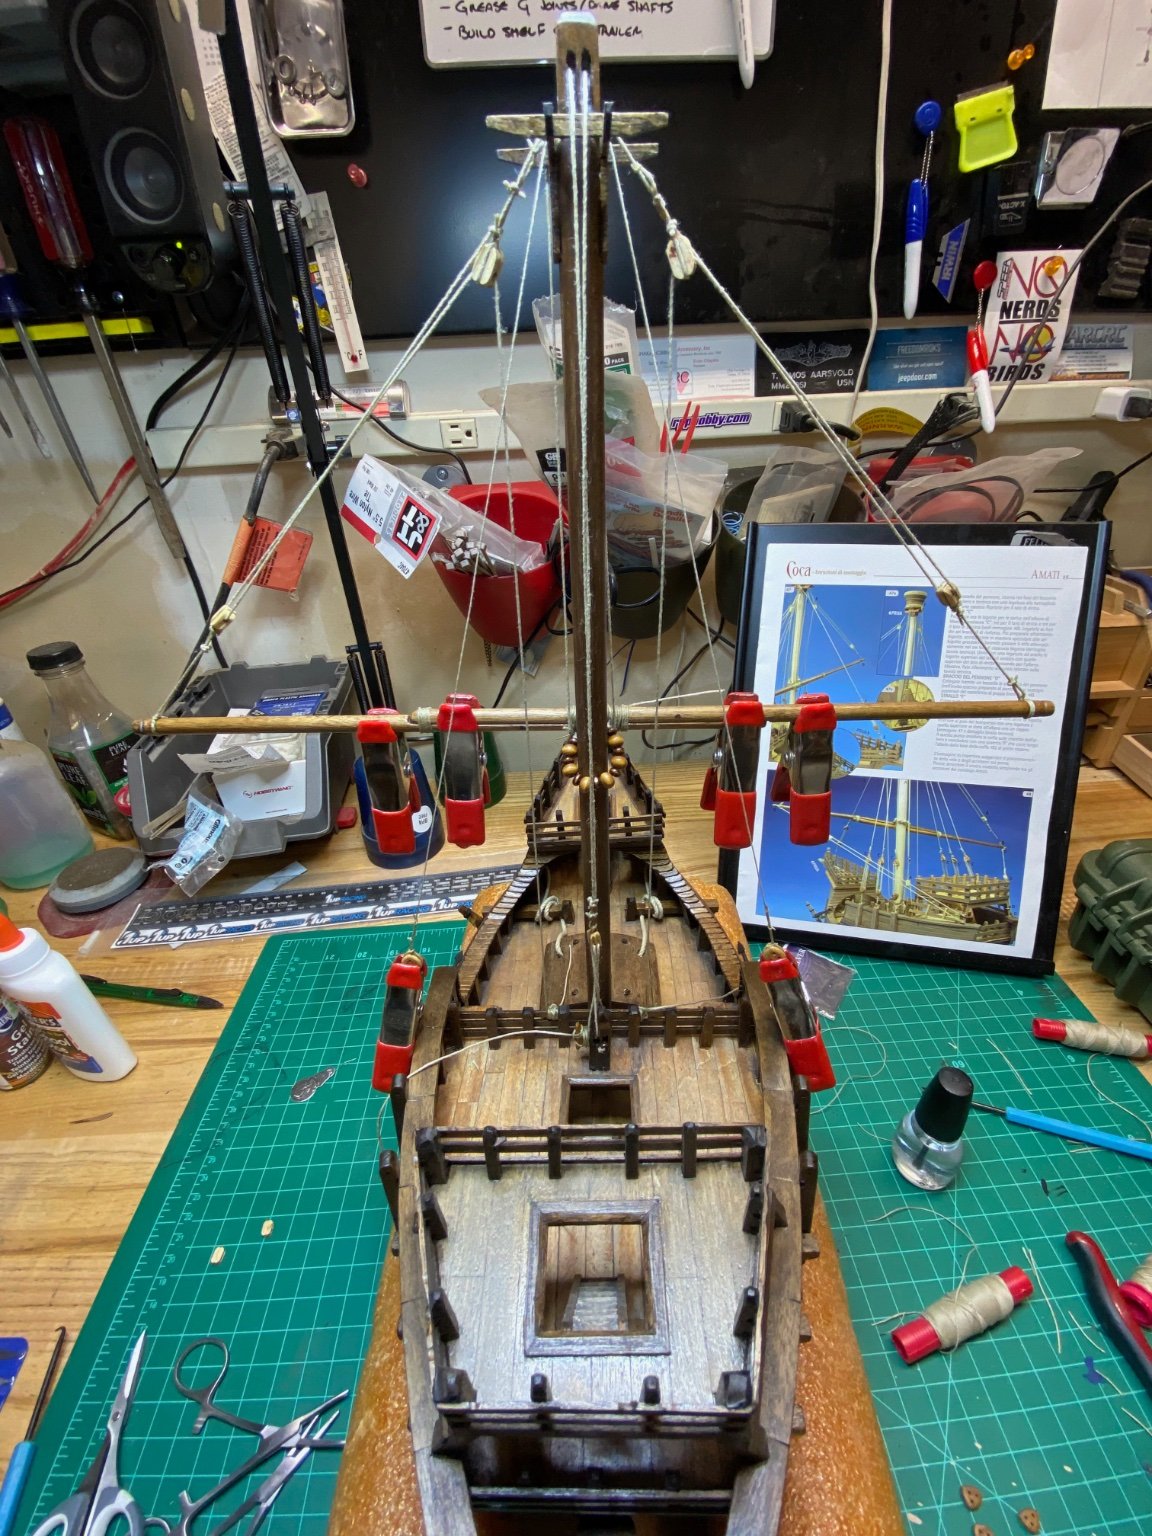
The real reason I chose this model was upon me... learning how to do rigging. It wasn't as bad as I was expecting, but it certainly had a learning curve. I'm still not convinced I achieved taut enough lines, but passable for a first effort. I used clear nail polish to help set the knots.
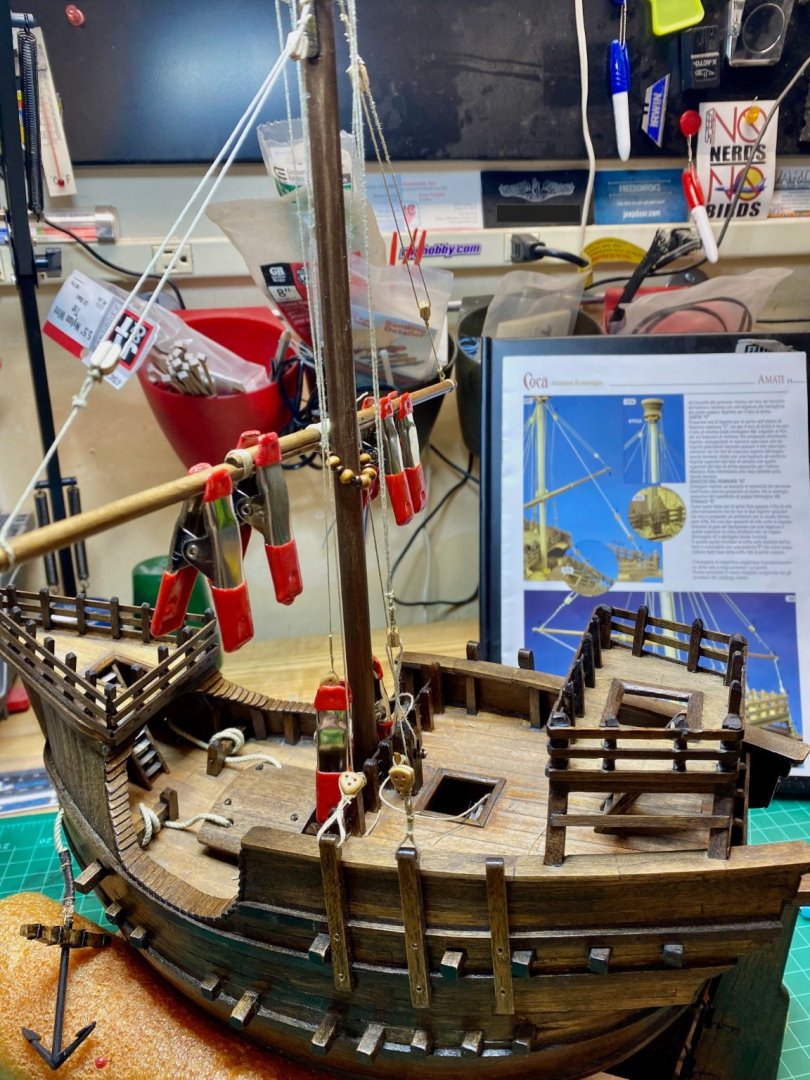

Here is where I'm at as of this evening. All that remains is the mast ladder and sail. I find it odd Amati included the sail material but neglected any directions or mention of attaching it (same for the ladder). Is the ladder 100% composed of line or does it have boards for the rungs?
-
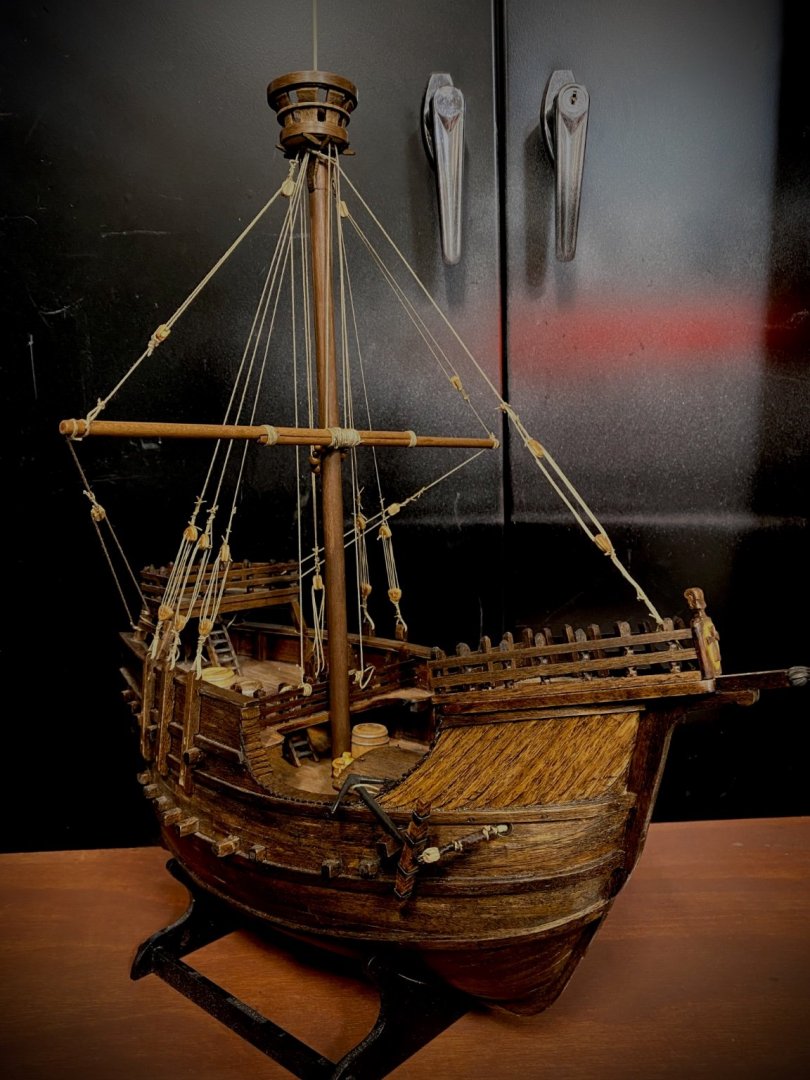
Wow, it has been awhile since I've updated this log. I took the summer off for my other hobbies but I'm back again. I've picked some of this highlights of my build since my last post...
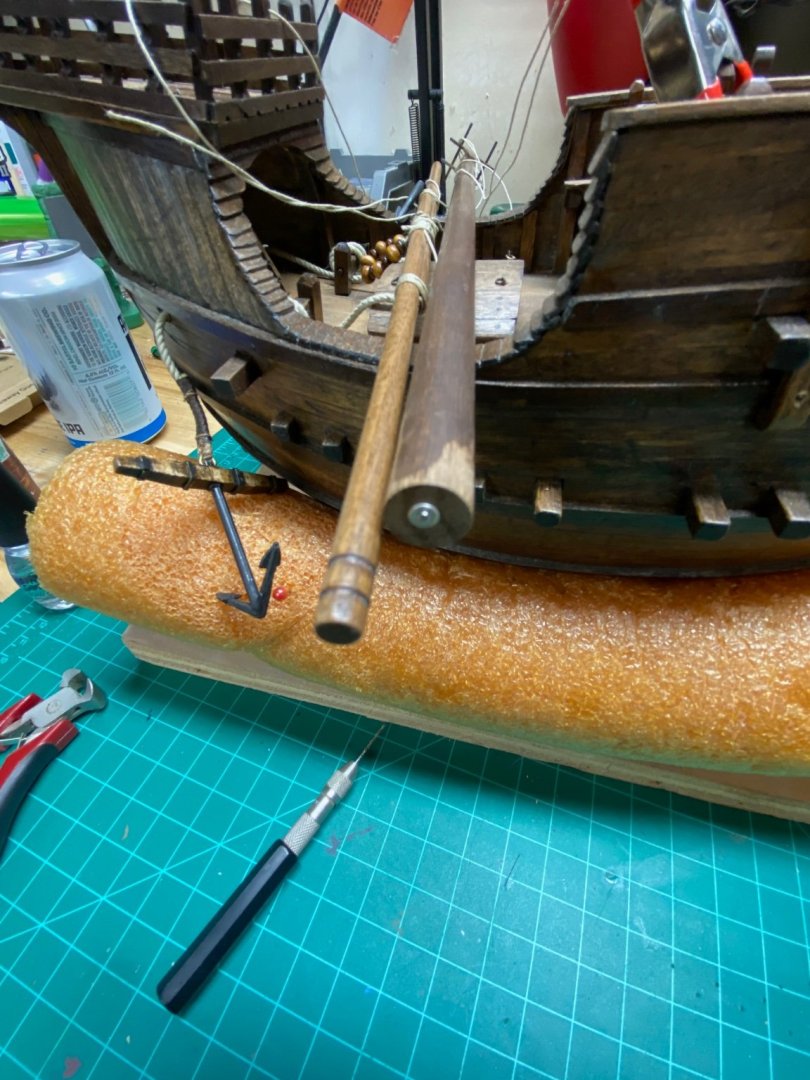
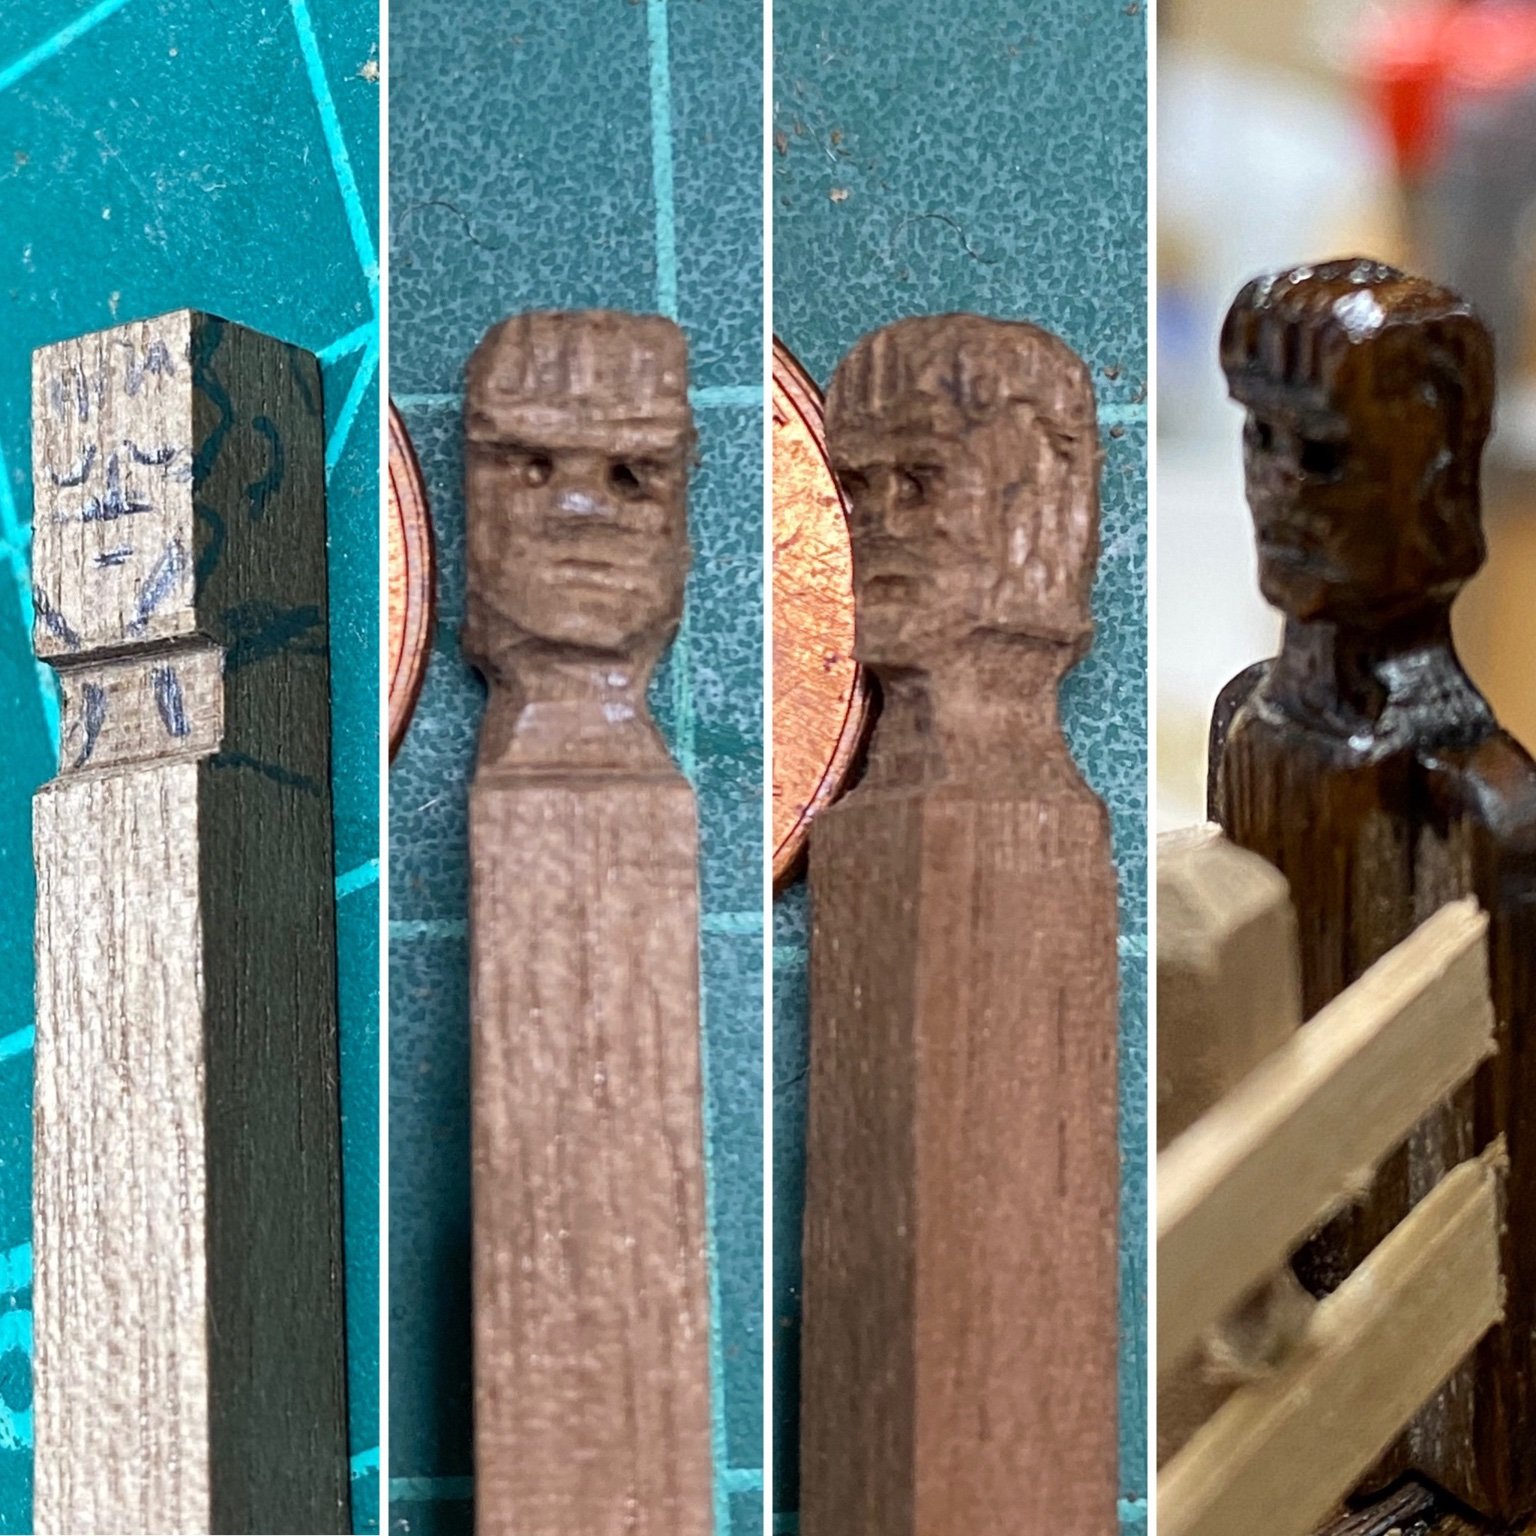
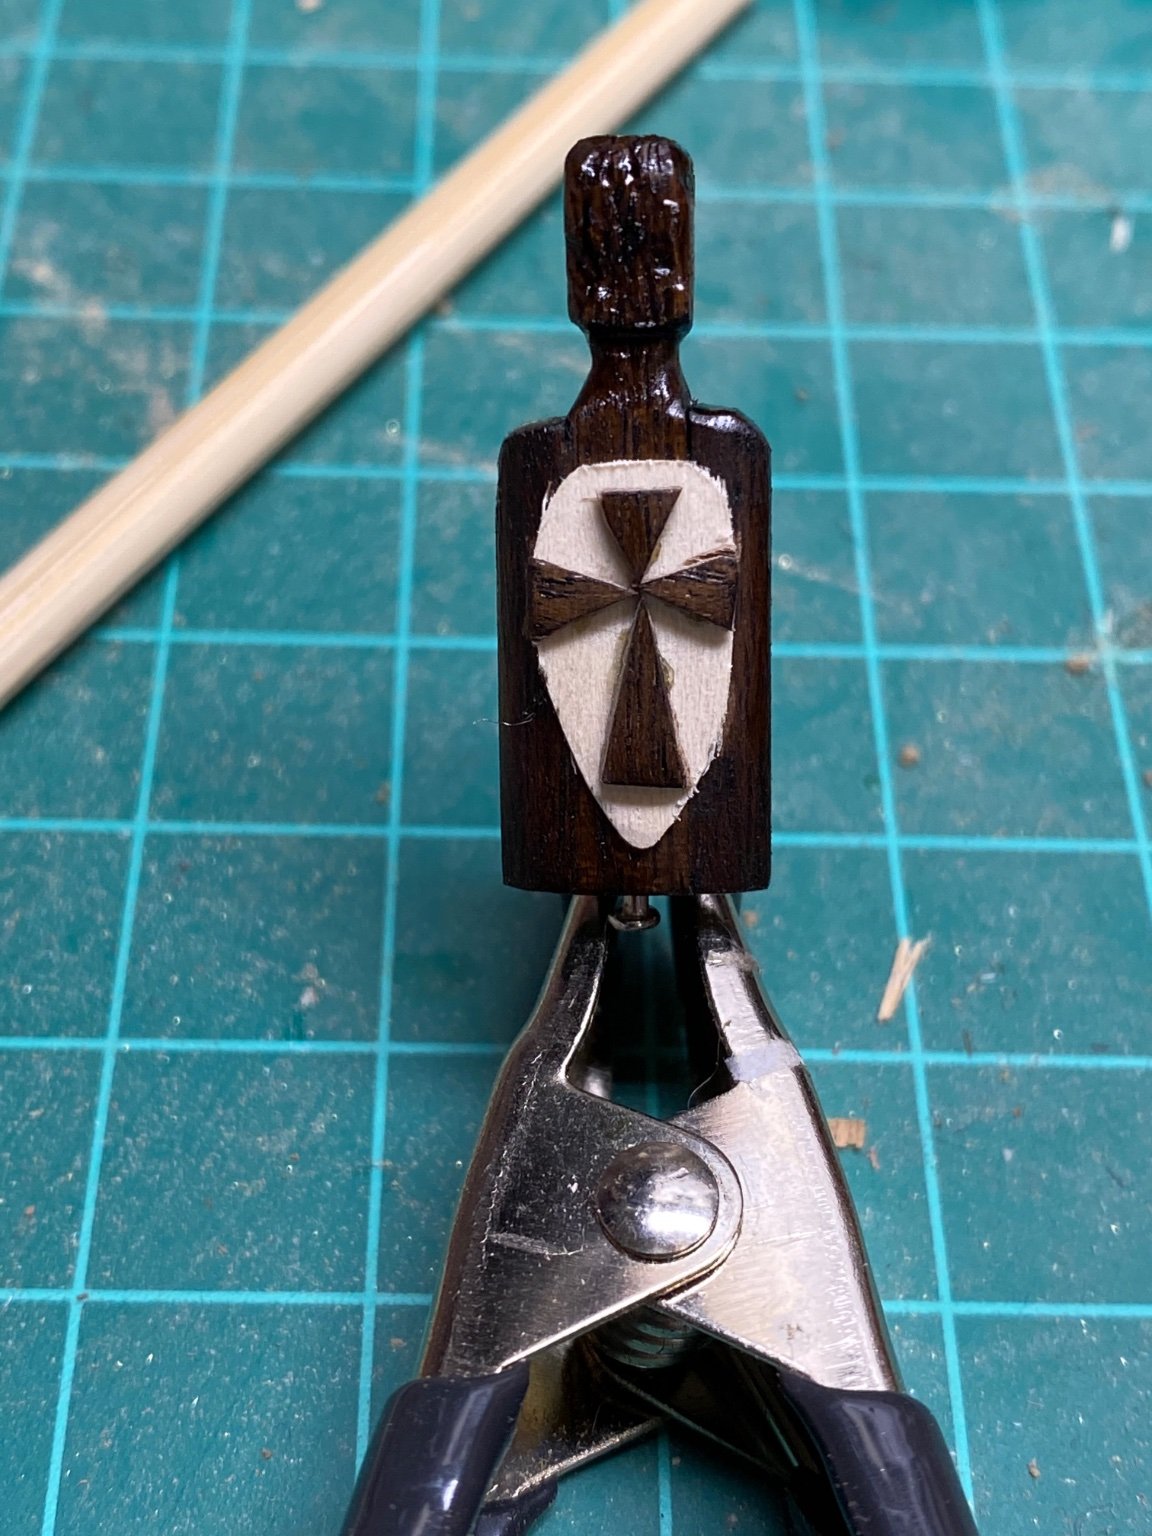
I decided to have a little bit of fun and embellished the forward-most bow post


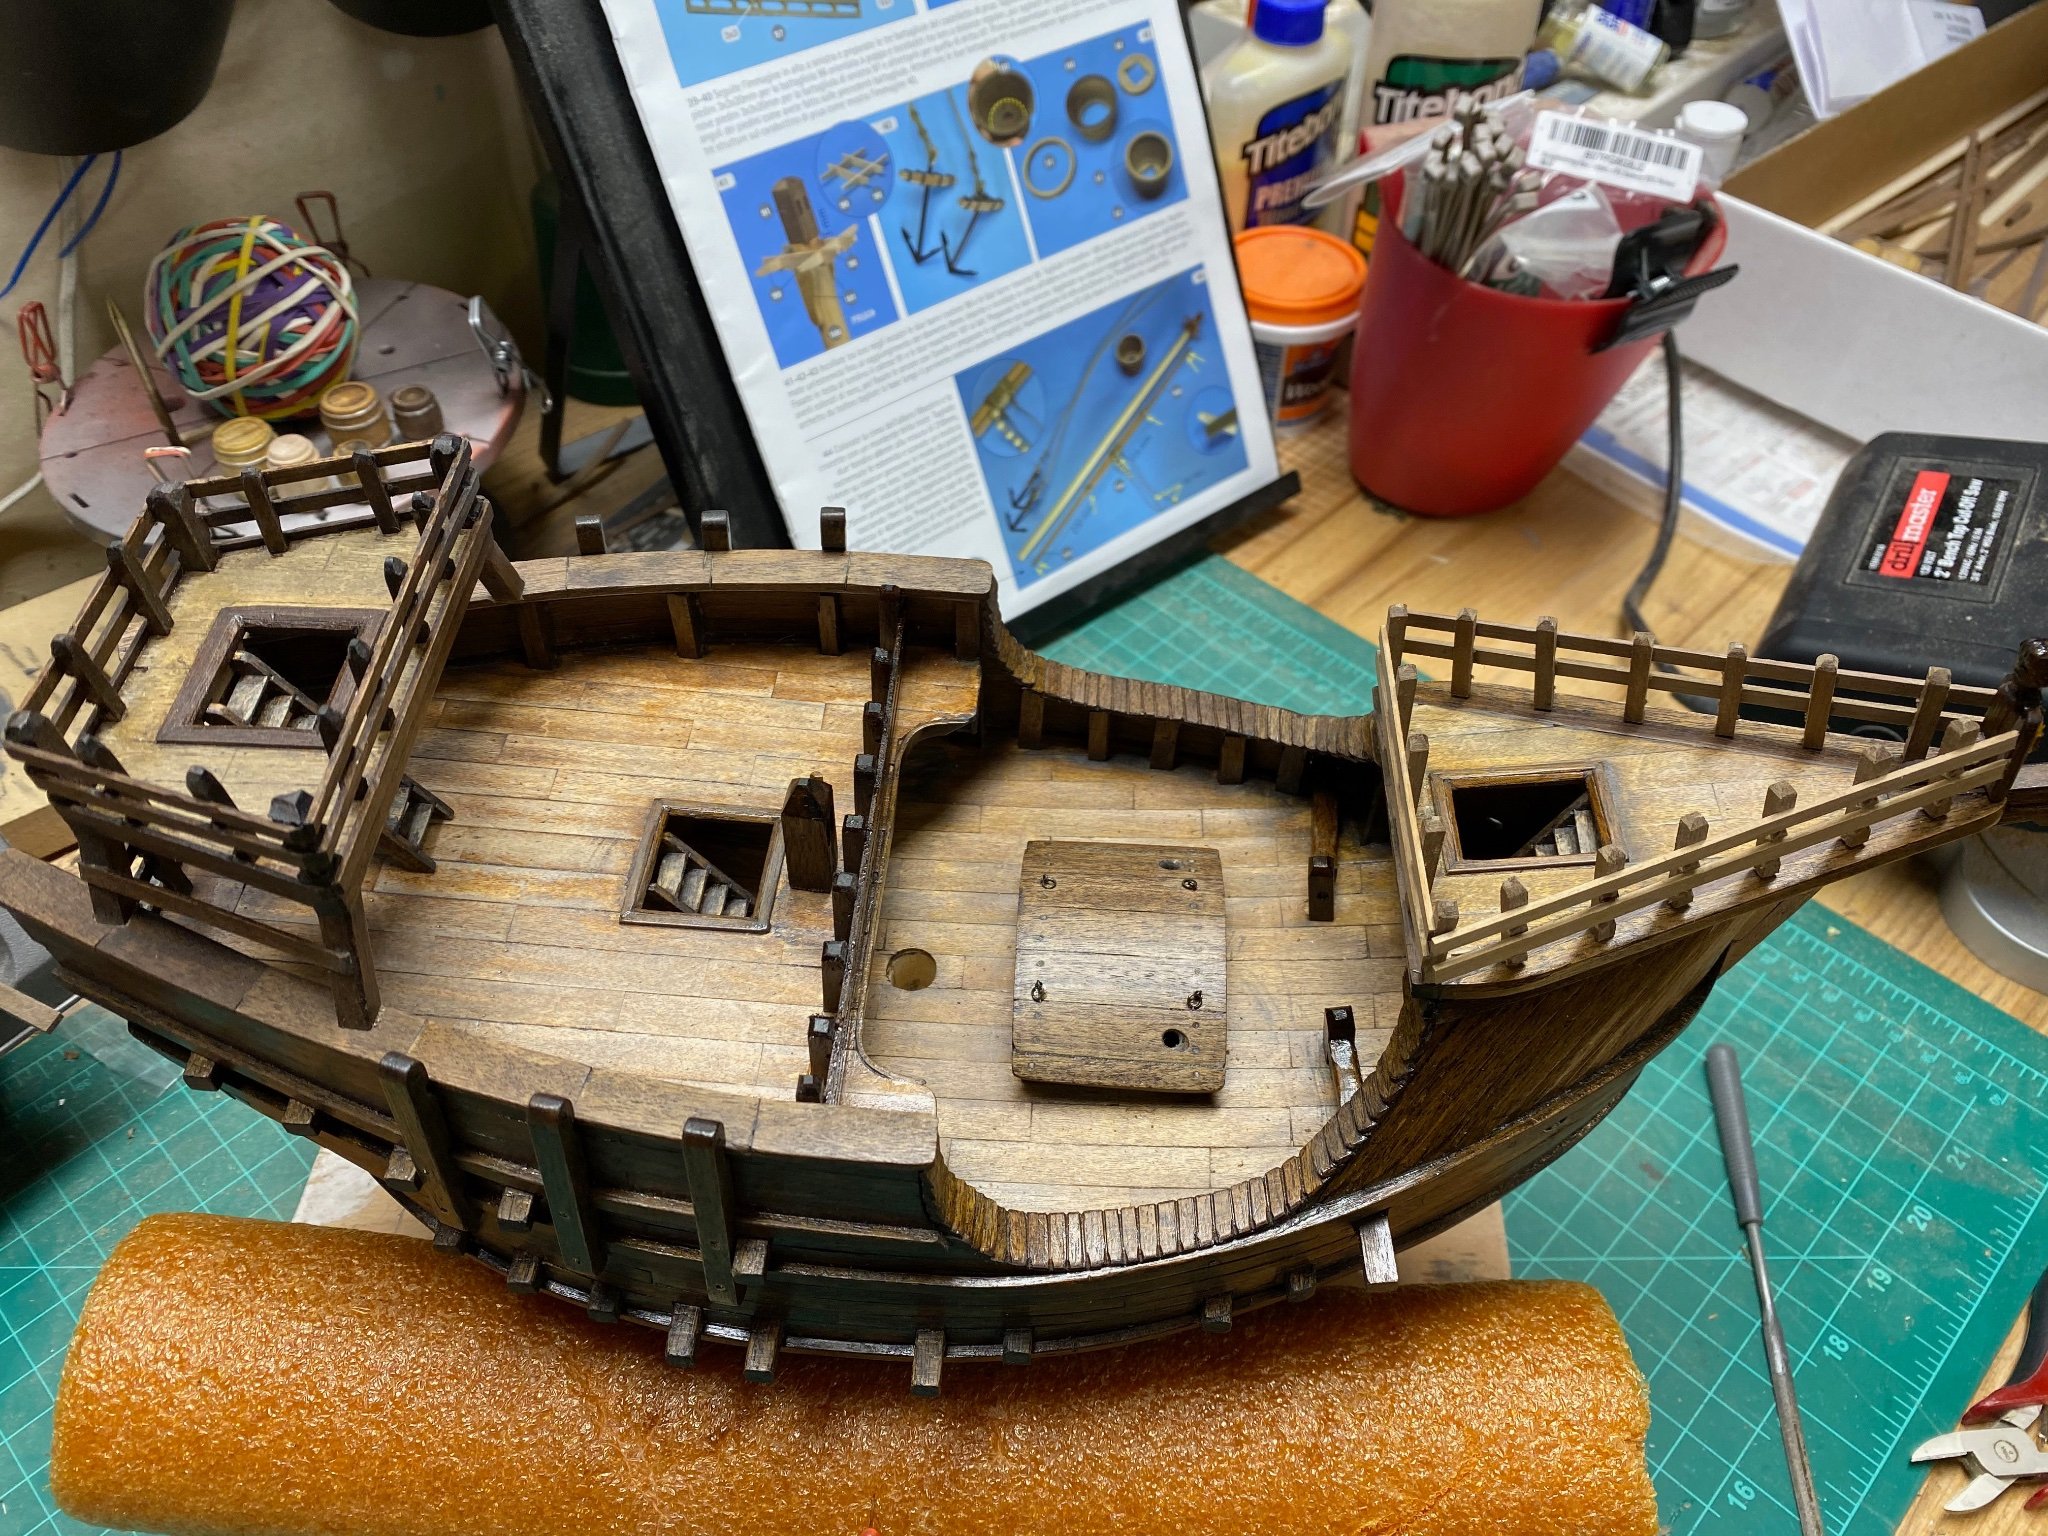
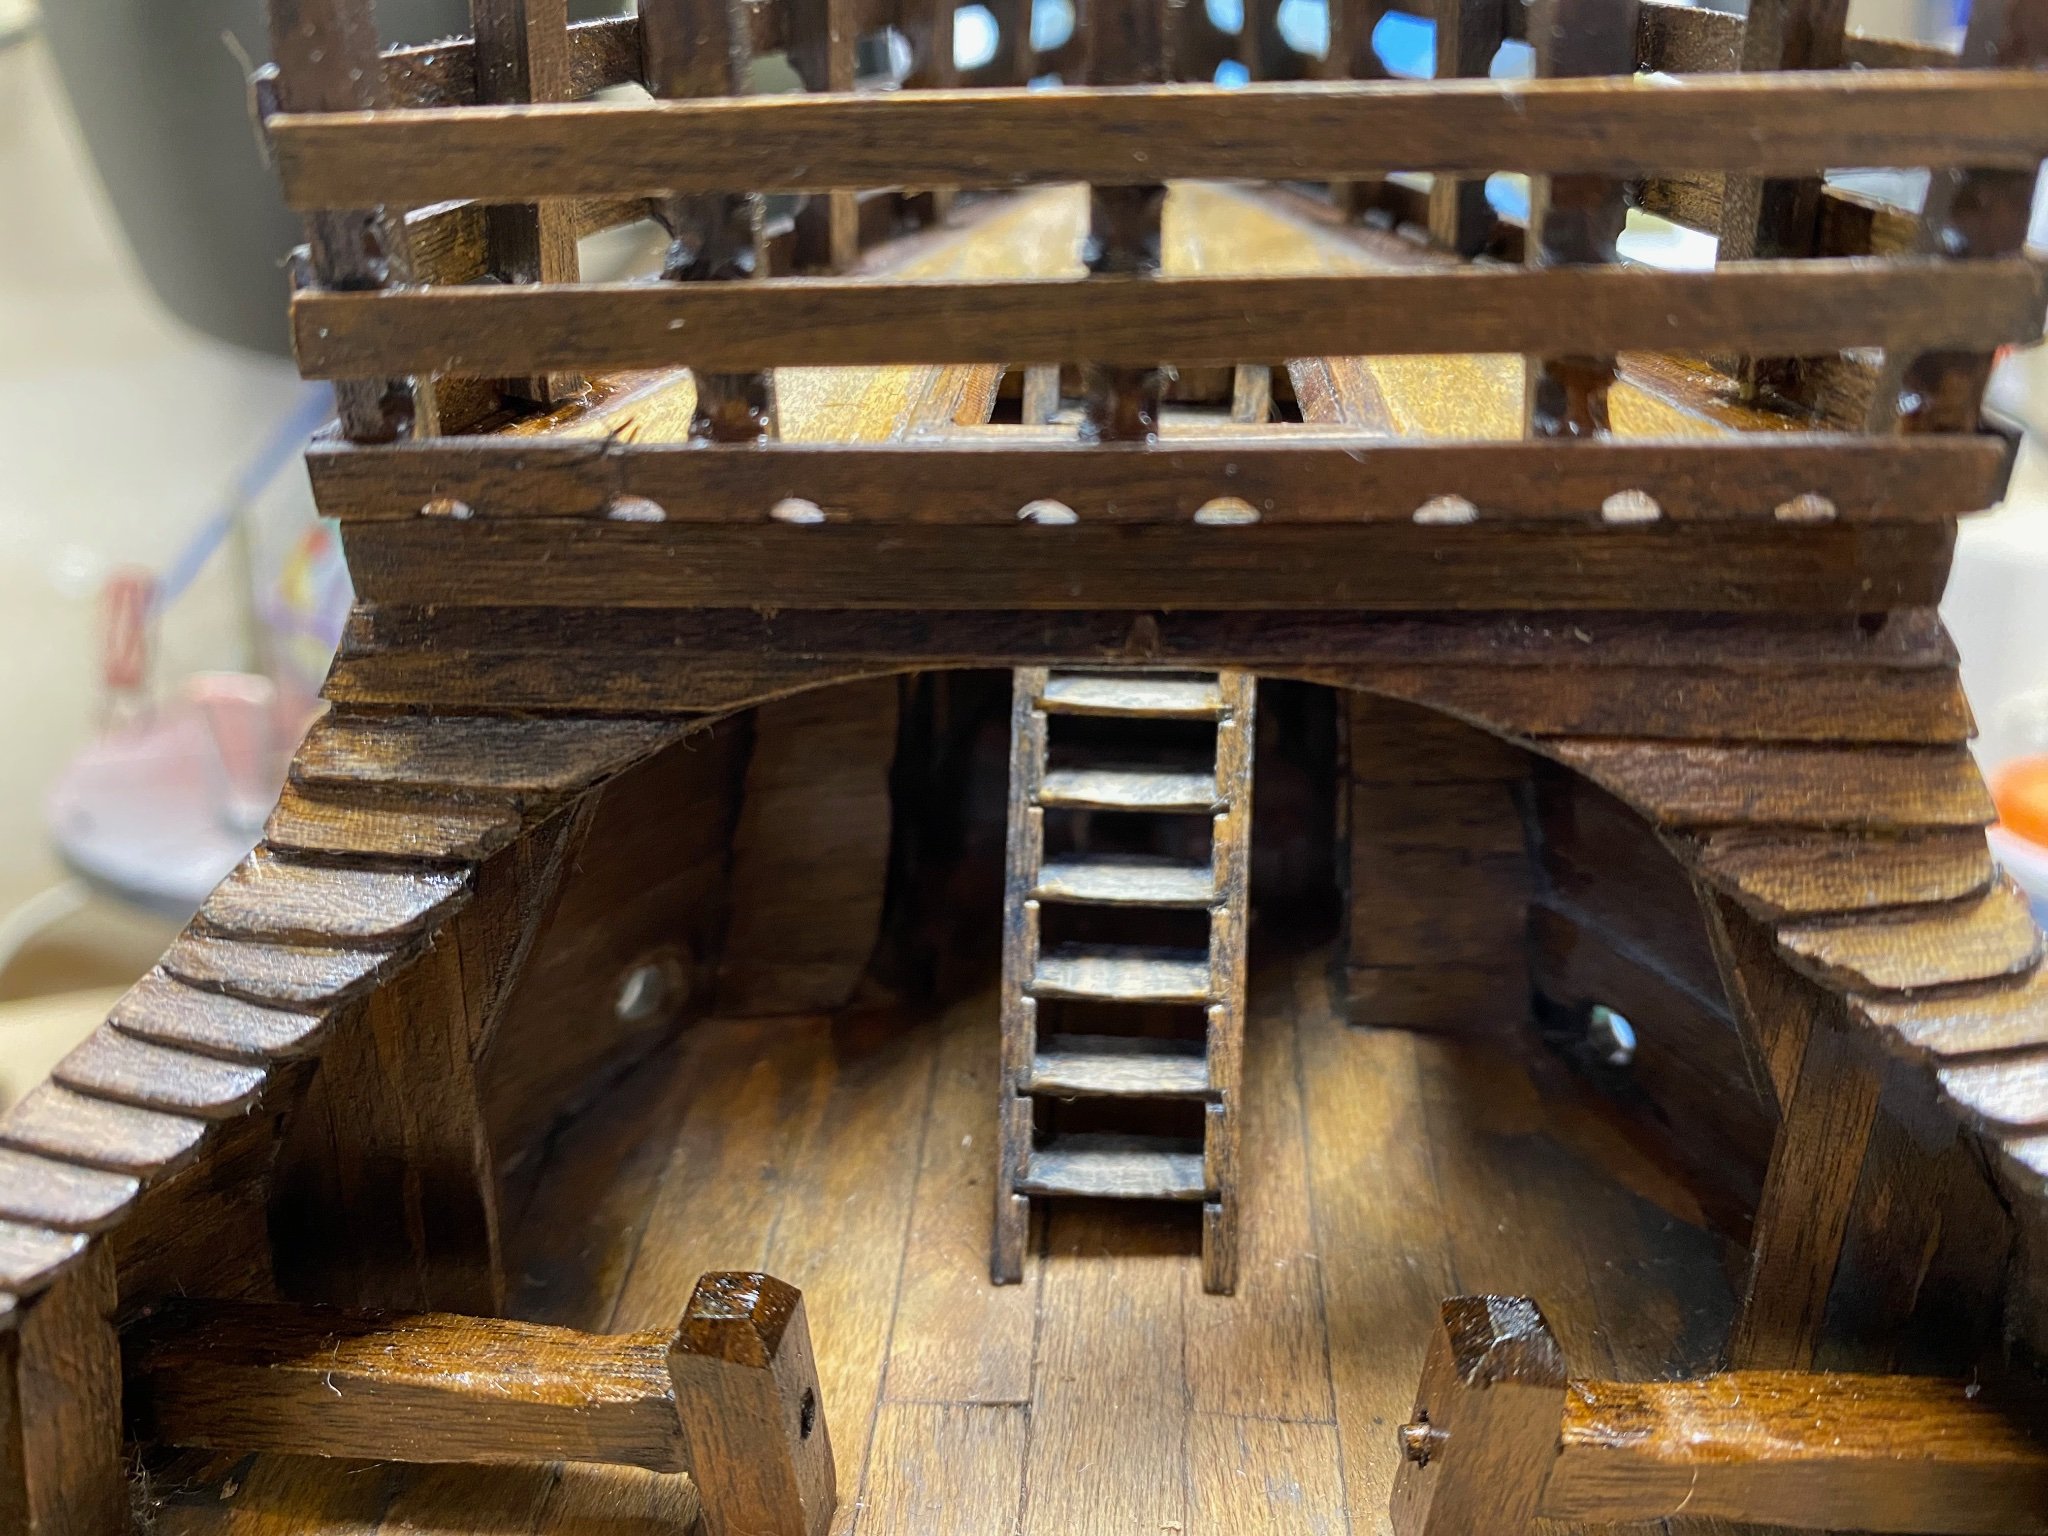
Interior pictures showing my revised anchor braces and ladder orientations from the Amati plans.

-
What about filing it manually first to get the desired profile and then chucking it in the Dremel to clean it up with a red scotchbrite pad?
- Moab, mtaylor and Keith Black
-
3
-
The challenge with our model ships is scale "brightness". High polish and shine from a distance is not the same as when viewed full scale... distance dulls it to a certain extent... even on Capt. Bligh's Bounty. Even something as large as 1:10 tends to look fake if it is too shiny. To me, a certain level of dinge adds realism.
-
Welcome to MSW!
- Keith Black, mtaylor and Robp1025
-
3
-
Aside from toys... my first tool set was a hand-me-down X-acto carving set and Montgomery Ward soldering iron when I was 9 or 10yrs old. At that time I was splitting my hobby time between my model trains and plastic models. I think I pretty much stuck to the standard #2 blade but I thought it was really cool to have the other stuff that came with it. I gave the wooden case with the remaining blades and handle to my daughter when she was about the same age. She actually took them with her to art school, used the blades I never used, and keeps sharpening them (she uses them to carve wood blocks for prints).
- mtaylor, Canute and FlyingFish
-
3
-
Are you building this as a static model rather than R/C?
-
-
1 hour ago, Keithbrad80 said:
Just the opposite actually but your on the right track! Ca glue requires a porous surface to bond to and PVA can be stick to pretty much anything if you let it dry long enough.
Bradley
I think you are confused which one is which. Build a plastic model with PVA and you have a pile of plastic parts if you look at it wrong. Nothing likes bonding non-porous materials, CA just hates it significantly less than PVA... particularly when you don't sand the joint to provide it something to grab onto mechanically.
- Balclutha75, Canute, Gregory and 1 other
-
4
-
Based on my usage of CA the bond strength isn't the big concern when working with wood; it is the strength of the substrates. The most common failure I've had using CA to bond wood is the wood itself parting at the limits of the adhesive spread due to tensile and cleavage stresses being greater than that of the wood fibers. Depending on the size of the pieces being bonded its non-plastic bond can be problematic (smaller, more dense pieces tend to work best) due to shrinking and swelling, particularly dissimilar woods.
When working on natural or stained wood models I use CA only when absolutely necessary as a tack weld while the wood glue is curing. It just isn't worth the heartache or physical pain that comes with errors and clumsy technique. When the model is to be painted or fiberglassed I have done as Turangi spoke of and even done some very unnatural things with wood in a pinch.
I wouldn't go so far as calling it Devil's spittle, but it is remarkable at propagating unforeseen (and sometimes impossible to mitigate) problems. CA is like any other tool in the shed. It has things its meant for and does them very well; outside of that you are rolling the dice and will often get away with it. When it doesn't work it really doesn't work and we only have ourselves to blame.
- mtaylor, Canute and Keithbrad80
-
3
-
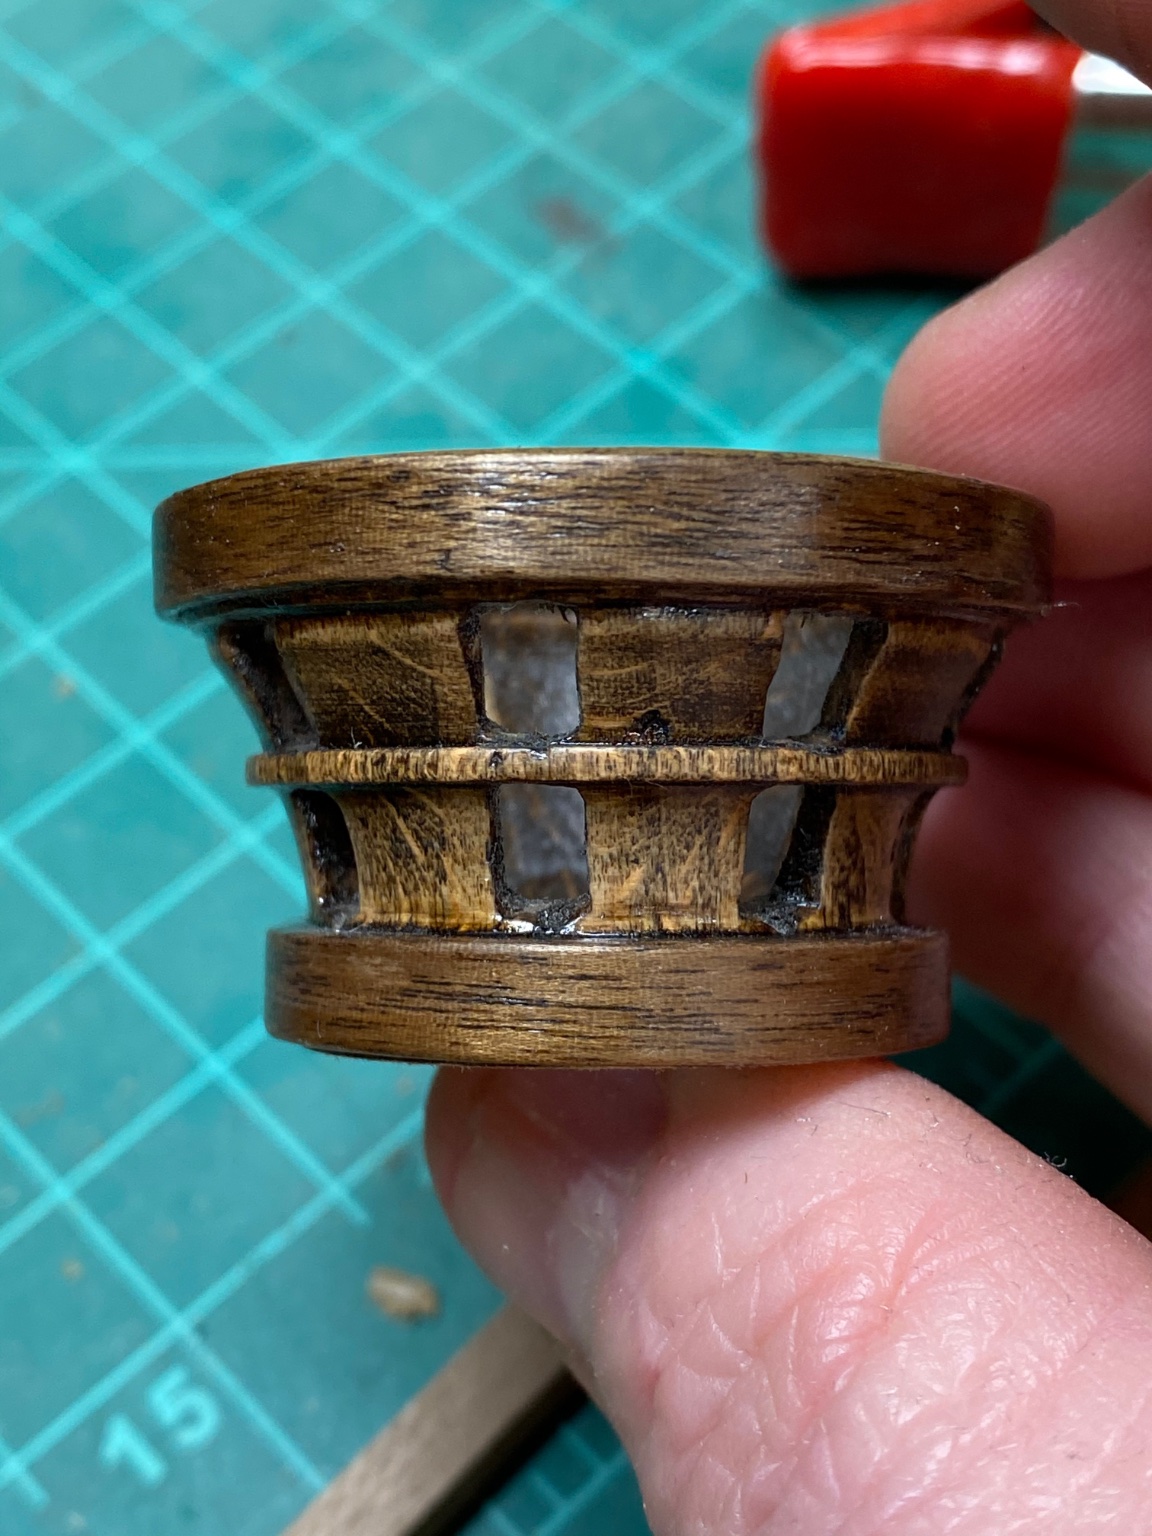
Thanks Rodolfo, I'm happy with how it turned out.
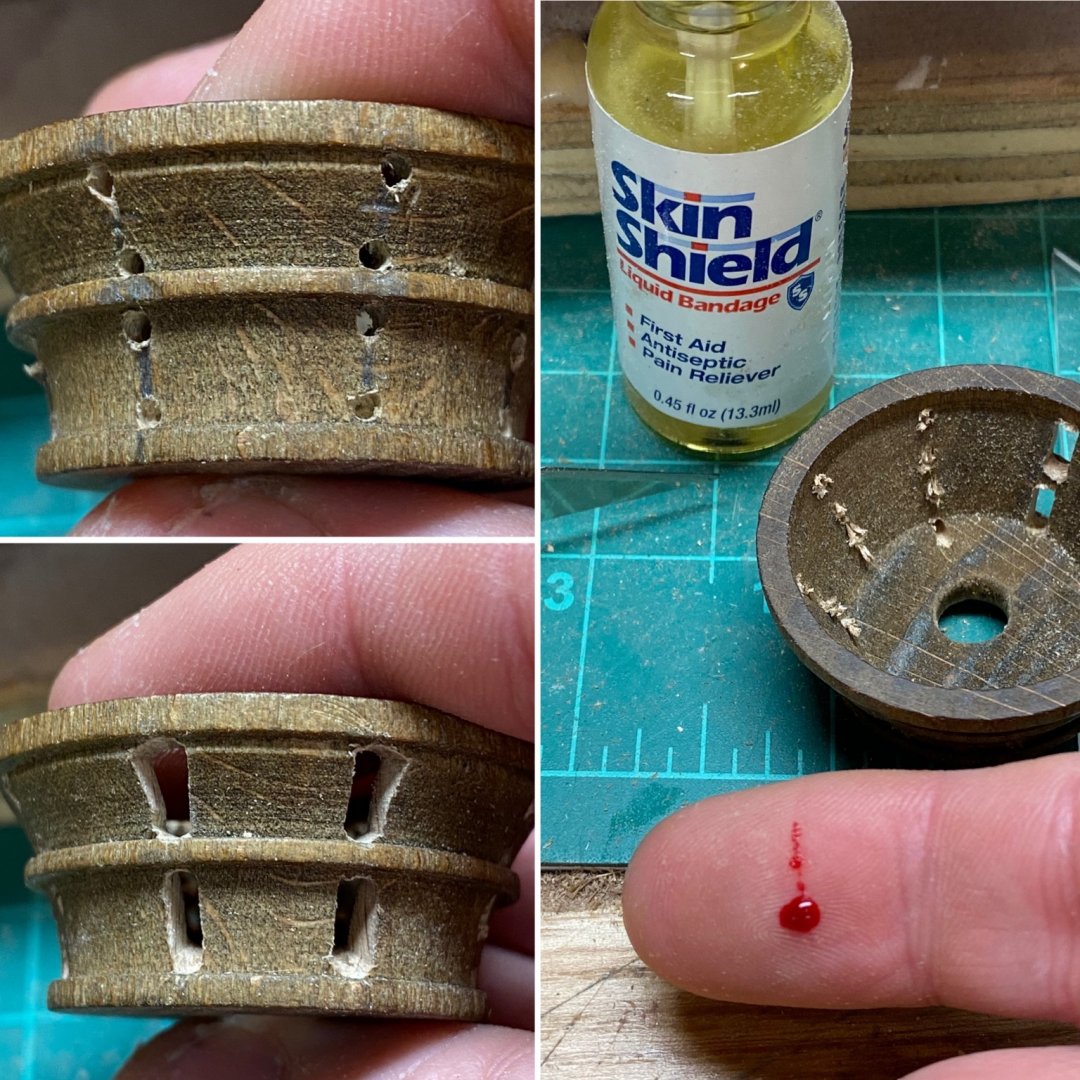
Here's the finished "basket". I decided to trim the MDF top and bottom pieces with spare wood strip rather than leaving it exposed. After cutting myself using a hobby knife I used a Dremel to hog out between the holes and then followed with some files to clean it up. The MDF forms seemed disproportionally thick so I sanded them down once I had the trim affixed.

- J11, GrandpaPhil, Balclutha75 and 2 others
-
5
-
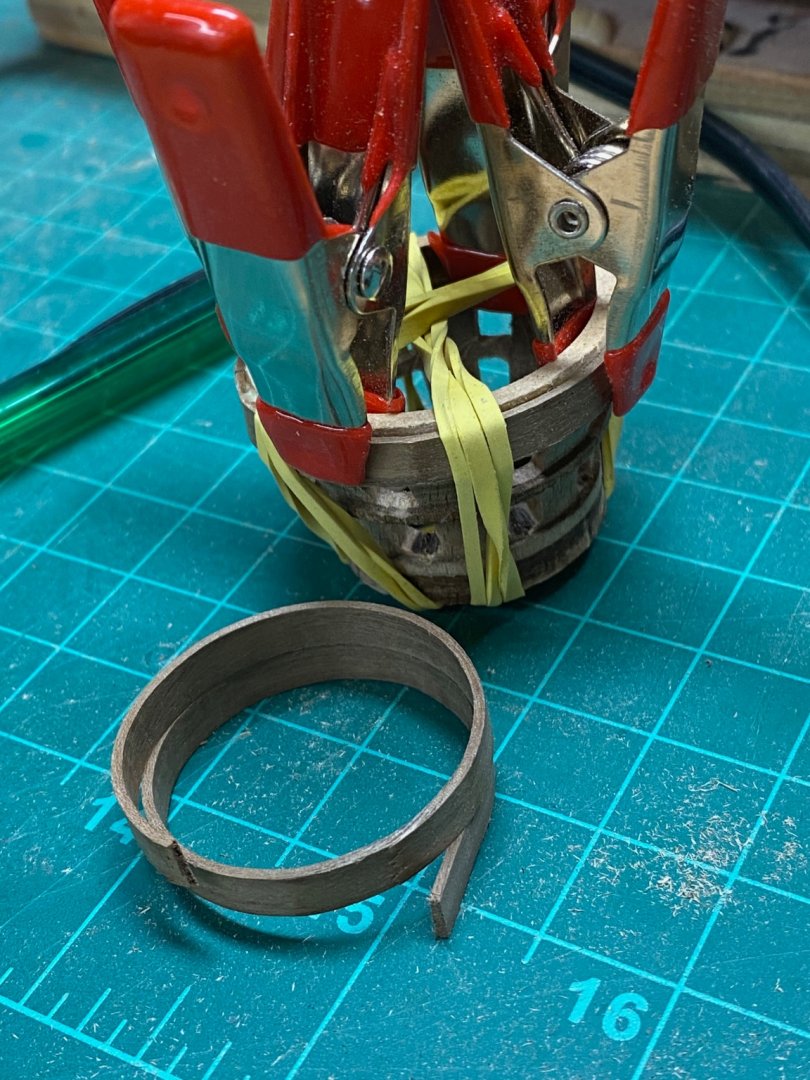
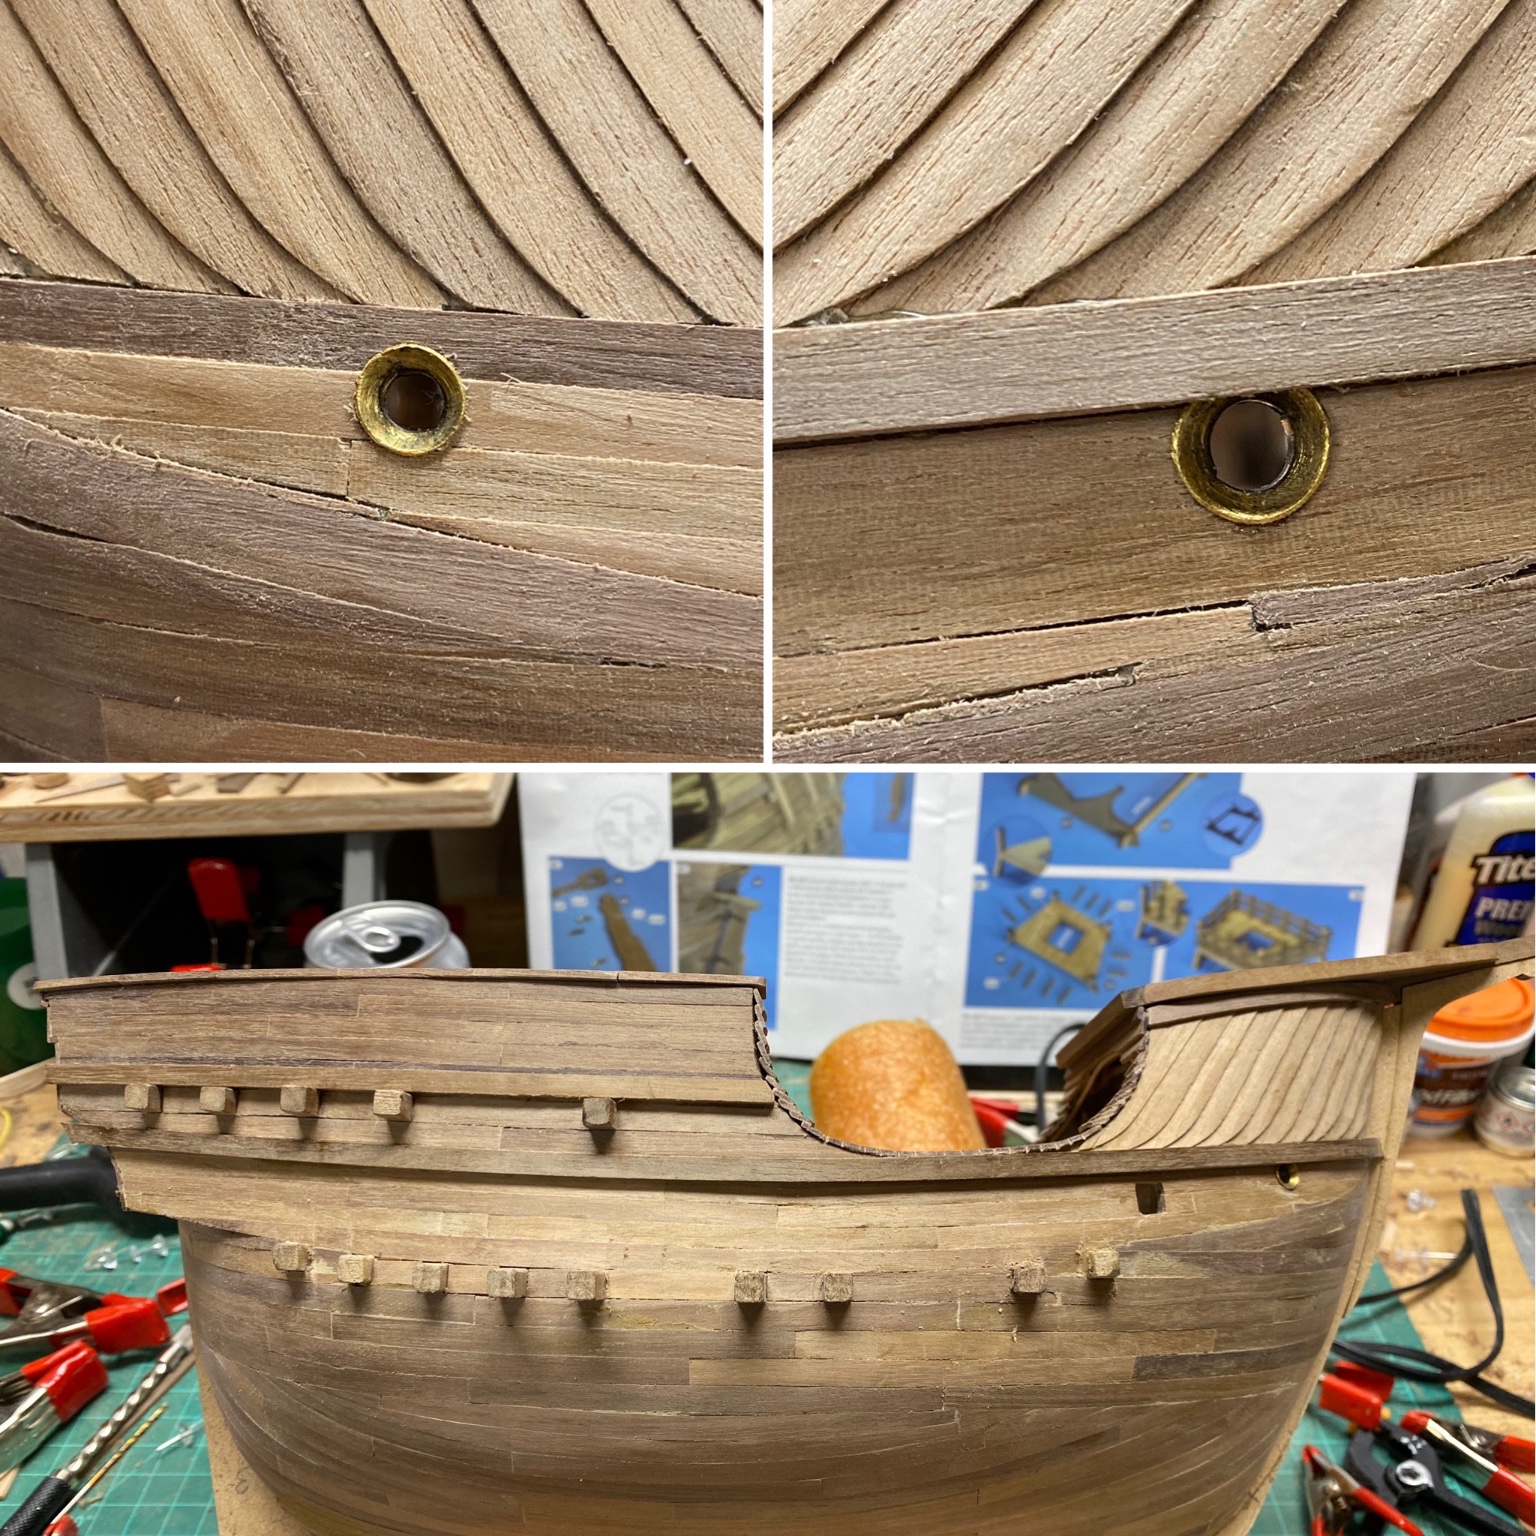
Decided to make hawses using some brass tube I had in the bin from other projects. I used a brake line flaring tool to get the necessary flare and a reamer to get them nearly flush. I tried some liver of sulphur to blacken them... it didn't work. I suspect I didn't clean them well enough, but what is done is done for now (I'll have to practice using more before I use it on the rudder and bow decoration). Once I figure out what the patina looks like on the aforementioned pieces I will paint as close as possible to match. If the wales didn't overlap I'd hold off and get it right but I'd like to keep some momentum.

I've also started a little side project of turning the supplied basket into something more representative. In the process the inevitable blood sacrifice finally happened... its not a building project of mine without one. Note to self: keep track of when you're cutting with the grain. Plenty of work to go still.
-
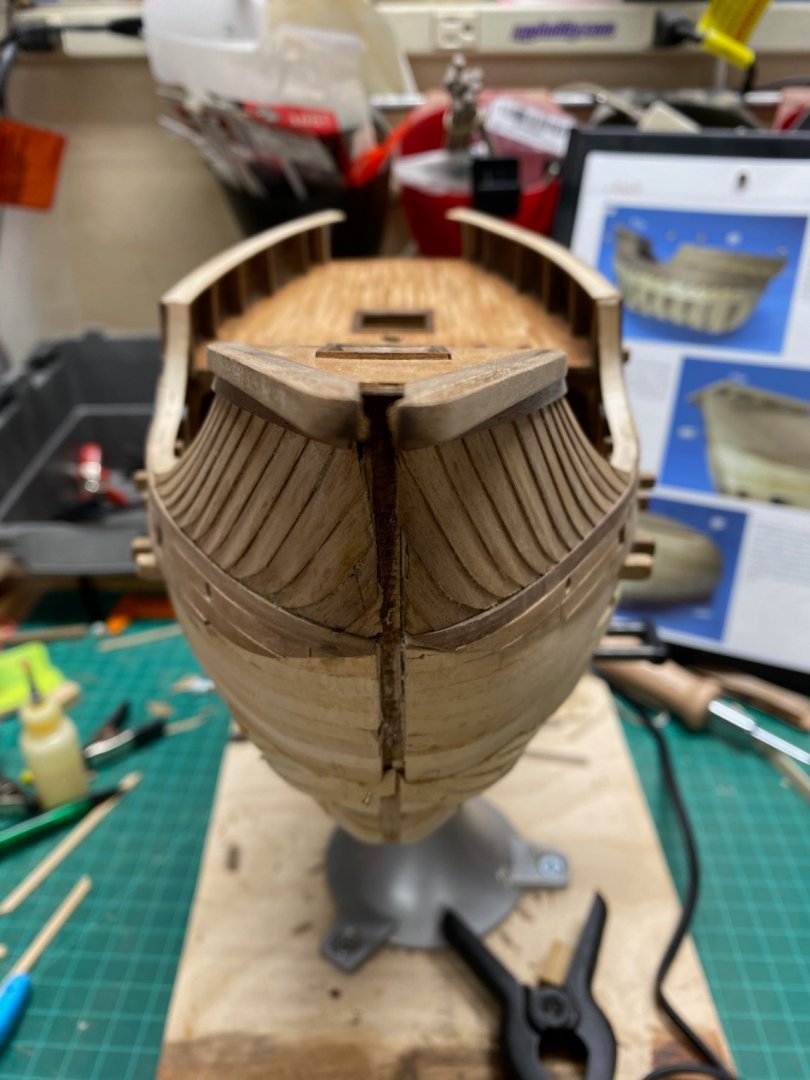
Finished second planking! I still have some sanding/scraping to do, but the big hurdle before rigging is complete. The pictures definitely make it look rougher than it is. The gaps around the lower beams are aggravating as heck and certainly didn't seem as noticeable at the time.
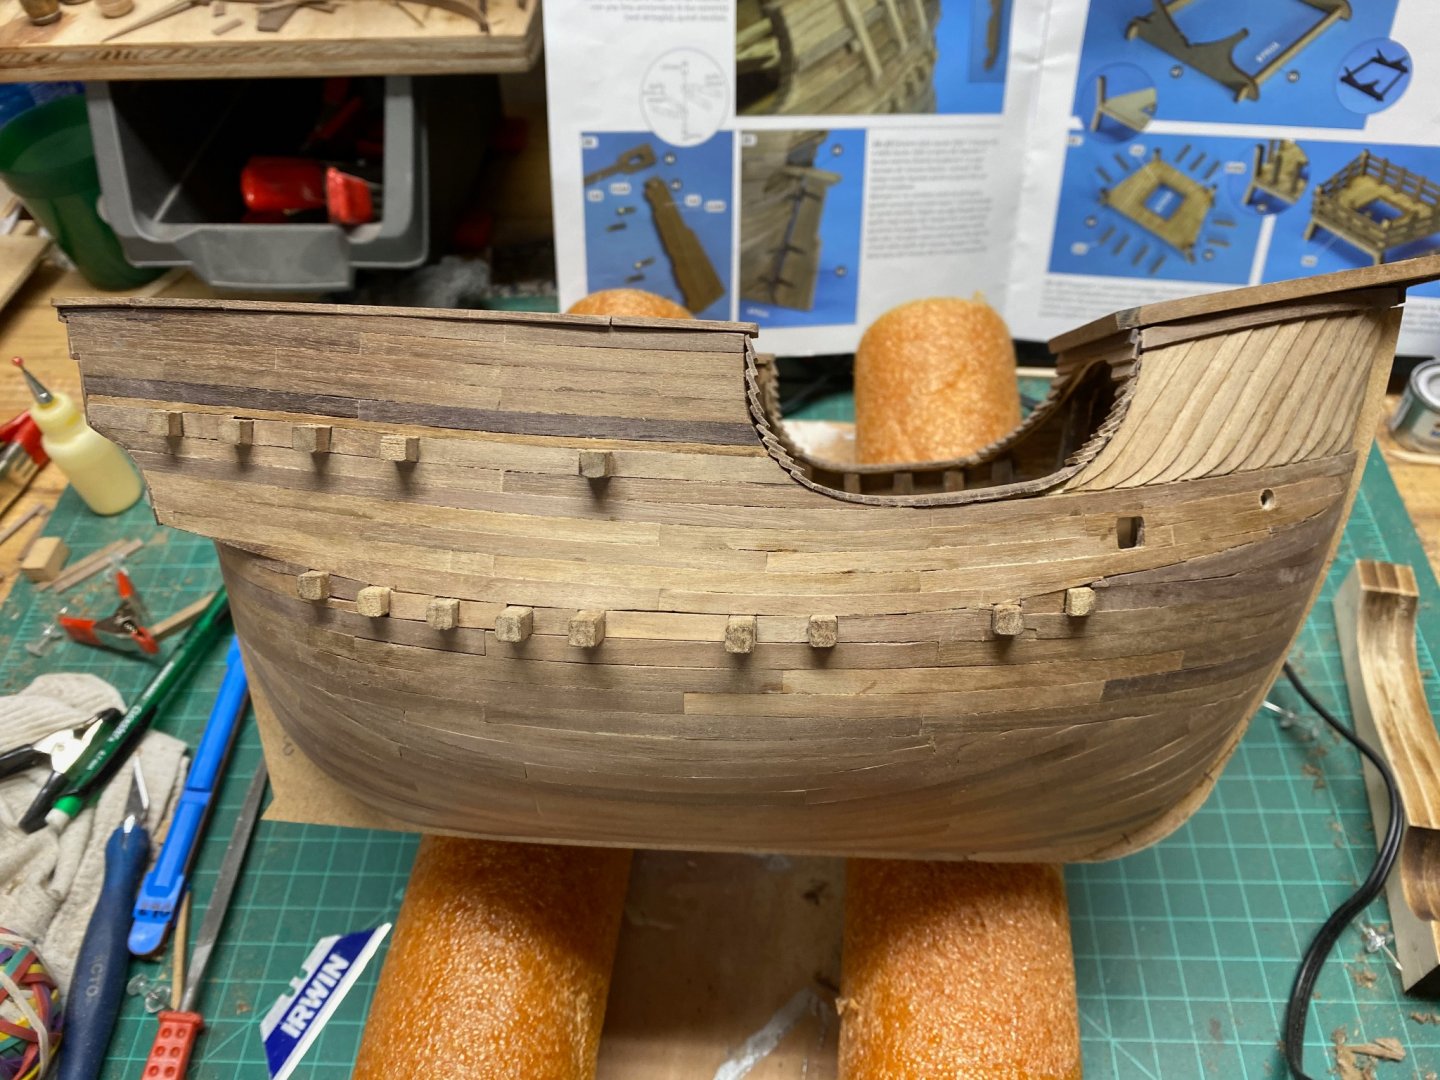
Hindsight is 20/20... I wish I would have did a test fit of the keel before starting the second planking to ensure the profile was as it should be. Luckily I didn't pitch the MDF pieces the keel was cut from yet so I cut a filler from the same spot to bring it out to look right.
- Rodolfo Bigoni, Duanelaker, Baker and 3 others
-
6
-
-
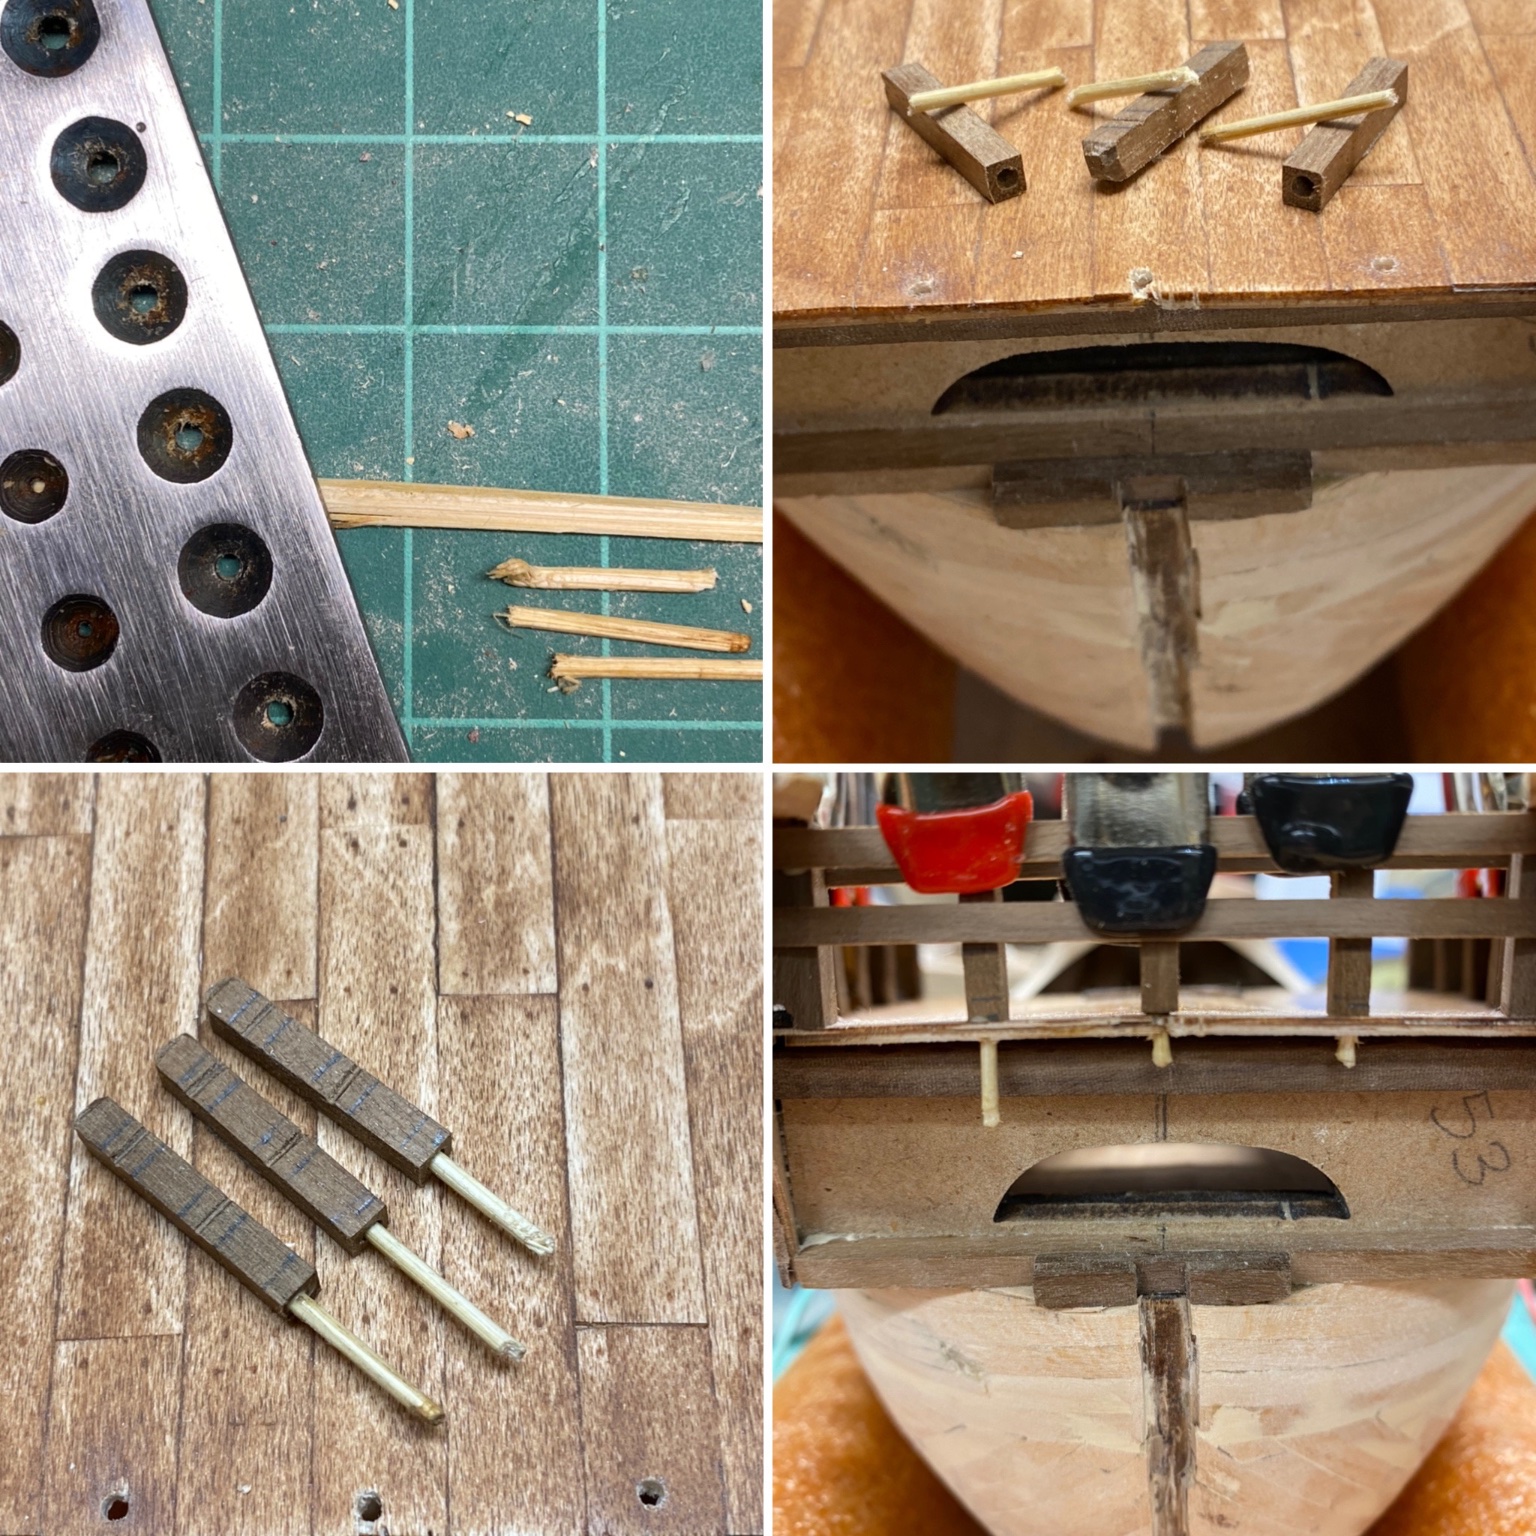
My wife bought me a draw plate (MicroMark since the Byrnes one wasn't available when she was looking to buy it) for the holidays and I found reason to use it today. I could have just used toothpicks but I set out to pick up new skills and techniques with this build, so why not? It worked out fairly well; I will do the same for the rest of the rail posts.

- Louie da fly, Duanelaker, Baker and 1 other
-
4
-
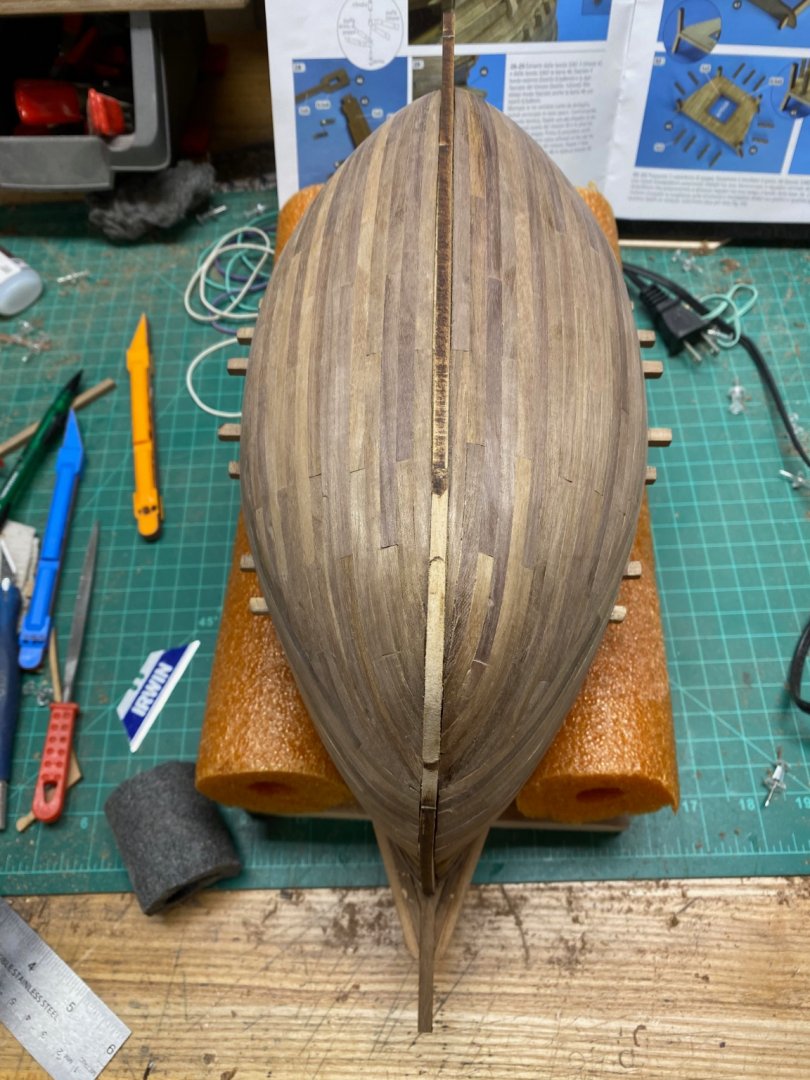
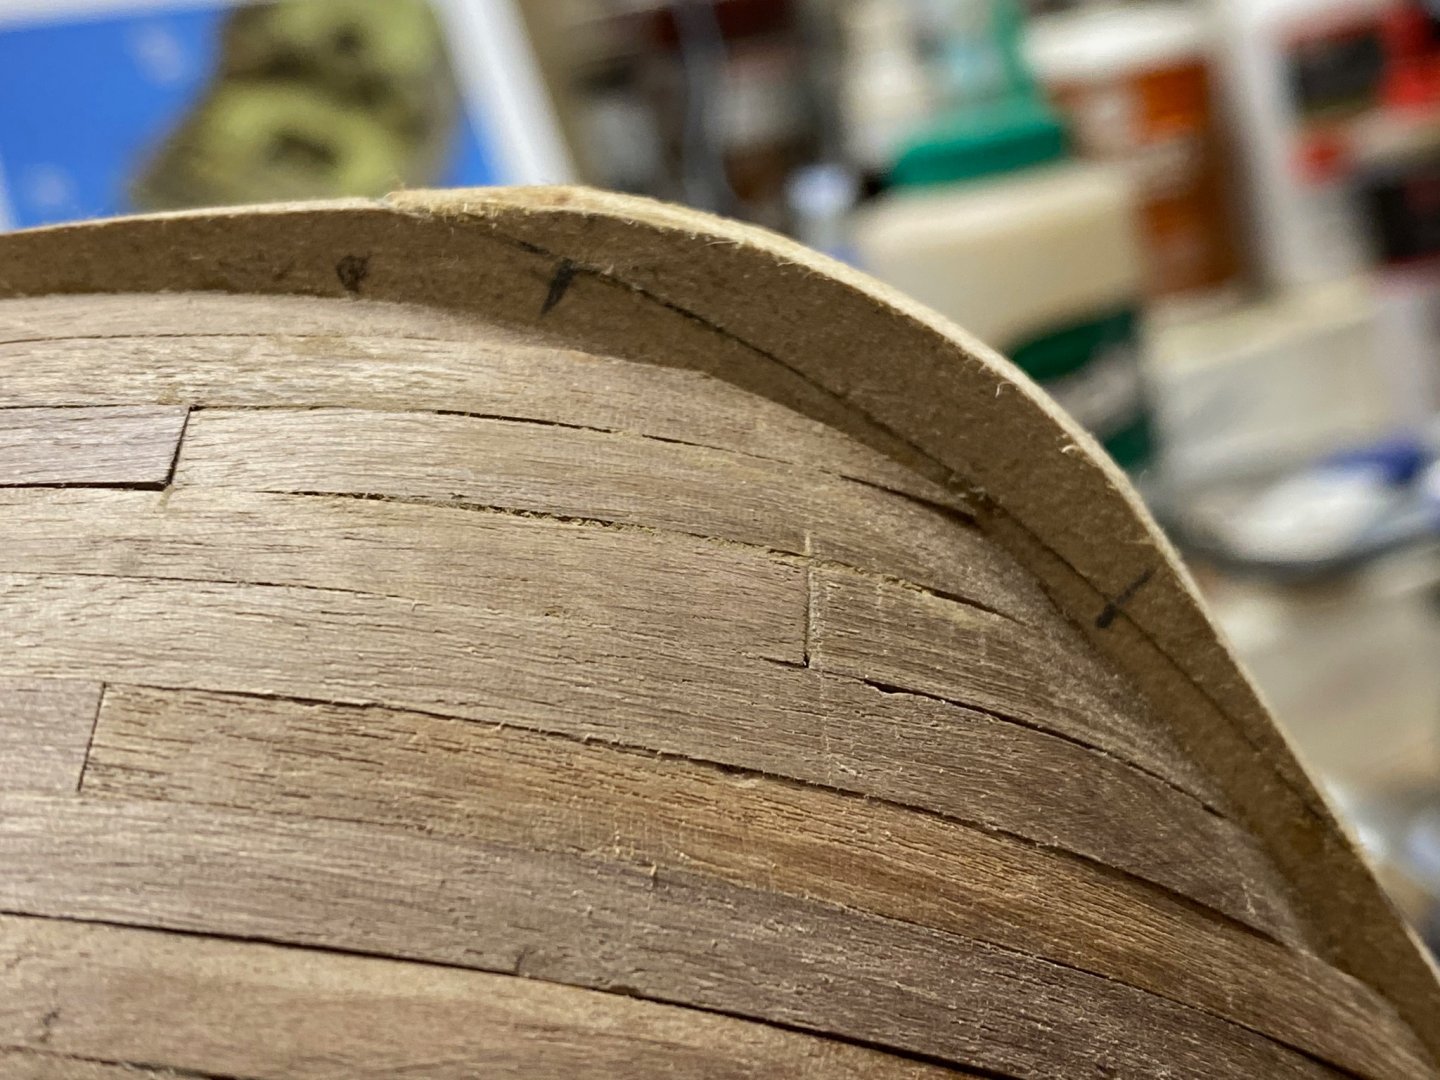
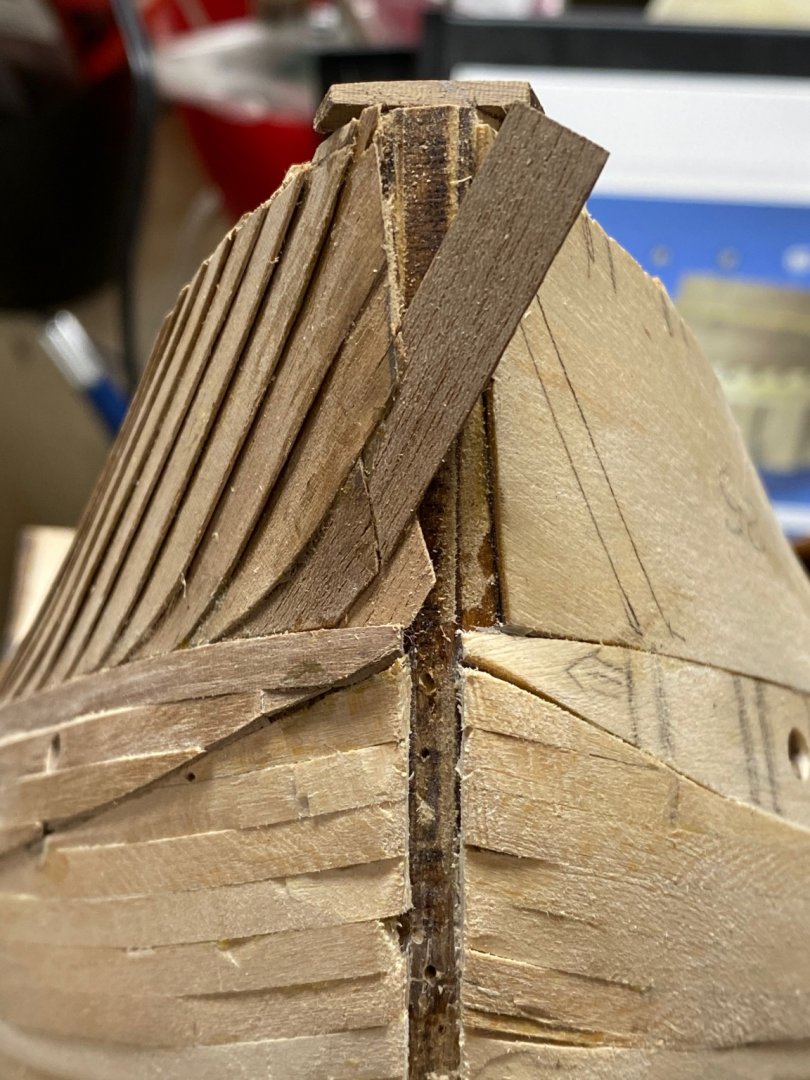
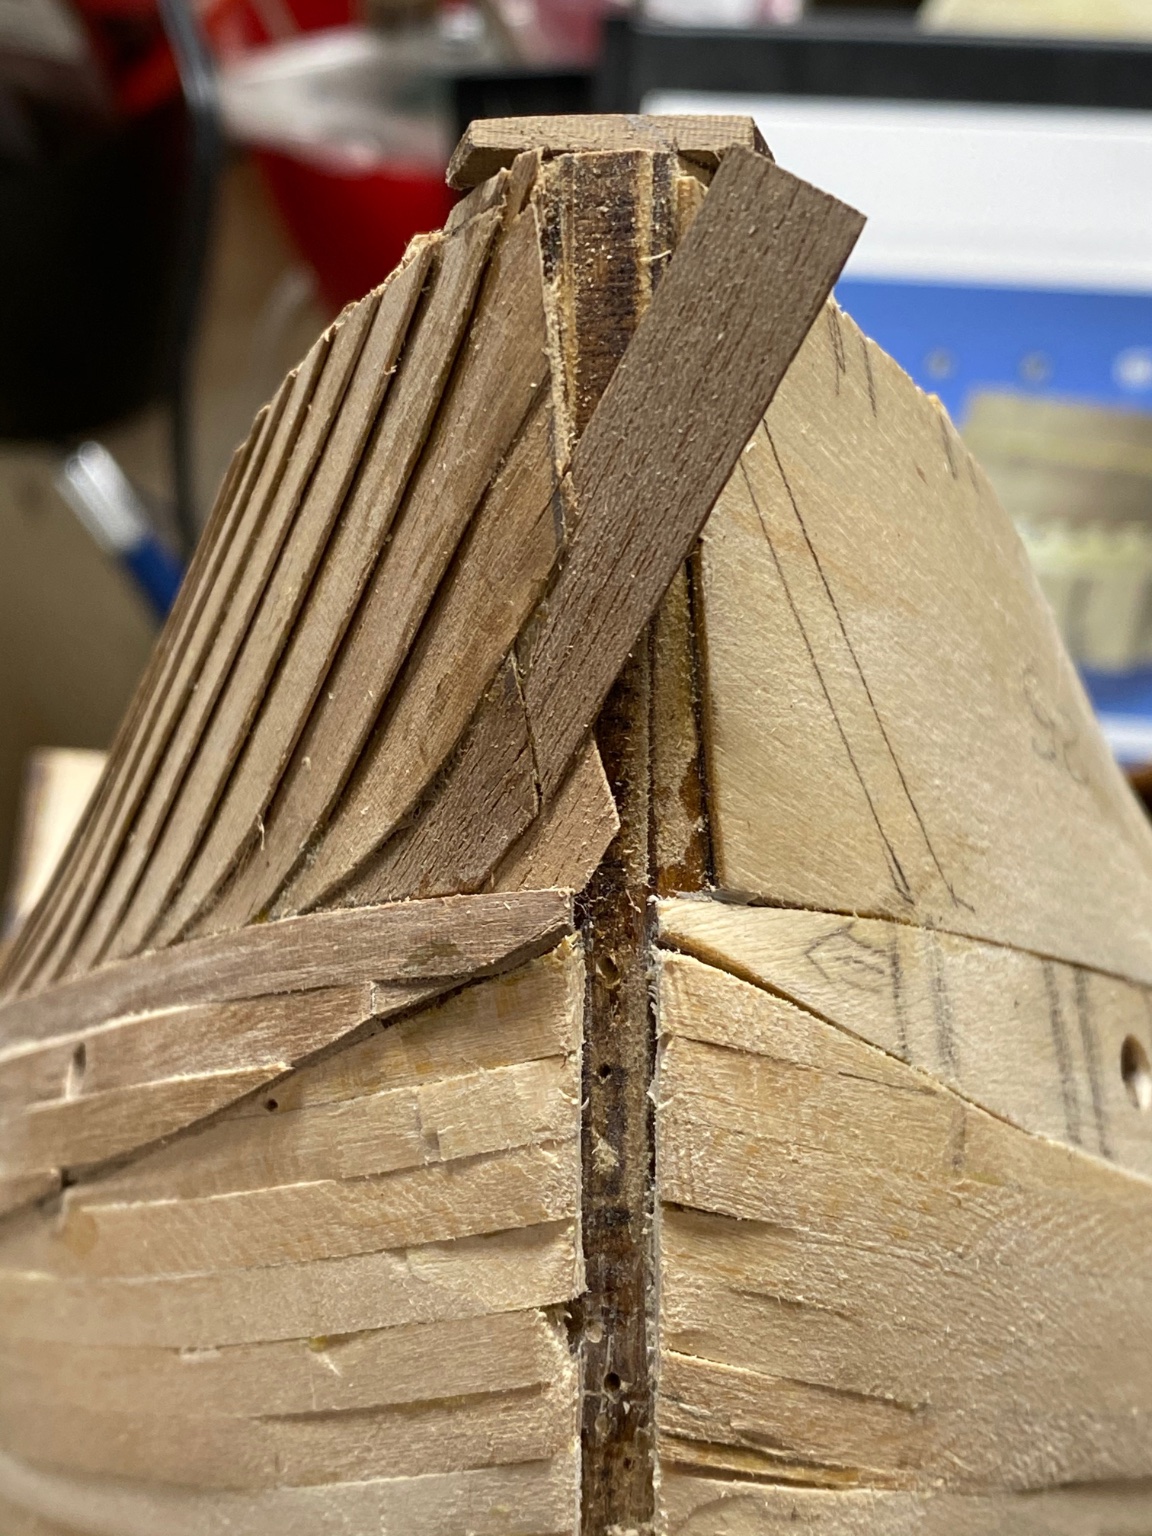
Finished up the bow until later in the build when the details are fitted. In the process I realized I trimmed one of the clinker slats shy of the keel so I had to mend an extension on. It isn't the cleanest so I may sand it down and apply a thinned down piece as a veneer when I need a distraction while final planking.
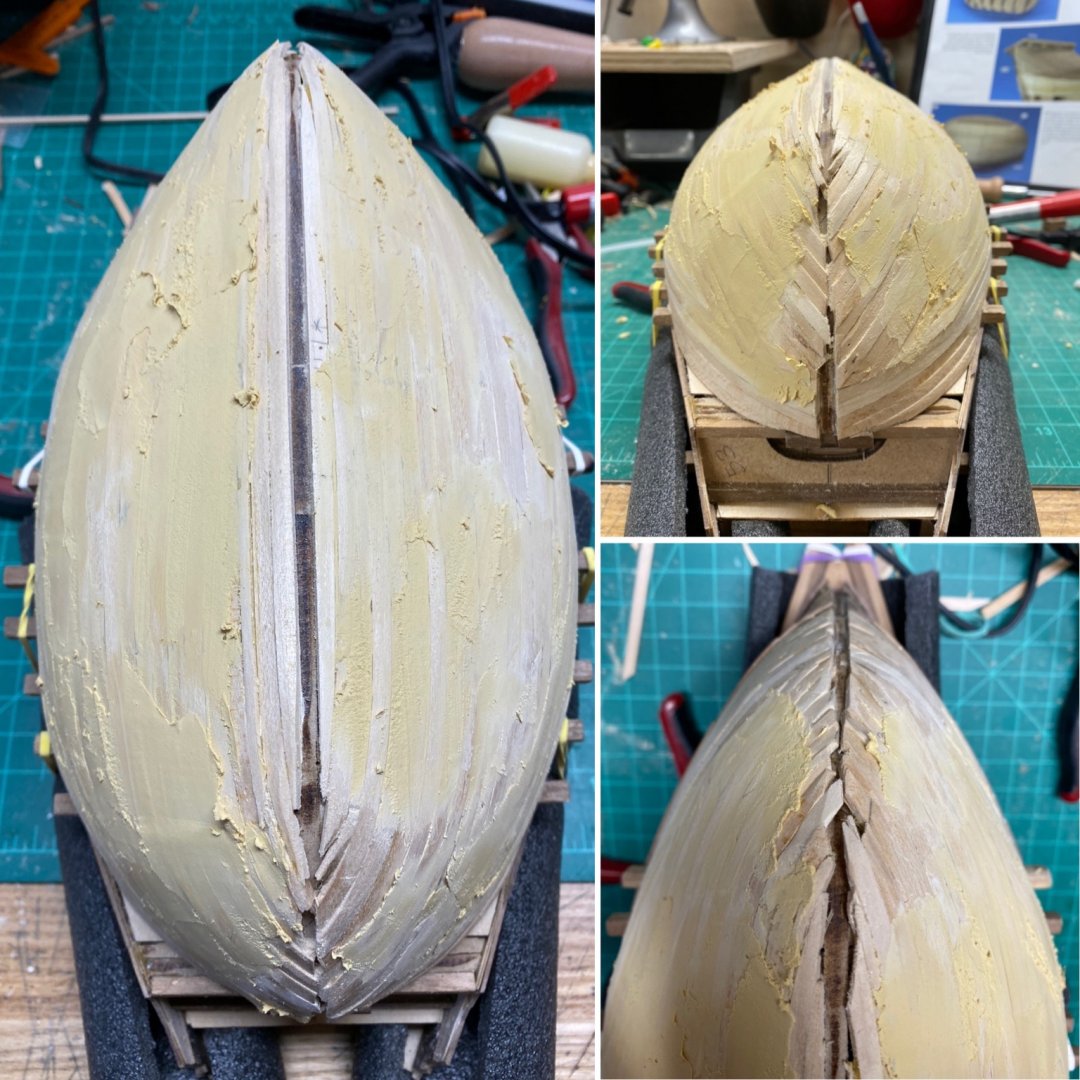
First planking is complete and now I'm working to fair out the lands and valleys. In hindsight, I would have thinned it down ever so slightly to permit more of a skim coat and added some pigment to make it easier to see. Once the sanding dust starts flying, it requires frequent wipes to see progress since the filler material kicks up a much finer texture and matches the basswood. It's pretty sloppy here, but it did clean up well (I thought I took a pic of it with the keel seat cut & cleared). There was one spot that I ended up having to add some basswood scraps to level out but everything else is pretty close. After a few more rounds of sanding I should have it so nearly all of the filler is removed, particularly in the tighter radiuses at the bow and stern.
- Lapinas, GrandpaPhil and Louie da fly
-
3


Questions Before I Buy My First Ship
in New member Introductions
Posted
I doubt you'll have reliable internet service (blessing and a curse), so you may want to invest in a some good texts as well. The NRG has a great collection and there is a thread on here of recommended books as well. Personally, I have found Historic Model Ship by Wolfram Zu Mondfeld as a great reference. Even if some of the info doesn't directly pertain to your model, it is still a good primer on ship modeling and the lexicon.
It will be frustrating at times... don't justify your summer job by lighting it on fire and tossing it off the tower. 😉