BANYAN
-
Posts
5,969 -
Joined
-
Last visited
Content Type
Profiles
Forums
Gallery
Events
Everything posted by BANYAN
-
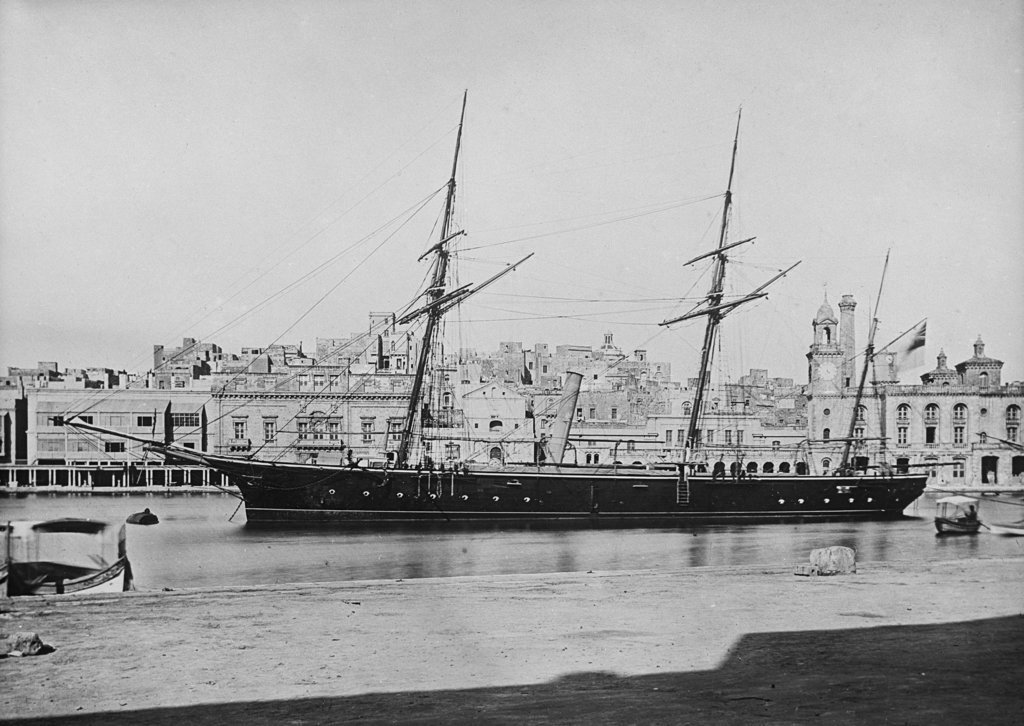
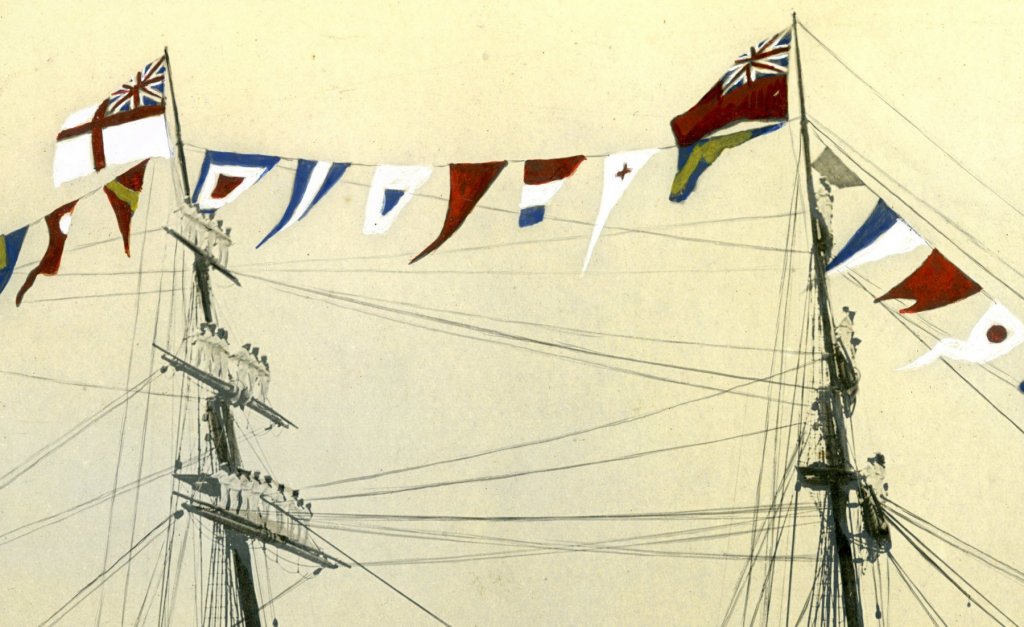
Hi folks. I am just getting to the point of having to draw up and plan the spars and rigging for my HMCSS Victoria build (1855). I was getting, and remain somewhat, very confused while reading the Contract specifications, looking at the lithographs and Photograph of the ship, and the descriptions and tables in contemporary books by Fincham, Kipping and other authoritative authors such as Lees, Marquardt and Underhill. Of note: during this period there was a move towards 'combined' masts (poles); and, Victoria was built to merchant standards but rigged to meet RN quality. The core of the issue: Victoria was designed and built as a three-masted schooner, but Barque rigged/sail configuration. I initially got hung up on "Barque" and all the authors discuss this rig and the usual mast configuration for this period as 'lower mast, topmast and combined top-gallant mast + royal mast (as a pole) providing excellent tables etc to allow the taper/diminishing of the masts to be calculated from the specification values. HOWEVER, looking at the imagery it is obvious 'Victoria' was configured with a 'lower mast, and combined topmast, top-gallant mast and royal mast as a single pole (confirmed in the Rigging Warrant also). Now for the delima that I hope someone may assist me with. None of the authors offer a table, or formula that I can understand to calculate the taper/steps of the combined 3 masts to allow a realistic end size (Royal mast head), nor to calculate the step (at the stops for each mast). The Contract provides the start diameter (at the cap) for the topmast, and the lengths of each mast (so I know where the stops are) but not how much to reduce the mast (step inwards I assume as the imagery seems to show a 'funnel' - iron and copper combo - rather than 8-sided) at these points. This combination appears to be typical of three-masted schooners (merchant types at least) for this period and was introduced into the RN for later gun boats (eg Beacon class - HMS Beacon 1867) - did Victoria set a standard ? HMS Beacon moored in Malta - from Wikipedia (commons) QUESTION Can anyone provide me with a reference/pointer to a table or formula to calculate these? I have tried using the individual tables for topmast + table for combined top-gallant and royal (from Kipping and Fincham - close but not the same) using the head size of the topmast as the starting (given) size for the pole but the result does not seem realistic (too narrow) at the head of the royal. Also, this method does not tell me how much to step/reduce the diameter of the pole at these junctures to fit the funnels (noticeable in all the imagery). Any info or guidance would be most welcome cheers Pat p.s. I have also not been able to locate a single drawing/illustration of this type of pole with associated fittings.

-
 Hi Steven, a bit late for you now but one technique I have used to work out the positions of holes was either: 1. if confident I can place pins accurately into the tenons, or the flat bottom piece, place accurately on the deck in-situ, apply a 'little pressure' - just enough to see where the pins land; then drill holes to size. This may still work for you? 2. add some pencil/graphite or ink (be quick before ink dries) and place onto a bit of thicker paper or thin card and apply light pressure to get a mark. Drill holes into card/paper to make a template. Cut paper/card to shape to fit area and/or register with known marks/parts on the deck. cheers Pat
 -
sorry mate cheers Pat
-
- now that is the right sort of building attitude! Looks good Keith; very trim work. As to the colour of the plank, could it be simply the grain running in the opposite direction? Maybe a silly comment as someone with your experience has probably dismissed that already? cheers Pat
-
Alan, asto the oversized hole, was there a leather puddening/strip in the 'bed' to protect the timbers? cheers Pat
-
Steven, try SpotLight or similar store for some fine 'tulle' - amazing how fine you can get. Sorry to hijack Greg. cheers Pat
-
Certainly looking good Rob; she is really starting to show her character now cheers Pat
- 1,208 replies
-
- 3
-

-
- great republic
- clipper
- (and 1 more)
-
Ditto; looks like just the setup for some quality modelling time. cheers Pat
- 969 replies
-
- 3
-
-
- hahn
- oliver cromwell
- (and 1 more)
-
Up to your usual very high standards of quality materials and workmanship Chuck; nifty idea of the binder clips and 'L' brackets (I'll stow that idea away for future use ) cheers Pat
- 1,784 replies
-
- 4
-
-
- winchelsea
- Syren Ship Model Company
- (and 1 more)
-
Nice work, and useful technique cheers Pat
-
That is one very hard-worked ship Greg. Your weathering techniques at scale show you have a lot of talent (and patience) n this field. A very good looking model of a working-ship mate. cheers Pat
-
As always your very crip, clean joinery is an inspiration cheers Pat
-
HMCSS Victoria 1855 by BANYAN - 1:72
BANYAN replied to BANYAN's topic in - Build logs for subjects built 1851 - 1900
Thanks Ed and Rob, very much appreciate the comments and encouragement. I have a ways to go yet to achieve the same level of quality you guys produce, but learning with every 'mini-project' cheers Pat- 1,021 replies
-
- 2
-
-
- gun dispatch vessel
- victoria
- (and 2 more)
-
Very nice joinery for that wheel mate; I think you would have given the old masters a run for their money. cheers Pat
-
Nice work on the rigging Dave; very tidy indeed. I will also need to try and get hold of some of that timber it looks great and will be nice along side one of my other faves "Tasmanian Myrtle" Enjoy the shore leave mate, but don't follow that band too closely (they simply faded away after showing so much promise.) cheers Pat
-
Some nice improvements there Martes. I must admit I am a 'sucker' for good graphics in these styles of games to maintain my interest. A realistic algorithm or two to control ship behaviour and damage inflicted/received are the other two main priorities. cheers Pat
-
HMCSS Victoria 1855 by BANYAN - 1:72
BANYAN replied to BANYAN's topic in - Build logs for subjects built 1851 - 1900
Thanks Michael, much appreciated cheers Pat- 1,021 replies
-
- 2
-
-
- gun dispatch vessel
- victoria
- (and 2 more)
-
Looks good Steven; hopefully all continues going well with this redo. The carvings look smoother than before with the pear wood. cheers Pat
-
HMCSS Victoria 1855 by BANYAN - 1:72
BANYAN replied to BANYAN's topic in - Build logs for subjects built 1851 - 1900
Thank you very much for the encouragement and comments gentlemen; much appreciated. cheers Pat- 1,021 replies
-
- 3
-
-
- gun dispatch vessel
- victoria
- (and 2 more)
-
Many thanks Vossie, you seem to have a good 'handle' on all things tools (for ship modelling) You're right about the GRS prices (even on eBay - that is ridiculous) cheers Pat
- 714 replies
-
- 2
-
-
- lady nelson
- victory models
- (and 1 more)
-
Nice work Martes and thanks for sharing Martes. What are your plans for these? Are you going to make them available as add-ons? You appear to have put a lot of work into these. cheers Pat
-
Adapting DRO Devices To Shop Tools
BANYAN replied to Thistle17's topic in Modeling tools and Workshop Equipment
Thanks for sharing Joe, I will be interested in your final comments as I have been 'dabbling' with more 'manually controlled' methods of repeatability (all too complicated for my liking to date). cheers Pat -
HMCSS Victoria 1855 by BANYAN - 1:72
BANYAN replied to BANYAN's topic in - Build logs for subjects built 1851 - 1900
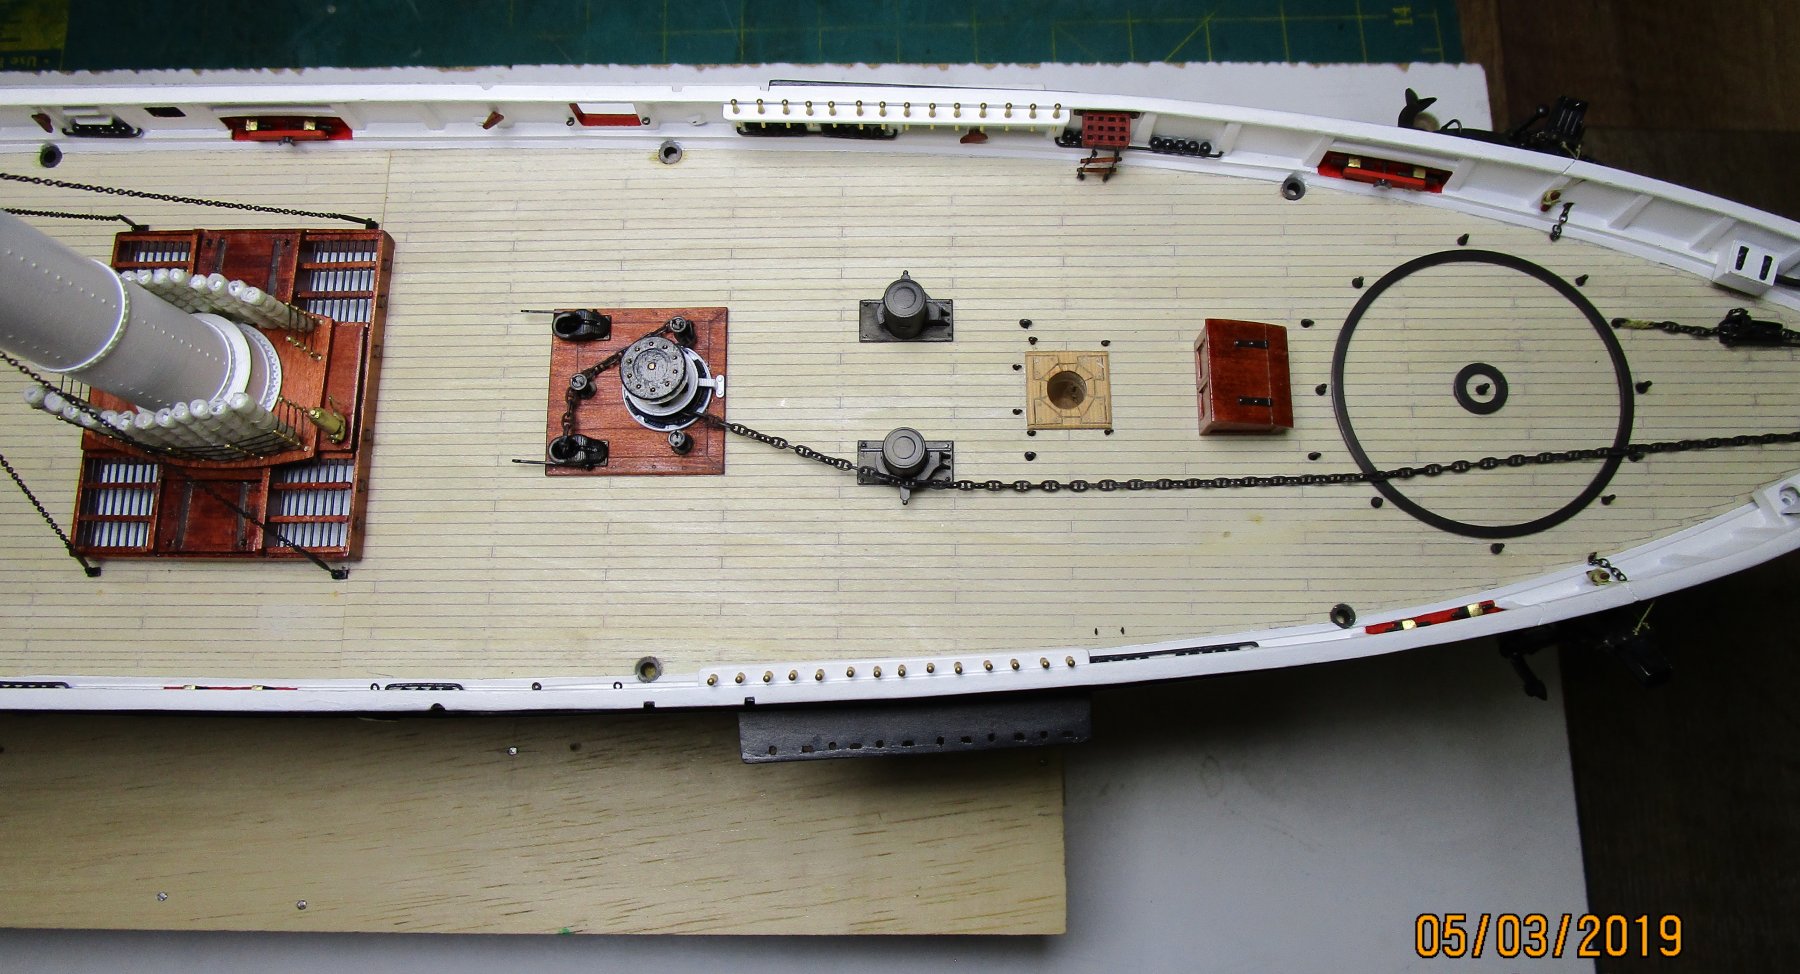
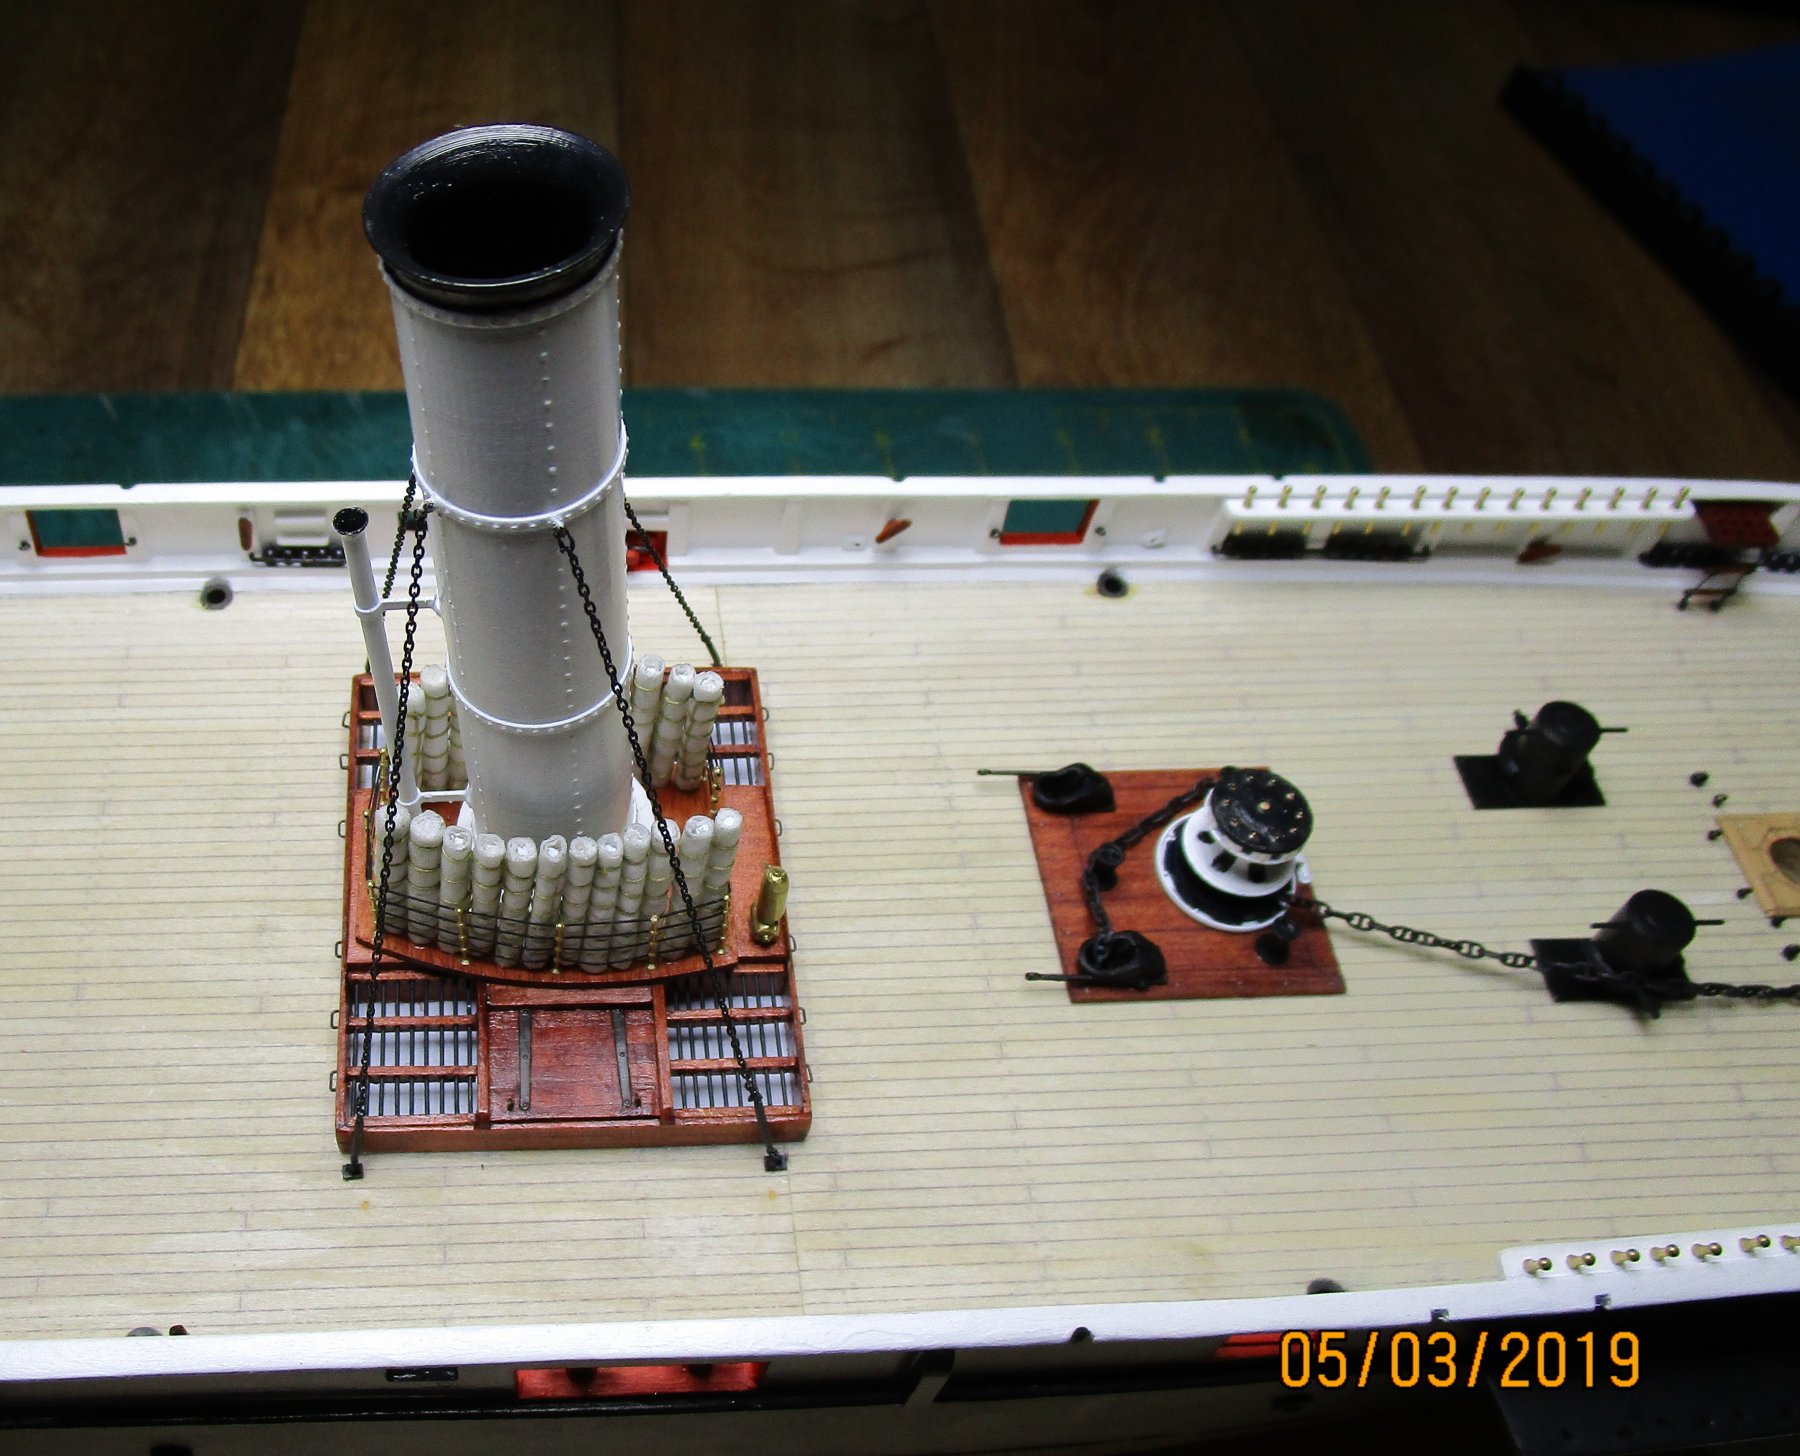
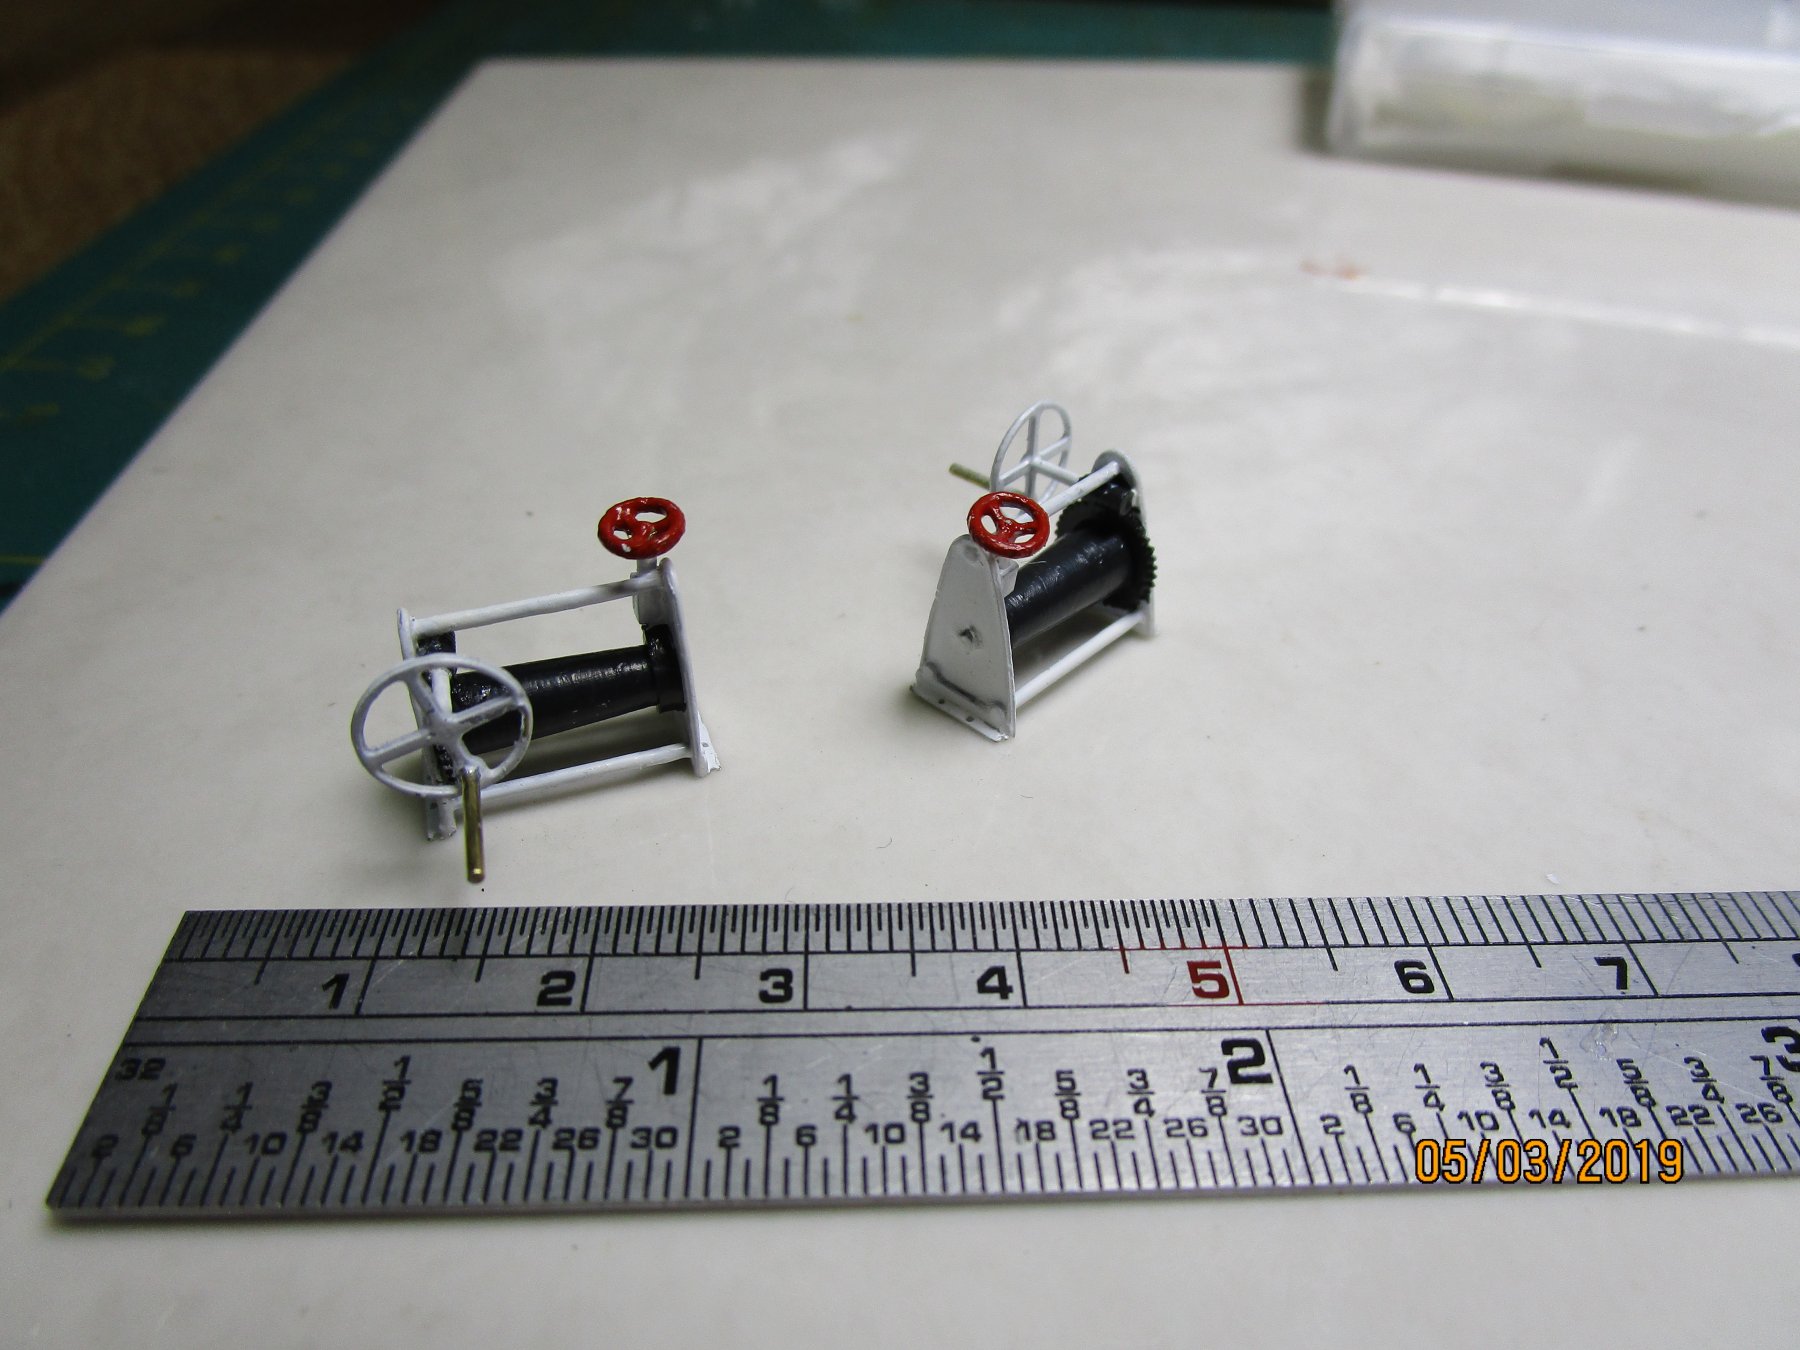
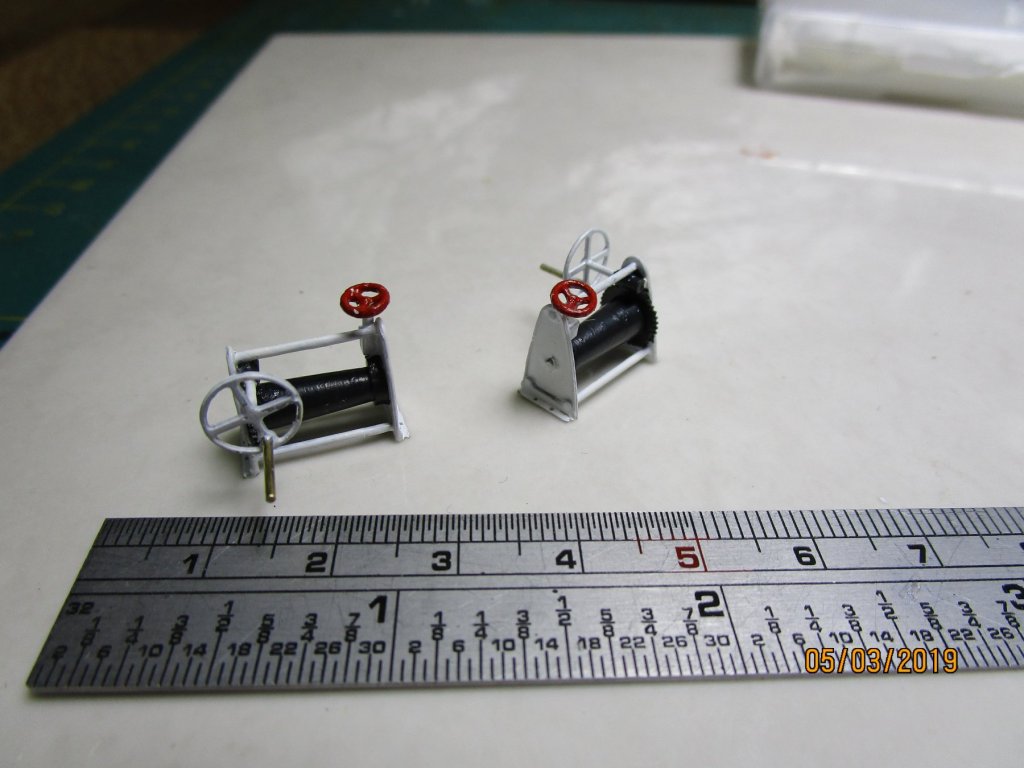
Thanks Dave; appreciate your comments. Some further small updates; I think the photos show all. First is the completed (minus firehose/rack) of the Downton Pump area; then the foredeck with chain blackened, and the funnel with its stay chains and finally the painted purchase winches. cheers Pat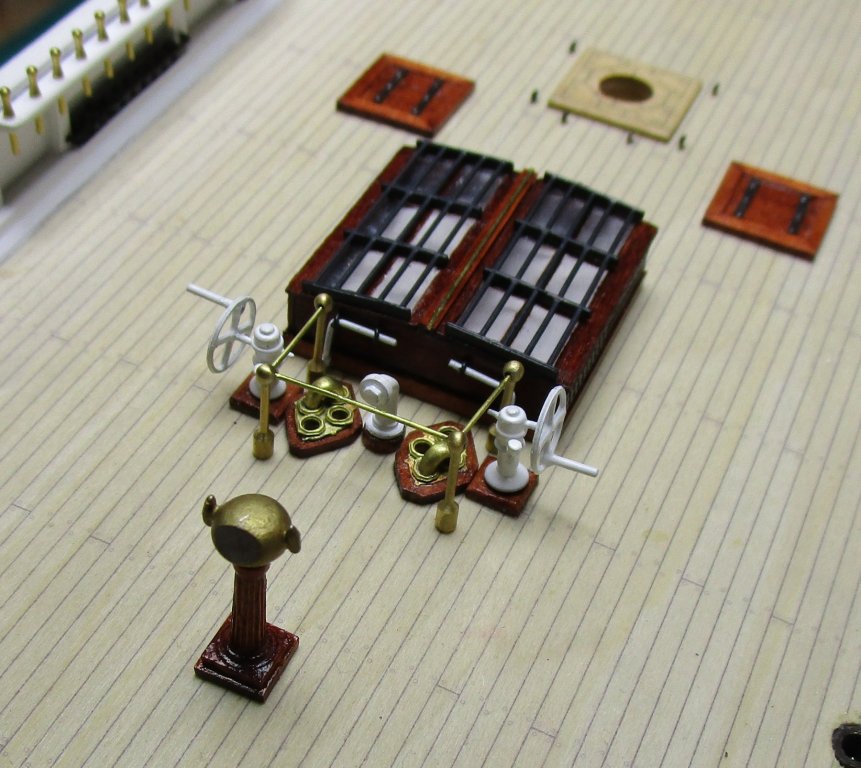


- 1,021 replies
-
- 21
-
-
- gun dispatch vessel
- victoria
- (and 2 more)