


BANYAN
-
Posts
5,965 -
Joined
-
Last visited
Content Type
Profiles
Forums
Gallery
Events
Everything posted by BANYAN
-
 Looking very good Dave, some significant progress even if not readily visible. Mate one small thing to check if it can still be done is the lead of some of that running rigging coming from the bow where it passes over rather than under the other lines; this would cause a lot of 'chafe' on those lines - more likely that running end passed under the other lines/ cheers Pat
 -
HMCSS Victoria 1855 by BANYAN - 1:72
BANYAN replied to BANYAN's topic in - Build logs for subjects built 1851 - 1900
Thanks Ed and Greg, appreciate your condolences Pat- 1,021 replies
-
- 3
-

-
- gun dispatch vessel
- victoria
- (and 2 more)
-
HMCSS Victoria 1855 by BANYAN - 1:72
BANYAN replied to BANYAN's topic in - Build logs for subjects built 1851 - 1900
Thanks Carl and Patrick, your kind thoughts are appreciated. cheers Pat- 1,021 replies
-
- 3
-
-
- gun dispatch vessel
- victoria
- (and 2 more)
-
Really on a roll now Rob; looking good! cheers Pat
- 1,208 replies
-
- 5
-
-
- great republic
- clipper
- (and 1 more)
-
Good start there Jason; your officer appears to be keeping a watchful eye to ensure these do not go 'adrift' cheers Pat
-
HMCSS Victoria 1855 by BANYAN - 1:72
BANYAN replied to BANYAN's topic in - Build logs for subjects built 1851 - 1900
Thanks Vossie and Druxey; appreciate your thoughts Pat- 1,021 replies
-
- 3
-
-
- gun dispatch vessel
- victoria
- (and 2 more)
-
HMCSS Victoria 1855 by BANYAN - 1:72
BANYAN replied to BANYAN's topic in - Build logs for subjects built 1851 - 1900
Hi folks, there may be a short delay in updates and responses as a good friend, Karl H Marquardt, passed away very recently and I am preparing to farewell him. See regards Pat- 1,021 replies
-
- 3
-
-
- gun dispatch vessel
- victoria
- (and 2 more)
-
Developing into a very fine model and addition to your 'little fleet' mate. cheers Pat
-
HMCSS Victoria 1855 by BANYAN - 1:72
BANYAN replied to BANYAN's topic in - Build logs for subjects built 1851 - 1900
.... and despite what these companies say about protecting your privacy, the data they collect is indeed frightening. I wish Aust. would follow some of the new European privacy laws. I think I will replace the worm - will experiment a little today to see what I can do. All to late for thickening the main drive cog though. [edit: Eberhard, I will do this by using a small bolt and turning the threads of a short length for the axle. I very much like the process using the 'tap'. I have a good range of these, and in future will use that to create a better drive cog in particular, but also a more correct worm as well.] cheers Pat- 1,021 replies
-
- 3
-
-
- gun dispatch vessel
- victoria
- (and 2 more)
-
HMCSS Victoria 1855 by BANYAN - 1:72
BANYAN replied to BANYAN's topic in - Build logs for subjects built 1851 - 1900
Thanks again Eberhard, you are a fountain of knowledge on these matters. I am still tempted to replace them and am leaning more and more towards doing so before I start painting them, and then it will all be too late. cheers Pat- 1,021 replies
-
- 3
-
-
- gun dispatch vessel
- victoria
- (and 2 more)
-
HMCSS Victoria 1855 by BANYAN - 1:72
BANYAN replied to BANYAN's topic in - Build logs for subjects built 1851 - 1900
Hi Eberhardt, appreciate you feedback also, again I have a long way to go to match your machining skills. Sorry, I thought I had answered your question. My intention in the text was to infer that I used brass to represent the iron as it is easier to work at at this scale. I am confident they were used as the Contract called for them and my research (Underhill in particular, but others) show they were being introduced as early as the 1850s but mainly in the mercantile ships, in particular clippers. Victoria used them as they were minimum manned. It was of interest that in letter written by Commander Lockyer (build superintendent) as a progress report to the Colony's governor (Sir Charles Hotham - a RN Naval Officer also) that I found in the Public records Office, it states: In this vessel I am continuing all the newer, and well tried, improvements that have been adopted in Her Majesty’s Service and in the Mercantile Navy. This verifies earlier assumptions that 'cutting edge' technology for that time was being fitted. cheers Pat- 1,021 replies
-
- 3
-
-
- gun dispatch vessel
- victoria
- (and 2 more)
-
HMCSS Victoria 1855 by BANYAN - 1:72
BANYAN replied to BANYAN's topic in - Build logs for subjects built 1851 - 1900
Thanks Denis and Ed, appreciate the feedback. Denis, saves me on the mental 'gymnastics' also Ed, appreciate that coming from you; I have a long way to go to match your skills though In hindsight, there are two things I would change; one I am considering making. I should have used another thickness (or two) of the large cog in the laminated approach I have taken (there are only two of 0.2mm) which would have made it looks a little more substantial and represent the real thing a little better. The other is that I should have used a cut-off section of a very fine thread small bolt for the worm gear. I am tempted to replace it but do not want to risk destroying other work with applying yet more heat to desolder and resolder the worm drive. Lesson learned for next time at least. cheers Pat- 1,021 replies
-
- 4
-
-
- gun dispatch vessel
- victoria
- (and 2 more)
-
I for one am moving down the 3D printing path for the accuracy and level of detail which is consistently repeatable. cheers Pat
-
HMCSS Victoria 1855 by BANYAN - 1:72
BANYAN replied to BANYAN's topic in - Build logs for subjects built 1851 - 1900
Thanks Michael, plenty of those extra large scale rules hanging around; I hoped no one would notice that cheat Thanks Mark, I was intimidated at first, but once I broke it down to chunk sized mini-projects it all came together so to speak. the hardest part was working out the soldering sequence to minimise heat transfer to other parts and allow access to parts still needed to be done. Appreciate the comments guys. cheers Pat- 1,021 replies
-
- 2
-
-
- gun dispatch vessel
- victoria
- (and 2 more)
-
I would say that is a pretty good effort Steven, I think the overall effect is there - it is distinctive and infers mail cladding. I look forward to seeing your small 'army' complete cheers Pat
-
Impressive joinery skills Daniel; very crisp clean work with great details. cheers Pat
-
Nice work indeed. Looking forward to seeing her as she progresses through the rigging fitout. cheers Pat
-
That is seriously nice work Jason; she is looking good with her 'teeth' added. cheers Pat
-
Another way to make shackles
BANYAN replied to vaddoc's topic in Metal Work, Soldering and Metal Fittings
Those eccentric pins are a great idea Wefalck, certainly better than a normal pin. I also like the idea of the former you use - clever idea for those sorts of parts. cheers Pat -
HMCSS Victoria 1855 by BANYAN - 1:72
BANYAN replied to BANYAN's topic in - Build logs for subjects built 1851 - 1900
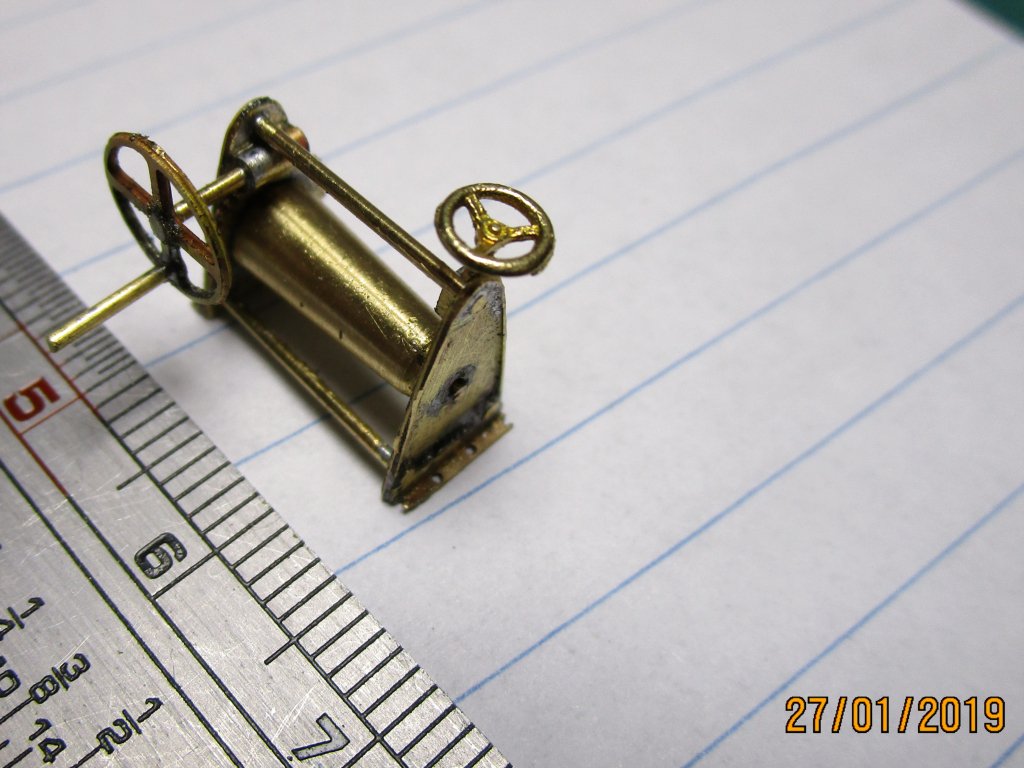
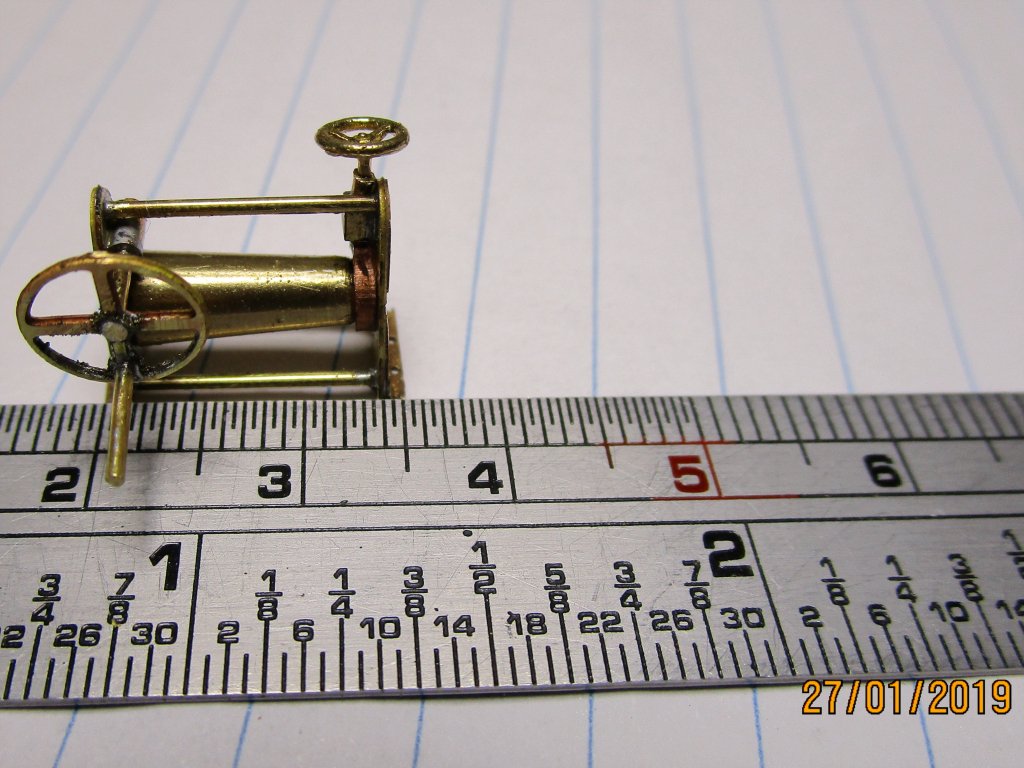
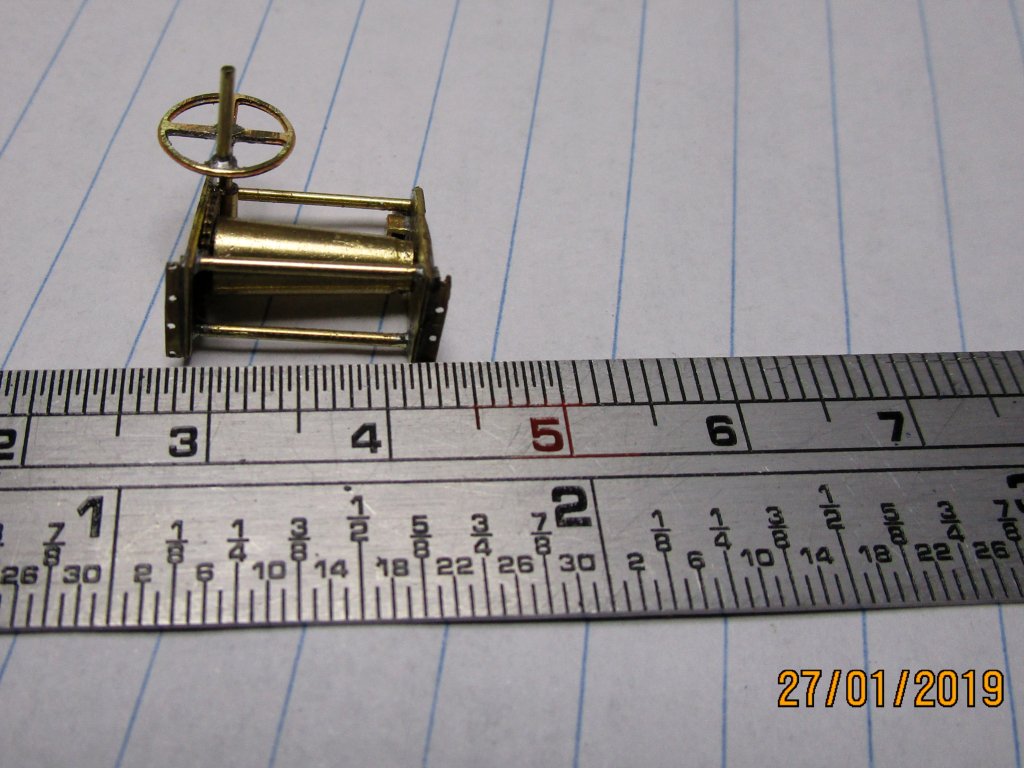
Hi folks, I have made some progress on the winches, with the parts now all turned, photoetched etc. I have managed to put the ironwork (brass) for one of them together but still to add the wooden 'bed'. The photos show the progress as I went along but still a lot of cleaning up to do. Most of this is fine metal powder, but a few 'dags' here and there to fix. The whole assembly is only 15mm long by 11mm high. The small handwheel was purchased but the rest of the parts including the larger hand wheel, except the tapered drum which I turned, are PE that I drew up and had etched. The slightly grooved effect n the drum is deliberate as it had grooves for the first turns of the wire to lay up into. I have styled this after a winch illustrated in Underhill's 'Masting and Rigging the Clipper Ship and Ocean Carrier'. The cog wheel is two pieces of .2mm bras with tiny alignment holes which allowed me to solder them together and keep the teeth aligned. The worm gear is still beyond my skills so I simply used some brass tube (1.5 mm). The other handwheel is set into a short length of 1.0 mm tube, which is then partially inserted into some small brass square section, to represent the gear box for the drum brake, which is made from thin copper (bends more easily). The small ding in the tapered wire drum is bigger than planned but is intend as a 'flat' to let me drill through as a starting point for the steel wire rope that will be attached. The halliards (steel wire) were bent to the winch and remained there permanently with the tension held by the drum brake. My next problem is to work out how to fit this strongly enough to allow me to create a 'little' tension on the scaled halliards without pulling the winch away from the deck. cheers Pat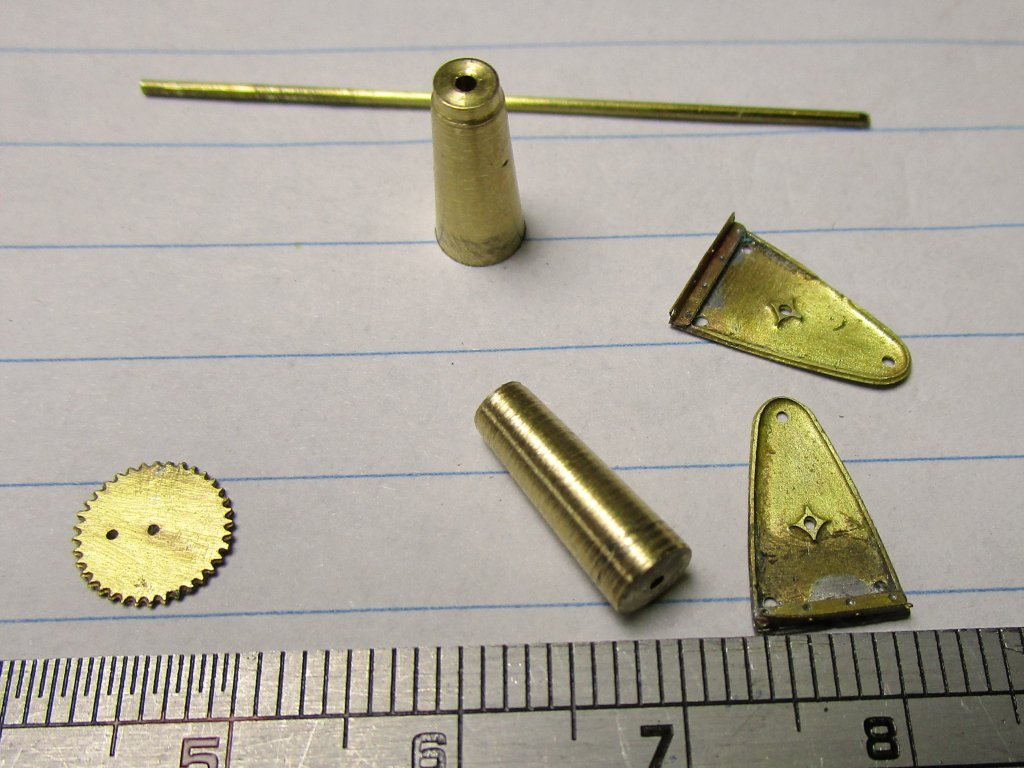
- 1,021 replies
-
- 18
-
-
- gun dispatch vessel
- victoria
- (and 2 more)
-
HMCSS Victoria 1855 by BANYAN - 1:72
BANYAN replied to BANYAN's topic in - Build logs for subjects built 1851 - 1900
Thanks for the likes, and Roger and Denis for your very kind remarks. cheers Pat- 1,021 replies
-
- 1
-
-
- gun dispatch vessel
- victoria
- (and 2 more)
-
This will be one-stunning model Michael. I love the detail and quality of the work. cheers Pat
-
Very nice work GL, a very nicely detailed cross-section. cheers Pat
- 219 replies
-
- 1
-
-
- smack
- cross-section
- (and 2 more)