


ERS Rich
-
Posts
600 -
Joined
-
Last visited
Content Type
Profiles
Forums
Gallery
Events
Posts posted by ERS Rich
-
-
2 hours ago, Der Alte Rentner said:
9/32" vs 17/32".
Hello,
Yes, the text is/was incorrect.
I can’t recall exactly, but I did either rip the kit stock to what was needed, or made my own.
The Byrnes table saw is a valuable tool.
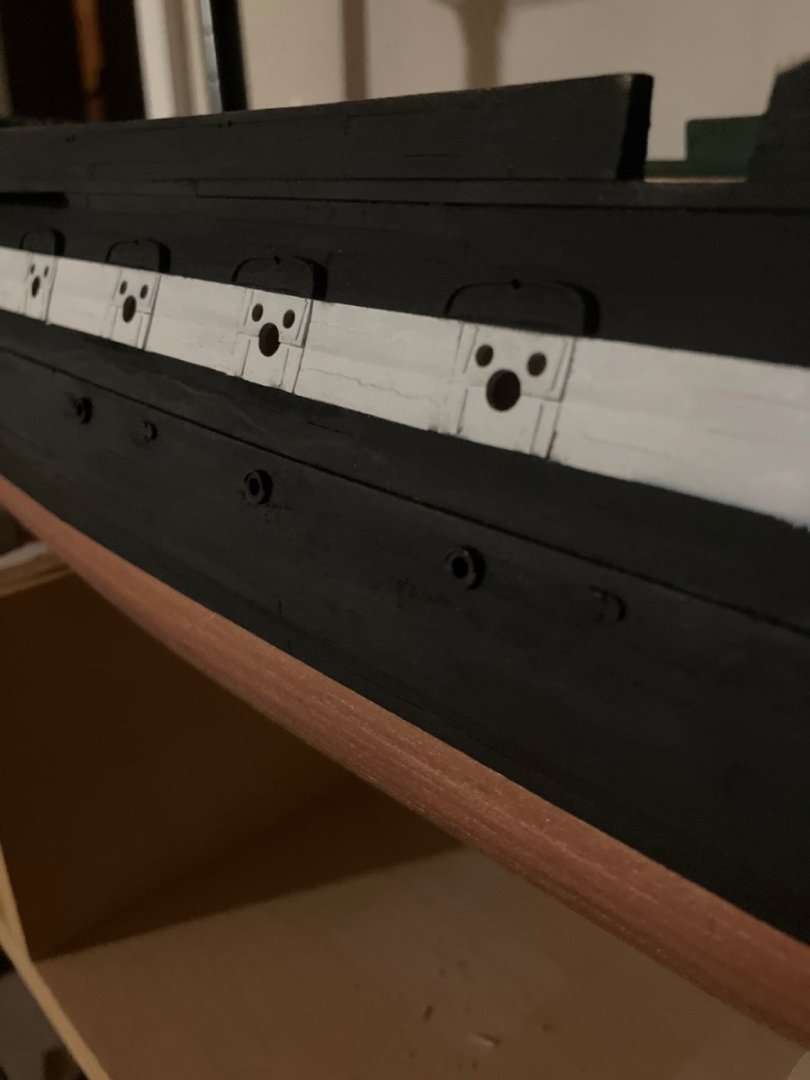
My Constitution is on hold at the moment. Photo below shows the gun-ports with the covers installed.
Cheers,
-Rich
- Knocklouder and Ryland Craze
-
 2
2
-
1 hour ago, schooner said:
Are you going to build or buy the case?
Good Morning,
Will make the case, thinking of cherry hardwood and probably plexiglass panels to minimize the weight. Need to source a sheet of cherry faced plywood. I have some Kusmi #1 button shellac that looks nice on cherry (shellac.net).
Have a good weekend.
-Rich
- Canute, bwross11, Keith Black and 2 others
-
5
-
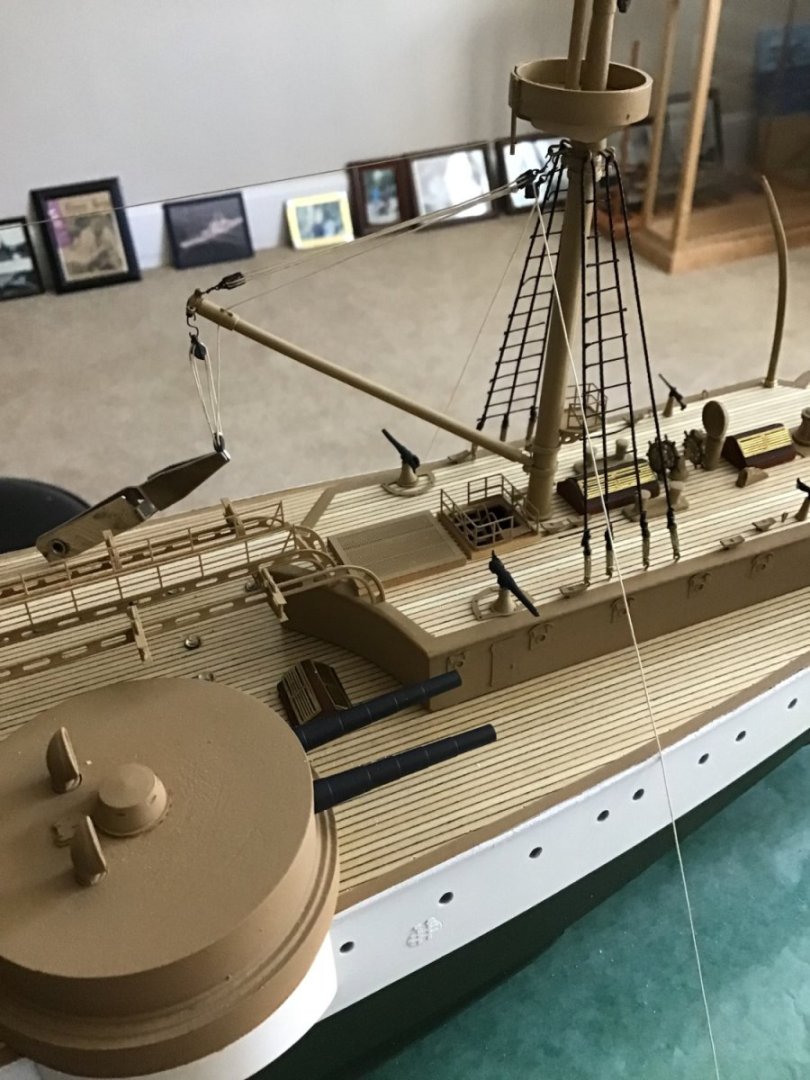
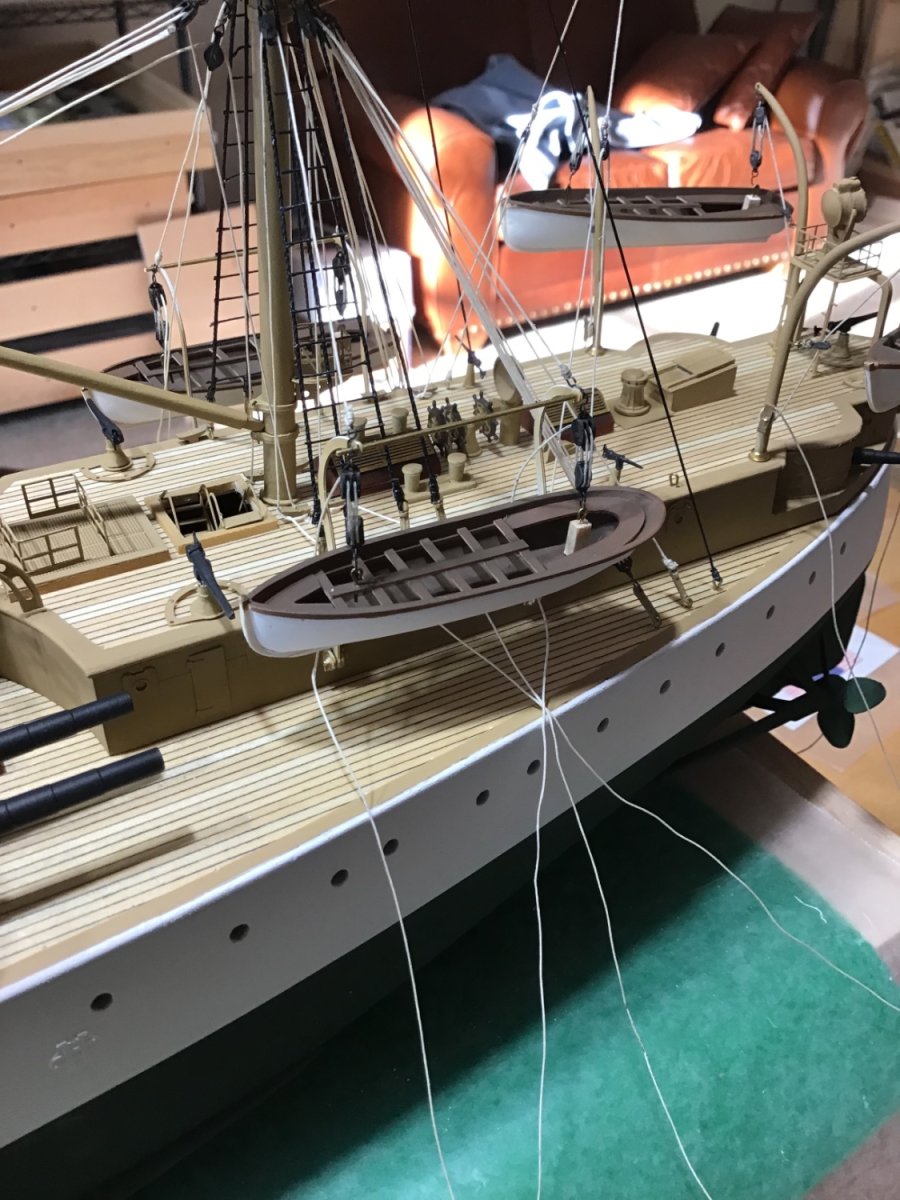
Aft Boat Davits
Rigged the davits, and radial davits this week.
I like to get everything in place, to make sure everything fits before tying off the lines. Just love how this is looking.
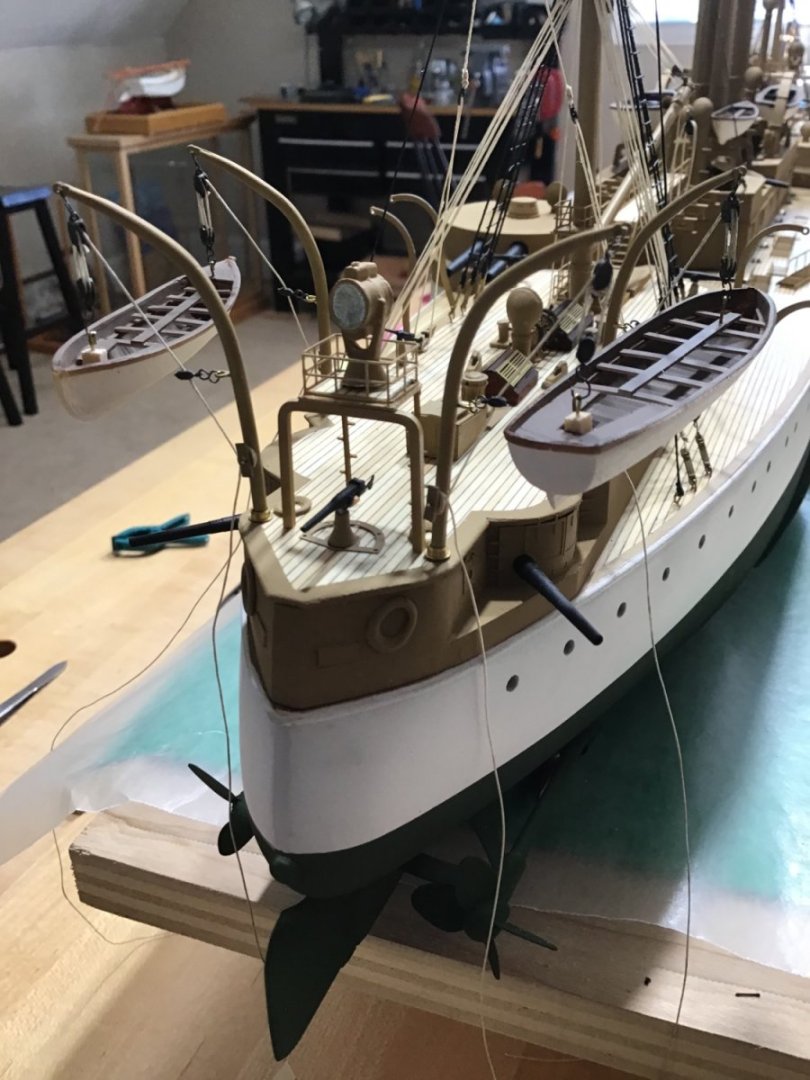

Made a little jig to help place the davits.

- SiriusVoyager, GrandpaPhil, Canute and 8 others
-
7
-
 4
4
-
On 9/20/2023 at 5:33 AM, aliluke said:
There is nothing not to like about this!
Hello in New Zealand! Thank you, for the encouragement. Oct 4 will be one year, and it looks like I’ll finish by then, outside of the case. Looking forward to building several 1/32 aircraft. Nice break from so much construction.
Rigging the cranes tomorrow, then just the companionways to construct, and finally the scroll details.
Cheers Alistair
- mtaylor, Canute and Keith Black
-
3
-
Hello Michael,
Welcome to MSW. Congrats on finishing your project. That’s a huge accomplishment.
Best if luck on the next one!
Cheers,
-Rich
- Keith Black and mtaylor
-
2
-
Hi Giuseppe, welcome to the forum and best of luck on your projects!
-Rich
- mtaylor and Keith Black
-
2
-
Hello George,
Welcome and it’s good to know you. Your ship is coming along nicely. There is a topic called “At a Glance” where progress pictures are posted. Check it out.
-Rich
- Keith Black, ExiledArtist and mtaylor
-
3
-
Hi Fred, glad to know you!
-Rich
- Keith Black and mtaylor
-
2
-
-
-
On 9/3/2023 at 8:21 AM, Frank Burroughs said:
I am looking for USS Constitution at 1/96 scale. Which year model is up for grabs.
Hi Frank,
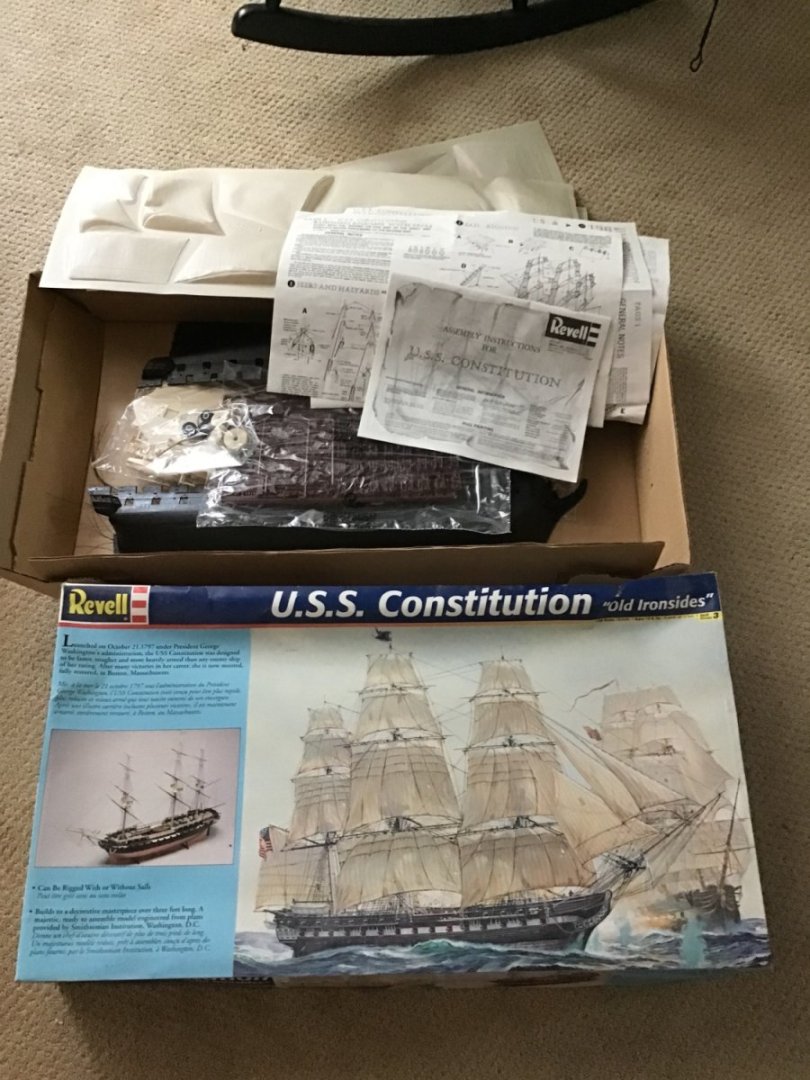
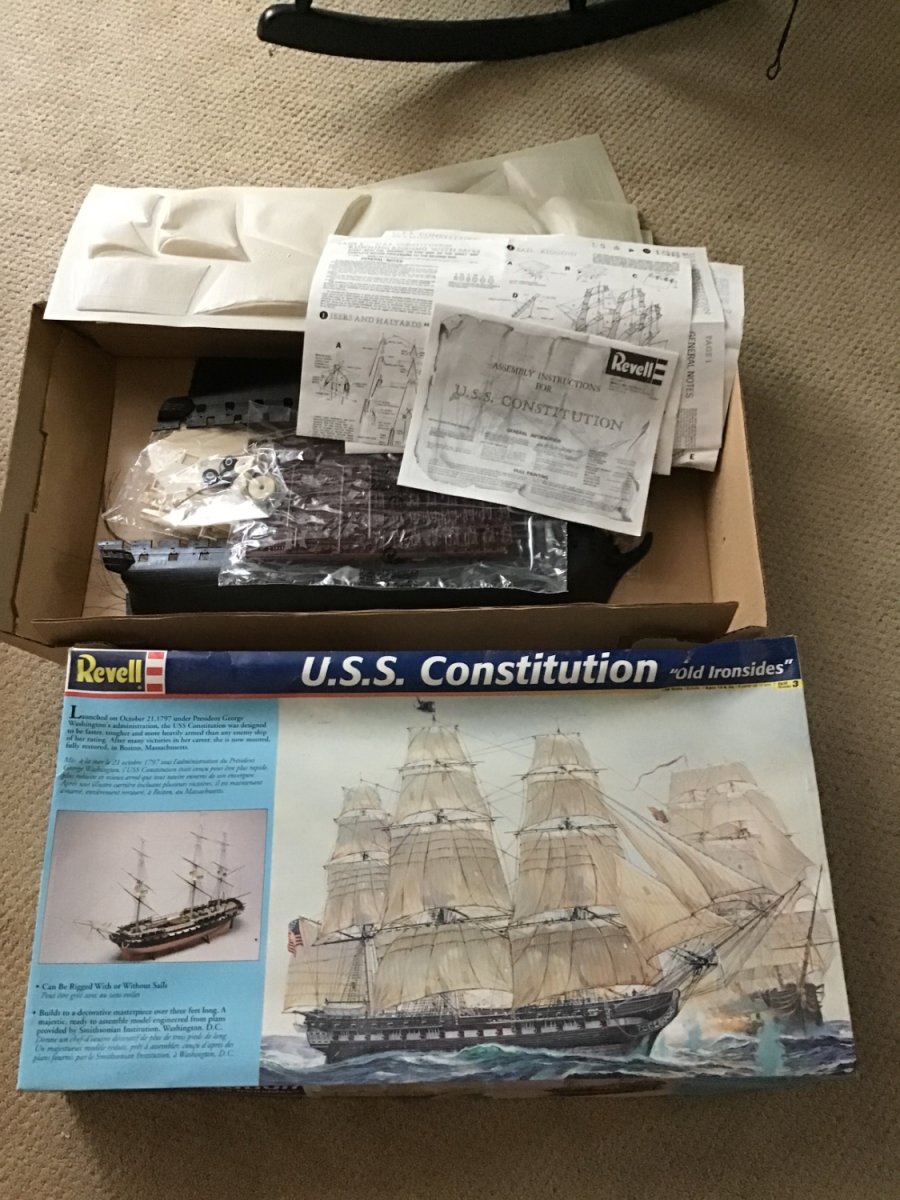
Are you looking for the Revell, Constitution? I have one, bought it at a local hobby shop, must have been over 10 years ago. Box is intact, never started, bags unopened, vac formed sails, shrouds/ratlines, thread etc.
Send me a message if interested.
Thanks,
-Rich
- John Ruy, mtaylor and Frank Burroughs
-
3
-
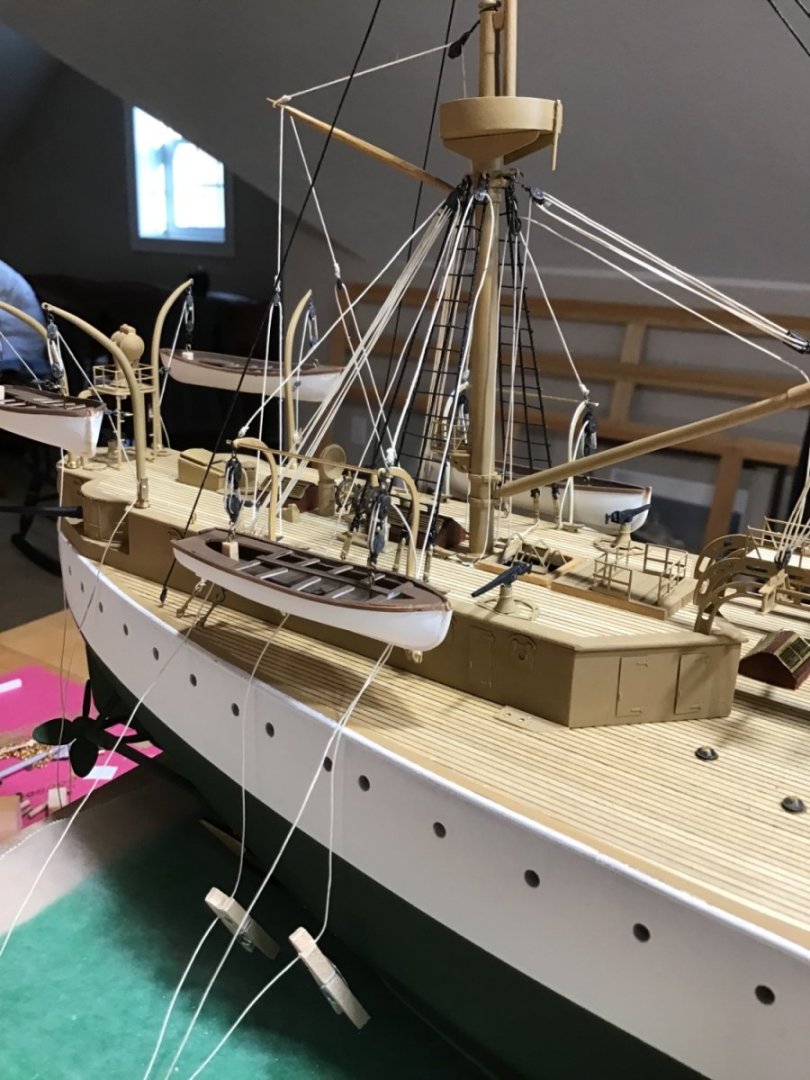
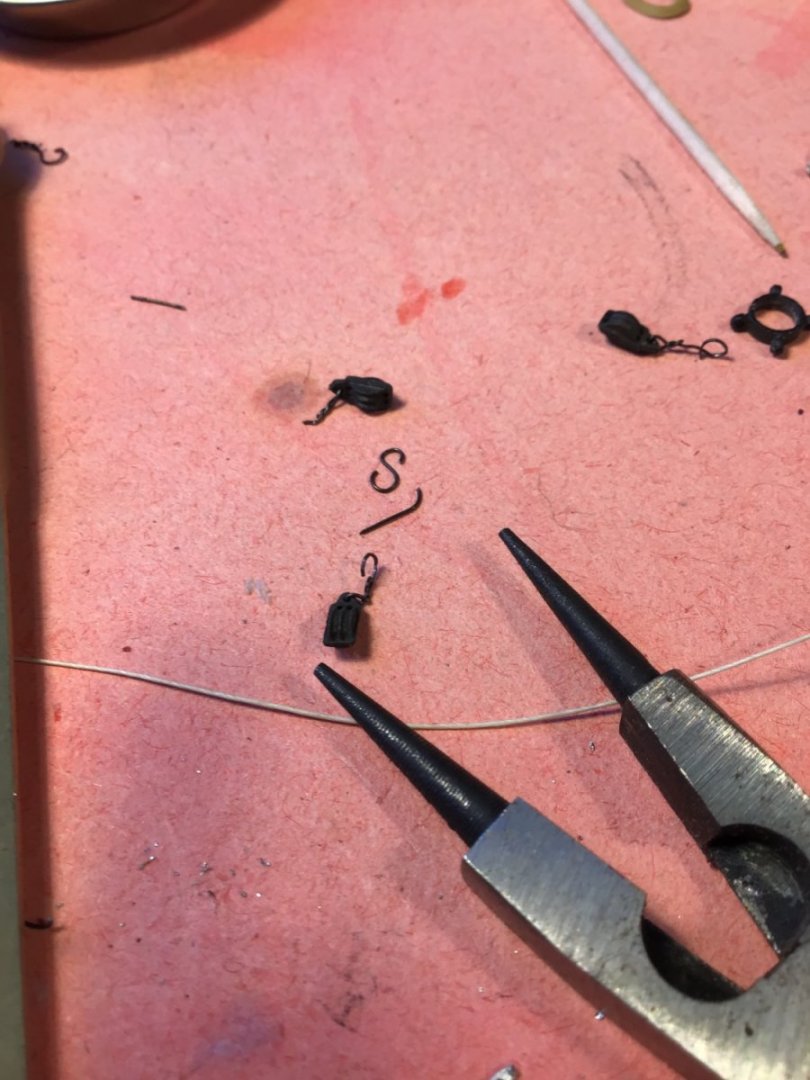
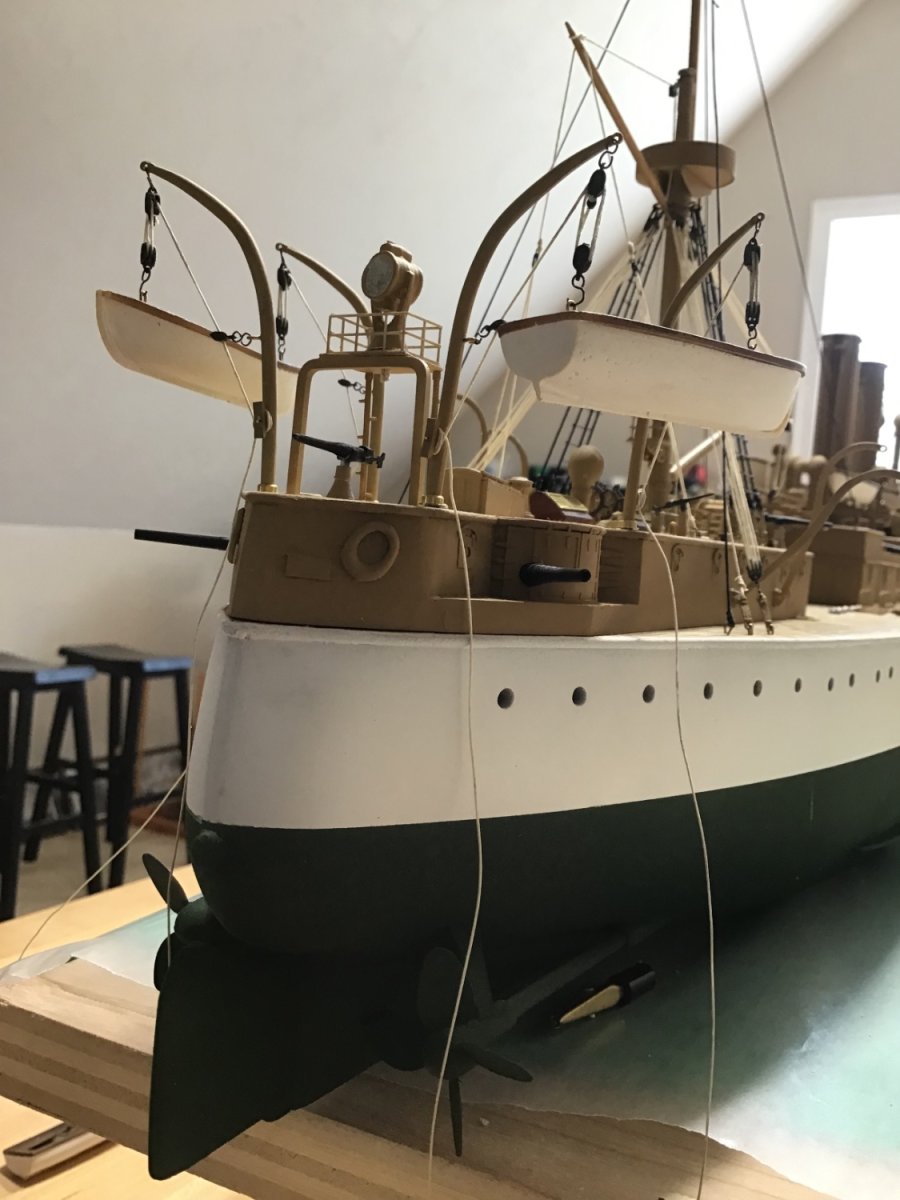
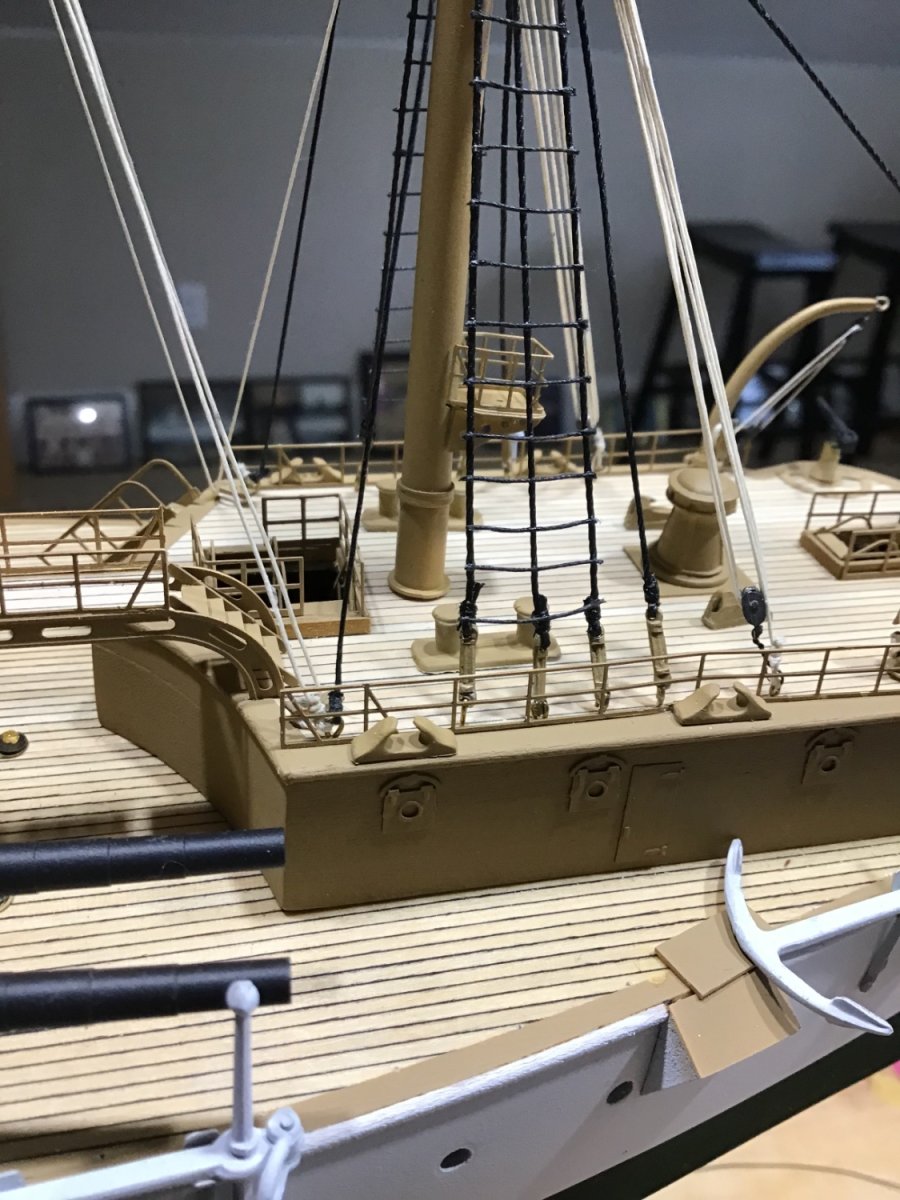
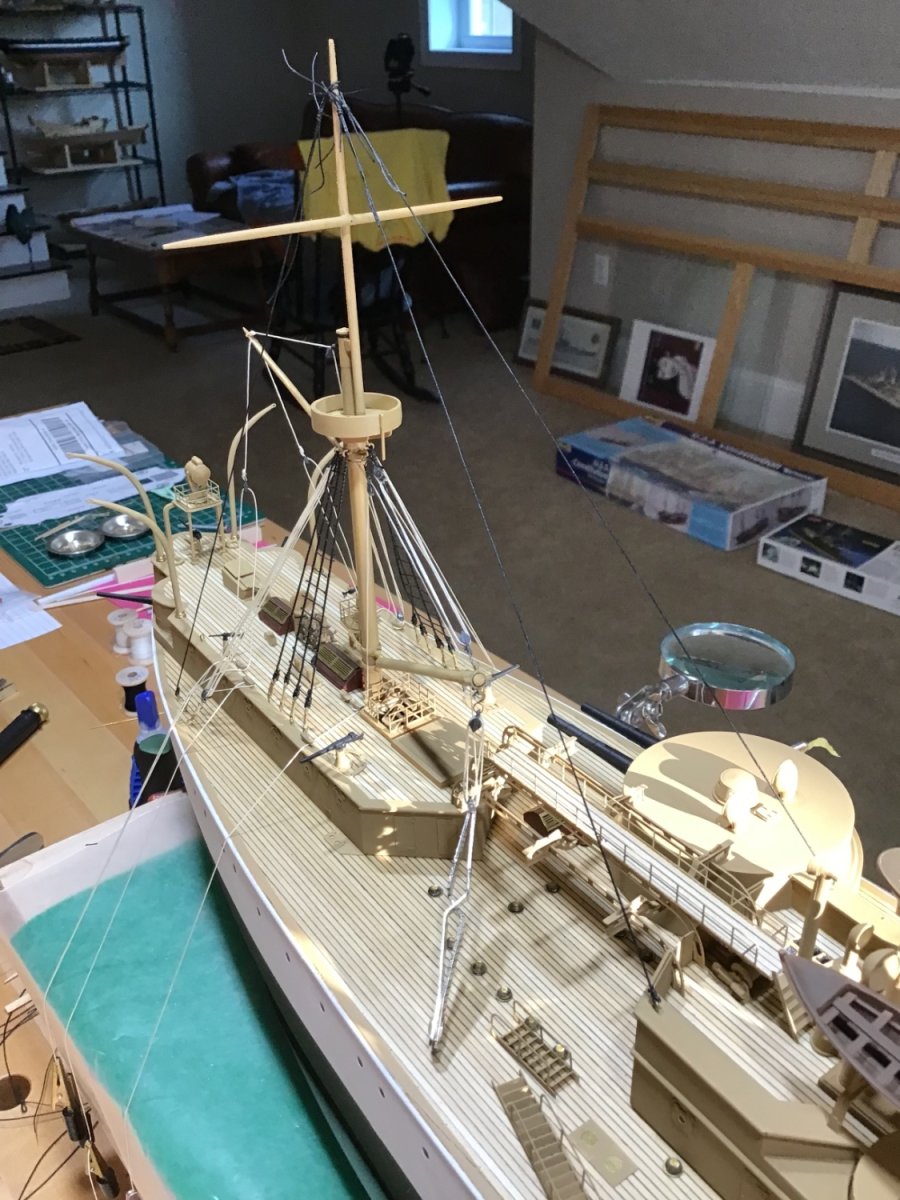
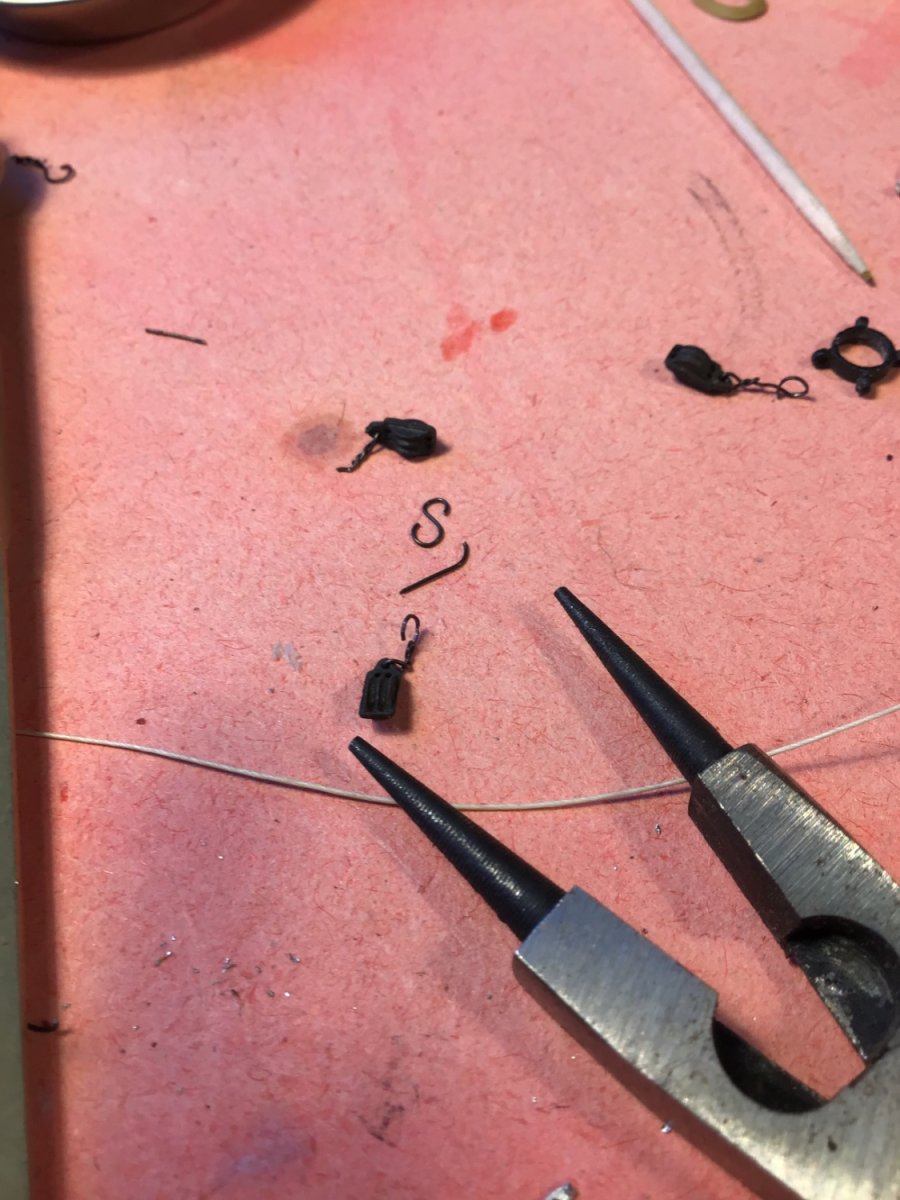
More Rigging
Rigged the aft mast derrick with this setup.
Then installed it on the ship.
The round nose pliers make “S” hooks easy.
Foremast rigging is coming along.
- GrandpaPhil, ccoyle, mtaylor and 7 others
-
10
-
2 hours ago, schooner said:
Nice rigging work!
Good Morning, thanks schooner.
Annapolis is a place I’d like to go, just haven’t made it yet, we have a new dog, and my wife would go but she isn’t into museums.
Looked up “preventer” in a couple of books I have about rigging, nothing there.
I’m not an expert on rigging/line names, I’m a mechanical engineer, so from my point of view seems like extra support, maybe because of the “crows nest”, imagine men/weapons up there at battle stations.
Getting to the finish line, started last October, hoped for six months. Eager to start something new. A simpler project.
- mtaylor, Ryland Craze, Keith Black and 2 others
-
5
-
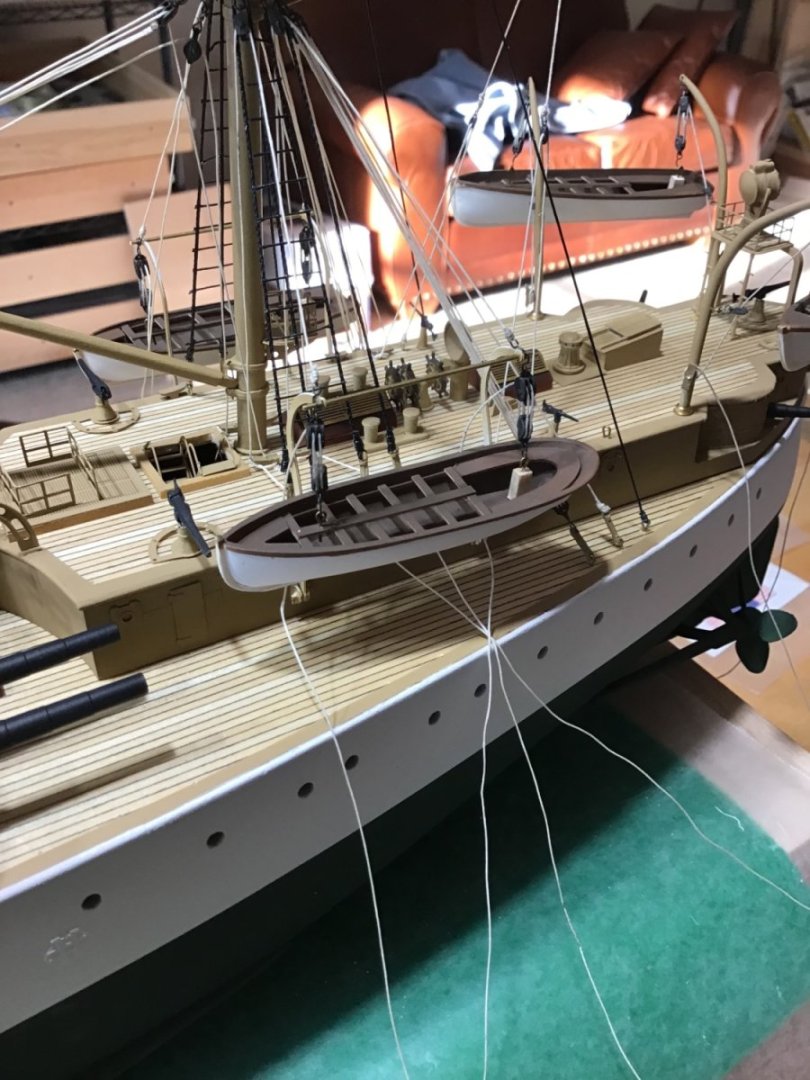
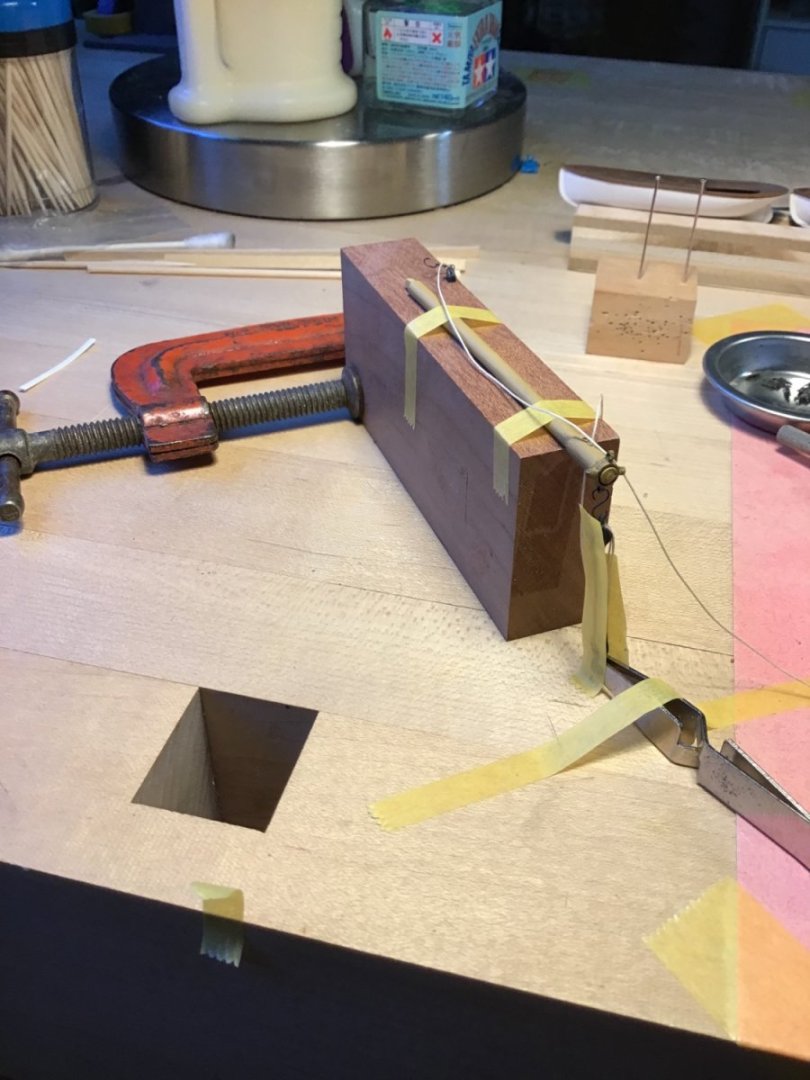
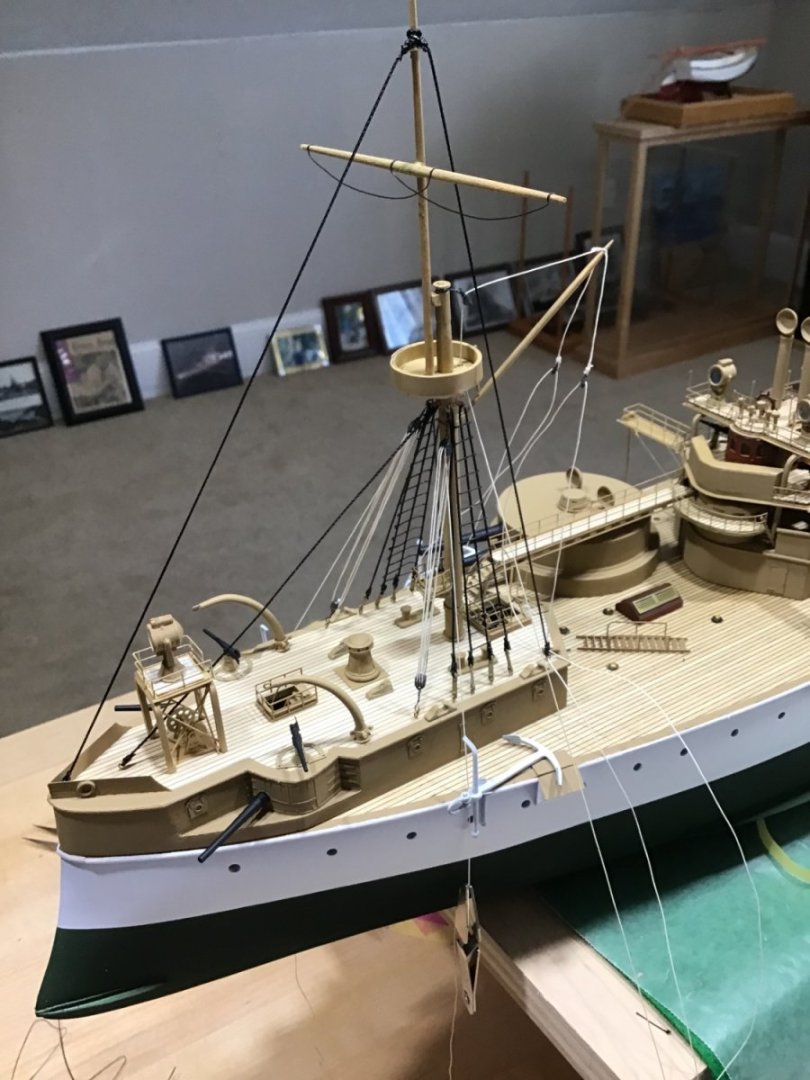
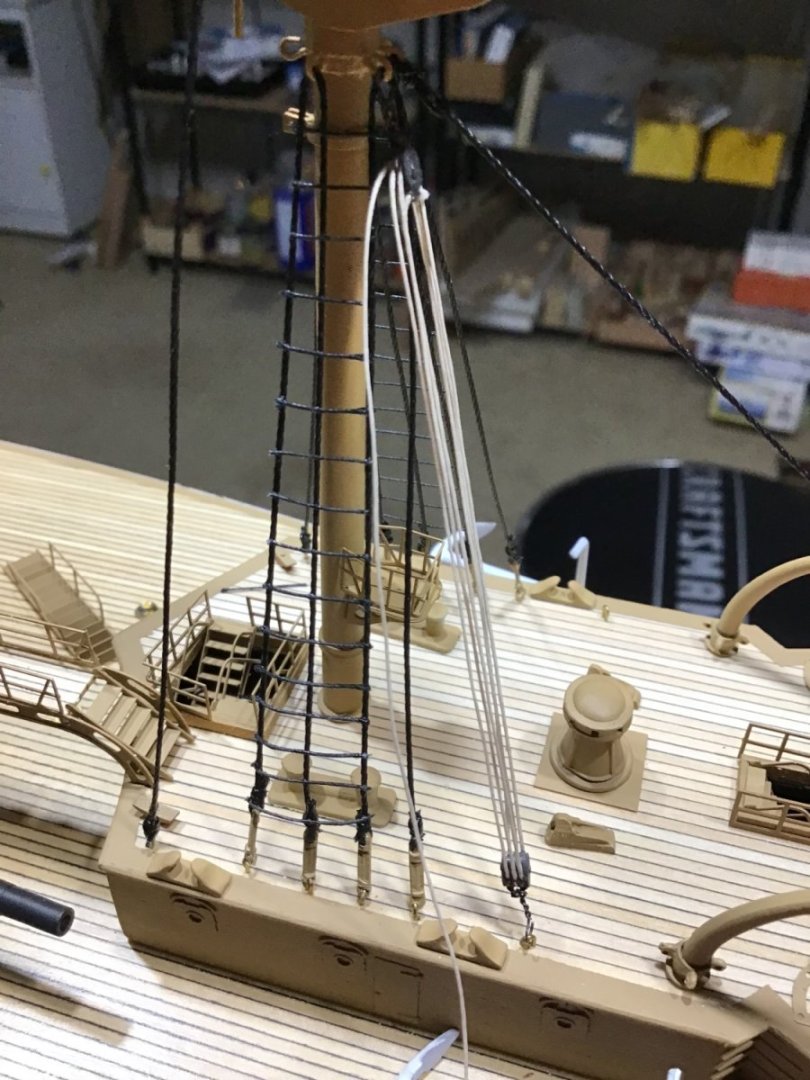
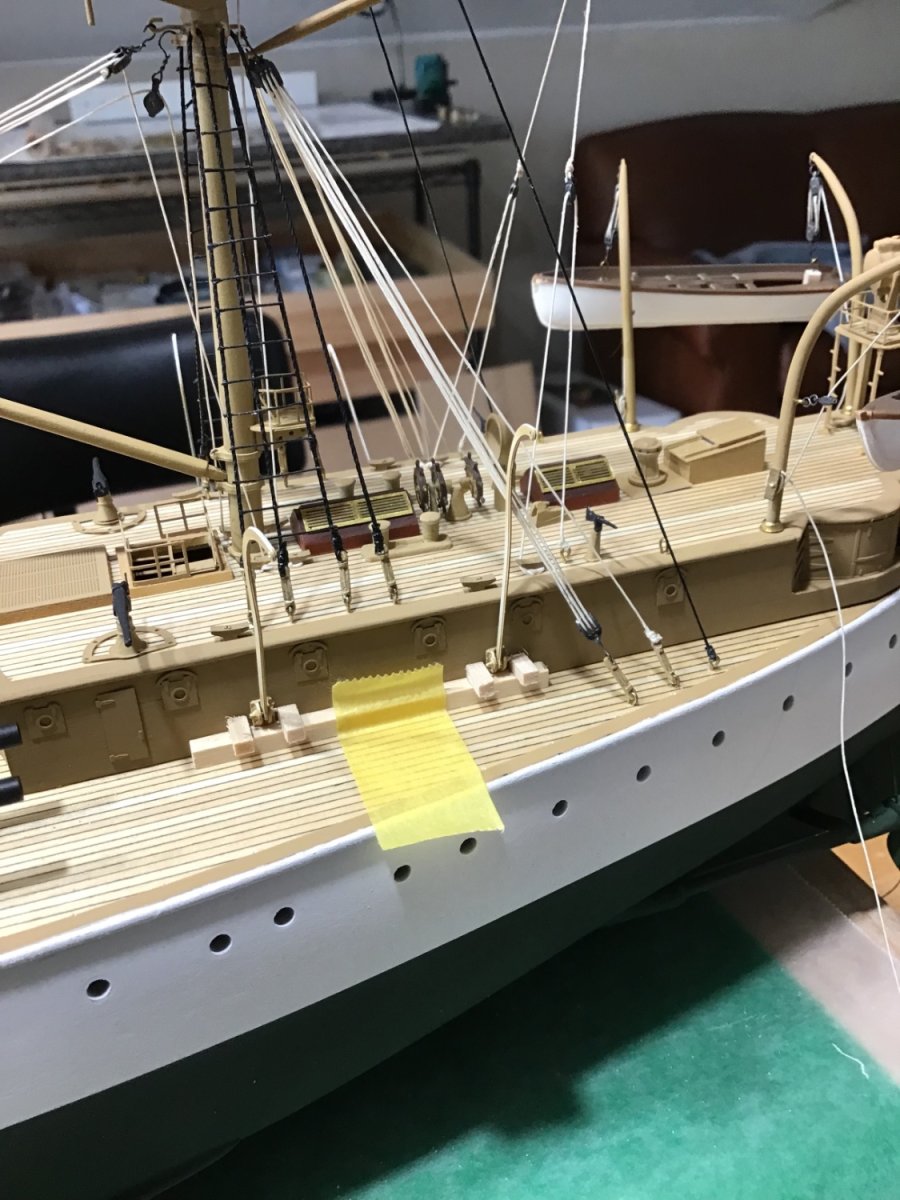
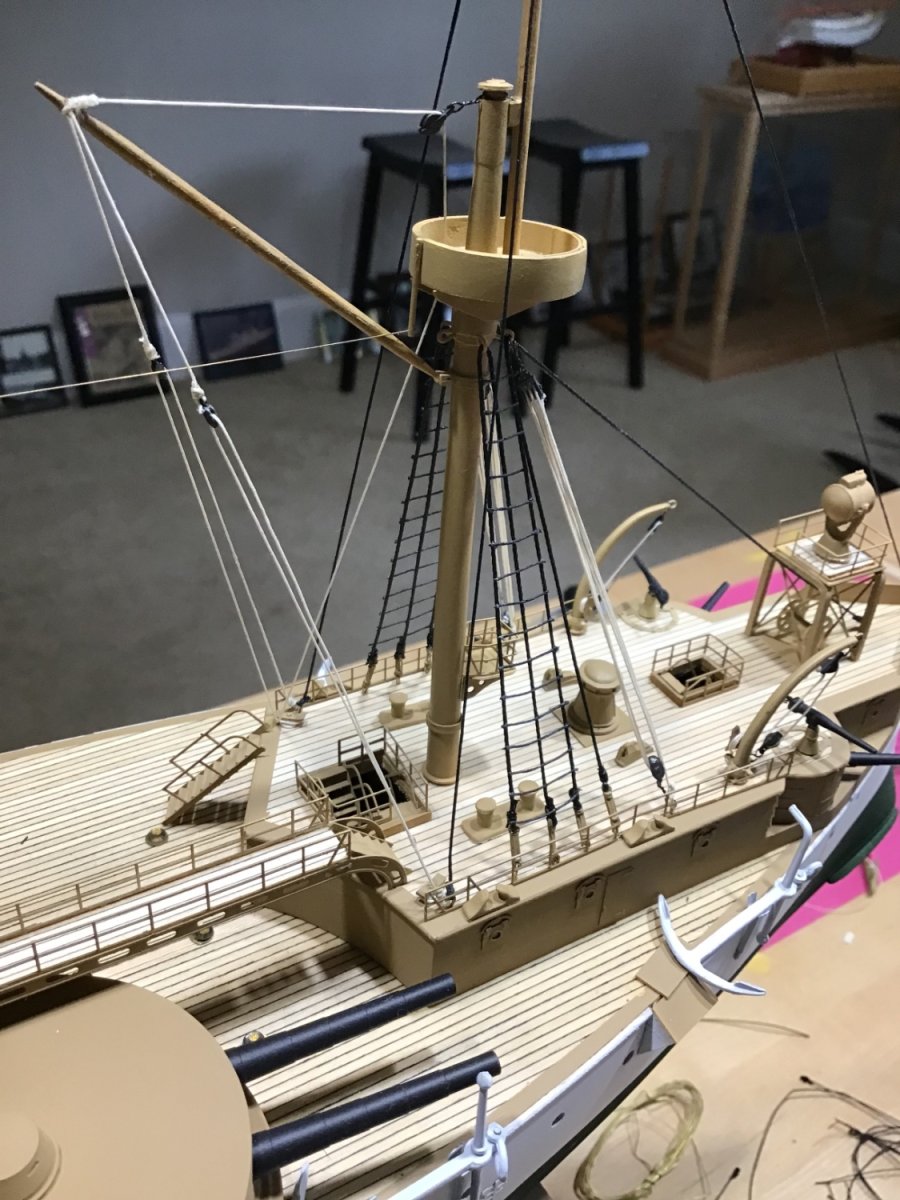
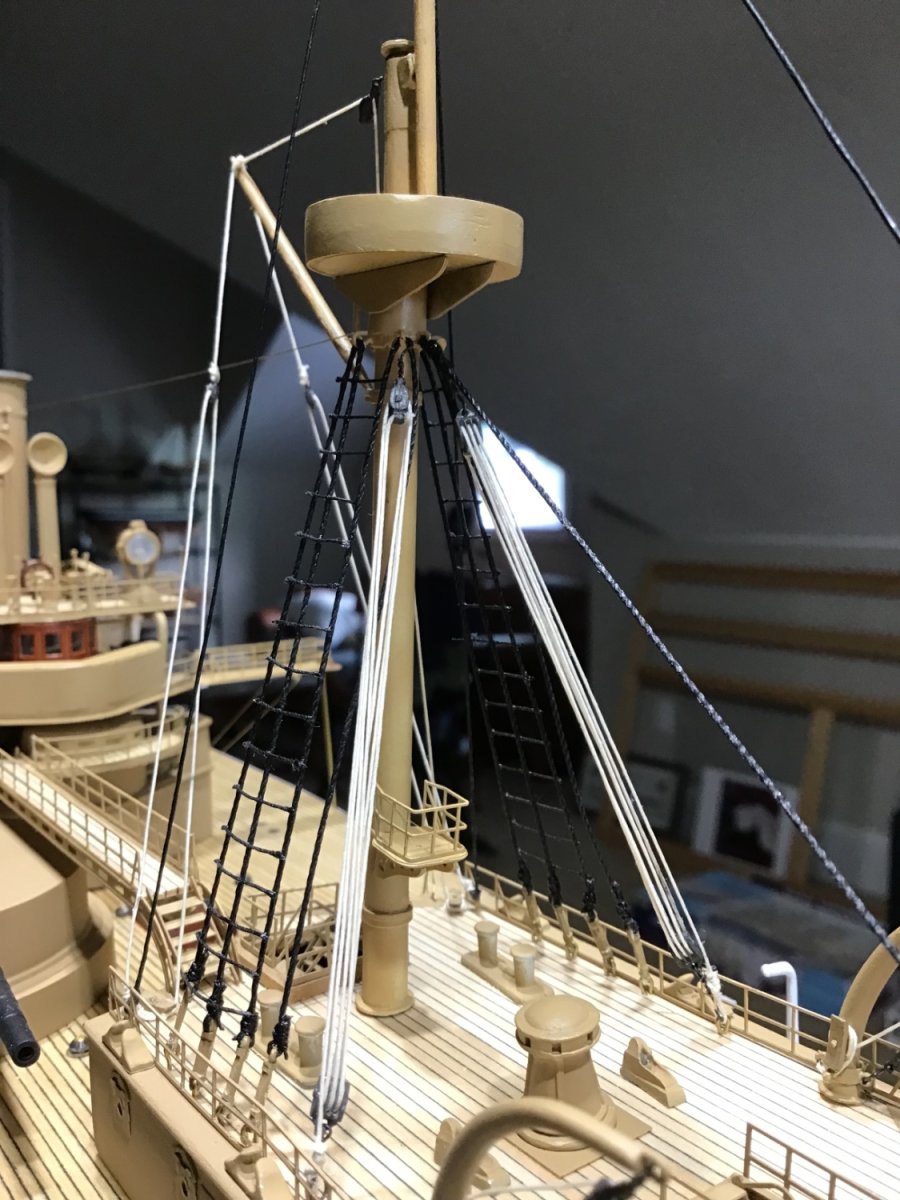
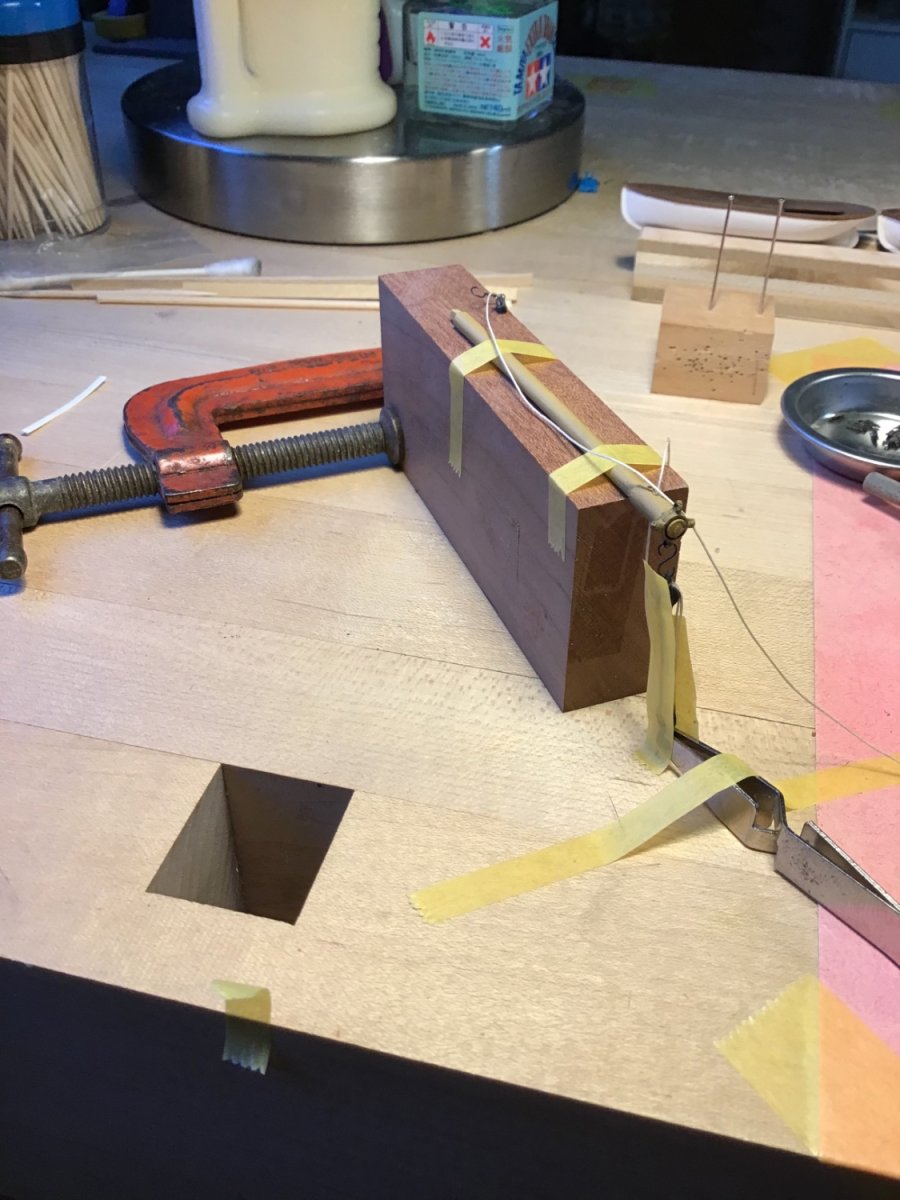
Rigging the Foremast
Here is my general approach to rigging, the major steps.
First lines are seized with a lashing, using this setup. To the left are several lines seized to turnbuckles for shrouds.
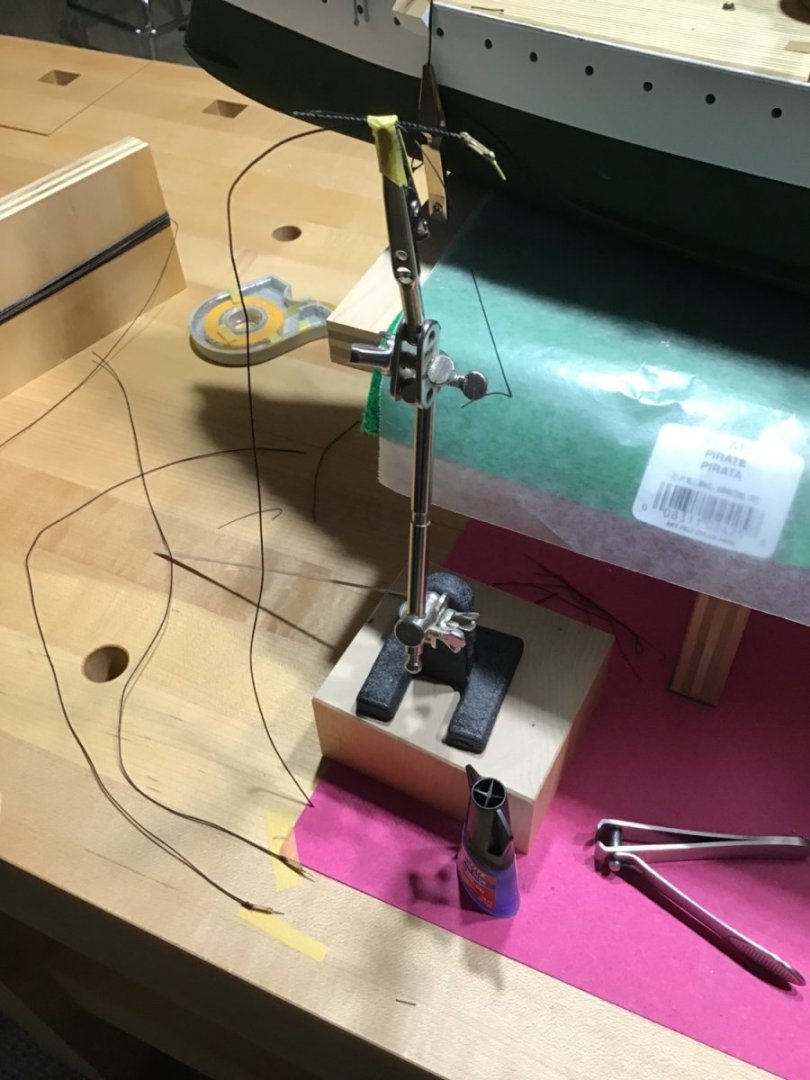
Here several shrouds are in place, I like to create tension with the silver clamps.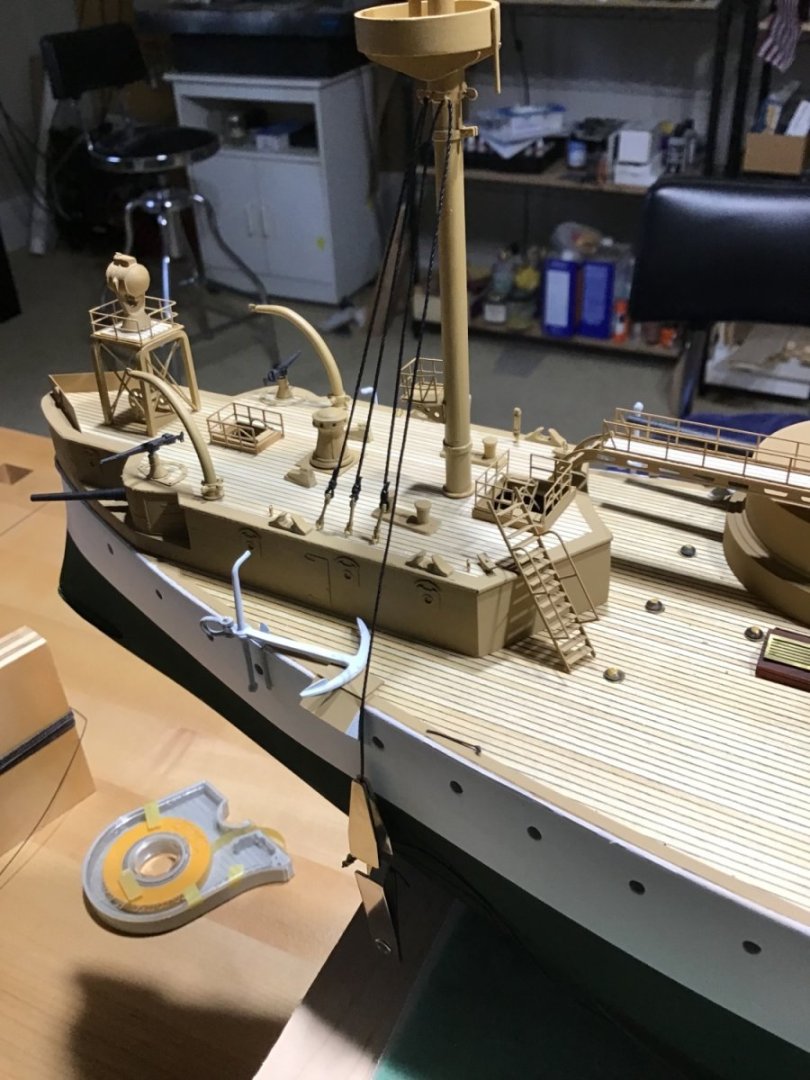
Sometimes I apply CA at the top, this fixes the shroud so one side has tension while the other side is rigged.

The seizing is left relatively loose so tweezers can be used to take up the slack.
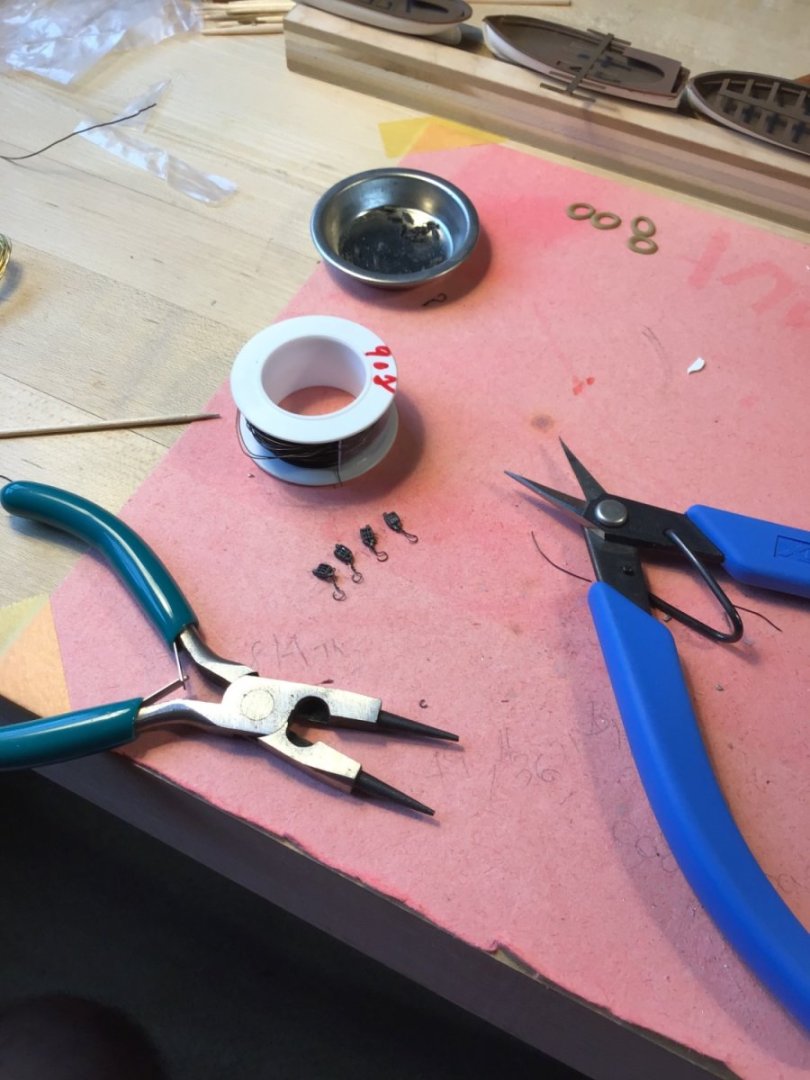
Blocks were blackened with a solution from Bluejacket. First drilled out the hole, then threaded the blocks on brass wire. Dipped in the solution, then swirled in the water to stop the reaction. Later the block sides will be painted, after installation.
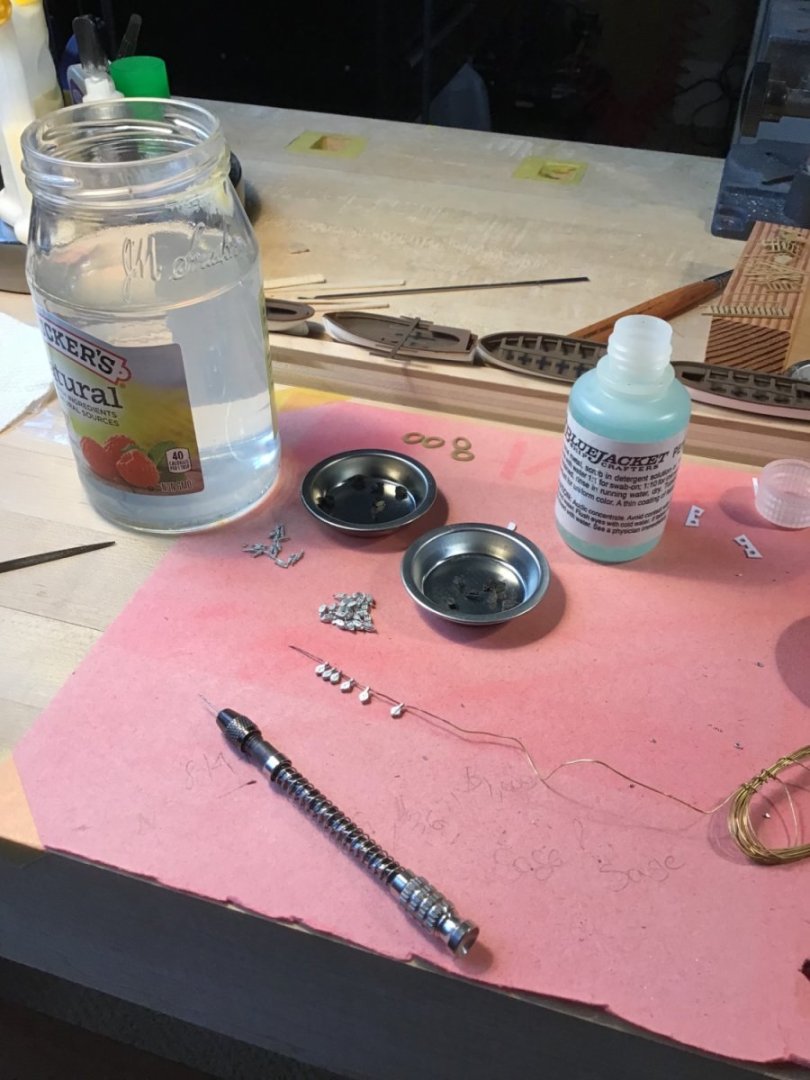
The blocks were stropped with wire, and a hook formed with the pliers with round ends.
The preventer was built on a piece of plywood, with posts spaced from a measurement of the model. Tape is used to hold it together for placement on the ship.
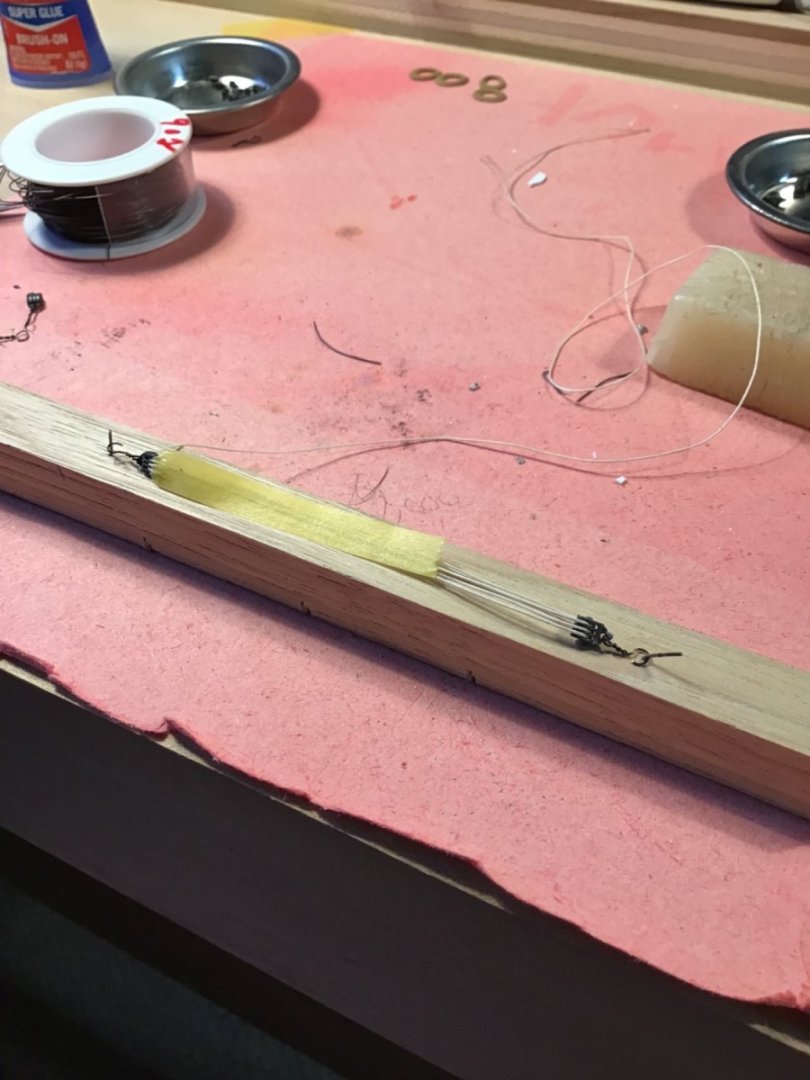
The Preventer is installed.
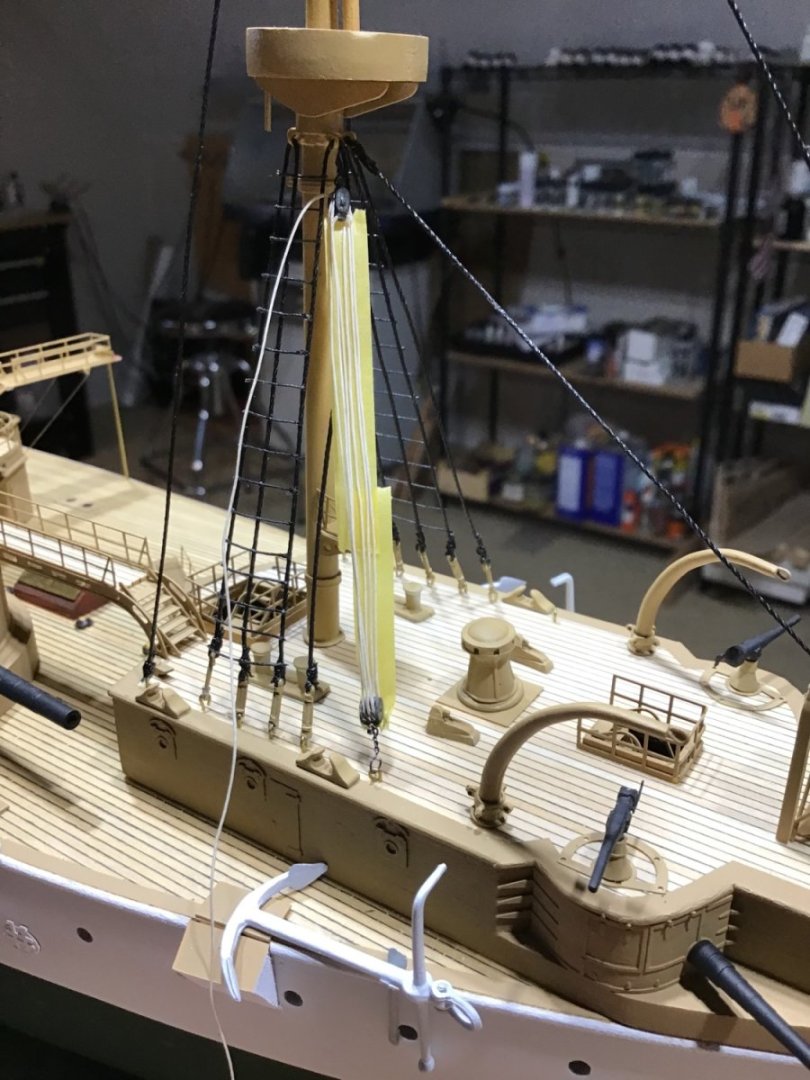
Tape is removed.
- Knocklouder, mtaylor, Ryland Craze and 4 others
-
5
-
2
-
Rick, Roger, Alistair,
Thanks for the encouragement. I’ll post pictures of the rigging asI go along.
Thinking of making the case with Cherry Hardwood, have some that’s been around too long and may as well use it for this.
Thanks again, and have a great weekend.
-Rich
- mtaylor, Ryland Craze, Keith Black and 2 others
-
5
-
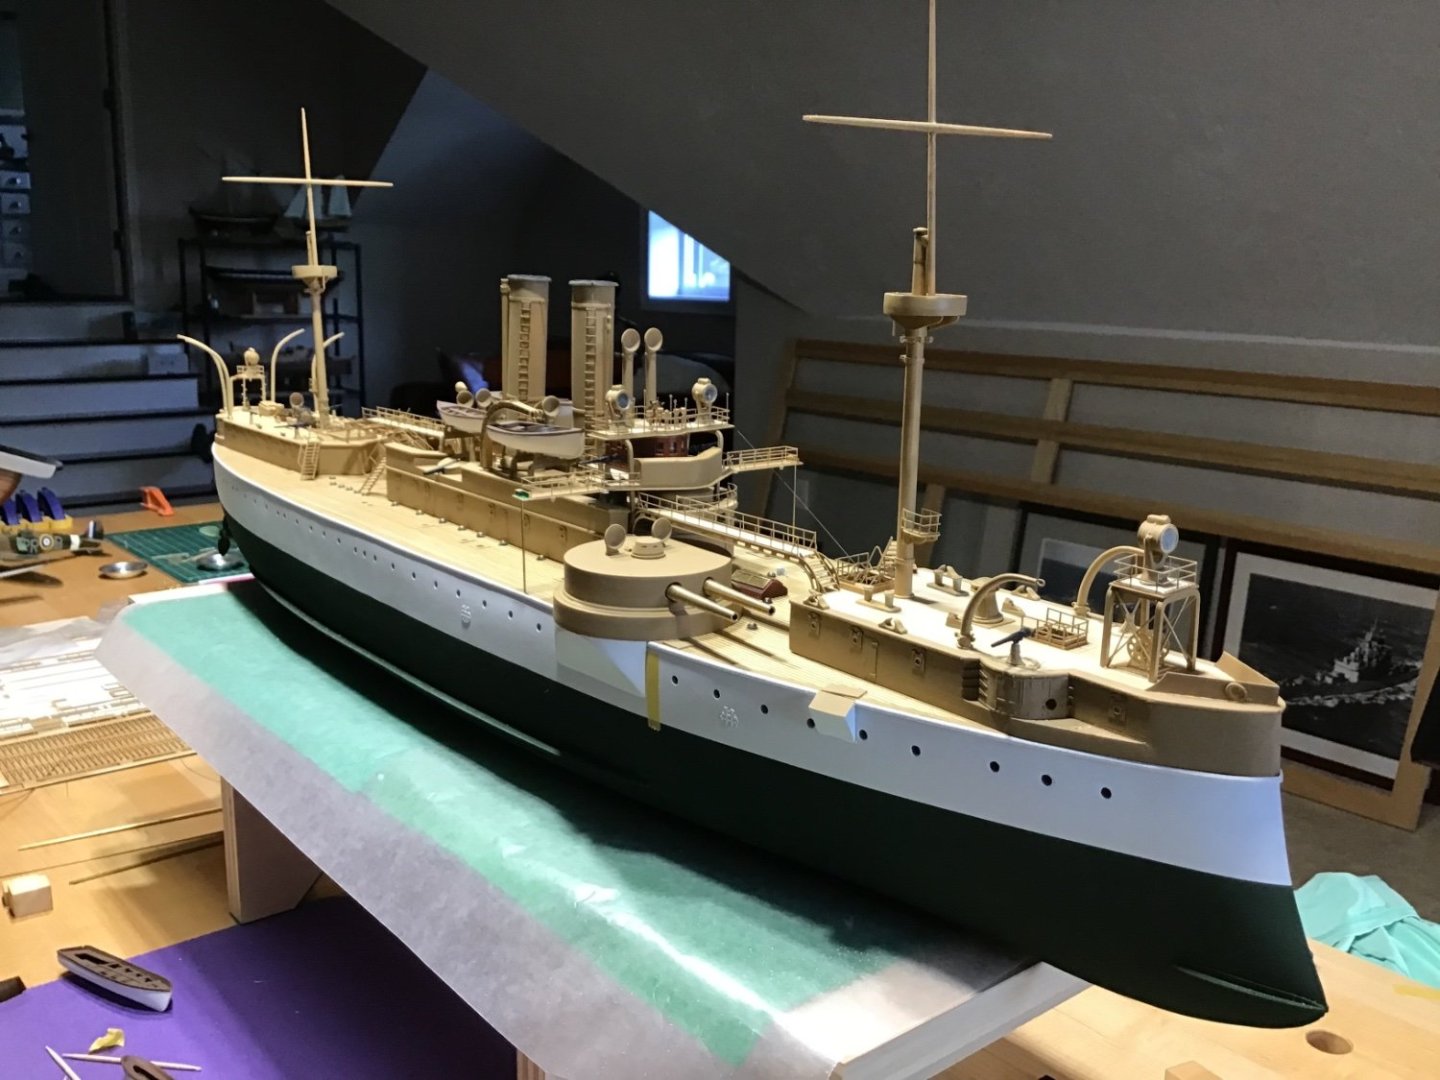
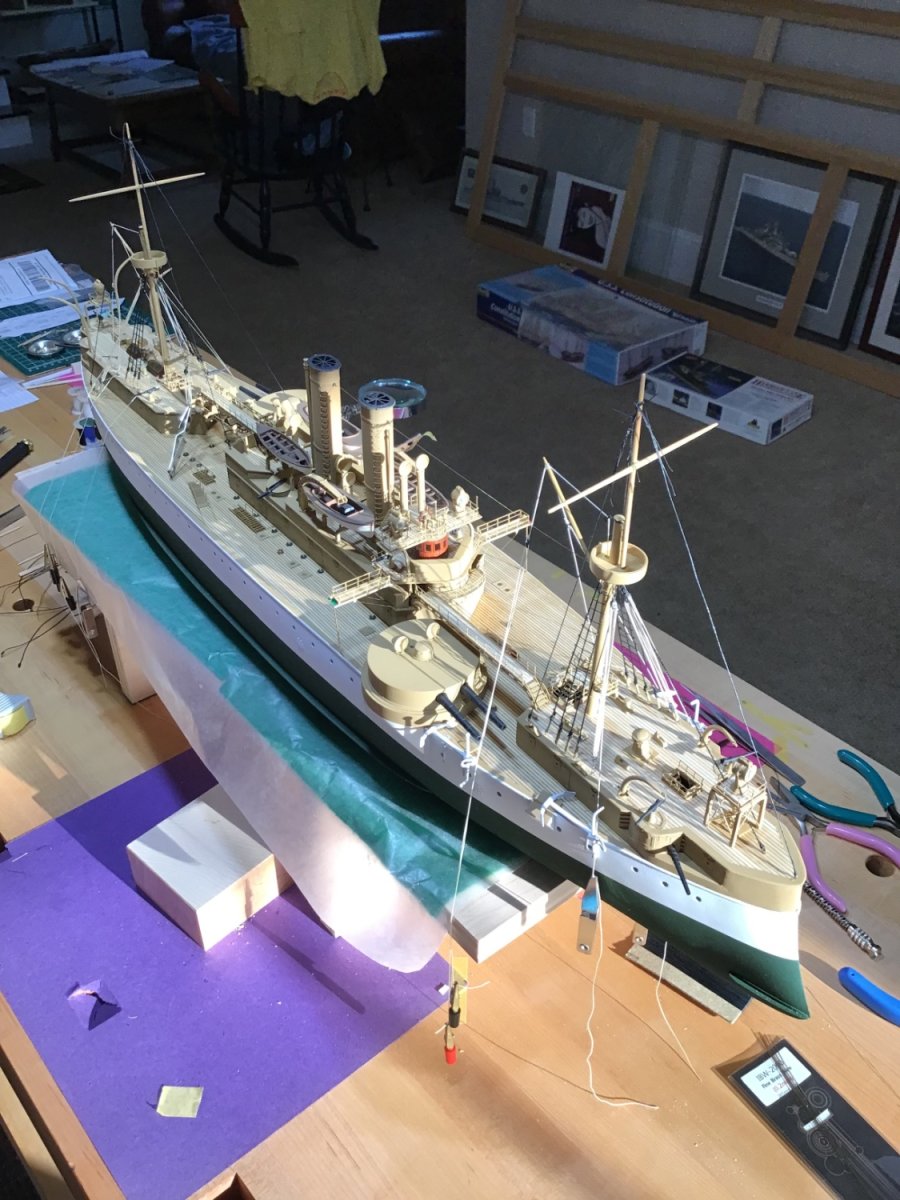
End of Construction
At this point the construction steps have been completed. Next is Rigging, beginning on Page 58 of the manual. Once the rigging is done will fit the railings and the bow and stern scrollwork. Then final touchup, dusting, and the case. Thanks for following along.
- mtaylor, Ryland Craze, GrandpaPhil and 5 others
-
8
-
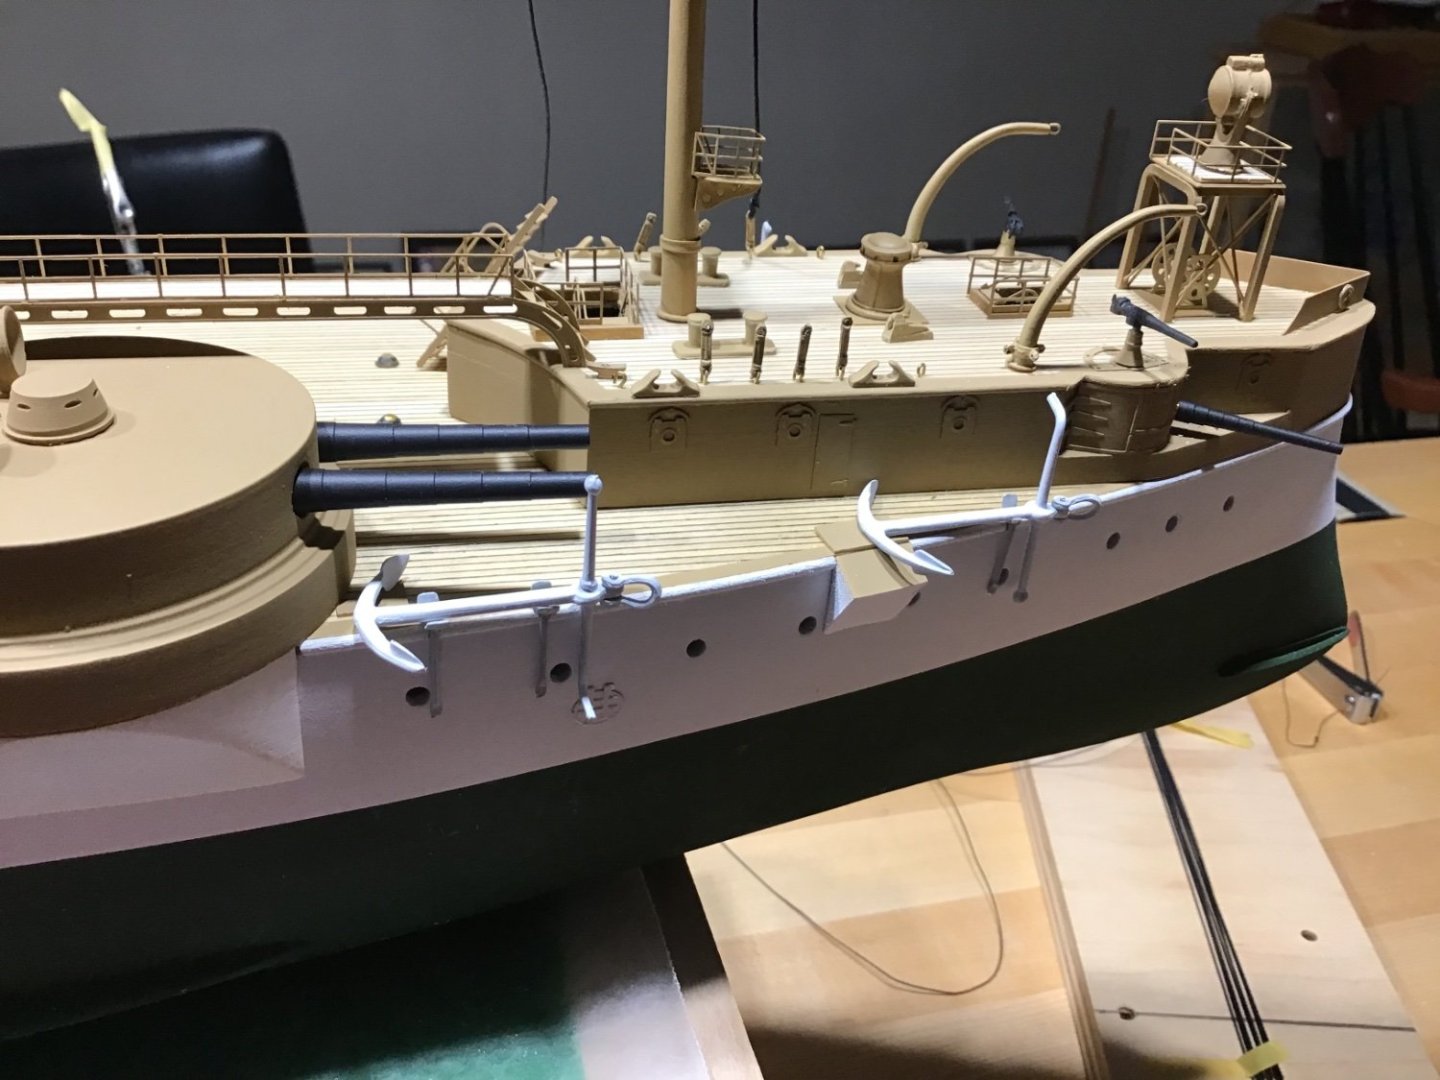
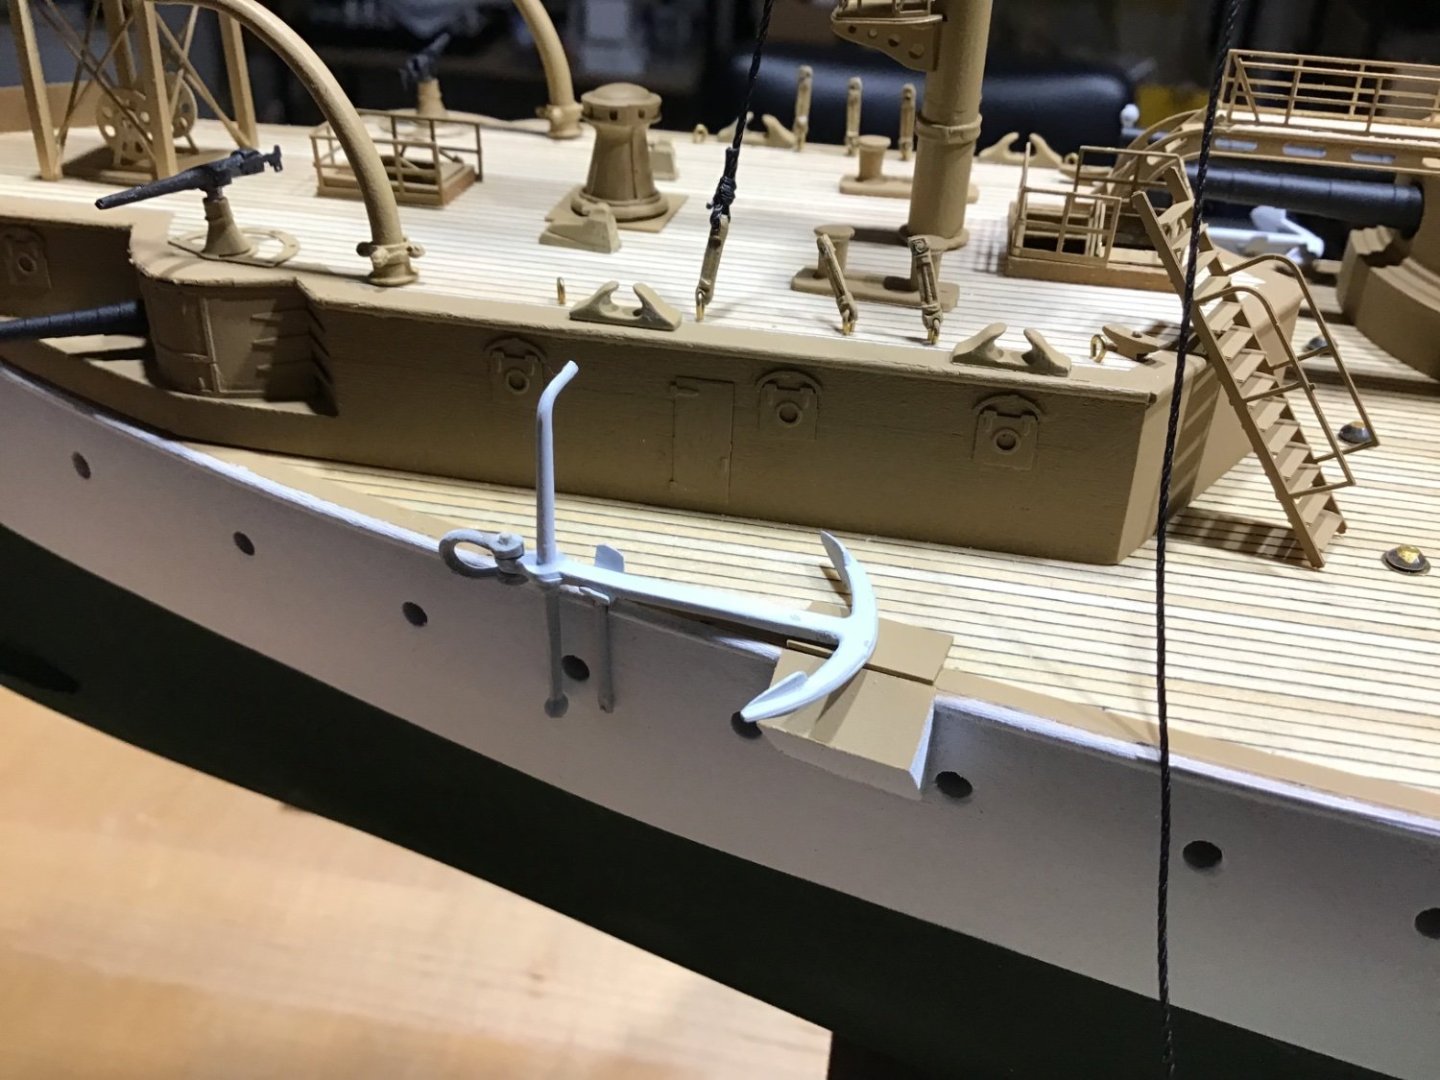
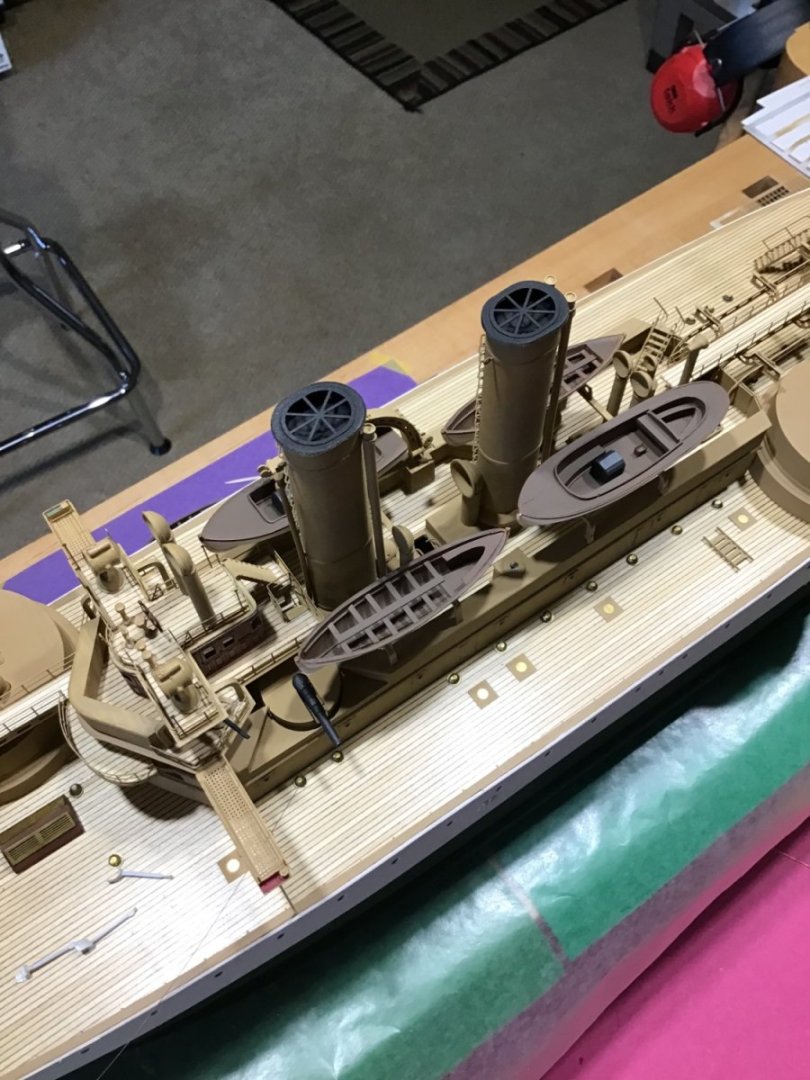
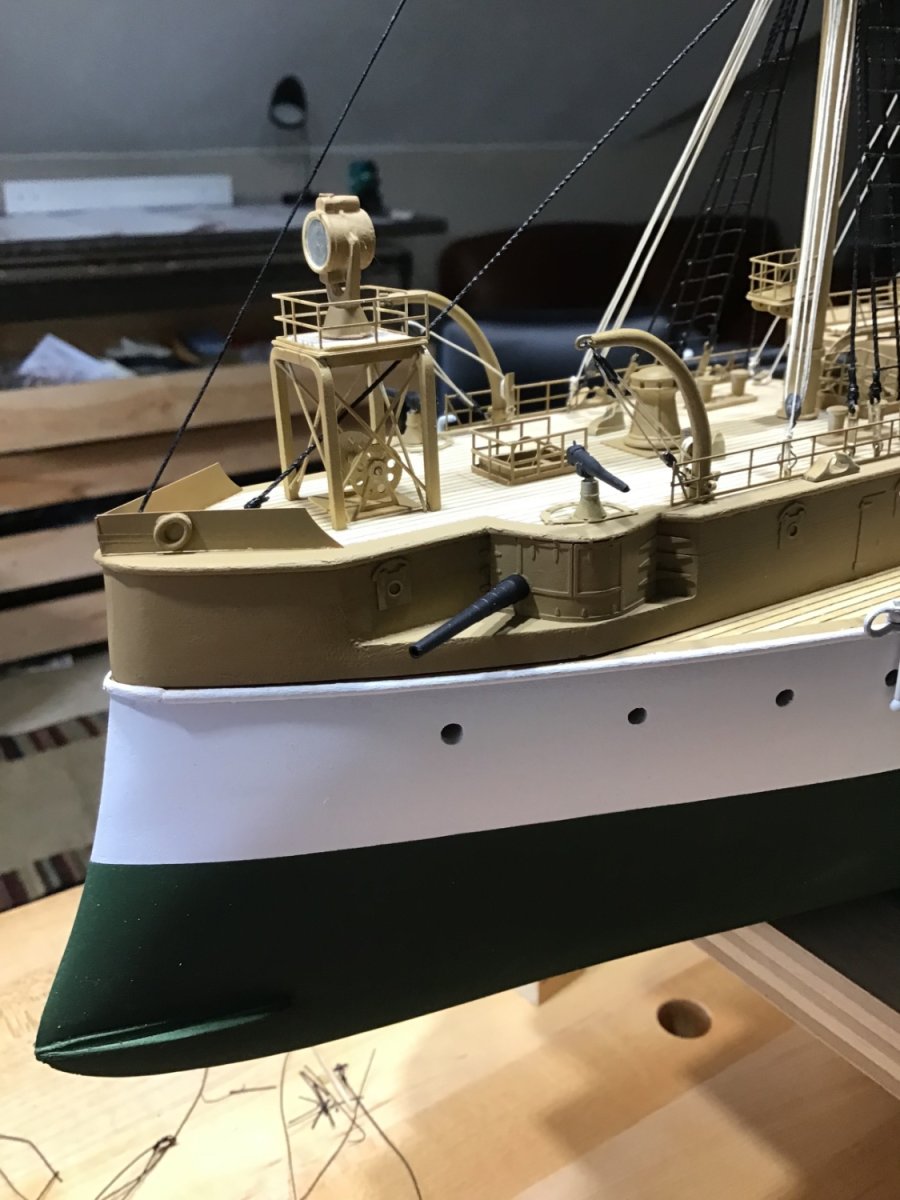
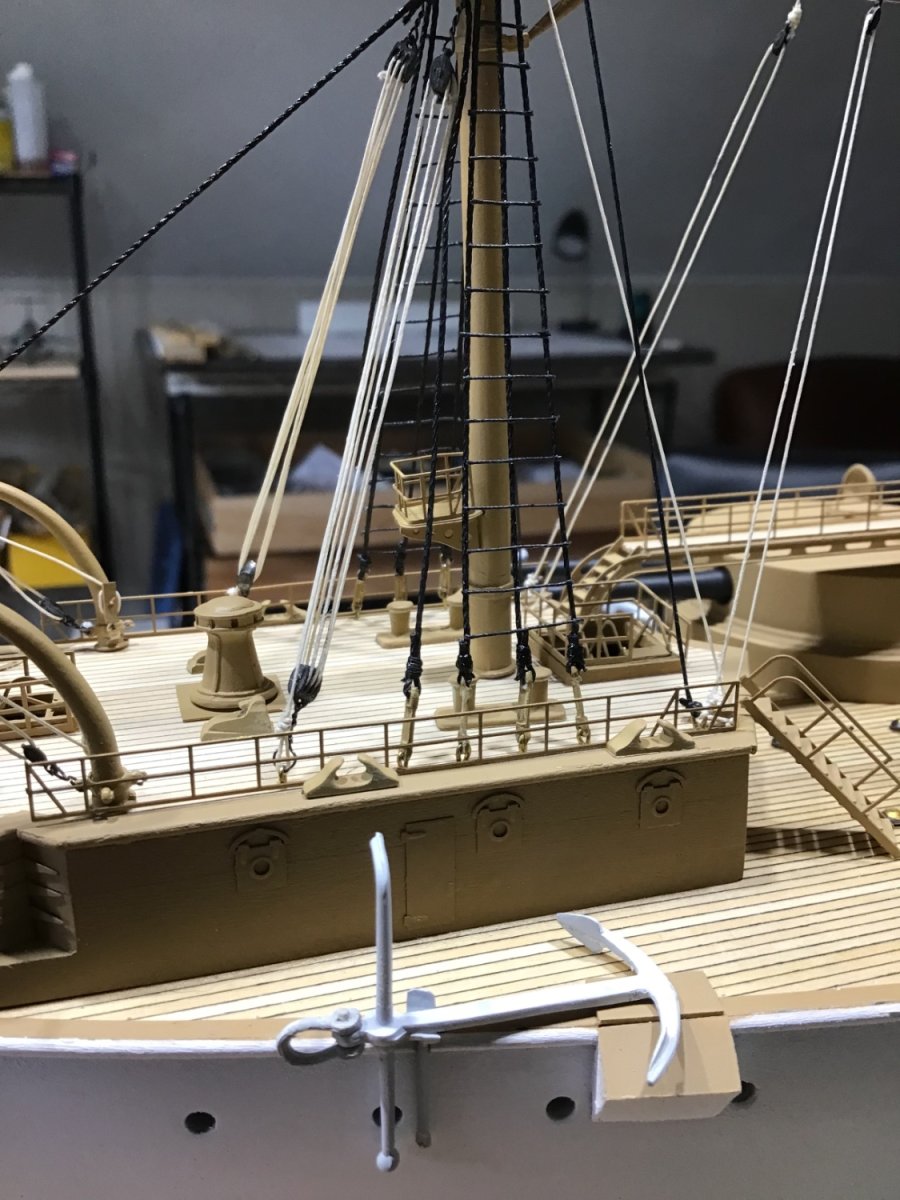
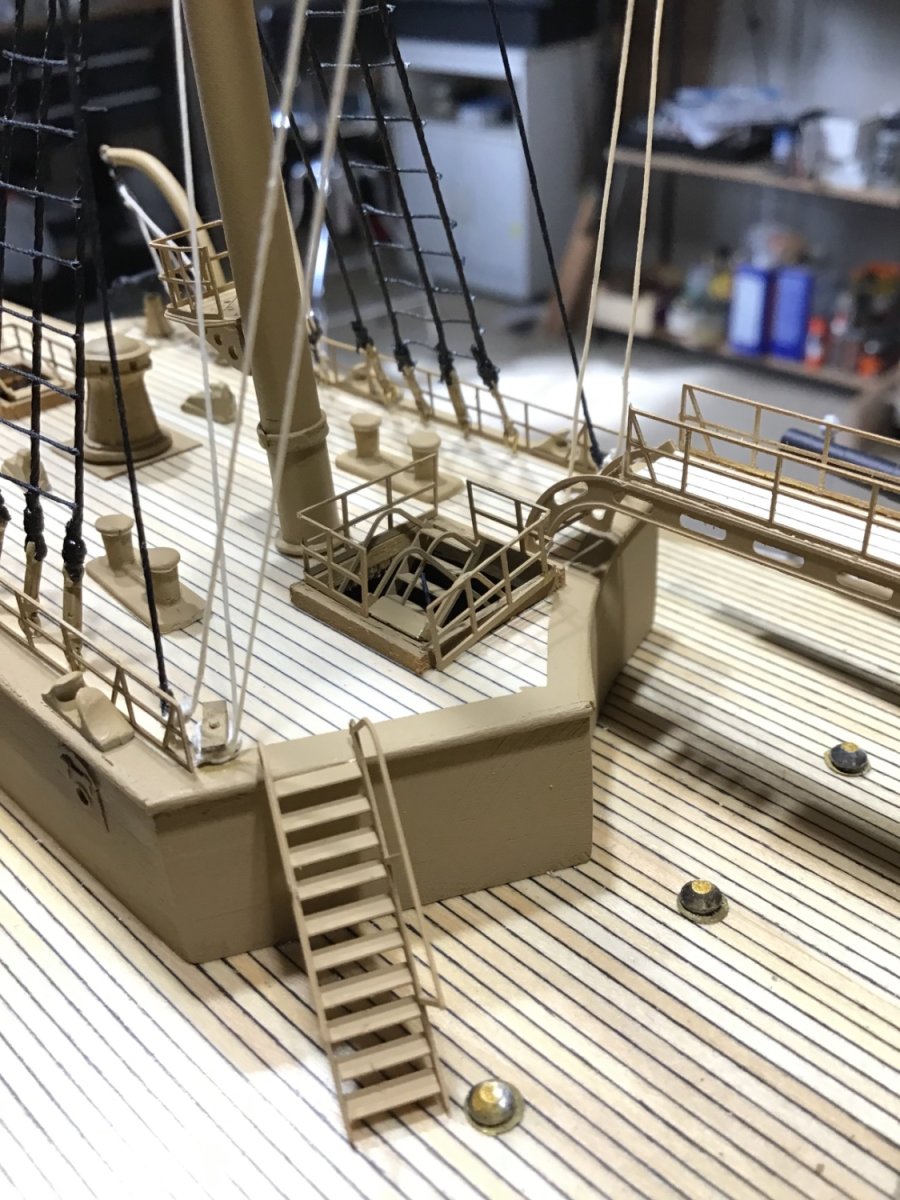
Anchors
Used a round file to make grooves in the deck outboard trim to accept the anchor stanchions (holders). Anchors rest easy in them.
Anchors primed and painted white. Second shot shows the start of rigging the ratlines into the turnbuckles, and a ladder that needs to be cut down to size.
- Ryland Craze, mtaylor, GrandpaPhil and 6 others
-
9
-
Hello Herby, welcome to model ship world! Always ready to answer any questions.
- Keith Black, mtaylor and Herby63
-
3
-
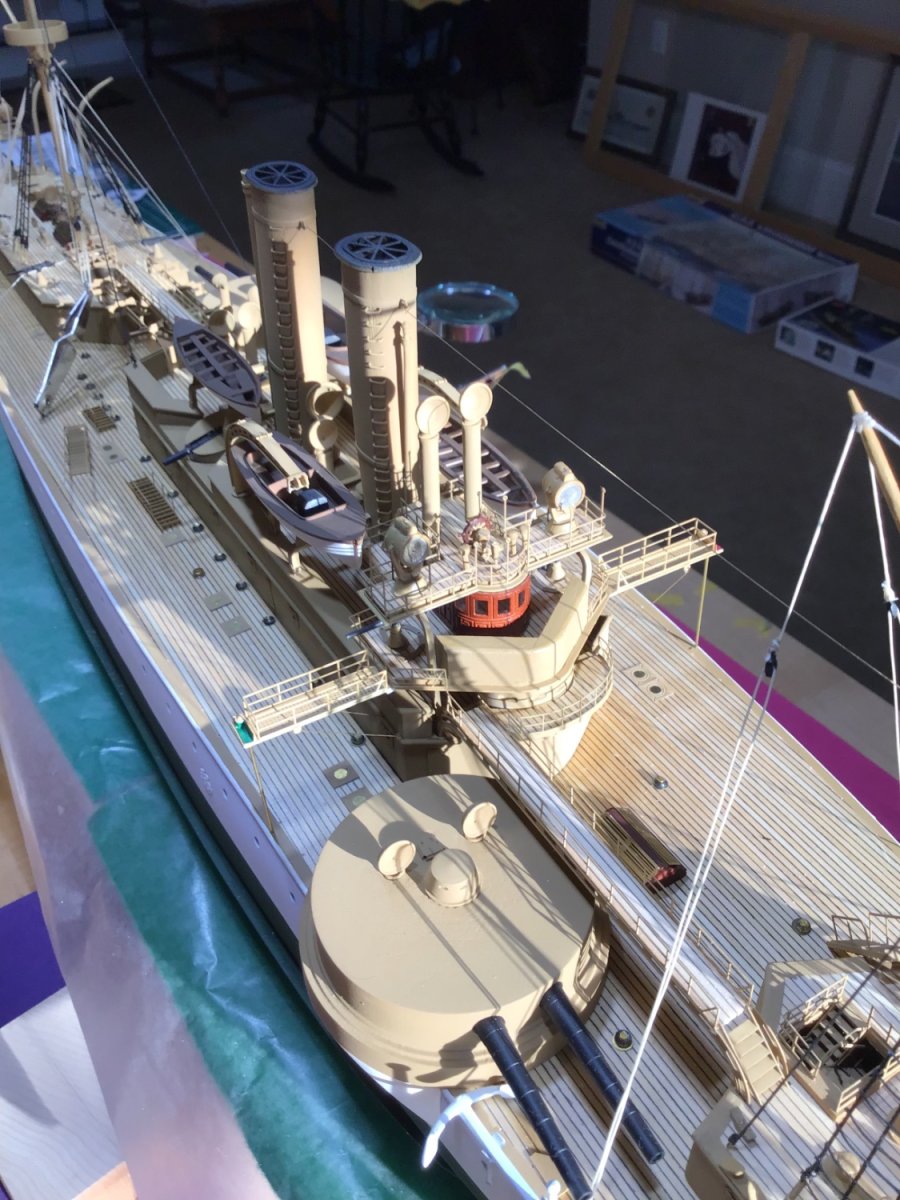
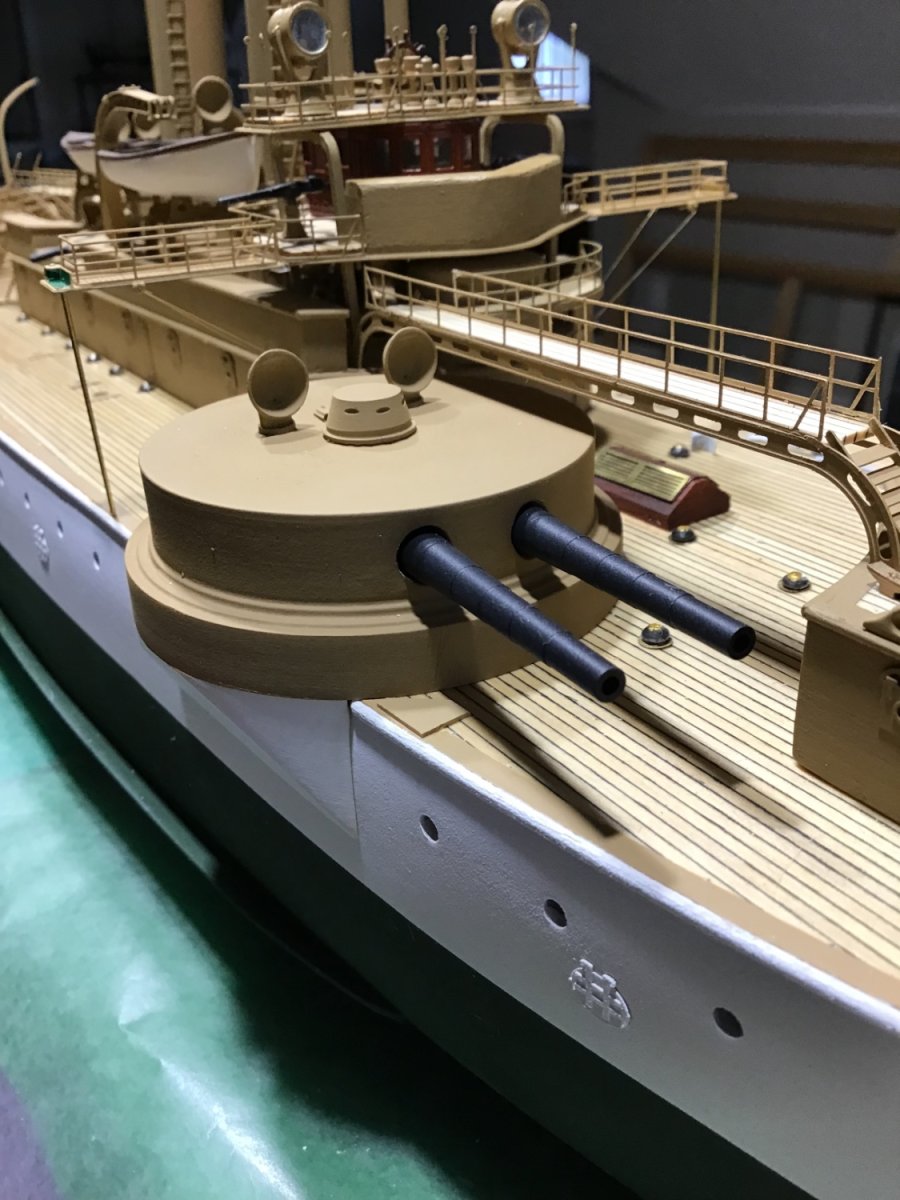
Finishing the Gun Barrels
Decided to finish the brass barrels. I wanted a variation from the straight black finish of the smaller guns.
Primed brass with Krylon Maxx Grey Primer right out of the rattle can, quick short bursts.
Color finish applied with Paasche Talon, #2 tip, air pressure 15 psi. Vallejo Model Air paint, Black 71.057, 15 drops in the cup, then 1 drop Gunmetal 71.072, and stir well. Finish with thin coats of Valejo Matt Varnish.


- aliluke, GrandpaPhil, yvesvidal and 8 others
-
11
-
7 hours ago, yvesvidal said:
I like the lack of symmetry of that ship. It makes it very interesting.
Thanks Ives. It’s hard to describe. Words like detail and intricate are trite.
Often spend time looking at the model and friends and family love it. (My wife wants me to sell it. Can’t get there.) It may be the combination of materials: wood and metal, and the shapes: angles and curves of the superstructures, railings, round turrets. And it’s interesting that this iron ship has masts with the round tubs.
Anyway it’s a fine kit with plenty of material. And certainly worth the effort.
Sometimes I think, how did I make this? Did I do all of this?
My approach to the work is just thinking of the next step, because thinking of all the steps at once can be overwhelming.
Getting to this skill point has been an over 10 year journey, that started when I was working full time. I work part time now and I’m very fortunate to have the space for a nice shop. And the time to figure out how to do the work. After many models, and now Maine, I have most of the process figured out. Except maybe primer on brass, still have an adhesion problem.
Not sure what’s next, plenty in the stash. Probably some plastic for a break. Faster and helps building finishing skills.
It may be another power vessel, I have a Tug, the Nantucket Light Ship, and Olympia. Also USS California, my alma mater, by Ironshipwrights.
Thanks for listening.
-Rich
- yvesvidal, Keith Black, mtaylor and 2 others
-
5
-
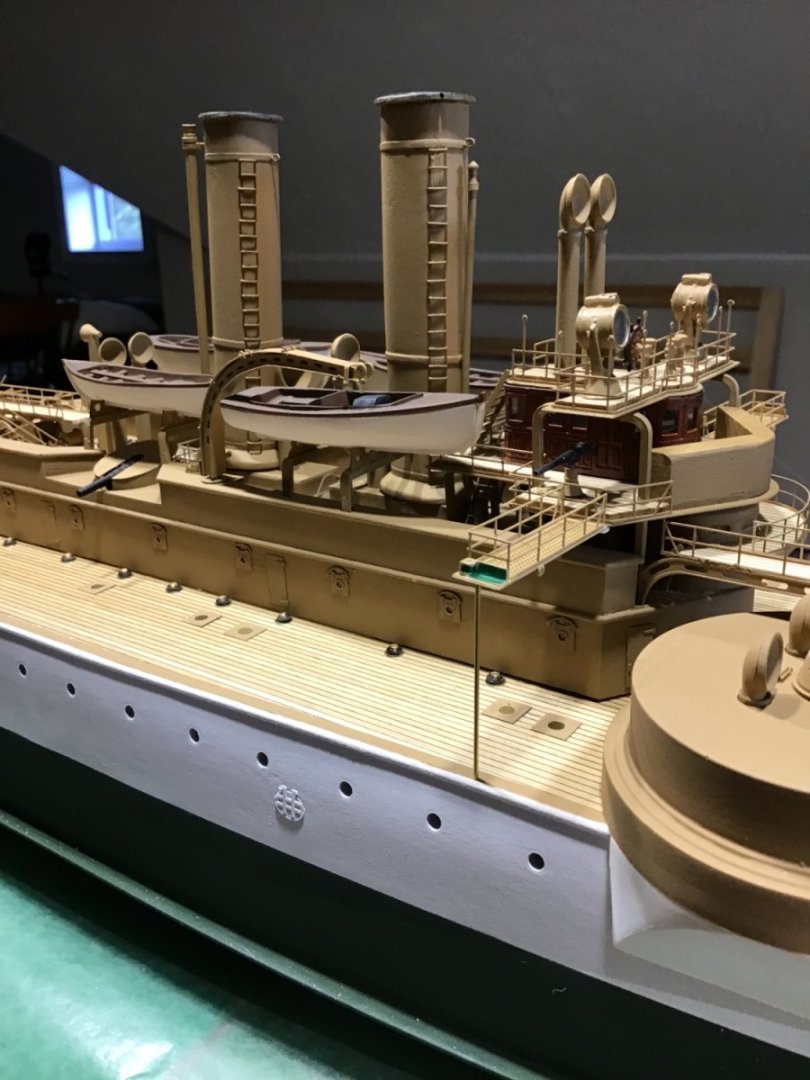
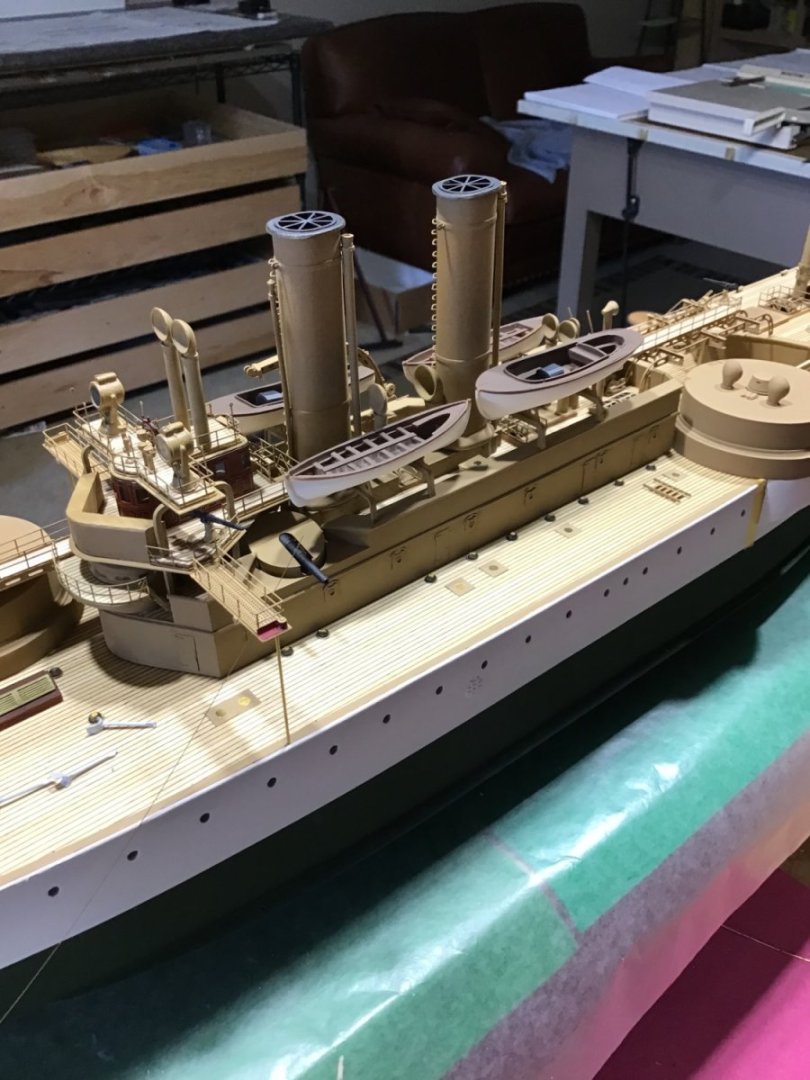
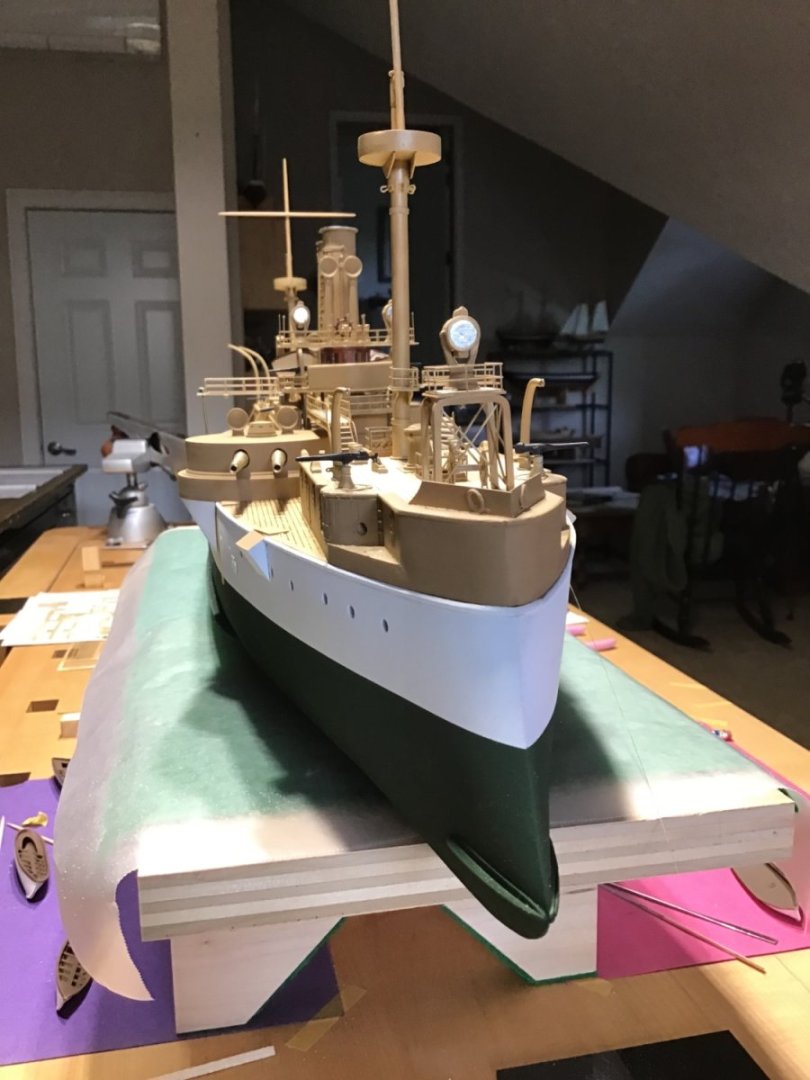
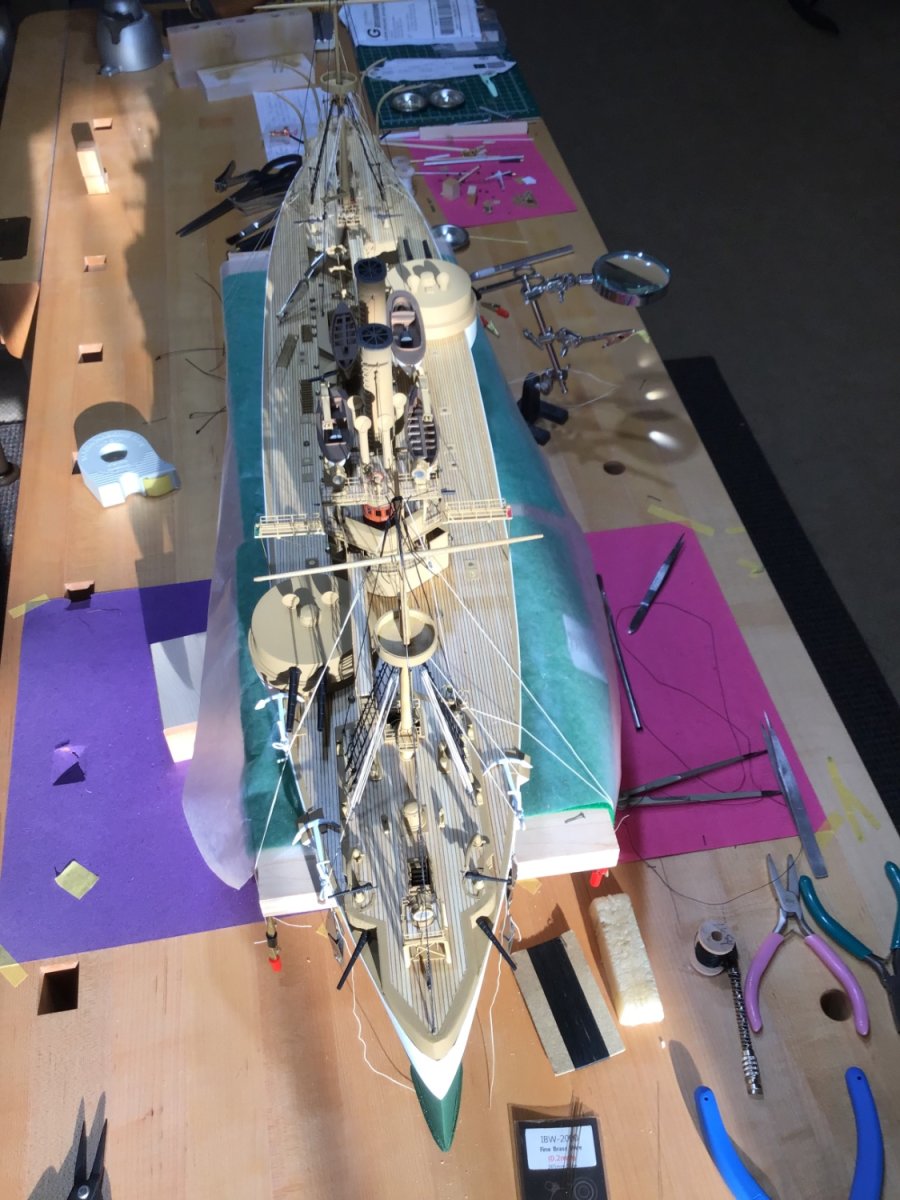
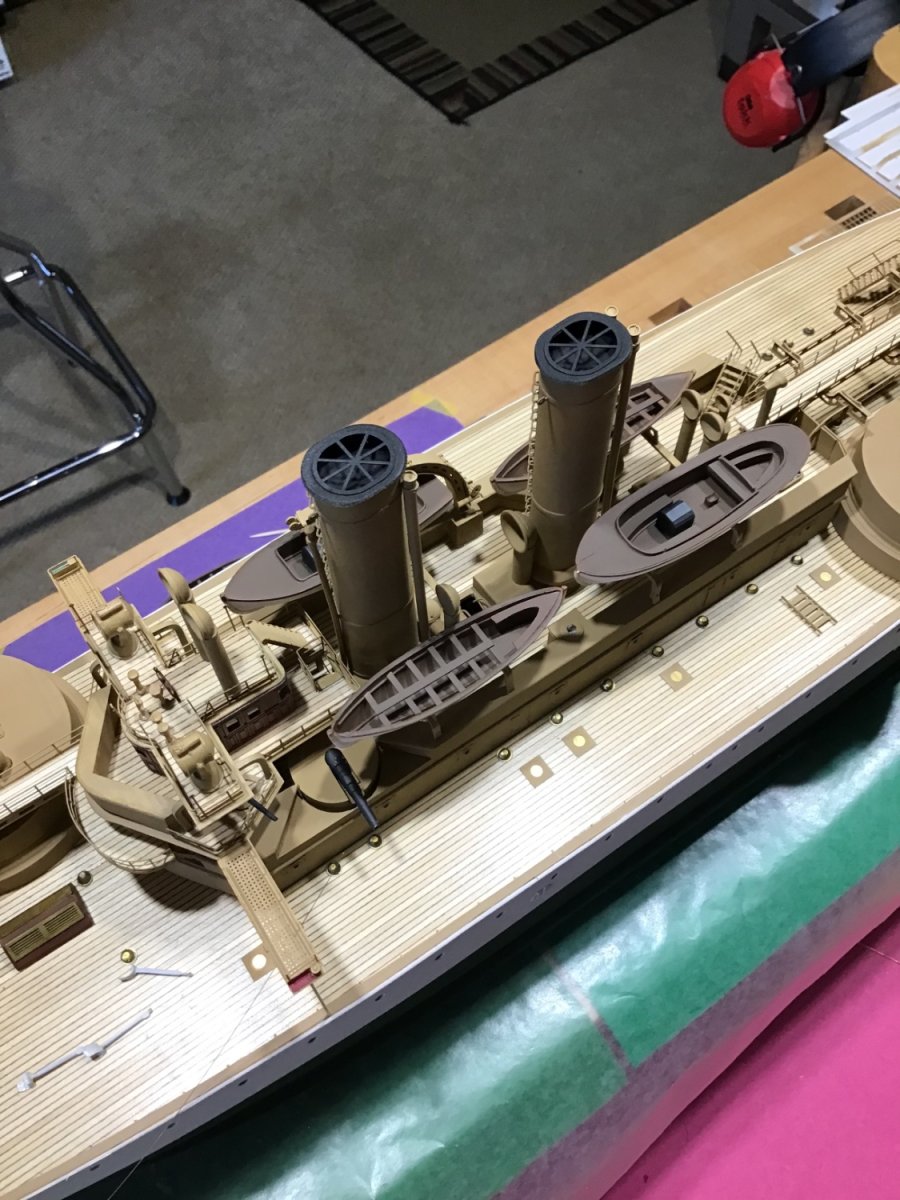
Locating Ship’s Boats Amidships
At this point each assembly steps feels like an added layer of complex detail, which makes the ship comes to life.
Boat skids are installed. Dry fit the boats on the skids to determine the cradle locations on the skids, then installed the cradles and painted.
View of boats from port, starboard, and overhead. Plus a few shots of the model, masts dry fitted.
-
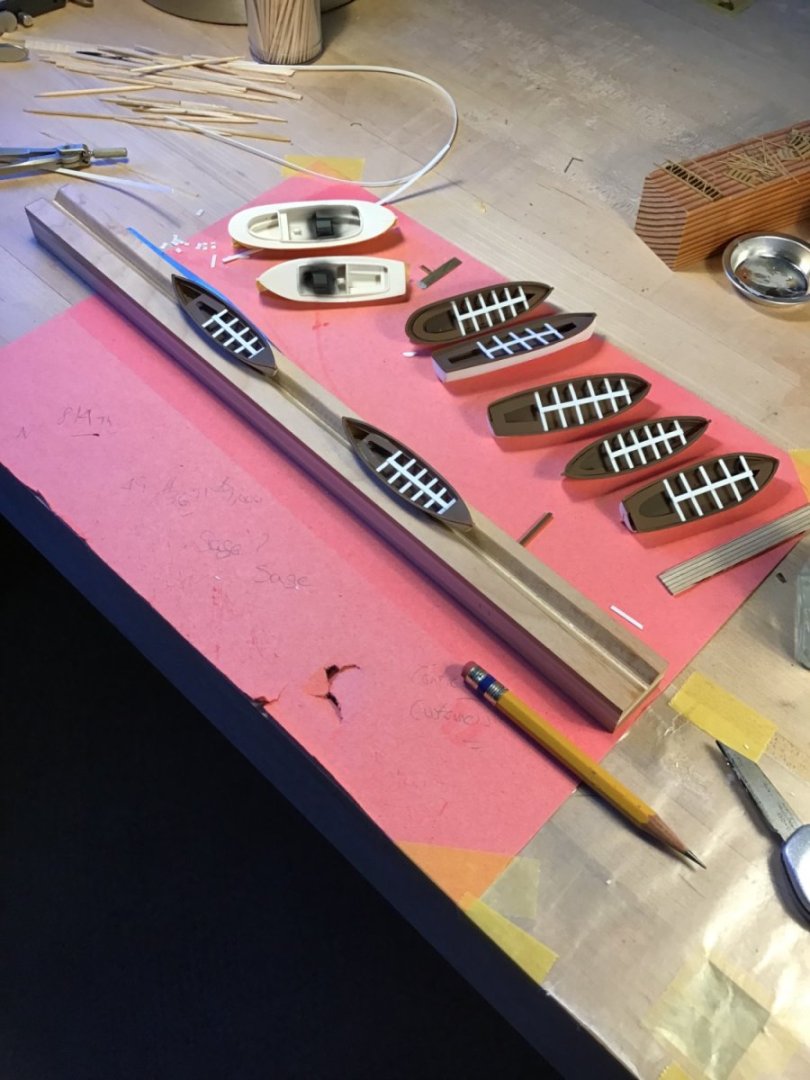
Ship’s Boats
Finished with Tamiya Flat White XF-2, and Vallejo Medium Brown 71.038.
The boilers in the launches are Vallejo Black 71.057 with a few drops of Gun Metal 71.072
Eagle Talon airbrush, #1 nozzle and tip. Straight paint, no thinner, 20 psi.
Strip stock from the kit.
-
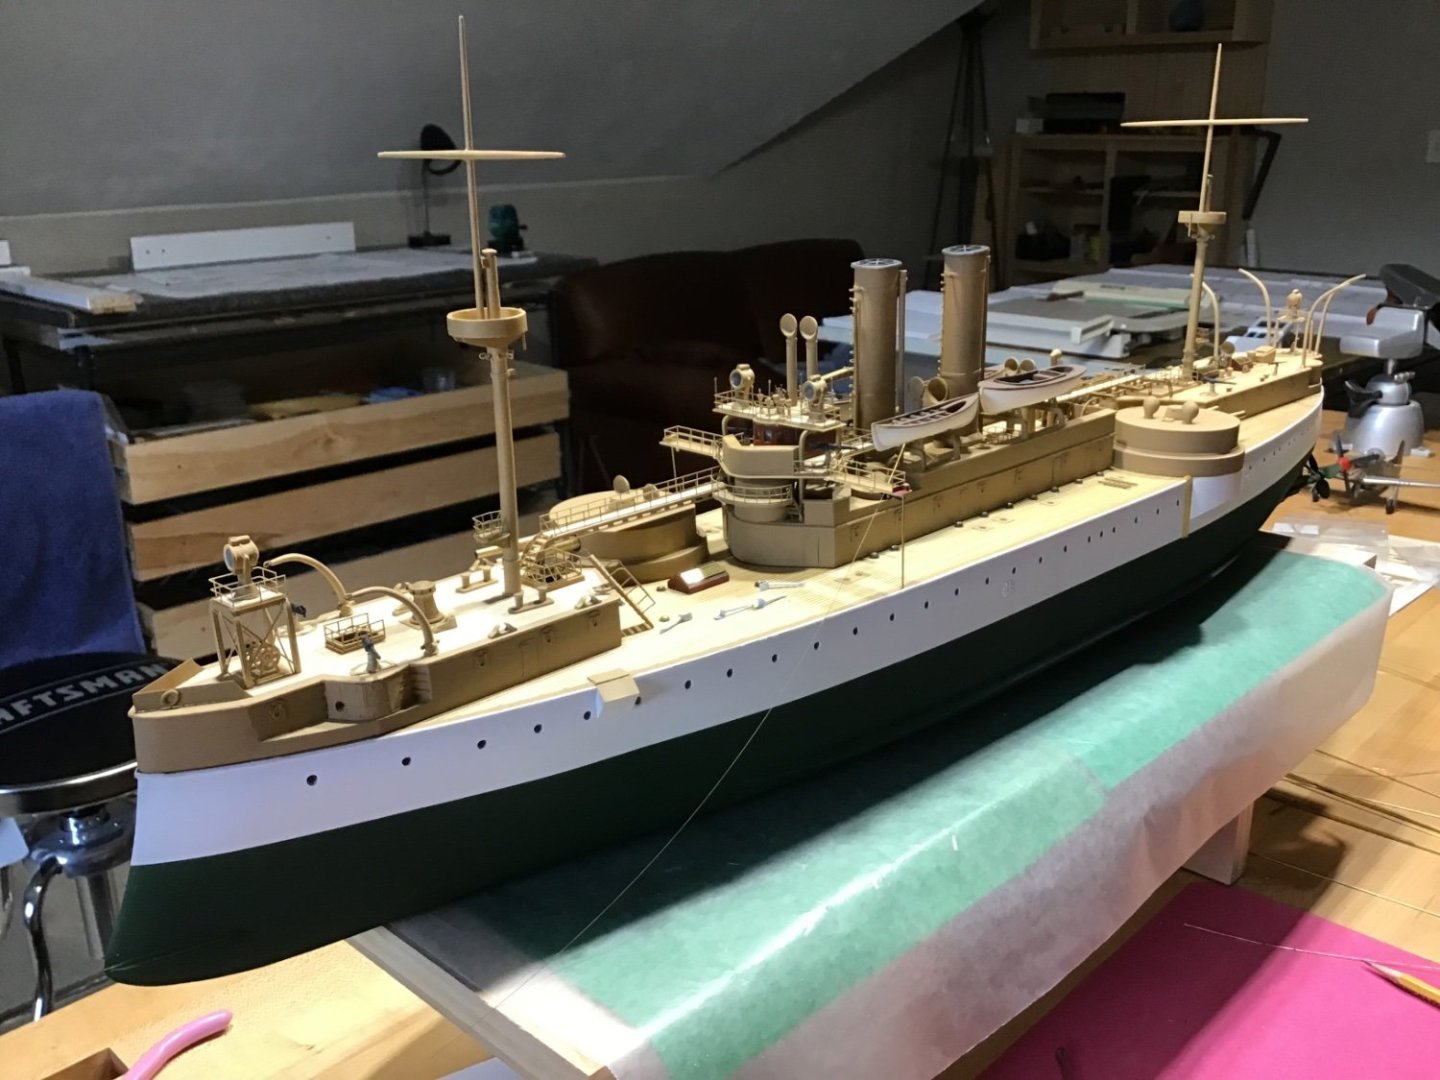
Back in the office. Fresh eyes, fresh perspective.
Interesting how the model looks better after a break, see the whole ship, rather than just, what could be done better.
- mtaylor, Canute, Keith Black and 1 other
-
4
-
Thank you for showing how this work is done. Inspirational!
- shipman, FriedClams, Valeriy V and 3 others
-
6


USS Maine by ERSRich - FINISHED - BlueJacket Shipcrafters - 3/32
in - Kit build logs for subjects built from 1851 - 1900
Posted
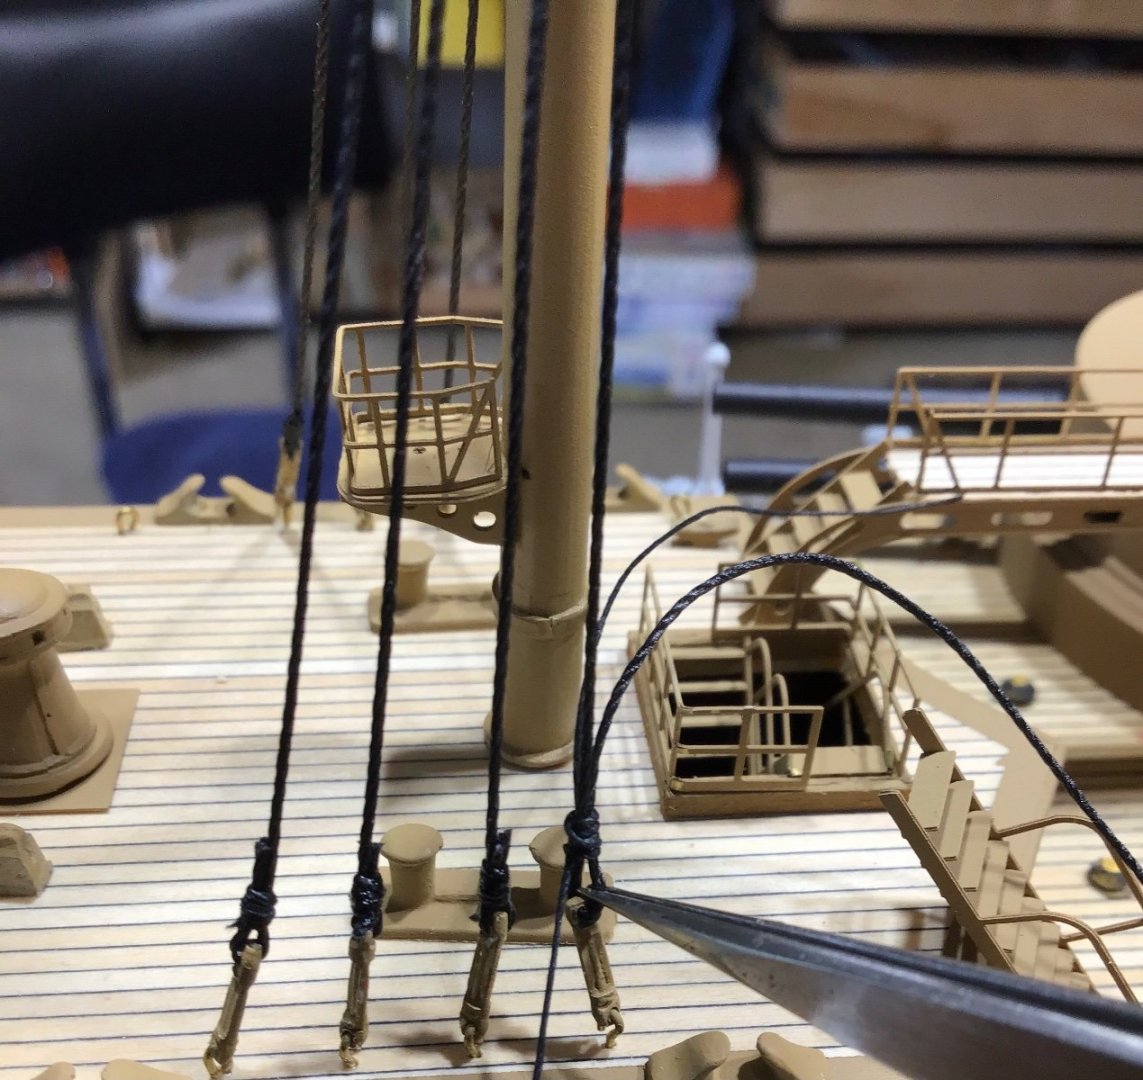
Accommodation Ladder and Railings
Here's how the accommodation ladder install went. Two brass rods under the top platform. Using the bit as a weight on the lower platform for tension in the block ropes, then liquid CA on the ropes. Added the U shaped rod, seems to make sense, may redo it seems a little out of scale.
Railing install pretty straight forward - use little dots of CA in the corners instead of along the bottom of the whole piece.