


ERS Rich
-
Posts
600 -
Joined
-
Last visited
Content Type
Profiles
Forums
Gallery
Events
Posts posted by ERS Rich
-
-
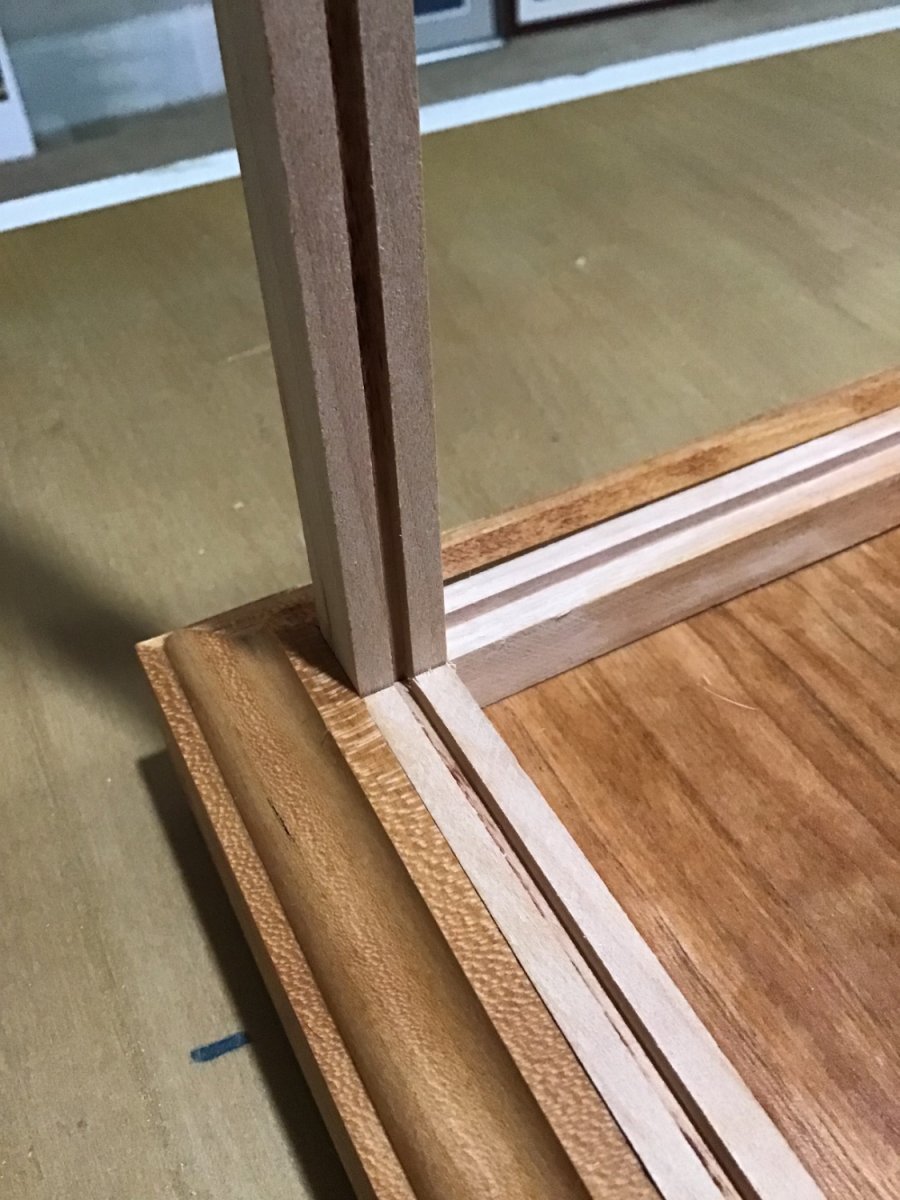
Case Frame
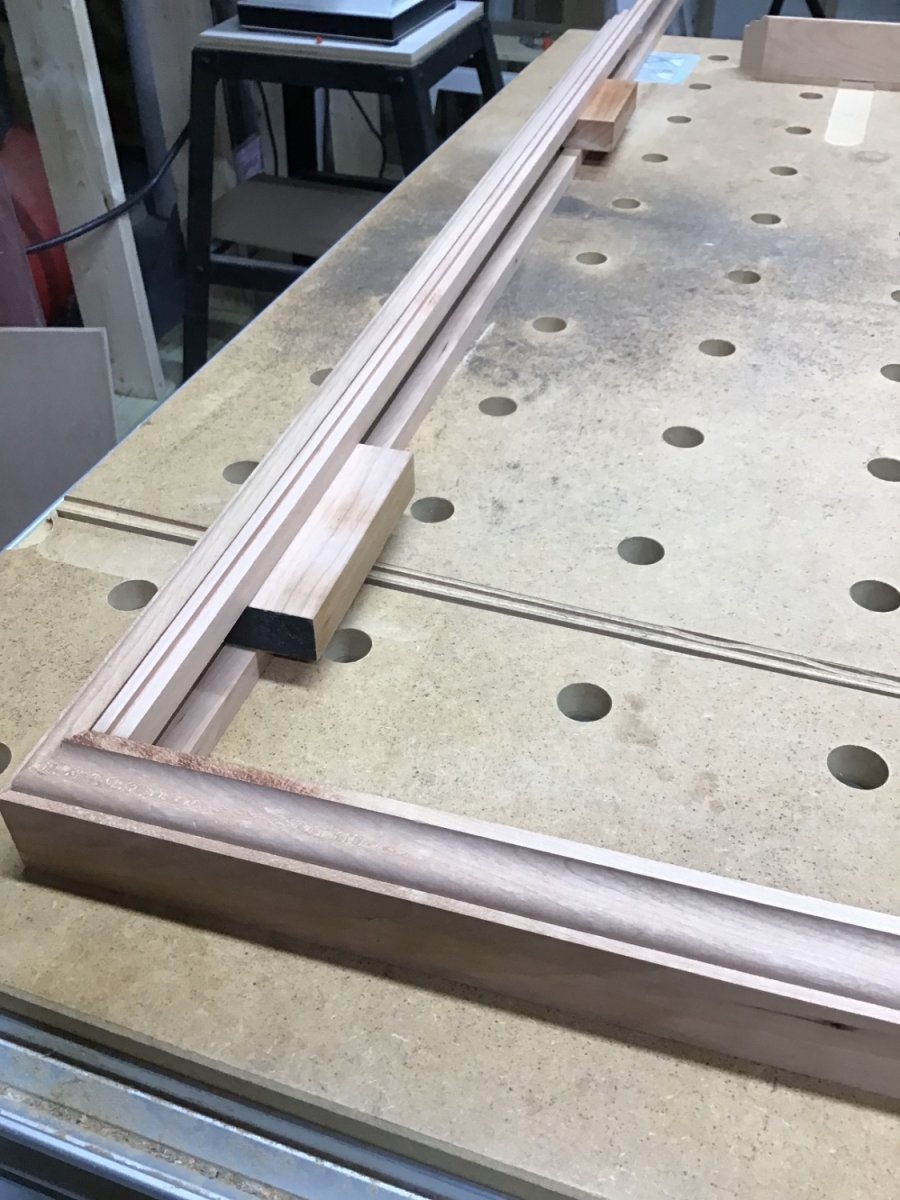
The case frame members are made of 1/2” square Cherry with grooves cut with the table saw. Grooves are centered on the face of the member and 1/8” deep. The posts and top pane frame members have two grooves. The bottom members one.
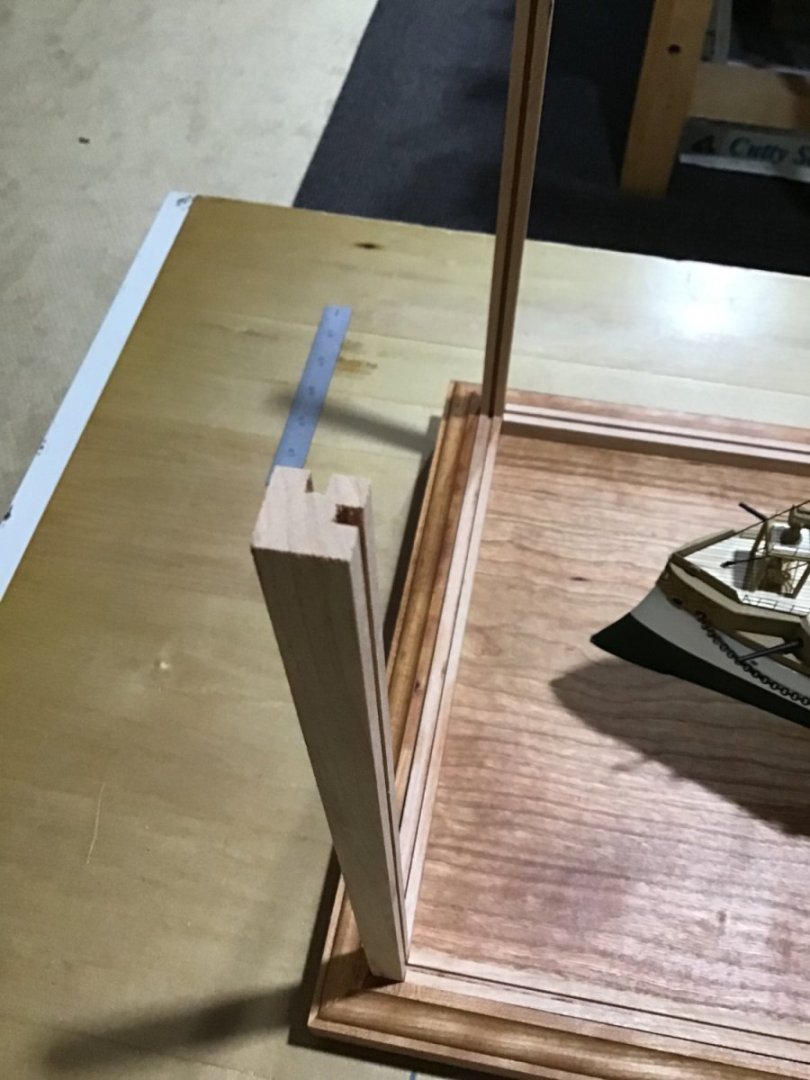
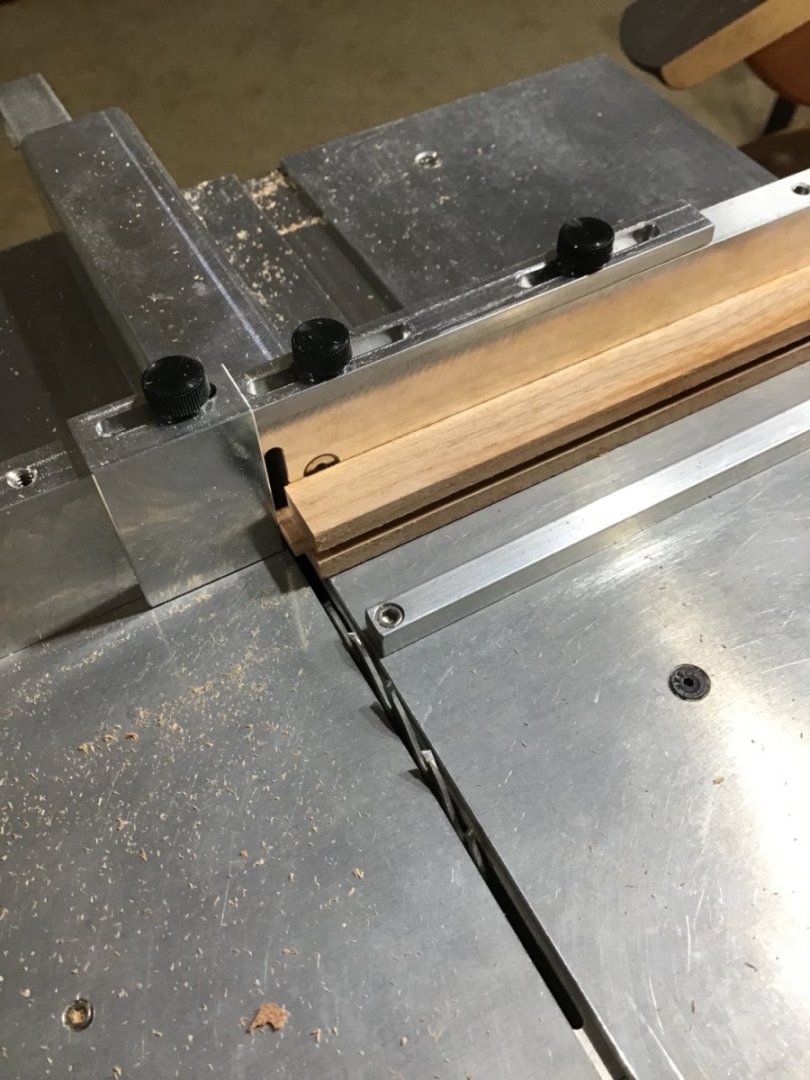
The bottom members have tenons cut to fit the groove. The Burns saw is setup to cut the tenons. Joints will be pin nailed.
The post sits on the base top and is supported on two sides by the base moulding.

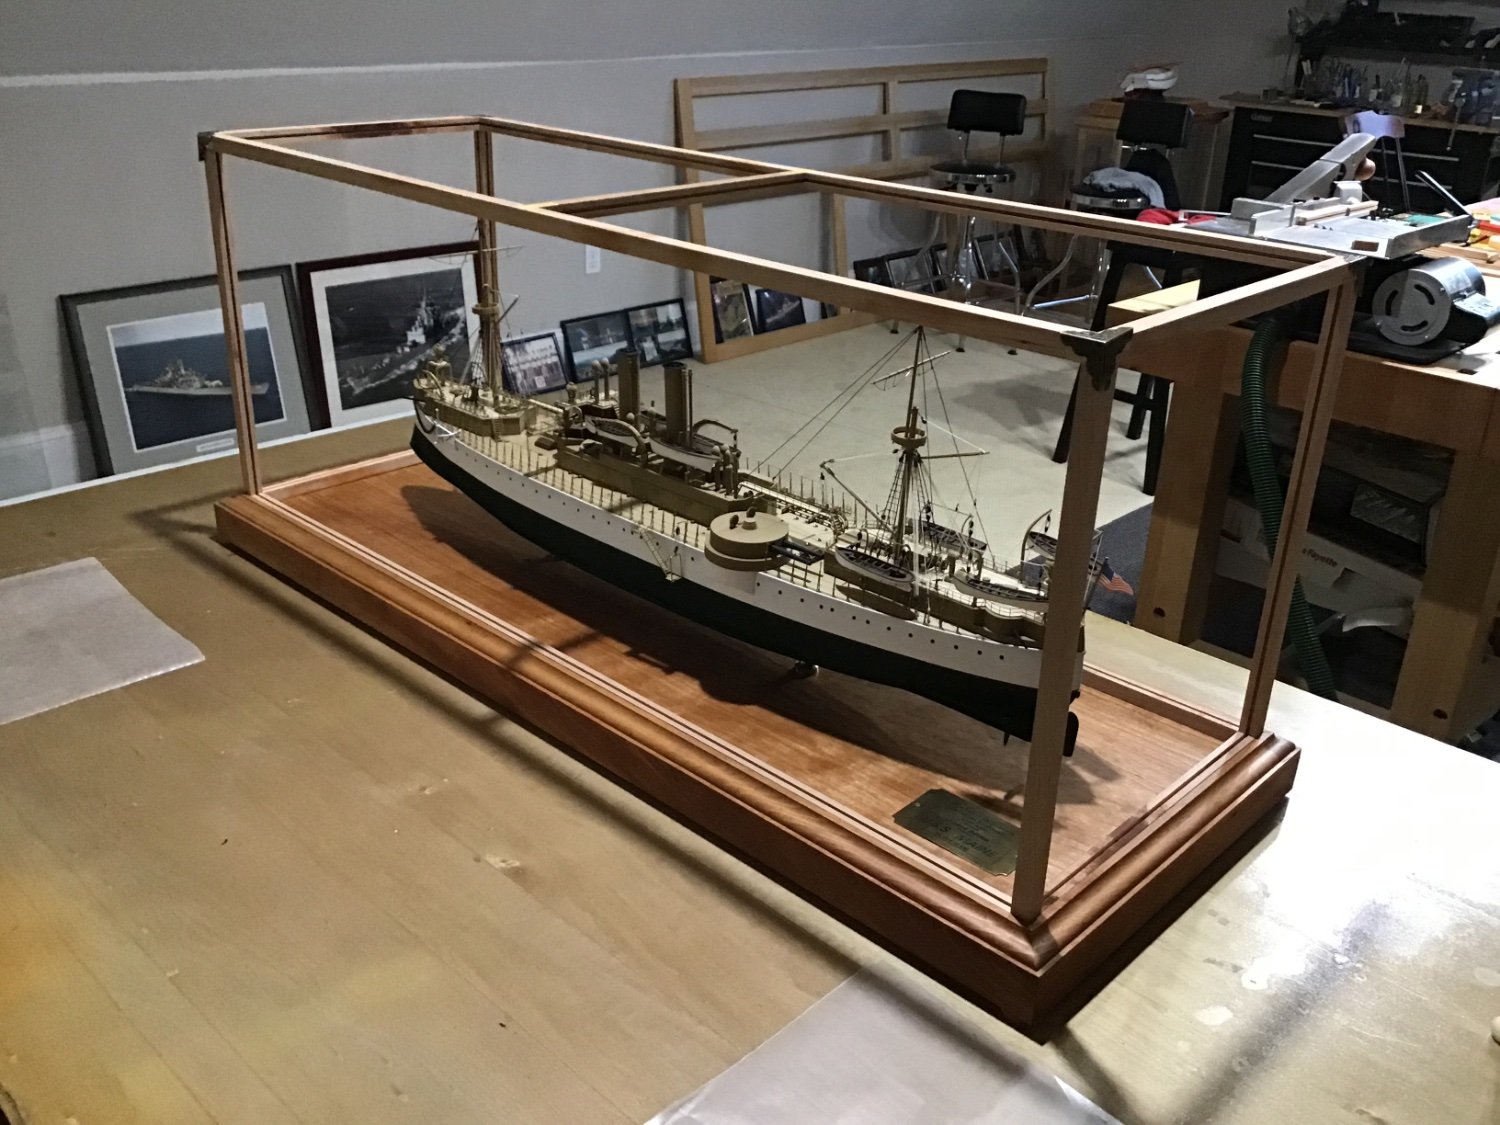
The top panel has mitre corners, that will be glued and supported with metal corner braces. There is a cross piece across the middle.
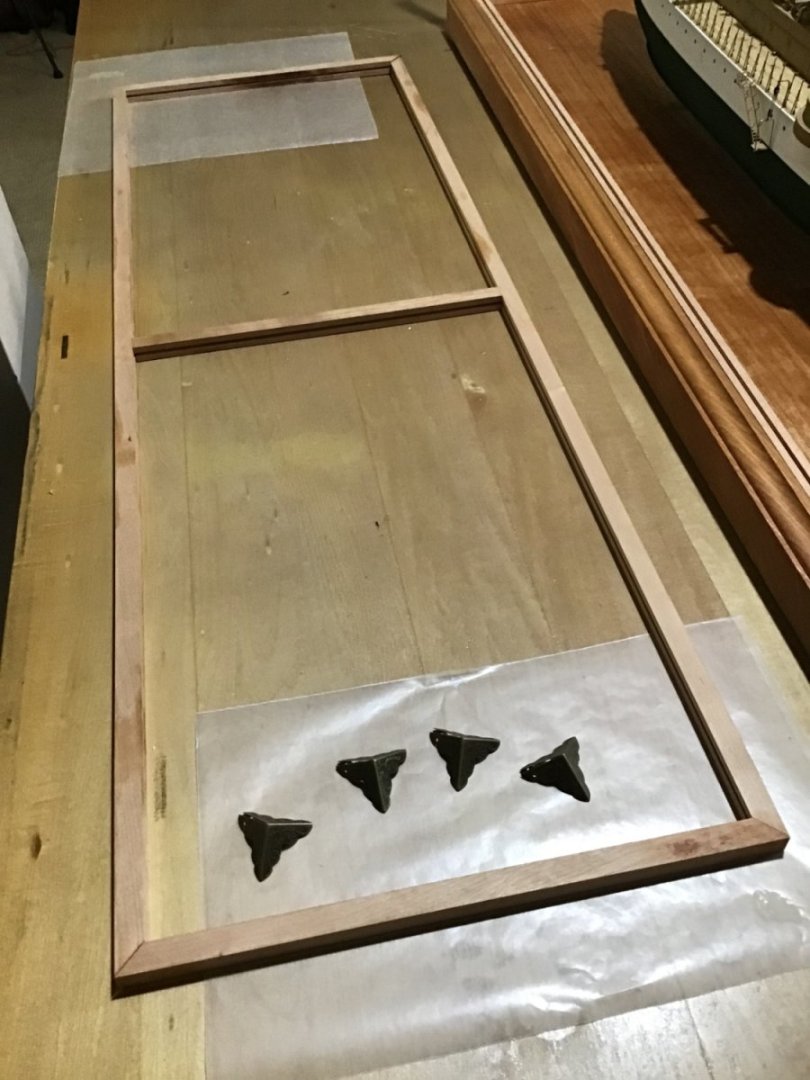
Here the frame is dry fitted. Next is cutting the Lexan panes. Happy Holidays!

-
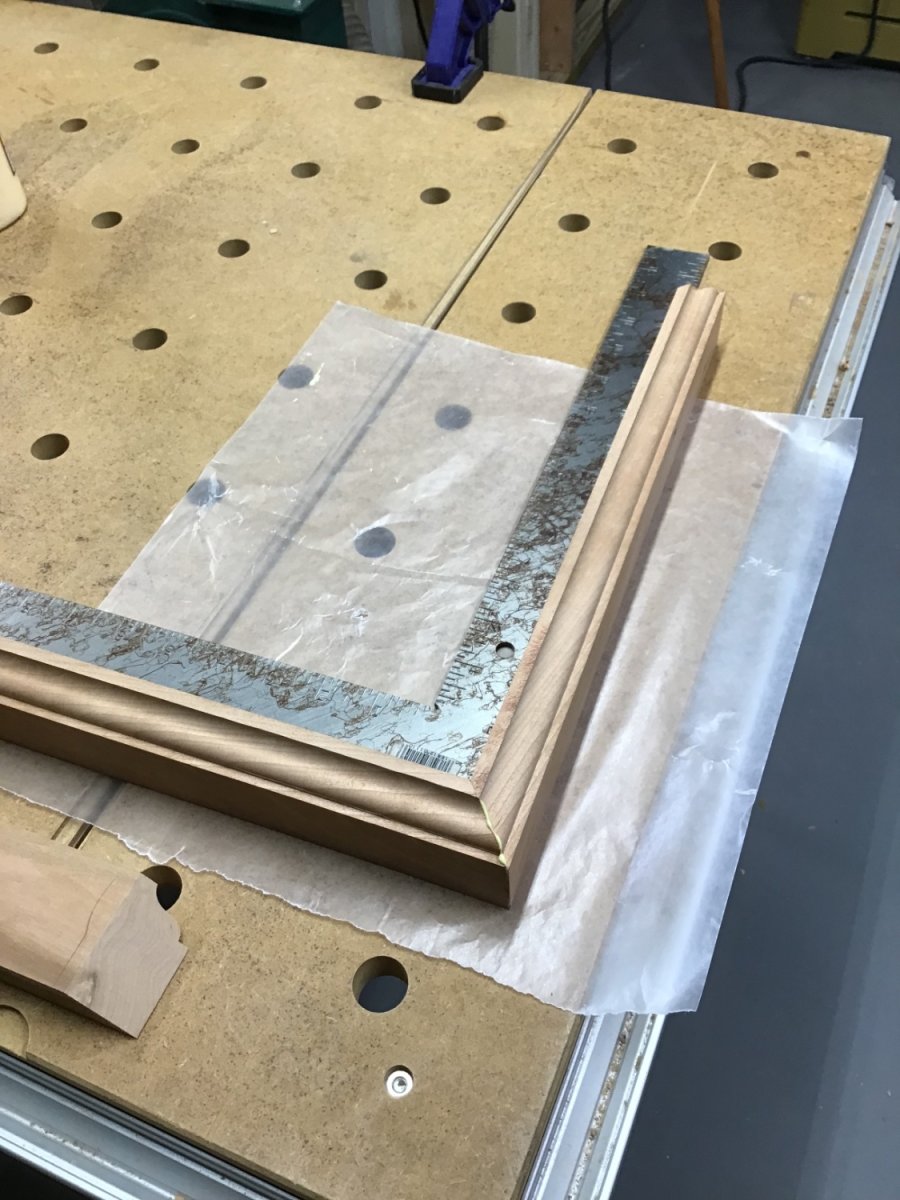
Base Frame
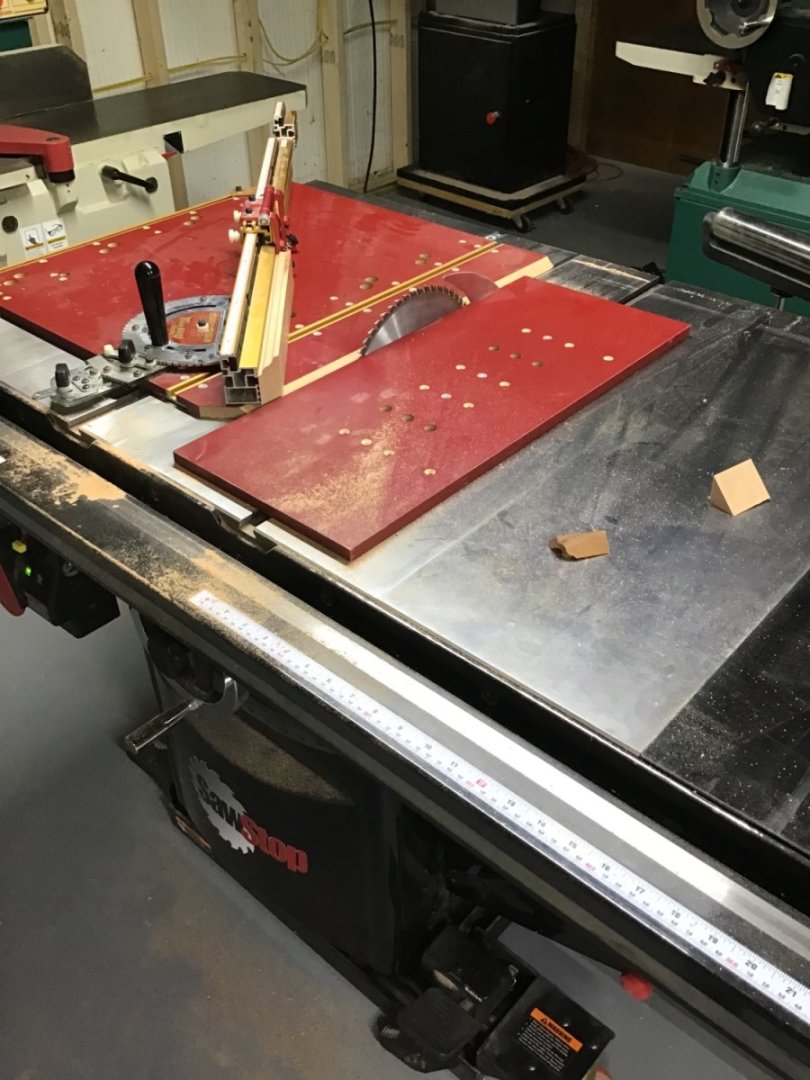
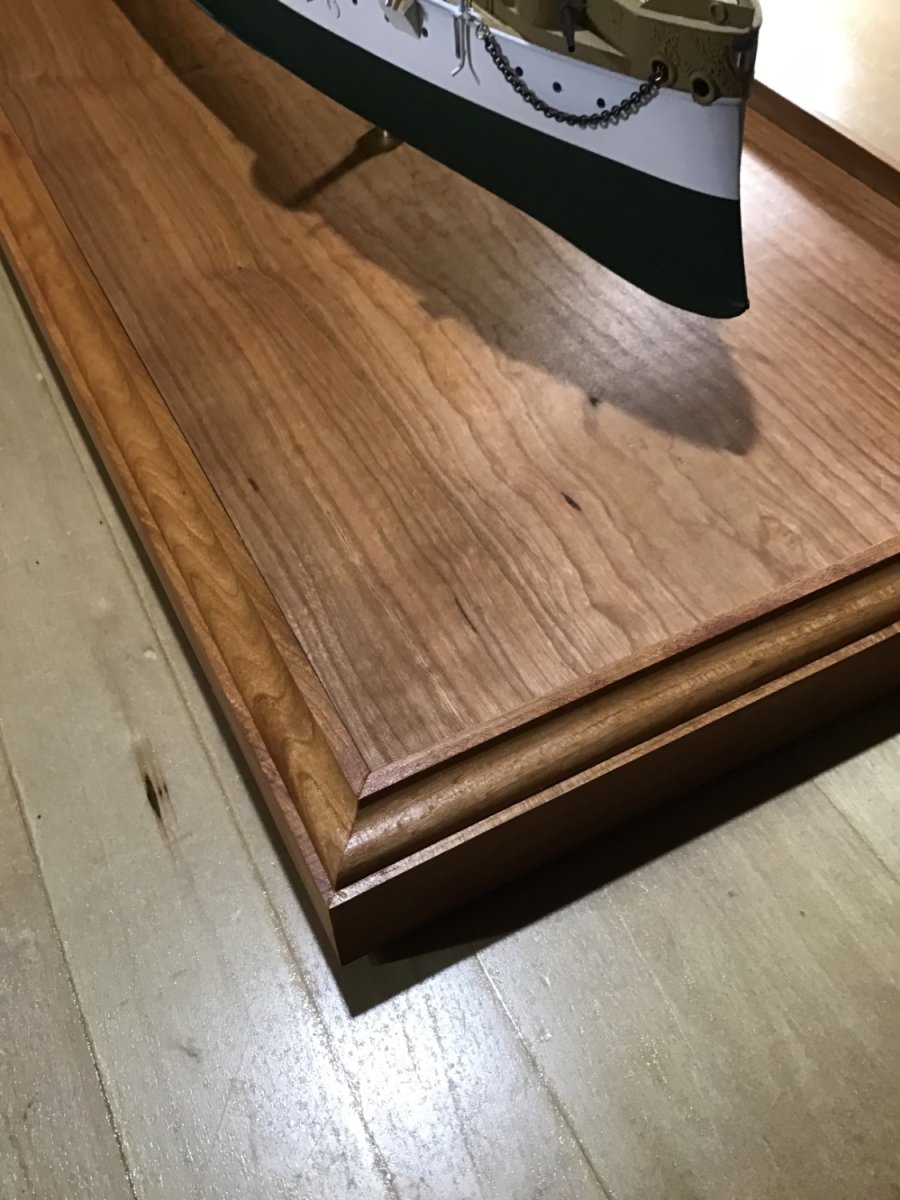
Milled the frame components from 4/4 rough Cherry. Base moulding is 1 7/8” high, just under 1” thick. Routed a Roman Ogee edge on the router table. Mitre cuts were made on the table saw with an Incra fence.
Glued up the frame, square makes sure of the alignment.

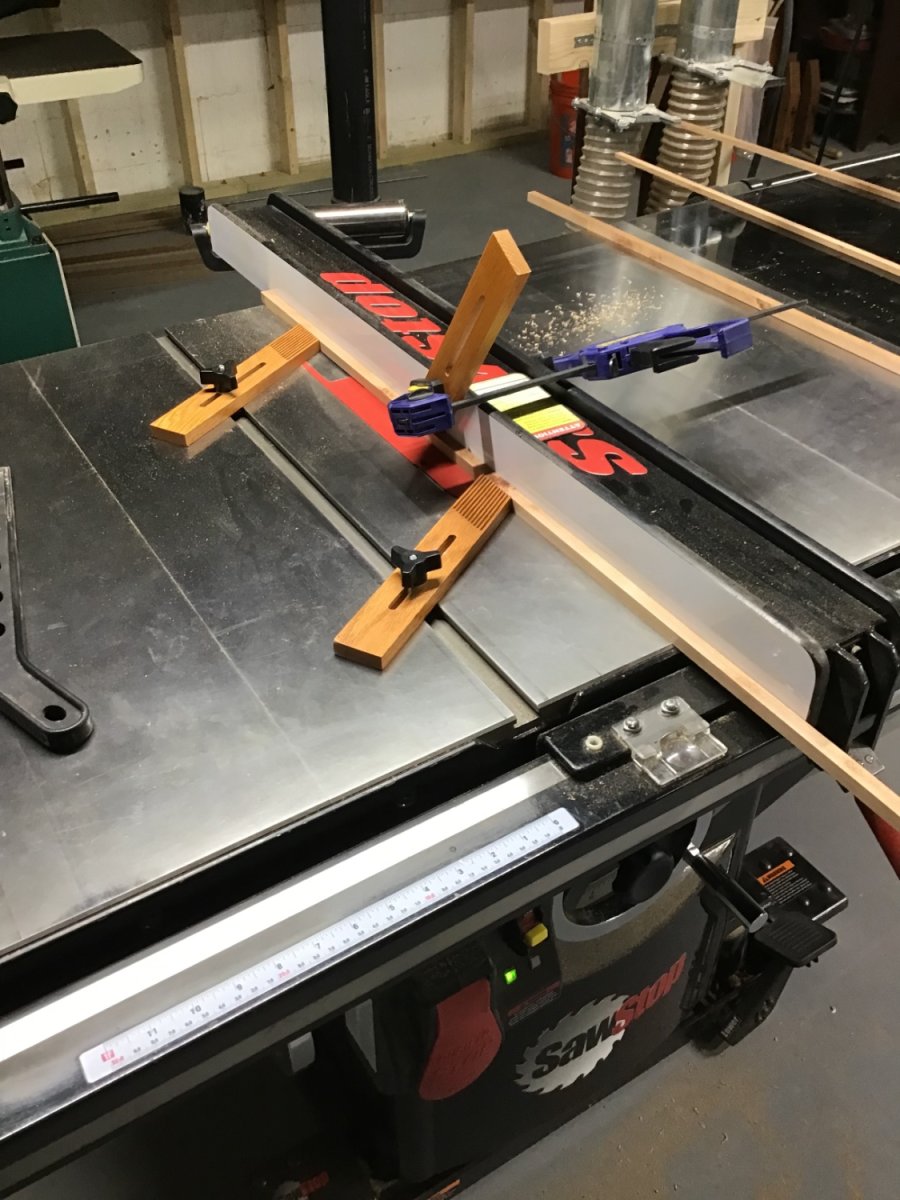
Case frame will be made from 1/2” square stock. Here is the table saw setup to cut the stock from the rough. This picture shows cutting the 1/8” deep groove for the Lexan.

Stacked up the case components against the base moulding, 1/2” square strip on bottom under 2 short blocks representing the base, and 1/2” square grooved strip on top representing the case frame above the base. Lucked out, stack is flush with top of base moulding.

Under the base will be 4 blocks screwed to the moulding with holes to allow screws into the base. There are also 4 corner blocks.

To remove the tool marks, sanded the frame with a random orbital sander - 220 grit. As before, finished the Base Frame with Howards Feed and Wax Oil and Conditioner, Beeswax and Orange Oil. Added felt pads to corner bottoms.
Here’s the model in the frame.


-
The files I like…..deep between the cutting bits so plastic doesn’t build up, yields a smooth finish…..
Enjoy
- Egilman, Old Collingwood, mtaylor and 2 others
-
 5
5
-
On 12/10/2023 at 1:16 PM, Rik Thistle said:
Anyway, it's good fun and I am happy the way the tank is turning out.
It’s looking good, enjoying following along….
-Rich
- Egilman, Rik Thistle, Canute and 2 others
-
5
-
Hello and welcome to Model Ship World. Sounds like you are on the right track with a few projects under your belt..
Looking forward to seeing your San Juan….
Have fun in Sydney!
Cheers,
-Rich
- Keith Black, mtaylor and Ryland Craze
-
3
-
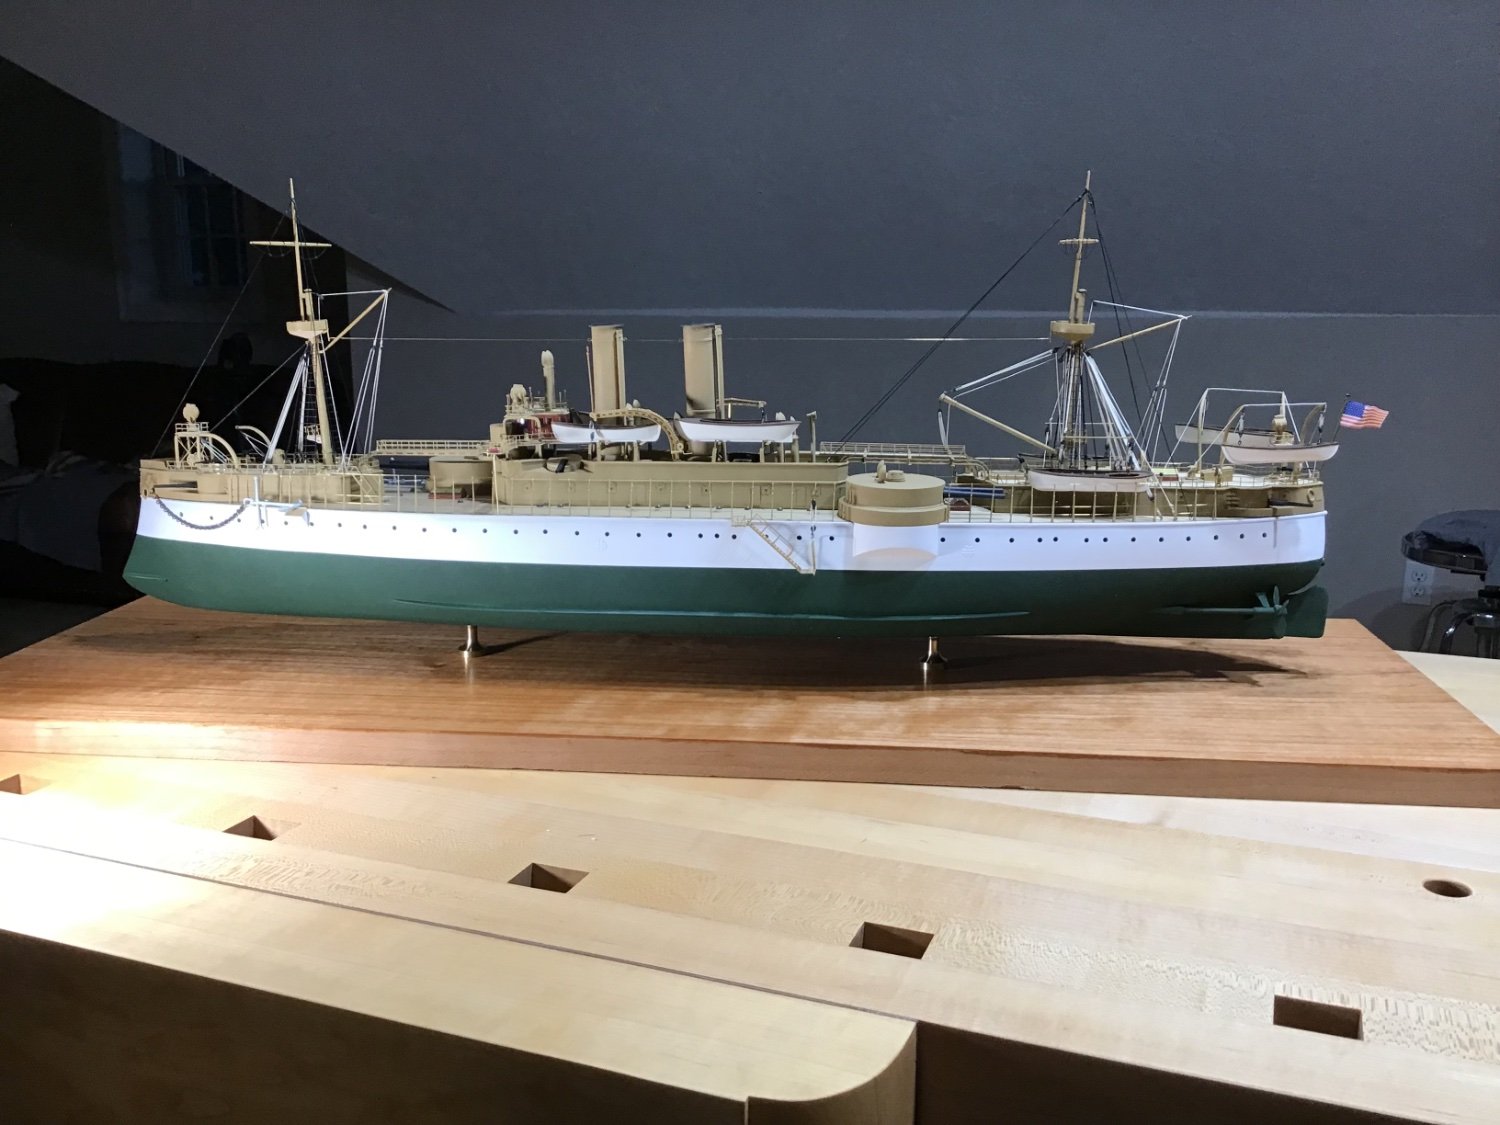
The Base
Happy Hoidays!
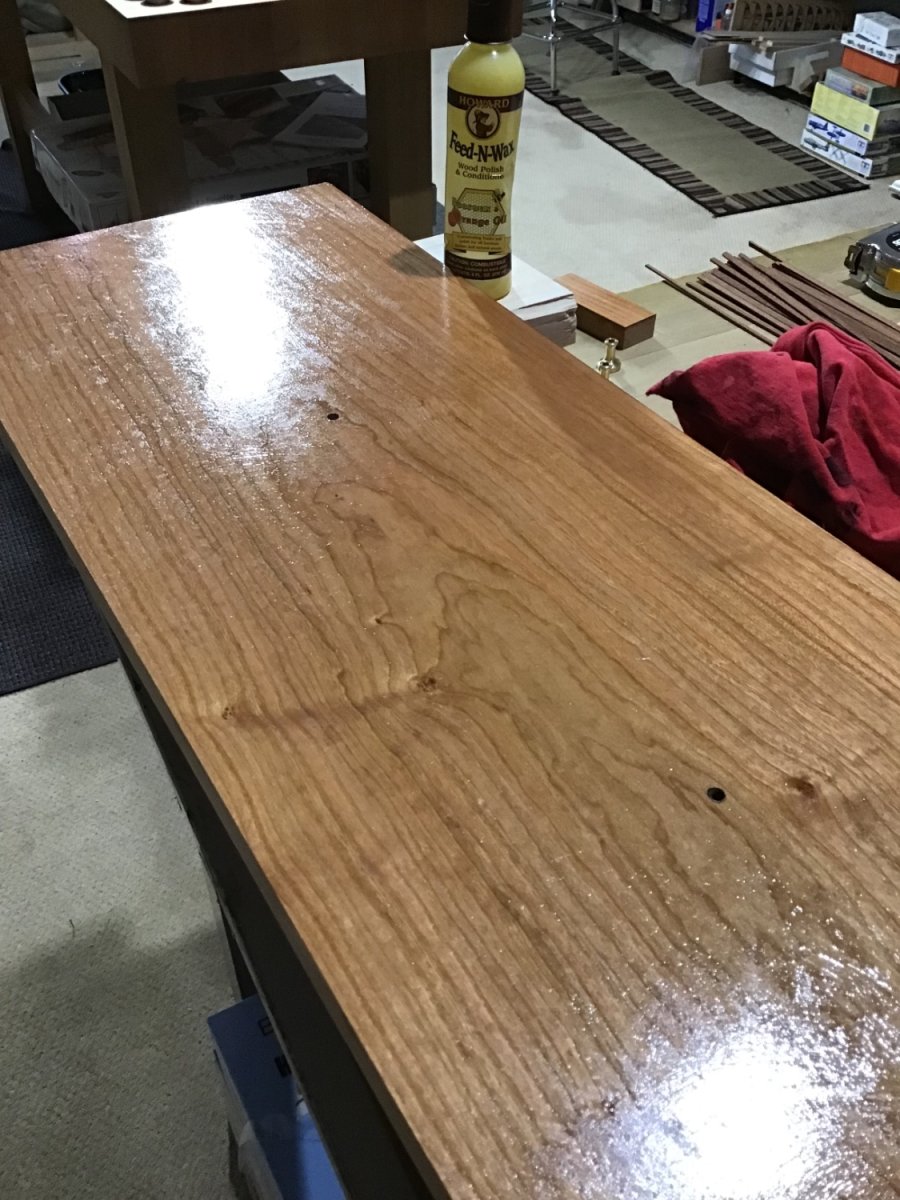
Decided on a Cherry Hardwood base with a light finish (essentially natural), to contrast with the green hull. To determine the base length and width, measured the length and width of the model and added 3” to both, base is 12” wide by 36” long.
Had already a piece of Cherry milled lumber finished to 4/4 (1”), so cut it to the base dimensions. Rubbed down the piece with 0000 steel wool. As the base will be cased, it will not be touched, finished with Howard Feed and Wax, Beeswax and Orange Oil. Flooded the surface, let absorb 20 minutes, wipe down, and repeat. It’s also a quick way to finish wood.

Drilled two 1/4” holes in the base 12” apart. Pedestals by Bluejacket with 3 1/2” #10 mounting screws. Drilled out the pedestal bore slightly to accommodate the screws. Stacked the base board on pieces of 2” x 6”, placed the model on blocks, with a couple of cradle blocks - so the beast doesn’t roll, the model is slightly higher than the pedestals. Installed the mounting screws from below the base, through the pedestals and into the pre drilled holes in the hull. Just before final tightening removed the blocks and rested the model on the pedestals.
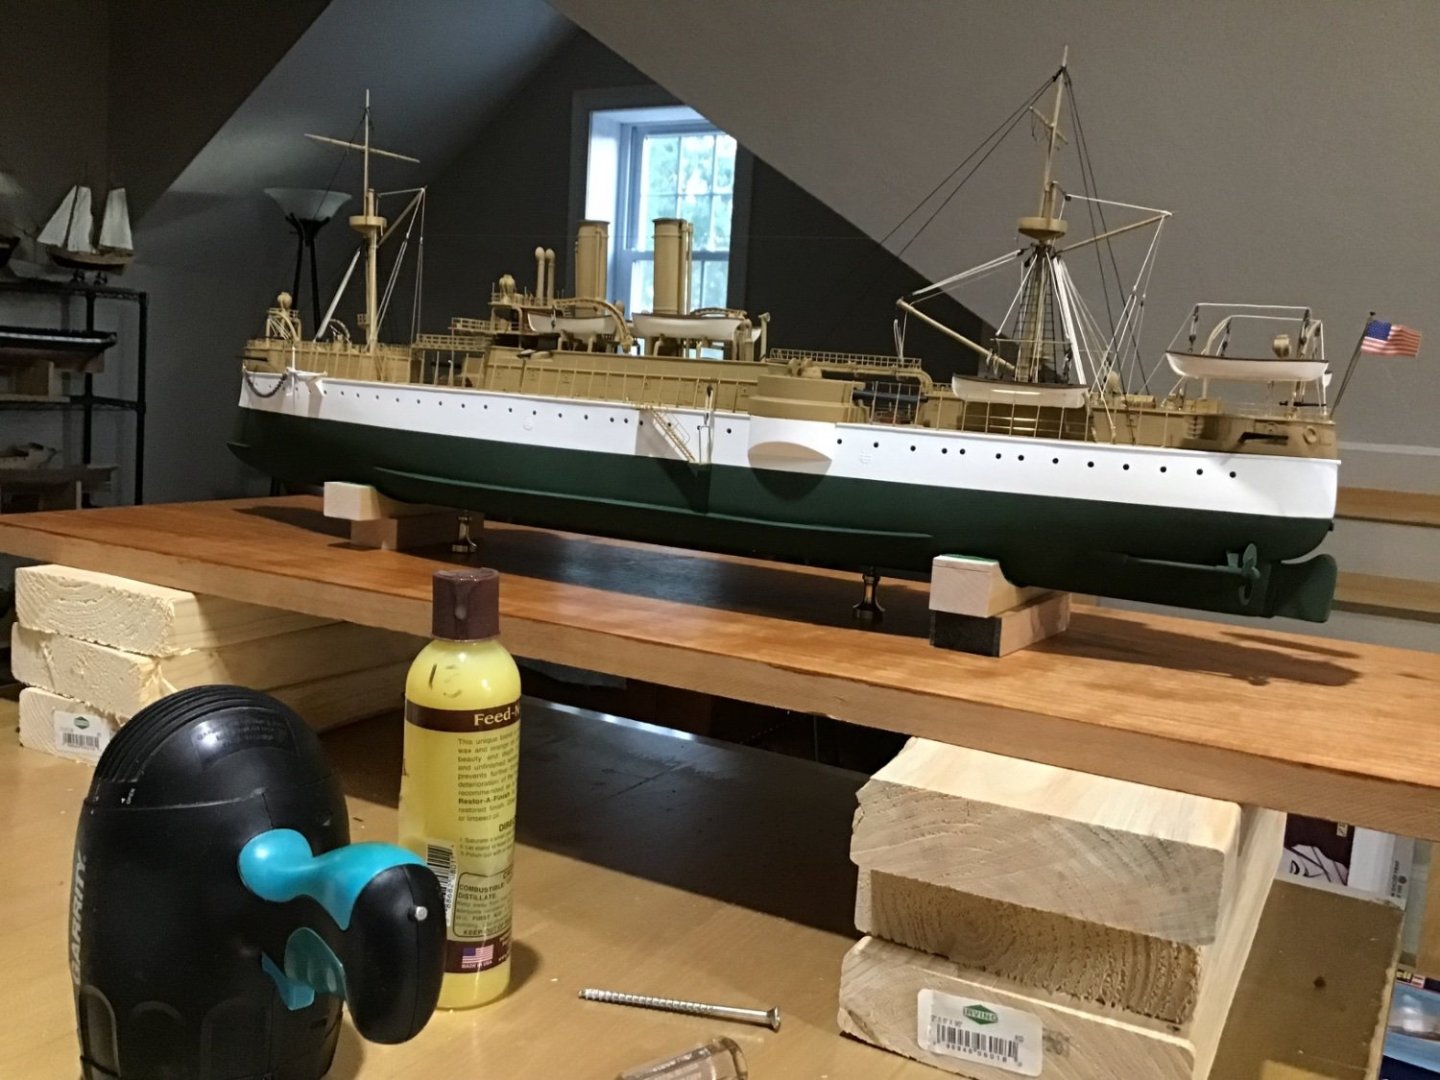
Here she is. I’ll take her out of the shop, while I build the case. Once the case is done the base will be dropped into it.

-
Welcome to Model Ship World! Why not try working together and see how it goes? It could work out.
Good luck with your projects snd happy holidays!
-
17 minutes ago, Der Alte Rentner said:
Sorry about the time lag
Hello,
Cannons not installed because they need finishing.
The supplied backplates are installed. To do this, the gun port covers were installed, and a cannon was used to align the backplate before the adhesive set.
Cheers!
-
-
On 10/12/2023 at 5:57 AM, wefalck said:
Well, weren't midshipmen not put through almost all mundane shipboard tasks as well so that that they better understand what they will be commanding later?
Well, at least “observed” mundane shipboard tasks……😎
- Canute, Valeriy V, Keith Black and 2 others
-
5
-
Greetings from Massachusetts, USA. Welcome to Model Ship World.
- mtaylor and Keith Black
-
2
-
On 11/17/2023 at 10:30 AM, bigcreekdad said:
😹ERS. You have built some beautiful ships. I'm humbled when I look at mine.
Good Morning Sinon,
Thanks for the kind words. Likewise, I’m humbled by the work of craftsman and artisans here on MSW.
See that you are getting started. Think about several things, tools/ techniques, finishing, and the project. If you’ve never worked with wood, study how. Plenty of Youtube videos out there - see Tom Lauria’s channel.
Gather the hand tools needed. It can be chisels, files, and small saws. Woodworking is measuring, marking, cutting to a line. Start with hand tools, later if you are into it, step up to power tools. Probably the most important skill for a woodworking beginner is being able to sharpen a chisel.
Likewise study wood finishing - sealing then color. Consider shellac for sealing, it’s natural and dries quickly. And it’s very forgiving, it’s sandable. Start with paint brushes to apply paint, my suggestion is acrylics - and pay attention to thinning the paint, so it lays down nicely.
Last is the kit. Start with a very inexpensive and easy kit. This is practice to develop the skills and techniques that work for you. Once you have your technique down, move up to a more difficult kit. The last thing you want to do is buy an expensive kit before you have developed your techniques. That’s a setup to fail.
Start with an open boat. The idea is to move through all the steps and finish the project in a reasonable amount of time. Don’t worry necessary how it looks, it doesn’t need to be perfect. Keep a log, for yourself, write down what does and doesn’t work. This is the time to experiment and figure out what works for you. There is usually more than one way to get a result.
One idea is to buy two of the same inexpensive kit to start and build them at the same time. Experiment and perfect a step on the first, then do it again on the second.
Avoid perfectionism and finish the project and enjoy the satisfaction of getting it done.
The open boat project lays the foundation of building a hull and paint. Next is projects with a single mast, then two masts - schooner rig, then square rig.
Best of luck and happy holidays.
-Rich
-
All acrylic in my shop. Airbrush is Paasche Talon, for large areas Iwata RG-3 mini sprayer. Small compressor from Home Depot - 15 psi. Paint: Vallejo Air or Tamiya. Brush small details with Vallejo Model Color: Steam Era Set.
Airbrushing is all about a clean brush and thinned paint + practice.
Good luck.
-
Good Morning,
For the wale, a possibility is making a vertical cut and removing a section say aft of the gunport to the stern, and adding new wale.
The issue with loss of shape of the counter sides may not be an issue after the counter is planked. Maybe build up the inboard sides of these pieces with planks for more contact area when fitting the counter planks.
Regarding technique, a half round file gives exact control of wood removal vs sandpaper. Personally I rarely use sandpaper.
Have a good one. -
Thanks everyone, the feedback is much appreciated.
On to some plastic subjects for a while…..
Holidays are coming up, enjoy yours!
-Rich
- Canute, Keith Black, Ryland Craze and 1 other
-
4
-
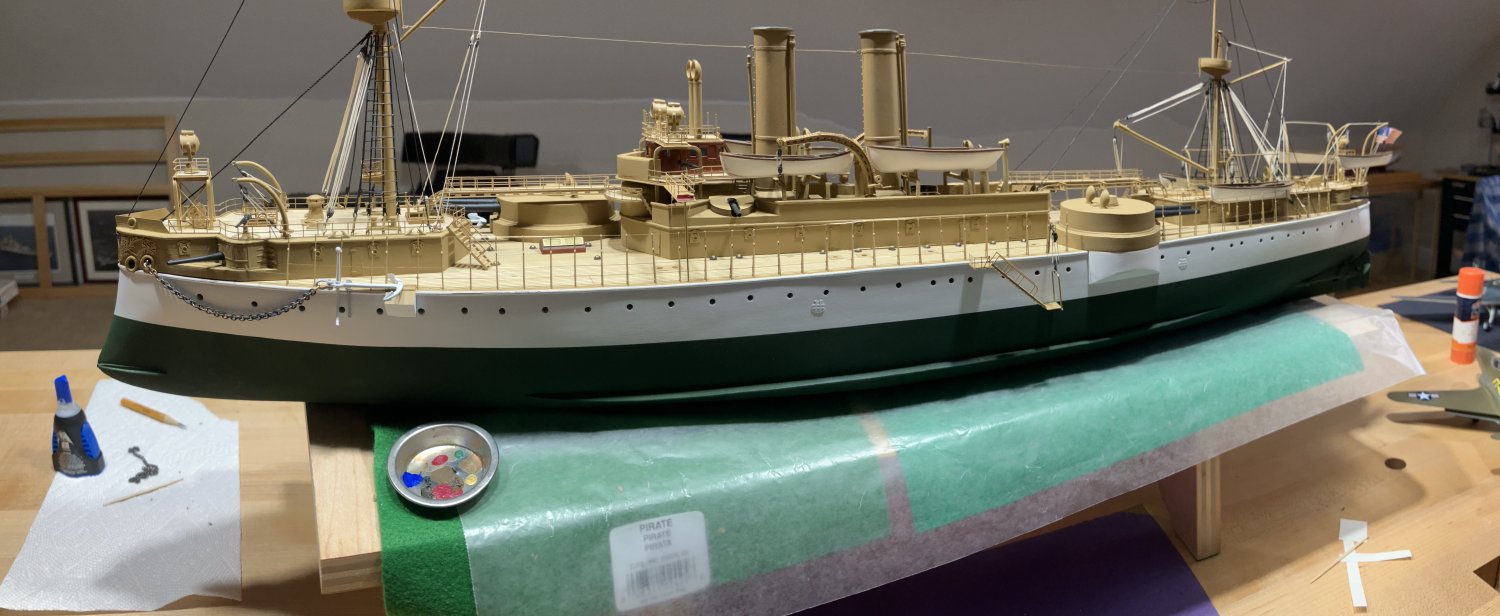
Finished and Epilog
Making the call that she’s finished since the minor work remaining won’t impact any pictures. Look for photos of her cased in the gallery, probably in a month or so. Here as a panoramic photo taken with my iPhone.

Epilog
What an experience. The kit has everything needed out of the box to build a beautiful rendition of the ship. The plans are good and I found the instruction booklet easy to follow. And there are many extra PE parts to cover mistakes.
One comment about the plans is to understand that parts, say eyebolts are identified with a number and symbol. The eyebolt symbol appears in each location on the plan, however each symbol does not have a number.
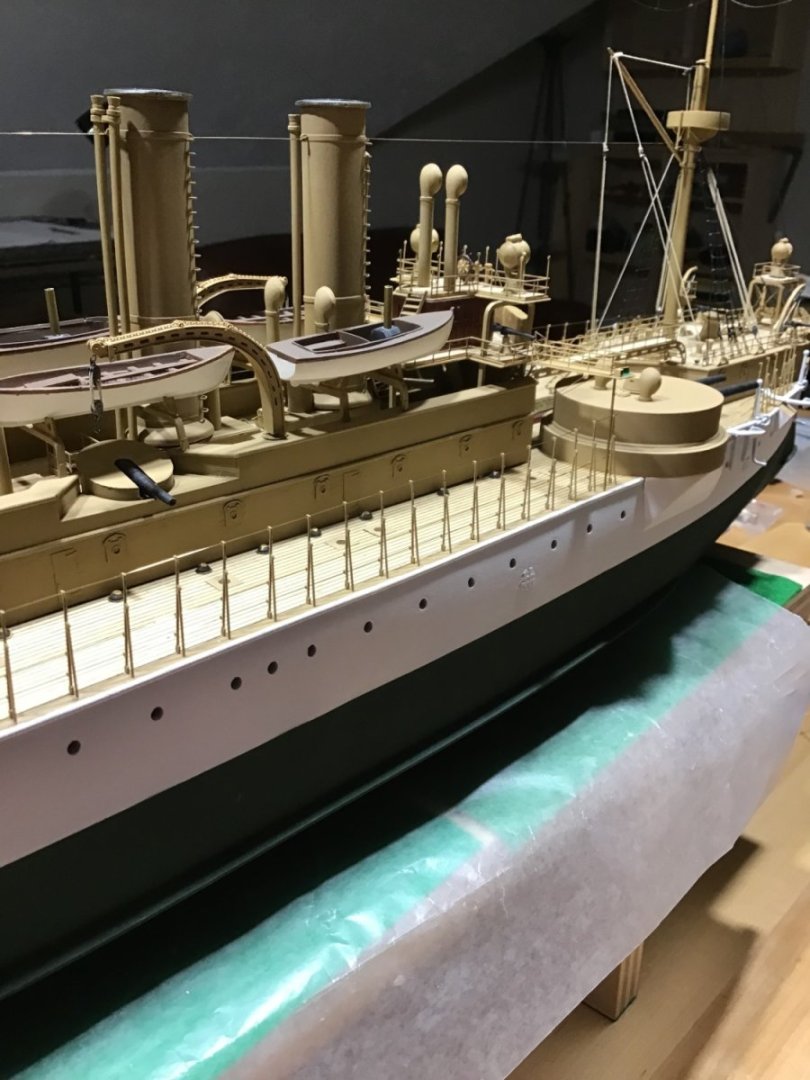
Notice that a part can be identified by looking on the plan, and in the bill of material in the instruction book. The bill of materials is divided by material type (wood, brass, casting, etc), then part name and quantity. If the instructions call to install a part and you do not know what that part looks like, find it’s name on the bill of material, ID what it’s made of, and the quantity, then look in the sealed bag for a quantity match. I also found the photos at the end of the instructions book helpful for identifying the smaller amidship stacks.
Pay attention to part and component spacing, on the amidships superstructure in particular. Notice the center hatch on the amidships superstructure does not have a coaming, I added it to my model and much later found my stack spacing was slightly off. Much is happening on the amidships superstructure so make sure the components are spaced according to the plan.
Last is part numbering, I did find a few inconsistencies between the booklet and plan. Not a big deal.
Not much else to say other than it certainly is worth the effort. I’d say anyone who has a few kits under their belt, can take it on. That being said finishing is a major effort, an airbrush is suggested. My ship is finished with Tamiya and Vallejo acrylics.
Finally Bluejacket is immediately available if you have a question. Just give them a call.
Best of luck if you take this on. Feel free to message me if you have a question.
- Nunnehi (Don), gsdpic, Ryland Craze and 13 others
-
9
-
 7
7
-
Boss!
Someone said, a masterpiece is a collection of simple steps, each executed perfectly…..
- John Ruy and Glen McGuire
-
2
-
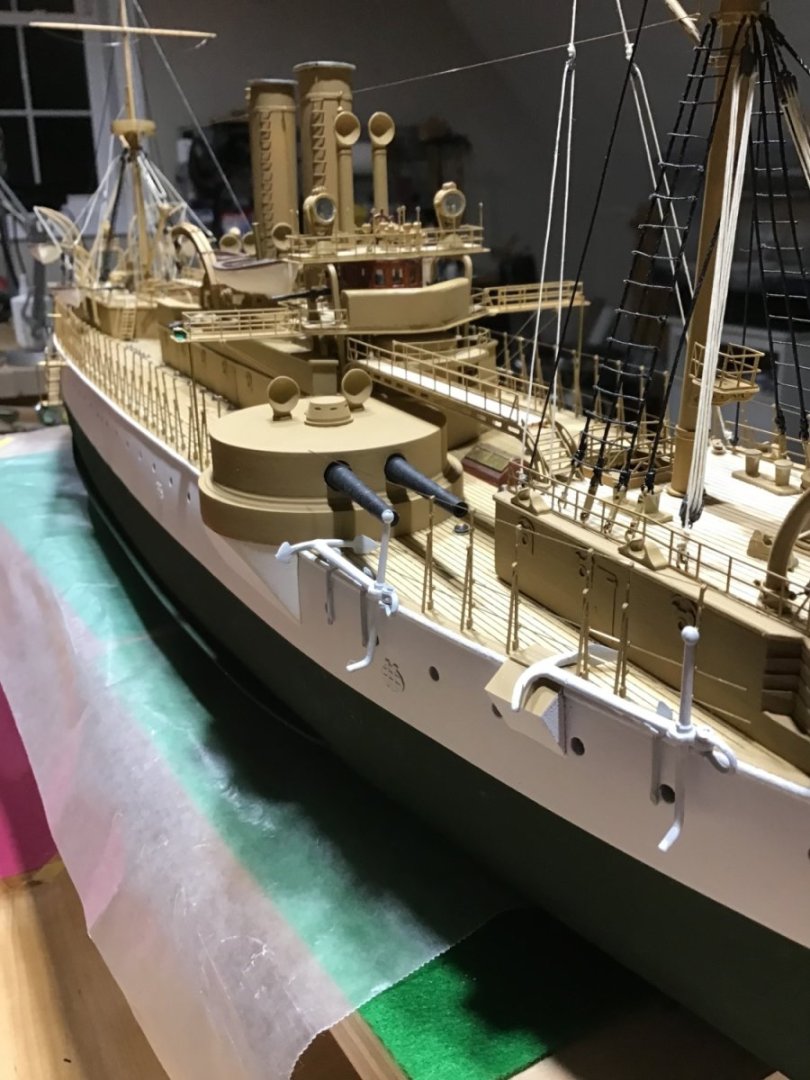
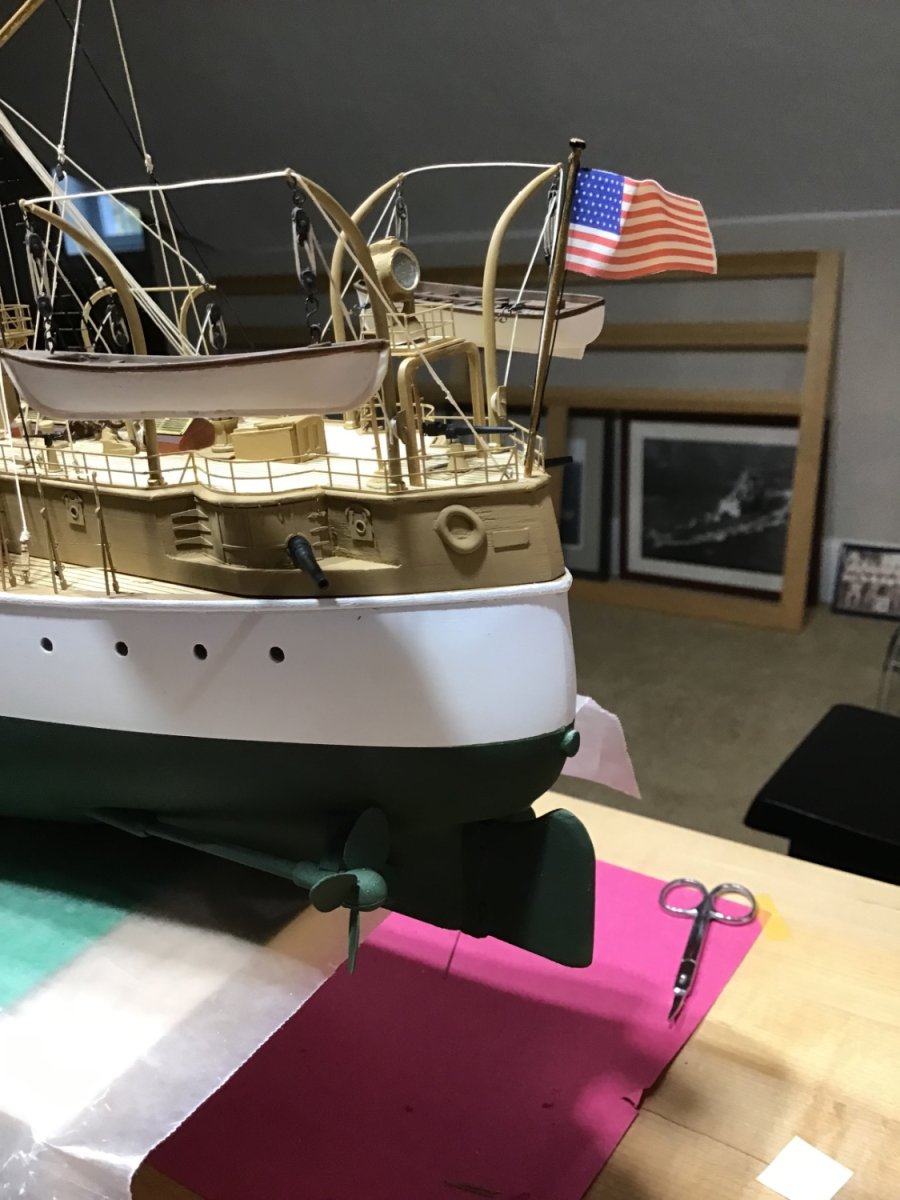
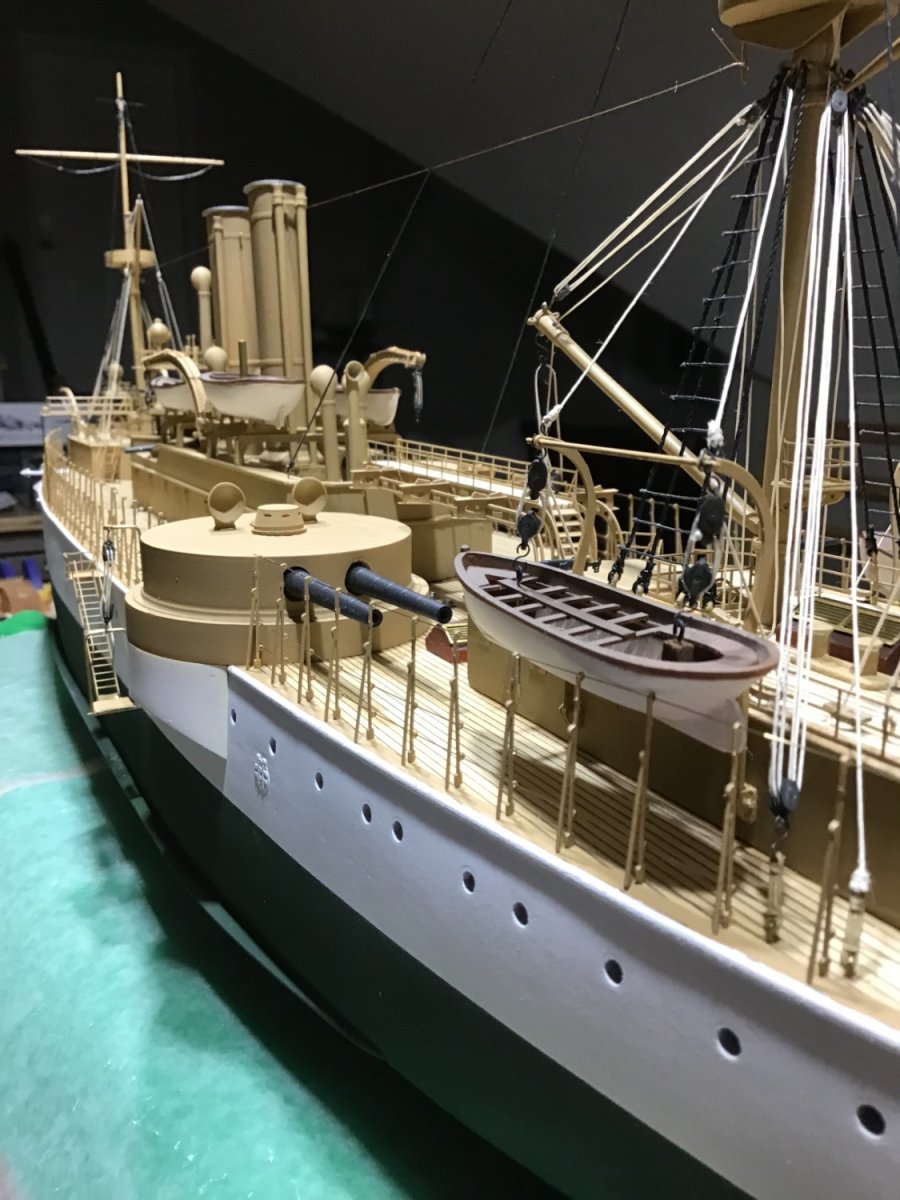
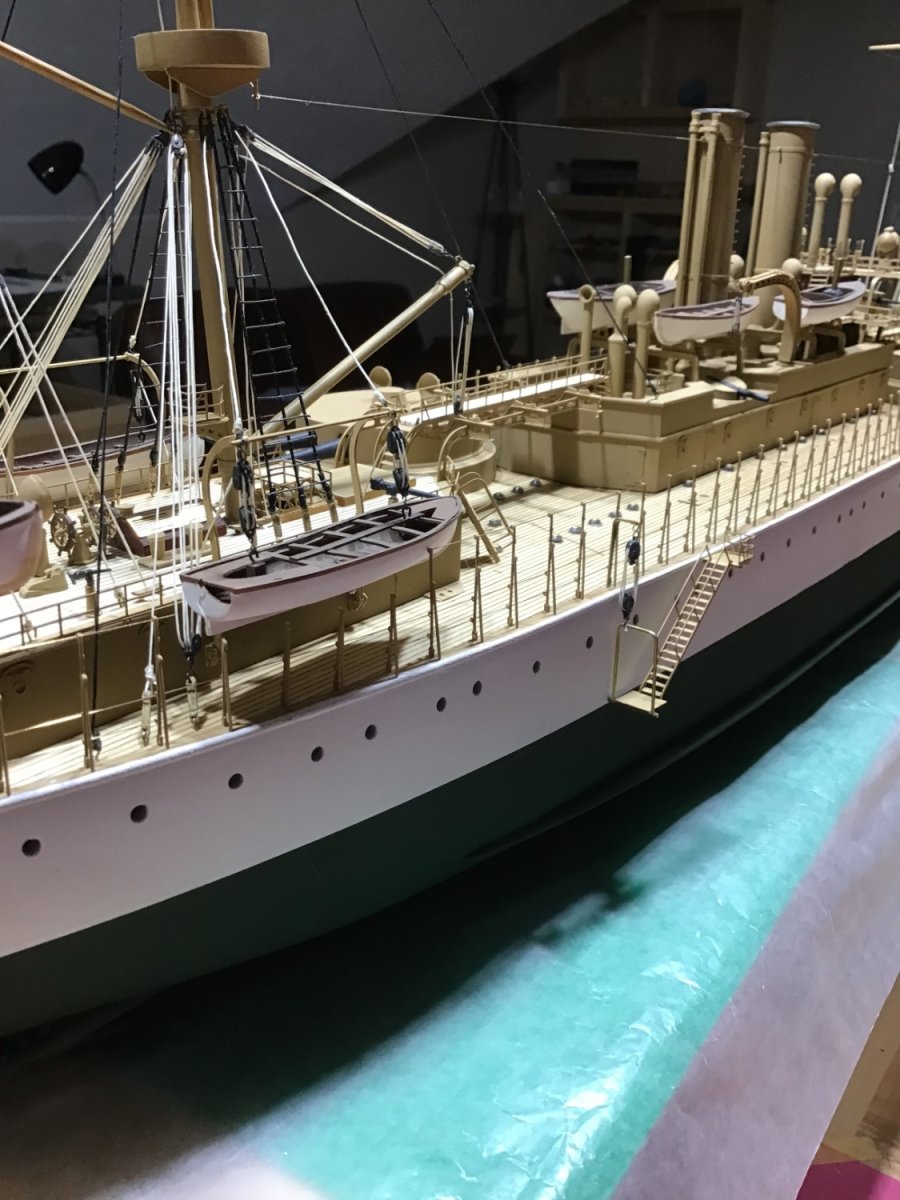
Various Photos
Flag on the aft jack. Prefer to heavily crumple the paper flag. Also touched up white area on the stern.

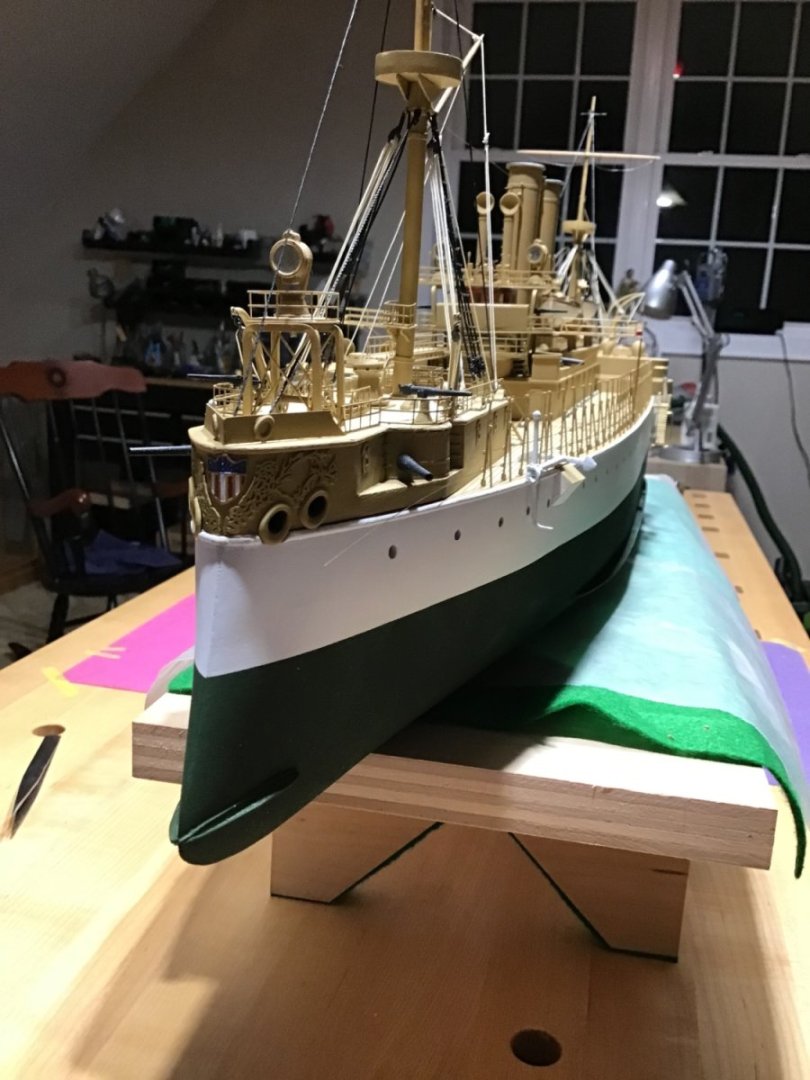
Finished up the hawse lips and bow ornaments.
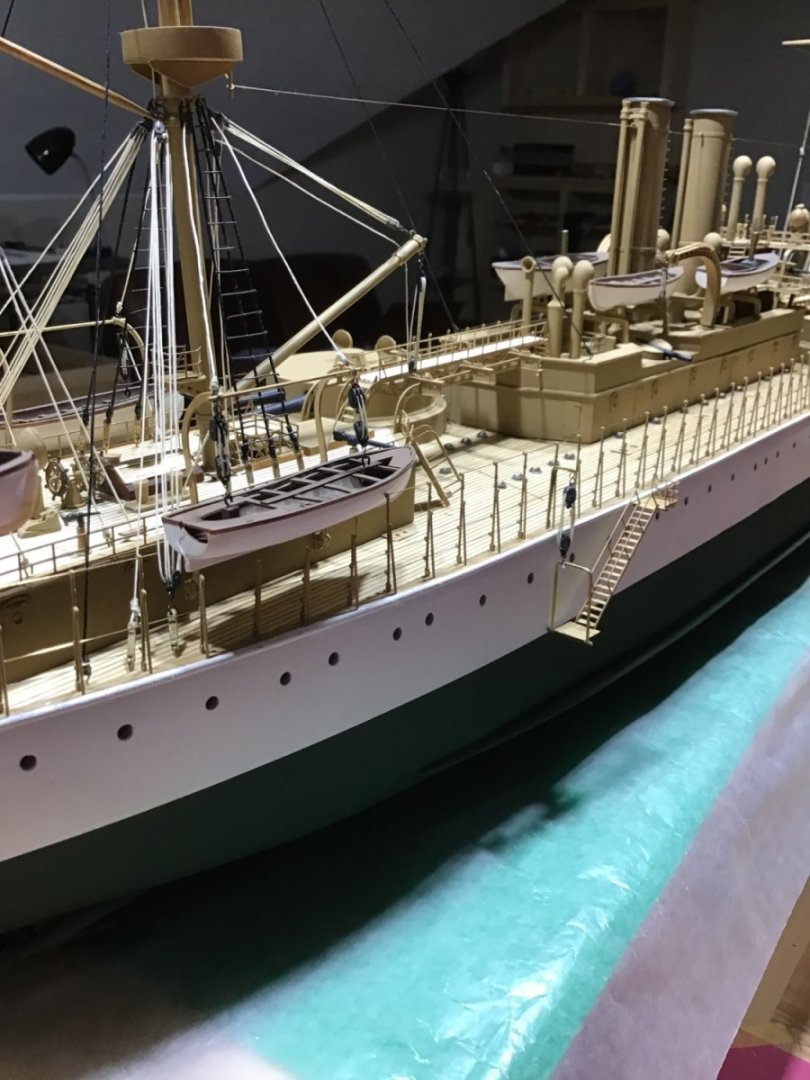
Views of the main deck stanchions. Line is bass wire, tried thread but to difficult to pass through the stanchion eyes.

-
-
22 hours ago, John Ruy said:
3/16” Drill bit
Hi John.
Is the 3/16” drill bit used to hold the ring for drilling a hole into the ring?
Thanks for showing how it’s done.
-Rich
-
15 hours ago, aliluke said:
Brilliant from all angles.
Hi Alistair,
Thank you very much for the kind words. Yes, this kit had everything needed to produce a fine model of the Maine. At the end, I’ll post thoughts on some things to be careful about when building this kit.
And I do have another USS Maine kit that I’d consider selling along with USS Olympia if anyone is interested they can private message me. Given the price of shipping someone would have to be within driving distance!
Cheers!
-Rich
- Keith Black, aliluke, mtaylor and 1 other
-
4
-
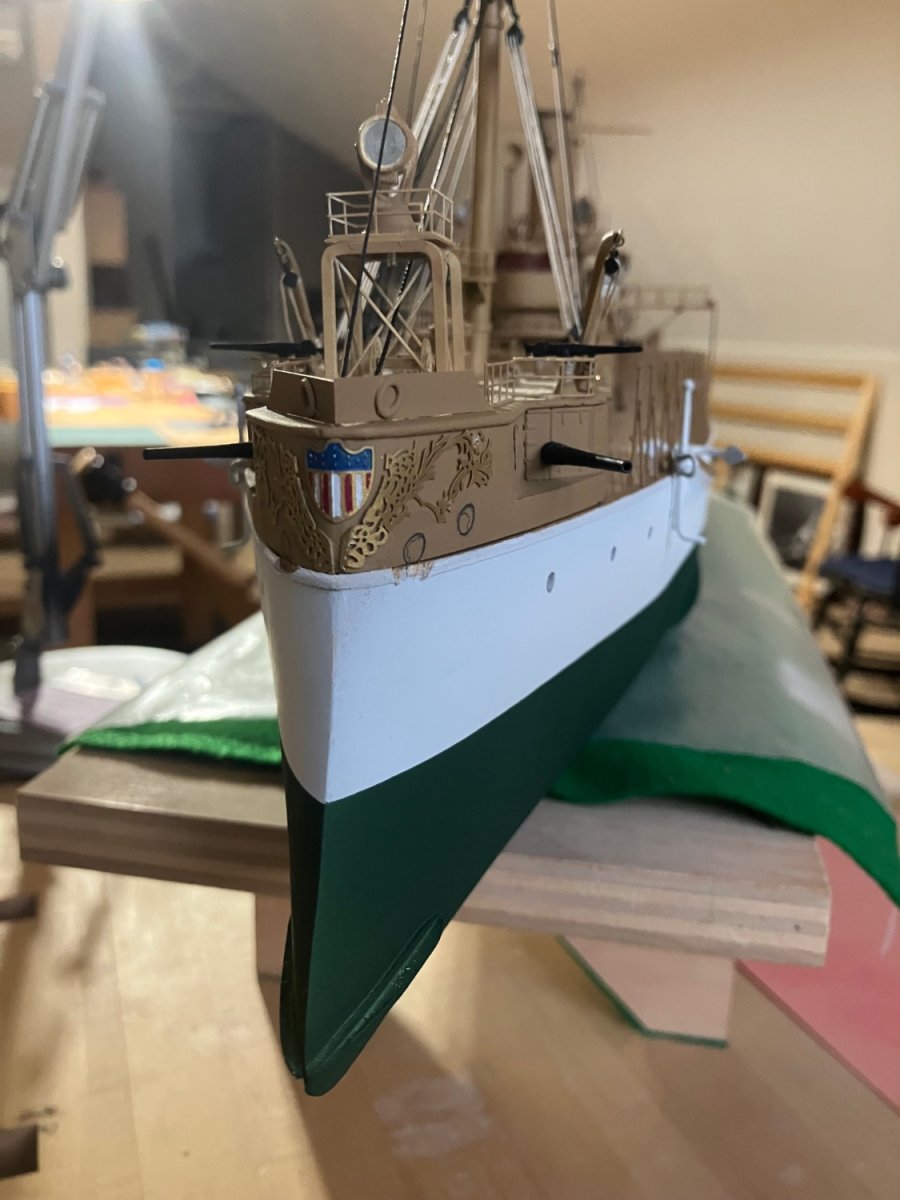
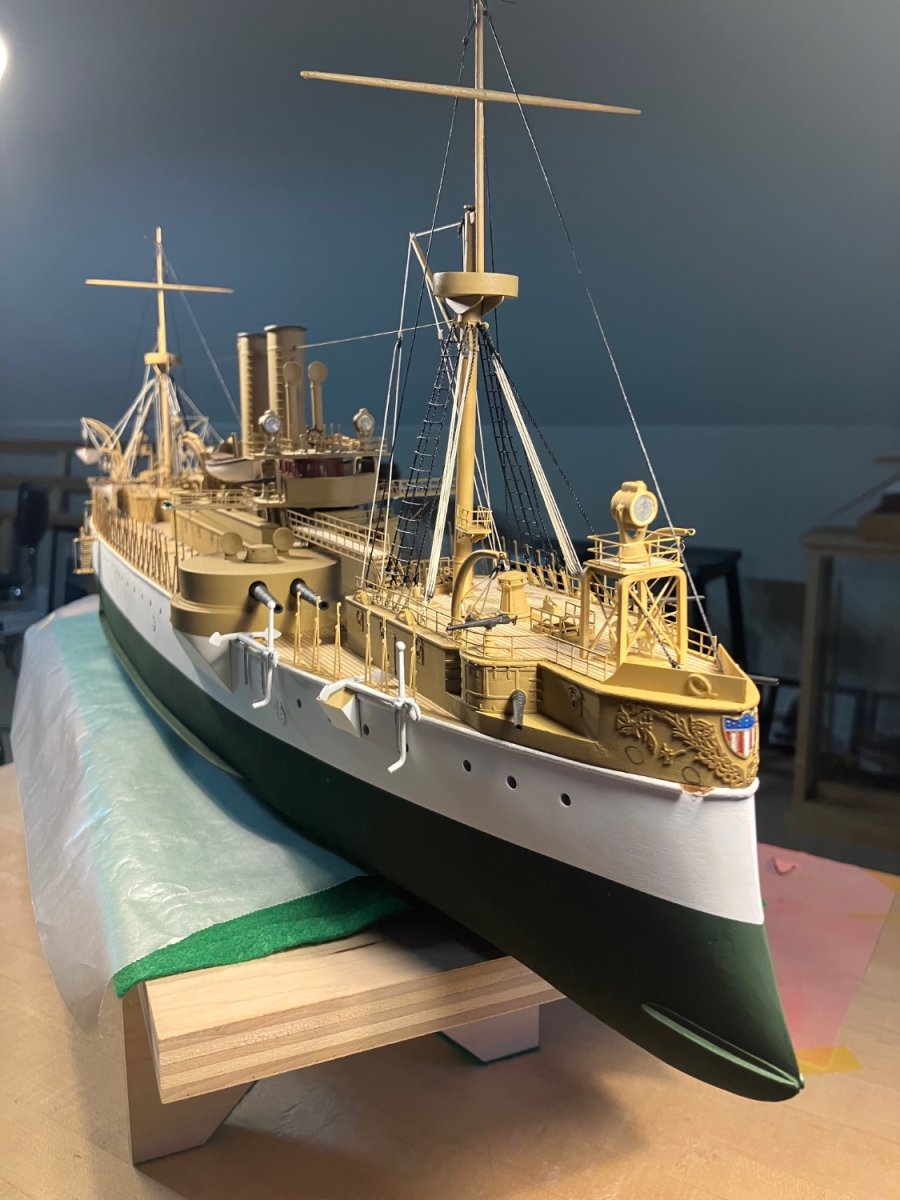
Home Stretch
It’s getting down to it. Not many more tasks to do. The heavy lifting is over.
Here is a shot of the bow ornaments. Followed by the entire ship with the main deck stanchions installed.


- Keith Black, Rick310, GrandpaPhil and 13 others
-
7
-
9
-
5 hours ago, Avi said:
For the curious
Hi Avi,
Thanks for posting information about this different, from parrafin, type of wax. It’s interesting.
Big advantages of wax for me is easy to apply and less cleanup to deal with.
-Rich
-
53 minutes ago, yvesvidal said:
Try it, you will be surprised how well it works.
I will, thank you Yves!
- Canute and Keith Black
-
2


USS Maine by ERSRich - FINISHED - BlueJacket Shipcrafters - 3/32
in - Kit build logs for subjects built from 1851 - 1900
Posted · Edited by ERS Rich
Thanks Yves, I’m a cabinet maker, once had a business, and am fortunate to have the equipment.
Hand tools could be used to make the base and the base frame - with moulding from a hardware store.
The frame groove could be made with a hand router. Check this out from Lie-Nielson Toolworks in Maine. But it is a little tedious.
If you don’t have a tablesaw, possibly you could access one by taking a woodworking class. Or approach a local cabinetmaker/shop.
Have a good holiday season.