Snug Harbor Johnny
-
Posts
1,502 -
Joined
-
Last visited
Content Type
Profiles
Forums
Gallery
Events
Everything posted by Snug Harbor Johnny
-
 Ahoy Noel, (Sorry for my delay in response) Indeed, the Imai 1:120 CS was marketed under the Monogram label (the one I bought on EBAY) and also Aoshima (as noted in the title of this kit review - see also the picture of the box top). 'Can't recall where the seller was located, but the 1:150 Academy version I bought for inspection came from Japan. So far I've bought things from around the world, but as long as it was through EBAY there were no problems. Buying directly from Artsania Latina (or any well-known manufacturer) is also just fine. It's only international direct sales from an individual (or Ali Baba) where you start taking risks. But I digress - the 1:120 Cutty Sark kit is indeed worth getting, as it is not so large as the 1:96 Revell - nor as small as the Academy 1:150 or even the 1:168 Airfix 'classic' CS (discussed elsewhere). They are just too small to get into much detail (although some have the incredible skill it takes to do so). As for the 1:300 scale version found in toy stores or Hobby Lobby ... forget it. The things the 1:120 kit does NOT have are blocks. The instructions only show rudimentary 'simplified' rigging, when in fact there is a lot you can do with or without sails by consulting other sources (e.g. the companion book to the Airfix CS 'Cutty Sark Classic Ships Their History and how to model them' Noel C. L. Hackney 1974. What a compendium for any level of pretty authentic rigging for the CS or late clipper - if you have the patience to navigate through it and study. It shows an actual model - a fine miniature - at 1:168, so imagine what one can do at a more generous 1:120 !) If one does not want to struggle rigging scale deadeyes, the molded shroud sets in the 1:120 kit are better than average since the ratlines have 'sag' built into them. One can also rig true deadeyes (and blocks) that are 1:96 scale and get away with it, which you really can't do in smaller scales. Iis up to the modeler just how far 'into the weeds' one will go. Now I recall that there was an uncommon 1:96 Thermopylae kit from Japan where the hull was plank on frame, but the deck upwards was plastic. Now that I have the idea of combining the 1:120 Scientific wood Thermopylae with parts from the 1:120 CS, it becomes obvious why a 1:96 version combining wood and plastic came about. The cost of making a large hull mold for injection molding was too expensive for the low production imagined. Gosh, the details about said kit escape me now, but I suppose if I'm that curious I can retrace my investigations.
 -
Just an update note ... rigging at 1:96 (I use 1:100 to figure block sizes easier, e.g. an 8"block is about 200mm - so that would be 2mm on the model, dividing by 100, that is). Now I have some 2mm blocks, and they are DARNED hard for my hands to deal with. So sizing blocks up to 50% out of scale might fly - and the 3mm molded blocks in the Revell 1:96 kits suffice. Looking at 1:120 (definitely a size smaller), my thoughts are to use beads like my father did at that scale. I found some bronze-brown Czech 'demi round' beads that look pretty good as blocks (compared to ordinary round beads) in 2, 3 & 4mm - representing 6" (30% oversize), 8" (50% oversize) & 12" (50% oversize) at 1:100, respectively. The 2mm beads at 1:120 would only be 20% oversize for 8"blocks - definitely close enough. The 3mm at 1:120 would be 43% oversize for a 10" block or deadeye ... but I suppose that the 4mm would be OK for the hearts, and perhaps passable as the largest deadeyes - with the 3mm as backstay deadeyes and topmast deadeyes (saving the 2mm for topgallant mast deadeyes). One has to choose one's battles carefully. ALL the Scientific clipper kits are about 1:20 scale. This includes their "best" kit - the Thermopylae. I've seen that listed as a larger scale model, but DON'T believe it. Just to be absolutely sure, I bought one on EBAY for $99 (the hull barely started, with nothing not correctable). Sure enough, its a 1:120 kit. What makes it stand out from the other clippers in the line are three big drawings (compared to single sheets in the other kits) that go into much better detail - including rigging. Now they intended the kit to be equipped with sails, and they omitted some key lines to make the kits easier to build ... and much of the omitted lines would be blocked by the sails - specifically clew lines and sheets. Halyards for the yards having them would just run down the back of the masts, so they are omitted also - as well as reef tackle and downhauls. (There are no jackstays shown.) The drawings DO go into detail for all the braces, bunt lines and leech lines - and how to rout them to specific belay points (modified for the purposes of this model) They show in and outhaul lines for the jibs (and their sheets), but no hauling lines for staysails (yet that can be copied from what is shown for the jibs. The rigging for the spanker seems detailed enough - as well as the shrouds, forestays and backstays. The effect will be to present many lines that are most visible for a ship under sail. With some additional source material, one could omit the sails and add some lines for a decent enough 'harbor rig'. Railings still have to be hand-made, but I suppose there are aftermarket stanchions or PE that might help in that area. There is a multi-page instruction book with more illustrations that beats, by far, the relatively scant instructions in the other kits Scientific made. There are also more fittings provided - including a nice metal casting of King Leonidas for the figurehead. A challenge from a modeling standpoint would be the same presented doing the cabins and some other details as noted on Popeye the Sailors MSW build of the 1:124 Sergal Thermopylae. Things get tiny at scales smaller than 1:100 - and they are tiny enough even then! Note to self: now that I have this Thermie kit, do a review with photos on the forum. Now an idea hits me ... that the cabins and many small details so well done on the 1:120 IMAI Cutty Sark would work on the 1:120 Scientific Thermie - another case of 'borrowing' stuff from one kit to use on another ... like lifeboats, davits, winches, etc. The idea will take some time to hatch.
-
One can always cut or trim off extra wood as needed, but its often troublesome to add back on.
-
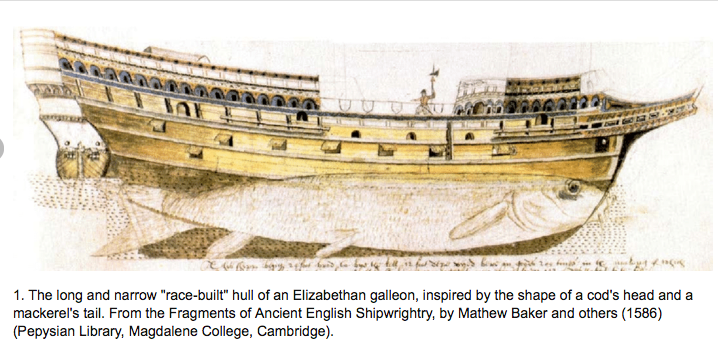
The well-known 1586 drawing of a race-built English galleon came to mind, and indeed - there are 7 guns for a broadside ... and (yes!) a forward pointing gunport. Due to the rising curve in the stern of the main gun deck, there is an aft communication port closer to the waterline, similar to the one Vasa has. The drawing 'rotates' the stern elevation by 45 degrees so the viewer can see that there are 2 stern guns. French built examples employed a step-down of the gun deck where the quarter deck begins aft of the main mast - which keeps the line of guns more level (instead of having an increasing side angle) and easier to man. The headroom in the quarters above was thus increased. This is a plausible configuration of the Golden Hind ... hiding in plain sight, as de Silva noted she was French built but not new (nor that old, as she was able to make it around the world).
- 417 replies
-
- 3
-

-
- soleil royal
- Heller
- (and 1 more)
-
You didn't mention what the f ratio is on your 6" scope (that is the focal length divided by the aperture of the optics). Ergo a 48" focal length (1220 mm) divided by 6" (150 mm) yields f8. Many have been made in recent years with f5 optics, and some even with f3 (or so) - so 'fast' (short) that it takes a spreader lens mounted in the base of the focuser for the 'light cone' to be extended enough to reach the eyepiece. They list the f number as the 'effective' focal length of the artificially lengthened light cone. But Barlow lenses do not correct any spherical aberration or 'coma' produced by fast optics. Fast scopes also have much larger secondary mirrors - thus have a larger central obstruction that inducers more diffraction effects. A 6" f8 scope with good optics will render Jupiter with pretty sharp bands and clear color differentiation. BTW, that removable cap will do wonders for lunar observing because 1.) it eliminates the central obstruction of the secondary mirror since it is 'off axis', and also misses the spider vanes (supporting the secondary), thus eliminates all the diffraction effects caused by the same .. and 2.) reduces the aperture, thus raising the focal ratio - e.g. if the scope is f5 (5 x 6" mirror = 30" focal length), then a 2" aperture (just fine for lunar observing because the moon is so bright) divided into 30" yields a true f 15 ! BOOM ! You've just improved your scope significantly. Since refractors are plagued by chromatic aberration, your humble reflector in an induced f 15 mode performs as good as an apochromatic refractor costing thousands of dollars. Now, just for kicks, try looking at Jupiter in this same mode. The image will not be as bright, but I'll bet your view will be much better regarding the bands and the coloration. Jupiter is still high in the sky at sunset, so why not give it a try?
-
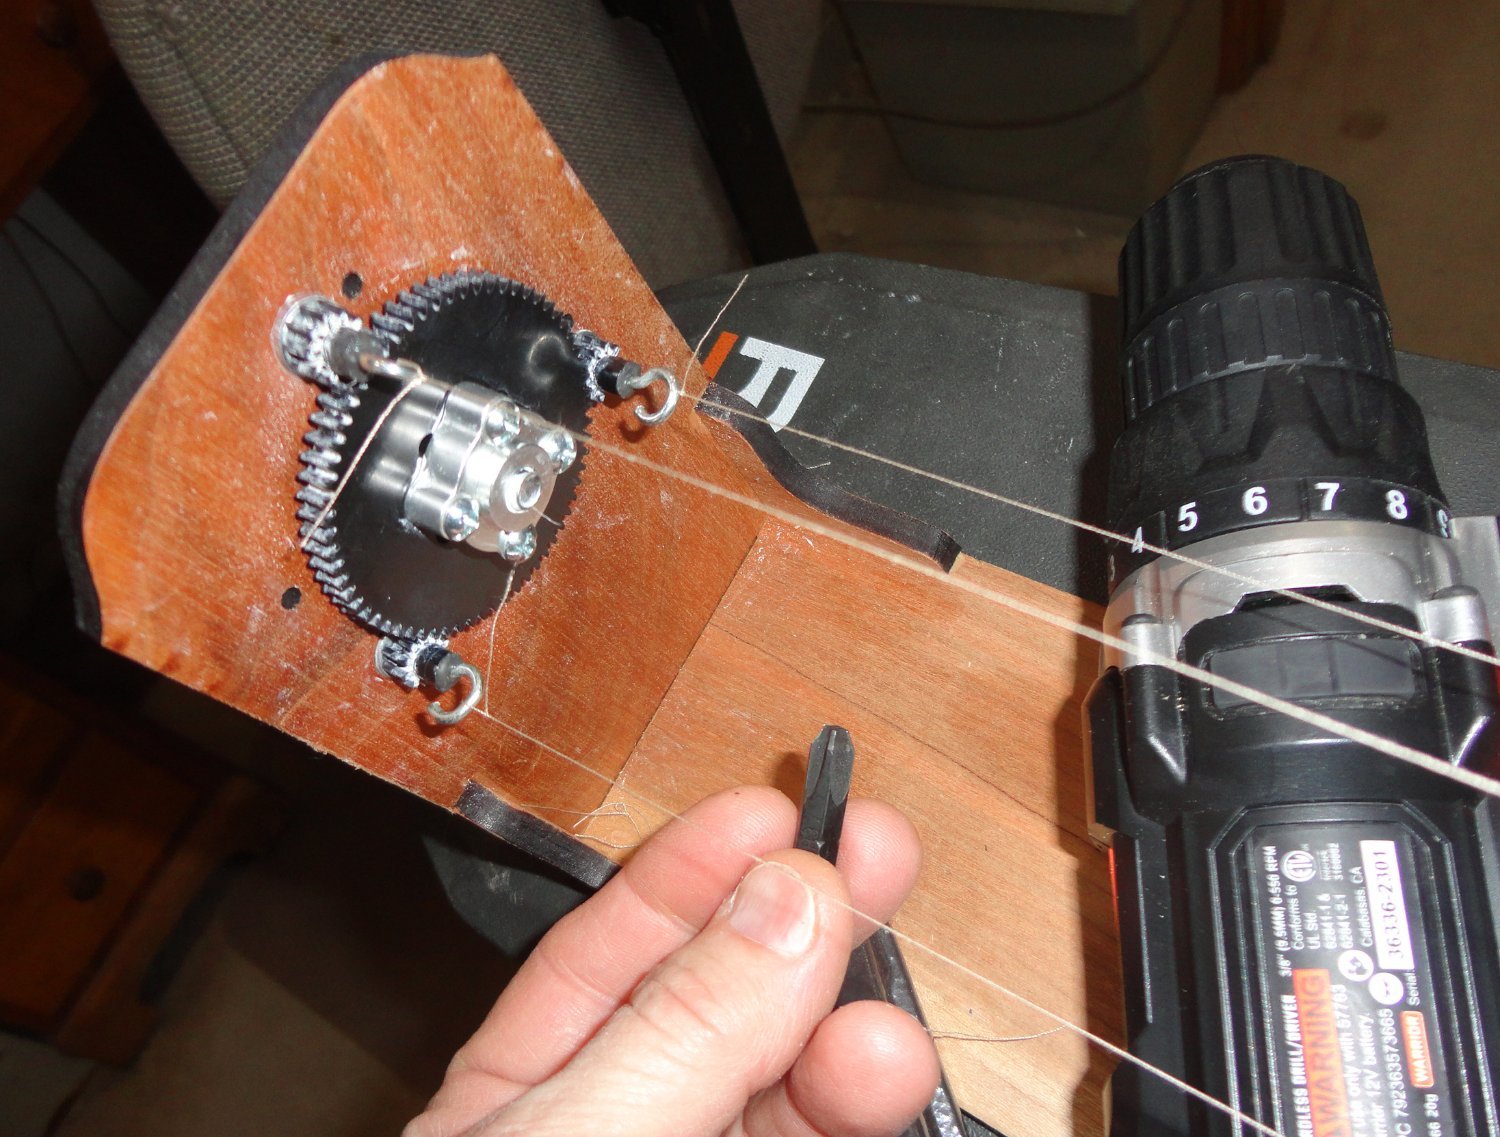
Looking at this rig, what the problem might be is that the planetary gears that turn the spools don't twist enough in relation to the revolutions of the large disc laying the strands on the other side (not quite sure what the exact ratio needs to be).
-
The two 'forward pointing' guns served as "bow chasers", and had to have a longer barrel due to the angle of the ship in that area. The gun carriage was therefore at an angle - just imagine the geometry, and there was a post elsewhere on MSW (try and find it, but it was Vasa related) on this very subject. My theory is that ships in the early era like the Golden Hind had two forward pointing guns in the hull because 1.) there was little room on the typical small forecastles in those days (the Vasa being an exception, and likely the builders omitted a forecastle as they found the hull 'tippy' after it was too late in the build to do anything about it ... ), and 2.) the bowsprits had a higher angle and carried a horizontal yard with sail. the high angle being to keep the sail out of the water - but then would be in the way of fire from any forward pointing gun on the forecastle. These ships were 'machines', and form follows function - function dictated by the technology and evolution of ships at the time. The reason bowsprits on so many examples of period ship artwork (e.g. Drakes 'Caribbean' fleet) are angled high is for the canvas on the yard there to be effective as a sail to balance wind pressure in conjunction with the stern lateen sail (there were no jib sails at that time, and soon the spritsail topmast evolved - something else in the way of forward firing ordnance atop the forecastle). This leaves a clear space for a forward firing canon from the hull at the bow on either side, to cover the 'blind spot' (preventing a vulnerability). There were always two cannon pointed directly astern, where there is a convenient perpendicular wall, that covers a vulnerability in that direction. The Golden Hind's armaments are described in two separate testimonies from Nuno de Silva ( Portuguese Navigator held by Drake while circling S. America - to be set ashore on the West coast of Mexico) affirming the armaments to be 7 per side (broadside) and 4 at the bows - meaning 2 astern and 2 forward. So my bet is that there were 2 'forward' facing (or nearly so), just as seen on the Vasa, 2 astern (typical) and a broadside on the gun deck below the weather deck of either 7 guns per side, or 5 guns plus 2 more (per side, of lesser weight) on the quarter deck - as seen on some aertwork and drawings of French 'race-built' galleons.
- 417 replies
-
- 4
-
-
- soleil royal
- Heller
- (and 1 more)
-
Super build and great carving ! ... inspirational as well. I know a 'sheep to shawl' person, and have sympathy for wool shearers, washers and combers - what, with all the soil, grease-in-the-fleece and 'dingle berries' found on wool from the sheep. Hmmmm - lots of sheep down under, mate.
-
I was wrong about my thread ... its NOT Gutermann (I apologize for my mistake), but Metrosine by Mettler. I'll have to look for the former.
-
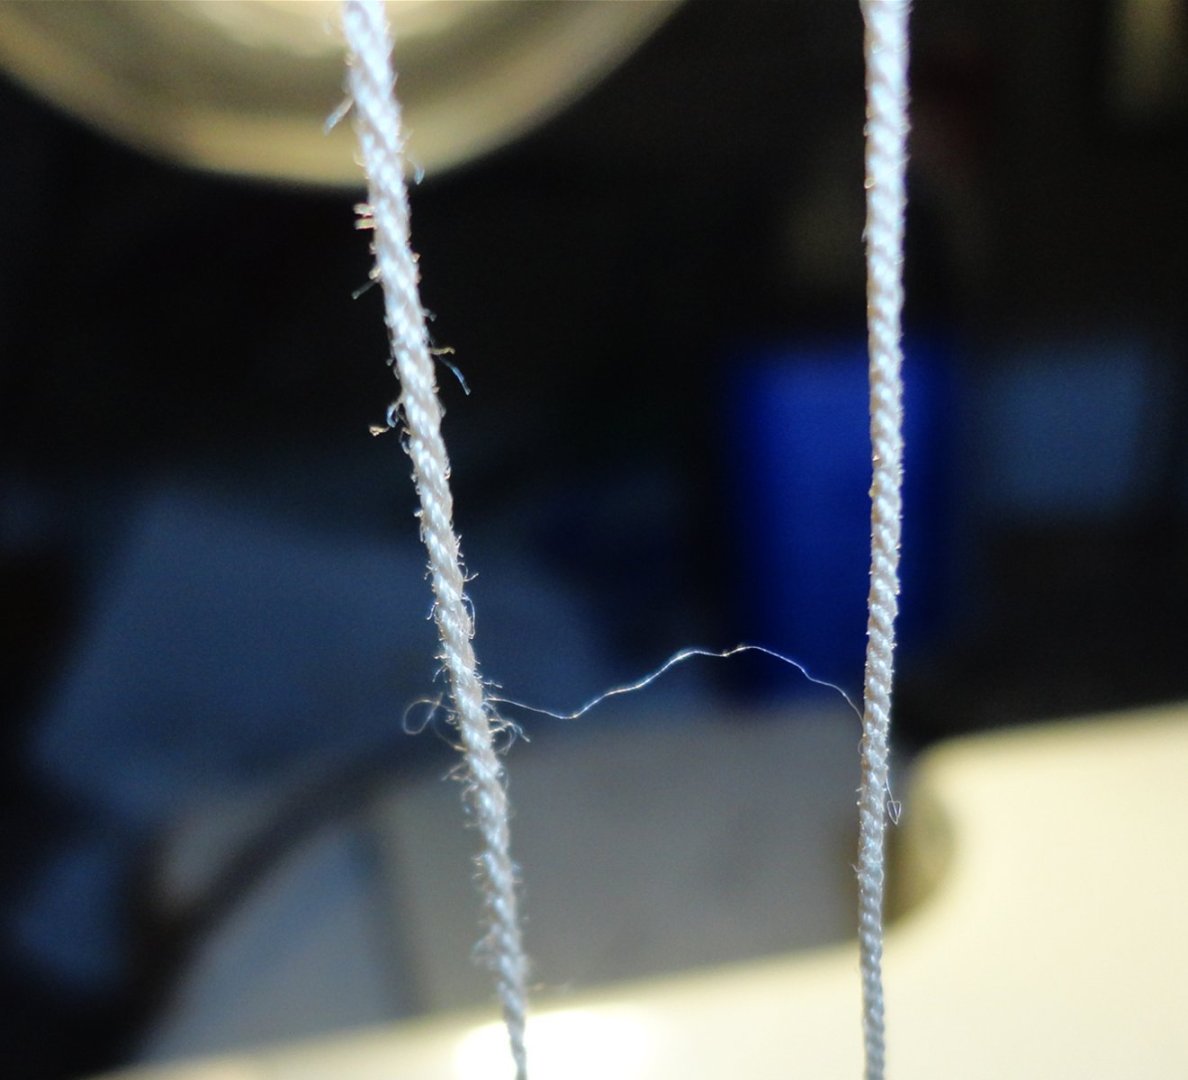
Duh, 'just thought to show a photo of 'fuzzy' scale rope (on the left) and mostly smooth rope where I singed-off the fuzzies (on the right).
-
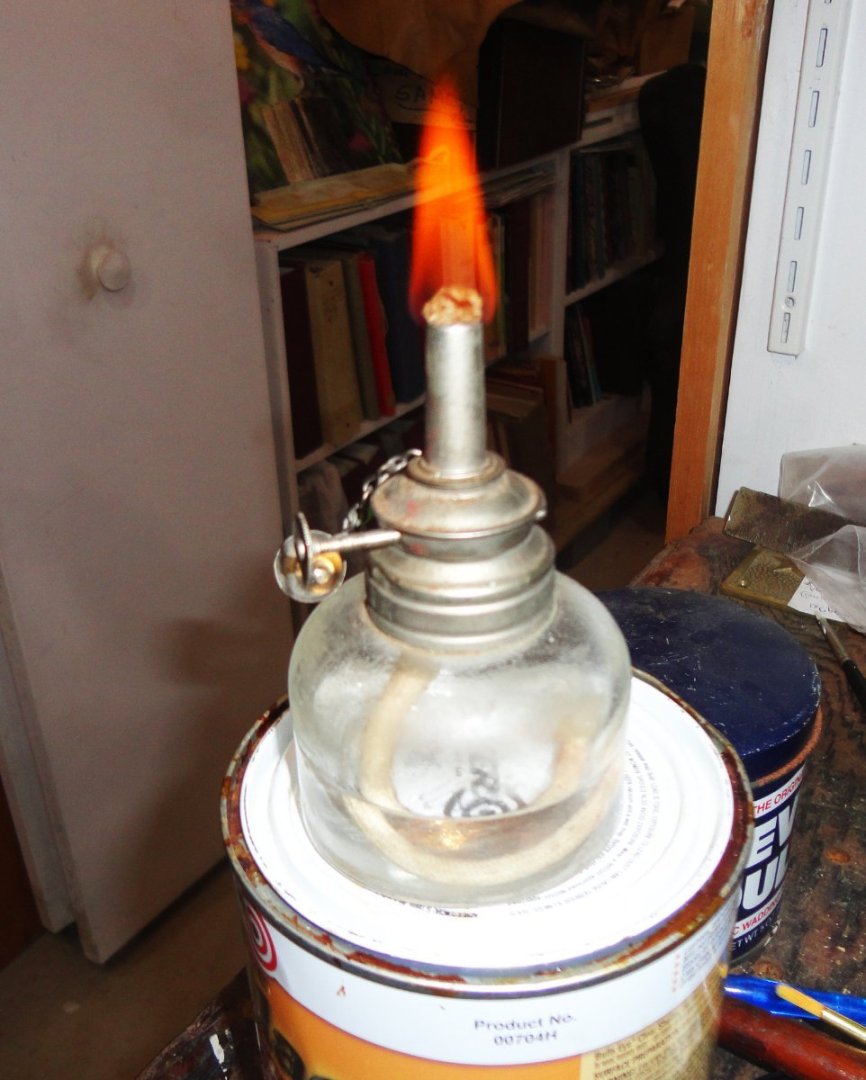
I'm using the Syren Rope Rocket (assy. reqd.) using Metrosine poly sewing thread: 3 single strands yield .010 scale rope (1" for 1:100), 2 threads per strands yield .020 (2" rope at 1:100) and 3 threads per strand yield .030. Ploy rope is tempered for 7 min. on a cookie sheet in a 350 degree oven, then it won't self-ravel. There are some 'fuzzies' (as some of your photos show), and I found they can be singed-off by quickly passing lengths of the scale rope over an alcohol flame. Pausing over the flame will part the rope, so deftness is needed. The photo below shows fuzzy rope on the left, and singed rope (now mostly smooth) on the right. Close-up photos tend to show more of the 'fuzzys', so why not get rid of them. Will likely work on natural fibers as well.

-
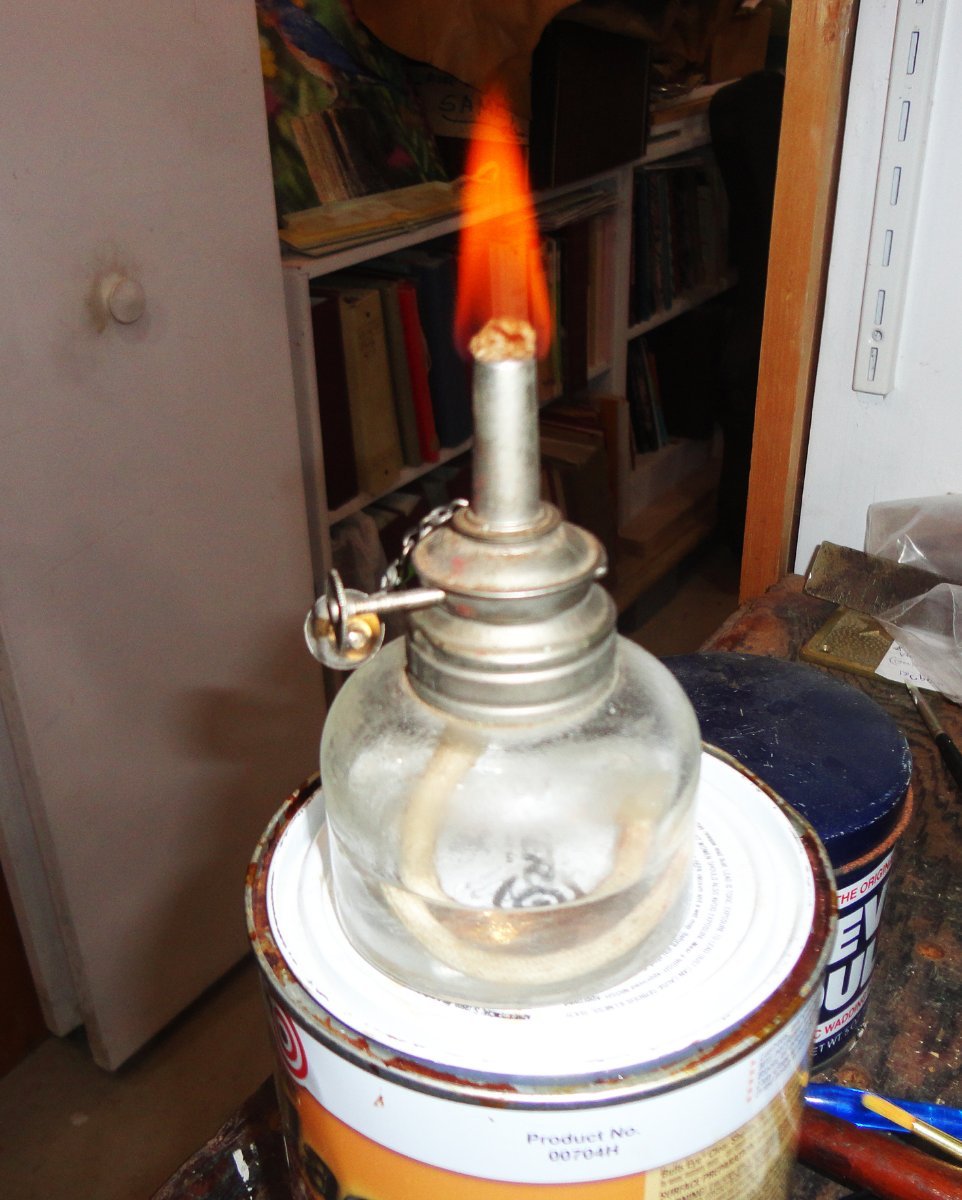
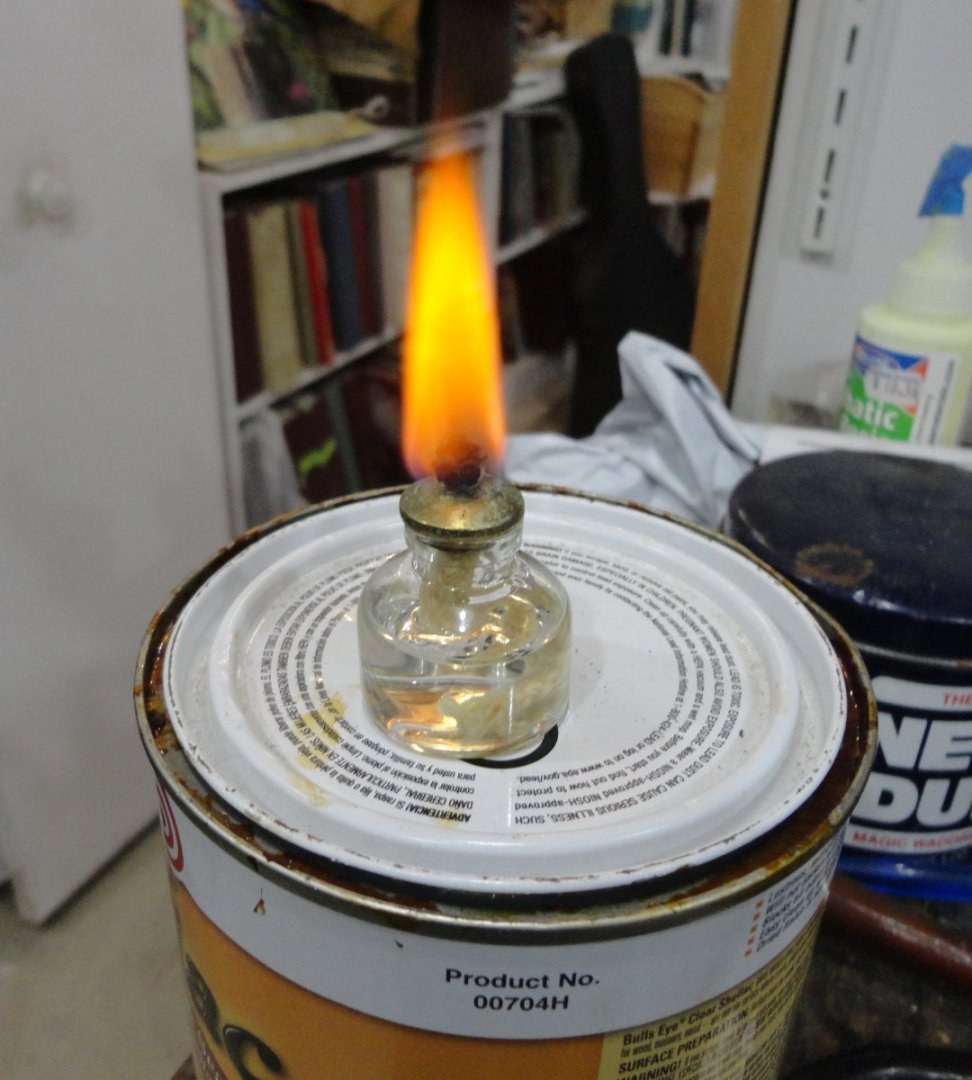
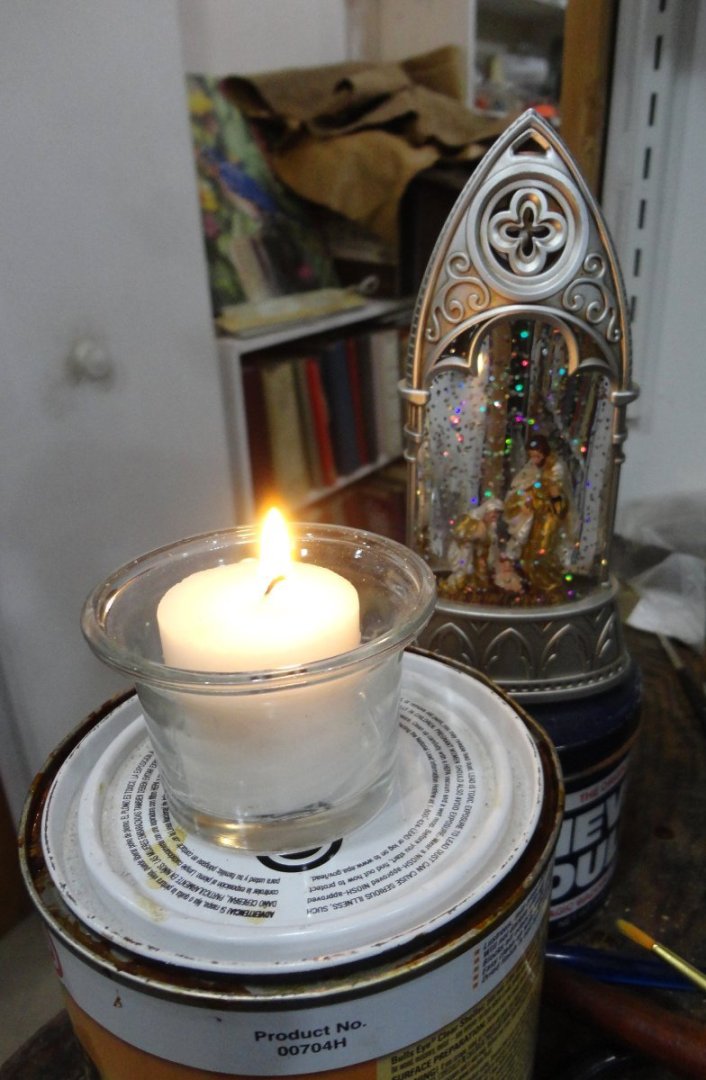
A couple clarifications on scale rope making ... I forgot that the clockwise rotation of the central gear makes the pinions go counter clockwise. Fortunately, most thread is left-hand spun, so counter clockwise rotation increases twist whether one, two, three threads are attached to each pinion hook. On the other end, the clockwise rotation distributes the over twist as the rope is laid - so if the rotations are balanced, the scale rope will 'fall off' when cut free without any kinking. With full size rope making, one can easily count the revolutions made on either end, or let the ropemakers' "top" self-adjust as it lays the rope. If one has a case where right-hand thread is used, then the drill direction needs to be reversed - something I've not run into yet. After baking (and it can be noticed also before) looking at the poly rope against backlight (or with any magnification to speak of) I definitely notice what I consider to be 'too much' fuzz on the rope - not as much as some kit rope, but too much. 'Guess this is why close-up photos are not the friend of the ship modeler, since every defect gets magnified - whereas just looking at a model on the shelf or in a case minimizes irregularities. I'll try and see if there are other thread sources (like linen), but until then I thought I'd try something I've done on 1/2" demo rope that looked too fuzzy - singe-off the fuzz. With full size rope this is easy. BTW, running the twine over beeswax before making rope also helps - guess that's why some modelers run rigging rope over some beeswax. After singeing large rope, there is still a little 'stubble'. So first I lit a propane torch set on low to run a length of rope (using both hands) over ... but it burns too hot and incinerated the poly rope immediately. That rules out anything hotter like oxy-acetylene ... 😉 I found a very small alcohol burner and used some denatured alcohol (pictured below) ... I still had to be quick or the flame would part the rope, but with deft hands (and perhaps a daft brain) IT WORKED ! The rope looks fine close-up. This little burner still produced too large a flame, but a swift passing, length by length, of the rope on a hank took off all the fuzz - and there were little 'sparks' as they singed as the rope passed along the flame. OK, I needed a smaller flame, so I found a votive light I got as a Christmas present (along with a Nativity Scene in miniature). This was set-up (with a small prayer), and I found the smaller flame harder to keep the rope on track, and it was hotter - but it worked. Then I came across my father's old alcohol lamp that is far better at controlling a moderate flame - this was the best solution. Since both hands are needed for singeing fuzz off scale rope, there are no pictures of me doing this - and I didn't want to bother the Admiral to video the process since there might be a dim view of an open flame so near all sorts of flammables. The final iteration will be try a less energetic source of fuel - perhaps 90% isopropanol from the local drug store.
-
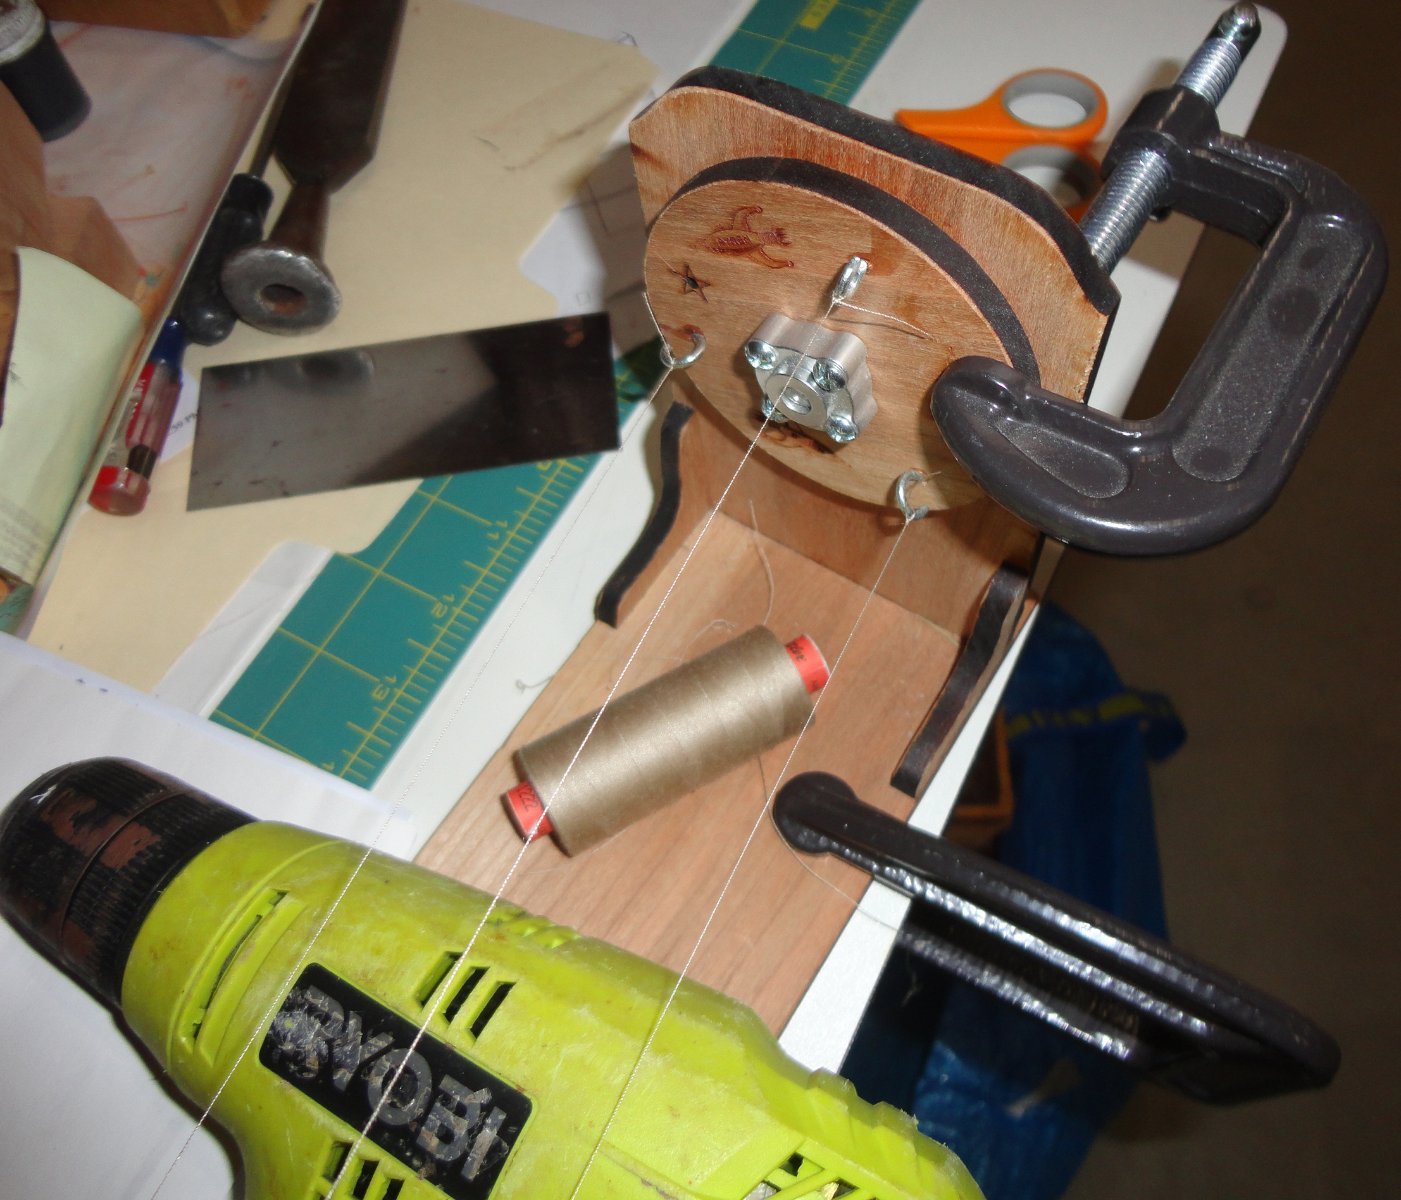
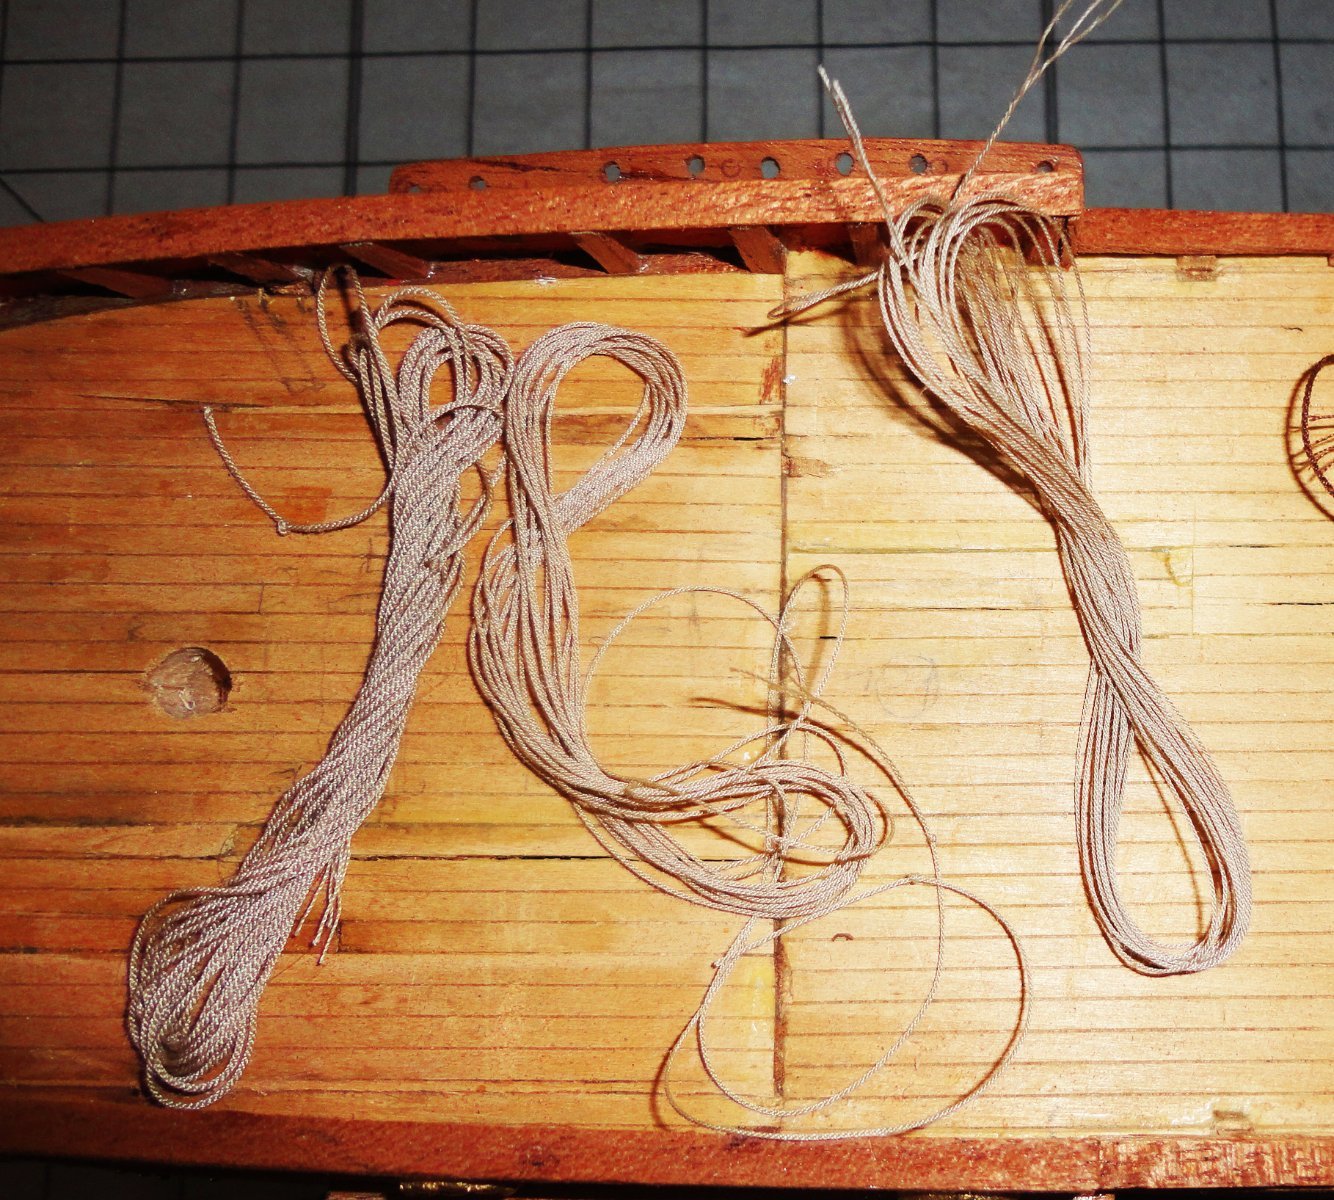
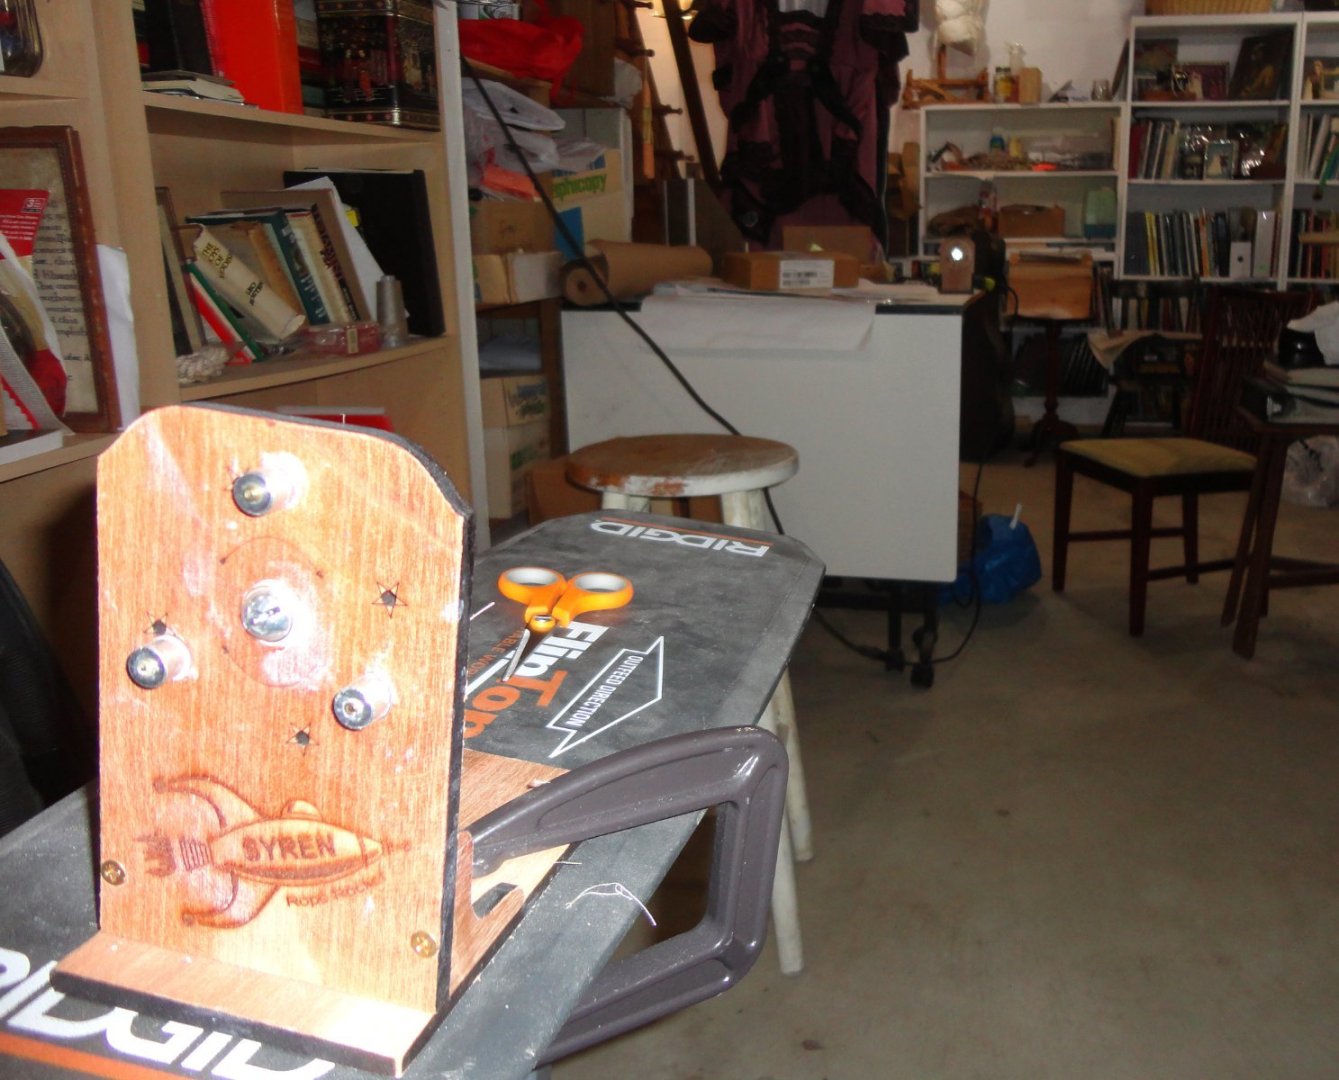
Having run hat orders for officer promotions in the re-enactment world, I started running some scale rope for the GF in tan Guterman polyester thread. Using a single strand in each of the three spinning points produces scale rope measuring around .010 in diameter ... that's 1" rope for 1:100 scale. Using two threads yields .020 - 2" scale rope, and 3 threads per yields .030 (or thereabouts) for 3" scale rope. I'll use thick rope in black for the shrouds and stays, medium tan rope for halyards, sheets and braces. and thin rope for most everything else. There are videos on MSW and via the Syren website, and once one has built the Rope Rocket and made a couple hanks - its pretty easy to make rope in whatever color and thickness you need whenever you need ... in the long run, an economical and practical way to go. I don't know how many builds I've seen where construction is nicely done, but 'kit rope' is used for the rigging that a.) doesn't look as nice as scale rope and b.) is way too 'hairy' or 'fuzzy'. Picture #1 shows the geared end (the white residue being lithium grease on the gears), and a 'stubby' Phillips head fits the coarse Phillips drive screw on the back side. I'm using a battery powered drill that has a 'lower' max speed, since there is something like a 3:1 speed-up from the large central gear to the three planetary gears with the spinning hooks. Thin rope is need now to pre-rig certain places on the GF, so only single threads have been tied. Chuck shows a setup with both ends on the same height table, but I clamped the geared end to an adjustable height stand - the kind used on either side of a table saw to support long boards being cut width-wise. Rather than loosen the clamp and moving it toward the other end with a free hand as Chuck does, I use my feet to nudge the stand - its only about a foot. The trick is not to spin the strands in step one more than you have to. Picture #2 shows the other end of the rope walk - in my case a mere 10 feet long - but could extend it another 6 feet if I wanted. If the weather was clement (meaning warmer), I could set up in an open garage with a 40 foot walk going out the open garage and down the driveway. But I've 'cut my teeth' doing 9 foot hanks, and there is a certain 'feel' to the tension and how far you have to move each end in the 2-step process. Also, making a 30 - 40 foot hank takes a lot more spinning time, and you have to hold whatever drill(s) you are using the whole time. Note that there are 2 clamps holding the 2nd end for the 2nd phase of rope making - and I'm using a high speed corded drill (about 2 1/2 faster than the battery drill), since the 2nd end does not have any gearing and the slower drill would take 3 times as long to do step 2. As the 2nd end is spun, since it faces the other way relative to the 1st end - one still uses the drill running clockwise, and the rope is counter spun relative to what was done on the 1st end. The rope winds itself from the center out. Real life rope walks work somewhat differently (self-twisting from the far end using a juggernaut once the tension on the three strands accumulates), and I've tried to devise a miniature rope makers 'top' to do the whole job in one operation - but the difference in scale makes the rig behave rather differently in relative tension than full-sized rope making I've done at demos. When running the 2nd end on a table top, the free hand (after clamps are removed) lets the 2nd end 'float' as the tension varies - and it actually lengthens before getting shorter - go figure. There is a bit of 'art' to this process, so someone new to it has to practice a little to get the hang of it. Heres a picture looking down the rig after I cut-off the rope just made. The Rope Rocket works like a charm. After the rope is made, it should be 'stretched out'. If a bit over spun, there will be some kinking - which is just shook off, and the rope will adjust itself. Using polyester thread, one heats an over to 350 degrees F, puts the rope made on a cookie tray and bakes for 7 -10 minutes. This 'sets' the poly and the ends won't unravel unless you manually do so (for whatever reason). Some use cotton thread - and I suppose laid rope like this will be less likely to break over time, as my Dads ship model had mere sewing thread that did start breaking after 50 years or so. Obviously linen would be best, but it is difficult to find suitable linen thread these days. Hemp is an alternative (if decent thread is found). Chuck says to wet the rope slightly before cutting off and stretching is cotton or other natural fiber is used. Poly does not need this, and natural fibers don't need baking - go figure. Below are three hanks of tan rope, with .020 on the left and the other two .010 - looks good to me.


-
As for rolling small hammocks, using a fine 'natural' linen (off white) might work well. There are also 'linen look' cottons, but they tend to haver thicker threads. At scale, the material would look nearly smooth.
-
I'll agree that most 'aluminum' you can easily find is 'gummy' and does not machine that well. Yet once upon a time I worked for a company that made aircraft controls and components, and I was able to collect samples of 'bar ends' of decent-machining aluminum alloys. One prized piece was referred to as "hard aluminum", and it took effort to scratch it - yet it cut beautifully on a lathe. I've rationed out my available stock over the years doing small projects.
-
Many say the brads are to hold the first planking until the glue cures. Some pull them out after that, while some just sand over them. Your first planking looks pretty good, and sanding should suffice. Yet I've seen some who slather filler all over everything and then sand away. 'Guess its whatever works for you. I don't mind working with thin stock, because its easier to soak in warm water and should bend easily. Since the bottom gets coppered over (and there are many ways to do that), I'd focus on how the planking that shows looks and not worry too much about the second planking that gets covered over.
-
With the right wood, small tools and a steady hand, much is possible.
-
'Love the backdrop ... ever watch Bob Ross paint on TV?
-
Ahoy Beth, A problem with copper is that over time, humidity in the air can cause green colored compounds to form on the metal - and that can stain the cloth. Obviously, you don't want to use thin steel wire, since that can spontaneously rust and also stain the sail cloth. The best idea is to use brass wire, which almost always (over time) will get a simple brown patina. If you use jewelers brass wire (used by bead crafters and found in many craft stores nationwide), the wire comes clear coated to resist even getting a patina - so will stay brass colored for a long time. Since the thin wire is run through the fold-over of the sail edges, you should not be able to see that there is wire inside. It can be flexed as desired to get the sail shape you want.
-
Rather than 'paint' - and most consider paint to be thick enough to 'cover' (ergo hide) the wood below - why not experiment on some stock with a 'tint'. That could be white paint thinned enough so that it becomes a 'wash' - with the carrier soaking into the wood (it will out-gas as it dries) - leaving behind 'transparent' pigments on the surface. This is more like staining, and there might even be white stains. Experimenting on samples of the stock you are going to use is key (you don't need much), and you can use both sides of the same test piece to experiment on ... just label each side with a number or letter and keep a key as to how you treated that sample.
-
Lots going on in life means delays in the ship yard. Part of the process is 'learning the ropes' - and I mean well enough to visualize them on the ship for the purpose they're intended for and how they are routed from end to end. I keep imagining how I'd go aloft to manage the sails, and how on the deck the lines would be utilized and belayed to the right place every time. Finding glitches this way means repeatedly going over the drawings and making changes as needed - since I'm making my own plans. Now I can 'get' the frustrations sometimes expressed by those new to sailing ship modeling ... that no one can 'just tell them' what they need to know. One has to LEARN this for the project at hand, and the rigging changes greatly for each time period and type of ship in the age of sail. Those with the benefit of 'plans' often find simplifications and other glitches there depending on how far one wants to go 'into the weeds'. Real learning is done by the individual, and that takes a variety of sources and (thankfully) the large array of builds (complete or not) to be found on MSW. Another part of the planning is figuring how everything has to go on a small replica. Some of the belaying pins in 'tight' areas need to have lines pre-attached, coiled (with wire for twist ties) and laid over the gunwale for later use. I'm going to try using the Airfix loom or similar layout on a board (with modified technique posted elsewhere) for the shrouds and ratlines, fixing the top (narrow) ends to the tops/crosstrees (given the existing mast assemblies that I have to work with already), placing the bottom turnbuckles for the next level with their futtock shrouds passing through the shroud set below, then rolling the shroud set from the bottom up and tied for later utilization. The bottom ends will be attached and tensioned to the turnbuckles below much later in the rigging process, and the loose, pre-sewn ratlines adjusted and fixed last. Forestays and staysails will have to go in early after the masts have had the yards with sails (with much of their associated lines) assembled off-model before planting on the deck and belaying line ends. Those pre-coiled lines will come up to where they need to go. Braces can be done from either side. Obviously, lilliputian ship modelers (the same size as scale crew figures) would have no trouble running lines in the order done for actual ship construction ... but I have to deal with fingers much larger (and far less nimble) that scale crew. There are still a lot of things to go on the deck - various pieces of equipment and the railings (there's a task ... putting all the uprights for a run of railing on triple wires, then bending and fitting so the stanchions get in place without the railings kinking too much). I'll have to bodge things as best I can, then take some pictures when there's something to show.
-
Don't I know this ... a blue pill might help 😉
-
Returning after a long absence
Snug Harbor Johnny replied to mrjuan's topic in New member Introductions
You'll find this forum a smorgasbord of modeling and nautical information, -
The issue comes under the protection provided to forums (such as ours) for what a rogue individual might post. Efforts continue (via SCOTUS) to undermine this long-standing precedent (as efforts to continue to try and 'flip' any Supreme Court ruling when the makeup of the Court changes, regardless of how long a prior ruling has been in effect) face considerable headwind in Congress, as seems to be no agreement how a 'halfway' measure could be fabricated - or how said wording might be interpreted by any court. Bottom line, anyone can sue anybody for anything (if they have enough money to burn). WHAT IS SECTION 230? If a news site falsely calls you a swindler, you can sue the publisher for libel. But if someone posts that on Facebook, you can’t sue the company — just the person who posted it. That’s thanks to Section 230 of the 1996 Communications Decency Act, which states that “no provider or user of an interactive computer service shall be treated as the publisher or speaker of any information provided by another information content provider.” That legal phrase shields companies that can host trillions of messages from being sued into oblivion by anyone who feels wronged by something someone else has posted — whether their complaint is legitimate or not. Politicians on both sides of the aisle have argued, for different reasons, that Twitter, Facebook and other social media platforms have abused that protection and should lose their immunity — or at least have to earn it by satisfying requirements set by the government. Section 230 also allows social platforms to moderate their services by removing posts that, for instance, are obscene or violate the services’ own standards, so long as they are acting in “good faith.” WHERE DID SECTION 230 COME FROM? The measure’s history dates back to the 1950s, when bookstore owners were being held liable for selling books containing “obscenity,” which is not protected by the First Amendment. One case eventually made it to the Supreme Court, which held that it created a “chilling effect” to hold someone liable for someone else’s content.
-
Once enough salvage and research has been done on the 16th century Mars wreck, it might be cool if there were a kit of THAT ship.